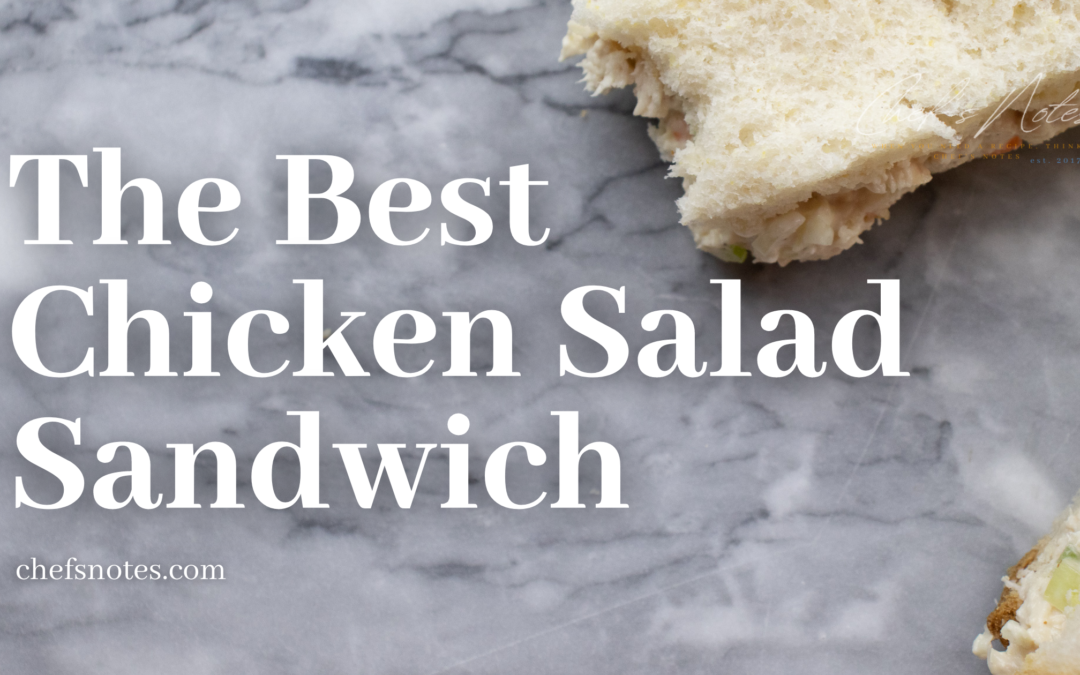
It’s bold to claim that this is the Best 4 ingredient Chicken Salad Sandwich recipe*. But, in my opinion, it is. This deli style chicken salad sandwich is uncomplicated, only having a few ingredients. It is that simplicity that really makes it so great. Making chicken salad with minimal ingredients is all well and good, but if it doesn’t taste great, it’s all pointless. Luckily, this sandwich does tick all the taste boxes. It has a little bite, a pop of sweetness, a touch of celery-ness, and of course, it’s a little creamy. I think you’ll love this Chicken Salad Sandwich, and I am so excited to share it with you.
*four ingredients excluding mayonnaise, salt, pepper, and bread.
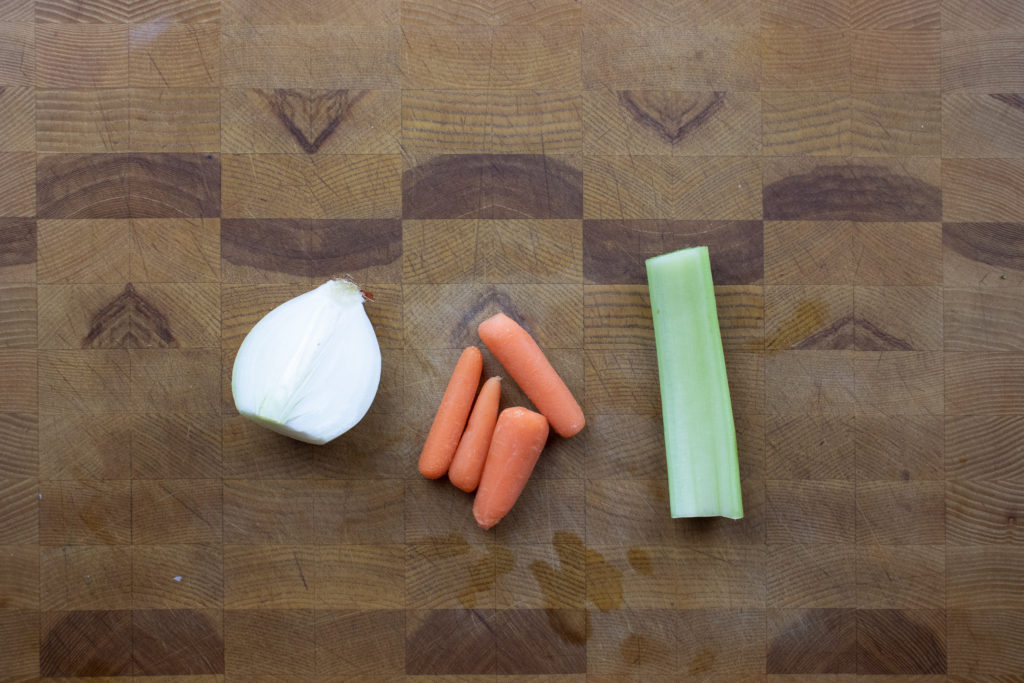
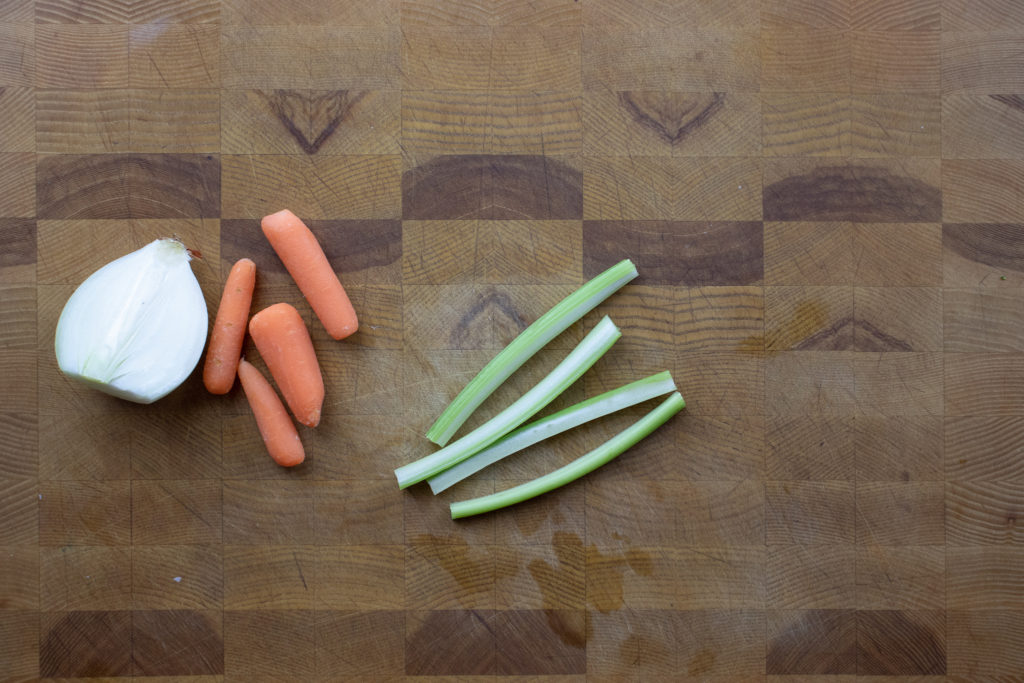
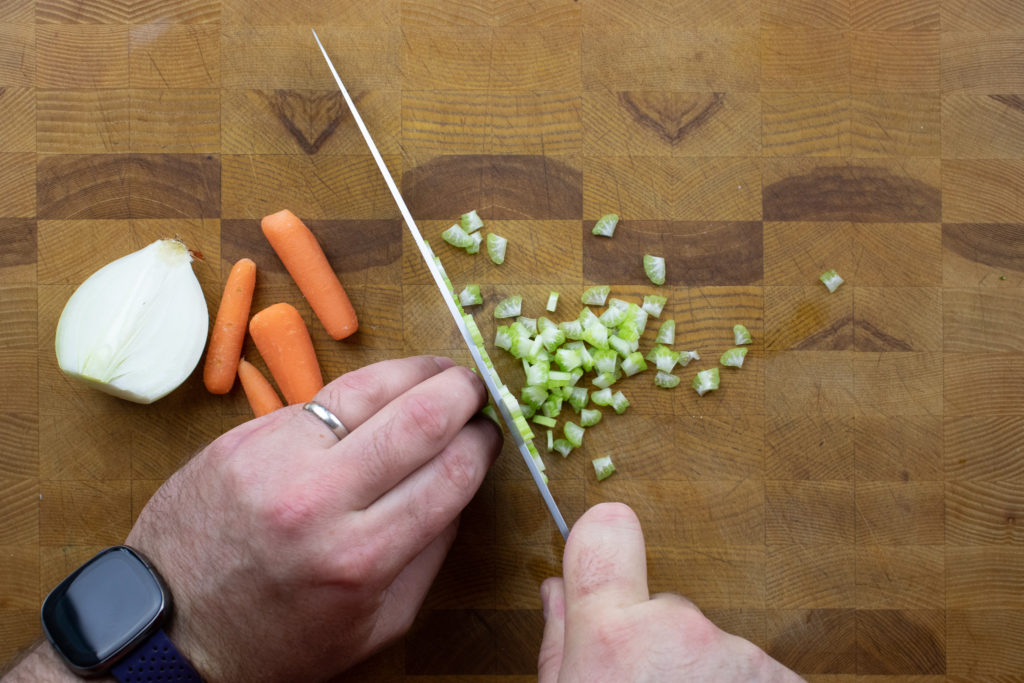
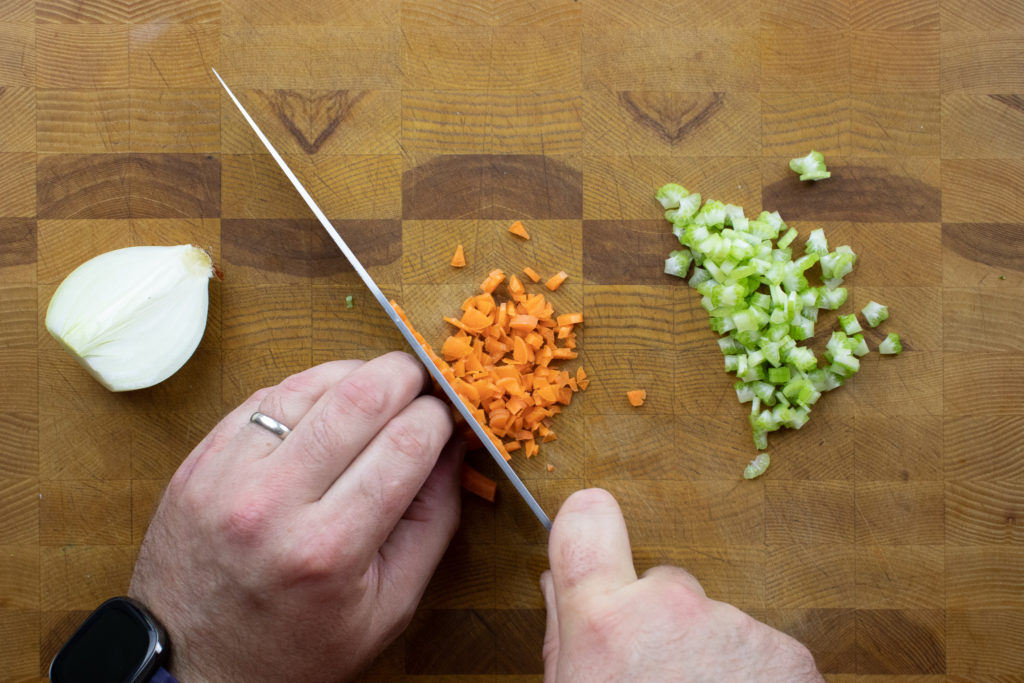
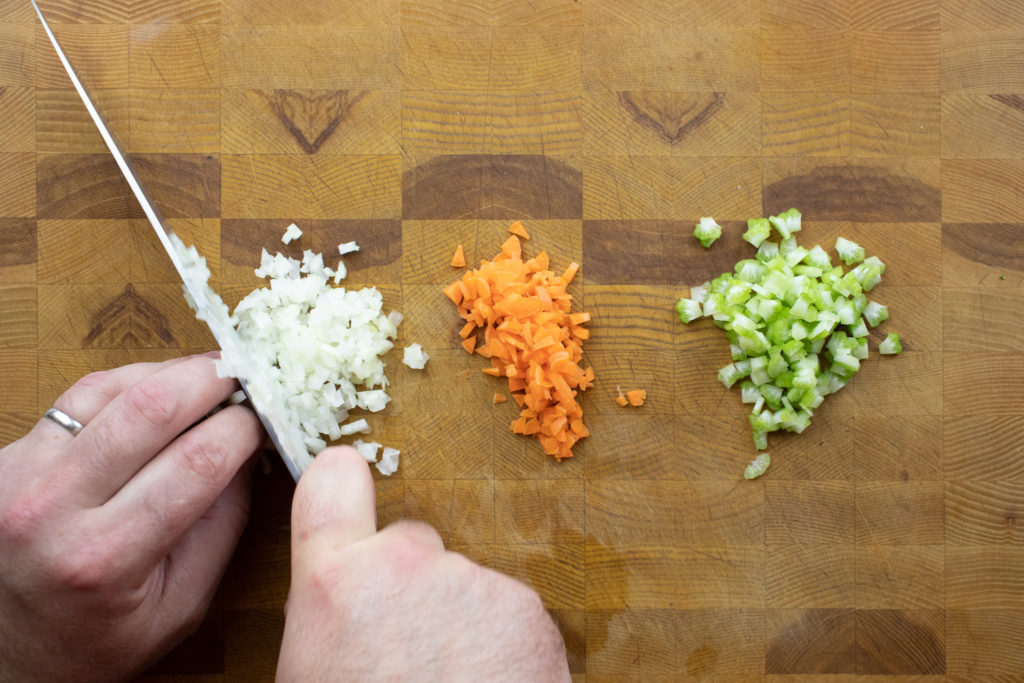
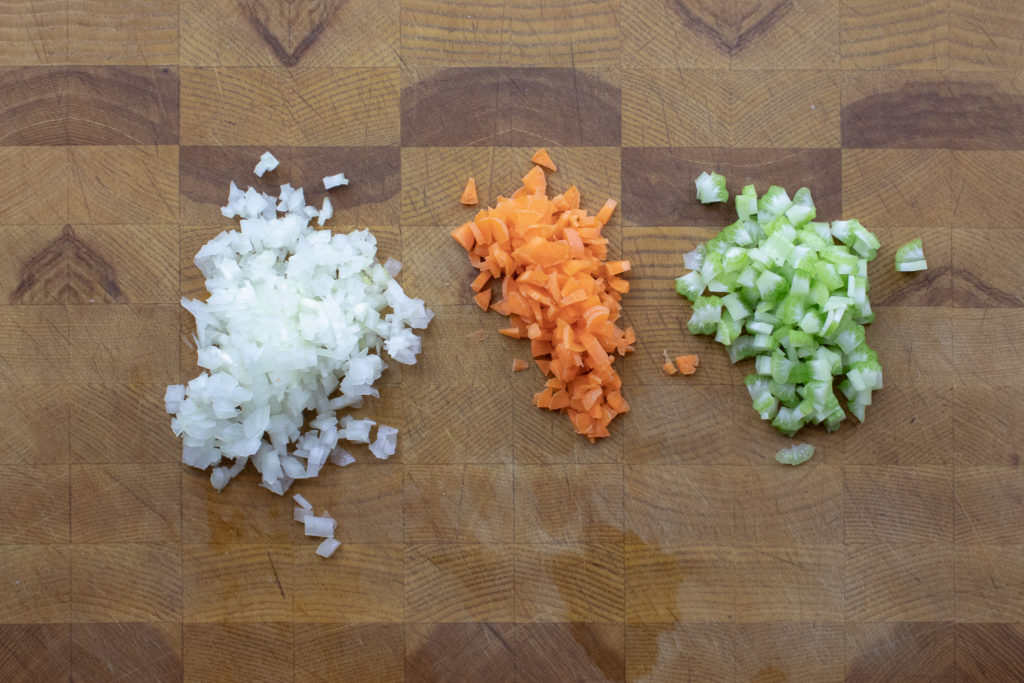
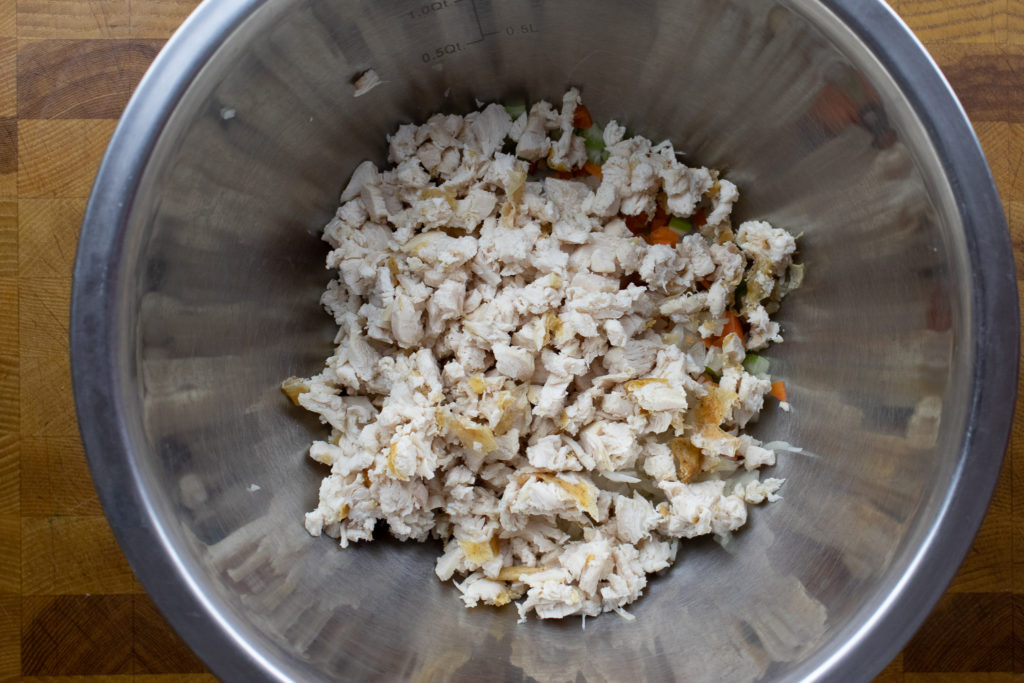
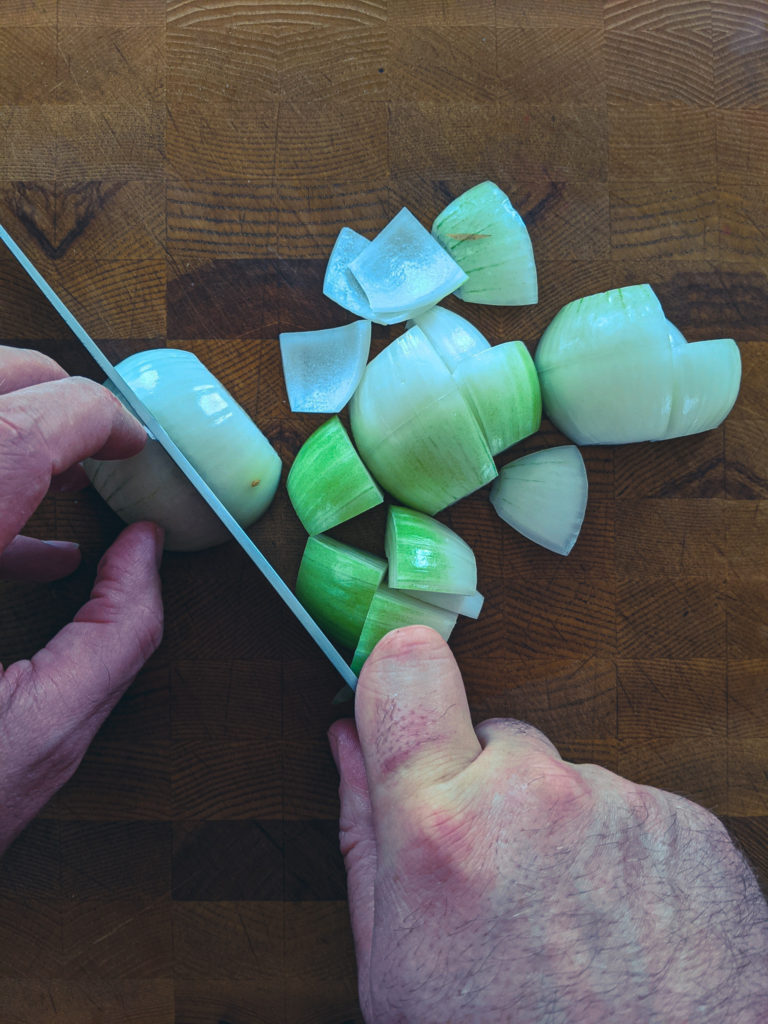
Chicken Salad Vegetables
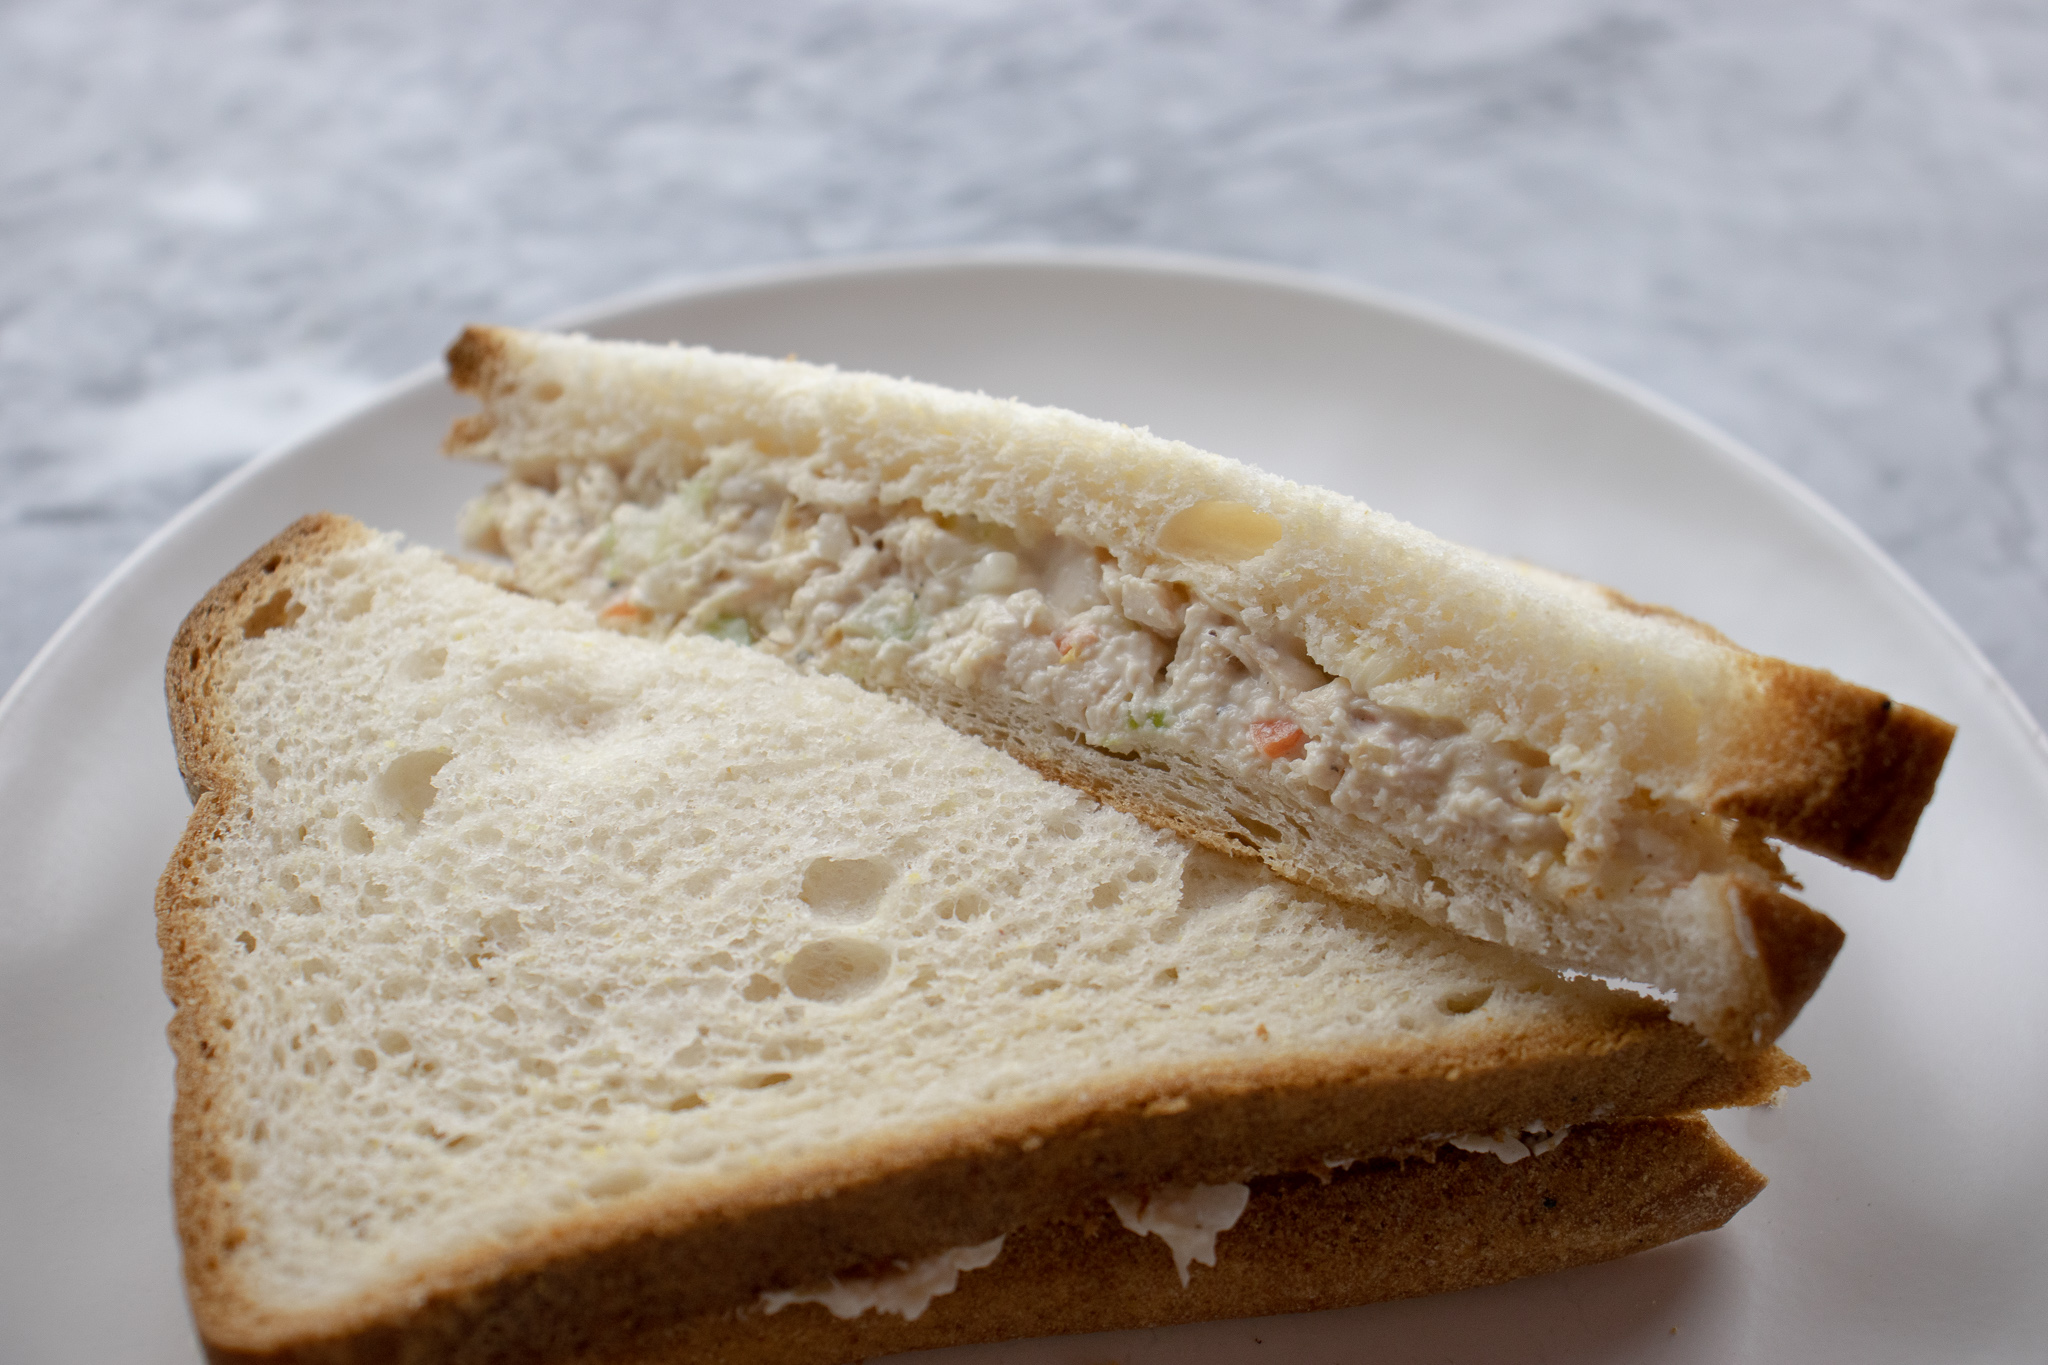
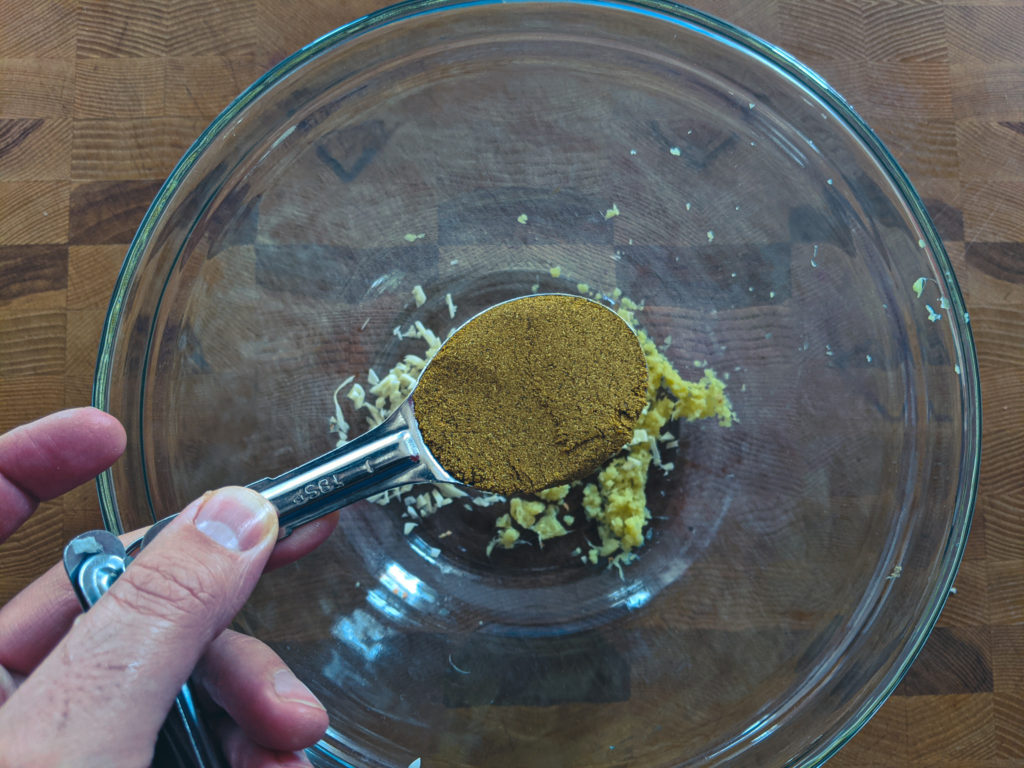
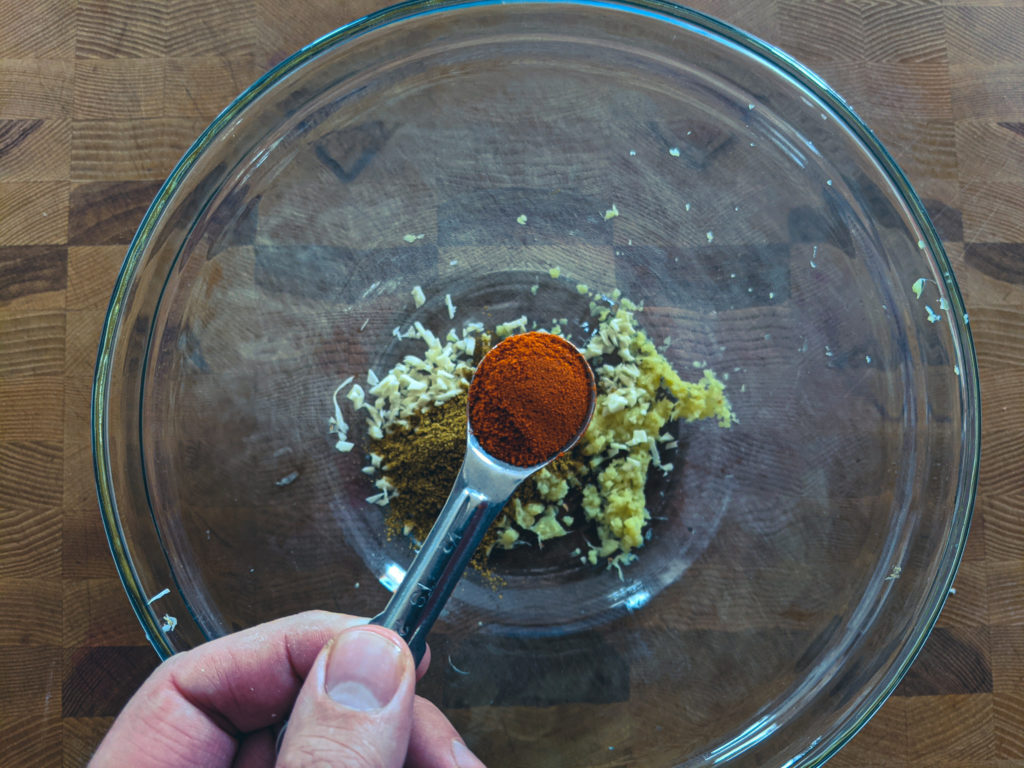
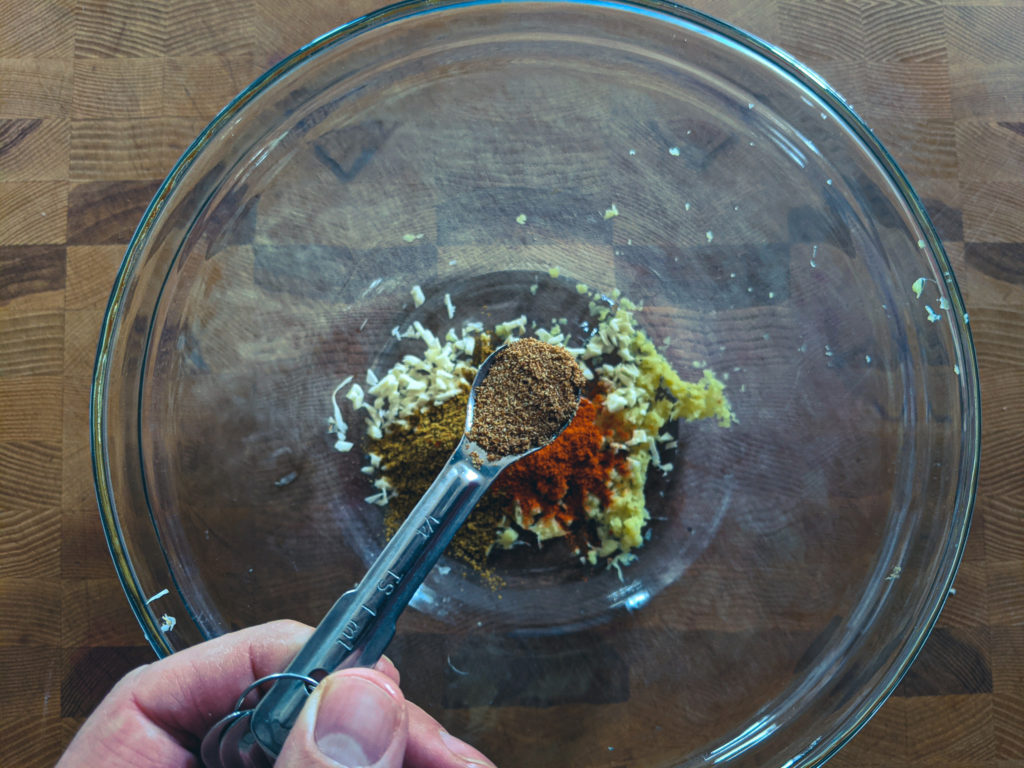
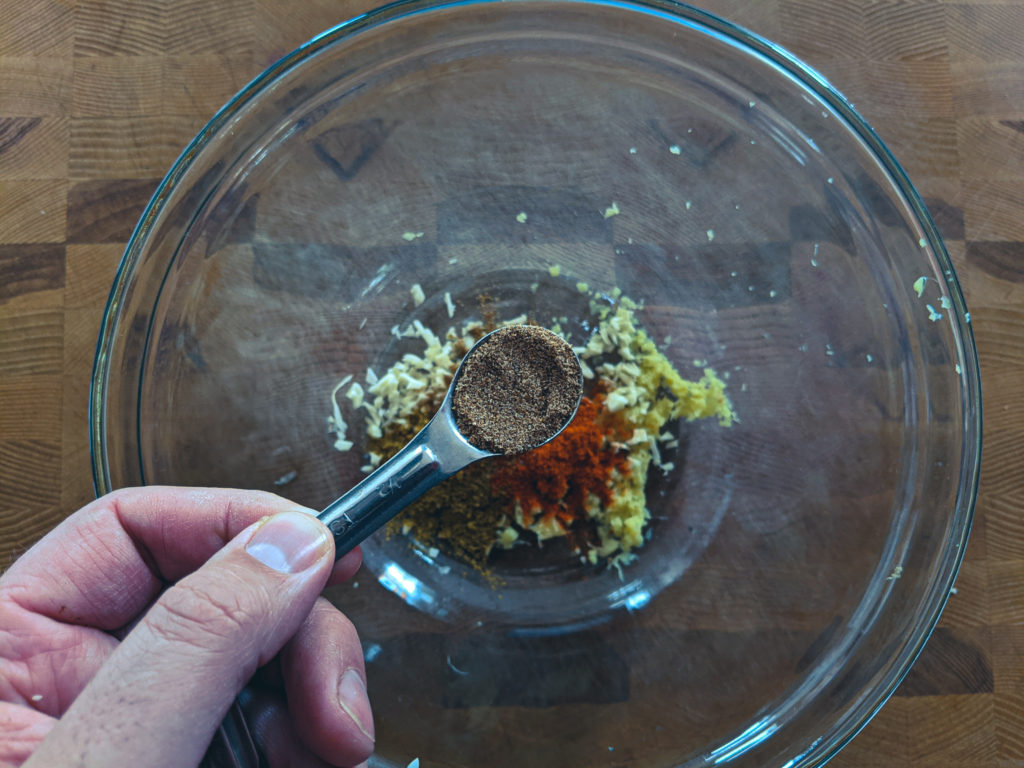
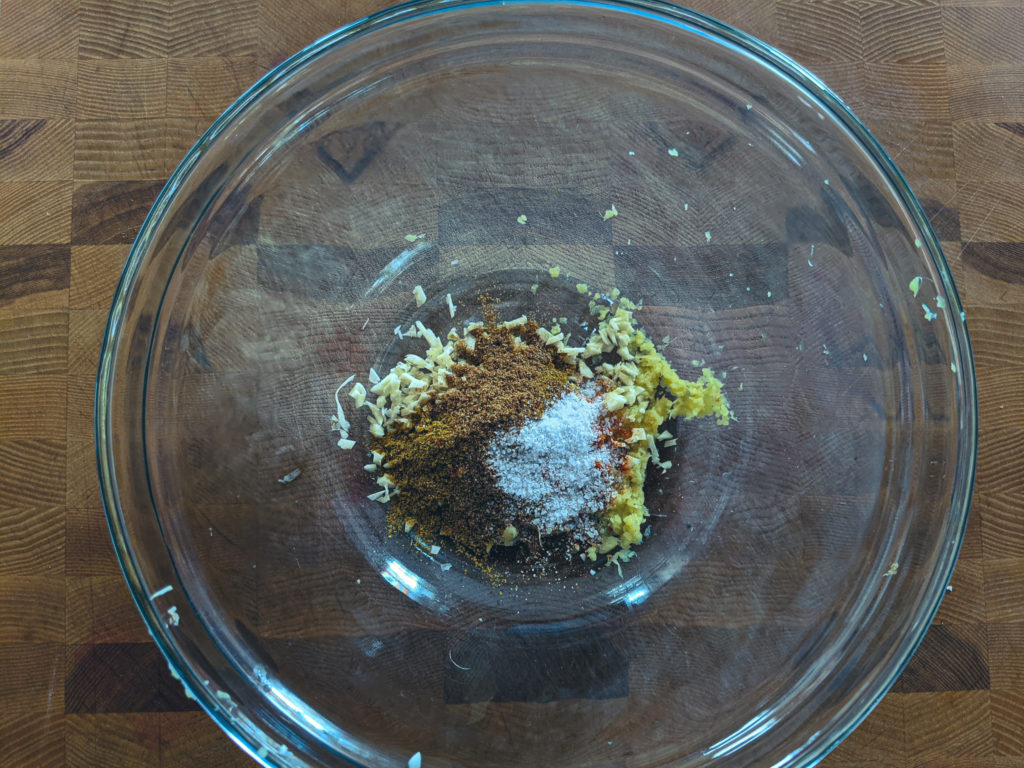
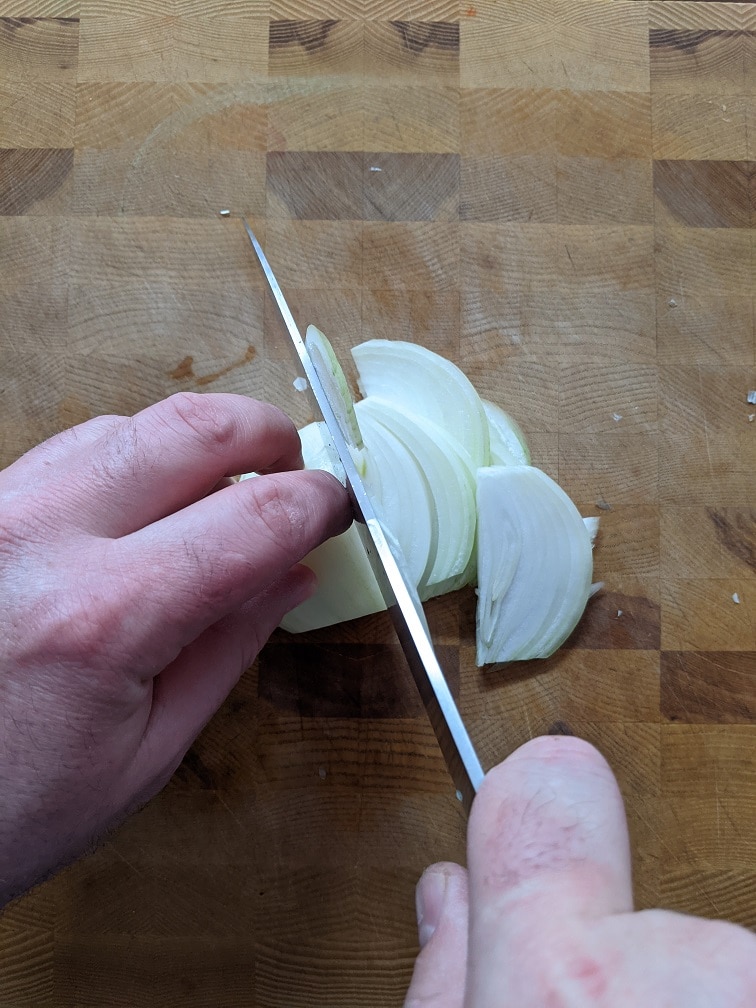
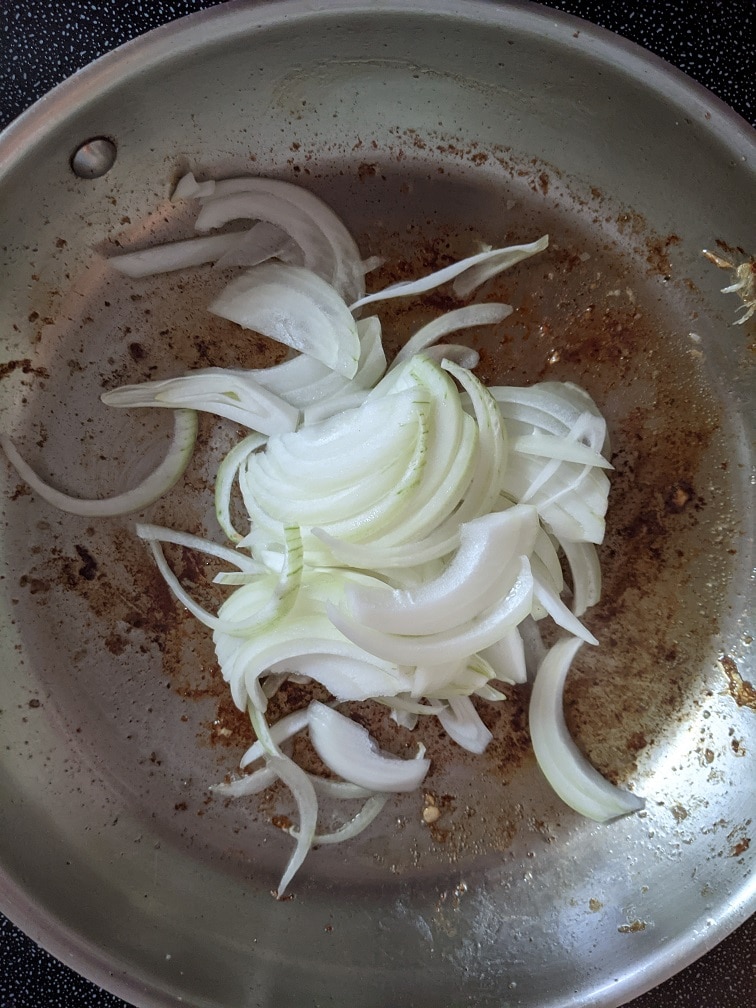
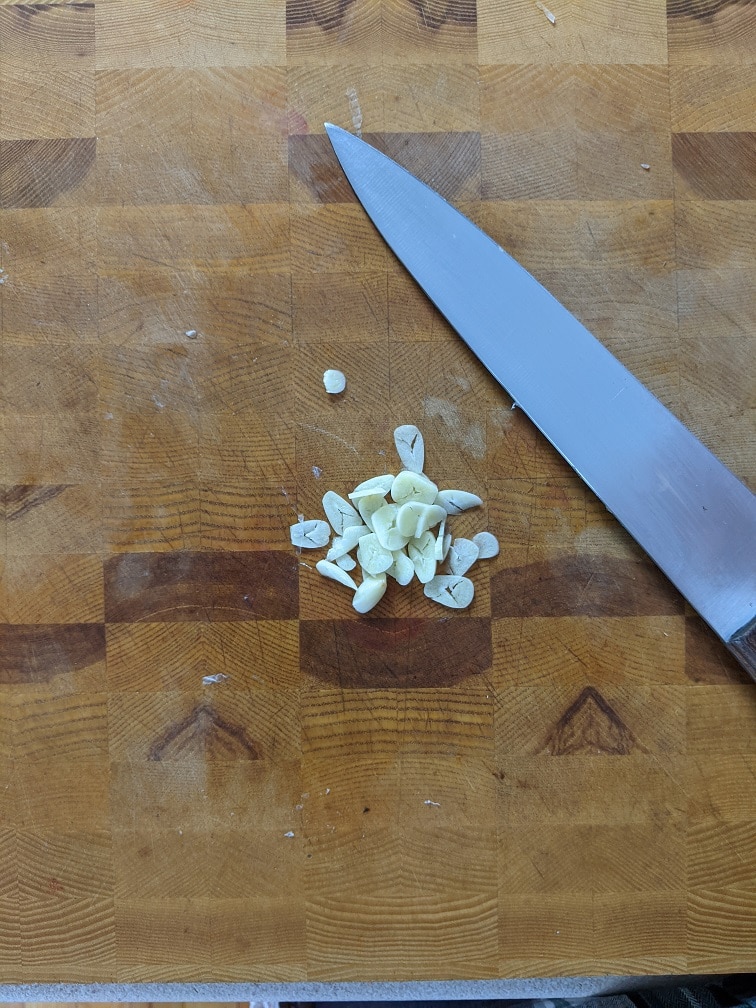
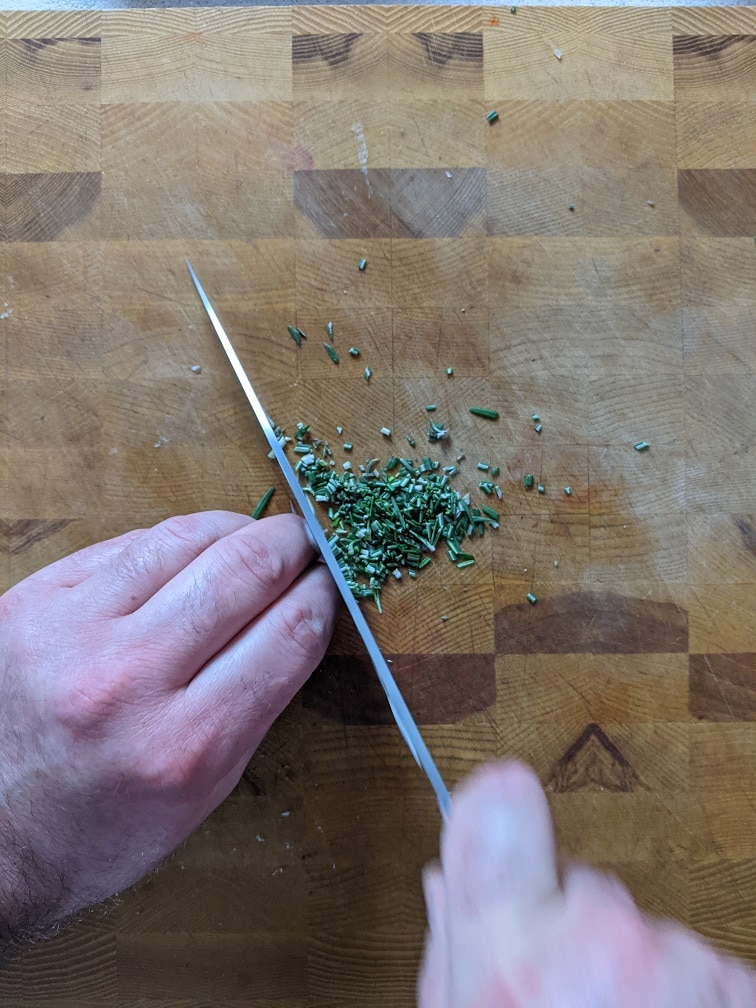
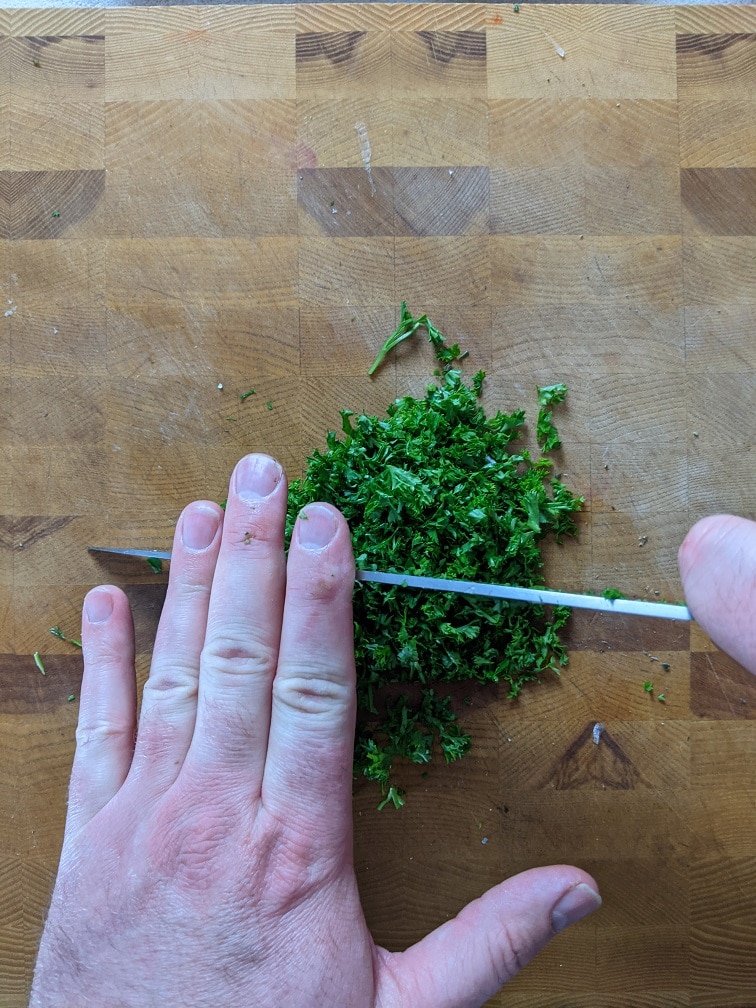
The real secret to making this chicken salad is the garnish that goes in the chicken salad mix. I’ve had chicken salad with various ingredients like avocado, grapes, apple, bacon, pickles, and so on. And honestly, I’ve loved them all. However, as you’ll know if you’ve been reading this blog for any amount of time, I like simple, uncomplicated food. So, for me, a 4-ingredient chicken salad is best. I don’t count the mayo, salt or pepper as ingredinets as they are more seasonings. The best chicken salad has onion for sharpness, carrot for sweetness, and celery for celery-ness. (If you can think of a better way to describe the flavour of celery, please tell me in the comments below.) Of course, you can make a basic chkcen salad no celery if you’d prefer. You can leave any ingredient out, but I think the combination of all the ingredients is what makes this loaded chicken salad so good. The key is to cut the vegetables into the smallest pieces you can. You can grate the vegetables on a cheese grater if you’d like, as I demonstrated in my Deviled Egg Salad Sandwich post. In total, you need three tablespoons of onion and two tablespoons of both carrot and celery.
Chicken For Chicken Salad
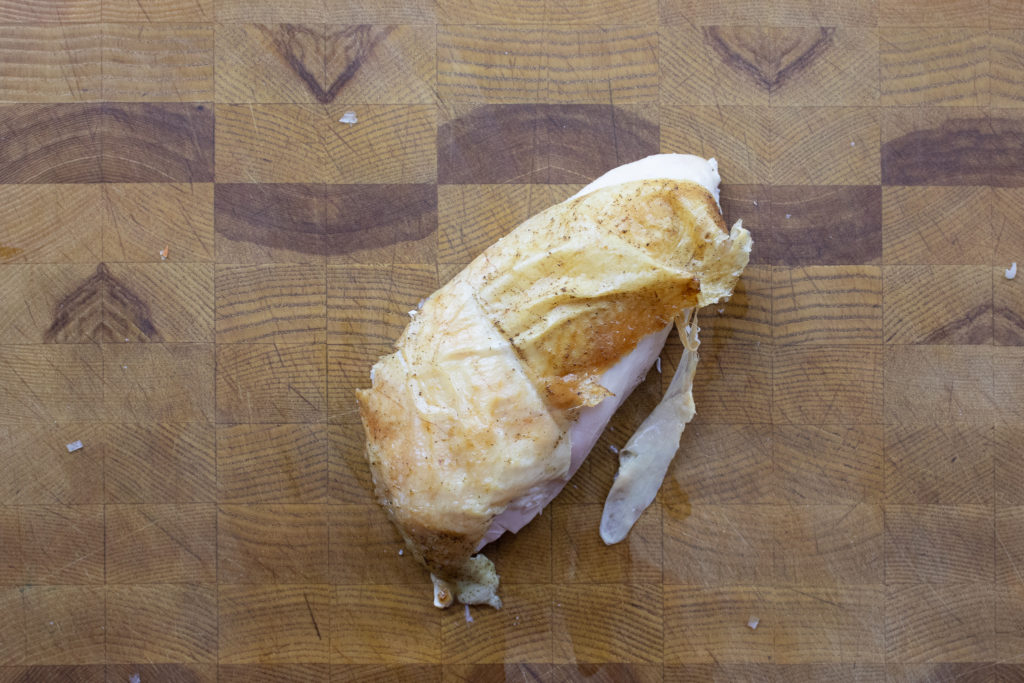
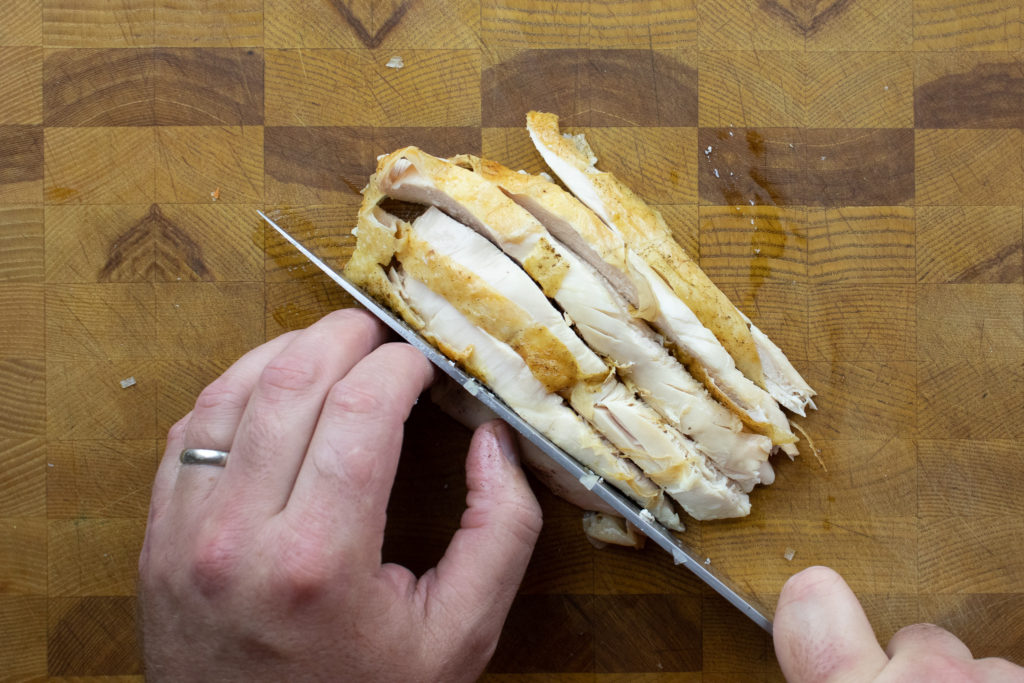
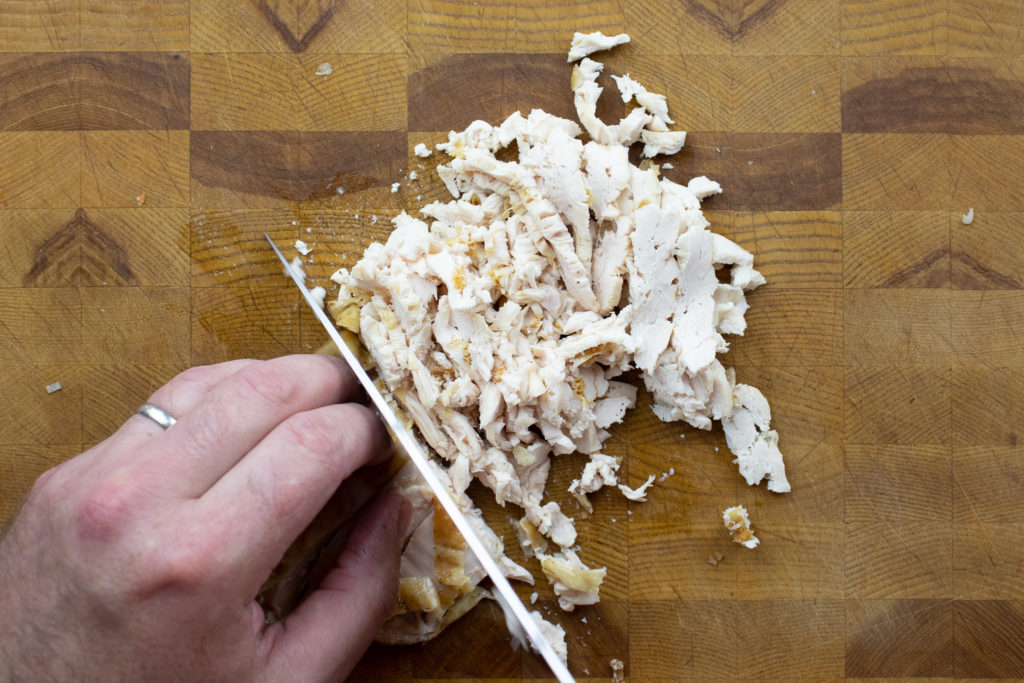
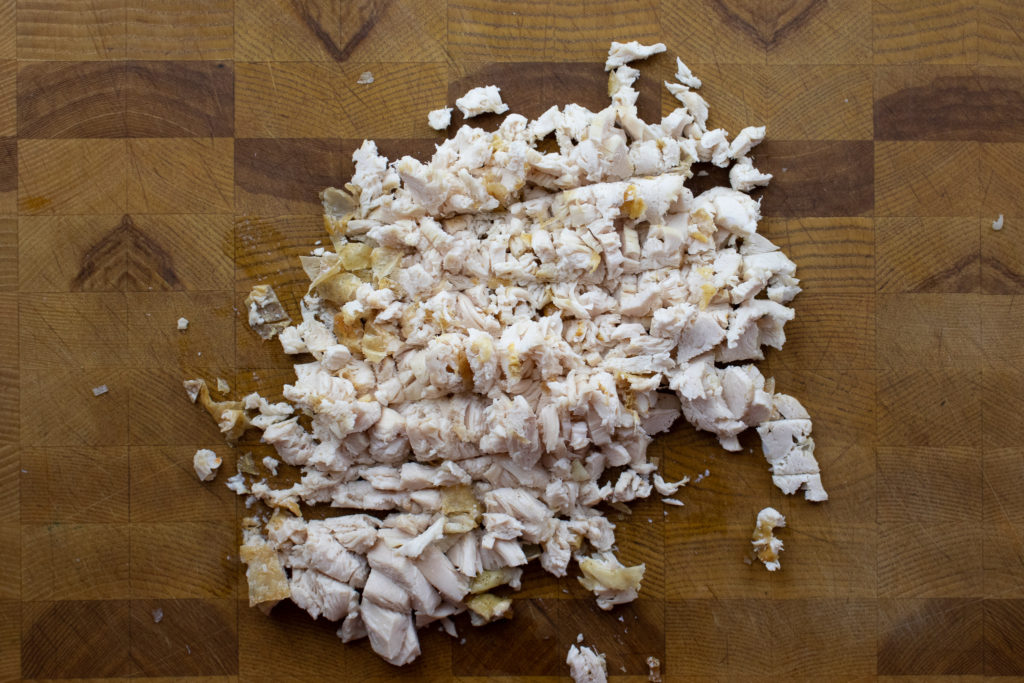
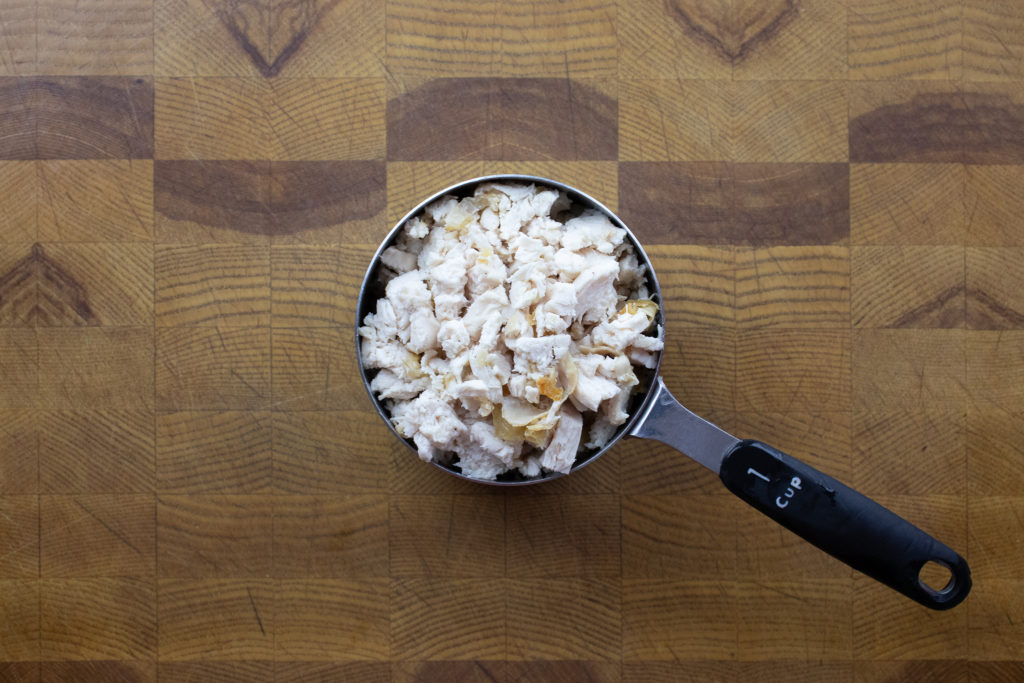
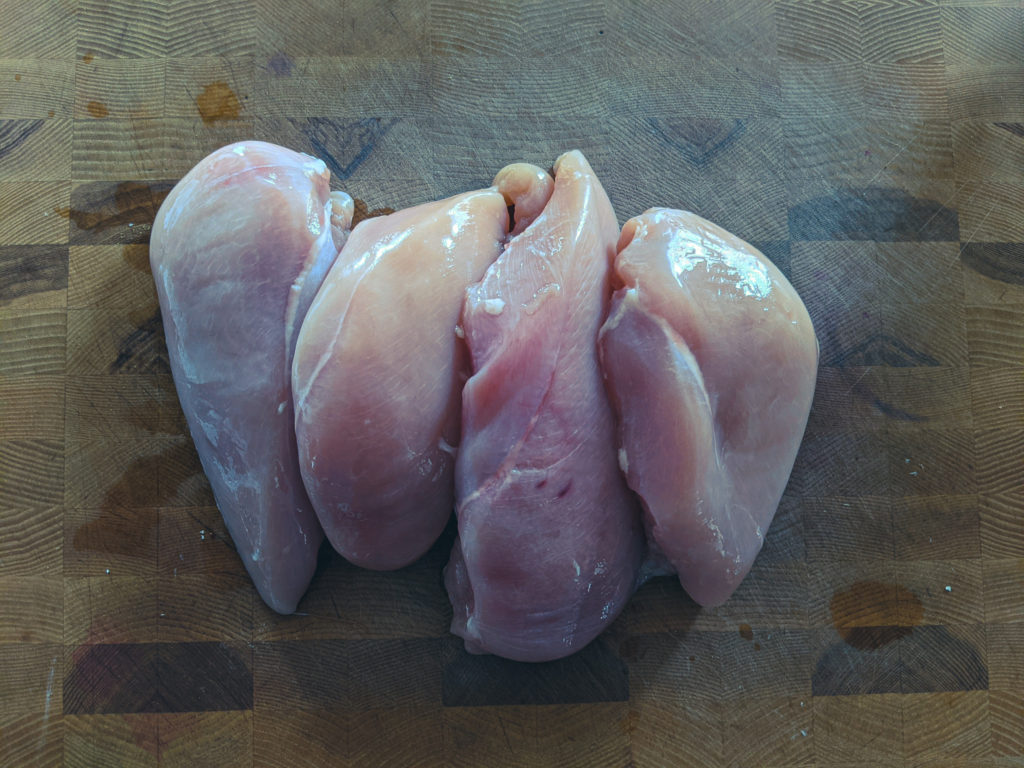
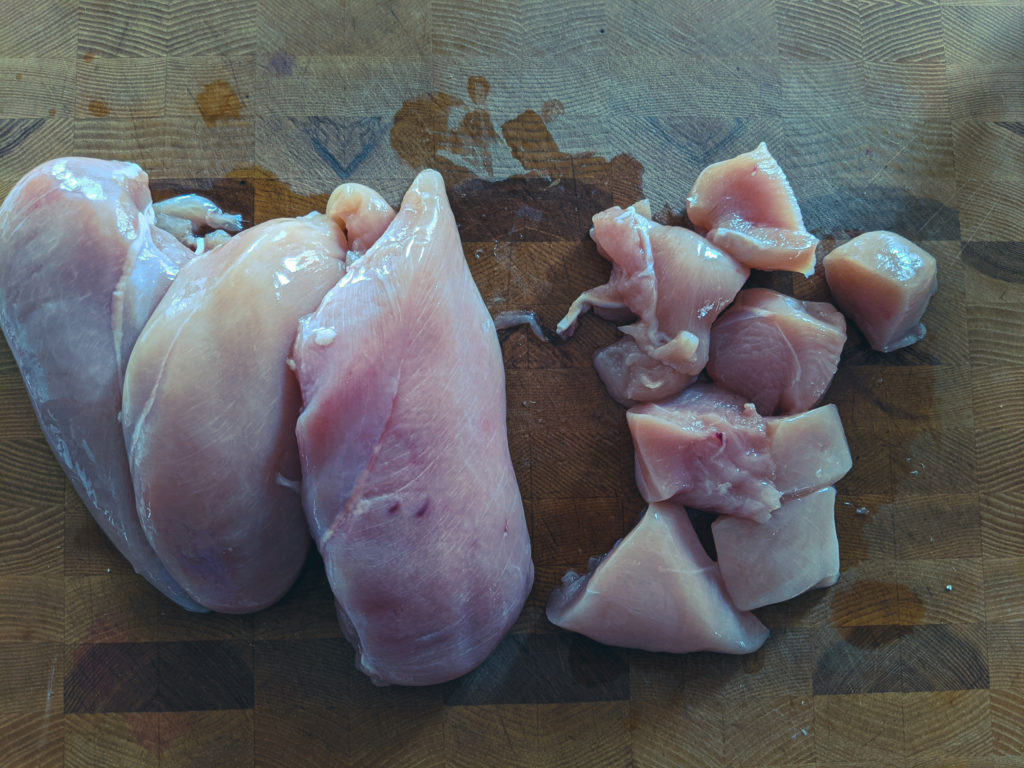
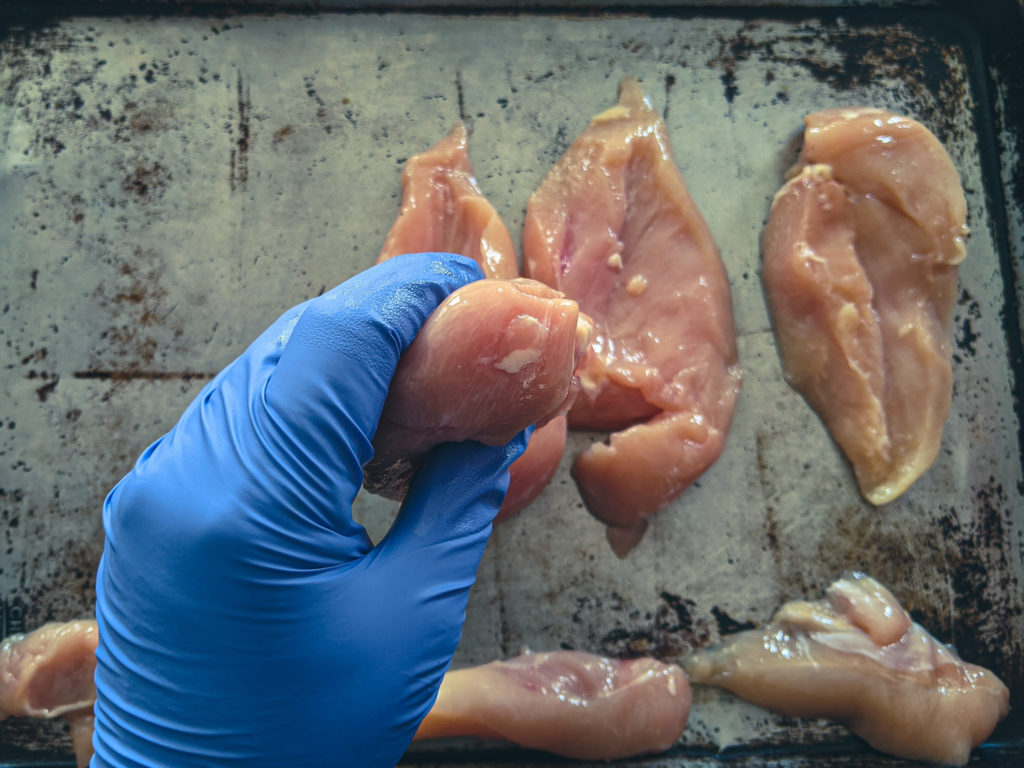
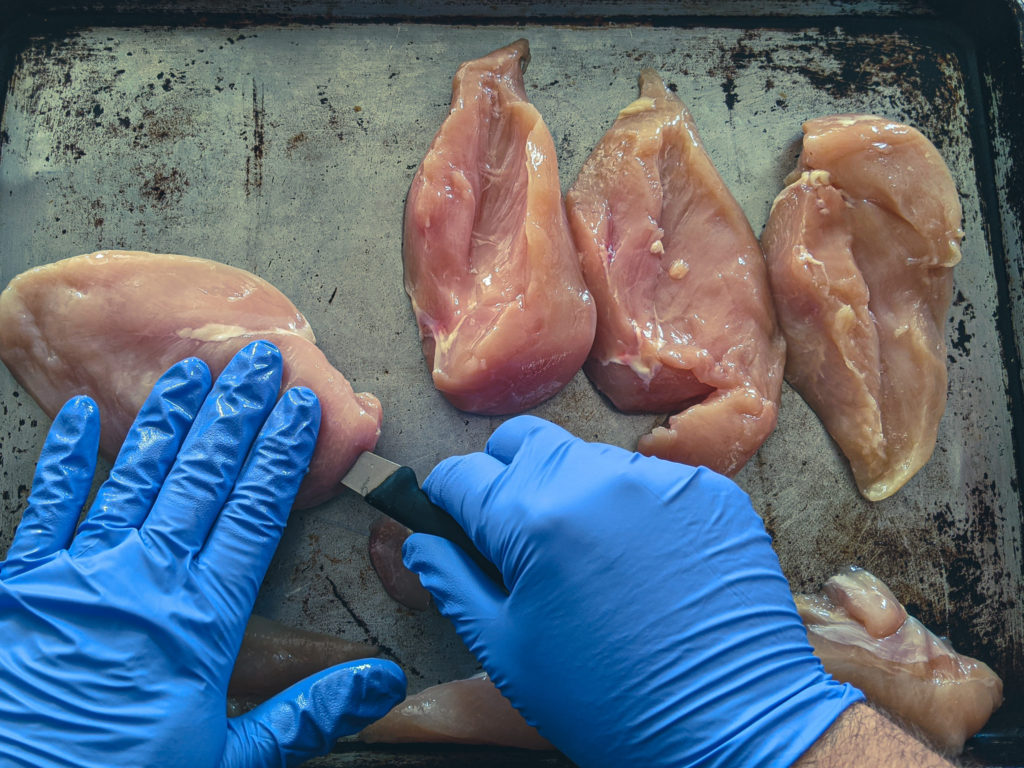
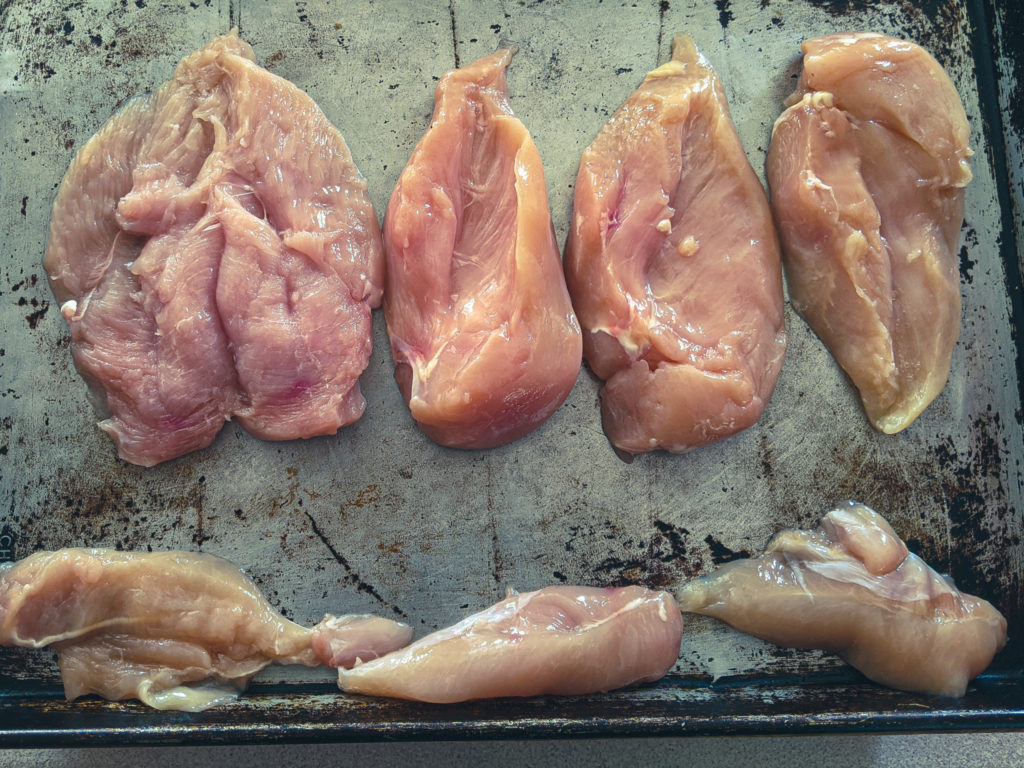
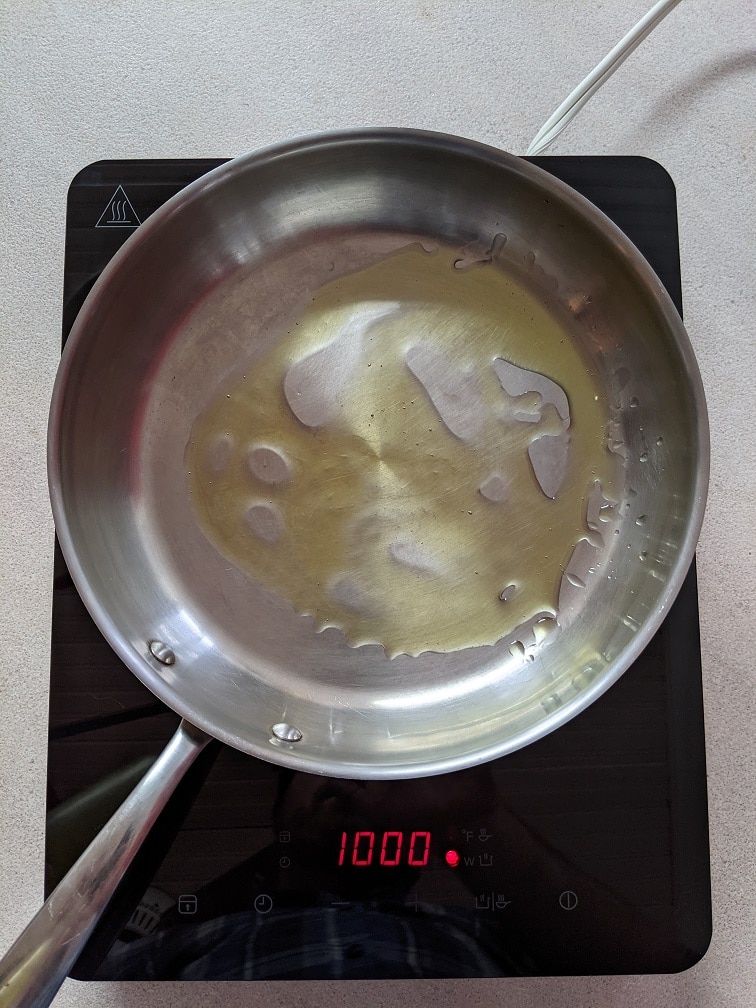
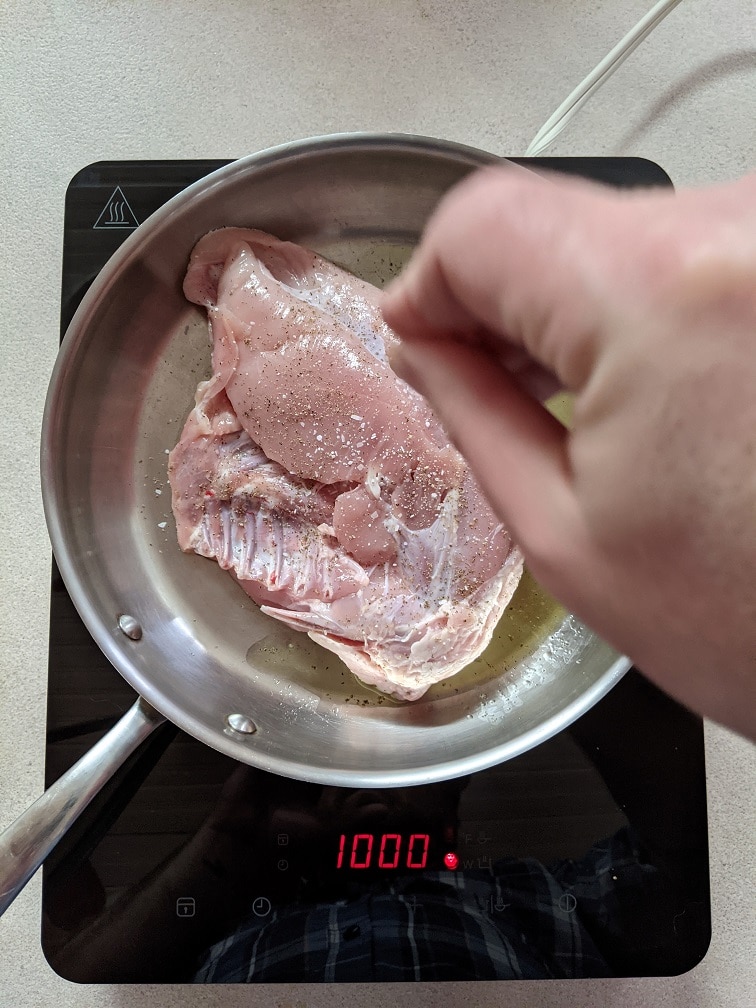
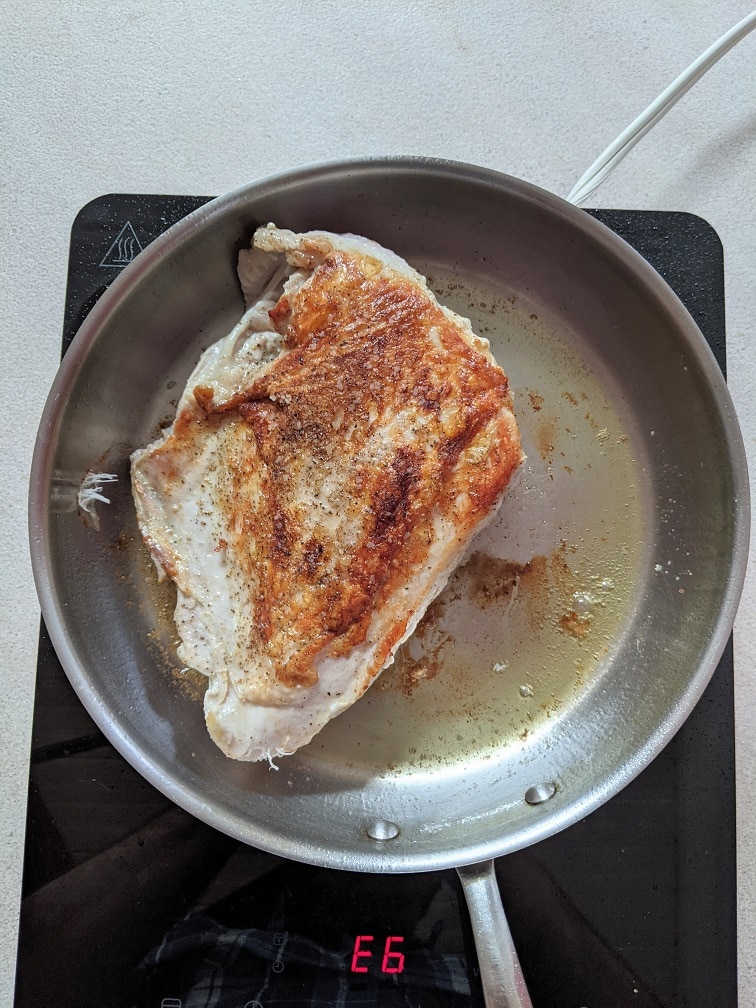
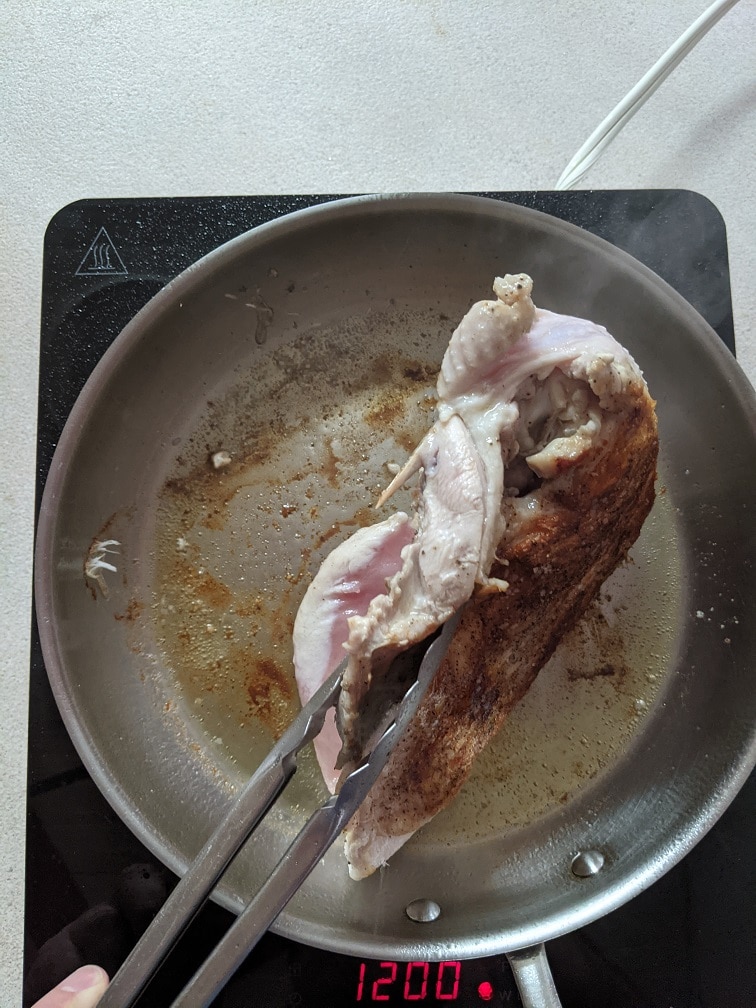
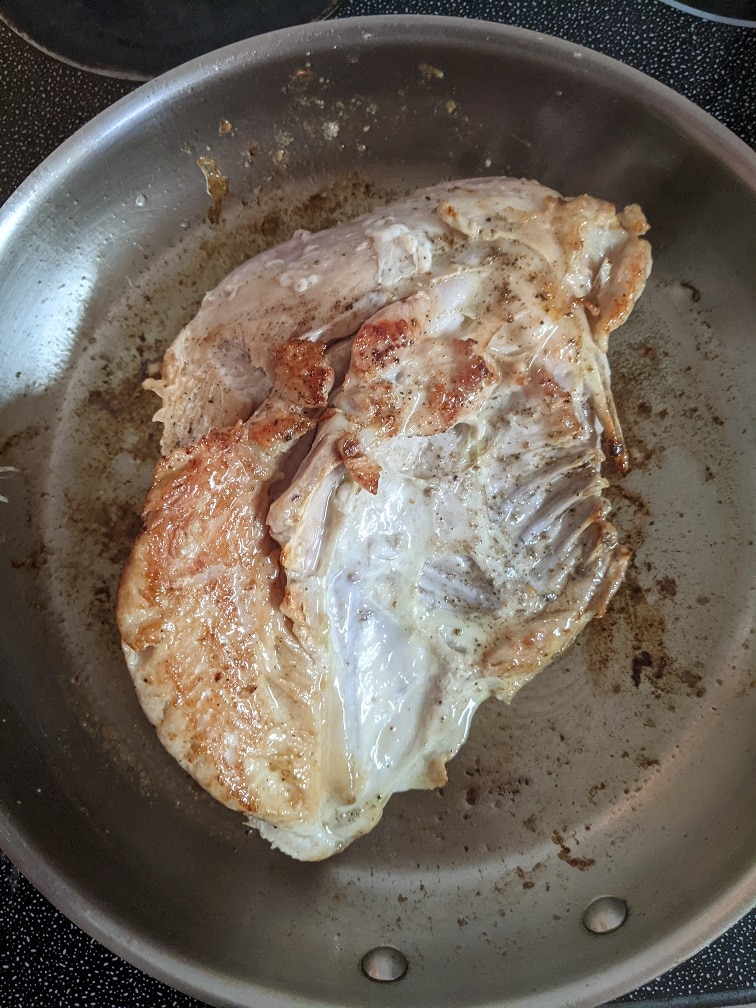
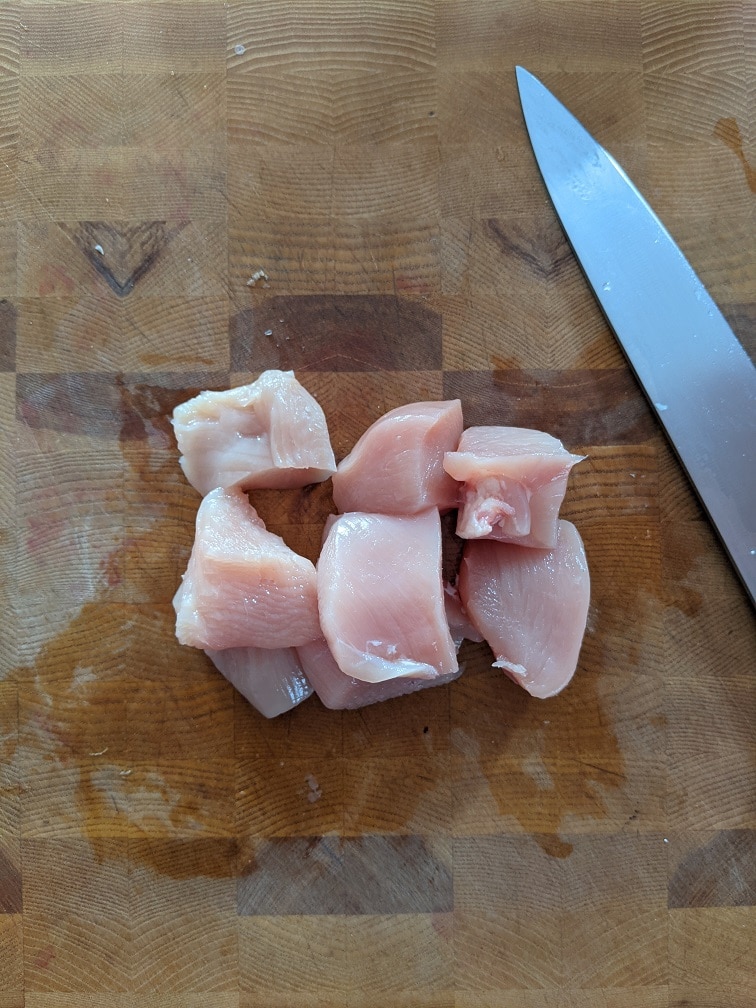
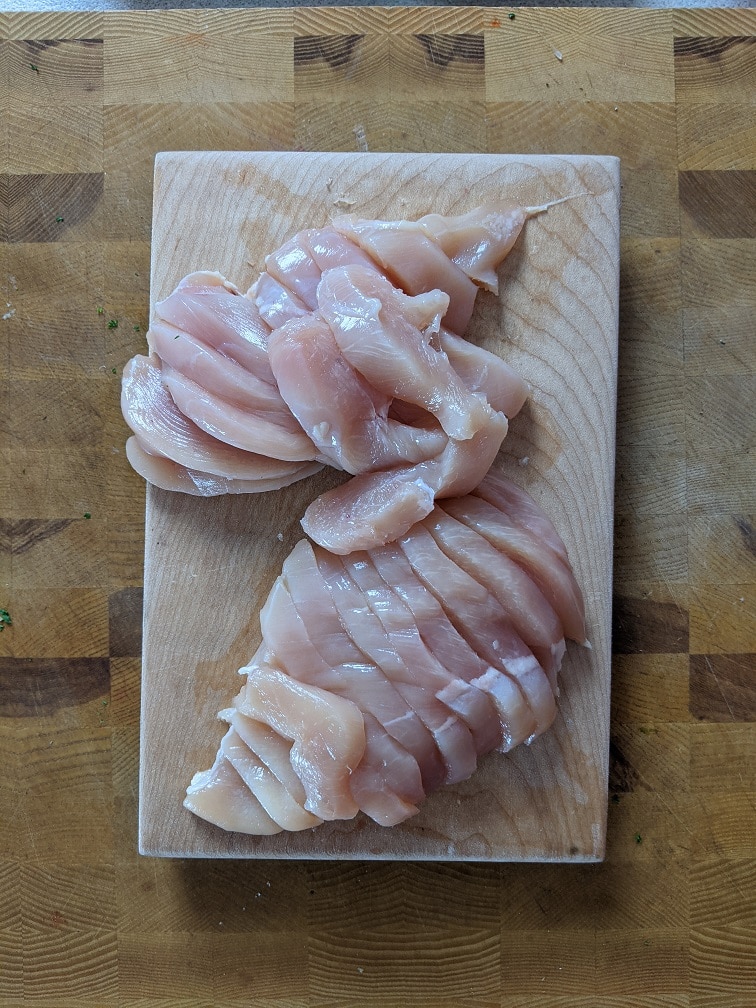
I think that the best chicken salad sandwiches are those that are made with leftover whole roasted chicken. Chickens that are roasted whole have more flavour and moisture than boneless, skinless chicken breast. So, I took the breast off a roasted chicken and cut it up with the skin. You can leave the skin out if you’d prefer, but it does add a lot of flavour. As with the vegetables, cut the chicken as small as you can. You’ll need one cup of cut chicken in total.
Optional Chicken Salad Ingredients
In my opinion, the best cheese for chicken salad, is no cheese at all. But, if you really want cheese on chicken salad sandwich, cheddar, swiss, or even pepper jack cheese are great options. Lot’s of people prefer an easy chickne salad recipe without celey, but you can add grapes or apples instead to provide that crunch. If you’re wondering what goes good with chicken salad sandwiches, I suggest some veggie sticks or even a bag a potato chips. Either dill pickle, salt and vinegar or plain would be best.
How to make the Best Chicken Salad Recipe
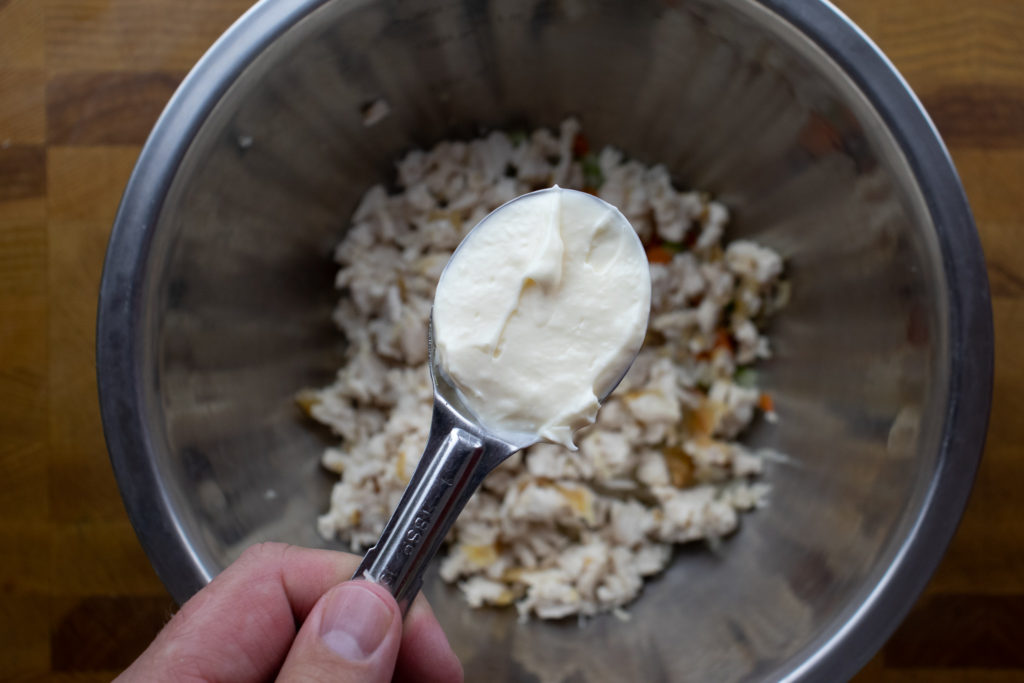
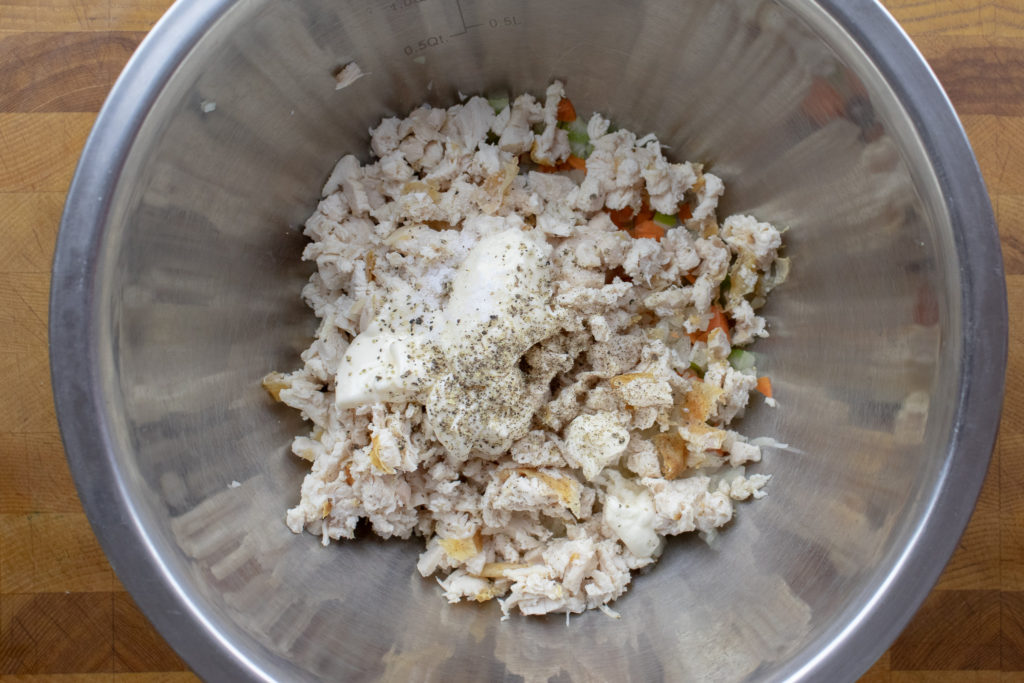
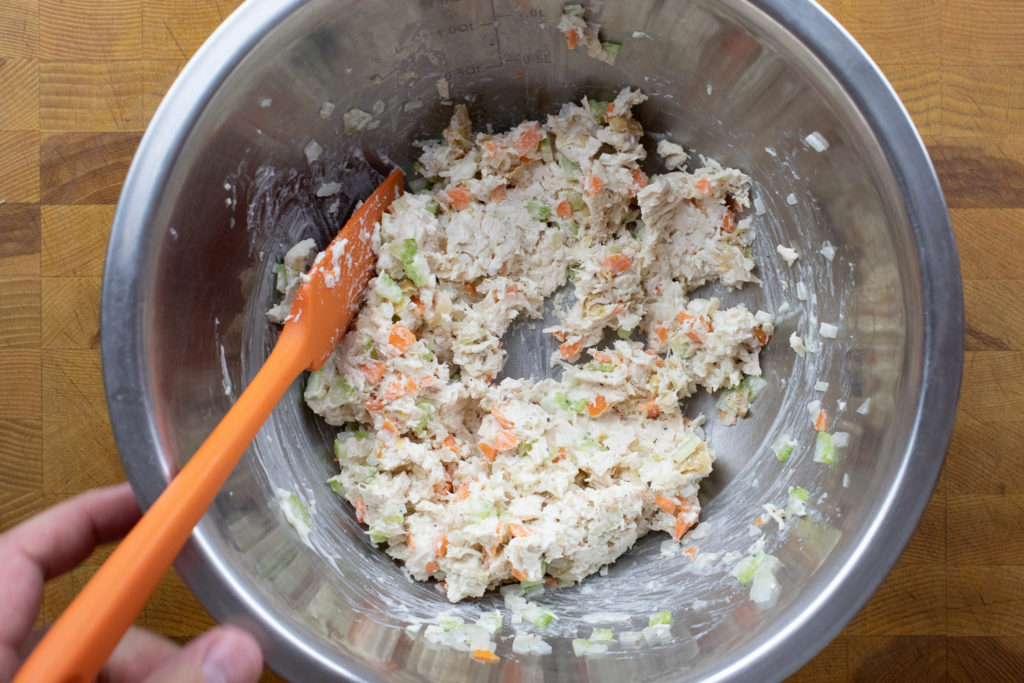
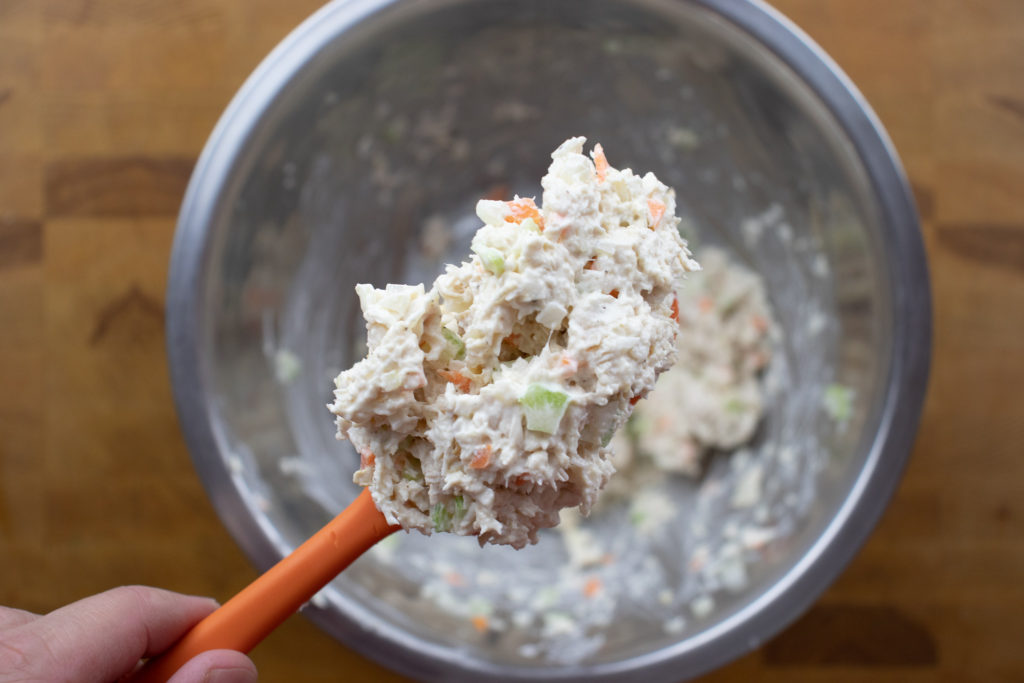
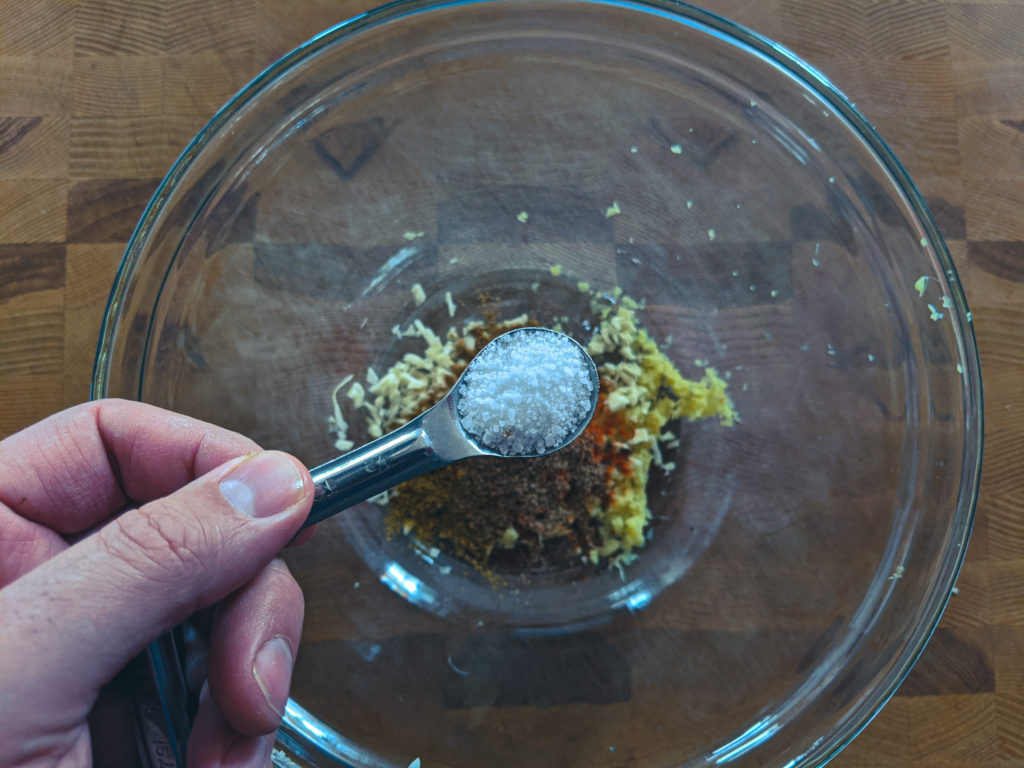
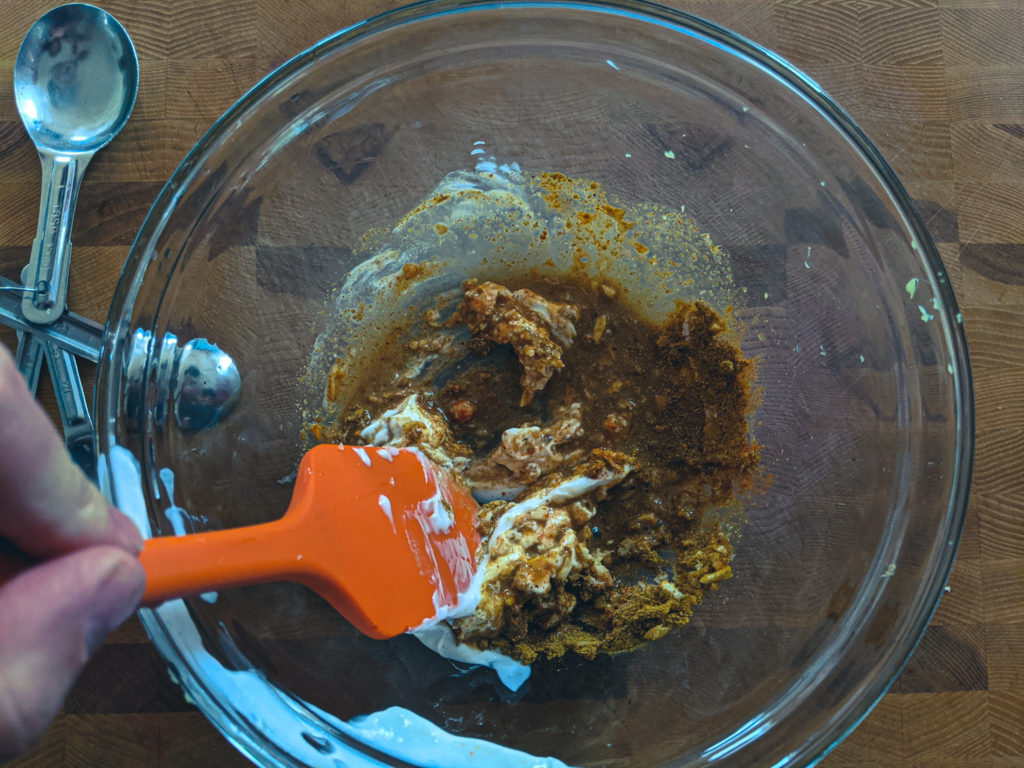
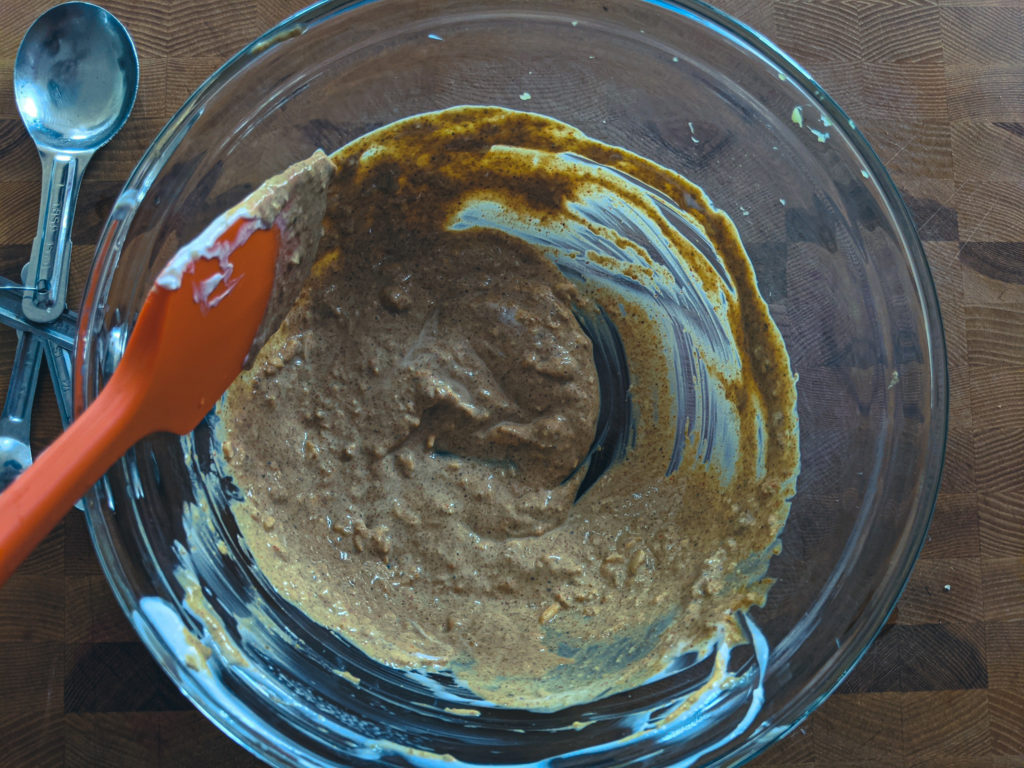
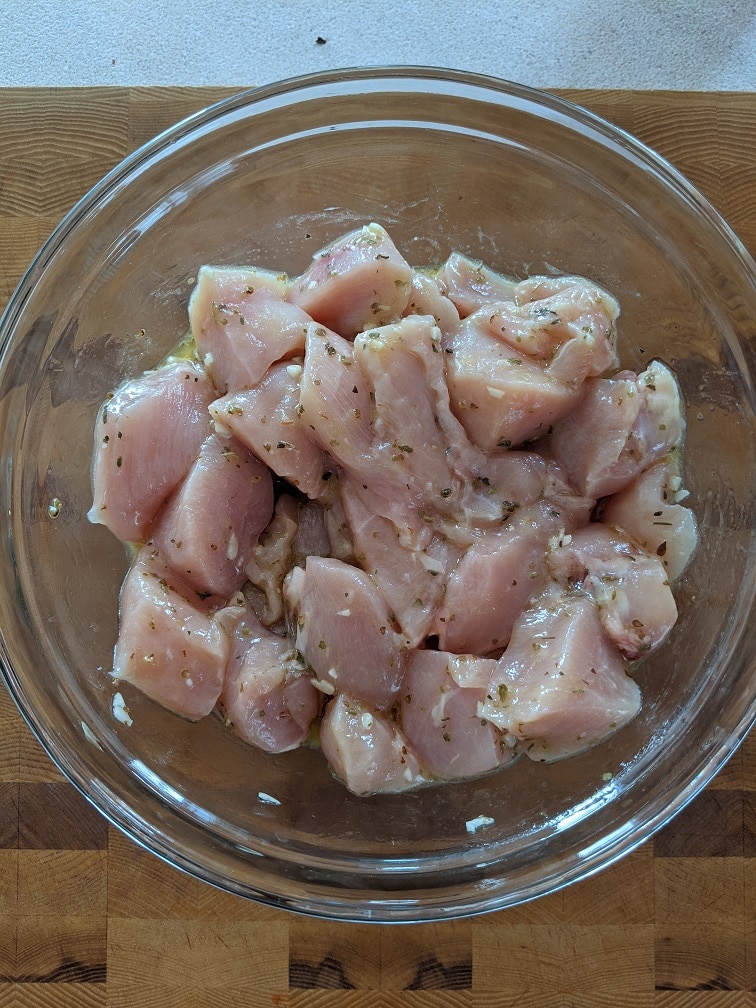
Put the chicken and vegetables in a medium mixing bowl. Add three tablespoons of mayonnaise, a quarter teaspoon of kosher salt, and a pinch of black pepper. Mix the chicken salad, taste it and season with a little more salt and pepper as needed. The finished mixture should be creamy but not wet.
Best Bread For Chicken Salad Sandwiches
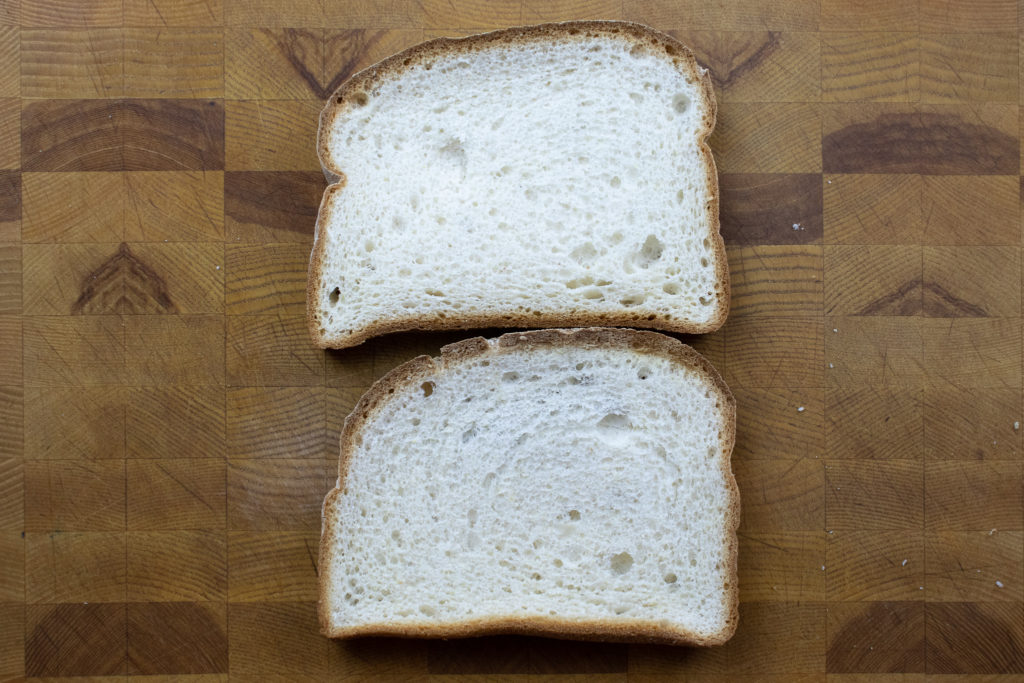
When it comes to choosing the right bread for your chicken salad, there are a few things to keep in mind. First, you want the bread to be soft. If the bread is too hard, when you bite into it, the chicken salad will come out the other side. Second, you want bread that doesn’t have too strong a flavour. Chicken salad has a mild flavour so pairing it with a strong flavoured bread like Rye would be to much. I also wouldn’t serve chkcne salad on a bagel, just due to how dense the bagle is, and the pesky hole in the middle. All your filling will leak out the middle and the back when you bite in. Soft white or whole wheat bread, or even a crossiant are in my opinion, the best bread for chicken salad sandwiches.
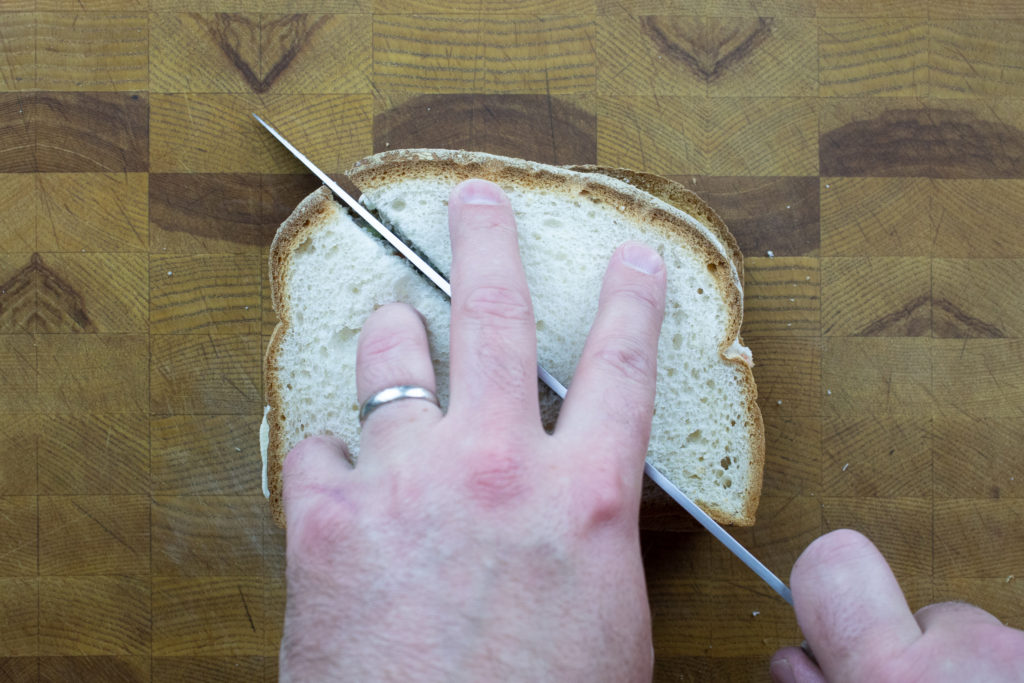
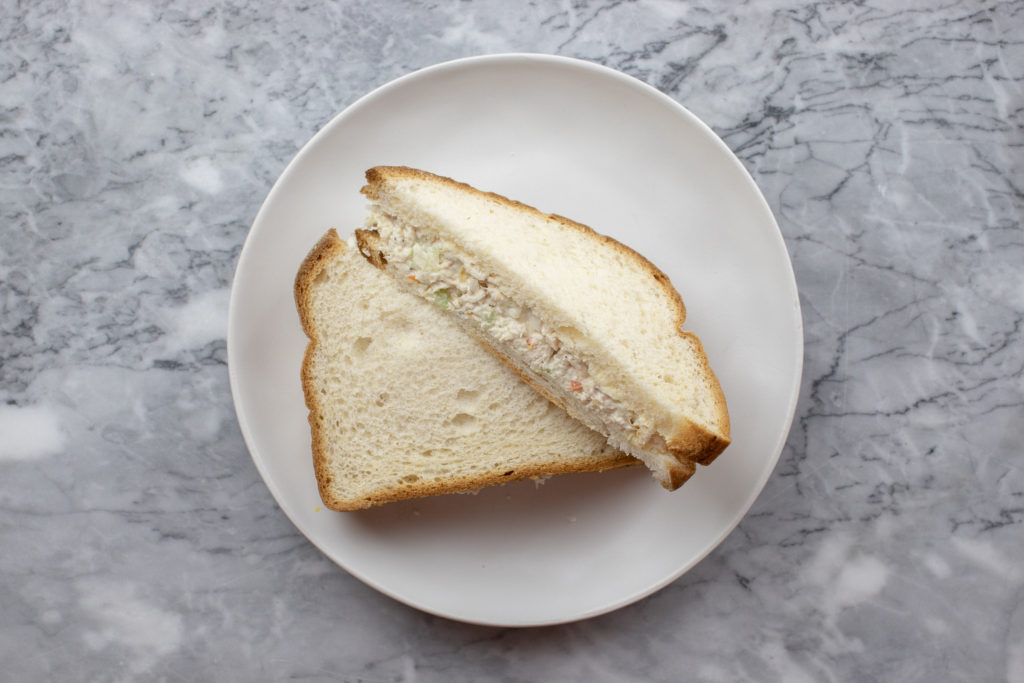
Assembling The Sandwiches
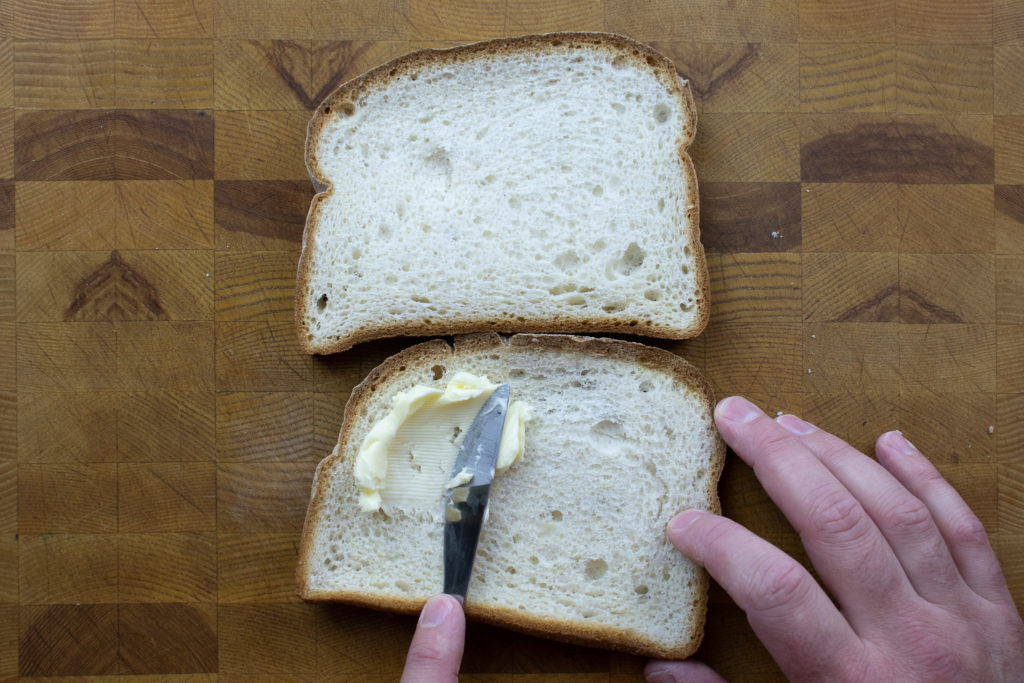
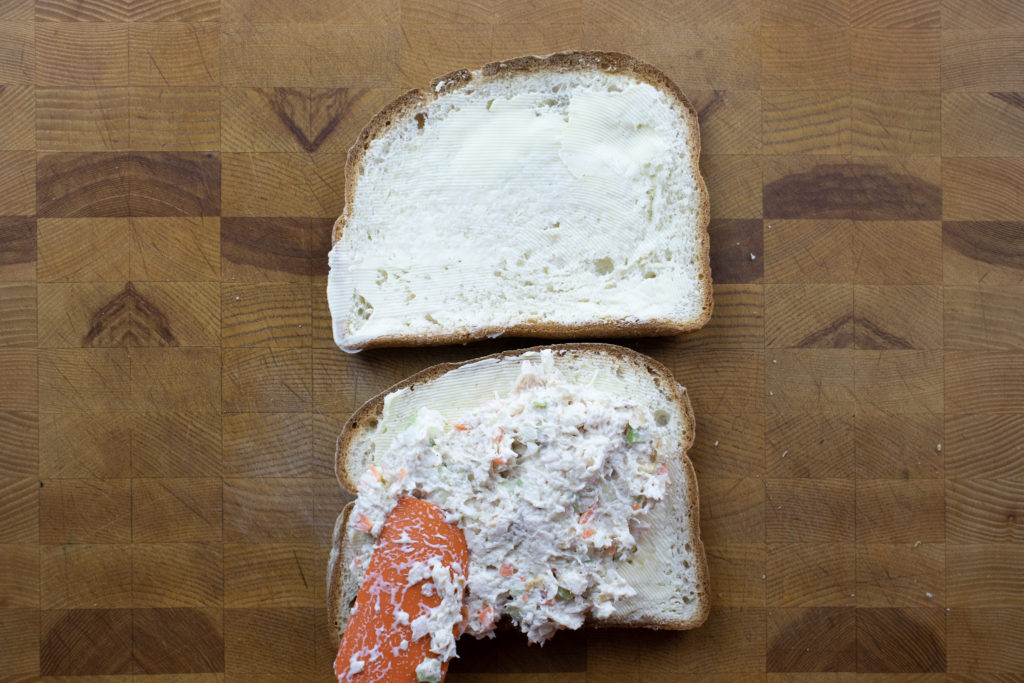
This amount of chicken salad should yield between two and four sandwiches depending on how much you load them up. To make the sandwiches lay out your bread and butter it making sure to push the butter right to the edge of the bread all the way around. Top the buttered bread with a quarter to a half cup of the chicken salad mixture. Top with the second slice of buttered bread, slice and serve. If you’d like, you can also add some lettuce to the sandwich.
Wrap-Up
For me, the best chicken salad sandwich is simple, and I think this recipe hammers that point home. Of course, you can take this recipe, change it and make it your own. However, I recommend you try it as written once because I think you’ll be amazed at just how good something with so few ingredients can truly be. Enjoy!
Thank you for coming to Chef’s Notes. I hope you’ve enjoyed this post. The mission of Chef’s Notes is to share over twenty years of professional cooking experience. If you’d like to be a part of that mission, you can share this post on Facebook or Pinterest or leave a comment below and rate the recipe. You can also subscribe to the Chef’s Notes Patreon by clicking here. You’ll get access to exclusive content, including live streams, monthly cooking videos and more. And remember to subscribe to the Chef’s Notes newsletter.
Best Chicken Salad Ever
The Best Chicken Salad Sandwich is made with a few quality ingredients that balance each other to create a simplistic yet delicious sandwich.
Mince or grate the onion, carrot and celery and add them to a medium mixing bowl.
Add the diced chicken, mayonnaise, salt and pepper. Mix well. Taste and adjust the seasoning with salt and pepper.
Spread the butter out onto eight slices of bread. Top four slices of bread with between a quarter and a half cup of the chicken salad. Top with the other pieces of bread, cut in half and serve.
Notes
Lettuce makes a great addition to this sandwich. Leftover chicken salad can be stored in an airtight container in the fridge for up to two days.
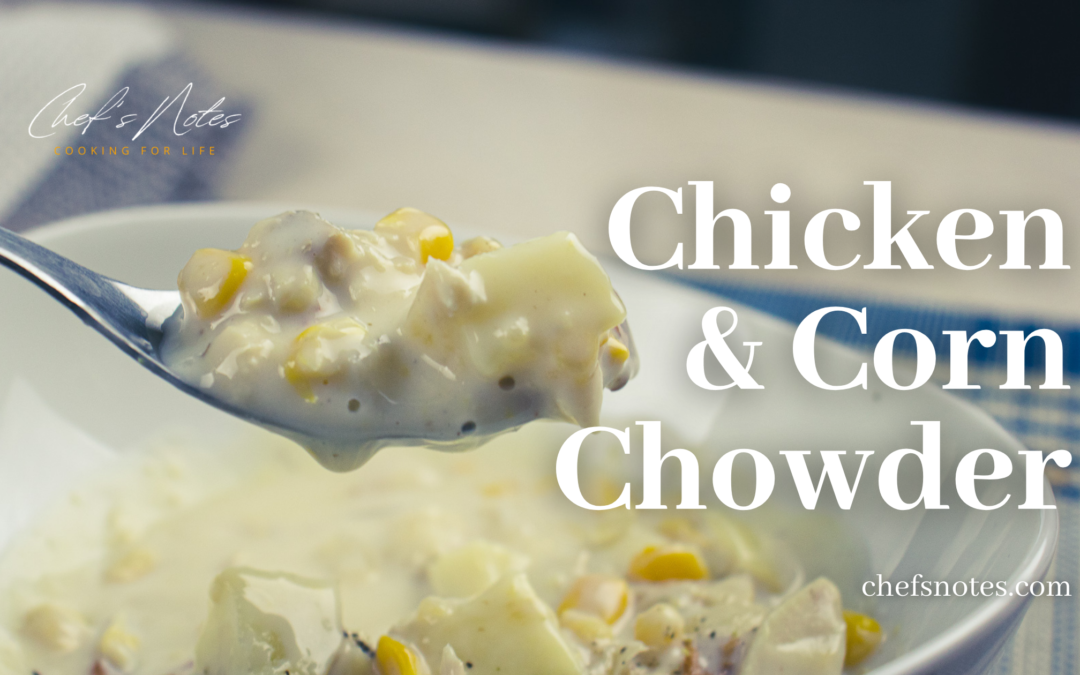
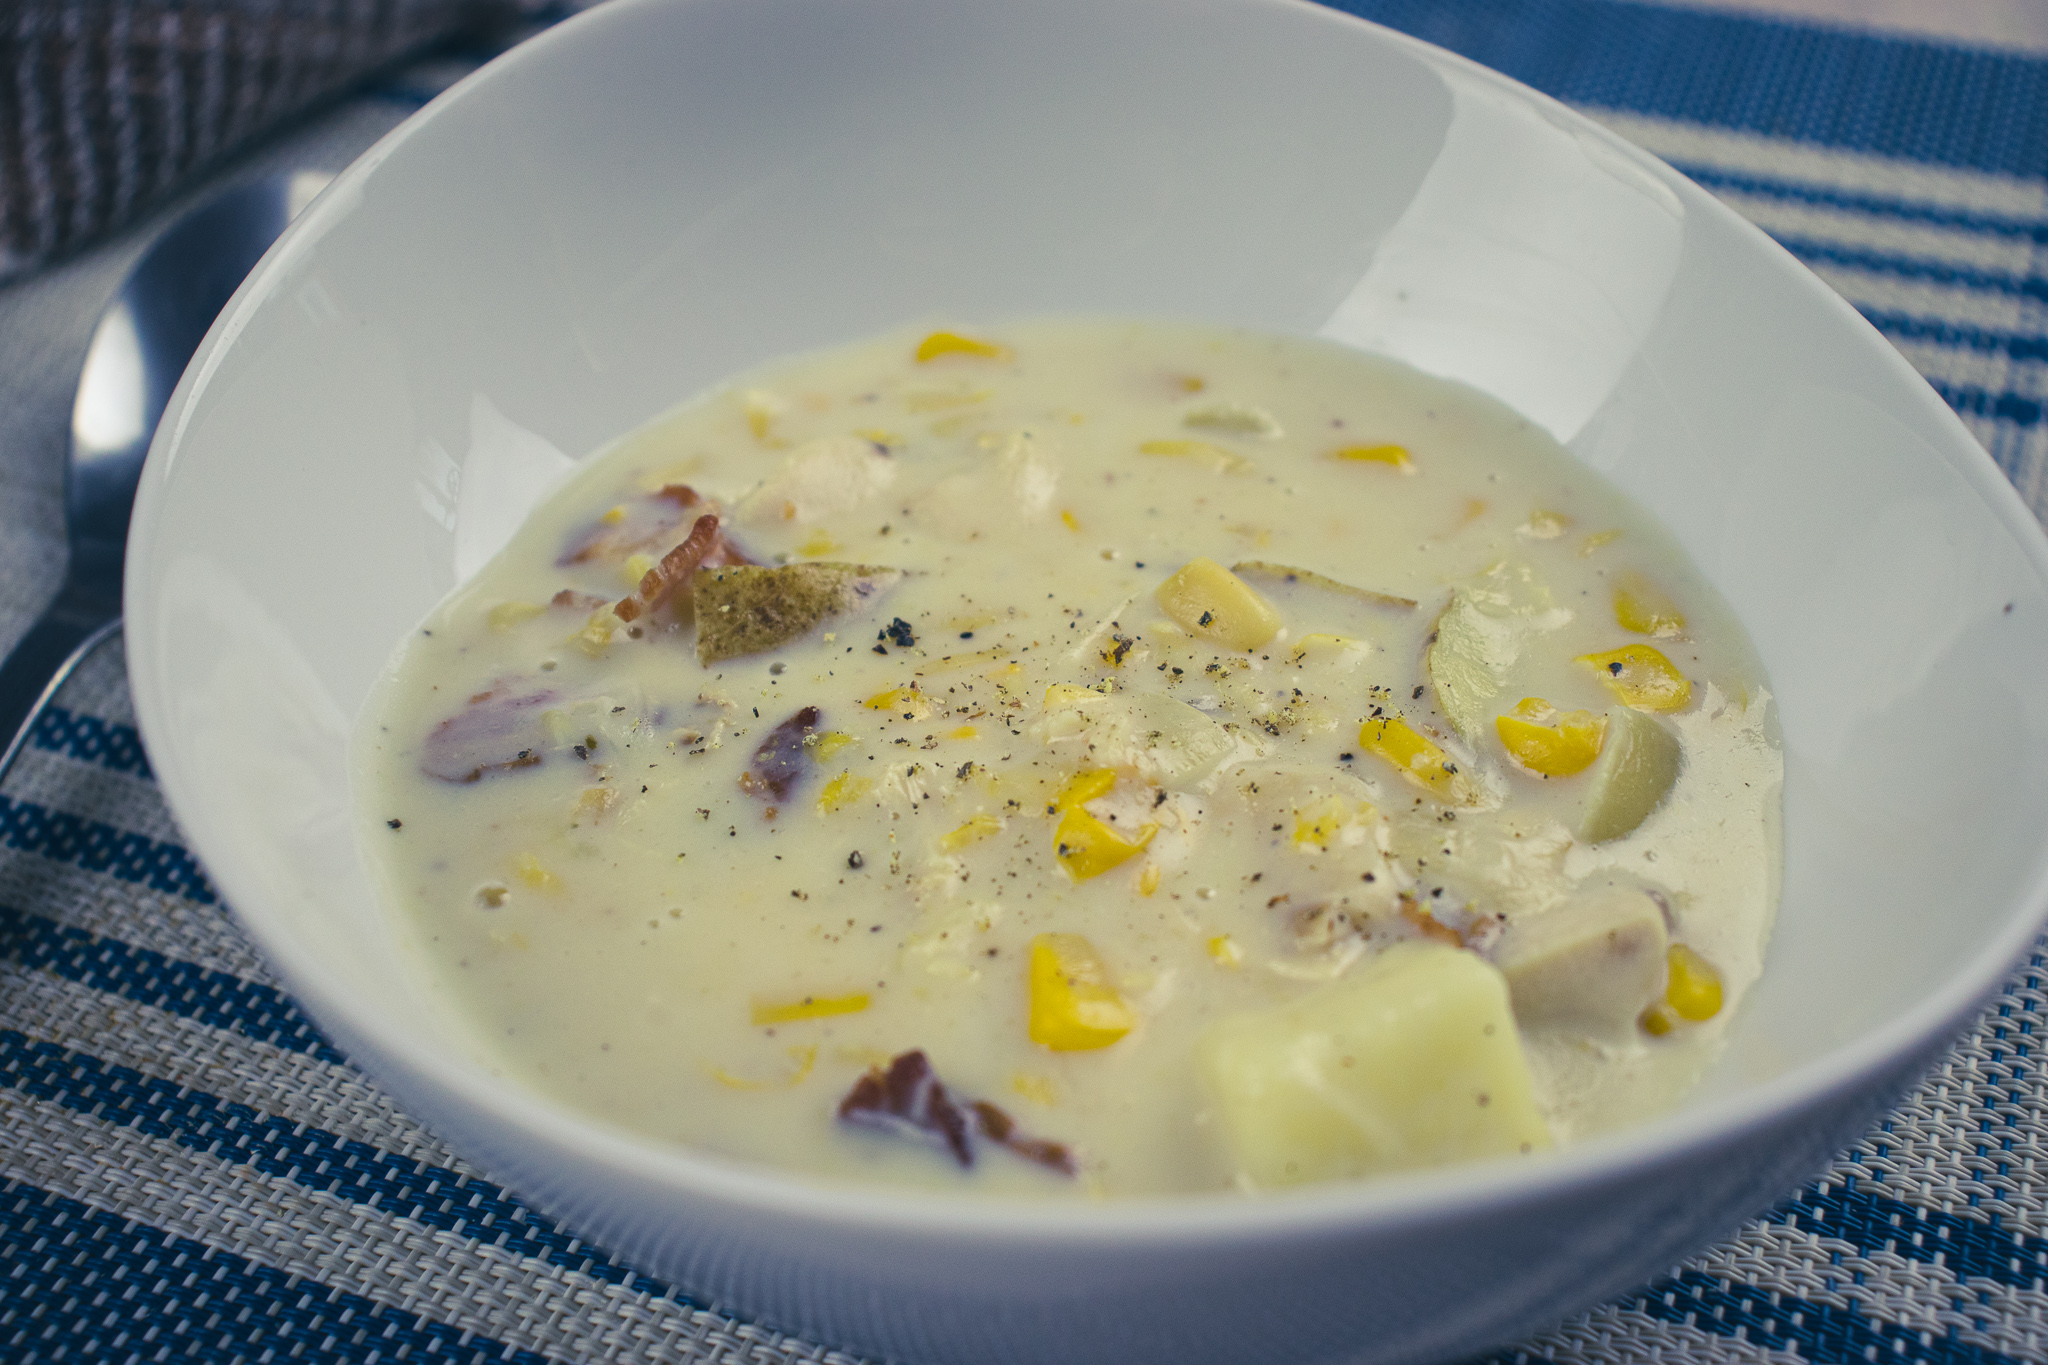
There is no single dish that means more to me than corn chowder. It is the first thing I learned to cook and was taught by my mom. It always has and will always have a special place in my heart. This Chicken and Corn Chowder is a little different from my mom’s. She never put the chicken in it, but it still has that same feeling as my mom’s recipe. When I eat it, I’m still reminded of my mom and of her teaching me to cook. She taught me that one of the secrets to good corn chowder is using leftover baked potatoes. I’ve taken that a step further and used leftover roasted chicken, making this dish comforting, delicious, and frugal. I hope you enjoy the recipe and the chowder. Let’s get to it.
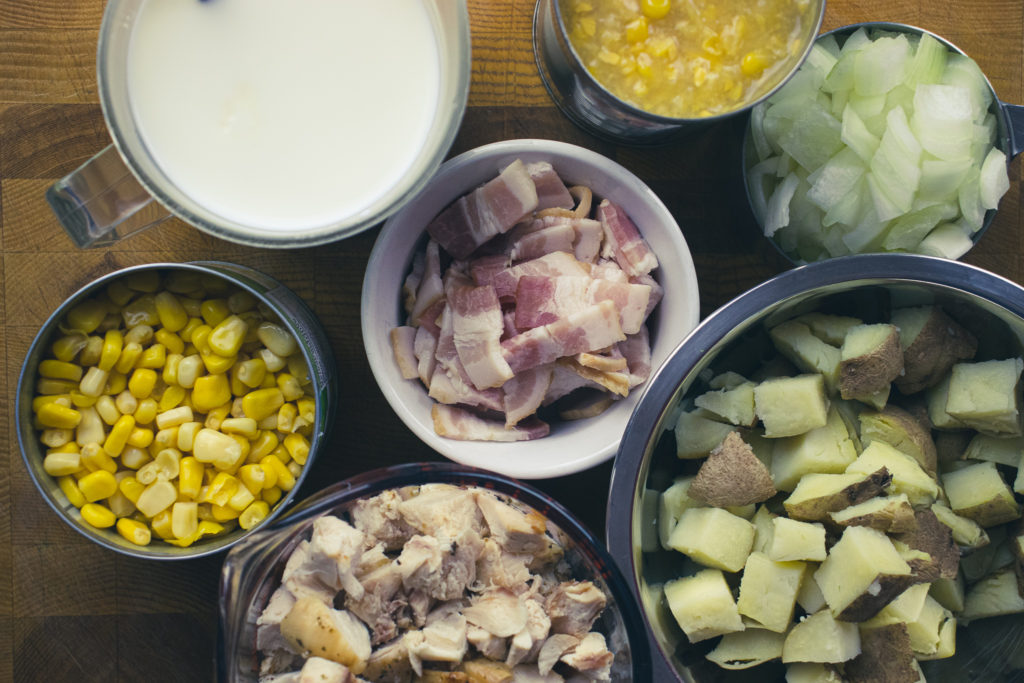
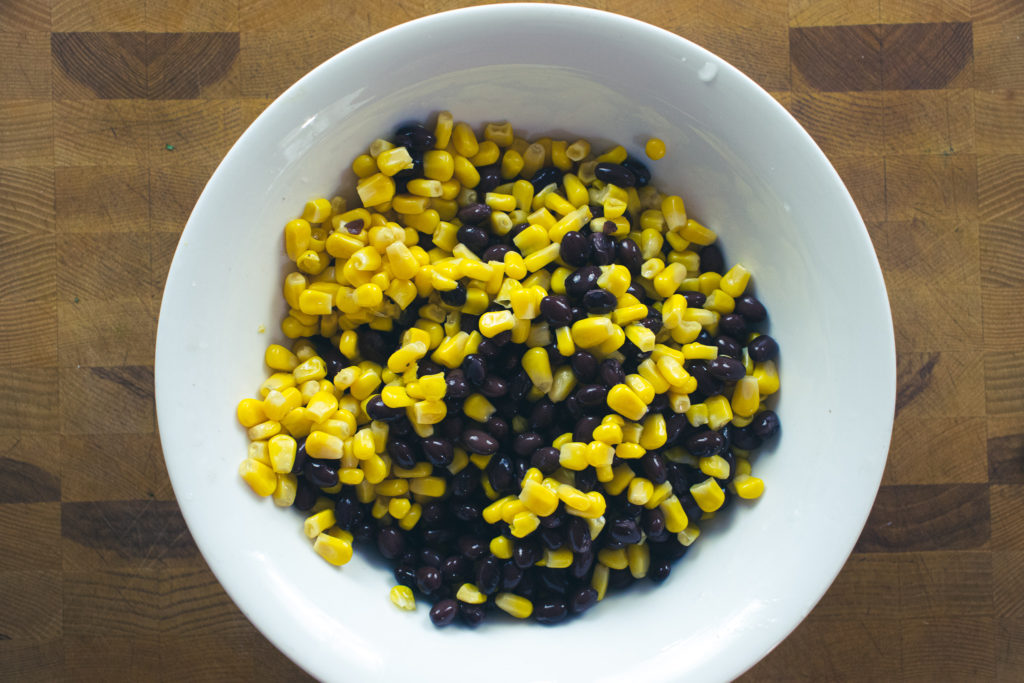
Chicken and Corn Chowder Ingredients
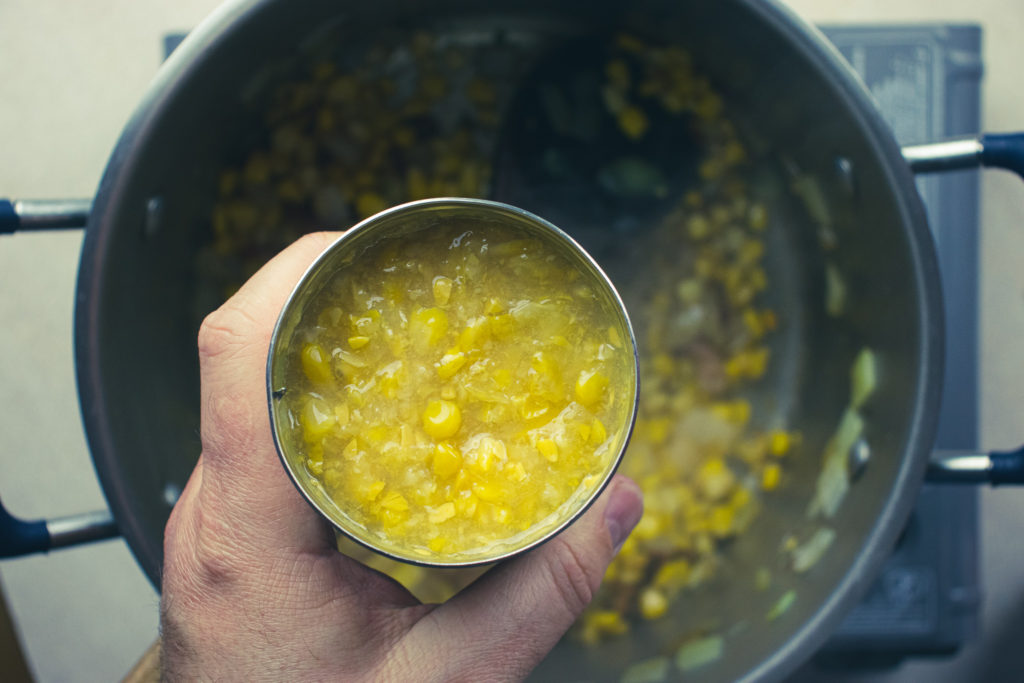
As I said in the introduction to this post, Chicken and Corn Chowder is a fantastic way to use up leftover roast chicken and baked potatoes. That’s exactly what I’ve done with this recipe. The first two ingredients are leftover chicken and baked potatoes. Of course, you can cook the chicken and potatoes fresh if you’d like. The other ingredients are creamed corn, corn niblets, onion, bacon, milk, cornstarch, salt, pepper, and a little sugar.
I used to work at a restaurant where we served corn chowder. Their recipe, which made four litres (a gallon) of chowder, had an entire kilogram (2.2 lbs) of sugar in it. It was way too sweet. I didn’t like it all, but lots of people loved it. So, if you want to add a little more sugar than I did, you can. I’ll leave that up to you. But I don’t recommend adding as much as that restaurant did.
How To Make Chicken and Corn Chowder
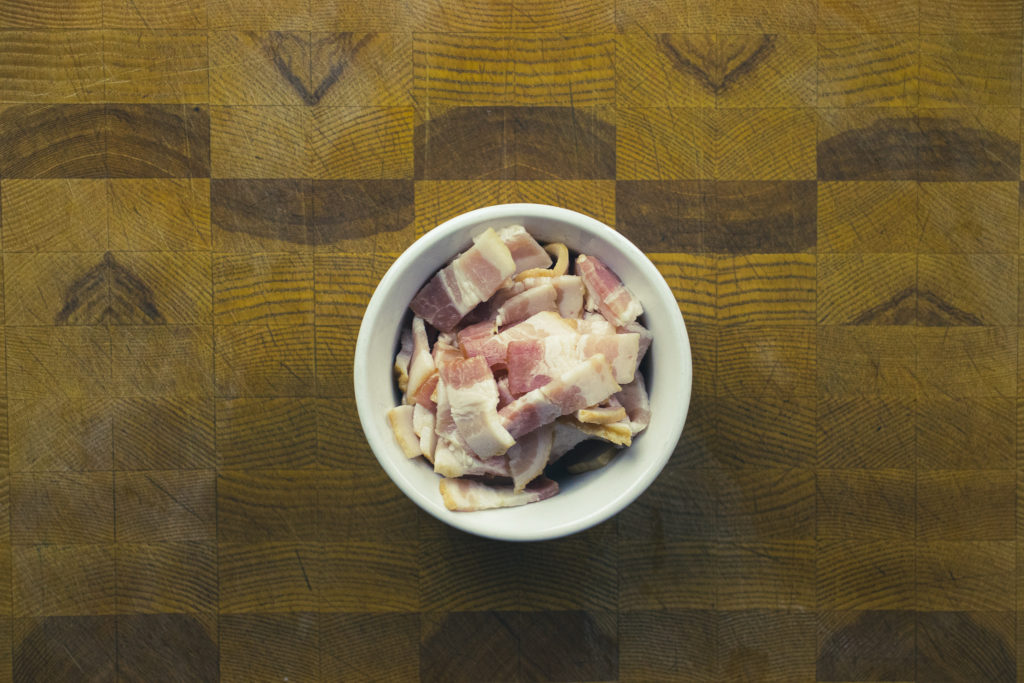
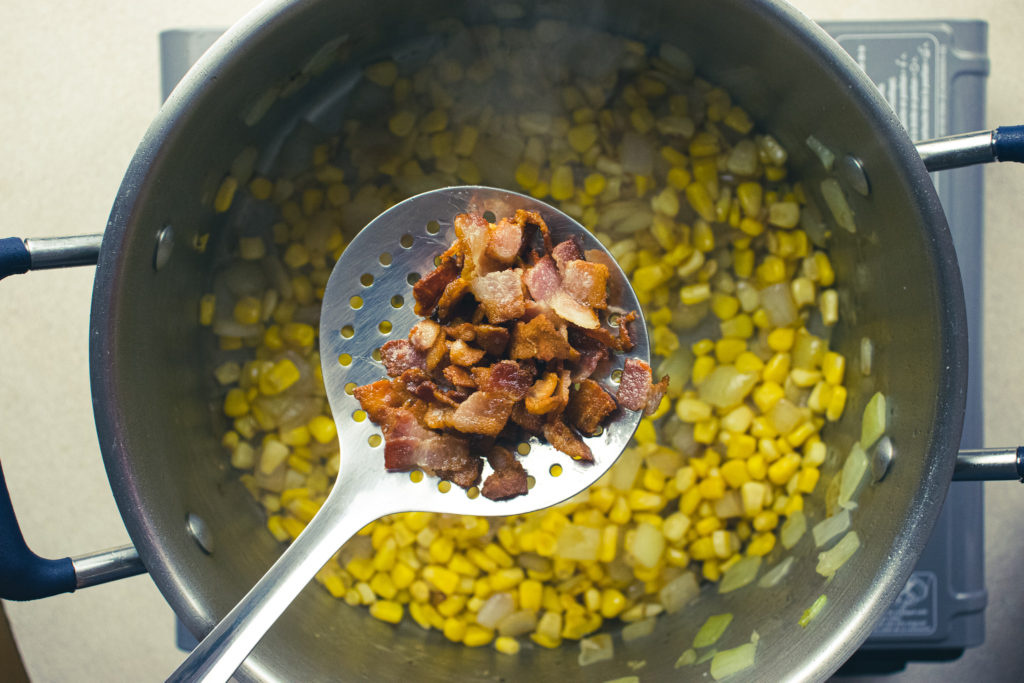
Bacon
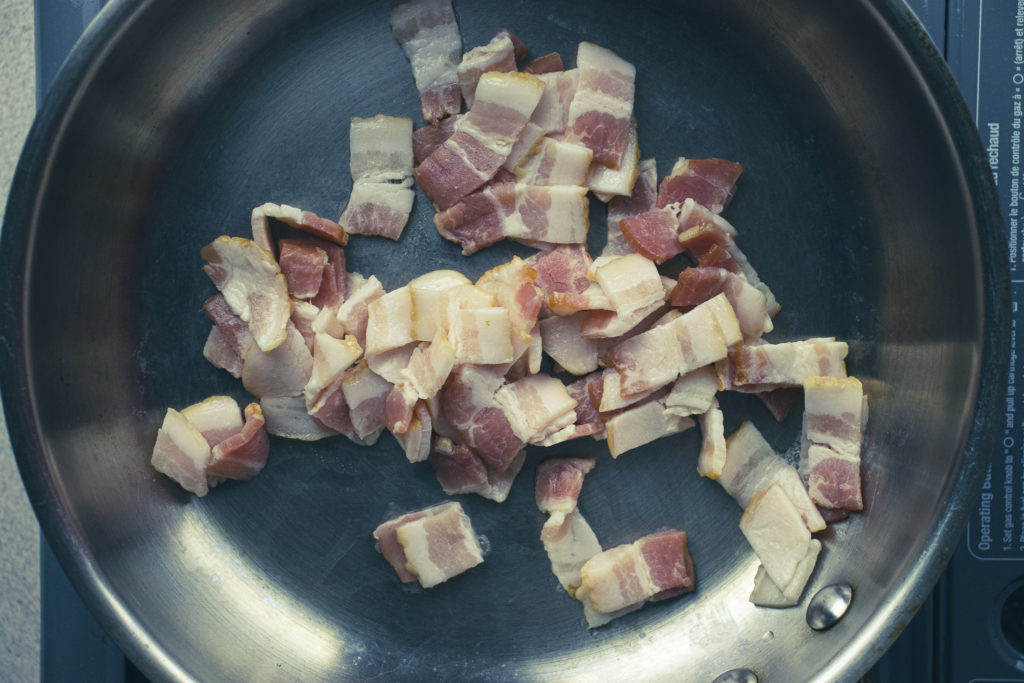
If you have leftover cooked bacon, you can use that, but I cooked my bacon fresh. I like really crispy bacon in my chowder, so I made what’s called lardons. That’s a French term for really crispy pieces of bacon. To make the bacon super crispy, put it in a pan, put the pan on medium heat and let it cook. The fat will render out of the bacon, and it will get crispy in about 10 minutes. Once the bacon is cooked, drain the fat off and set it aside until you’re ready to add it to the chowder. Alternatively, you can microwave the bacon for a few minutes.
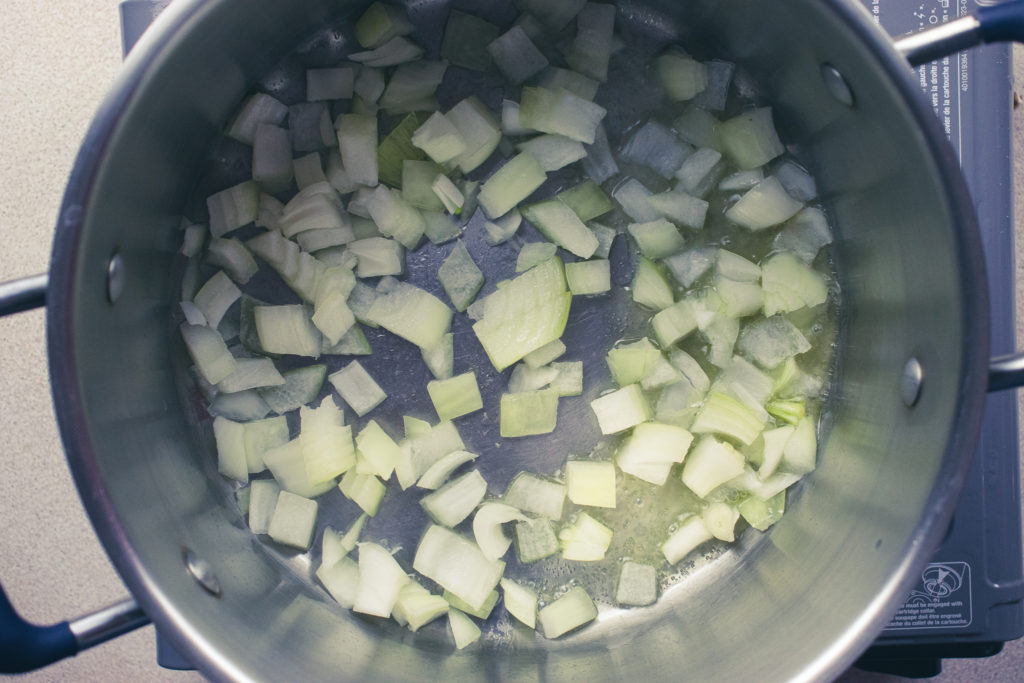
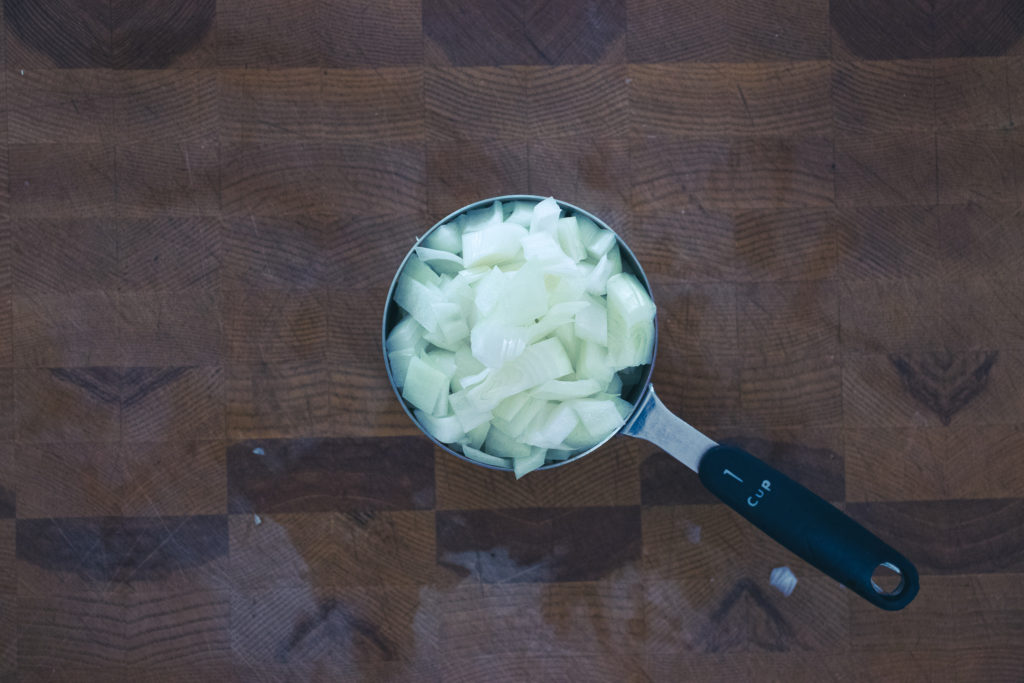
Sauté The Onion
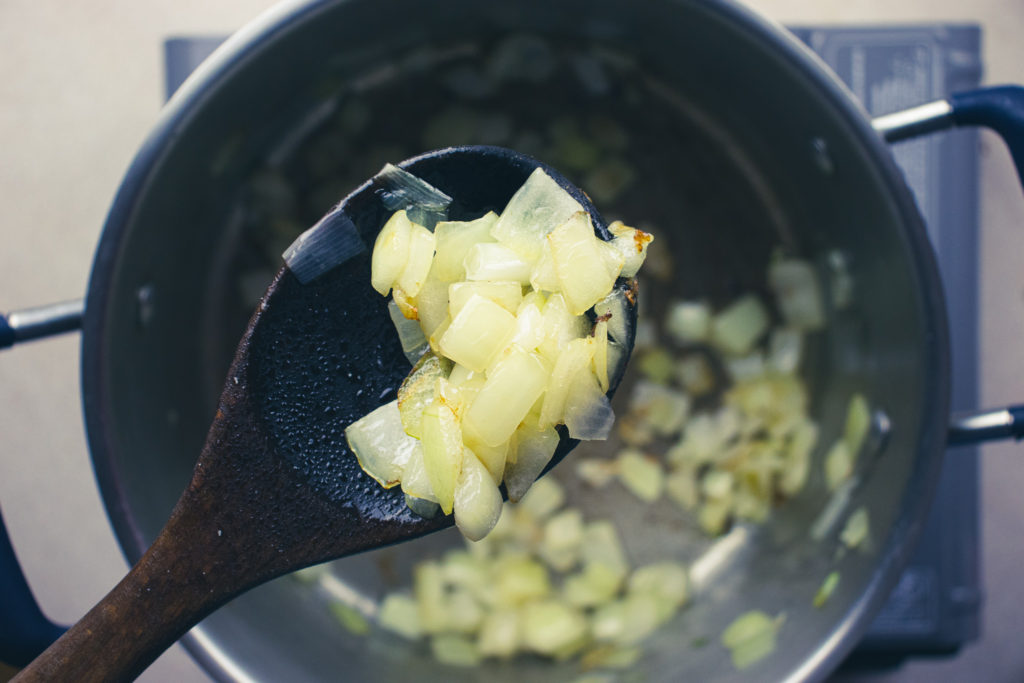
The chowder starts with a base of sautéed onion. Heat a large pot over medium heat and add a bit of cooking oil. Add the onions and a pinch of salt. The salt will help break down the onions a little and speed up the cooking process. Cook the onions for 5 to 7 minutes or until they are soft, translucent, and a little brown around the edges. Cooking the onions until they start to brown makes them a little sweet, lessening the need for sugar.
Next Step
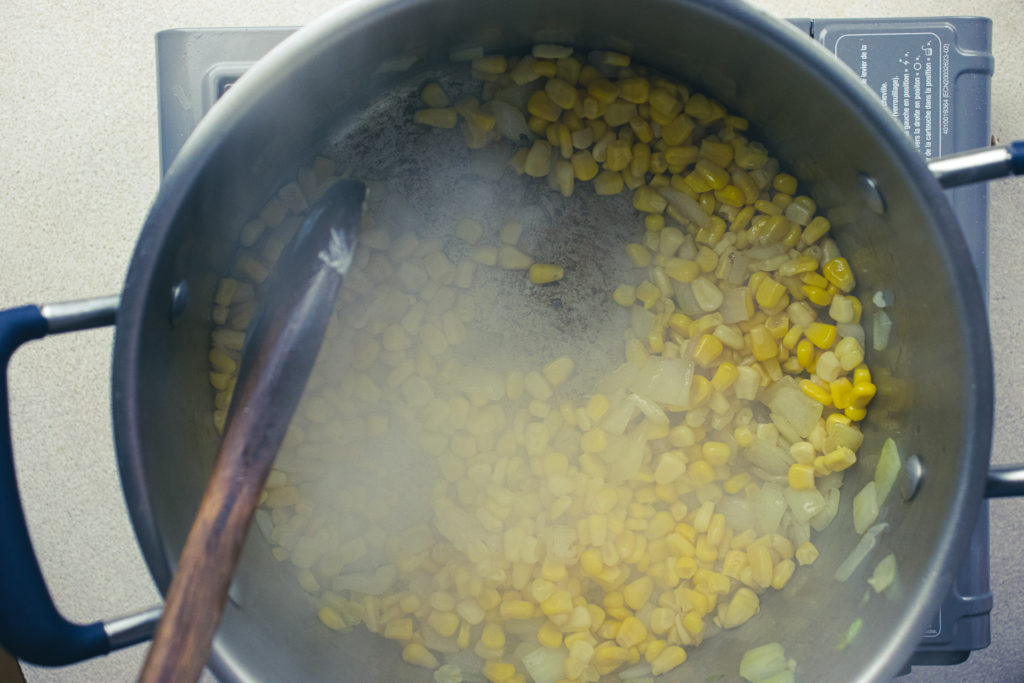
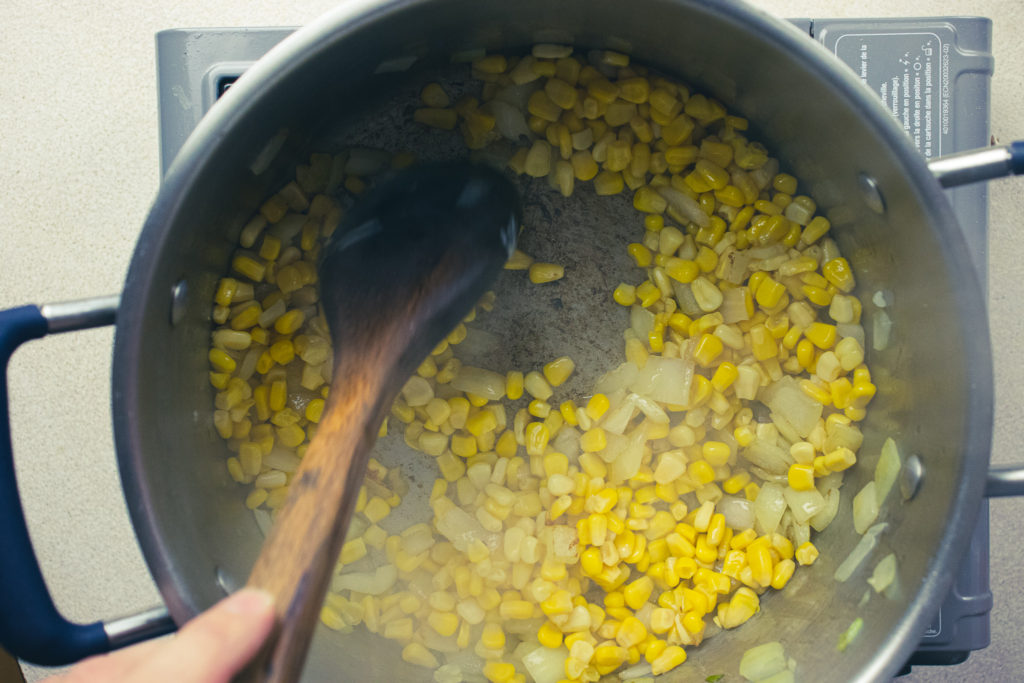
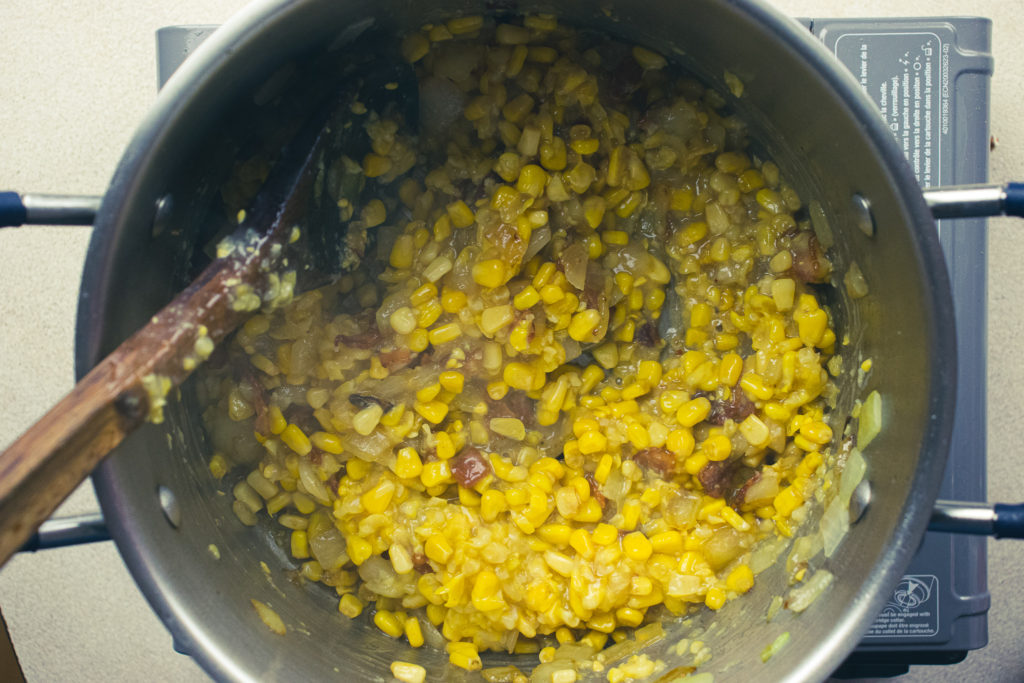
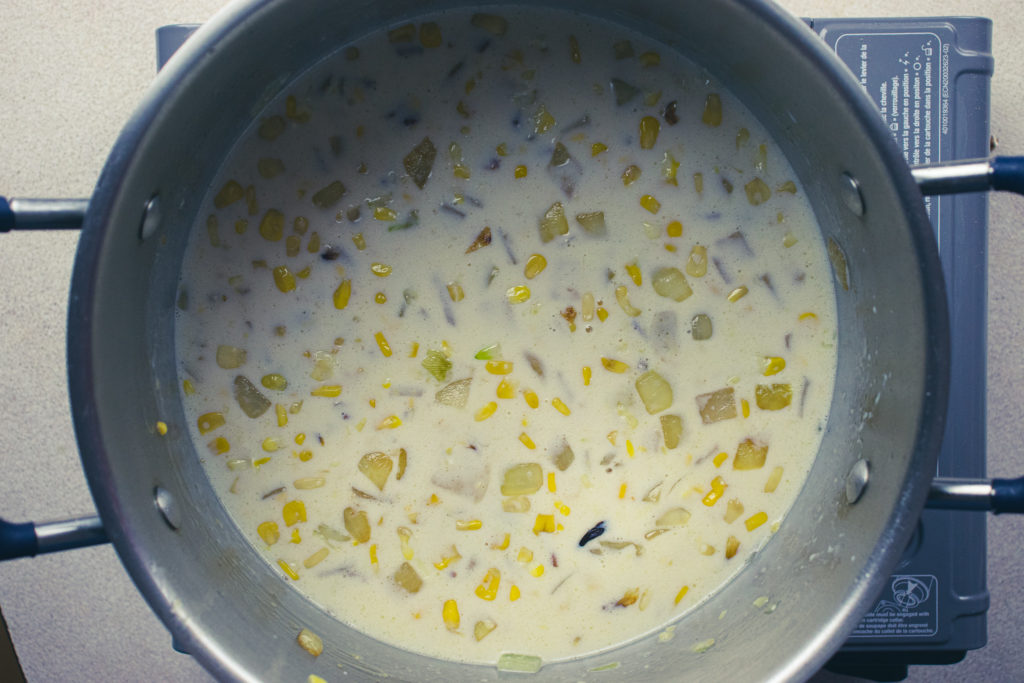
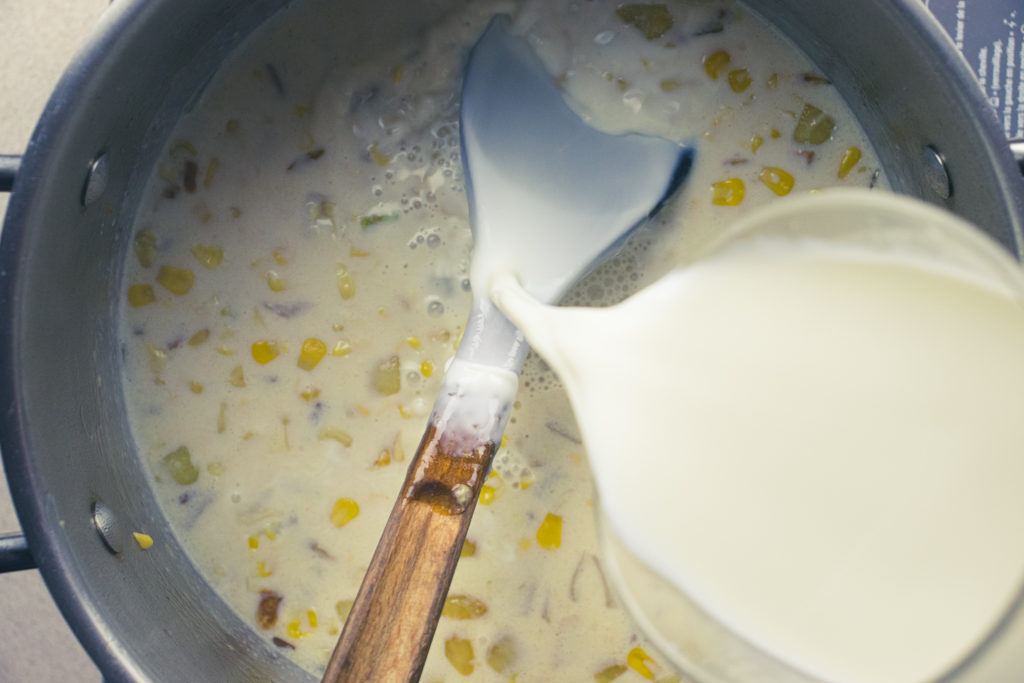
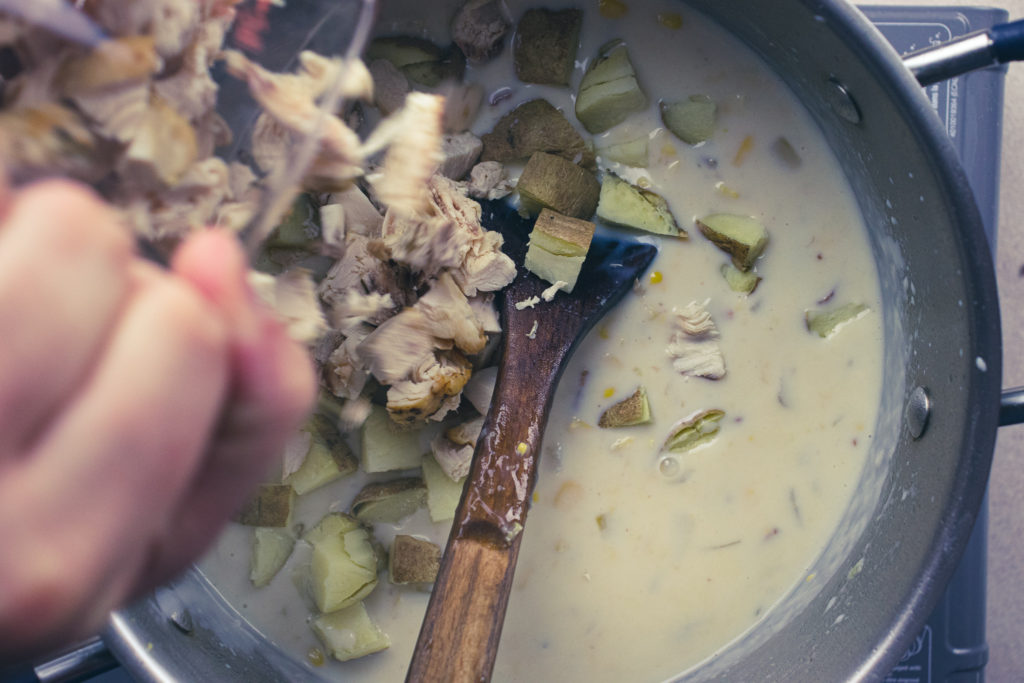
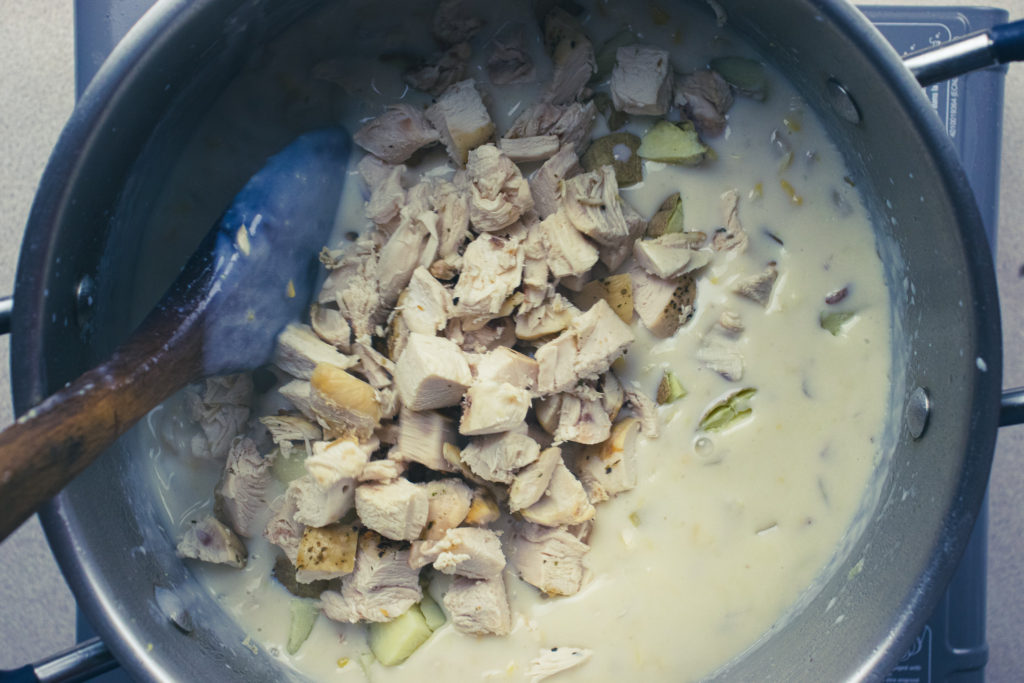
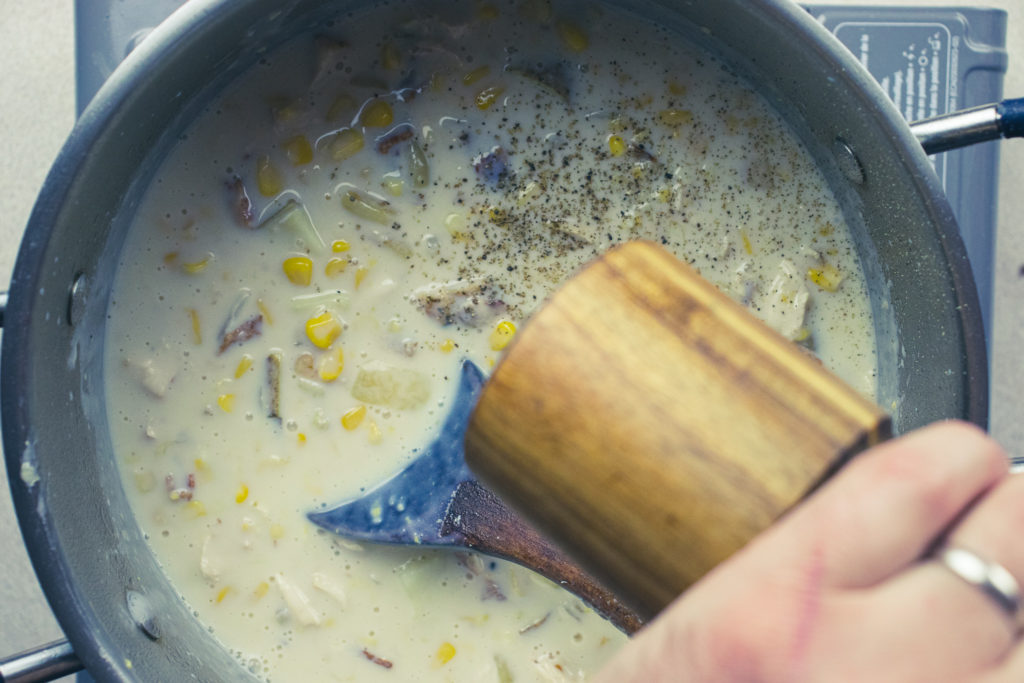
After the onions are cooked, add the corn niblets to the pot and cook for about two minutes. If the corn gets a bit of colour on it, all the better. Next up, add the bacon, creamed corn, and 4 of the 5 cups of milk. Stir the pot, making sure to scrape the bottom to lift off any bits of food that have stuck. Heat the chowder until the milk is hot and starts to steam. Heating the milk should take between 5 and 10 minutes, depending on your stove.
Thickening
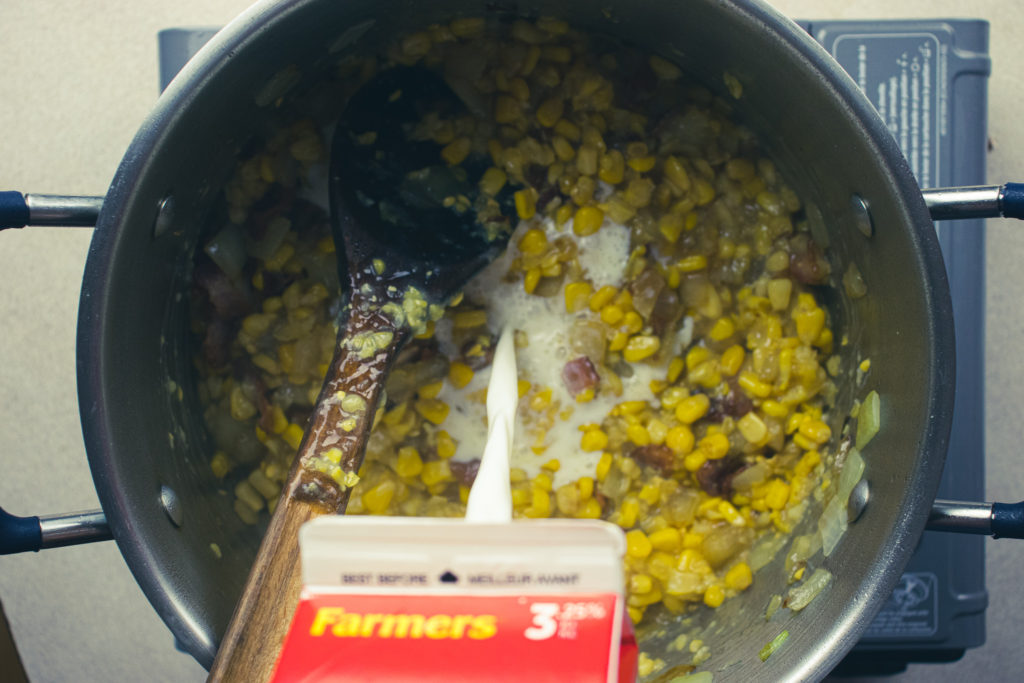
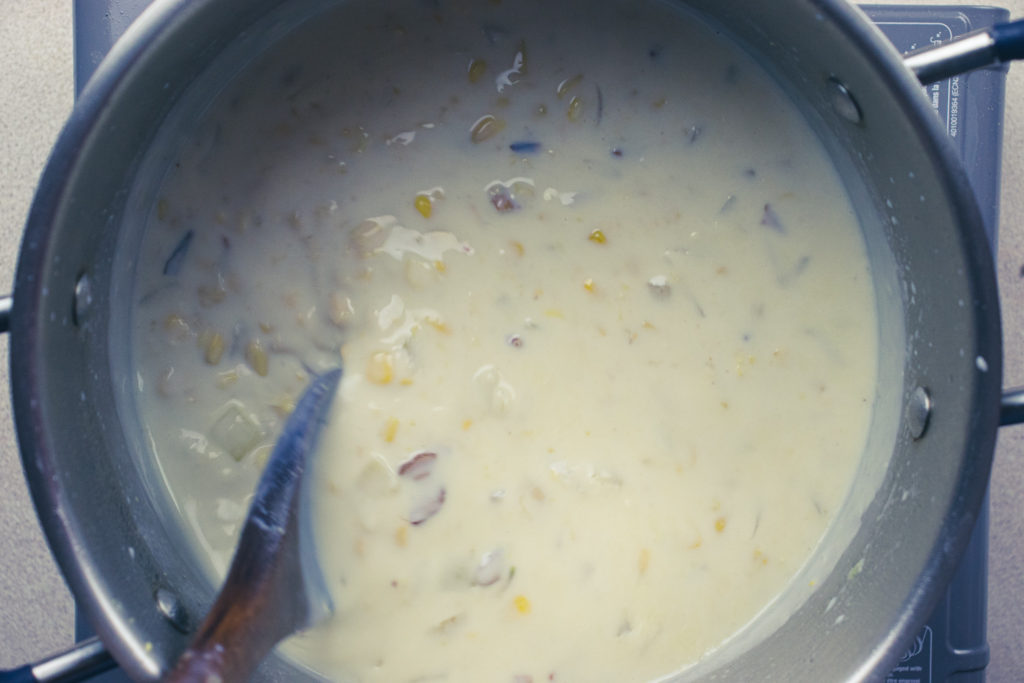
While the chowder is heating, take the remaining 1 cup of milk and mix it very well with the cornstarch. Pour that mixture into the chowder and stir until it thickens. About 5 minutes. Make sure to stir the milk and cornstarch mixture immediately before adding it to the chowder to ensure that it is thoroughly mixed.
Chicken and Potatoes
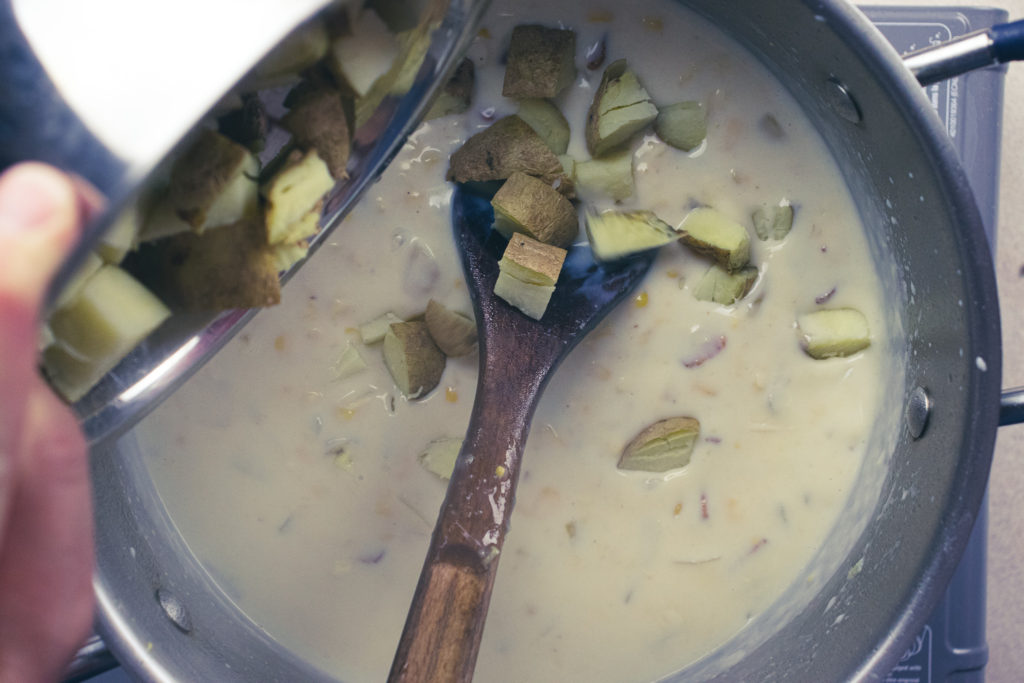
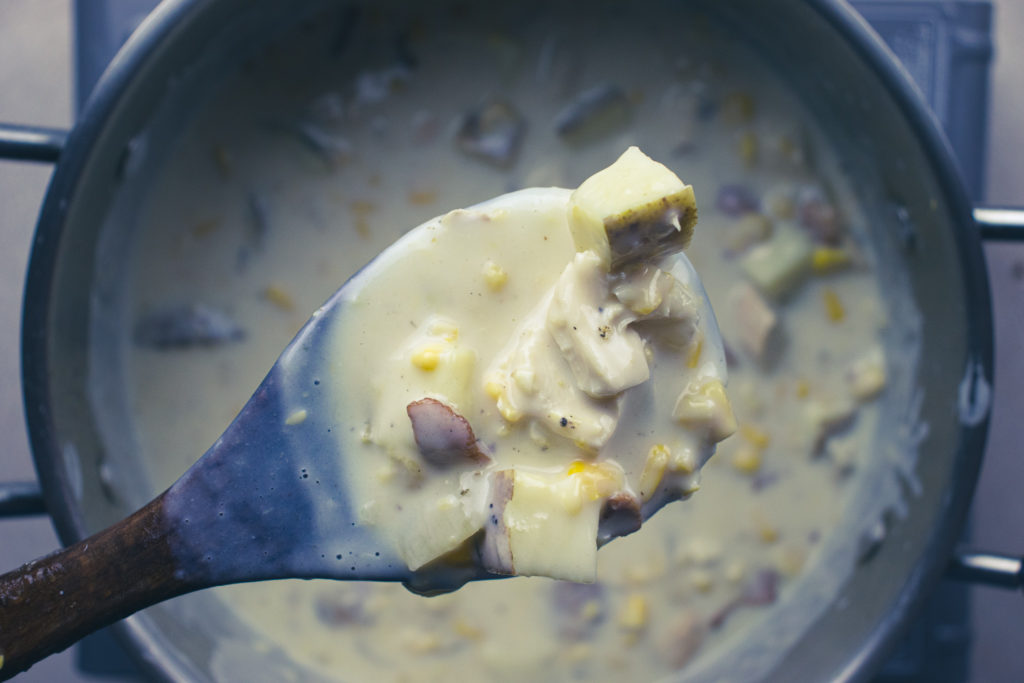
Once the chowder’s thick and chowder-like, add potatoes, chicken, salt, pepper, and sugar. Simmer for about five minutes or until the potatoes and chicken are heated. Taste and adjust seasoning as needed with salt and pepper, then serve.
The Wrap-Up
I can’t tell you how happy I was doing this post. Specifically, when I was done cooking and got to eat the chowder. It doesn’t matter what kind of mood I’m in or what’s going on in my life. A big bowl of corn chowder, chicken or otherwise, will always put a smile on my face. Hopefully, it puts a smile on your face too. Enjoy!
That does it for today. Thanks for reading. I hope you’ve enjoyed the post. Remember to share this on Facebook or Pinterest and leave a comment below. I love to hear from you. Finally, remember to sign up for my mailing list so you don’t miss out on exclusive recipes and cooking tips. Members of the mailing list also get a sneak peek at all the upcoming posts. Sign up below. Have a great day! I’ll see you back here next Thursday.
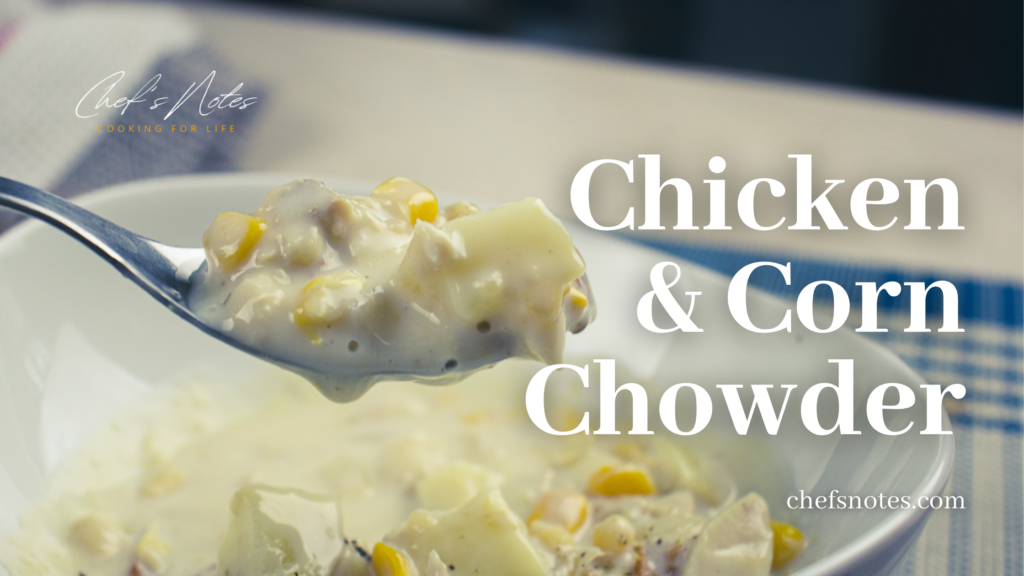
Chicken and Corn Chowder
Chicken and Corn Chowder is a hearty and frugal meal using leftover chicken and baked potatoes. It is creamy and delicious. Great for any meal.
Put the bacon in a medium skillet and put it on medium heat. Cook, stirring every few minutes, until the bacon is crisp, about 8 to 10 minutes. Remove the bacon from the pan and drain it on a paper towel. Set aside.
Heat a large pot over medium heat. Add the cooking oil, onion, and a pinch of salt. Cook the onion for 4 to 5 minutes or until the onions soften, turn translucent, and start to brown around the edges.
Add the corn niblets to the pot and cook, stirring for 2 minutes. Add the creamed corn, crisp bacon, and 4 cups of milk. Stir to loosen any bits of food from the bottom of the pot. Cook until the milk starts to steam.
In a small bowl or measuring cup, combine 1 cup of cold milk with the cornstarch. Mix well, then pour into the steaming milk. Cook, stirring, until the chowder thickens, about 5 to 10 minutes.
Add the chicken, potato, salt, pepper, and sugar. Simmer for 5 minutes, gently stirring now and again. Taste the chowder, adjust the seasoning as needed with salt and pepper, then serve.
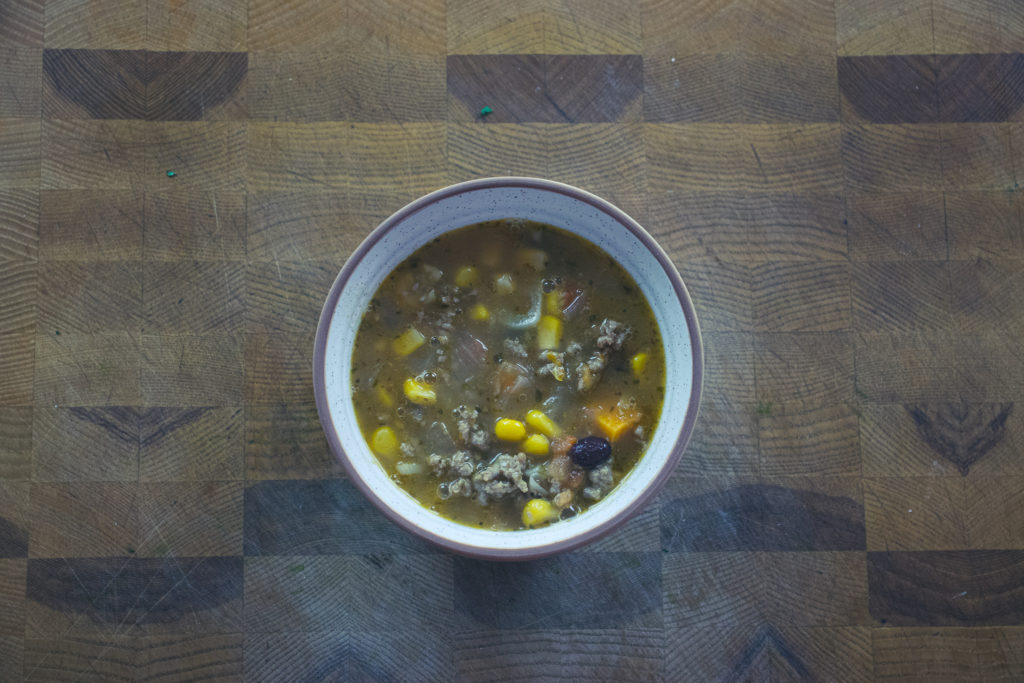
It’s not very often that something I do on this blog surprises me, but this Turkey Taco Soup did. Months ago, when I was planning my blog posts for this year, I randomly wrote down Turkey Taco Soup. I had no idea what I was going to make, how I would make it, or how it would turn out. A few months later, the next post on the roster is, of course, Turkey Taco Soup. So, I sat down, thought it through, and decided on a plan of action. While cooking the soup, I constantly questioned myself but stuck to the plan. When the soup was finished, it tasted okay. Good, but not as good as I’d hoped. I decided that I would have to make it again to perfect it, but I wouldn’t let the soup I’d made go to waste. So, I filled up a bowl, garnished it with some classic taco toppings, and dug in. Wow! Those garnishes brought the soup to life. What was good became great. I couldn’t believe how much the soup tasted exactly like a taco. Even better is that I didn’t need to go back and make it again. To say that I’m excited to share this recipe with you is an understatement. I, as an almost thirty-seven-year-old man, am giddy with excitement. So, without further delay, let’s get to it!
How To Make Turkey Taco Soup
Turkey Taco Soup Ingredients
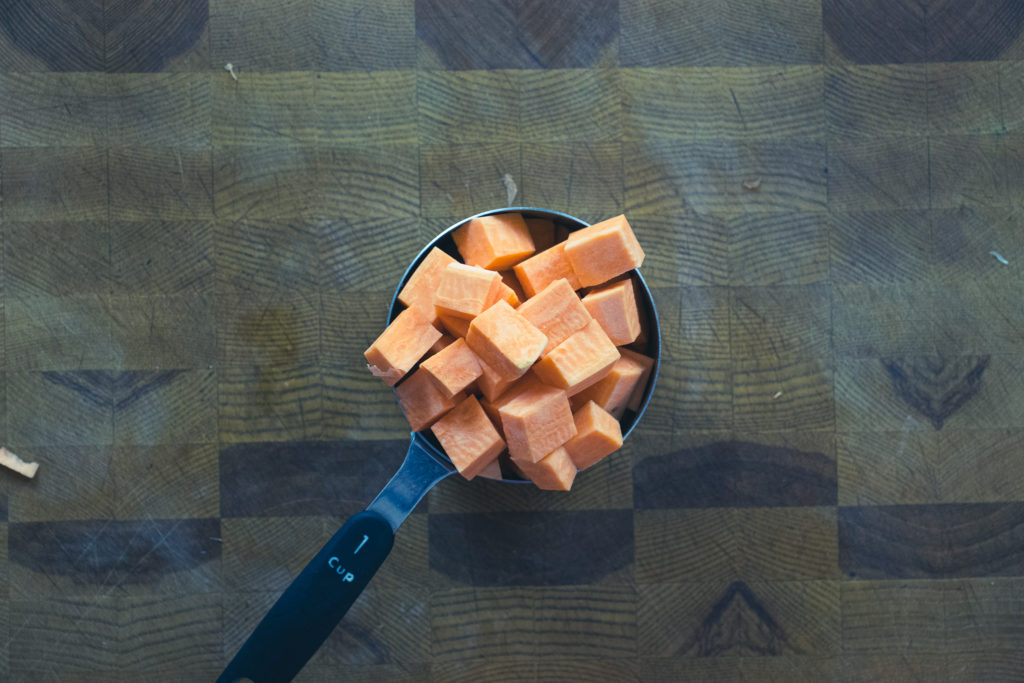
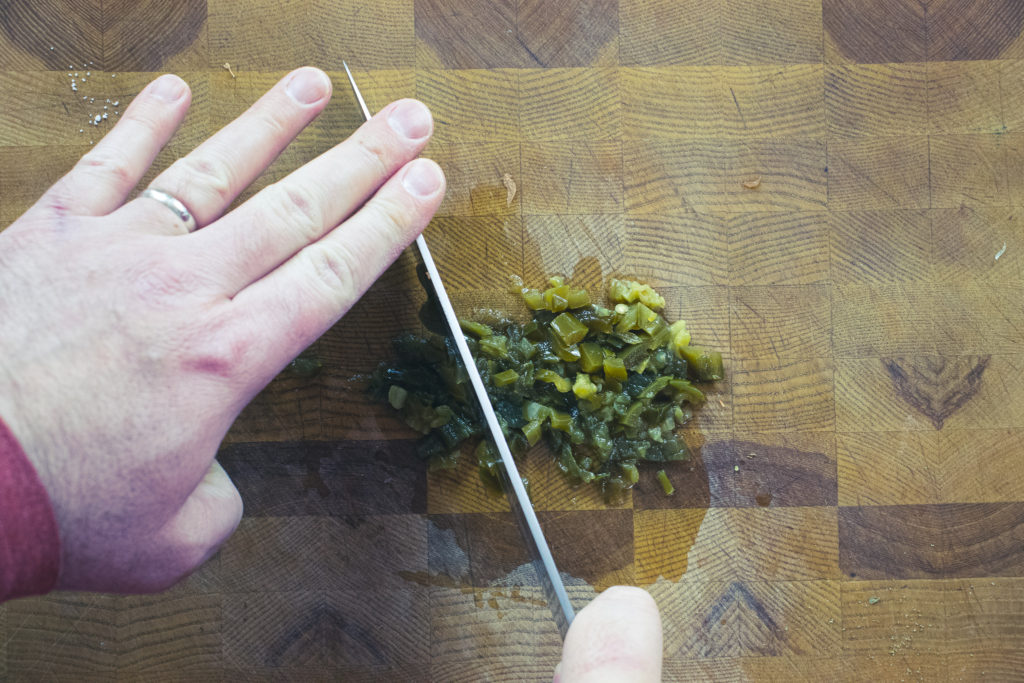
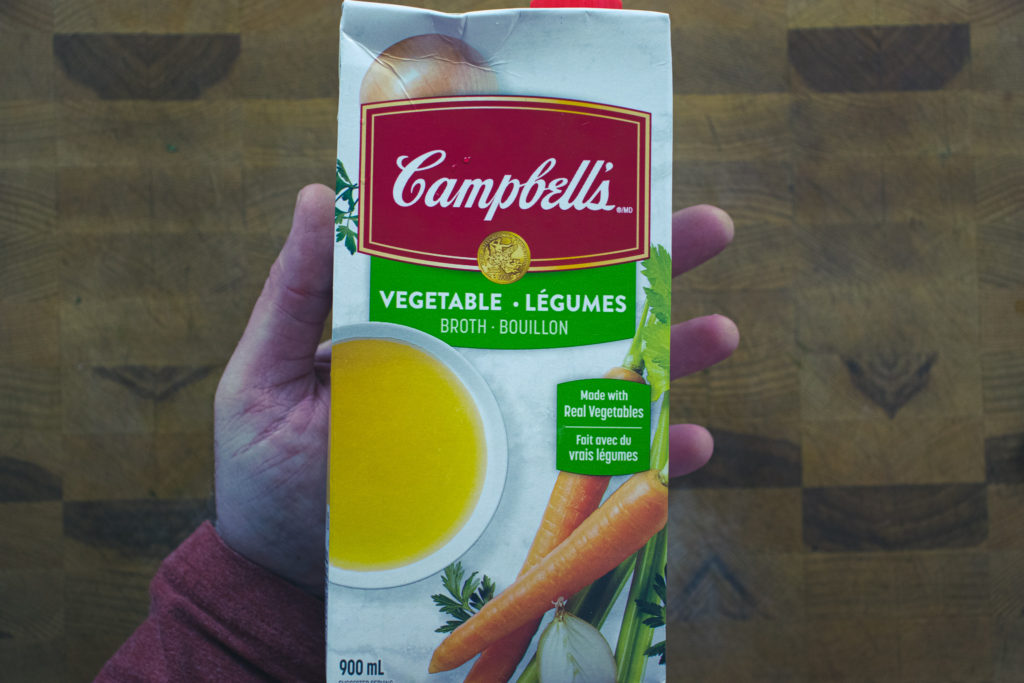
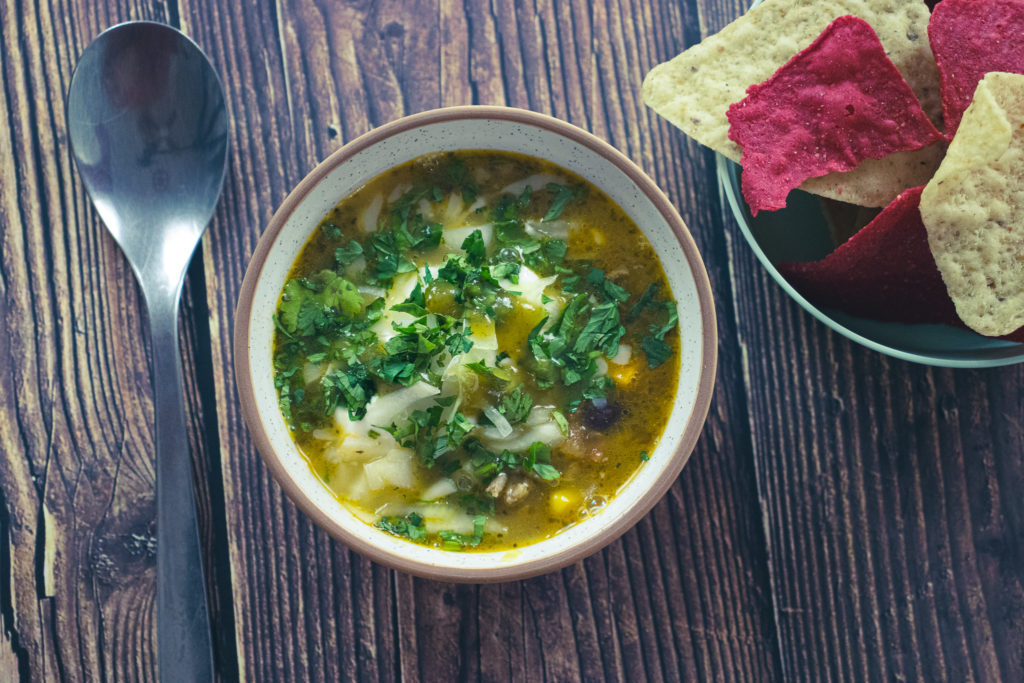
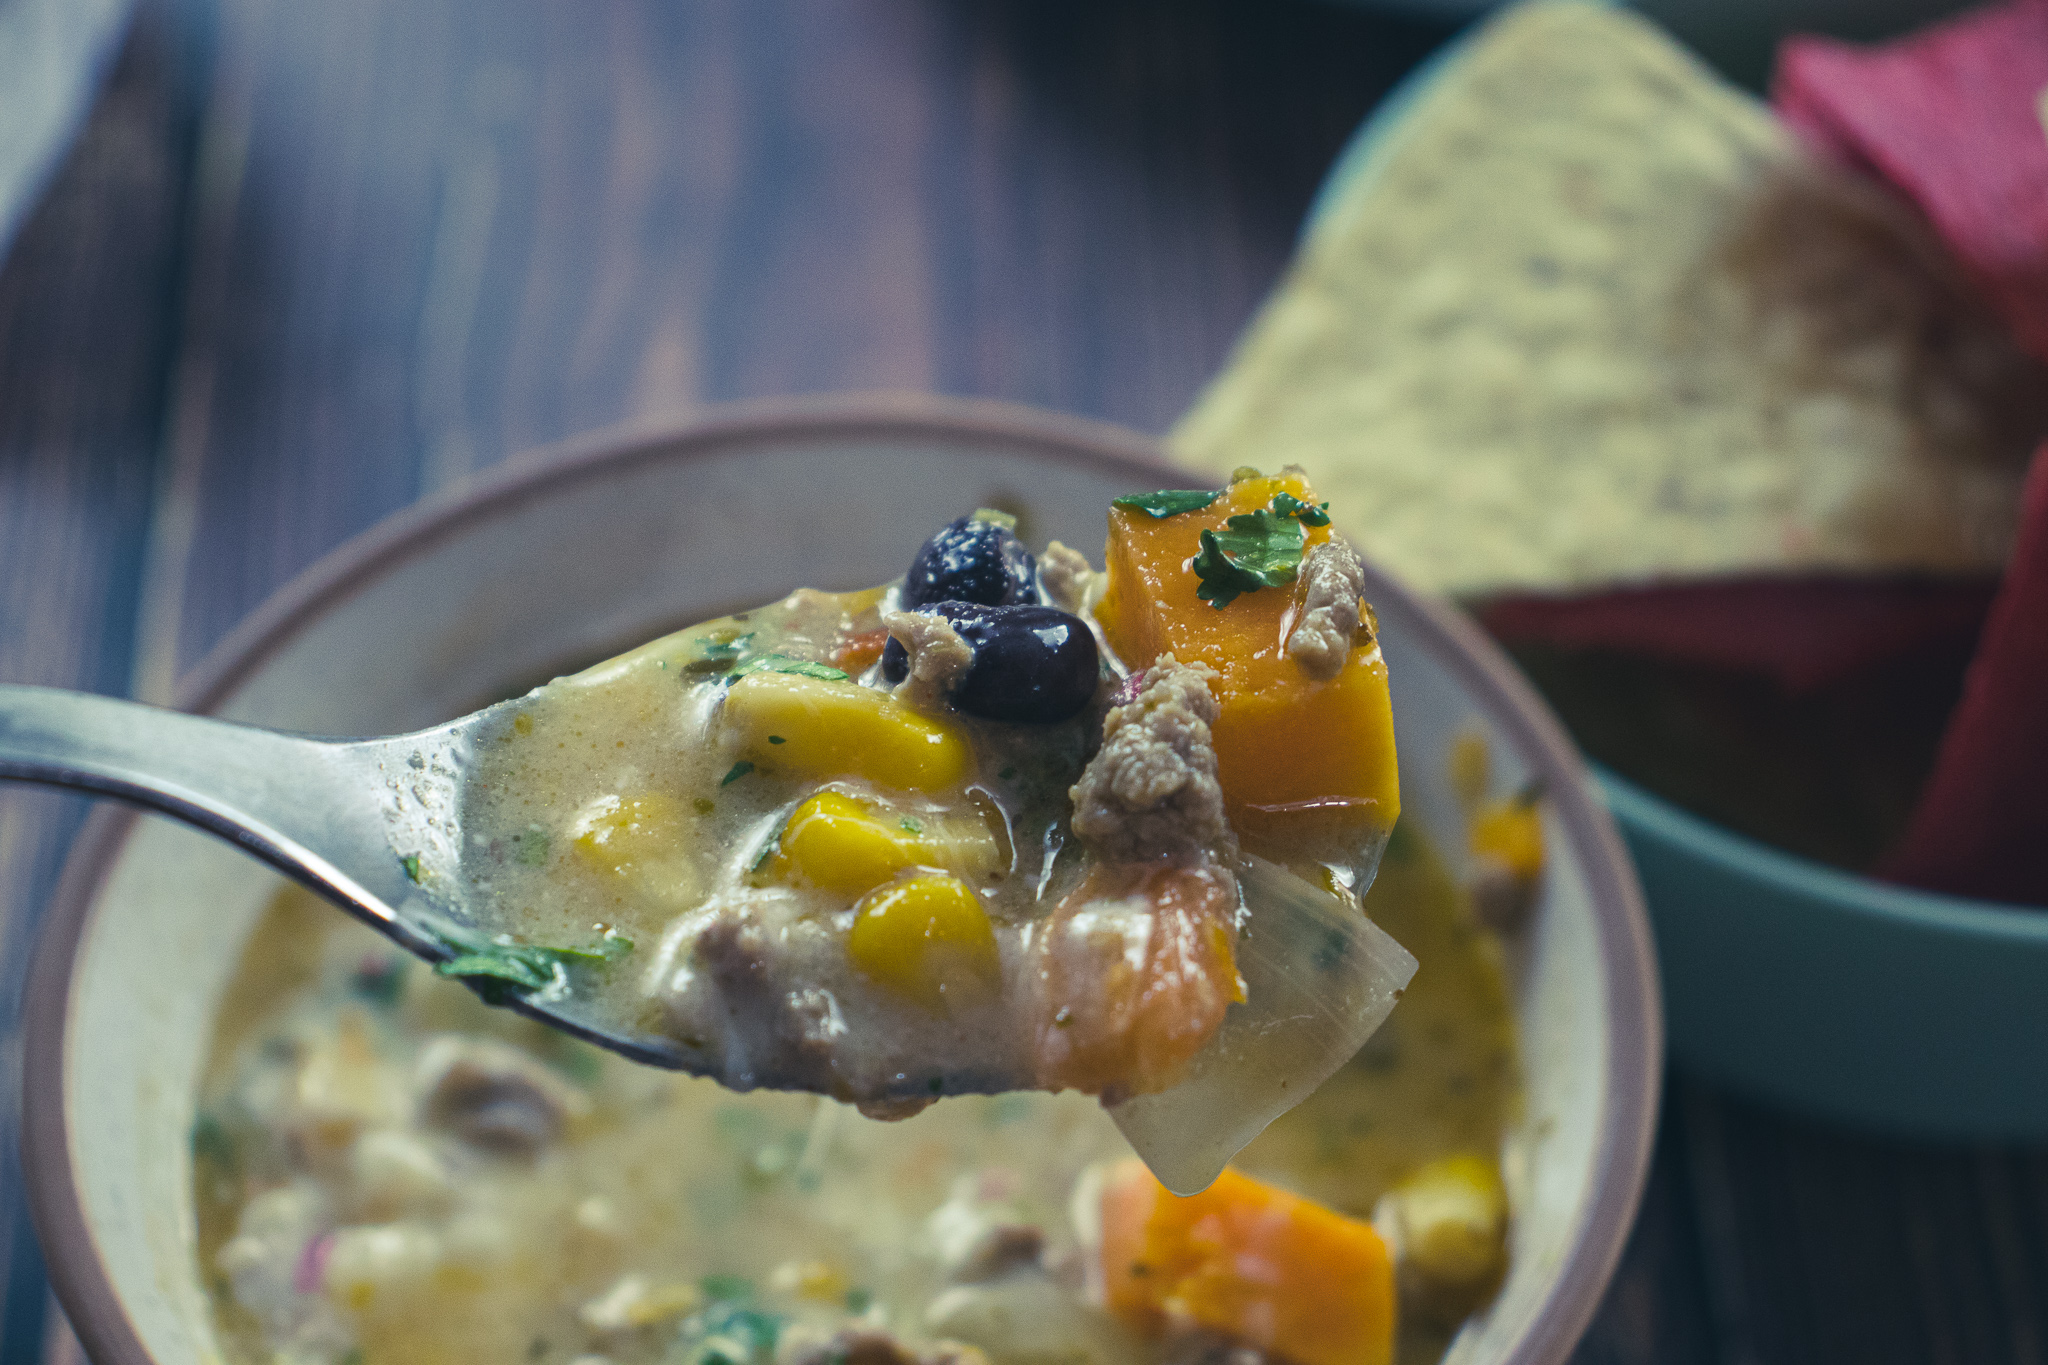
The ingredients for my Turkey Taco Soup are turkey, onion, garlic, tomato, sweet potato, spices, pickled jalapeno, orange and lime zest and juice, chicken or vegetable stock, black beans, and corn. Then for garnish, pepper jack cheese, sour cream, raw onion, cilantro, Mexican Hot Sauce, and tortilla chips. The jalapenos don’t add much spice, but they do add a bit of acidity and flavour. So please don’t leave them out because you think they will make the soup too spicy. If you decide not to use them, add a teaspoon or two of cider vinegar or wine vinegar to balance the acidity. I chose turkey for this recipe because it is lean and a traditional Mexican protein. Turkey was first domesticated in Mexico over 2000 years ago.
Making The Soup
Brown the turkey.
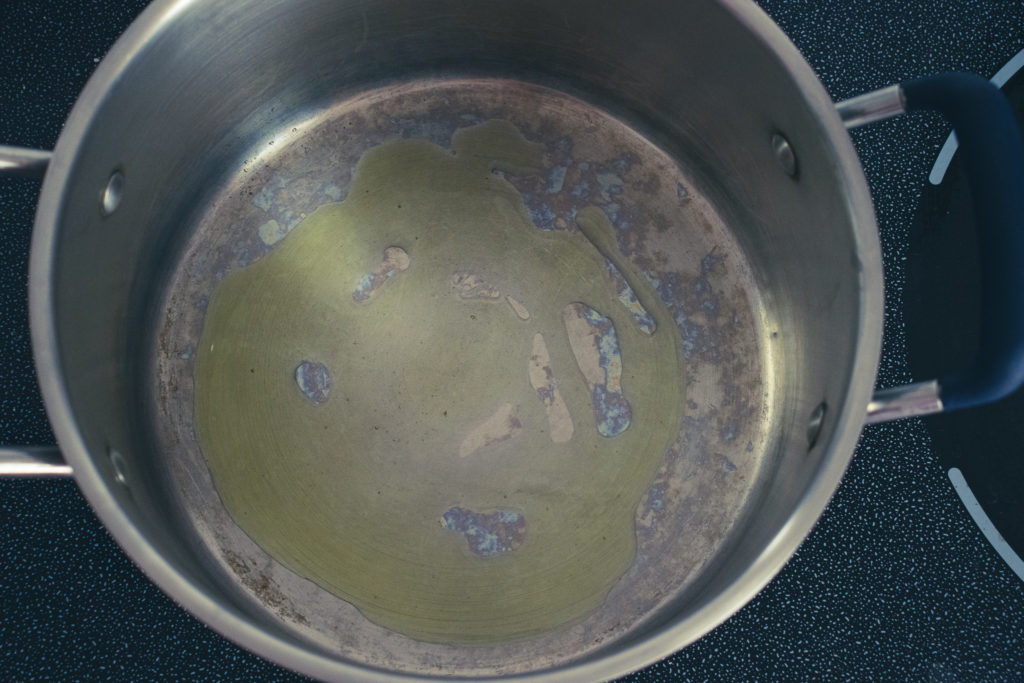
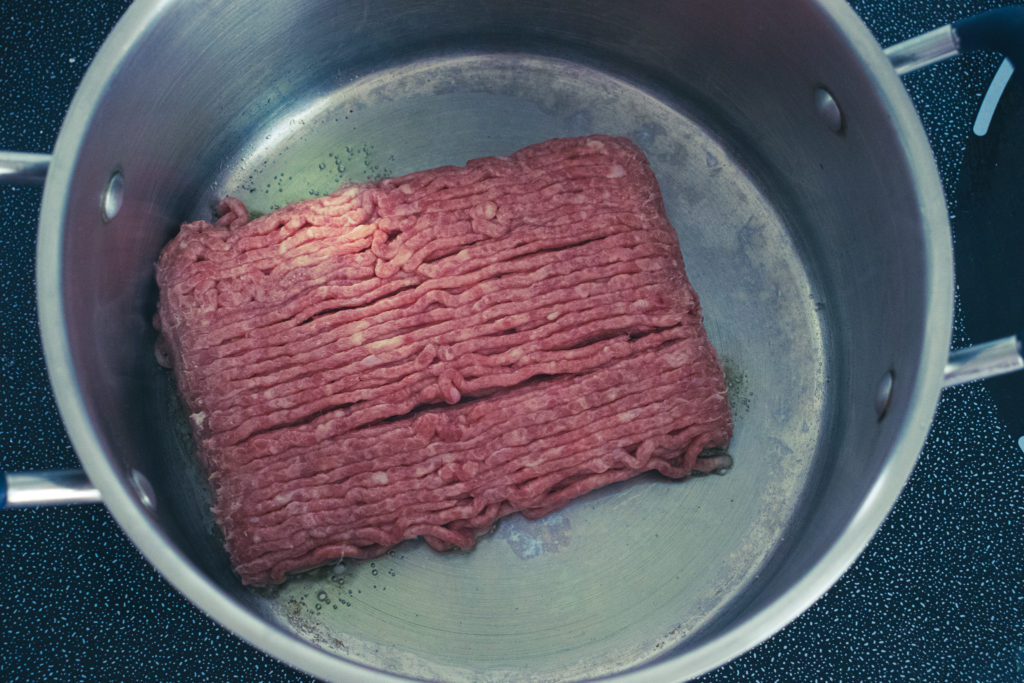
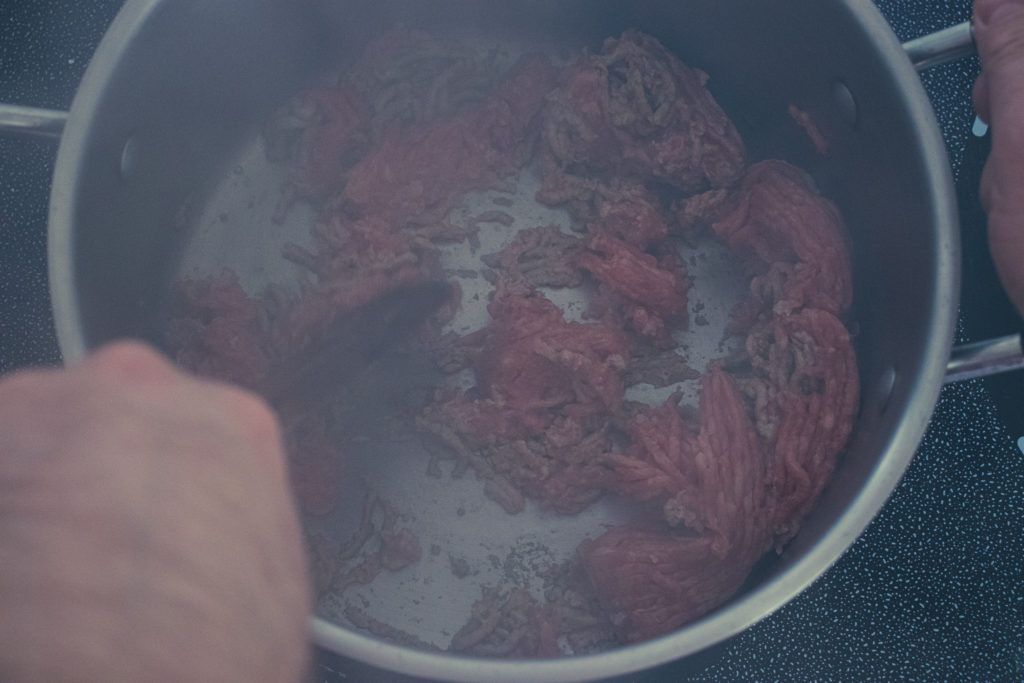
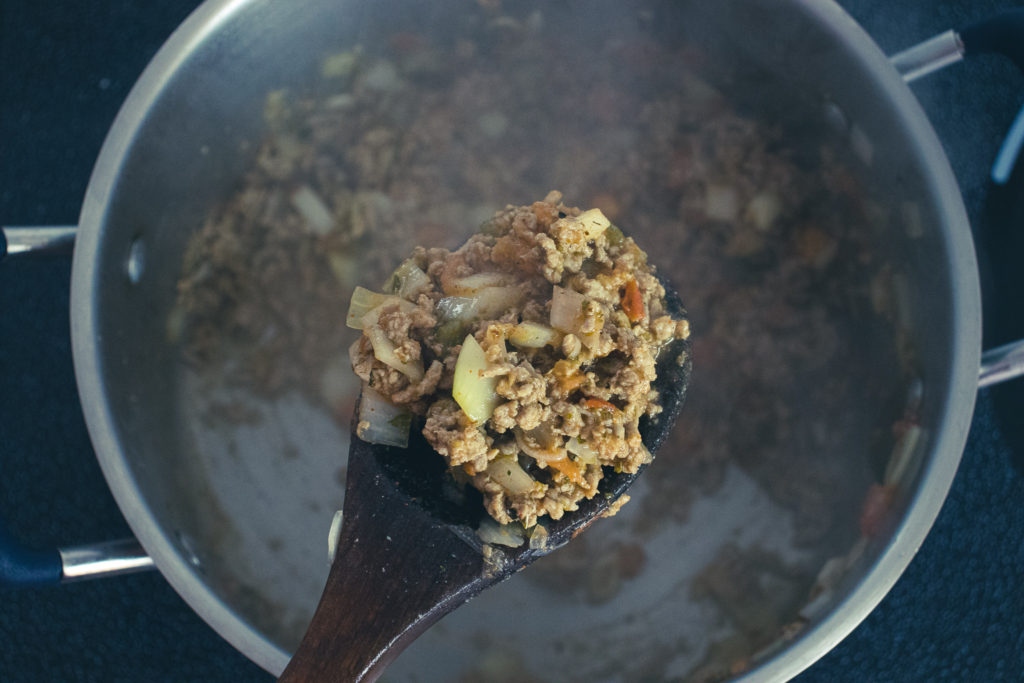
Browning the turkey is step one to making this soup. Heat a large pot over medium-high heat. Add a tablespoon or two of olive oil, add the turkey and cook until it’s browned. It’s best to put the turkey in the pot, then leave it alone for a few minutes. Then, stir it, and leave it alone for another few minutes. The turkey will never actually brown if you stand there and mix it constantly.
Tomatoes and Onions
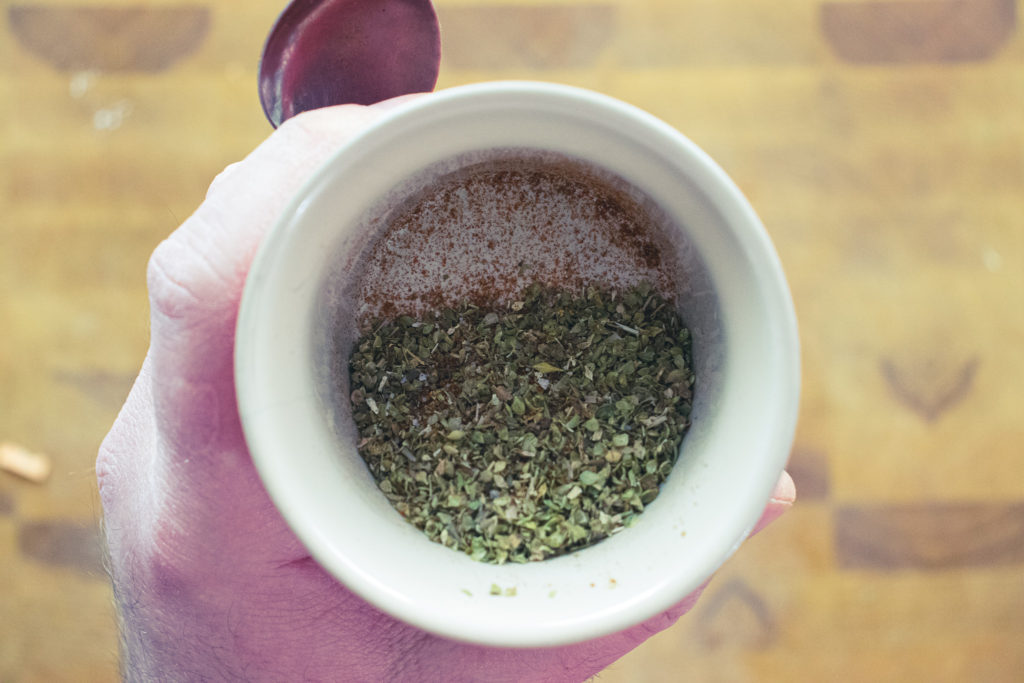
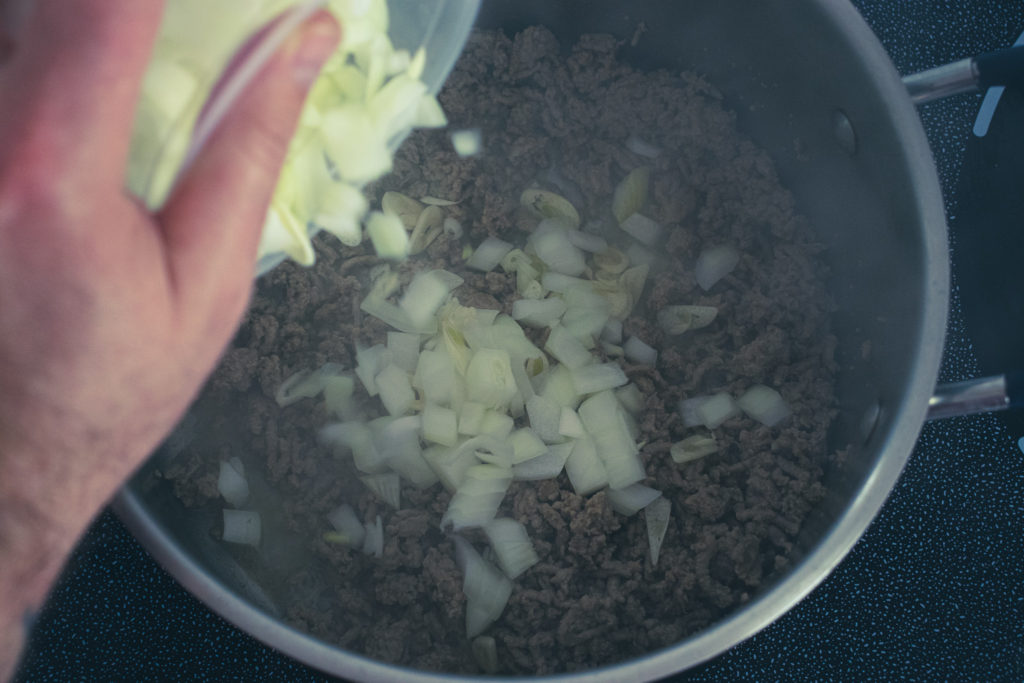
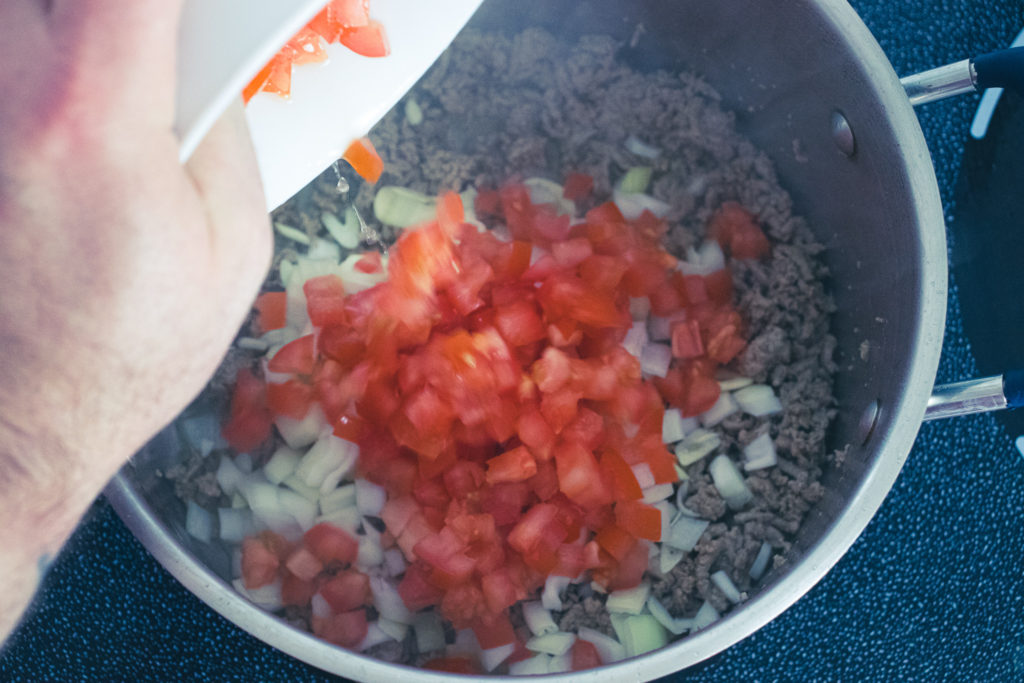
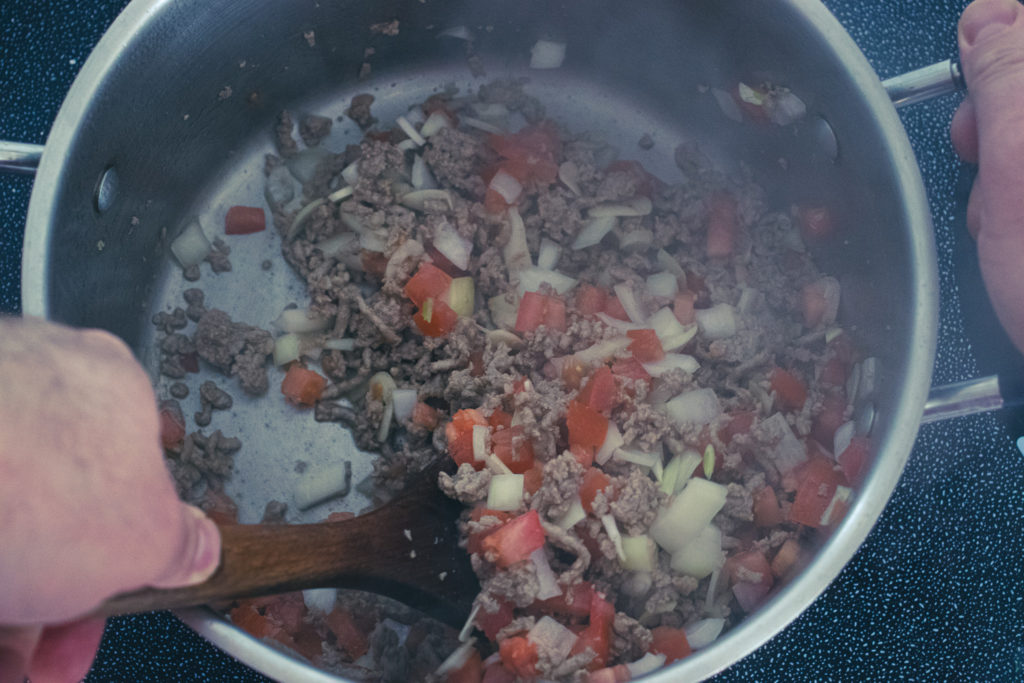
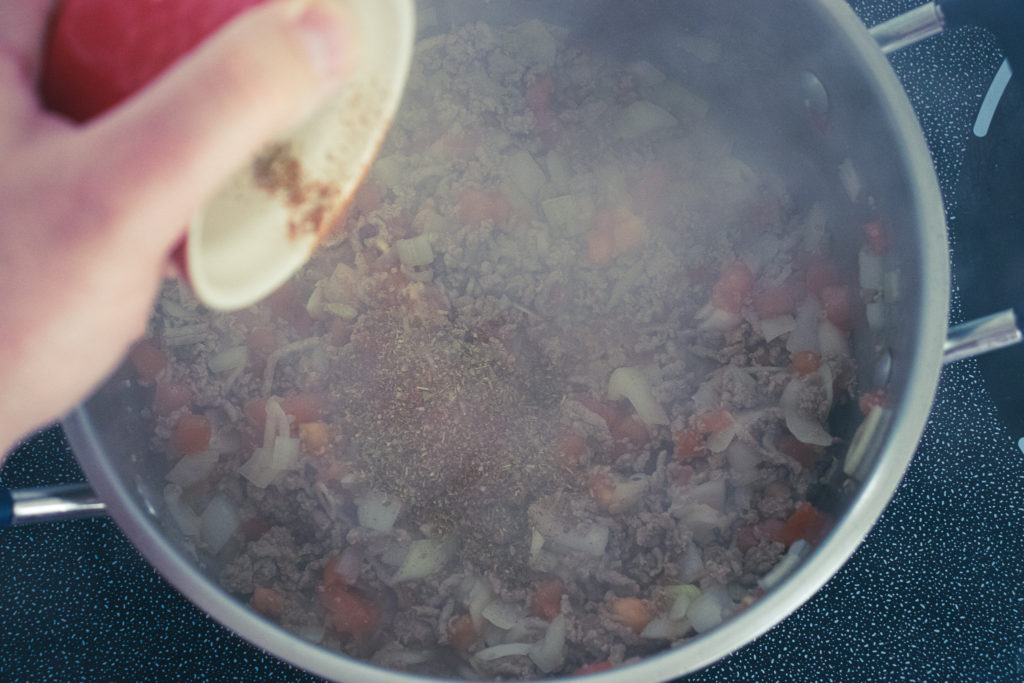
Once the turkey is cooked, add the tomatoes and onions. Continue to cook for another three to four minutes or until the onions soften, and the tomatoes start to break down. You can tell the onions are softening because they will begin to turn from opaque to translucent. Next, add the oregano, cumin, salt, paprika, and pickled jalapenos. Cook for another minute or two or until you start to smell the spices.
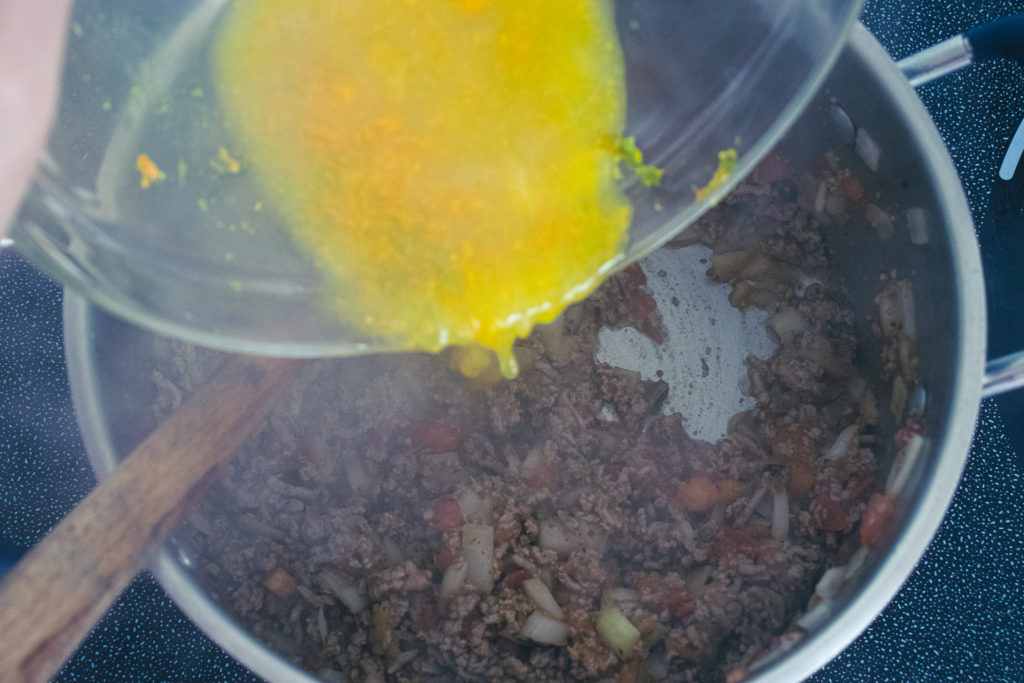
Citrus
In goes the citrus zest and juice. The citrus does three things. First, it adds flavour, then acidity, and finally sweetness. It is essential. Once you add the citrus, cook it until it has mostly all been cooked away. The easiest way to tell when it’s time to move on to the next step is to drag your spoon along the bottom of the pot. If a line forms and stays for at least one second, the citrus has cooked down enough, and you can move on.
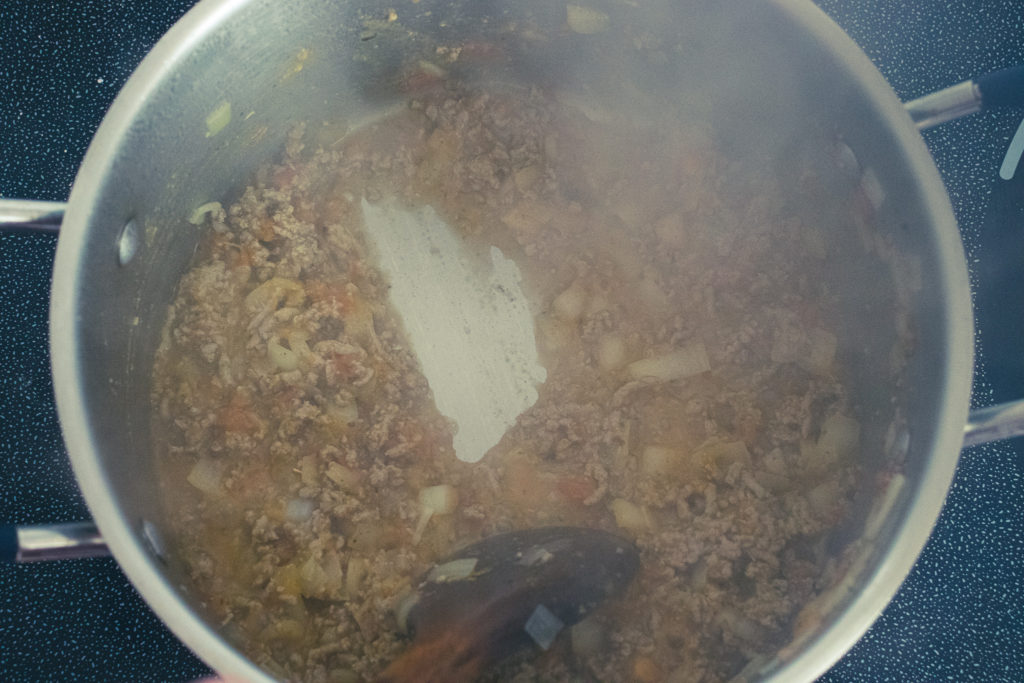
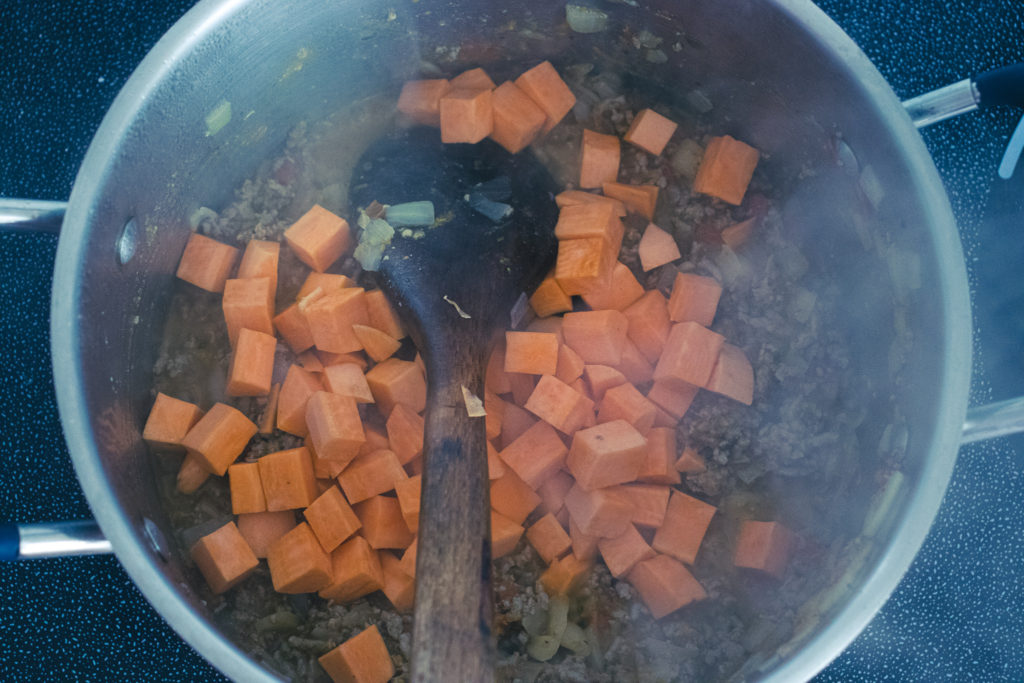
Make it a soup.
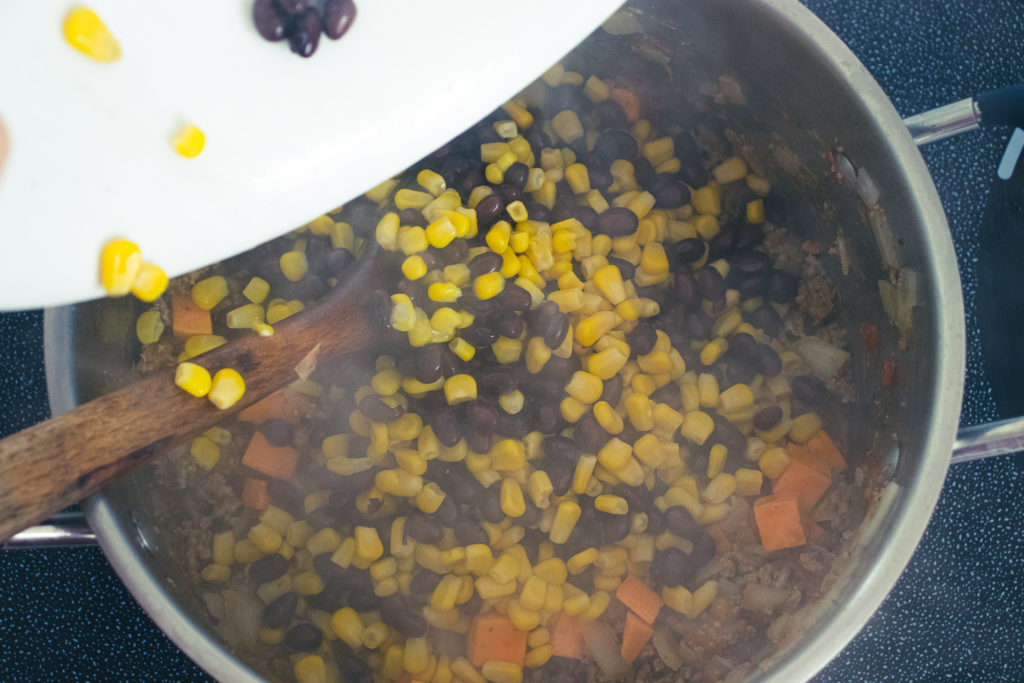
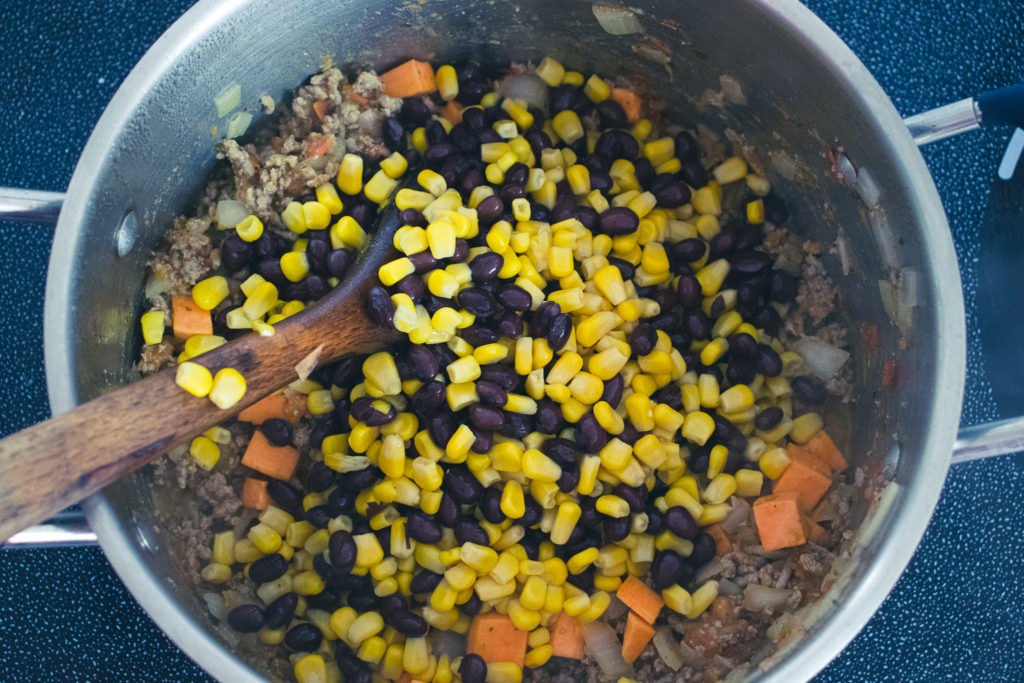
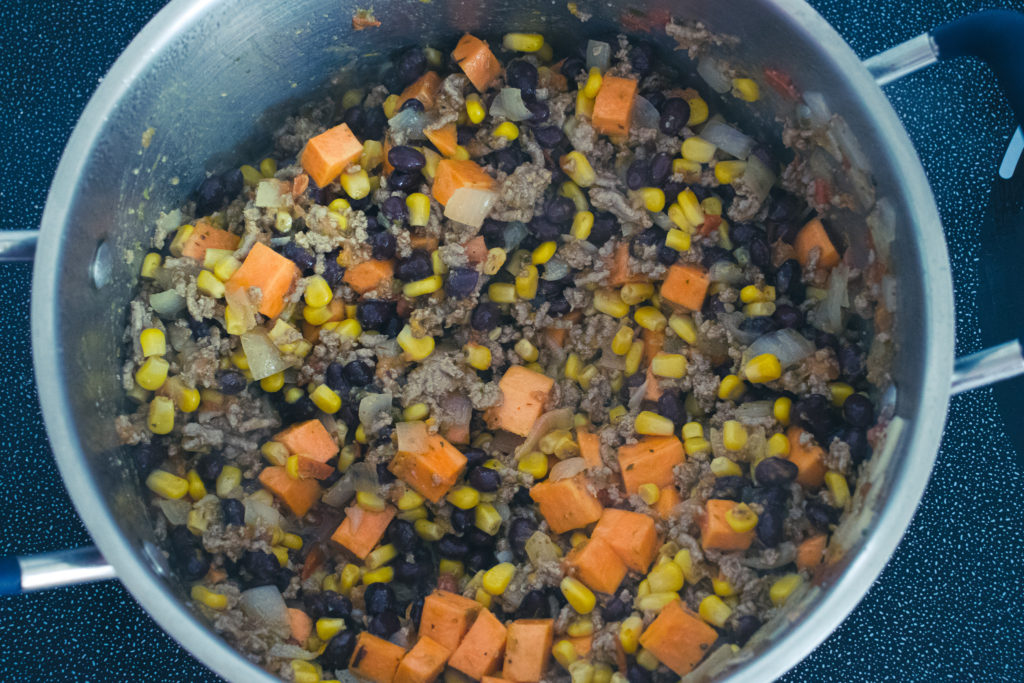
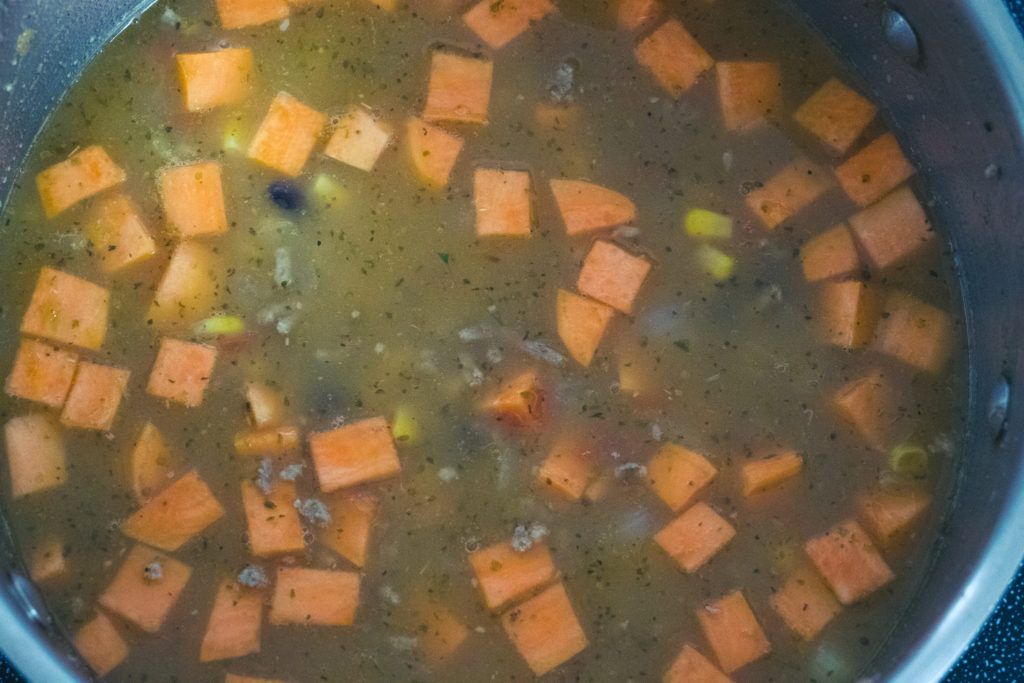
The final few steps in the cooking process are to add the sweet potato, corn, black beans, and stock. Then, bring the soup to a boil, turn the heat down to medium-low and simmer for twenty minutes or until the sweet potato is tender. After twenty minutes, or once the sweet potato is ready, taste the soup and season as needed with salt and pepper.
Finishing and Serving The Turkey Taco Soup
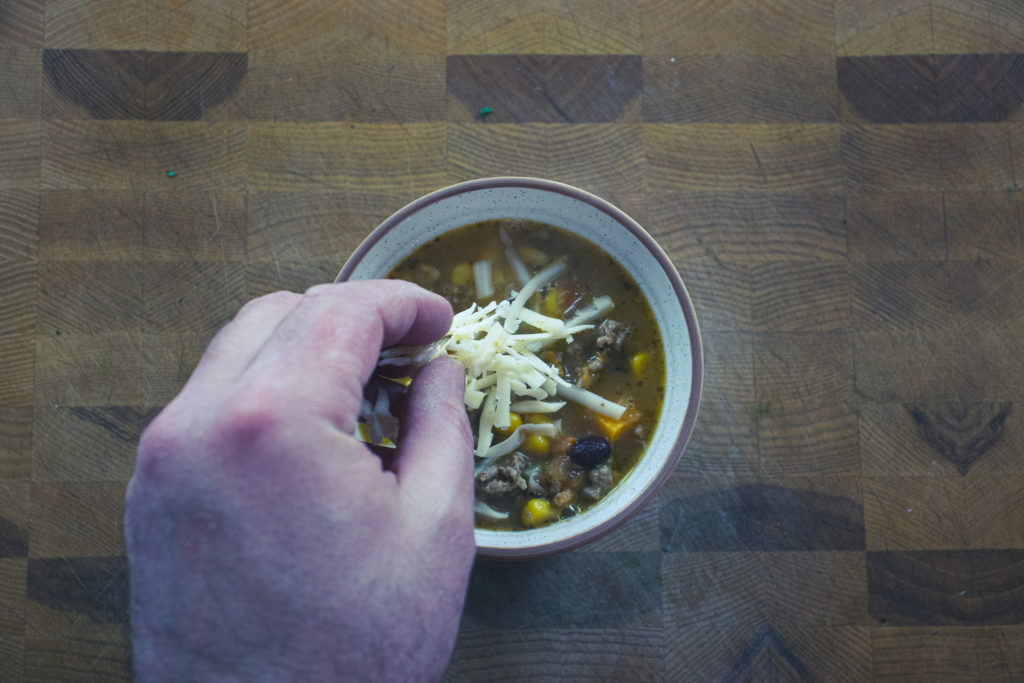
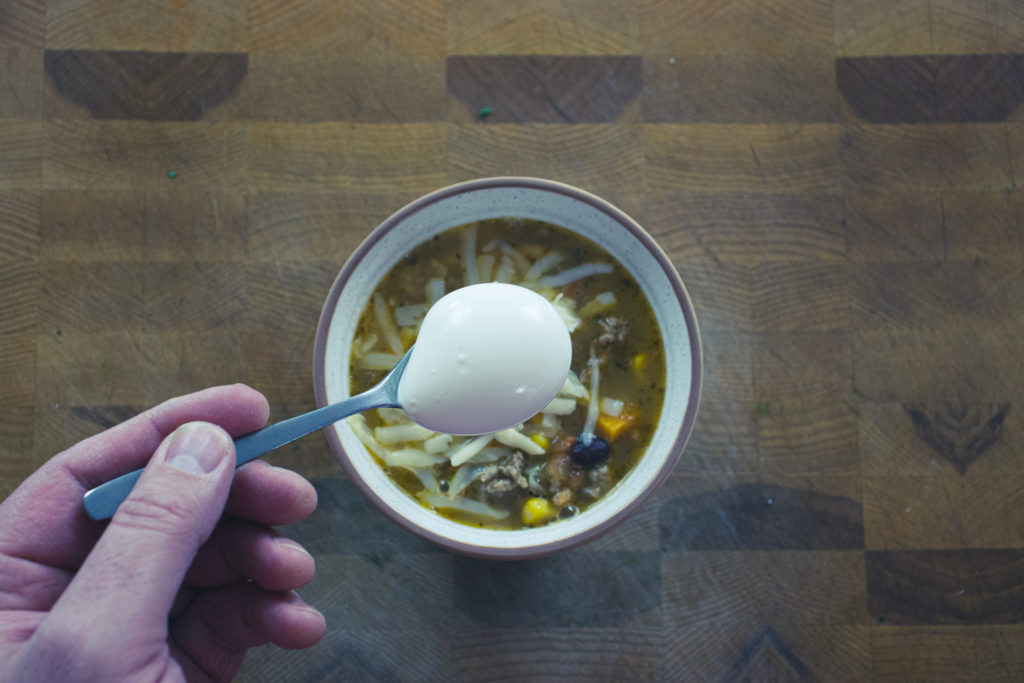
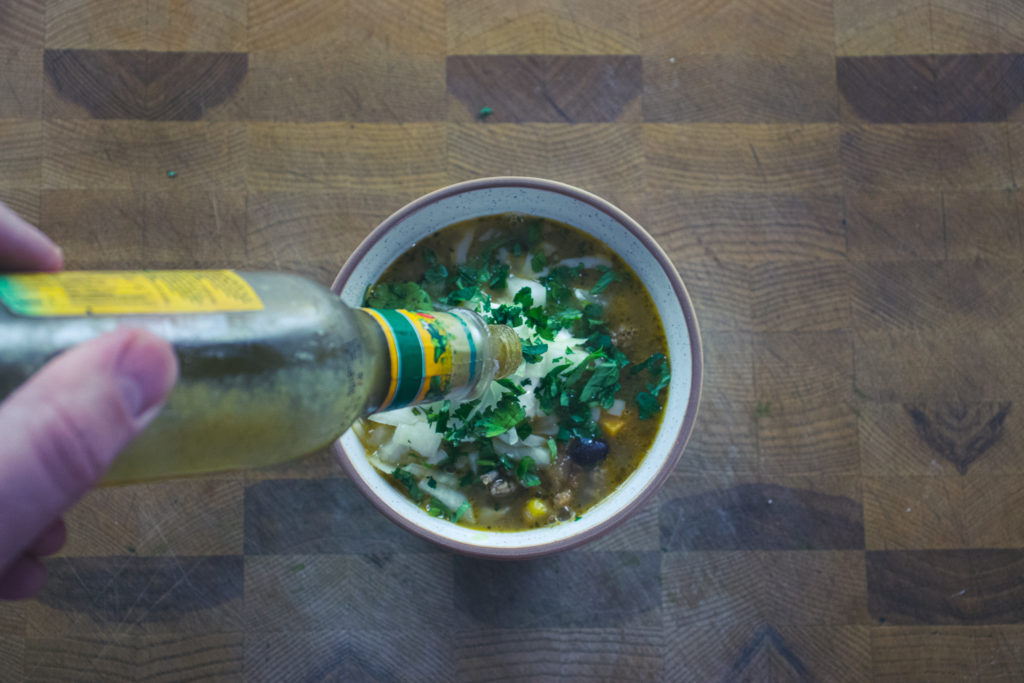
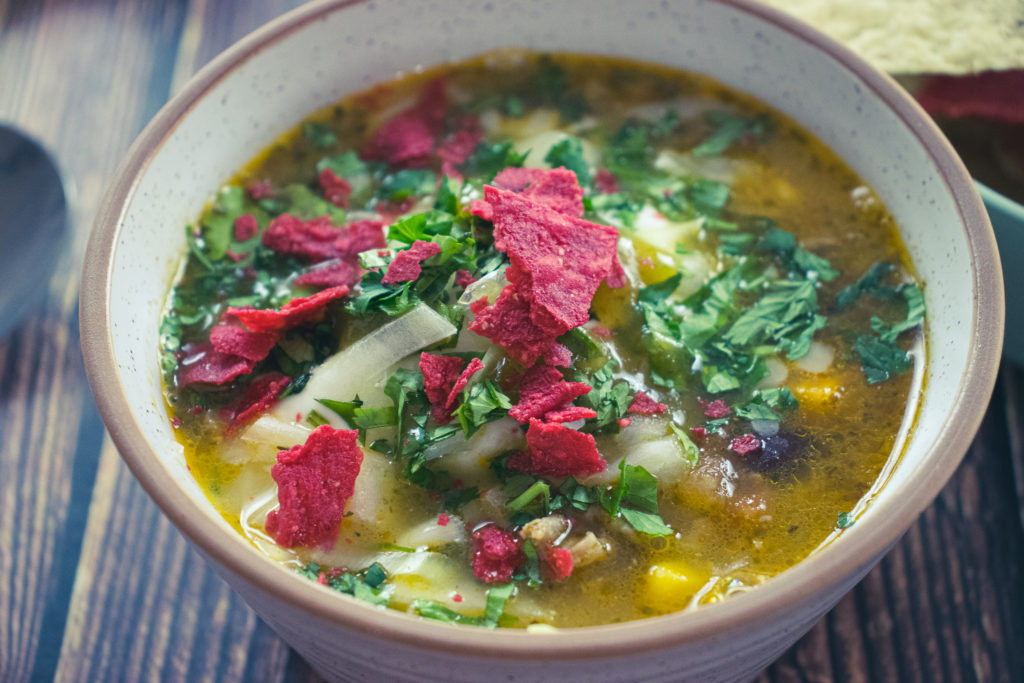
The soup is ready, and it’s good, but as I said initially, what makes this soup are the finishing touches. So, put the soup in bowls, and garnish each bowl with pepper jack cheese (cheddar or mozza will work too), sour cream, minced raw onion, chopped cilantro, a few drops of hot sauce, and tortilla chips on the side. When eating the soup, I like to crush the chips up as you would with soda crackers in a chicken noodle or tomato soup bowl. But, the chips are also great to just dip in the soup. I’ll leave that part up to you.
The Wrap-Up
Please, for your own good, go in your kitchen and make this soup as soon you as possibly can. You will be so unbelievably happy that you did. For once, take my word for it. You need to make this. It is worth your time and effort. If you have any questions or comments please leave them in the comments section below. Thanks for reading. I hope you enjoyed this post. Remember, sharing is caring so share this with your friends. Have a great day! I’ll see you back here next Thursday. Oh, and if you love this soup you may also love this turkey taco recipe.
Have you signed up for the Chef’s Notes Monthly Newsletter? No? Why Not? Don’t miss exclusive recipes, cooking tips, and behind-the-scenes pictures and stories. Sign up below.
Turkey Taco Soup
All the flavours of a top-quality taco but in a soup. It's a taco in every spoonful.
1/2tsp Mexican Hot Sauce or your favourite hot sauce
1smallbowl tortilla chips
Instructions
Heat a large pot over medium-high heat. Add the olive oil and turkey. Cook until the turkey is browned.
Add the onion, tomato, and garlic to the turkey and cook for 4 minutes, stirring now and then.
Mix in the oregano, cumin, salt, and jalapenos. Cook for 2 more minutes.
Stir in the citrus juice and zest and cook until a spoon scraped on the bottom of the pot leaves a clear line for at least 1 second.
Stir in the corn, black beans, and sweet potato, then pour in the stock and bring to a boil.
Turn the heat to low, simmer for 20 minutes.
Serve the soup garnished with 1 tbsp sour cream, 1 tsp minced onion, 1 tsp chopped cilantro, 1 tbsp pepper jack cheese, a few drops of hot sauce and tortilla chips.
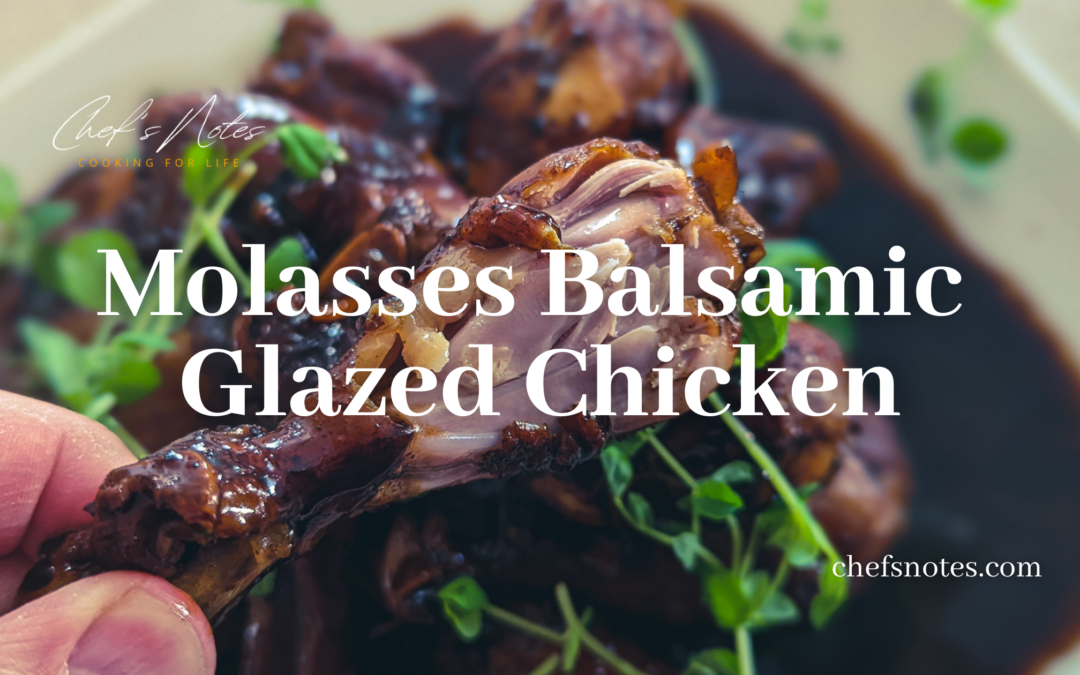
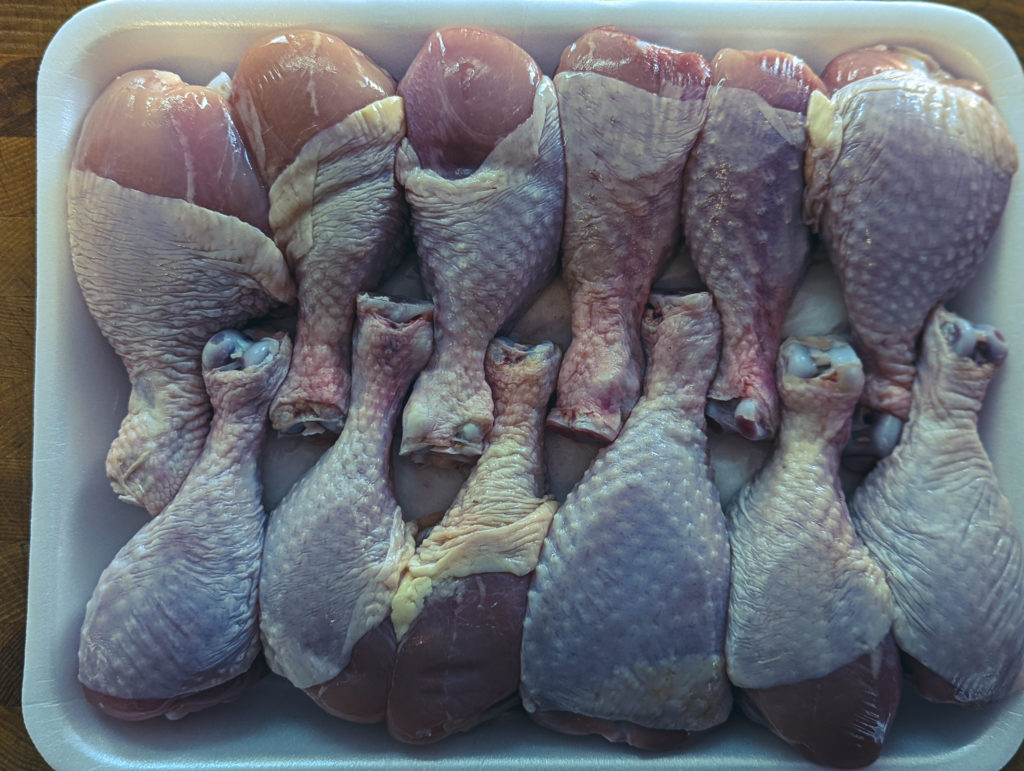
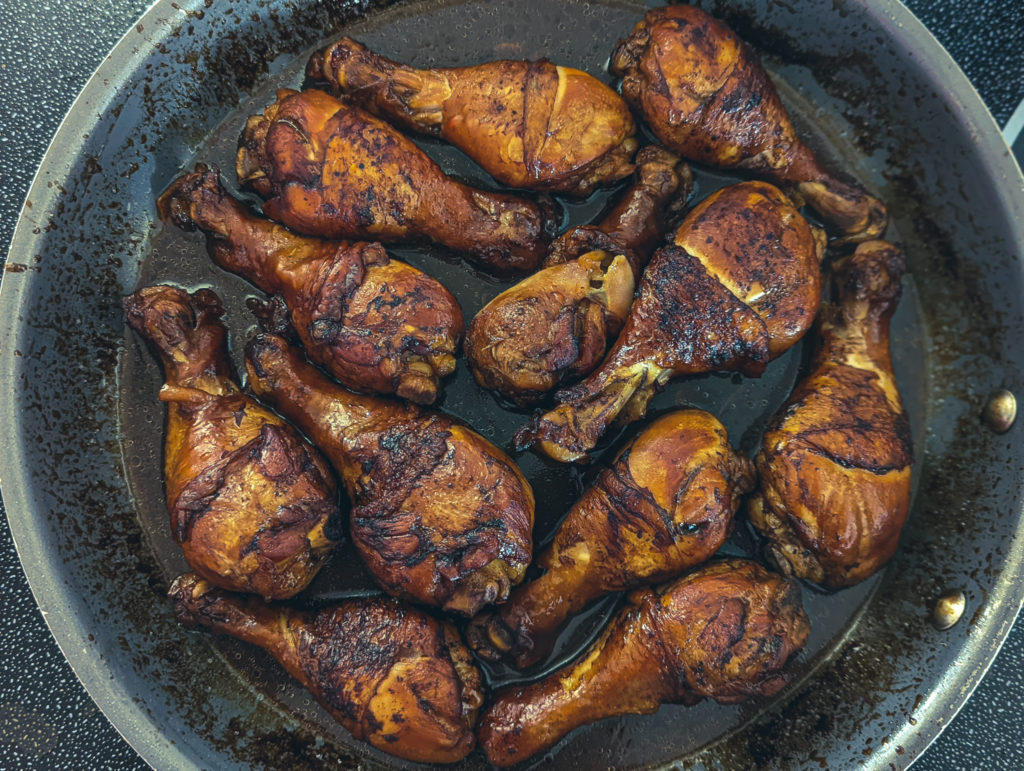
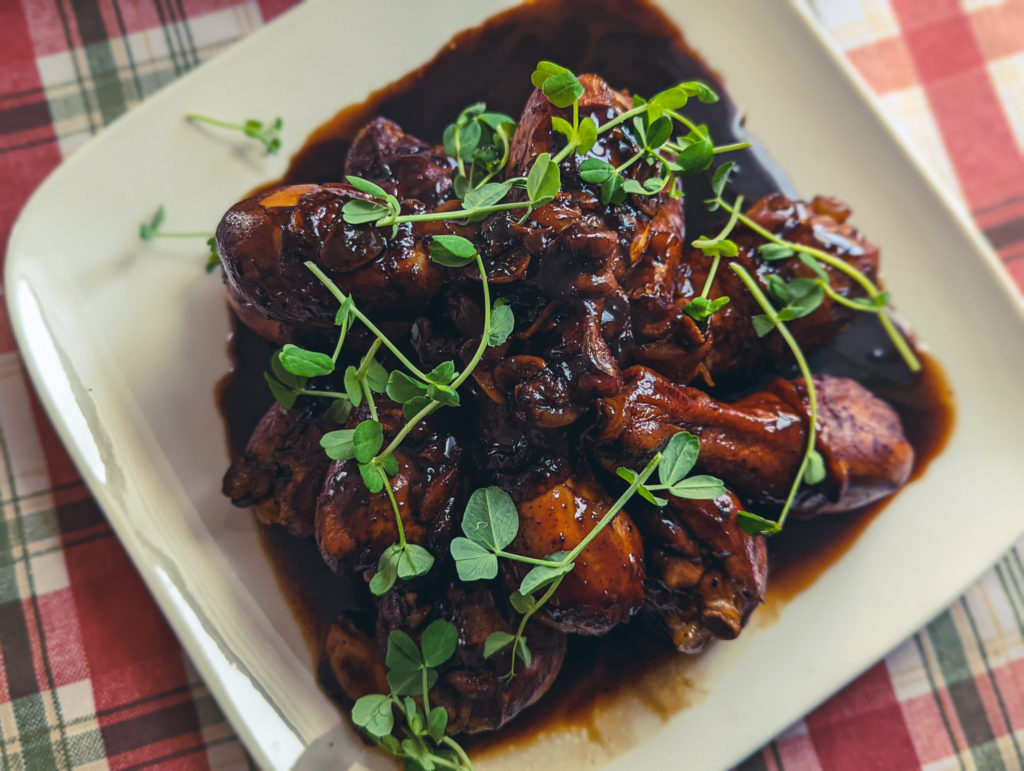
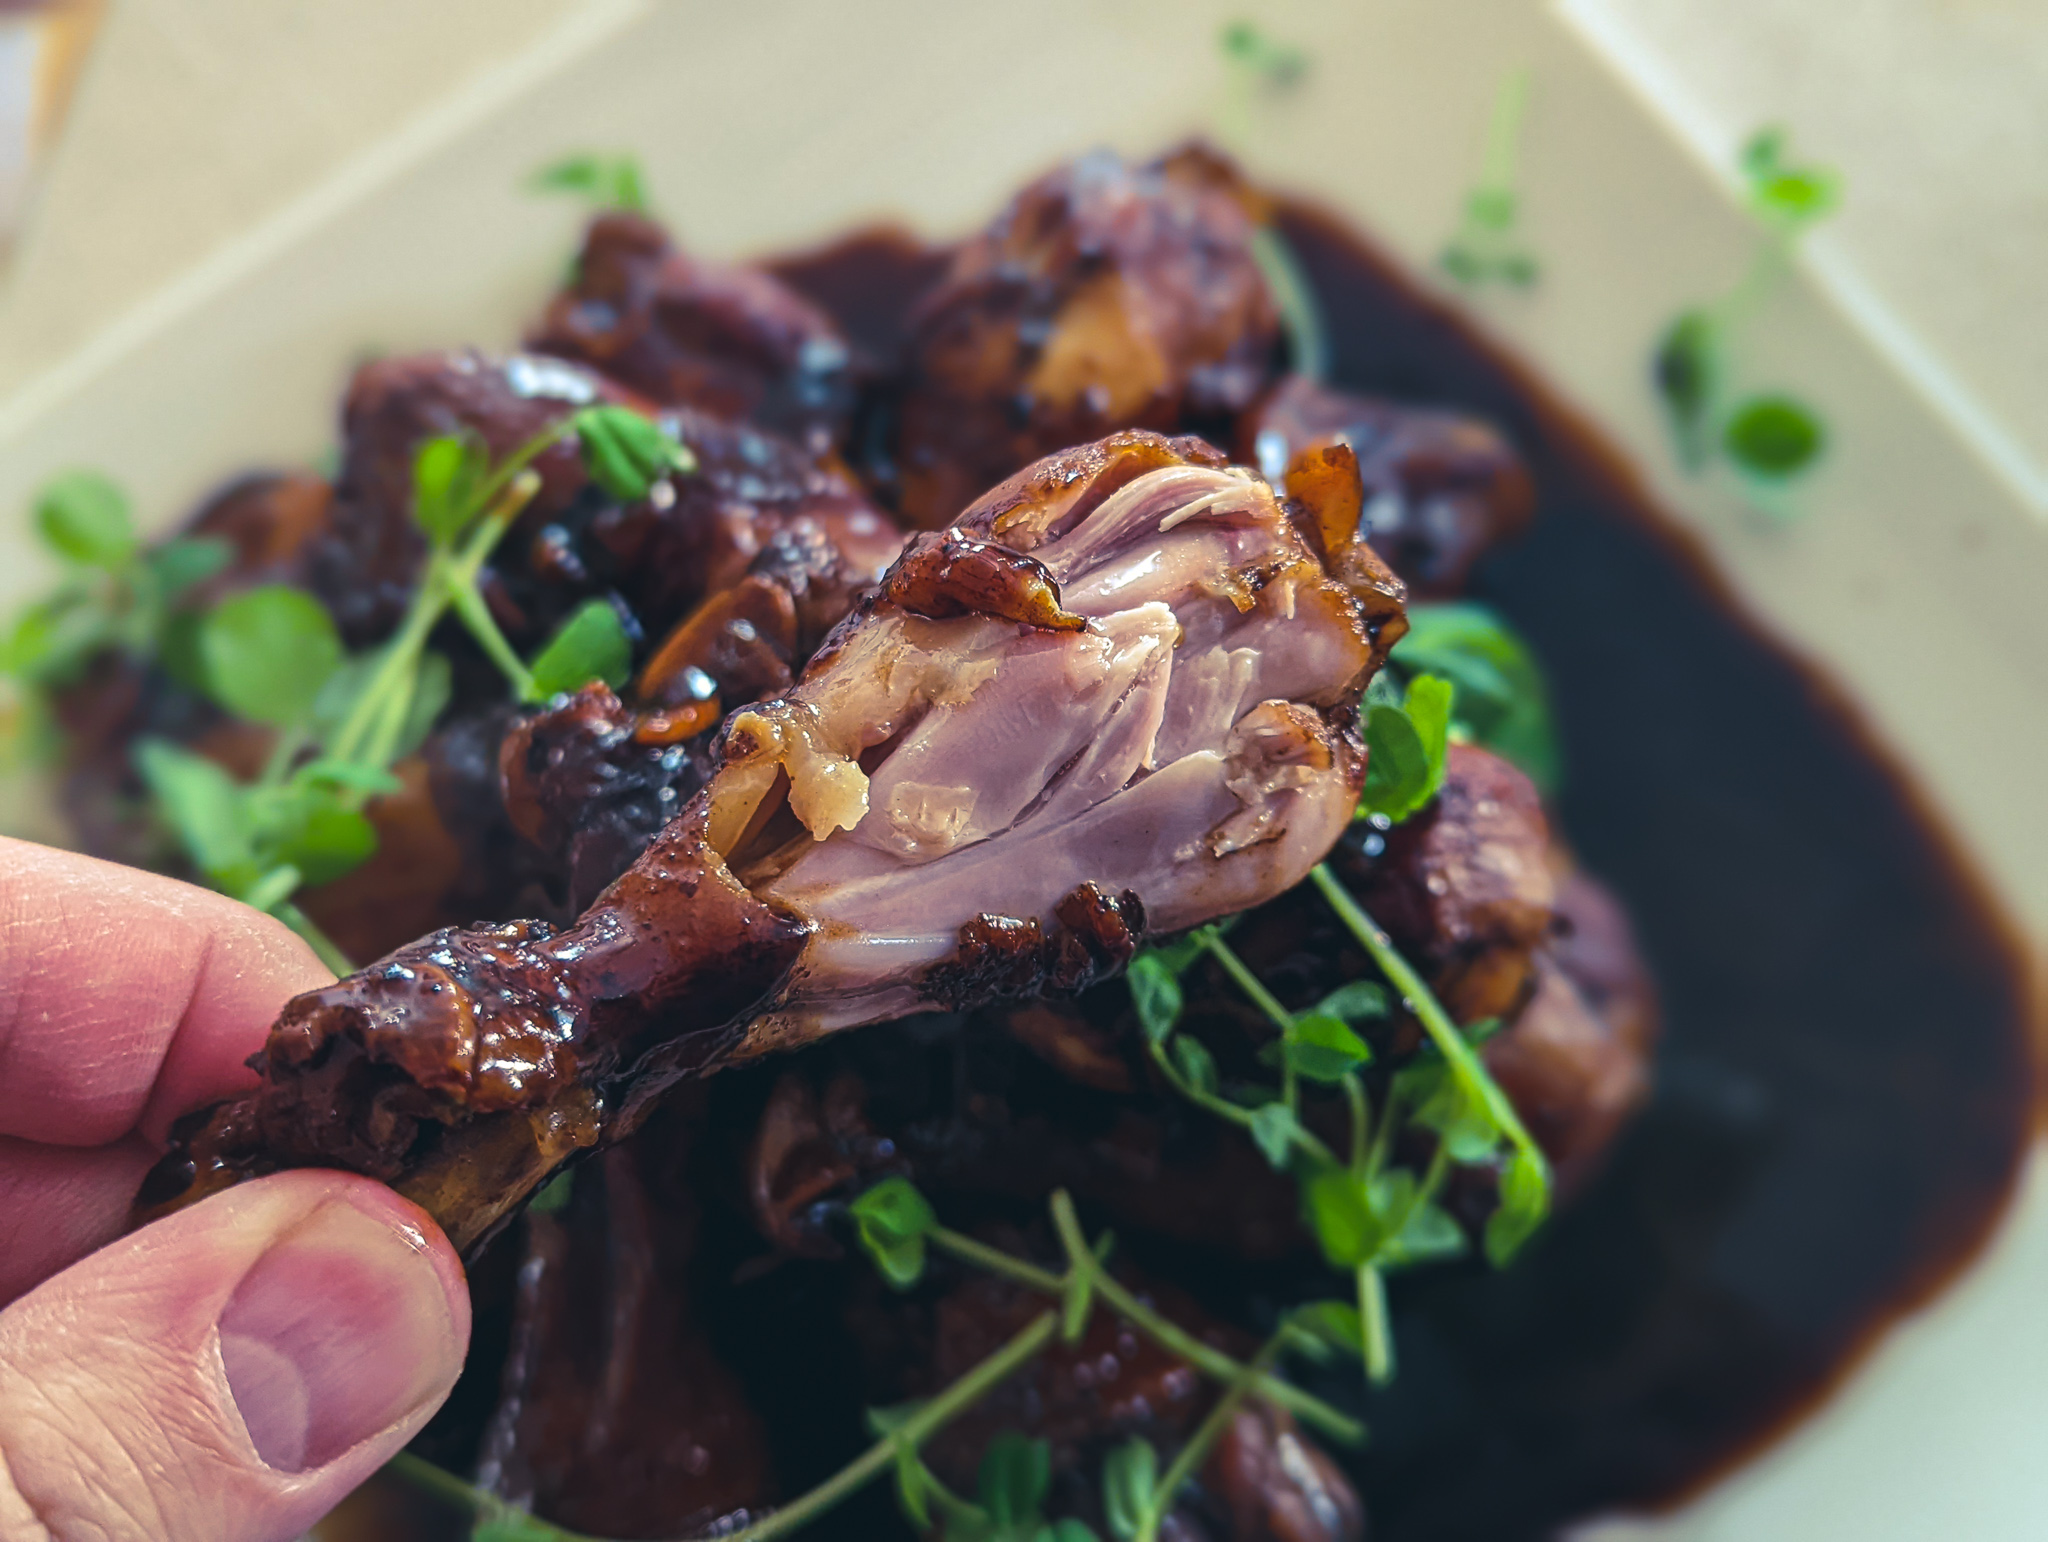
You will love this Molasses Balsamic Glazed Chicken if you like sweet and sour chicken. This is essentially sweet and sour but made with balsamic vinegar rather than white vinegar and with molasses rather than white sugar. So, it has that same sweet and sour flavour that you love, but with more depth because of the base flavour of the molasses and balsamic. It also looks cool because it has that deep dark brown, almost black colour. So, if you have a pack of chicken sitting around and don’t know what to do with it, look no further.
Molasses Balsamic Glazed Chicken
Ingredients
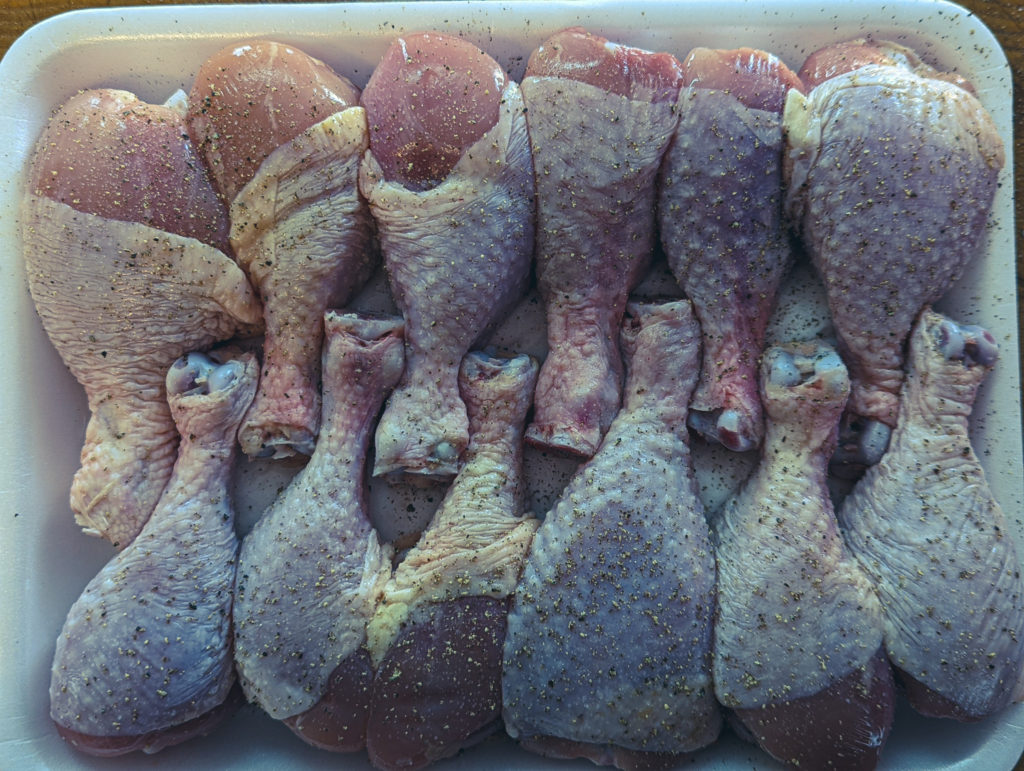
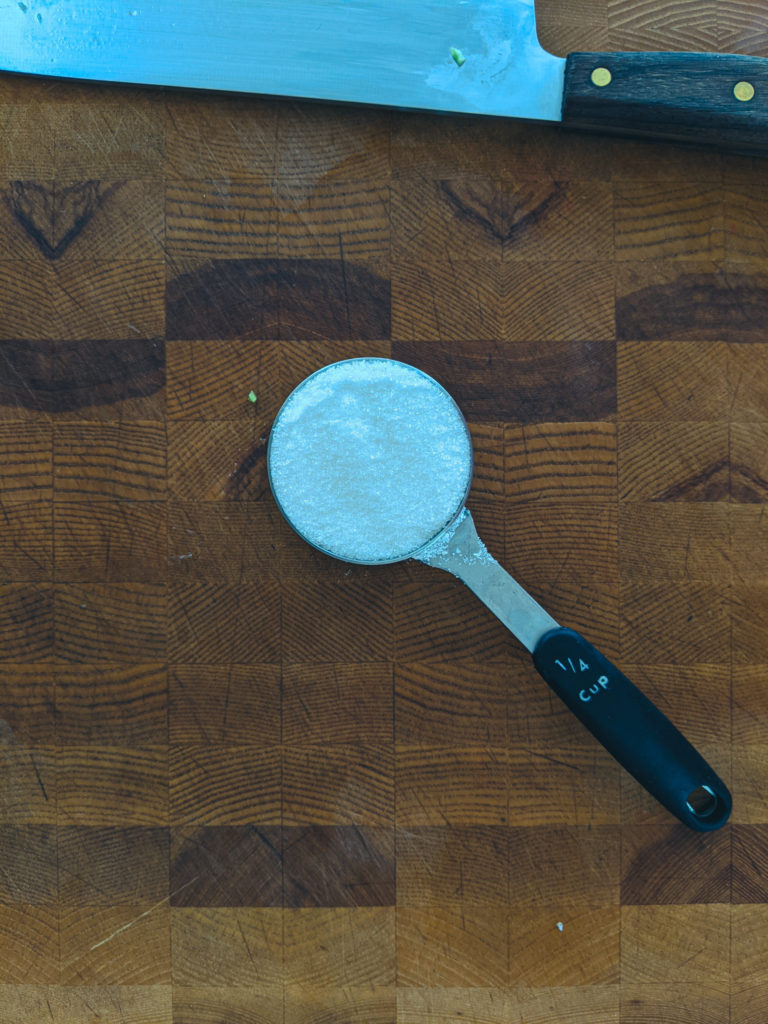
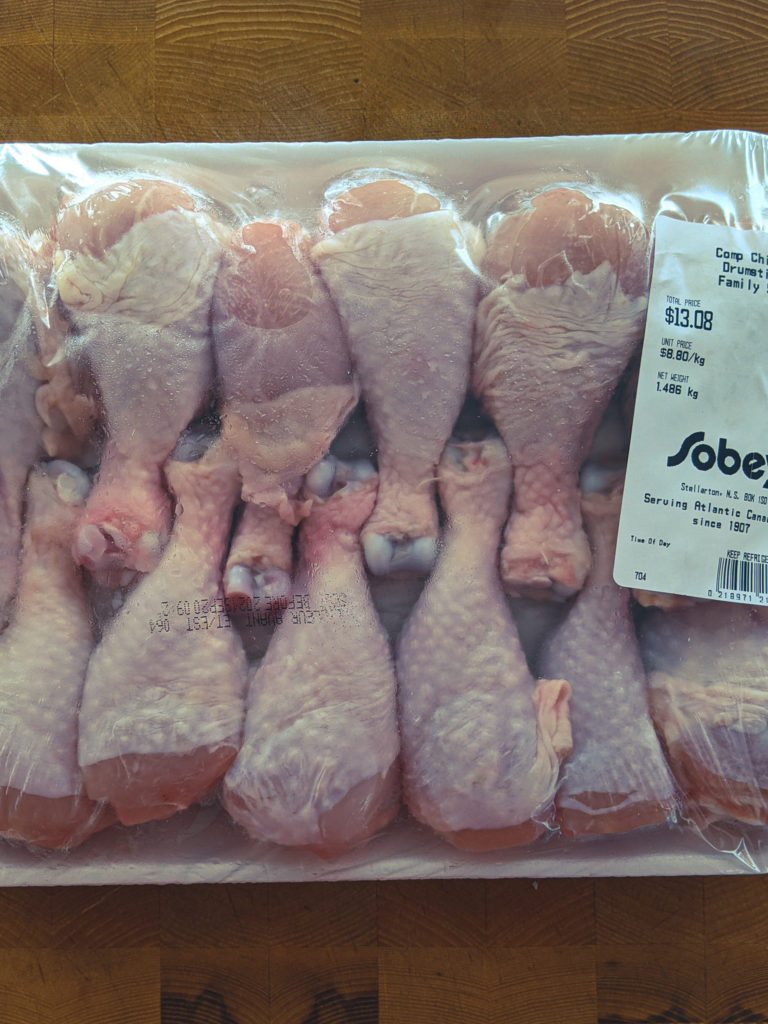
One of the many nice things about this Molasses Balsamic Glazed Chicken recipe is that you likely have all the ingredients on hand already. If you don’t, they are easy to find. So, what are they? It should come as no surprise that the first ingredient is chicken. I use chicken drum sticks in the recipe, but you can use full legs, thighs, breasts, or even wings. You may need to adjust the cooking time a little bit depending on what cut you use. Any cut of chicken will work. The other ingredients are balsamic vinegar, molasses, salt, pepper, chicken stock, garlic, and a little bit of cooking oil. I prefer peanut oil, but grapeseed oil, avocado oil, or canola will work.
Preparing The Chicken
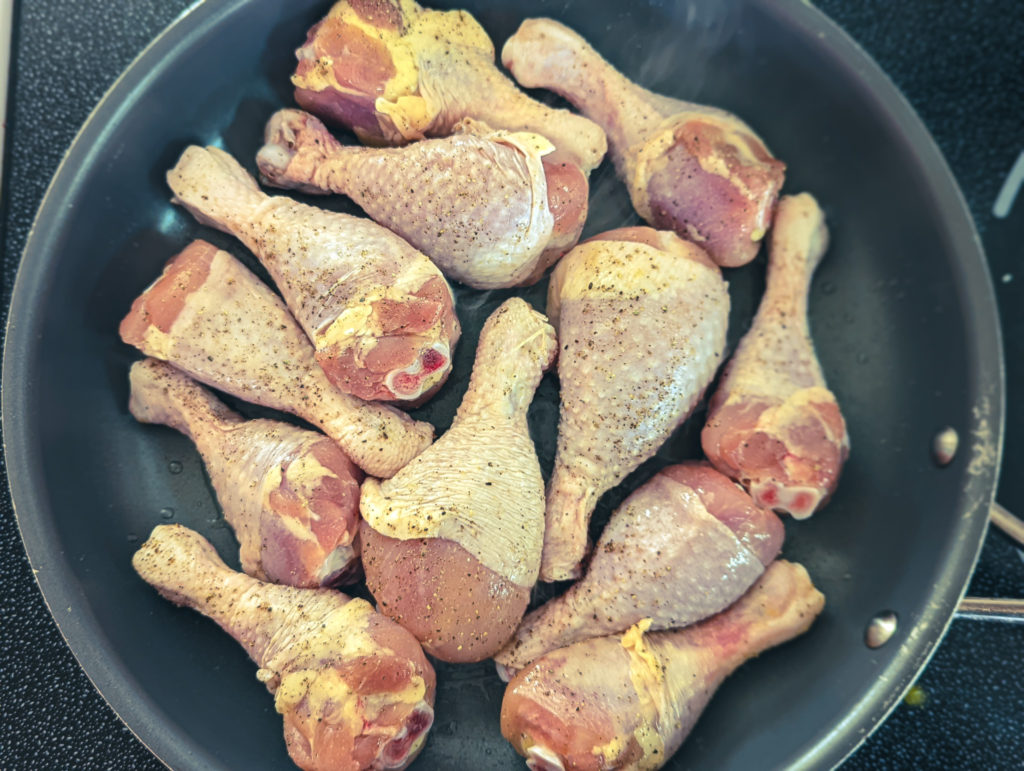
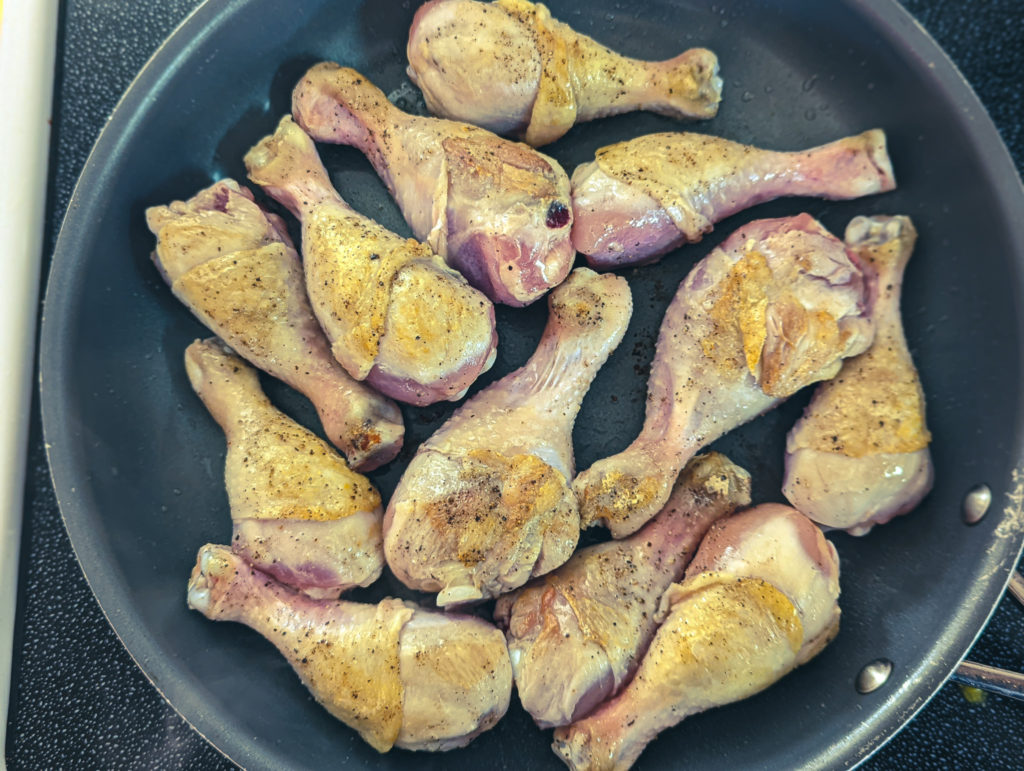
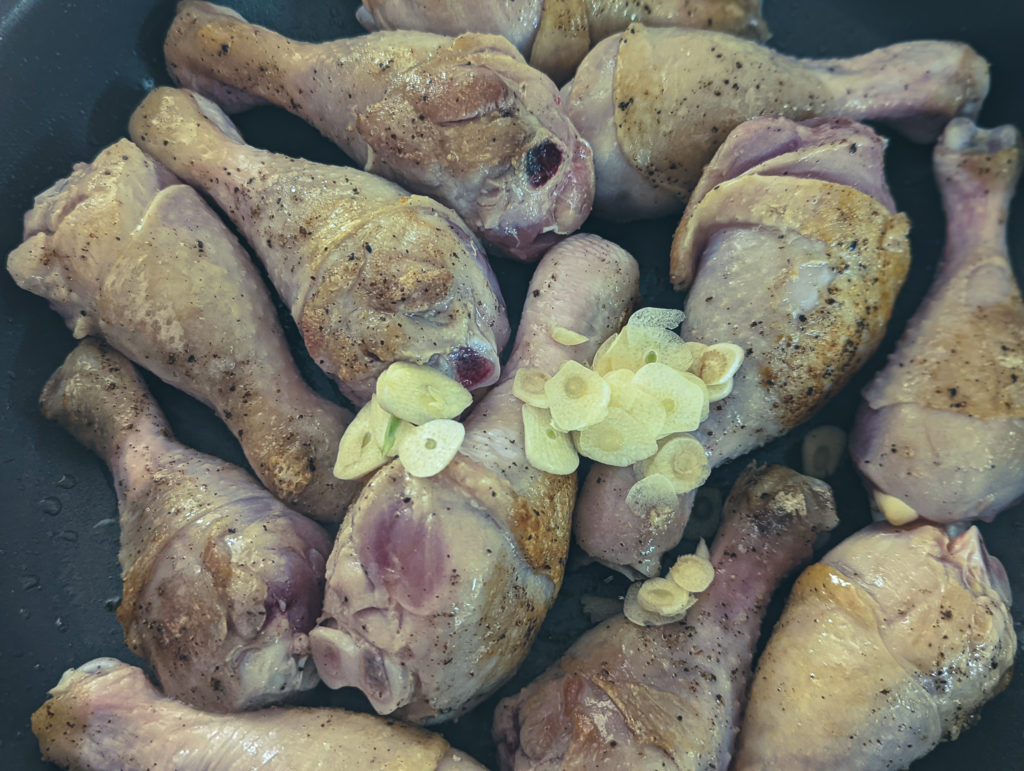
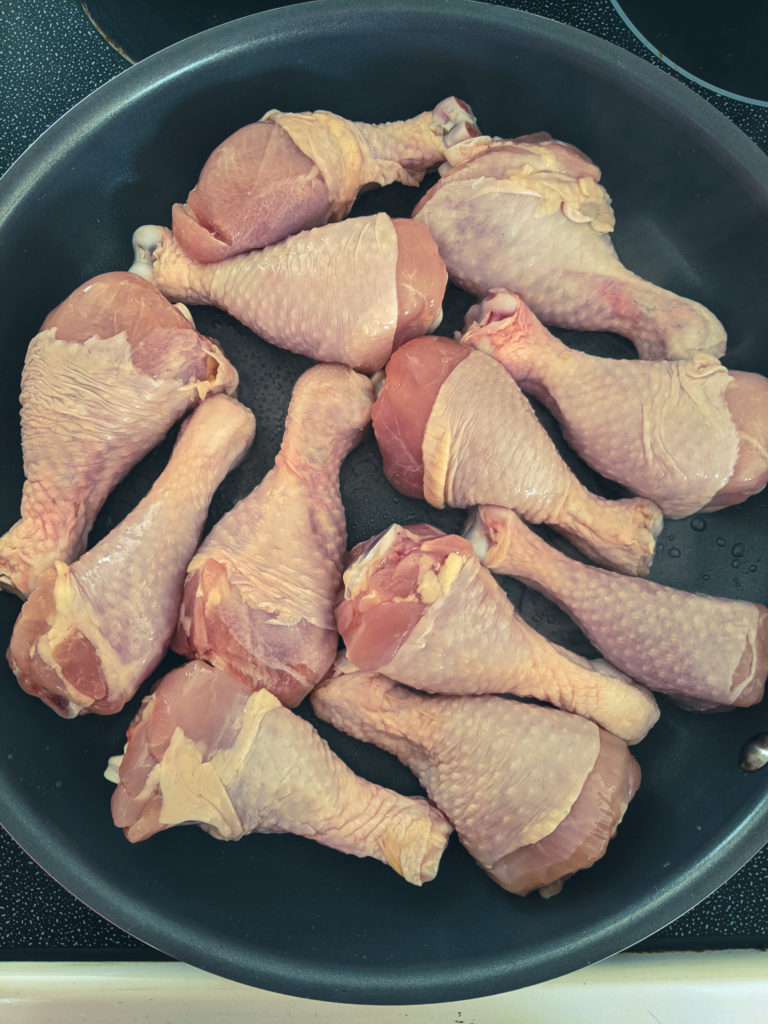
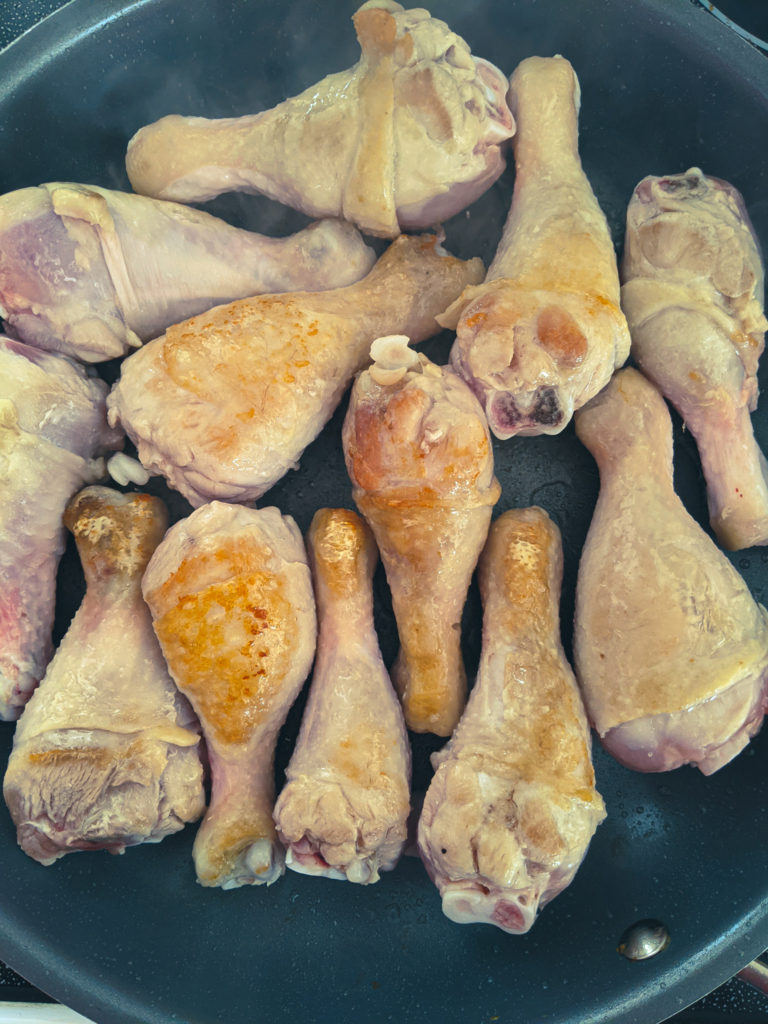
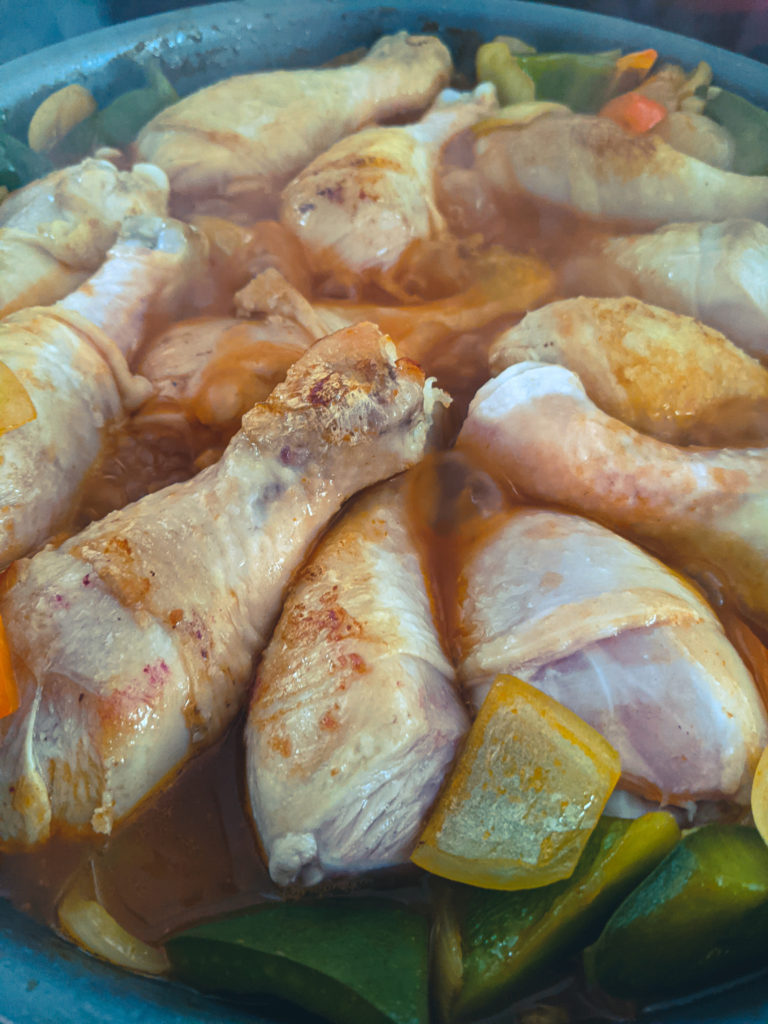
The best way to get a good sear on any piece of meat is to ensure that it has a dry surface. The easiest way to do that is to dry it with a paper towel. So, that’s what you should do. Use a paper towel and dry the surface of the chicken as best you can. Then, season the chicken generously with salt and pepper. Next, heat a large oven-safe skillet on high heat. Add the cooking oil, then the chicken. Sear on all sides.
Building the Molasses Balsamic Glaze
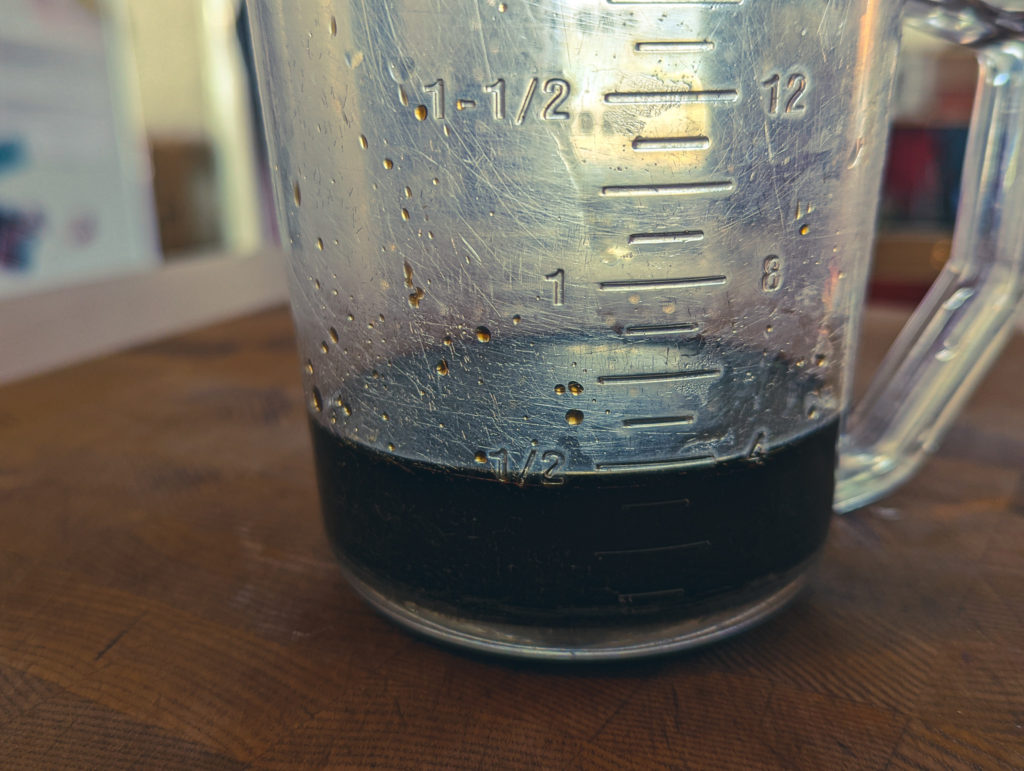
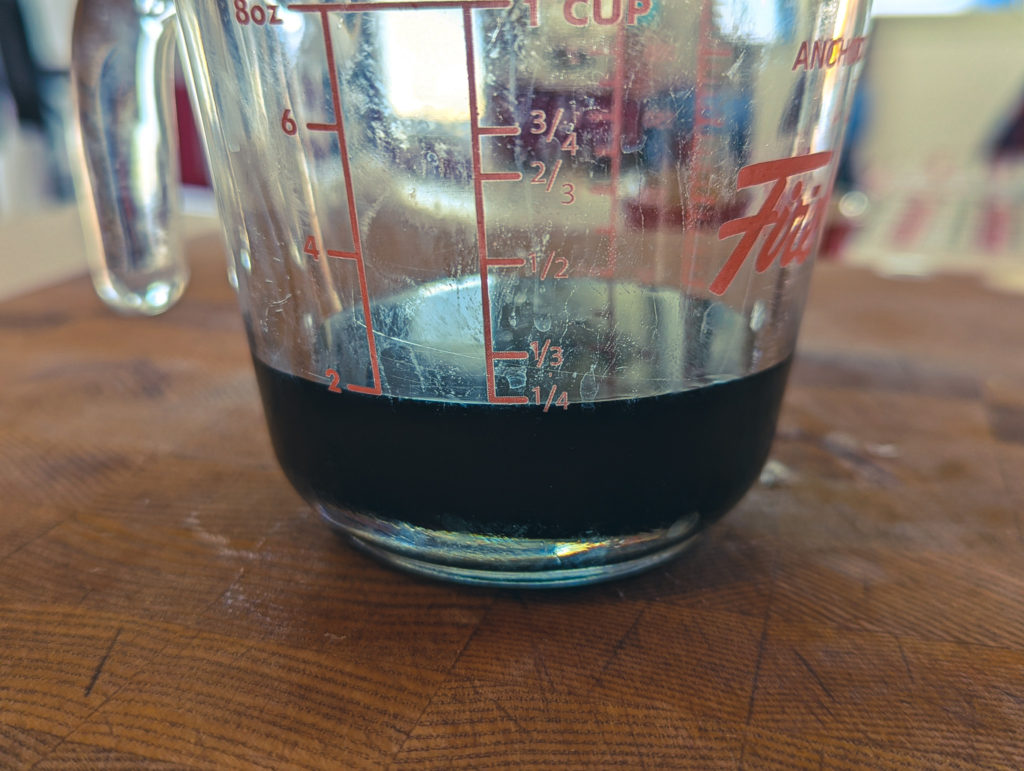
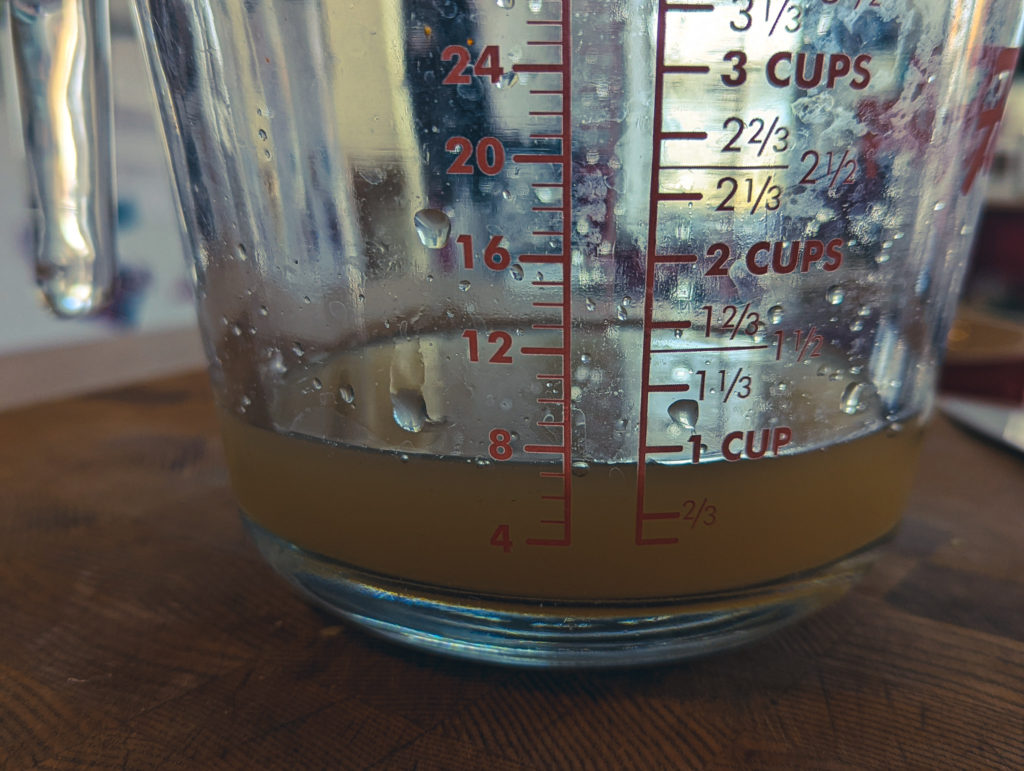
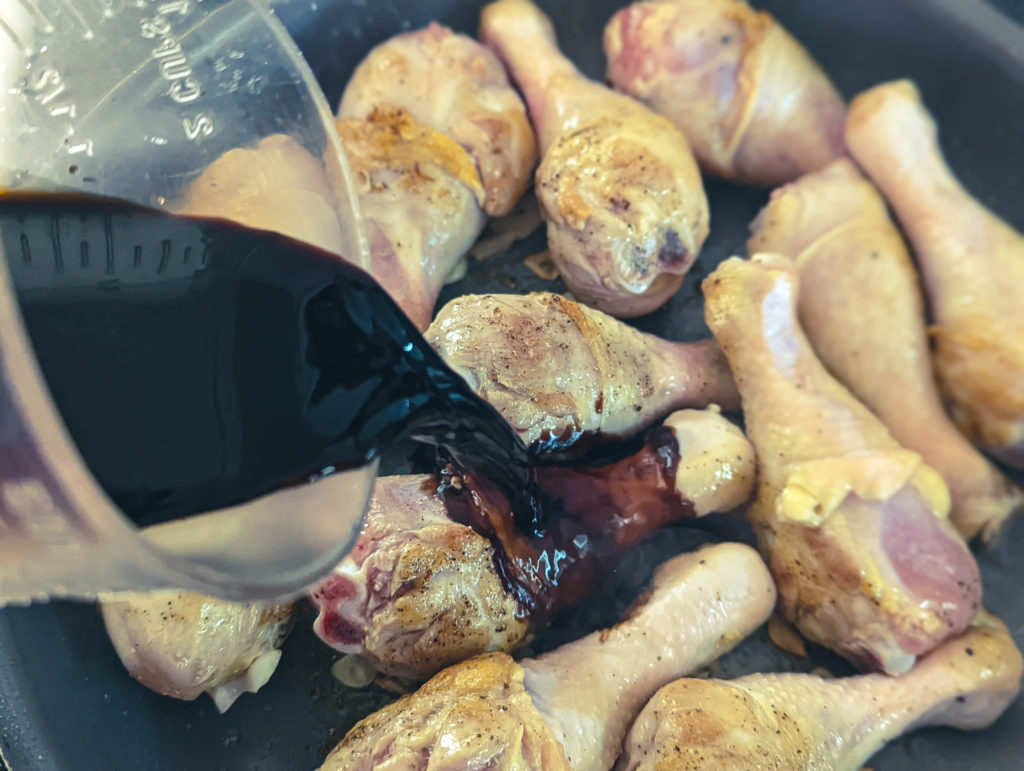
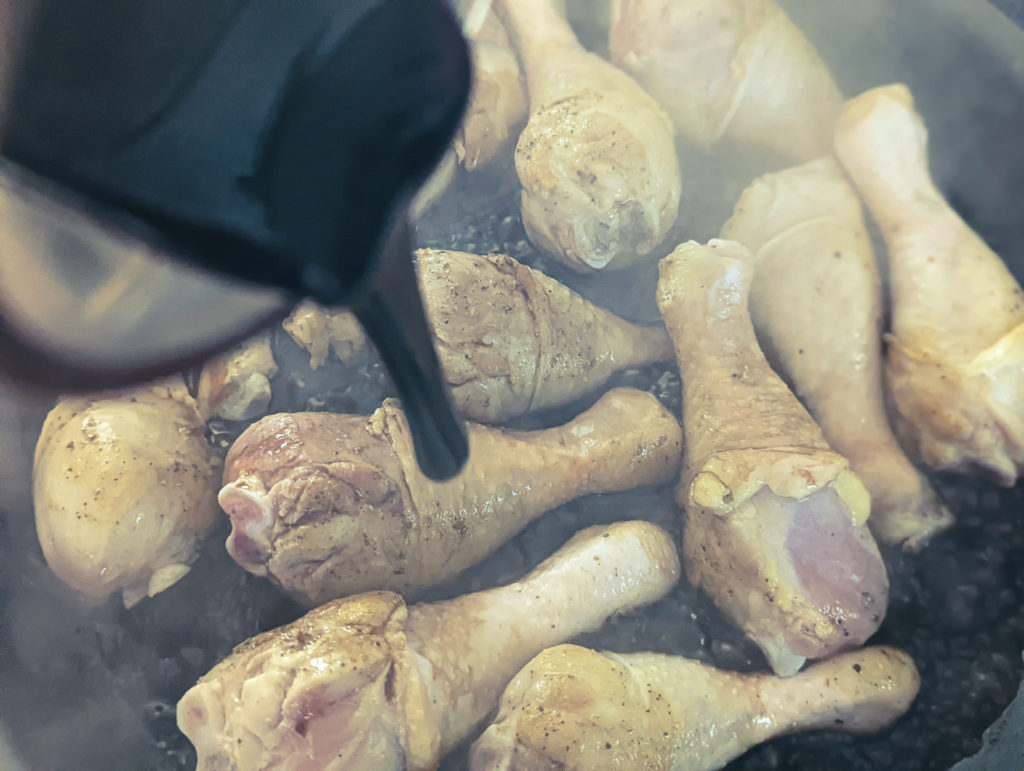
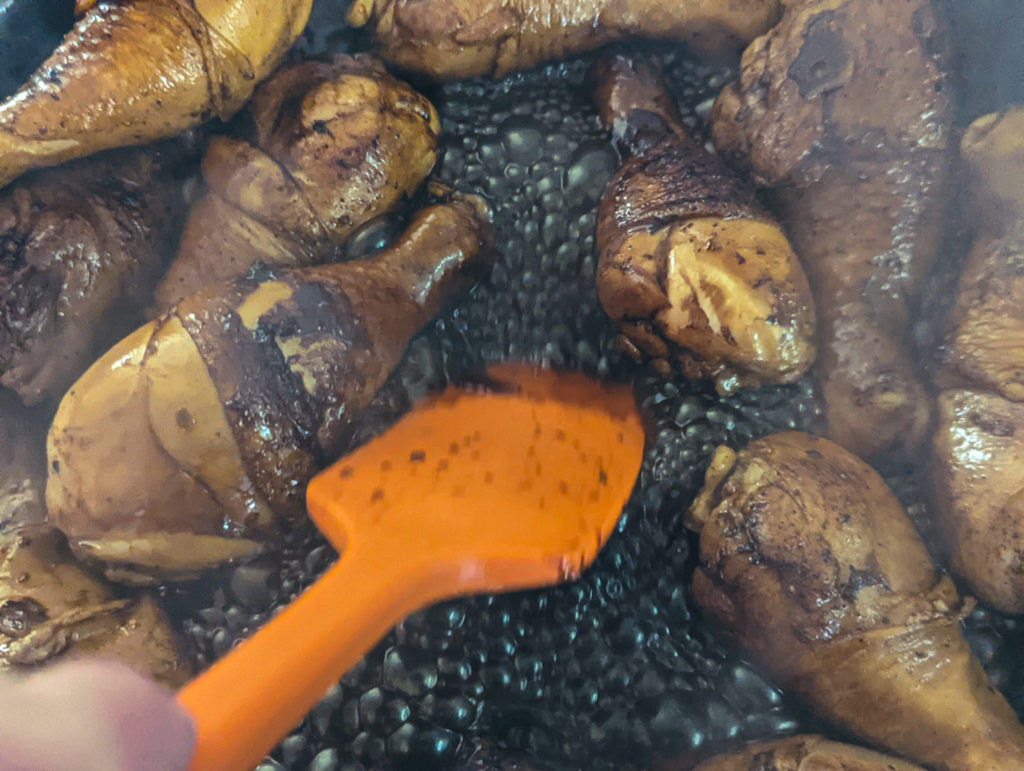
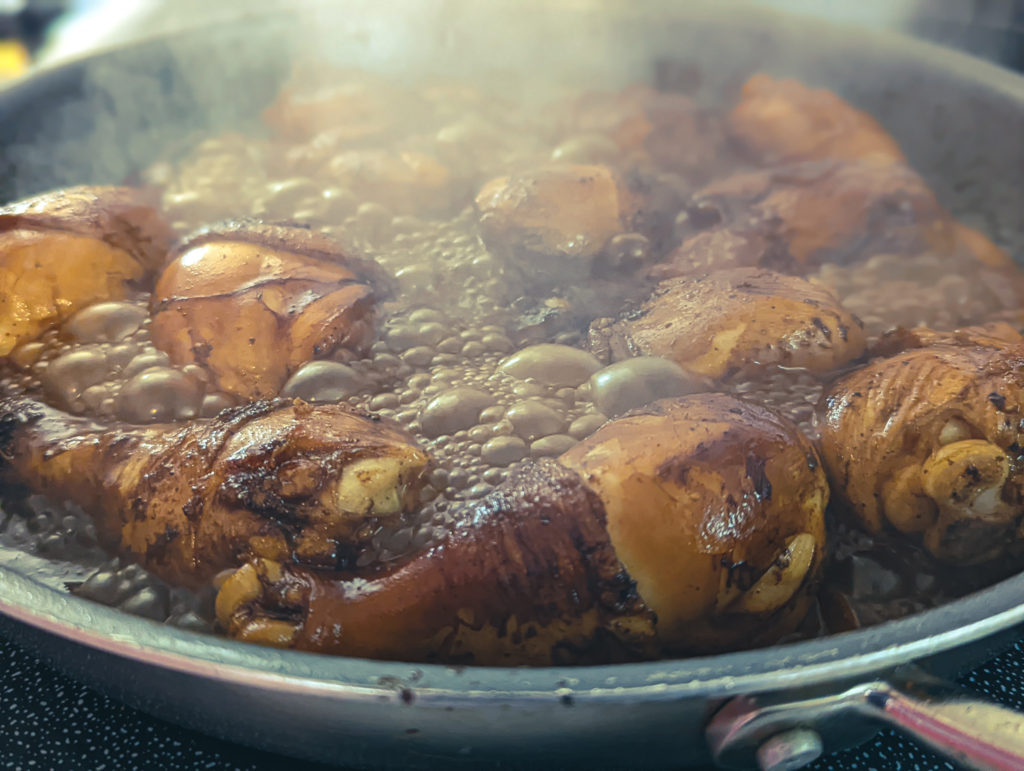
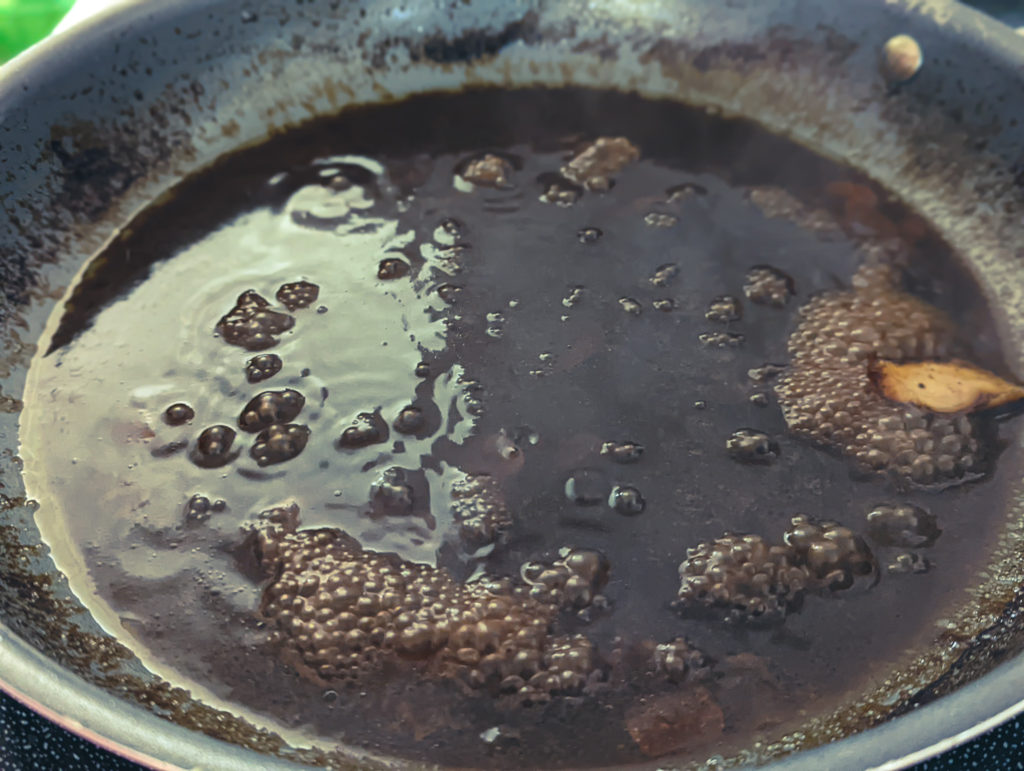
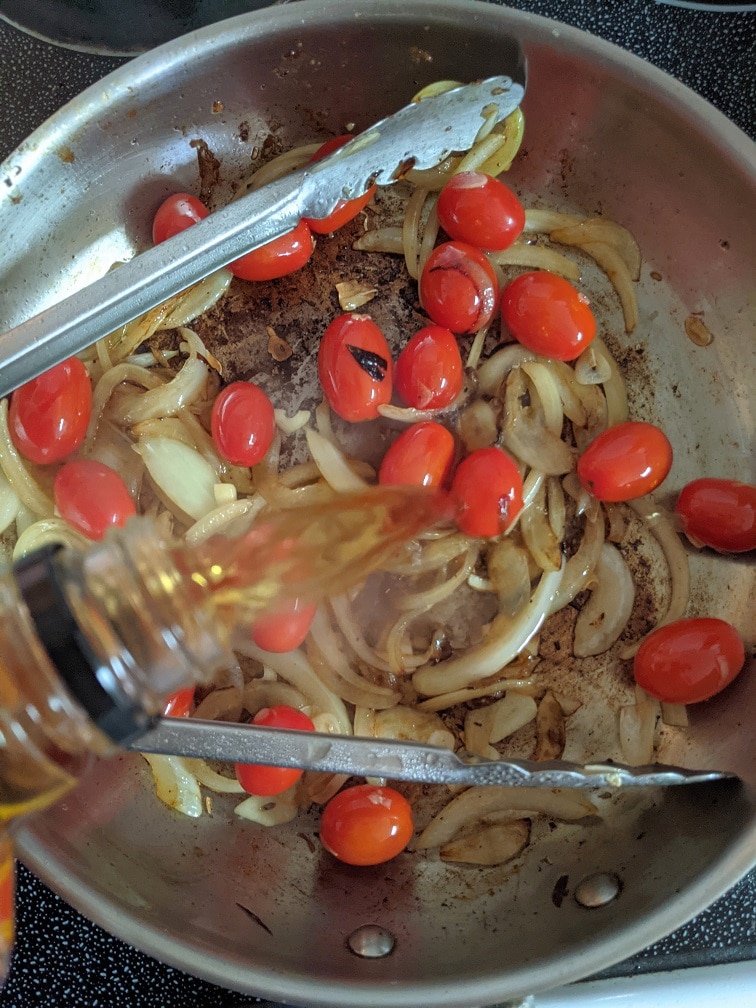
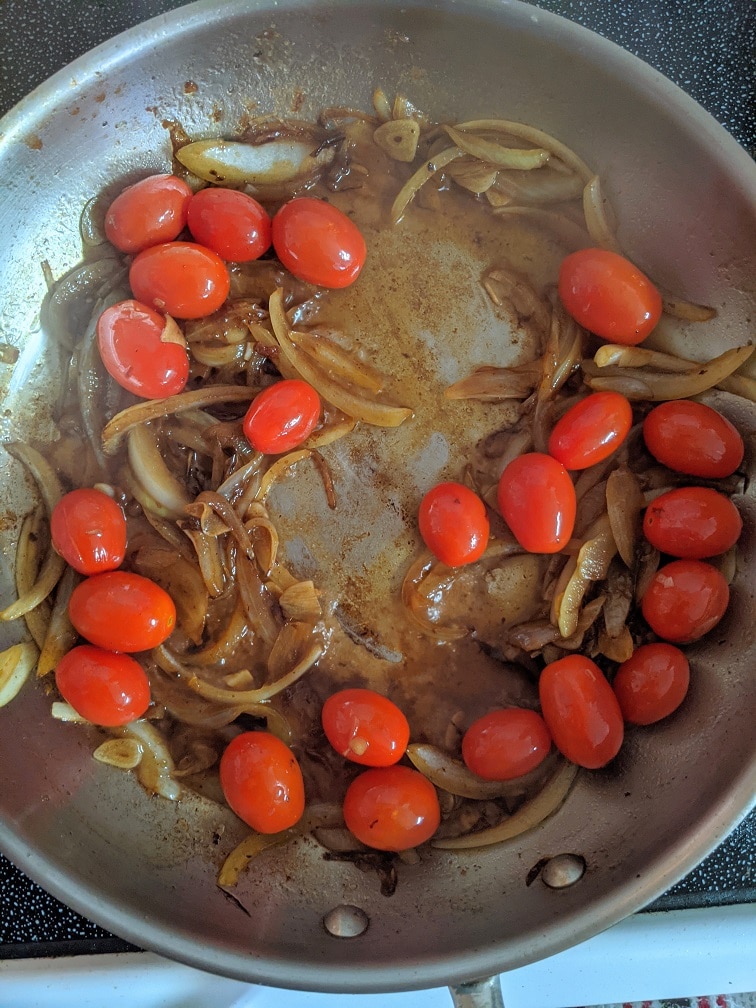
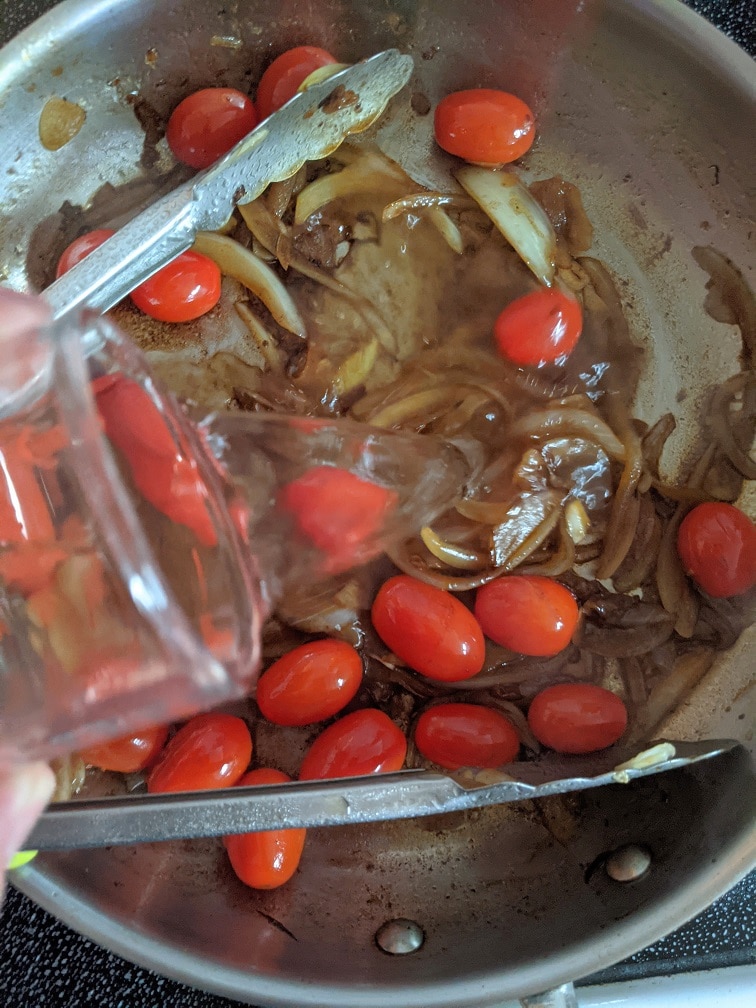
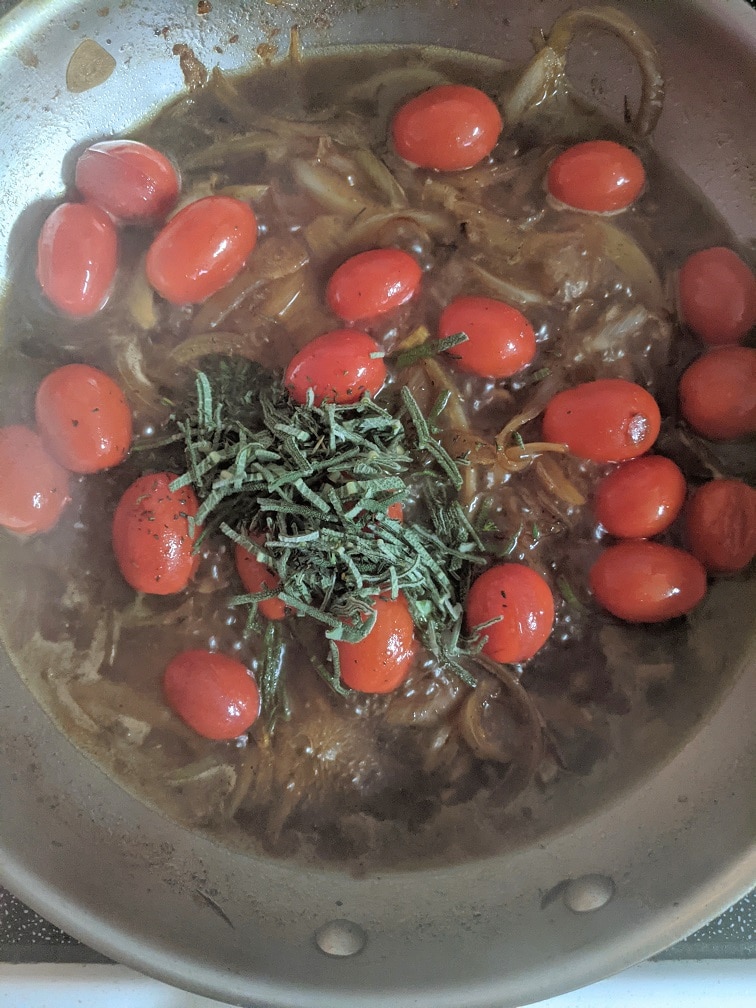
Once the chicken is seared, add the garlic and sauté for one minute. Next, pour in the molasses and balsamic vinegar. Cook the sauce until a line drawn on the pan’s surface with a spoon stays for one second. Next, add the chicken stock, bring it to a boil, and cook for three minutes.
Baking The Molasses Balsamic Glazed Chicken
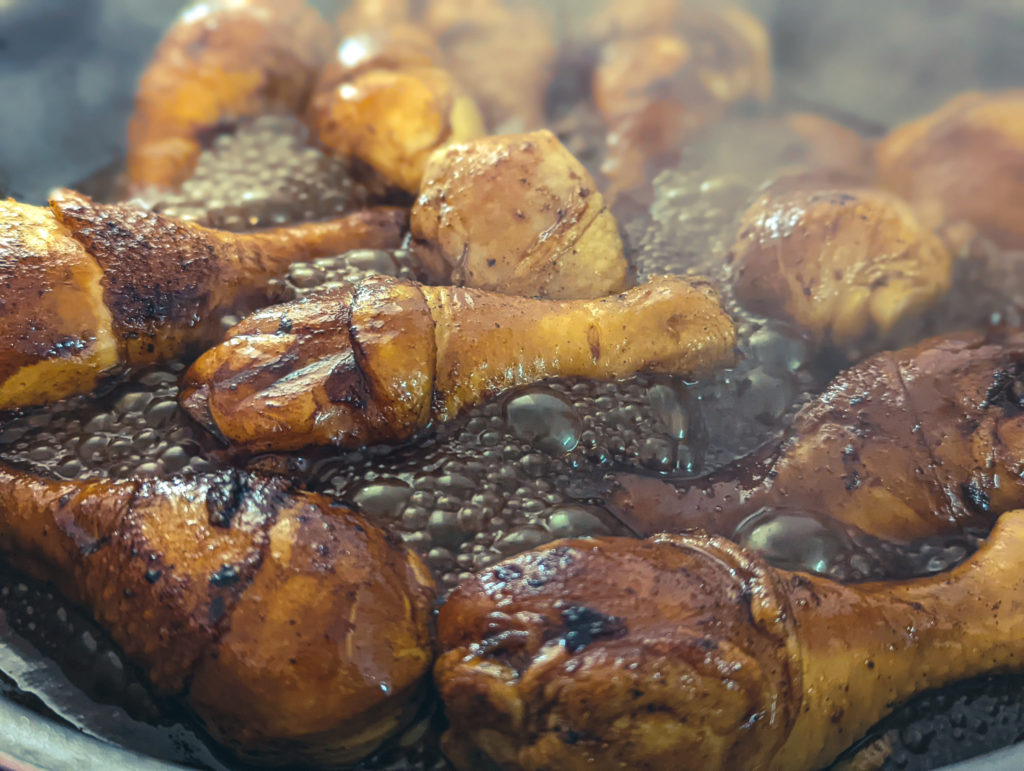
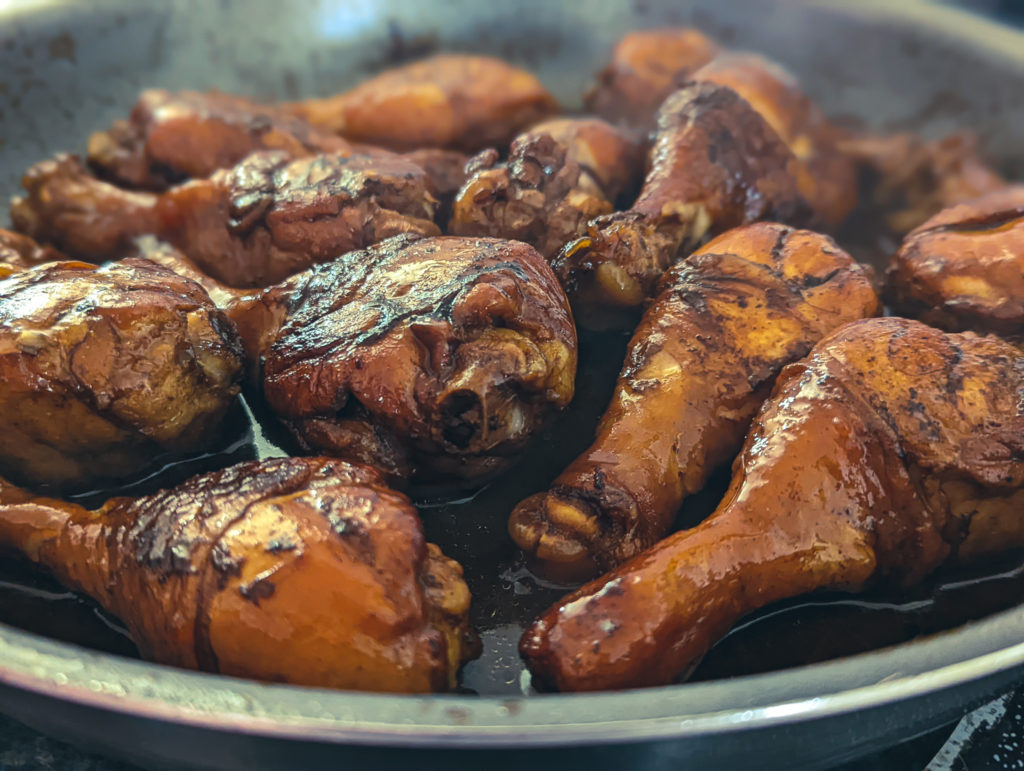
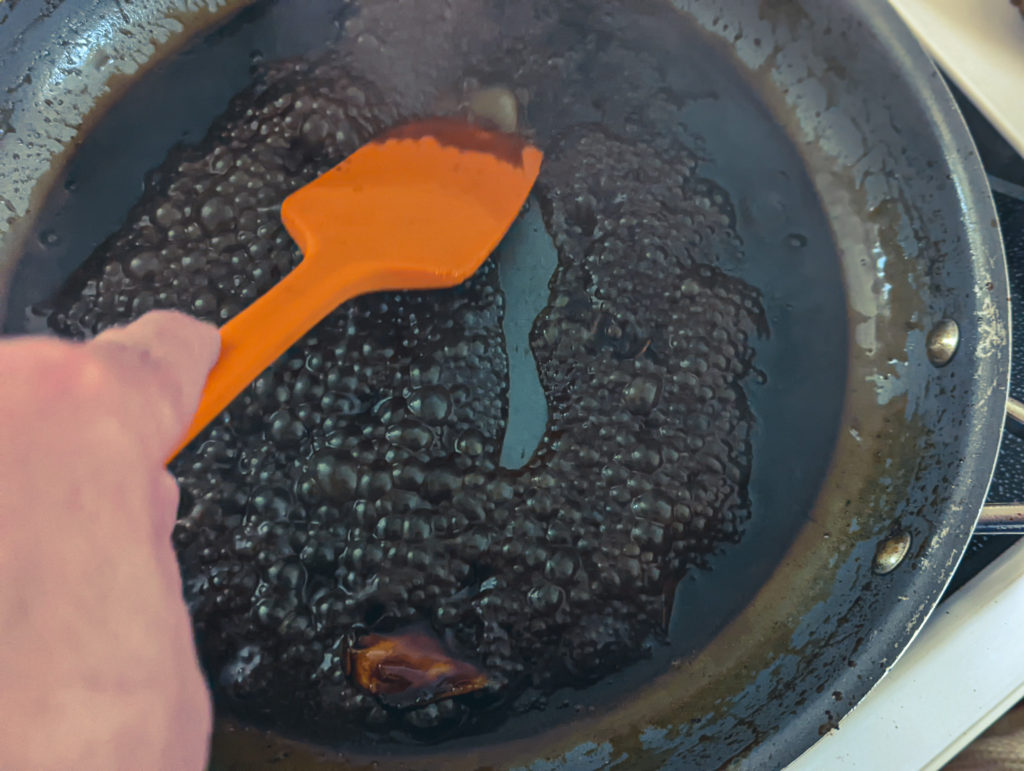
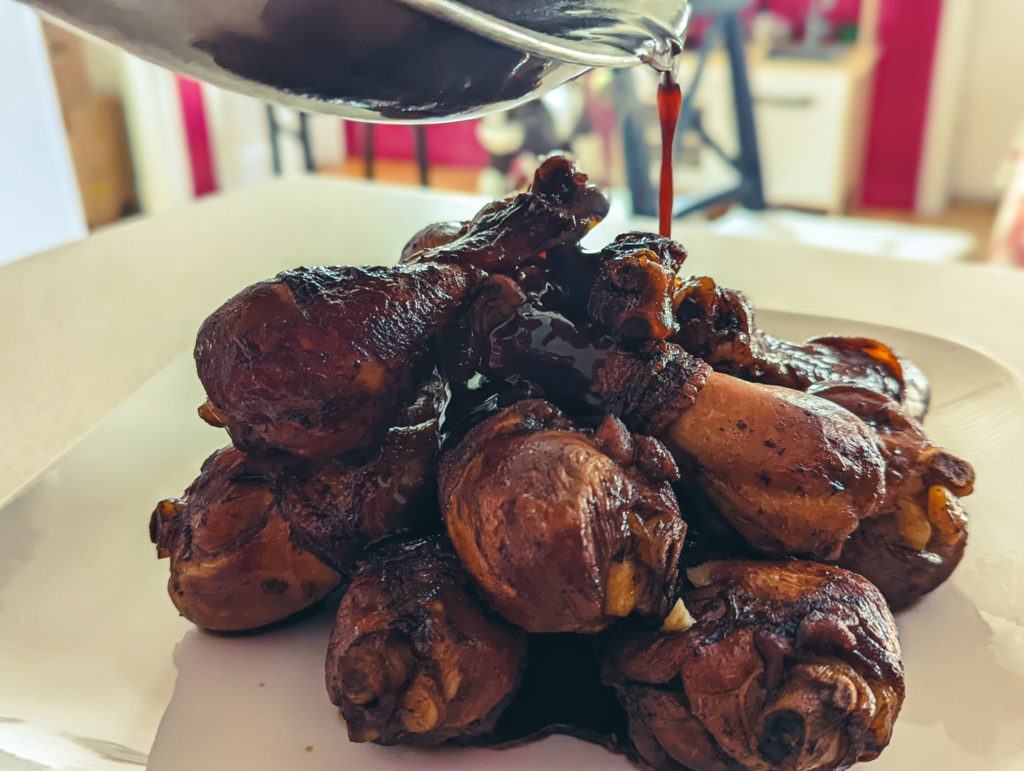
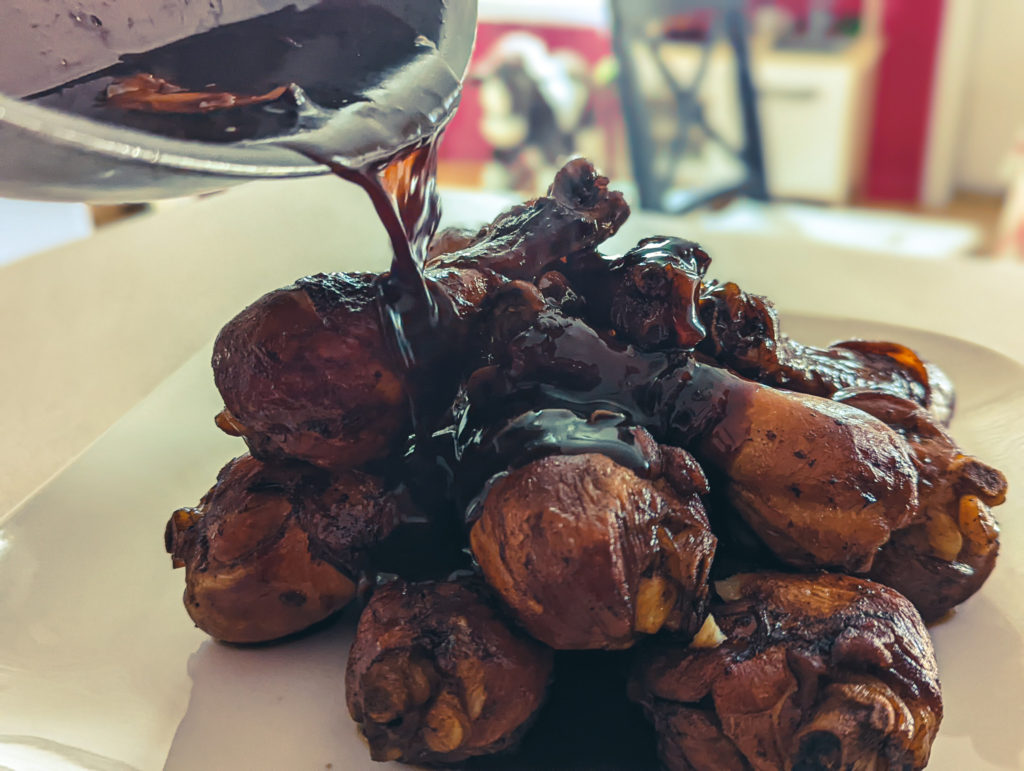
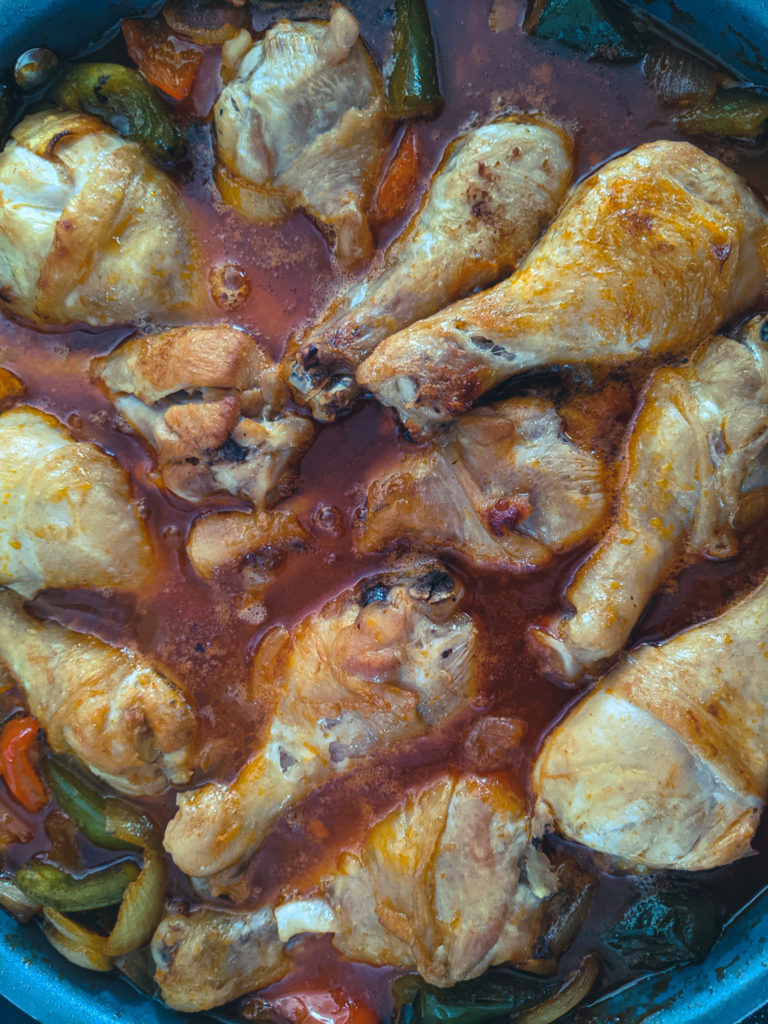
After the chicken stock has boiled for three minutes, put the pan in a 350°f oven for twenty minutes. Take the chicken out of the oven, flip it and put it back in the oven for another ten minutes or until the chicken is cooked. Take the chicken out of the sauce and set it on a serving platter. Put the pan on high heat and boil until the sauce is thick. A line drawn on the bottom of the pan should stay for at least two seconds. Pour the sauce over the chicken and serve.
The Wrap-Up
Molasses Balsamic Glazed Chicken is a tasty way to transform that boring pack of chicken into something exceptional. It’s sweet. It’s sour; it has depth and richness. What more could you possibly want? Try it for yourself, and if you enjoy it, remember to return and leave a rating on the recipe and share it with your friends.
That does it for today but thank you for coming. I hope you enjoyed the post. And, if you haven’t already, remember to sign up to my newsletter at the bottom of the page to get exclusive recipes, cooking tips, behind-the-scenes stories etc., in your inbox once a month. Have a great week and a fantastic weekend! I’ll see you right back here next Thursday.
Molasses Balsamic Glazed Chicken
Molasses Balsamic Glazed Chicken is a little sweet, a little tart, and full of flavour. It is a great way to take a pack of chicken and make it into something special.
Pat the chicken dry and season with salt and pepper.
Heat a large skillet over medium-high heat and add the oil.
Sear the chicken on all sides until deep golden brown.
Add the garlic and saute for 1 minute.
Add the molasses and balsamic vinegar and cook until the sauce is thick enough that a line drawn on the bottom of the pan stays for at least 1 second.
Add the stock, bring to a boil, cook for 3 minutes on high heat, and then put the pan in the oven at 350°f for 20 minutes.
Remove the chicken from the oven, flip and put it back in the oven for another 10 minutes.
Once the chicken is cooked, put it on a platter. Put the pan back on the stove on high and bring to a boil. Cook the sauce for 2 to 3 minutes or until thick. Pour the sauce over the chicken and serve.
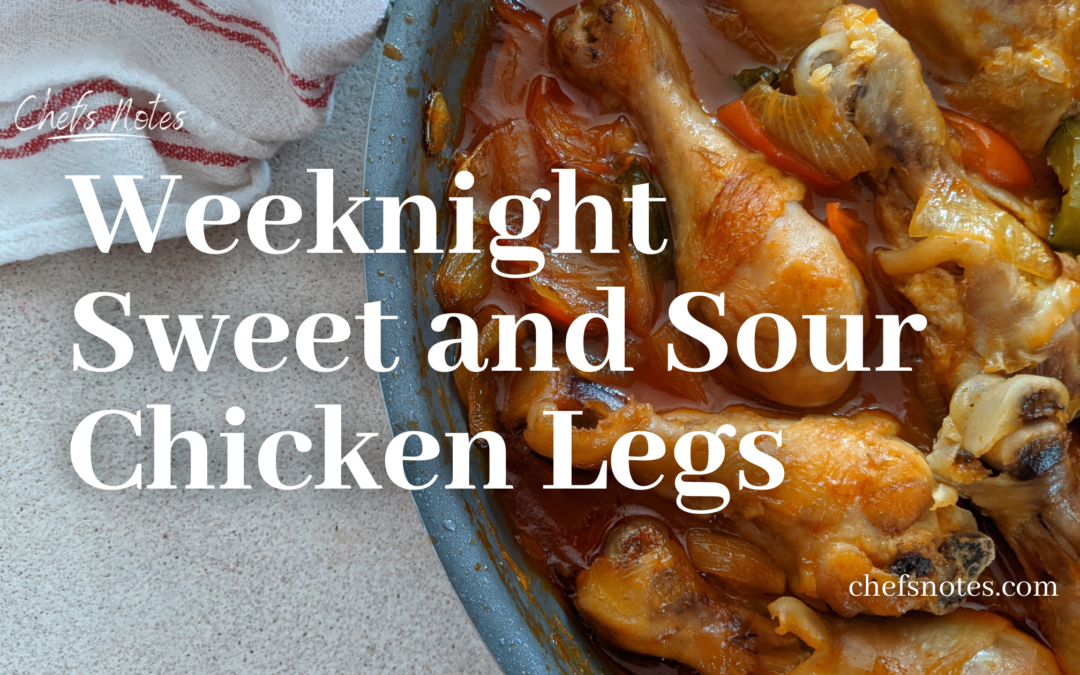
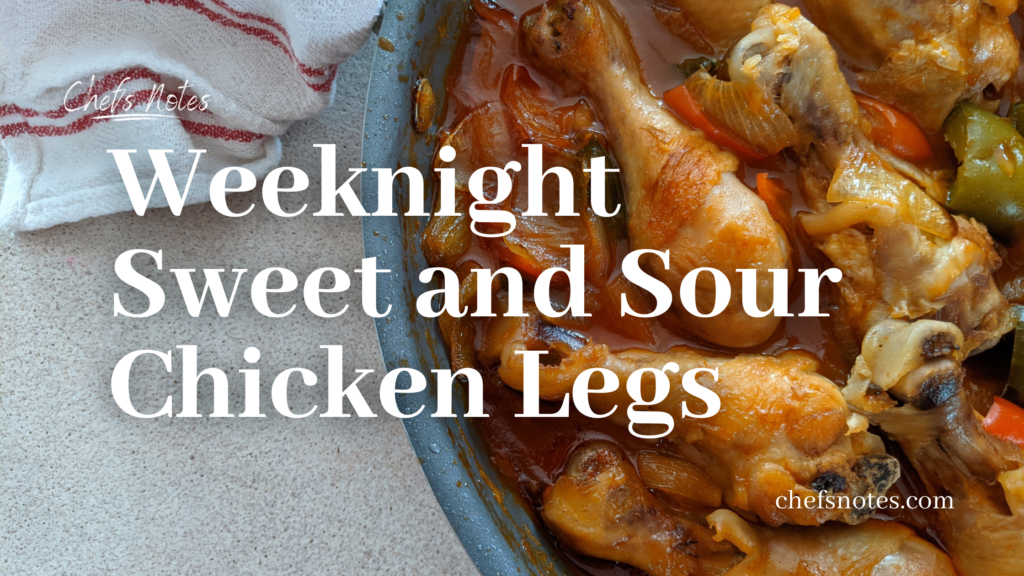
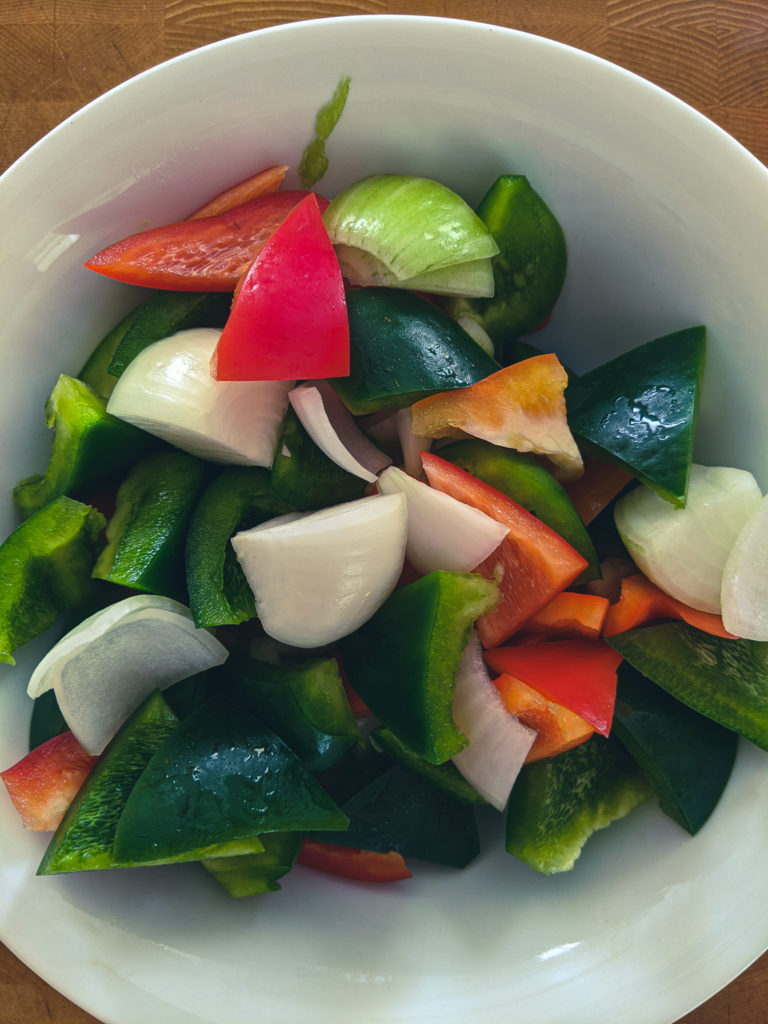
Are you looking for the perfect weeknight meal? Do you want to change up your usual chicken recipe? Are you in need of a delicious recipe that will satisfy even the pickiest eater? You may have just found what you’re looking for. This Sweet and Sour Chicken Leg recipe comes together in less than an hour. It is a great way to jam a bunch of flavour into some chicken legs. And it tastes great. That sounds like a win, win, win to me. Alright, enough chit-chat, let’s get cooking! You can find the recipe directly below, but keep reading for a more detailed explanation.
Weeknight Sweet and Sour Chicken Legs
This recipe takes about 45 minutes to make from start to finish. A lot of that time is passive, meaning you don't have to do anything but wait. That makes this Sweet and Sour Chicken Leg recipe perfect for any weeknight meal.
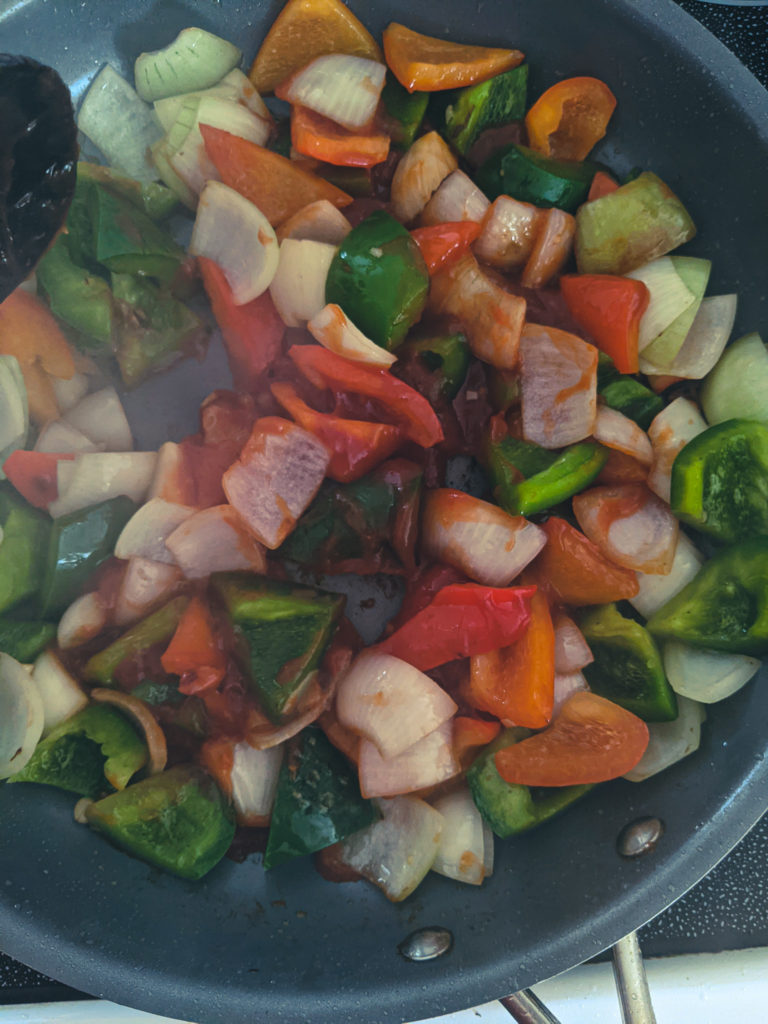
Heat a large skillet over medium-high heat. Add the oil and the chicken. Sear the chicken until browned. About 3 minutes per side.
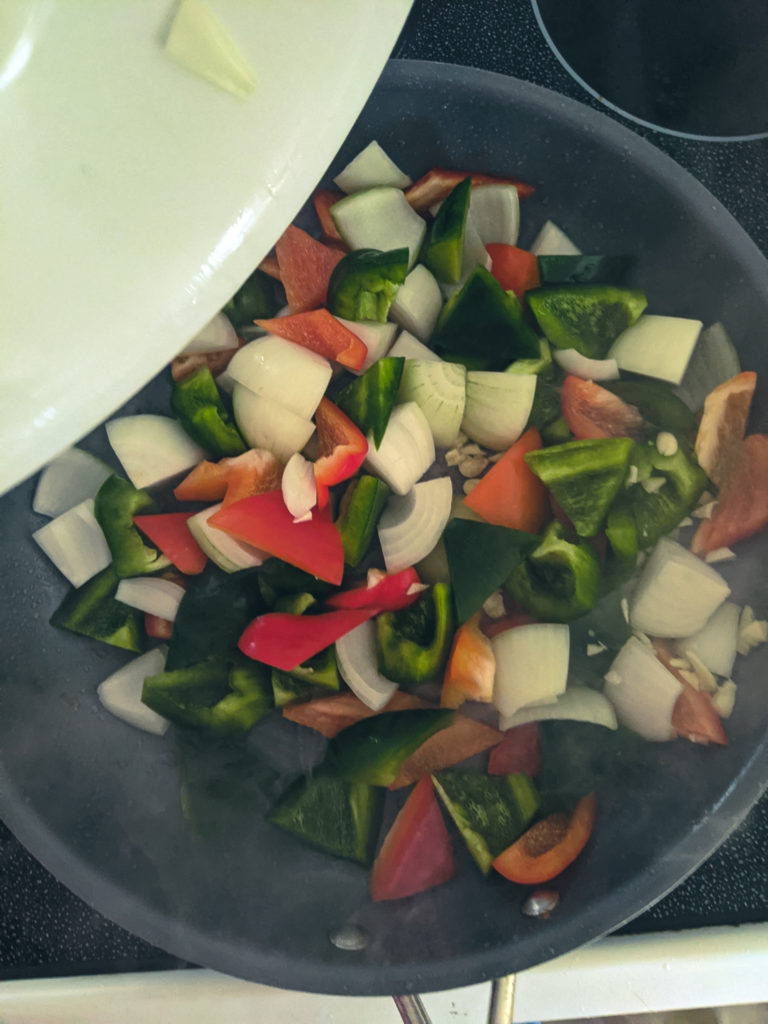
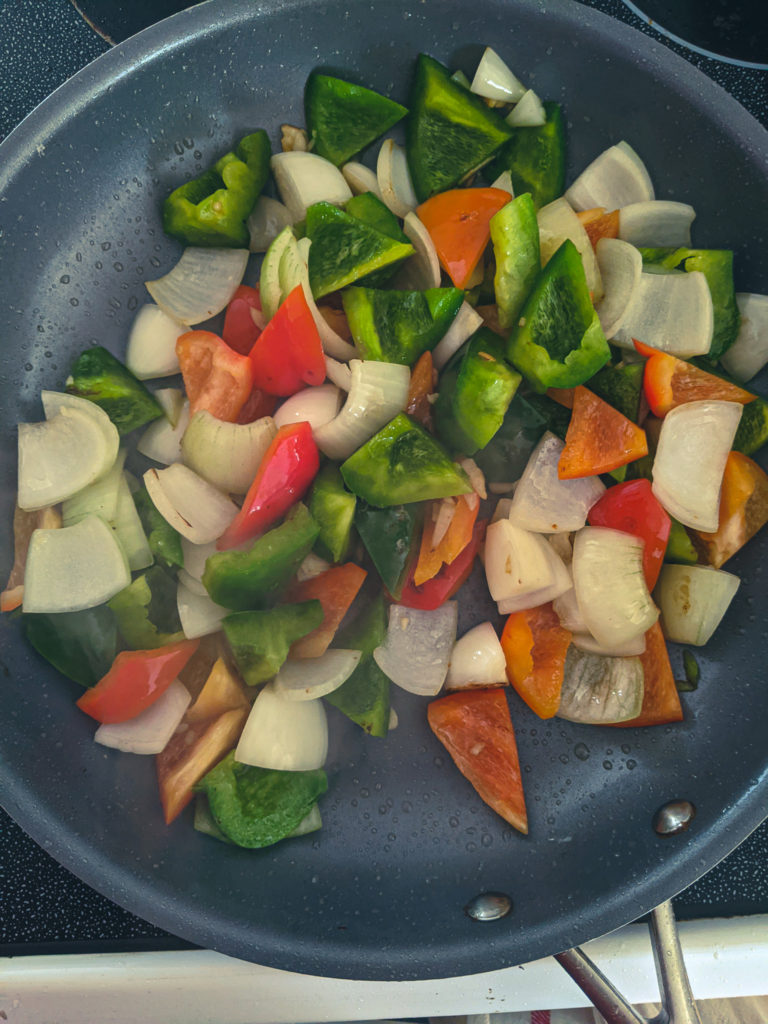
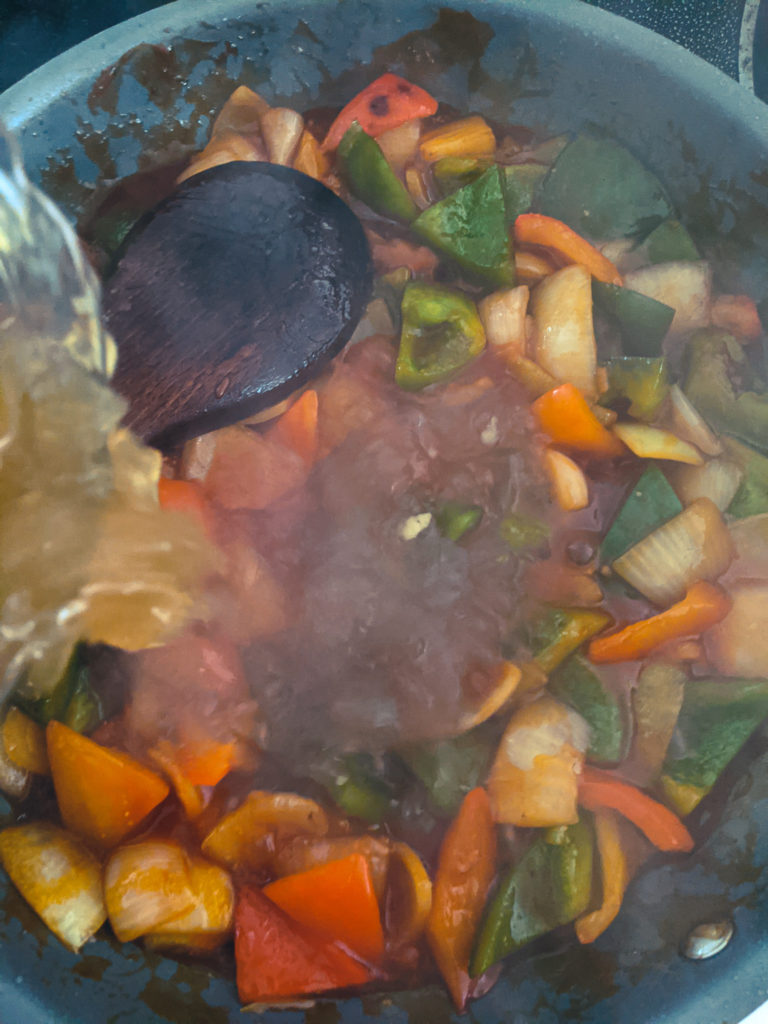
Remove the seared chicken from the pan and set it aside. Drain the excess fat out of the pan and add in the bell peppers, onion, and garlic. Cook for 5 minutes.
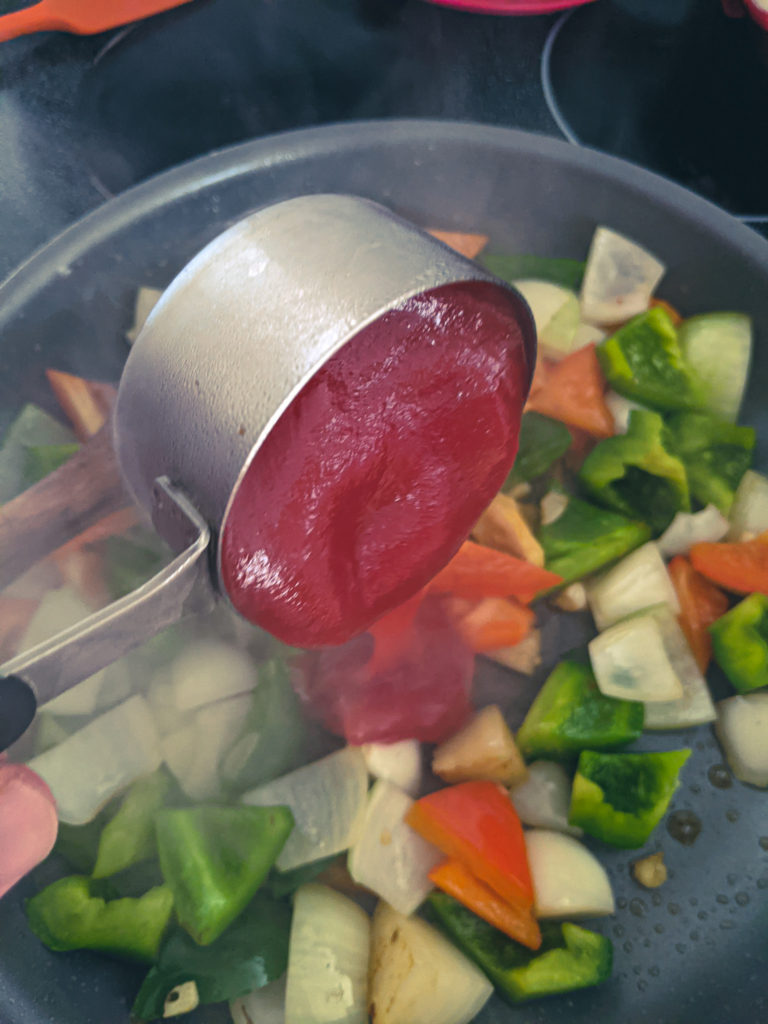
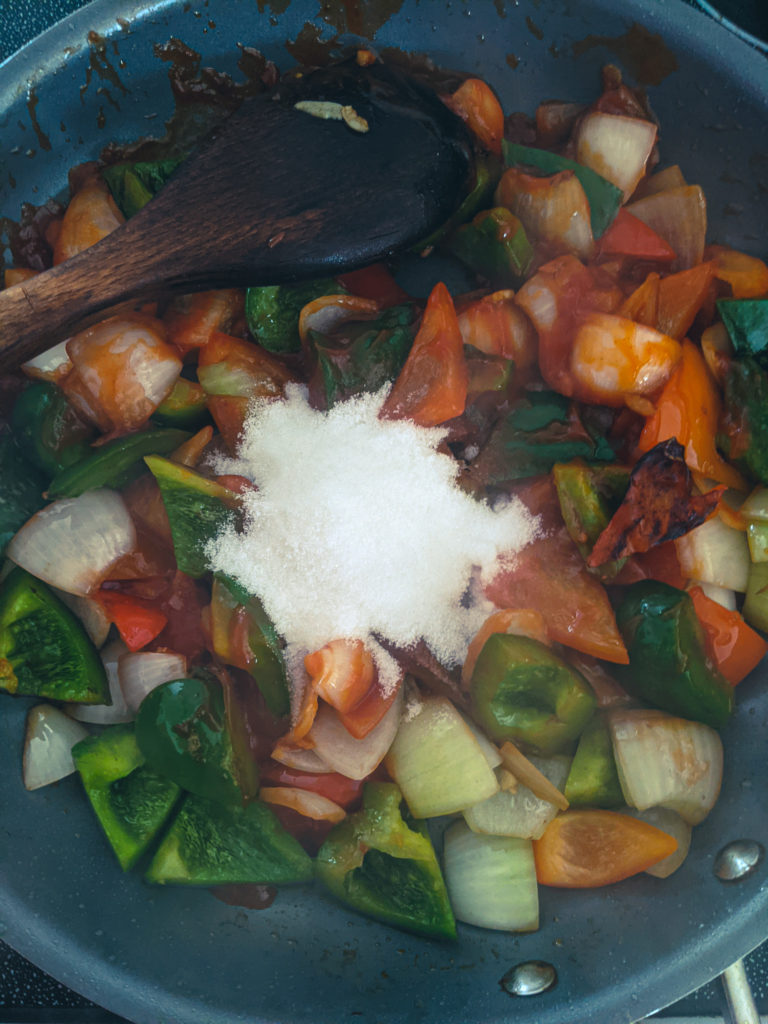
Add the ketchup to the vegetables and sauté for 1 minute.
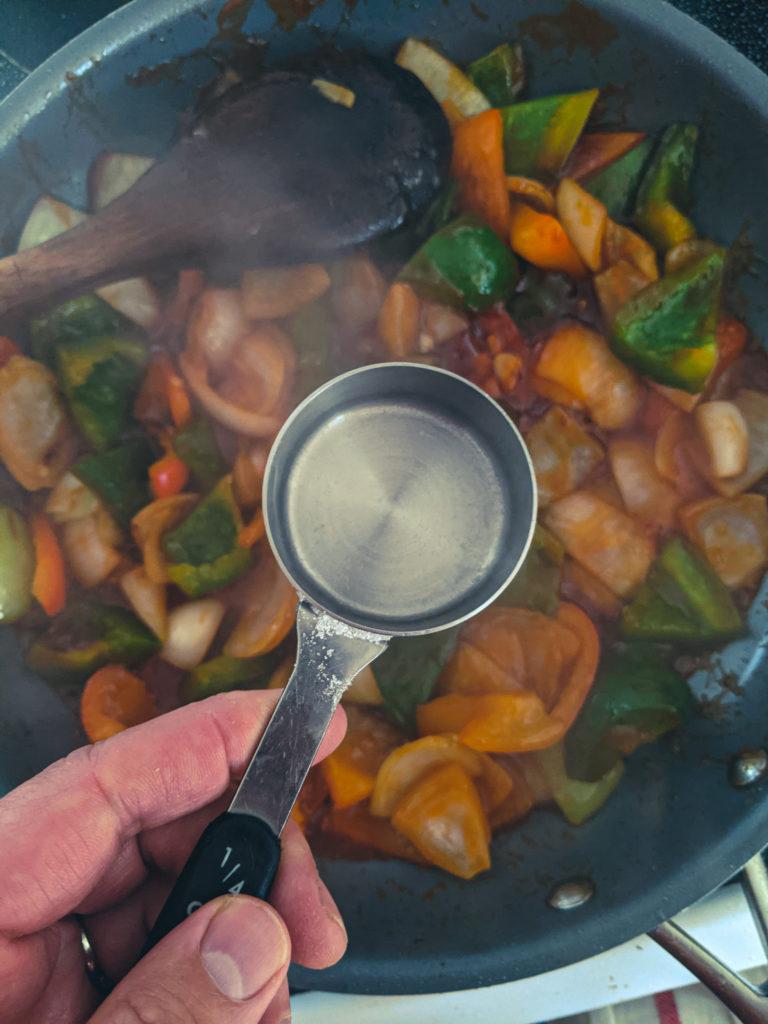
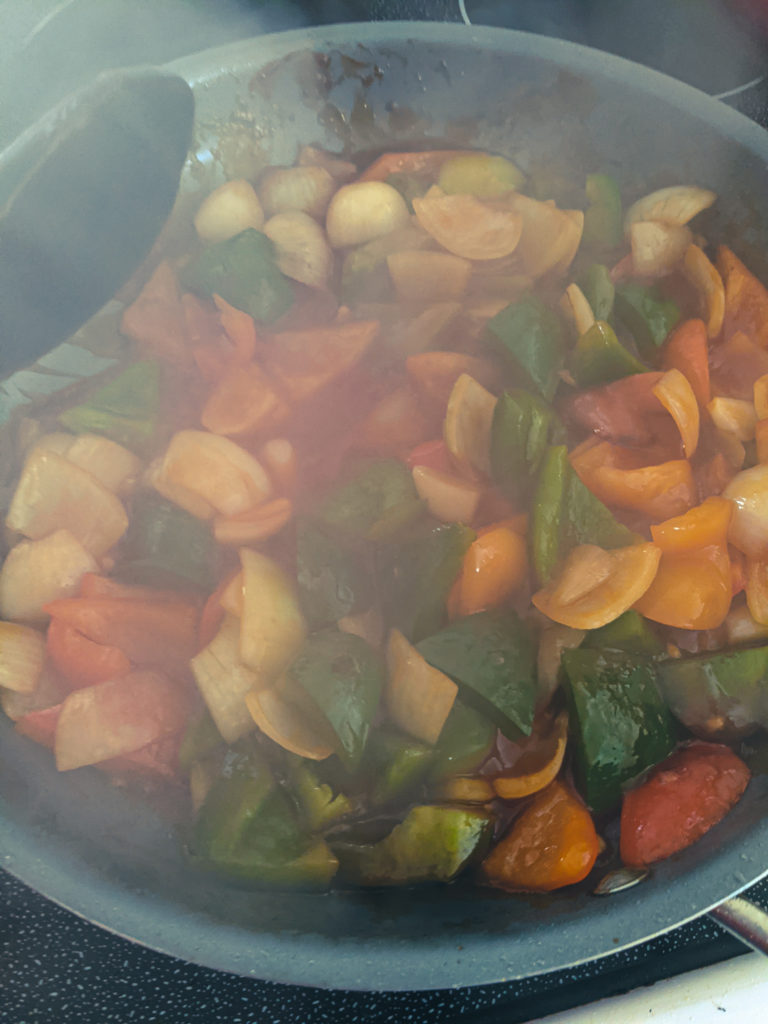
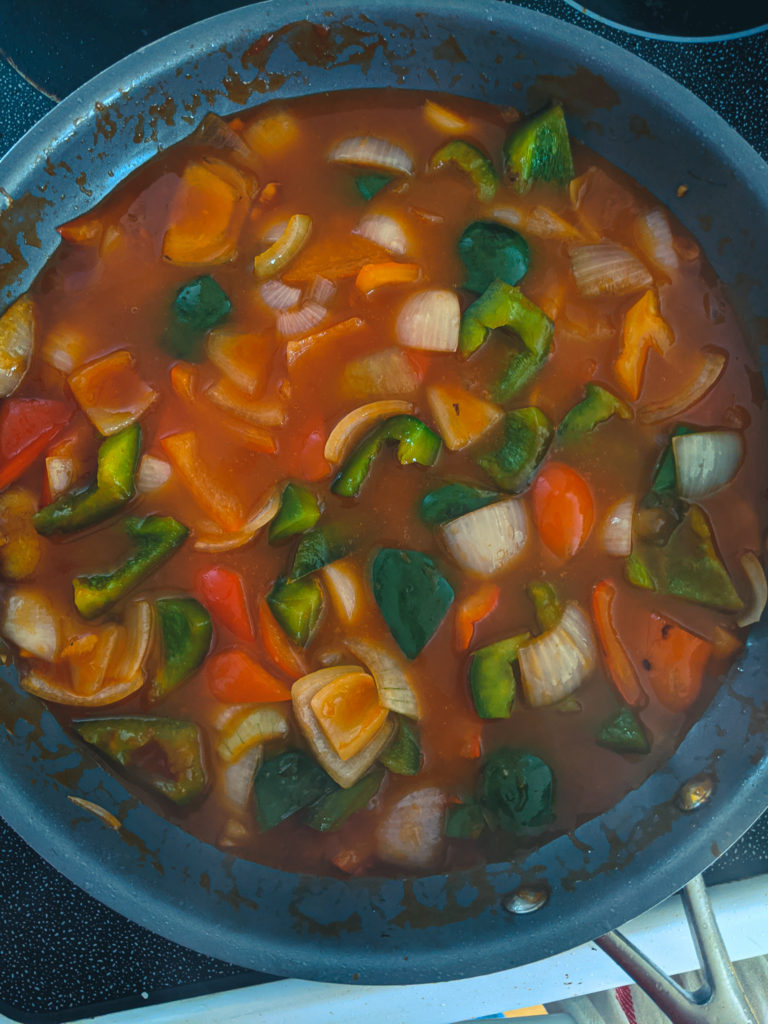
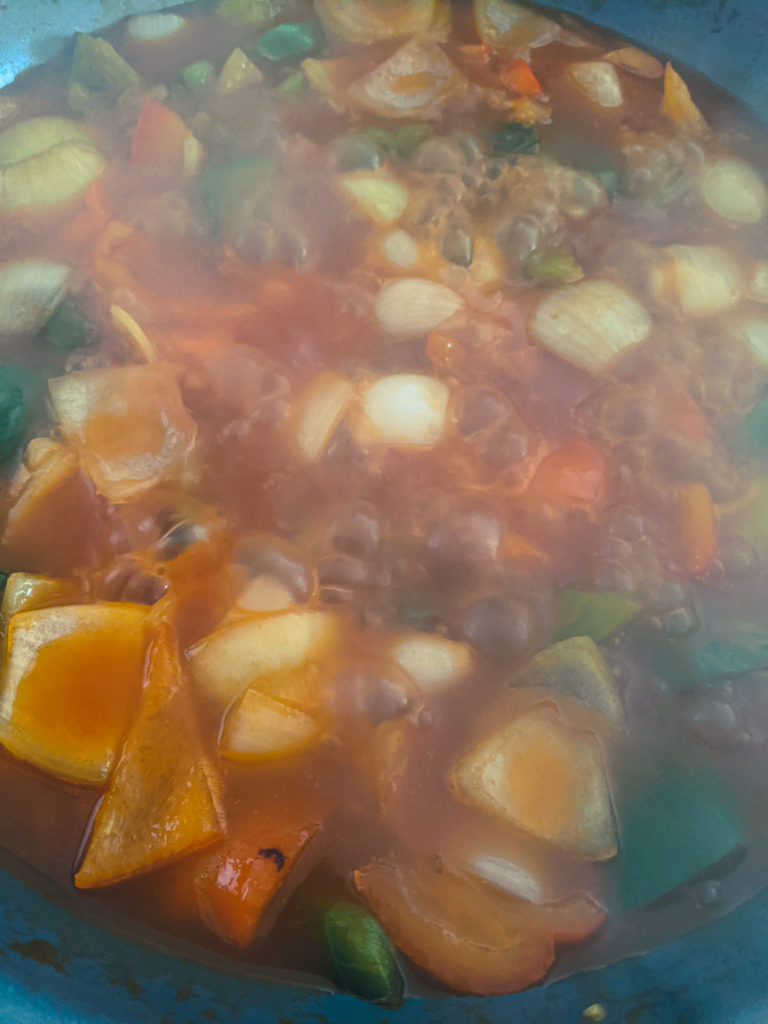
Pour the vinegar, sugar, salt, and chicken stock into the skillet and bring to a boil.
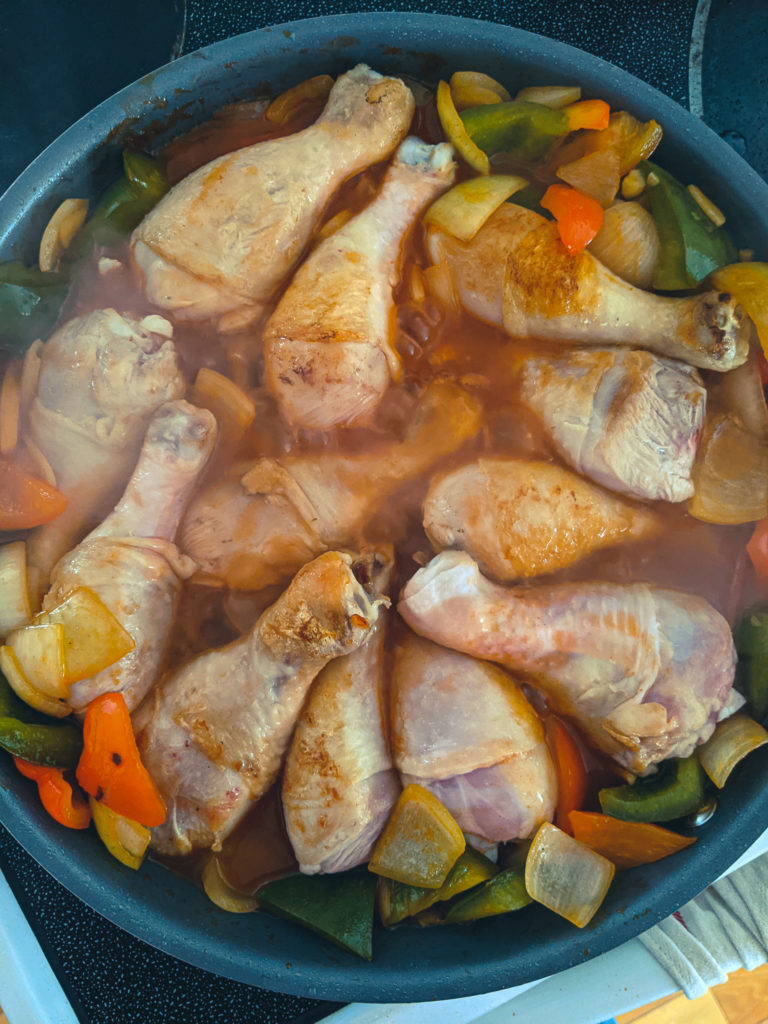
Return the chicken to the pan, bring it back to a boil, then put it in the oven for 15 minutes.
After 15 minutes remove the chicken from the oven, flip the legs, and put them back in the oven for an additional 10 to 15 minutes or until the chicken is cooked.
Take the chicken out of the oven, and serve with rice.
Preparing The Sweet and Sour Chicken Leg Ingredients
Vegetables
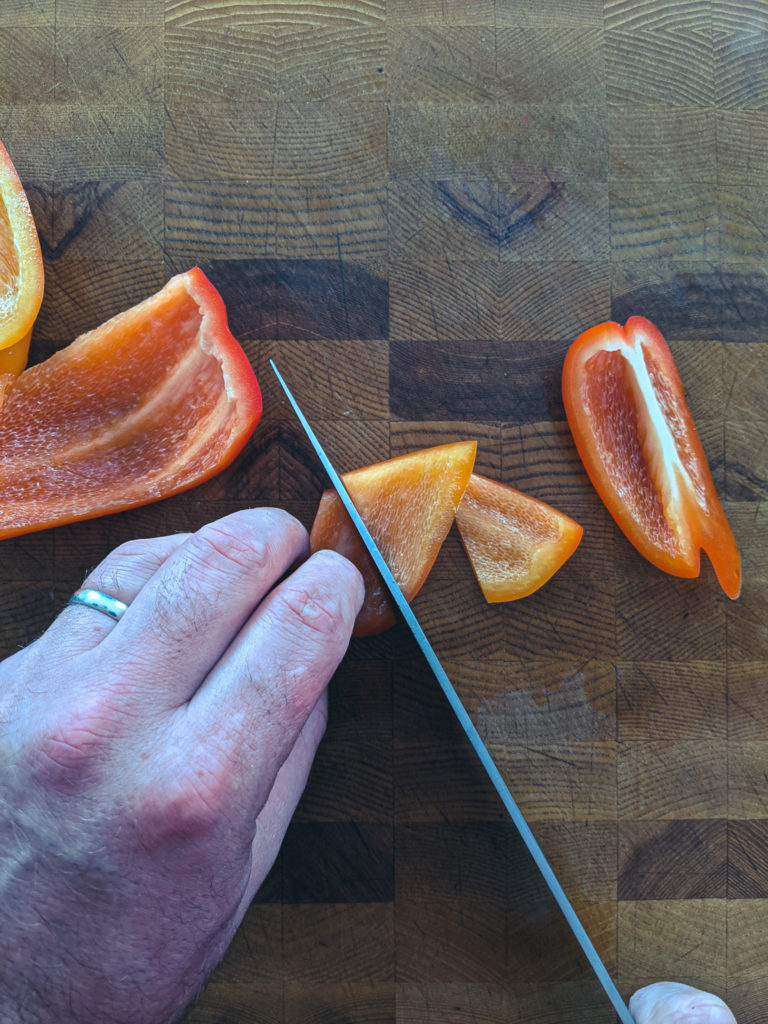
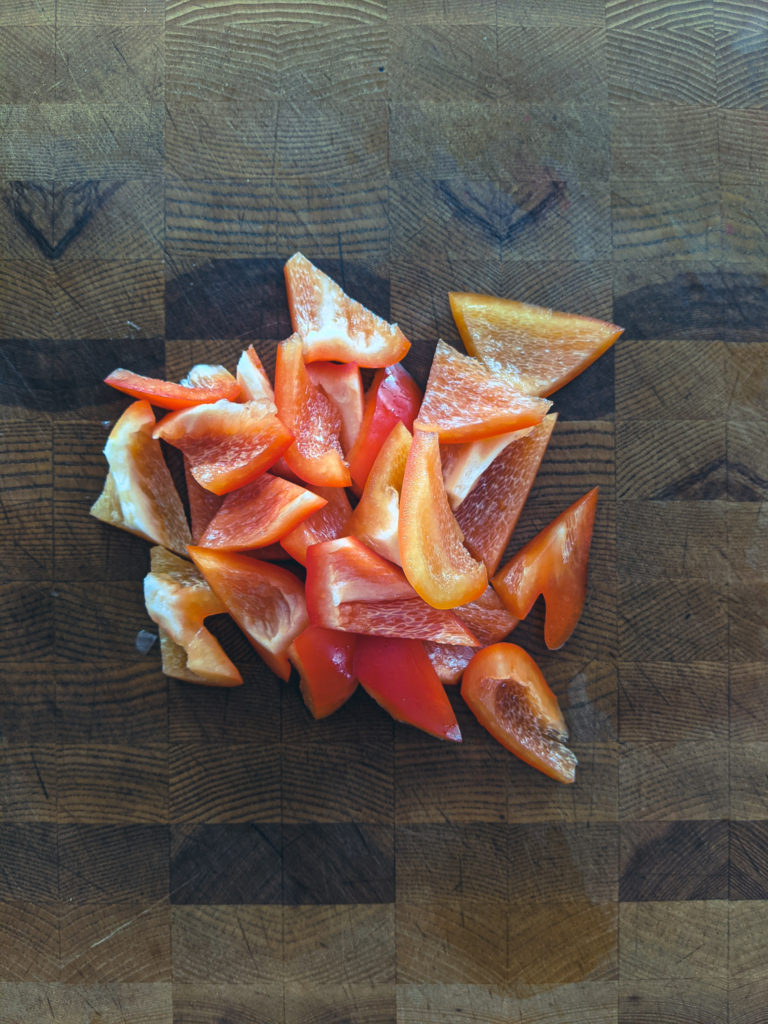
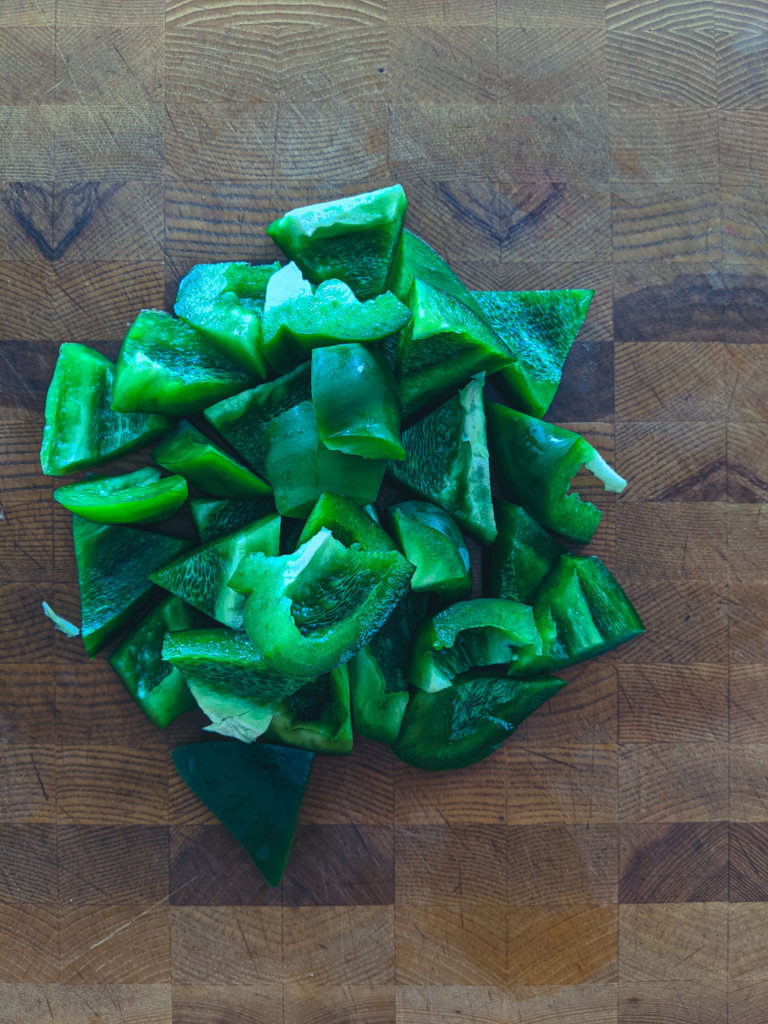
The vegetables used in this Sweet and Sour Chicken Leg recipe are red and green bell pepper, onion, and garlic. Cut the bell peppers and onion into pieces that are about the width of your thumb. For the peppers, I like to cut them into thumb-width pieces, then do an alternate angle cut, creating a diamond pattern. You don’t have to do this, but it adds to the visual appeal.
Garlic
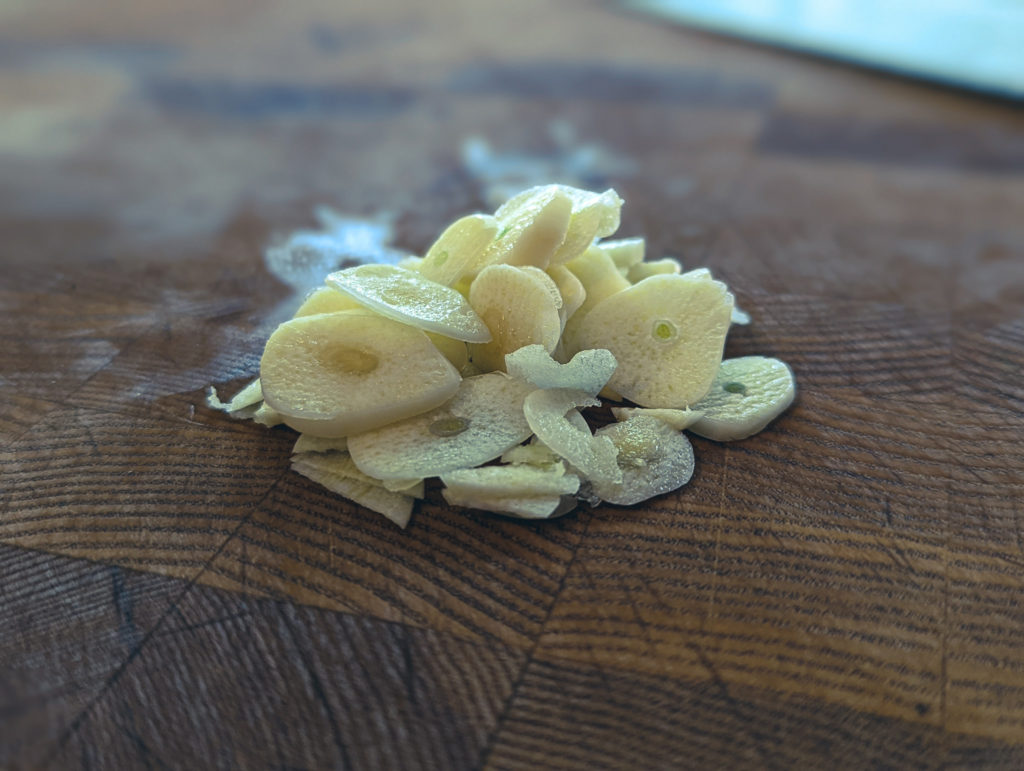
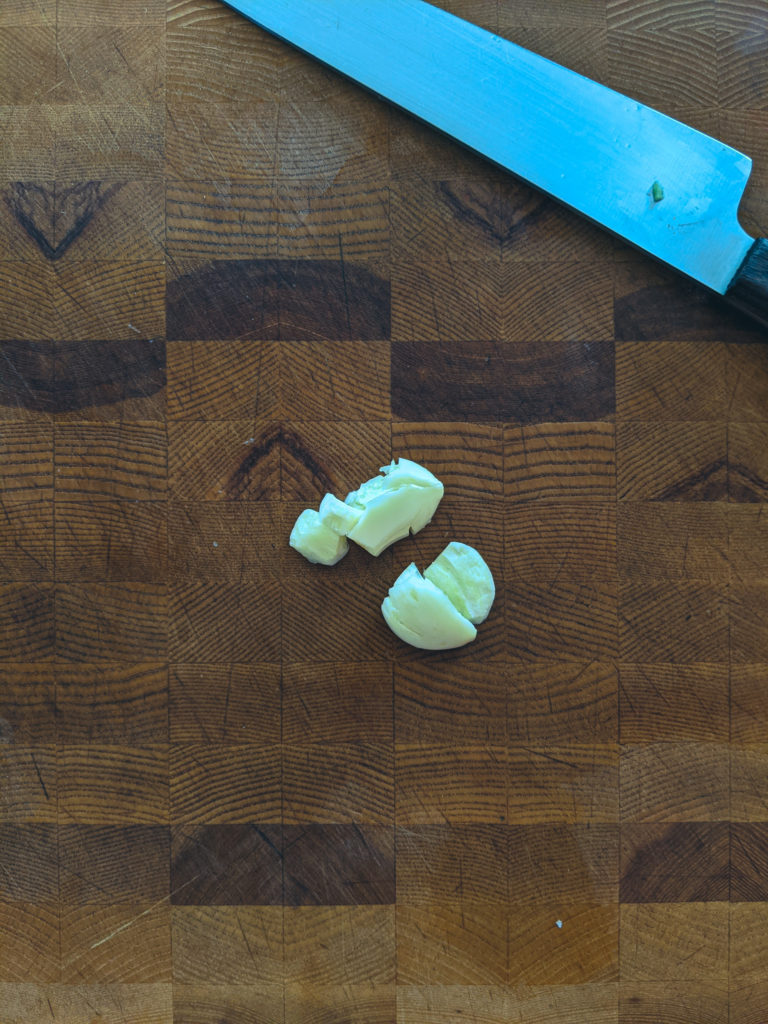
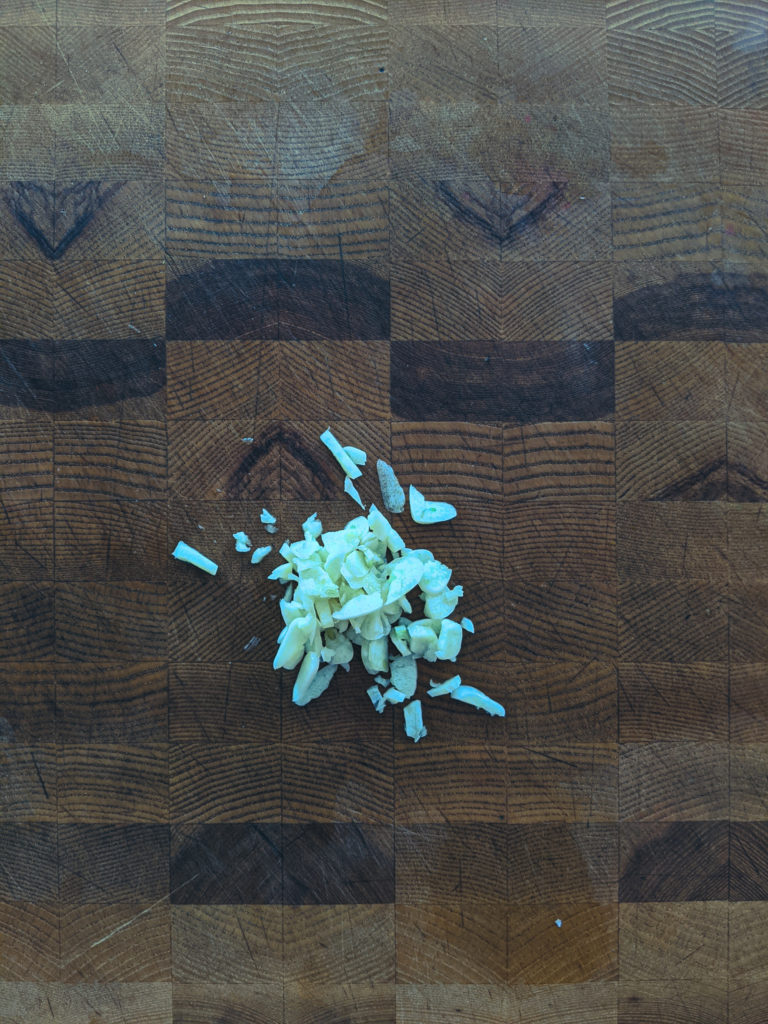
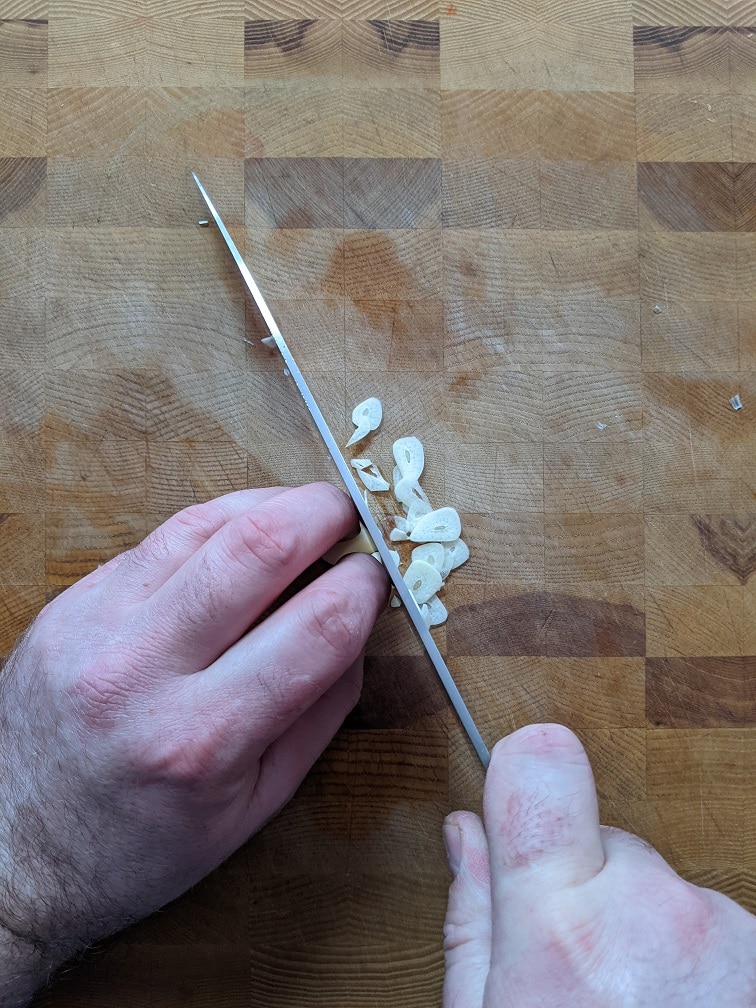
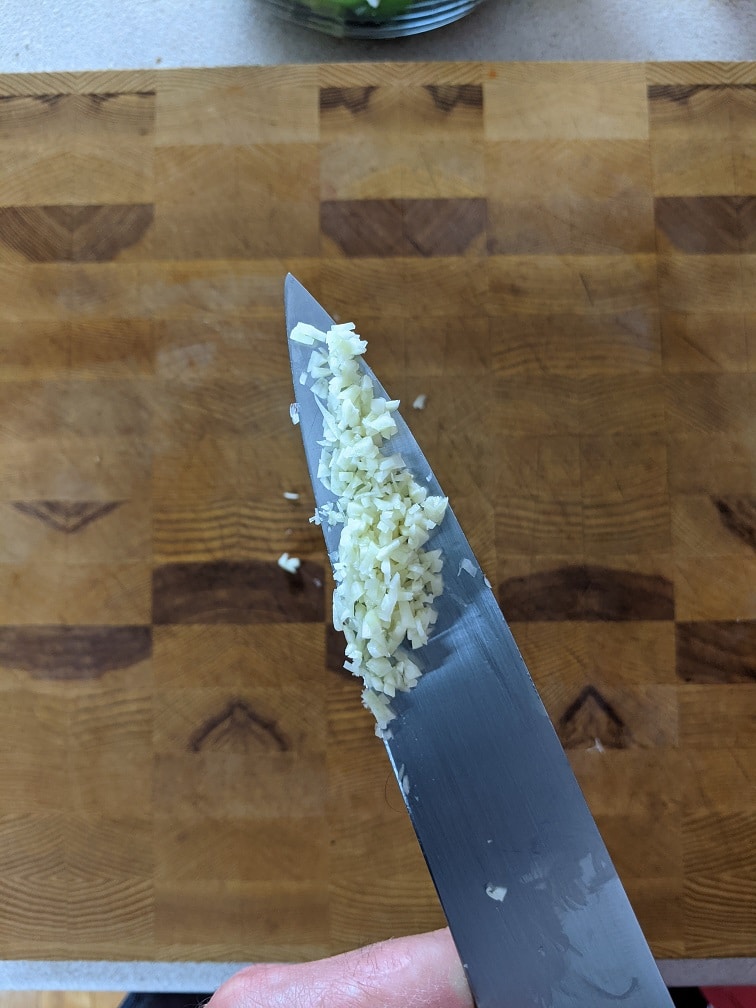
To prepare the garlic, remove the peel by cutting off the stem and gently crushing the cloves with the side of your knife. Pull the peel away and discard. Cut the garlic lengthwise into three or four pieces, then slice those pieces across as thinly as you can. Or…just cut the garlic as fine as you can. It doesn’t really matter that much.
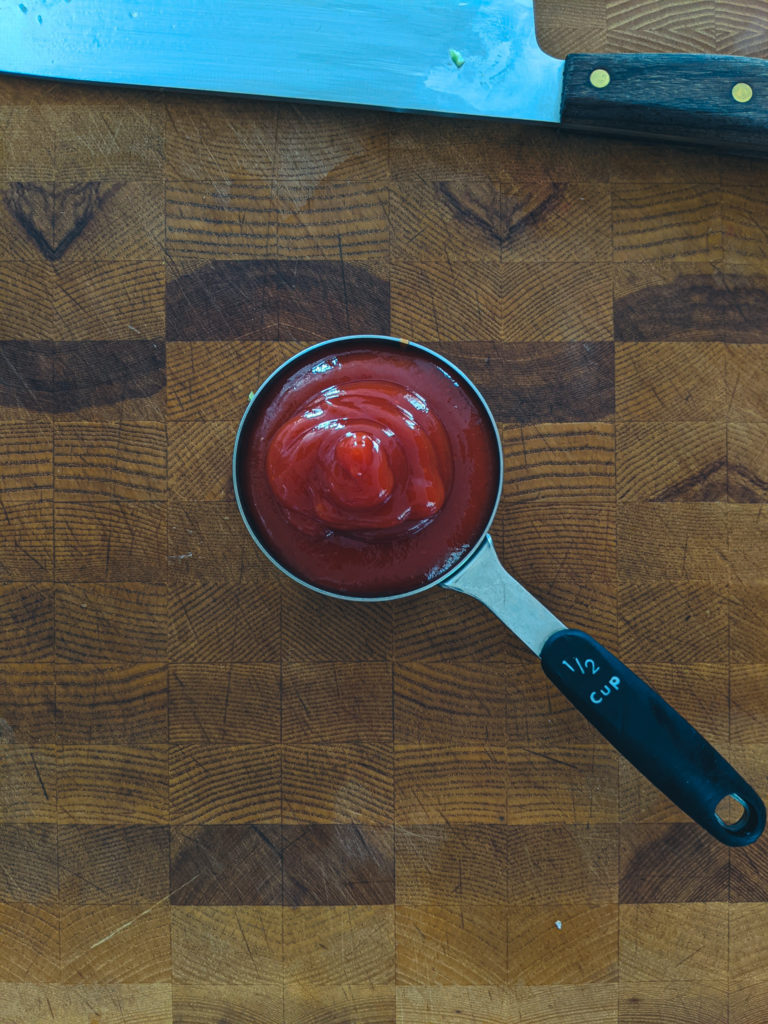
Sweet and Sour Sauce Ingredients
The ingredients for the sweet and sour sauce are ketchup, sugar, white vinegar, and chicken stock or water. If you prefer a thicker, more traditional Sweet and Sour Sauce, you can also add 2 teaspoons of cornstarch mixed with 2 tablespoons of cold water. I’ll explain in a few minutes when you would add that in if you were to use it.
Making Sweet and Sour Chicken Legs
Searing the chicken legs
The first step in making this Sweet and Sour Chicken Leg recipe is to sear the chicken. To do that, get a pan nice and hot, then add in a few teaspoons of oil (canola, grapeseed, etc.). Put the chicken in the pan and leave it alone, don’t even look at it for about 2 1/2 to 3 minutes. Then flip it over and do it again. For a better sear, pat the chicken dry with a paper towel first. Also, you may have noticed that I didn’t season the chicken with salt and pepper. The sauce has more than enough flavour. Salt and pepper are not needed. (That is probably the only time in my life I’ll say/write that.)
Sautéing The Vegetables
Once the chicken legs are browned, remove them from the pan and set them aside on a plate or something. Pour all the oil out of the pan except for about 1 tablespoon. Add the bell peppers, onion, and garlic. Sauté for 3 to 4 minutes on medium-high heat until the onion softens and browns around the edges. DO NOT TURN THE HEAT DOWN!! You need that heat to make sure the vegetable juices don’t stay in the pan. Just keep the vegetables moving, and they won’t burn.
Making Sweet and Sour Sauce
After the vegetables get a little colour on them, you can add the ketchup into the pan. Cook the ketchup for about a minute, then throw in the sugar, vinegar, and a pinch of salt. Bring that to a boil, then add the chicken stock. Bring it back to a boil. If you are using cornstarch and water, you can add that now.
Finishing the Sweet and Sour Chicken Legs
Once the chicken sauce comes back to a boil, after the stock has been added, you can add in the chicken legs. Again, bring it back to a boil, then put the whole pan uncovered in a 375°f for 15 minutes. Then, take the chicken out, flip the pieces and put it back in the oven for another 10 to 15 minutes or until the chicken is cooked. Serve the Sweet and Sour Chicken Legs over rice, and you’ve got yourself a full meal just like that.
The Wrap-Up
Who said delicious had to be hard? Probably no one, but that doesn’t change the fact that delicious doesn’t have to be hard. What’s great about this Sweet and Sour Chicken Leg recipe, other than how tasty it is, is that you don’t have to use chicken legs. You can use chicken breast or thighs. You can use turkey, beef, pork, turkey, or chicken meatballs. Hell, throw in some tofu for a nice vegetarian meal. The point is, this recipe is versatile, so get cooking! Thanks for reading and subscribe below, so you never miss a post.
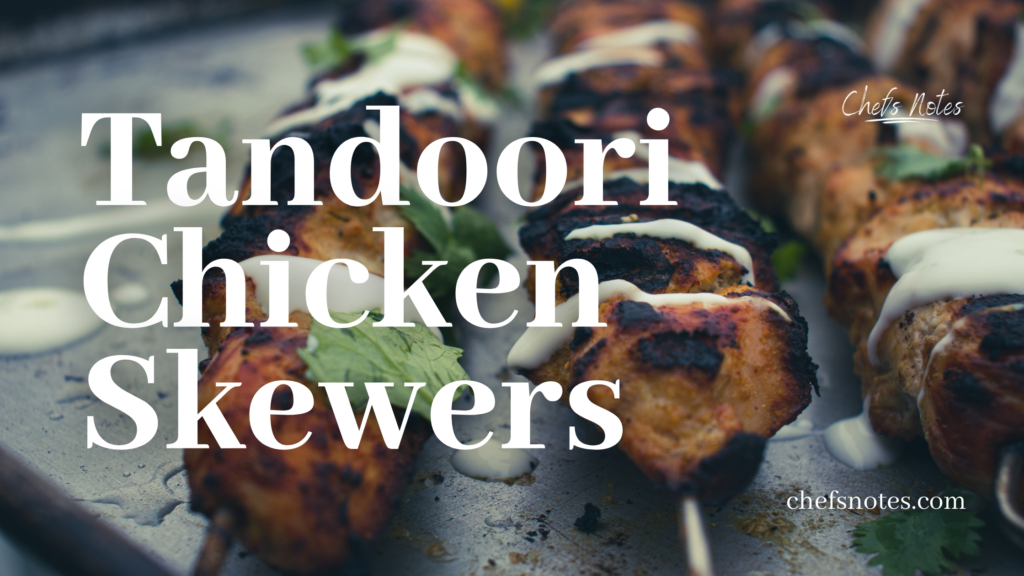
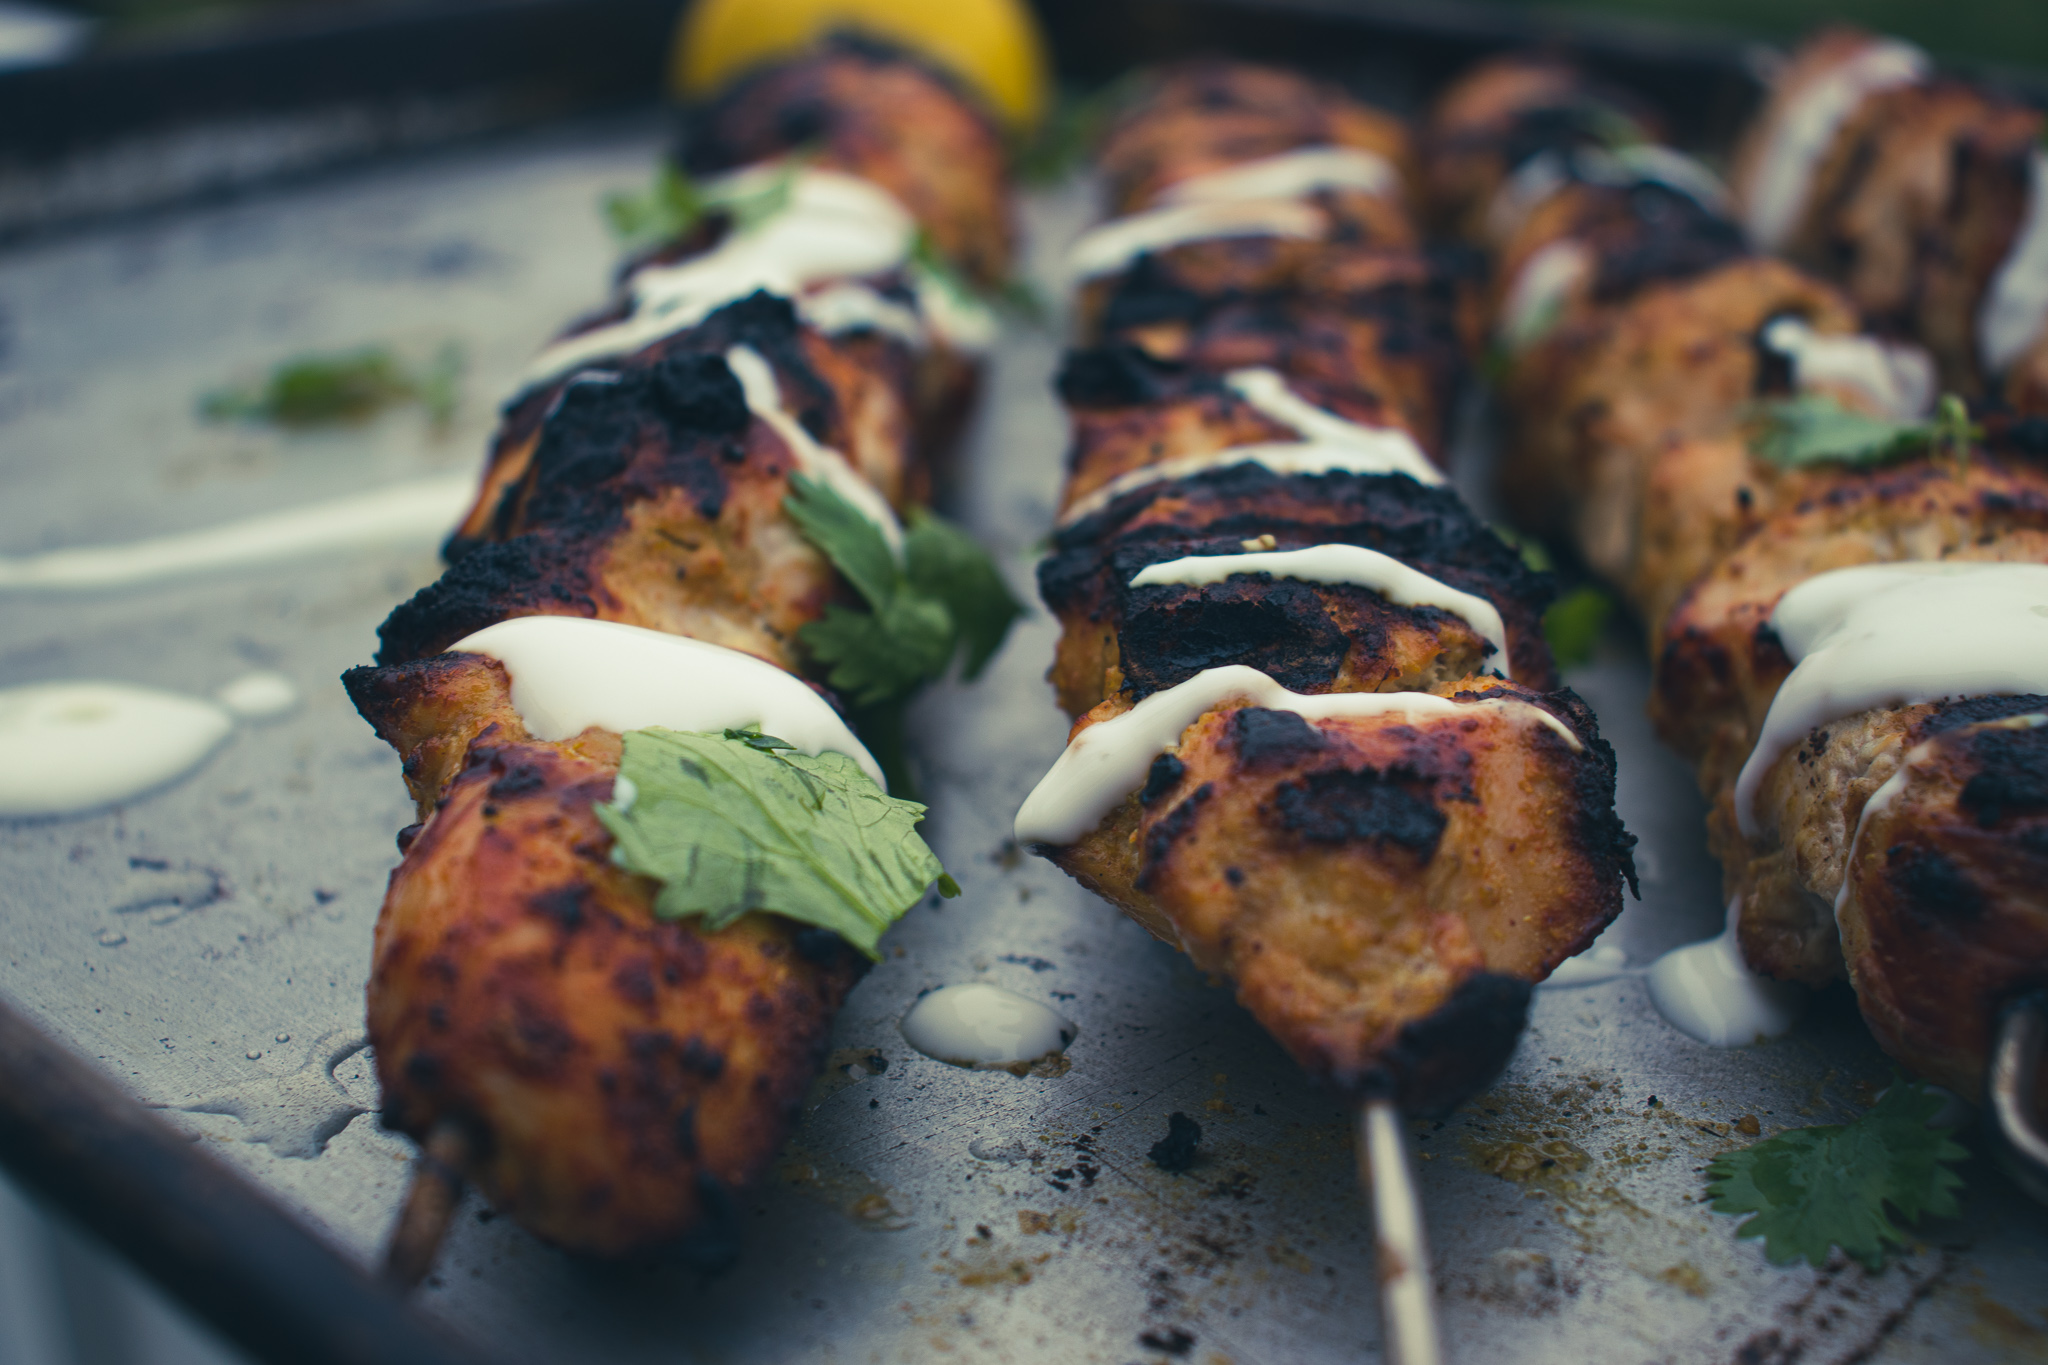
Here on the east coast of Canada, the grilling season is short. You have to make the most of it while you can. Becasue of that, it is easy to get stuck in a rut grilling the same things repeatedly. I hope to help you break free from that rut with this delicious and surprisingly simple Grilled Tandoori Chicken Skewer recipe. Tandoori Chicken is an Indian dish of chicken marinated in yogurt and spices and then cooked in a very hot clay oven known as a Tandoor. You don’t have a Tandoor oven. Neither do I. But, using a hot grill, we can create a very similar dish to what you’d find in an Indian restaurant.
Directly below you will find the written recipe. So, if all you want is the recipe, it is easy to find. If you want more detail, keep reading beyond the recipe for the full walkthrough. Either way, enjoy the post. Let’s get to it!
Grilled Tandoori Chicken Skewers
A staple of Indian restaurants the world over. Now you can make delicious Tandoori Chicken at home with this surprisingly simple recipe. Who knew it could be so easy?
The first step to making Tandoori Chicken is to make a marinade. This marinade is yogurt-based. The yogurt is seasoned with spices, ginger, garlic, and lemon juice. We’ll talk in a little more detail in a minute about the benefit of marinating in yogurt, but for now, let’s get to making the marinade.
Ginger and Garlic
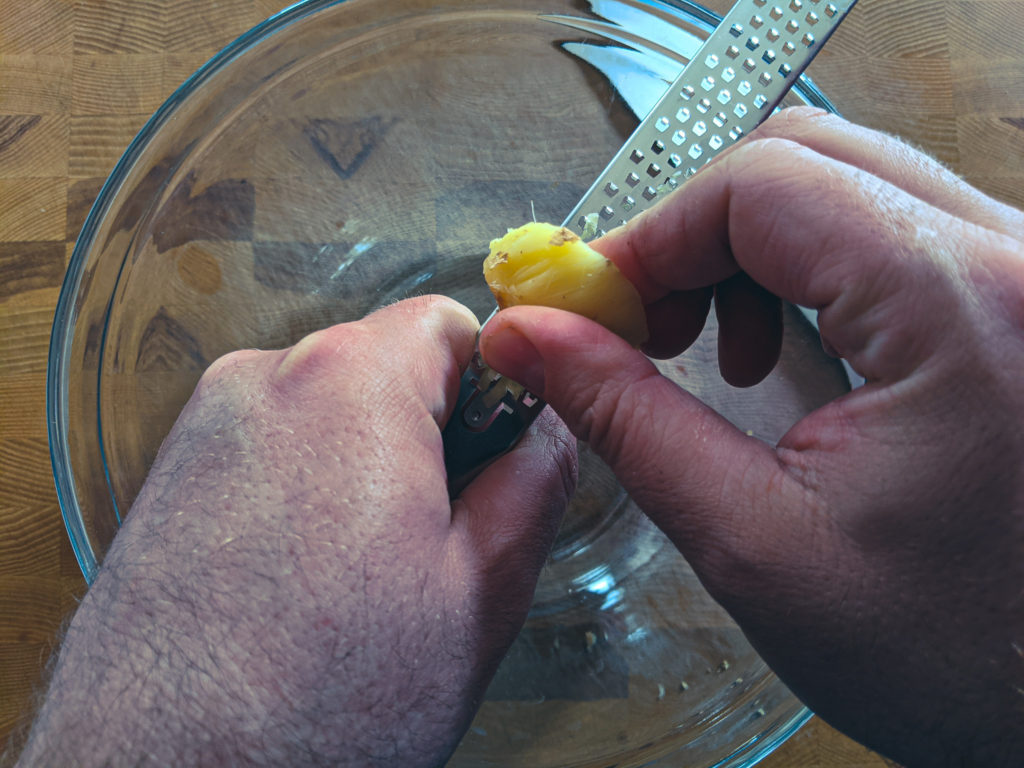
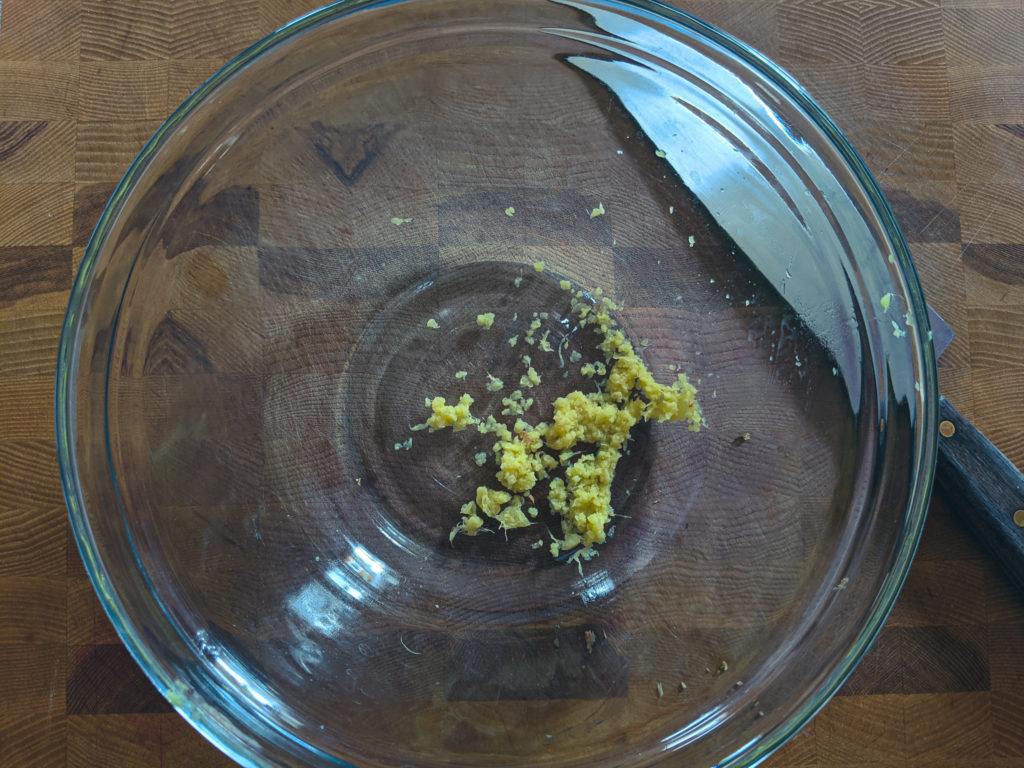
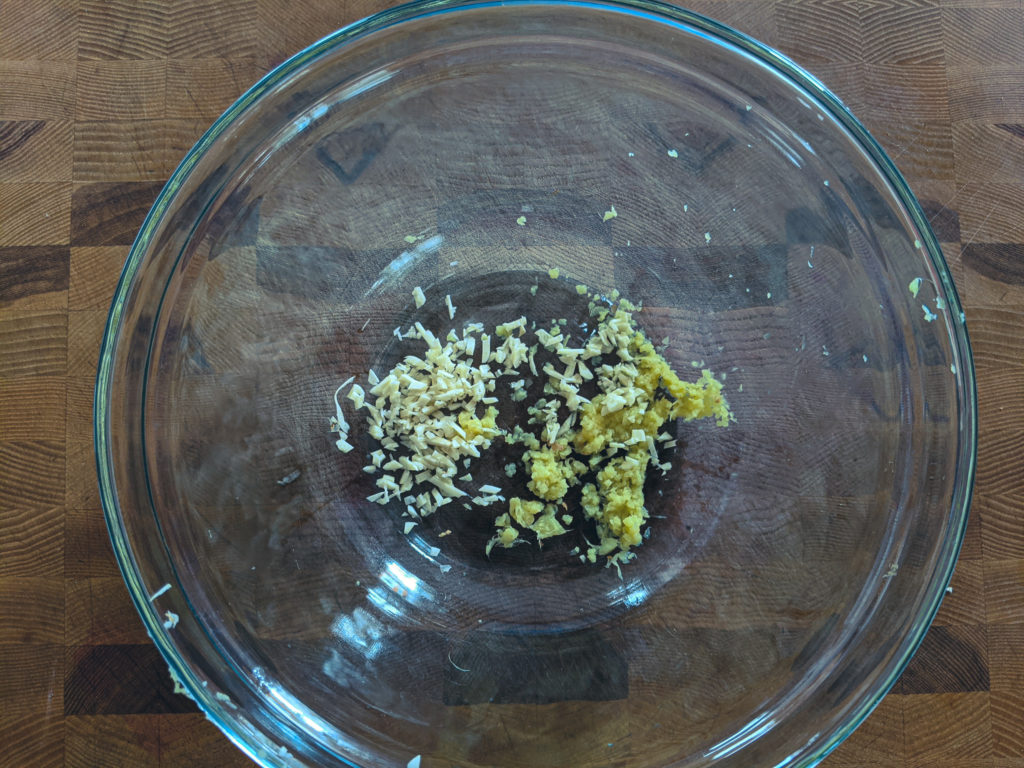
The marinade starts with ginger and garlic. These two ingredients are part of a quartet of ingredients that comprise the base of countless Indian dishes. The other two ingredients in the group are onion and chilli. If, for example, you want to make a curry, but you aren’t sure where to start. Purée an onion, a few garlic cloves, an equal amount of ginger, and green chilli. Sauté that mixture in a bit of oil or clarified butter, and you’ve got the base of your curry. From there, it’s just deciding what spices to use. You can read more about that in my post, The Basics of Curry. But I digress. For this Tandoori Chicken marinade, you will need two teaspoons each grated ginger and minced garlic.
Tandoori Spices
Garam Masala
Ginger and garlic make a great starting point for our Tandoori chicken marinade, but they need some help. That’s where the spices come in. The first spice is actually a spice blend known as Garam Masala. I’ve talked about Garam Masala a lot in the past. So, I’m going to go deep on it now. To learn more about it and make it yourself take a look at this post about 5 Essential Spice Blends You Should Master.
Other Spices
The second spice is Kashmiri Chili Powder. This is a powder made from ground Kashmiri Chilies. Go figure. If you don’t have Kashmiri Chili powder, you can use half as much cayenne for the heat and the same amount of paprika for the colour. Rounding out the spices, we have cumin and coriander. These spices are found in Garam Masala, but I like to add a little more for a bit more flavour. Finally, add a bit of salt.
Yogurt and Lemon Juice
The two remaining marinade ingredients are yogurt and lemon juice. The lemon juice adds a little extra acidity and a fresh flavour. The yogurt is what really does the heavy lifting. I’m not really sure of its science, but there is an enzyme in the yogurt that helps keep the meat moist, and that adds a lot of flavour. Mix the yogurt and lemon juice with the other marinade ingredients, and you’re good to go.
What yogurt to use for your marinade?
Normally, I would recommend using a full-fat Greek yogurt, obviously with no flavourings added. However, I used a 0% fat Greek yogurt, and it worked very well. For any other cooking application, go with full fat. For this, it’s up to you.
Prepping the Chicken
Despite what I said in my post about how to grill chicken breast a few weeks ago, I used chicken breast for this recipe. Why? Because of the yogurt. The yogurt will help keep the chicken breast moist and tender. Plus, between the yogurt and spices, there is going to be loads of flavour. Having said that, if you want to use chicken thighs, go for it. You’ll be happy you did.
Cutting The Chicken Breast
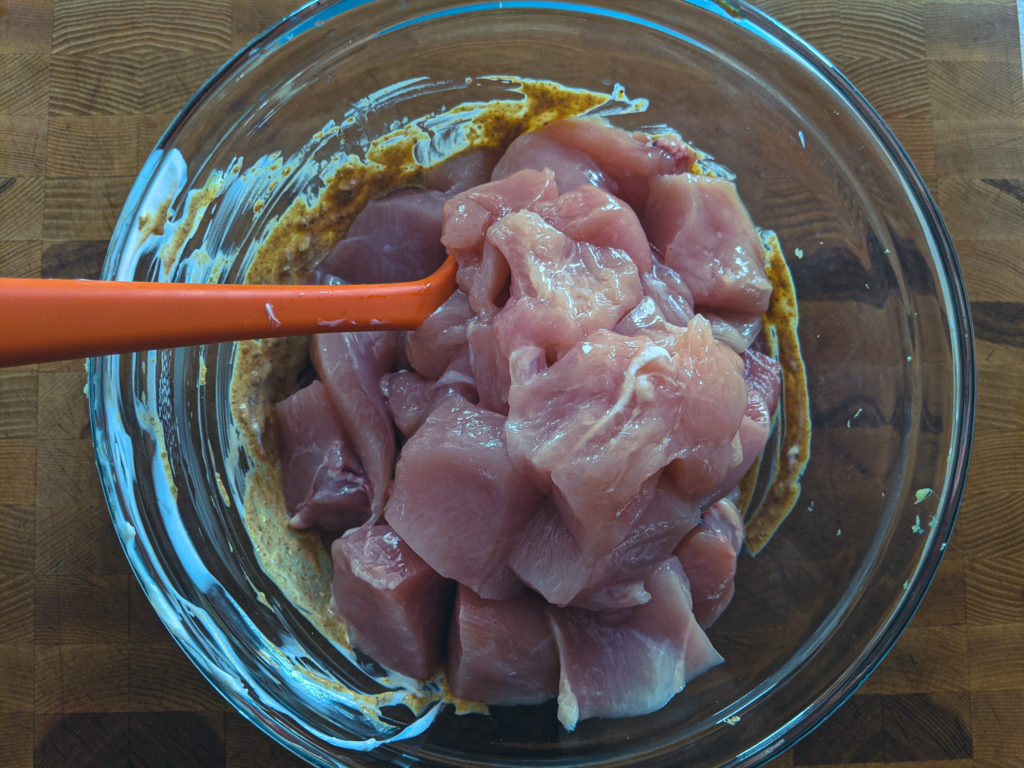
To prep, the chicken breast, cut it into evenly sized pieces. People often make a big deal about what size the chicken has to be cut to go on skewers. I’ll tell you right now that it doesn’t matter. The only thing that matters is that the chicken is all cut about the same size so that it cooks evenly. So, if you want to cut your chicken breast in strips, go for it. If you want to make really small cubes, so the skewers cook quickly, again, go for it. I went for cubes about 1-inch square, but you do you.
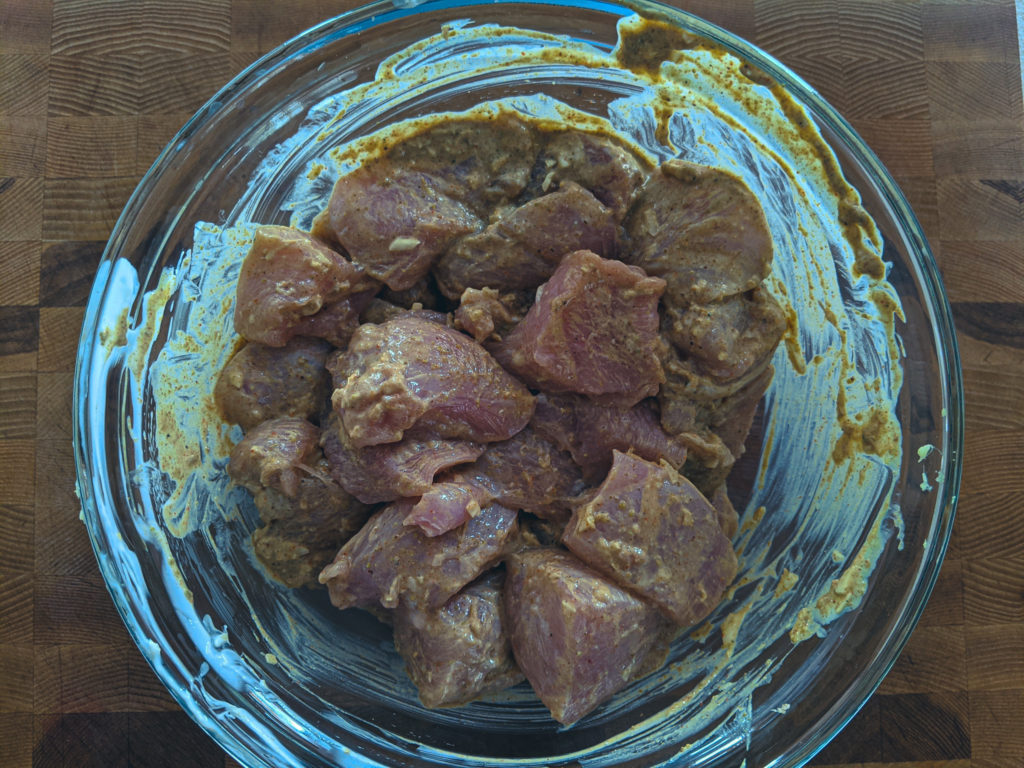
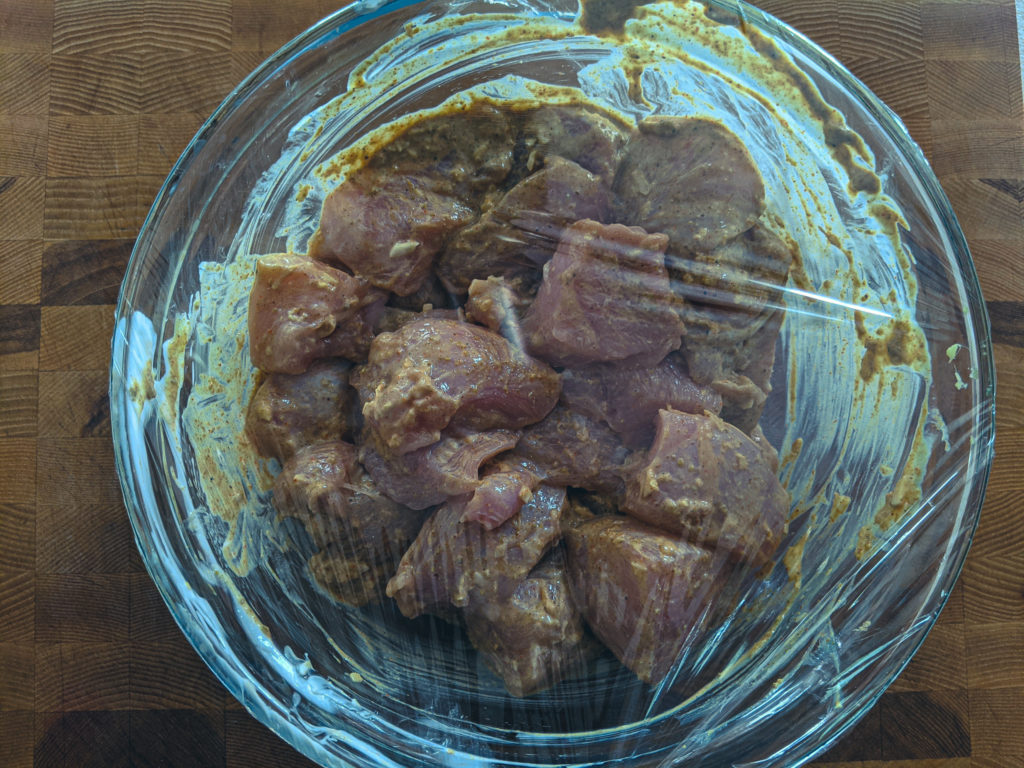
Marinate The Tandoori Chicken
Once the chicken is all cut, add it to the marinade. Make sure to stir the chicken well to ensure that every piece is evenly coated in the marinade. Cover the bowl with plastic wrap and put it in the fridge for at least two hours. You can let this marinate overnight, but you don’t really want to go much longer than that. The yogurt will start to break the chicken down, and the lemon juice will start to cure it, making it tough on the outside and mushy inside.
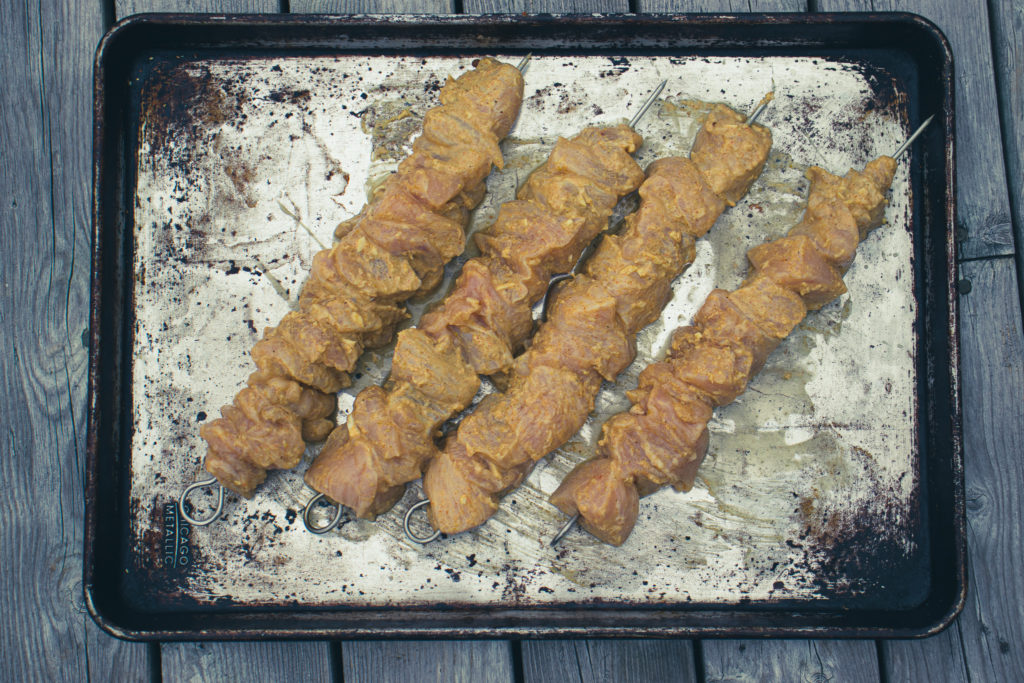
Put It On A Skewer
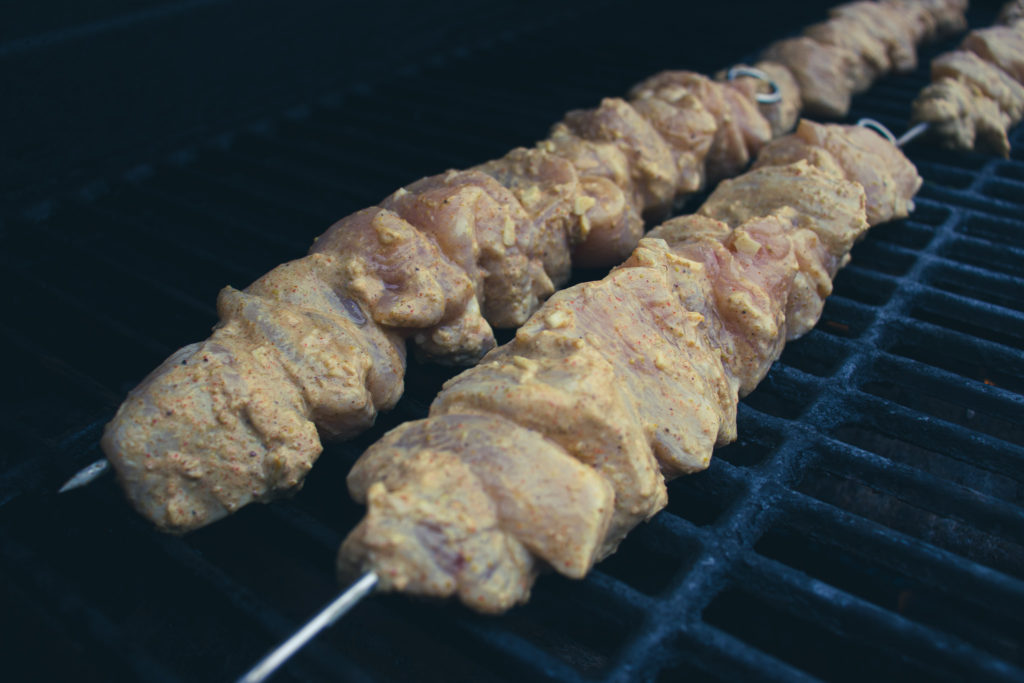
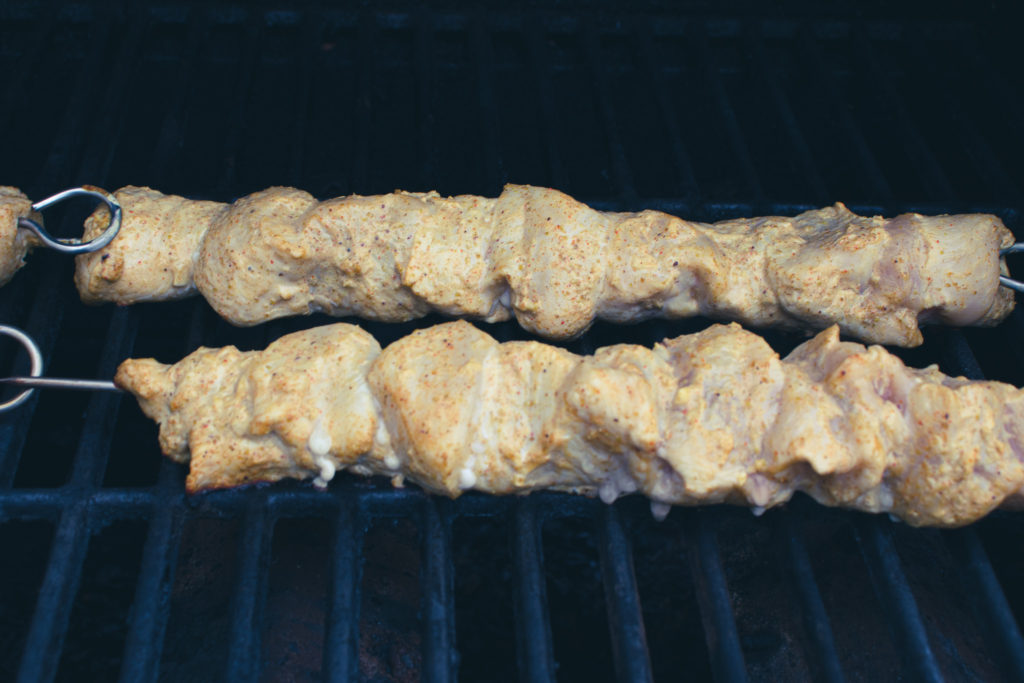
Once the chicken has had enough time to marinate, put it on a skewer. I’ve been making a lot of skewered foods lately, so I went out and bought these nice metal skewers. If you are using wooden ones, make sure to soak them in water for an hour before skewering the chicken. My skewers are 12-inches long, which made them big enough to hold one chicken breast each. If you use smaller skewers, you will have more skewers. That’s math.
How To Grill Tandoori Chicken Skewers
Before you start skewering your chicken, turn on your grill and get it hot. Essentially, put it on high, and leave it alone while you skewer the chicken. When I talked about grilling chicken breast a few weeks ago, I said that as long as you let your grill get hot and give the chicken time to cook before you flip it, you don’t need to oil your grill or chicken. I stand by this, but it is essential to let the grill get hot and give the chicken enough time to cook and release from the grill naturally when cooking with yogurt. What I’m trying to say is that the yogurt will make the chicken stick unless you are very diligent. So, if ever there was a time to oil your grill a little bit, this might be it.
How long do you cook the Tandoori Chicken Skewers?
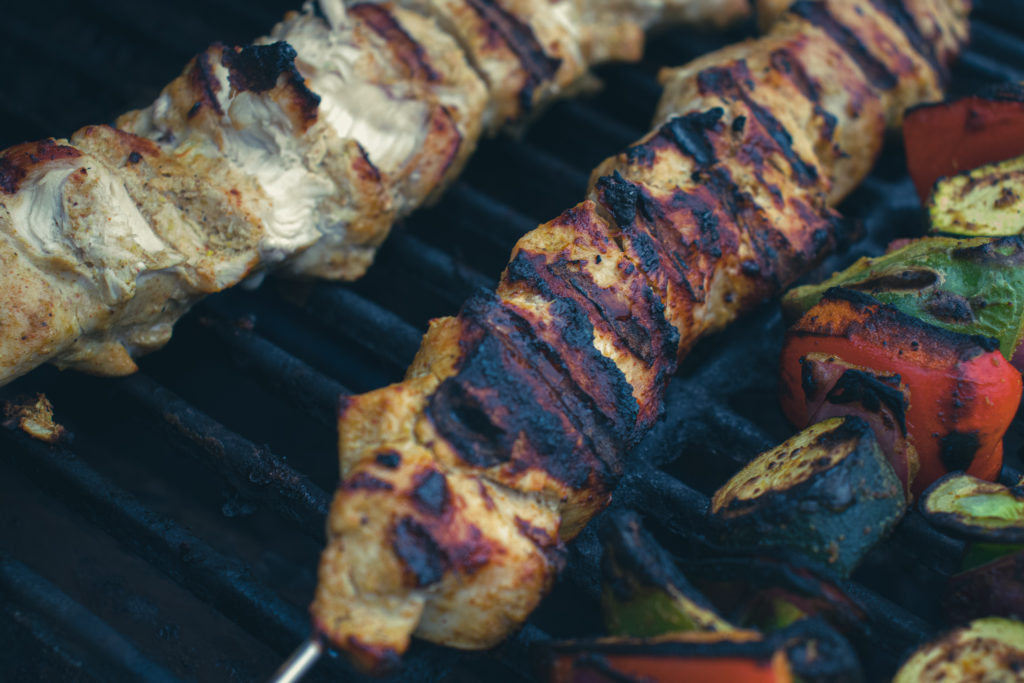
How long you cook your skewers really depends on how thick you cut your chicken. For me, it took about 6 minutes per side. However, it was really windy, which lowered the temperature of my grill. But, for 1-inch cubes of chicken on a hot grill, 5 to 6 minutes per side seems about right. When in doubt, use a probe thermometer to check the temperature of the chicken to ensure it is cooked (165°f).
Serving The Tandoori Chicken Skewers
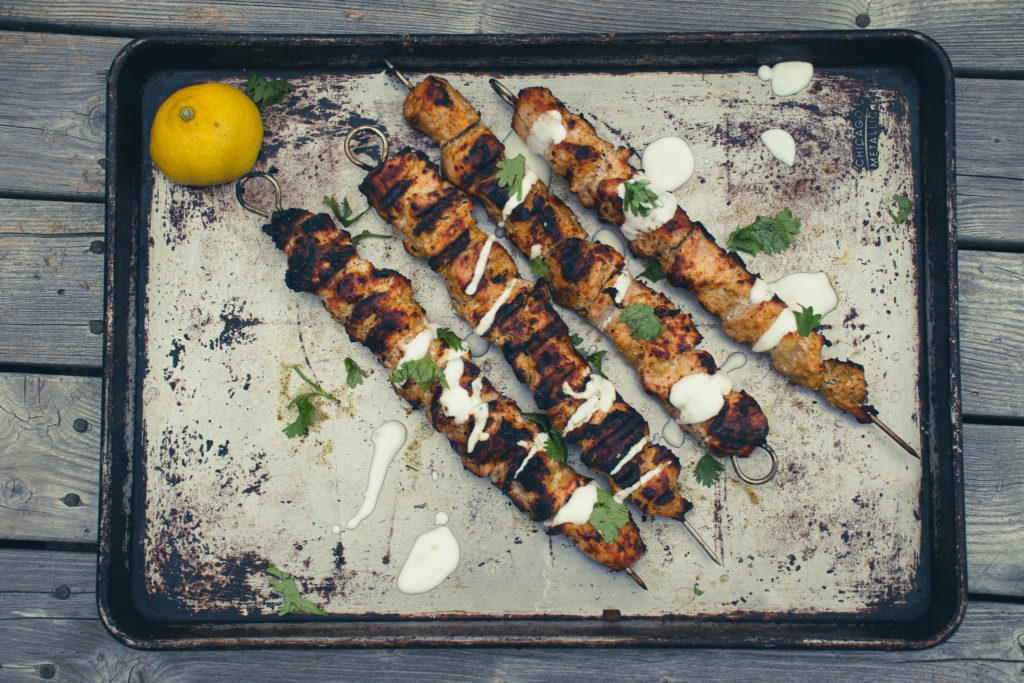
You can serve the chicken skewers right off the grill, or you can drizzle them with some yogurt thinned with lemon juice and some cilantro leaves. This is especially helpful if you take pictures of them for social media (tag me! @chefbenkelly). When I finally got around to eating my Tandoori Chicken, after all the pictures had been taken, I served it with basmati rice cooked with onion, ginger, garlic, chilli (call back to earlier there) and madras curry powder. I also made some vegetable skewers to go along with the rice and chicken.
The Wrap Up
If you’re looking for something a little different to throw on your grill this weekend, look no further. And before you say to yourself, “But they look spicy.” remember that you are making them. You’re in control of how hot they are. A little heat isn’t a bad thing (I actually like a lot of heat), but more than heat these Tandoori Chicken Skewers have loads of flavour. I think that this is a recipe that you will come back to over and over. But, as always, don’t take my word for it. Try them for yourself. And, if you have any leftover Tandoori Chicken you can use it to make this delicious Butter Chicken Soup.
Thank you for reading, and have a great week. Remember to subscribe below, so you never miss a post and share this on Facebook or Pinterest if you enjoyed it.
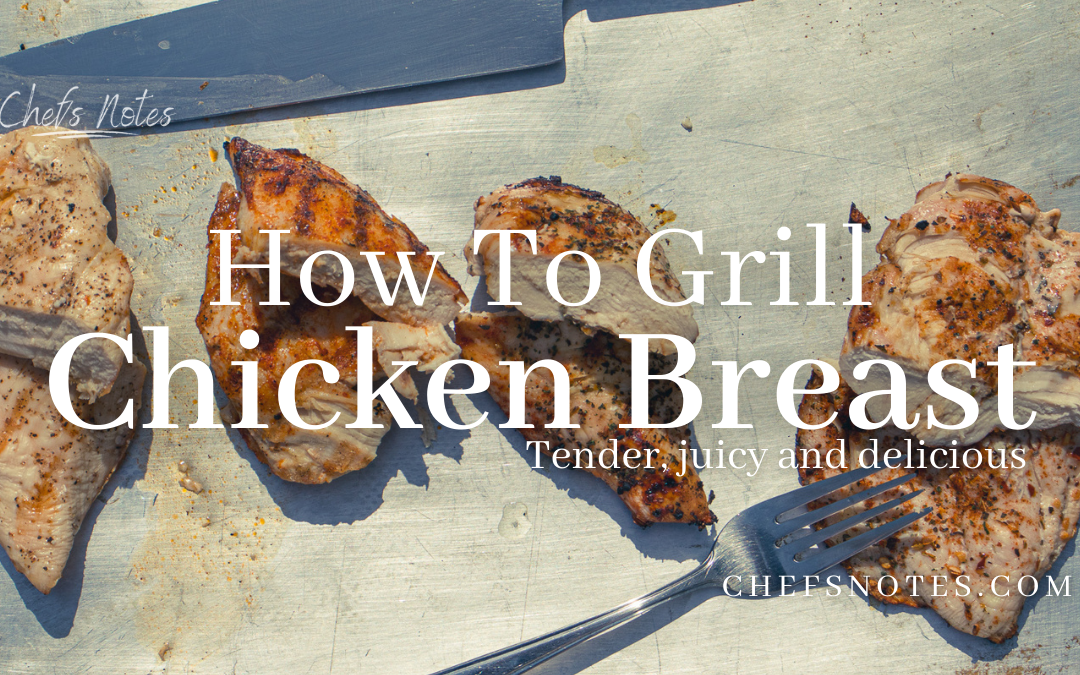
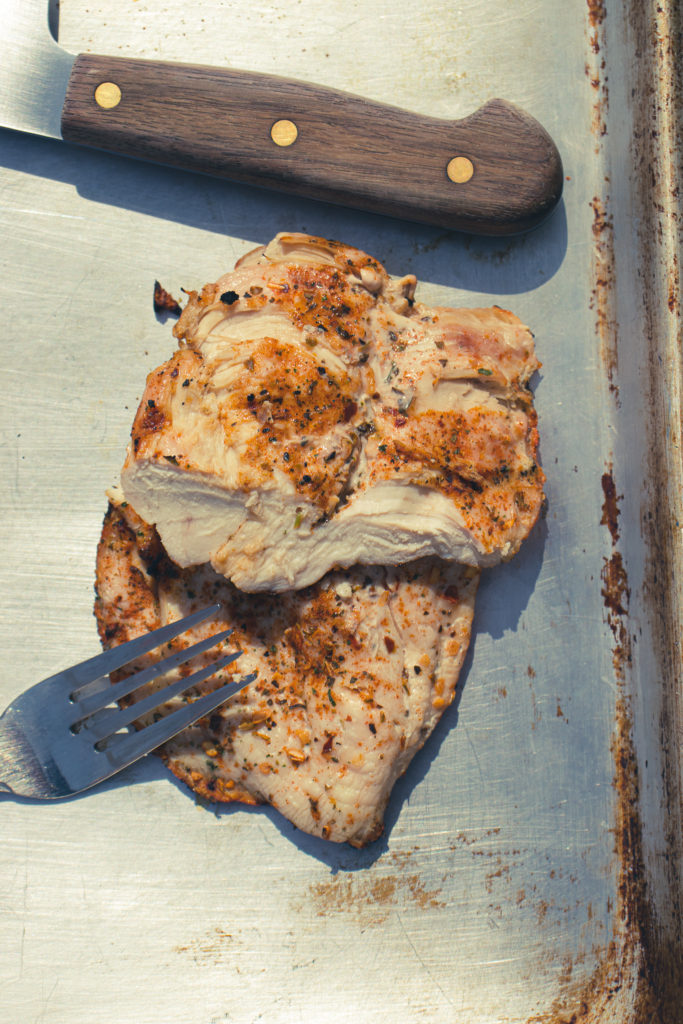
People love chicken breast. I don’t really know why. It is the fifth-best part of a chicken, and chickens don’t really have more than five parts. But, despite how I feel about them, you will probably be throwing them on your grill this year. Since you’ll be grilling them anyway, why not grill them as well as possible? What I’m about to share with you is a foolproof method for cooking chicken breast, or anything for that matter, perfectly on the grill. You don’t even need to read the whole post. I’ll tell you the secret right now. Are you ready? Okay, here it is. Don’t overcook it. I know. Mind blown. That really is basically what I’m about to tell you. Of course, there’s more to it, but that’s the short version. If you love chicken breast and are planning on grilling some, keep reading. Let’s get to it.
Why Chicken Breast Sucks
Chicken breast sucks and is easy to ruin for the same reason that so many people like it. It is extremely lean. In a 3 oz (85 g) portion of skinless chicken breast, there are 140 calories. Of those 140 calories, only 3 grams are fat. That’s a pretty good ratio if your only focus is eating lean. However, whether you like it or not, fat equals flavour and juiciness. Lean meat tends to be dry and flavourless. They are also much less forgiving when even slightly overcooked. So, the two big questions that we need to answer are; How do you keep your chicken breast juicy? And, how do you impart as much flavour as possible?
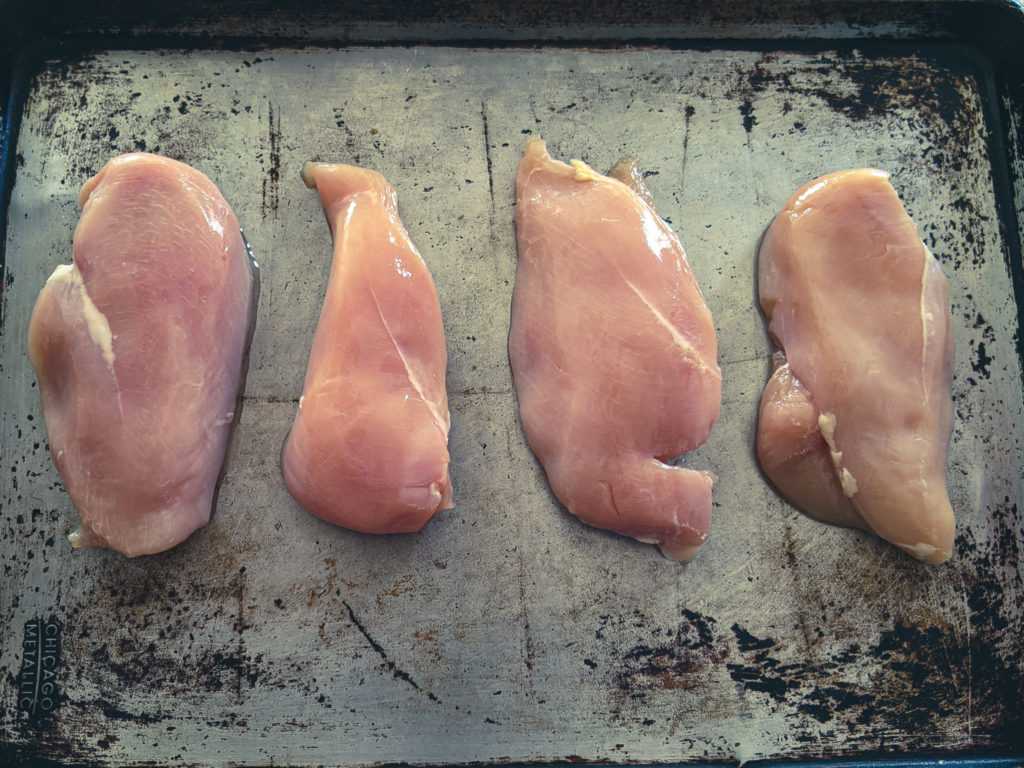
Prepping The Chicken
I’ve seen a lot of people standing in front of their grill with a package of boneless, skinless chicken breast. They take the chicken right from the package to the grill. No seasoning, no nothing. I’m here to tell you, if you don’t already know, don’t do that. First of all, where is the flavour? Secondly, there is a little prep that you should do to help your chicken breast cook evenly.
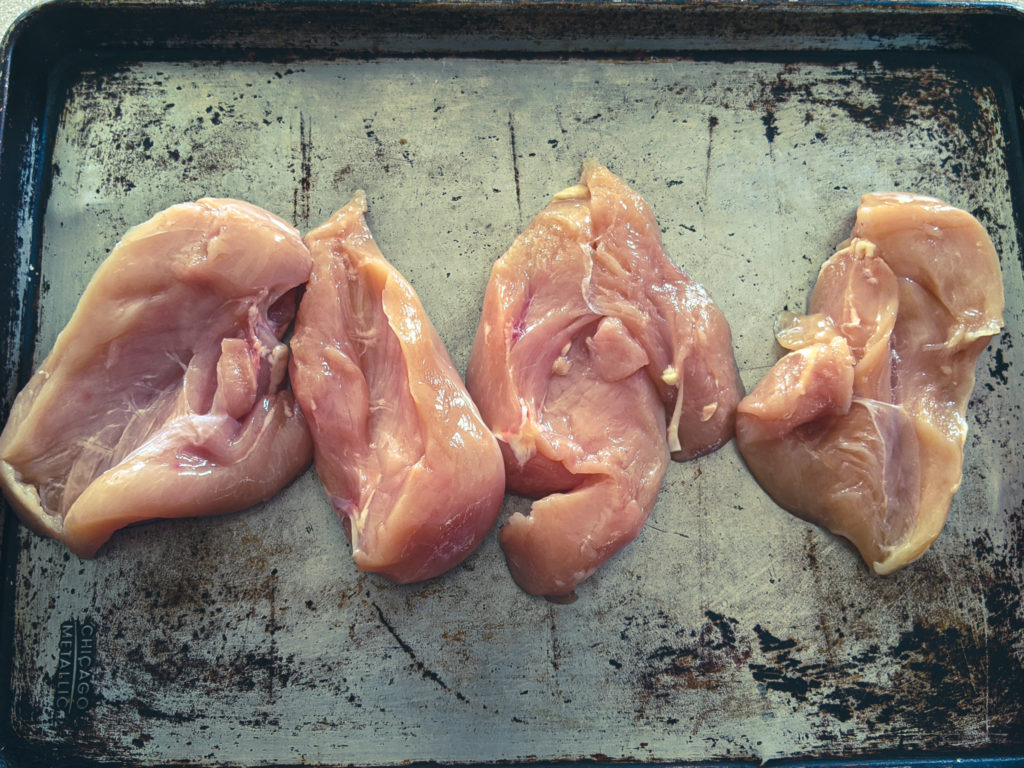
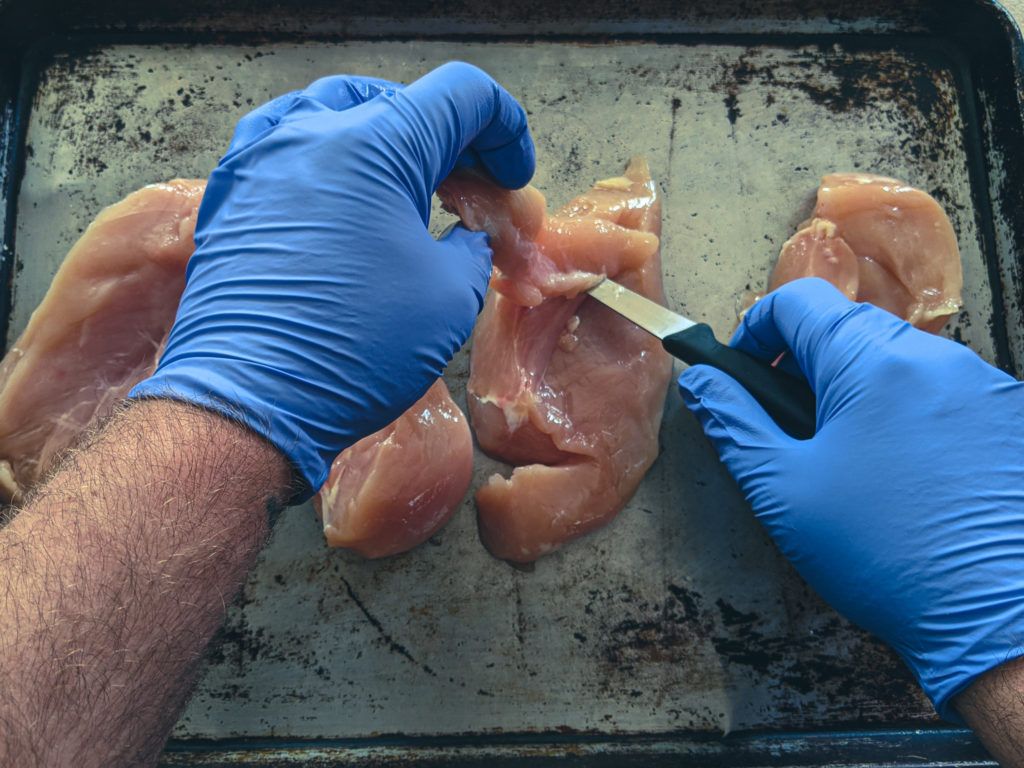
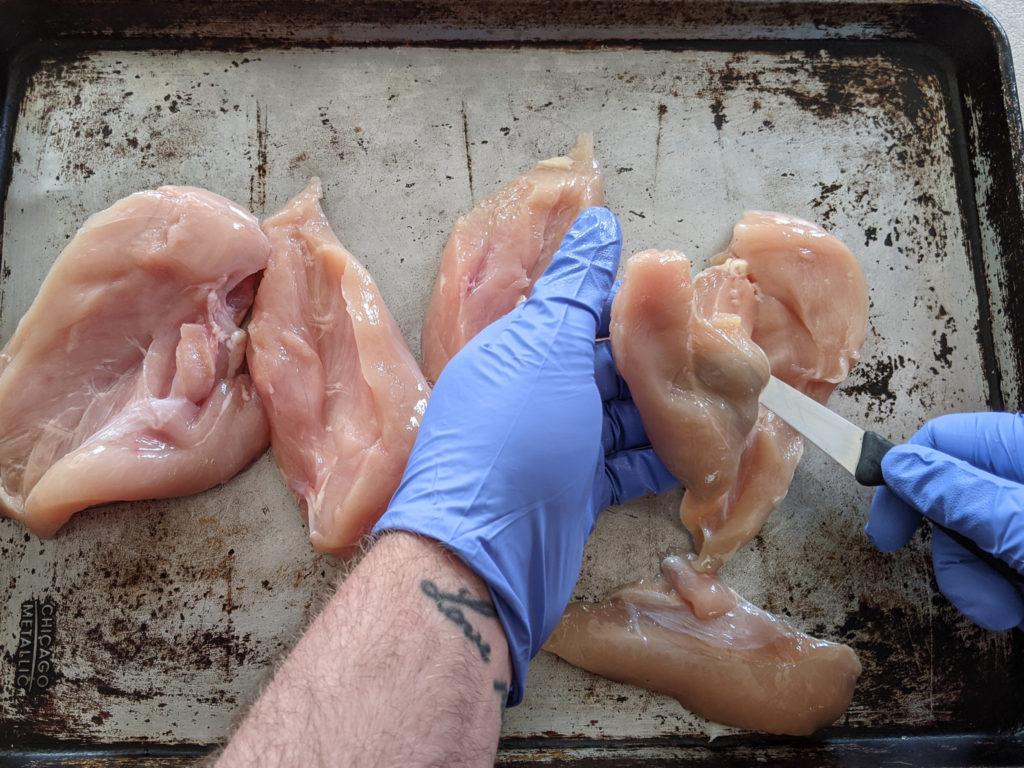
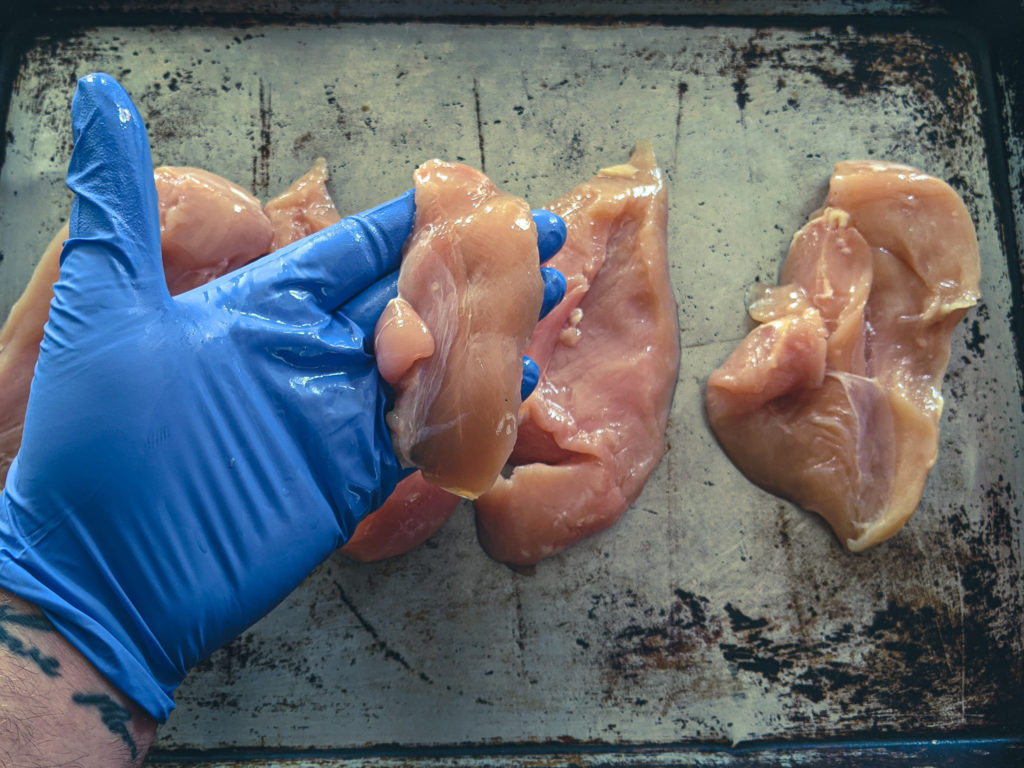
Removing the tender
If you flip over a chicken breast, you will see what is known as the “tender.” The tender (yes, that’s what breaded chicken tenders are made of) is a little flap of meat that hangs off the bottom of the chicken breast. You don’t have to go hunting for it; it’ll be pretty obvious. Using a sharp knife, cut the tender off. Why? Because the tender will create a little pocket between itself and the rest of the breast that will take a long time to cook. By the time this pocket is cooked, the rest of the breast will be overcooked.
What do you do with the tender?
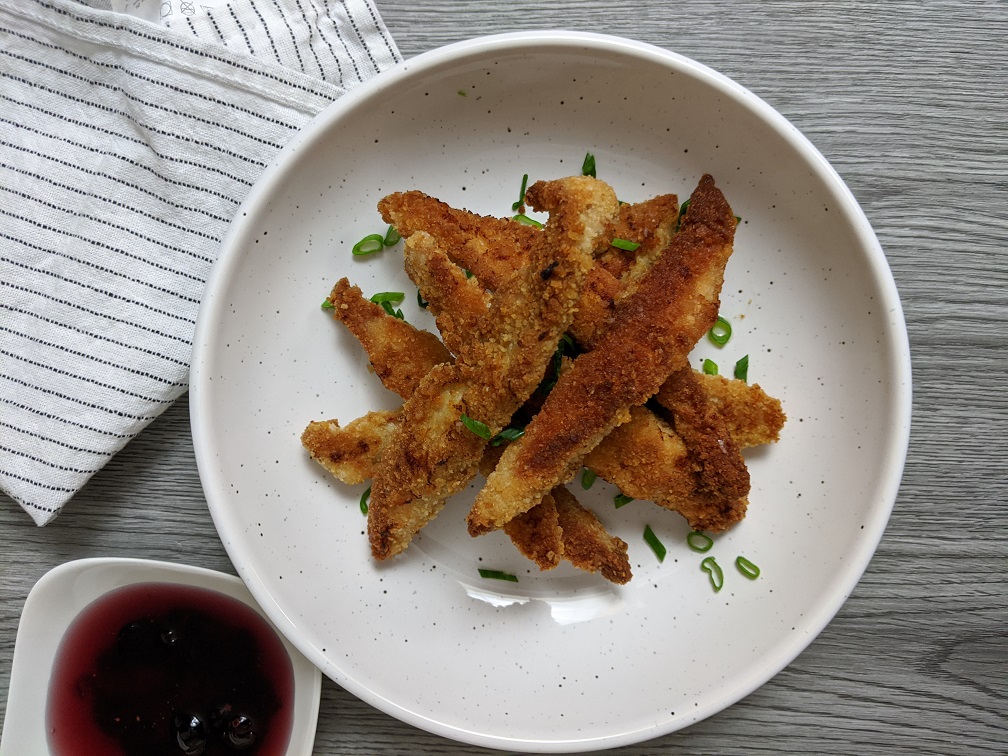
Don’t throw the tender away! If you want to, you can throw it on the grill and cook it alongside your breasts. They only take a few minutes to cook and make a great addition to salads. You can also freeze them. Once you get a stockpile in your freezer, thaw them and make a big batch of homemade chicken fingers. You can substitute the turkey in the Turkey Tender Recipe below with the chicken tenders. Chicken tenders also make a great ingredient for a stir-fry or soup.
Oven-Baked Turkey Tenders
These Turkey Tenders will not only become an entertaining staple but you will want to eat them every day of the week. Pair them with the cranberry sweet and sour sauce and you have a real winner.
Taking the tender off will help the breast cook more evenly. But, if you have an especially thick chicken breast, you may want to butterfly it. Butterflying will give you a thinner chicken breast with a larger overall surface area. This means that the breast will cook much quicker than if it was left whole, and it will have more of that delicious grilled flavour and more room for seasoning.
How to butterfly a chicken breast
To butterfly a chicken breast, remove the tender as described above, then place the chicken breast flat on your cutting board. Using a sharp knife, cut halfway up the height of the breast. Keep cutting in long even strokes until you’ve cut about 80% of the way through the chicken breast. You should no be able to open the the breast like a book. That’s all there is to it. Just try your best to keep your knife as even as possible otherwise, you may cut through the top or bottom of the breast. This won’t hurt it, but it won’t be as pretty.
Note: I did not do a very good job butterflying my breast. I was too preoccupied with taking pictures. I should have grabbed a better knife. But never fear; I make mistakes, so you don’t have to. Yeah, that’s why I do it.
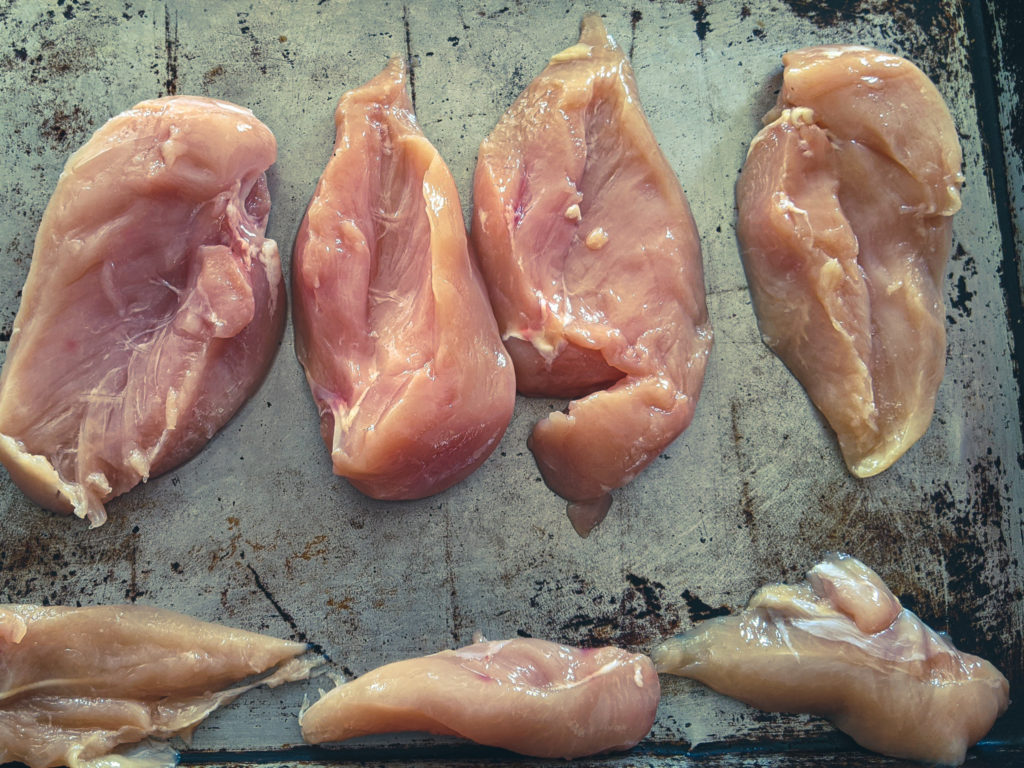
Seasoning the chicken breast
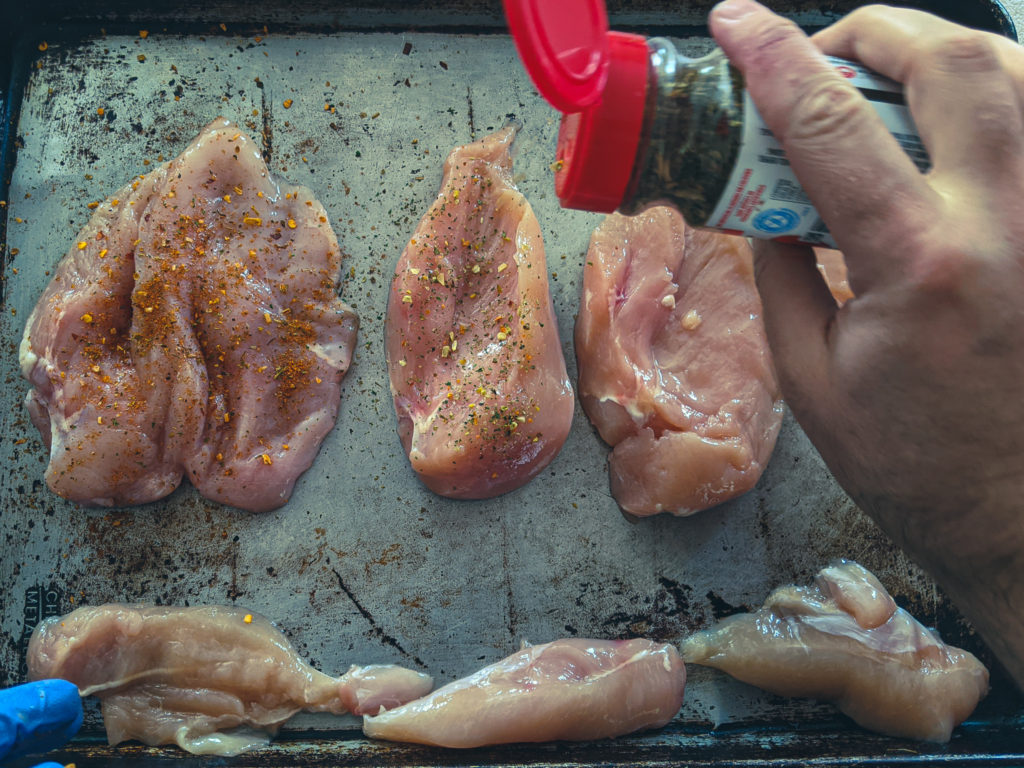
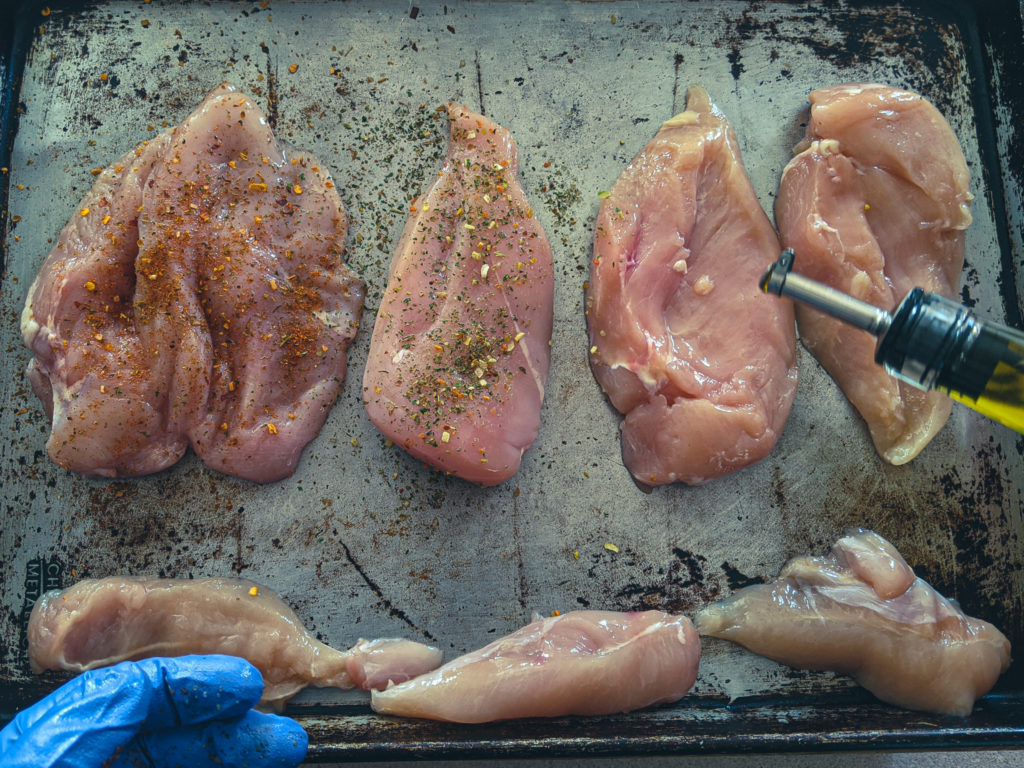
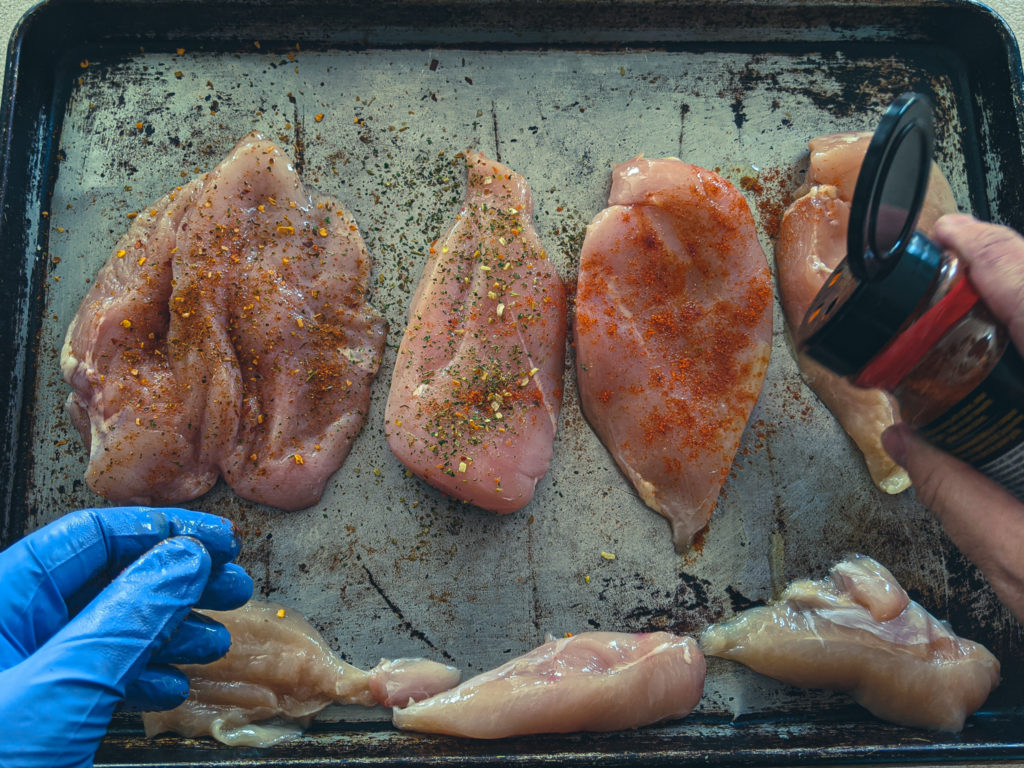
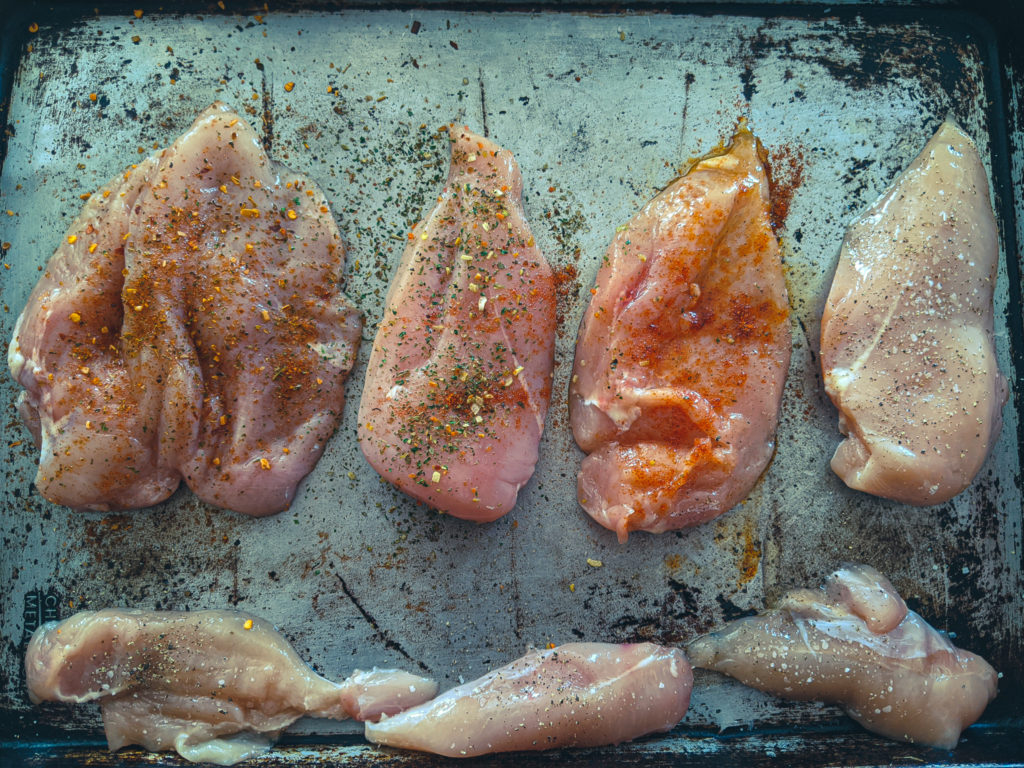
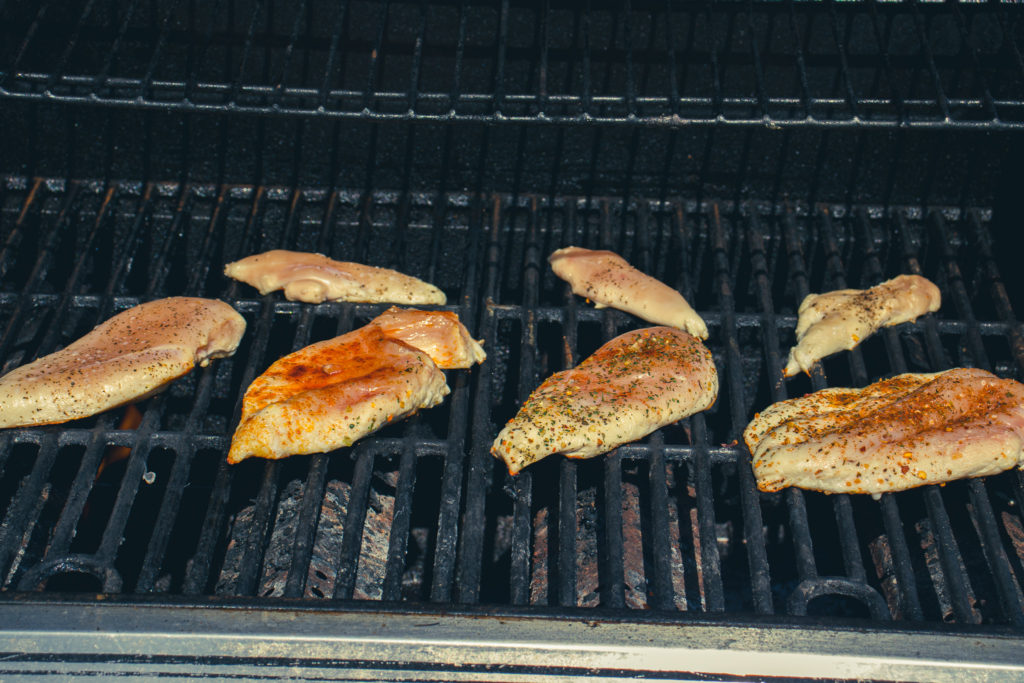
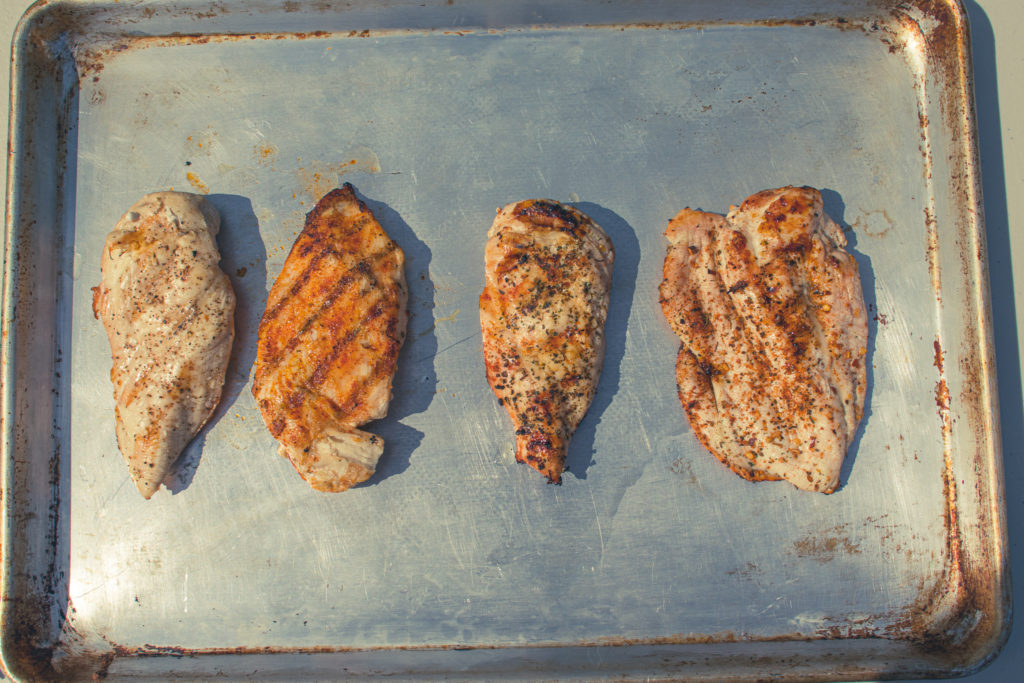
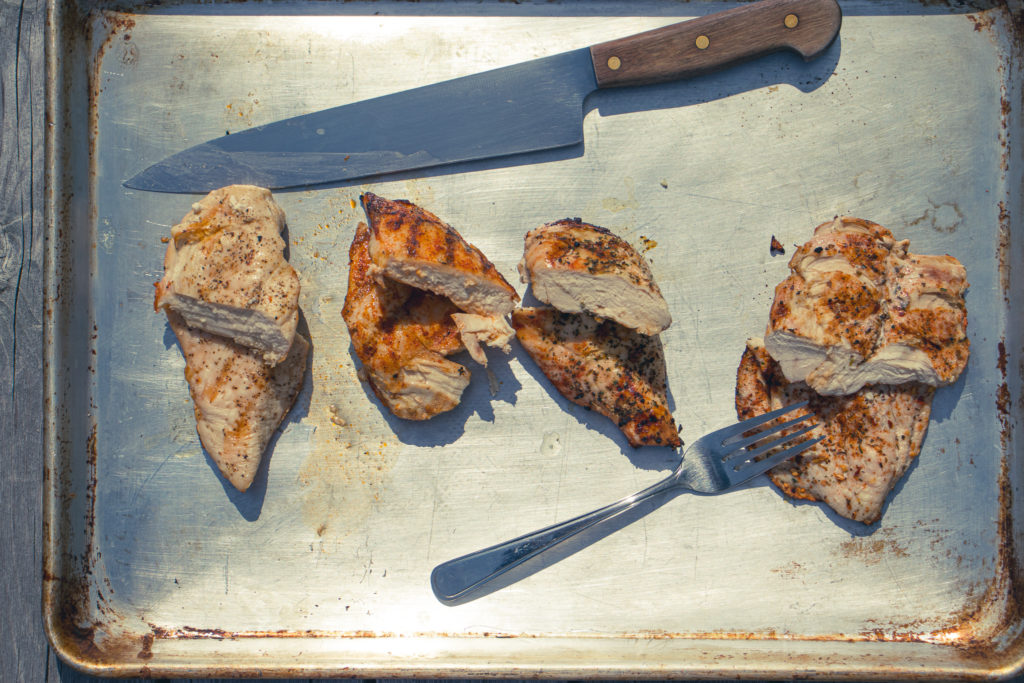
Okay, your chicken breast has had the tender removed, and the larger ones have been butterflied. It’s time to go to the grill, right? That was a test. If you said yes, you failed. It’s flavour time, not grill time. At this point, you can marinate your chicken breasts if you want, or you can season them with any number of seasonings. To make my point about seasoning, I flavoured all four of my chicken breasts differently. One is seasoned with a store-bought BBQ chicken seasoning. One has Italian seasoning. Another has Cajun seasoning. The final breast just has salt and pepper on it.
To oil or not to oil?
You may have noticed in the images above that I only oiled one breast. I know that many people, when grilling, tend to oil their food and their grill. If you are eating chicken breast becasue it is lean meat, adding a pile of oil to it kind of defeats the purpose. It is also unnecessary and is likely to cause flareups. Don’t believe me? It’s okay, you’ll see in a few minutes. If you want to add all that extra oil, go for it. I’m not going to tell you how to live your life, but again, it is not needed.
Prepping Your Grill
Do you want to know the big secret to grilling? Here it is. Turn your grill on high. Leave it alone with the lid down for 10 to 15 minutes. Next, clean your grill with a grill brush or whatever new fangled grill cleaning tool you have. Put the lid back down, and leave it alone for another 5 minutes. Then, and only then, grill your food.
The secret to a non-stick grill
No matter what your grill is made of, it has the capacity to be non-stick. But, it comes down to you. The hotter your grill is when you add food to it, the less likely it is that food will stick. Also, the more you use your grill, the more grease from your food will build up and bake onto it. This will “season” your grill, just like a castiron pan. Seasoning the grill will also help it be nonstick. So don’t wipe the grill down with soap and water. Just get it hot and brush it off with your grill cleaning tool of preference.
Why your food sticks
Maybe you’re saying to yourself, “But Ben, come on. I use my grill all the time. I let it heat up and I clean it with a grill brush. But everything still sticks.” Well, to that I have to say, it’s your fault. Harsh, I know, but hear me out. There are three main reasons your food, chicken breast or otherwise, is sticking to your grill.
You didn’t let your grill get hot enough, or you keep opening the lid and cooling the grill down too much. Or, you let your grill heat up but then turned the heat way down before you put your food on. We’ll talk about this in a minute.
You didn’t brush your grill off well enough, so the food you’re cooking is sticking to old bits of dried-on food.
Or, the most common reason, you are trying to flip your food before it’s ready to be flipped.
The Maillard Reaction and Grilling
We’ve talked before about the Maillard reaction in other posts. I’m not going to get too deep into the science here, but you can check out this Wikipedia article about it if you are interested. The short version is that the Maillard reaction is the process that causes food to brown. Think about the cheese and crust of a pizza. The Maillard reaction causes the golden brown colour. It’s the same with a perfect brown crust on a nicely seared steak. Well, that browning, the Maillard reaction, is vitally important when cooking on a grill.
When to flip your food
When your food hits the grill, it is being cooked by the heat transfer from the flames, the heat in the air, and the heat stored in the grill’s metal. Metal is a better conductor of heat than air, but it takes a while to absorb enough heat to maintain its temperature. So, the metal will be much hotter than the air, ideally. That’s why you get grill marks on your food. Those grill marks are more than just pretty. They are the key to your food not sticking. As the Maillard reaction happens, the food touching the grill will brown. As the food browns, it will release from the grill. But, this takes time. So, if you are concerned about your chicken breast, or other foods, burning, turn down the flames a little bit, but don’t force the food to flip. Once it is ready to flip, it will release from the grill easily. That’s why it is so important to pre-heat your grill.
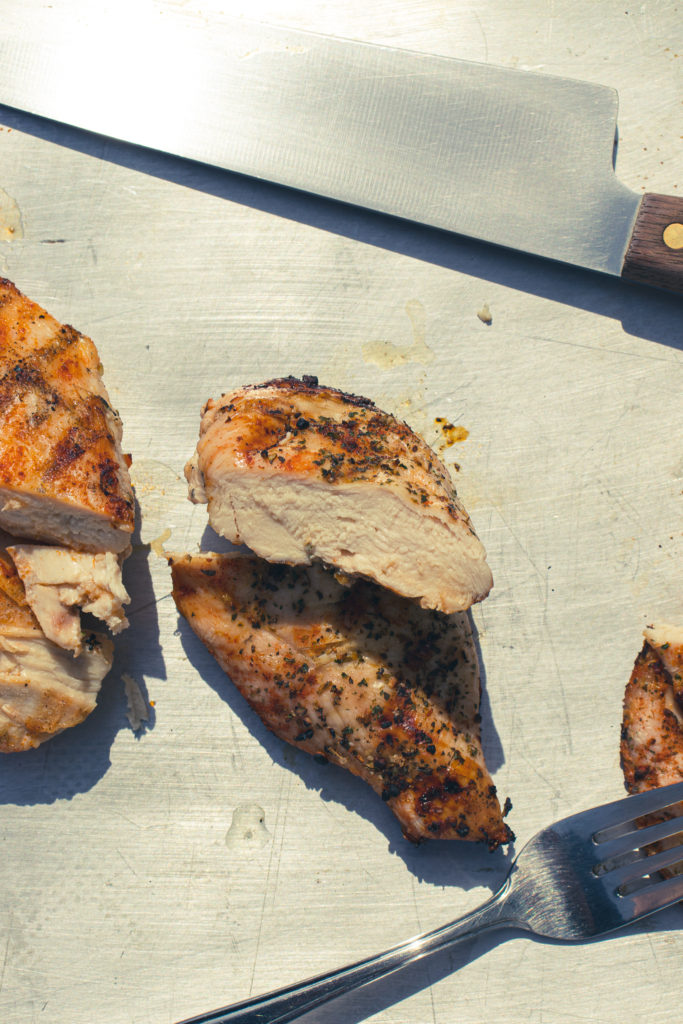
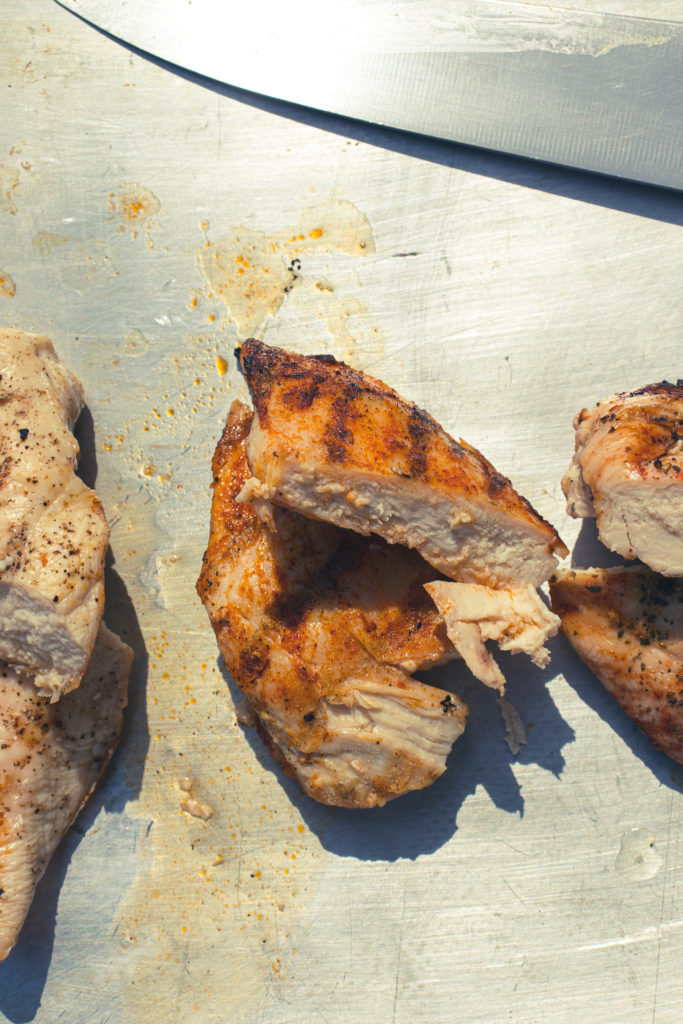
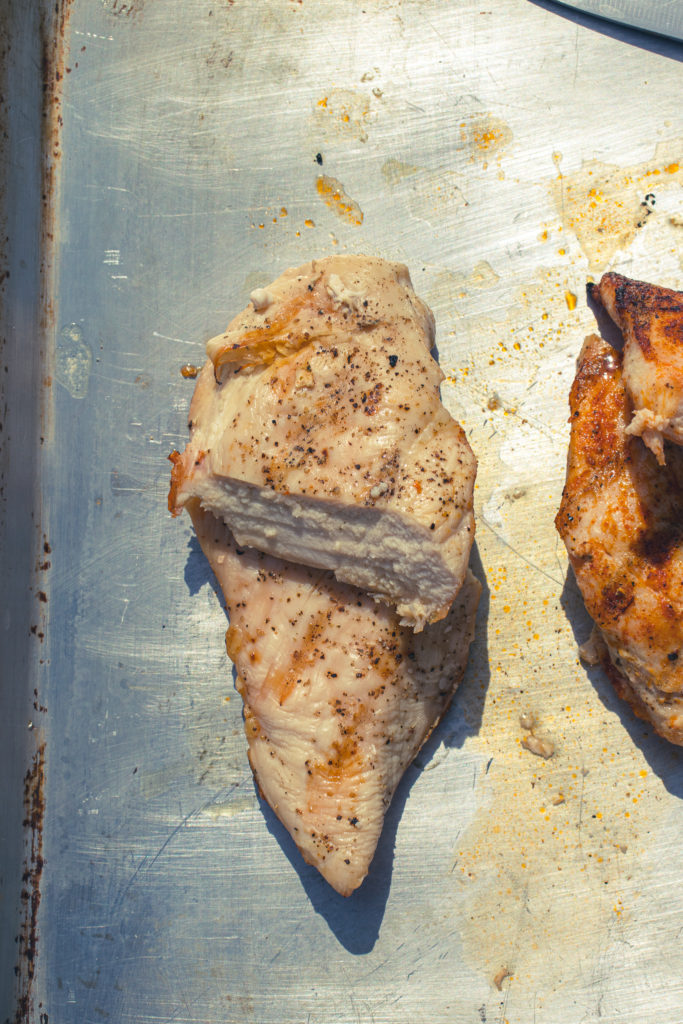
How to grill chicken breast
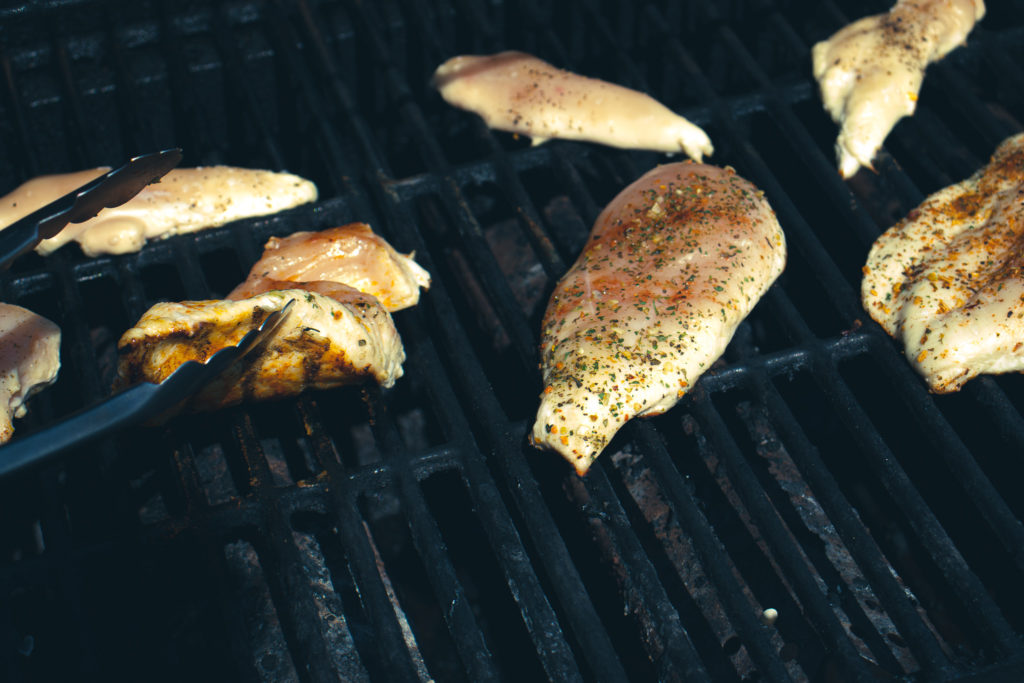
Okay, we’ve covered a lot. But I think it’s important to know all of this before we get to actually cooking. At this point, your breasts should have the tenders removed. The larger breasts should be butterflied. All the chicken should be seasoned on both sides, and your grill should be nice and hot. Now, put the chicken breast on the grill, close the lid, and leave it alone for about 5 to 6 minutes. Before the chicken goes on the grill, the gas should be on a high. Once the chicken goes on and the lid is closed, wait until the thermometer comes back to about 400°f then turn the gas to medium. If you leave the gas on high, you risk burning the chicken. If you turn the gas down before the chicken is on the grill or before the grill comes back to temperature, you risk the metal cooling down too much and the chicken sticking.
How do you know when to flip the chicken?
After 5 minutes, open the lid and gently lift the chicken breasts. If they are sticking, close the lid and leave them alone for another minute or two. Once the breasts easily pull away from the grill (notice I said pull away and not lift away), flip them, close the lid and leave them alone for another 4 to 5 minutes.
Even though the breasts shouldn’t stick to the grill, they likely aren’t going to lift off like they are being cooked in a non-stick pan, either. So you may need to pull them a little bit, but there should be no tearing, and there shouldn’t be any chicken left on the grill either.
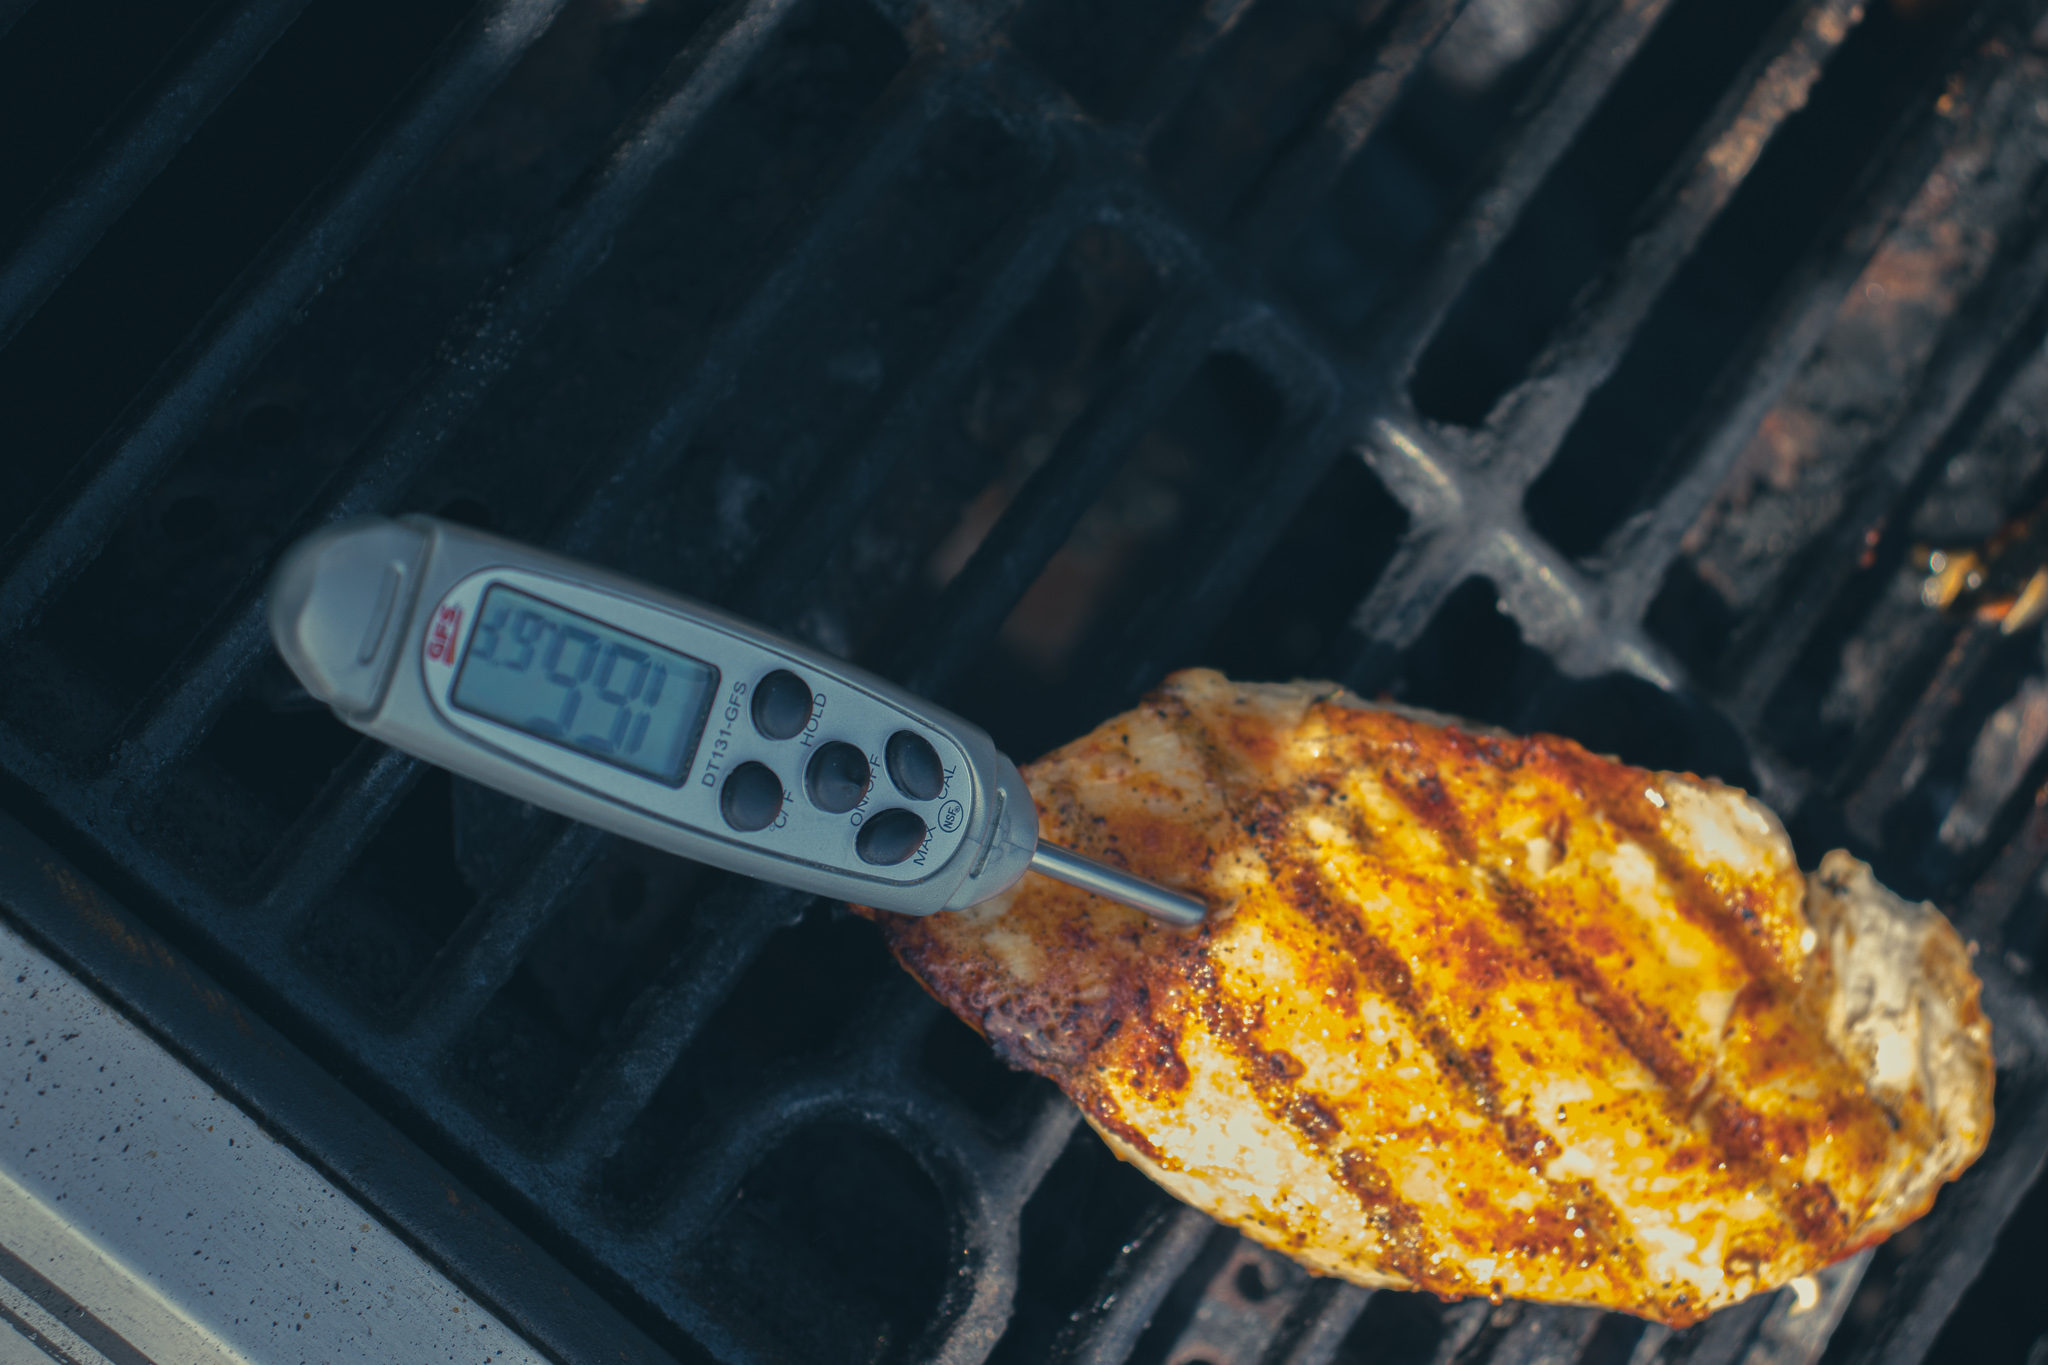
How to tell when the chicken is cooked?
There is only really one foolproof way to ensure that your chicken breast has reached a safe temperature but isn’t overcooked. That is to use an instant-read probe thermometer. These cost between $10 and $30 and are worth every penny. You can find them on amazon, at most grocery stores, and all kitchen supply stores. If you’re the type of person that cuts into your chicken breast to see if it is cooked, stop. Two things. Colour is not a reliable indicator of whether or not chicken has reached a safe temperature (165°f for breast 170°f for thighs and whole birds). Secondly, when you cut into a piece of meat straight after cooking or while cooking, all the juice runs out, leaving it dry and flavourless. So, stop cutting into your chicken to see if it’s cooked. Spen the $20 and get a thermometer.
How Long Should I Cook The Chicken Breast Per Side?
A minute ago, I said to cook your breast for 5 to 6 minutes, then flip and cook for another 4 to 5 minutes. This is a good rough guide, but many factors determine how long it will take to grill your chicken breasts. Things like how thick your chicken is, the temperature of the chicken when it goes on the grill. How far away from the flames your grill is, how much air circulation does your barbecue have, what the temperature outside is and if it is windy or not? So, don’t try to tell the chicken breast when it is ready to flip or when it’s cooked. Let it tell you.
To keep it juicy let it rest.
The final step in ensuring your chicken is juicy and tender is to let it rest for at least 5 minutes before cutting it or serving it. We all know that we have to let steaks rest, but most people don’t think about resting chicken or pork. All meat needs to rest after cooking to allow the internal juices time to redistribute throughout the meat after being superheated. I know it can be hard to wait—your hungry. You’ve been working hard for this meal, but don’t ruin it by rushing. Take 5 minutes, set the table, pour yourself a drink, give your partner a few shoulder squeezes. Whatever it takes, don’t touch that chicken for 5 minutes.
Grilled Chicken Breast
The finished chicken should have grill marks but not be burnt. When you cut into it (after waiting 5 minutes), you should be able to see how juicy it is. If you cut a piece and squeeze it, juice should run out, and it should feel tender. Congratulations! You just grilled the perfect chicken breast, and you didn’t even oil it. Oh, and I should mention, the breast I did oil, cooked just as well as the others and came off the grill just as well. There really wasn’t a difference. So, why add the oil at all?
The Wrap Up
Okay, I know that this was a lot of information. This post is quite a bit longer than I intended it to be, but I think it is important to understand the why just as much as the how. If you enjoyed this post, please share it on Facebook, Pinterest, or Twitter. Also, remember to subscribe to Chef’s Notes below, so you never miss a post. And, if you want to help support the site, hit the donate button at the bottom of the page.
Thank you everyone, have a great week! I’ll see you right back here next Wednesday.
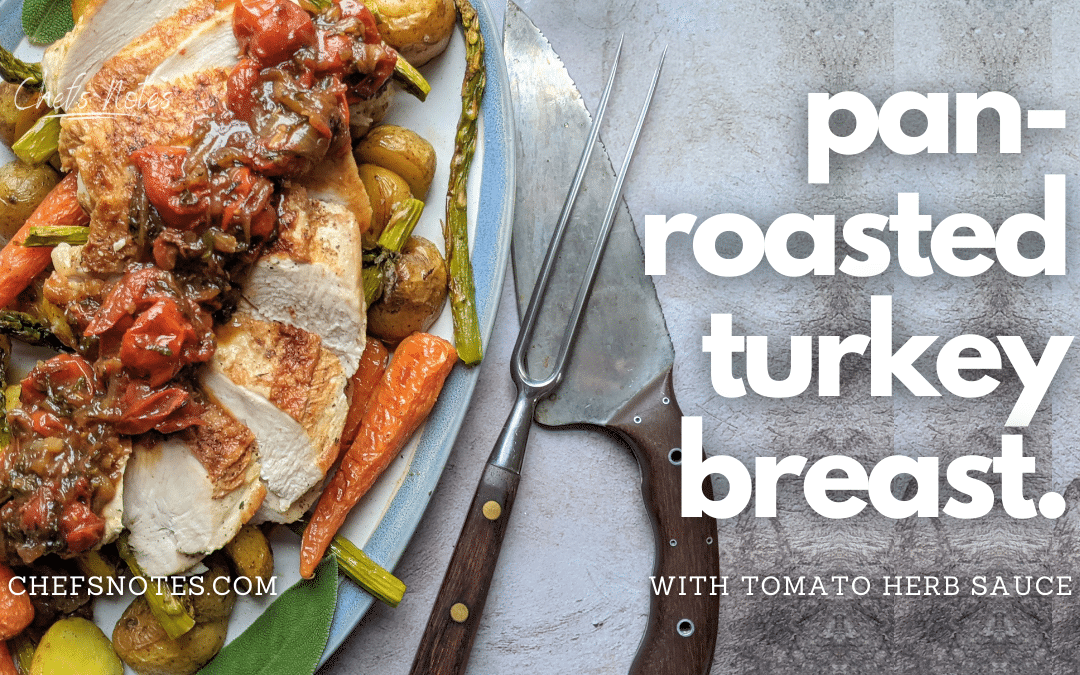
Easter is fast approaching, and what better way to celebrate than with a delicious pan-roasted turkey breast. This dish serves two to four people, which makes it perfect for a smaller gathering. The turkey breast is cooked right in the sauce, so it picks up all that wonderful flavour and stays nice and moist. Serve it with roasted spring vegetables, and you’ve got a meal to remember. Let’s get to it.
This post is written as a paid partnership with Turkey Farmers Of Canada and thinkturkey.ca
Getting Ready
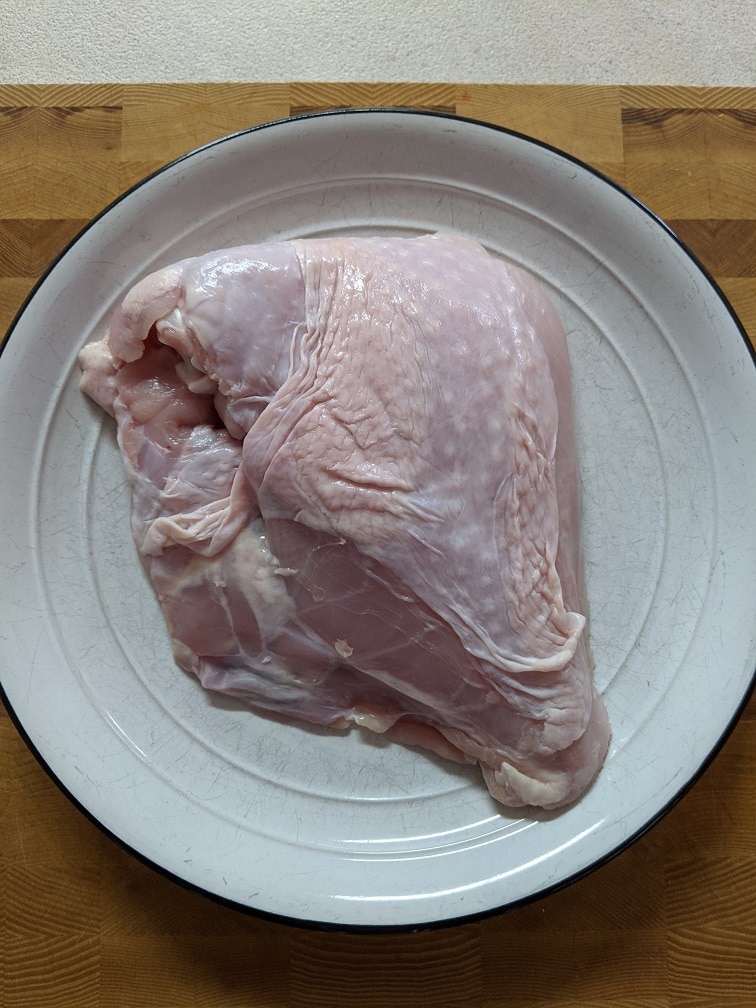
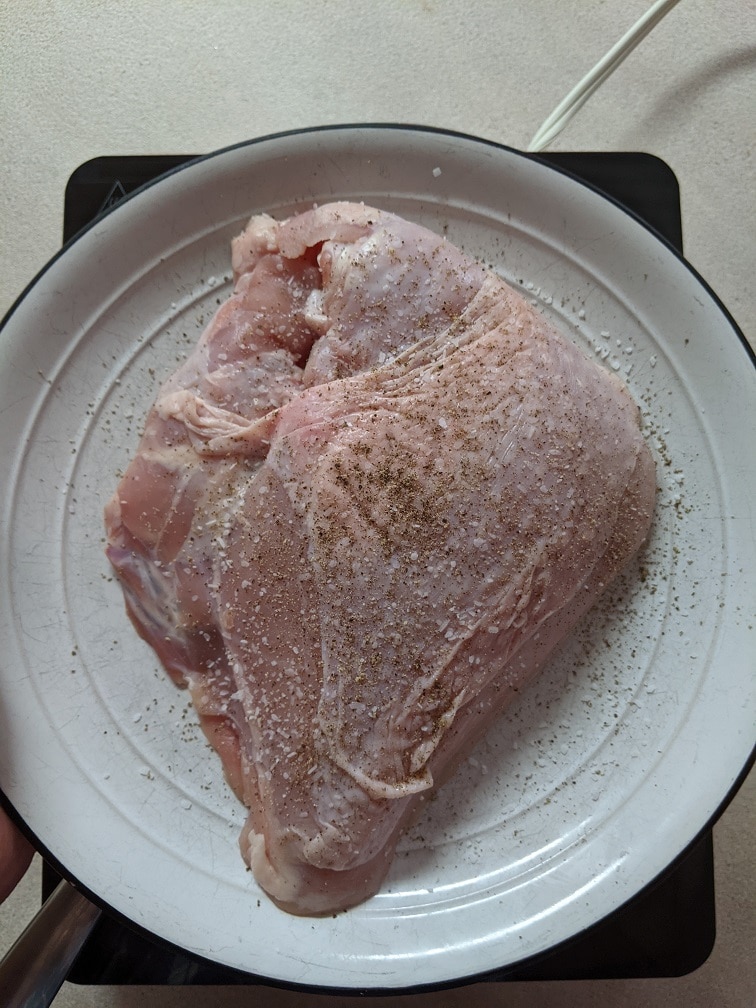
Once you start cooking this pan-roasted turkey breast, things are going to happen pretty quickly. So, you want to make sure you have all of your ingredients prepared and ready to go. The ingredients are one bone-in skin-on turkey breast. One cup of sliced onion, one tablespoon sliced garlic, a quarter cup brandy or white wine, one cup water or stock, one tablespoon sliced sage, one teaspoon chopped thyme, and a bit of salt and pepper. Prep the turkey breast by patting it dry with a paper towel, then season it on both sides with salt and pepper.
Cooking the Pan-Seared Turkey Breast
Searing the Turkey Breast
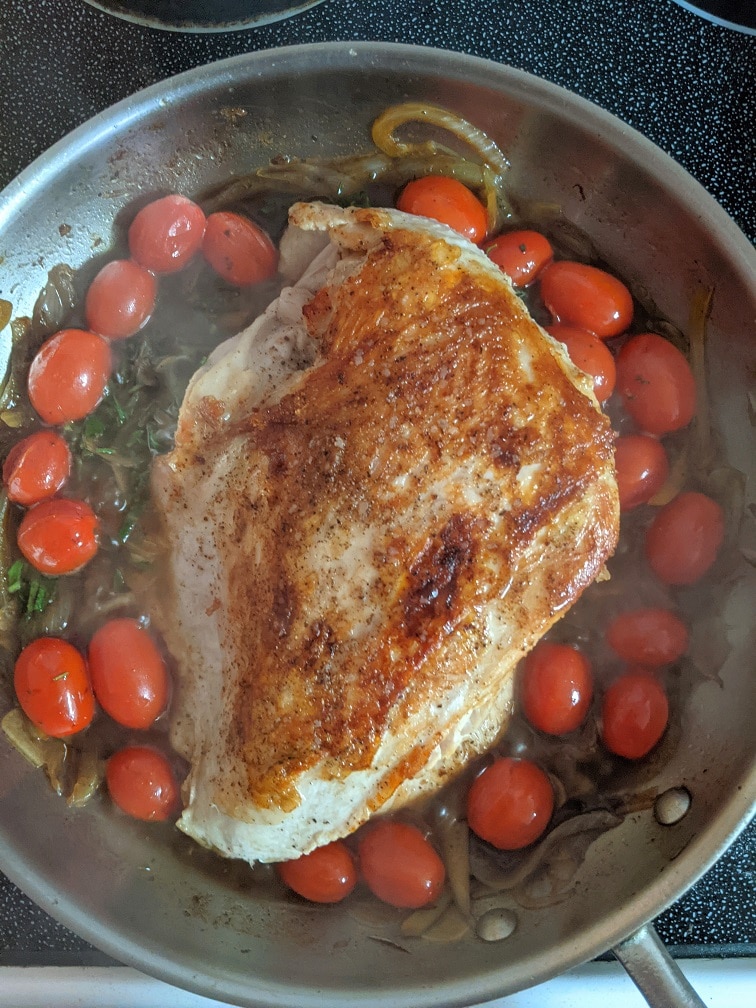
The most important step in cooking the pan-roasted turkey breast is to get a really nice sear on it: the more colour, the more flavour. Heat a medium skillet over medium-high heat and add in two tablespoons of olive oil. Put the turkey breast in the pan, skin-side down and leave it alone for about five minutes or until it is brown. Flip and cook for another five minutes to brown the underside.
Building The Sauce
Once the turkey’s browned, take it out of the pan, set it aside, and turn the heat down to medium. Add in one more tablespoon of olive oil along with the onions and cook for two minutes, stirring every thirty seconds or so. Add in the tomato and garlic and cook for one more minute. Deglaze the pan by pouring in the brandy and scraping all the brown bits off the pan’s surface. After about a minute, or once the brandy has almost completely evaporated, add the water and herbs.
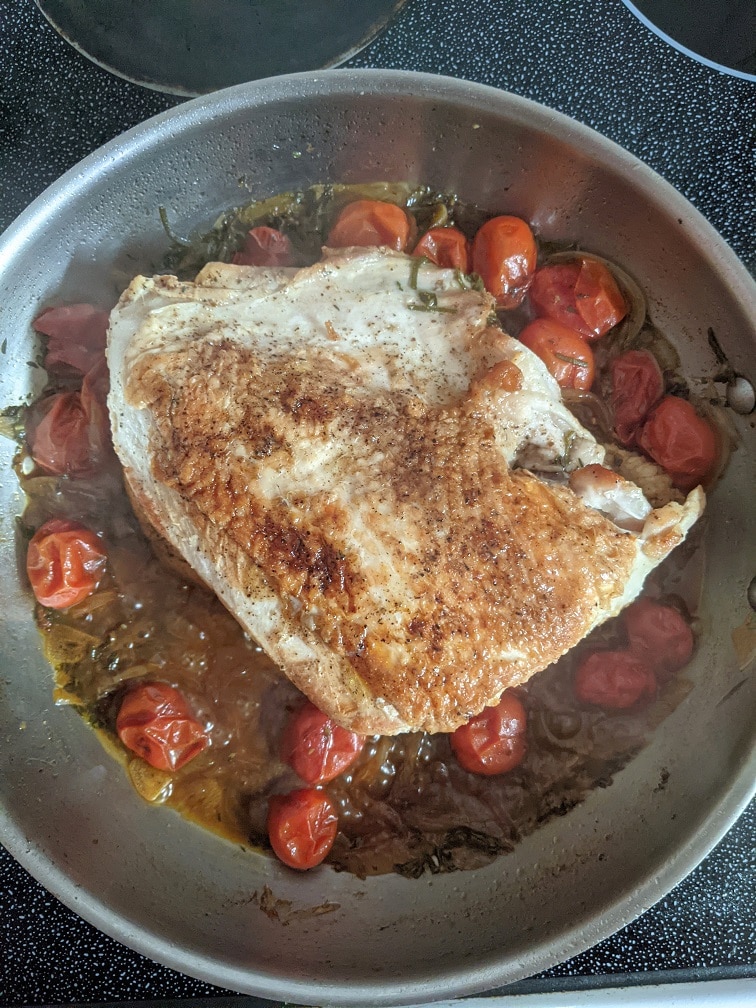
Finishing The Turkey Breast
The final step in cooking the turkey breast is to add it back into the pan and bring the liquid to a boil. Put a lid on the pan, turn the heat to low and simmer for 35 minutes or until the turkey’s internal temperature reaches 165°f. Take the turkey out of the pan and set it aside to rest for ten minutes. The sauce should be the consistency of chunky salsa. If it is too thin, put it back on the heat until it reaches the desired consistency. Taste the sauce and adjust the seasoning as needed. While the turkey is cooking, check the pan every ten minutes to ensure the water level isn’t too low. If it seems like the pan is going to cook dry, add another half cup of liquid.
Pat the turkey breast dry with a paper towel and season on both sides with salt and pepper.
Heat a medium skillet over medium-high heat. Add 2 tbsp of olive oil to the pan and put the turkey breast on the skin side down. Cook the breast for 5 minutes, flip and cook for 5 more minutes. Take the turkey breast out of the pan, set it aside, and turn the heat down to medium.
Add the remaining olive oil and the onion to the pan and cook for 2 minutes, stirring every 30 seconds or so. Add in the tomatoes and garlic and cook for another minute.
Add the brandy, cook for about a minute or until it has mostly evaporated, then add the water or stock and the herbs.
Return the turkey breast to the pan, let the water or stock come to a boil, put a lid on the pan, turn the heat to low and simmer for 35 minutes or until the turkey's internal temperature reaches 165°f. Check the pan every 10 minutes as you may need to add a little more liquid.
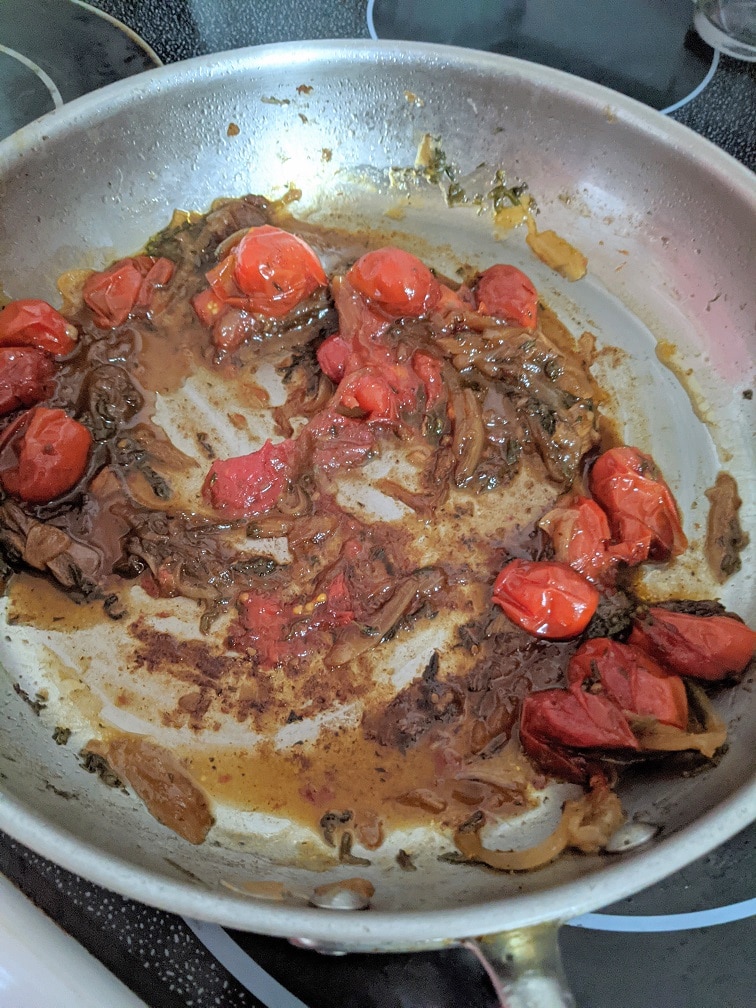
Take the turkey out of the pan and set it aside to rest for 10 minutes. The sauce should be the consistency of a thick salsa. If it is too watery, put it back on the heat for a minute or two. Taste the sauce and add salt and pepper as needed.
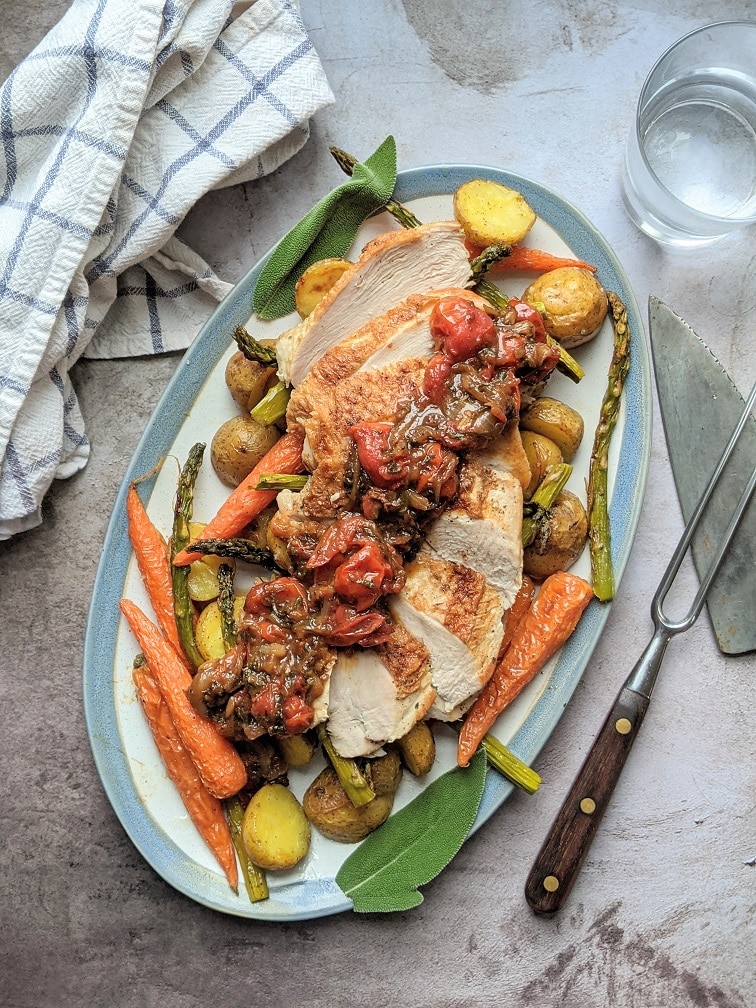
Remove the bone from the turkey breast and discard it. Thinly slice the breast and serve with the sauce on top.
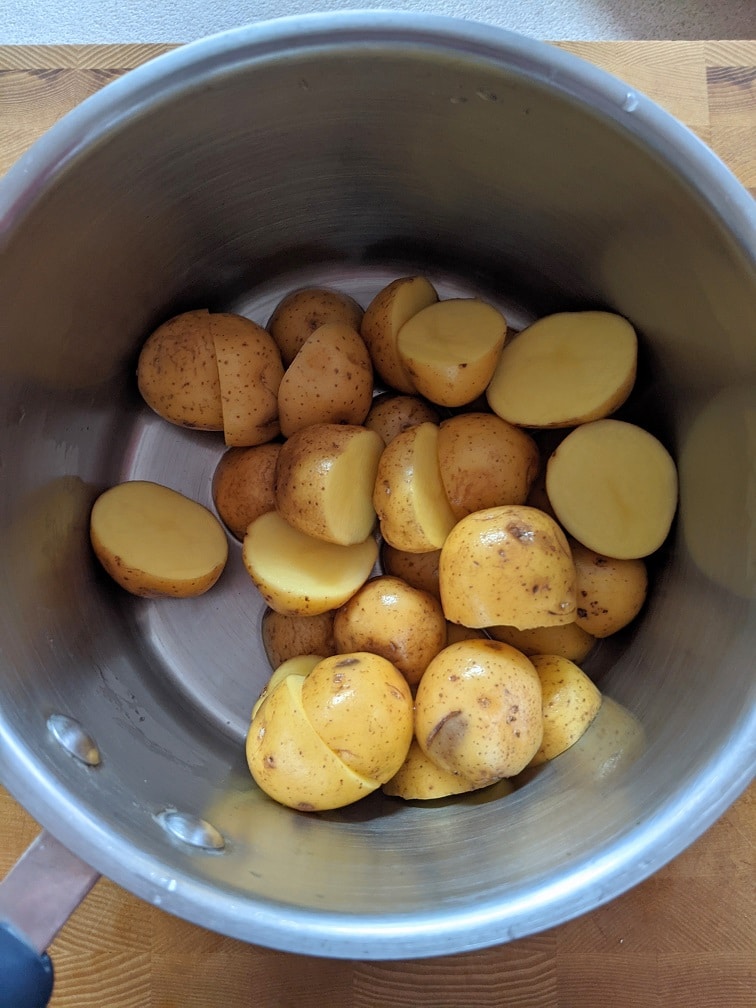
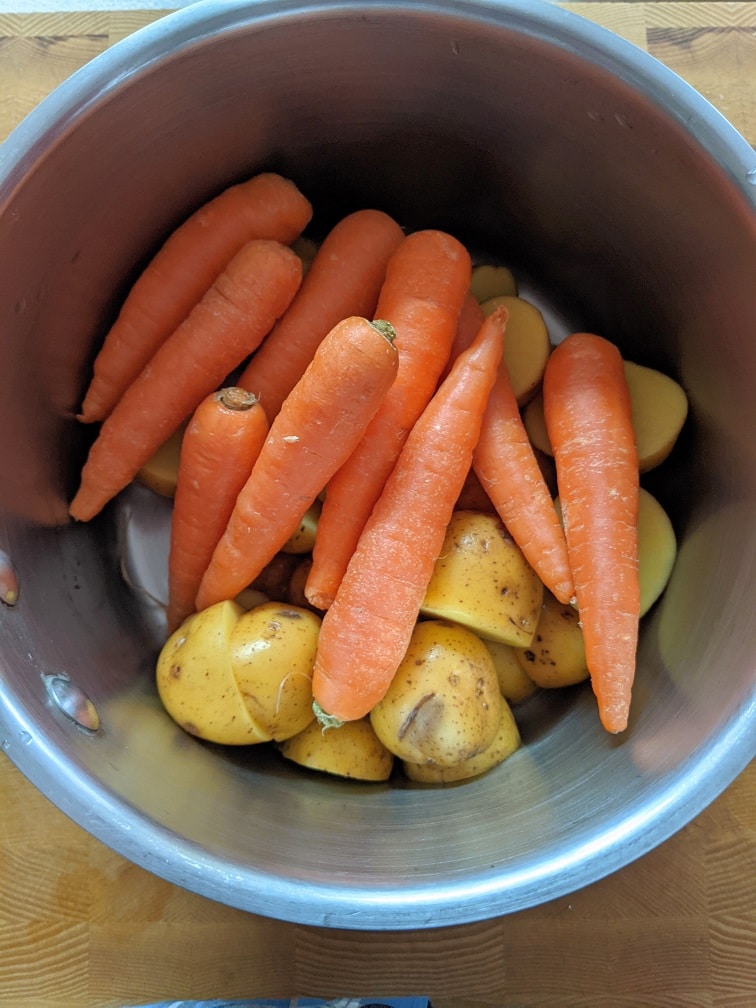
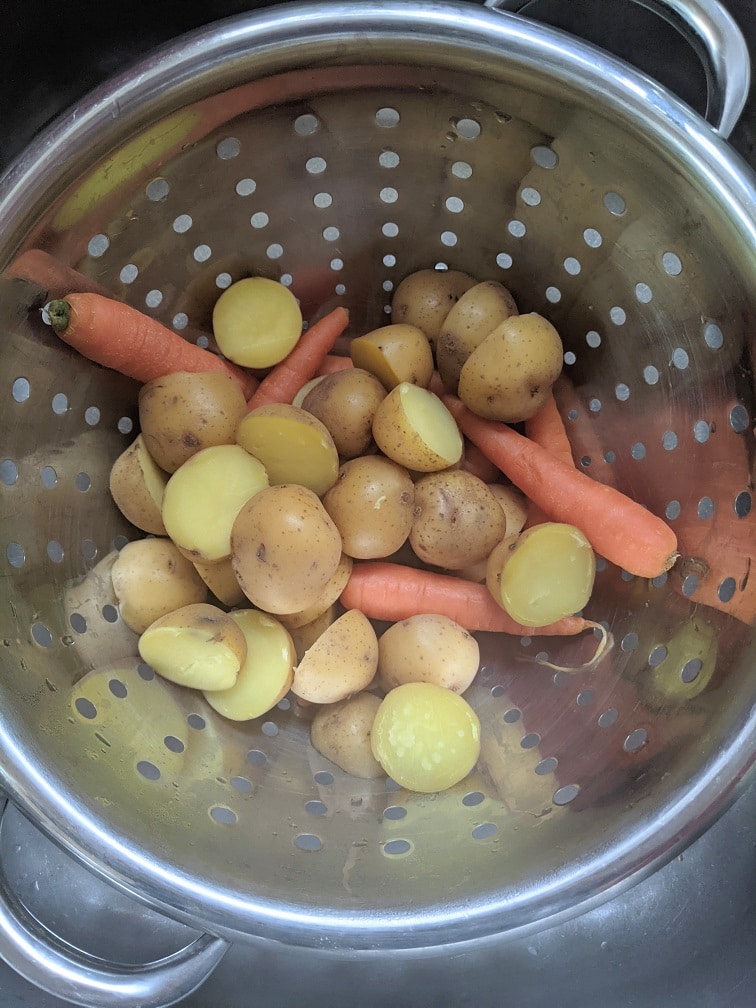
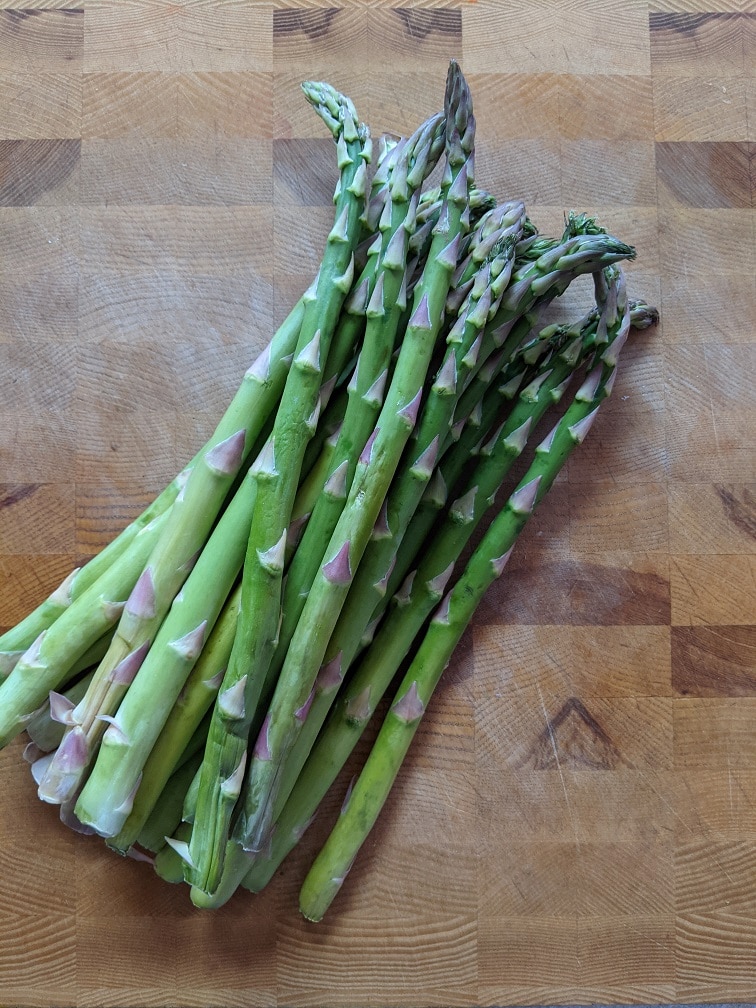
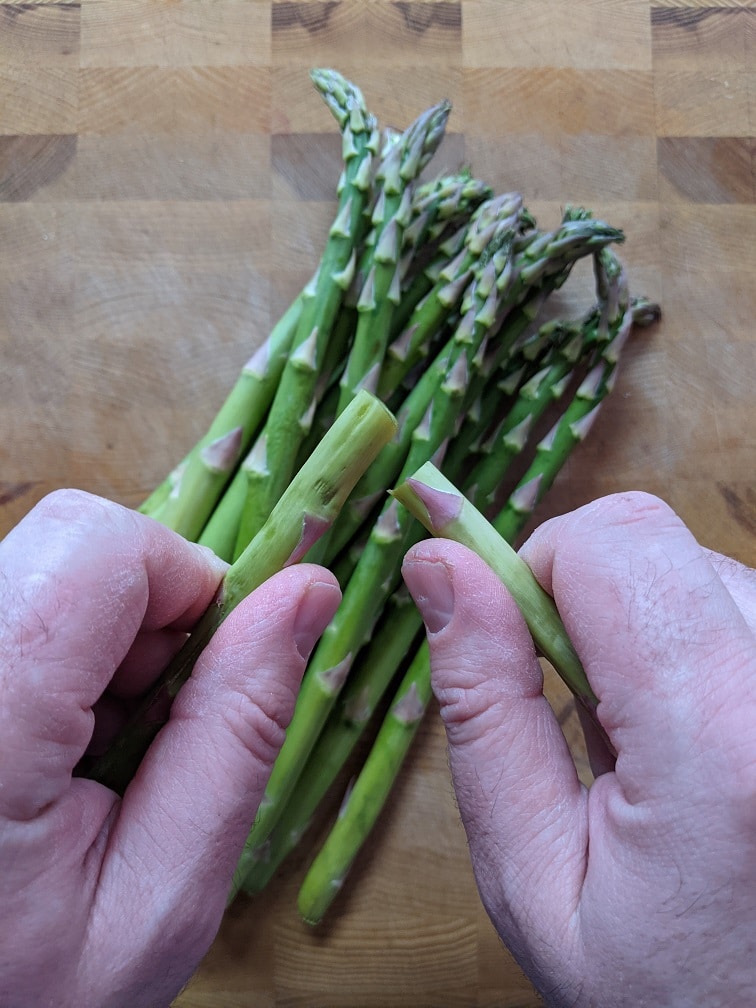
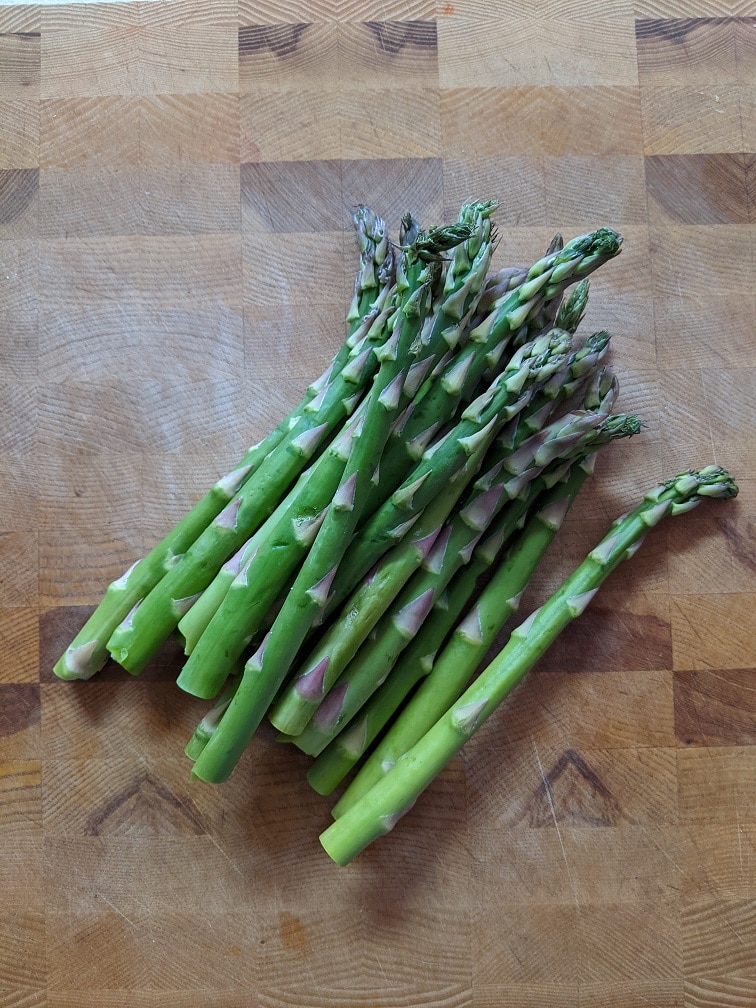
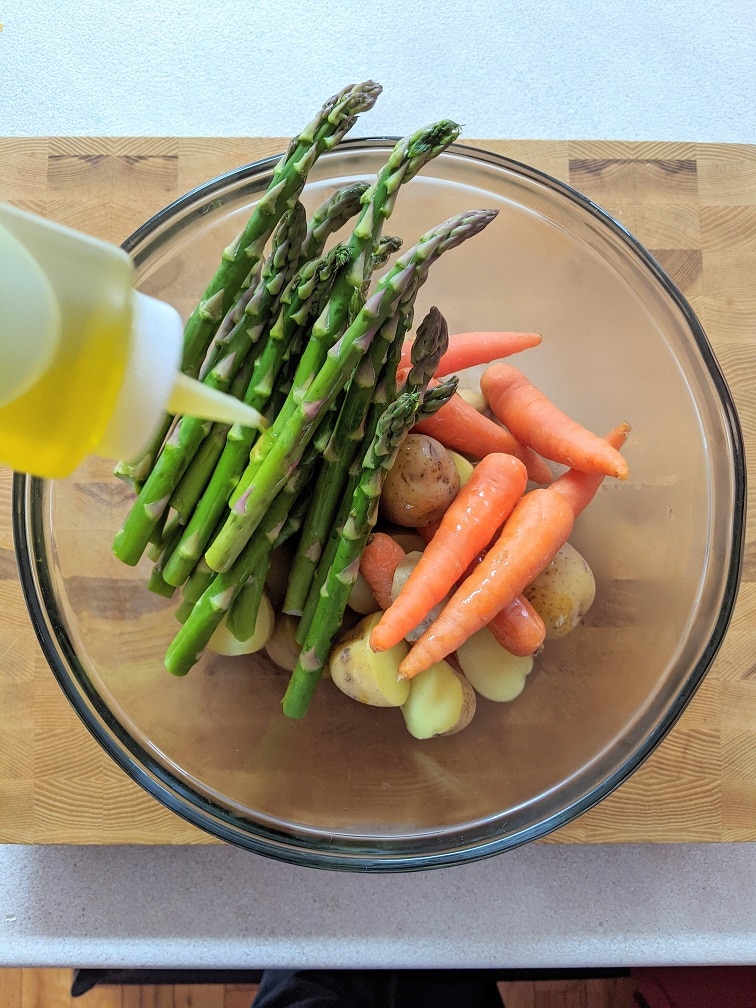
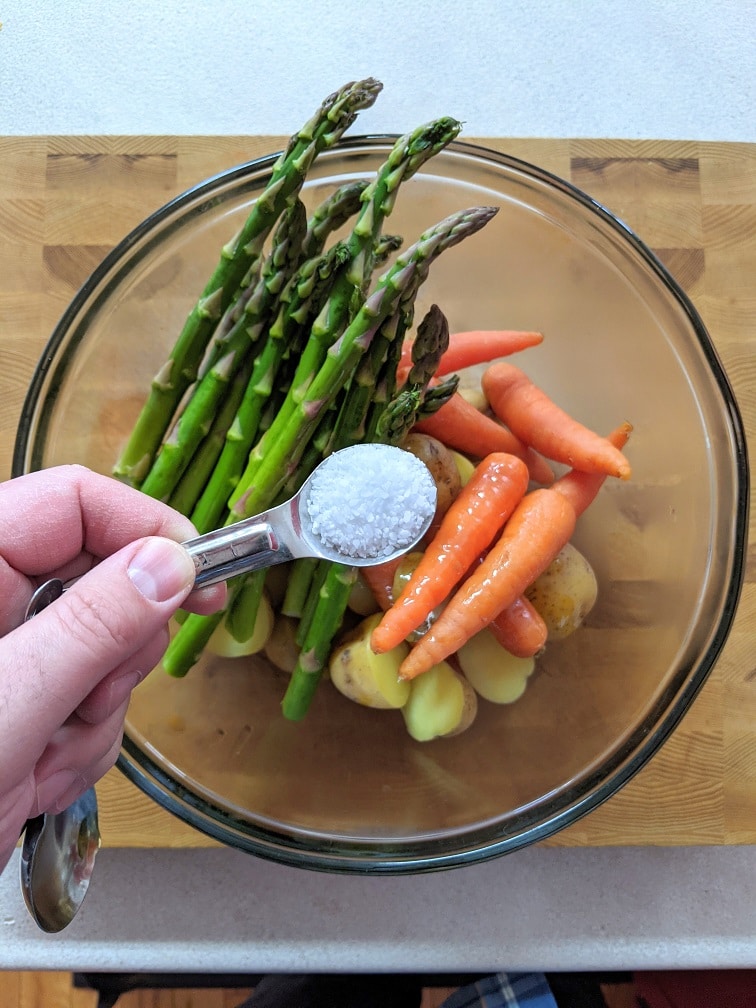
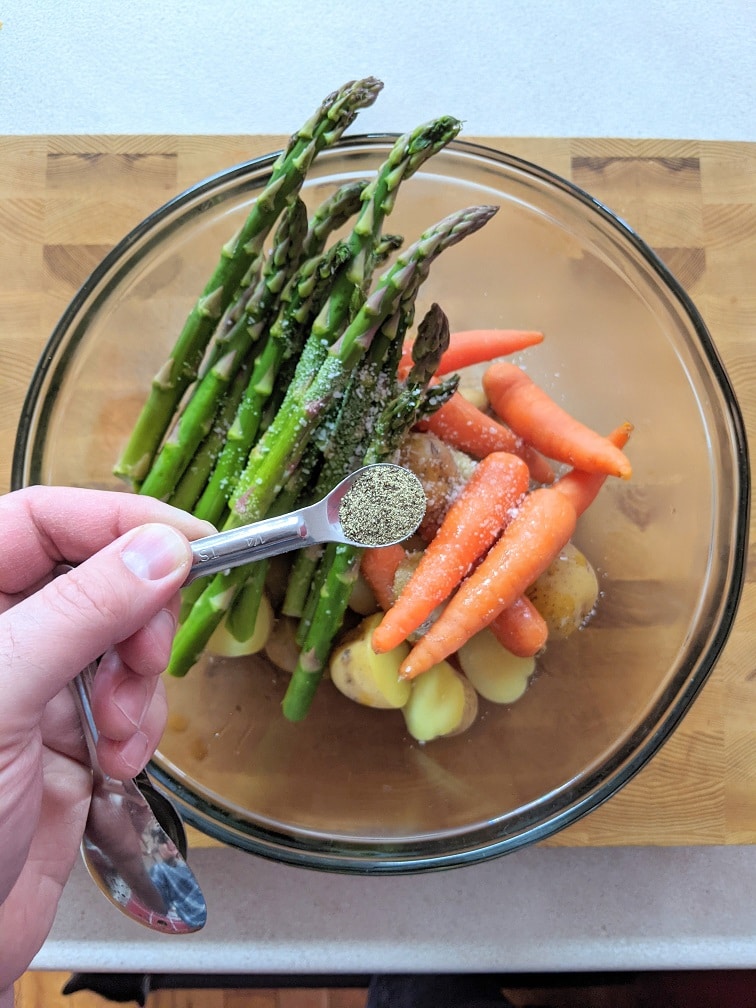
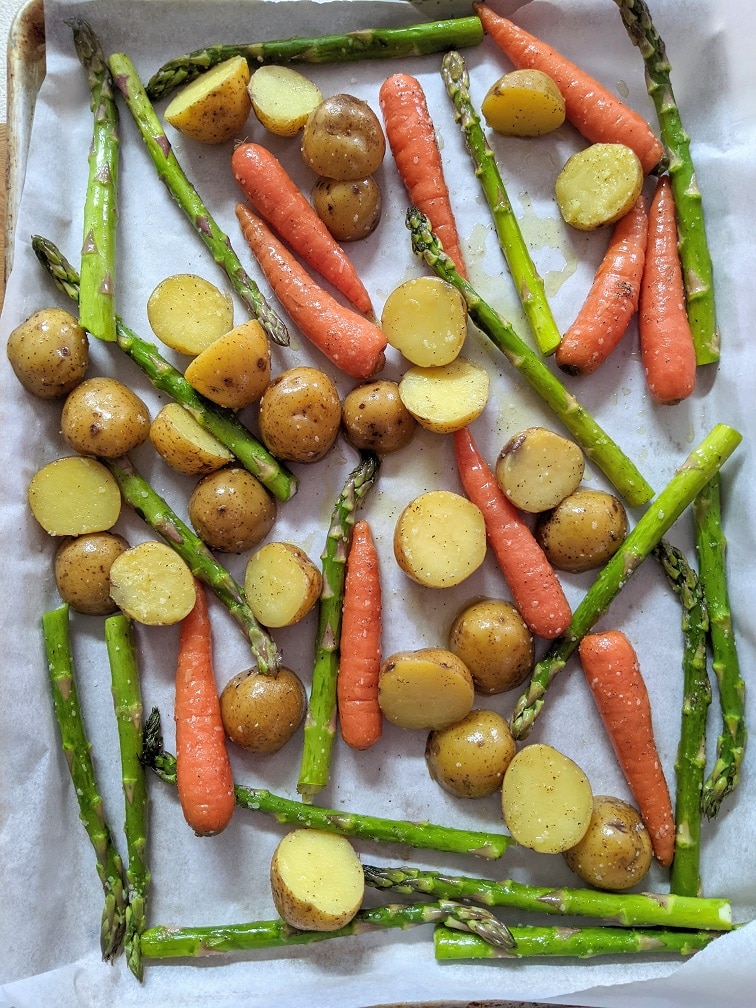
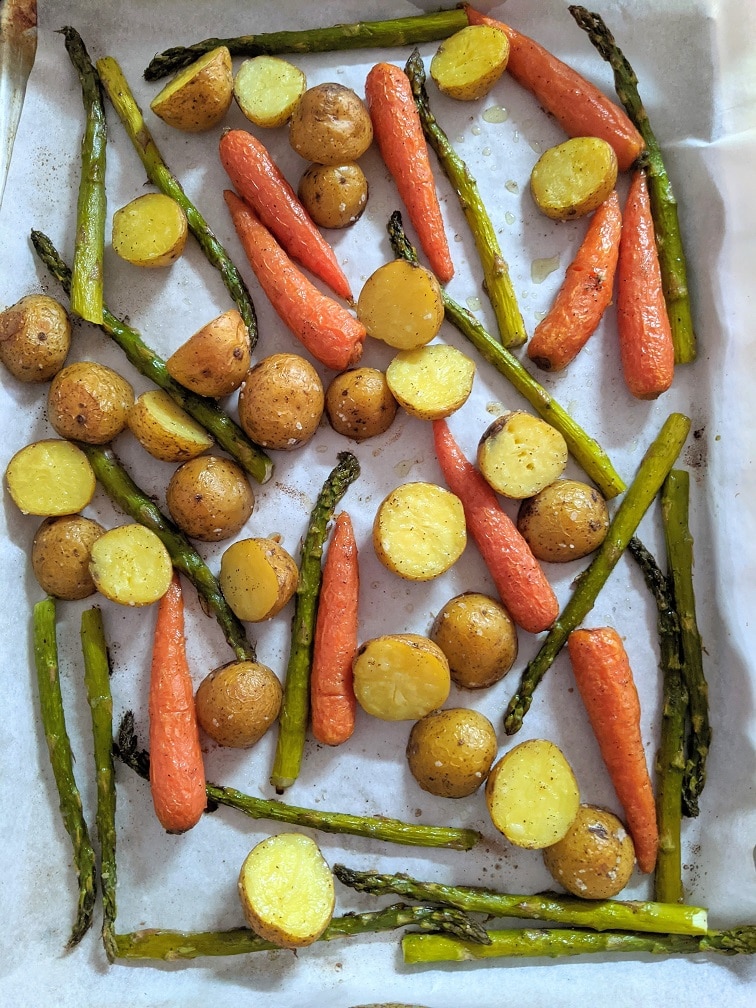
The spring vegetables include one pound (454 g) each of baby yellow potatoes, baby carrots, and asparagus. Cut the potatoes in half and put them in a medium pot with the carrots. Cover with cold water and put the pot on the stove on high heat. Bring the pot to a boil and cook for five minutes. Drain the potatoes and carrots and let them sit in the colander for three minutes to steam. Break the ends off the asparagus and discard them. Put the tops of the asparagus in a medium mixing bowl, add the carrots and potatoes, along with two tablespoons of olive oil, one teaspoon kosher salt, and a quarter teaspoon black pepper. Spread the vegetables out onto a parchment-lined sheet pan and roast in a 400°f oven for 30 minutes.
Roasted Spring Vegetables
Roasted spring vegetables are the perfect side for pan-roasted turkey breast, or just about any other spring meal.
Cut the potatoes in half and put them in a pot with carrots. Cover with cold water and bring to a boil on high heat. Boil for 5 minutes, then drain and let sit to steam in the colander for 3 minutes.
Break the ends off the asparagus and put in a medium mixing bowl with the potatoes, carrots, olive oil, salt and pepper.
Spread the vegetables out onto a parchment-lined sheet pan and roast for 30 minutes.
To serve, remove the bone from the turkey breast and discard it. Thinly slice the breast. Spread the roasted vegetable out onto a serving platter and fan the turkey breast out over the vegetables. Spoon the sauce over the turkey and enjoy.
The Wrap Up
This spring-inspired Pan-Roasted Turkey Breast is tender and juicy, the sauce is bursting with flavour, and the roasted spring vegetables are the perfect compliment. But don’t take my word for it. Try it for yourself. I think you’ll be happy that you did.
Thank you to Turkey Farmers of Canada for sponsoring this post. For more great turkey recipes, check out thinkturkey.ca
Thank you for reading this post. Please share it on Facebook, Pinterest, or Twitter to help Chef’s Notes grow. Subscribe to Chef’s Notes below, and you will never miss a post again.
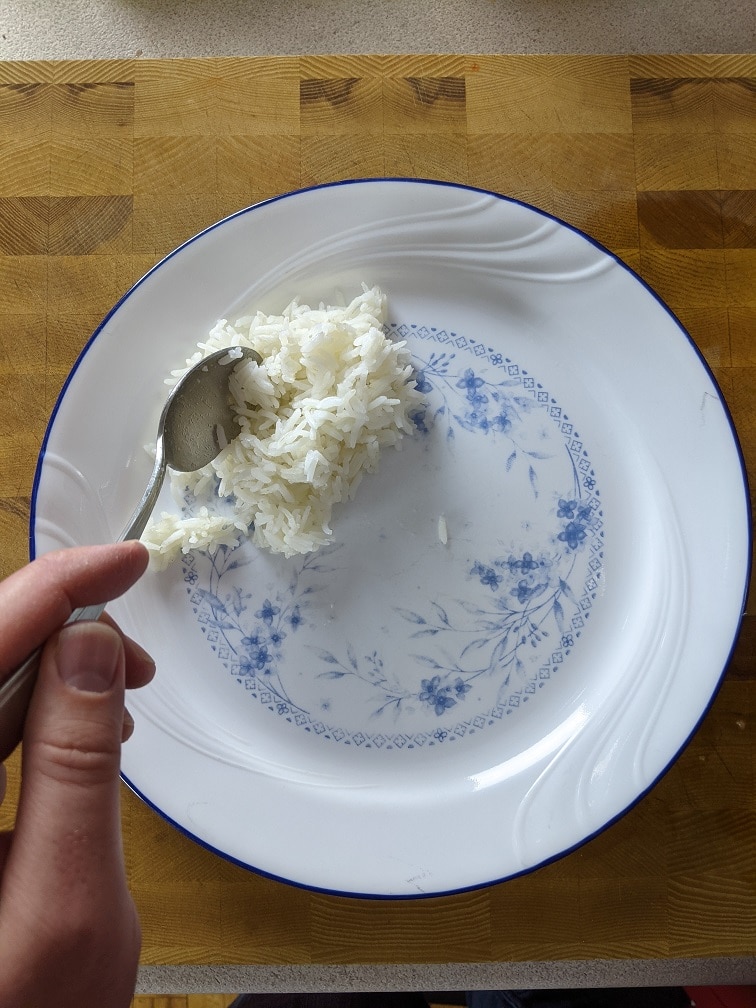
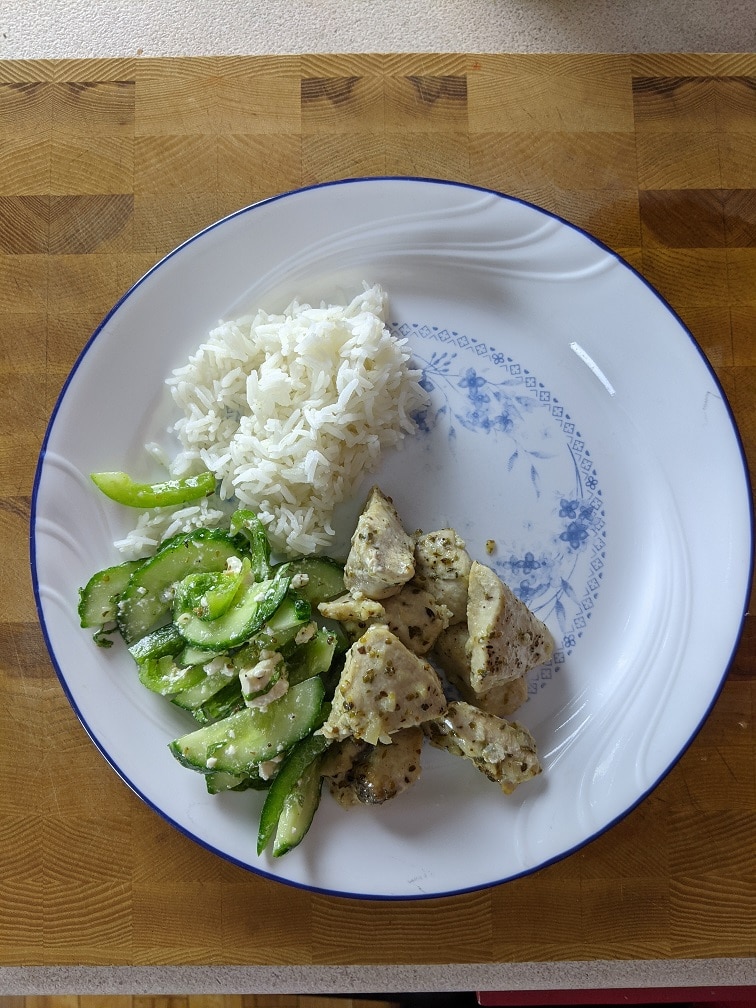
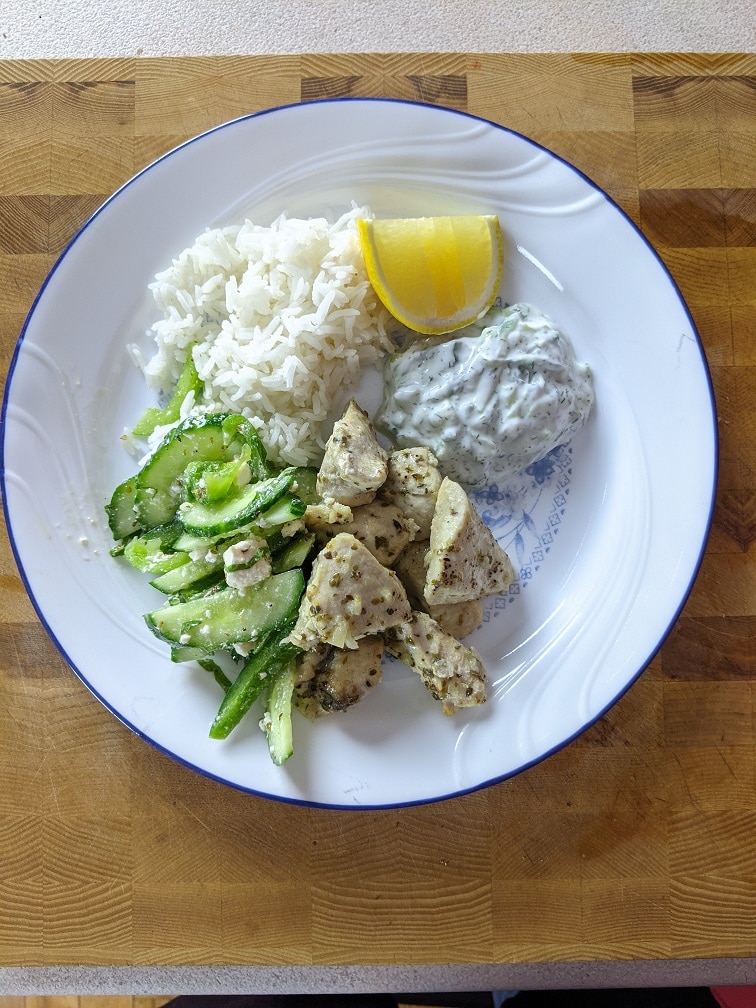
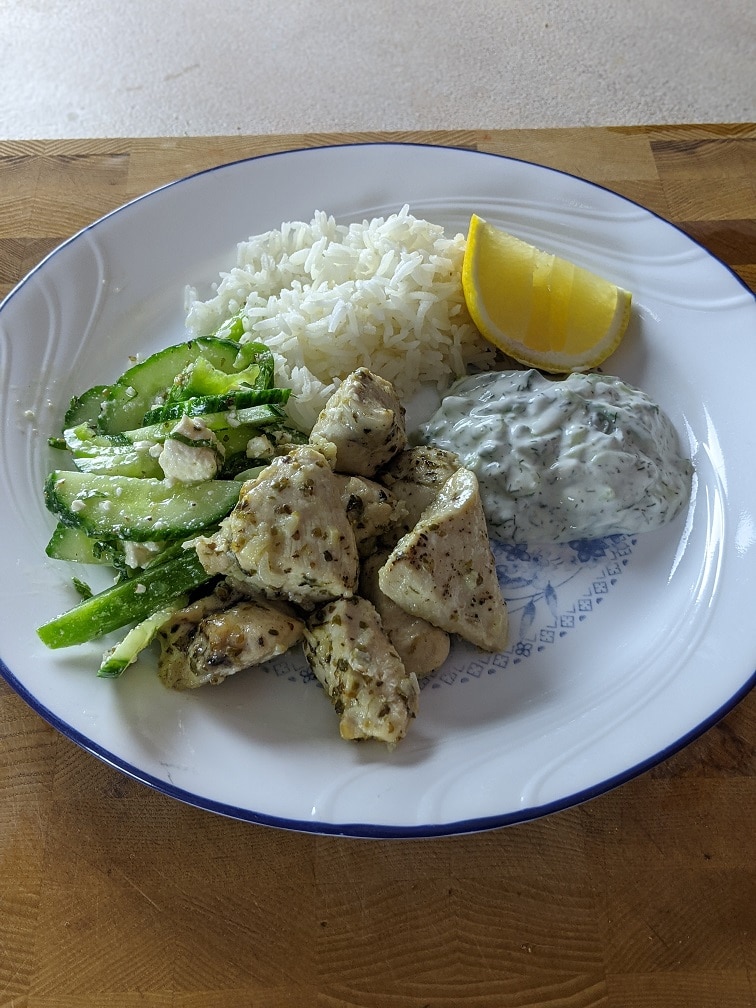
Greek-style chicken, village salad, and tzatziki with rice. This simple Greek meal is all you’ve ever wanted and more. Join me as I walk you through how to make it and share a few tricks from my time working in a Greek restaurant. Without further ado, let’s get to it.
Greek-Style Chicken
It’s best if this Greek-style chicken is left to marinate overnight (two hours will be okay), so we will start with that. The marinade for the chicken is essentially a less acidic version of Greek salad dressing. If you want to, you can use Greek dressing, but it is a pretty simple marinade to make so why skip it?
Marinating the chicken
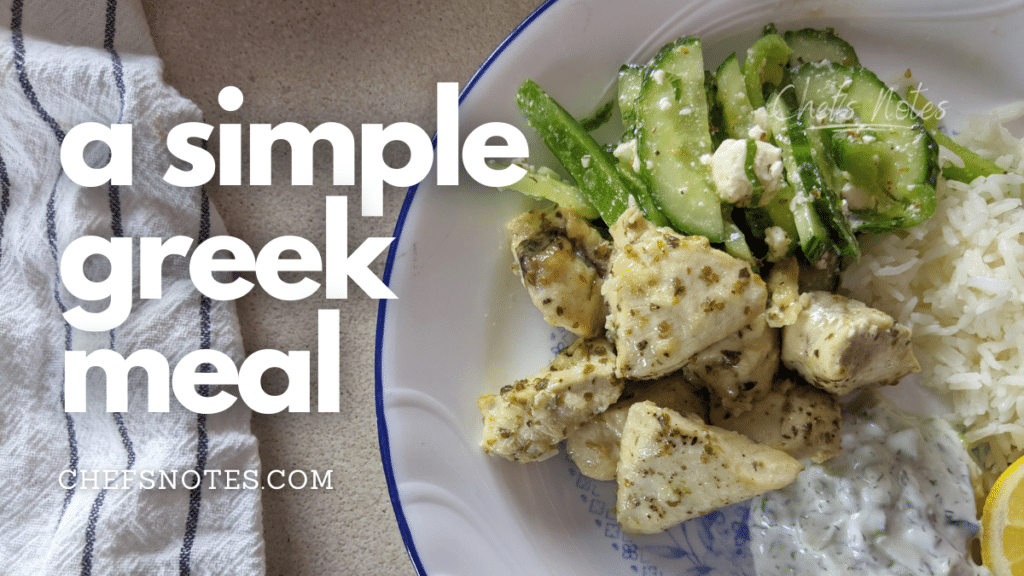
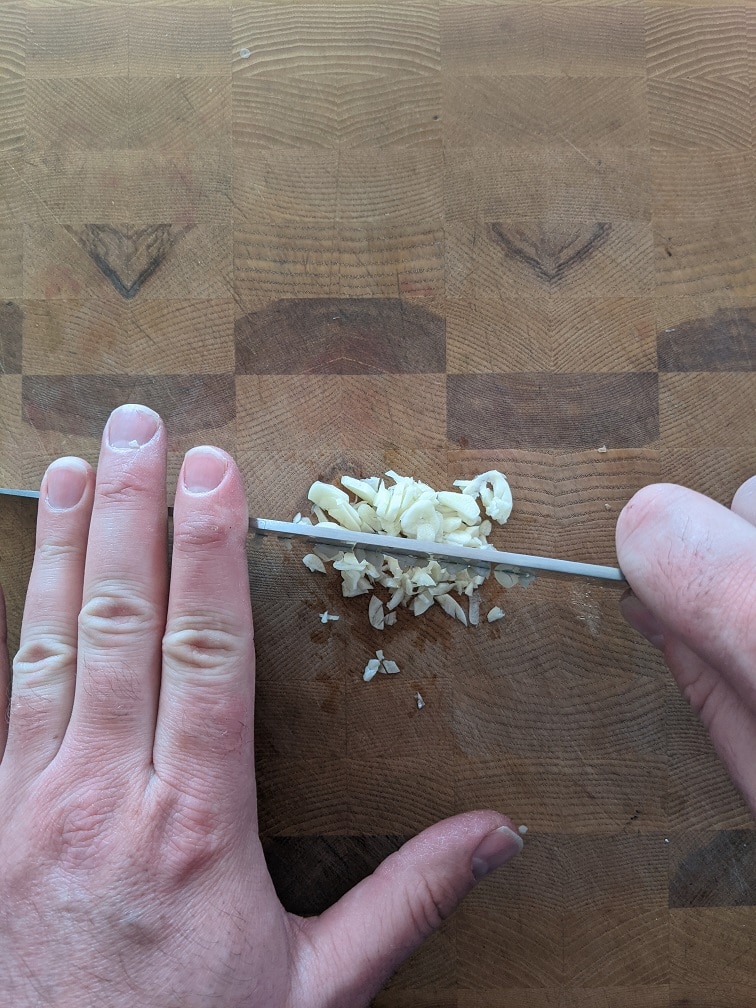
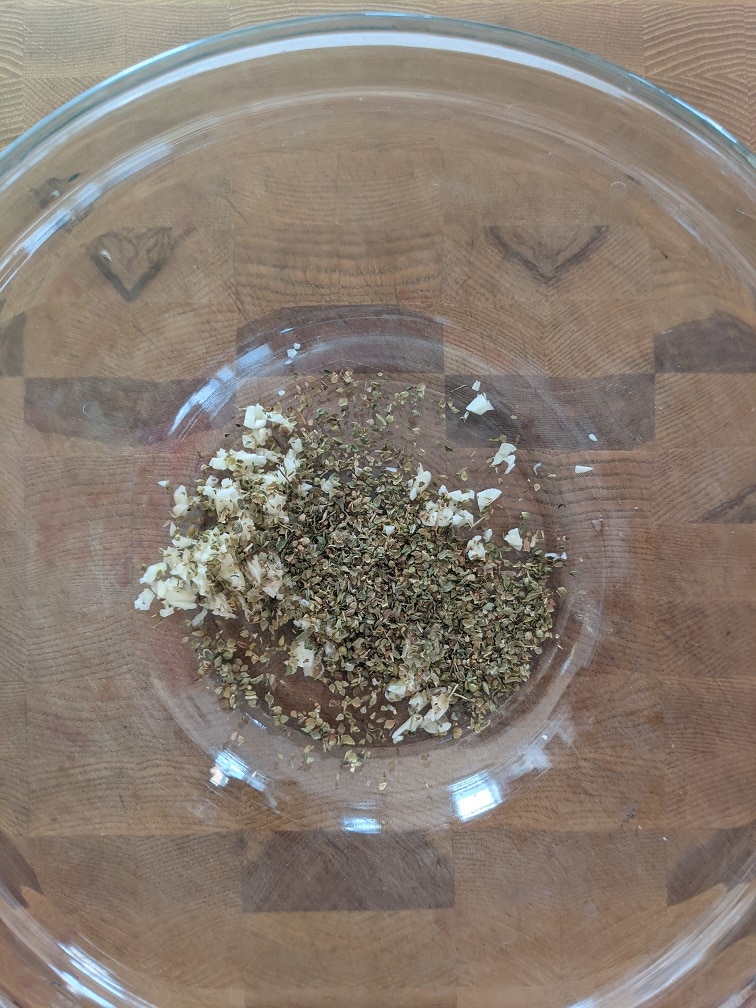
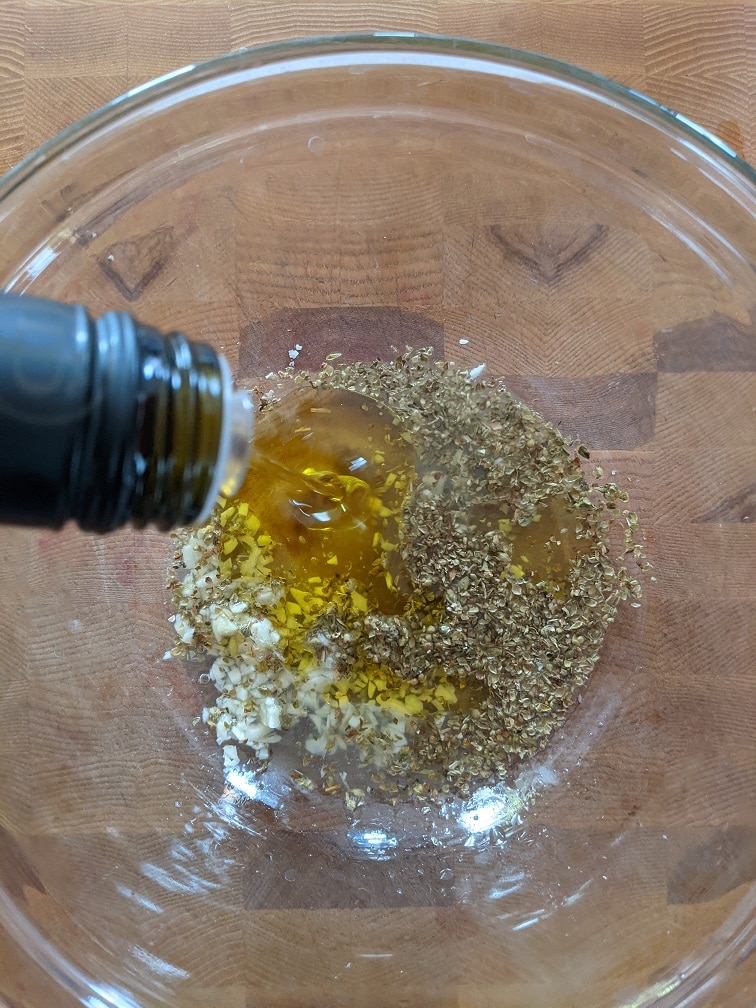
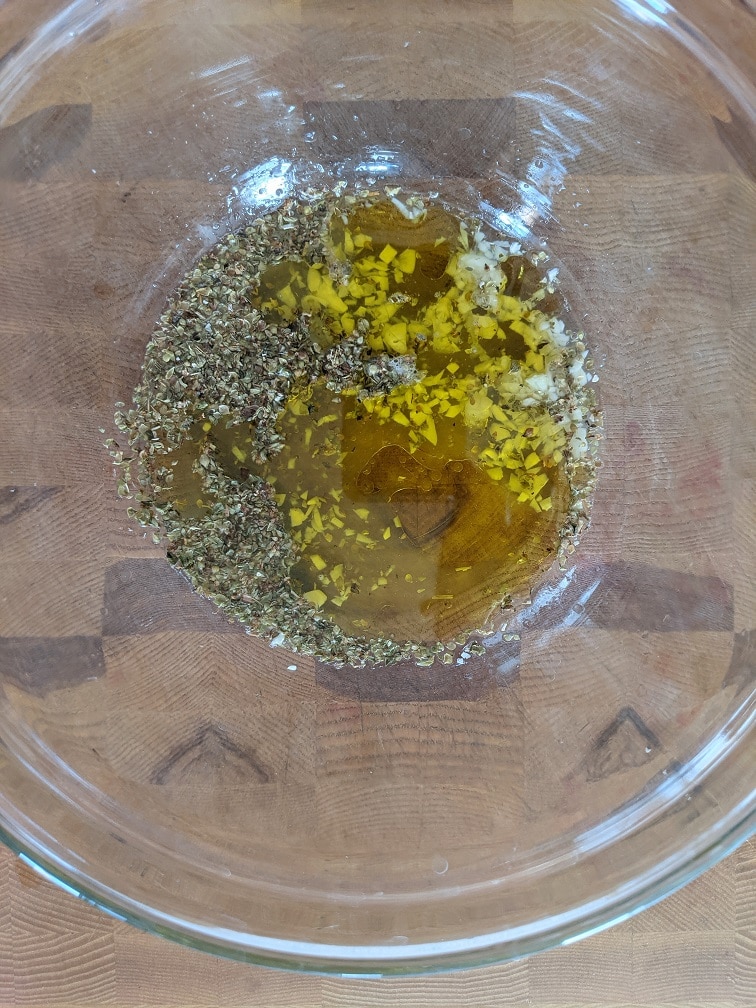
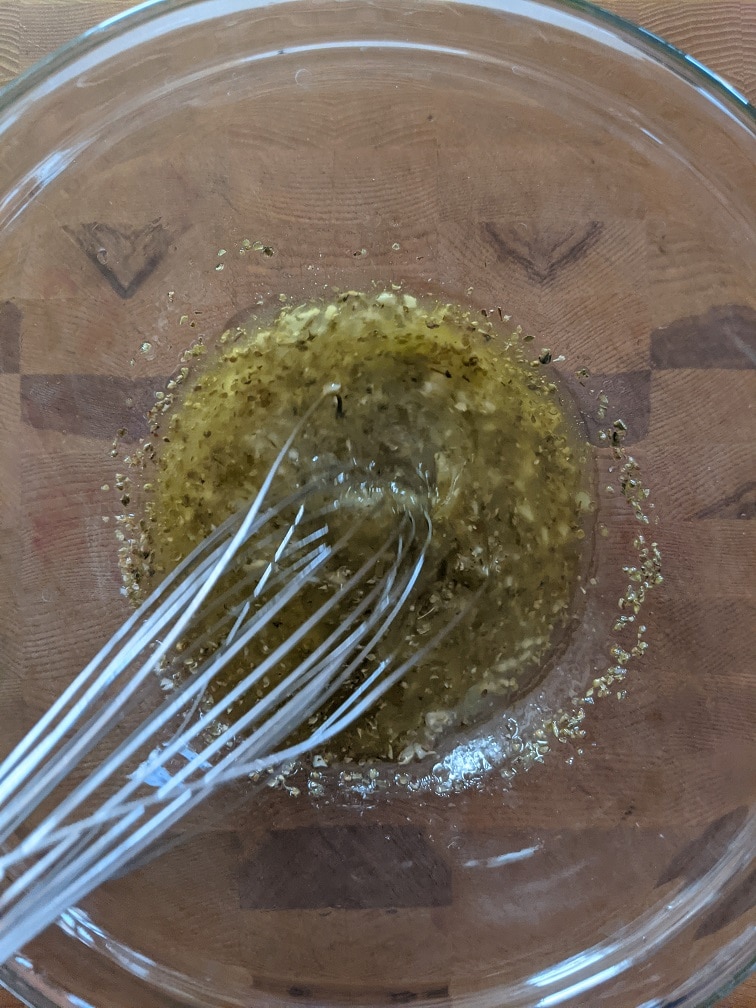
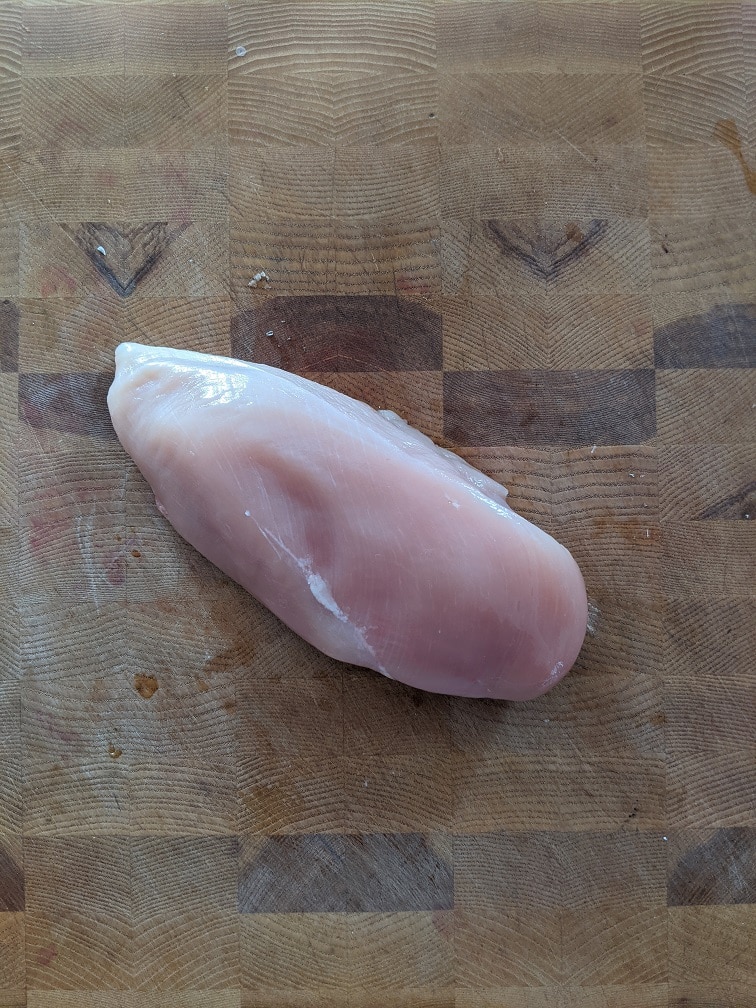
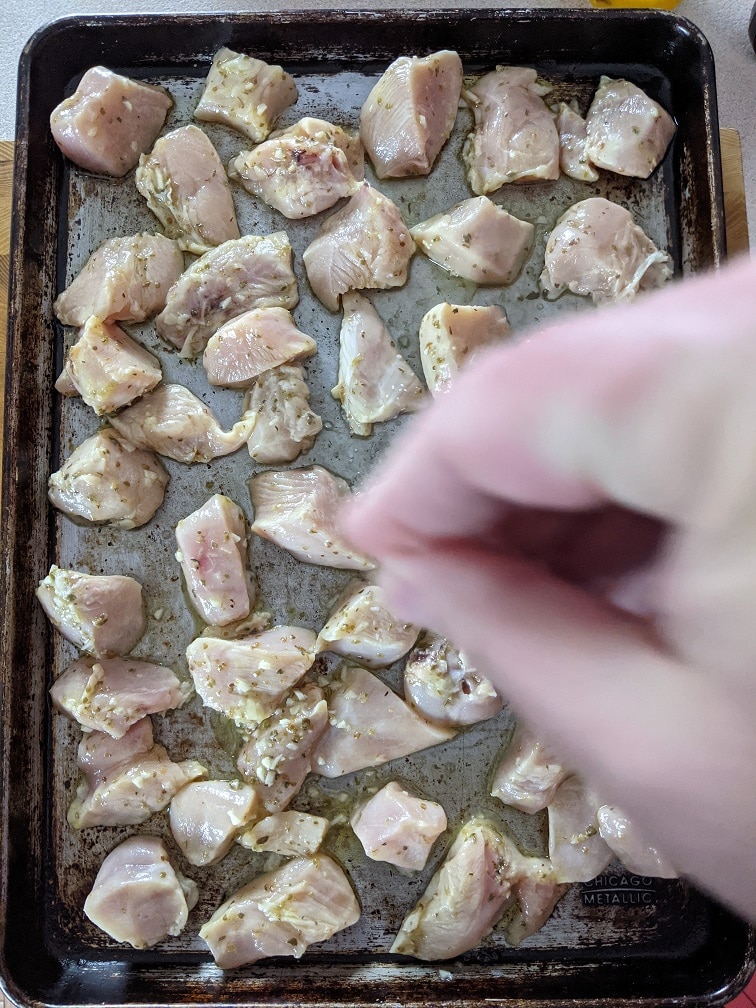
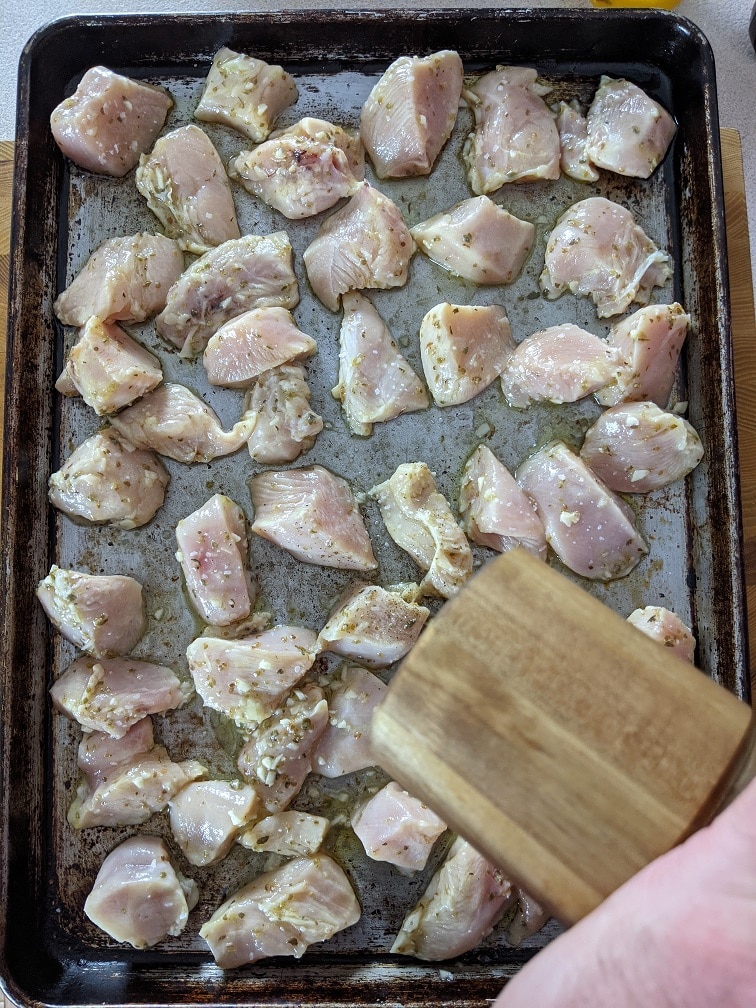
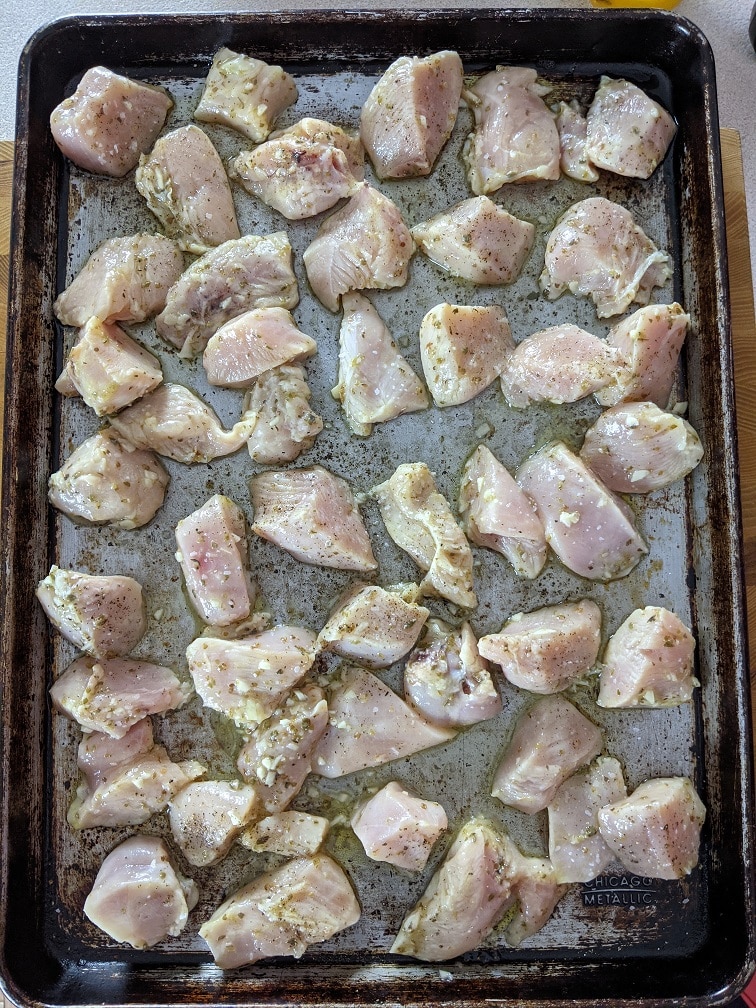
To make the chicken’s marinade, combine one tablespoon of minced garlic with one tablespoon of dried oregano, the juice of one lemon, and a quarter cup of olive oil. Mix well. Cut three large chicken breasts into 2cm x 2cm cubes and add to the marinade. Stir to coat the chicken. Cover the bowl with plastic wrap and put it in the fridge for the night.
Roasting the chicken
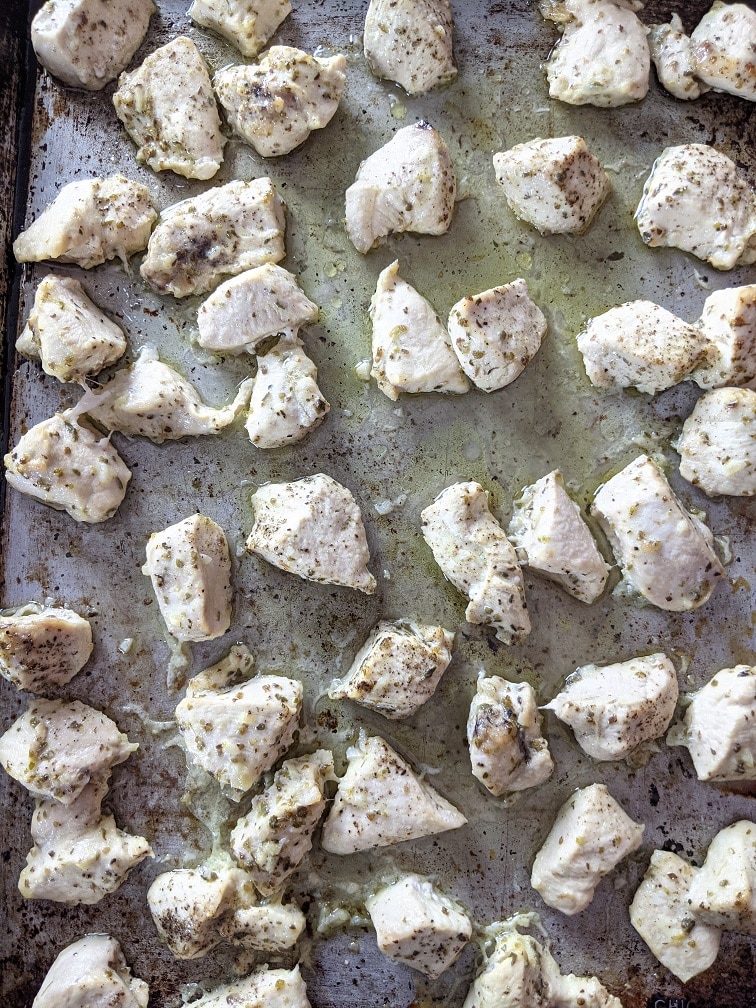
To cook the chicken, first heat your oven to 400°f. Spread a few tablespoons of olive oil on a sheet pan, drain the excess marinade off the chicken, and spread the chicken out on the sheet pan. Season with salt and pepper, then roast for 25 to 35 minutes or until the chicken is cooked. The chicken is cooked when its internal temperature reaches 165°f.
Greek-Style Marinated Chicken
Chicken marinated in lemon, olive oil and other Greek flavours then roasted or grilled.
Squeeze the juice of the lemon into a medium mixing bowl. Then add the garlic, dried oregano, and olive oil. Whisk to combine.
Cut the chicken into 2cm x 2cm cubes or are close to that as you can get them. Put the chicken in the marinade, and stir to coat.
Put the chicken in the fridge and leave it to marinate overnight.
Heat your oven to 400°f.
Drain the marinade off the chicken, then spread it out onto a lightly oiled sheet pan. Season the chicken with salt and pepper, then roast in the oven for 25 to 35 minutes or until the chicken is cooked.
Alternatively, put the chicken on bamboo skewers that have been soaked in water for 1 hour, then grill on medium-high heat for 4 to 5 minutes per side.
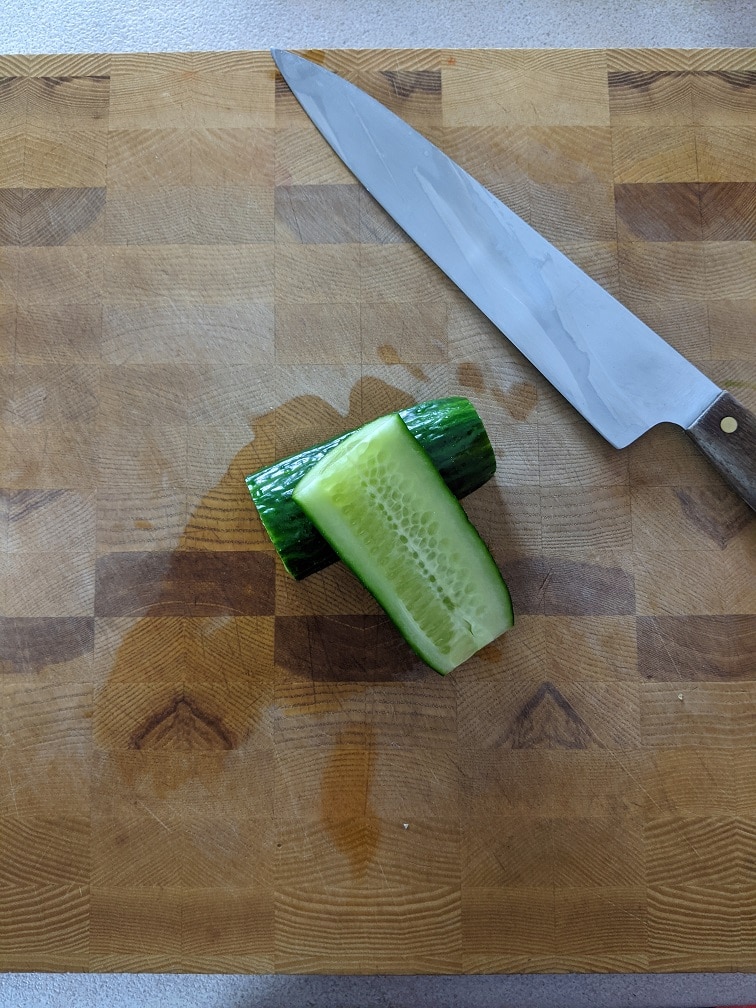
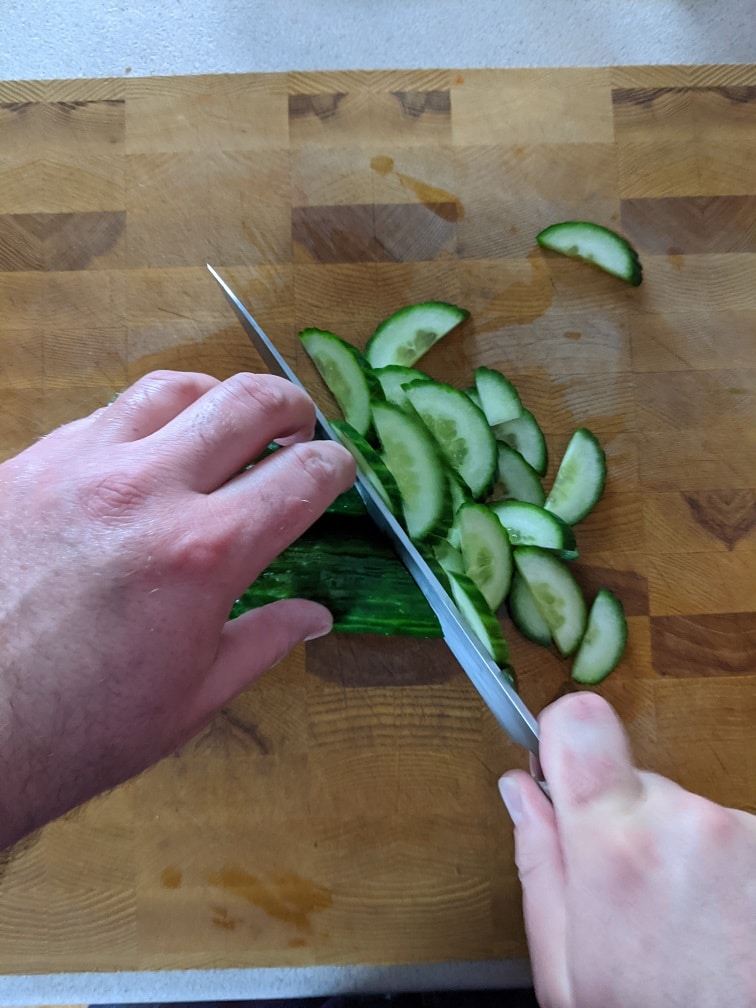
Tzatziki is like the secret weapon of Greek food. It can act as a dip for vegetables or bread, as a sauce for grilled or roasted meat, or as a spread for pita wraps. Oh, and it tastes fantastic. There are two things that you have to focus on to get the right consistency for your tzatziki. First of all, the yogurt. It has to be a thick Greek-syle yogurt. Otherwise, you may end up with watery tzatziki. No one wants watery tzatziki. The second point to focus on is how you process the cucumber. Let’s take a look at how you do that.
Salting the cucumber
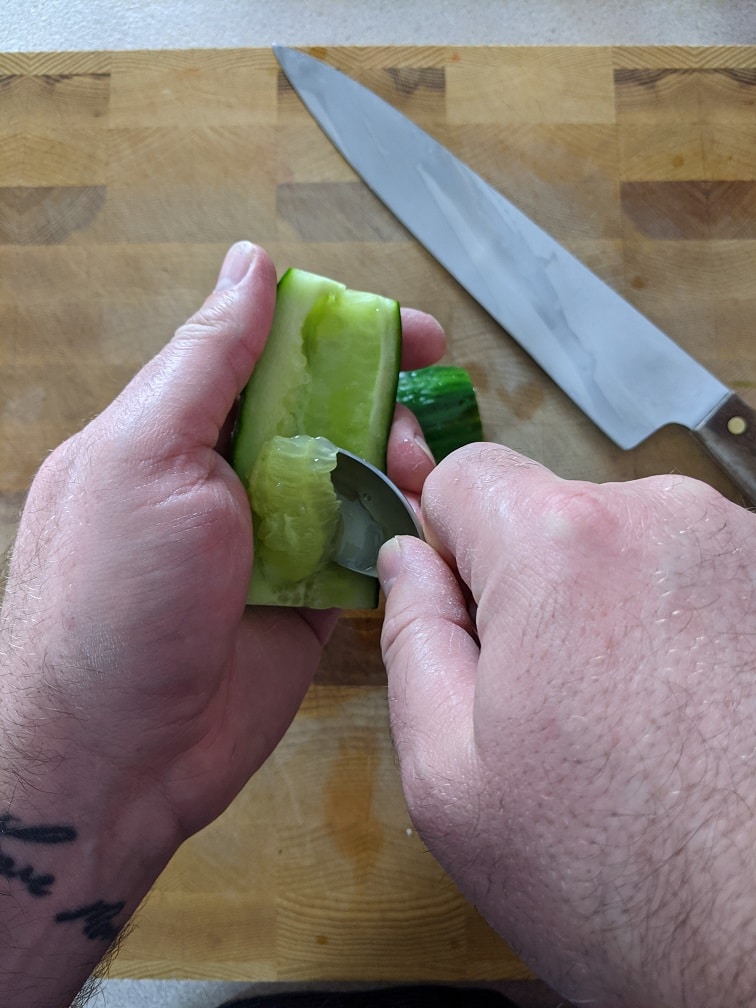
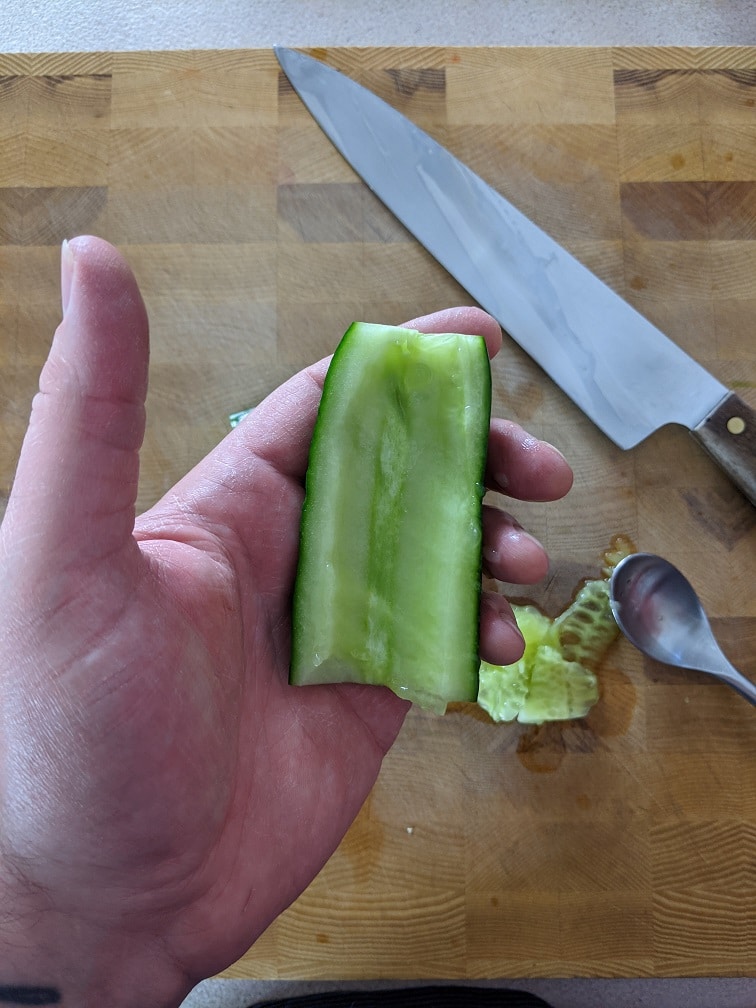
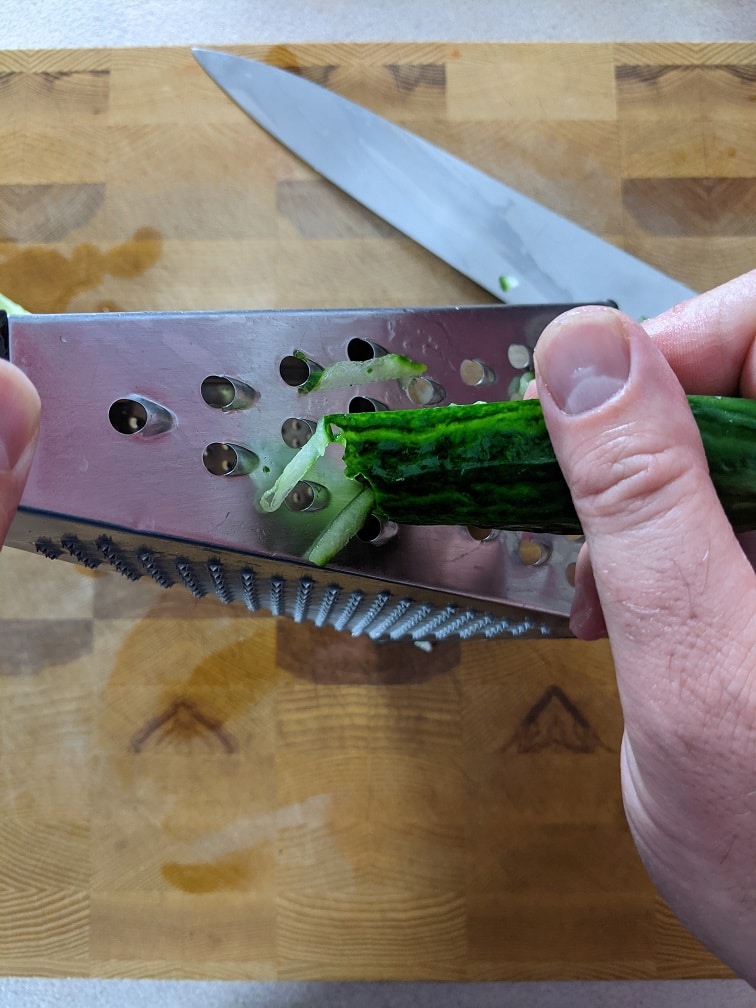
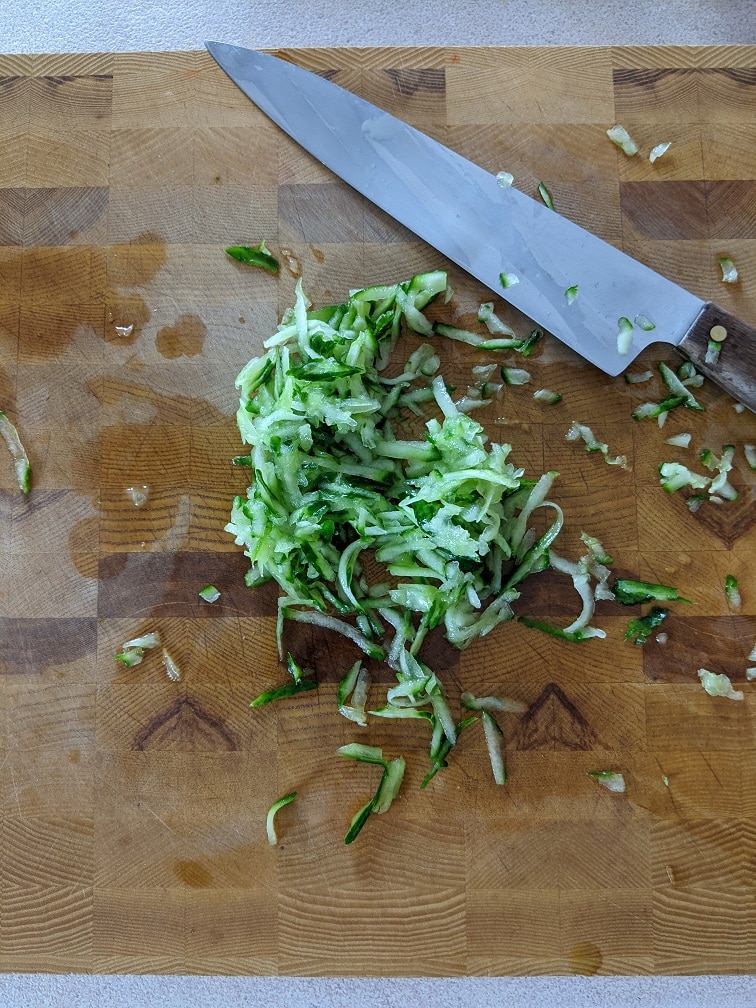
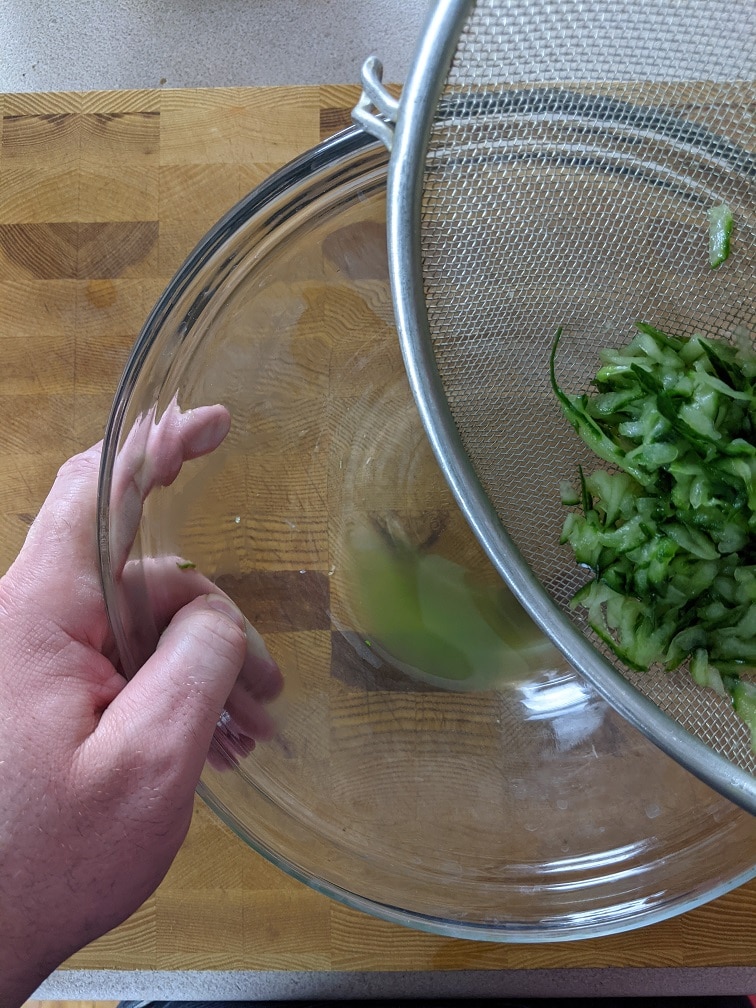
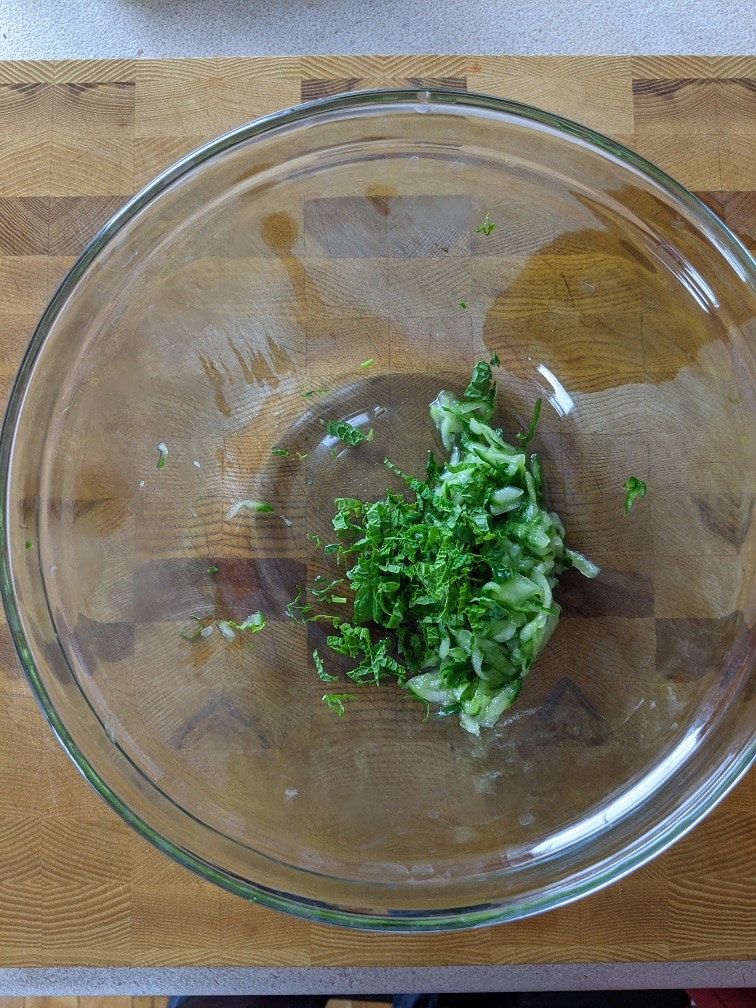
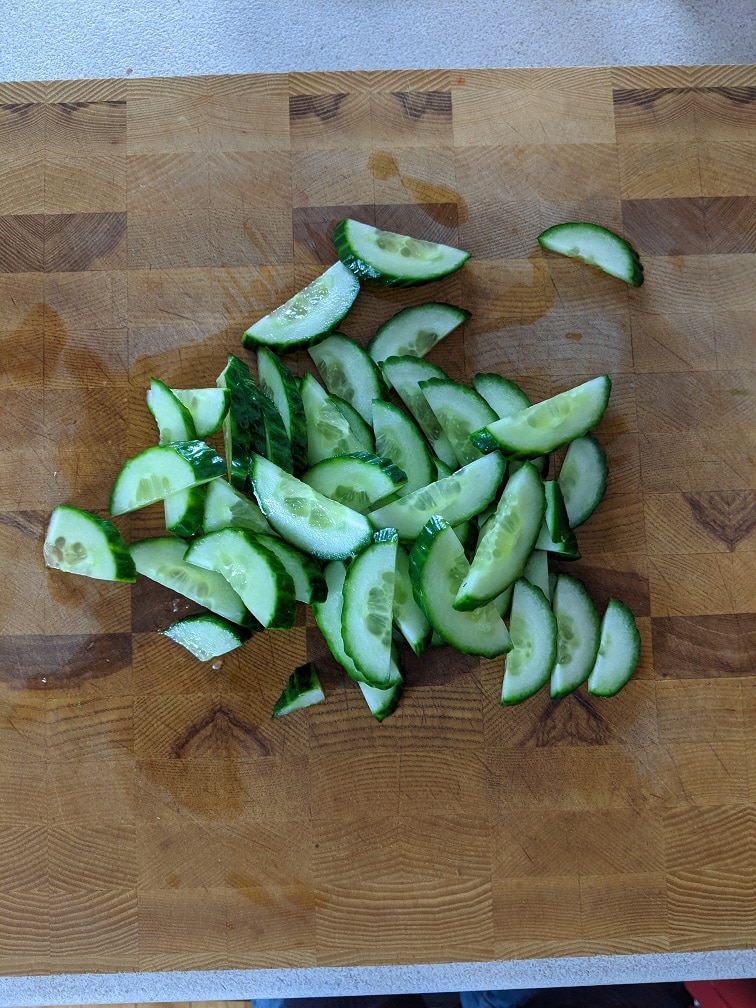
Cucumbers are mostly water. As the cucumber sits in the yogurt, a lot of that water is going to be pulled out, again, giving you watery tzatziki. There are four steps to process the cucumber to limit how much cucumber juice leaks into the yogurt. 1. remove the seeds. 2. grate the cucumber. 3. salt the cucumber. 4. drain the cucumber.
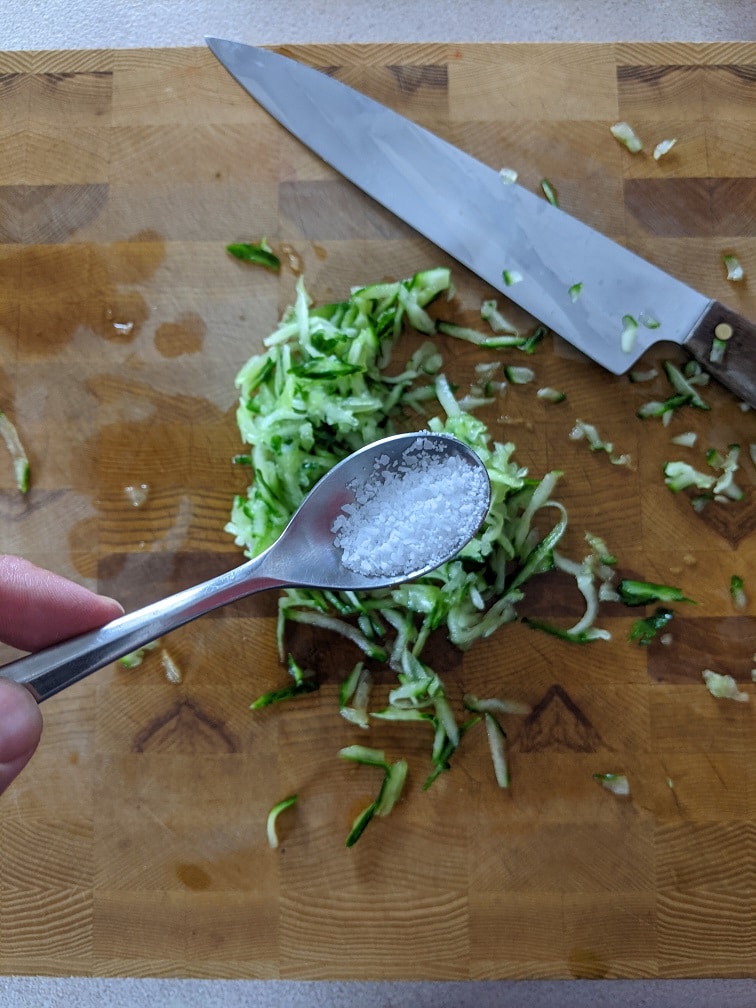
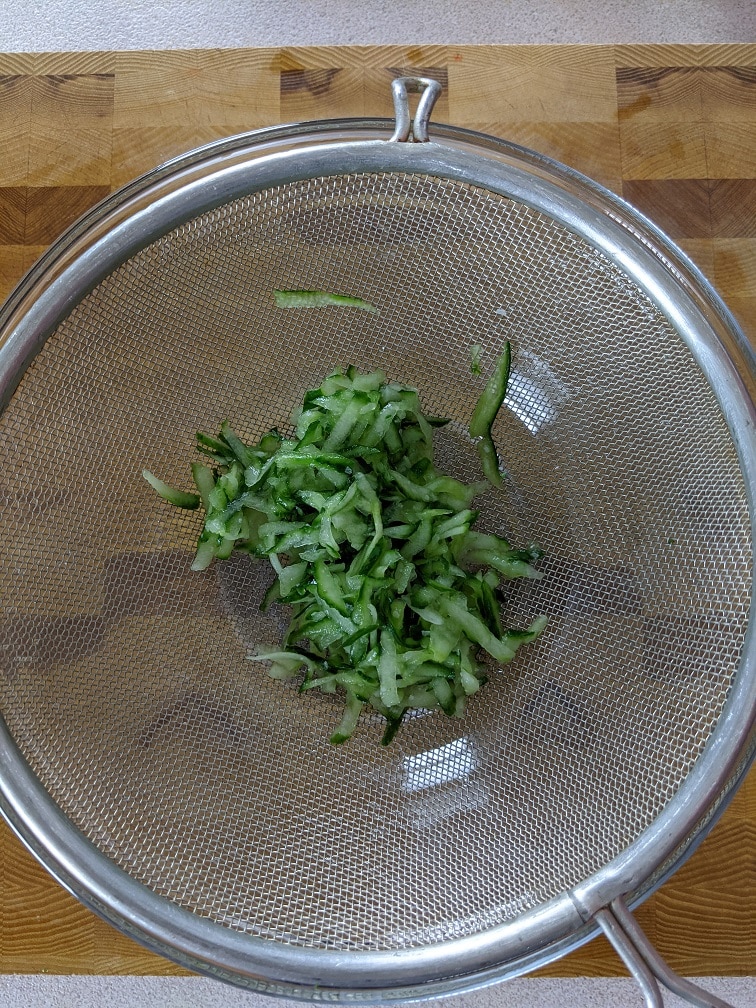
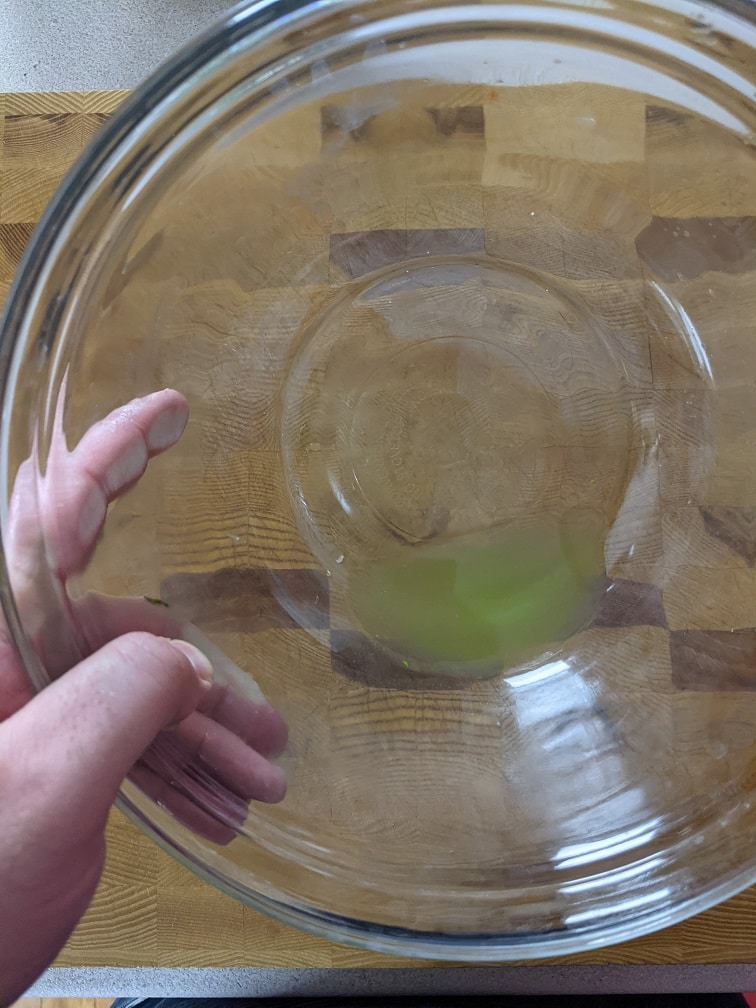
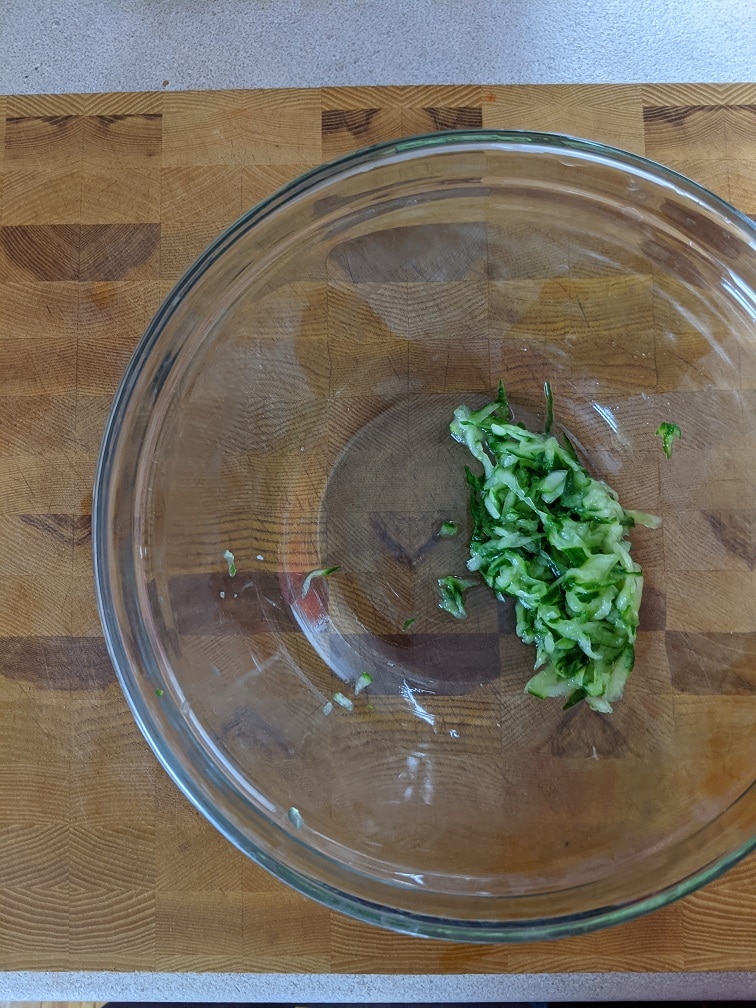
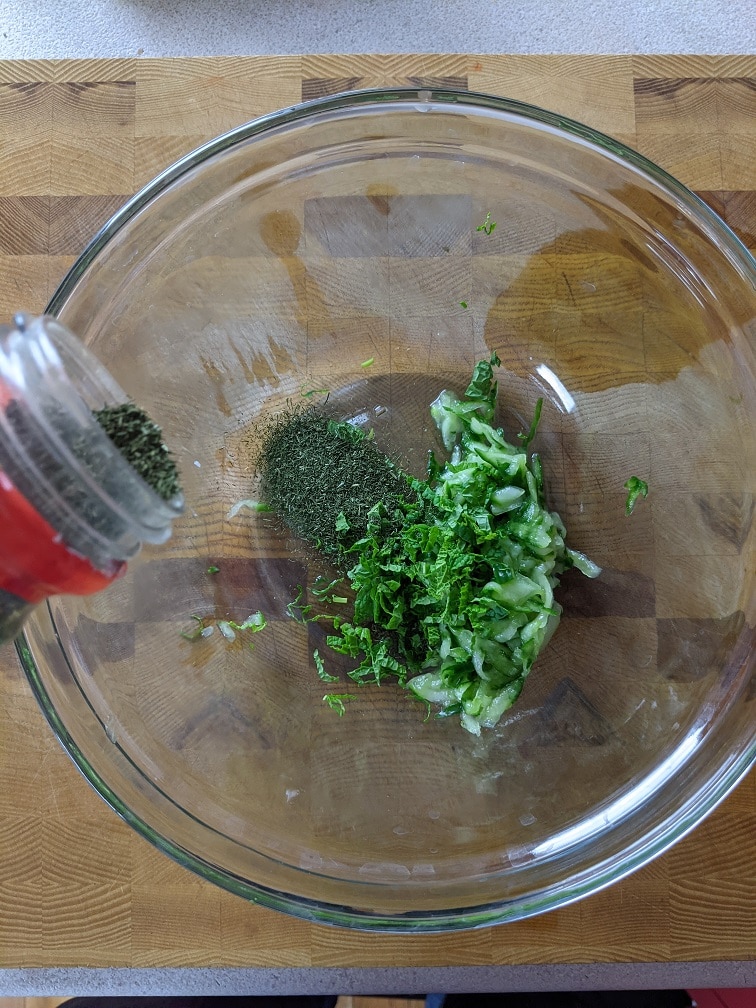
To remove the seeds, cut the cucumber in half lengthwise and scoop them out with a spoon. This will remove a lot of excess moisture, but it will also extend your tzatziki’s shelf life because the seeds will spoil quicker than the rest of the cucumber. Grate the cucumber on the large setting of a cheese grater. This creates more surface area, allowing you to extract more moisture. It also helps to distribute the cucumber throughout the tzatziki evenly. Mix half a teaspoon of kosher salt into the cucumber. The salt will pull water out of the cucumber. Finally, put the cucumber in a strainer set above a mixing bowl. Let it sit for ten minutes, then discard the liquid.
Finishing the tzatziki
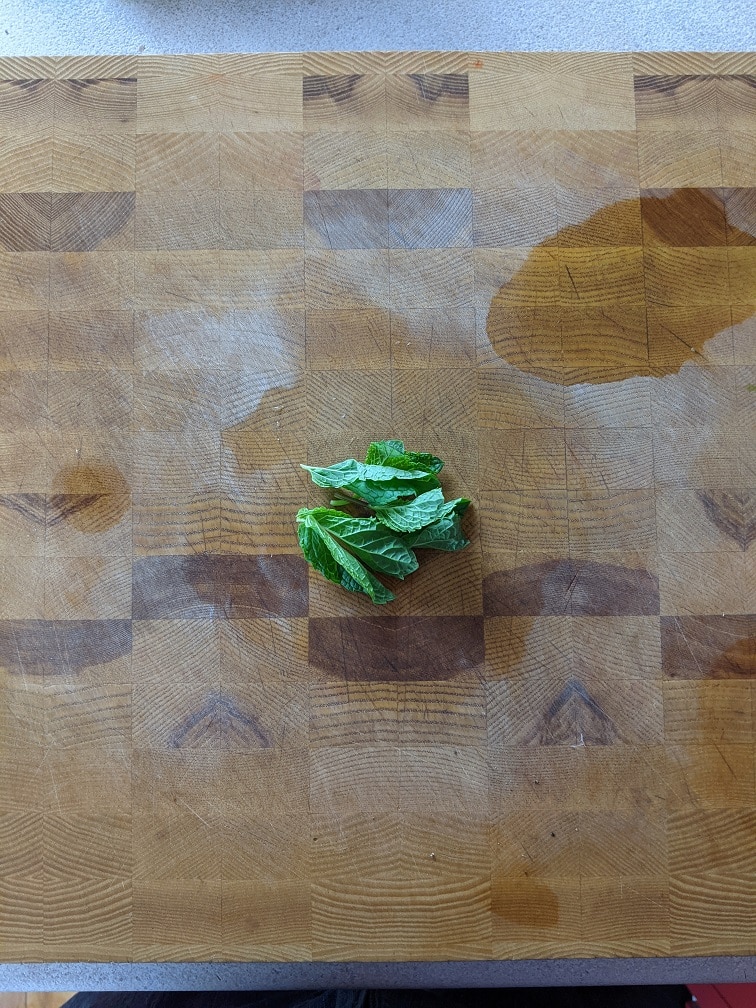
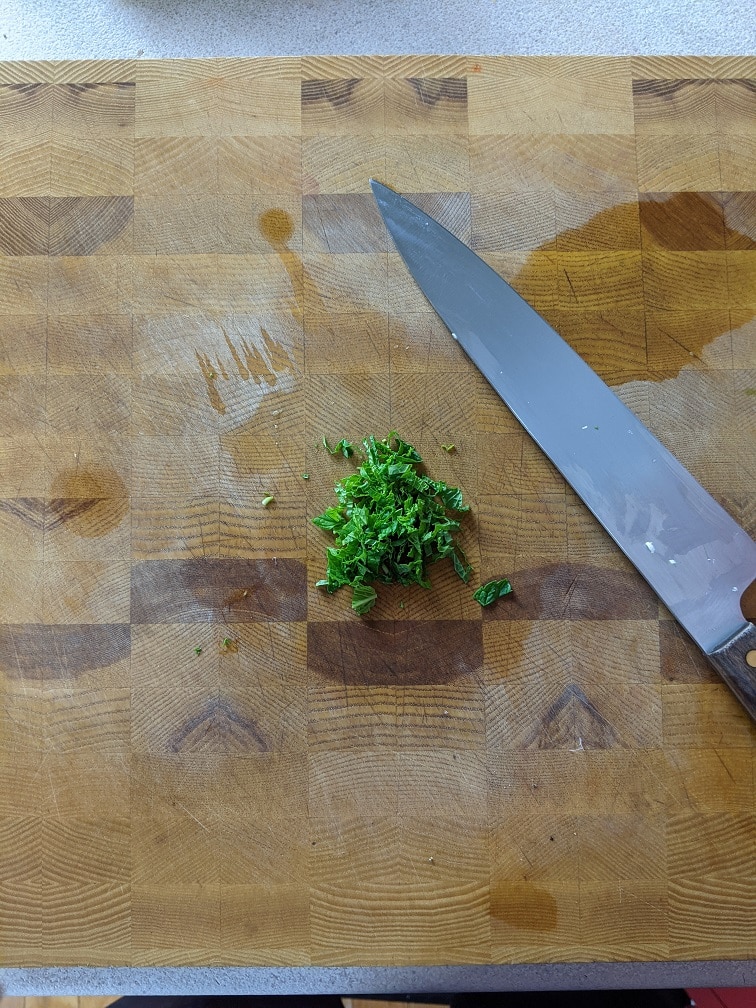
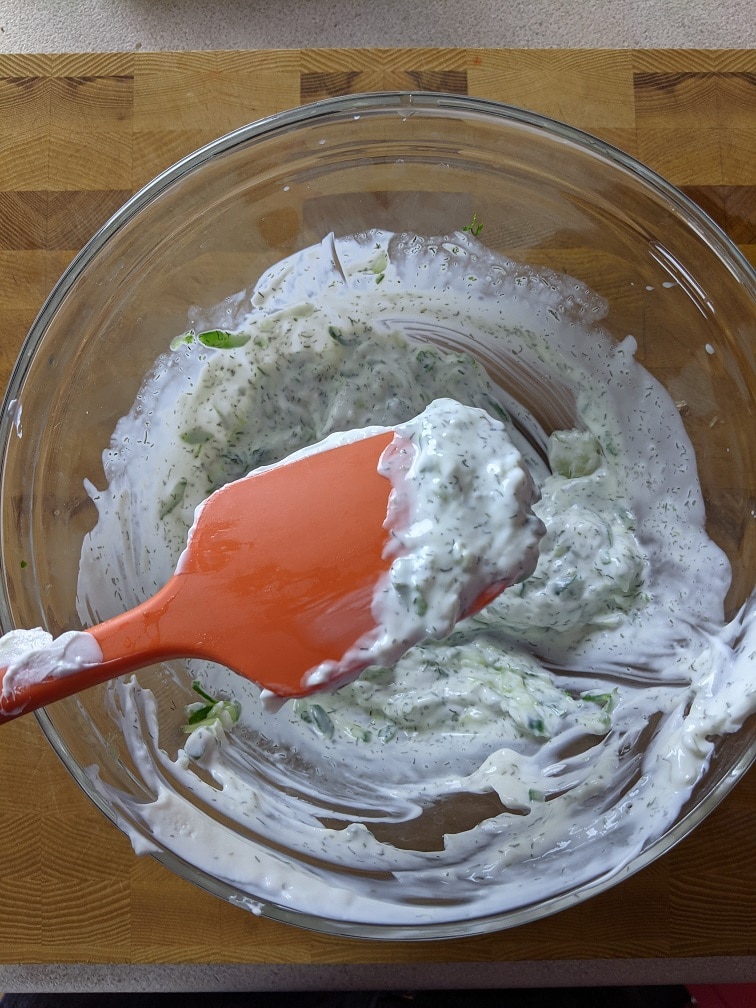
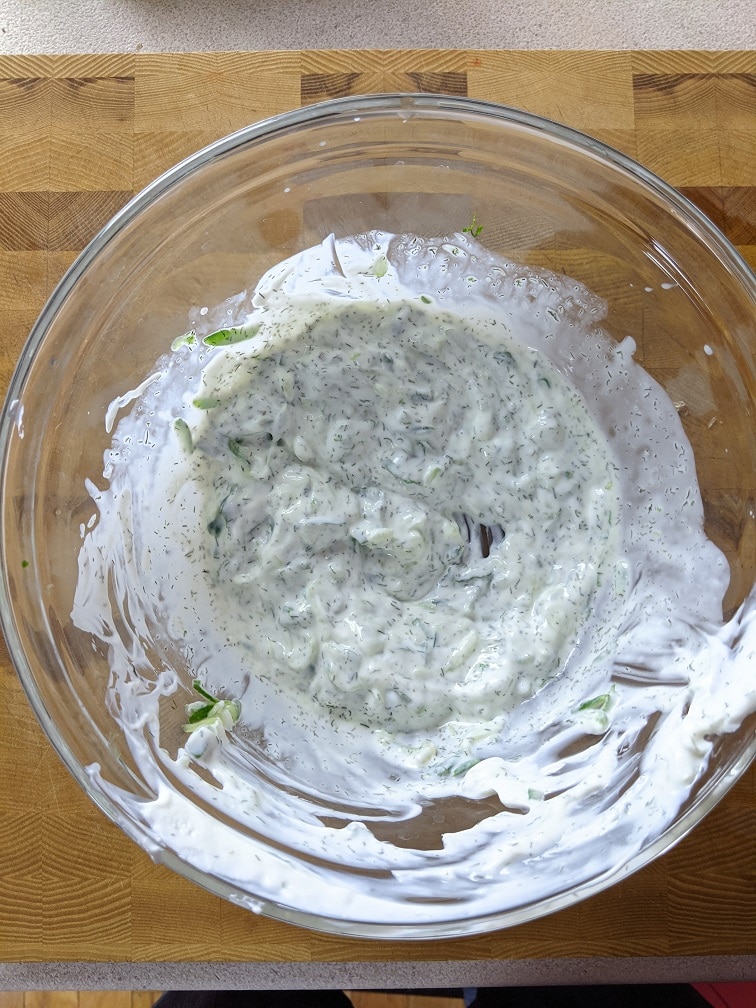
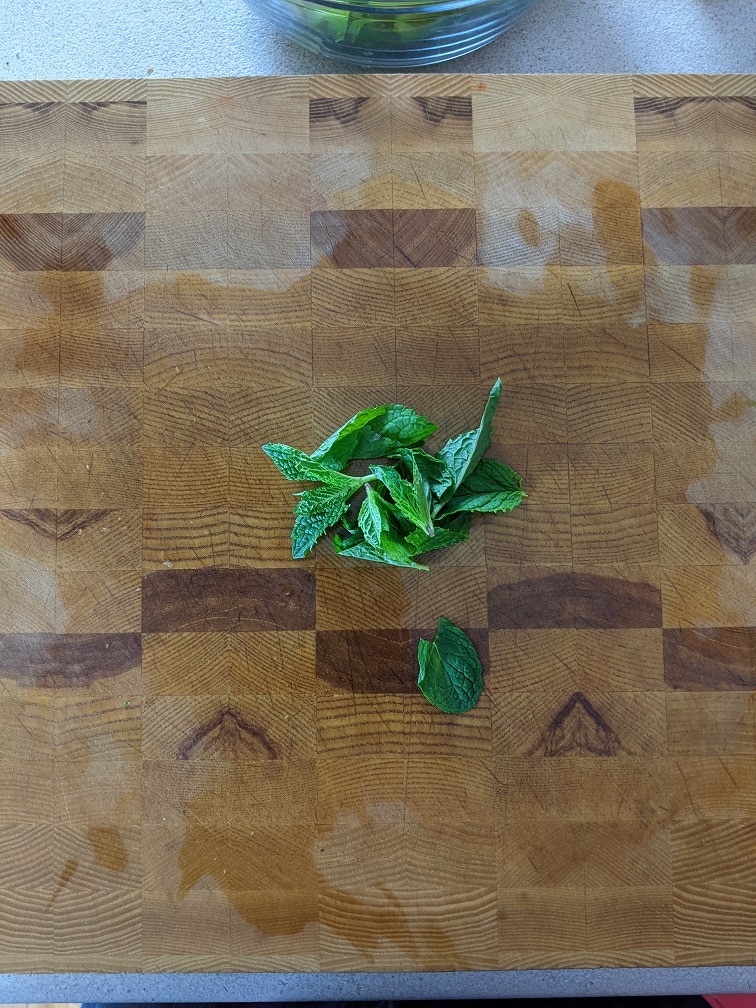
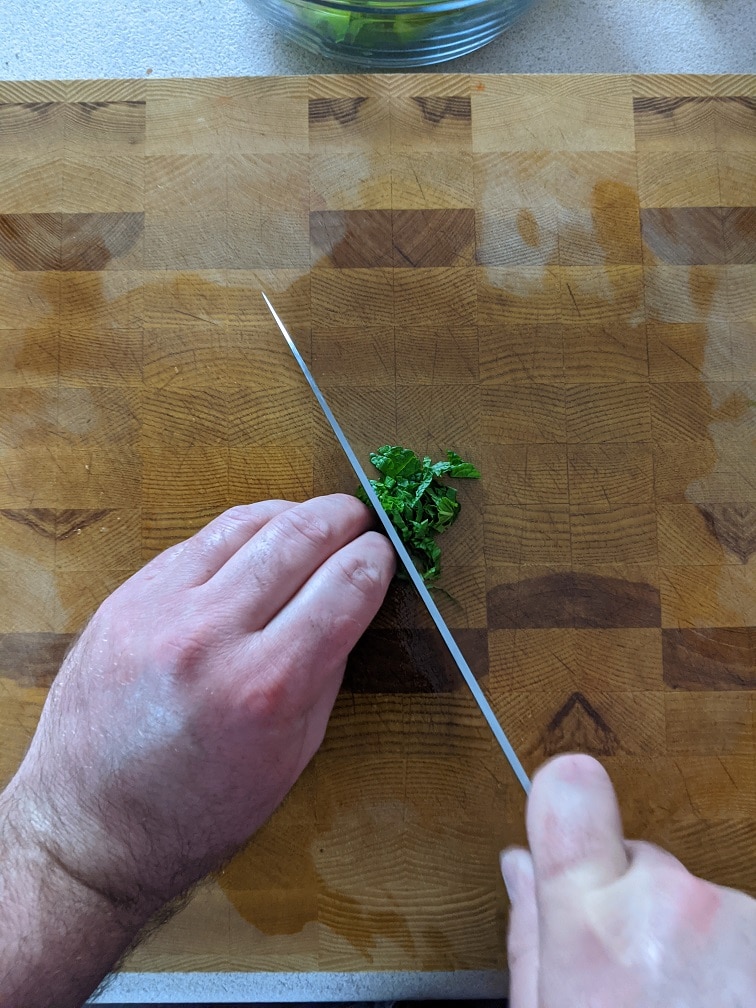
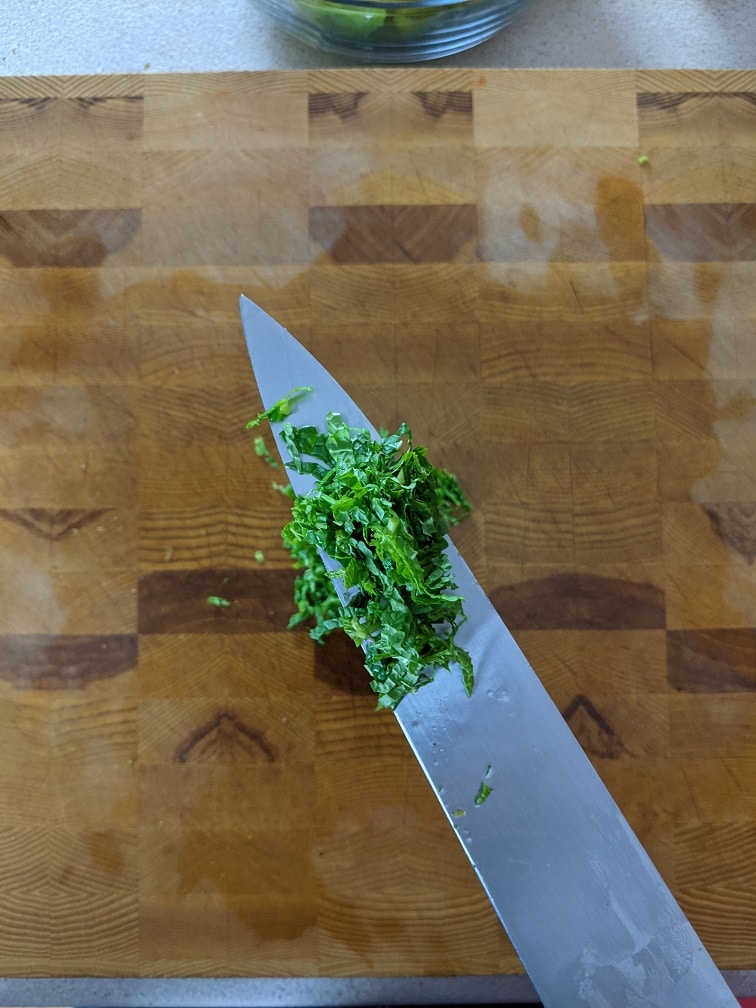
To finish the tzatziki, add one tablespoon chopped mint, a quarter teaspoon dried dill, one teaspoon minced garlic, the juice of half a lemon, and one cup of Greek yogurt to the cucumber. Mix well. You can use the tzatziki right away, but if you cover it and put it in the fridge for an hour or two, it will have more flavour.
Tzatziki Sauce
Greek yogurt and cucumber sauce that works as a dipping sauce for almost any grilled or roasted meat, fresh or roasted vegetables, or pita bread.
Cut the cucumber in half and remove the seeds. Grate the cucumber on the large holes of a cheese grater. Mix the grated cucumber with the salt and put it in a strainer set above a medium mixing bowl. Leave to sit for 10 minutes.
Squeeze the cucumber to extract any remaining juice then discard the liquid in the bottom of the bowl. Put the cucumber in the bowl with the remaining ingredients, stir and serve.
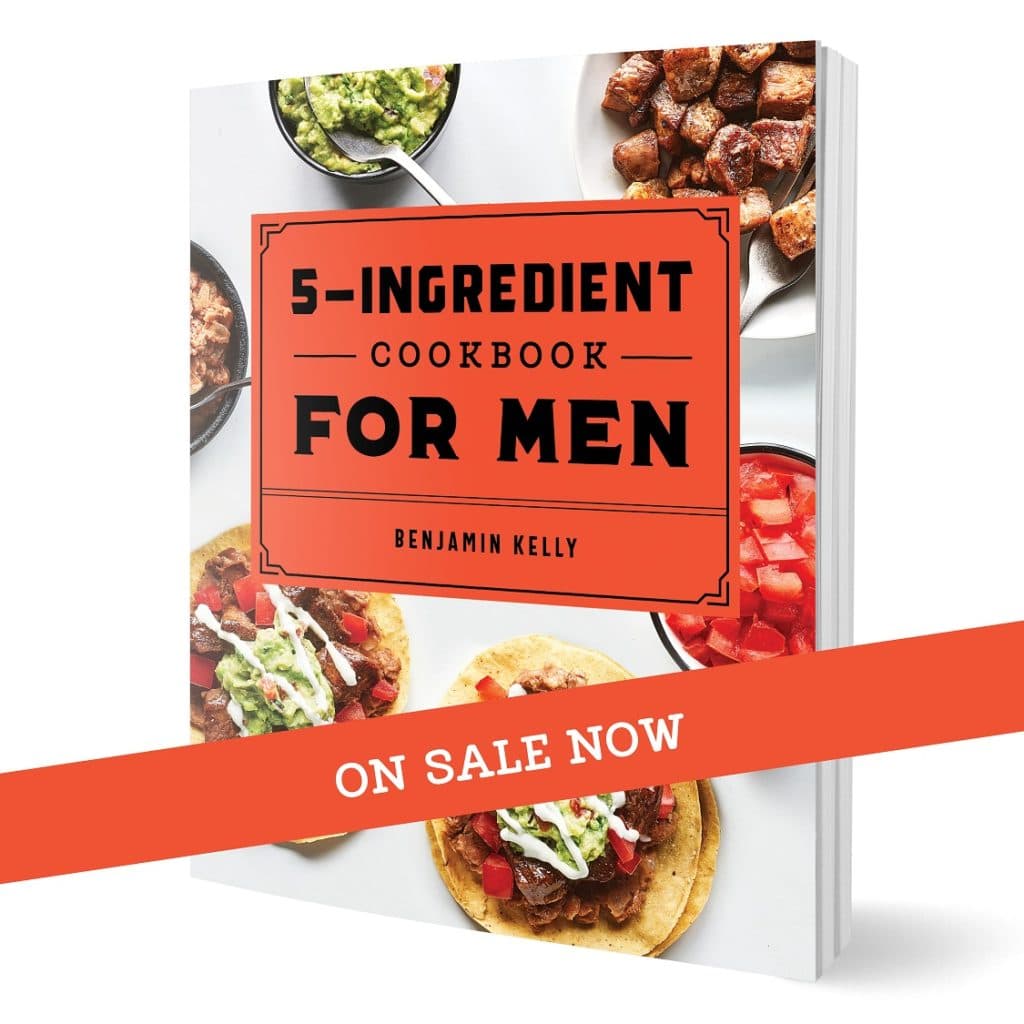
Did you know that I wrote a cookbook? It’s called the 5-Ingredient Cookbook for Men (of course, it is for everyone). Get your copy today at Amazon in Canada here, and Amazon in the US here, or wherever fine books are sold.
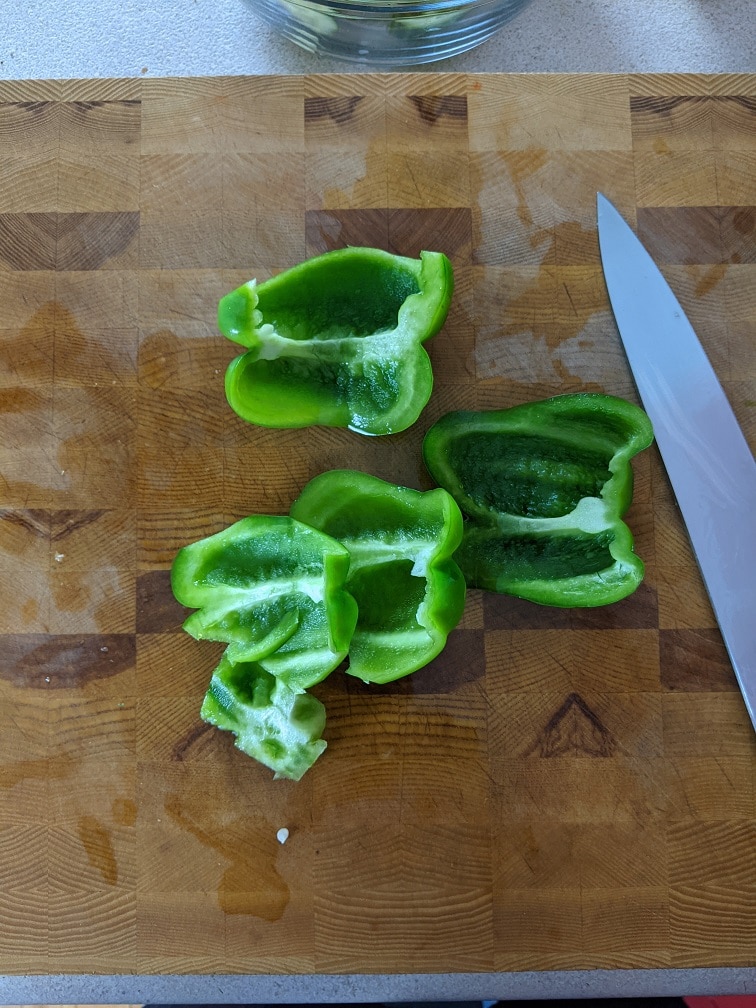
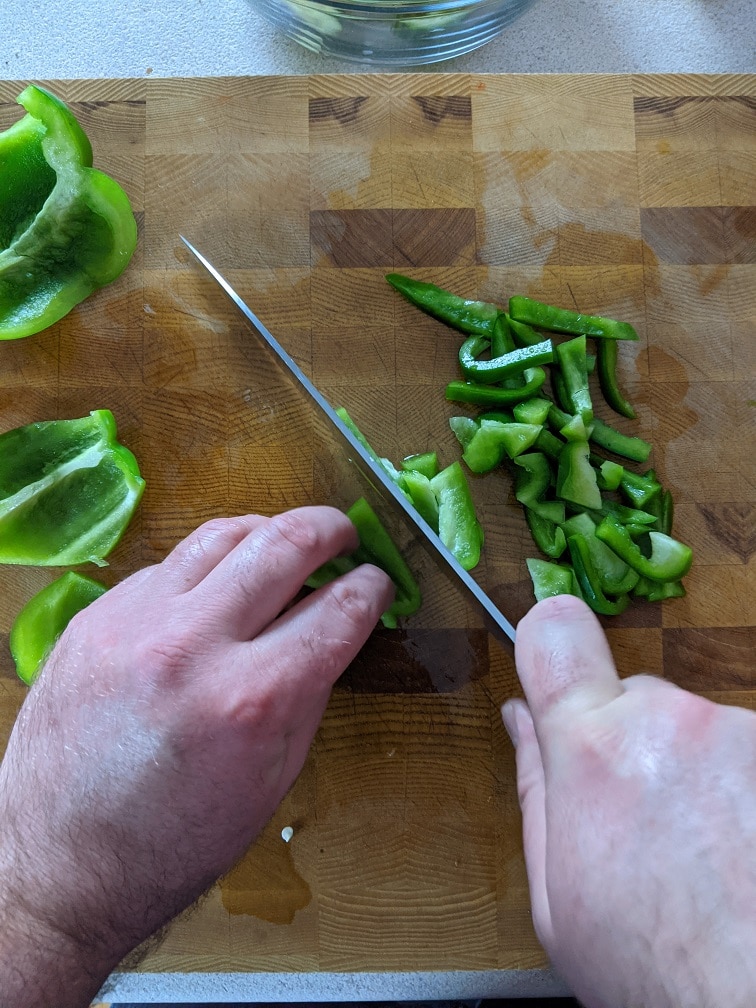
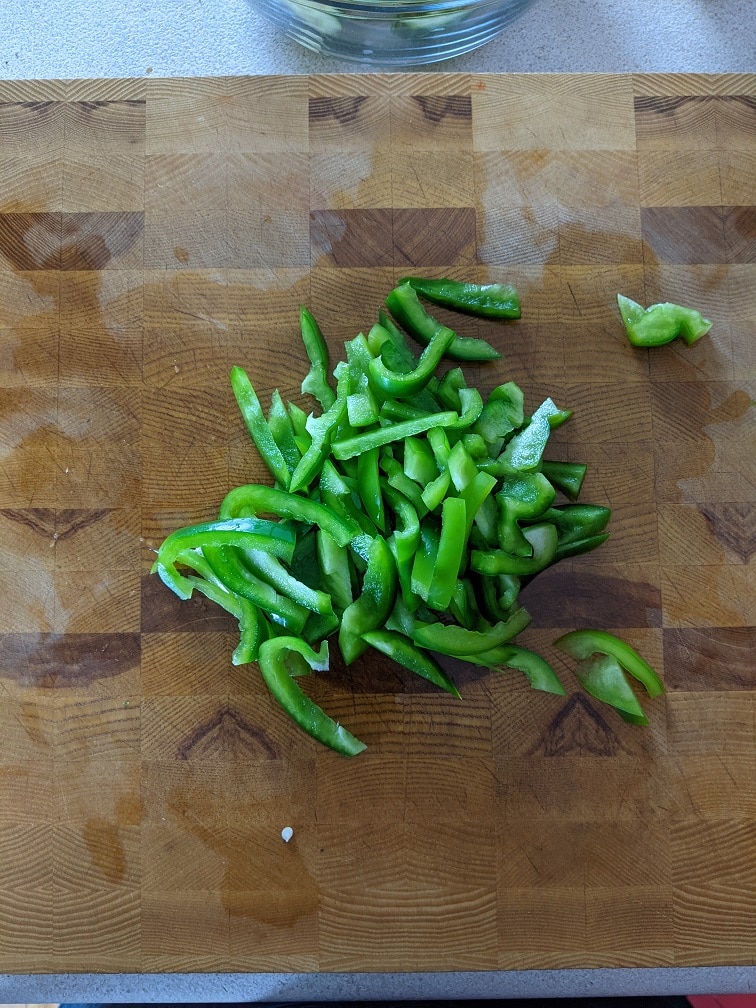
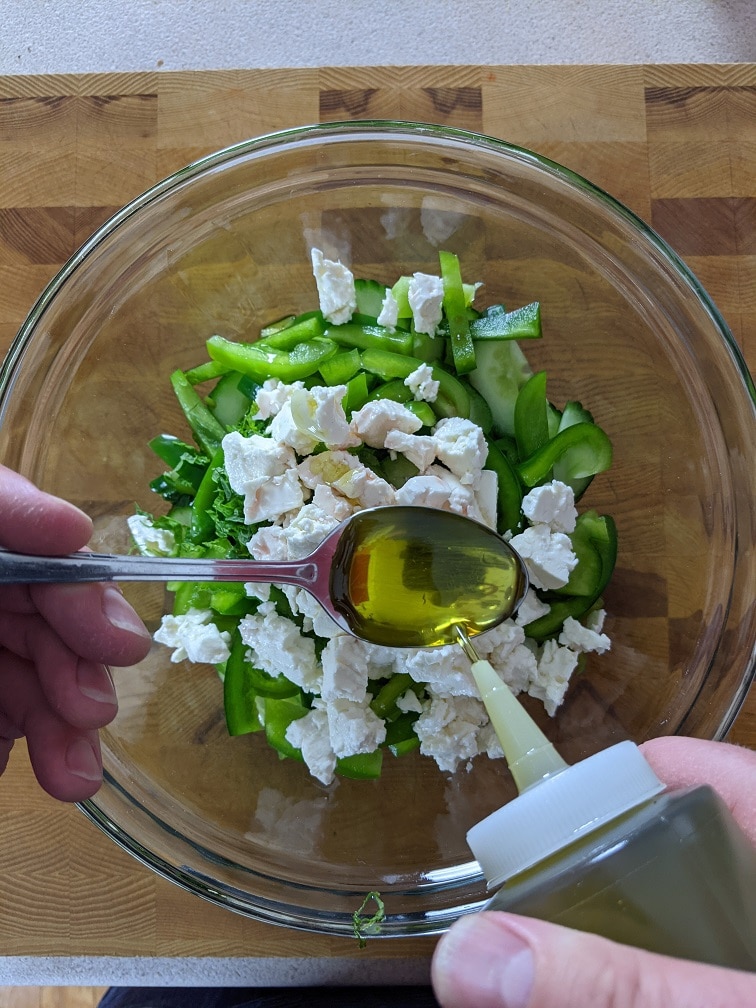
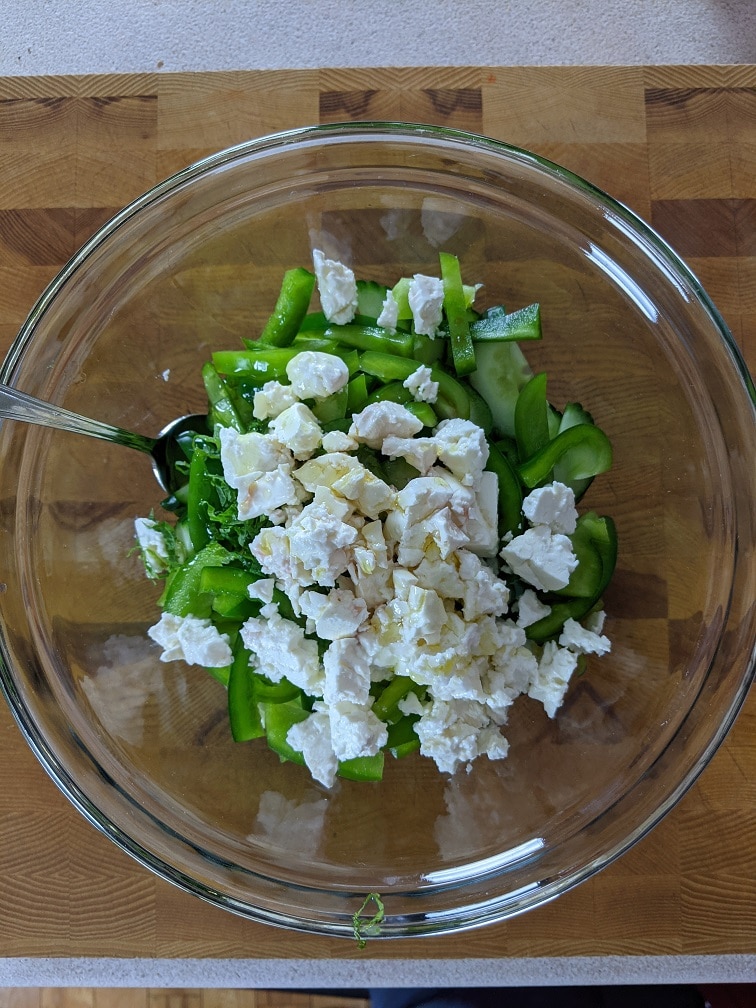
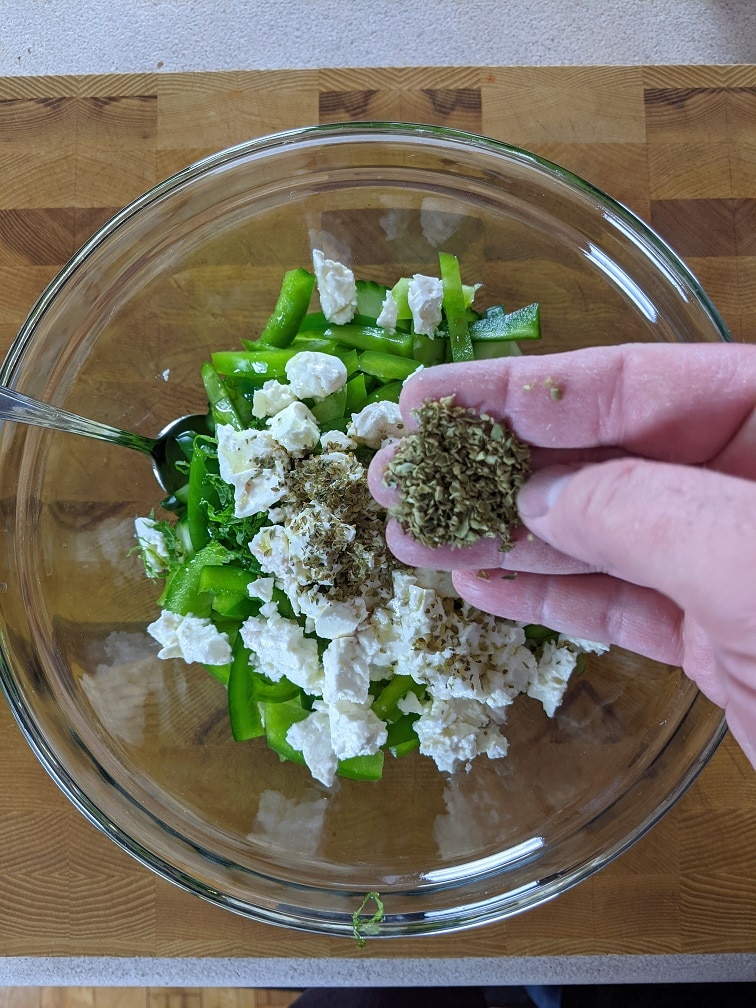
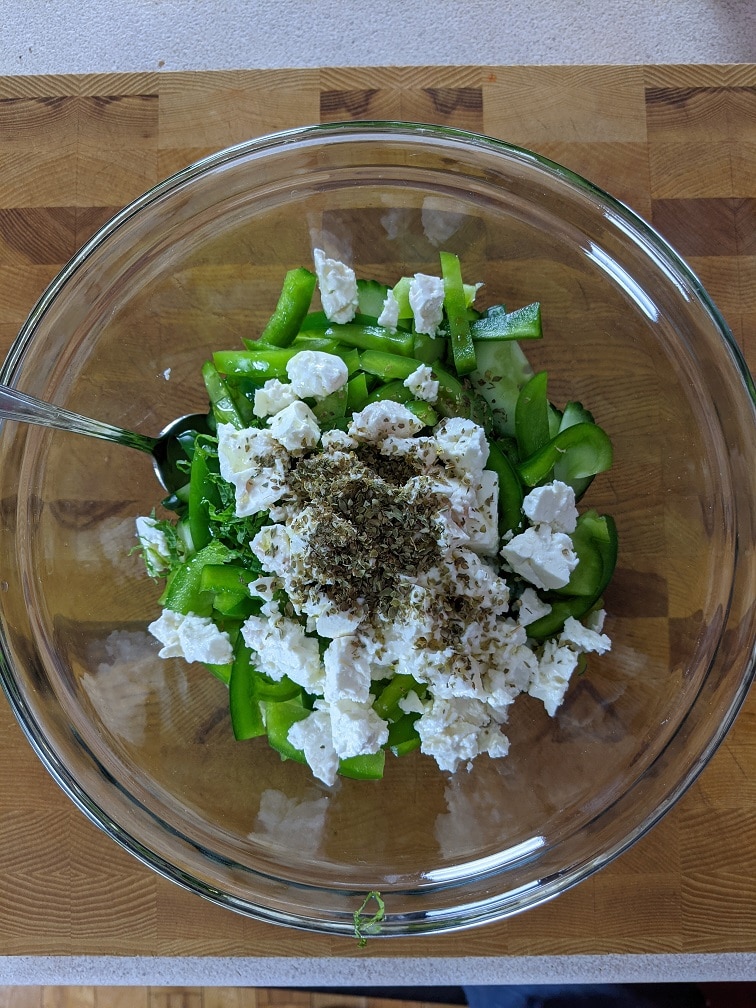
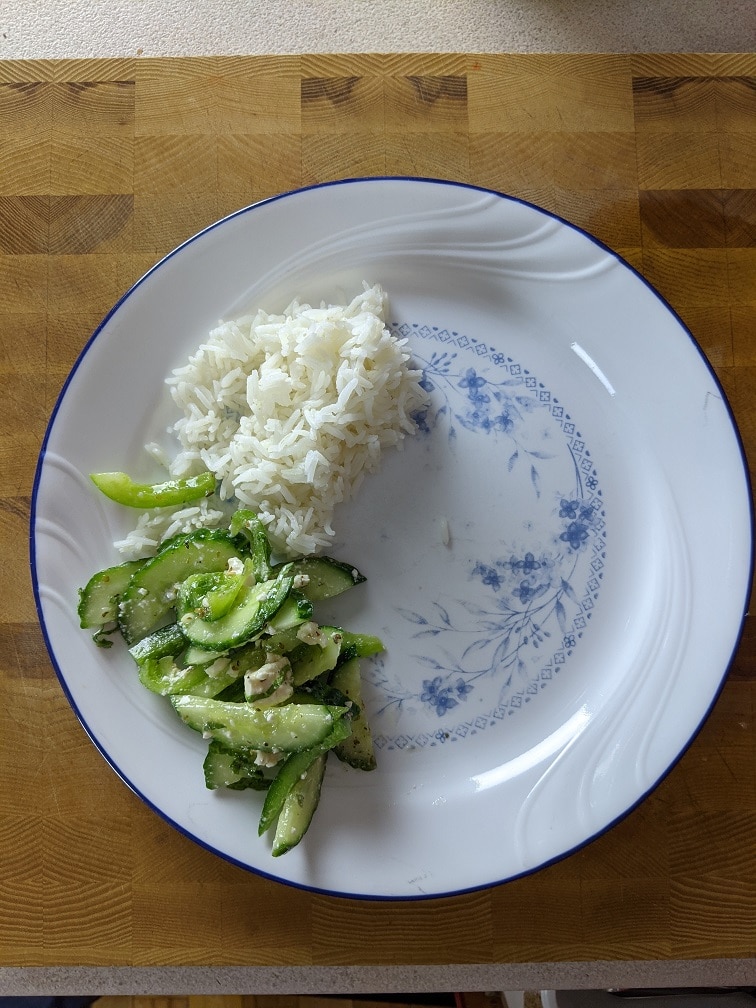
Greek Salad
You can’t have a Greek meal without a Greek salad. When you think of Greek salad, you may think of cucumber, green pepper, red onion, cherry tomatoes, olives, all on a bed of romaine lettuce topped with feta and Greek dressing. That’s a delicious salad, and one you will see in every Greek restaurant in North America, but it isn’t what we’re making today. Our salad is a more rustic version of the Greek salad. Gone are the tomatoes, olives, lettuce and red onion.
Making the Greek Salad
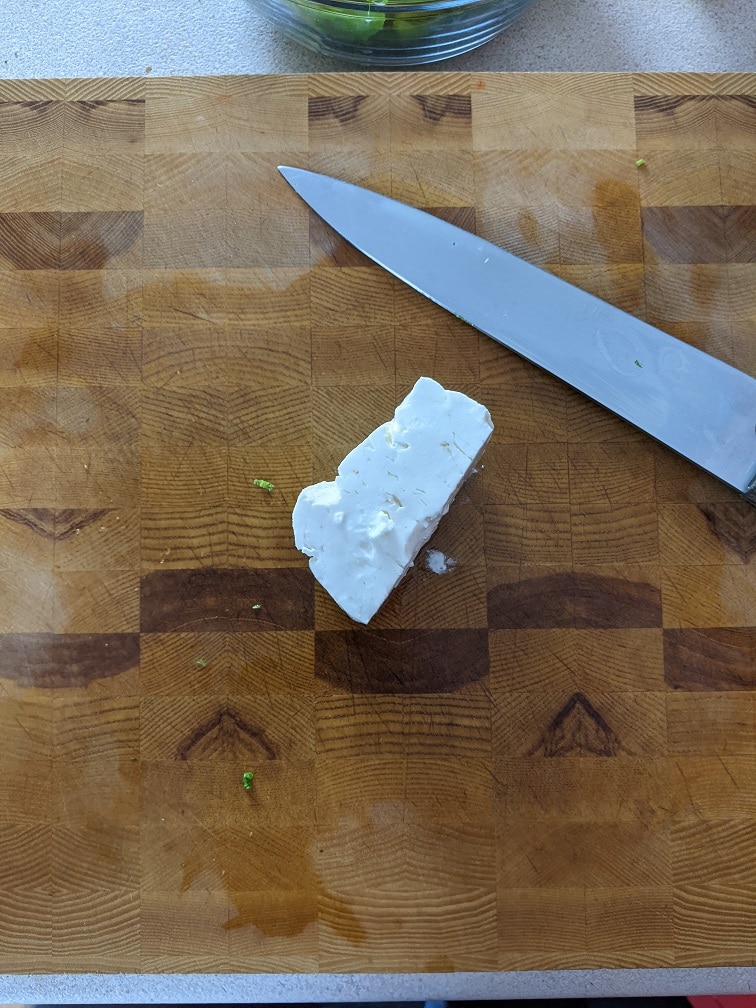
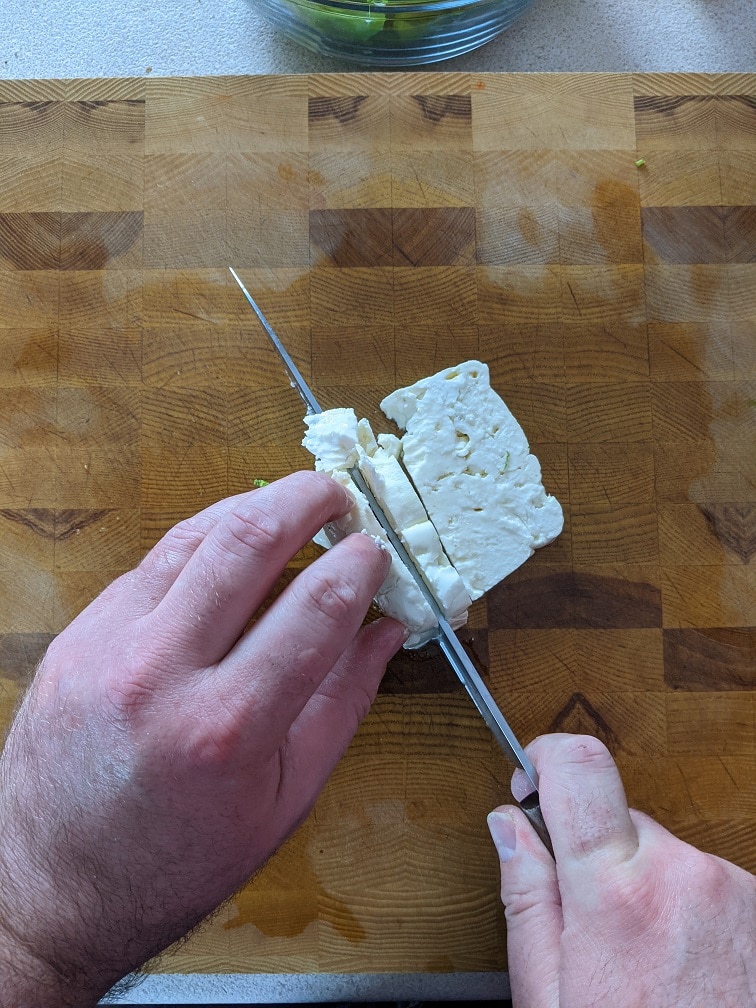
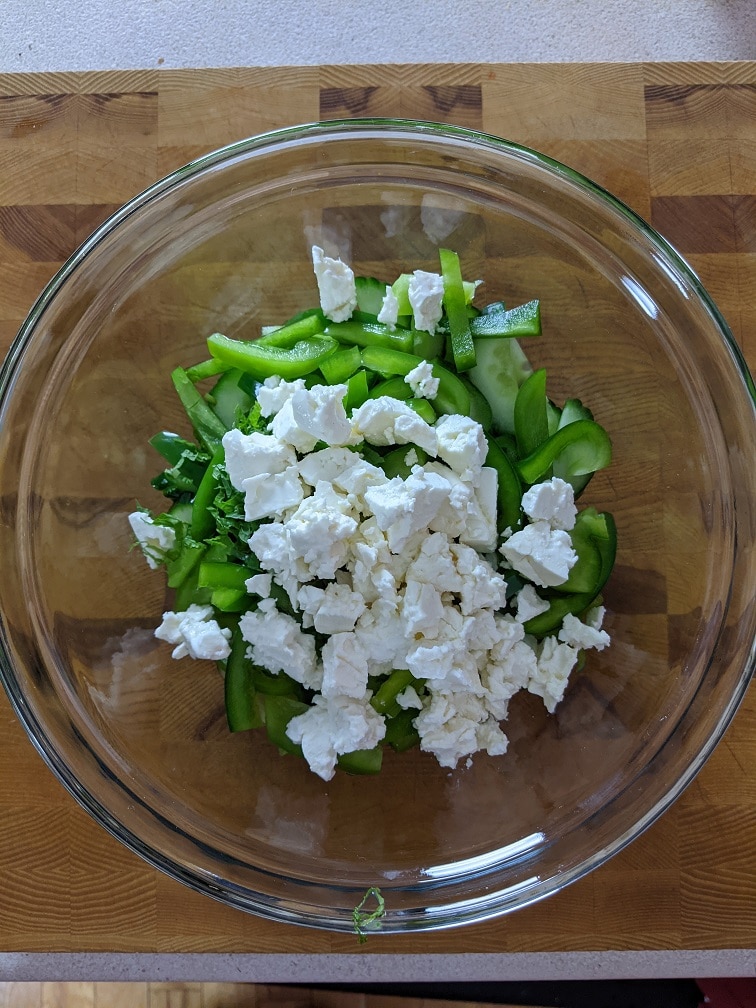
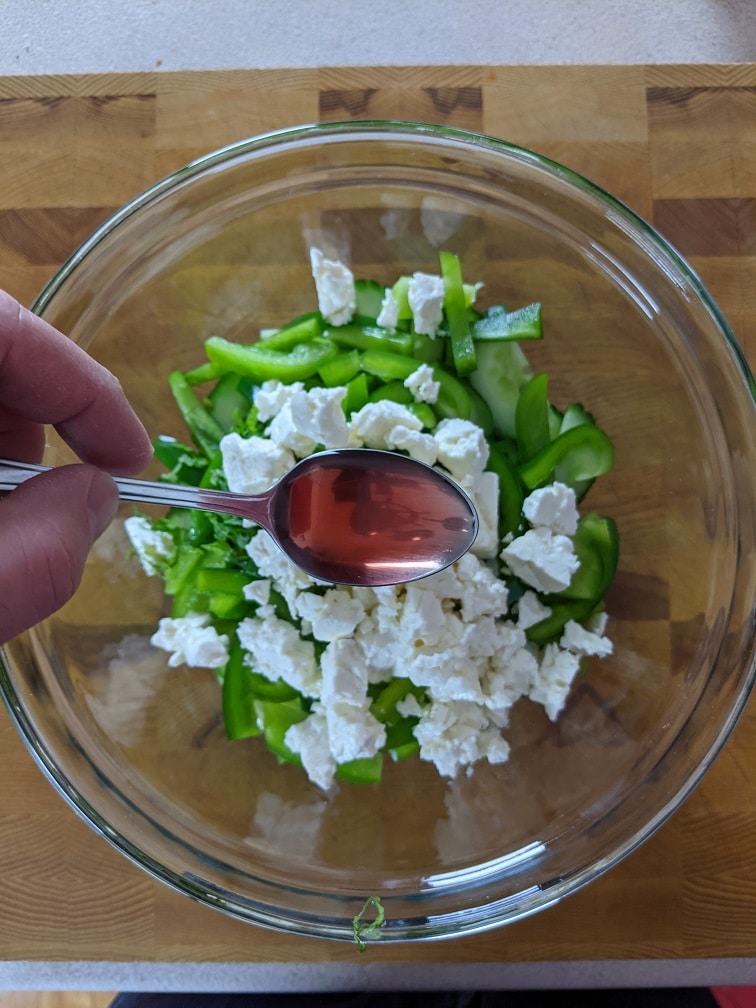
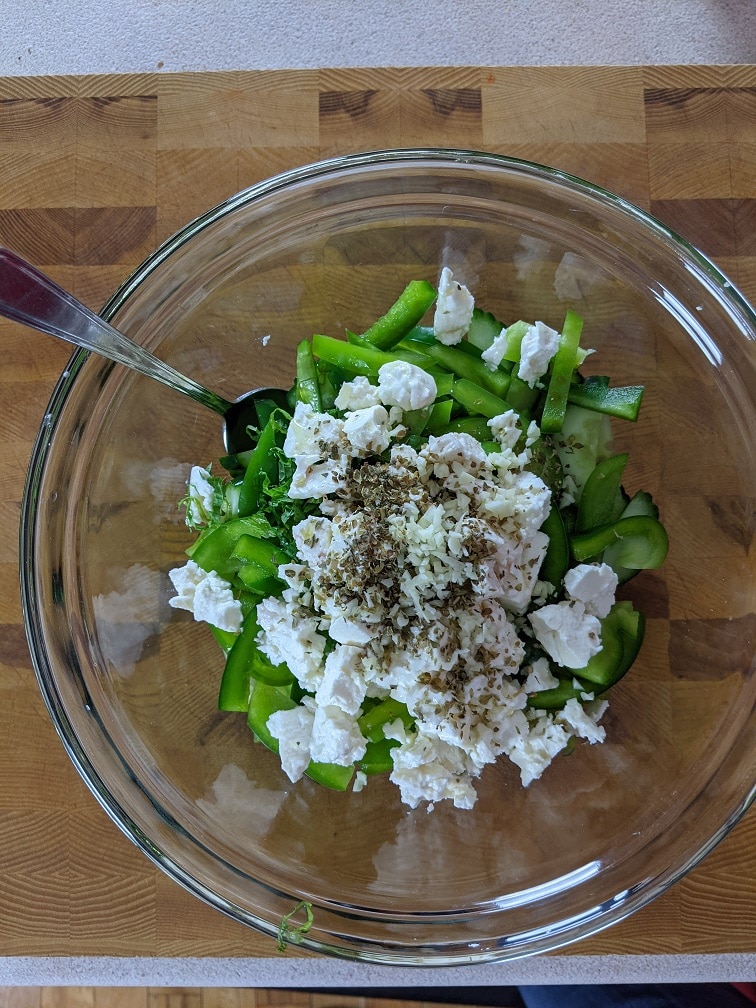
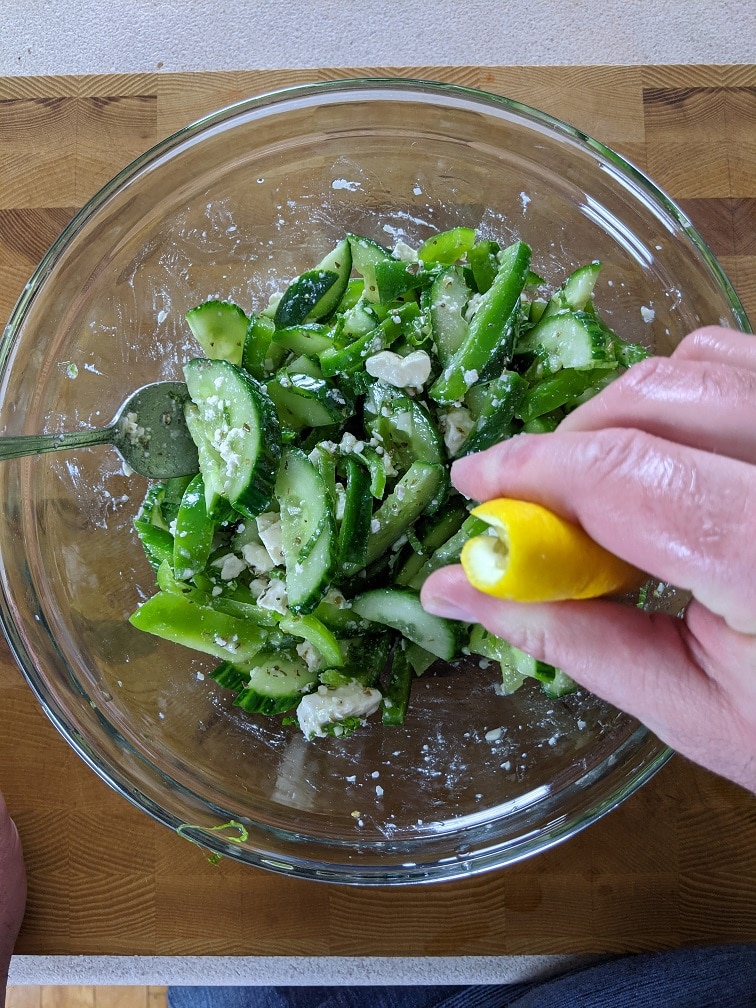
To make the Greek salad, thinly slice half an English cucumber, a whole green bell pepper with the seeds and stem removed, one tablespoon of fresh mint and about a half cup of feta. Put all of that in a bowl with one tablespoon red wine vinegar, two tablespoons olive oil, one teaspoon dried oregano, one teaspoon minced garlic, and the juice of half a lemon. Mix the salad and serve right away, or put in the fridge for an hour to develop the flavour.
Simple Greek Salad
A very simple and delicious Greek salad bursting with fresh flavours and ingredients.
Cut the cucumber in half lengthwise and remove the seeds. Thinly slice the cucumber and put it in a medium mixing bowl
Remove the seeds and stem from the green pepper. Thinly slice the pepper and add it to the bowl with the cucumber.
Add the remaining ingredients and stir. Serve right away or put in the fridge for up to an hour before serving.
Notes
For a more North American Greek salad add 1 cup of grape tomatoes, 1/4 cup kalamata olives, and 1 head of romaine lettuce that has been cut into bite-sized pieces.
I served my Greek meal with basmati rice, which I’ve cooked on the blog a thousand times, so I didn’t see the need to share the process. Put the rice on the plate, the salad beside it, then the chicken, tzatziki and a lemon wedge. The meal tastes as fresh as it looks.
The Wrap Up
Greek food is one of my top 5 global cuisines. I love it, and I am so happy to share this meal with you. What is your favourite Greek food? Tell me in the comments below or on Facebook. Remember to share this post on Facebook or Pinterest if you enjoyed it. Thank you for reading, and have a great day!
Remember, there are new Chef’s Notes posts every Monday, Wednesday, and Friday, and you can subscribe below, so you never miss one. Have a great weekend
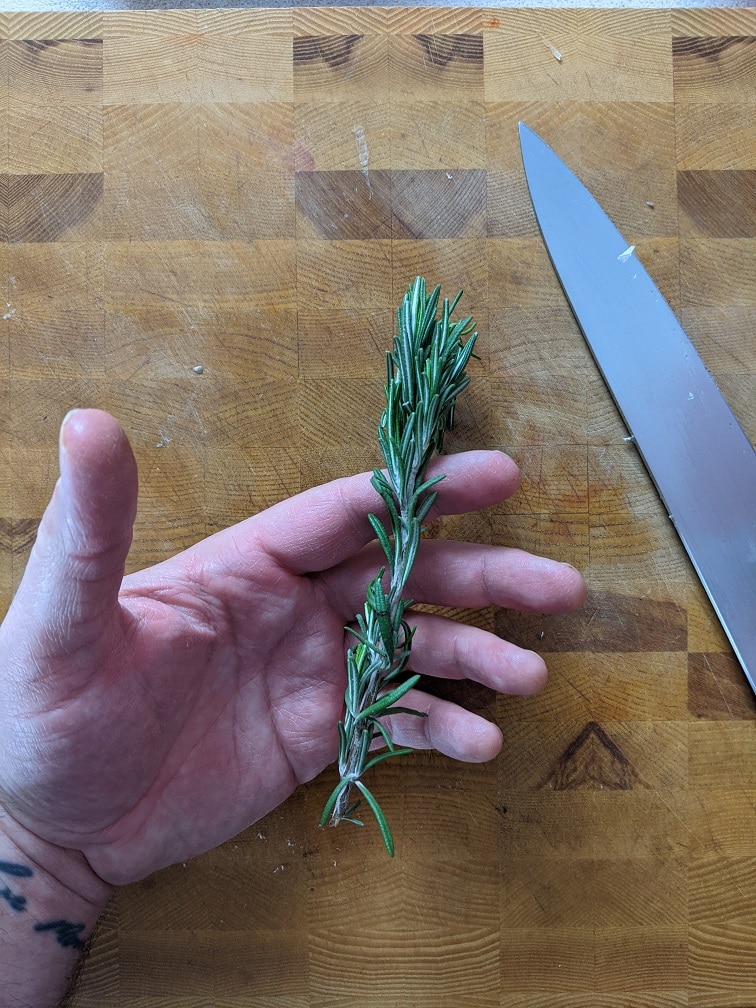
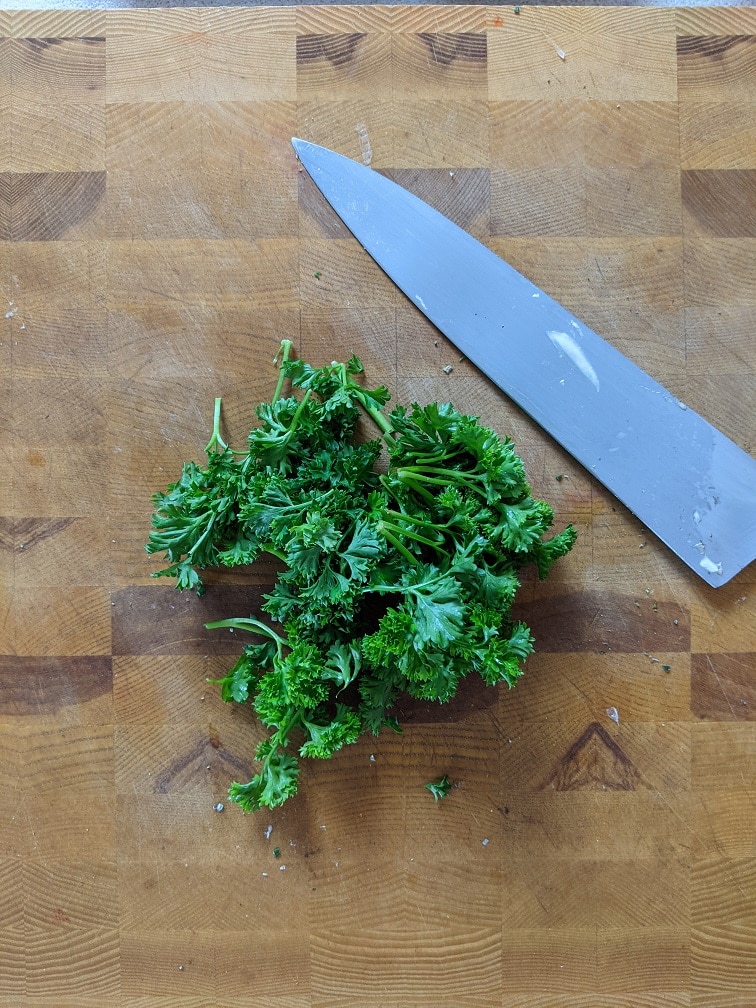
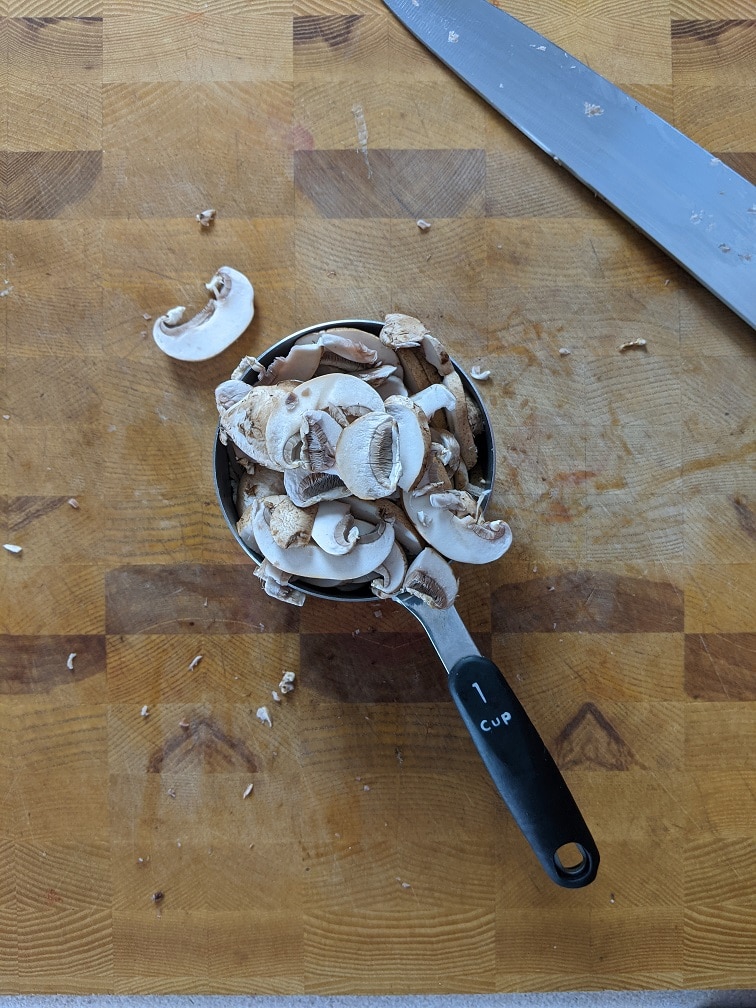
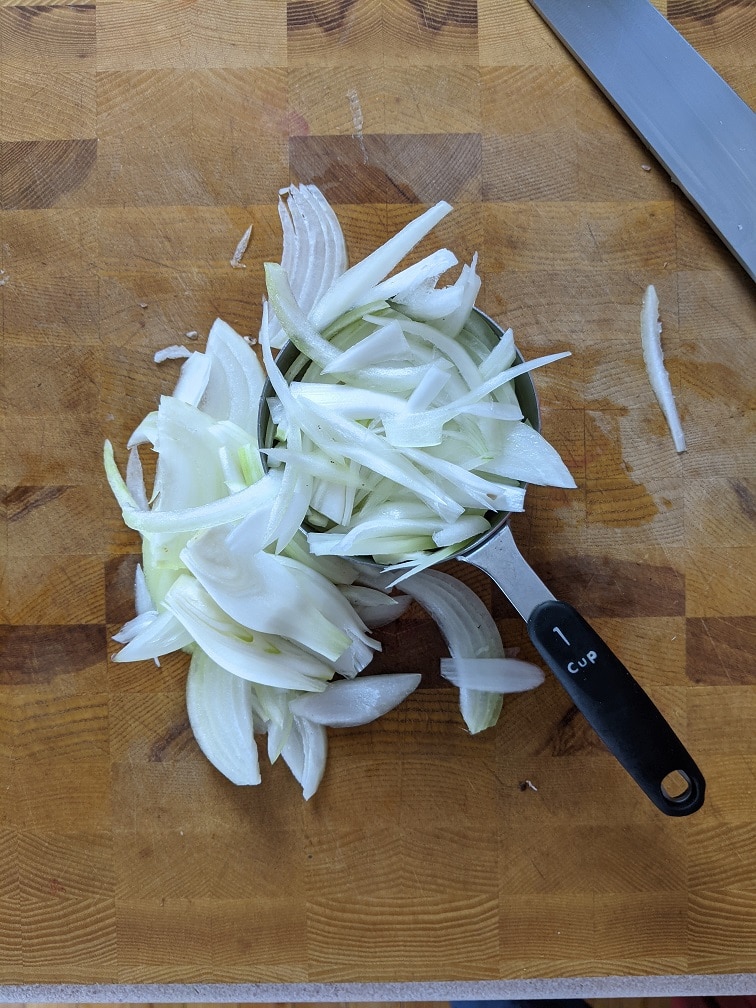
Cheesy Chicken and Mushroom Casserole is exactly what you need when you are craving a taste of home. It’s the kind of thing your grandmother would make for you on a cold day when you’ve been out playing in the snow. It is comfort food at its best, and I’m excited to share this recipe with you. Let’s get to it.
Ingredients
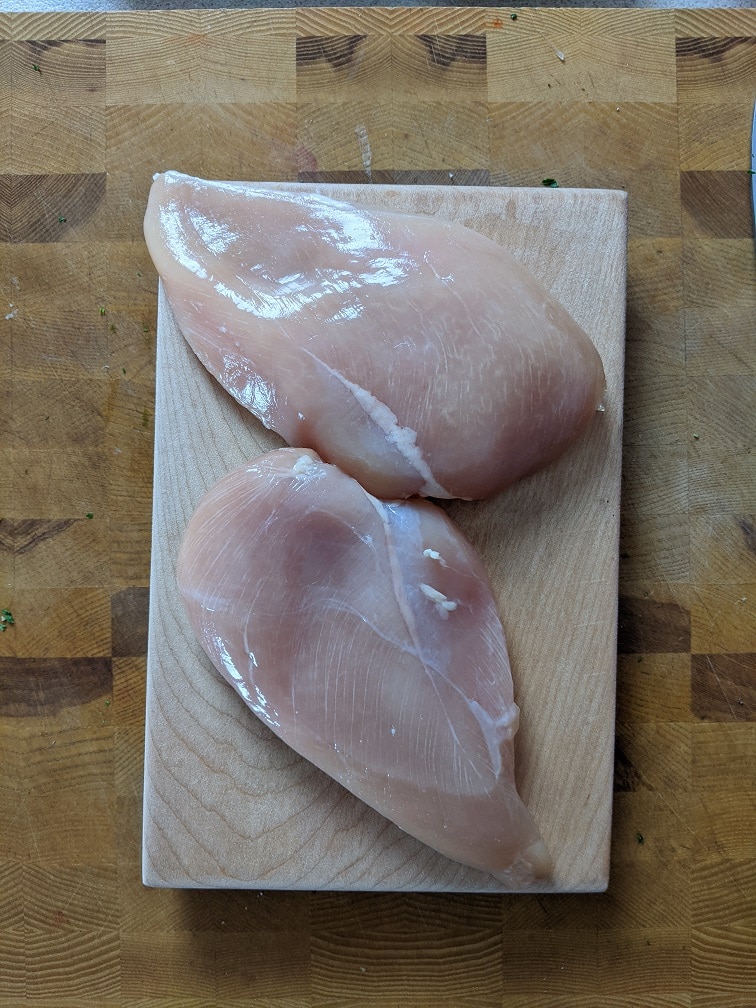
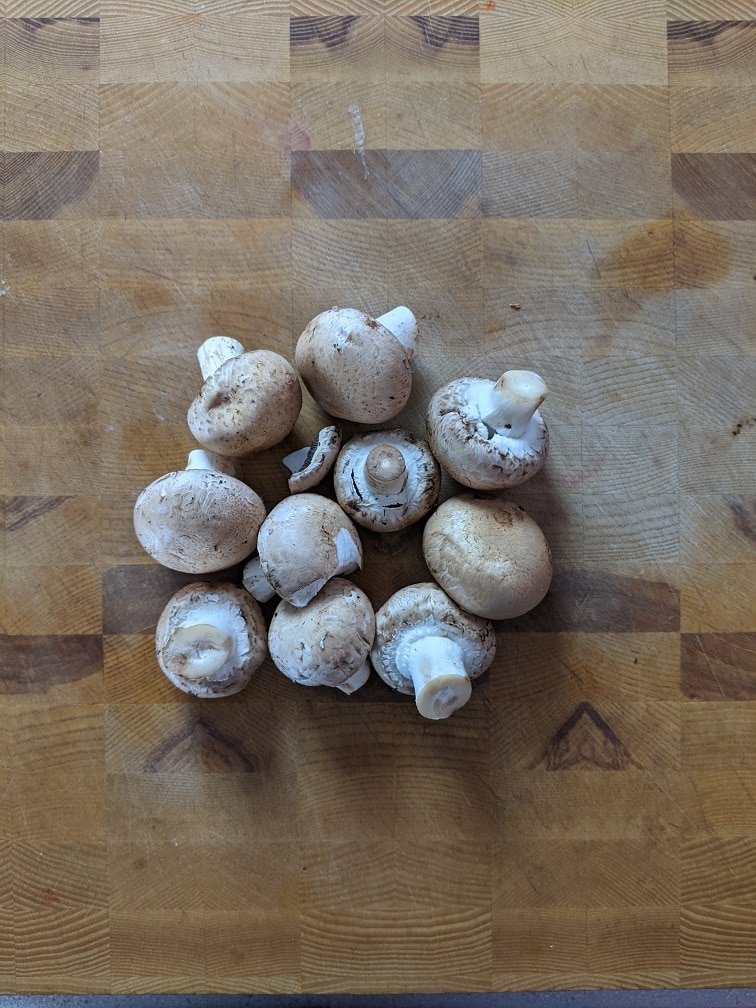
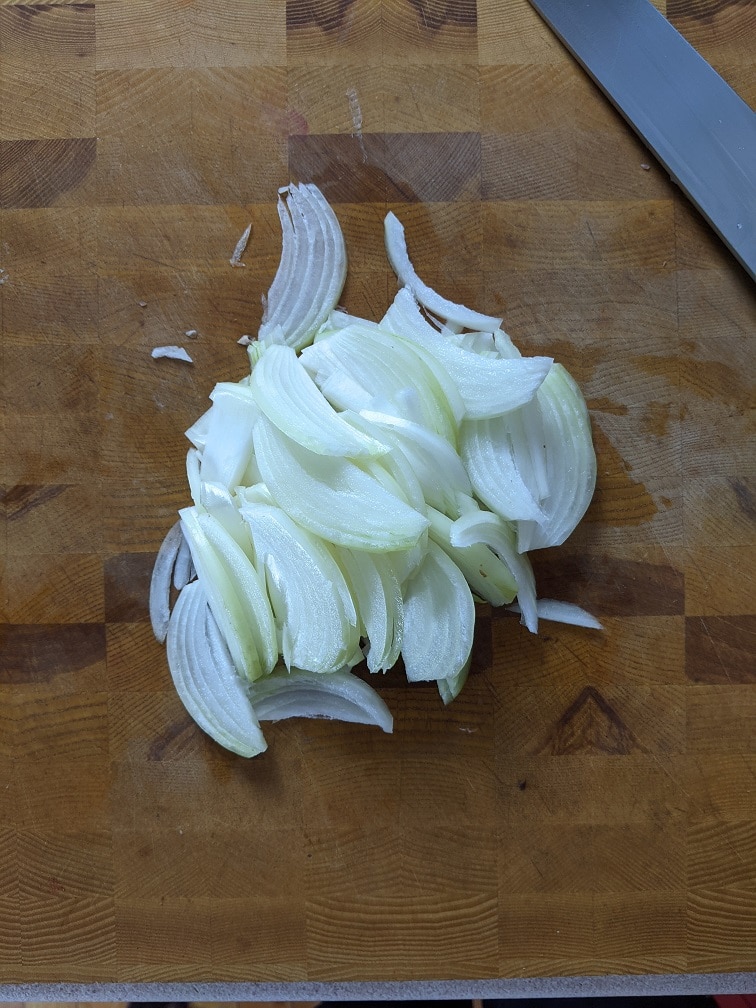
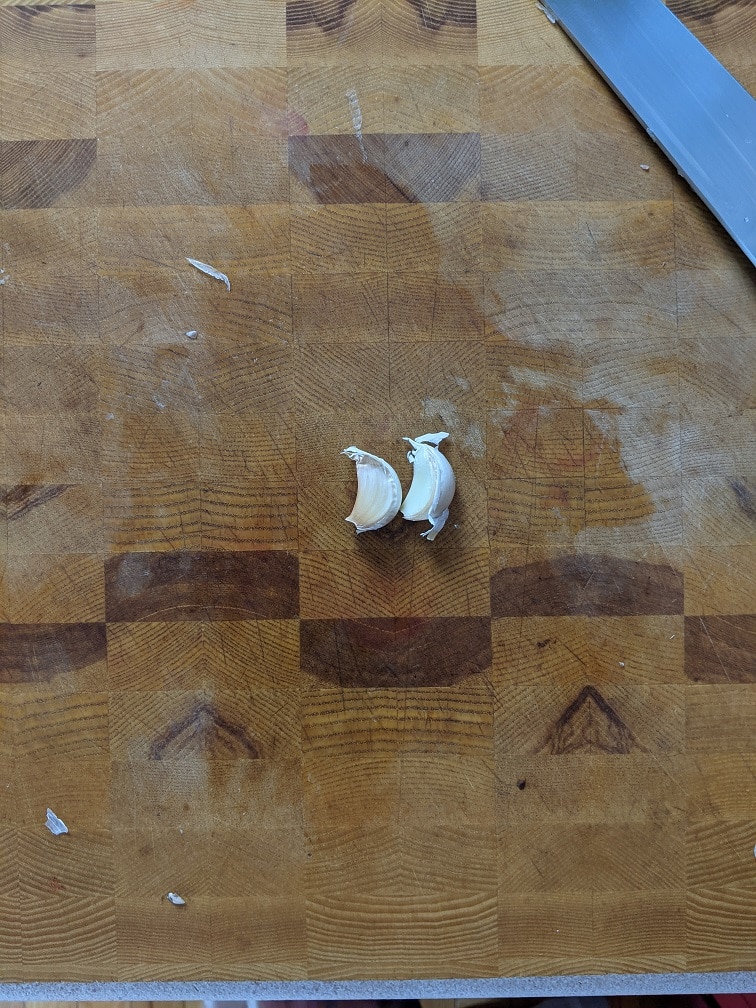
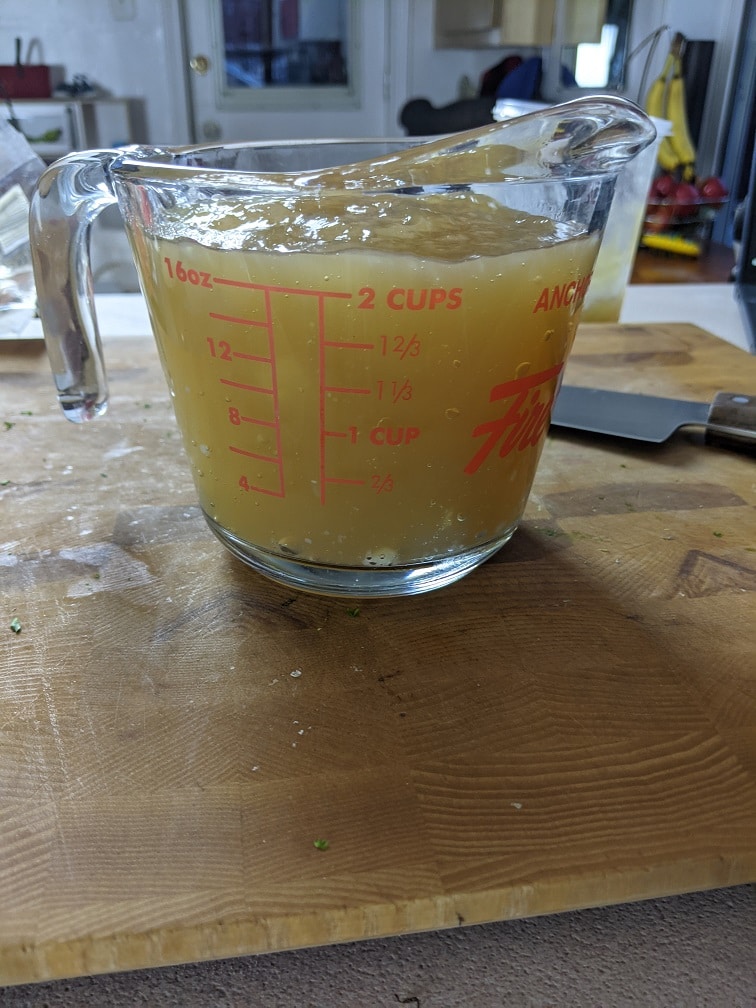
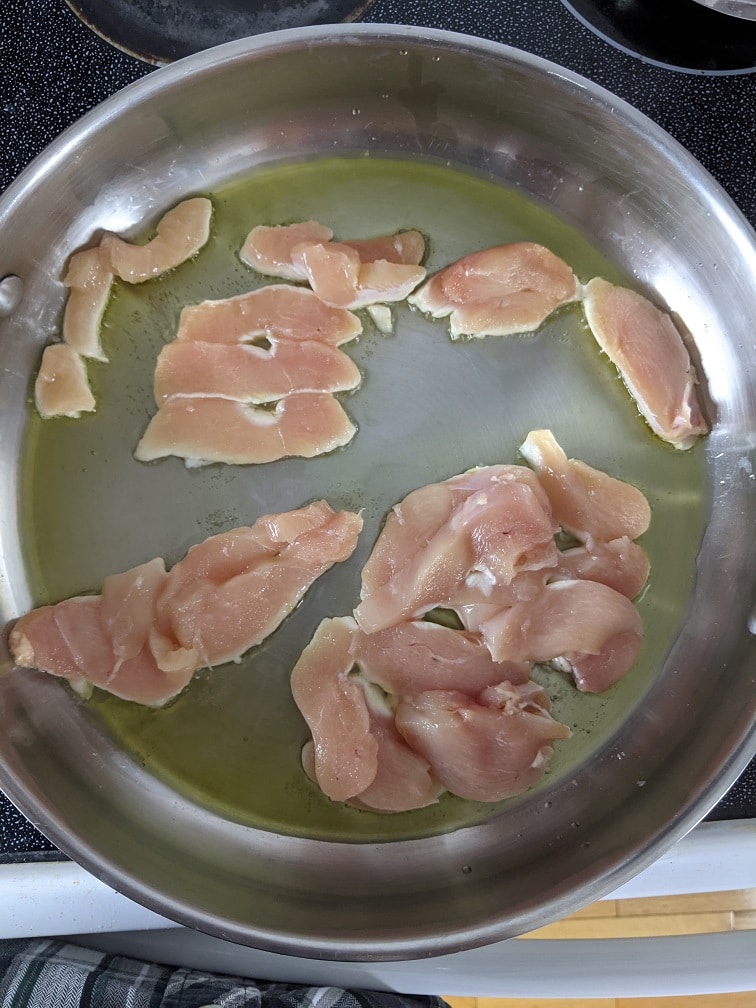
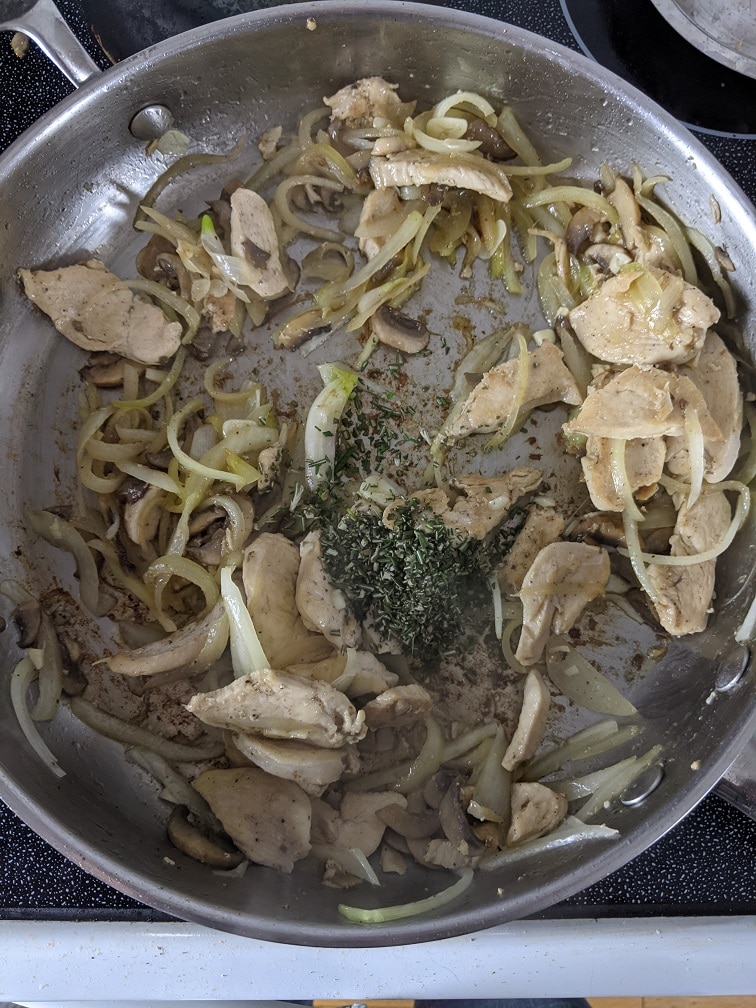
The ingredients for the chicken and mushroom casserole are olive oil, chicken breast, mushrooms, onions, garlic, chicken stock, rosemary, parsley, basmati rice, mozzarella cheese, cheddar cheese, salt, and pepper.
Prep
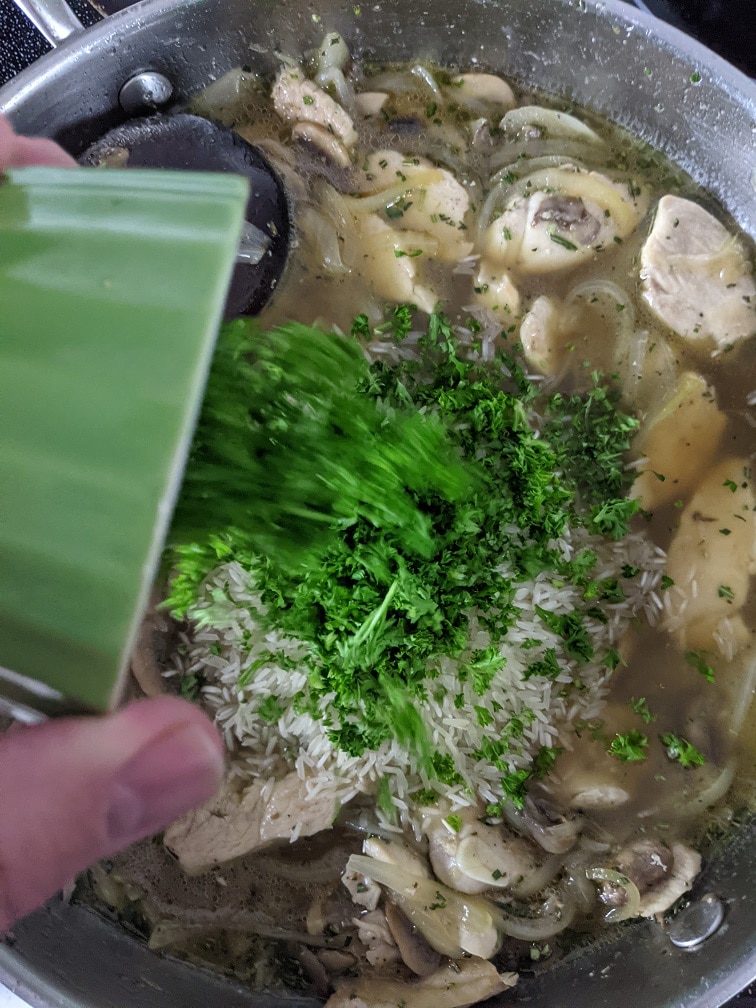
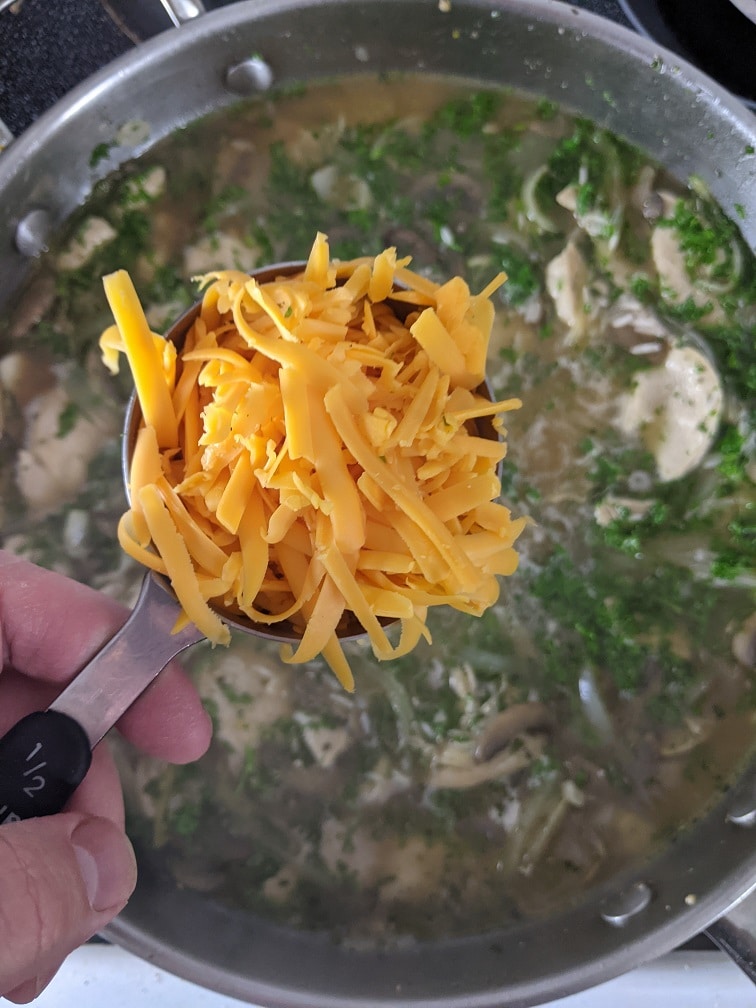
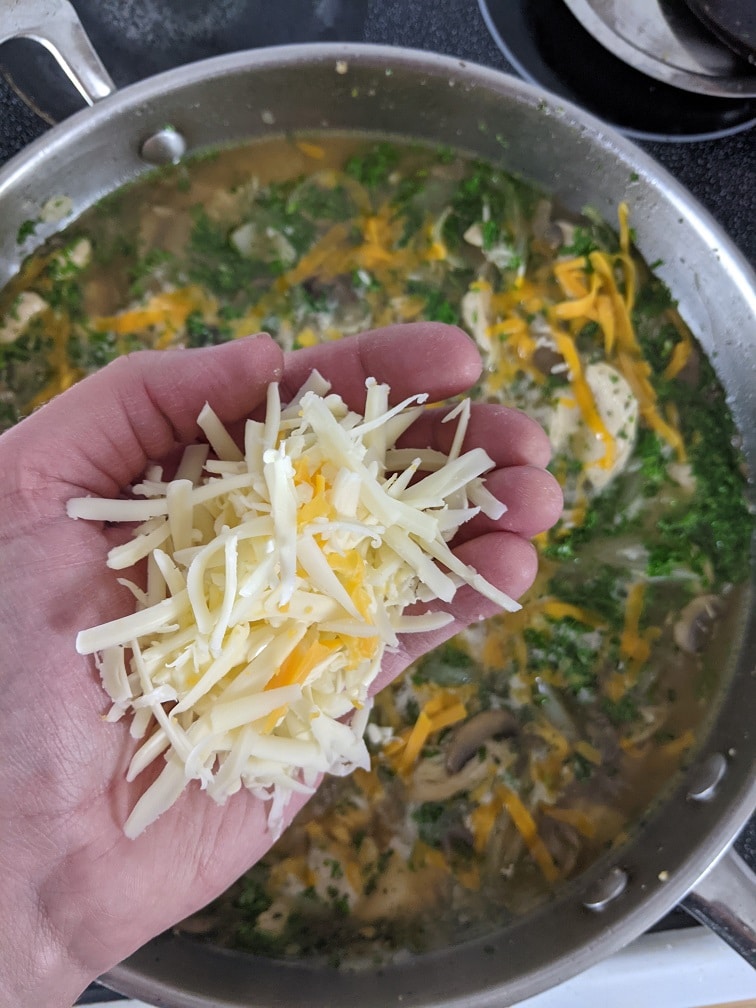
The prep for the cheesy chicken and mushroom casserole is to slice the mushrooms, onion, garlic, and chicken breast. Chop the herbs. Grate the cheese and measure out the rice and chicken stock. In total, you want about 1 cup of sliced mushrooms, 1 to 1 1/2 cups sliced onion, 1 teaspoon sliced garlic, 2 teaspoons minced rosemary, 1/4 cup chopped parsley, 1 cup grated mozzarella, 1 cup grated cheddar cheese, 1 cup basmati rice, and 2 cups chicken stock.
Cooking
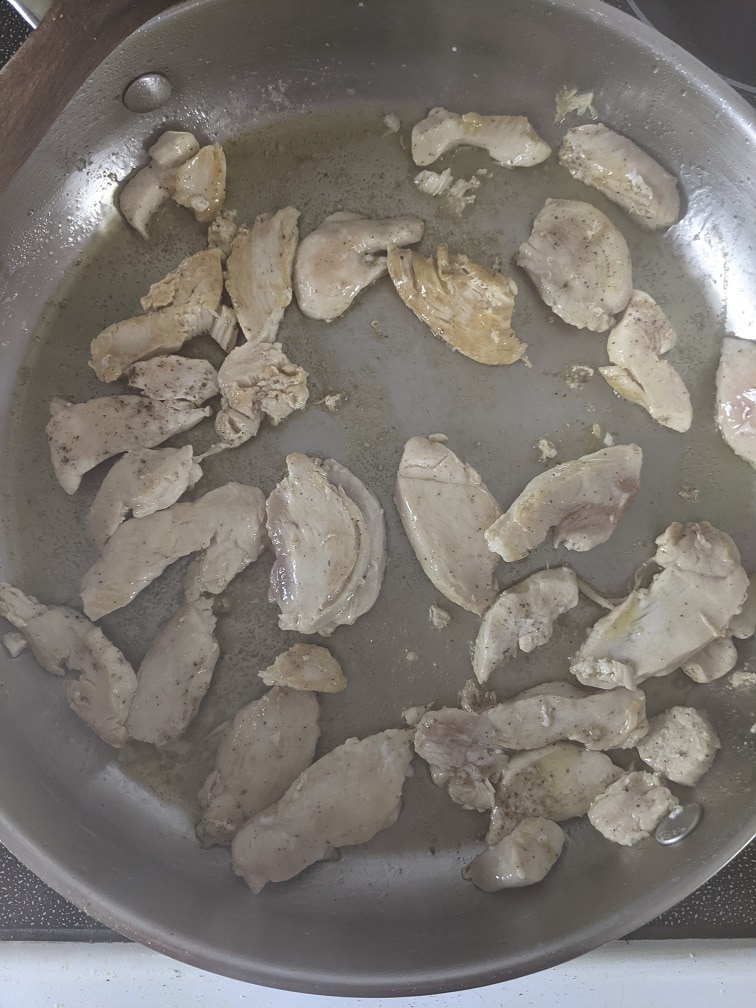
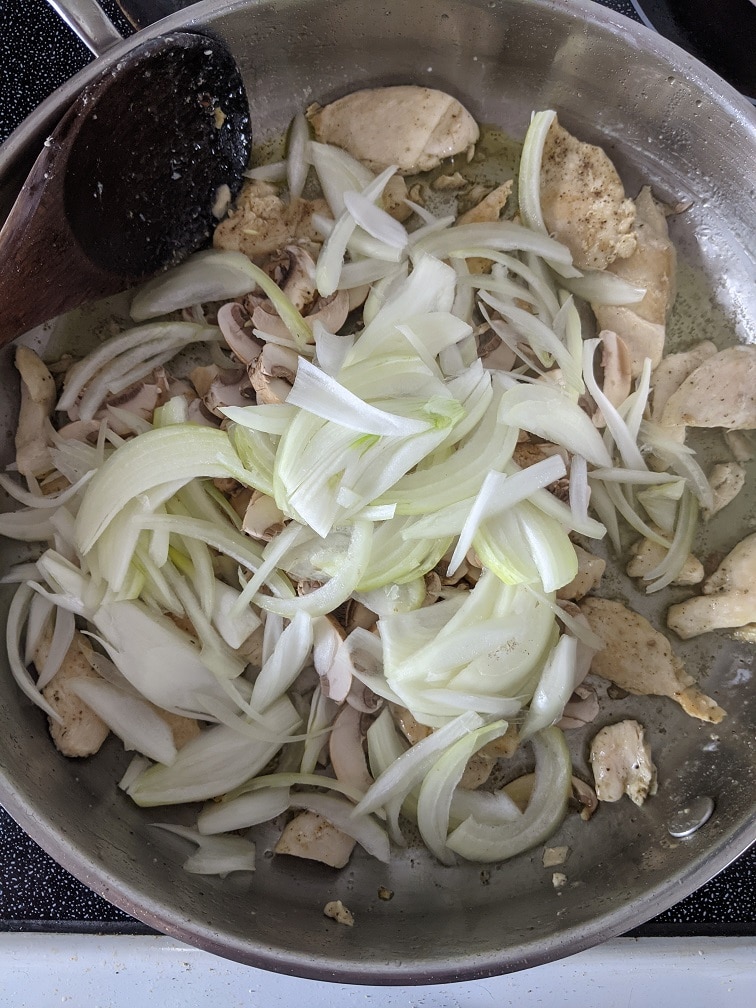
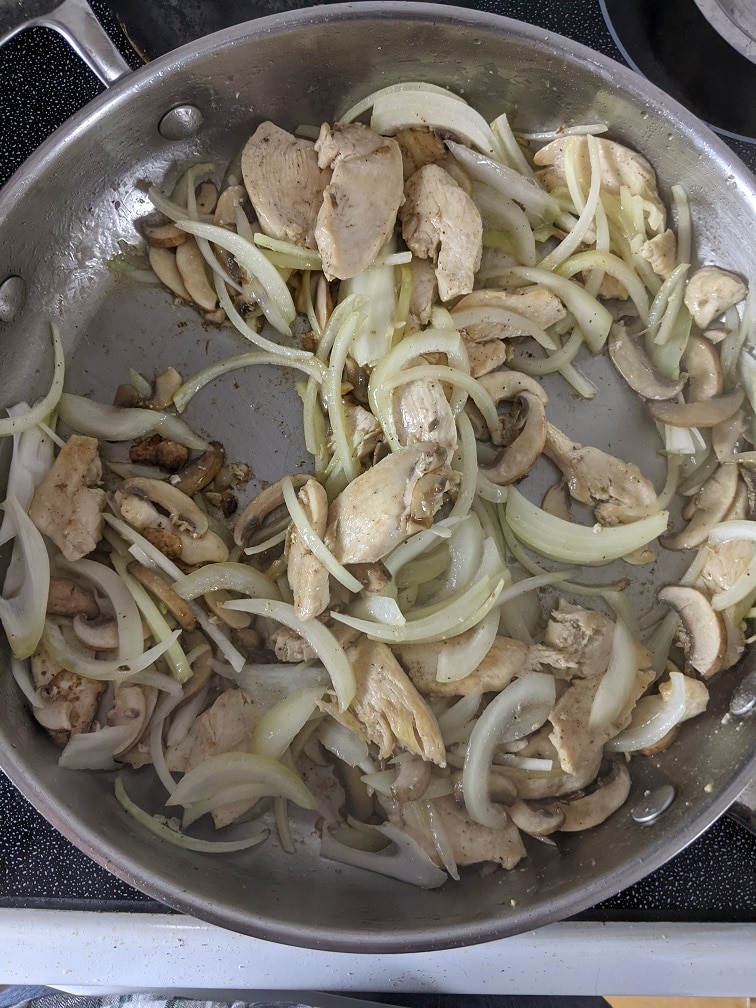
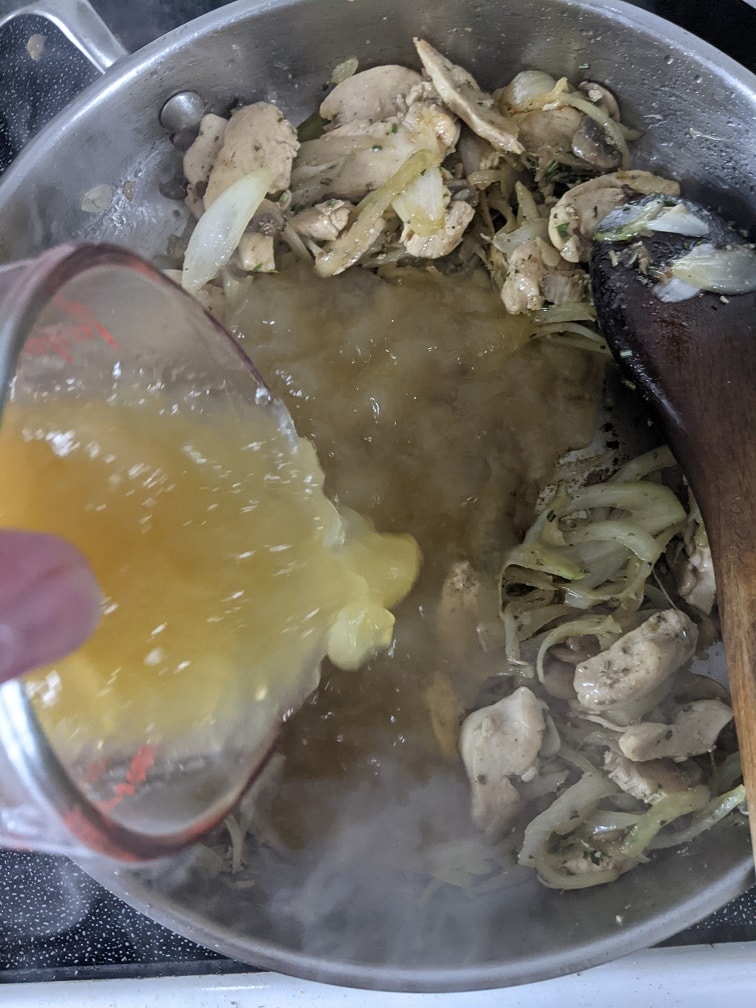
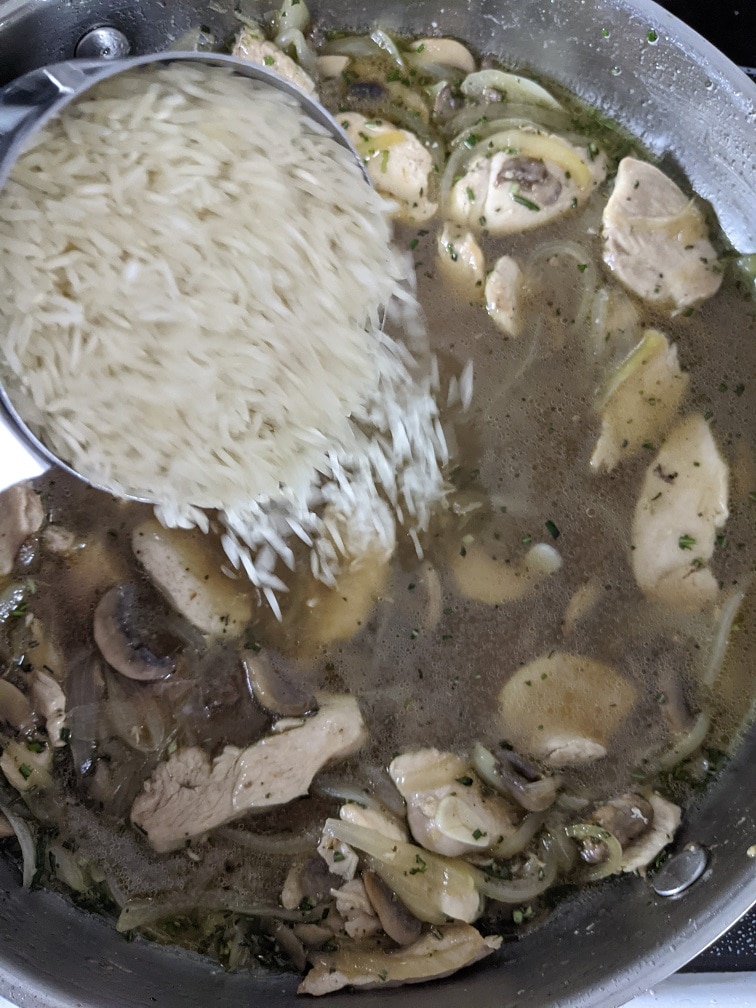
Heat a large oven-safe skillet over medium-high heat. Season the chicken with salt and pepper. Add in 2 tablespoons of olive oil along with the sliced chicken. Cook the chicken for 2 to 3 minutes per side or until browned. Add in the onions and mushrooms and cook for another 3 minutes. Add the garlic, cook for 1 minute, then add the herbs, chicken stock, rice and seasoning. Bring the stock to a boil and take it off the heat.
Did you know that I wrote a cookbook? It’s called the 5-Ingredient Cookbook for Men (of course, it is for everyone). Get your copy today at Amazon in Canada here, and Amazon in the US here, or wherever fine books are sold.
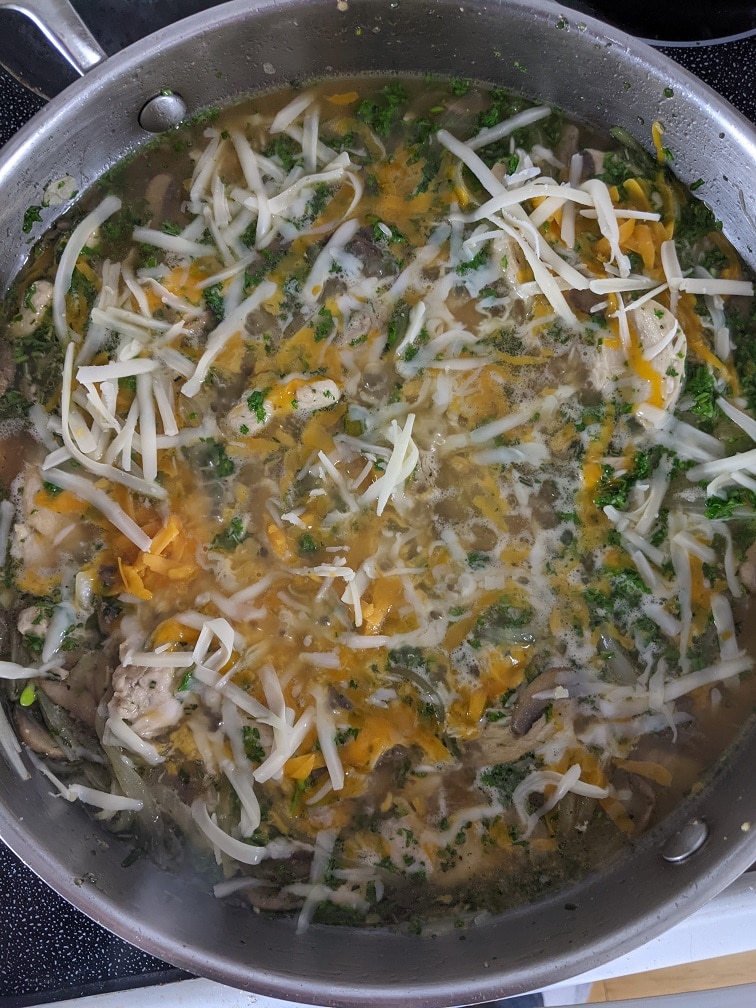
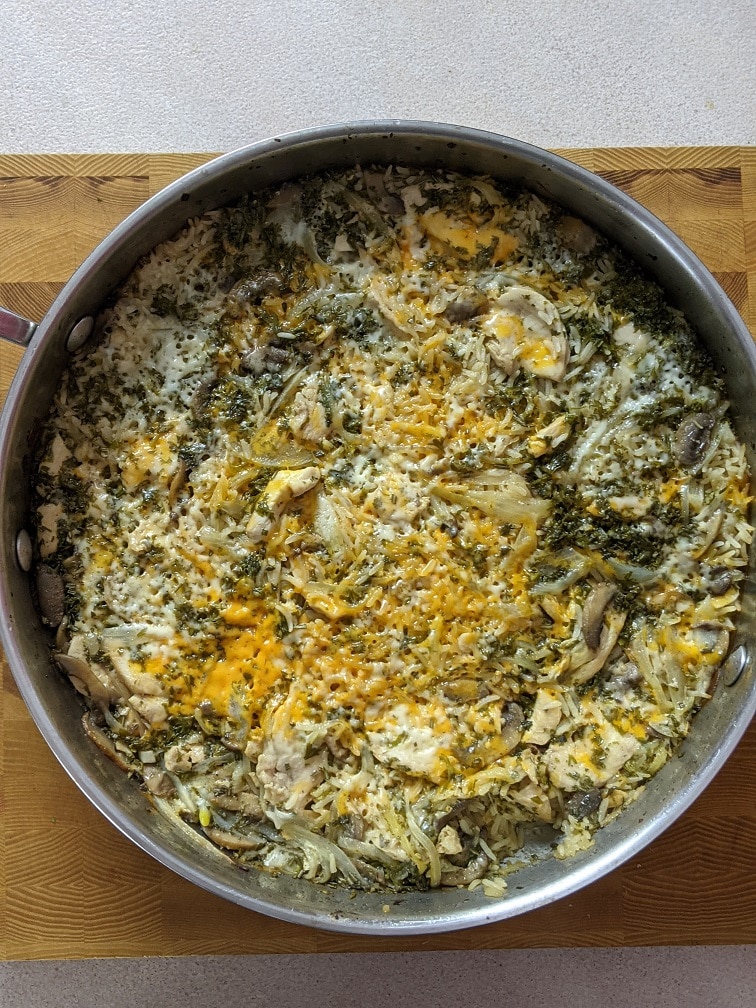
Finishing The Chicken and Mushroom Casserole
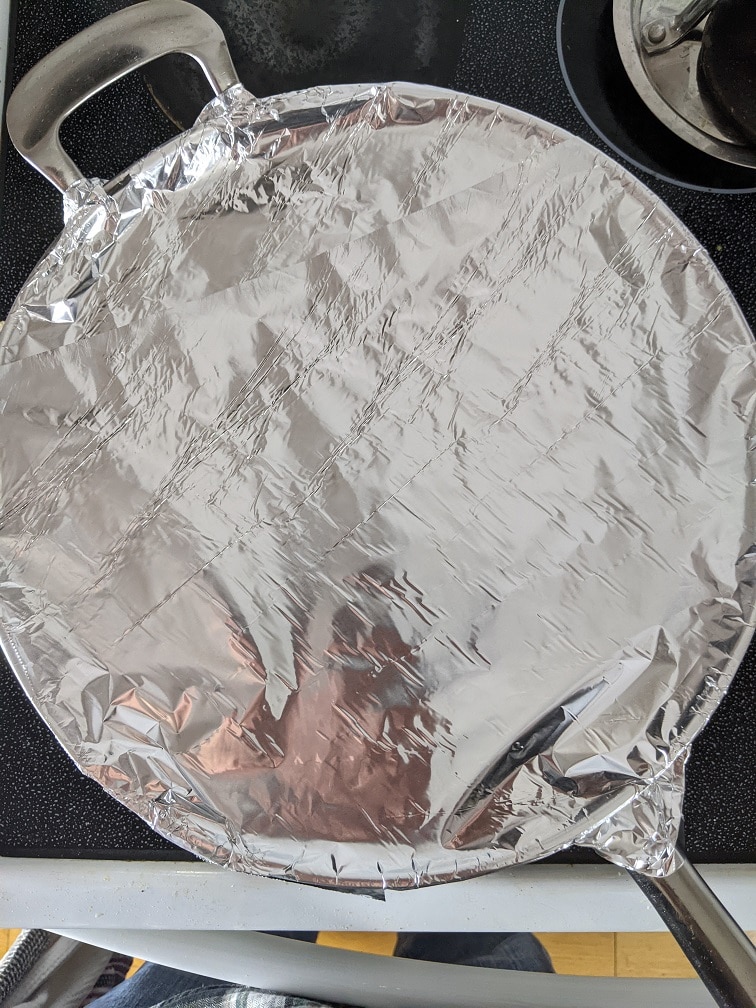
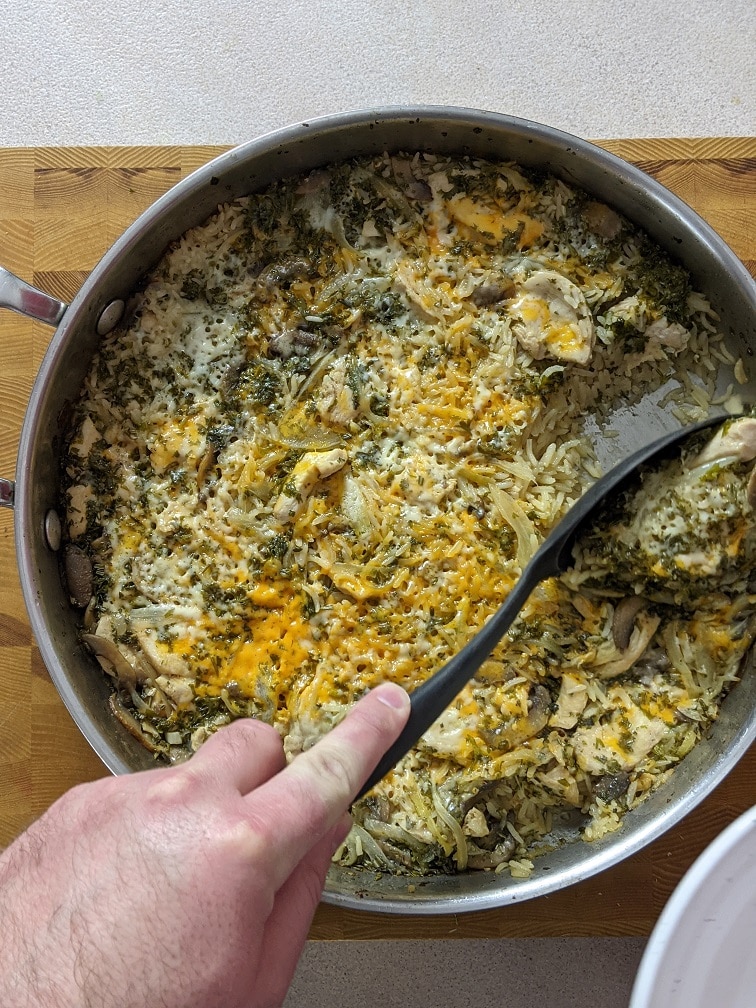
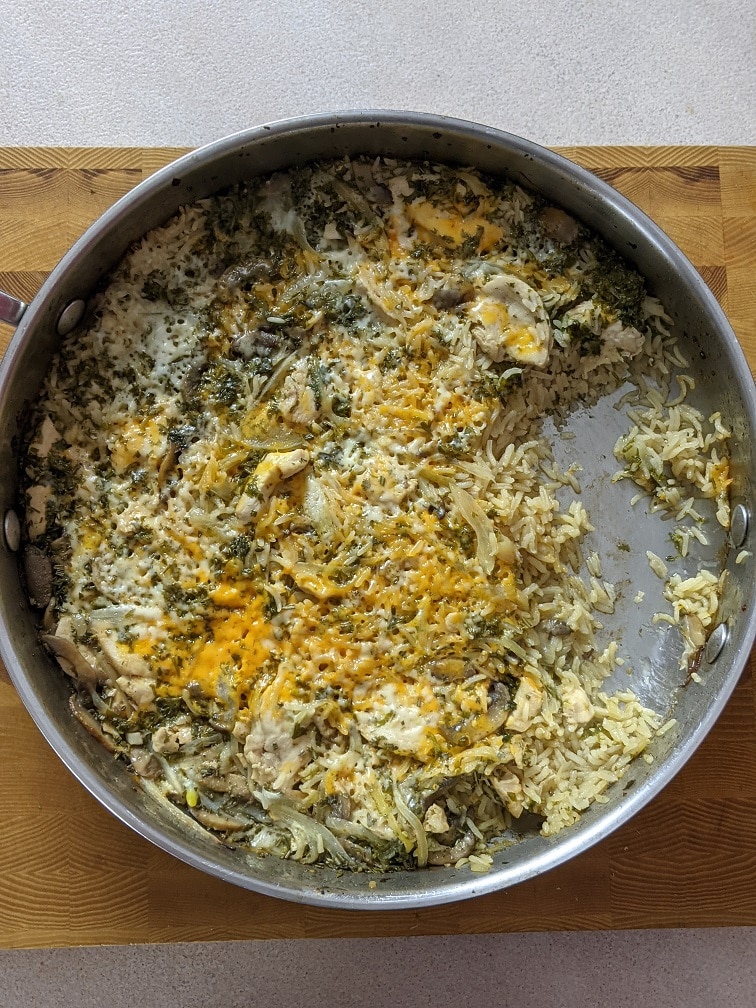
To finish the cheesy chicken and mushroom casserole, stir half the cheese into the pan, then sprinkle the rest over the top. Cover the pan with a tight-fitting lid or foil, and bake for 25 minutes at 350°f. Take the pan out of the oven and let it rest, covered for 5 minutes. Take the lid off and serve or put it under the broiler for a few minutes to brown the cheese.
Cheesy Chicken and Mushroom Casserole
A taste of home in every bite. Chicken, mushroom, rice and cheese. What more could you want in a casserole?
Heat a large oven-safe skillet over medium-high heat. Add in the olive oil and sliced chicken breast. Cook until the chicken is browned on both sides. 2 to 3 minutes per side
Add the onions and mushrooms, cook for 3 minutes, then add the garlic and cook for 1 minute.
Pour the chicken stock into the pan along with the rosemary, parsley, rice, salt, and pepper. Bring to a boil. Take the pan off the heat, mix in half the cheese and top with the cheese. Cover with a tight-fitting lid or foil and bake for 25 minutes or until the rice is tender. Let the casserole sit for 5 minutes, then enjoy.
If you'd like to crisp the cheese, take the lid off the pan and put it under your broiler for a minute or two.
Casseroles are great for feeding a lot of people with as little effort as possible. They are also great for getting that home-cooked meal feeling. This cheesy chicken and mushroom casserole is the beginning of a new eight-week casserole series here at Chef’s Notes. Consider it one final push through the cold to get us to the warmer weather. Join me next Wednesday for a delicious Cheese Burger Casserole. And remember to come back Friday for another great recipe.
Remember, there are new Chef’s Notes posts every Monday, Wednesday, and Friday, and you can subscribe below, so you never miss one. Have a great weekend!
We use cookies on our website to give you the most relevant experience by remembering your preferences and repeat visits. By clicking “Accept”, you consent to the use of ALL the cookies.
This website uses cookies to improve your experience while you navigate through the website. Out of these, the cookies that are categorized as necessary are stored on your browser as they are essential for the working of basic functionalities of the website. We also use third-party cookies that help us analyze and understand how you use this website. These cookies will be stored in your browser only with your consent. You also have the option to opt-out of these cookies. But opting out of some of these cookies may affect your browsing experience.
Necessary cookies are absolutely essential for the website to function properly. This category only includes cookies that ensures basic functionalities and security features of the website. These cookies do not store any personal information.
Any cookies that may not be particularly necessary for the website to function and is used specifically to collect user personal data via analytics, ads, other embedded contents are termed as non-necessary cookies. It is mandatory to procure user consent prior to running these cookies on your website.