It can be hard to figure out what Christmas gifts to get that foodie on your Christmas list. They’ve probably already got at least one drawer full of little gadgets and tools that they never use (cherry pitter anyone?). But, luckily for you, I’ve taken the time to put a list together of 20 Christmas Gifts Under $20 For The Foodie In Your Life. You’re probably thinking, “yeah, but won’t these just end up in the junk drawer?” Come on, you know me better than that. All the items on this list are useful. I know because I have versions of all of these, and I use them, or I don’t have them but really want them. Some will get more use than others, sure. But none will sit in that dreaded drawer collecting dust, never to be seen again. Alright, without further ado, let’s get to it.
Disclaimer:
This is not a sponsored post. I have chosen every item on this list because I believe that it is a useful item. However, each item does have an amazon.ca affiliate link attached to it. Meaning, if you click on any of the pictures, you will be taken to their amazon.ca page to buy them. If you buy one of the items on this list after clicking on it on this page, amazon pays me a small affiliate fee. But, you can also find most of these items in your local kitchen supply store, and I recommend buying them there if you can becasue that local store is probably struggling pretty hard right now.
1. Swissmar Peeler
The first item on this list is a Swissmar Vegetable Peeler. These will cost you anywhere from $8 to $18, depending on where you buy them. You may think that $18 is an awful lot to spend on a little piece of plastic with a metal blade. I mean, those fancy old school metal peelers with rubber grips don’t even cost that much. But, this peeler is different for a lot of reasons. First of all, you can take the blade off to clean it, which is a big deal. Second of all, it makes peeling vegetables very quick compared to other peelers. And finally, it will last a lifetime. Every professional Chef I know has at least one of these peelers. I have two, one for work and one for home. The peeler I use at home is my old work peeler. I’ve had it for at least eight years, probably longer, and it has never let me down. If these peelers can last essentially forever in a professional kitchen, they will last forever for the foodie you’re buying them for.
2. Microplane
A good Microplane is a precious tool in any kitchen. They are used for finely grating hard cheese, grating spices like cinnamon and nutmeg, and zesting citrus. A Microplane will cost you anywhere from $12 to $40. But, you don’t need to spend a lot of money to get a quality one. The important thing to look for is a sturdy handle and firm teeth that won’t bend. Any foodie will be happy to open one up one of these on Christmas morning. And, you may end up with a little cinnamon or nutmeg grated over your coffee.
3. Probe Thermometer
When it comes to Foodie Christmas Gifts, a probe thermometer is almost always at the top of the wish list. These range in price from $10 to over $100. But, a $20 thermometer will last a couple of years and will give an accurate reading. These are great for foodies that cook a lot of meat, especially roasts and barbecues.
4. Paring Knife
There is almost nothing more useful to a cook than a good paring knife. They have a million uses, from cutting small items to peeling vegetables, you name it. The Victorinox paring knife listed below costs $10 and will stay sharp for a long time. What’s more, the thin ergonomic handle is easy and comfortable to hold no matter the size of the person’s hand.
5. Silicone Baking Mats
If your foodie likes to bake, silicone baking mats are a must. They are completely reusable and save money becasue they remove the need for parchment paper when baking. These cost about $20 even and are worth every single penny. Any baker will be thrilled to see these under the tree.
6. Apple Corer
This may seem like an odd item for me to include on this list. Anyone who knows me well knows that I’m not a fan of single-purpose items, and what could be more single-purpose than an apple corer? But I have one, and I love it. I use it all the time for coring apples and pears for tarts and galettes. They also work well for cutting little cylinders out of a pound of butter, if you’re into that kind of thing. We used to do that for our bread service at a restaurant I worked at years ago. An apple corer will cost about $11 and may even take that foodie by surprise, but they will use it more than they think they will.
7. Bench Scraper
A good bench scraper can be used to clean bits of stuck flour off a countertop, for cutting dough, for picking up ingredients off a cutting board, and for many other purposes. They run about $13 and are a work horse for anyone who knows how to use them. If your foodie friend is a foodie indeed, a good bench scraper may be just what they need. (see what I did there?)
8. Meat Mallet
Not only is a meat mallet useful for tenderizing tough cuts of meat and for making scallopini and schnitzel, but it will also lead to countless meat beating jokes, which are just delightful. A decent meat mallet will cost about $16 and will likely last a lifetime. If your foodie likes flattened meat and dirty jokes, this is the Christmas gift for them.
9. Kitchen Towel Push Hooks
Full disclosure, these Kitchen Towel Push Hooks are the only item on this list that I don’t have. But they look really cool and handy. What I’m saying is that I want them. If my wife is reading this (just joking. I know she isn’t), I would like these for Christmas, please. These will run you about $10 on amazon.ca.
10. Digital Kitchen Scale
A digital scale can be used for weighing ingredients (especially when baking) and for portion control. I don’t use my kitchen scale every day, but I’m glad it’s there when I need it. The price range on kitchen scales varies greatly, but the one pictured below will cost you about $20 on the dot.
11. Kitchen Shears
No kitchen is complete without a good set of kitchen shears, which are just heavy-duty scissors. They can be used for cutting chives, cooked chicken or even pizza (which is the actual Italian way). Really, they are scissors. They have a million uses. Kitchen Shears will cost you anywhere from $20 to $60, but there is no need to go top of the line with them. A $20 set will do the same jobs as a $60 set.
12. Ove Glove
I remember seeing the commercials for these years ago and thinking how stupid the “chef” in them looked. “I would never use that,” I told myself every time I saw them. But then, about ten years ago, or more now, my mom got me one for Christmas. It turns out I love it. The Ove Glove works really well and is by far the best oven mitt I’ve ever owned. I still have the one my mom got me all those years ago, though I am probably due for a new one. The Ove Glove will cost you about $18, but it will last a long time and save you from many potential burns.
13. Cork Trivets
Trivets are what you put hot pots and pans on to protect your countertop and table. They are not a fancy gift by any means, but they are incredibly useful. You can buy all kinds of different trivets, from cork to castiron, but I find for the money and usefulness, cork trivets are the way to go. You can get these at Ikea really cheap. Even the dollar store usually has them. The ones pictured below from amazon are actually pretty expensive at $19. Get them somewhere else if you can.
14. Fine Mesh Sieve
If the foodie on your Christmas list likes making sauces, stocks, or puréed soups, then a sturdy fine-mesh sieve is just the thing to get them. I use mine at least a couple of times a week and highly recommend having one on hand for straining sauces or passing soups. A decent Fine Mesh Sieve will cost about $20 bucks but is worth the price.
15. Gnocchi Board
A Gnocchi Board is probably the most specialized item on this list. And it’s not for everyone. But, if your foodie loves Italian food or making pasta, this may be the thing they’ve always wanted. It’s really just a block of wood with grooves cut into it. When you make gnocchi, you roll them on the board to create grooves that will hold on to the sauce. A Gnocchi Board costs about $16 and, again, isn’t for everyone. But for the right person, the Italian food lover, the foodie that loves to make pasta, this will be their favourite gift of the year.
16. Fish Spatula
A Fish Spatula is a thin, flexible metal spatula used mostly for delicate things like flipping fish. However, there are a million uses for a thin, flexible spatula. Whether or not your foodie likes cooking fish, this is the right gift for them. The Fish Spatula pictured below is the exact one that I have, and I absolutely love it. It costs about $19.
17. Candy/Deep-Frying Thermometer
A candy thermometer (which doubles as a deep-frying thermometer) is a great Christmas Gift for anyone who likes to make candy, caramel, or likes to deep fry but doesn’t have a deep fryer. Like the gnocchi board, this isn’t a gift for everyone but for the right person, it is perfect. The one pictured below is the one I have, and it works great. It costs about $17.
18. Sushi Rolling Kit
Every foodie dreams of making sushi. But, to make sushi, you need the right tools. The right tools are a sushi mat and a rice paddle. That’s it. The one pictured below comes with a set of chopsticks as well. This kit costs $18, though you can find cheaper sushi mats in most places. If your foodie loves sushi, get them this, because whether they’ve said so or not, they’ve been dying to try their hand at making sushi at home.
19. French Dowel Rolling Pin
French Dowel Rolling Pins are all the rage right now. Personally, I don’t see what all the fuss is about, but I know for a fact that if your foodie likes to bake, they’ve had their eye on this for the last year or so. I’m positive that there are a few local artisans in your area making these, and you should buy one from them though it will likely set you back more than $20. On Amazon, they are $18.
20. Ring Molds
These ring molds are $18, which kind of pisses me off becasue I spent $60 on mine. They are used for many things, from cutting out biscuits and cookies to forming perfectly even fish and crab cakes, to stacking food in that old school way. Whatever skill level your foodie is at, they will find many uses for ring molds.
Conclusion
There you have it—my list of 20 Christmas Gifts under $20 for that foodie on your Christmas list. I hope you found this useful, and if you did, share it becasue you may help a friend struggling to know what to get their foodie for Christmas. And, if you have a foodie gift idea under $20 that I didn’t mention, I’d love to hear about it in the comments section below or on social media. Thank you, have a great day and a great weekend.
Thank you for reading the post. If you liked it, remember to share it on Facebook, Pinterest, or Twitter. Did you know that Chefsnotes.com has over 400 posts just like this one? Subscribe to the blog below, and you will be notified of every new post so you will never a helpful tip or recipe again. And if you would like to know more about me, click the picture of me below to read my story “Life on the line.”
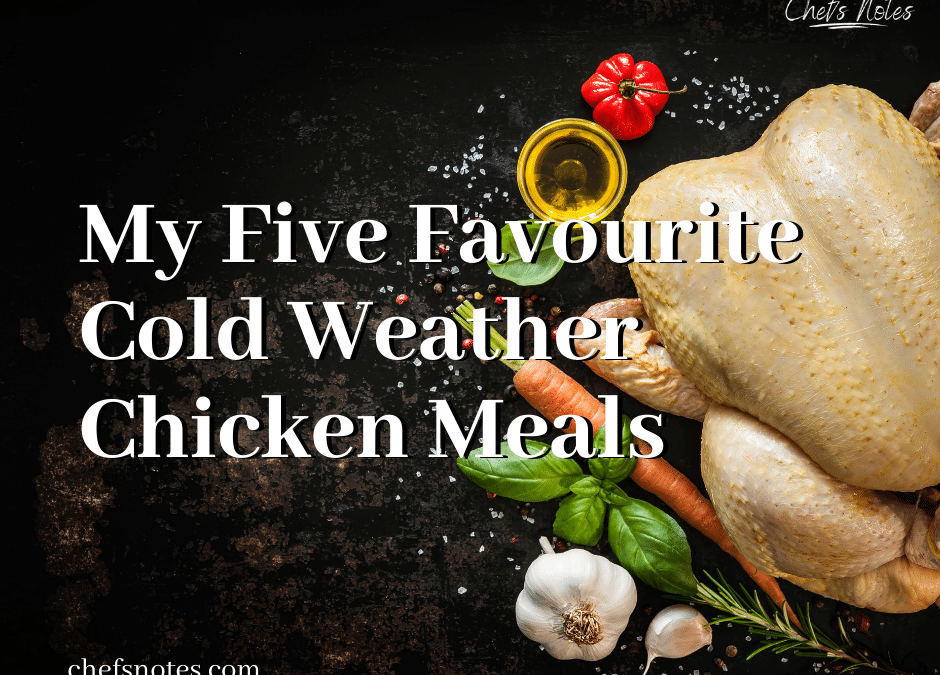
Let’s be honest, chicken is great at any time of year, but some specific chicken dishes are best suited to colder weather. Today, I am going to share with you my five favourite cold weather chicken meals. Some of these you’ve probably had, others you may never have heard of. But I assure you that any and all of these dishes will help get you through the long impending winter. These are my favourites, and I’d love to hear about yours too. Tell me about them in the comments at the end of this post or on Facebook. Alright, let’s get to it.
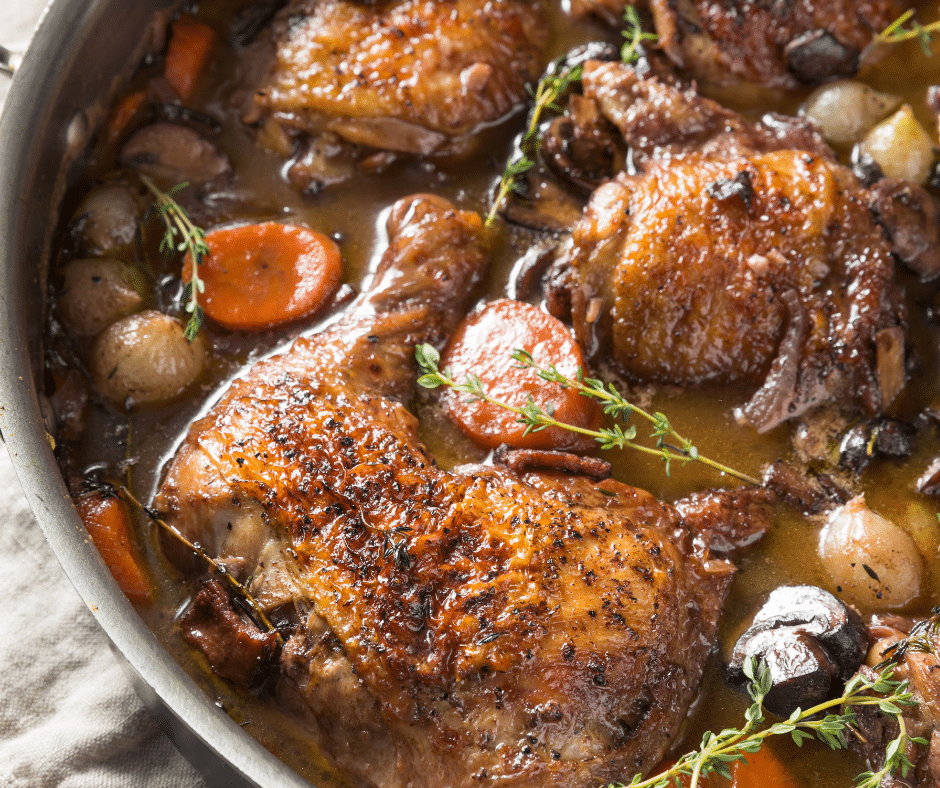
1. Coq Au Vin
The first cold weather chicken dish that we will look at is Coq au vin or chicken in wine. Coq au vin is a rustic French dish of chicken braised in wine with vegetables, herbs, and often bacon. Traditionally, the chicken used for Coq au vin would be a rooster. Roosters are often tougher and leaner than hens, hence the long cooking time and bacon’s addition to the dish. The long cooking time and low temperature are perfect for tenderizing tough cuts of meat or a tough rooster. The bacon adds additional fat to the dish that would be necessary when using a lean rooster. Now, unless you raise your own chickens or know someone who does, you will likely be using store-bought chicken. That’s not an issue. If anything, it may cut down the cooking time of the dish.
I could give you a coq au vin recipe, but why would I when I can share with you Julia Child’s in her own words? Check out the video below for her recipe. Heads up, the video isn’t the best quality, but the recipe is top-notch.
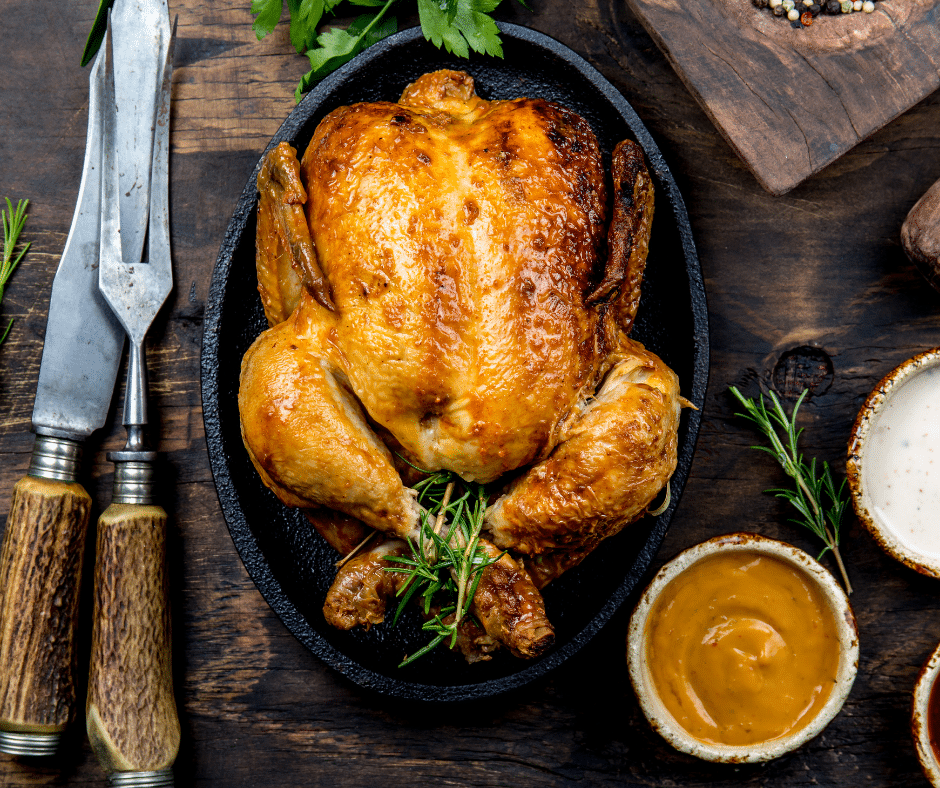
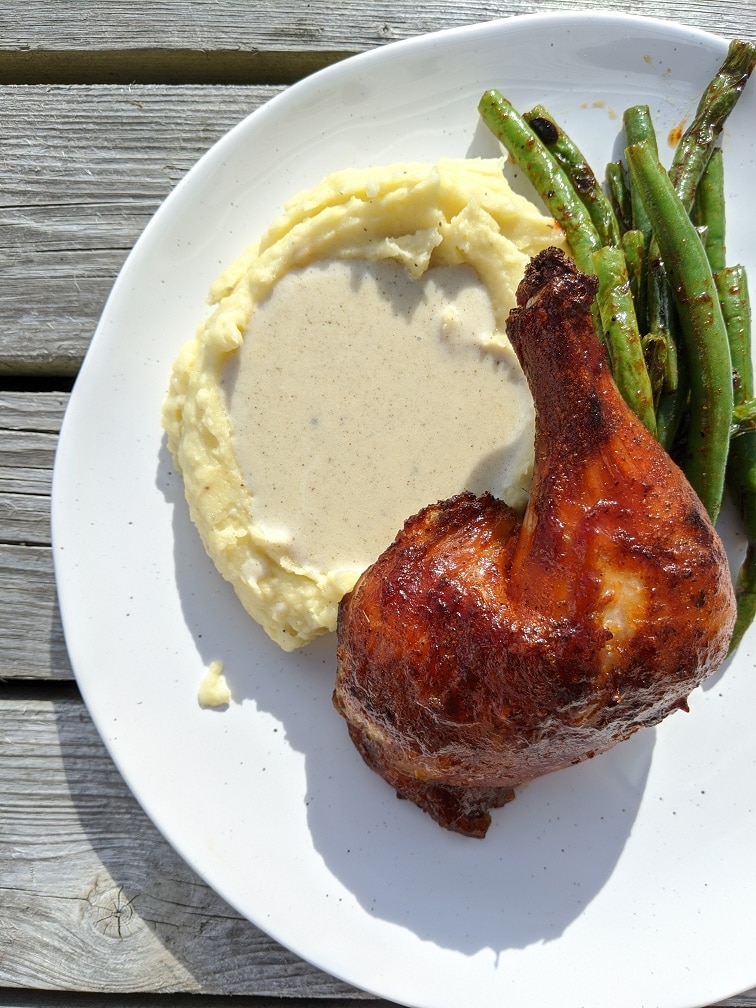
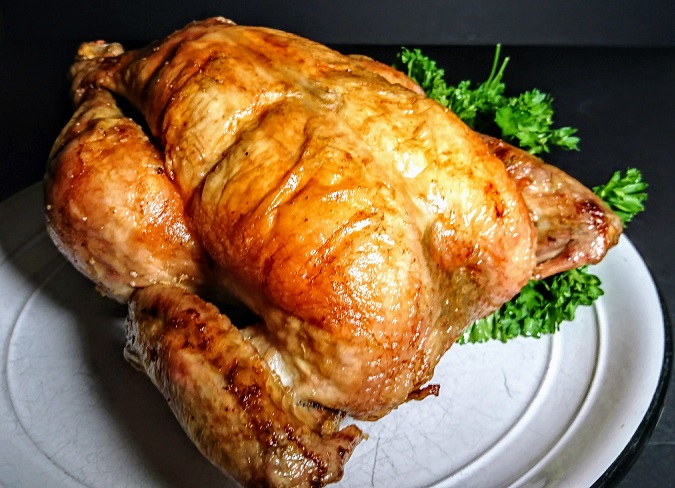
Is there anything better than a classic roasted chicken dinner? I don’t think that there is. When it comes to roast chicken, the simpler, the better. Once again, I defer to Julia Child and her writing in Mastering The Art Of French Cooking. Julia’s recipe is one that has only four ingredients. They are chicken, salt, butter, and olive oil. Julia drys her chicken’s skin, rubs it in and out with salt and olive oil, then roasts it, and bastes it with melted butter and olive oil. She starts her chicken at 425°f for 15 minutes, rotating the bird from left to right every five minutes. She then turns the oven temperature down to 350°f and roasts it for another hour or so until the bird is cooked through. About halfway through cooking, she bastes the bird with a mixture of olive oil and melted butter and continues to do so every ten to fifteen minutes until the chicken is cooked. If you want an amazing roast chicken on a cold winter day, this is how you do it.
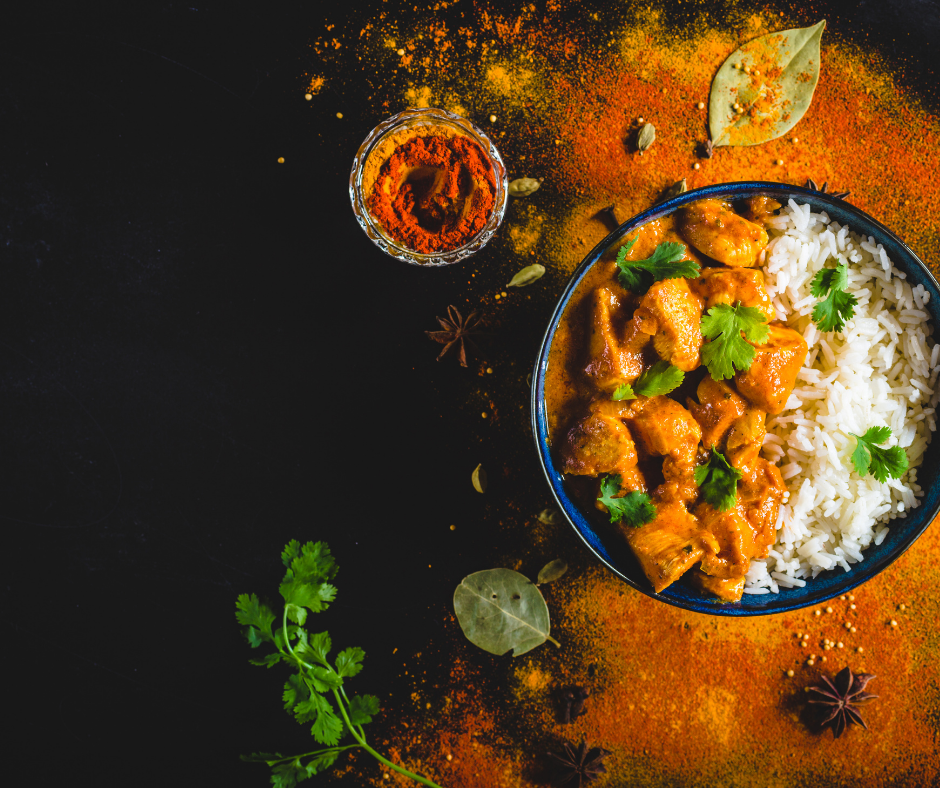
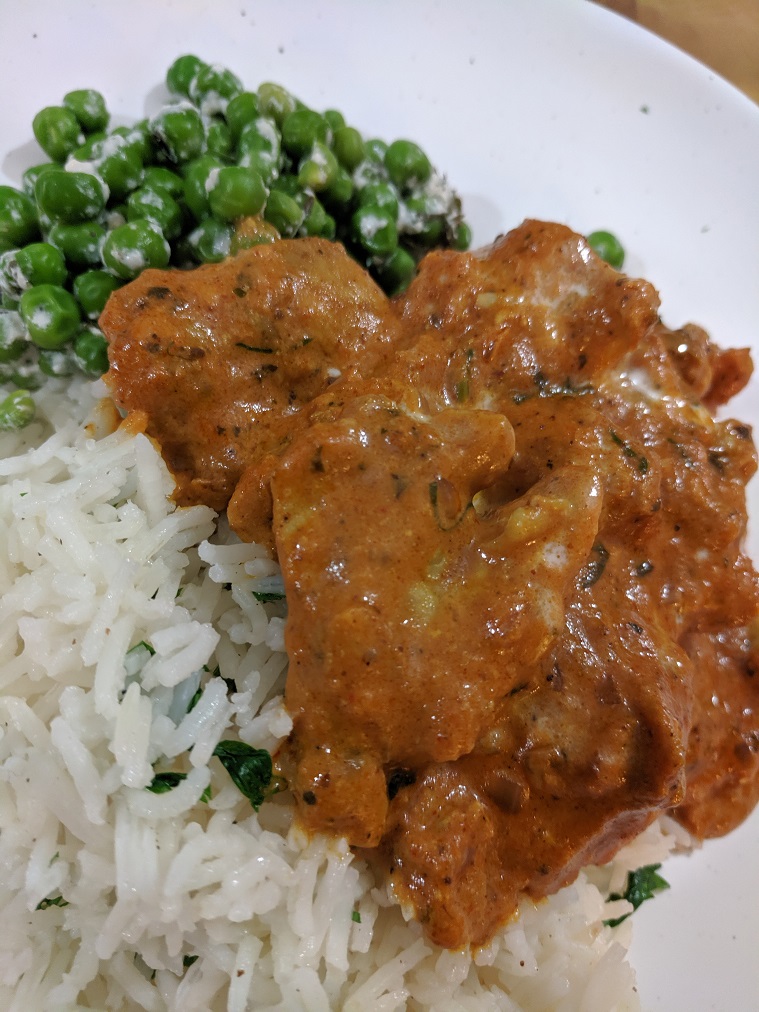
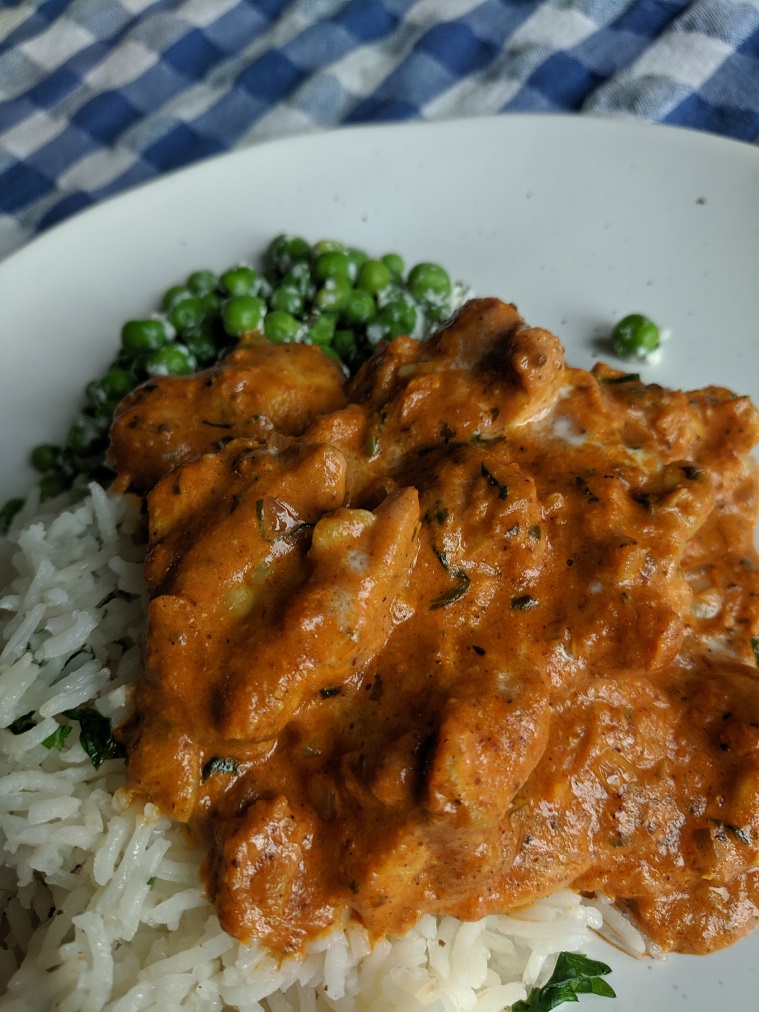
We think of butter chicken as a classic Indian dish, and in a lot of ways, it is. But, it depends on how you define the word classic. Butter chicken is not a dish that has existed for hundreds of years or that was enjoyed by the maharajas of old. But that doesn’t mean that it isn’t an interesting or delicious dish. Butter chicken was actually developed by three restauranteurs in Delhi in the 1950s to salvage tandoori chicken that was leftover at the end of the night. The restauranteurs realized that if they stored the left-over chicken in a rich tomato gravy, the chicken would remain tender for the next day. A happy side effect of this is that the chicken was even more delicious. And just like that, butter chicken was born.
I struggled for a long time to develop my own butter chicken recipe. There was something about it that I couldn’t wrap my head around. That was until I realized that butter chicken was two things, tandoori chicken and tomato gravy. After that, it came together very quickly. I hope that this helps you as well. You can find my recipe below.
Butter Chicken
A staple of Indian restaurants the world over, now you can make it at home. Delicious, creamy, butter chicken.
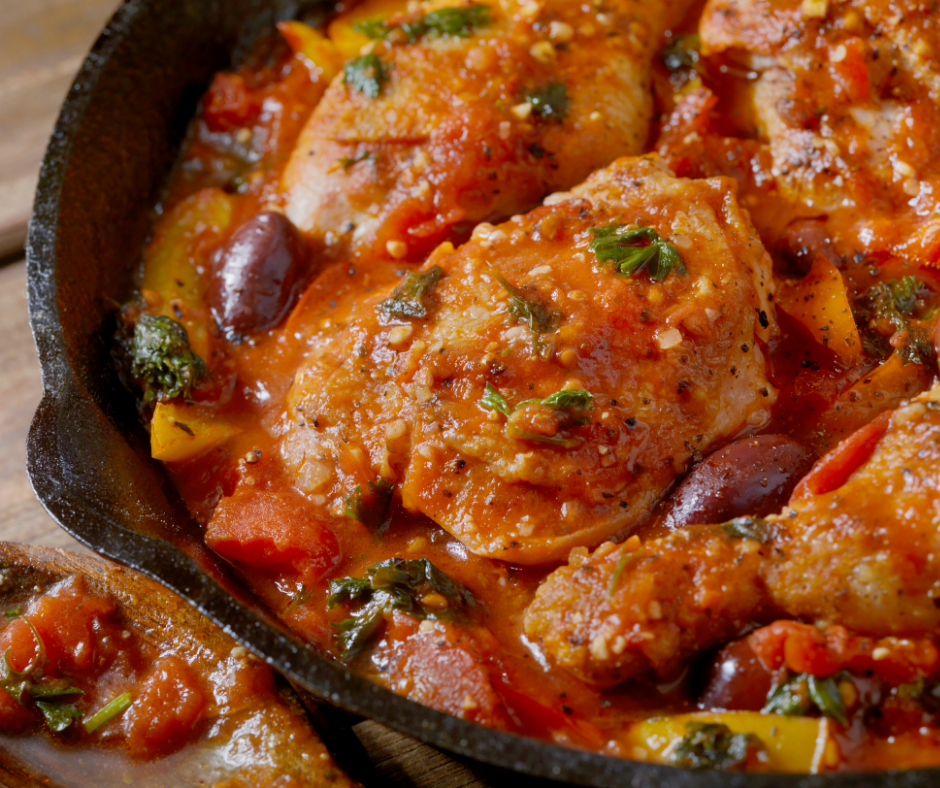
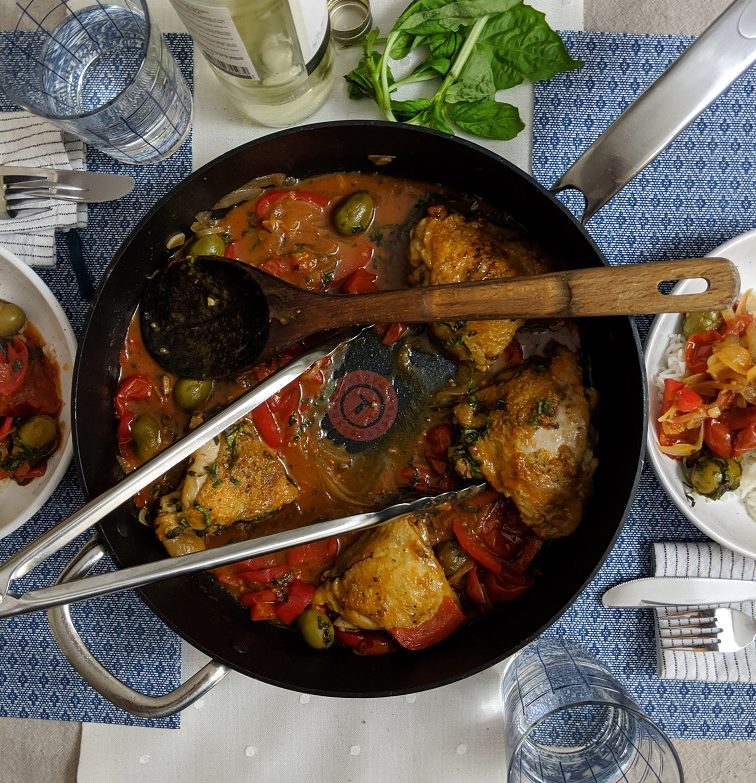
Like Coq au vin is a rustic French dish, Chicken Cacciatore is a rustic Italian dish. Cacciatore translates to “Hunters Chicken.” Essentially, Cacciatore is a dish that an Italian hunter would put together with whatever meat they had harvested. This could easily be a recipe for Rabbit Cacciatore or Quail Cacciatore. The dish comprises the main protein, olives, onions, peppers, wine, tomato sauce, and fresh herbs. It is a wonderful dish that is full of flavour and is classic Italian comfort food. Make this cold weather dish to warm your body and soul. You will be so happy that you did.
35 Minute Chicken Cacciatore
A delicious Chicken Cacciatore recipe that only takes 35 minutes from start to finish.
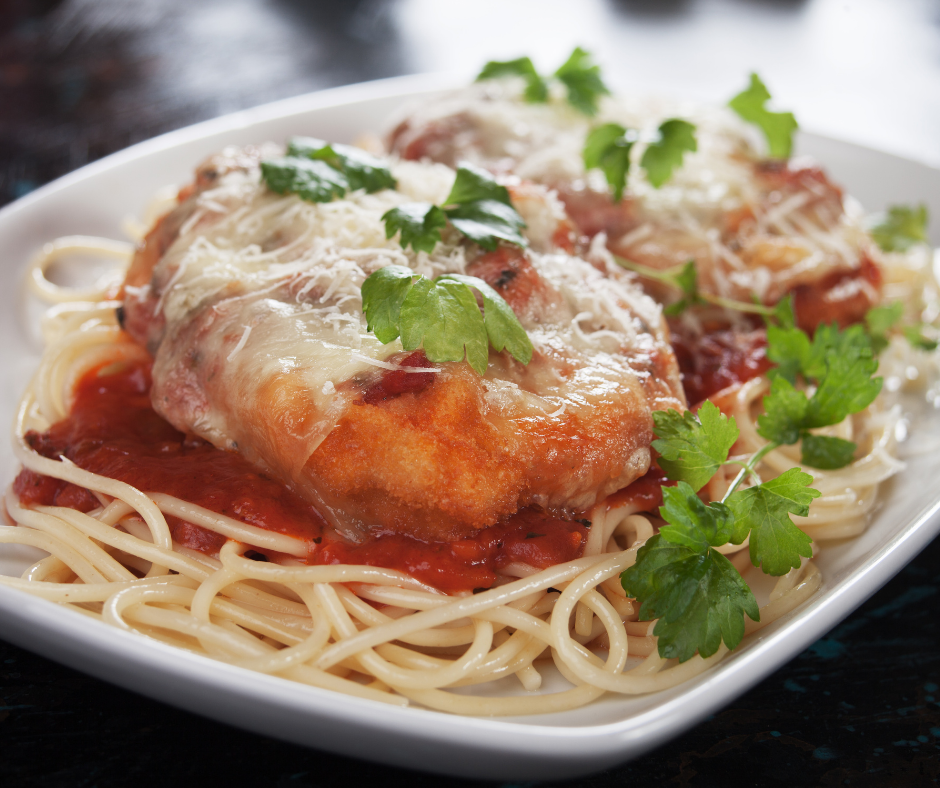
Chicken coated in flavoured breadcrumbs, pan-fried in butter and olive oil, topped with marinara sauce, parmesan and mozzarella cheese, then baked. What’s not to love about that? Chicken parmesan can be served with pasta, the classic accompaniment in North America, or potatoes and vegetables, which is more common in Italy. Whatever you choose to serve your chicken parm with, you’re going to enjoy it. Chicken parmesan also happens to make a delicious sandwich if you’re into that sort of thing.
If I’m honest, I’m thrilled that the weather has turned colder temperatures are coming. Cold weather means braises and stews and really hearty dishes, which I love. When the snow starts to fall and the windows are frosted over, it will likely be one of the dishes from this post that I turn to for comfort. Over the course of the winter, I will likely turn to all of these dishes, among many others, to get me through the long nights. What dishes will you turn to?
Thank you for reading the post. If you liked it, remember to share it on Facebook, Pinterest, or Twitter by clicking the icon to the left of the page. Did you know that Chefsnotes.com has almost 400 posts just like this one? Don’t ever miss a post again. Become a Chef’s Notes member right here. You will be notified of every new post. And if you would like to know more about me, click the link below to read my story.
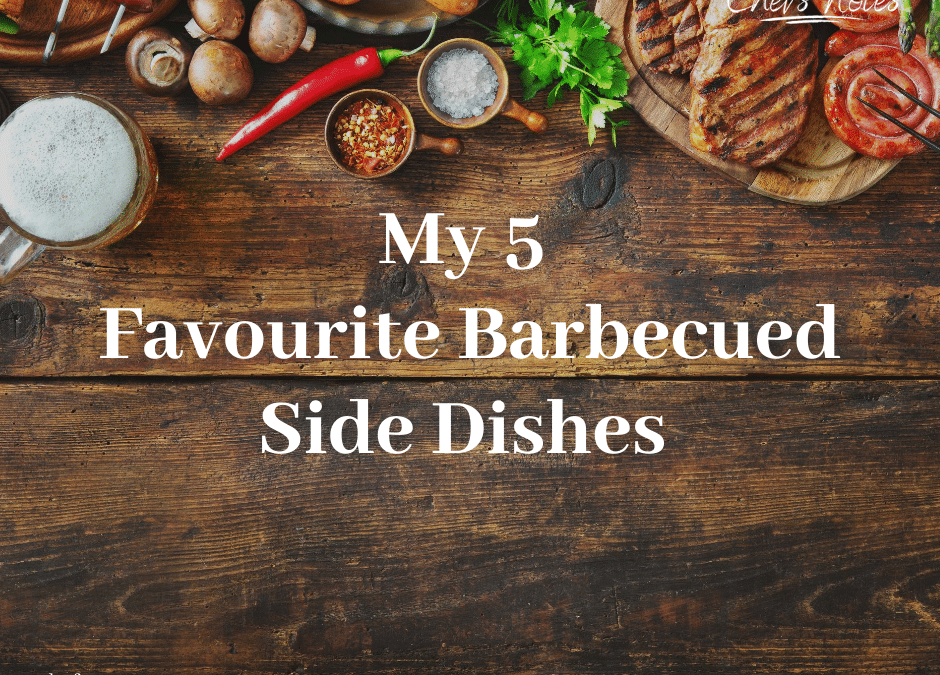
Today marks the end of my Summer Grilling and Smoke Series. In honour of that, I thought I would share with you my 5 Favourite Barbecued Side Dishes. Although I love potato salad and coleslaw, you aren’t going to see either of those things on this list. The key to this list is that all the items are cooked on the grill right alongside the main course. If you are stuck eating the same old side dishes and want some new ideas, or if you just love to see what I eat for some strange reason, this post has you covered. Keep reading to see My 5 Favourite Barbecued Side Dishes.
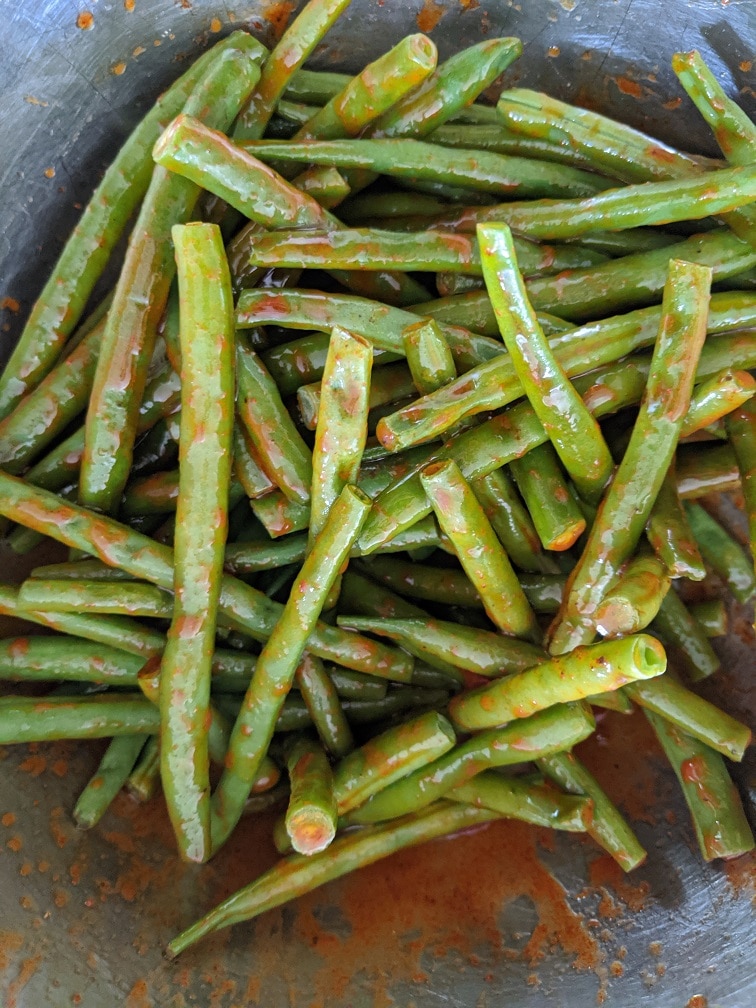
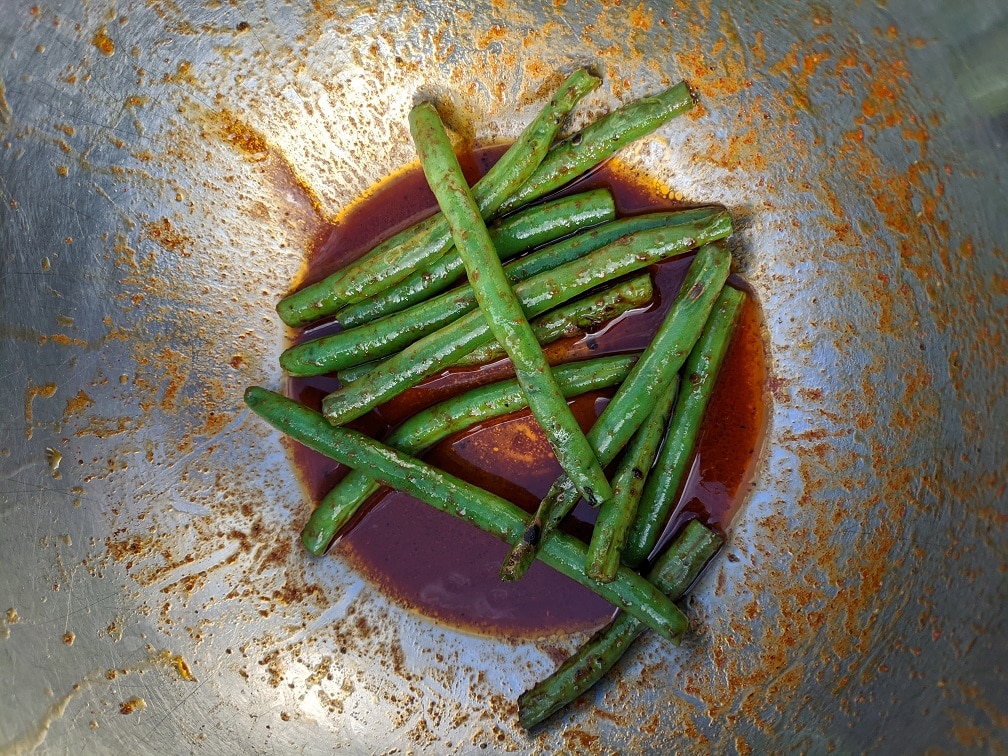
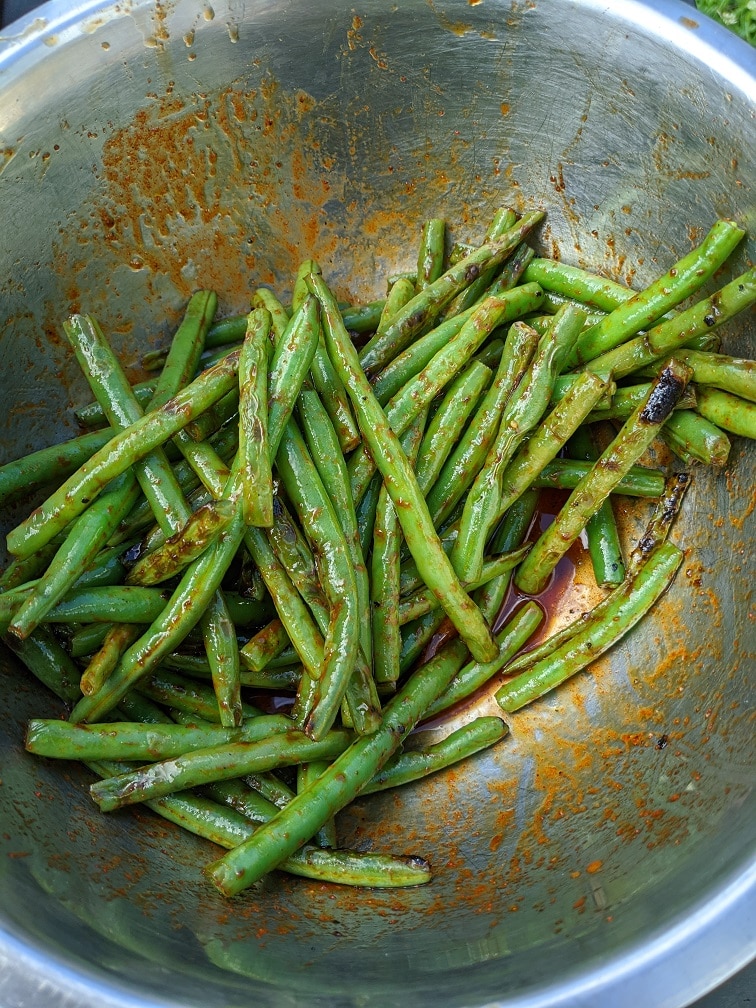
1 – Paprika Green Beans
I know that a lot of people are tentative about grilling vegetables like green beans and asparagus. The thought is that they are going to fall through the grill. Yeah, that will happen. Barbecuing green beans, you may lose a few to the gods of fire but, it is worth the loss. The flavour of grilled green beans is outstanding. Barbecued green beans are great, barbecued green beans tossed in smoked paprika vinaigrette before and after cooking are much better.
To make these green beans, you first have to make the smoked paprika vinaigrette. You can find the recipe below, but it is mainly smoked paprika, maple syrup (or honey), mustard, vinegar, and oil. Toss the green beans in the vinaigrette, grill them for ten to twelve minutes, flipping them once, then toss them in the remaining vinaigrette. You can do this with asparagus too, but I prefer it done with the green beans.
Grilled Green Beans With Paprika Vinaigrette
A delicious barbecued side dish of grilled green beans tossed in Paprika Vinaigrette.
Keyword: Barbecue, Side Dish, Summer Barbecue, Vegetables
Servings: 4servings
Author: Chef’s Notes
Ingredients
1lbCleaned Green Beans
1tspsmoked paprika
1tbspMaple syrupor honey
1tspDijon mustard
2tbspred wine vinegar
1/4cupolive oil
Salt and pepper to taste
Instructions
In a medium-sized mixing bowl whisk together the paprika, maple syrup, mustard, and vinegar.
While whisking, slowly add the oil a few drops at a time until it is all incorporated. Season the dressing to taste with salt and pepper.
Toss the green beans in the vinaigrette, then take the beans out of the bowl reserving any remaining vinaigrette. Grill the green beans over medium heat for about 10 minutes flipping once.
Put the cooked green beans back in the bowl with the remaining vinaigrette, toss to coat and serve.
I did a whole post on corn on the cob, which you can find here. Corn on the cob is one of the great all-time barbecued side dishes. One of the many things I love about grilling corn on the cob is that there are a few different ways you can make it. You can cook the corn in the husk, right over the flames for about thirty minutes to get really sweet tasting corn. You can husk the corn, brush it with oil, season it with salt and pepper, and grill it on high for about twelve minutes for a roasted corn flavour. Or, you can cut it into pieces, and put it in a vegetable pouch, which we will look at in a minute. Of course, I haven’t even mentioned all the things you can put on the corn once it’s cooked. Check out this post from The Kitchn about six toppings you can add to your corn.
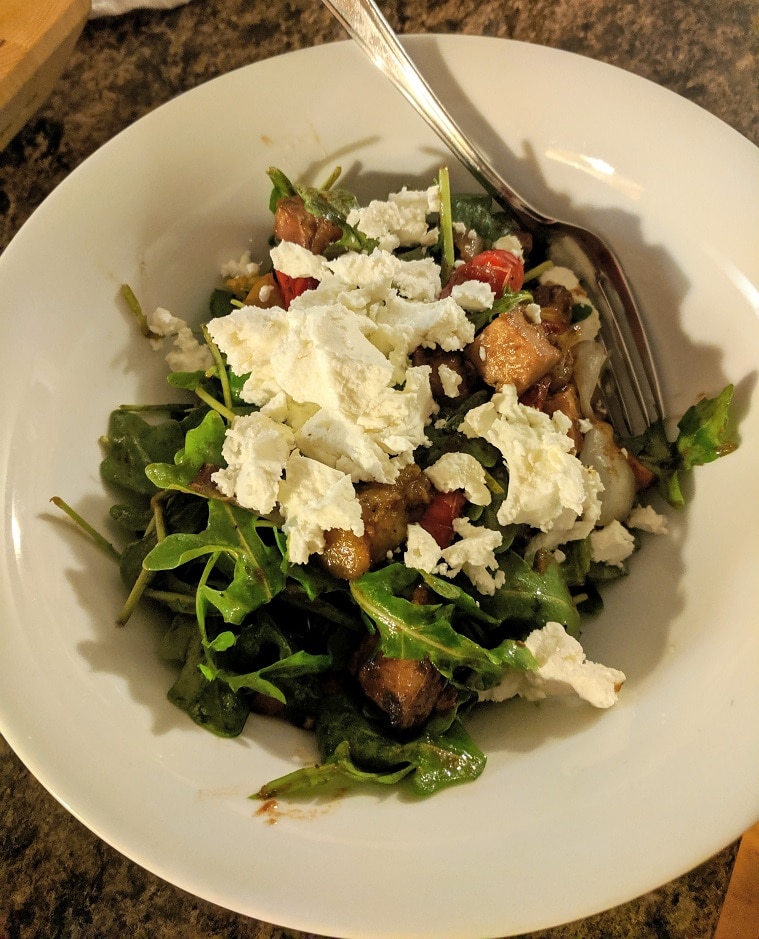
3 – Grilled Vegetable Salad
Grilled vegetables of any kind are amazing. I could easily have added mixed grilled veggies to this list, but this salad takes those vegetables to a whole other level. It is a mix of grilled vegetables tossed with arugula and balsamic vinaigrette then finished with goat cheese. What could be better than that on a beautiful summer’s day?
To make this salad for four people slice the following vegetables about a quarter-inch thick: one zucchini, one eggplant, one red onion, one red bell pepper. Also, skewer twenty cherry tomatoes. Toss all the vegetables with olive oil, salt and pepper. Grill the veggies on medium-high for about five to six minutes per side or until they are soft. Cut all the vegetables except the tomatoes into bite-sized pieces then put them in a large bowl with the balsamic vinaigrette (recipe below). Stir the vegetables to coat them all in the dressing, then let them sit and cool for ten minutes. Letting the vegetables sit will help them to absorb some of the dressing. Toss in four to five big handfuls of arugula and toss. Top the salad with goat cheese and serve.
I love this salad any time of the year. In the winter, I will add squash or sweet potato to the mix rather than the eggplant and zucchini. The only other difference between the summer and winter versions of this salad is that in the winter, I roast the vegetables in the oven as opposed to on the barbecue.
Maple Balsamic Vinaigrette
This basic recipe can be used to make thousands of kinds of salad dressings. Change the vinegar and add different ingredients like herbs and garlic to make whatever vinaigrette you would like.
I get asked a lot about foil vegetable packets. My response is that the question isn’t what can you put in a vegetable packet. The question is, what can’t you put in them? Foil vegetable packets are the most versatile barbecued side dish because you can put just about anything in them. Really, I can’t think of anything that you wouldn’t want to put in them.
The only real tip I have about vegetable packets is to add in some fresh herbs and use garlic butter as much as possible. These two small things will have a significant impact on the flavour of the vegetables. Actually, I have one other tip. If you use a vegetable that cooks quickly like zucchini and a vegetable that takes a while to cook like sweet potato, cut the zucchini two to three times larger than the sweet potato. That size difference should make up for the difference in cooking time.
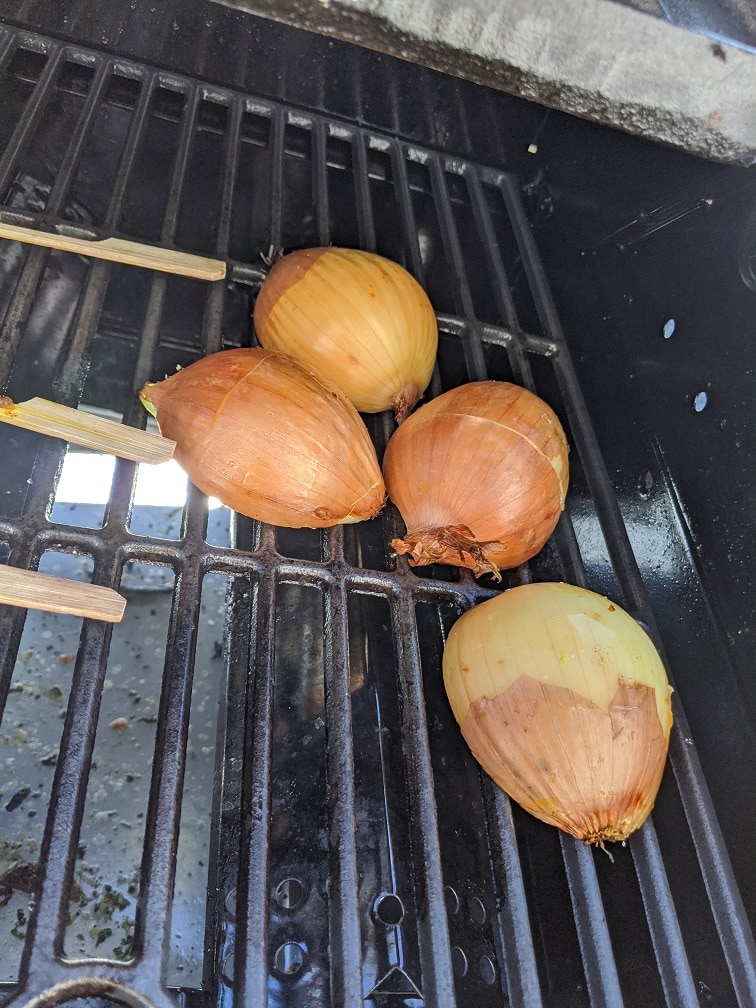
5 – Charred Onions
Onions, so simple, so unassuming, so delicious. The final item on this list of my 5 favourite barbecued side dishes is also the most simple; charred onions. All you have to do is cut an onion in half, drizzle it with olive oil, season it with salt and pepper and put it on the grill for forty-five minutes to an hour. Put them on and forget about them. You may want to flip them for the last fifteen minutes of cooking, but you probably won’t have to. As the onions sit on the grill, the surface of the onions goes black and takes on a nice charred flavour. The inside of the onion steams in its juices and takes on a sweet taste as it cooks and softens. To serve the onion, just cut the ends off and remove the skin. Charred onions go very well with steak, pork chops, grilled chicken, or just about anything. You can’t believe how good these onions are until you try them, seriously.
Conclusion
These are my 5 favourite barbecued side dishes, but I would love to hear what yours are. Tell me about them in the comments section below. I hope that this post has given you some ideas and some things to try. That’s kind of the point of it after all. Happy grilling, everyone!
Thank you for reading the post. If you liked it, remember to share it on Facebook, Pinterest, or Twitter by clicking the icon to the left of the right of the page. Did you know that Chefsnotes.com has almost 400 posts just like this one? Imagine all the great tips, tricks, and recipes you’ve missed. Don’t miss any more! Subscribe to Chef’s Notes by putting your email address in the subscription box at the top right of the sidebar. You will be notified of every new post. And if you would like to know more about me, click the link below to read my story.
I grew up in a very meat and potato centric family. We would eat rice, and pasta on occasion but most days it was potatoes. I didn’t really have a favourite potato dish because generally, they were just mashed though or sometimes baked, which I hated. It wasn’t until my teens and early 20’s that I was exposed to a variety of different potato preparations. This mostly came from the restaurants I was working in at the time.
Growing up I never really thought much of potatoes. I didn’t hate them. I didn’t love them either. They were just always there. But, once I started to see all these different ways that they could be prepared I fell in love with them. Even the ubiquitous mashed potato which I’d eaten with the majority of my meals as a kid took on new meaning to me.
Potatoes, like so many other ingredients that I’d learned about over the course of my early culinary education, can be so much more than we typically think they can be. Even the most common potato dish, mashed potatoes, can easily be elevated by the addition of sour cream and chives, or caramelized onions, bacon or duck fat, pushing them through a food mill rather than mashing by hand, and the list goes on and on.
Today, I wanted to take a few minutes and focus on the humble potato. With that in mind, I am going to share with you a few of my favourite ways that potatoes can be prepared. Some of these I picked up in restaurants, some from cookbooks, some from friends or family. Wherever they come from, they come with love, and that is all the humble potato needs to be more than it already is.
With that, in no particular order, these are…
My 5 Favourite Potato Dishes
Mashed Potatoes
I would be lying to myself and you if mashed potatoes wasn’t on this list. Here’s why. In the 16 years I worked in restaurants the 2 years in catering and the 2 years that I’ve been a personal chef one thing has always stood out to me. Good mashed potatoes will outshine everything else on a plate every single time. I’m serious. It doesn’t matter what it is. I’ve personally served people and have seen people be served incredible meals. Perfectly cooked and well-seasoned proteins with a really well-balanced sauce, and tender vegetables with just the right amount of butter and crunch. The customer will say, “It was really good. Everything was great! But, oh my god the potatoes!”
I think the reason why people get really excited about good mashed potatoes is actually pretty simple. We’ve all eaten a pile of them. We have a very clear understanding and expectation of what mashed potatoes are going to be. But when we’re served silky, buttery, well-seasoned potatoes, it blows our expectations out of the water. We expect the protein to be perfectly cooked. We expect the sauce and vegetables to be really good. But the mashed potatoes we only ever expect to be mashed potatoes.
I love mashed potatoes for a lot of reasons. They obviously pair well with almost anything which is great. Anyone can make them and it takes little effort to make the great. Most importantly, they are delicious.
If you want to see some ways that you can up your mashed potato game you can find two different posts I wrote about them. Here and here.
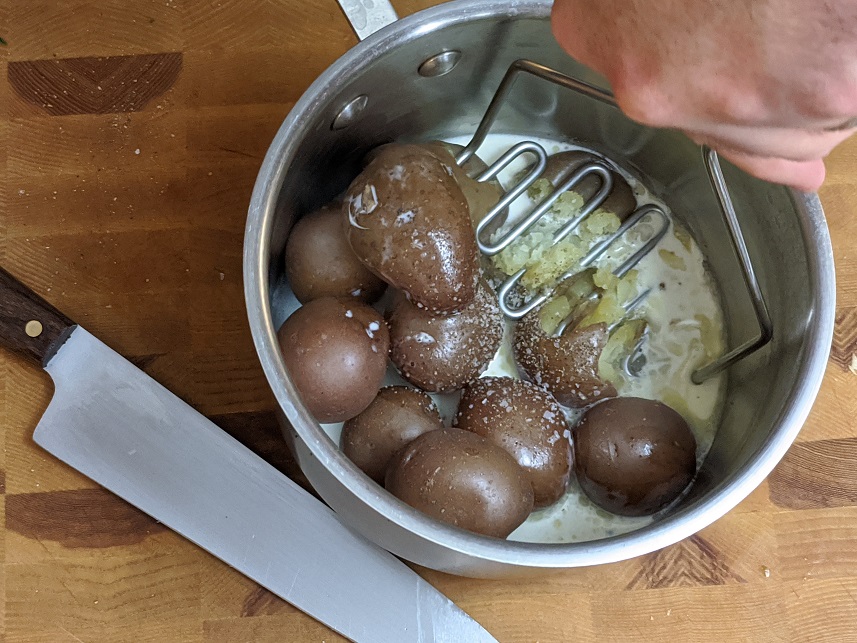
Smashed Potatoes
The term “smashed potatoes” seems to get thrown around a lot over the past few years. But what exactly does it mean? Well, in my understanding, there are two styles of smashed potatoes. They both start by boiling baby potatoes. In the first style, the potatoes are placed on an oiled sheet pan then pressed. The potatoes are then drizzled with olive oil, seasoned with salt and pepper and roasted in a hot oven, usually around 400°F. These are also sometimes referred to as crushed potatoes. The outside gets a little crispy and golden and the inside stays light and fluffy. Delicious!
In the second style of smashed potatoes, the potatoes are boiled as in the first style. However, rather than being crushed and roasted with oil, these are smashed and mixed with cream, butter, salt, and pepper. I enjoy both of these styles a lot and honestly don’t know if I have a favourite out of the two. Which one do you prefer?
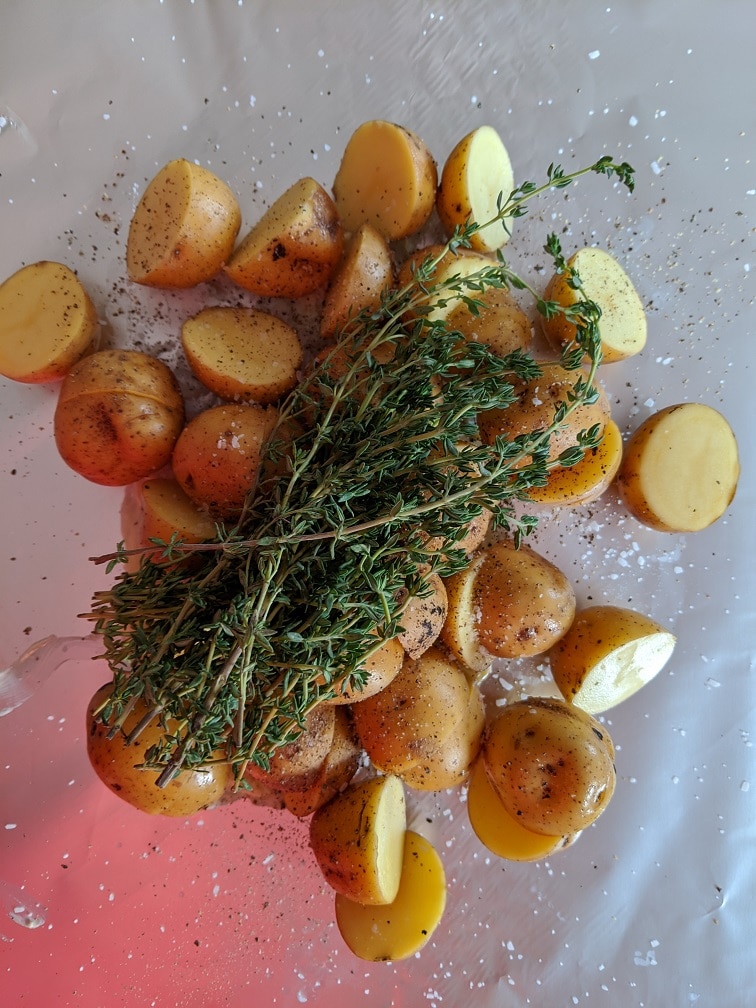
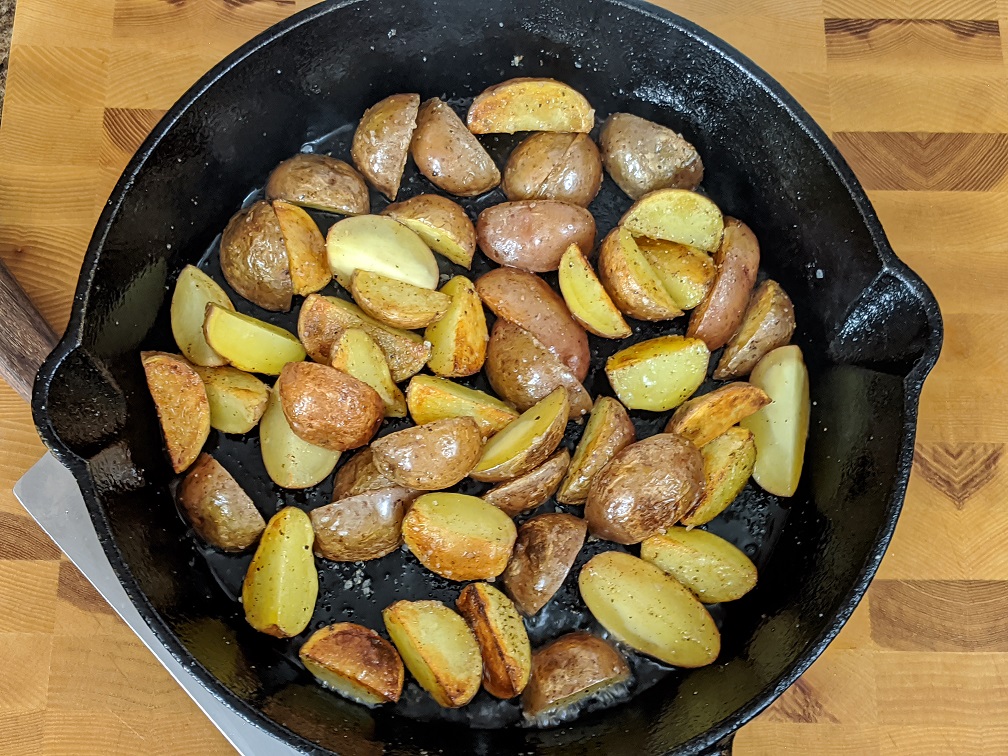
Pan-Roasted Potatoes
Pan-roasted potatoes are generally made with either baby red, golden-gem, or fingerling potatoes. These cook fairly quickly and get nice and crispy. In this method, the potatoes are sliced, halved, or quartered and then cooked about halfway on the stovetop with a bit of olive oil. A tablespoon or two of butter is usually added and then they go into the oven on 375°f to finish cooking. Because they are already partially cooked, the oven-roasting only takes a few minutes.
This is a really quick way to make delicious roasted potatoes. Not only that, but herbs like thyme or rosemary can easily be added for extra flavour.
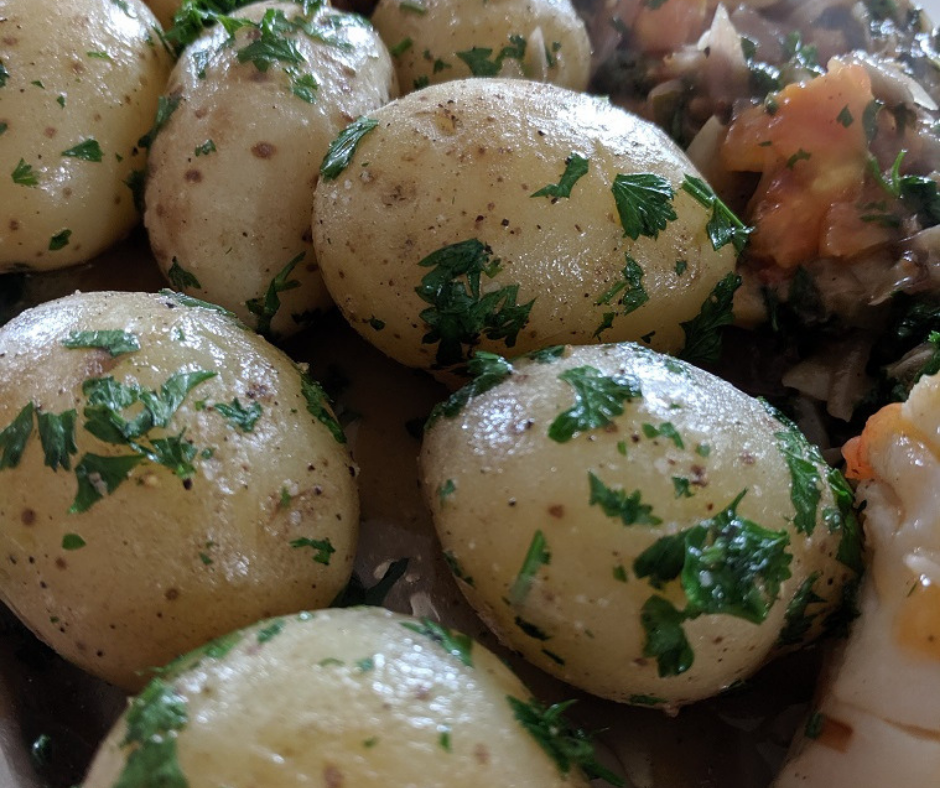
Parsleyed Potatoes
Parsleyed potatoes. What could that possibly mean? Well, it means potatoes with parsley on them. And yes, as simple as that sounds this is in my top five potatoes dishes. Why?
Parsleyed potatoes is a dish usually made with new or young potatoes. The potatoes are boiled in salted water until they are cooked through and then drained and left to steam for a minute or two to ensure they are dry. While the potatoes are draining a bit of butter is melted along with a bit of salt and pepper. The potatoes are added to the butter and tossed with a big handful of fresh chopped parsley right before being served. It sounds simple because it is. It also happens to be delicious and beautiful.
I like parsleyed potatoes for big family-style meals because the bright green from the parsley in contrast with the potato really pops. Also, the flavour is incredible. This dish goes especially well with white fish, roasted chicken, beef bourguignon, or even coq au vin (chicken cooked in wine). Give it a try!
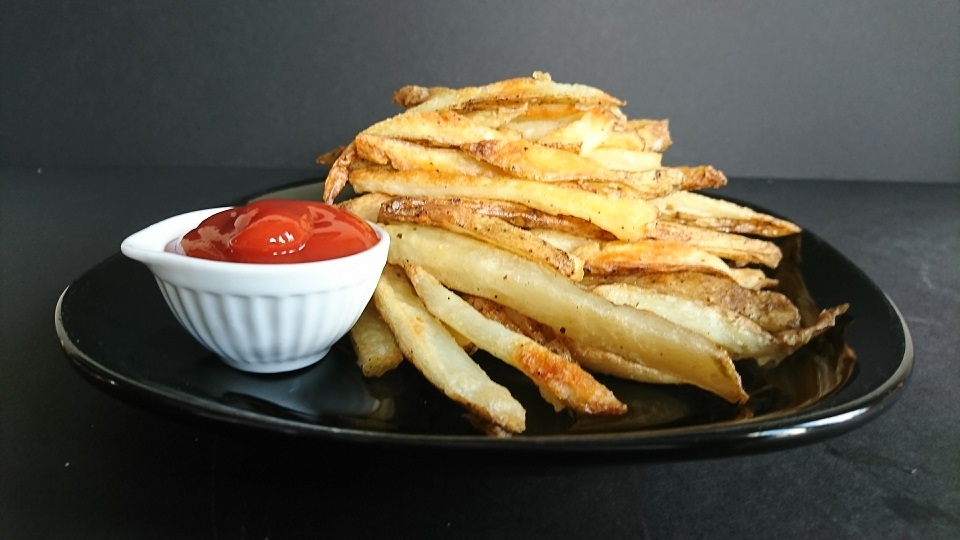
Oven Roasted French Fries
I have a bit of a problem with French Fries in that if I eat them once, I crave them for a month afterwards. It drives me crazy! But they’re just so damn good.
These specific fries are actually oven-baked and ridiculously crispy. I know you’re probably thinking I’m crazy. There is no way to get really crispy oven-baked fries. Well, you’re wrong. Let me explain. I first cut the potatoes into fries and then boil them in salted water just until they are about to fall apart. I drain them, let them steam dry in the colander for a few minutes, then toss them with olive oil, salt and pepper and bake them on 425°F. They are amazing!
This same boiling then roasting technique works to get really crispy roasted potatoes too!
If you love fries but heat the grease, this is your work around. You can find the recipe on my Instagram here.
Conclusion
Potatoes are a humble vegetable which when treated without care are boring, bland and blah. However, when shown a little love, these tubers can become something that your family, friends, or guests, will talk about literally for years.
What are your favourite potato dishes? Let me know in the comments or on social media. In the meantime, have a great Friday and a great weekend!
Over the last few years of eating gluten-free, it has been a struggle to find decent gluten-free versions of regular products. However, over that time, and through a lot of trial and error and a serious lightening of my wallet I have found some products I like. In the hopes of helping to save my gluten-free brothers and sisters a little time and a lot of money, I put a list together of my favourite Everyday Gluten-Free Products.
Before I get into this I want to make it clear that I am not sponsored by any of these brands in any way. However, the Presidents Choice brand is included in this list and I teach occasional cooking lessons for Loblaws. Of course the opinions I express in this post are mine and mine alone. And are a true and accurate representation of my experience with each of these brands.
Okay, in my opinion here are…
THE 5 BEST EVERYDAY GLUTEN-FREE PRODUCTS
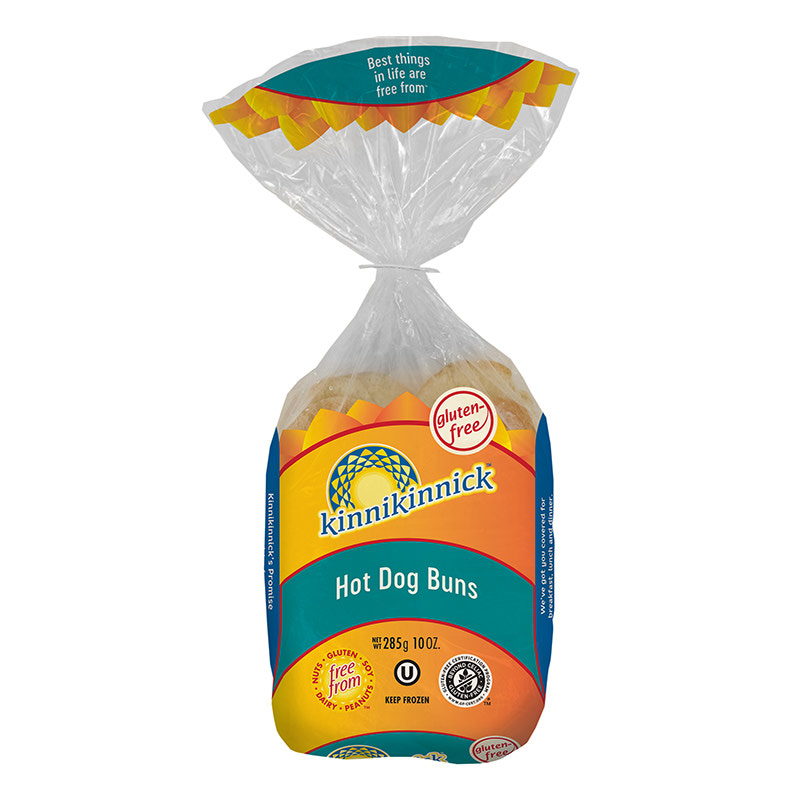
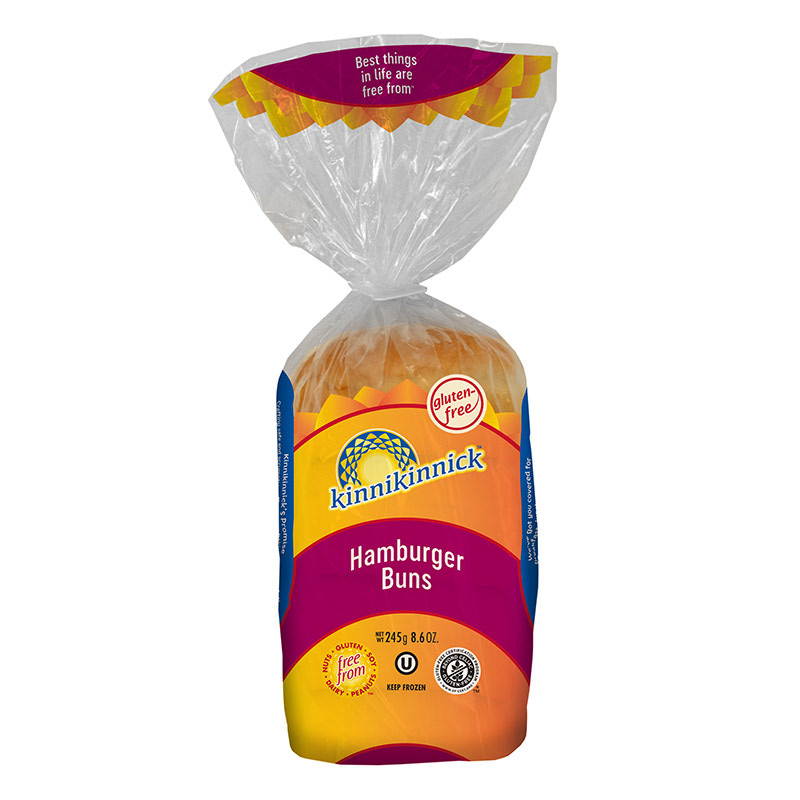
1. Hotdog & Hamburger Buns – Kinnikinnick
I am a man who loves a good burger more than almost anything. For a long time trying to find a bun that didn’t take away from the flavour of the burger was really hard. Then I discovered Kinnikinnick. You’ve absolutely heard me talk about this brand before.
If these burger buns, were not gluten-free they would fall into the category of a kind of middle of the road white bun. There would be nothing that special about them. No one at a barbecue would complain but they probably wouldn’t compliment you on the buns either. But, that is exactly what makes them so incredible as a gluten-free product. When you are eating them, you don’t think about them. You’re mind is saying, “Hey, this is pretty good for a gluten-free bun.” It is saying, “Hey, this is a really good burger.” I think that is a good burger buns job, and these do it well.
The Kinnikinnick hotdog buns fall into the exact same category as the burger buns. They are actually the same thing just in a different shape.
The downside of these, like most gluten-free products, is the price compared to regular buns. Where a bag of eight regular buns might cost you $2-$3 at most. These are closer to $7 for four. But, if you have to eat gluten-free, they are worth that price and more.
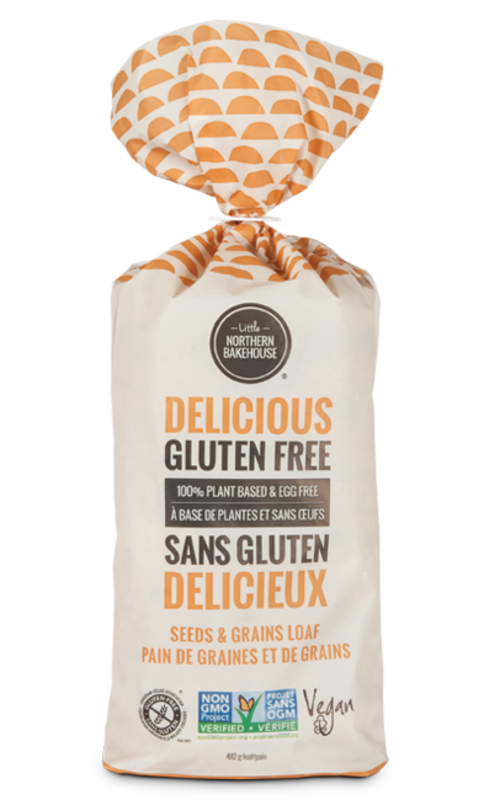
2. Bread – Little Northern Bakehouse
Little Northern Bakehouse is a brand of gluten-free bread that I started eating only a few months ago. After years of trying different brands, I randomly picked this one out of the freezer at the grocery store. I’m so happy I did. Like all the products on this list, this bread stands out because it doesn’t stand out. Eating this bread you won’t think ” This is really good gluten-free bread.” You will just think you are eating good bread. In fact, the first time I bought Little Northern Bakehouse bread I took a bite of a slice and had to double-check to make sure it was actually gluten-free.
Like most gluten-free bread this falls into the $7 range per loaf. But, it is well worth the price.
3. Frozen Pizza – Oggi’s
I have talked about Oggi’s Gluten-Free frozen pizza a few times on the blog now. Why? Because it is that good. I said it before and I’ll say it again, this is the best-frozen pizza I have ever had, period. That is really saying something since it is gluten-free. Even if you are one of the lucky ones who can chomp down on as much wheat as you can, I suggest trying this pizza at least once.
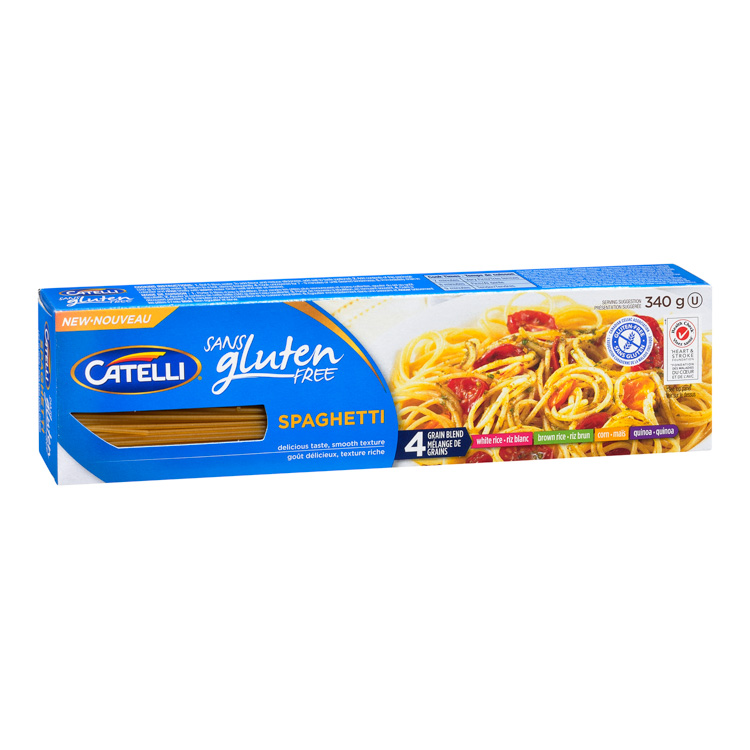
4. Best Pasta – Catelli
I’m saying that Catelli makes the best all-around gluten-free pasta. But that comes with a little caveat. I’ll get to that in a second.
Catelli, which is a good Canadian brand, makes a really good quality gluten-free pasta. What’s interesting is that I find every box I buy gets better and better. I think they have continued to work on and develop their recipe which is awesome. They make a variety of shapes including a no-boil lasagna noodle.
One issue I had with Catelli Gluten-Free pasta in the pasta was that I always had to undercook it by a minute or so or else it would fall apart. And, it was terrible for leftovers because it would fall apart when reheated. However, I’ve found that in the last six months or so these issues have largely been resolved. This is why Catelli is my number one all-around gluten-free pasta brand. Also, it is a bit more expensive than regular pasta but not outrageously so.
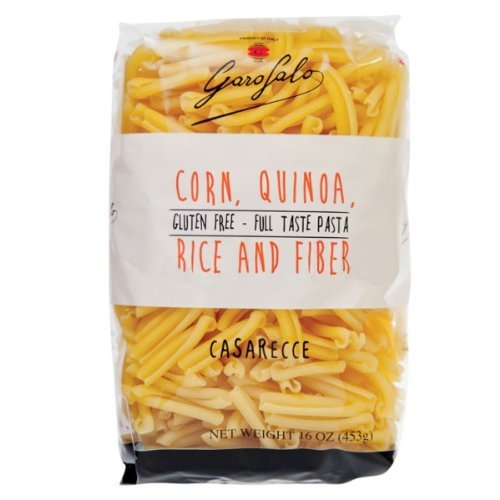
I said there was a caveat and this is it. Garofalo makes an incredible gluten-free pasta. Like, it is amazing. However, it is really expensive coming in around $8 for 2-3 portions. This is the pasta for a special occasion or a very specific dish, you’re not going to eat this brand once a week. That’s why it isn’t my number one. Also, I know Garofalo makes different shaped pasta but I’ve only seen the casarecce which isn’t a shape of pasta suited to a lot of sauces.
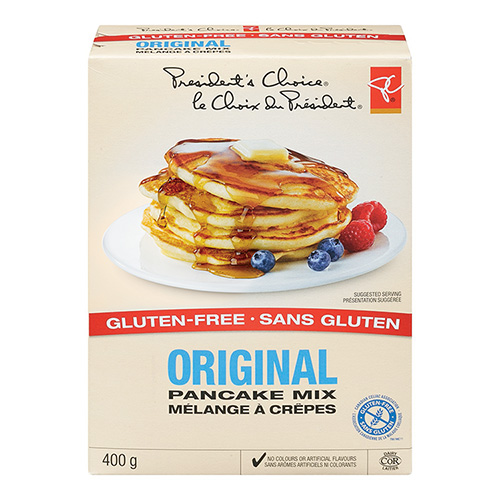
5. Best Gluten-Free Pancake Mix
The final item we are going to look at here is one that is difficult for me. Prior to having to cut gluten out of my diet, I would have never dreamt of using a pancake mix. Ever. Growing up my mom was adamant that cakes, pancakes, muffins, cookies, all be made from scratch. I still hold close to those values. However, it is really difficult to make a good homemade gluten-free pancake. Having said that, there are two brands that really stand out in the gluten-free pancake mix arena.
The two brands of gluten-free pancake mix that I like are Kinnikinnick and Presidents Choice. As close as the race is I have to give it to Kinnikinnick. I find the colour, texture, and flavour of Kinnikinnick pancakes ever so slightly beats out PC. But again, either one will do well. And they are about the same price which I think falls into that $7 range.
Conclusion
Even just a few years ago, if you were told you had to stop eating gluten it meant you had to give up everything you loved. Luckily, today there are a lot of really great products out there that will help you maintain a sense of normalcy.
Is there a gluten-free product you love that I didn’t mention? I’d love to hear about it in the comments or on social media. Thank you as always for reading and check out this post all about gluten-free snacks.
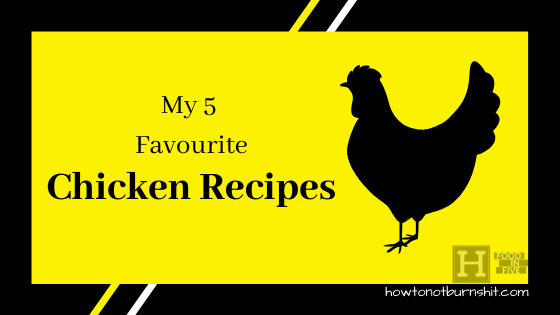
Chicken, it must be the most used and versatile protein on the planet. Who doesn’t love chicken? I know I do. One of the many things I love about it is how it can go from Asian cuisine to French, to American, to the Carribean, to Indian and everything in between. What’s not to love?
Today, in celebration of the love I have for chicken I am going to share with you my 5 favourite chicken recipes. Some of these you may have seen me talk about before and some may be completely new to you. Either way, I hope that you enjoy this post as much as I’ve enjoyed creating, cooking and tasting all these recipes.
Here are…
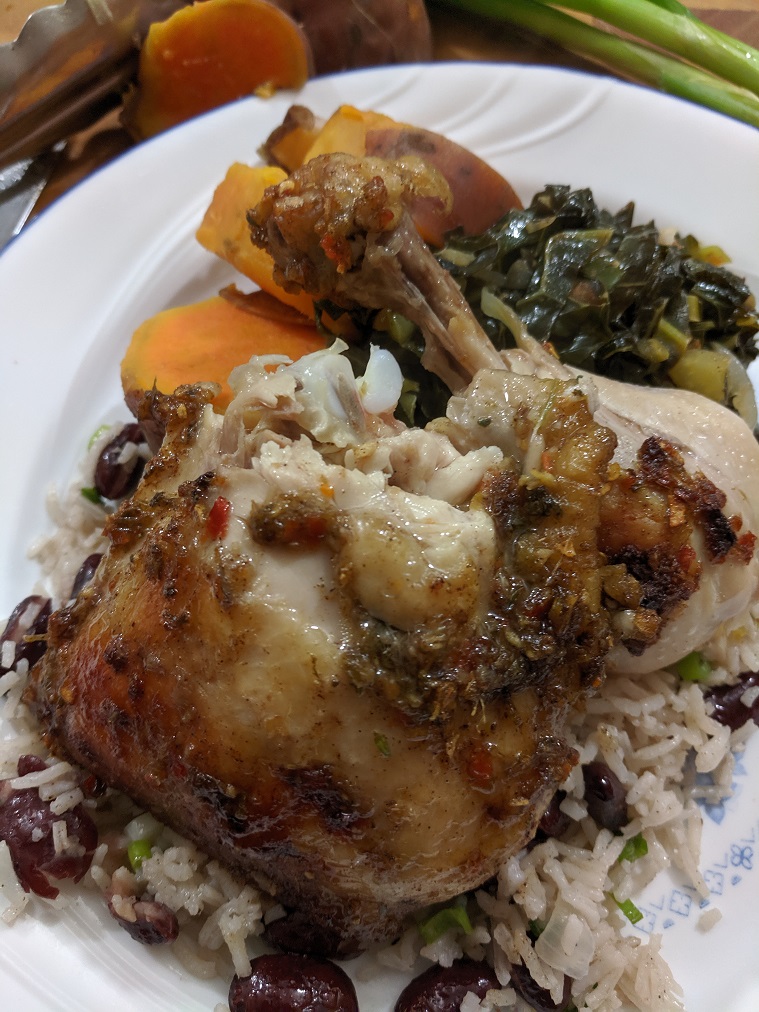
1 – Jerk Chicken
I can’t think of another chicken dish that is more misunderstood or that carries with it more mystique than Jerk Chicken. To some, even saying the words is a challenge to their taste buds. But, to those in the know, Jerk Chicken isn’t scary at all (unless you go for the extra hot version) it is a flavourful and powerful Carribean dish that is worth a taste.
Although Jerk Chicken is generally spicy hot, it is also spicy as in there an abundance of spices used to make it. The main spice used to flavour Jerk Chicken is allspice or pimento. Traditionally the chicken is not only marinated in a combination of allspice, other spices, and chili but it is also cooked over a pimento wood fire.
Pimento wood comes from the tree that grows the allspice berry. You can buy pimento wood chips which can be added to a BBQ or smoker to give Jerk Chicken that authentic flavour. In the recipe below I don’t use pimento smoke or wood to flavour the chicken. I cook mine in the oven. However, what this version lacks in pimento wood smoke, it makes up in bursting flavour.
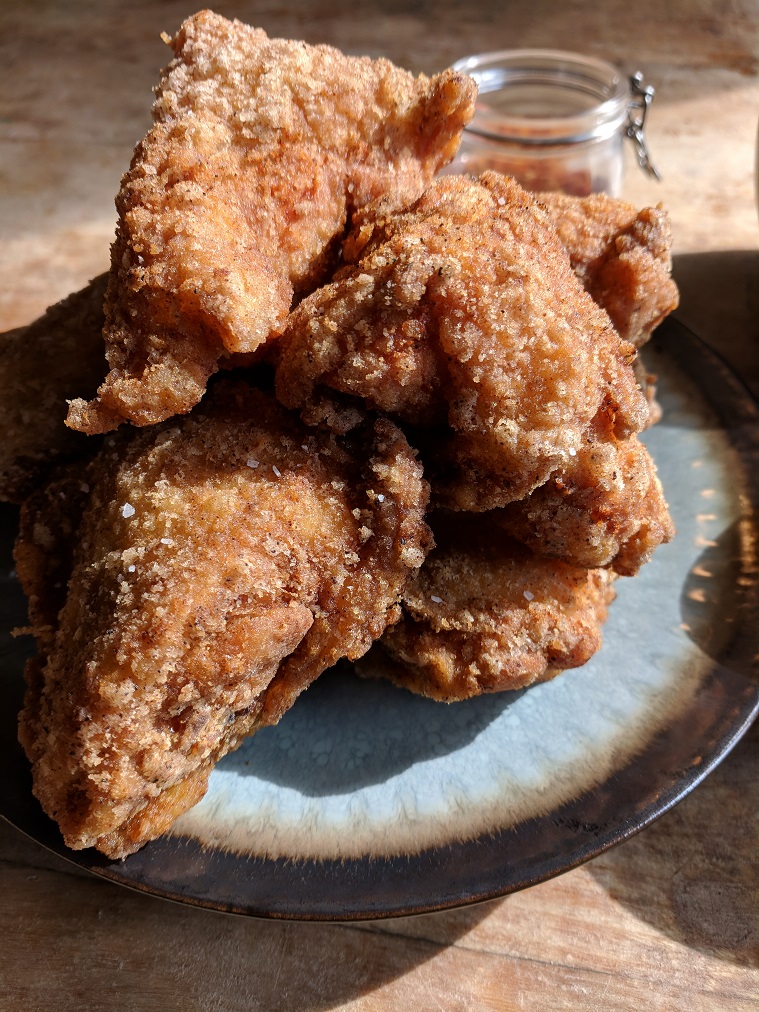
If you don’t like fried chicken, I don’t want to be friends with you. There’s no other way to put it.
Buttermilk fried chicken is special in that the chicken is marinated in buttermilk prior to being fried. This keeps the chicken really tender and moist while also imparting a nice mild fresh flavour.
The other key to delicious crispy fried chicken is that the chicken has to be left in the flour to dry for at least 30 minutes before being fried. This creates this really intense coating that gets extra crisp when it hits the hot oil.
I use a deep fryer to cook my chicken but if you don’t have one it’s not a problem. That’s what cast iron skillets are for. Don’t have one of those either? A deep pot will do. Just heat the oil up slowly over medium heat to 350°f and fry the chicken for about 12 minutes or until it reaches an internal temperature of 165°F.
Once the chicken is cooked put it on a rack or in a basket. It is important to get air circulating around the chicken as quickly after cooking as possible. This will help to ensure that the crust stays nice and crisp.
Combine the buttermilk with the hot sauce and mix well.
Place the chicken thighs in the buttermilk and let sit in the fridge for at least two hours, preferably overnight.
Combine the flour with the garlic and onion powder, cayenne, oregano, paprika and a big pinch of both salt and pepper.
Stir to combine.
Remove the chicken from the buttermilk shaking off excess and toss in the flour making sure to fully coat the chicken.
Place the chicken on a cooling rack set above a sheet pan and let sit for twenty minutes.
Repeat the process with all the chicken pieces.
While the chicken is resting heat the oil for frying to 350°F
Fry half the chicken at a time.
It will take 10-13 minutes for the chicken to be cooked through and it's best to check with an instant-read thermometer. The chicken is done when it reaches a temperature of 165°F.
Remove the chicken form the oil, drain, and place on a cooling rack set above a sheet pan.
Let the chicken sit for 3-4 minutes before eating.
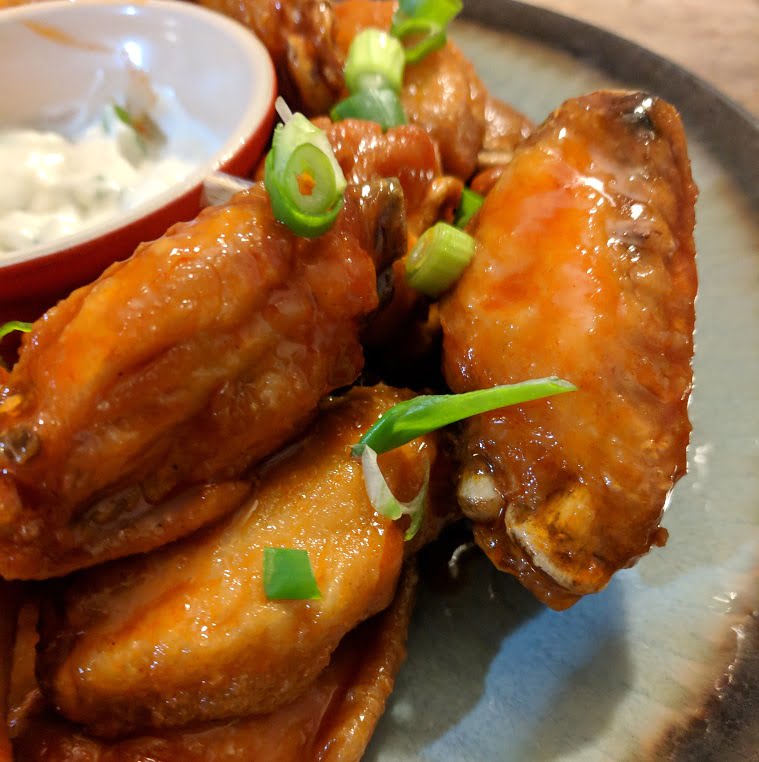
There is a faction of people out there who get down with breaded chicken wings. To those people, I say “Get over it!’ Chicken wings are much better when they have no breading and are deep-fried to crisp, delicious perfection.
When I am making chicken wings at home, I often deep-fry them (sometimes I just roast them in the oven) but once they’re cooked, I toss them with sauce and I usually pop them in a very hot oven, maybe even under the broiler. This bakes a layer of sauce on to the wing that gets really sticky and caramelized. After that, I toss the wings in sauce again and serve. Delicious!
The sauce that I make for my absolute favourite Chicken Wings is a combination of equal parts Franks Red Hot or Louisiana Hot Sauce and Honey. I put this in a pot and simmer it for 5-10 minutes or until it is nice and thick. Sometimes, if I am feeling a little extra decadent I will finish the sauce with a bit of butter. This makes it richer and gives it a more silky feel.
I also generally serve the wings with a homemade blue cheese dressing. It’s made of blue cheese, sour cream, mayo, and herbs.
If you are looking for a delicious twist on your everyday Chicken Wings, look no further!
You can find the full recipe and walkthrough right here.
What I will say is that there are few things better in this world than a perfectly roasted chicken. It is misleading in its simplicity in that it is made with only 2-3 ingredients but it takes serious patience and skill to get it just right.
Start by drying the chicken skin. Rub it all over with olive oil and salt. Roast it, turning every 15-20 minutes. Sounds easy, but is it?
Give it a shot!
5 – Butter Chicken
Butter chicken was originally created in Delhi in the 1950s as a way for a chef to save and reuse leftover tandoori chicken. The Chef realized that if he stored the chicken in a tomato gravy overnight the chicken would remain tender and juicy. This caught on like wildfire.
Today, butter chicken is one of the most commonly known and most popular Indian dishes around the world and for good reason. It is really, really delicious.
There are all kinds of bottled butter chicken sauces out there and I’m sure that some of them may actually be good, but other than needing a few special ingredients this isn’t difficult to make. The recipe below has everything you need, and for more specific instructions check out the video.
When looking for the spices it’s best to try and find an Indian grocer in your area. The spices are usually better quality than at the bulk store or grocery store and they are usually much cheaper. If you can’t find what you need in your town check out this amazon shopping list I made that has everything you need.
People say that everything tastes like chicken, but really, chicken is made to taste like everything. That is the beauty of it. No matter where you are in the world, or what you like to cook and eat, you can find something to do with chicken.
I hope that you enjoyed this post, but more importantly, I hope that you have found one or two recipes that you will actually use and come back to time and time again.
What’s your favourite chicken recipe?
Thank you as always for reading and supporting the blog.
Usually, on Monday I do a post called ’30 Minutes or Less’ where I describe how to make a specific dish in under 30 minutes. I make and document the dish on Sunday night and write the post in the morning. This weekend I was out of town helping some friends of mine with a large event and I didn’t get home last night until about 10 pm. Needless to say, I didn’t cook anything when I got home last night. Not even something that takes less than half an hour. I ate a salami sandwich, some doritos and fell asleep on the couch.
Today, because I don’t have a new dish to post I’m going to do something a little different. I thought it would be interesting to reflect back on all the ’30 minutes or less’ posts I have done so far, pick out the most popular ones and compile a list. Here we go…
Total ’30 minutes or less’
I started doing the ’30 minutes or less’ post way back in February. Since then I have done 23 posts in total. That equals a total of 690 minutes or about 11.5 hours of cooking. In that time I have cooked a wide range of items from herb and garlic pork chops, to chickpea curry, to linguine and clams. All have been delicious except for one, which was the haddock en papillote I messed up last week.
Of all the posts I do, all the social media content, everything, ’30 minutes or less’ is by far the most work. For an average 30 minute meal, I take at least 100 pictures. That means I have to edit and upload all of those pictures which generally takes about 1 to 2 hours. By the time I come up with the recipe, go out and buy all the groceries, set up the camera and lights, cook the meal, clean up the kitchen, edit and upload the pictures, write and edit the post and publish it about 6 1/2 hours have gone by. Even though it’s the most work of pretty much everything I do, it is also one of my favourite things that I do.
Considering all the work that goes into these posts it is nice to see the positive reaction that they get. I love to hear from people who cook the dishes because that’s really the whole reason I do this. That’s why I like doing these posts so much, they actually get people cooking. That makes it all worth it.
So, let’s take a look at the ’30 minutes or less’ posts that you guys liked the most.
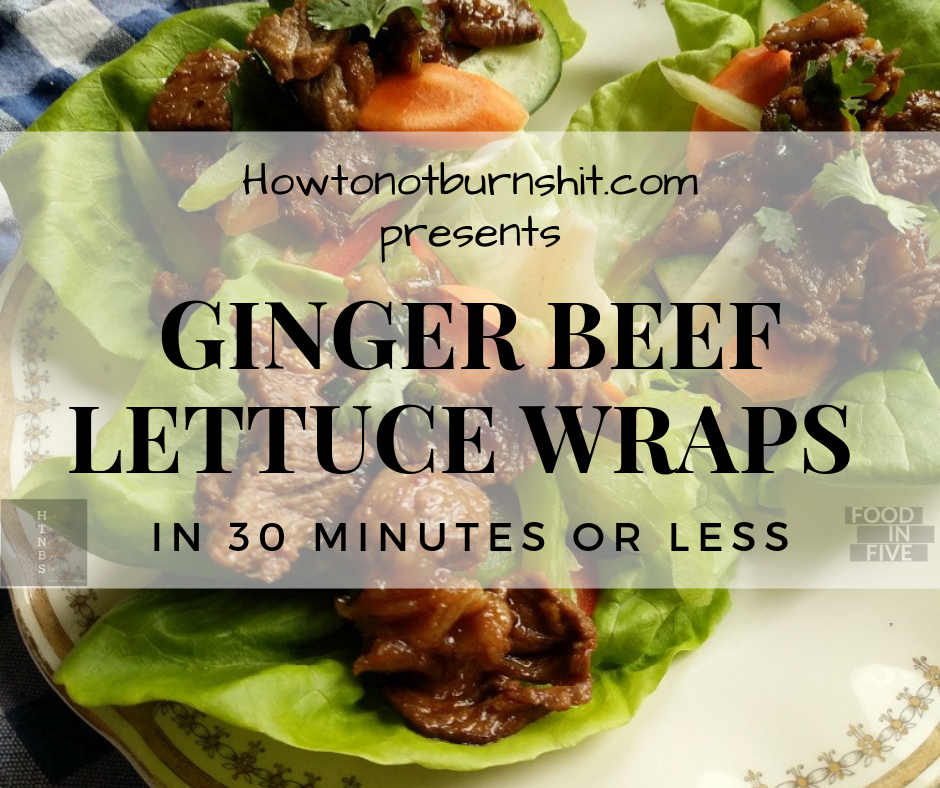
Ginger Beef Lettuce Wraps
In all honesty, I am a bit surprised that this post has been as popular as it has. When I came up with it I knew the dish would be good but I wasn’t sure people would necessarily be interested in it. Well, I had no need to worry because I posted this back in May and it is still really popular.
What exactly is it? That’s a great question. It is ginger beef, with fresh vegetables and sriracha mayo wrapped in a lettuce leaf. I can’t express to you how delicious and simple this recipe is. If you haven’t made it, you should. Mix it into your weeknight schedule and you will not be disappointed.
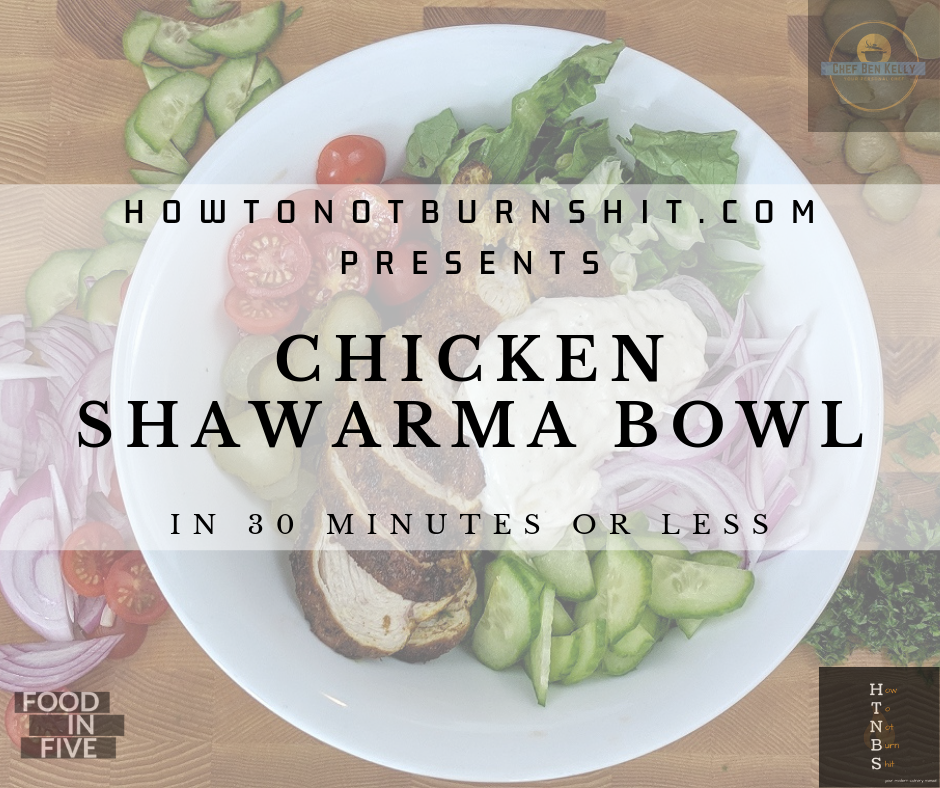
This one is also from way back in May. It is a base of white rice, with lettuce, cucumber, red onion, tomatoes, and pickles, with garlic mayo and chicken dusted with homemade shawarma spice and roasted.
I love this post for a few reasons. It was one of my favourite ’30 minutes or less’ dishes to eat, and continue to eat as I make it regularly. It initially got a big reaction from people which I love, and it continues to perform very well. It is a delicious and healthy dish that also happens to look beautiful too.
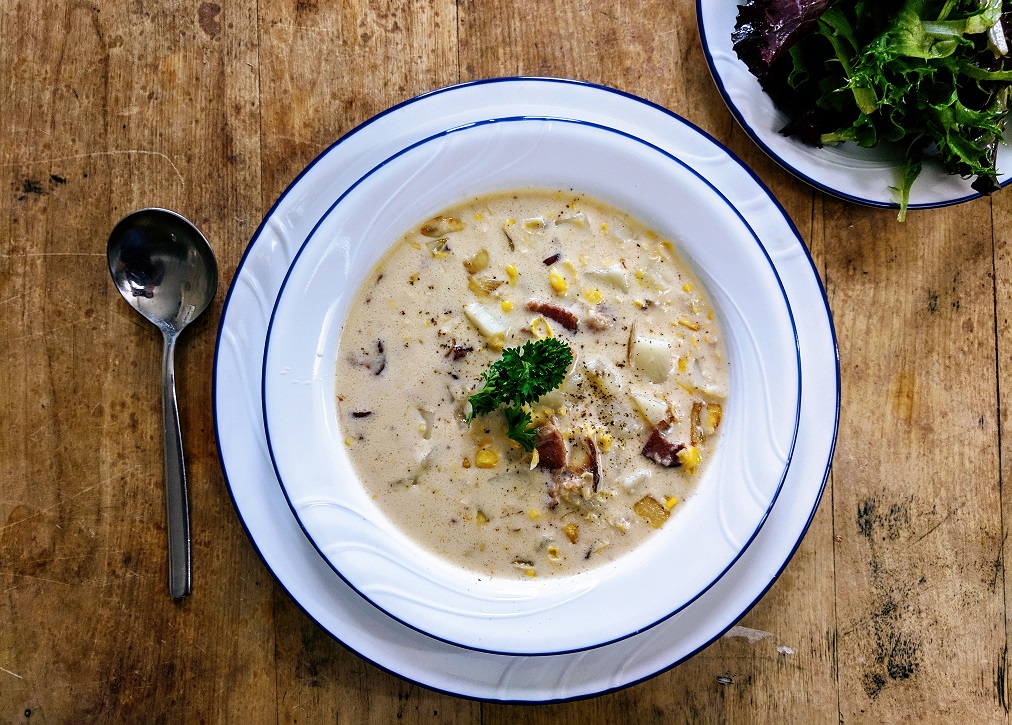
From all the way back in April we have my absolute favourite comfort food, Corn Chowder. This is one of the first dishes I ever learned to cook from my mom and I still make it her way to this day.
I love this post because it has deep personal meaning to me. You loved it because who doesn’t love Corn Chowder?
With the colder weather quickly approaching it is time to start planning to add this dish into the rotation again. Nothing warms the body and soul like a big bowl of homemade corn chowder.
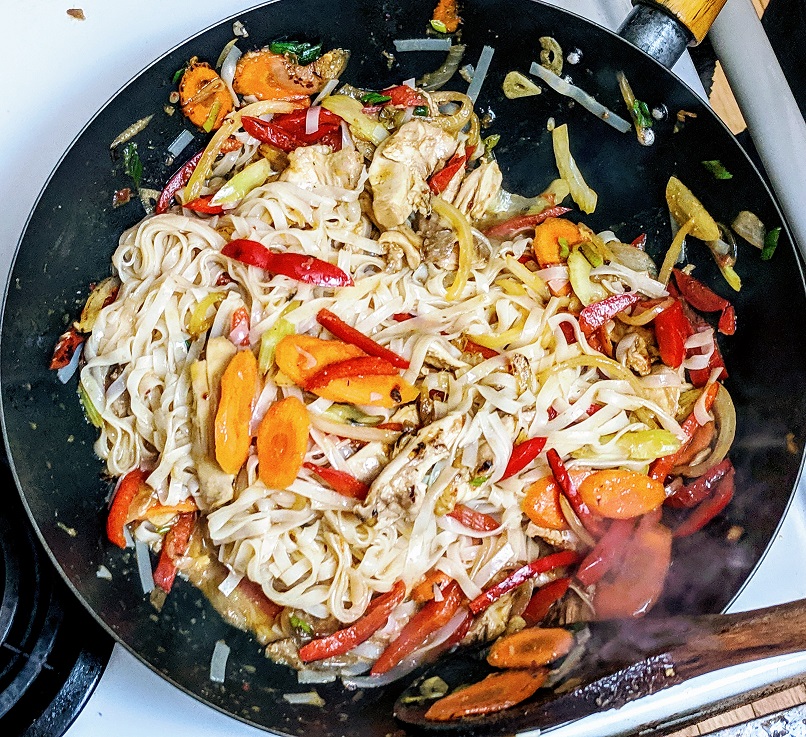
When I get home from work late, I’m tired and I don’t know what to eat, this or a version of this is my goto. Noodles with lots of vegetables, some kind of meat, a quick sauce and lots and lots of spice. It is filling, quick, easy and delicious. What’s not to love?
Pad Thai is a noodle dish from Thailand most often served as street food. Some versions have shrimp, tofu, pork or chicken. This one is a chicken version but the chicken can easily be substituted.
Over the past 5-10 years, Thai food has really grown in popularity which makes it no surprise that this is my most popular ’30 minutes or less’ post. One of the great things about Thai food is there is no BS. The food is made with lots of fresh, good quality ingredients, and big bold flavours.
Interestingly enough, Pad Thai was one of the dishes we were serving at the event I was helping with this weekend .So, I had a version of Pad Thai for lunch yesterday. What I love about this dish is that it is so versatile and there is so much variety. I mean, I ate it yesterday, but I would be more than happy to eat it again today.
I really enjoy doing these ’30 minute or less’ posts and I look forward to doing more of them. I think and I hope that there is a lot of value in them.
If you have a suggestion for a ’30 minutes or less’ post I would love to hear from you. You can leave a comment on this post or contact me on social media.
Thank you as always for reading.
Oh! I almost forgot, I now have an amazon.ca storefront. Essentially I have compiled a few lists of my favourite cookbooks, favourite tools, that type of thing. If you buy something from the store I get a few cents. So, check it out here. If you see something that you were going to buy anyway, buy it there! You’ll get the product you wanted and you will help to support a blog you love.
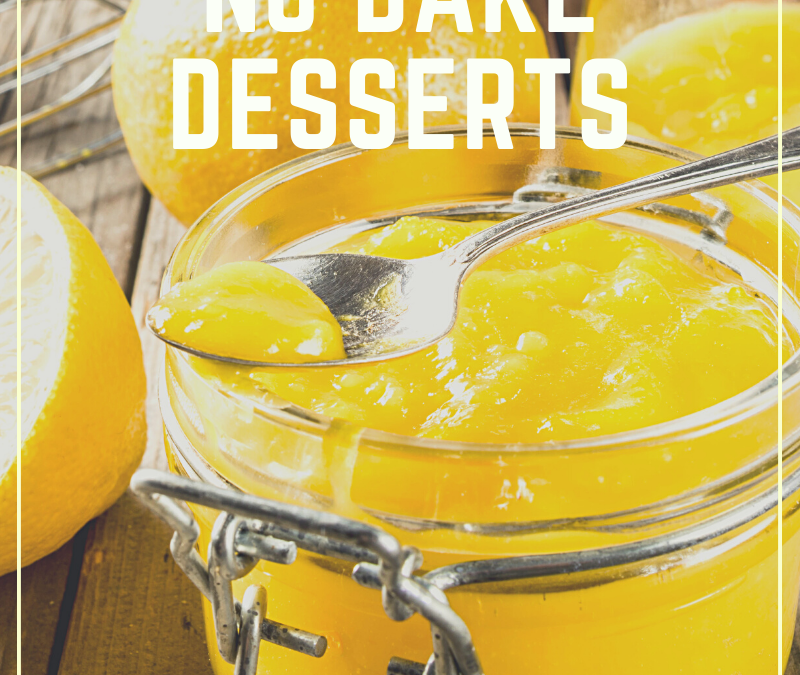
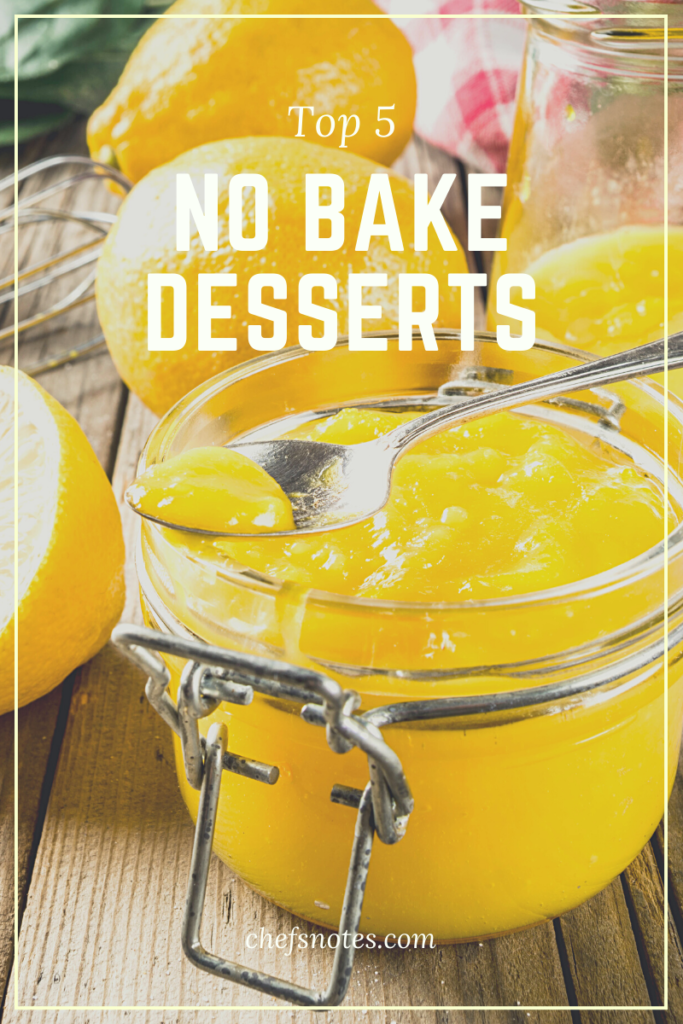
I don’t often talk about baking on this blog. In part because I don’t really enjoy baking. As you all know I also can’t eat gluten which makes baking even more difficult. So, when I do make desserts I prefer ones that aren’t baked.
Today I thought that since we never talk about desserts it was high time. So I decided to put together a list of no-bake desserts that I love to eat and make. These are all desserts that I have made at home and at dinner parties, and they will please just about everyone you serve them too. Being no-bake, they are also great for the summer as they don’t heat your house up too much.
So, without further ado, this is my
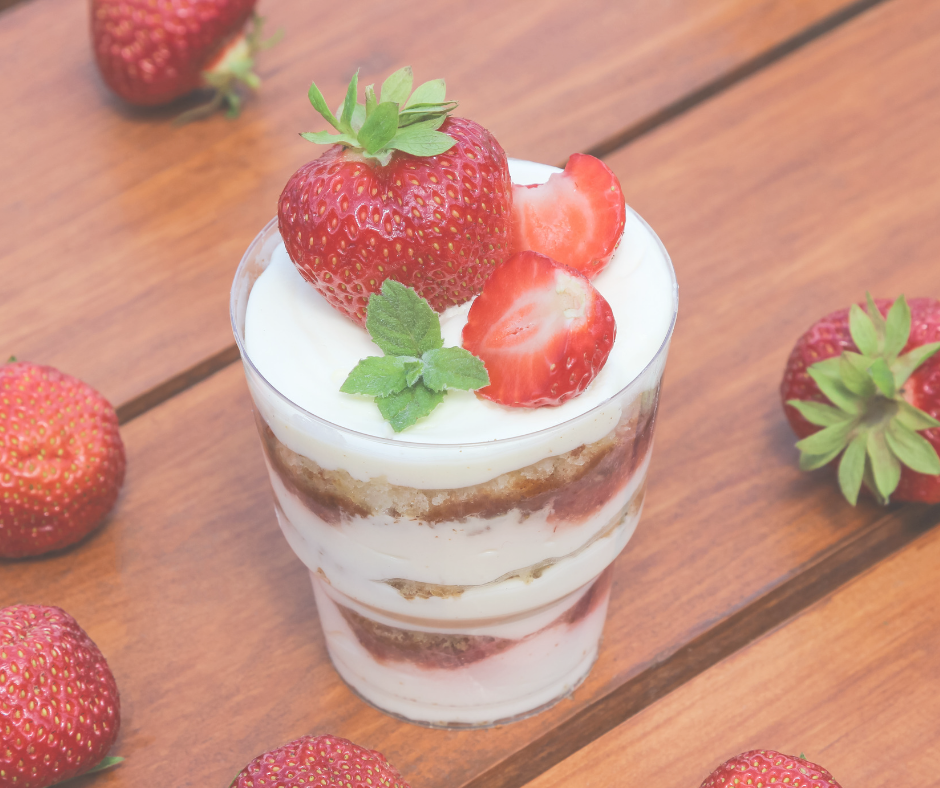
Number 5 – Strawberry Cheese Cake Cups
Okay, let’s talk about these little guys. Regular cheesecake is made by mixing cream cheese with eggs, sugar, and vanilla. The mixture is then poured over a graham cracker crumb base and baked. Once cooked it is cooled and topped with strawberry jam or something like that.
Similar to the original, this no-bake strawberry cheesecake is made by whipping together cream cheese, sugar and vanilla and a little bit of whipping cream. The cream thins out the cream cheese just enough that it can be squeezed through a piping bag.
This cheese mixture is then layered with fresh or macerated strawberries and graham cracker crumbs. This gives all the elements and flavours of cheesecake without the need for baking and in a fraction of the time. Portioned individually they make a great dessert for a party or large get-together.
No-Bake Strawberry Cheesecake cups
A quick and delicious no-bake dessert, great for parties
1 cupgraham cracker crumbsgluten-free if preferred
1 pint Strawberries washed, dried, and sliced
1/2cupWhipping Cream(more may be needed)
Instructions
Cut the cream cheese into small pieces and place in the bowl of a mixer with the paddle attachment.
Add the sugar, vanilla, lemon zest and juice and beat on medium speed for about two minutes.
Add in the cream in a slow steady stream.
Once all the cream is incorporated turn the mixer to high and beat until light and fluffy.
Put the cheese mixture in a piping bag and allow it to chill in the fridge for 30 minutes.
set up 6 equal-sized cups or ramekins.
Place a few sliced strawberries in the bottom of the cup, top with graham cracker crumbs, and a layer of the cheese mixture. Repeat for two more layers, finishing with a layer of cheese and strawberries.
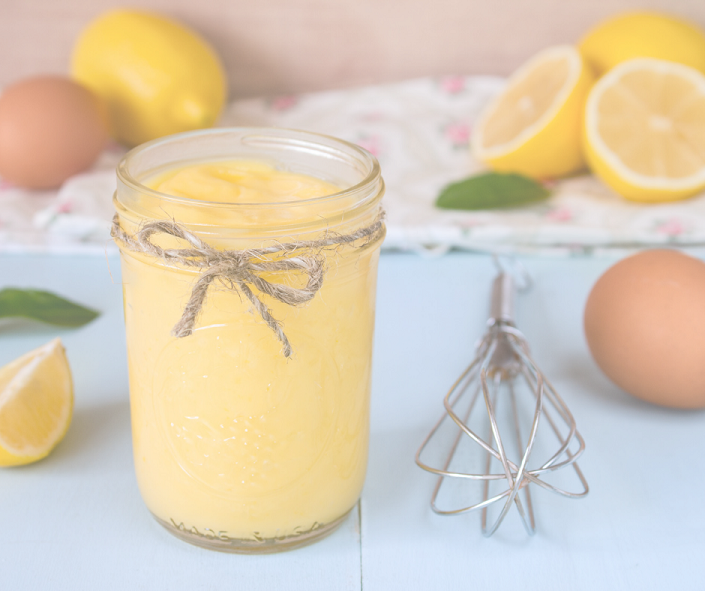
Lemon curd is one of my all-time favourite desserts. It has such a bright, fresh flavour that it is great to finish almost any meal. Lemon juice and zest, cooked with eggs, butter, and sugar. What could be better?
I have talked about lemon curd here before and shared this recipe from Epicurious. It is the recipe I use and so I am going to share it again. It couldn’t be simpler.
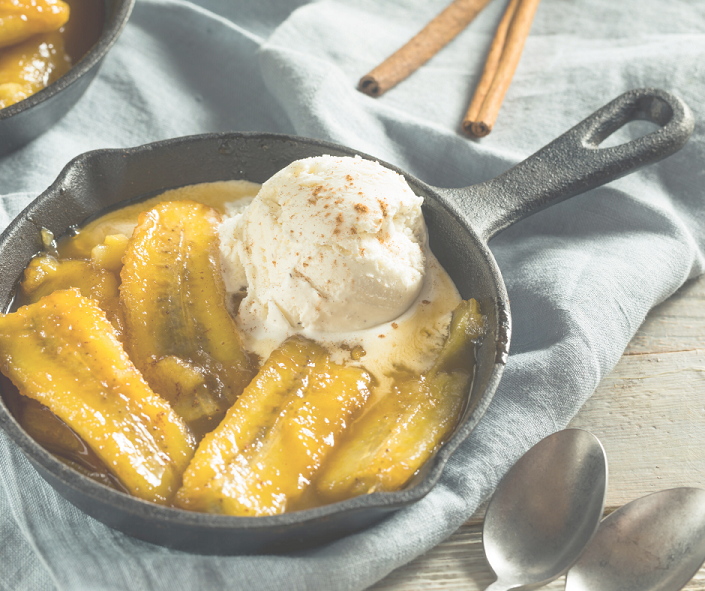
Number 3 – Bananas Foster
Bananas Foster is a dessert that originates in New Orleans. It is bananas cooked in caramel doused in rum, lit on fire, sprinkled with cinnamon, and served with vanilla ice cream. Yeah, I’m drooling too!
To make this dessert you first make caramel with brown sugar and butter. Take about 1/2 cup of brown sugar and 2 tbsp of butter and put them in a heavy-bottomed pan over medium heat. Once the butter and sugar melts and starts to bubble add in 2 bananas that are peeled sliced in half lengthwise and widthwise. Start the bananas flat side down, cook for about 30 seconds, flip and cook for 30 more seconds. Now add in 1 oz of rum, stand back and light it on fire. While the flames are still burning sprinkle over 1/2 tsp of cinnamon. Serve with vanilla ice cream as soon as the flames burn out.
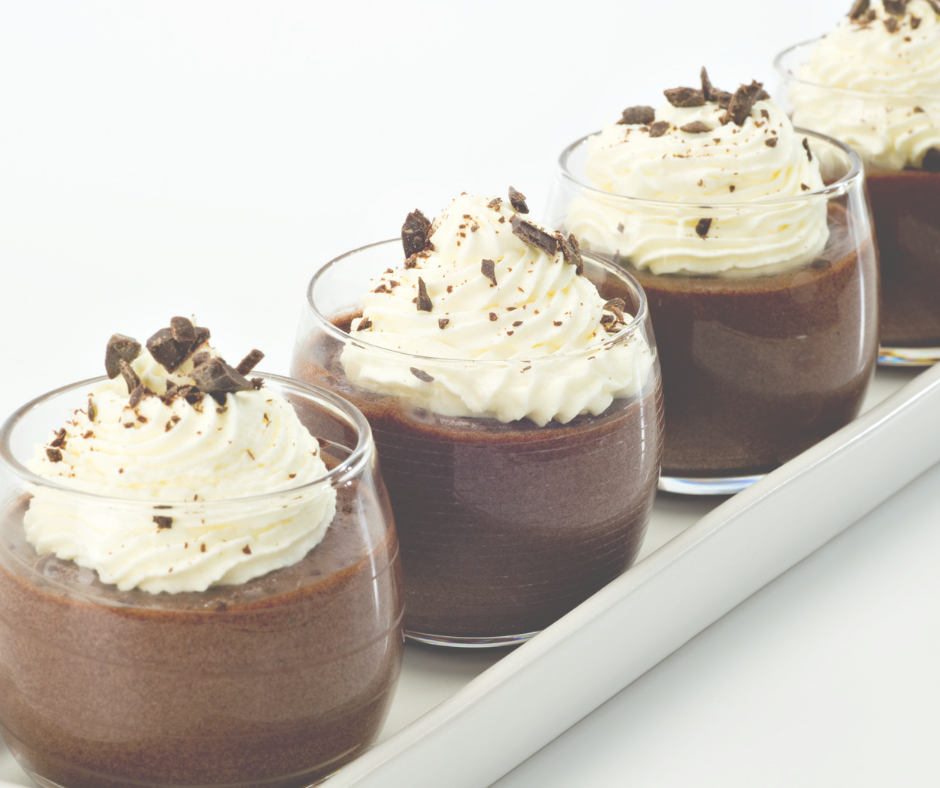
Number 4 – Chocolate Mousse
You guys know I love Julia Child. I talked about it last week. Well, I have yet to find a chocolate mousse recipe that is better than hers. So, that is the recipe I use.
Chocolate mousse is like the most decadent chocolate pudding you will ever have. Chocolate is melted with espresso, mixed into egg yolks that have been beaten with sugar, and then enlightened with whipped egg whites. The mixture is left to chill and set and what you get is the richest, chocolatiest dessert known to man. The kicker is it isn’t difficult to make. Yes, there is some skill involved, and it takes a bit of time, but the effort is well worth it.
Do yourself a favour and make this at least once in your life.
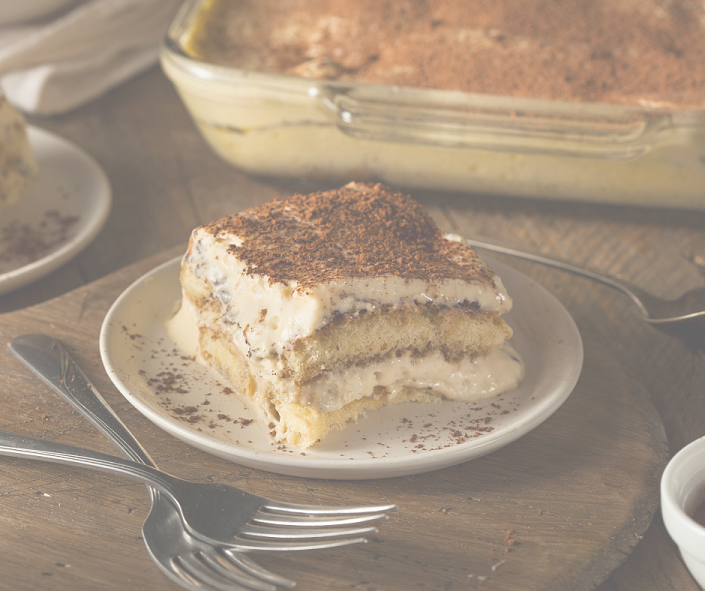
Number 1 – Tiramisu
The word Tiramisu literally means “pick me up” in Italian. The name is likely due to the amount of coffee, brandy, and sugar, in the dessert and the little jolt of energy you get after eating it. So, what exactly is Tiramisu?
It starts with a mousse. Similar to the chocolate mousse we just talked about except this version is made with mascarpone cheese. The cheese is mixed with vanilla, egg yolk, sugar, and a touch of brandy, then whipped until it is light. The egg whites are then whipped to soft peaks and folded into the yolk mixture to make a light mousse.
To make the Tiramisu, ladyfinger cookies are dipped in a mixture of hot espresso, sugar, and brandy, and layered with the mousse. The top layer of the cheese mousse is then sprinkled with cocoa powder. The dessert is then put in the fridge to set for a few hours.
While the tiramisu is in the fridge something magical happens. The cookies soften and form a moist cake-like layer. This is juxtaposed by the delicate airiness of the mousse. Finally, it is all tied together by the bitterness of the cocoa. Amazing!
Dessert doesn’t have to be really complicated, it doesn’t have to heat your house, and it can still be amazing. All of these are examples of no-bake desserts that will blow your family and friends away and every one of them can be made gluten-free (use gluten-free cookies for the tiramisu).
I highly suggest that you pick at least one of the desserts from this list and make it at least once. You will be so happy that you did.
As always, thanks for reading and have a great weekend!
Two weeks ago I woke up with a bad cold. That cold kind of kicked my ass, but last Monday I thought I was through the worst of it. I was wrong. This past week I have been sicker than I have been in years. I honestly can’t remember the last time I was as sick as I have been. I spent five days on the couch not moving or doing anything except watching Netflix and ingesting fluids and cold meds. Yesterday, I left the house for the first time in a week walking to our community mailbox which depleted my energy. Overall today I do feel a bit better but I’m still coughing, I’m still congested, and I still don’t feel very good.
I’m telling you all of this so you understand why I haven’t been writing lately and also because it leads into today’s post. The top five things I like to eat when I’m sick. Now, full disclosure, I haven’t actually been eating much. These are the things I like to eat when I’m sick. So, let’s jump into it.
Number 1. Chicken Noodle Soup
This is a classic for a reason. There is something about chicken noodle soup that makes you feel better. It could be the chicken broth or it could just be that homey feeling you get from it. Either way, I’m sure this dish would be on most peoples list of favourite things to eat when they’re sick.
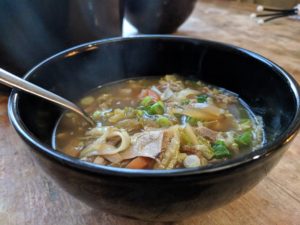
Number 2. Spicy Noodle Soup
Essentially, this is the same as chicken noodle soup just with a different flavour profile. I take a basic chicken noodle soup and add ginger, garlic, soy sauce, sambal chilli paste, fish sauce, maybe a touch of sugar, and whatever else I have lying around like lemongrass or rice vinegar. The spice helps with the congestion while the ginger and garlic are really good for colds. Sick or not, this is one of my favourite things to eat.
Number 3. Shephard’s Pie
This doesn’t have the same healing properties of chicken noodle soup, but it is delicious. Growing up, this was always my favourite meal. Often I would ask for it as my birthday meal. I think this is more about comfort than about healing.
Number 4. Fruit and Veggies
I don’t know if it’s because my body is craving the vitamins and nutrients that come with raw fruits and veggies or just because they are delicious but I always crave these when I’m sick. It could be carrots and celery sticks, or apples and oranges. It doesn’t matter. Delicious and good for you.
Number 5. Junk Food
The final thing I crave when I’m sick is junk food. Cookies, chips, popcorn, pizza, burgers I crave it all. It sounds weird and even I find it odd but it’s true. I crave junk when I’m sick.
So, there you go. A quick list of what I like to eat when I’m sick. A nice way to ease me back into my routine. Hopefully, over the next few days, I will get back to my normal self. As I’m sure you can imagine, I’m pretty tired of being sick.
I am not a vegetarian. Obviously. But you don’t have to be a vegetarian to enjoy vegetarian meals. Good food is good food no matter what category it falls into. With that in mind, I thought I would compile a list of my five favourite vegetarian meals in hopes that it might inspire some of my more meat-centric readers out there to try something a bit different.
I want to say before I begin that I hate vegetarian food that pretends not to be vegetarian. Using fake meat, or just substituting tofu for meat is not creative, interesting, or usually very tasty. The vegetarian dishes that I like, as you will see are not low-end versions of delicious meat dishes. The vegetarian meals that I enjoy eating are vegetarian because they are supposed to be. That’s how they were designed. They are delicious on their own. There is a world of possibility out there when it comes to vegetarian food. Don’t limit yourself.
My Five Favourite Vegetarian Meals
Margherita Pizza
This isn’t really something most people would associate with vegetarian food but there is no meat and it definitely isn’t missed. This pizza is simply dough, tomato sauce, cheese and fresh basil and it is perfect. No meat needed. And, this isn’t just one of my favourite vegetarian foods, this is by far my favourite pizza.
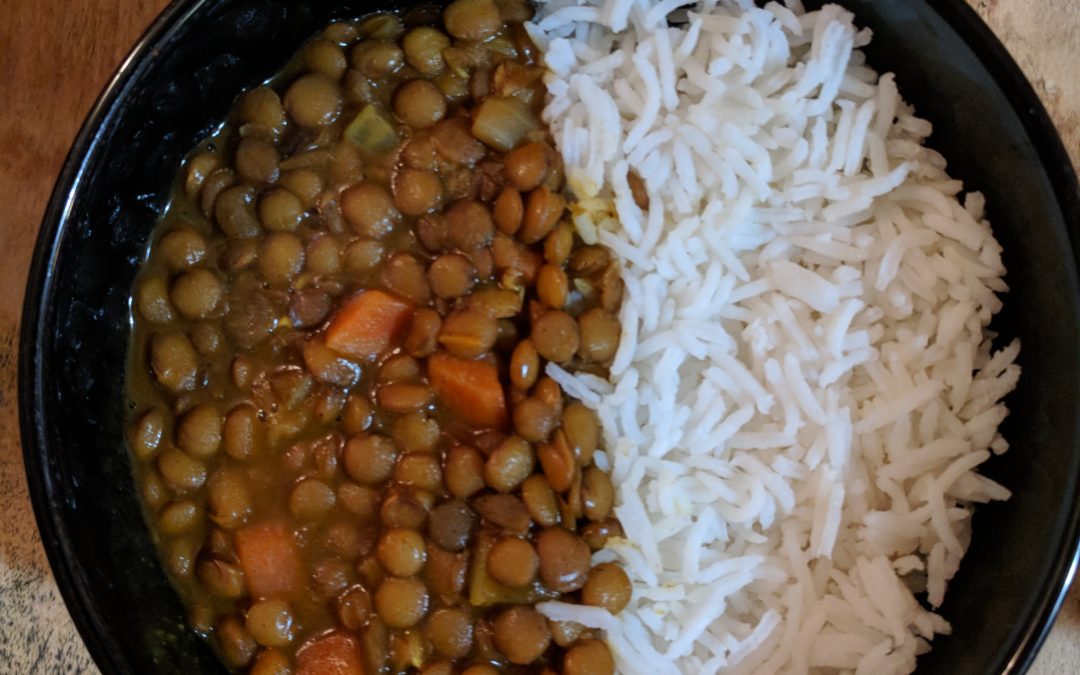
Dal
There are versions of this dish from many different parts of the world but at its heart, dal is a lentil stew. The flavours are similar to that of a curry. Generally served with rice and flatbread this is a vegetarian meal that will definitely fill you up. Because the dish is so flavourful and so filling you won’t even think about meat.
Roasted Tomato Soup with Grilled Cheese
Another classic that most people don’t necessarily think about as a vegetarian meal. Again, this dish has no meat at all. I would describe this as more of a lunch than a dinner but it is delicious none the less. On a cold fall day or in the dead of winter few things fill the belly and the soul like this very traditional vegetarian meal.
Chickpea Curry
A vegetarian staple on menus written by lazy chefs the world over. Chickpea curry is an easy, cheap and delicious way to satisfy that vegetarian craving. Chickpeas, tomatoes, vegetable, and spices cooked together and then served over rice. Even though it is a staple of lazy chef’s who don’t want to take the time to create an interesting vegetarian dish, it is a staple for a reason. People love it.
Black Bean Soup
Years ago I briefly worked in a vegan restaurant. One of my favourite things on the menu was a black bean soup. It had black beans, sweet potatoes, onions, spices, and much more. It was sweet and spicy, flavourful and filling. Served with a slice of homemade spelt bread it was perfection. Again no meat needed.
Eating vegetarian doesn’t have to be hard. It doesn’t have to be difficult. And you don’t just have to eat meat dishes without meat. There are so many great vegetarian meals out there just waiting for you to discover them.
This post was inspired by my friend Peady. You should check out her blog Tempered with Kindness
We use cookies on our website to give you the most relevant experience by remembering your preferences and repeat visits. By clicking “Accept”, you consent to the use of ALL the cookies.
This website uses cookies to improve your experience while you navigate through the website. Out of these, the cookies that are categorized as necessary are stored on your browser as they are essential for the working of basic functionalities of the website. We also use third-party cookies that help us analyze and understand how you use this website. These cookies will be stored in your browser only with your consent. You also have the option to opt-out of these cookies. But opting out of some of these cookies may affect your browsing experience.
Necessary cookies are absolutely essential for the website to function properly. This category only includes cookies that ensures basic functionalities and security features of the website. These cookies do not store any personal information.
Any cookies that may not be particularly necessary for the website to function and is used specifically to collect user personal data via analytics, ads, other embedded contents are termed as non-necessary cookies. It is mandatory to procure user consent prior to running these cookies on your website.


 will definitely fill you up. Because the dish is so flavourful and so filling you won’t even think about meat.
 Another classic that most people don’t necessarily think about as a vegetarian meal. Again, this dish has no meat at all. I would describe this as more of a lunch than a dinner but it is delicious none the less. On a cold fall day or in the dead of winter few things fill the belly and the soul like this very traditional vegetarian meal.