")
A well-cooked roast chicken is one of the rare pleasures in life. Crispy, buttery, golden skin, with tender, flavourful meat hidden below the surface. What could be better than that? But roasting a chicken isn’t something that people are just able to do. Its simplicity is extremely complex and takes practice and time to learn.
In some ways it feels like roasting a chicken is a dying skill. Most of us are much more likely to pick up a rotisserie chicken from the grocery store than to roast one ourselves. Of course, and I’m sure it goes without saying, there is no comparison when it comes to taste and quality. A home roasted chicken is a hundred times better. But, it does take time and effort to prepare.
Today, I am going to share with you…
Everything I know about roast chicken
The key to a good roast chicken is getting all of the skin nice and crispy without overcooking the rest of the bird. There are a few simple things that you can do to make this process easier.
Dry The Chicken’s Skin
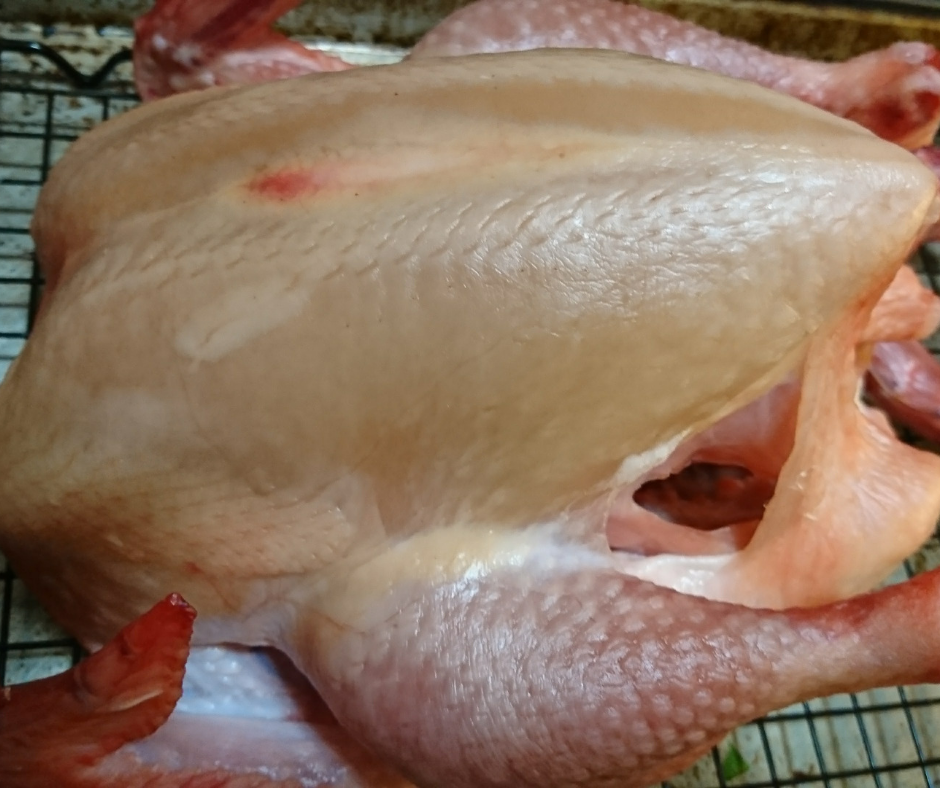
Removing moisture from the skin of the chicken is the single most important step in getting really crispy and brown. This can be done in one of two ways.
Dry the skin with a paper towel.
This is not my personal favourite as I find it doesn’t do a fantastic job. However, in a pinch, if you are pressed for time, this is the go-to technique. Get a few paper towels and dry the chicken inside and out. It’s pretty straight forward.
The reason you want to dry the chicken inside is that any extra moisture inside the chicken will add moisture to the oven which will prevent the skin from crisping. The goal is to remove as much moisture from the surface of the chicken as possible.
Air-dry the chicken.
Air-drying the chicken is exactly what it sounds like. This is letting the chicken dry naturally over a period of time. To do this, the chicken is placed on a rack, set over a pan or baking sheet and placed in the fridge for a day or two uncovered. I know that this seems foreign to a lot of people, putting a chicken in the fridge uncovered, but it works and it is the technique.
The reason you want the chicken on a rack is because liquid will pool at the point of contact if it is sitting on a flat surface. This will lead to their being one big wet spot on the chicken that won’t brown and it looks pretty gross. The pan under the rack is there to collect any drippings.
Leaving the chicken uncovered, as I said may seem like a really weird and uncomfortable thing to do but it is what allows the skin to dry. If the chicken is wrapped, moisture will get trapped and the skin will stay damp. This process usually takes about two days and you may have to flip the chicken after the first day. It’s done when the skin is dry and tightly clinging to the meat.
Safety –
Leaving raw chicken uncovered in the fridge is perfectly safe as long as other foods aren’t coming into contact with it and it isn’t dripping on foods. Again, keep the chicken on a rack with a pan under it to prevent juices running on to other foods. Also, keep the chicken on the bottom rack of your fridge and make sure other food items are stored well away from it.
Cooking The Chicken
Now that the skin of the chicken is dry, it is almost ready to cook. There are only two things that need to be done first. The first step is to grease up the bird. I generally use a good quality olive oil for this or, clarified butter. I find regular butter has too much water in it which causes the skin to soften. So, rub the whole chicken inside and out with olive oil. The only thing left to do is to season the chicken very well, inside and out with salt. That’s it.
Once the chicken is oiled and seasoned, put it in a roasting pan with a rack and fire it into an oven heated to 400°F.
Now comes the fun part. The best way to ensure that the chicken gets evenly crispy on all sides is to rotate it every 20 minutes or so. Start with the chicken breast up. After the first 20 minutes rotate it onto its left side. Then after another 20 minutes rotate it to breasts down, and so on. Continue doing this until the chicken is cooked through. And yes, it is worth the effort.
How long to roast the chicken?
How long the chicken takes to cook depends on the size of the chicken and the quality of your oven. Generally, 15-20 minutes per pound is suggested. The only way to know for sure if the chicken is done is with a thermometer stuck into the deepest part of the thigh. The temperature should be 168°F – 170°F.
Basting
If you notice that there are some spots of the chicken that just aren’t crisping up you may want to baste or brush those spots with a little more oil. You shouldn’t need to worry about basting the whole chicken.
Resting
With the chicken cooked through and the skin nice and crispy all that is left is to let the chicken rest. In a lot of ways, this is the hardest part. The chicken will look so good, like a cartoon roast chicken form bugs bunny or the Simpsons, but leave it alone! Don’t touch the chicken for at least 10 minutes. 15-20 is better.

Let the chicken rest, uncovered on the rack it was cooked on. This will allow the juices to redistribute throughout the bird keeping it juicy and moist. Resting will also give air time to circulate around the skin causing it to crisp up even more.
While the chicken is resting you can make gravy or sides.
Conclusion
I wasn’t joking when I said there were few things in the world better than a perfectly roasted chicken. Nothing compares to it. The only way for you to know for yourself is to give it a shot. Try this technique if you haven’t already. It is incredibly simple on the surface. It does take time and practice to master but it is so worth the effort.
You may also like Everything I know about barbecue sauce.
0 Comments