Spring is officially nine days away. What better way to say goodbye to winter than with nine spring recipes. These are a collection of recipes from the Chef’s Notes archives that I think you will love and that are perfect for ushering in spring. If I can promise you anything, it’s that when you have finished reading this post, spring will be closer than it is right now. It’s true. Let’s get to it.
1. Cajun Salmon and Citrus Salad
Nothing says goodbye to cold weather, hello sunshine like throwing a piece of fish on the grill. In the case of this Cajun Salmon and Citrus Salad, the fish (salmon) is flavoured with olive oil and cajun seasoning, grilled and put on a salad of arugula, orange, and lime. This dish has the flavour of spring and summer in every bite.
Cajun Grilled Salmon and Citrus Salad
Cajun Grilled Salmon, On Top Of Arugula With Citrus Vinaigrette.
Keyword: Barbecue, Best Pasta Salad, Citrus, Salmon, Summer Barbecue, Summer food
Servings: 2Servings
Author: Chef Ben Kelly
Ingredients
Cajun Salmon
2filletsSalmon
2tbspOlive Oil
1tbspCajun Seasoning
Citrus Salad
1lgOrange, Cut into Segments
1Lime, Zested and Cut into Segments
1tspHoney
1tspMustard
4cupsArugula
1/4cupOlive Oil
Salt and Pepper to taste
Instructions
Salmon
Combine the olive oil and Cajun seasoning in a medium bowl.
Roll the salmon in the Cajun Seasoning Mixture to coat it. Cover the bowl with plastic wrap and put it in the fridge to marinate for 2 hours.
Preheat your grill to 400°f for about 15 minutes.
Depending on how thick your salmon is, cook it 3-6 minutes per side over medium heat with the lid down.
Once the salmon has reached your desired level of doneness remove it from the grill and place it on the salad.
Citrus and Arugula Salad
Peel a large orange and using a small sharp knife cut between the membrane of each segment so that each segment comes away freely leaving the fibrous membrane behind. Once all of the orange segments have been cut free, squeeze the juice out of the remaining bit of orange into a bowl with the segments.
Using a microplane, grate the zest of the lime into the bowl with the orange. Once zested, peel the lime and segment it as you did with the orange, then squeeze any juice out of the bit that is left behind.
To the bowl with the orange and lime segments and juice add the honey, and mustard then gently whisk to combine.
Slowly whisk in the olive oil, then season to taste with salt and pepper.
Toss the arugula with the dressing divide it among two bowls and top with the Cajun Grilled Salmon. Finish the salad by spooning the citrus segments and dressing over the salmon.
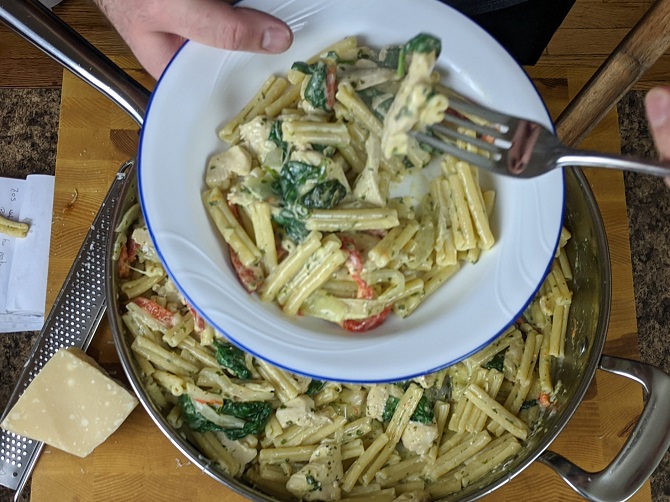
When we think of spring recipes we don’t often think of cream sauces. They seem like more of a fall/winter dish. But when the cream sauce in question is flavoured with homemade pesto and tossed with chicken, red pepper, and spinach, it’s a bit of spring in a bowl.
Creamy Chicken Pesto Pasta
What more is there to say? It's creamy, it's chicken, and it's pesto. Delicious!
Lettuce wraps are a great light meal, and this spring recipe for Sweet and Spicy Chicken Lettuce Wraps is going to put a spring in your step. Bad puns aside, this recipe is a little sweet, a little spicy, and a lot delicious.
Sweet and Spicy Chicken Lettuce Wraps
A new year a new you! What better way to kick off that new years diet than with some deliciously sweet and spicy chicken lettuce wraps?
Keyword: 30 minute meals, 30 Minutes or less, Asian Food, Butter Chicken, Chicken, chicken recipes
Servings: 4servings
Author: Chef Ben Kelly
Ingredients
1lbGround Chicken
1/2lg White Onion, Minced
3clovesGarlic, Minced
1/2Red Bell Pepper, Minced
4eaGreen Onionswhites and greens separate and diced
1tbspGrated Ginger
2tspChinese 5 Spice
1/2 tspRed Chilli Flakes
2tbspSesame Oil
3tbspSoy Sauceor GF Tamari
2tspRice Vinegaror white vinegar
2tbsphoney
1headBibb Lettuceaka Boston Bibb Lettuce
Salt to taste
1tbspSesame Seeds
Instructions
Heat a wok over medium-high heat.
Add the sesame oil along with the chicken and cook until the chicken is browned, stirring occasionally.
Once the chicken is browned and cooked through add in the onion, green onion (whites), and the garlic. Cook for 1-2 minutes or until the onions start to soften.
Next up add in the red bell pepper and red chilli flakes, cook for 1 minute then add in the Chinese 5 spice.
cook the spices for 1-2 minutes before adding in 1/4 cup of water along with the honey, soy sauce, and vinegar.
Turn the heat down and simmer for 4-5 minutes.
Add in the sesame seeds and the tops (greens) of the green onions.
Season to taste with salt.
Wash and pat dry the lettuce and serve with sticky rice.
It may seem odd to include a sandwich on this list (that isn’t a BLT), but this Cuban Sandwich has a surprisingly fresh flavour that really invokes spring. It’s roasted pork that has been marinated in orange juice, thyme and some other stuff. The pork is sliced thin and put on a Cuban roll (I’m using a gluten-free burger bun) with yellow mustard, dill pickle, cheese, and ham. The sandwich is grilled and is perfect in every way.
Cuban Sandwich
A delicious and flavourful sandwich made with roasted pork, ham, cheese, mustard, and pickles.
Brush the inside of the rolls with mustard then tops with pickles, ham, Swiss cheese, and the pork.
Heat a large frying pan on medium heat. Brush the outside of the rolls with butter and put them in the pan. Toast on one side for 2-3 minutes then flip. Press the sandwiches with a spatula to flatten slightly. Cook the sandwiches until the cheese starts to melt then serve.
This spring recipe is Roasted Cherry Tomato Soup. It’s a little twist on the classic tomato soup becasue the tomatoes are roasted, and the recipe uses cherry tomatoes instead of roma tomatoes or something like that. Whenever you pair tomato and basil, it’s going to taste like sunshine, and this soup is no exception. Like all tomato soups, it is best served with a grilled cheese sandwich.
The Ultimate Roasted Cherry Tomato Soup
A delicious homemade tomato soup using up all the extra cherry tomatoes from the garden.
Toss the tomatoes, onion and garlic with the olive oil and a pinch of salt and pepper.
Roast the tomatoes, onion and garlic on a parchment-lined sheet pan for 40-50 minutes on 400°f or until the tomatoes start to shrivel and the onions and garlic are slightly browned.
Put the roasted vegetables in a medium pot over medium heat and add in the milk.
Cook the soup only until the milk is hot then add in the basil and purée.
Taste the soup and season with salt, pepper, and sugar as needed.
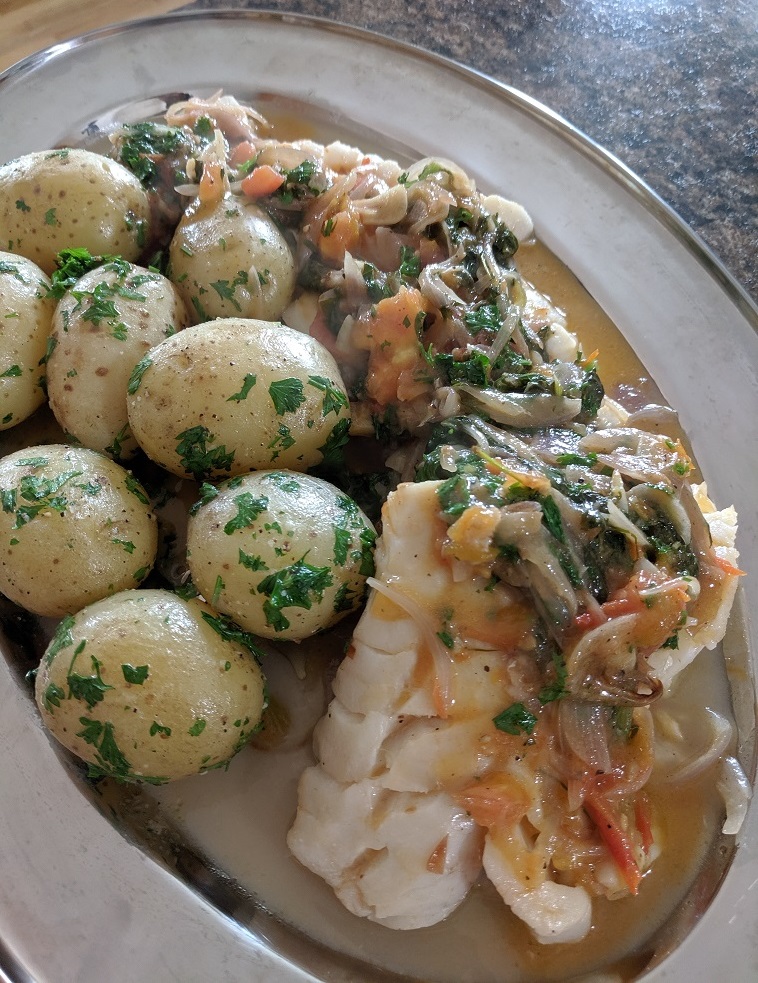
White wine poached cod with parsleyed potatoes to me is kind of the ultimate spring recipe. It has tomato and basil in it, lots of fresh flavours, and a light flakey fish. What more good you want on a warm spring day? As a side note, the potatoes are boiled new potatoes tossed in butter, salt, pepper, and fresh parsley, and they are one of my all-time favourite potato dishes. Seriously, they are so simple and so delicious. They are a definite must make.
White Wine Poached Cod with Parsleyed Potatoes
A quick and delicious cod dish that will knock the socks off any one you serve it to.
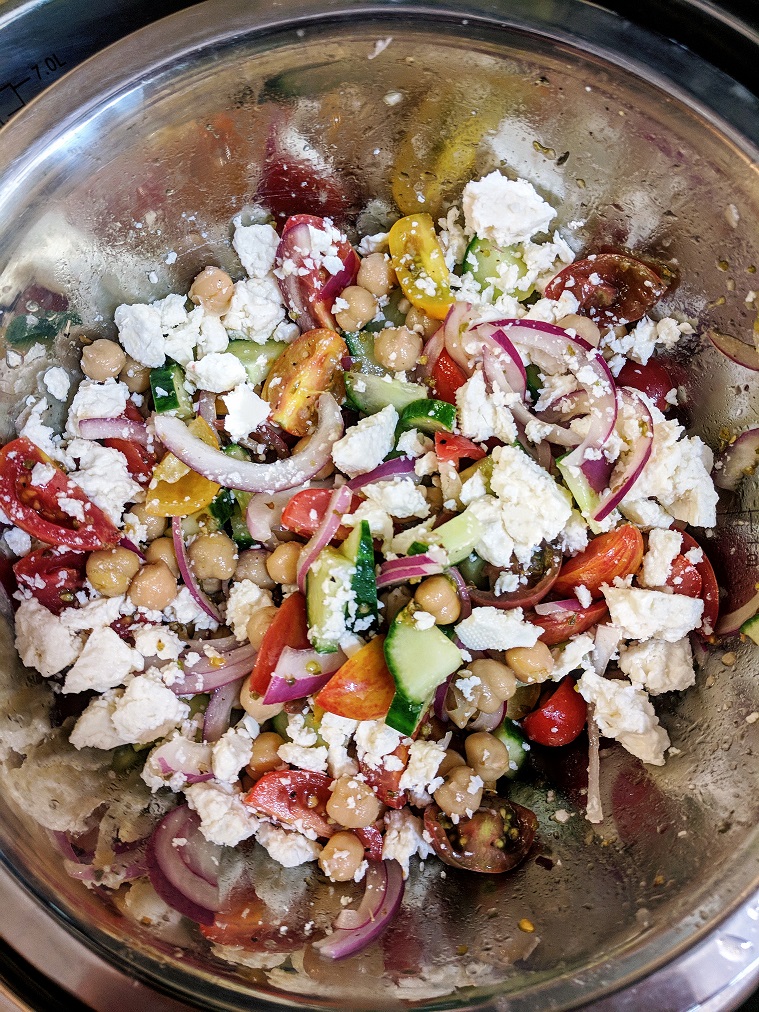
Greek Salad, by its nature, screams spring and summer. The balance of sweetness from the vegetables, saltiness from the cheese, and acidity from the dressing is everything you could want in a salad. When you replace the lettuce with chickpeas, you a more substantial meal with the same great taste.
Mediterranean chickpea salad
A quick, delicious and healthy salad that works just as well as a side dish as it does a lunch.
Salad bowls are a great spring food. That’s why I’m doing a whole series of them every Friday. This chicken quinoa Greek salad is great for all the reasons the chickpea greek salad is great. Plus, it has chicken for protein and quinoa, which is really good for you. So, you’ve got lots of fresh flavours, and it’s good for you. Sound like a great spring recipe to me.
Chicken Quinoa Greek Salad
A delicious and filling salad. The perfect meal for a hot summer day.
1/2cup Good Quality Olive Oilhalf for dressing half for the chicken
2 tbspDried oreganohalf for dressing half for the chicken
1tbspRed Wine vinegar
2clovesMinced Garlic
1lemonJuiced
1/4cupChopped Parsley
1tspDried Dill
Salt & Pepper
2tbspPlain Greek Yogurt
Instructions
Quinoa
Combine the quinoa with two cups of water and a pinch of salt in a medium pot and bring to a boil over high heat.
Once the pot begins to boil, cover it with a tight fitting lid and reduce the heat to low.
Let the quinoa simmer for 15 minutes.
Remove from the heat and let rest, covered for an additional 5 minutes.
Fluff with a fork and serve.
Chicken
Cut the two chicken breasts in half horizontally.
Lay flat on the cutting board and drizzle with olive oil, salt, pepper, and dried oregano on both sides.
Heat a large skillet on medium heat.
Sear the chicken on one side. Flip the chicken and cover. Reduce the heat slightly and cooked covered, flipping once or twice until the chicken is cooked through.
Let the chicken rest, then slice and serve.
Salad
Cut, wash, and spin dry the lettuce.
Combine all the vegetables in a large mixing bowl, except the lettuce.
Add the olive oil, red wine vinegar, lemon juice, oregano, dill, garlic, parsley, and salt and pepper into the bowl. Taste and adjust seasoning as needed.
Mix the warm quinoa into the vegetables along with 1/4 cup of crumbled feta cheese. Mix well.
Add the lettuce and mix.
Serve the salad in a large bowl, top with sliced chicken, the remaining feta, and a spoon full of yogurt.
The last spring recipe on the list is my Nicoise Pasta Salad. It is everything you love about a Nicoise Salad but with pasta in it. The salad starts with a basic red wine vinaigrette to which tuna, olives, blanched green beans, tomatoes and pasta are added. The salad is finished with slices of hard-boiled egg. It is even better than it sounds.
Nicoise Pasta Salad
Nicoise salad is often considered by Chefs to be one of the best salads ever created. Now, you can have it in pasta salad form.
If these nine spring recipes can’t get you through the last few days of winter, nothing will. They are all packed with loads of fresh ingredients and flavours and are simple enough that anyone can make them. What are some of your favourite spring recipes? Tell me in the comments below or on Facebook.
Did you know that I wrote a cookbook? It’s called the 5-Ingredient Cookbook for men (of course, it is for everyone). The kindle version is officially on sale now and the physical version goes on sale March 16th, but you can preorder it now from Amazon in Canada here, and Amazon in the US here.
Thank you for reading this post. Please share it on Facebook, Pinterest, or Twitter to help Chef’s Notes grow. Subscribe to Chef’s Notes below, and you will never miss a post again.
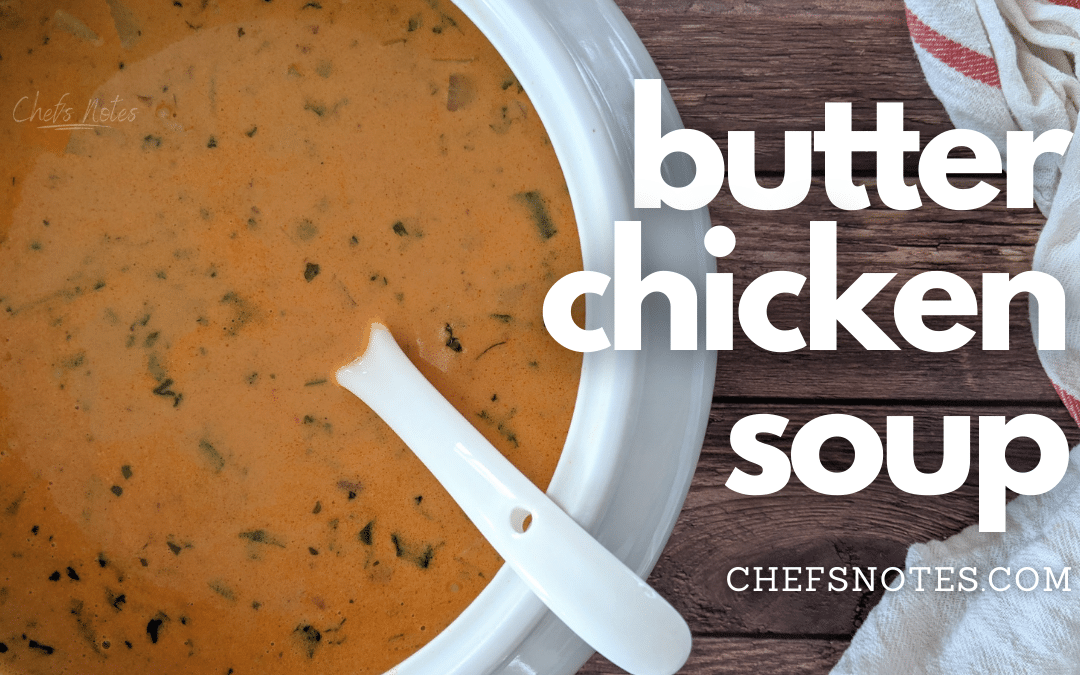
Today marks the end of the Chef’s Notes Hearty Soup Series, and I really wanted to go out with a bit of a bang. So, I created this recipe for Butter Chicken Soup and boy am I glad I did. Imagine everything you love about butter chicken but in a soup. It’s creamy, it’s a little spicy, and it is loaded with flavour. It is the exact thing that we all need to get us through this last little push of winter. So, won’t you join me as I walk you through how to make what is sure to be your new favourite soup? Let’s get to it.
Butter Chicken Soup Ingredients
The ingredients list for this Butter Chicken Soup may seem intimidating at first. I’m not going to lie to you; it’s kind of long. But other than one or two of the spices, there is nothing in this soup that should be unfamiliar to you. The soup starts with an onion, a few cloves of garlic, a Thai red chilli, and a piece of ginger. You can leave the red chilli out, but it does contribute to the flavour of the soup. The next ingredients are two potatoes, one cup of tomato purée, a pound of diced boneless skinless chicken thighs, and half a cup of frozen peas. Coming in at the end is one cup of whipping cream, a quarter cup of chopped cilantro, two tablespoons chopped mint and 1 tablespoon fenugreek leaves (aka Kasoori Methi) which are optional. There is also a teaspoon of lemon juice and three cups of water.
Spices
The Butter Chicken Soup spices are one tablespoon garam masala. You can buy garam masala or make it. There is half a teaspoon Kashmiri chilli powder which is an Indian chilli pepper that is ground. You can substitute it for half as much cayenne. There is a quarter of a teaspoon each of cumin, coriander, ground cardamom and black pepper, one teaspoon kosher salt. And finally, one tablespoon of sugar. I’m sure some of these are unfamiliar to you, but you can find most if not all at your local grocery store or specialty Indian market. If you don’t want to buy all the spices, I get it. It can get expensive. Most grocery stores now sell butter chicken spice blends. You can buy that and use it instead. I’m not sure what the measurements would be, though. I would say start with a tablespoon, and if you need to add more, you can.
Prepping The Ingredients
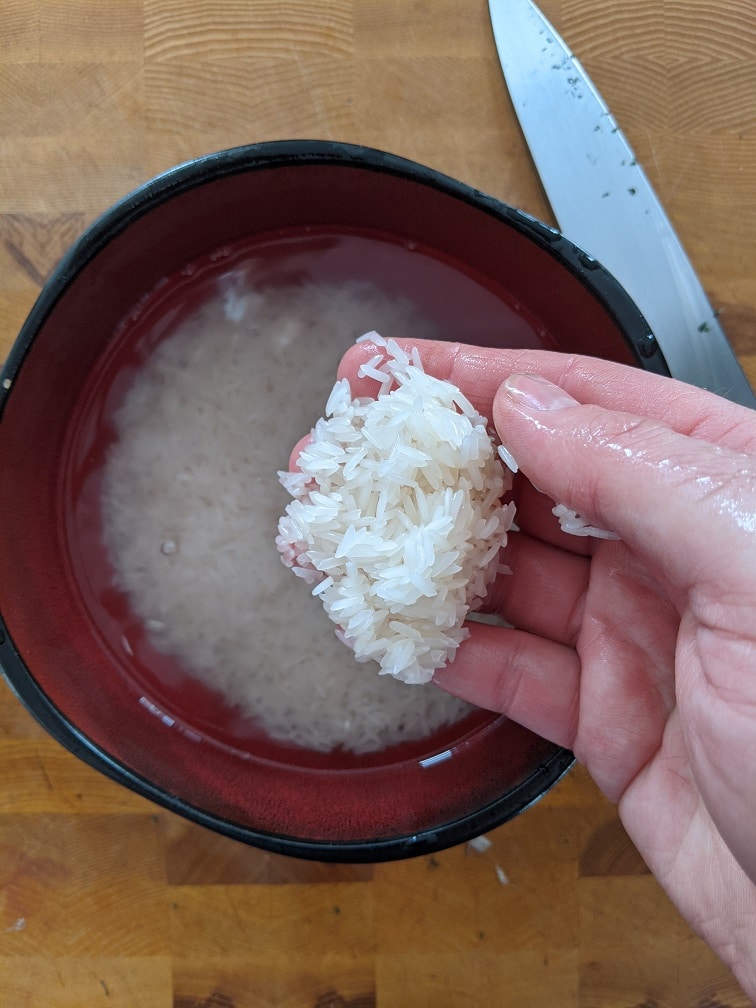
To prepare the ingredients to start by dicing the onion. Next, mince the garlic and ginger. Slice the chilli as thin as you can. And dice the potatoes, then rinse them in cold water until the water runs clear.
Cooking The Butter Chicken Soup
Heat a large pot over medium-high heat. Add two tablespoons of olive oil to the pot, then the chicken. Cook until the chicken starts to brown, then add in the onions and cook for about three minutes or until they start to soften. Next in goes the garlic, ginger, and chilli. Cook those for a minute before adding a tablespoon of butter and the spices. Cook the spices for about a minute, then add the tomato purée, water and potatoes. Bring the pot to a boil, put a lid on it, turn the heat to medium-low and cook for ten minutes. Add the peas into the pot, put the lid back on and cook for another five minutes or until the potatoes are tender.
Subscribe to Chef’s Notes and Never Miss a Recipe or Post Again.
Finishing The Soup
To finish the Butter Chicken Soup, add the cream and cook for two minutes. Take the pot off the heat and stir in the cilantro, mint, fenugreek leaves and lemon juice. Taste the soup and adjust the seasoning with salt and pepper as needed.
Butter Chicken Soup
Everything you love about butter chicken but in a soup. What more needs to be said?
What a way to end the series! Truth be told, I’ve been thinking about this soup for weeks now, and I am so glad to have finally been able to make it and share it with you. I hope you enjoyed this post and this Hearty Soup Series. Next Wednesday, we start a brand new series all about Casseroles which I’m very much looking forward to, and of course, there is the ongoing Friday bowl series. Lot’s happening. That’s it for me for now. Thank you so much for reading, and remember to share this post with your friends if you think they’d like it. Have a great day. I’ll talk to you soon.
Thank you for reading this post. Please share it on Facebook, Pinterest, or Twitter to help Chef’s Notes grow. Subscribe to Chef’s Notes below, and you will never miss a post again.
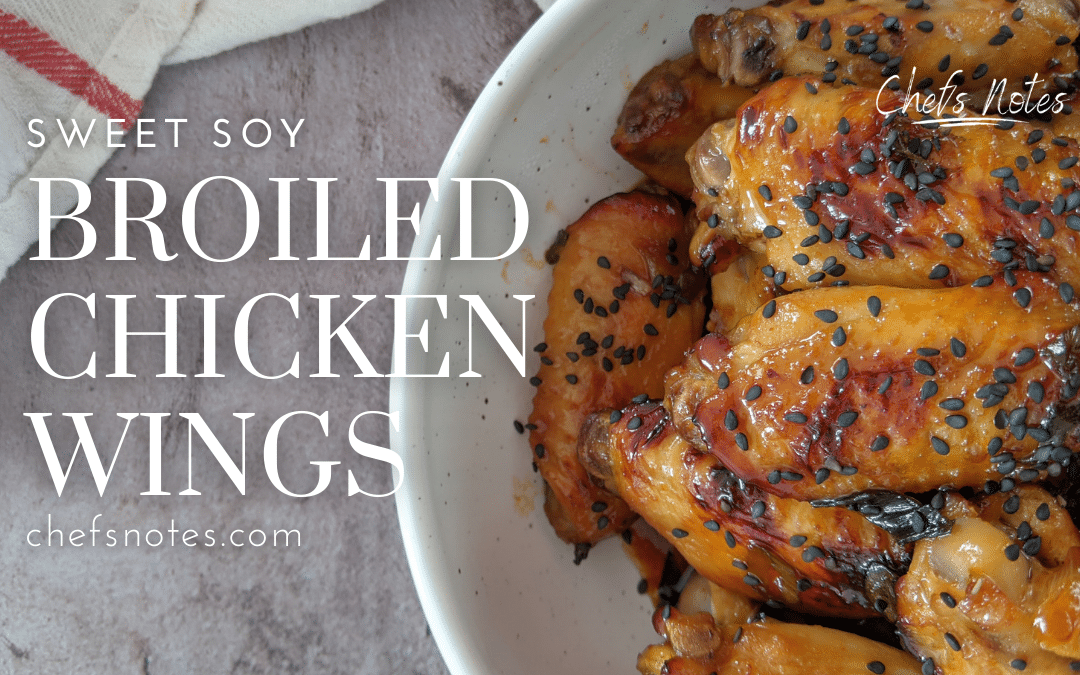
I’m a big fan of chicken wings. In fact, I’ve done a few other chicken wing posts here on Chef’s Notes. You can find those here and here. In those other two posts, the wings are either grilled or deep-fried. Today, we will look at a slightly different technique for cooking the wings; broiling. The great thing about broiling wings is that it’s quick, and the wings caramelize, which is what you want. From raw, it only takes twelve minutes to cook the wings under the broiler. They come out juicy, tender and full of flavour. In other words, delicious. The wings I will show you in this post are marinated in soy, honey, sriracha and a few other things for an hour, broiled, then tossed in a sauce similar to the marinade, but slightly different. Although this recipe is great, and I recommend you try it, it’s really the method for broiling the wings that I want to pass on to you today. So, without further ado, let’s get to it.
Marinade
First things first, we have to make the marinade. The ingredients are 2 teaspoons honey, 2 tablespoons soy sauce, 1 teaspoon sriracha, 1 teaspoon rice vinegar, 1 teaspoon sesame oil, and 1/4 teaspoon fish sauce. Put all the ingredients in a bowl and mix well.
The Wings
In total, I used about 2 pounds of spit chicken wings. Split means that the flat and the drum of the wing have been cut apart. You can use whole wings if you want though it might alter the cooking time slightly. Put the wings in the marinade, make sure they are coated and put them in the fridge for an hour or up to a day. It’s easiest to put the wings in a large ziplock bag, pour the marinade in, remove any excess air and seal the bag. This ensures more even coverage of the marinade on the wings.
Broiling The Wings
Once the wings have marinated, turn your oven’s broiler on too high and ready your broiler pan. If you don’t have a broiler pan, you should get one. They are handy. In the meantime, get a sheet pan, line it with foil, and set a stainless steel cooling rack on it. If you do have a broiler pan, line it with foil, put the rack in place and lightly oil it. Lay the chicken wings out on the rack in an even layer with a little space between each wing. Put the wings in the oven on a rack set slightly above the center and cook the wings for 6 minutes. Take them out, flip them and cook them for another 6 minutes.
I’m confident that after 12 minutes, your broiled chicken wings will be fully cooked, but it’s always a good idea to double-check. You can do this in one of two ways. The first and most reliable way is to use a meat thermometer. Check the three biggest wings by poking the thermometer into their thickest part, making sure not to touch bone. The internal temperature of the wings should be a minimum of 165°f. The second method is to stick the three biggest wings with two forks and pull in opposite directions. If the meat comes away from the bone easily, the wings are done. If it doesn’t, cook the wing for an additional minute or two.
The Wing Sacue
While the wings are in the oven, make the sauce by combining 2 tablespoons of soy sauce, 1 teaspoon sriracha, 1 tablespoon honey, 1 teaspoon rice vinegar, and 1 sliced green onion in a small pot. Put on the stove on high, bring to a boil and cook for 1 1/2 minutes.
Saucing The Broiled Chicken Wings
When the wings are cooked, put them in a large mixing bowl and pour the sauce over them. Toss the wings to coat them, and serve garnished with sesame seeds or green onions.
Sweet Soy Broiled Chicken Wings
Simple homemade wings, bursting with flavour. Marinate the wings for an hour, broil for 12 minutes and enjoy.
I don’t have the words to express how good these wings are and how happy I think you will be with them. They are so tender. They have so much flavour. I think you will love them. Of course, you don’t need to follow my recipe, but you should try the technique. You can broil the wings without the marinade, then toss them in your favourite sauce. Also, for crispier wings, toss them in a few teaspoons of oil before broiling.
Alright, that does it for today. I hope you’ve enjoyed this post. Come back on Wednesday for the thrilling conclusion of my hearty soup series. It’s a doozy. Oh, and if you haven’t already pre-ordered your copy of my brand new cookbook, you can do that by clicking the links below.
I can finally announce that I have written a cookbook. It’s called the 5-Ingredient Cookbook for men (of course, it is for everyone). It officially goes on sale on March 16th, but you can preorder it now from Amazon in Canada here, and Amazon in the US here.
Thank you for reading this post. Please share it on Facebook, Pinterest, or Twitter to help Chef’s Notes grow. Subscribe to Chef’s Notes below, and you will never miss a post again.
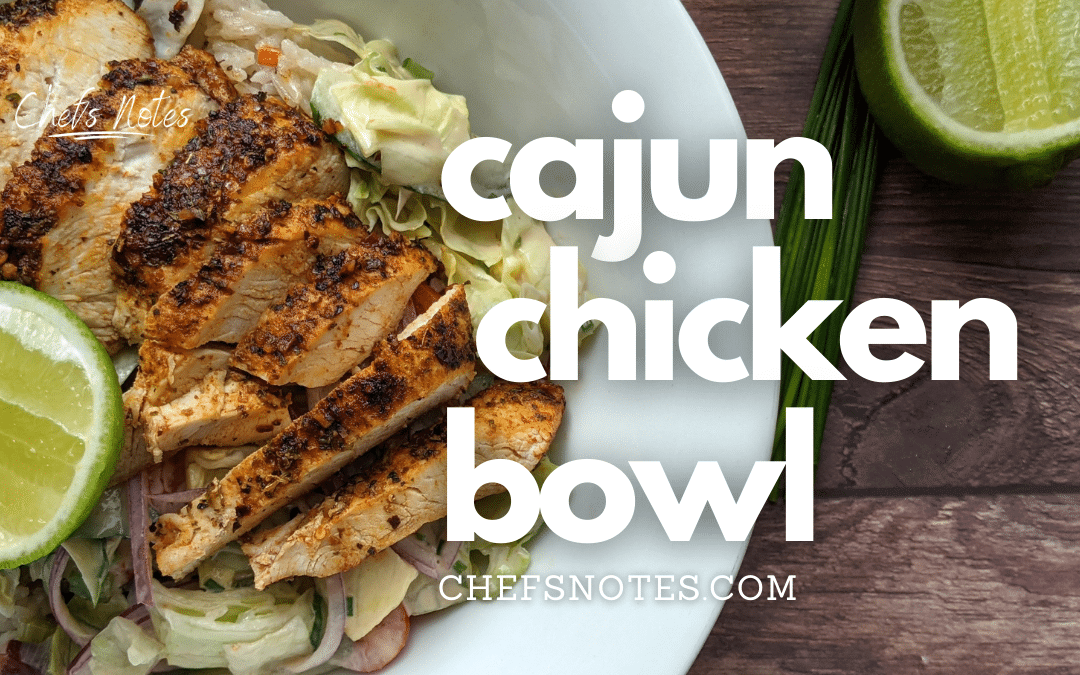
Today marks the beginning of a brand new series here at Chef’s Notes. Over the next eight Friday’s I will share with you recipes, instructions, and tips on how to make delicious “salad bowls.” Today, we’ll make a Cajun Chicken Salad and Rice Bowl. This bowl has three main components—the rice, which has beans and bell peppers in it. There is a salad with a delicious homemade dressing. And of course, there is the cajun chicken. I absolutely loved this Cajun Chicken Bowl, and I am very excited to share it with you. So, let’s get to it.
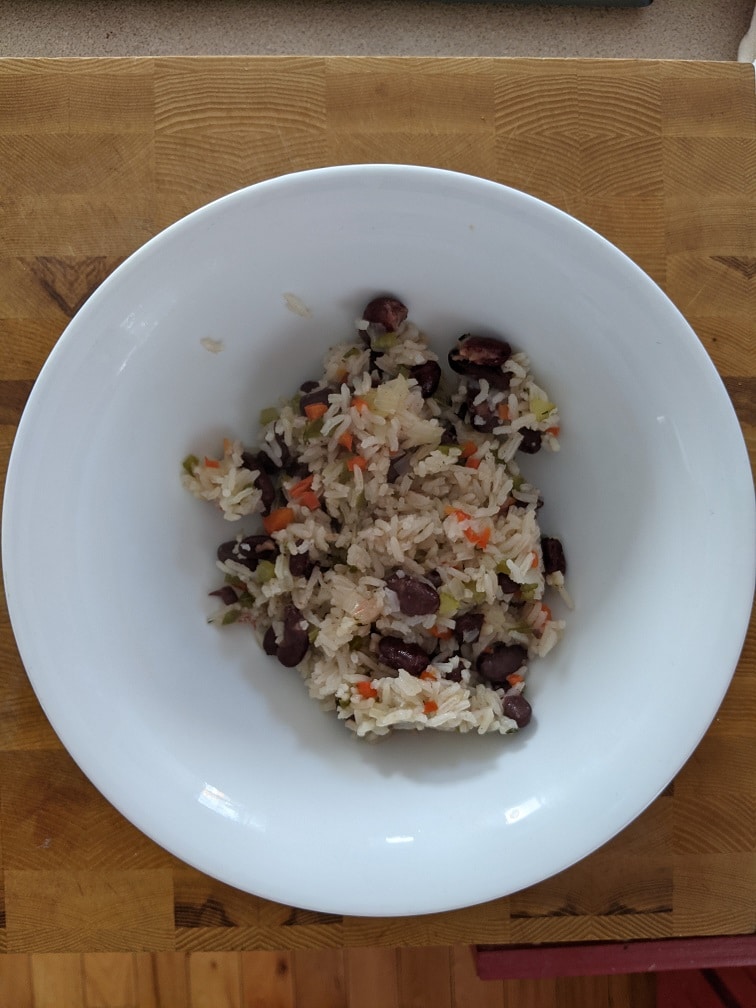
Rice and Beans
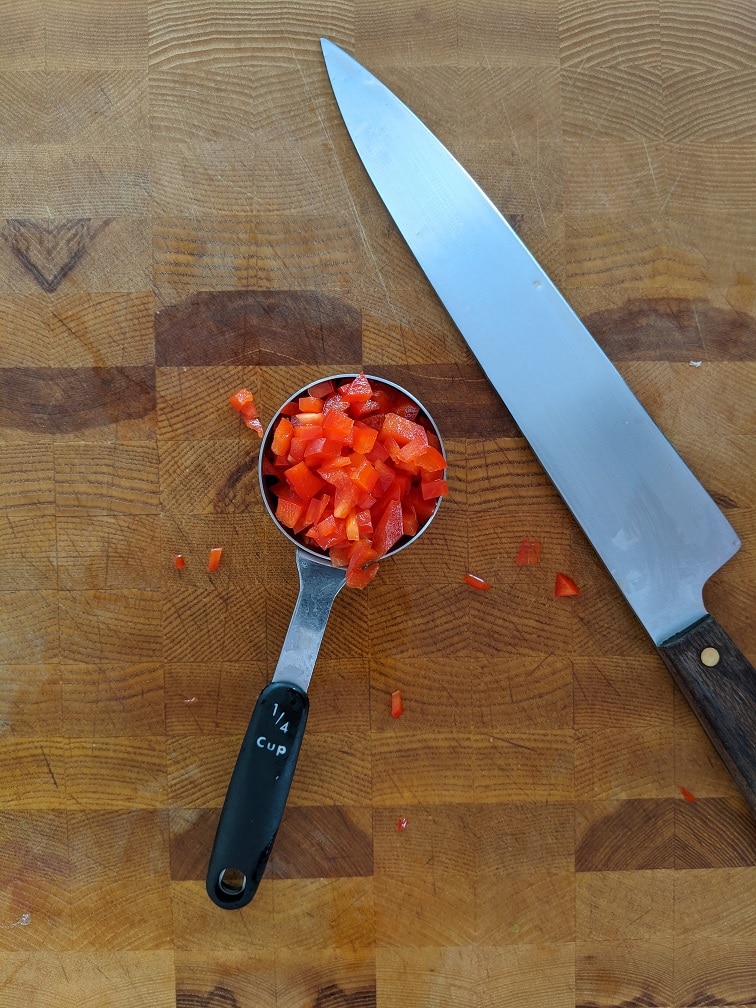
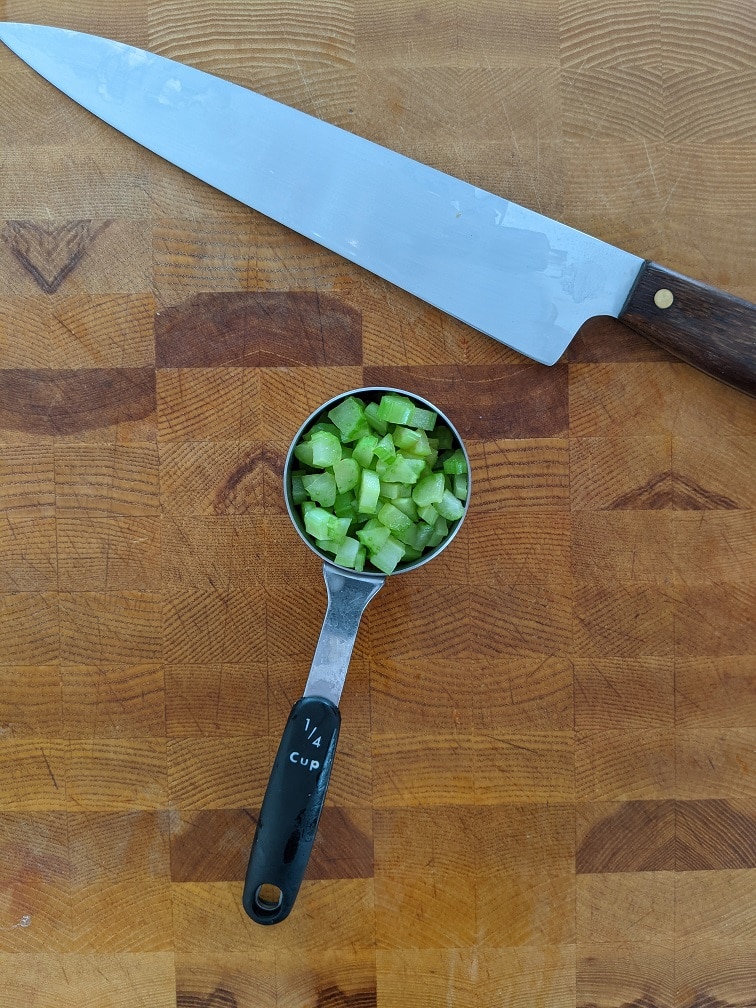
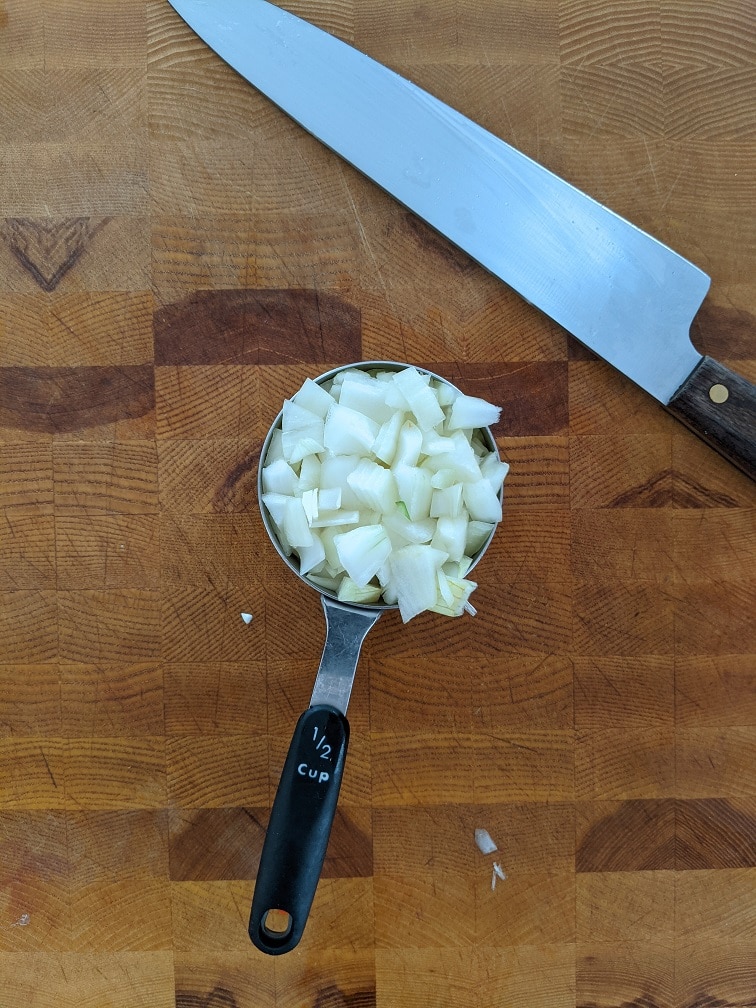
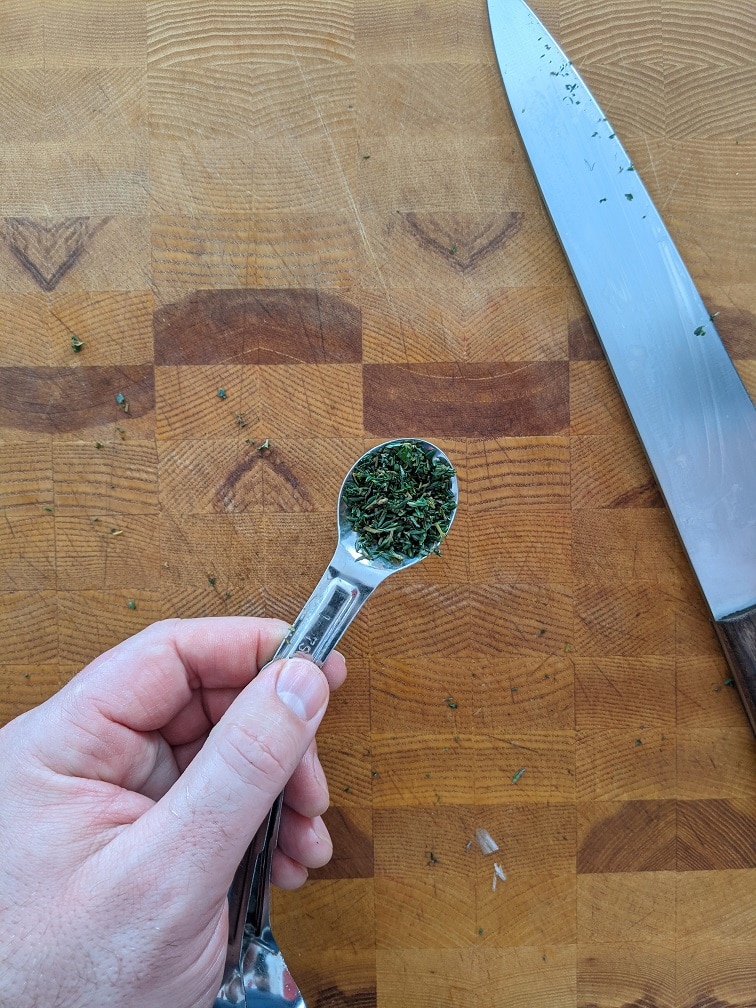
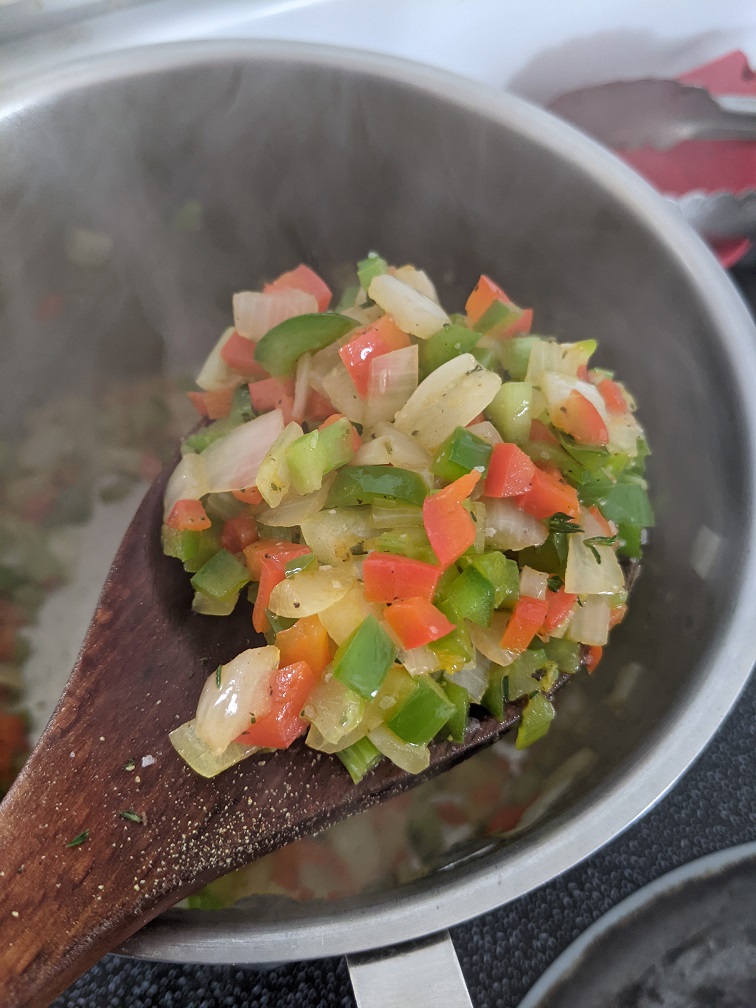
This bowl is built around the Cajun chicken, so I wanted to keep that Cajun feel throughout the dish. To do that, I made Cajun-style rice and beans. As any regular reader of this blog will know, the French have a combination of ingredients called Mire Poix (onion, carrot, and celery) they use as a base for soups, sauces, and just about everything else. Cajun cooking has a similar combination that is the foundation of their flavour called the Holy Trinity. The only difference between the Holy Trinity and Mire Poix is that the Holy Trinity substitutes carrots for bell peppers. You’ll be surprised at how much of a difference in flavour that small change makes. The rice and beans can be made a day ahead, then reheated in the microwave or on the stove.
Ingredients
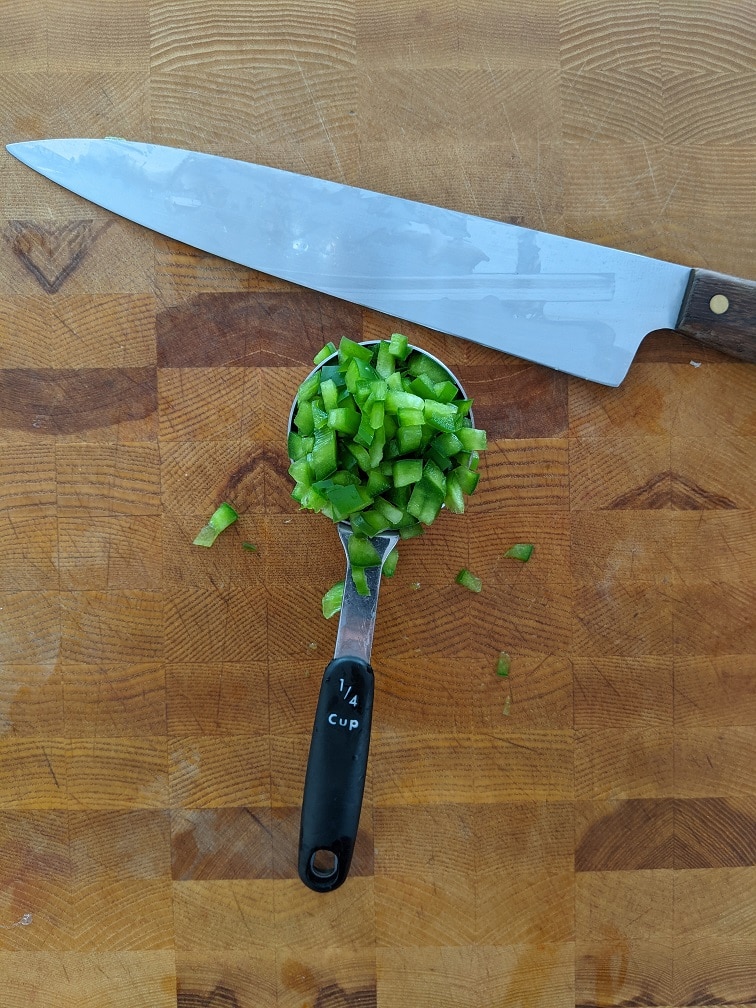
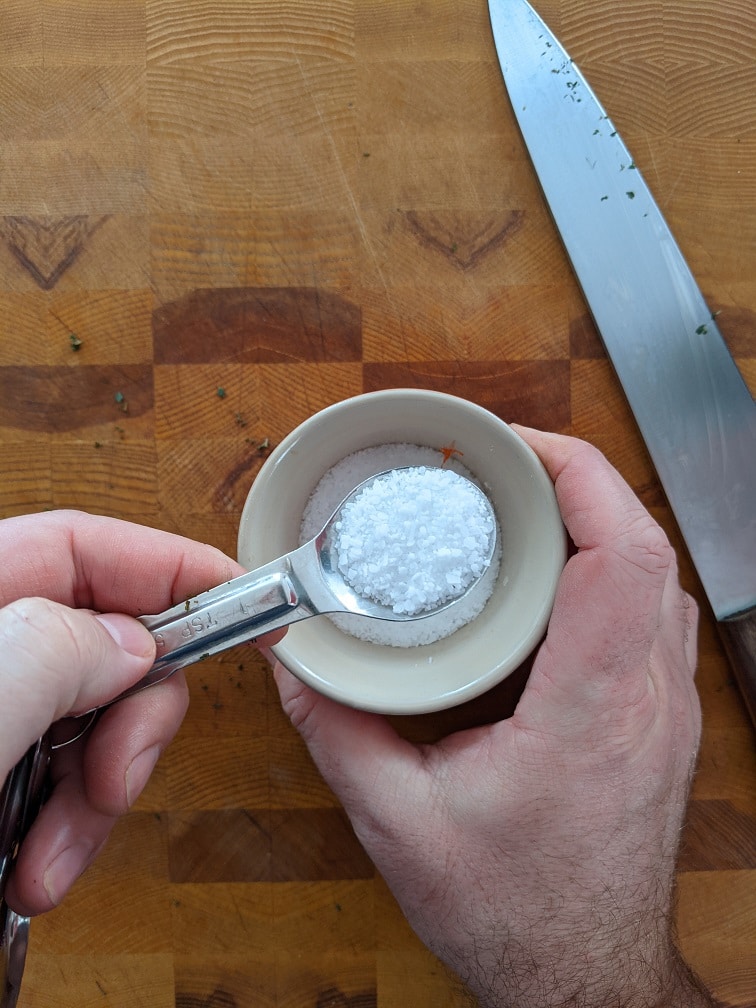
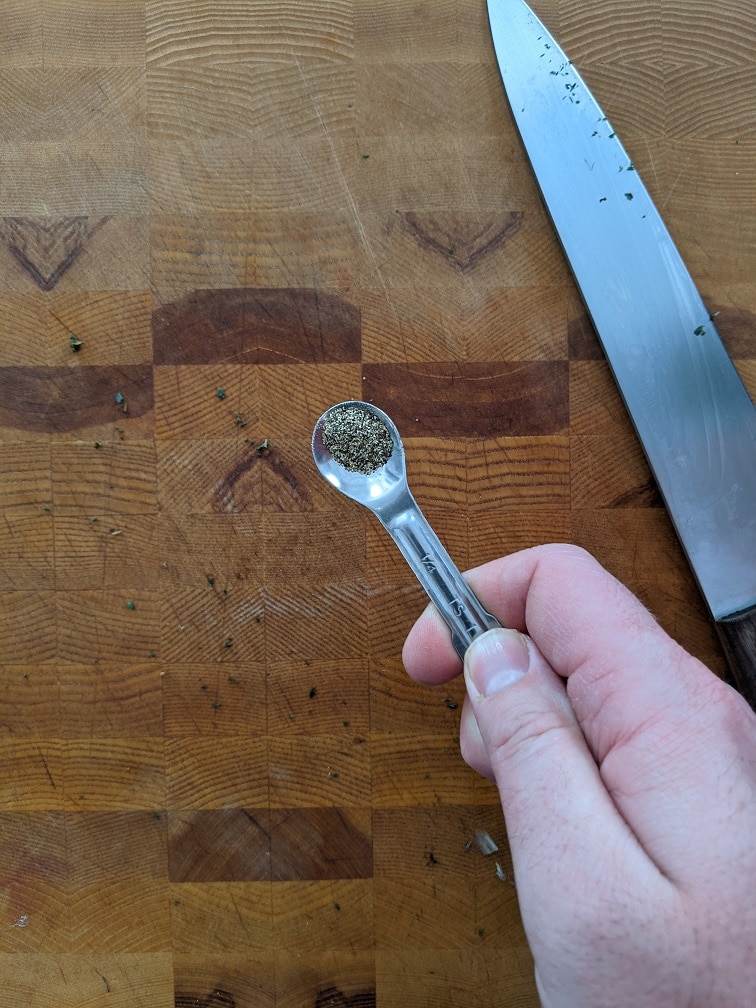
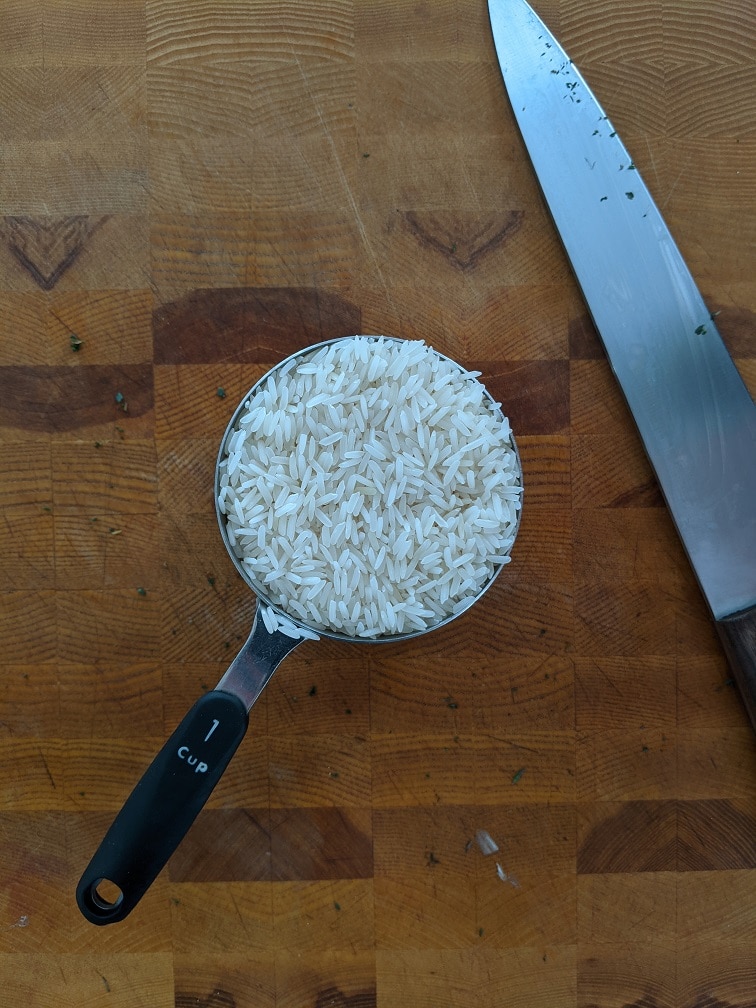
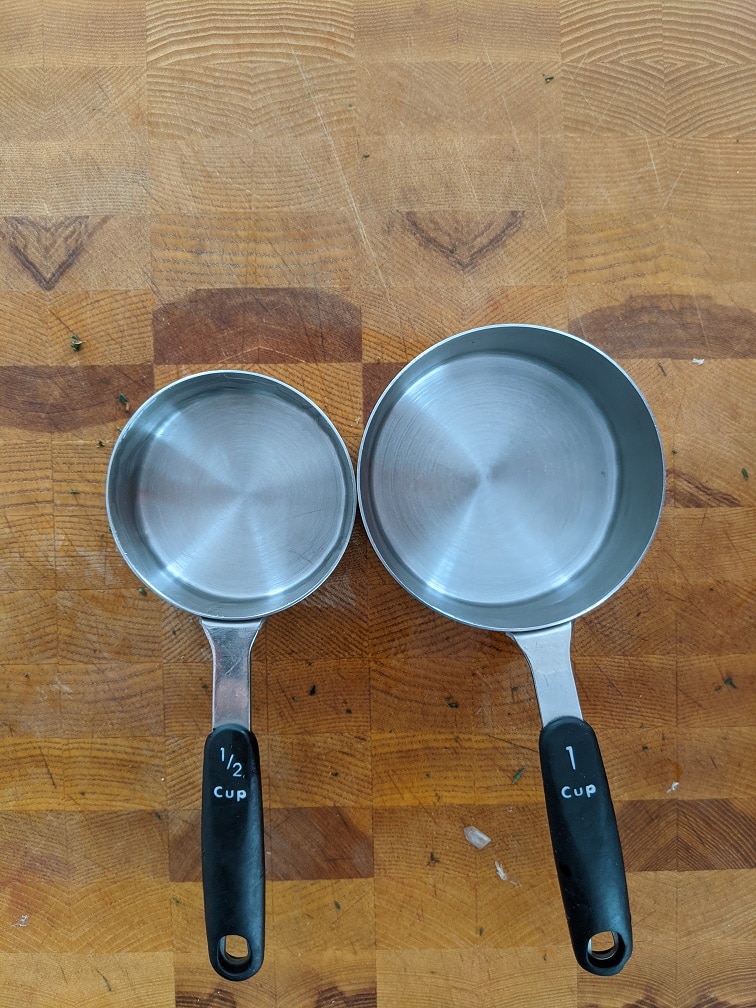
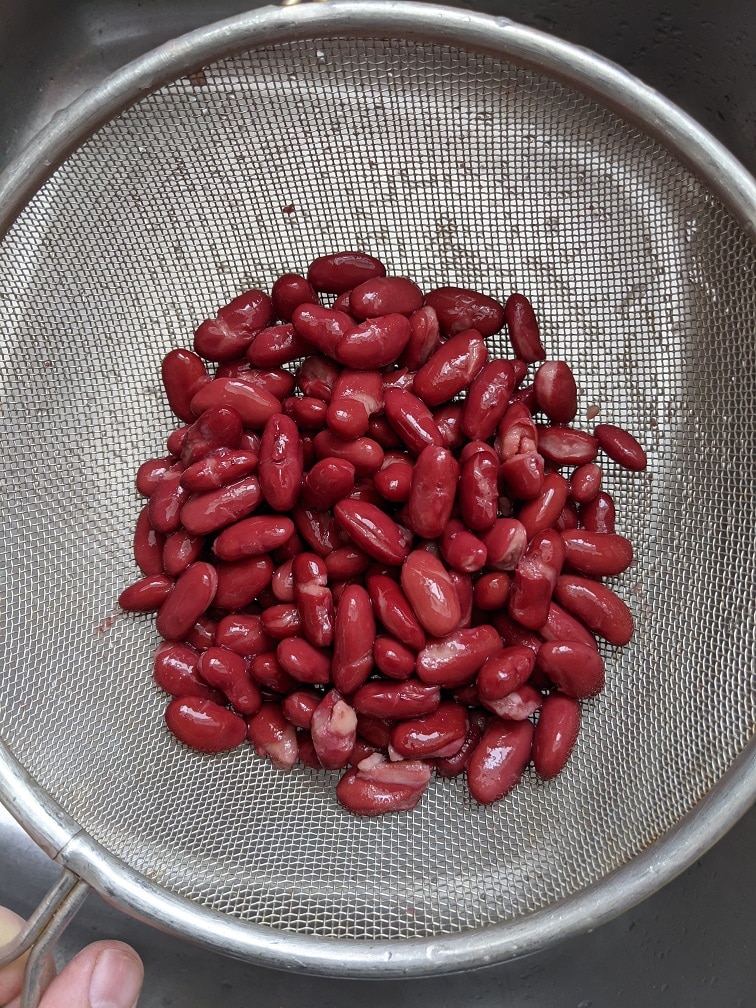
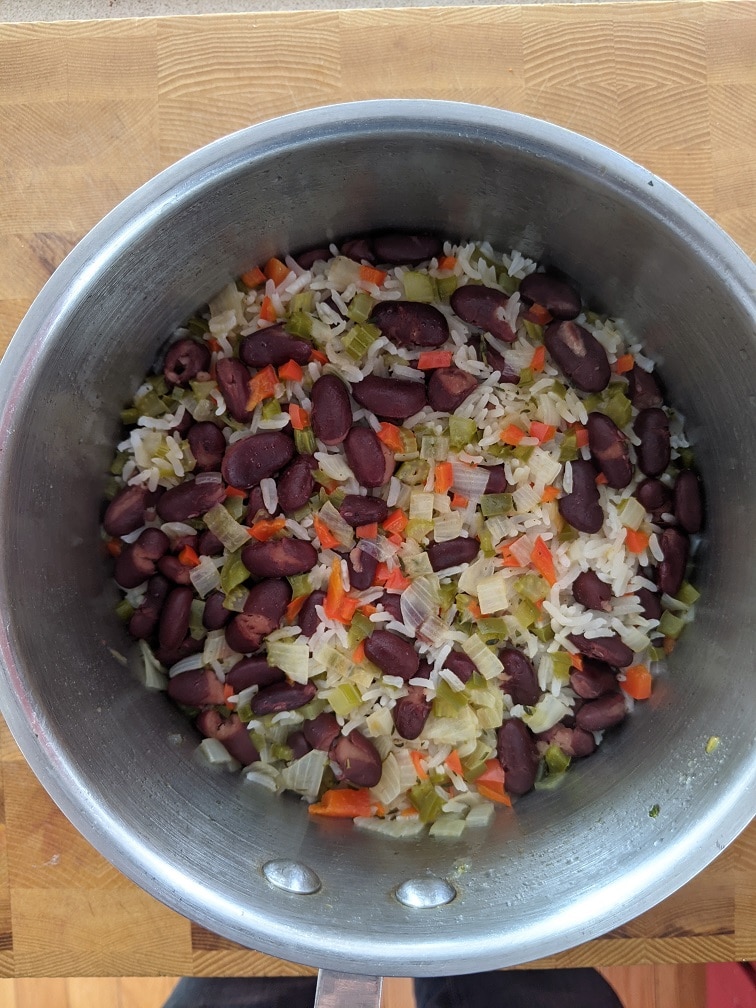
The rice and beans ingredients are a quarter cup each diced green bell pepper, red bell pepper, and celery. Half a cup of diced onion. One teaspoon of chopped fresh thyme. One teaspoon of kosher salt. One cup of jasmine rice, rinsed and drained. One and a half cups of water. And one 398ml can of red kidney beans, drained and rinsed.
Making The Rice and Beans
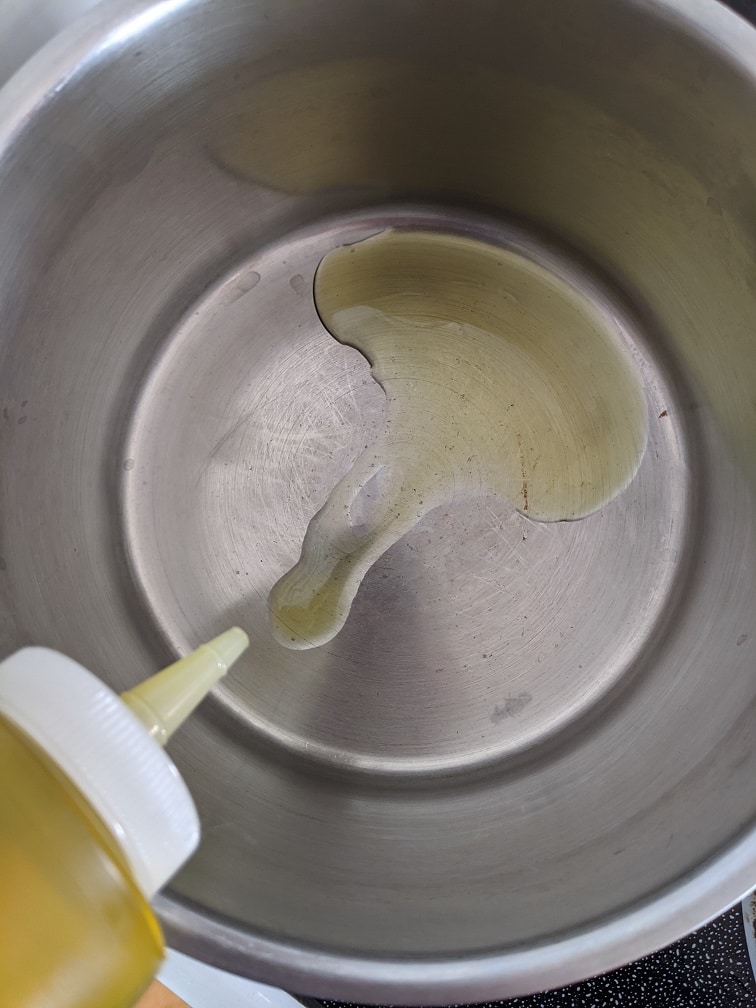
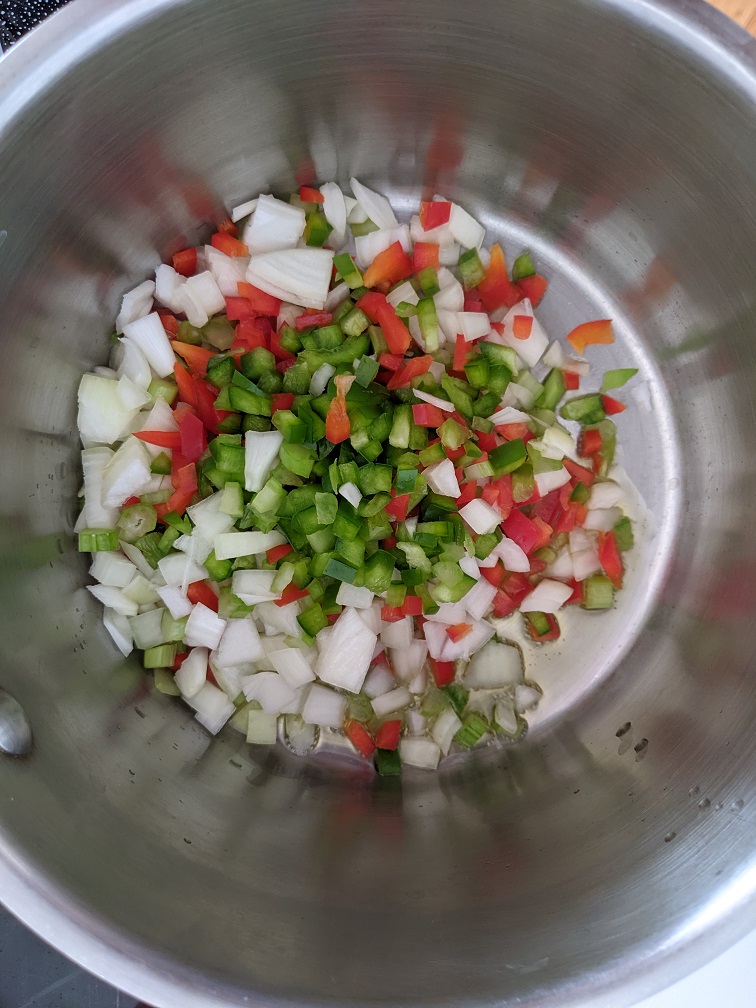
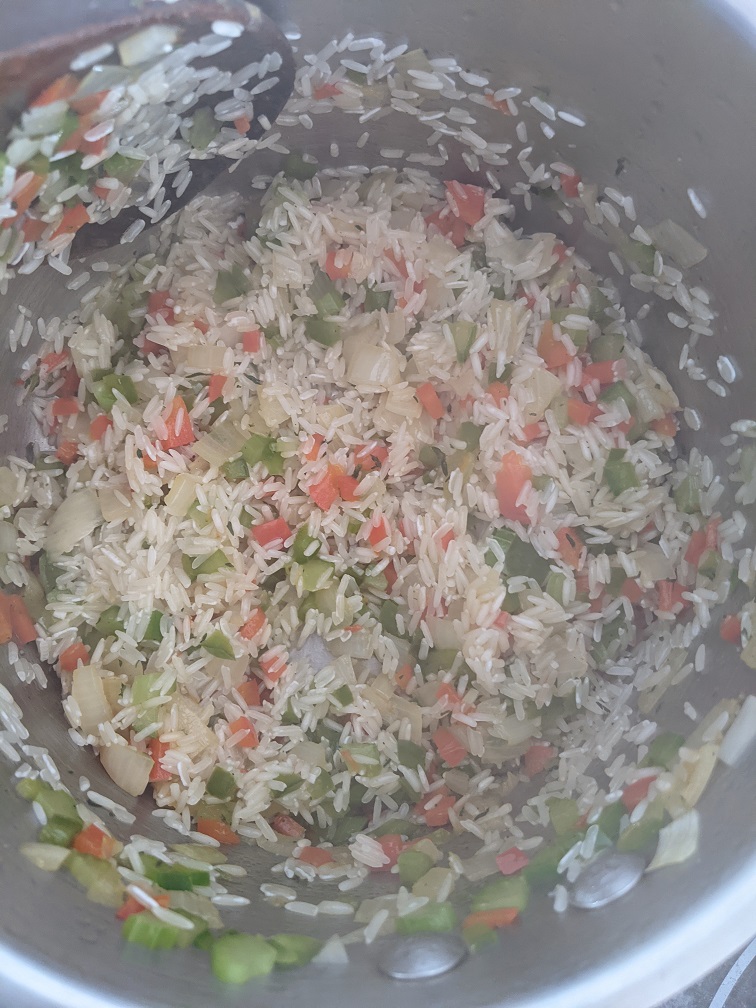
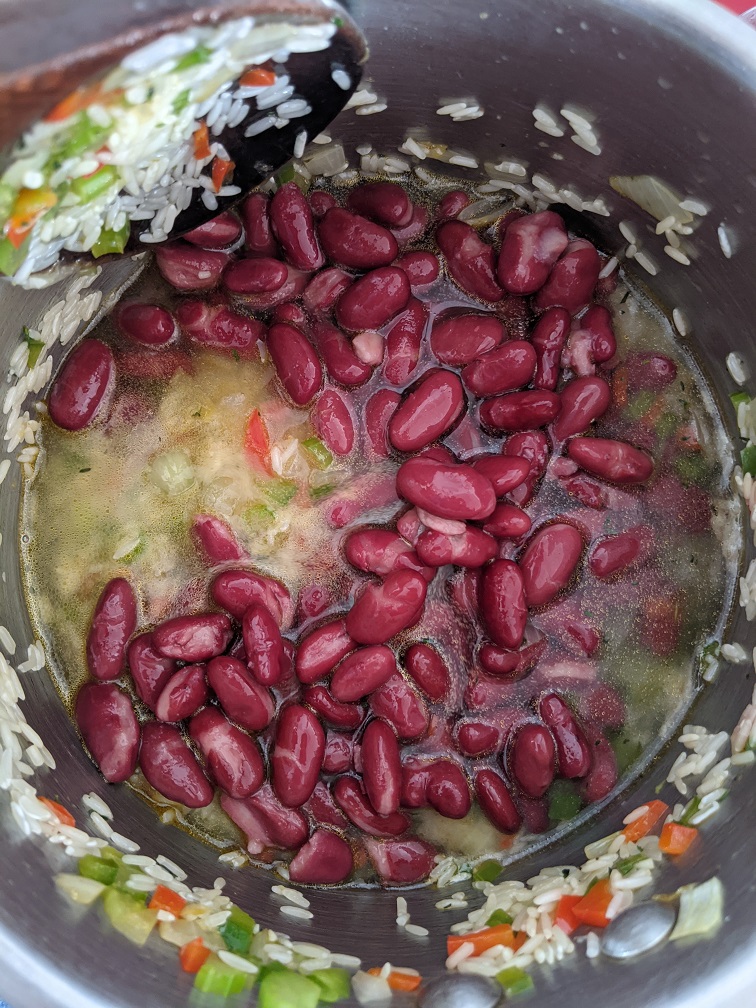
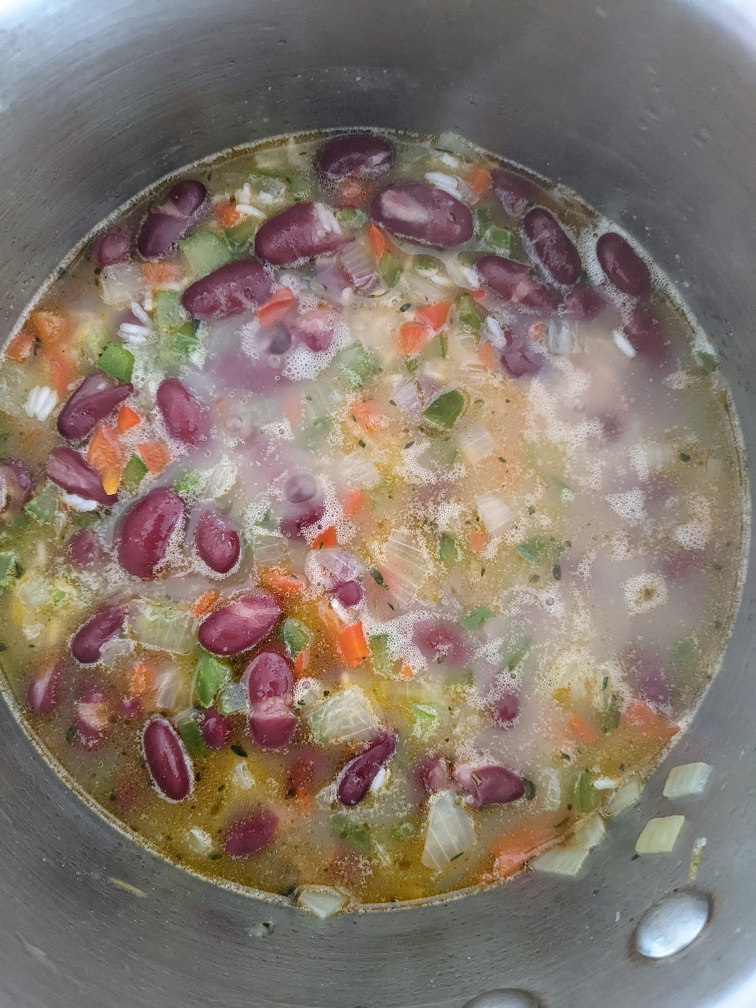
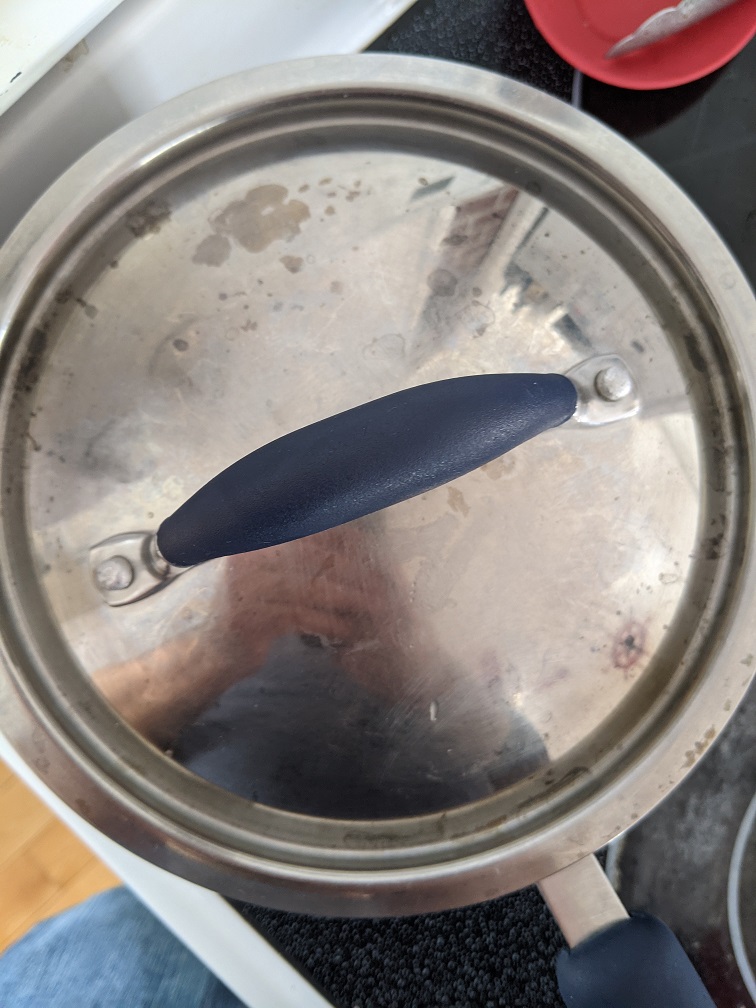
Start the rice and beans by heating a two-quart pot over medium-high heat. Add in the onion, celery and bell peppers and cook for three to four minutes or until the onions soften. Add the salt, pepper, and thyme, cook for thirty seconds, then add in the rice and cook for one more minute. Add the beans and the water, bring the pot to a boil, put a lid on the pot, turn the heat down to low, and let the rice simmer for seventeen minutes. Then, take it off the heat and let it rest for five minutes before serving.
Cajun Rice and Beans
The perfect side dish to any Cajun meal and a key componenet to my Cajun Chicken Salad Bowl
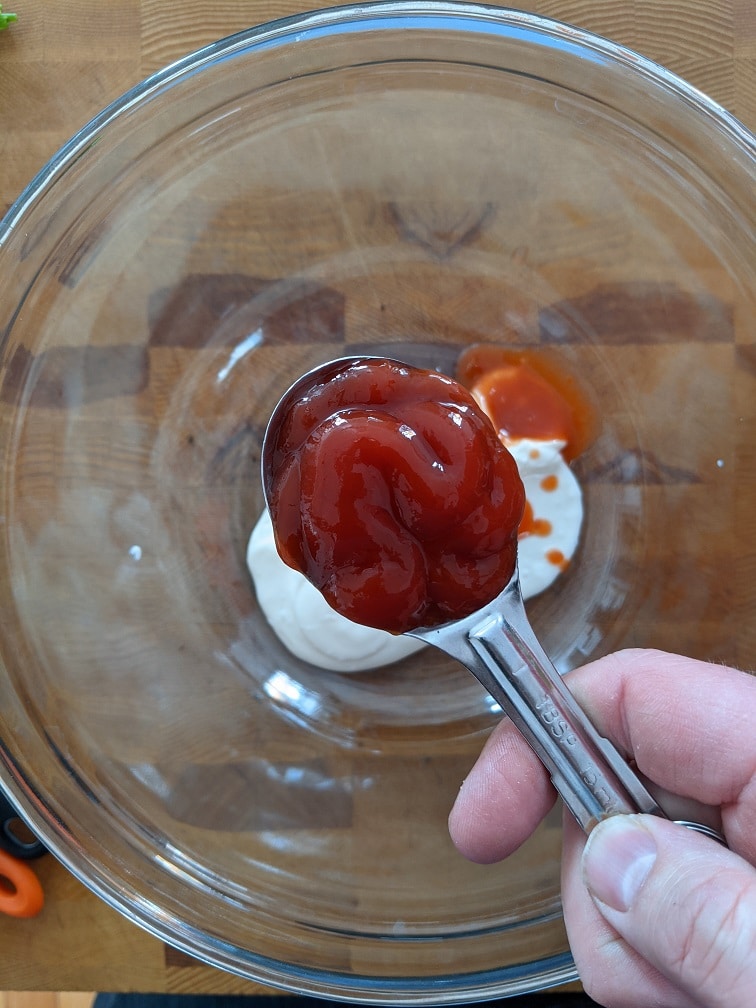
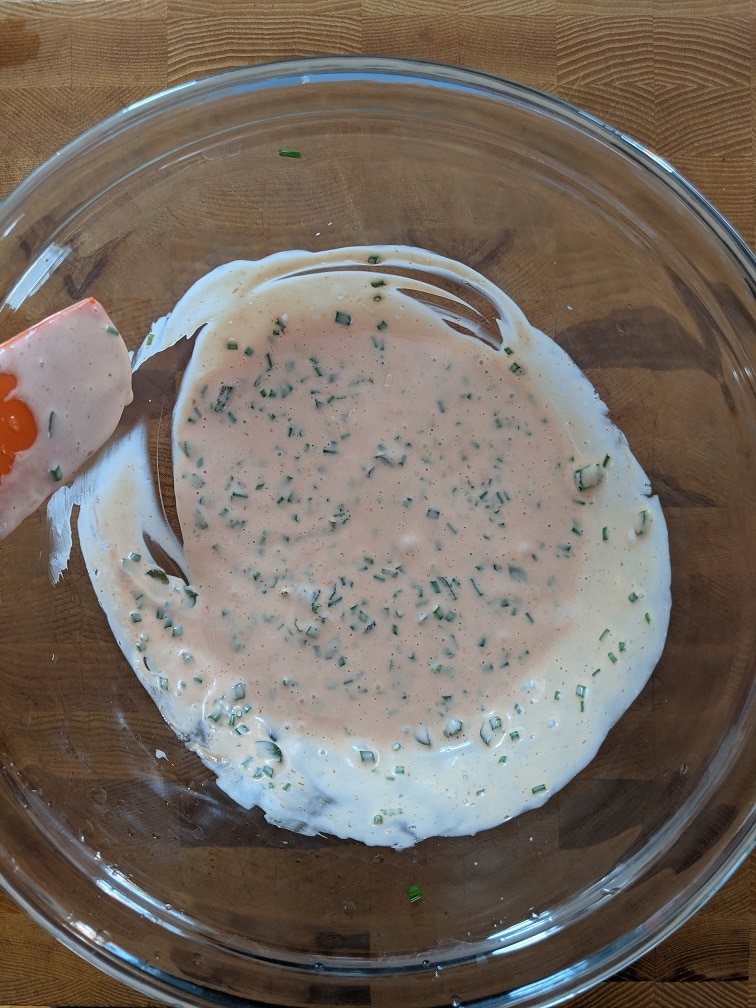
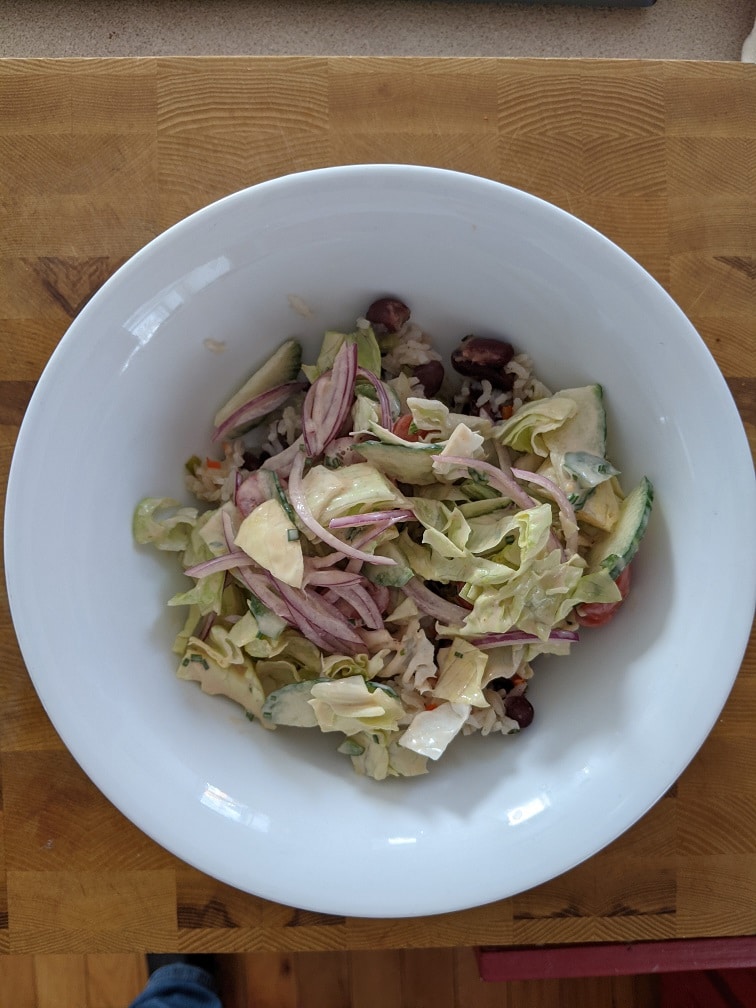
While the rice and beans are cooking, make your dressing and salad. The salad is a pretty standard type of garden salad with lettuce, cucumber, and tomato. However, the dressing is a take on a classic Cajun remoulade. Cajun remoulade differs from French remoulade only sightly. These differences are mostly based on regional ingredients. If you don’t know what remoulade is, don’t worry, you’ve had it before. Remoulade is essentially a fancy precursor to tartar sauce. Cajun remoulade tastes more like Thousand Island Dressing than tartar sauce, and that’s what we’re making today. Of course, you can just use store-bought dressing if you’d like, but I encourage you to make this at least once.
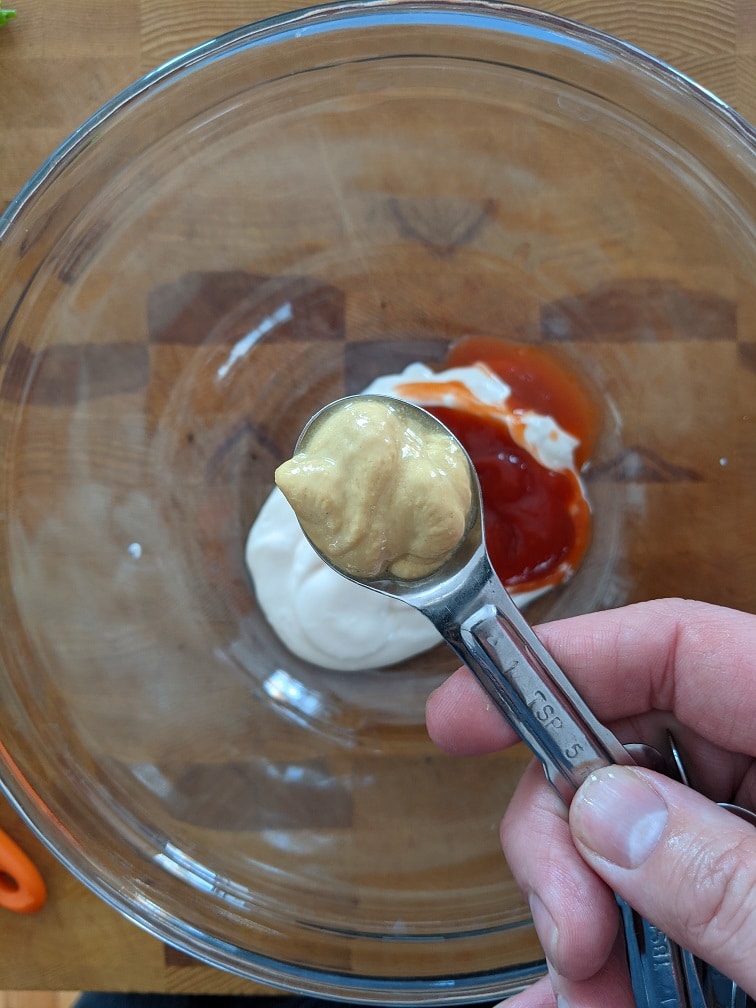
Making The Dressing
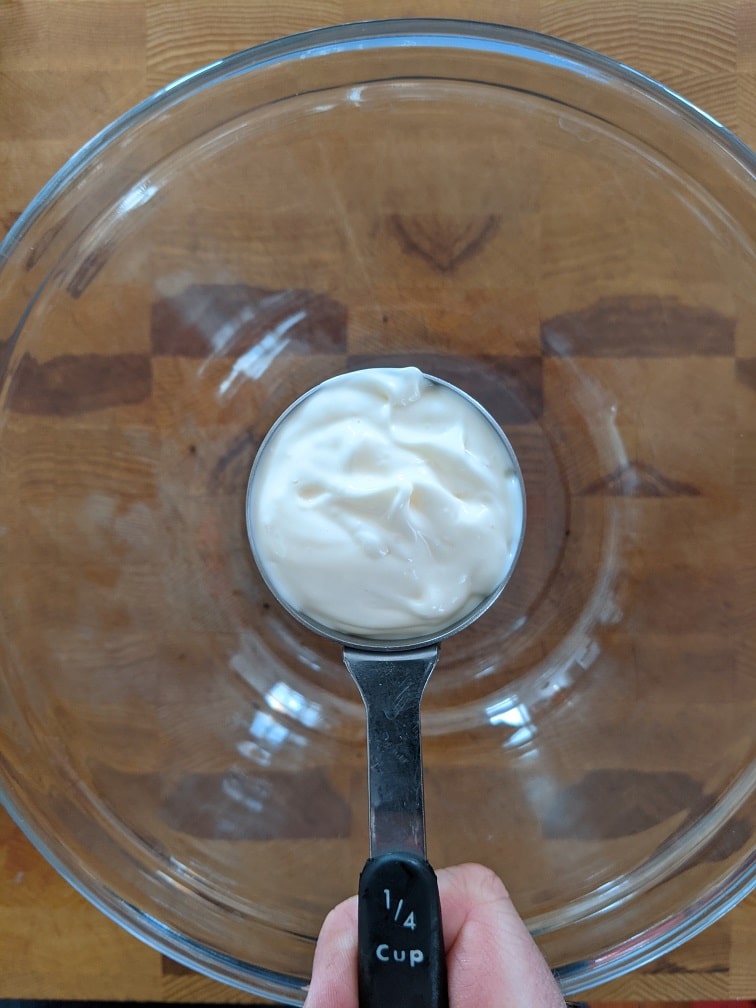
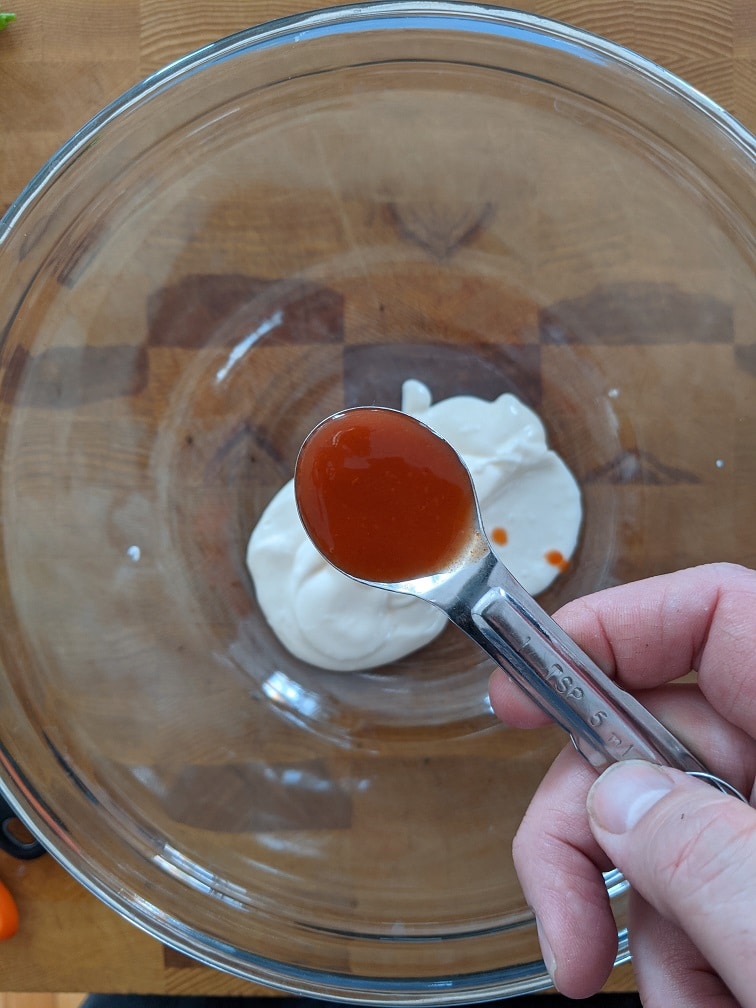
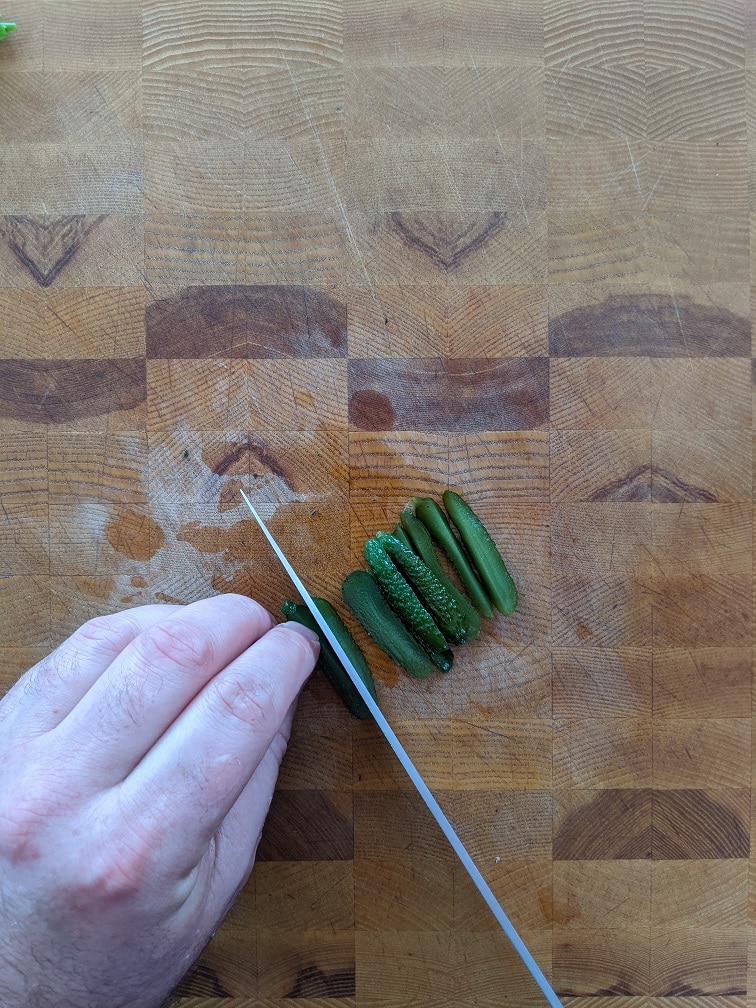
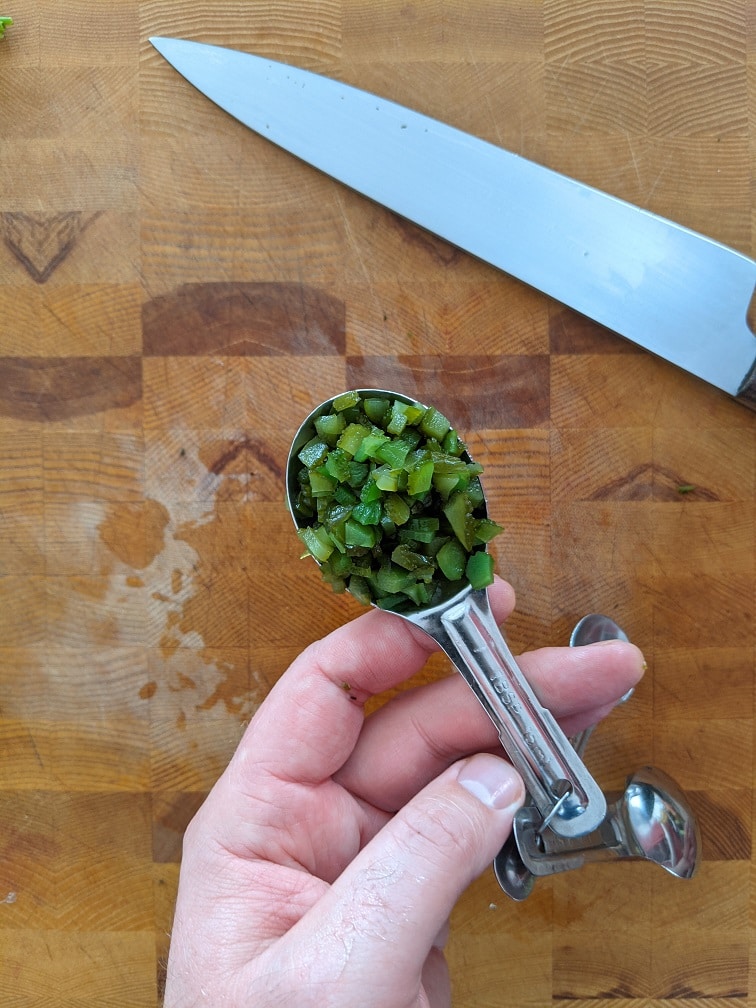
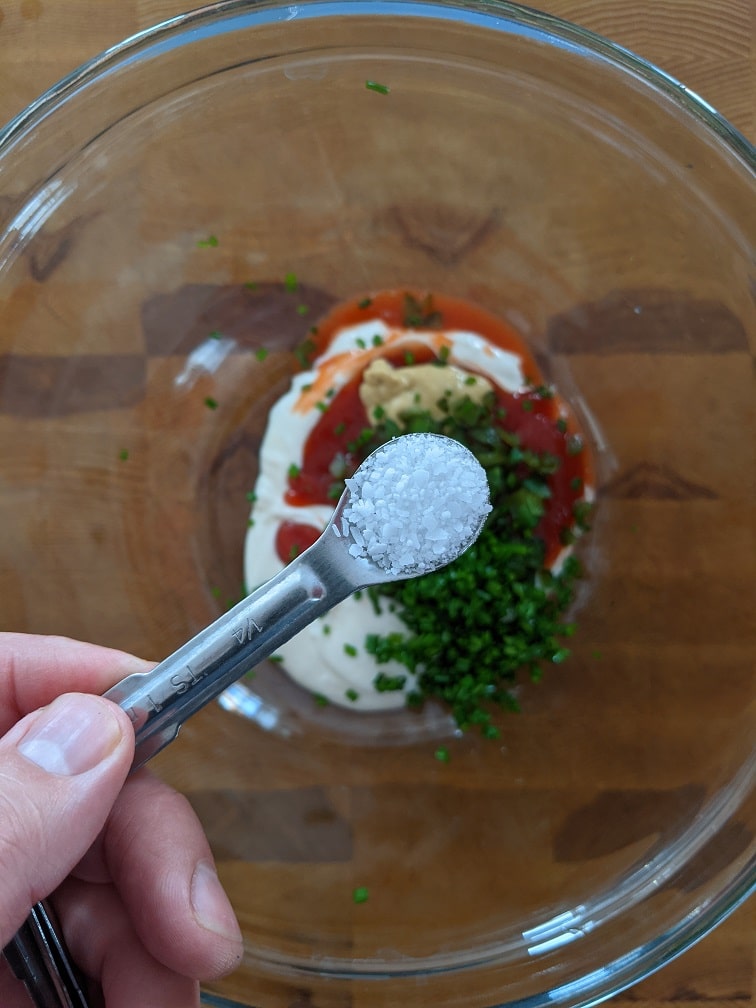
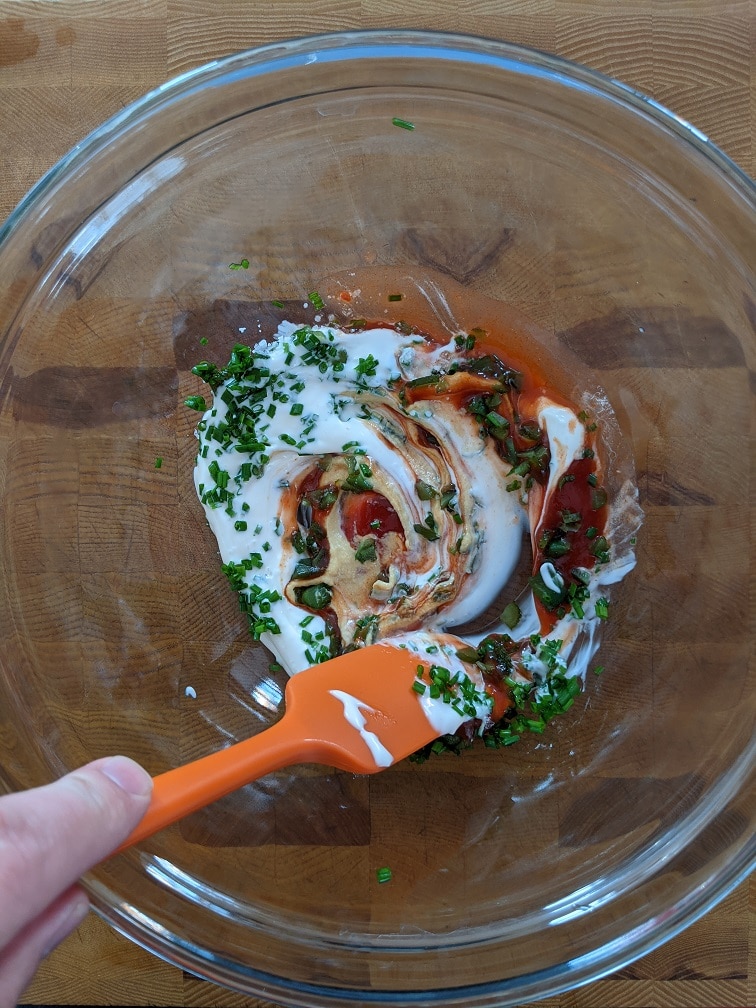
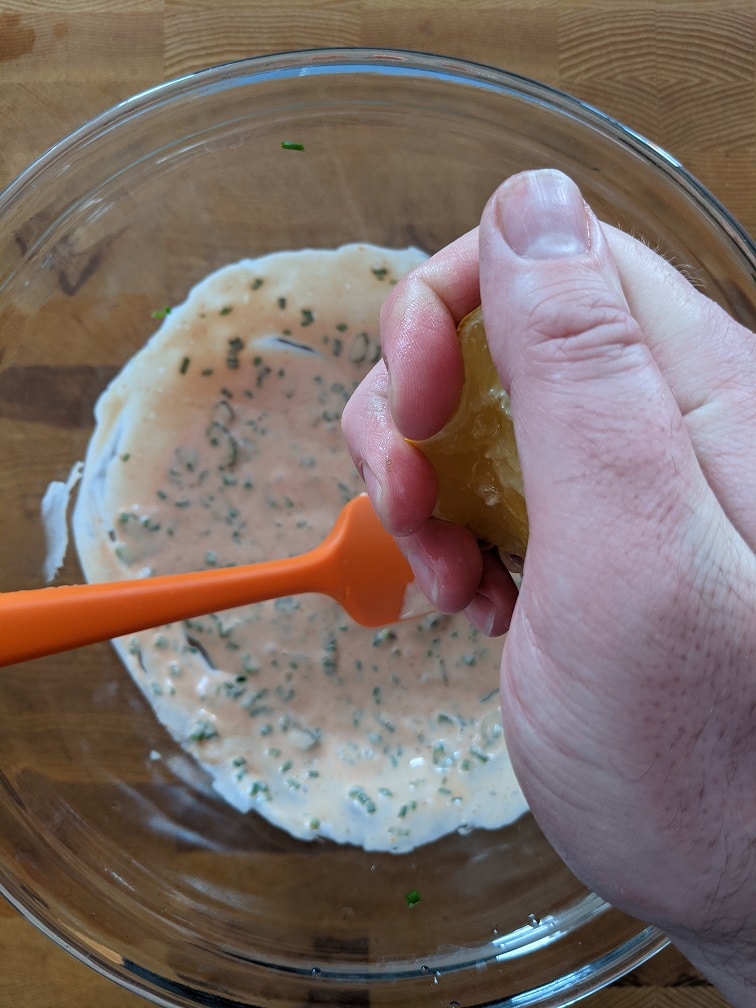
To make the Cajun remoulade combine a quarter cup of mayonnaise, one teaspoon hot sauce, one tablespoon ketchup, one teaspoon dijon mustard, one tablespoon finely chopped gherkins, one tablespoon minced chives, a quarter teaspoon kosher salt, and a teaspoon or two of fresh-squeezed lemon juice. Mix all the ingredients and let them sit for ten minutes before using.
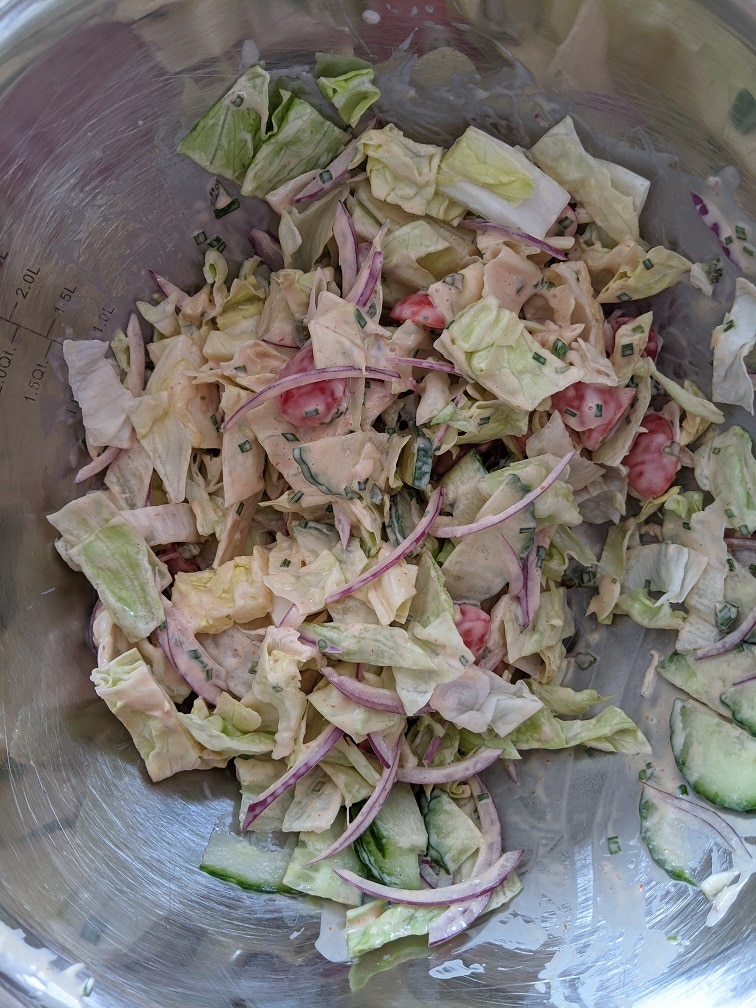
Making The Salad
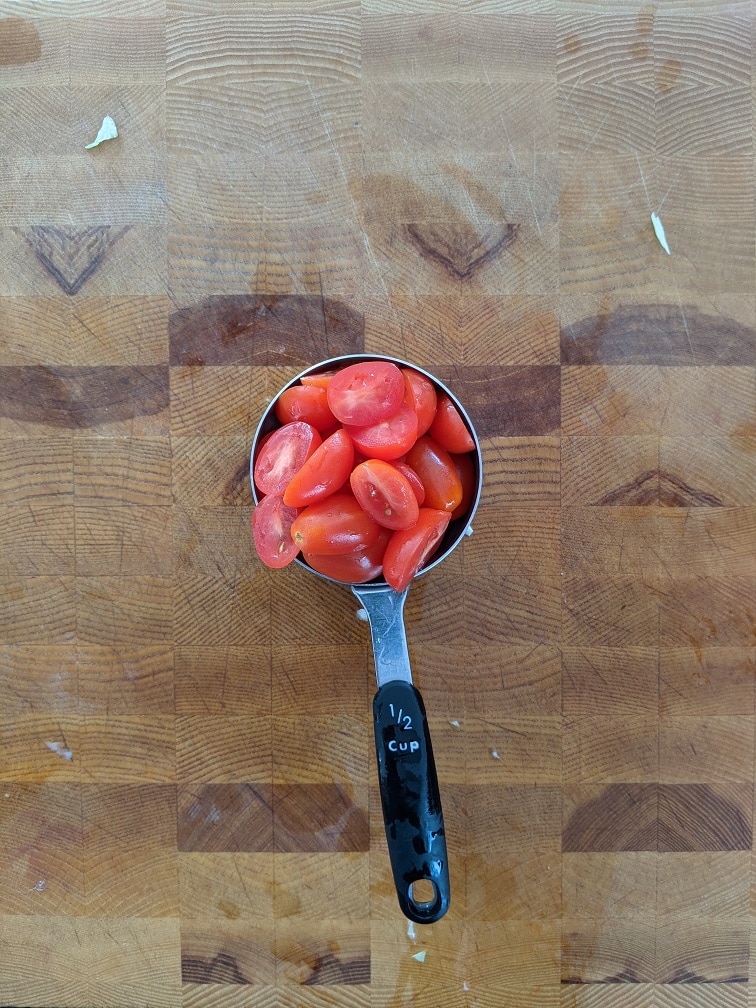
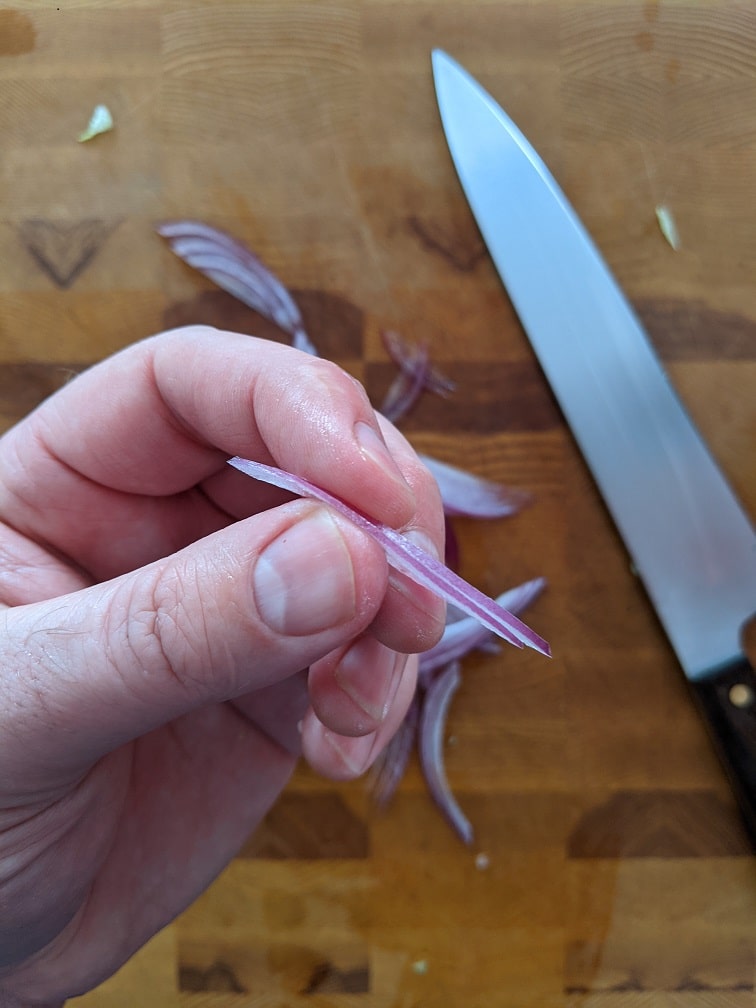
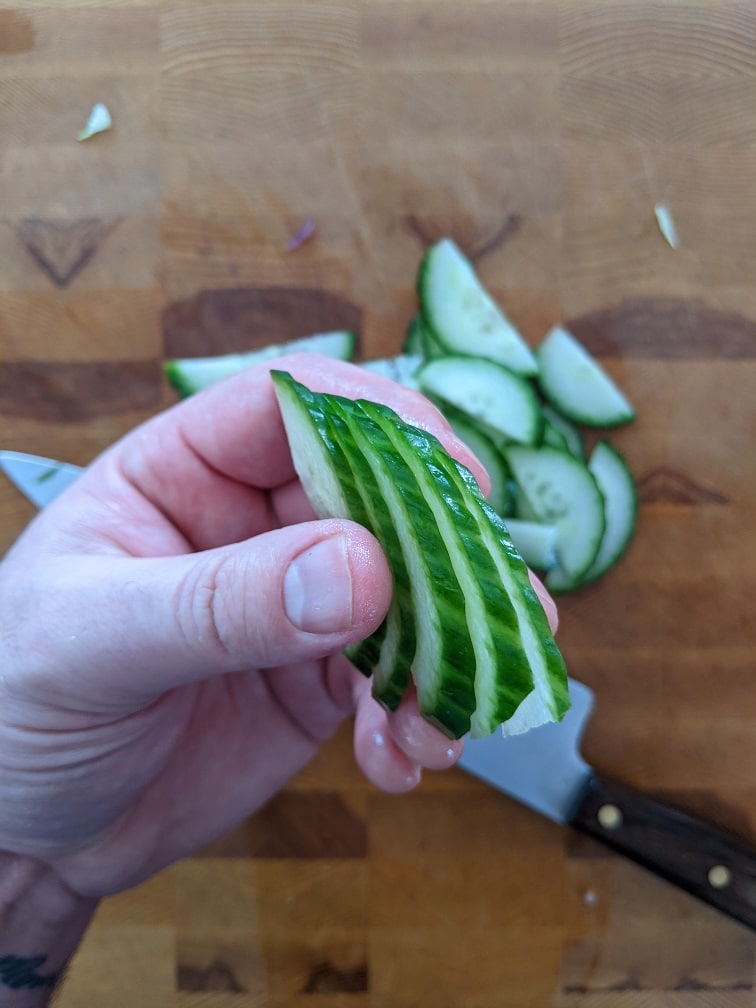
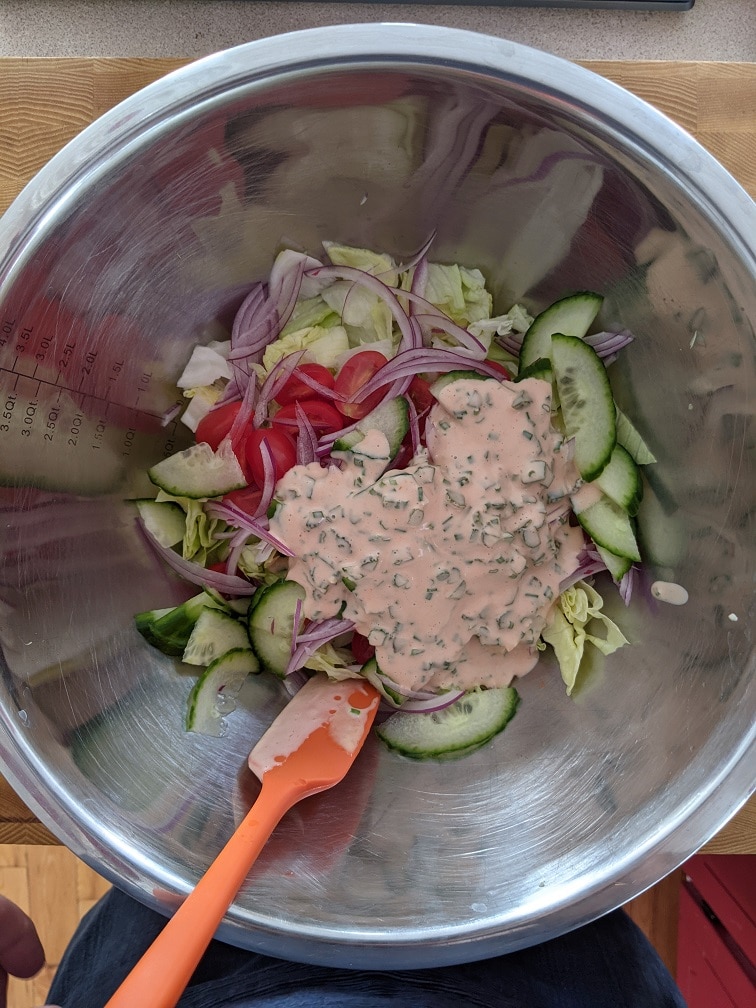
As I said, the salad itself is basic. It is a combination of iceberg lettuce, about three cups once it’s chopped—half a cup of quartered grape tomatoes. A quarter of an English cucumber cut in half lengthwise, then sliced thin. And about a quarter cup of thinly sliced red onion. Put all the ingredients in a bowl and toss with the Cajun remoulade.
Garden Salad with Cajun Remoulade
A simple salad tossed with a delicious dressing. Serve it as a side or as part of the Cajun Chicken Salad Bowl.
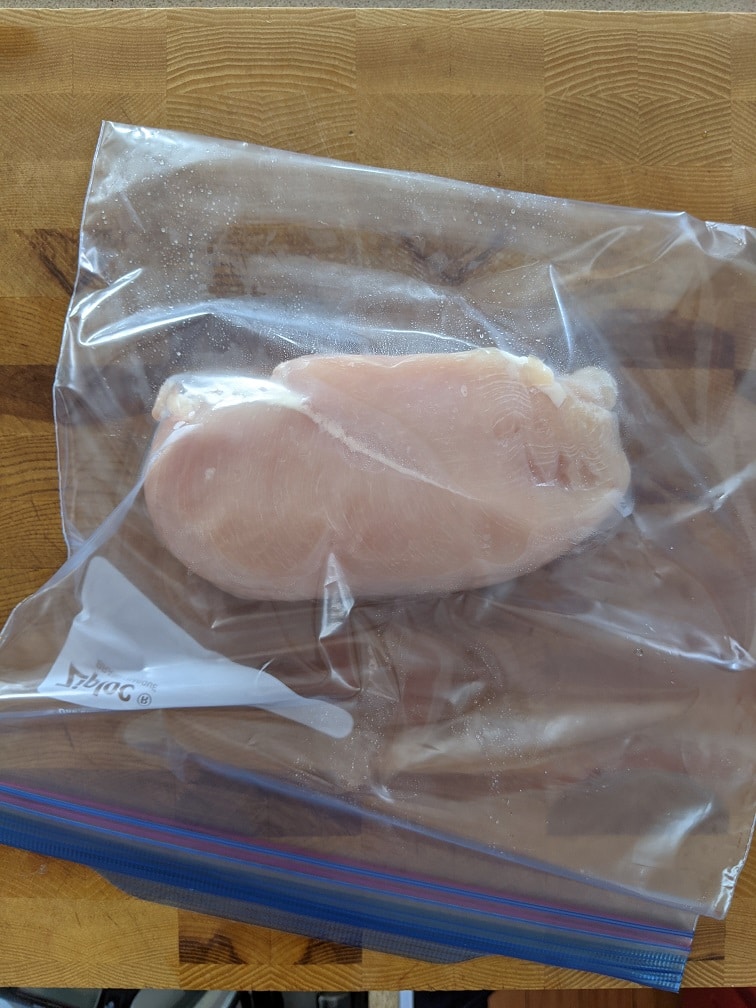
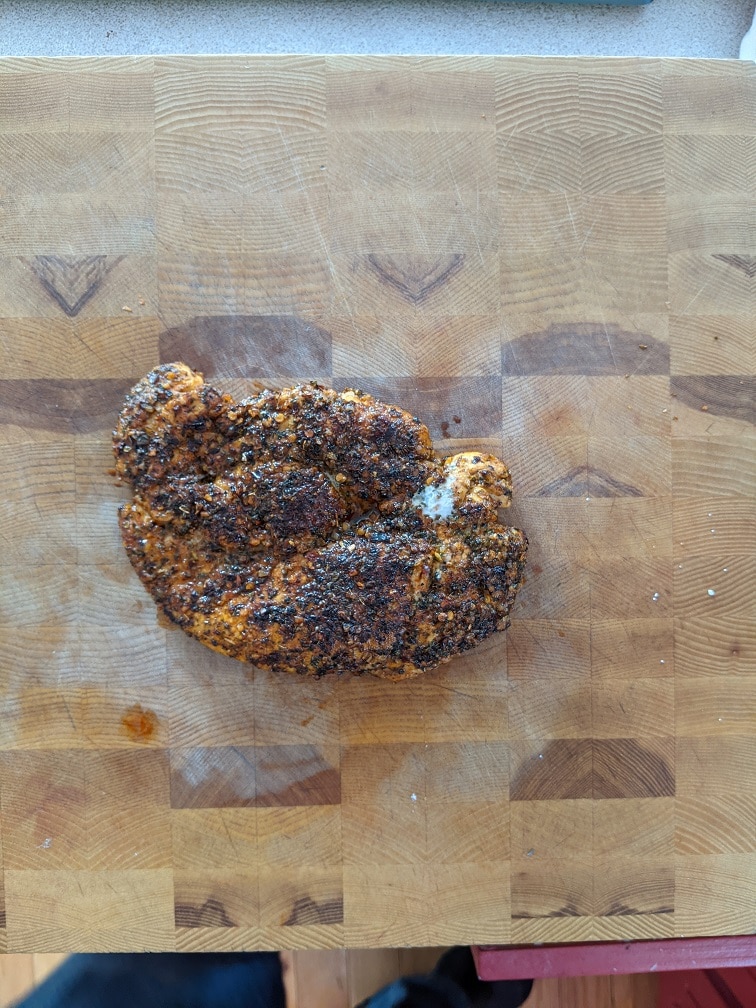
Finally, the star of the show, the Cajun Chicken. I cooked one very large chicken breast for two people. If you buy smaller chicken breasts, you will want one for each person. The rice and the salad should make four portions, so you will want enough chicken for four portions too.
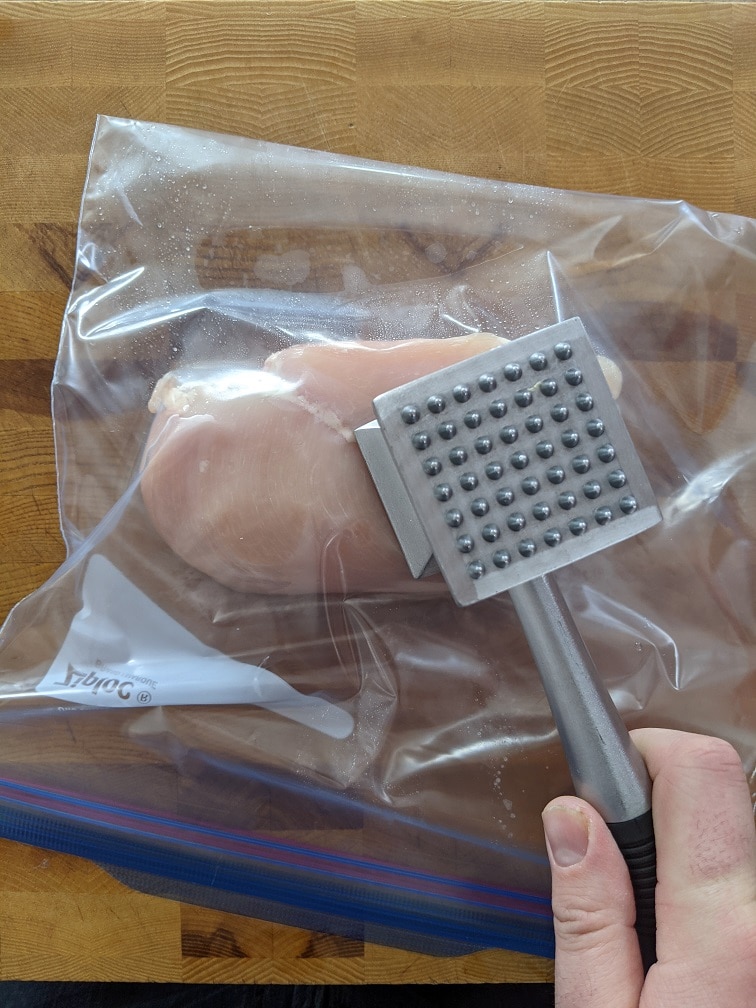
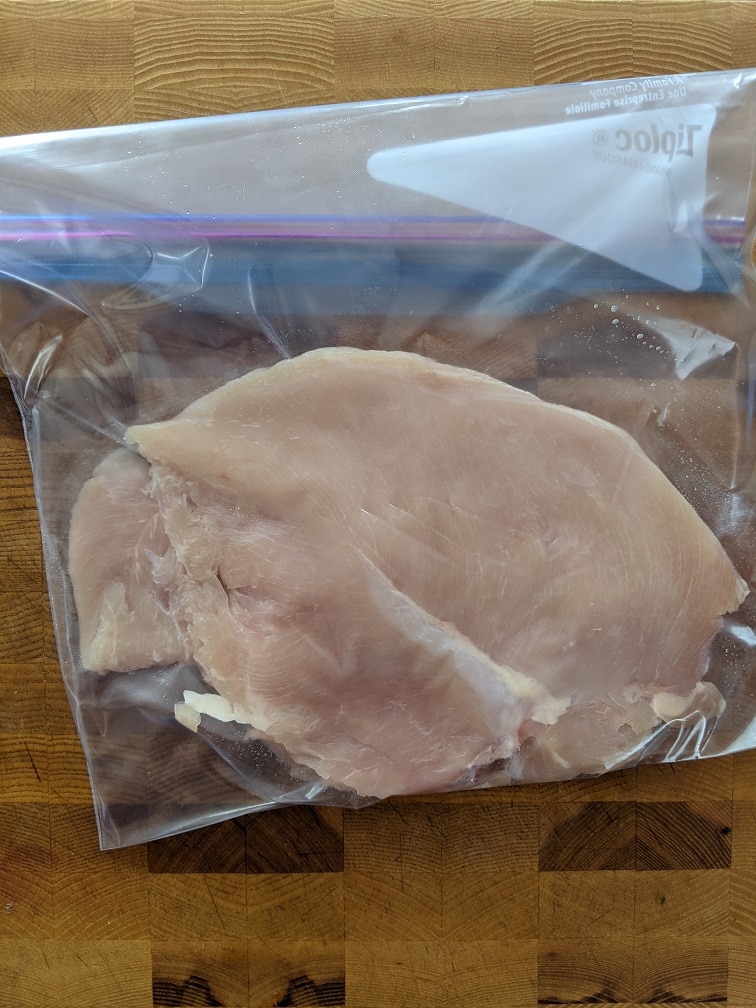
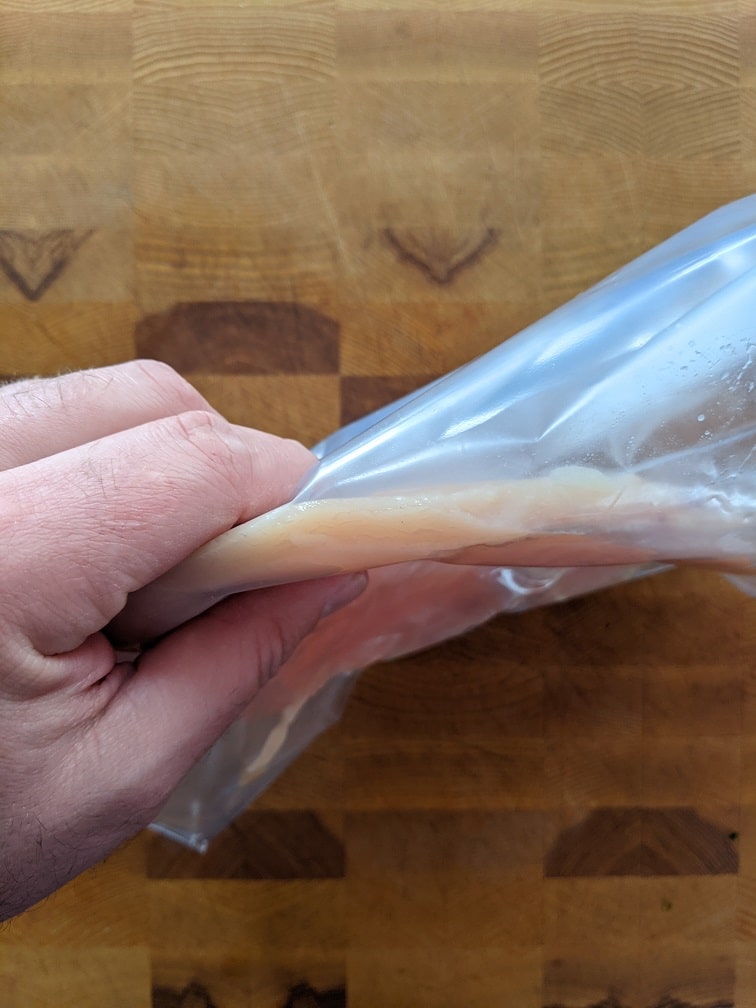
The first step is to flatten your chicken breast. The easiest way to do that is to put the breast in a zip-top bag, but don’t seal it all the way. If there is any air stuck in there, the bag may pop when you hit it, so leave one corner unseeled. Pound the chicken with a meat mallet or a heavy pot until it is about a centimetre thick.
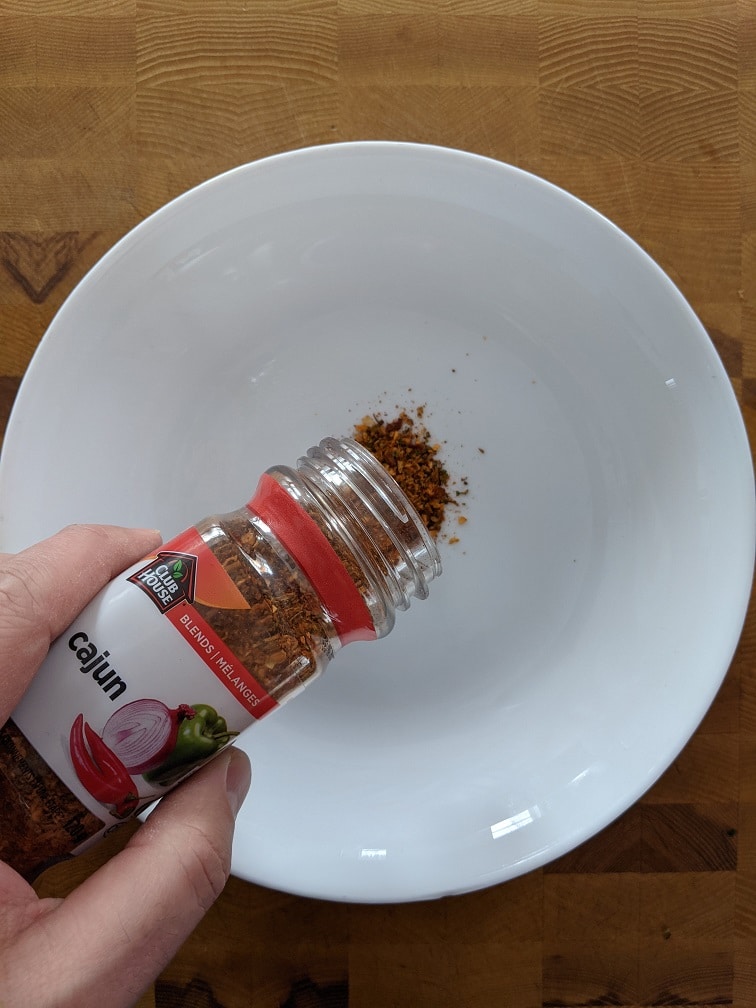
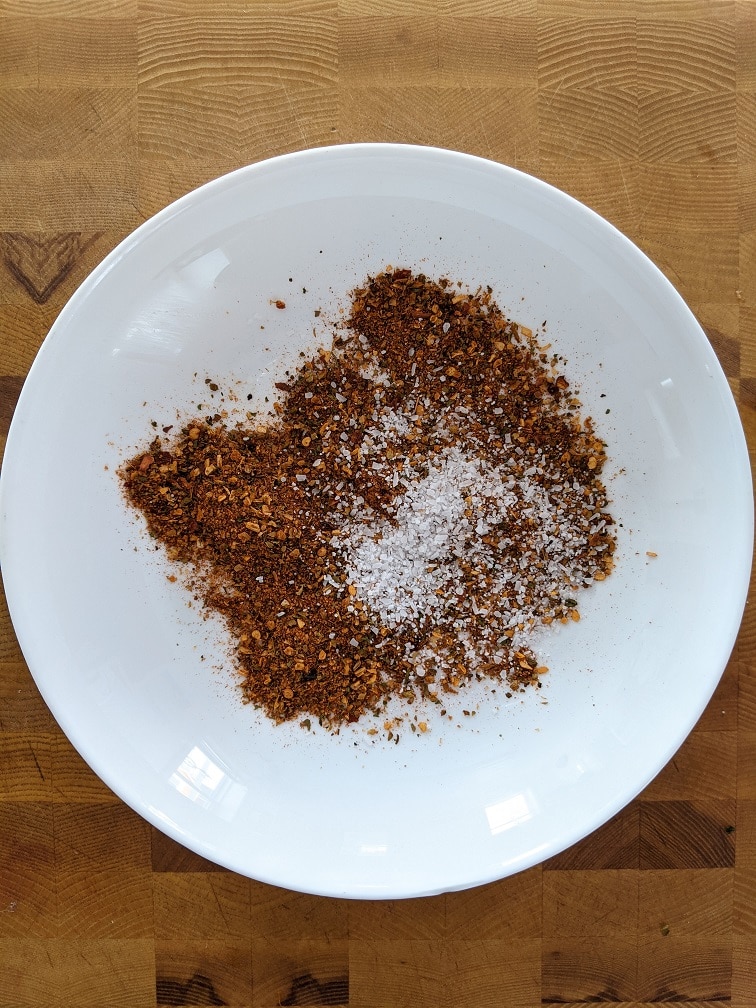
Make it Cajun
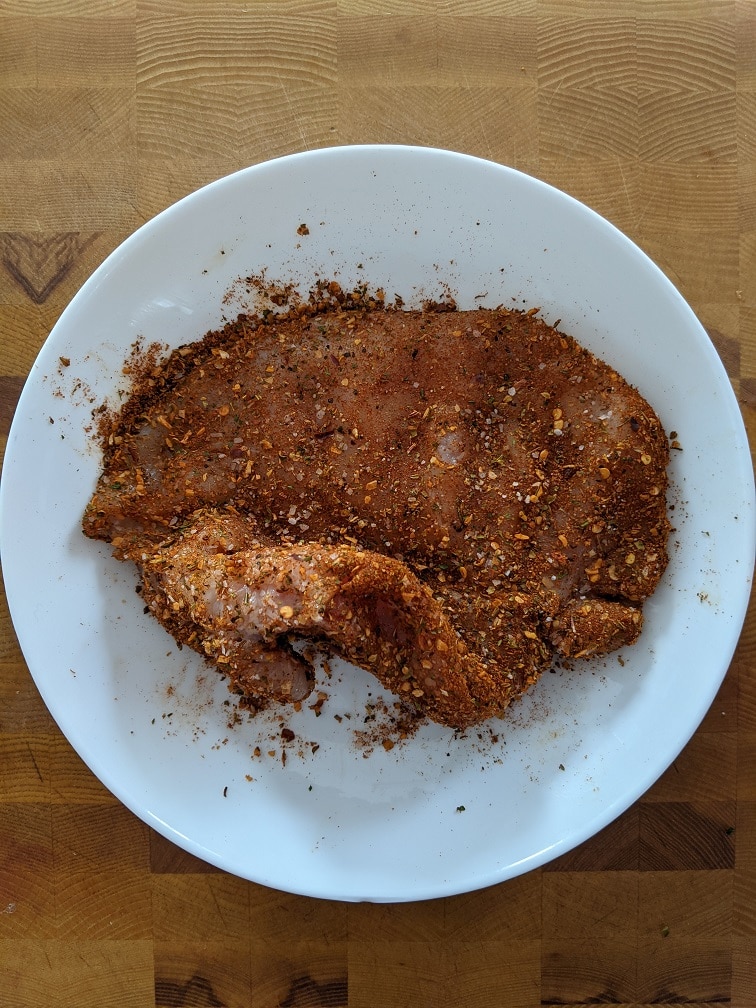
I used a store-bought Cajun seasoning becasue it is quicker than making a homemade one, and it’s delicious. I didn’t actually measure the amount of Cajun seasoning I used, but I would say about three tablespoons. I also added about a half teaspoon of kosher salt to it. Then, I rolled the chicken around in it. In retrospect, it would have made more sense to mix the salt, and Cajun seasoning then add it to the bag I used to pound the chicken and give it a good shake. All well. Next time.
Cooking the Cajun Chicken
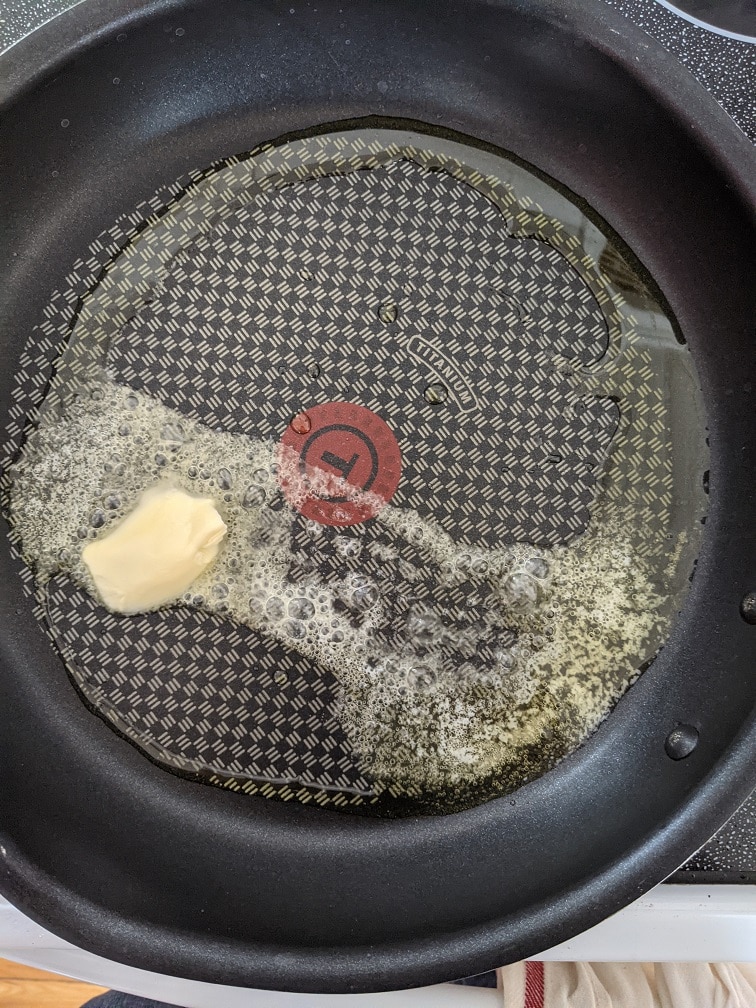
The Cajun seasoning is really only half the equation of getting that kind of authentic Cajun taste. The other part of the equation is butter. The butter is going to brown and help to flavour the chicken. That’s very important for the overall flavour of the dish.
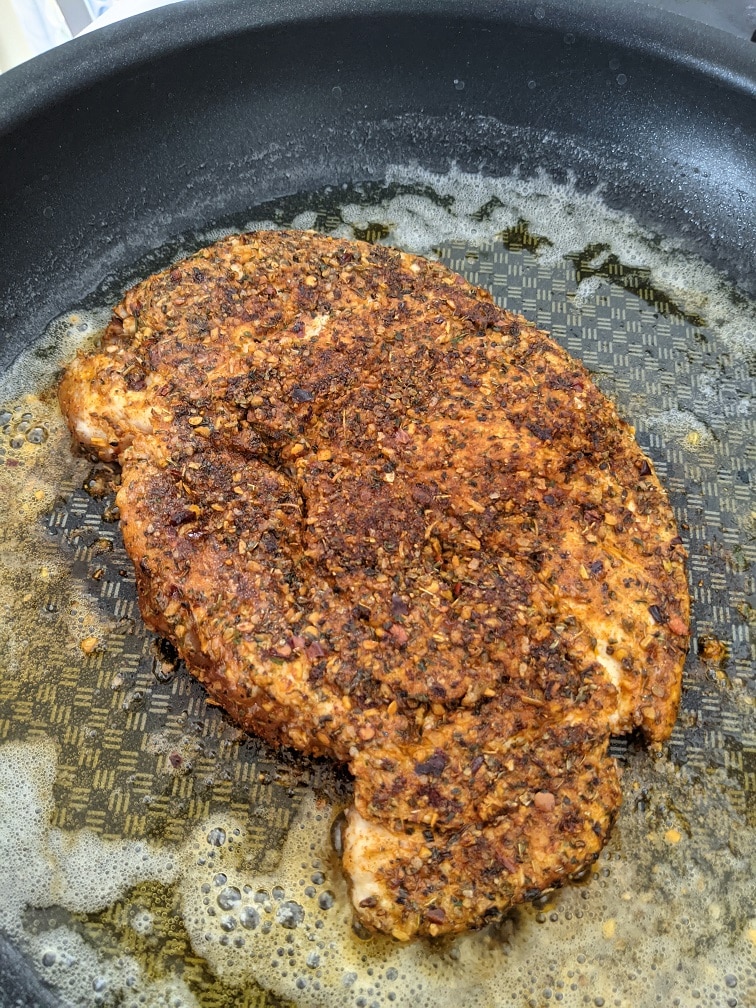
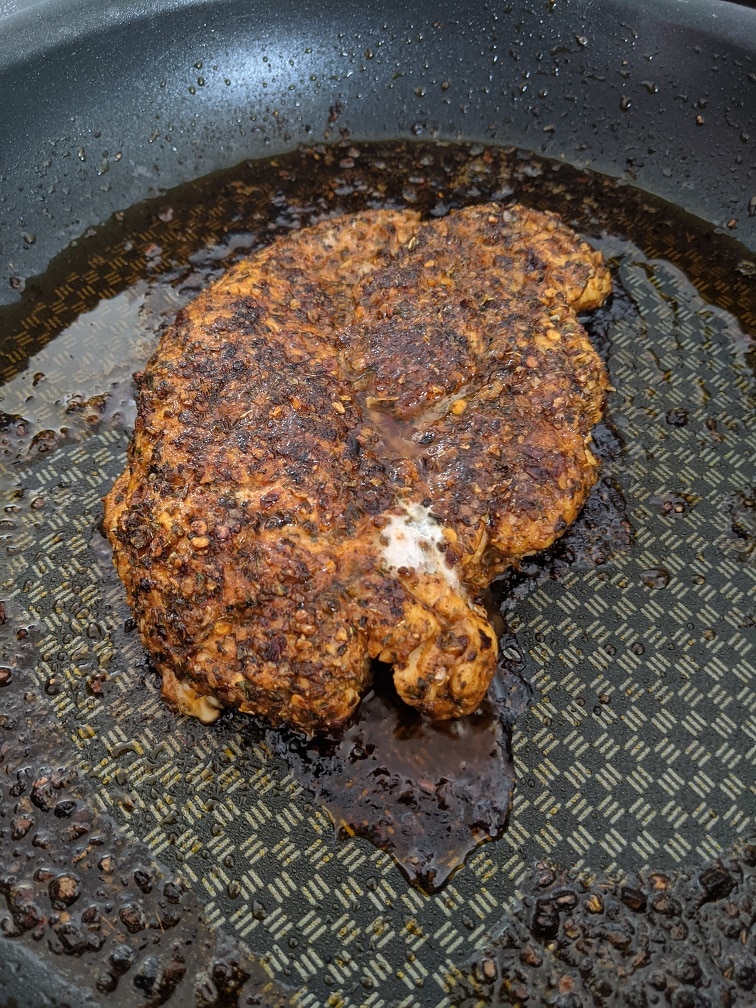
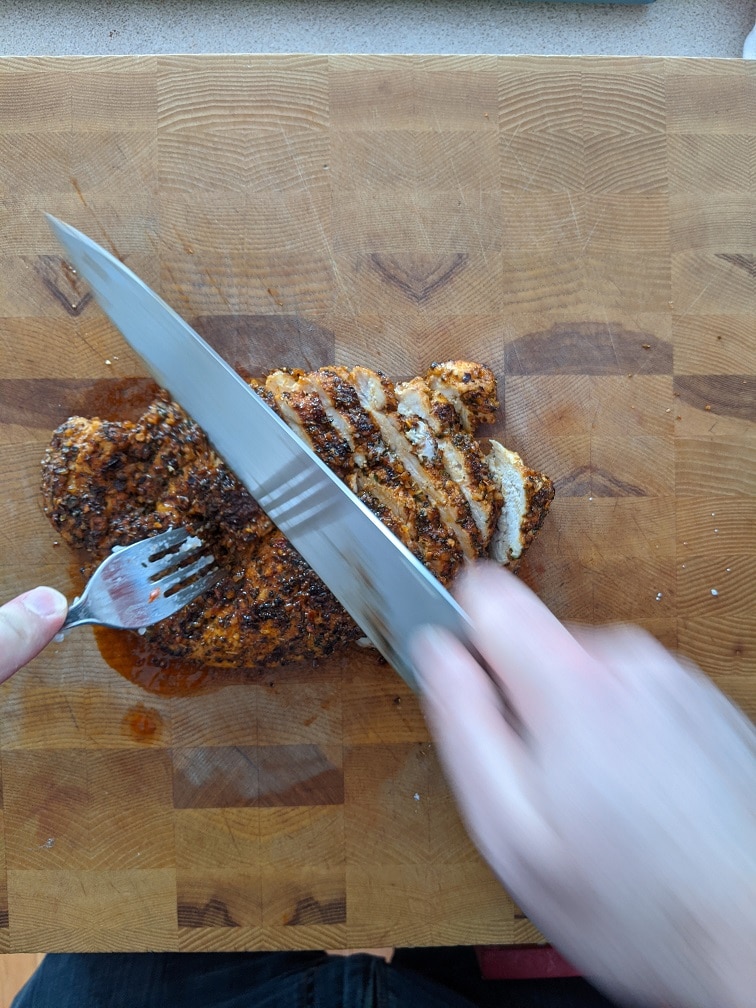
To cook the Cajun chicken, heat a large oven-safe skillet over medium-high heat. Add in two tablespoons of butter and one of olive oil. Once the butter melts and starts to foam, add in the chicken and cook for about three minutes before flipping and cooking for another minute. Finish the chicken in a 375°f oven for about twelve minutes or until it is cooked. Take it out of the pan and let it rest for five minutes before cutting it.
Cajun Chicken
A delicious cajun chicken recipe and the key ingredient to the Cajun Chicken Rice Bowl.
Put the chicken breasts in a zip-top bag and seal all but one corner.
Pound the chicken using a meat mallet or heavy pot until the breasts are 1 cm thick.
Mix the Cajun seasoning and salt, then add to the bag with the chicken. Seal the bag and shake to coat the chicken in the seasoning.
Heat a large oven-safe skillet over medium-high heat. Add in the butter and olive oil. Once the butter melts and starts to foam, add in the chicken and cook for 3 minutes. Flip the chicken, cook for 1 more minute, then put the pan in the oven for 10 to 12 minutes or until the chicken is cooked.
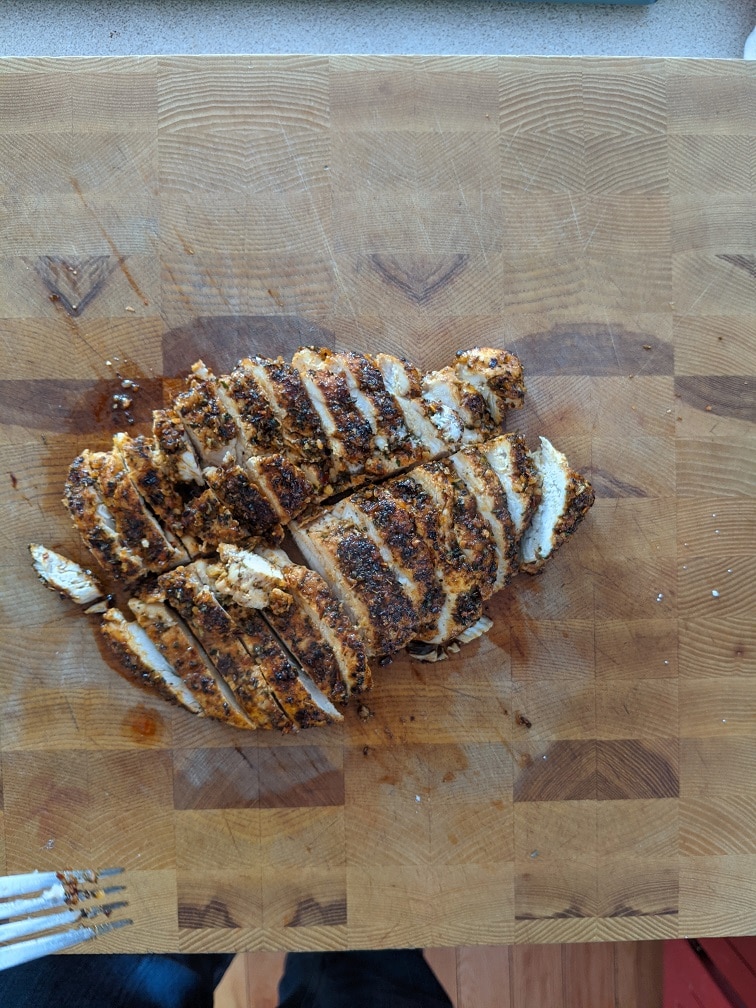
Take the chicken out of the pan and let it rest for 5 minutes before slicing and serving.
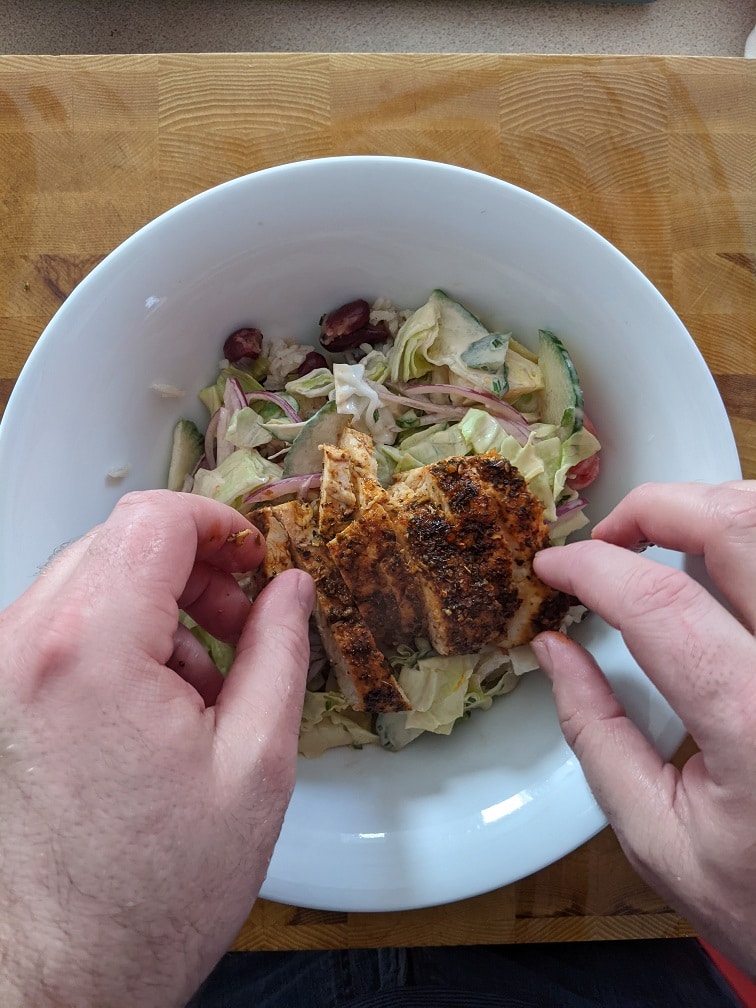
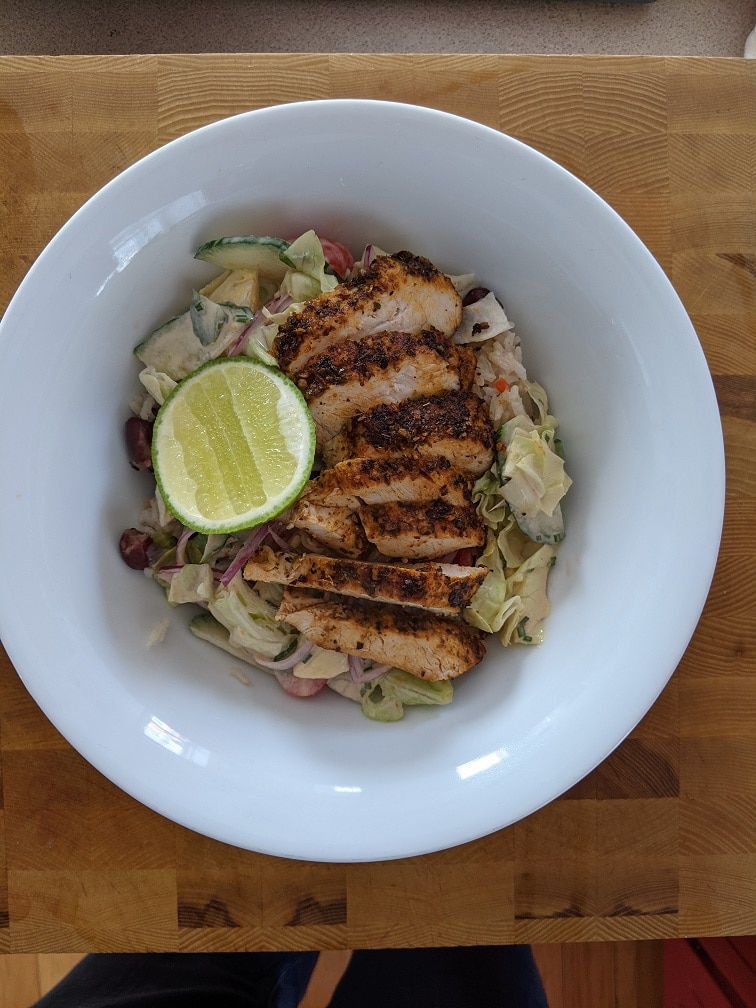
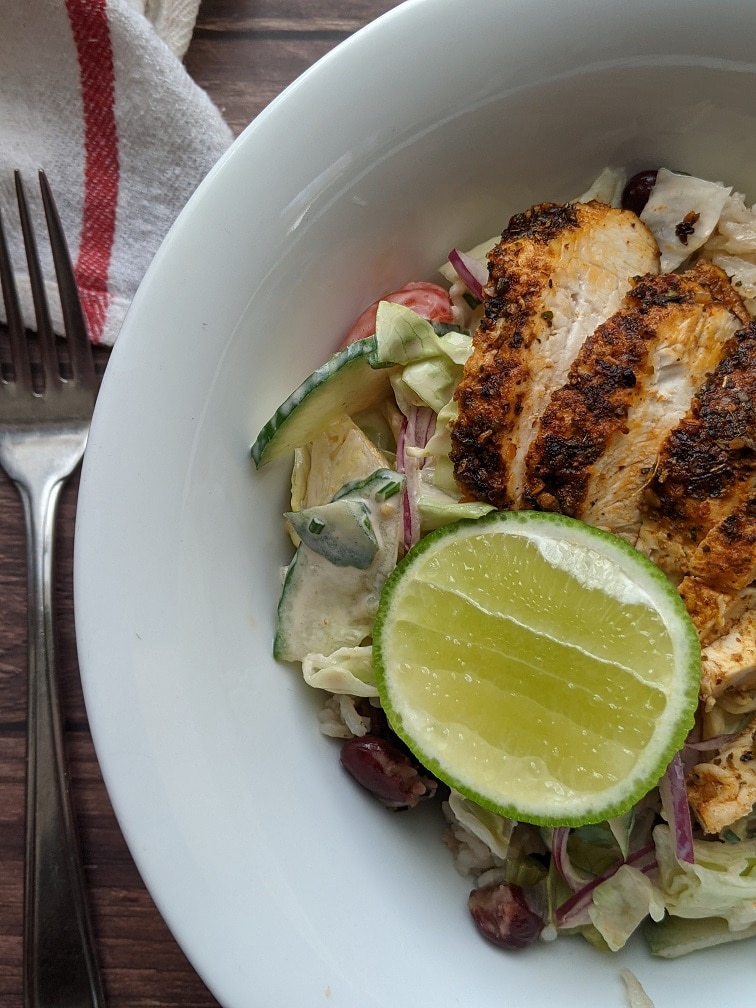
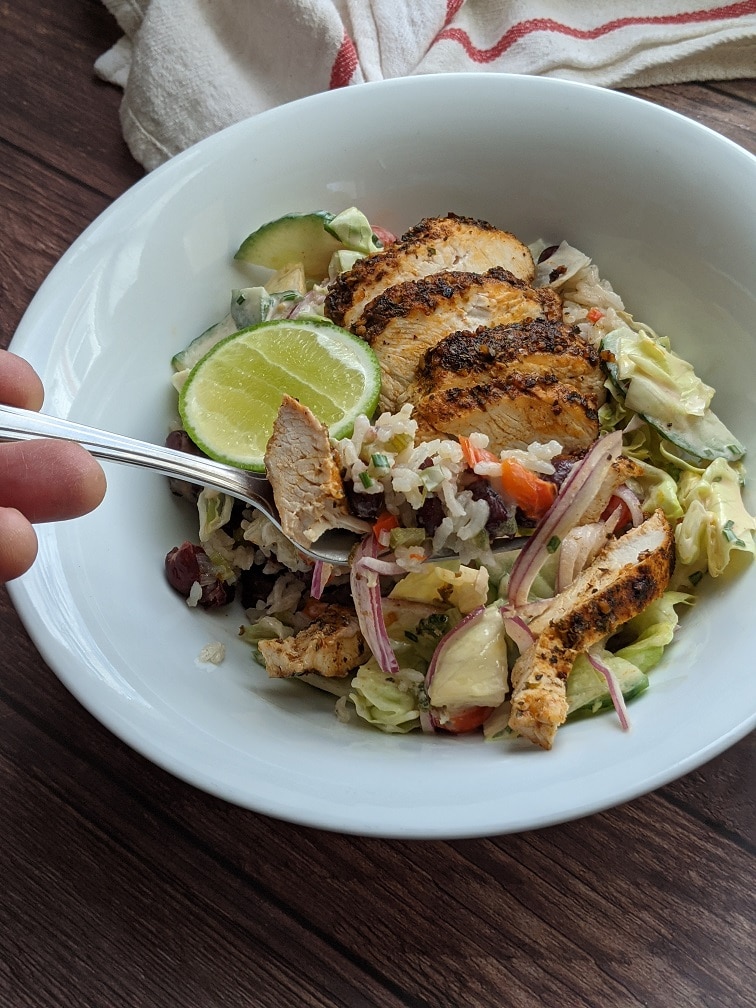
Okay, the three components are ready. We have the rice and beans, the salad with Cajun remoulade, and of course, the Cajun chicken. Now, it is time to put it all together. Start by putting the rice and beans in four bowls, top with the salad. Thinly slice the chicken and put that on top of the salad. Serve with a lime wedge and enjoy.
The Wrap Up
In all honesty, I didn’t intend to make a Cajun Chicken Salad bowl. Originally, this post was going to be a Chicken Shawarma bowl. But, just before I started cooking, I realized that I made a Chicken Shawarma bowl on the blog already, way back in May of 2019. I don’t like repeating myself, so I had to come up with something on the fly. I came up with the recipe you just read, and I have to tell you that I couldn’t be happier with it. The Cajun Chicken Salad bowl is loaded with flavour and is something I will be making again in the very near future. I hope that you enjoy it as much as I did.
I can finally announce that I have written a cookbook. It’s called the 5-Ingredient Cookbook for men (of course, it is for everyone). It officially goes on sale on March 16th, but you can preorder it now from Amazon in Canada here, and Amazon in the US here.
Thank you for reading this post. Please share it on Facebook, Pinterest, or Twitter to help Chef’s Notes grow. Subscribe to Chef’s Notes below, and you will never miss a post again.
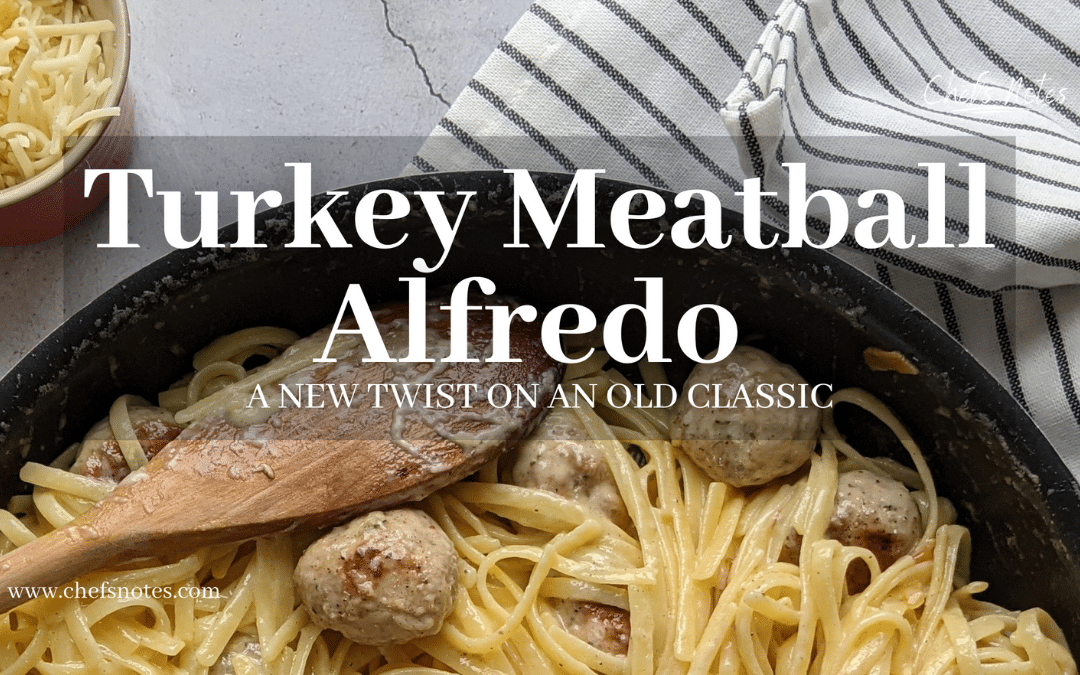
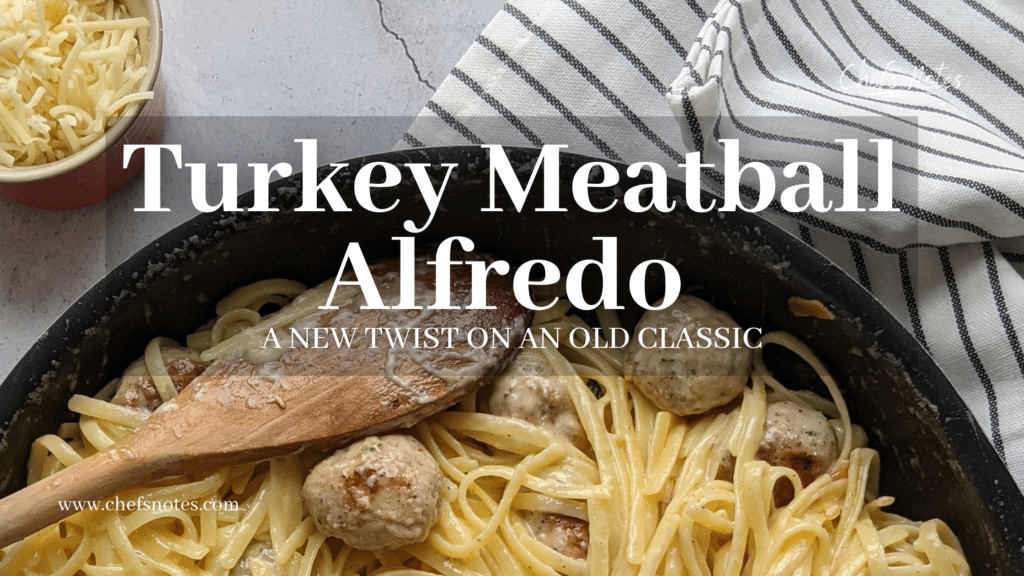
I love fettuccine alfredo, and I love turkey, so I thought why not put them together? To keep it simple, which is my M.O., I could have sliced up a turkey breast and added that into the pasta. Easy peasy. I’m sure that would have been delicious. But, I wanted to take it one step further. So, I made delicious turkey meatballs, roasted them and tossed them with pasta and alfredo sauce. Amazing! In all honesty, I’ve been thinking about this dish for weeks now, so I am very excited to have finally made it and to share it with you. This recipe is surprisingly light because the sauce doesn’t have nearly as much cream as you would expect. The sauce and the turkey meatballs are a perfect match and exactly what you need for dinner. Okay, enough chit chat. Let’s get to it.
This post is written as a paid partnership with Turkey Farmers Of Canada and thinkturkey.ca
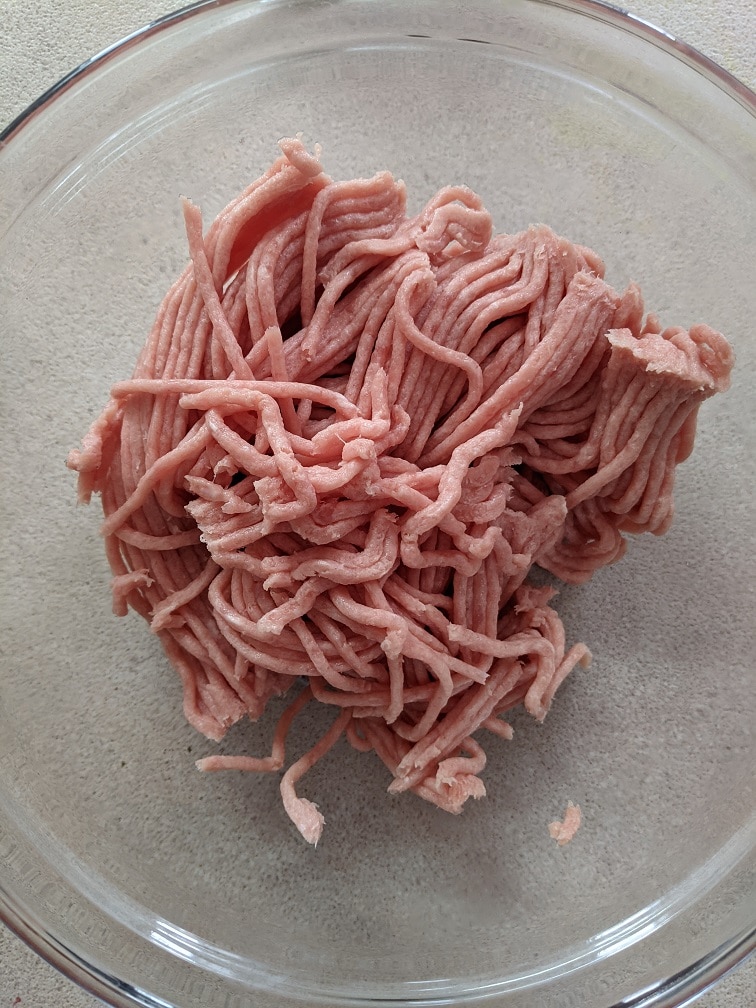
Turkey Meatballs
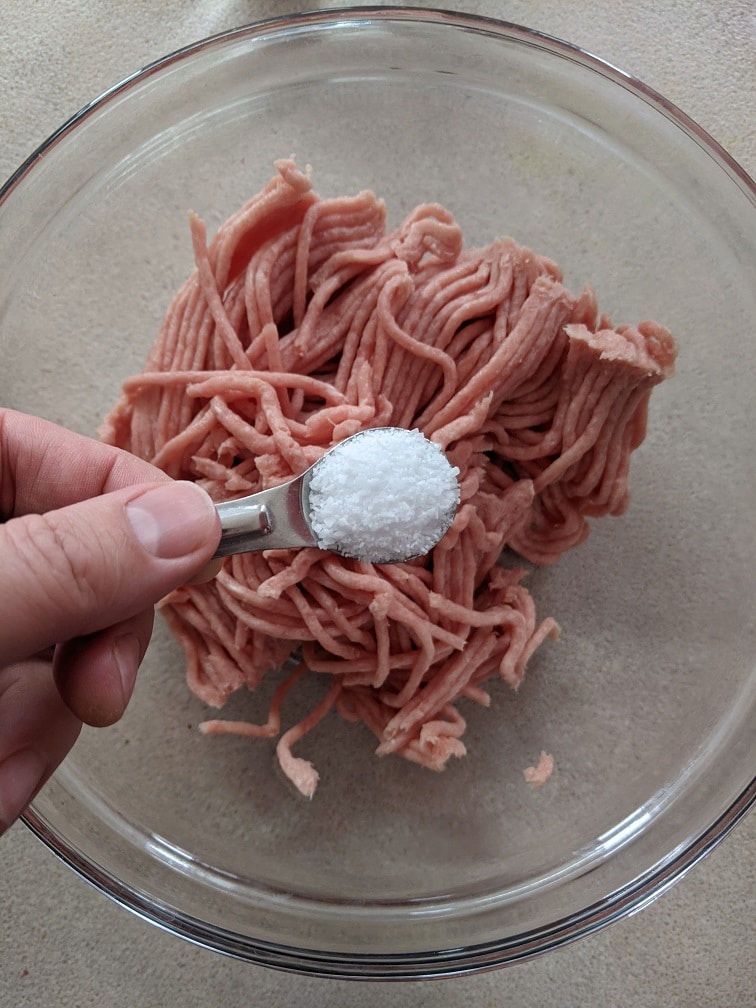
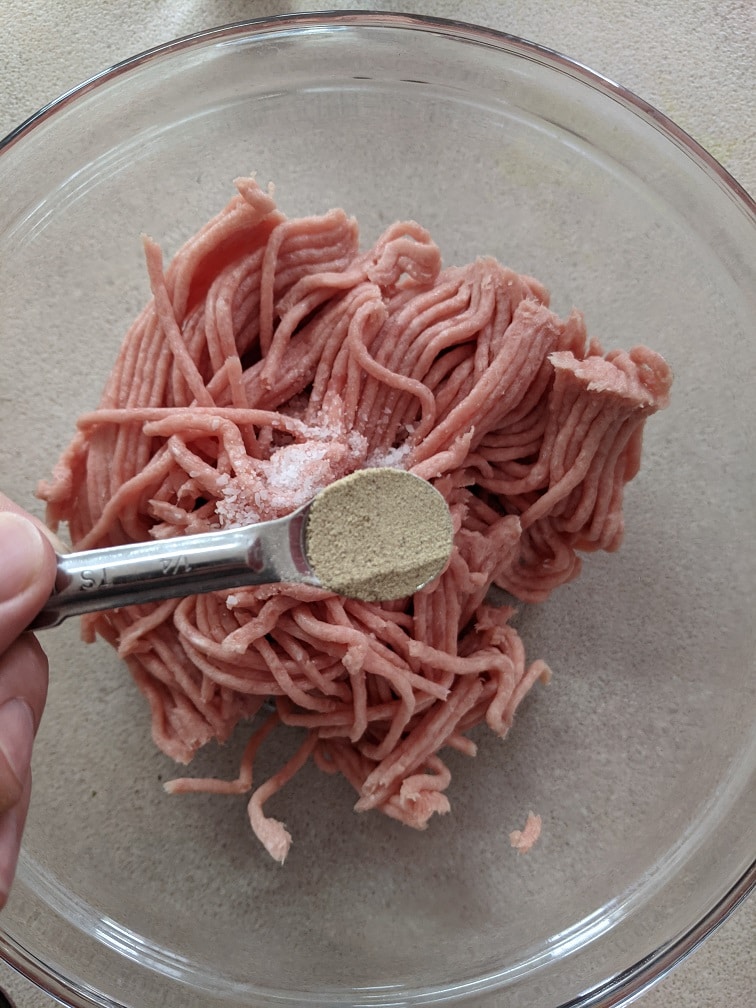
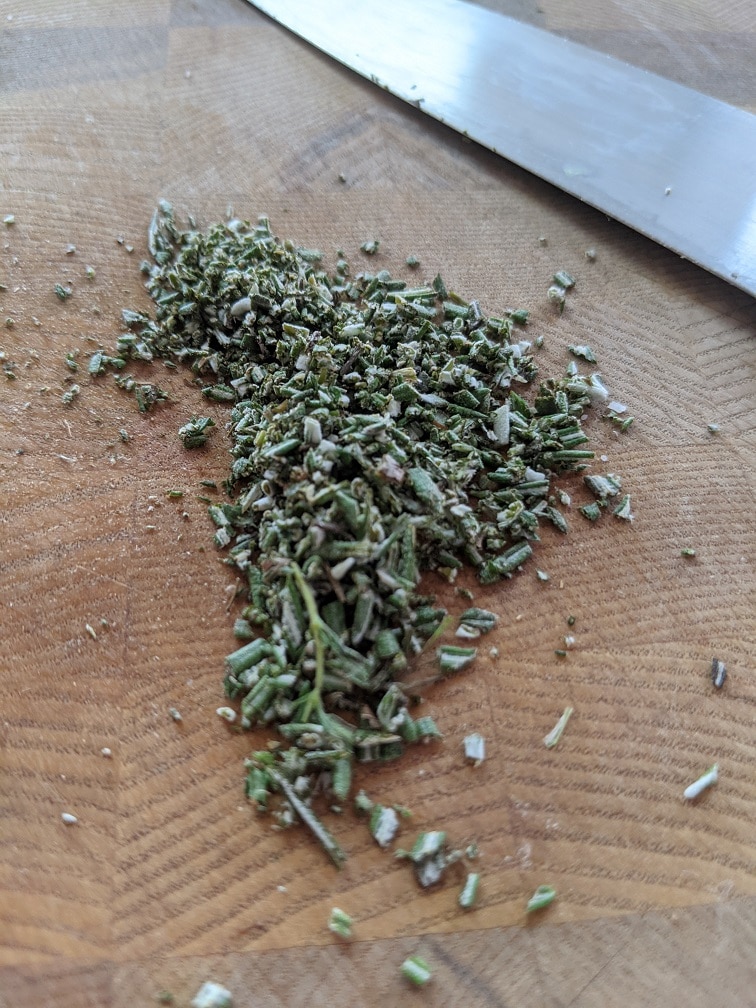
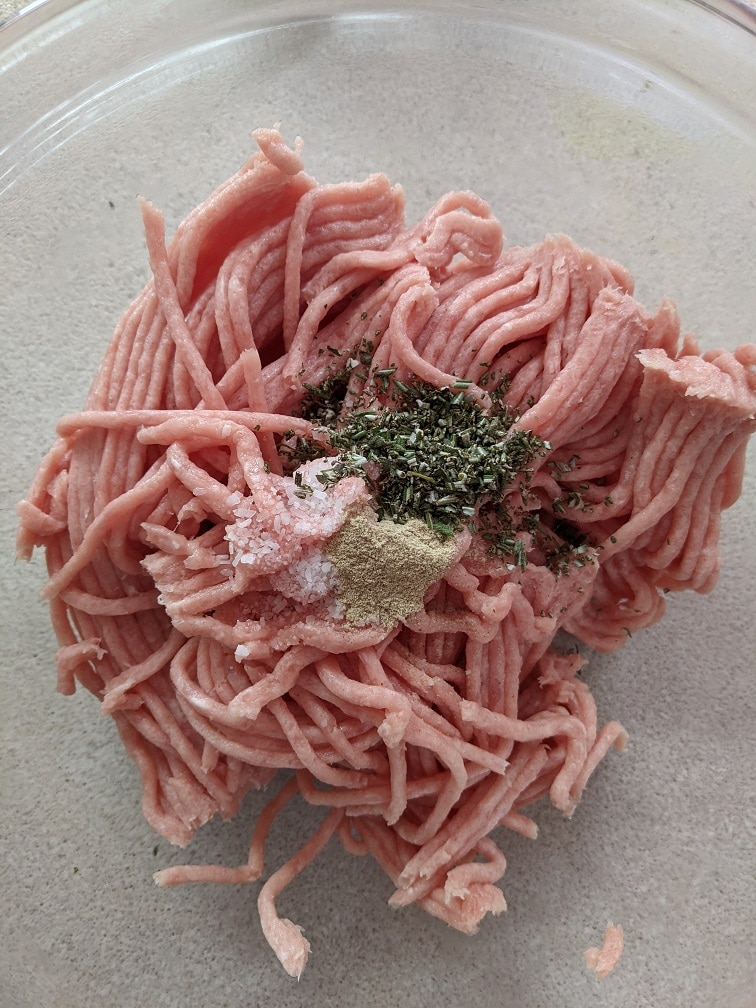
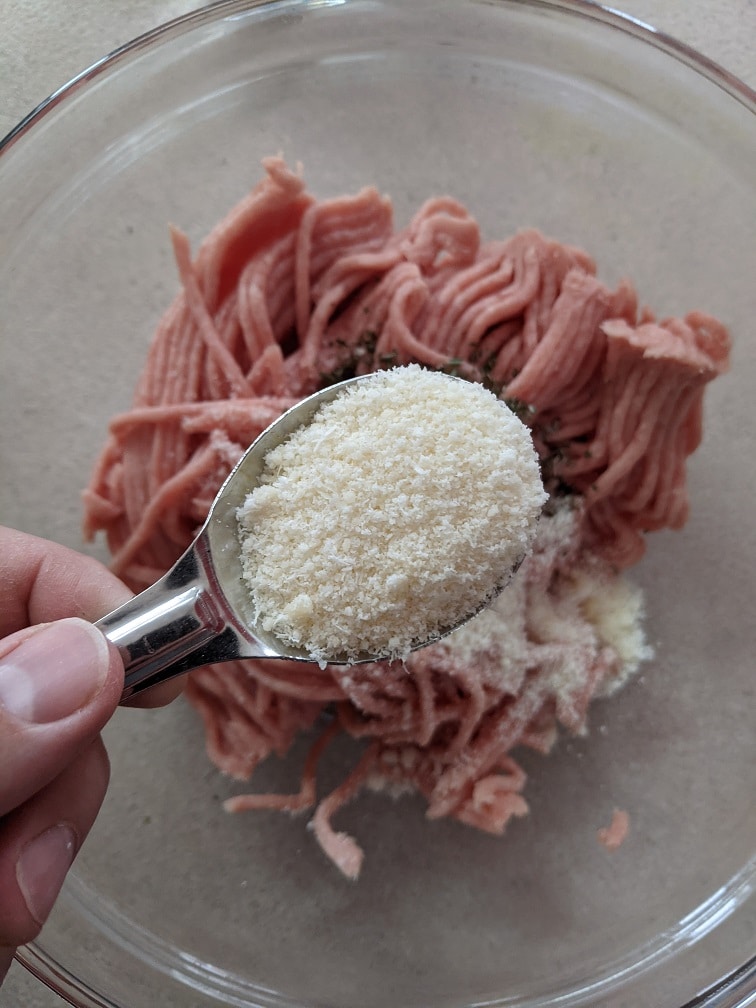
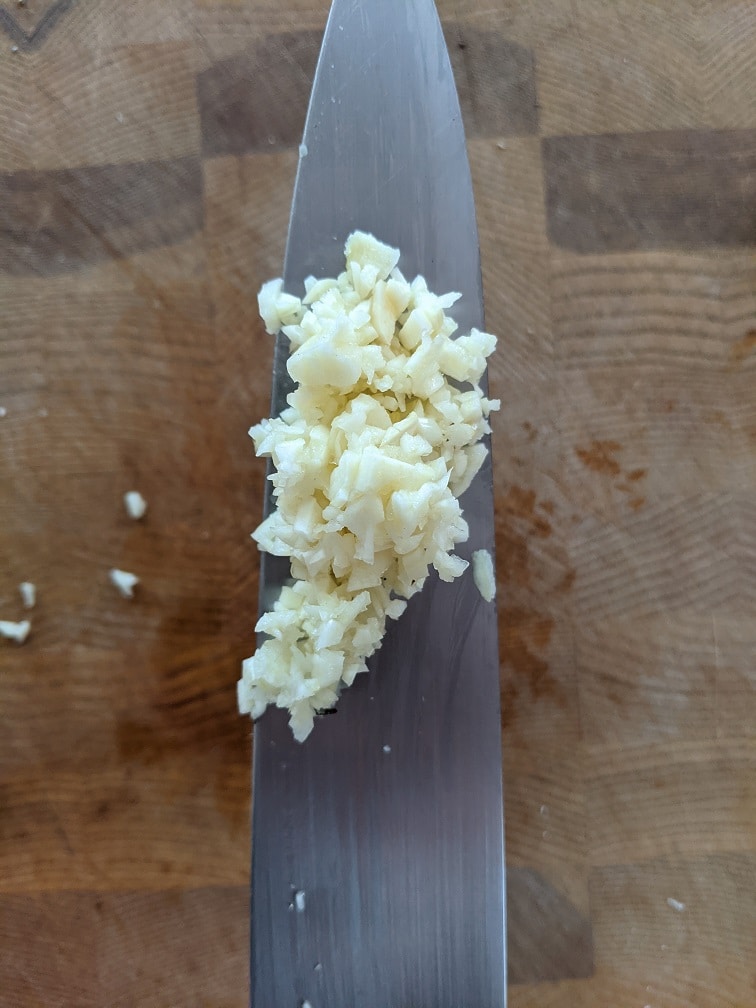
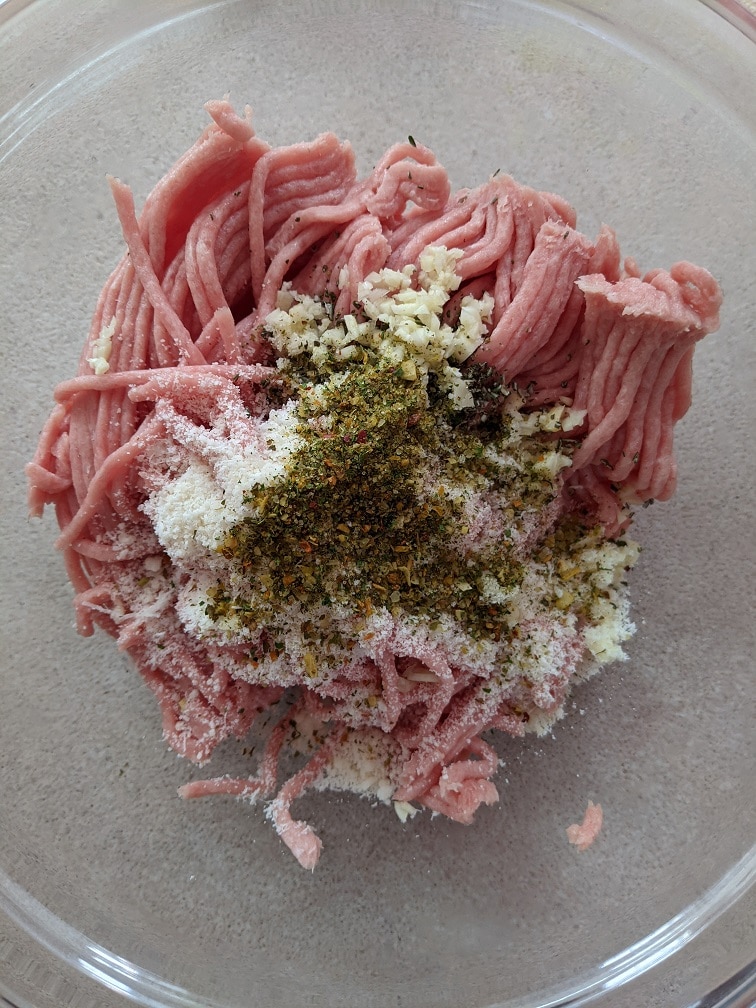
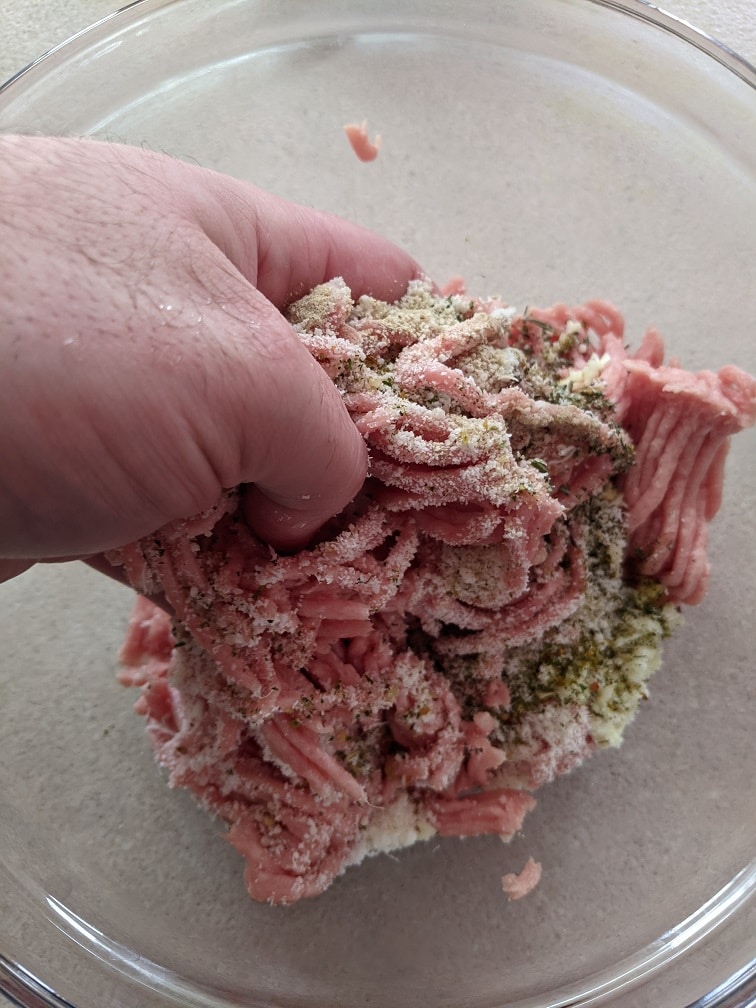
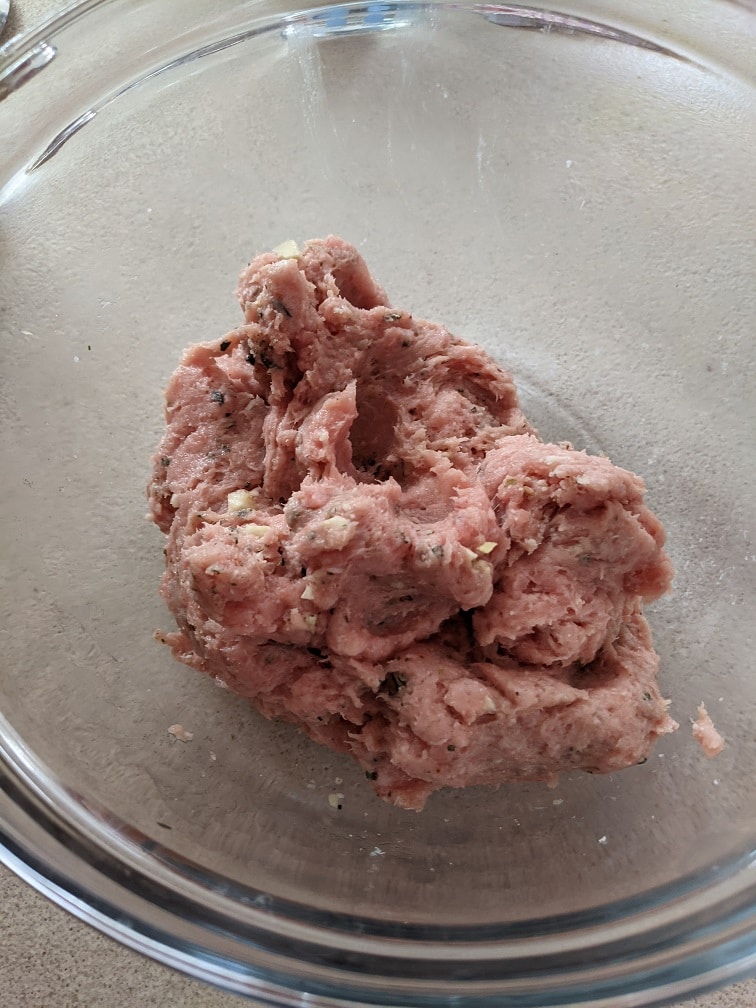
The first step to this dish is to make the turkey meatballs. To do that, combine one pound of ground turkey with one teaspoon of kosher salt (about half a teaspoon if you are using table salt). Add a quarter teaspoon of white pepper, one teaspoon of each fresh chopped rosemary and Italian seasoning, two tablespoons of grated parmesan cheese, and one tablespoon of minced garlic. Mix well.
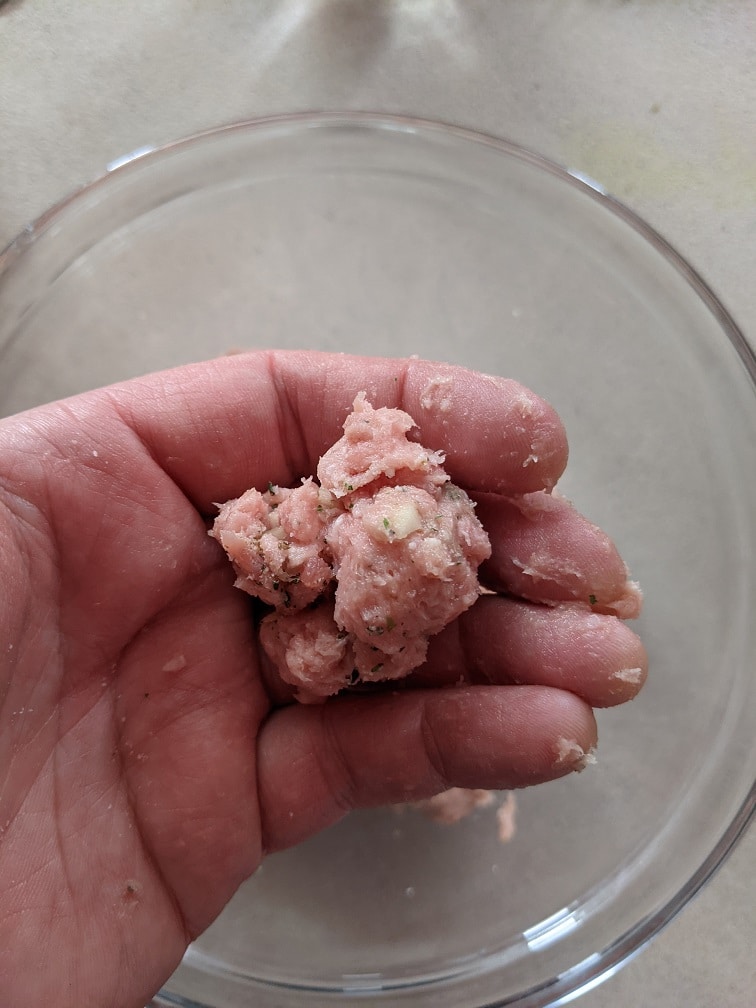
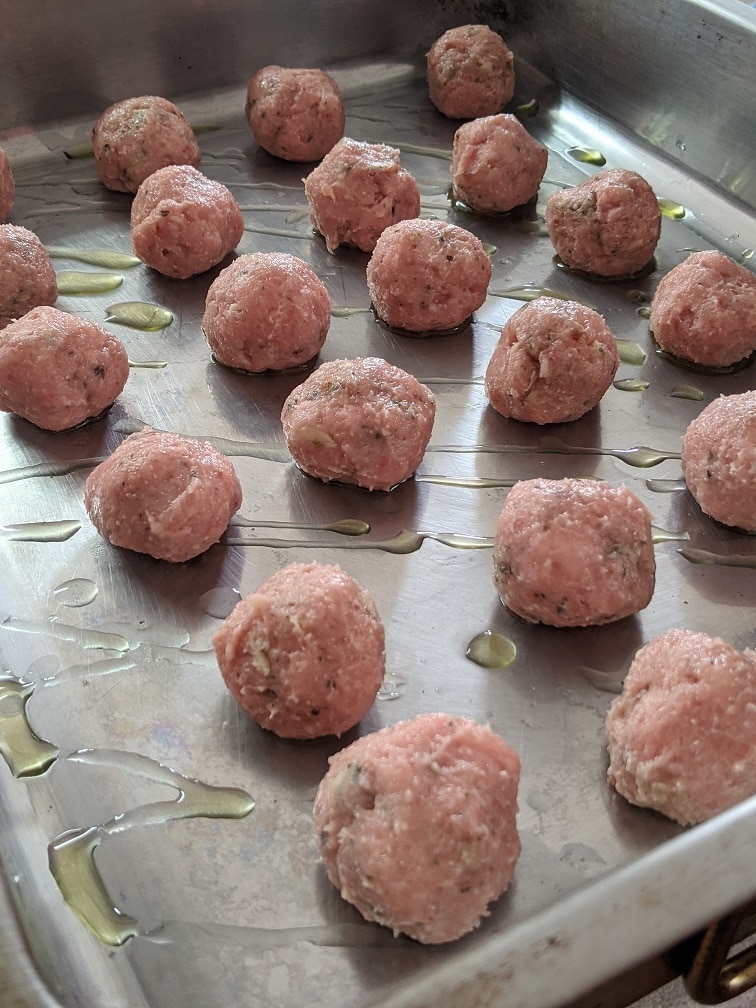
Forming the meatballs
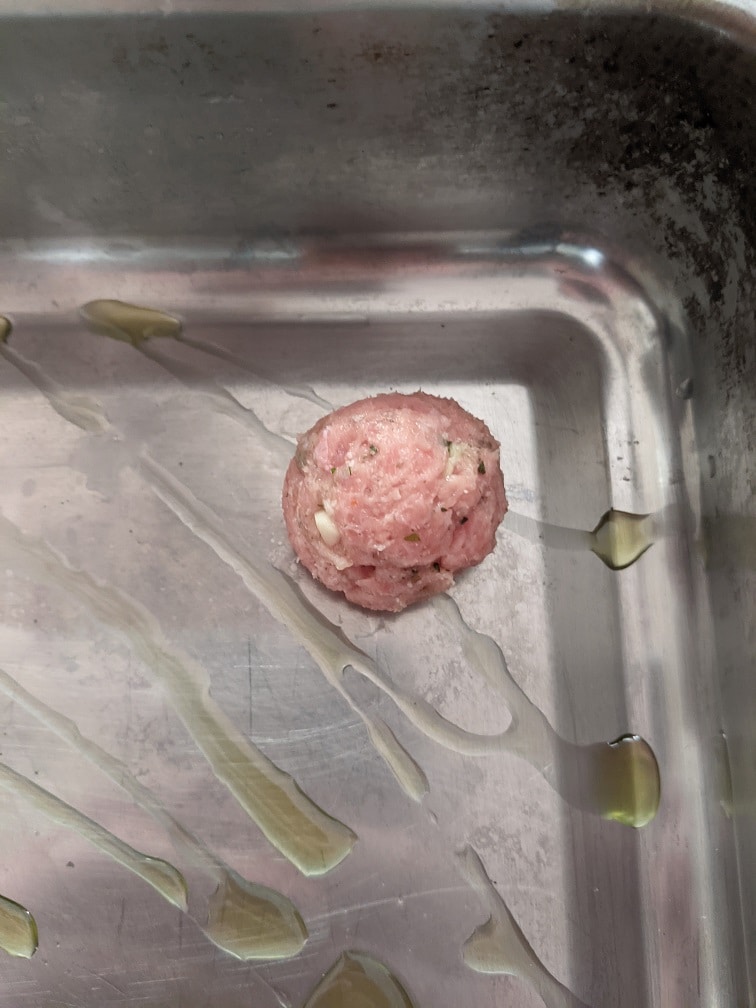
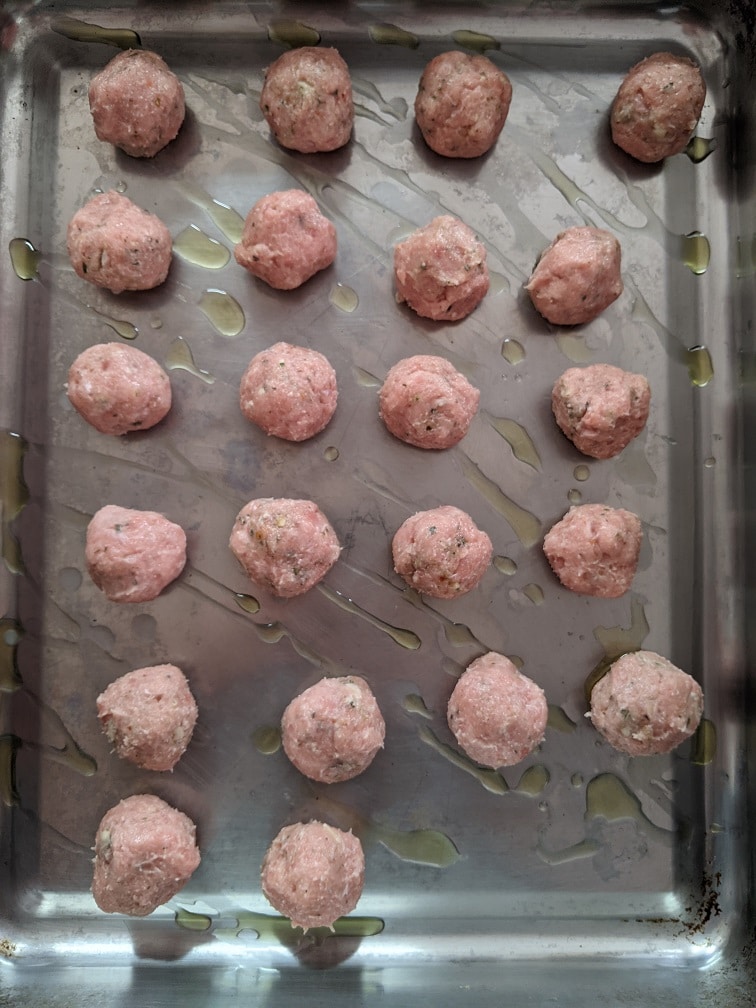
First, to form the turkey meatballs, wet your hands with cold water, then pick up about a tablespoon of the turkey mixture and roll it into a ball. Put the turkey meatball on a lightly oiled roasting pan and continue until all the turkey has been used up. In total, you should get around twenty to twenty-four turkey meatballs. Wet your hands after every fourth or fifth ball to prevent the turkey from sticking.
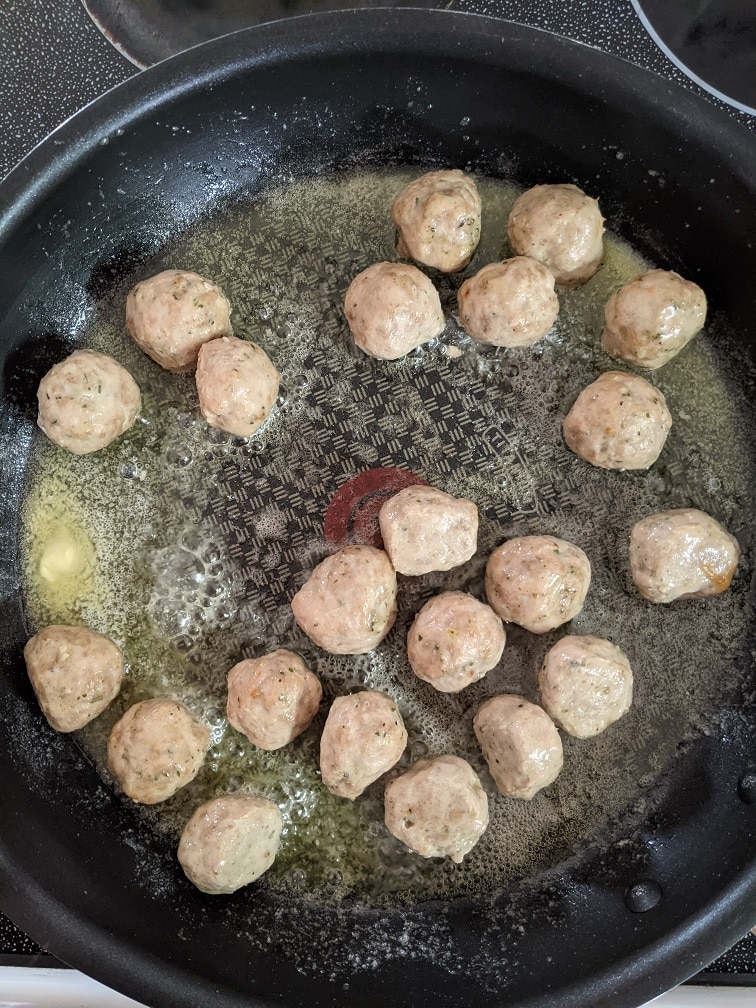
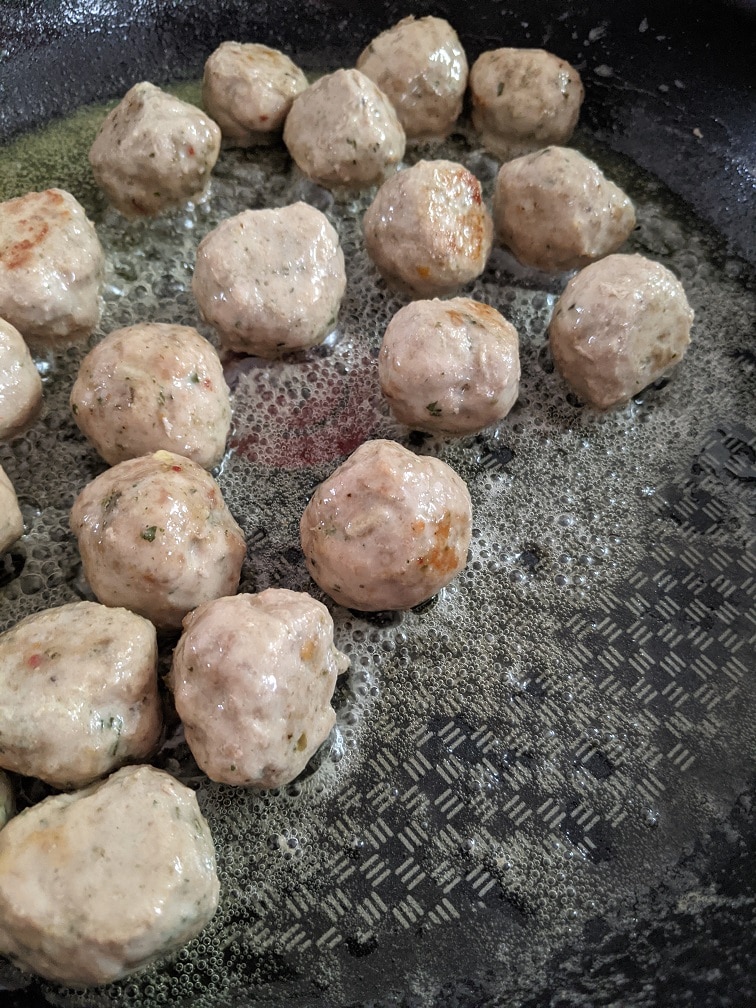
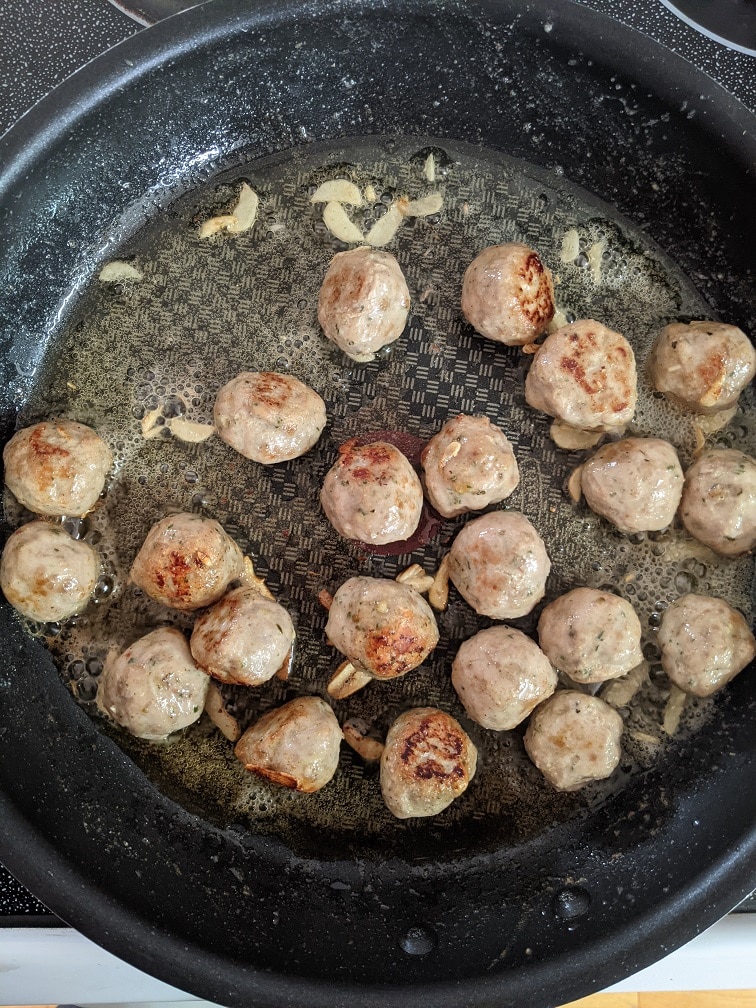
Cooking the turkey meatballs
To cook the meatballs, roast them for fifteen minutes at 400°f. Once the turkey meatballs are roasted, heat a large, non-stick skillet over medium-high heat. When the pan is hot, add one tablespoon of olive oil and a quarter cup of butter. Wait for the butter to melt and start to foam, then add in the meatballs—Cook the meatballs for two to three minutes or until golden brown on at least two sides.
Making the Turkey Meatball Alfredo
A note about Alfredo Sauce
Before we jump into finishing this dish, I want to talk about alfredo sauce quickly. The alfredo sauce that we are used to is a thick, rich, garlicky cream sauce. The original Italian version of the sauce is just butter and parmesan cheese. The parmesan melts into the butter, and when tossed with the pasta, it makes a creamy, light sauce. Maybe you’ve seen videos online of people mixing pasta in a giant wheel of parmesan cheese? Well, that is a version of the traditional alfredo. The sauce in this recipe is a cross between the classic sauce and the one we know. There is a little cream in it and a little garlic, but it still much lighter than what you are likely used to. It’s not going to weigh you down or make you feel disgustingly full. This lighter version of alfredo sauce pairs perfectly with the lean flavourful turkey meatballs.
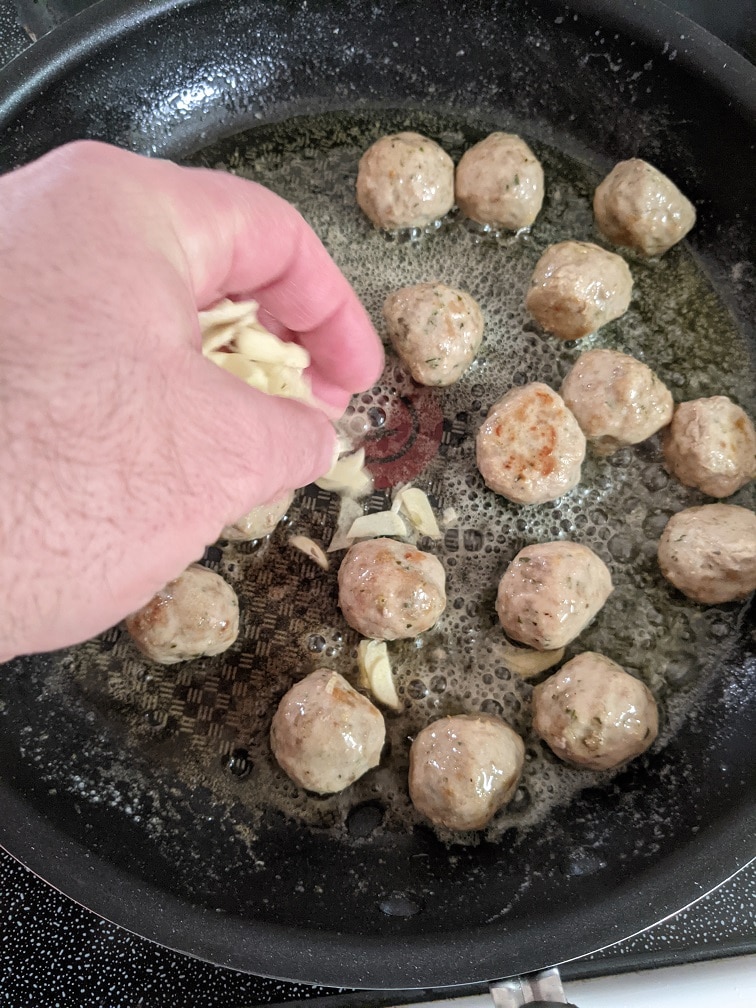
Starting The Alfredo Sauce
Once the meatballs are browned, add one tablespoon (about two cloves) of thinly sliced garlic to the pan and cook, stirring for about one minute or until you really start to smell the garlic.
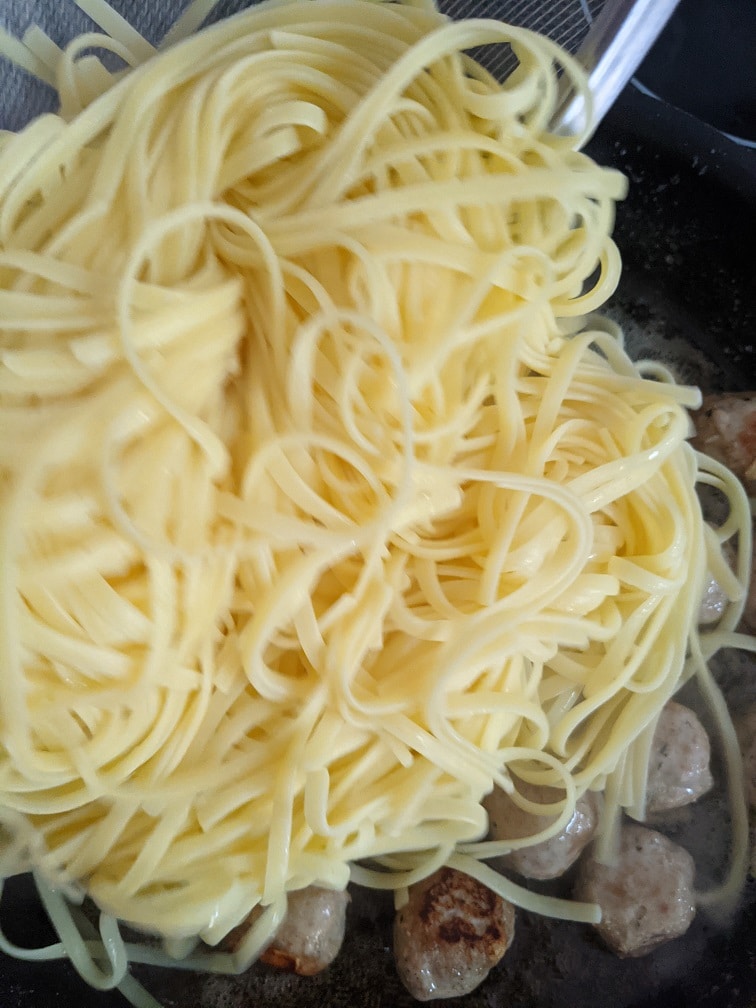
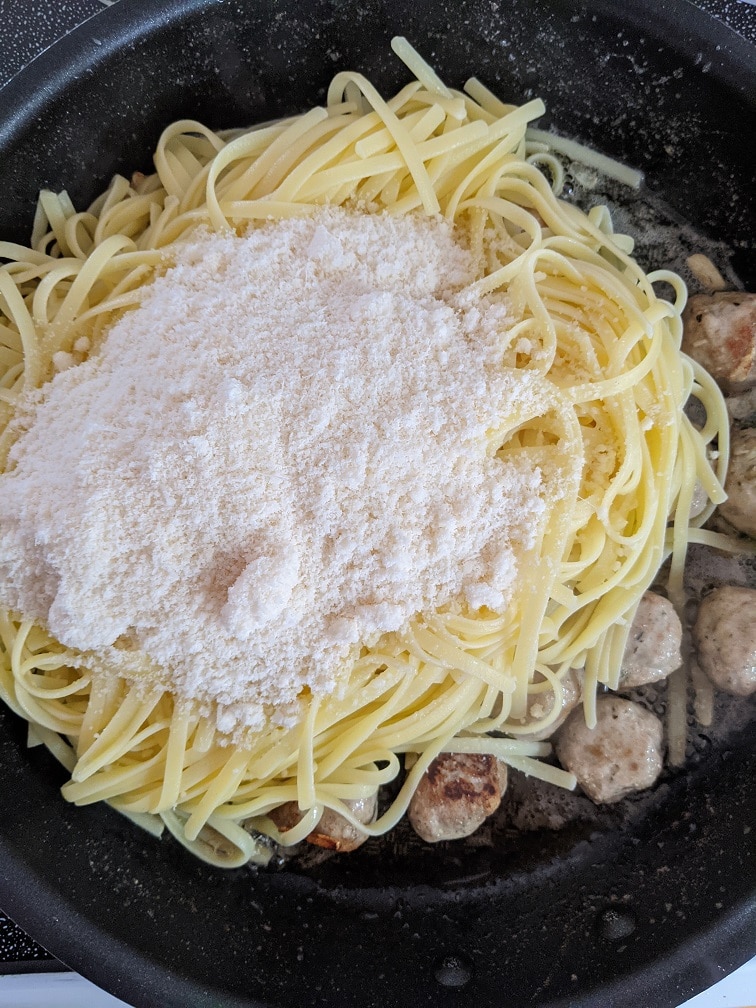
Putting It All Together
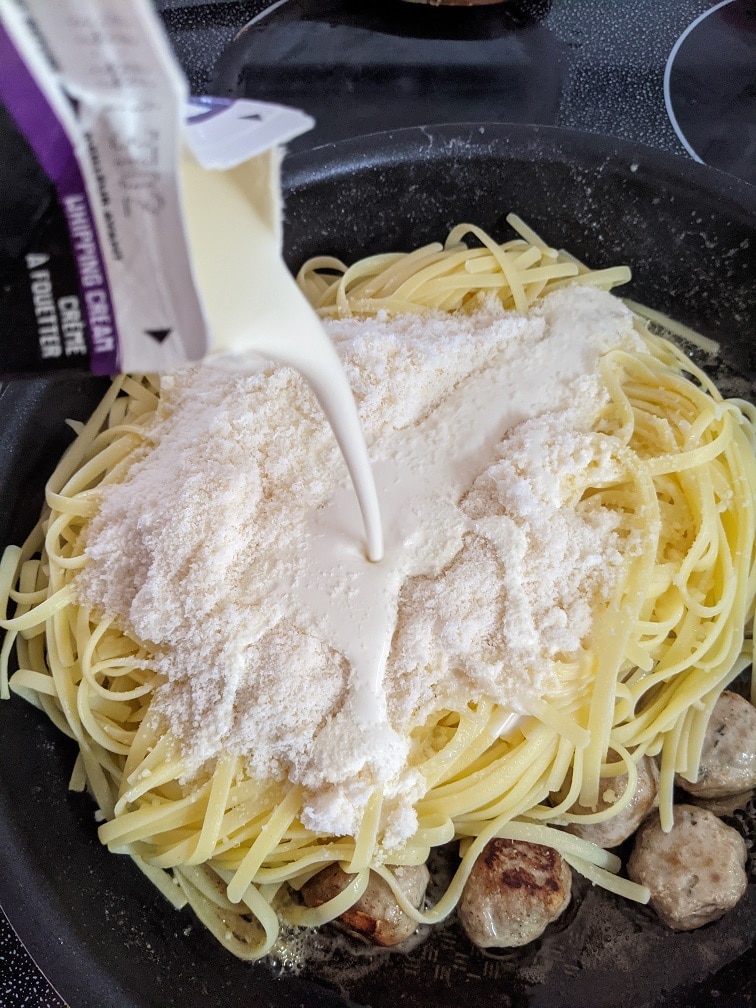
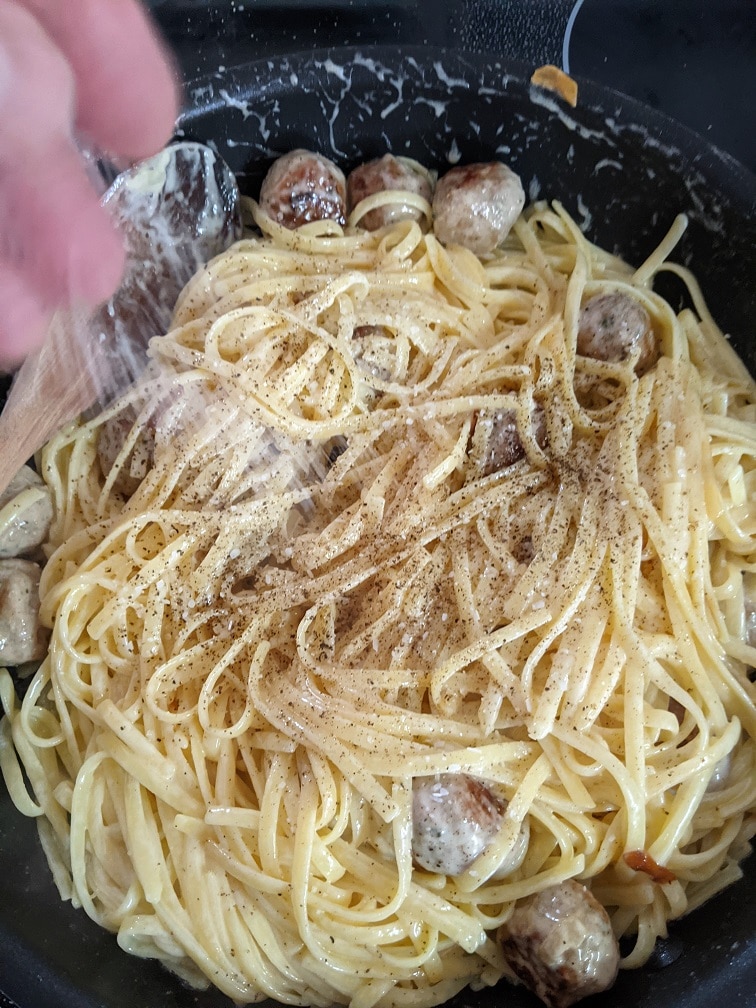
As soon as the turkey meatballs come out of the oven, start cooking your pasta. For six portions, you want to use a whole (454 g) box. I used gluten-free pasta, but you can use whatever you’d like. Cook the pasta according to the instructions on the package. Drain the pasta and add it into the pan with the meatballs and garlic. Add in one cup of grated parmesan cheese and half a cup of heavy cream. Cook the pasta, stirring and tossing until all of the parmesan has melted and the pasta is coated in the sauce. Finish the pasta by seasoning it with half a teaspoon of kosher salt and a quarter teaspoon of black pepper, then serve.
Note: You can substitute the cream for whole milk if you’d like.
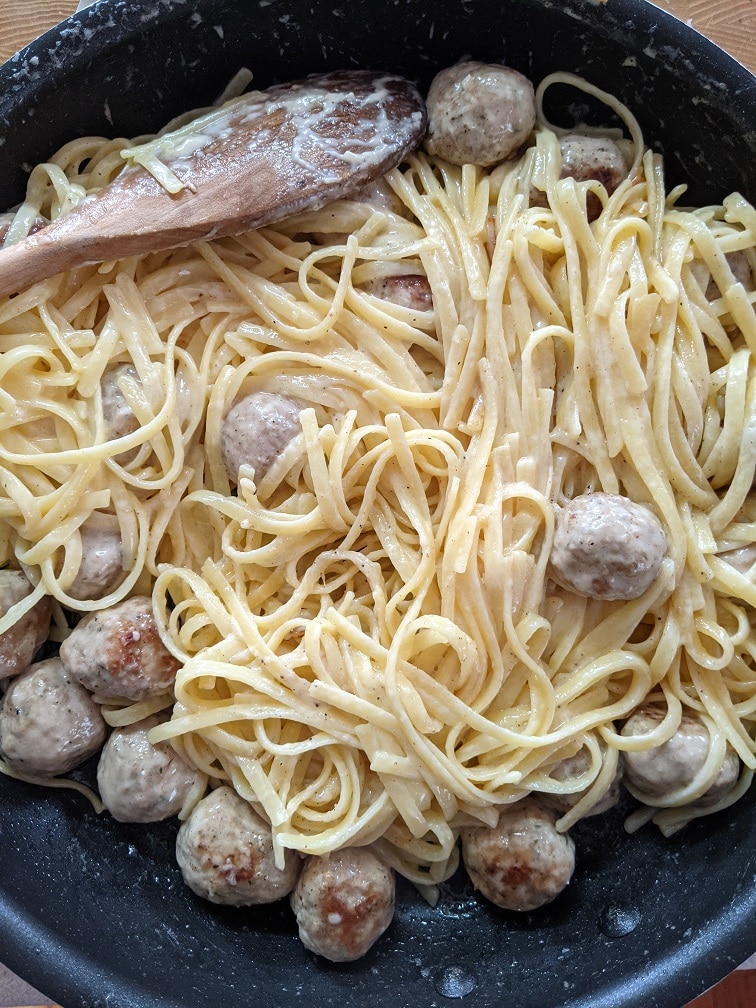
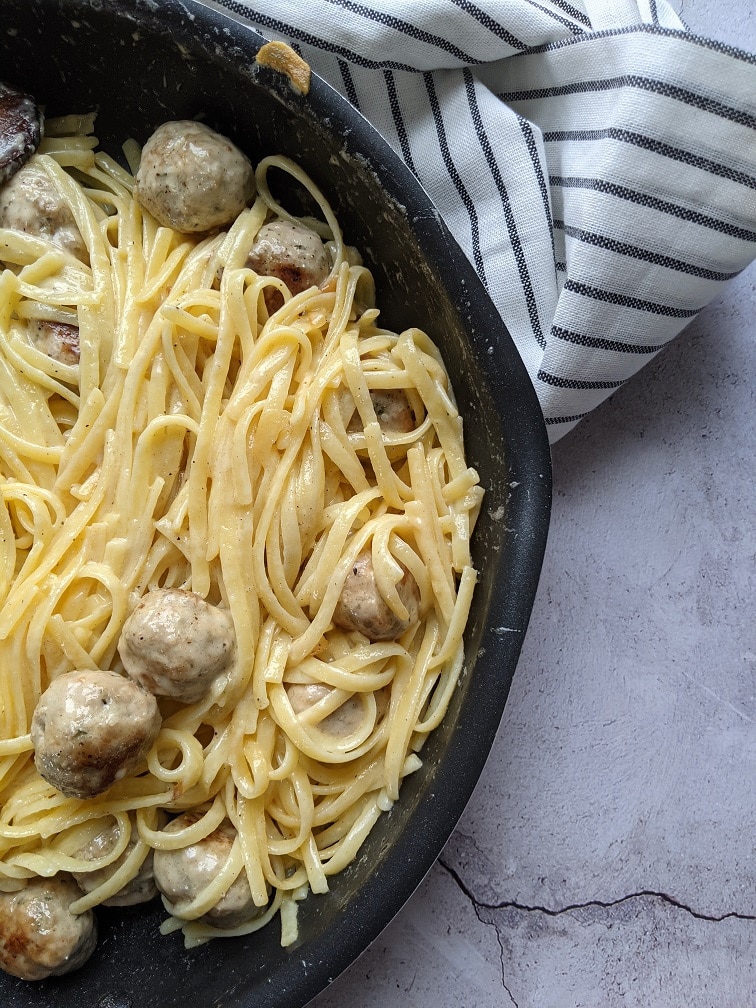
Turkey Meatball Alfredo
A new twist on an old classic this recipe plays on both traditional alfredo and traditional spaghetti and meatballs to create a unique and delicious dish. Try it for dinner tonight.
Keyword: pasta, pasta recipes, Turkey, Turkey Meatballs, Turkey Recipes
Servings: 6servings
Author: Chef Ben Kelly
Ingredients
Turkey Meatballs
1lbground Turkey
1tspkosher salt
1/4tspwhite pepper
1tspfresh chopped rosemary
2tbspgrated parmesan
1tbspminced garlic
1tspItalian seasoning
Alfredo
1tbspolive oil
1/4cupbutter
1batchTurkey Meatballs
1tbspthinly sliced garlic
1cupParmesan cheese
6portions of cooked pasta
1/2cupof cream
1/2tspof salt
1/4tspblack pepper
Instructions
Turkey Meatballs
Preheat your oven to 400°f
In a medium mixing bowl, combine the turkey with the salt, white pepper, rosemary, parmesan cheese, garlic, and Italian seasoning. Mix well.
Wet your hands with cold water and roll the turkey in small balls using about 1 tbsp of the turkey mix for each ball. In total, you should get between 20 and 24 turkey meatballs.
Put the meatballs in a roasting pan lightly coated with olive oil and cook in the oven for 15 minutes.
Alfredo
Heat a large non-stick pan over medium-high heat. Add in the butter and olive oil. Once the butter melts and starts to foam, add in the turkey meatballs and cook for 2-3 minutes to brown the outside.
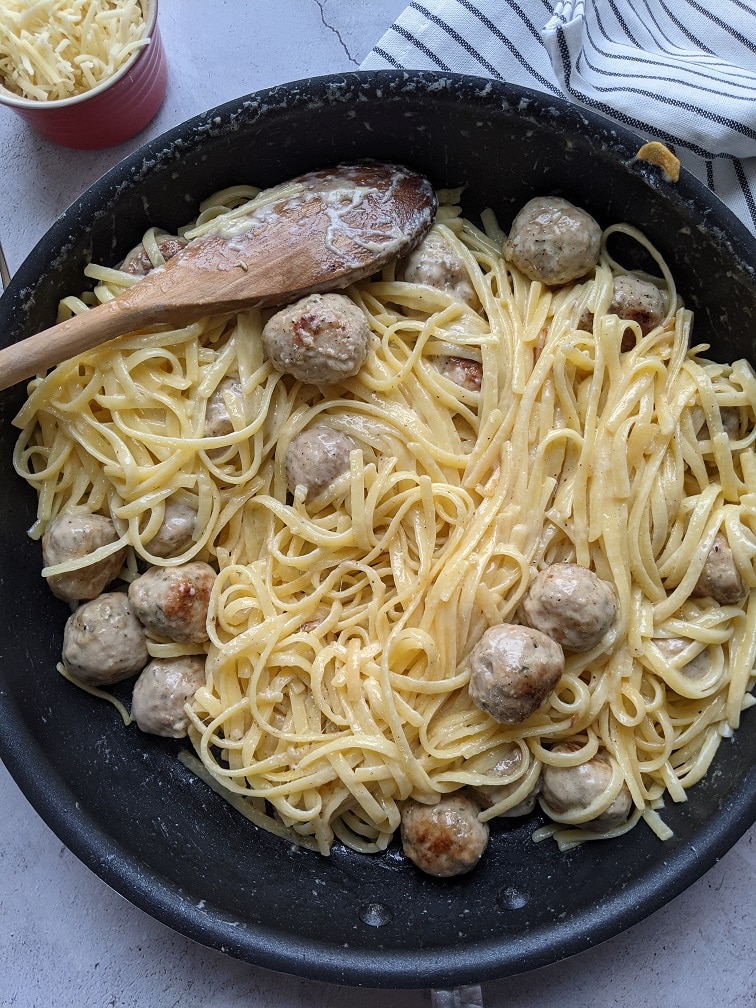
Add in the garlic and cook for 1 minute, then add cooked pasta, parmesan and cream.
Turn the heat down to medium-low and stir the pasta until all of the parmesan has melted and the sauce is creamy.
I have wanted to make this dish for a while, and I’m thrilled that I finally got around to it. It was everything I dreamed it would be and more. I hope you try this becasue it is likely something much different than you are used to. The turkey meatballs are bursting with flavour, juicy and tender, and the sauce is light and creamy, with a mild garlic flavour. I really think that you are going to love this. Give it a shot.
Thank you to Turkey Farmers of Canada for sponsoring this post. For more great turkey recipes, check out thinkturkey.ca
Thank you for reading this post. Please share it on Facebook, Pinterest, or Twitter to help Chef’s Notes grow. Subscribe to Chef’s Notes below, and you will never miss a post again.
Leftover turkey, there’s always lots of it, and you are always looking for creative things to do with it. This year, you could make that same old leftover turkey casserole or turkey pie, but why not try something a little different. Ladies and gentlemen, I introduce to you my Creamy Turkey Lasagna. The perfect use for this year’s leftover turkey. Let’s get to it.
Bechamel Sauce
The base of this creamy lasagna is a cream sauce. If you really wanted to, you could use a store-bought alfredo sauce or something like that, or you can make the sauce as I am about to describe.
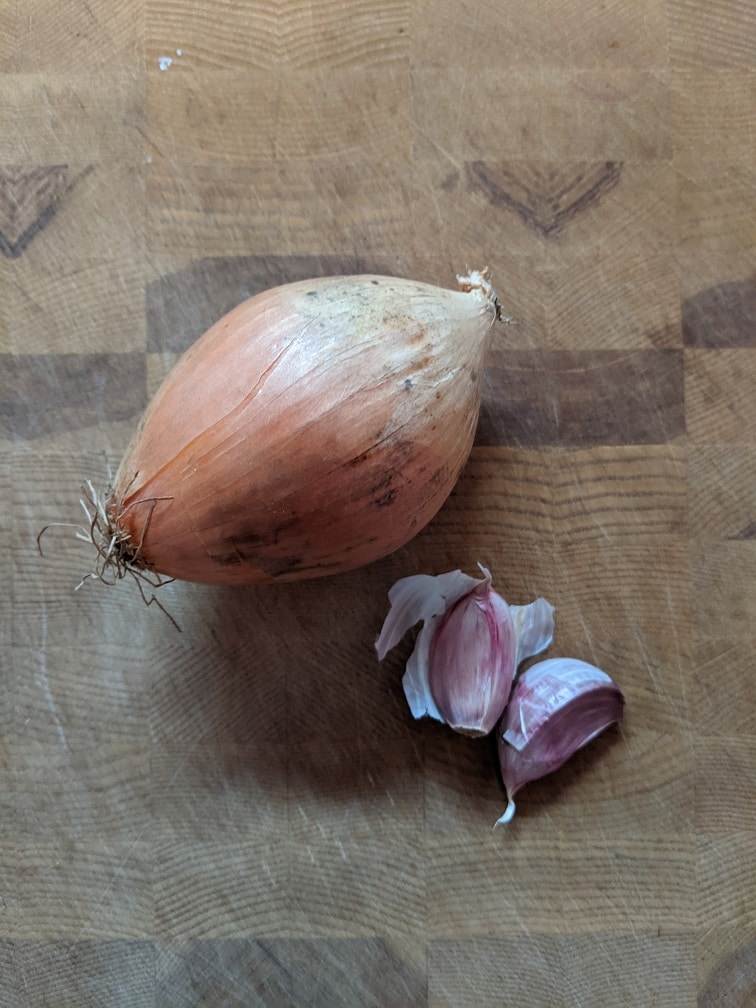
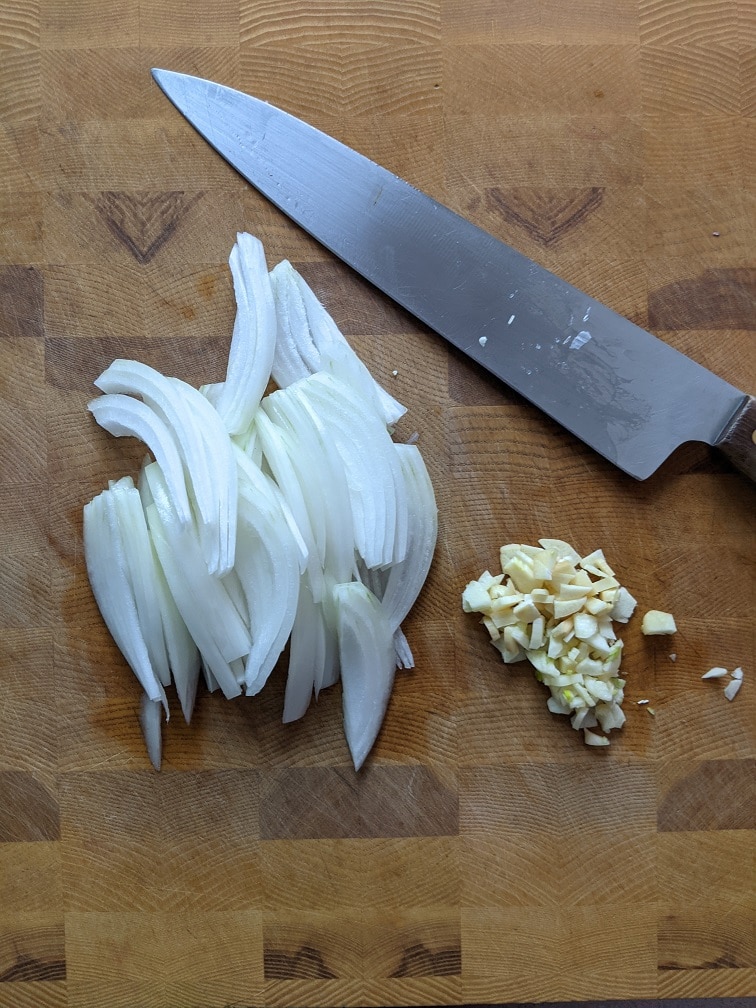
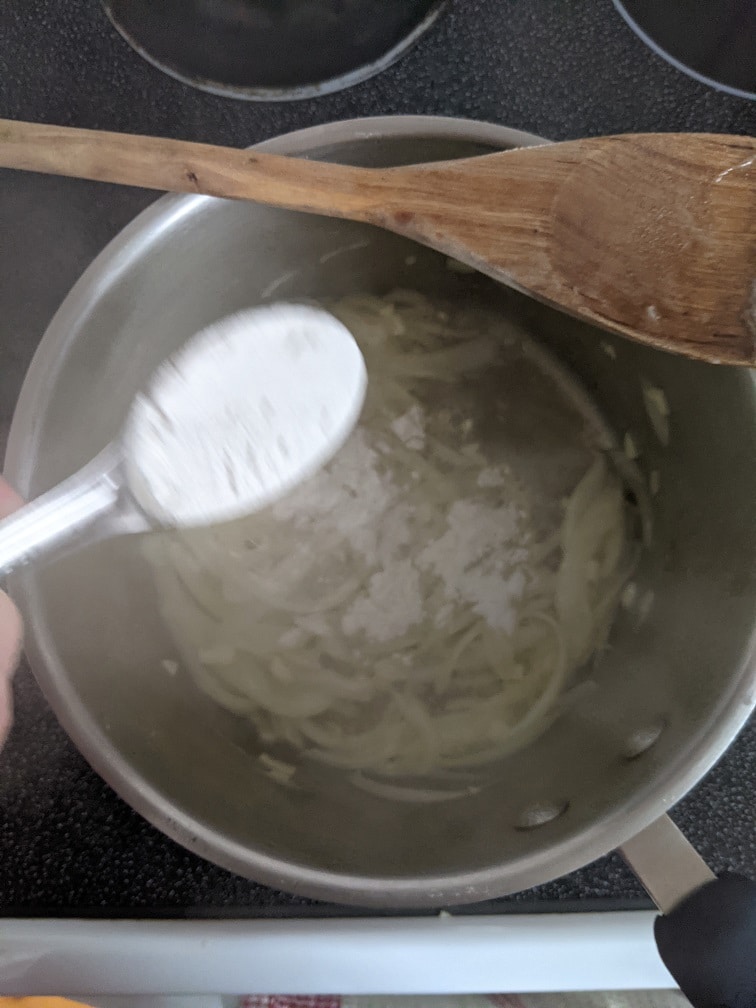
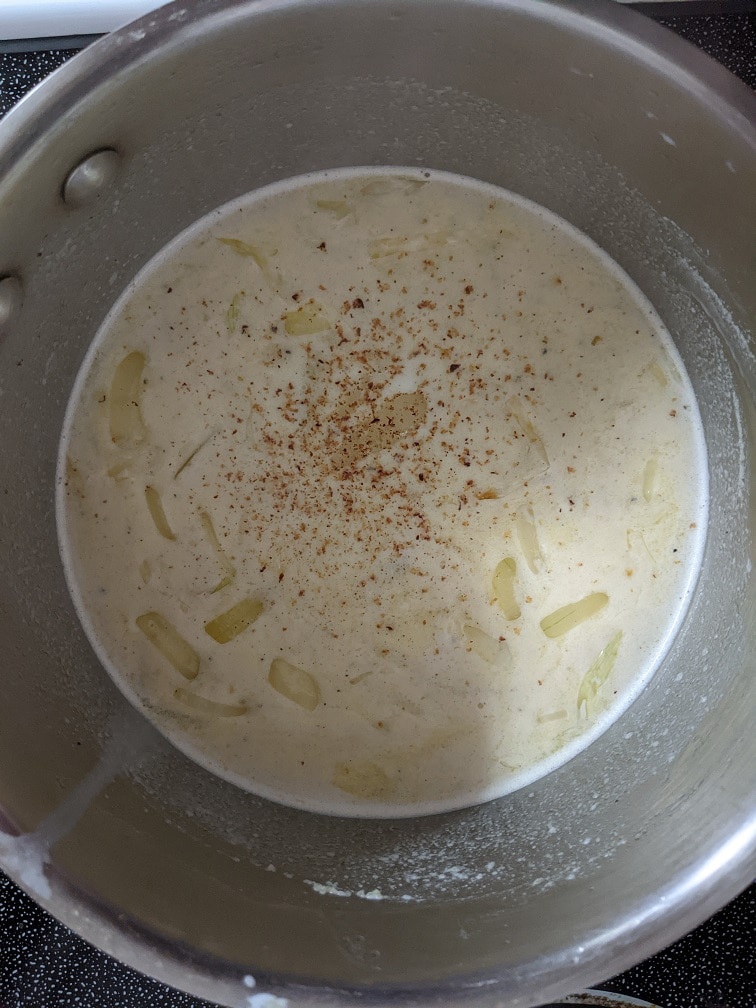
To make the sauce, you will need one small-ish onion, about one cup of sliced onion in total. You will also need two cloves of thinly sliced garlic or about two tablespoons worth. With the onion and garlic, you will need two tablespoons of butter and one of olive oil, two tablespoons of flour (I use all-purpose gluten-free flour), three cups of whole milk, a pinch of ground nutmeg, a pinch of pepper, and a big pinch of salt. You can also add some fresh or dried herbs like rosemary and thyme or even poultry seasoning. You want about one teaspoon of dried herbs in total or a tablespoon of fresh.
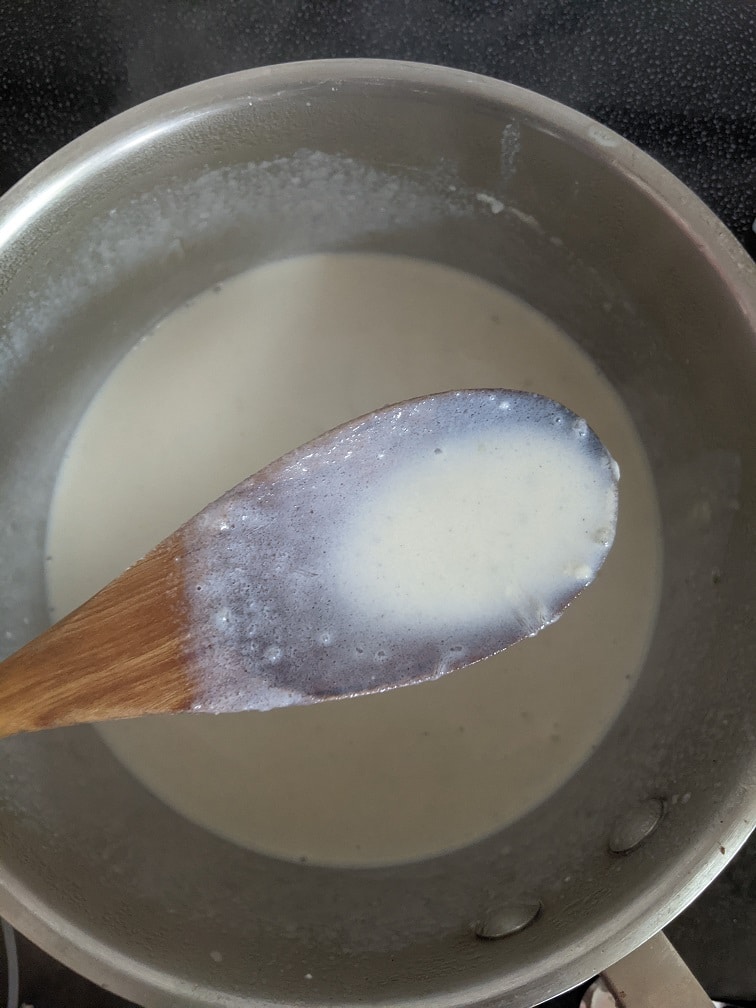
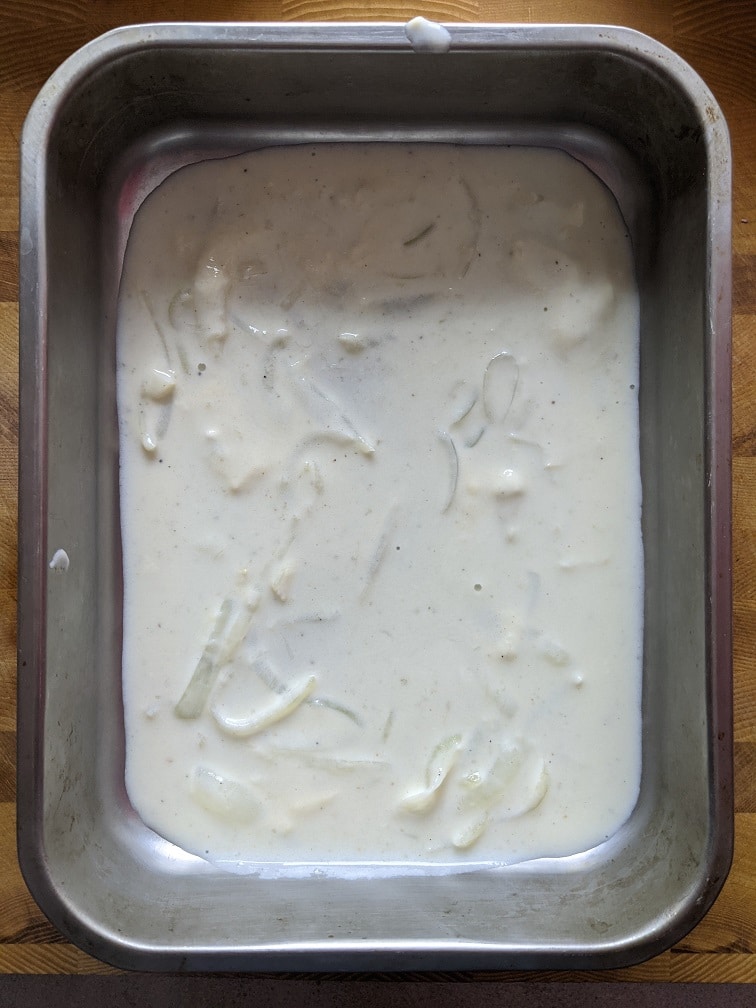
Making The Cream Sacue
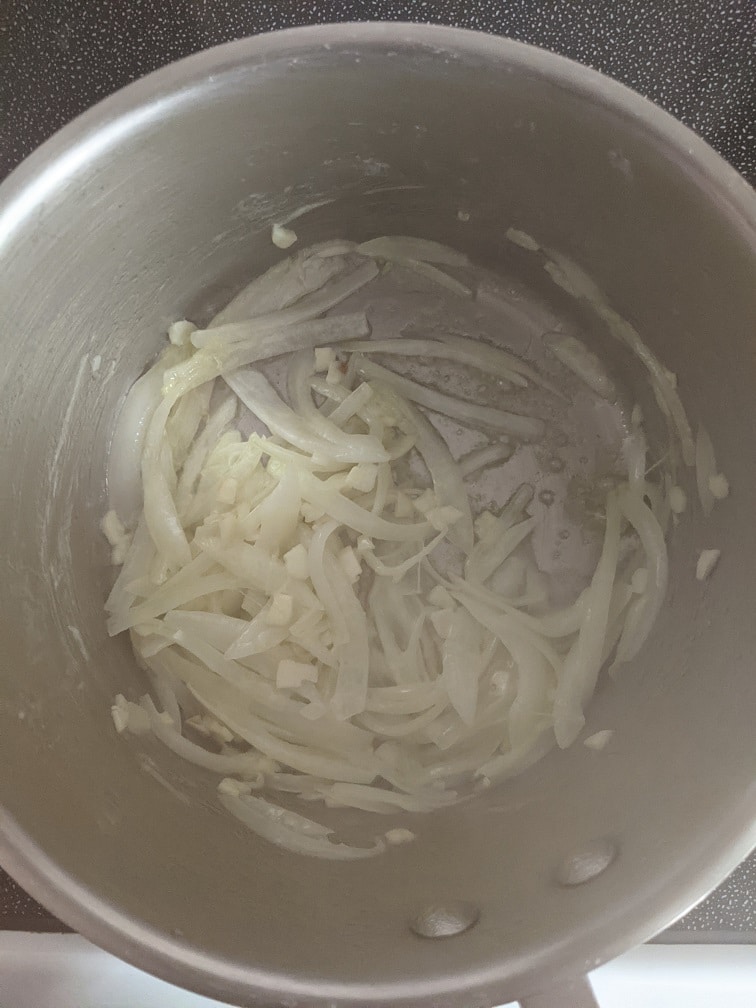
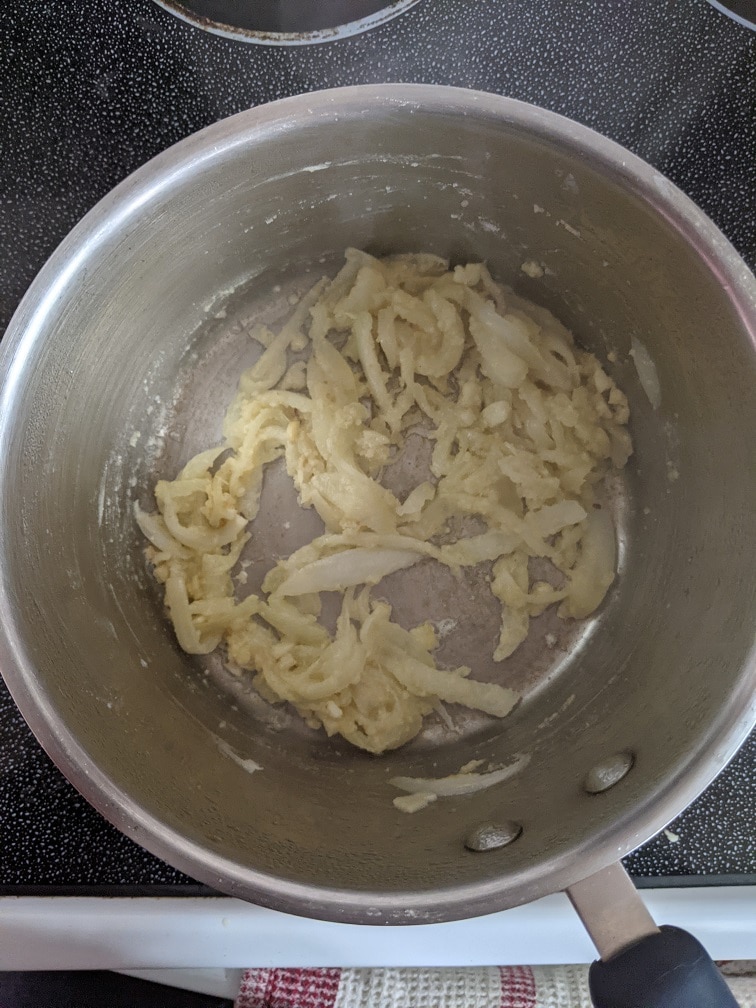
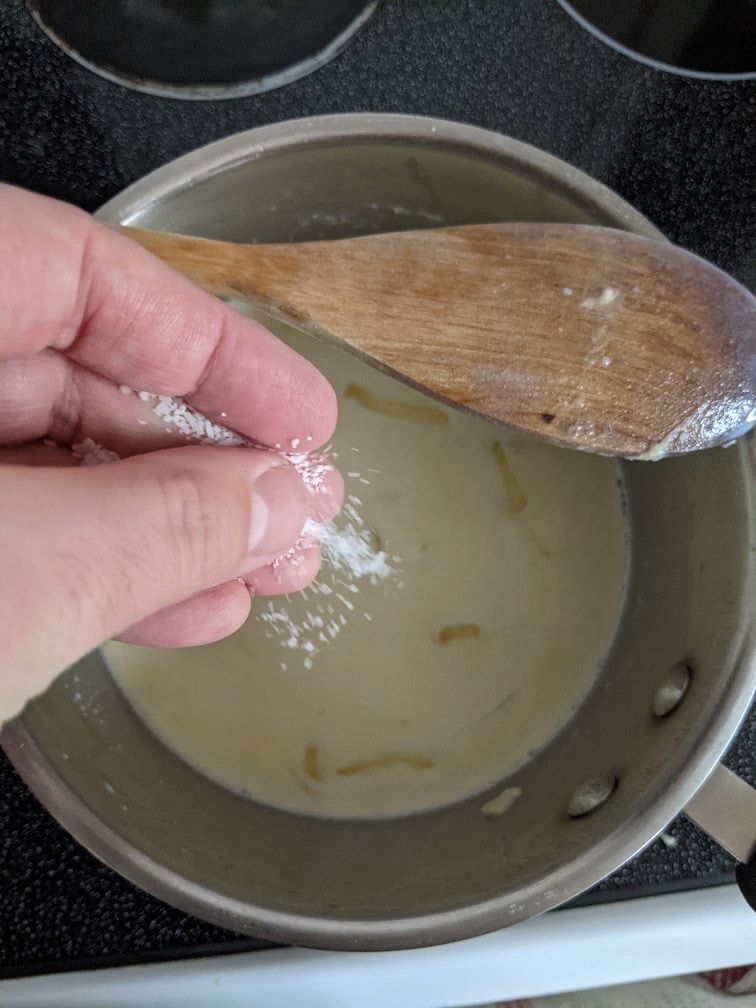
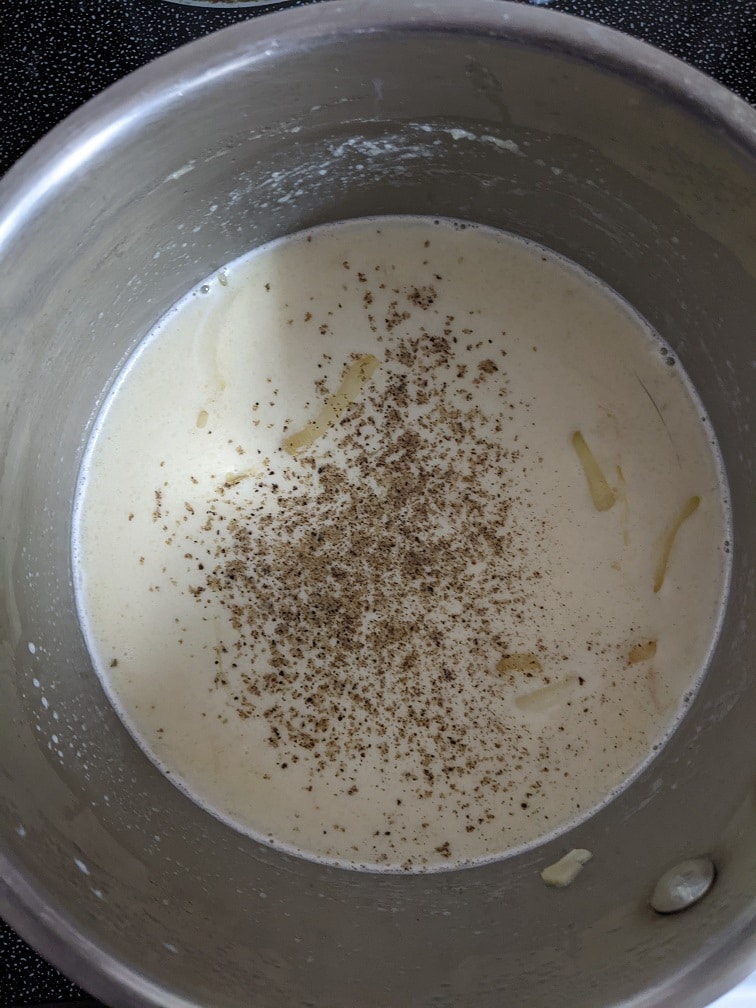
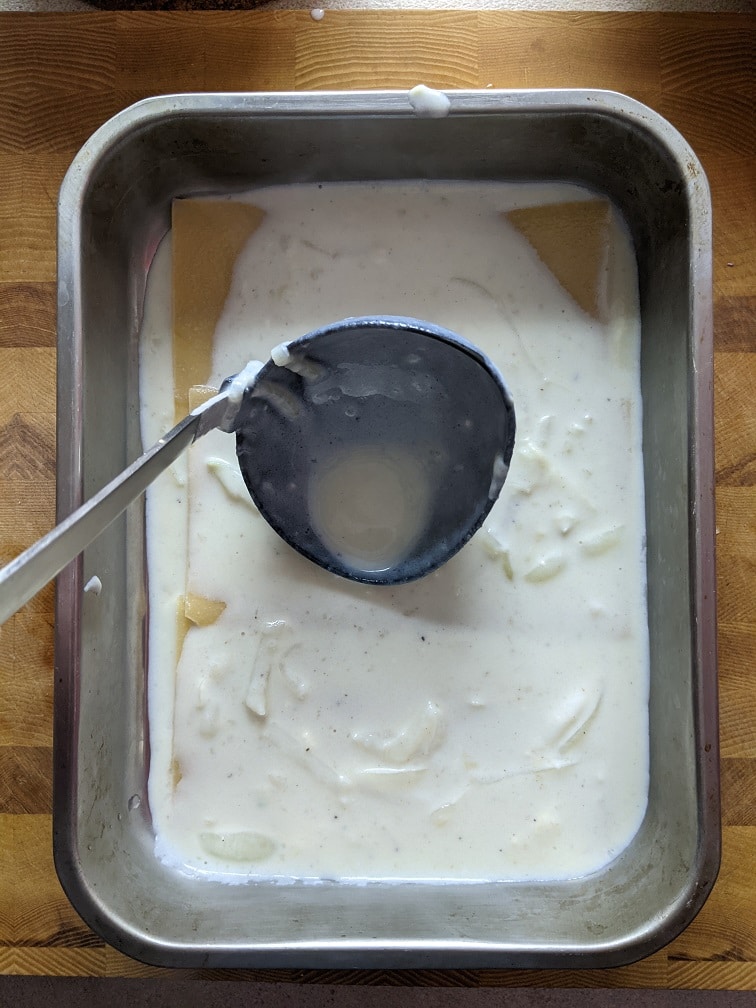
This sauce is a classic bechamel with a little extra flavouring. One other difference between this sauce and a standard bechamel is that the onions and garlic are not strained out. They add extra flavour and texture to the lasagna. To make the sauce sauté the onion in the butter and olive oil over medium heat for four to five minutes or until the onion is soft. Add the garlic and sauté for another minute or two or until the garlic starts to turn brown. Sprinkle the flour over the onion and garlic and cook stirring for about two minutes, then add in the milk and the seasonings. Simmer the bechamel, stirring for about ten minutes or until the sauce has no remaining raw flour flavour. Use the sauce right away.
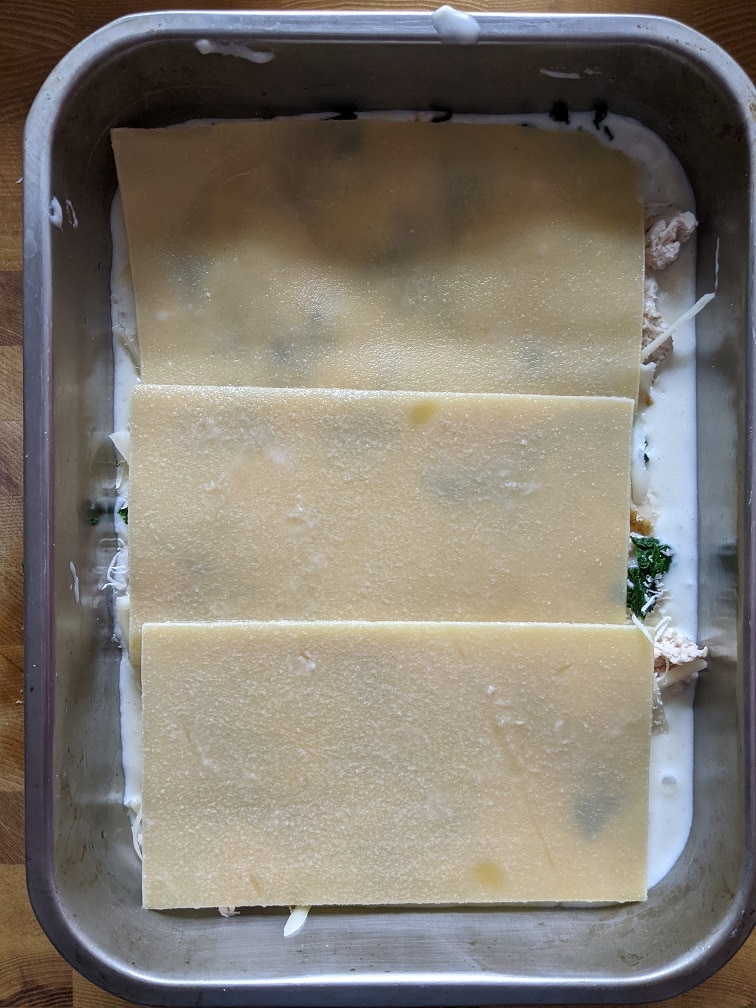
Lasagna Noodles
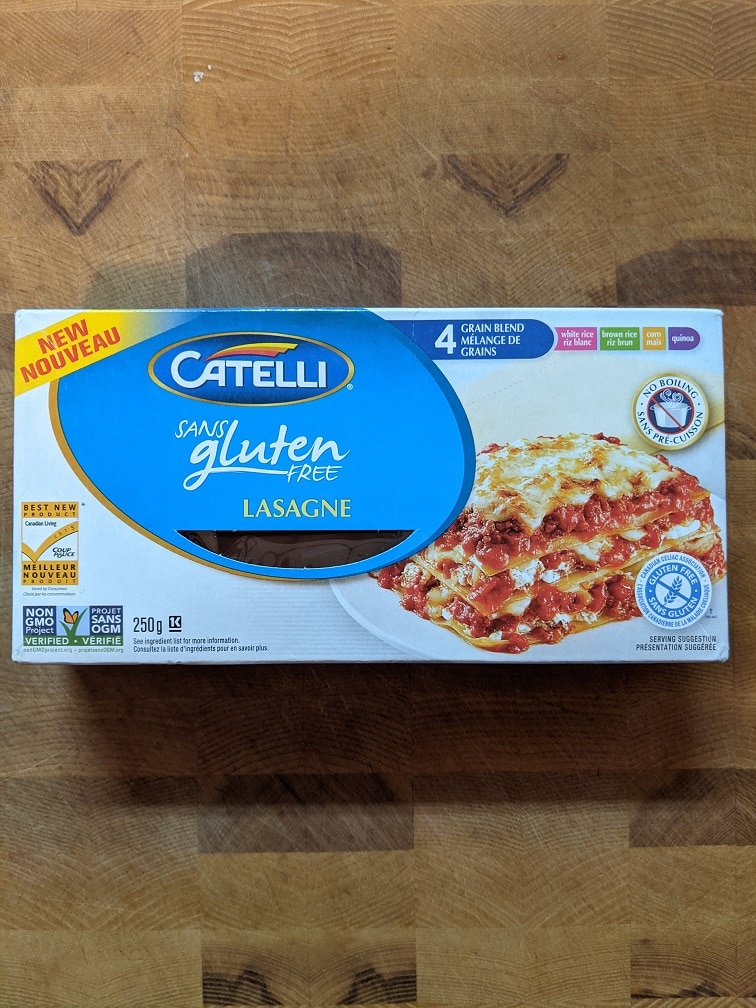
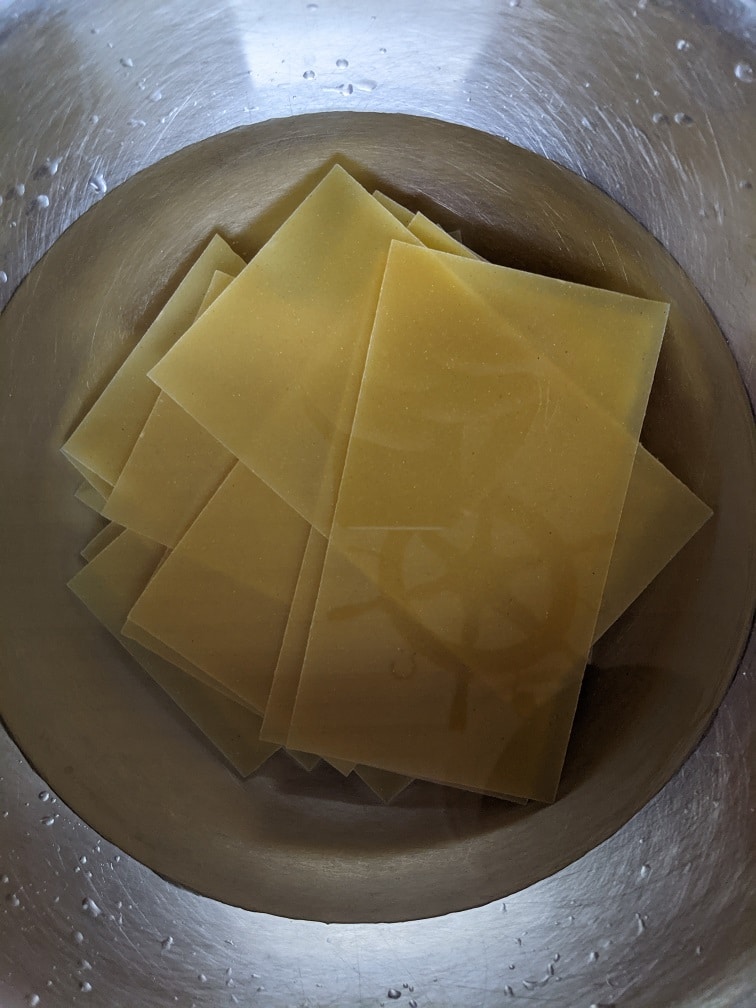
You can use whatever brand of lasagna noodles you’d like. You can even make them from scratch if you want to. I used Catelli Gluten-Free Noodles. These are a no-boil noodle. However, the package says to soak the noodles in hot tap water for ten minutes before using them for cream sauces. This worked well for these noodles, but you will have to refer to the package your noodles came in for specific instructions.
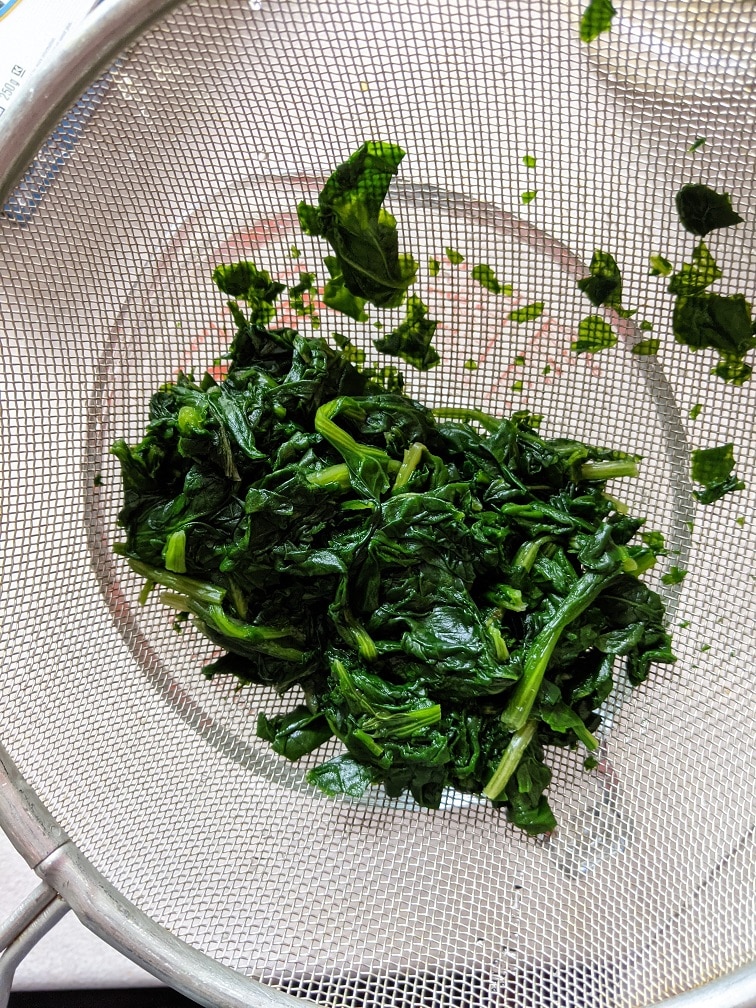
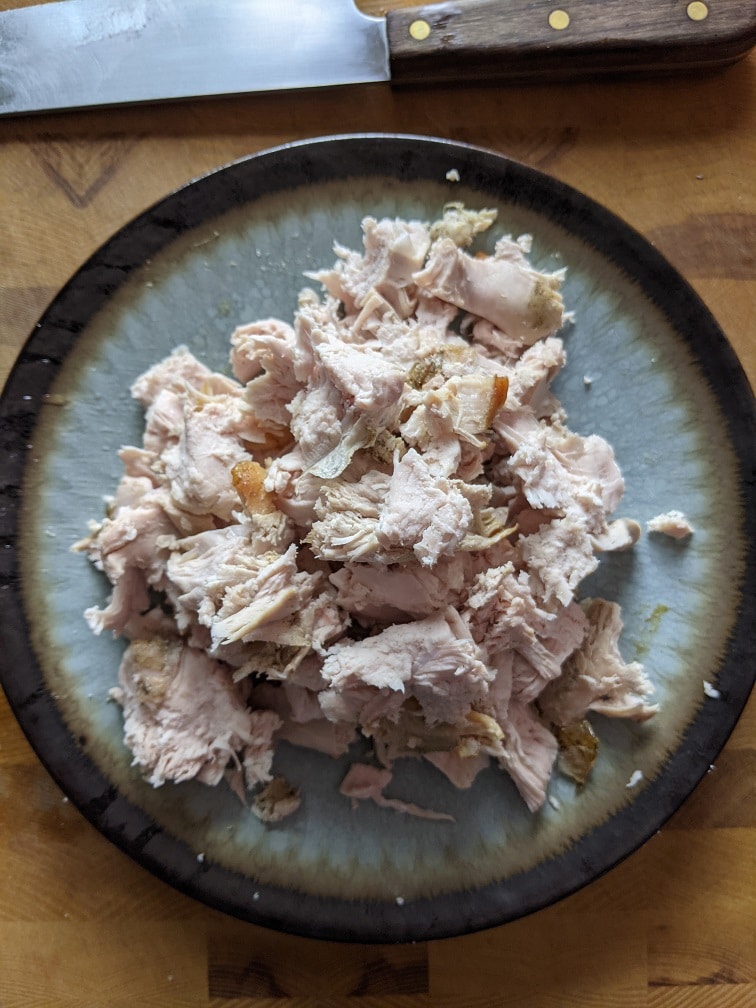
Remaining Ingredients
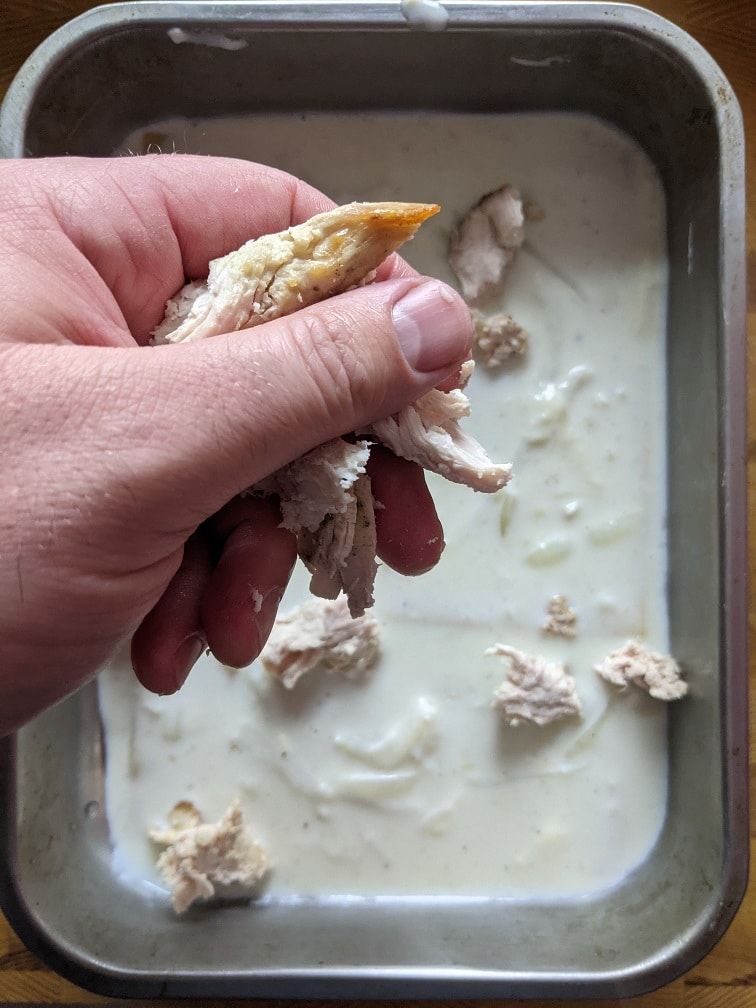
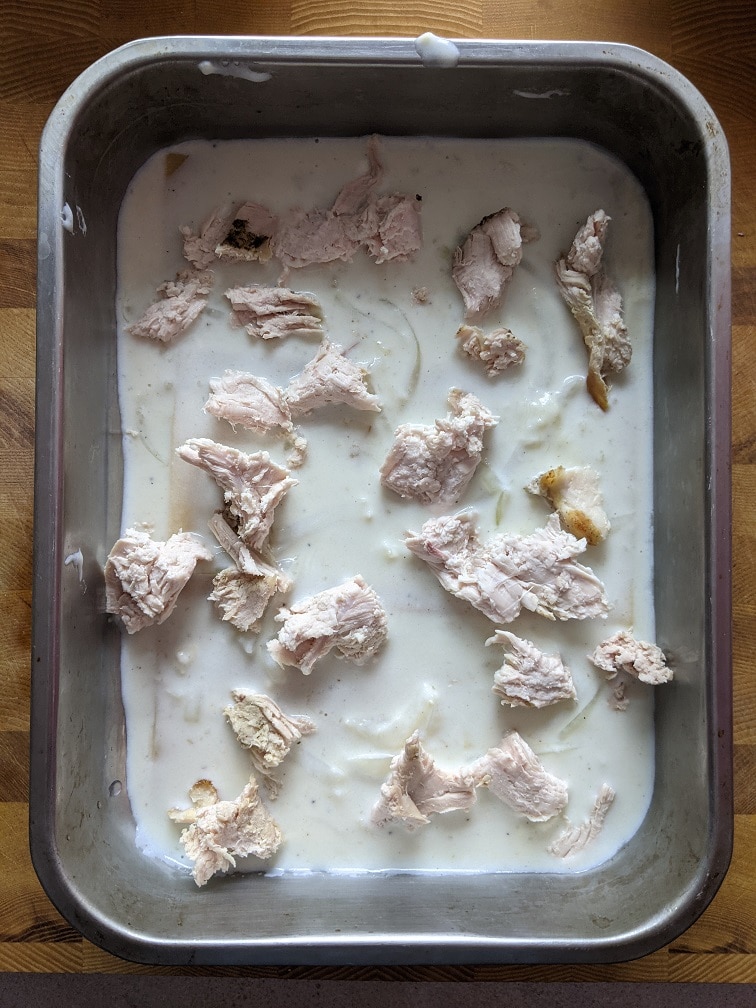
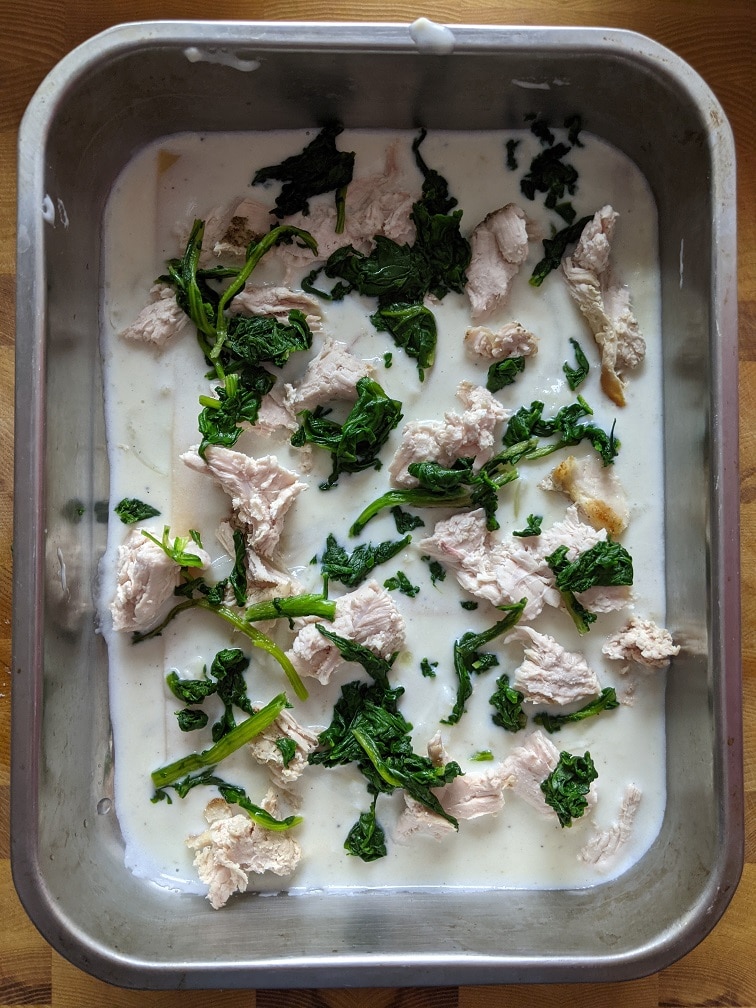
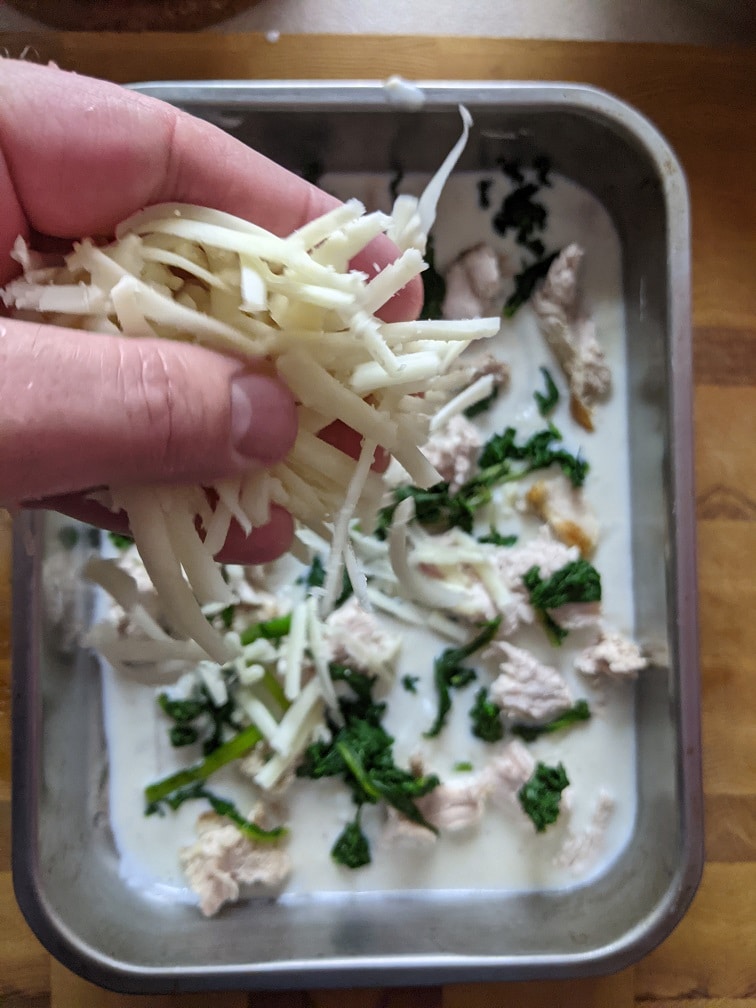
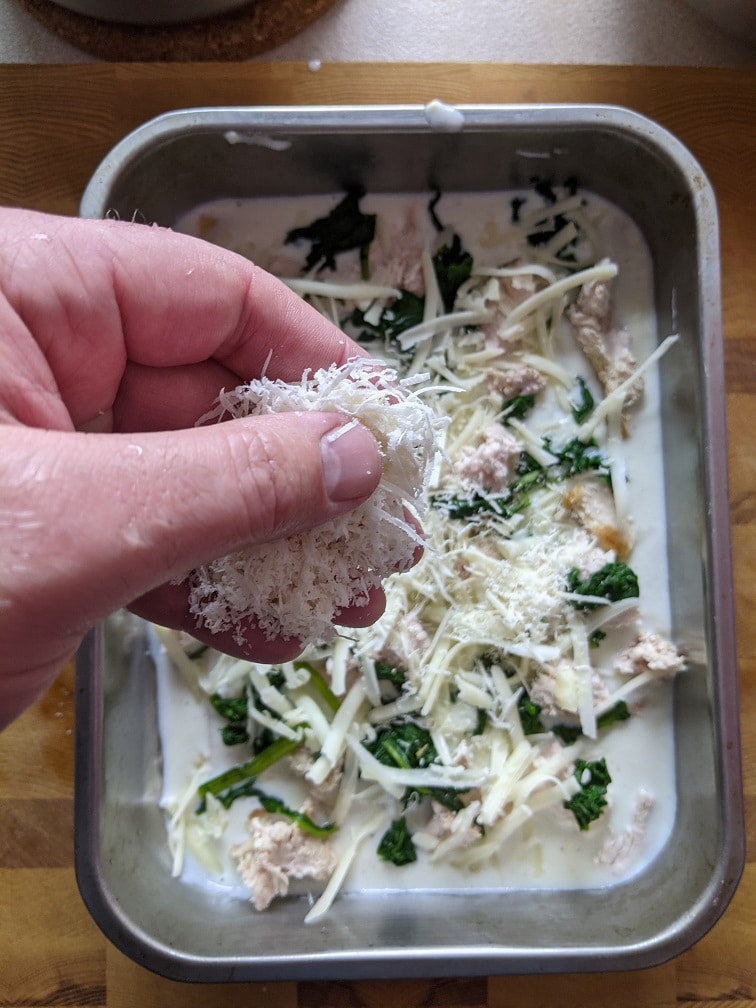
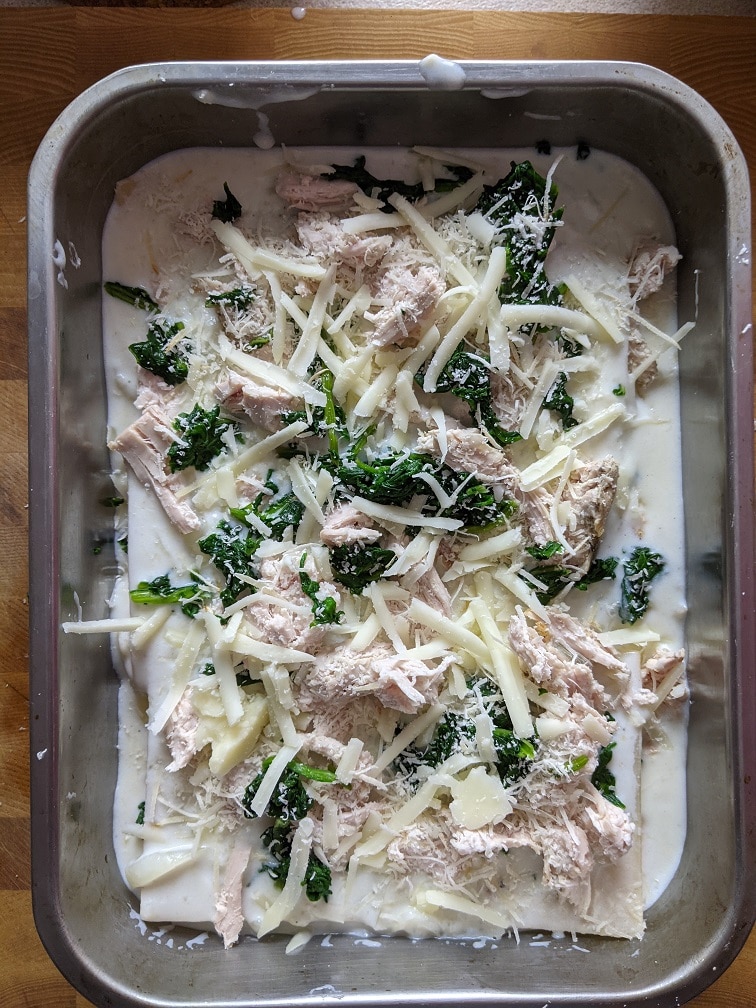
Other than the sauce and the noodles, this Creamy Turkey Lasagna also has cooked and drained spinach (one cup in total. I used the frozen stuff.), half a cup of parmesan cheese, one and a half cups of grated mozzarella, and two cups of cooked, and pulled turkey.
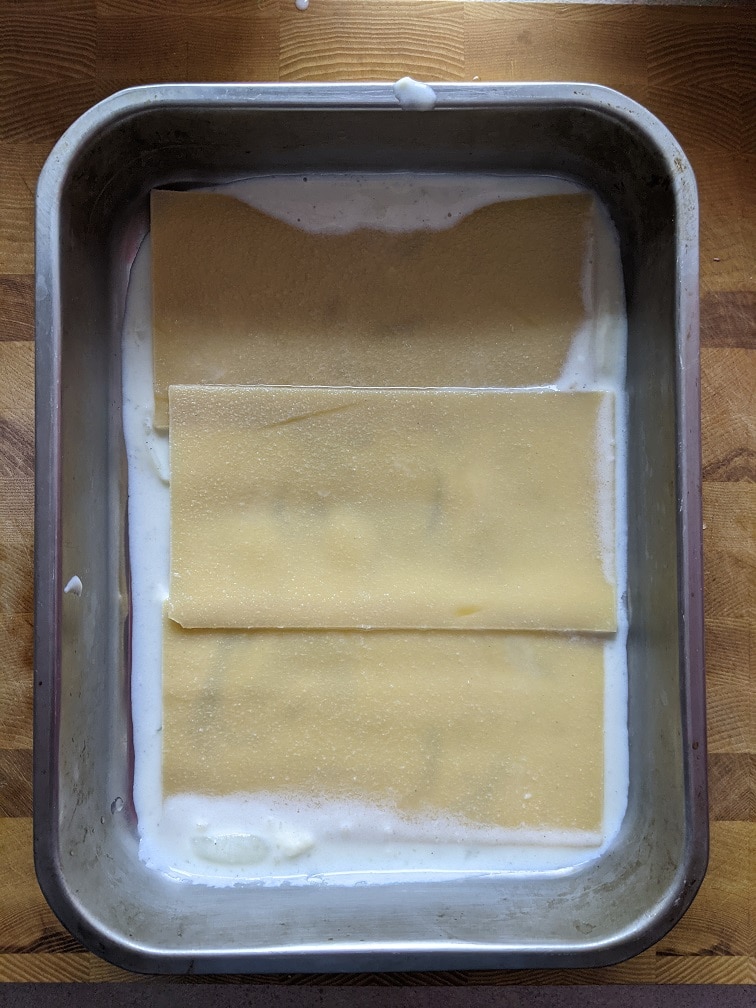
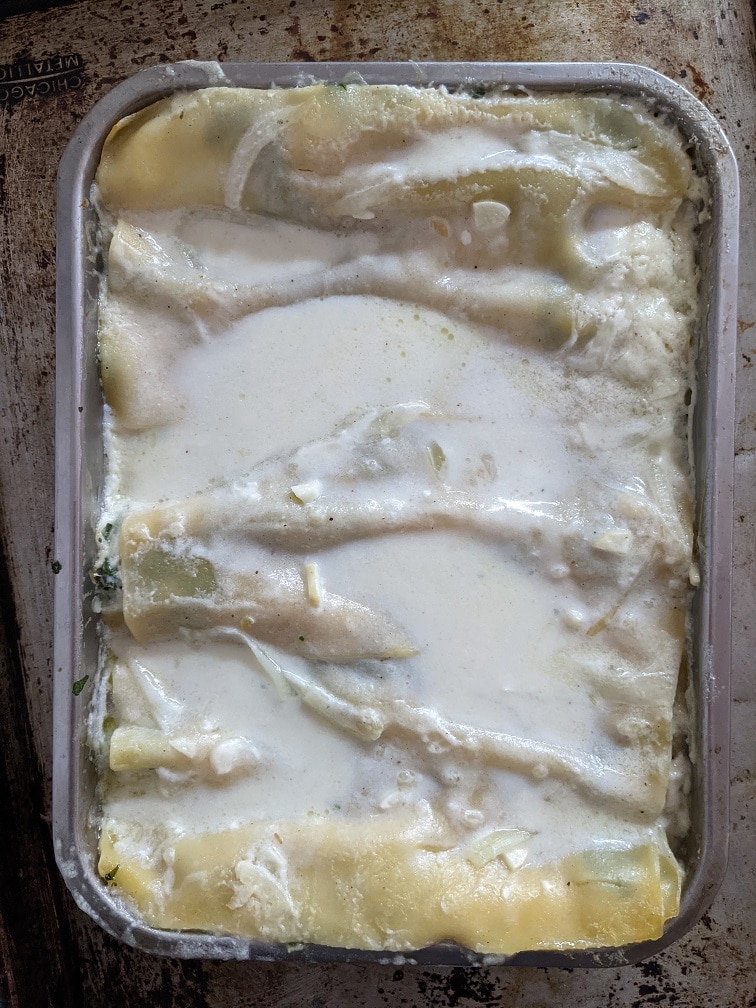
Assembling The Turkey Lasagna
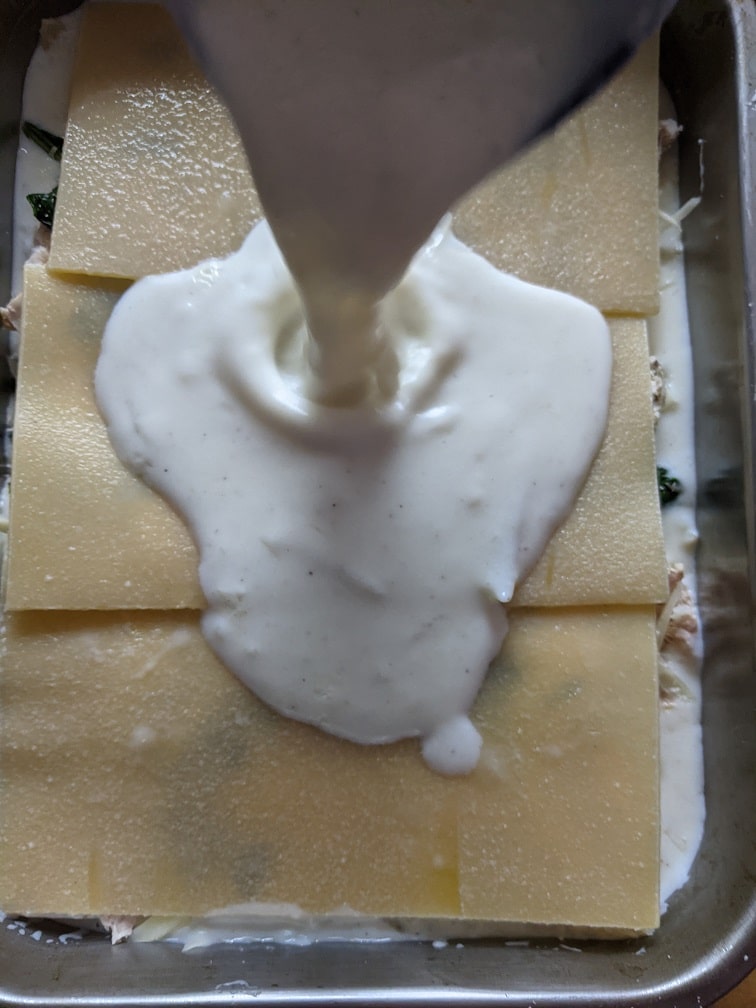
I made a small lasagna using a 10 ¼x7 ¾ ” (26×20 cm) roasting pan that I got from IKEA. If you want to make a bigger version, go for it, but you will have to double all of the ingredients. This Turkey Lasagna is assembled like any other lasagna. First, put a little sauce down, then a layer of noodles, some turkey, some spinach, and some cheese. I made four layers, not including the top (no turkey or spinach on the top), so each layer should get about half a cup of turkey, a quarter cup of spinach, two tablespoons of parmesan and a quarter cup of Mozza, reserving half a cup to broil on to the lasagna to finish it after baking.
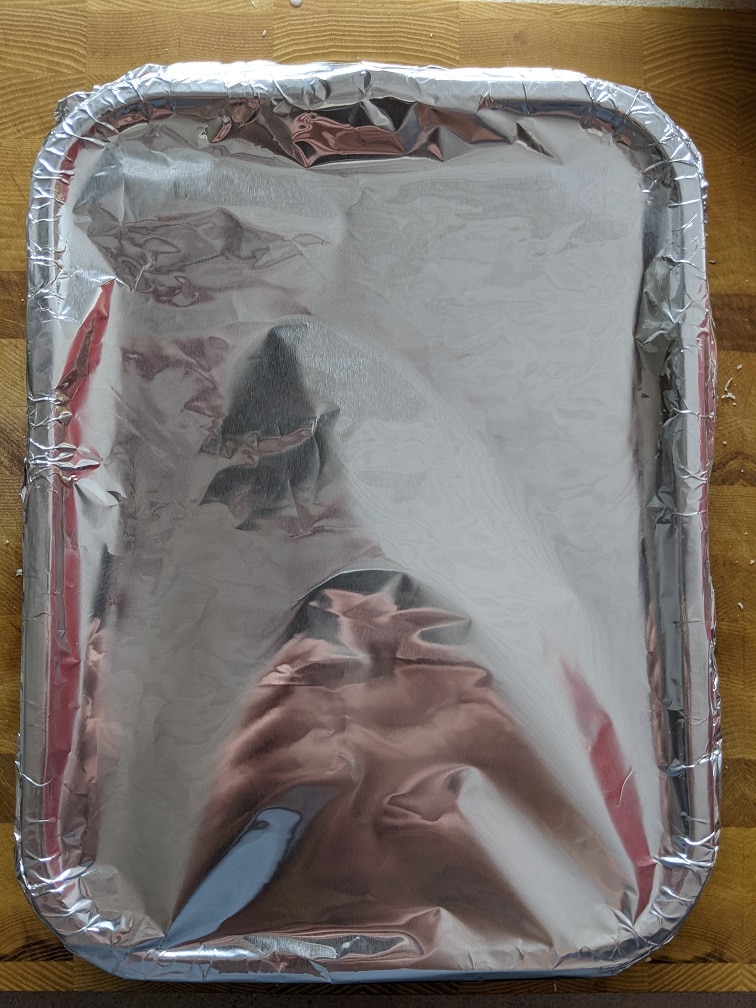
Once the lasagna is assembled, cover it with parchment paper and foil, then bake for forty-five minutes at 350°F.
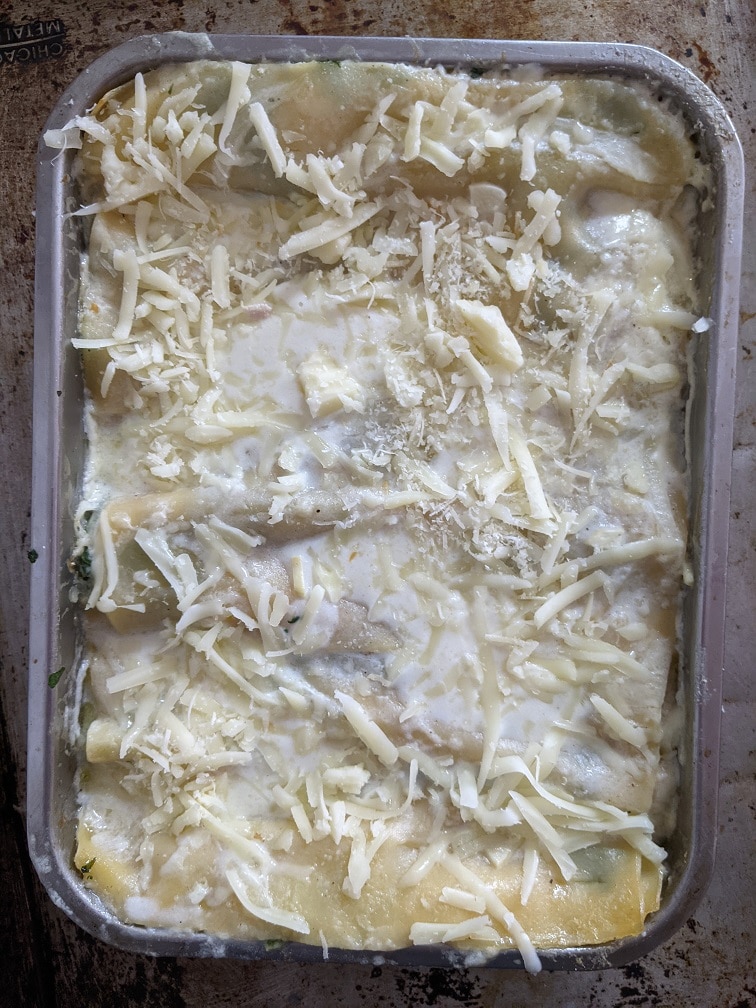
Finishing The Turkey Lasagna
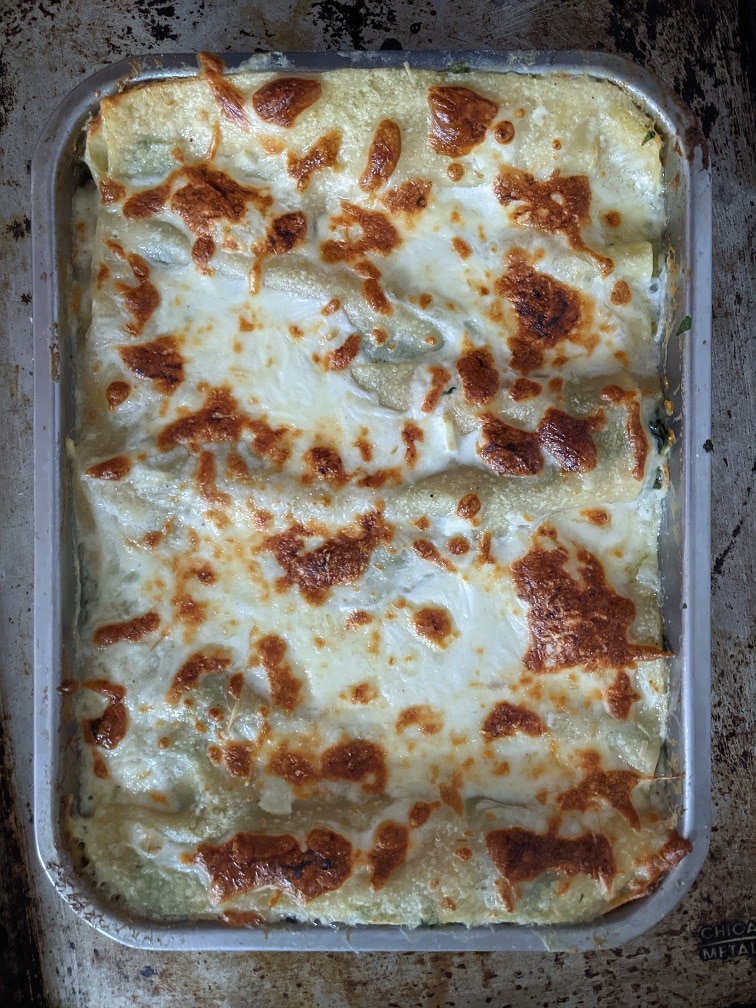
To finish the turkey lasagna, remove it from the oven and turn the broiler on high. Take the foil and parchment off the lasagna, top it with the reserved Mozza, then put the lasagna under the broiler just until it is browned. Let the lasagna sit, uncovered for ten minutes before cutting into it.
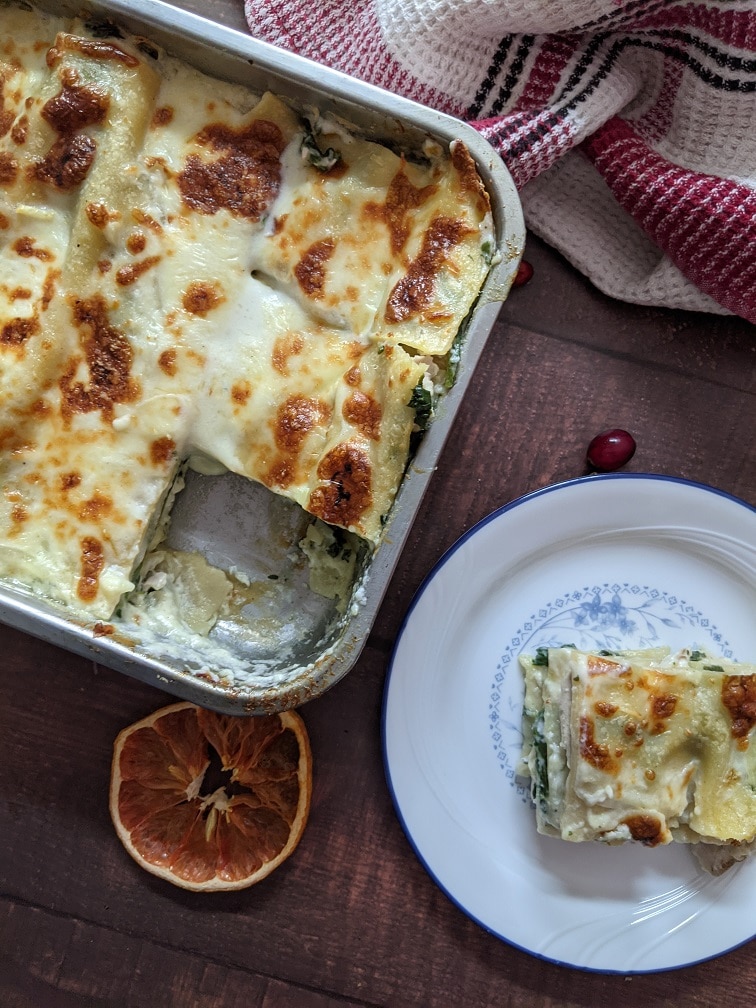
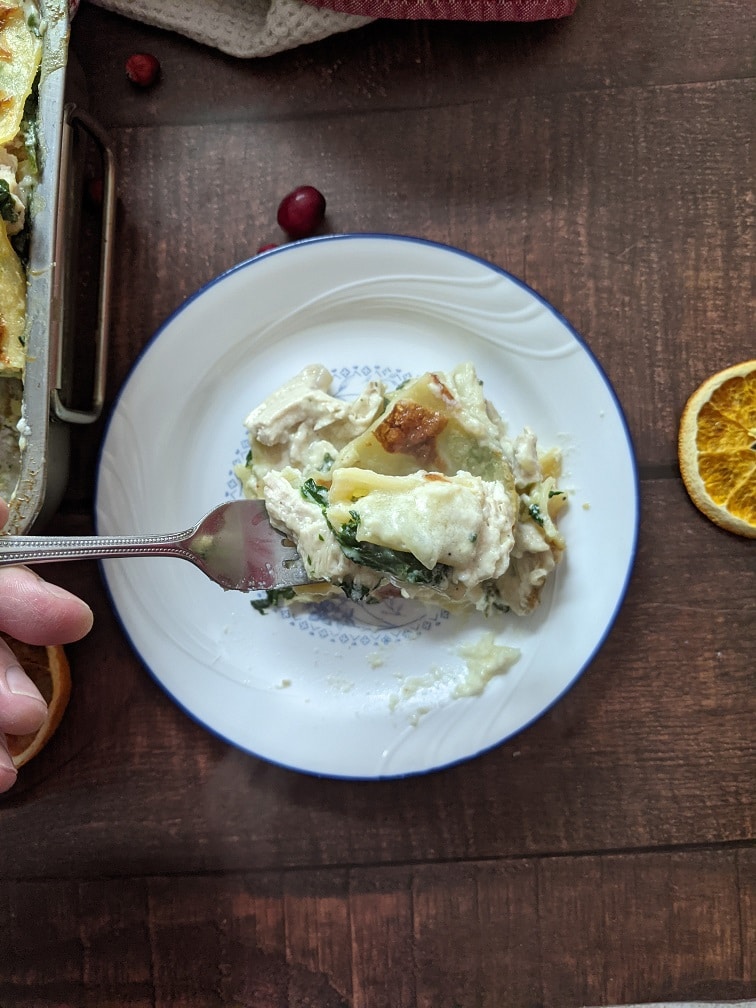
Creamy Turkey Lasagna
If you are looking for something different to do with all that leftover turkey, look no further. This Creamy Turkey Lasagna is exactly what the doctor ordered.
1cupCooked and drained spinach1 cup of frozen spinach is fine
1package of lasagna noodles
Instructions
Sauce
Heat a medium-sized pot over medium heat. Add the olive oil and butter. Once the butter starts to foam, add in the onions and cook for four to five minutes or until they soften. Add the garlic and cook for two more minutes or until it just starts to brown.
Add the flour to the pot and cook, stirring for two minutes. Add the milk and seasonings. Simmer the sauce, stirring for ten minutes or until the sauce no longer tastes like raw flour.
Lasagna
Follow the preperation instruction on the lasagna noodle's package.
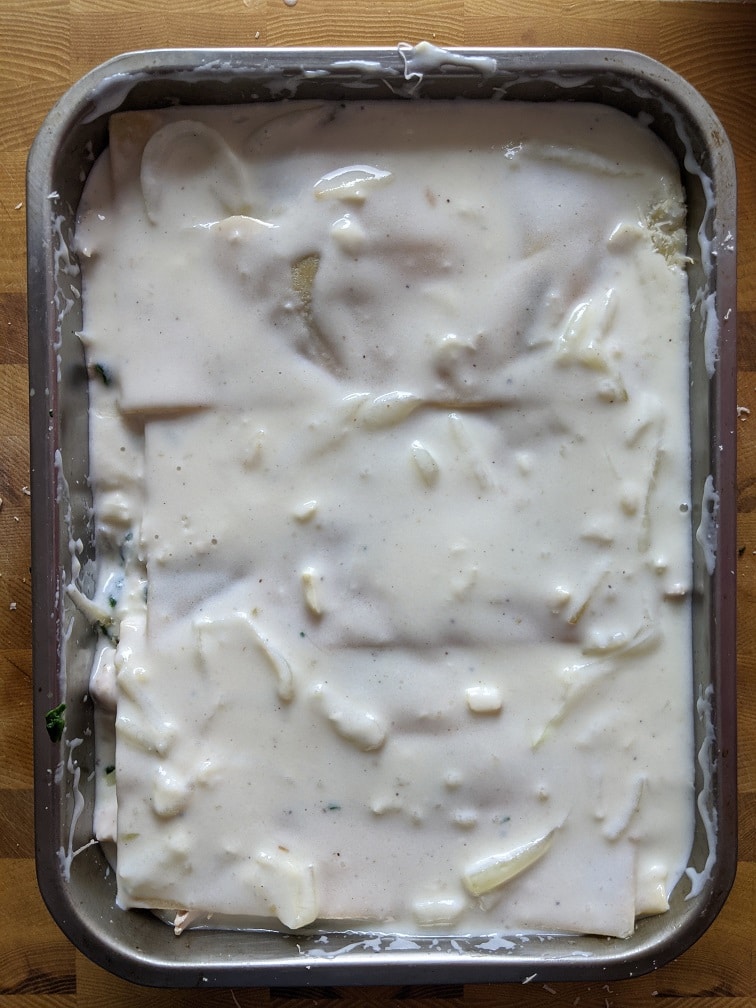
Cover the bottom of a 10 ¼x7 ¾ " (26×20 cm) roasting pan with a ladle full of the sauce. Top with a layer of noodles, another ladle of sauce, 1/2 cup of turkey, 1/4 cup of spinach, 2 tbsp of parmesan, and 1/4 cup of mozza. Repeat this three more times.
The top layer of lasagna should be only noodles and sauce. Cover the roasting pan with parchment paper and foil, then bake the lasagna at 350°f for 45 minutes.
Remove the lasagna from the oven, and turn the oven's broiler on to high.
Take the foil and parchment off the lasagna, top it with the remaining half cup of mozza, then broil the lasagna just until the cheese is browned.
Remove the lasagna from the oven and let it rest for 10 minutes before cutting into it. Serve it with a side salad.
I was thrilled with how this Creamy Turkey Lasagna turned out, and I think that you will be too. It would benefit from adding some poultry seasoning or fresh herbs like I said, but I will leave that up to you. I hope that this has given you something new to try with your leftover turkey. Enjoy!
Thank you for reading the post. If you liked it, remember to share it on Facebook, Pinterest, or Twitter. Did you know that Chefsnotes.com has over 400 posts just like this one? Subscribe to the blog below, and you will be notified of every new post so you will never a helpful tip or recipe again. And if you would like to know more about me, click the picture of me below to read my story “Life on the line.
For whatever reason, boneless, skinless chicken breast is one of Canada’s most popular meats or poultry cuts. Personally, I’m not really a fan. I find that chicken breast is often bland and dry becasue it’s been overcooked. It doesn’t have to be either of those things. Today, I will share a technique for stuffing and wrapping chicken breast that will help prevent it from drying out, and that will keep it interesting for years to come. Specifically, we will make Prosciutto Wrapped Chicken Breast Stuffed with Spinach and Goat Cheese, but the technique is really the core of this post, not the recipe. What do I mean by that? You’ll have to keep reading to find out. Let’s get to it.
Chicken Stuffing
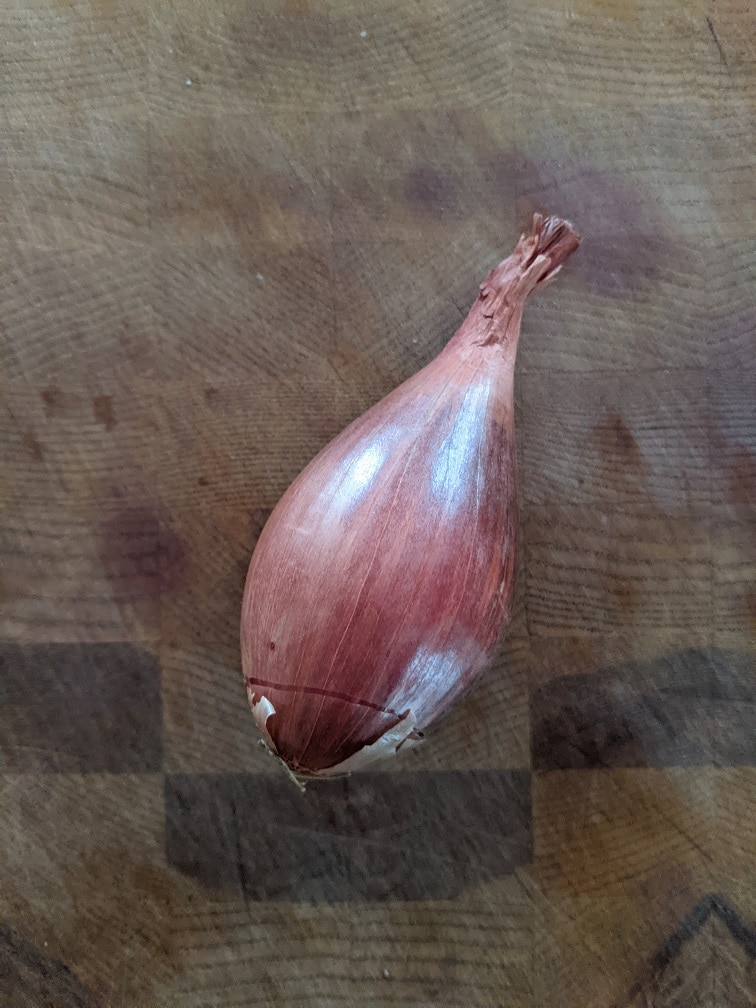
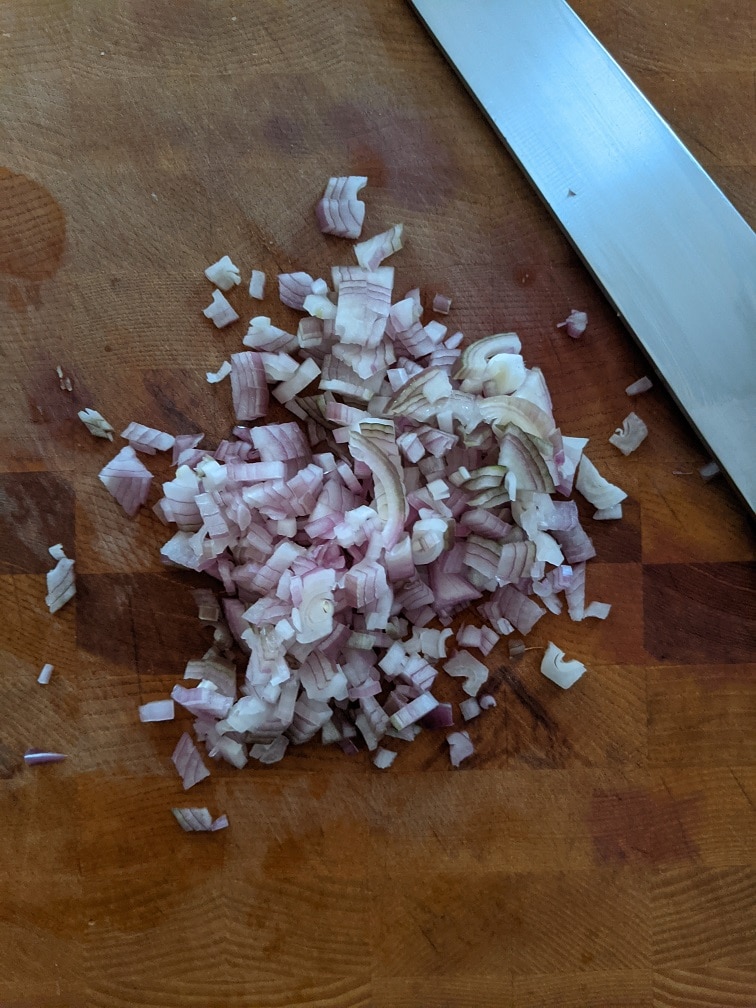
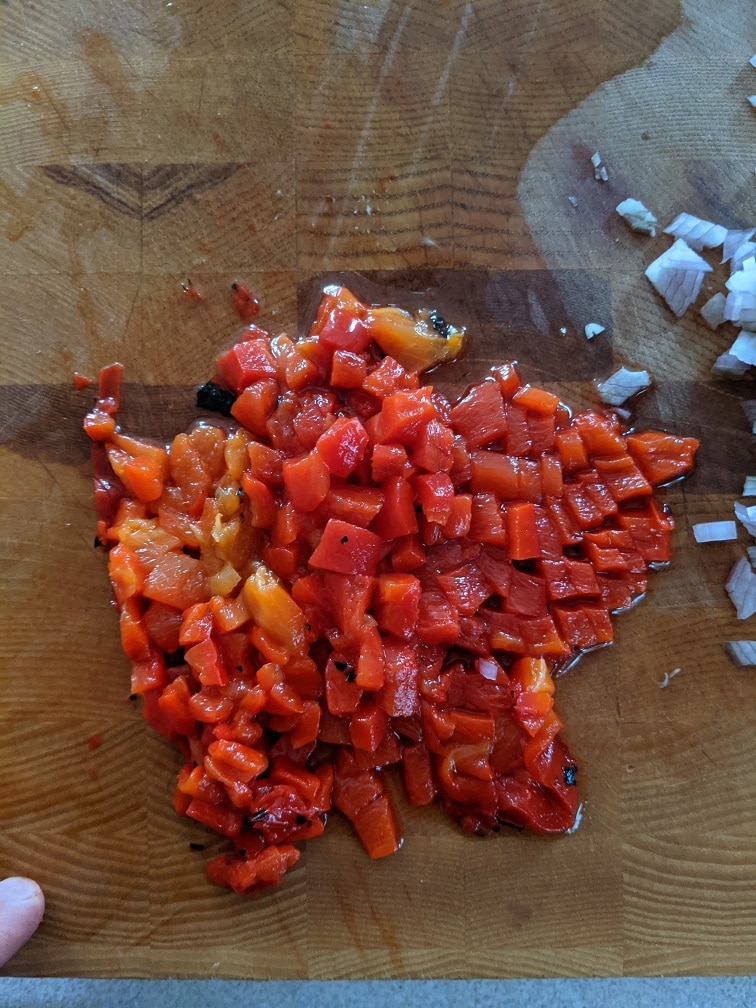
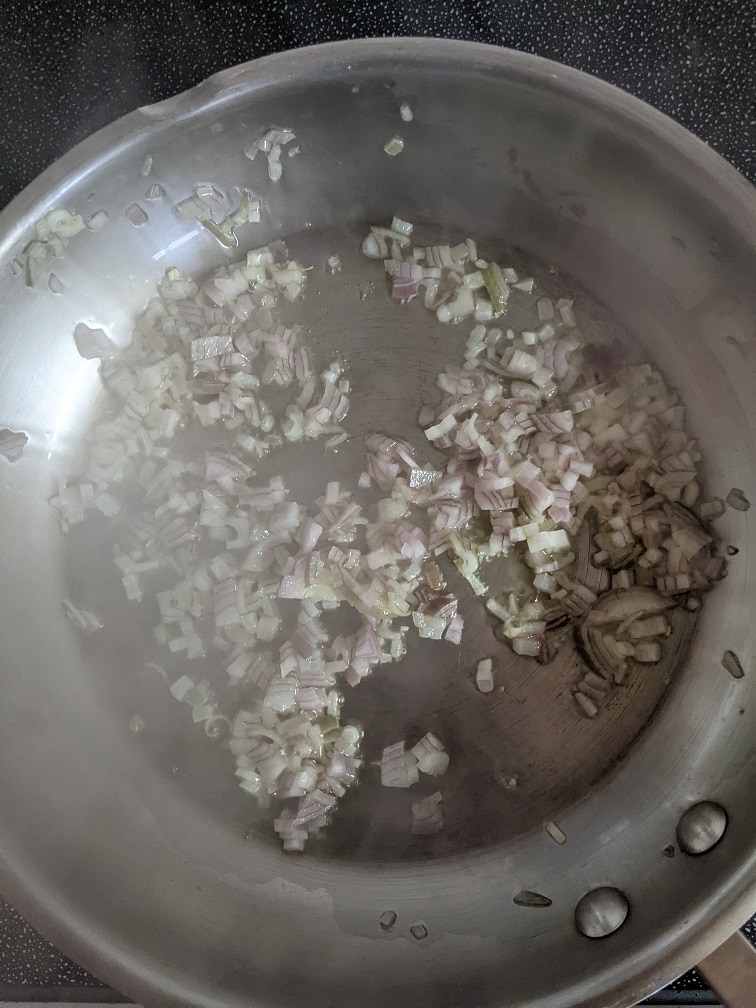
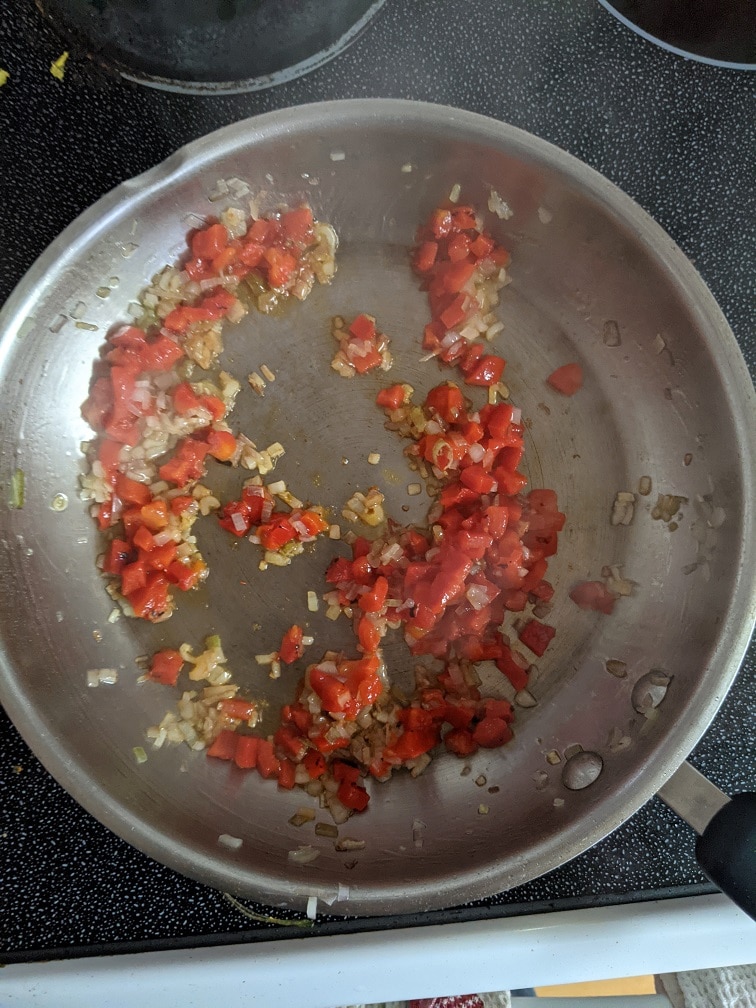
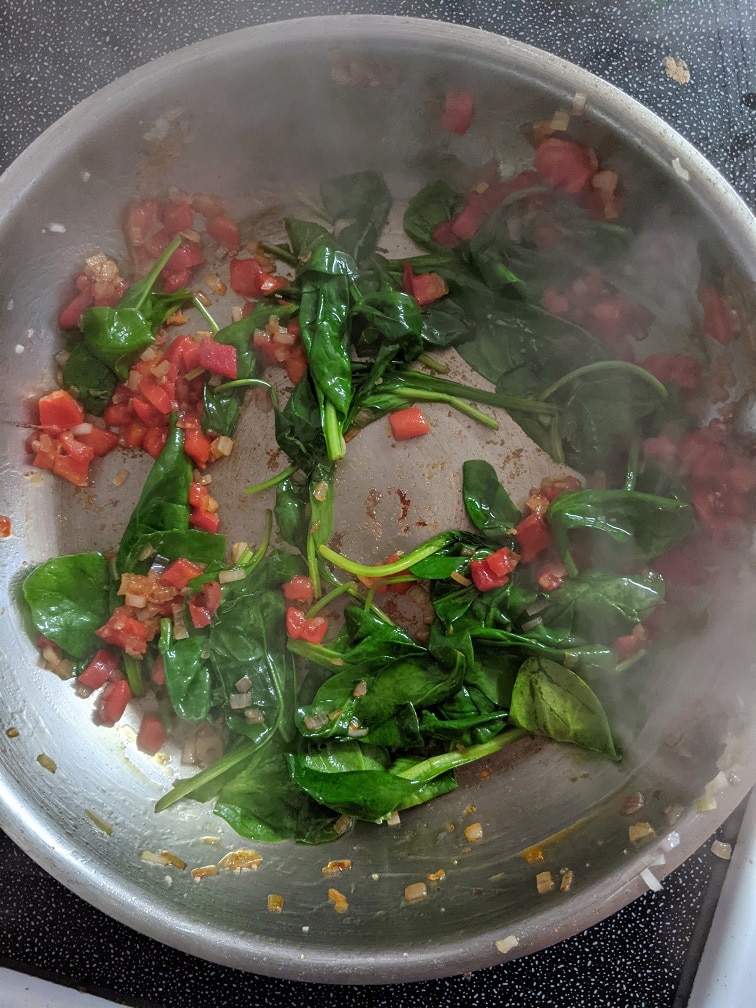
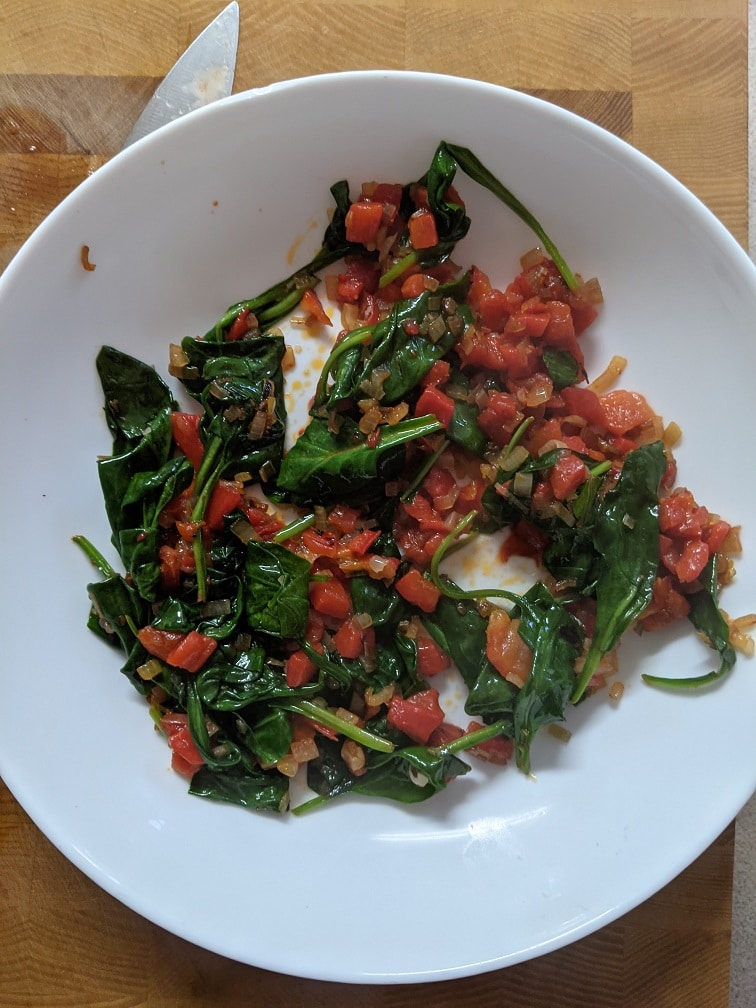
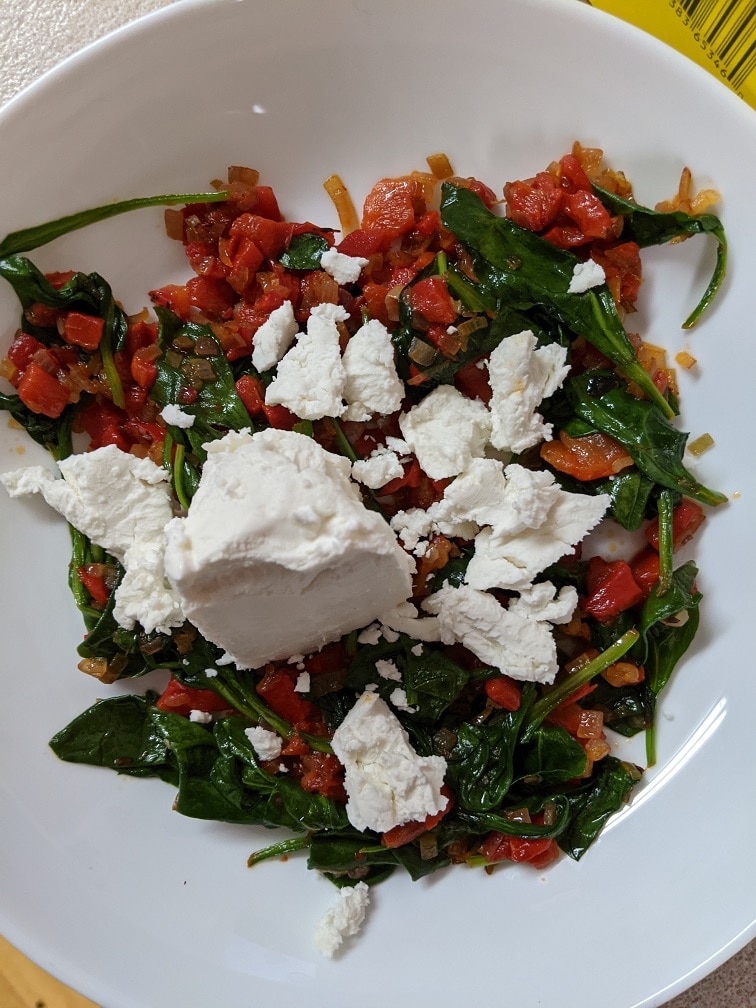
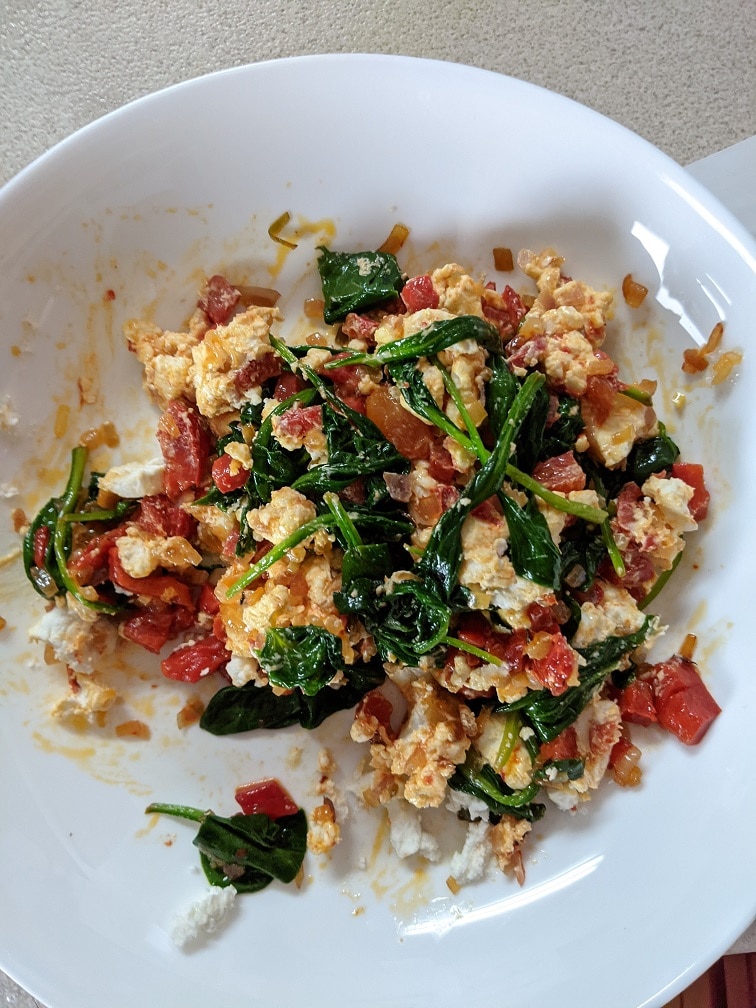
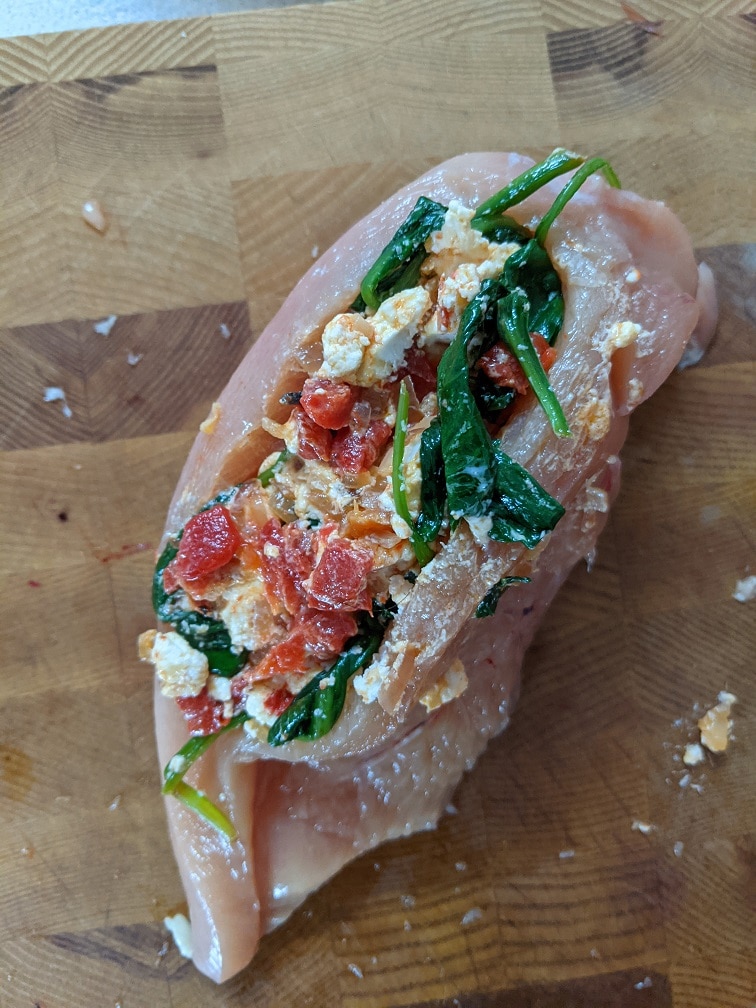
The stuffing for the Prosciutto Wrapped Chicken is made of shallots(you can use onions), garlic, roasted red pepper, spinach and goat cheese. It is not complex by any means. You can find all the measurements in the written recipe at the end of the post. To make the stuffing, mince the shallot or onion and the garlic, and dice the red pepper. Heat a medium frying pan over medium-high heat, then add one tablespoon of olive oil, then the shallot and garlic. Cook for two minutes, then add in the red pepper, cook for one minute, then add in the spinach and cook until it is wilted. Season with salt and pepper, then take the stuffing out of the pan and set it aside to cool. Once the mixture has cooled, mix in the goat cheese. Just like that, the stuffing is ready.
As I said in the introduction, this post not so much about the stuffing recipe, though it is delicious. Use the recipe, you’ll be happy you did, but focus more on how to cut the chicken breast, how to wrap it and how to cook it. Becasue if you master those techniques, you can stuff the chicken with whatever you want from Boursin Cheese, to apple, cranberries and brie, to caramelizd onion and Swiss. Focus on the techniuqe.
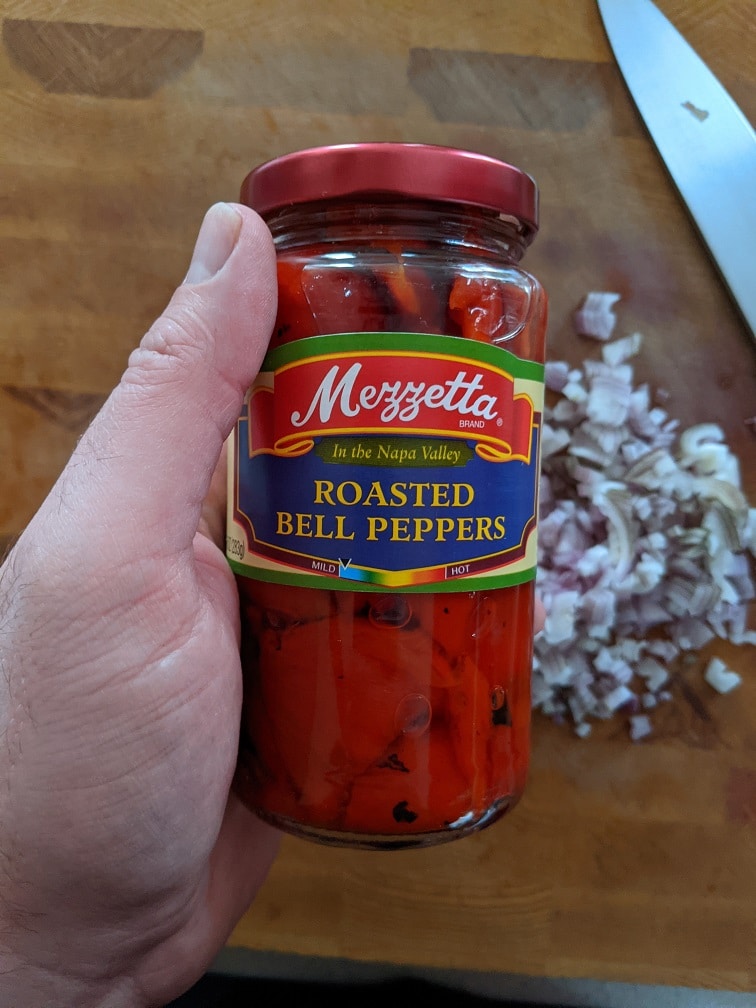
Jarred Roasted Red Peppers vs. Homemade
I used store-bought roasted red peppers in my chicken, stuffing for one main reason. It is a lot easier and quicker to buy roasted red peppers than roast them at home. There is very little difference in taste between the store-bought ones and the homemade ones. If you want to roast the peppers yourself, go for it, I often do, but it is okay to use jarred ones as well.
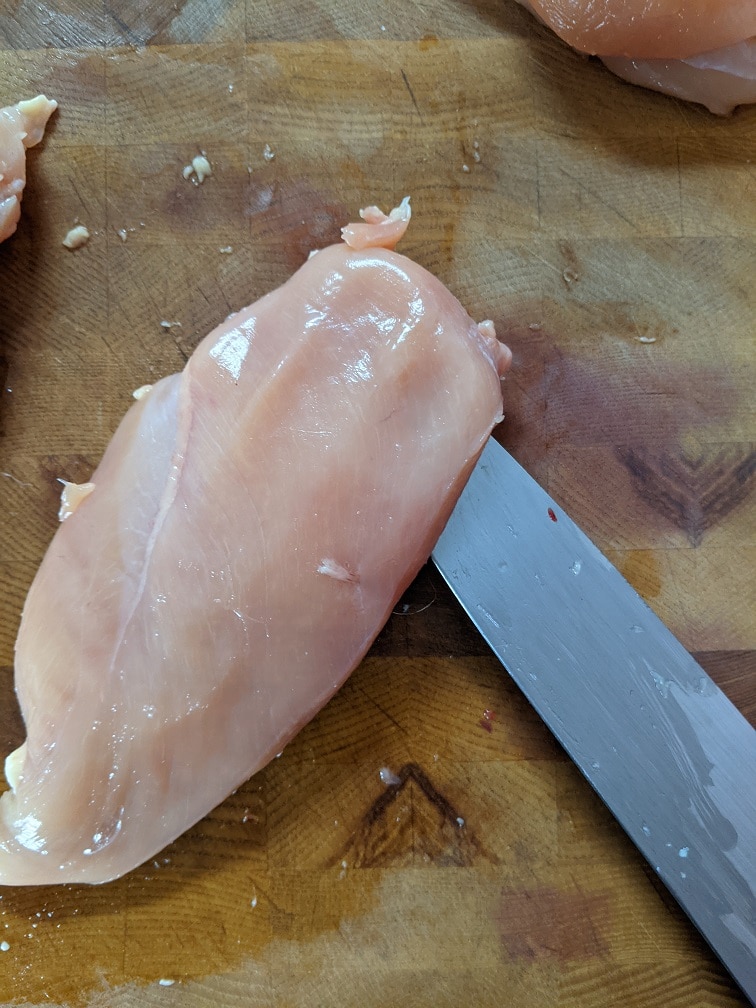
Cutting The Chicken Breast For Stuffing
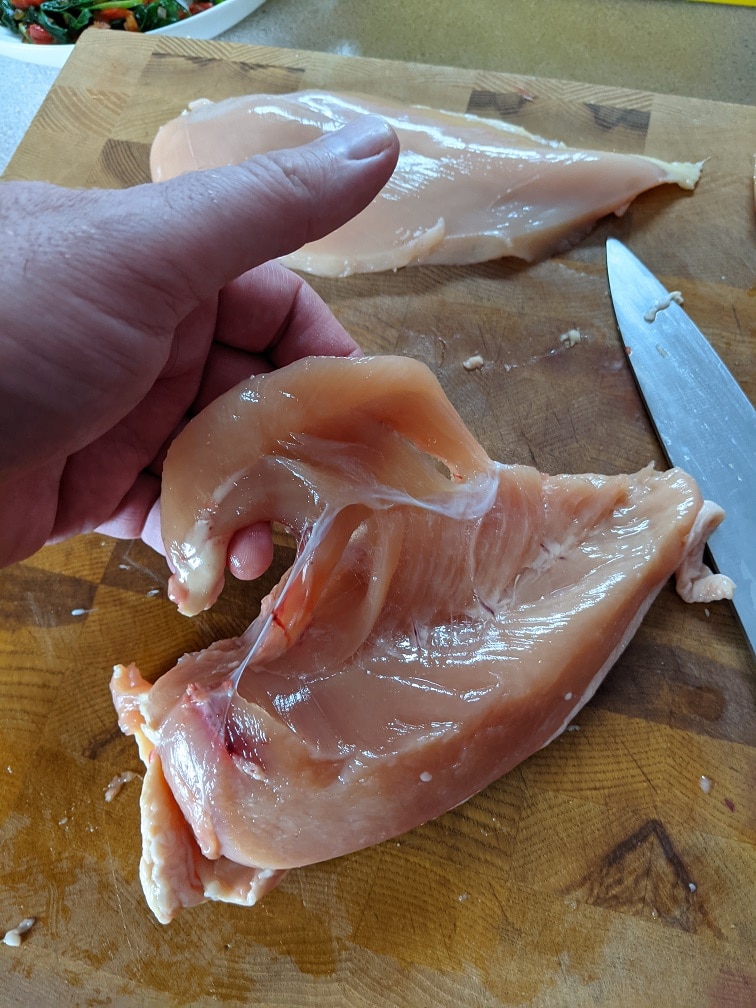
To prepare the chicken for stuffing, you first have to remove the little flap of meat on the bottom of the chicken breast known as the tender. If you buy breaded chicken tenders at the store or the pub, what you’re getting is that little piece of meat on the underside of the breast. Whenever I take the tender off of a chicken breast, I freeze it, then when I have enough, I bread and fry them. The tender has to come off the breast because it tends to affect how the breast cooks. Often there will be a small patch of raw chicken under the tender. So, it’s best to remove it.
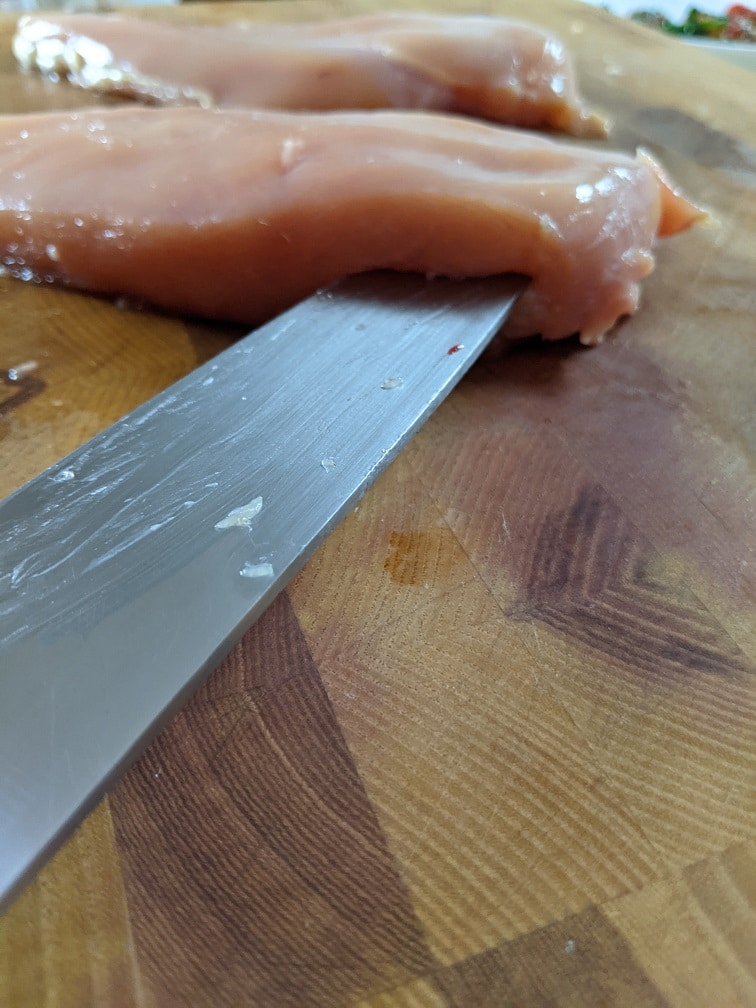
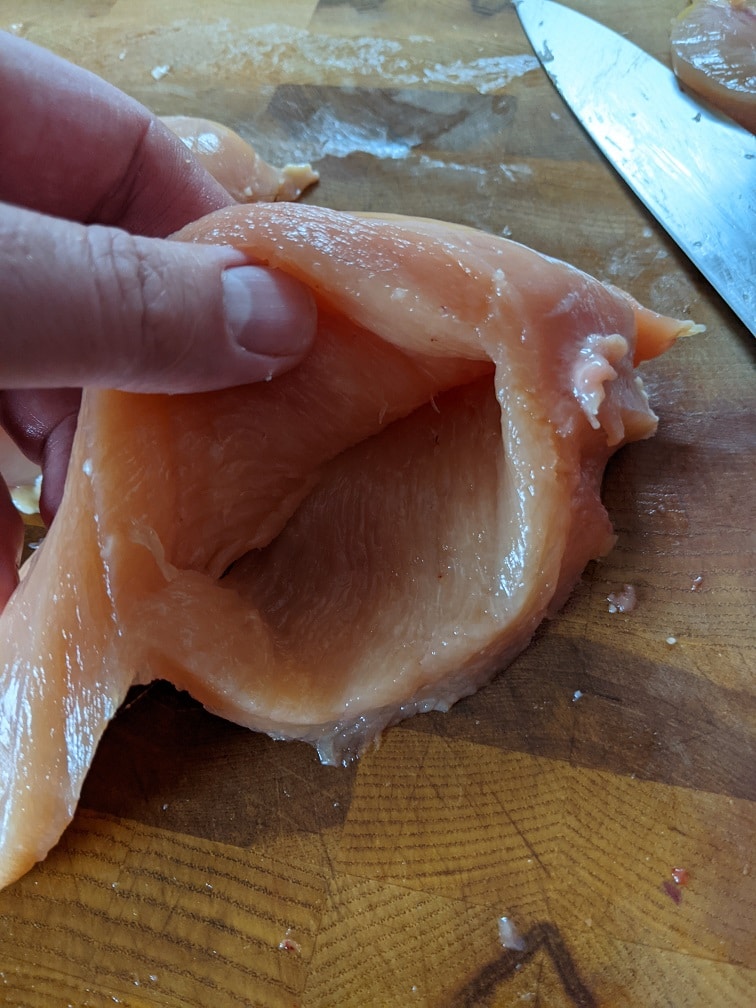
To make the pocket for the stuffing, use a knife (you might prefer a paring knife for this job) to cut a two-inch opening in the side of the chicken that goes about two-thirds of the way through the breast. Try your best not to cut through the other side or the bottom of the breast.
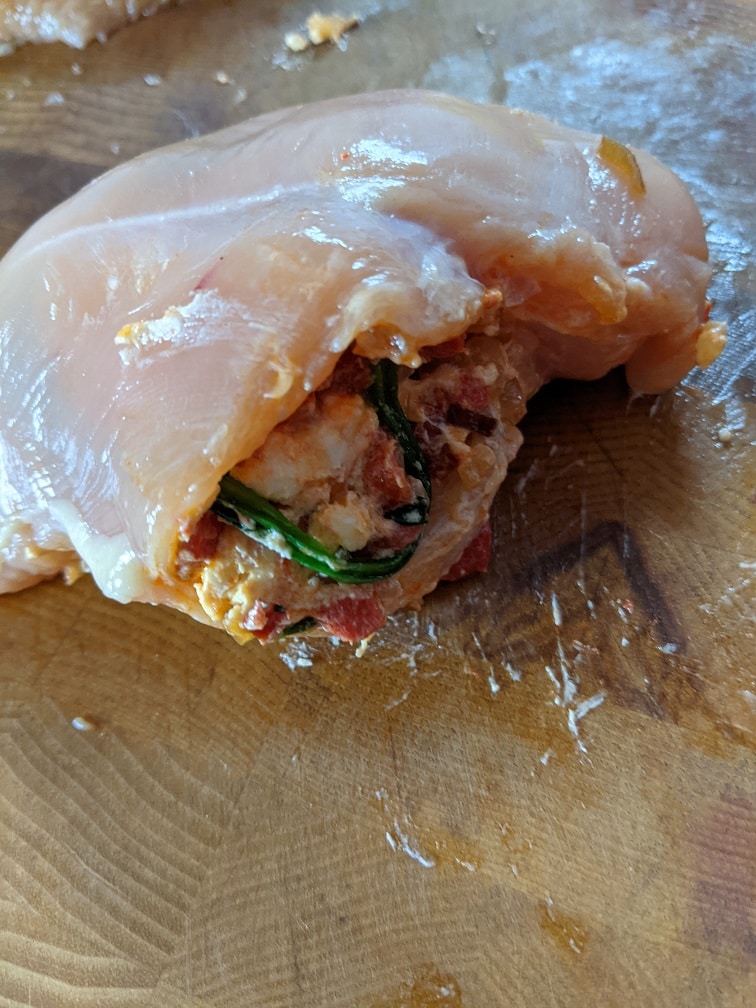
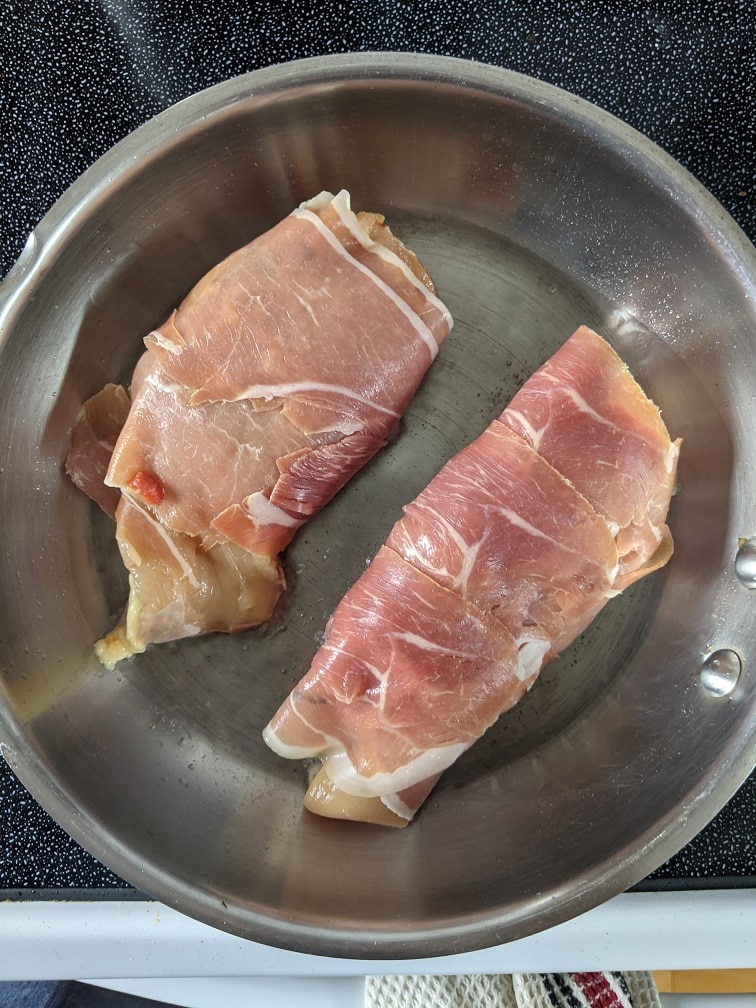
Stuffing and Wrapping The Chicken in Prosciutto
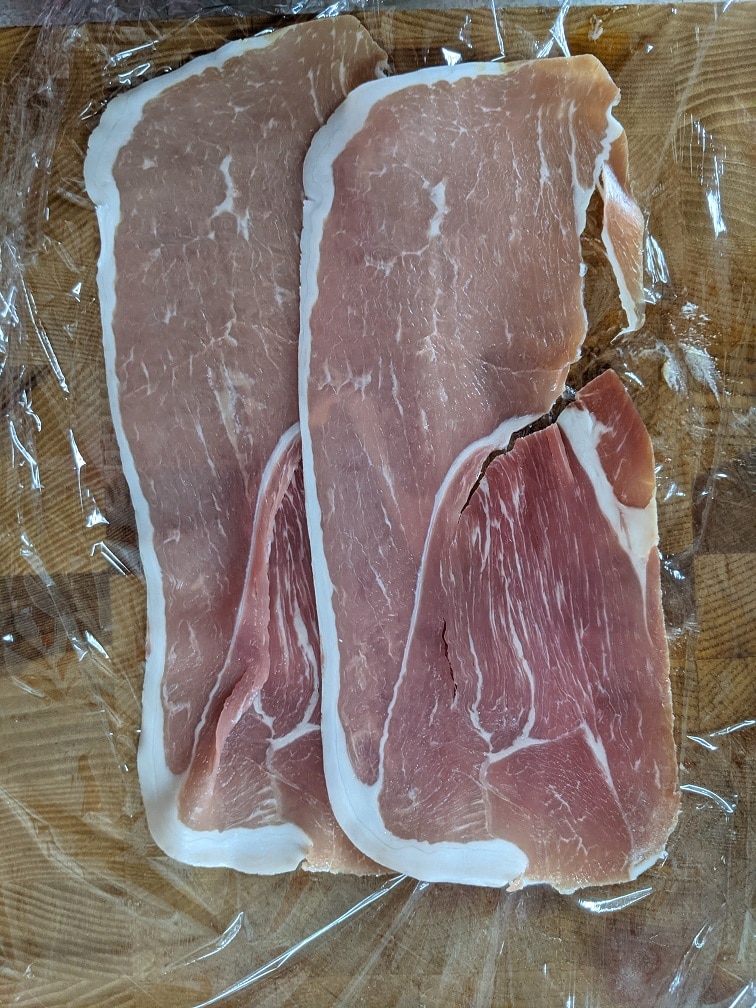
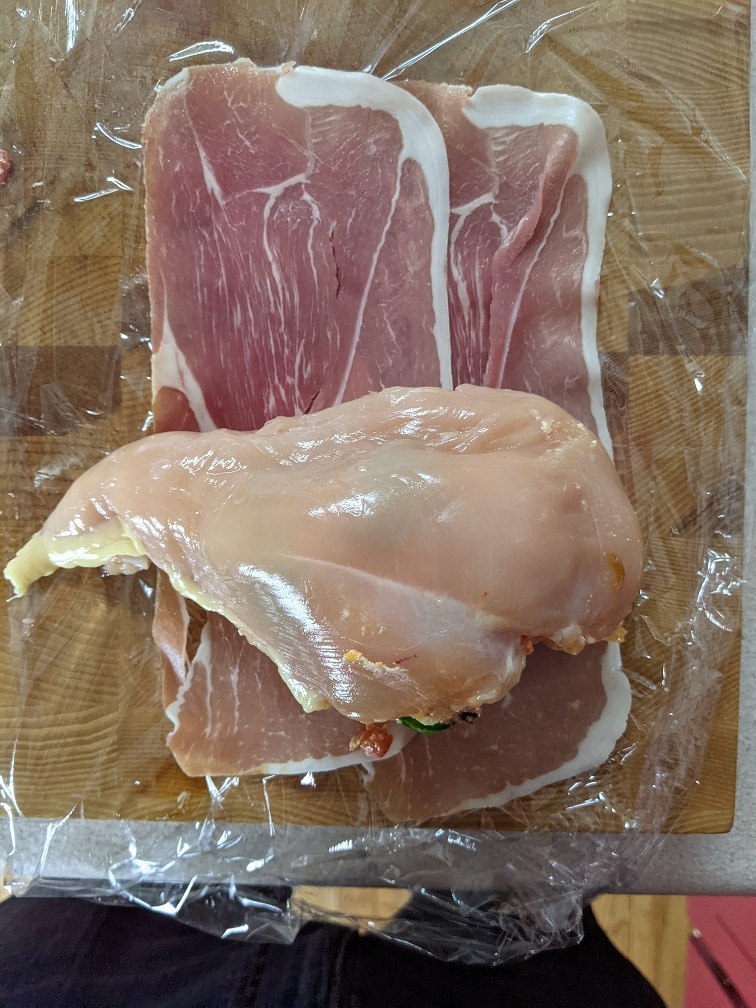
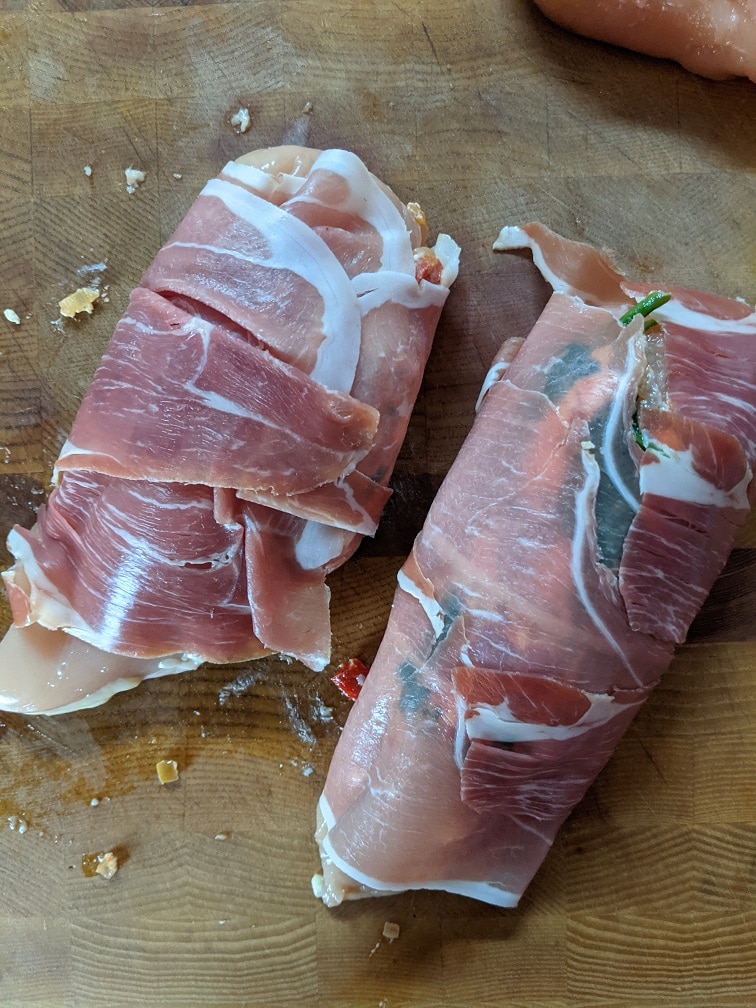
Now that you have a pocket in your chicken breasts, you can fill them with the stuffing. Use a spoon to push the stuffing into the breast. Don’t push the stuffing into the chicken with too much force as you may split the breasts. To wrap the chicken, lay a twelve-inch length of plastic wrap on your cutting board. Put two overlapping pieces of prosciutto down on the board, then place the chicken on the prosciutto. Use the plastic wrap to pull up on the prosciutto and roll it tightly around the chicken breast. Repeat with the second breast.
Cooking The Prosciutto Wrapped Chicken
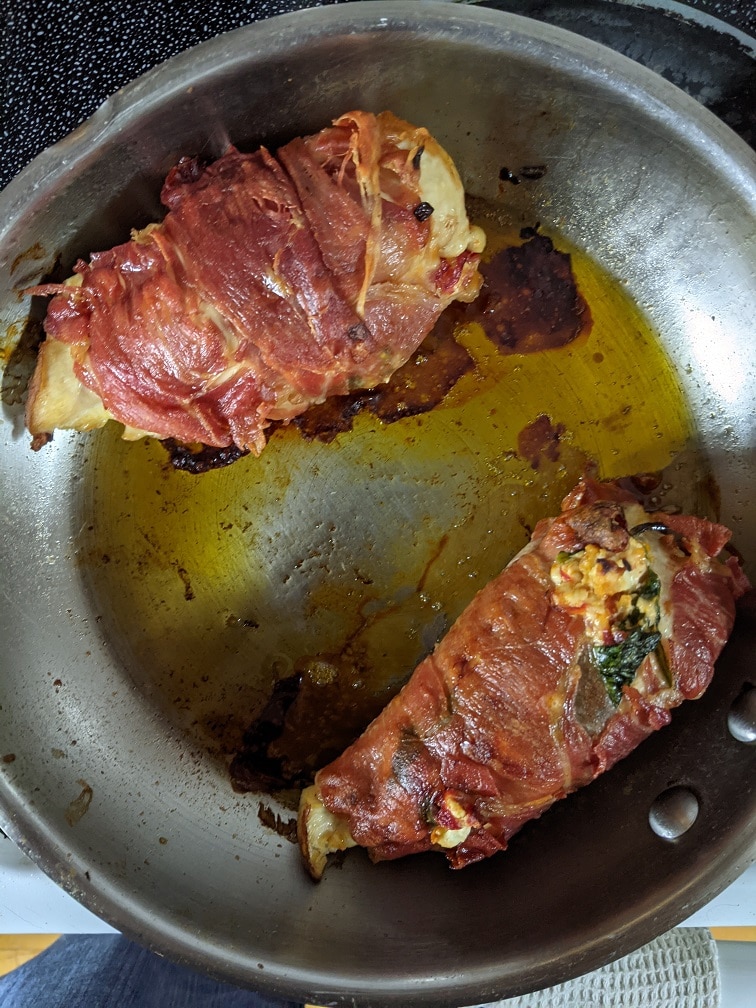
Cooking the prosciutto-wrapped chicken happens in two stages. The first stage is to sear the chicken in a hot pan. This first step will seal the prosciutto around the chicken, and it will help make the prosciutto crispy. The last thing you want is soggy prosciutto. The second stage of the cooking process happens in the oven. This will cook the chicken breast and finish crisping the prosciutto.
To cook the chicken, heat a medium-oven safe pan over medium-high heat. Add one tablespoon of canola oil into the pan, then place the breasts in the pan with the seam of the prosciutto facing down. Leave the chicken alone for three to four minutes or until it releases from the pan easily. Flip it, and leave it alone for another two to three minutes. Drain the oil out of the pan, then put the pan in the oven at 375°f for 30 to 35 minutes or until a thermometer inserted into the thickest part of the breast reaches 165°f. Remove the chicken from the oven, take it out of the pan and let it rest for five to ten minutes before cutting it. Serve with mashed potatoes or rice and vegetables.
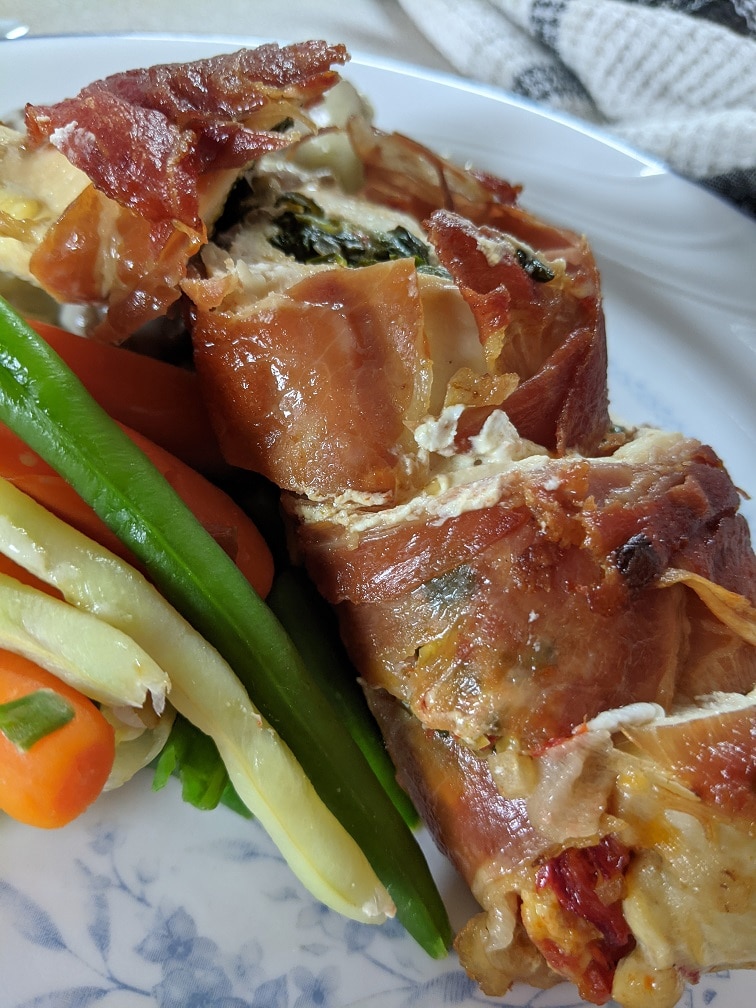
Prosciutto Wrapped Chicken Breast
Chicken Breast Stuffed with Spinach, Roasted Red Pepper, and Goat Cheese then wrapped in prosciutto.
Heat a medium skillet over medium-high heat. Add the olive oil along with the shallot and garlic. Cook for two minutes then add in the red pepper and spinach. Season with salt and pepper and cook just until the spinach is wilted. Let the filling cool to room temperature then mix with the goat cheese.
Prepping The Chicken
Cut the little flap of meat (the tender) off the bottom of the chicken breast. Lay the chicken breast flat on your cutting board. Make an incision in the chicken and cut 2/3 of the way through the breast, making a pocket for the stuffing. Repeat with the second breast
Stuffing and Wrapping The Chicken
Using a spoon push the stuffing into the chicken breasts but don't force so much filling into the breasts that they explode.
Lay a 12-inch length of plastic wrap flat on your cutting board and place two prosciutto slices on it overlapping each other. Put the chicken breast, open side down on the prosciutto and use the plastic to pull the proscuitto up and over the chicken. Roll until the breast is fully wrapped. Repeat with the other breast.
Cooking The Prosciutto Wrapped Chicken
Heat a medium frying pan over medium-high heat. Add the canola oil into the pan. Put the chicken in the pan with the seam of the prosciutto down. Cook the chicken for 3 to 4 minutes, flip, cook for another 2 minutes, drain off any excess oil and put in the oven on 375°f for 30 to 35 minutes or until a thermometer inserted into the thickest part of the breast reaches 165°f.
Stuffing chicken breast and wrapping it in prosciutto or bacon is a great way to jazz up that boring old bland piece of chicken. You can switch the stuffing up however you’d like by using things like Boursin or cream cheese, basil leaves instead of spinach, or any number of other ingredients. Really, this is more about the technique of stuffing the chicken, wrapping it and cooking it, so the prosciutto or bacon remains crisp. The recipe for the stuffing, delicious as it is, is irrelevant. Use the technique, create your own stuffing recipes and enjoy.
Come back on Wednesday to see how to make homemade Gluten-Free Eggrolls with homemade plum sauce.
Thank you for reading the post. If you liked it, remember to share it on Facebook, Pinterest, or Twitter. Did you know that Chefsnotes.com has over 400 posts just like this one? Subscribe to the blog below, and you will be notified of every new post so you will never a helpful tip or recipe again. And if you would like to know more about me, click the picture of me below to read my story “Life on the line.”
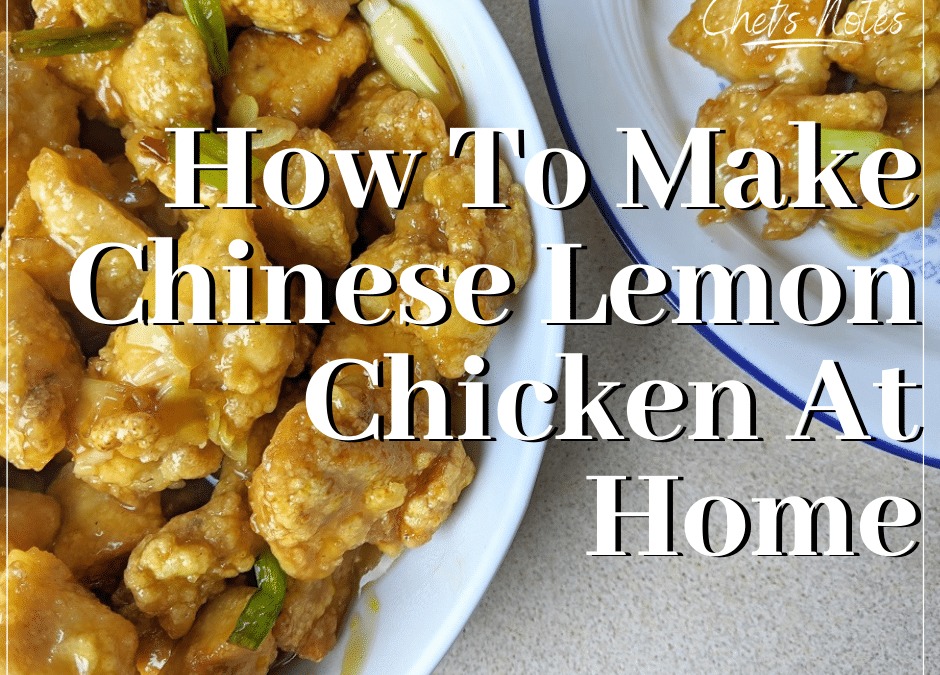
Chinese-Style Lemon Chicken is crispy bits of fried chicken in a lemon sweet and sour sauce. And yes, it is exactly as good as it sounds. For those who have been following the whole Homemade Chinese Take-Out Series here on Chef’s Notes, parts of this recipe will seem familiar. The batter for the lemon chicken is the same as it was for the General Tso Chicken. The lemon sauce is almost identical to the sweet and sour sauce we used for the Sweet and Sour Chicken Balls, with two exceptions. There is no cherry juice for colour, and the vinegar is replaced with lemon juice. Despite that, you will be blown away by how different this Lemon Chicken tastes than those other dishes despite the similarities. Okay, let’s get to it.
Chinese Lemon Chicken Sauce
To make this sauce, grate the zest of one lemon into a medium pot. Be careful only to grate the yellow rind as the white pith under it is very bitter and will make the sauce bitter. To the lemon zest, add the juice of three lemons, two tablespoons of soy sauce, one tablespoon of rice vinegar, half a cup of sugar, a pinch of crushed red pepper flakes and a pinch of salt. Boil the contents of the pot for one minute. Whisk in a mixture of two tablespoons cornstarch and half a cup of water. Turn the heat down to medium and cook the sauce, whisking until it is thick enough to coat the back of a spoon. Set the sauce aside until you are ready to use it.
The Chicken
When making lemon chicken, it is easiest to use boneless, skinless chicken breast. I used three fairly large chicken breasts for my lemon chicken, which I diced into one inch by one-inch cubes (2.5 cm x 2.5 cm). These three chicken breasts made more than enough lemon chicken for four people. I made a lot intending to have leftovers. Feel free to cut the amount of chicken back, or once the chicken is deep-fried, let half of it cool and freeze it. When you want to use it, cook it in a 400°f oven on a sheet pan for about twenty to twenty-five minutes from frozen.
Battering and Frying The Chicken
To batter the chicken, put three egg whites in a bowl and whisk them together with a big pinch of salt and white pepper. Put one cup of cornstarch in a separate bowl. In batches, coat the chicken in the egg whites, then in the cornstarch. Shake off the excess and deep-fry on 365°f for about five minutes or until the chicken is golden brown, crispy, and cooked all the way through. Shake any excess oil off the chicken, then put it in a large metal bowl and repeat the process until all of the chicken has been fried.
Putting The Lemon Chicken All Together
To finish the lemon chicken, heat a large wok or frying pan over high heat. Coat the bottom of the pan with canola oil and add in two tablespoons, each thinly sliced ginger and garlic along with three green onions cut into one-inch pieces. Cook just until the ginger and garlic start to brown. Add the fried chicken to the wok and toss. Finally, add the sauce, and cook it until it is hot. Toss the chicken to completely coat it in the sauce. Serve.
Chinese-Style Lemon Chicken
Lemon chicken is essentially sweet and sour chicken but the vinegar in the sweet and sour sauce is mostly replace with lemon juice. This sweet, tart lemon chicken is just the thing you need in your homemade Chinese Food repotoir.
Keyword: Chicken, chicken recipes, Chinese Food, Chinese Food Series, Chinese Take-Out, Homemade Chinese Food, Lemon Chicken
Servings: 4people
Author: Chef’s Notes
Ingredients
Lemon Sweet and Sour Sauce
1Lemon, zest
3Lemons, juiced
1/2cupSugar
2tbspSoy Sauce
1tbspRice Vinegar
1/4tspCrushed Red Pepper Flakes
1/4tspSalt
2tbspCornstarch
1/2cupWater
Chicken
3lgChicken Breast, cut into 1 inch cubes
3Egg Whites
1/2 tspKosher Salt
1/4tspWhite Pepper
1cupCornstarch
Oil For Deep Frying
Finishing the Lemon Chicken
2tbspSliced Ginger
2tbspSliced Garlic
3Green Onions, cut into 1-inch pieces
1tbspCanola Oil
Instructions
Lemon Sweet and Sour Sauce
Put all of the ingredients in a medium-sized pot except the cornstarch and water.
Bring the contents of the pot to a boil and cook for one minute.
Whisk together the cornstarch and water and whisk it into the sauce.
Turn the heat down to medium-low and cook the sauce, gently whisking, for about five minutes or until the sauce is thick enough to coat the back of a spoon.
Set the sauce aside until you are ready to use it.
Chicken
Whisk the egg whites with the salt and white pepper.
In batches coat the chicken in the egg whites then in the cornstarch. Shake off any excess then fry the chicken at 365°f for about five minutes or until the chicken is crispy and cooked through.
Take the chicken out of the fryer, draining off any excess oil and put it in a large metal bowl until you are ready to use it. Continue this process unitl all of the chicken has been fried.
Finishing The Lemon Chicken
Heat a large wok or skillet over high heat.
Add in 1 tablespoon of oil along with the ginger, garlic and green onions. Cook just until the garlic starts to brown.
Add the fried chicken to the wok and toss to distribute the ginger and garlic.
Add the sauce, and cook until it is hot. Toss the chicken to coat it full in the sauce.
Chinese Food is one of my favourite cuisines, whether it is real Chinese Food or our North American version. Having to eat gluten-free makes going to Chinese Restaurants almost impossible. So, cooking all these wonderful dishes at home means that I still get to enjoy them, and I don’t have to worry about gluten. Whether you can eat gluten or not, making this stuff at home is an excellent thing. There is nothing like really well made, fresh Chinese food, especially when you’ve made it yourself.
Thank you for reading the post. If you liked it, remember to share it on Facebook, Pinterest, or Twitter. Did you know that Chefsnotes.com has over 400 posts just like this one? Subscribe to the blog below, and you will be notified of every new post so you will never a helpful tip or recipe again. And if you would like to know more about me, click the picture of me below to read my story “Life on the line.”
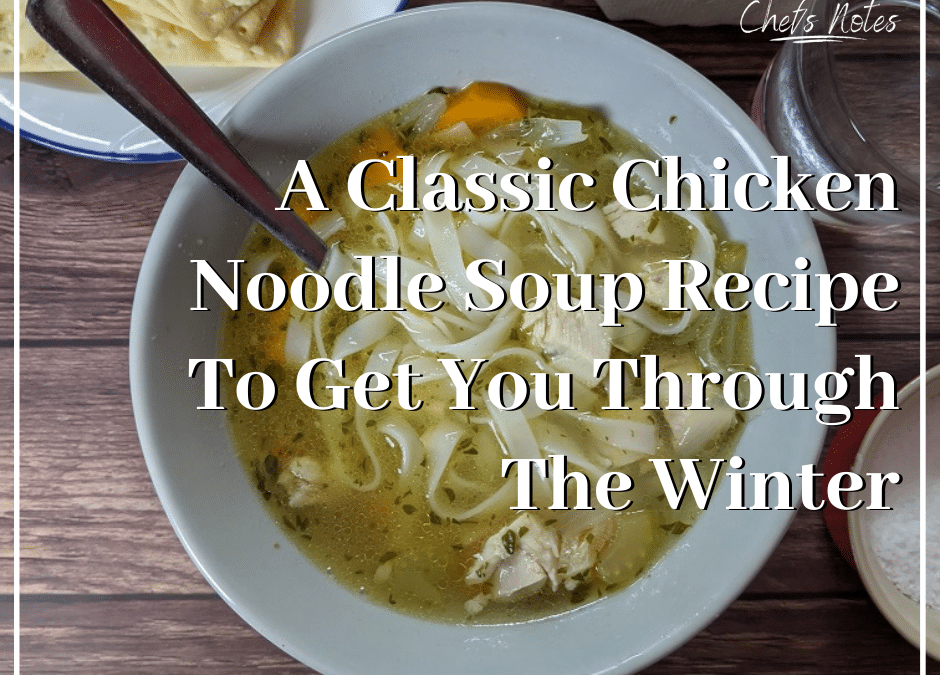
With cold weather and storms on the horizon, I think it is fair to say that we could all use a little comfort right now. What’s more comforting than a big bowl of homemade chicken noodle soup? Today, I will share my Classic Chicken Noodle Soup recipe with you to hopefully help get you through winter. What I love about this recipe is how few ingredients there are and how few steps there are to making it. Any one, despite skill level, can this soup, and I hope you all do. Let’s get to it.
Chicken Stock
Because chicken noodle soup is typically so stripped down, the ingredients really need to speak for themselves. The main ingredient, i.e. the most important, is the broth or stock that makes the soup base. Today, it is common to use the terms broth and stock interchangeably, but there is one significant difference between them. Let’s take a look at both.
Broth vs Stock
I’m sure you’ve heard the term “bone-broth” used in the last couple of years. I despise that term because it doesn’t make any sense. Bone-broth is a contradiction because if it is made with bones, it is a stock. For it to be a broth, it has to be made with meat. For example, Chicken Stock is made with the leftover carcass of a chicken, cooked or raw. On the other hand, chicken broth is made with a whole raw chicken or raw chicken pieces like legs and things. Besides bones or meat, broth and stock are made the same way.
Using Chicken Stock vs. Chicken Broth for Chicken Noodle Soup
All this stock versus broth talk is probably leading you to wonder which one is better for making soup. Generally, you are going to get more chicken flavour from broth than you will from stock. Having said that, one of the best parts about making chicken noodle soup is using the chicken carcass, which otherwise would be thrown away. So, even though you will get more flavour by making a broth, it is much more cost-effective and useful to make stock as the base for your soup. However, if you want to buy a chicken specifically to make broth for soup, go for it. It will be the best chicken soup you’ve ever had. I had a leftover chicken carcass, so the base of my soup is stock.
Making Chicken Stock
To make the chicken stock break a chicken carcass into pieces (separate the leg and wing bones, break the rib cage away from the back) and put it in a medium-sized pot. Add in one diced medium-sized onion, half a diced carrot, and half a celery stock diced. To flavour the stock, add two to three bay leaves, a teaspoon of peppercorns, and four to five sprigs of fresh thyme. Cover the ingredients with cold water, about two litres in total, then bring to a boil. Once the stock starts to boil, reduce the heat to low and simmer for an hour.
After the stock has simmered, it is time to strain it. Set a fine-mesh strainer over a large heat-proof bowl and pour the stock into it. Save the liquid and discard the carcass and vegetables. The stock can be used right away to make soup or gravy, or you can store it in the fridge for up to five days or in the freezer for up to six months. Extra chicken stock can be used to flavour mashed potatoes, cook rice, or add to sauces.
Vegetables
Now that the stock is made, strained, and ready to go, we can make our soup. For that, we need some more vegetables. For the soup, as for the stock, we will be using carrot, onion, and celery in the same amounts. The difference is that the soup vegetables are thinly sliced, where the stock vegetables were cut into fairly large chunks. Along with the vegetables, slice two cloves of garlic.
Noodles
Obviously, you can’t have chicken noodle soup without noodles. I use rice noodles in my soup for two reasons. First of all, they are gluten-free, and as someone who can’t eat gluten, that is obviously crucial for me. Also, rice noodles hold up in the soup better than most wheat noodles. If you would prefer wheat noodles, go for it. Either way, precook the noodles and have them ready to go. You want about two cups of cooked noodles in total.
One recommendation I will make, no matter what noodles you use, is to not add them directly into the soup. Keep the noodles separate. When you are ready to eat, put the noodles in a bowl, and pour the hot soup over them. If you put the noodles directly in the soup, they will continue to absorb liquid and eventually totally fall apart. This will be really bad for any leftovers.
Making The Chicken Noodle Soup
Everything is ready to go. It’s just a matter of putting it all together. So, to make the chicken noodle soup, put the stock in a medium-sized pot, along with the vegetables and one and a half teaspoons of kosher salt (or three-quarters of a teaspoon of table salt). Bring the stock to a boil on high heat, turn the temperature down to medium and simmer it for fifteen minutes or until the vegetables are tender. Add one teaspoon of fresh chopped thyme into the soup along with two cups of cooked, cubed chicken and half a teaspoon of black pepper. Simmer the soup for another five minutes, then take it off the heat and adjust the seasoning to taste.
Finishing Up
Divide the noodles among four bowls and ladle the hot soup over them. Then serve the soup with buttered crackers, biscuits, or bread and enjoy!
Classic Chicken Noodle Soup
Chicken, vegetables, broth, and noodles. What more do you need? This is the perfect chicken noodle soup recipe to help get you through winter.
Put all the ingredients for the stock in a pot and cover with cold water.
Bring the pot to a boil on high heat. Once the pot starts to boil, turn the heat down to low and simmer the stock for one hour.
Strain the stock reserving the liquid and discarding the carcass and vegetables.
Soup
Return the stock to the pot along with the sliced onion, carrot, celery, and garlic. Bring the stock back to a boil, then turn the heat down to medium. Season the soup with salt and pepper and simmer for 15 minutes or until the vegetables are cooked through.
Add the diced chicken and thyme into the soup and let it simmer for 5 more minutes. Taste the soup and adjust the season as desired.
Divide the cooked rice noodles among four bowls. Ladle the hot soup over the noodles and serve.
There is nothing better on a cold day than a big bowl of chicken noodle soup. It warms you up inside and out and gives you that homey feeling that we all need every once in a while. This recipe in this post is not meant to be fancy or high-end by any means. Chicken Noodle Soup doesn’t need that. It is perfect just the way it is.
Thank you for reading the post. If you liked it, remember to share it on Facebook, Pinterest, or Twitter. Did you know that Chefsnotes.com has over 400 posts just like this one? Subscribe to the blog below, and you will be notified of every new post so you will never a helpful tip or recipe again. And if you would like to know more about me, click the picture of me below to read my story “Life on the line.”
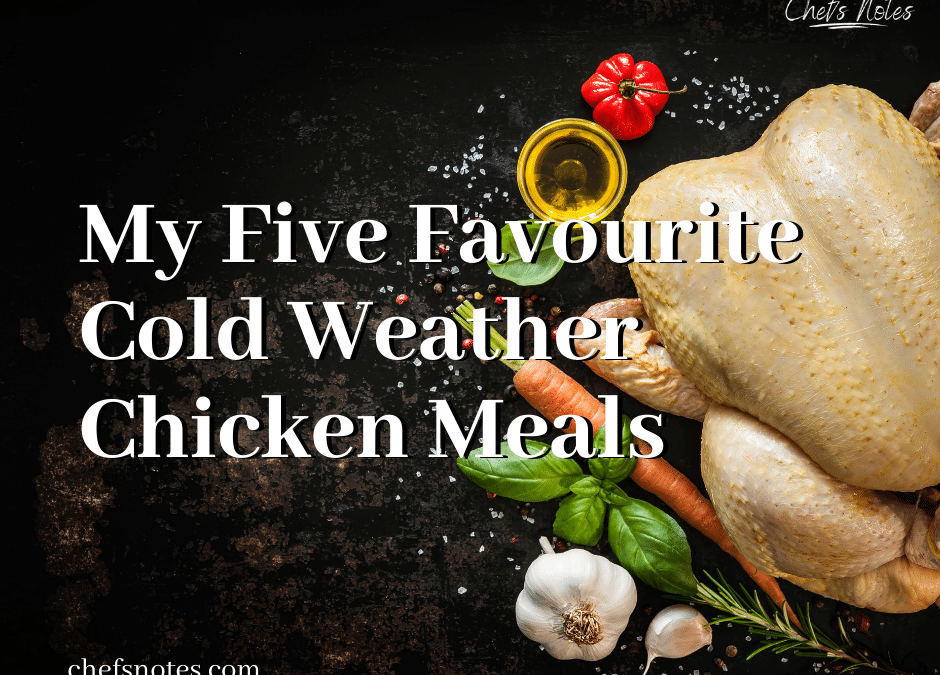
Let’s be honest, chicken is great at any time of year, but some specific chicken dishes are best suited to colder weather. Today, I am going to share with you my five favourite cold weather chicken meals. Some of these you’ve probably had, others you may never have heard of. But I assure you that any and all of these dishes will help get you through the long impending winter. These are my favourites, and I’d love to hear about yours too. Tell me about them in the comments at the end of this post or on Facebook. Alright, let’s get to it.
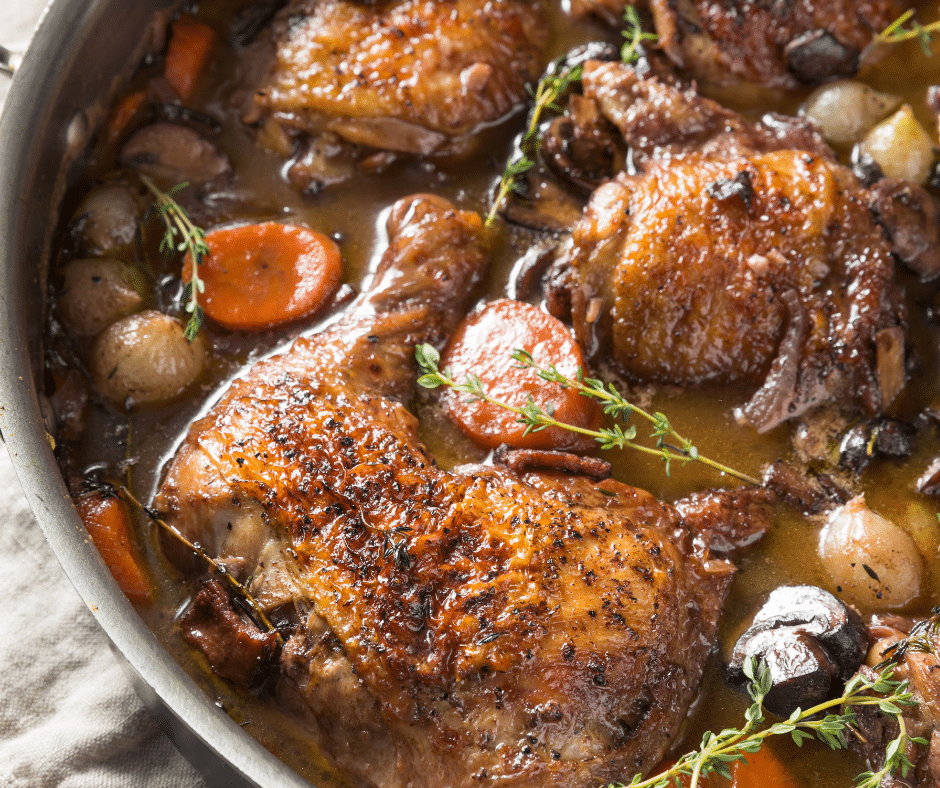
1. Coq Au Vin
The first cold weather chicken dish that we will look at is Coq au vin or chicken in wine. Coq au vin is a rustic French dish of chicken braised in wine with vegetables, herbs, and often bacon. Traditionally, the chicken used for Coq au vin would be a rooster. Roosters are often tougher and leaner than hens, hence the long cooking time and bacon’s addition to the dish. The long cooking time and low temperature are perfect for tenderizing tough cuts of meat or a tough rooster. The bacon adds additional fat to the dish that would be necessary when using a lean rooster. Now, unless you raise your own chickens or know someone who does, you will likely be using store-bought chicken. That’s not an issue. If anything, it may cut down the cooking time of the dish.
I could give you a coq au vin recipe, but why would I when I can share with you Julia Child’s in her own words? Check out the video below for her recipe. Heads up, the video isn’t the best quality, but the recipe is top-notch.
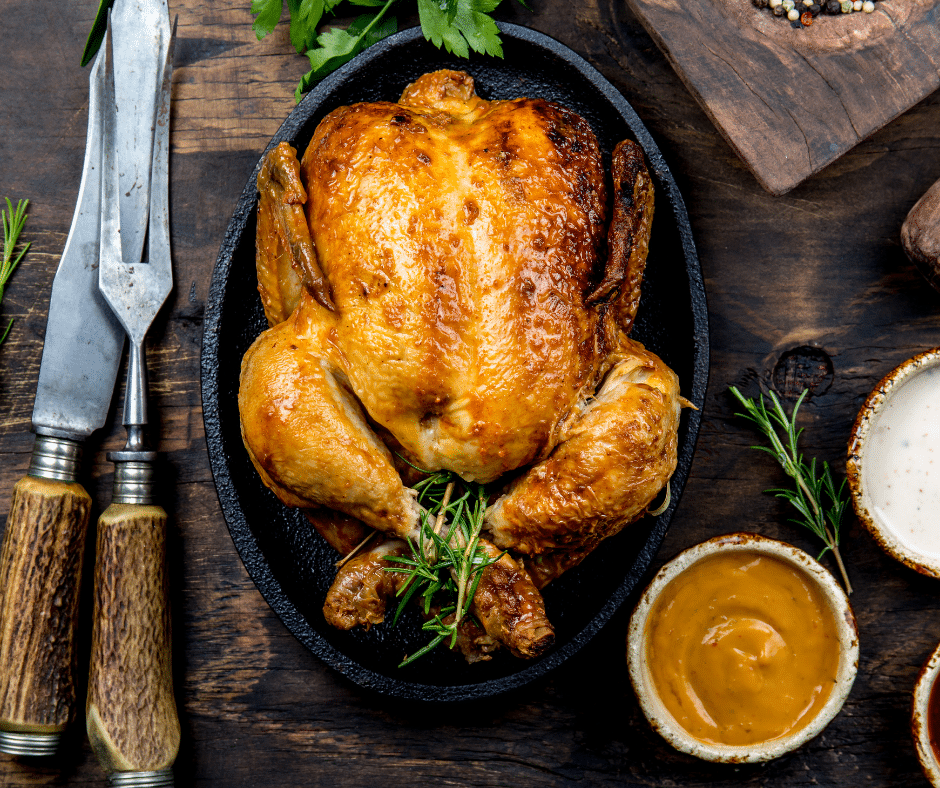
Is there anything better than a classic roasted chicken dinner? I don’t think that there is. When it comes to roast chicken, the simpler, the better. Once again, I defer to Julia Child and her writing in Mastering The Art Of French Cooking. Julia’s recipe is one that has only four ingredients. They are chicken, salt, butter, and olive oil. Julia drys her chicken’s skin, rubs it in and out with salt and olive oil, then roasts it, and bastes it with melted butter and olive oil. She starts her chicken at 425°f for 15 minutes, rotating the bird from left to right every five minutes. She then turns the oven temperature down to 350°f and roasts it for another hour or so until the bird is cooked through. About halfway through cooking, she bastes the bird with a mixture of olive oil and melted butter and continues to do so every ten to fifteen minutes until the chicken is cooked. If you want an amazing roast chicken on a cold winter day, this is how you do it.
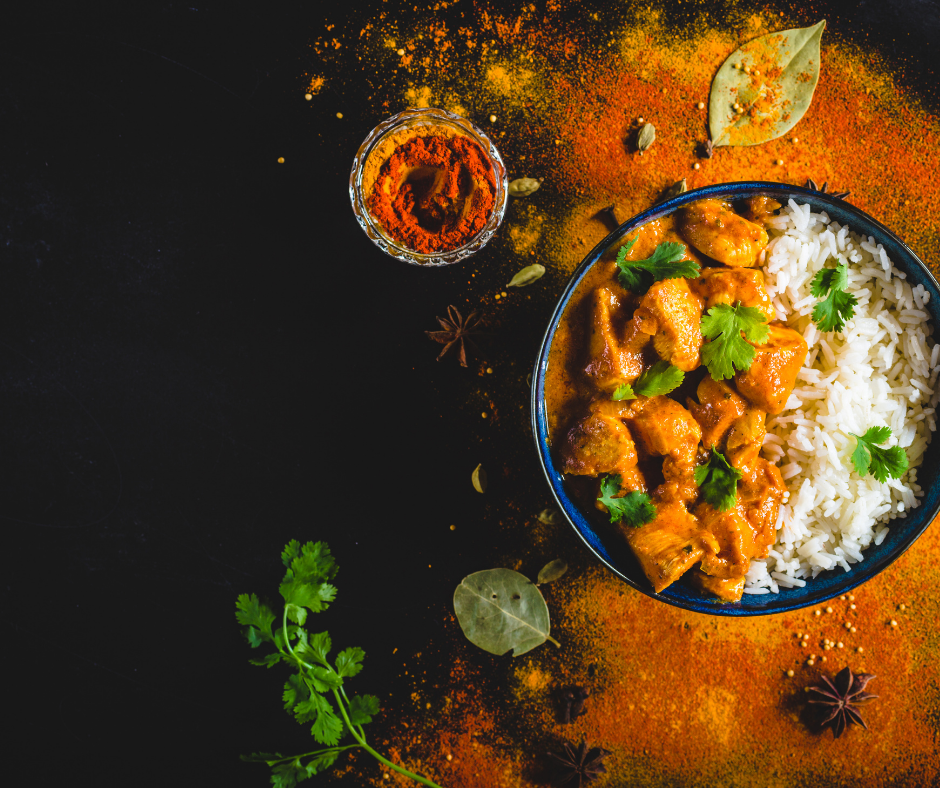
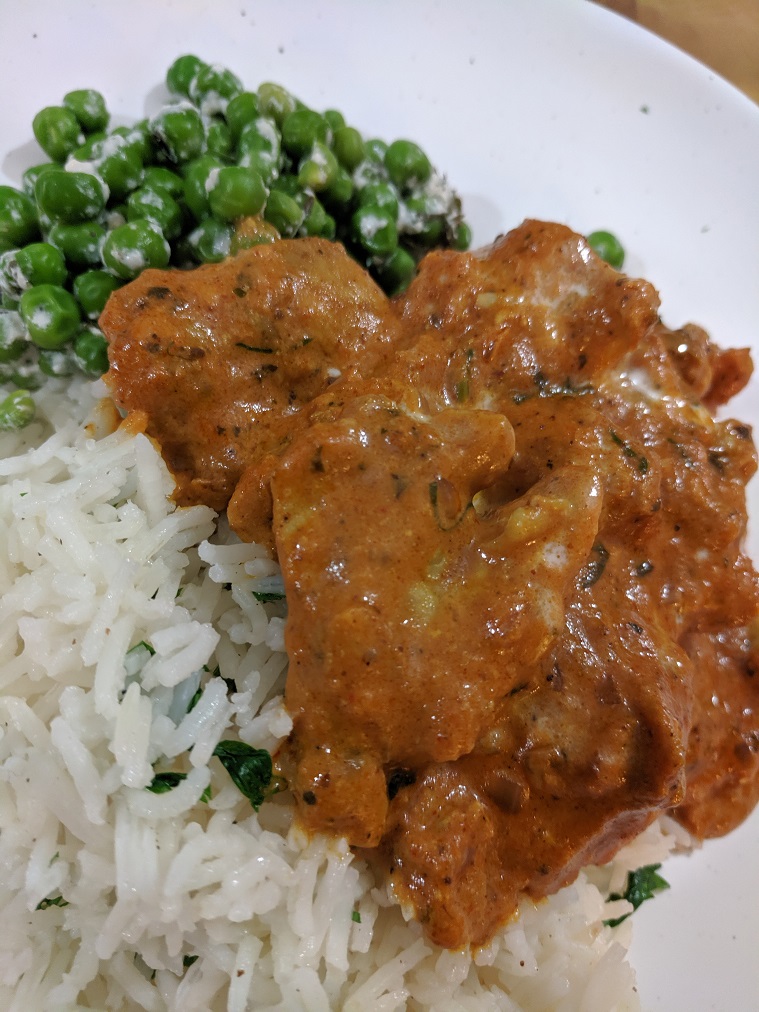
We think of butter chicken as a classic Indian dish, and in a lot of ways, it is. But, it depends on how you define the word classic. Butter chicken is not a dish that has existed for hundreds of years or that was enjoyed by the maharajas of old. But that doesn’t mean that it isn’t an interesting or delicious dish. Butter chicken was actually developed by three restauranteurs in Delhi in the 1950s to salvage tandoori chicken that was leftover at the end of the night. The restauranteurs realized that if they stored the left-over chicken in a rich tomato gravy, the chicken would remain tender for the next day. A happy side effect of this is that the chicken was even more delicious. And just like that, butter chicken was born.
I struggled for a long time to develop my own butter chicken recipe. There was something about it that I couldn’t wrap my head around. That was until I realized that butter chicken was two things, tandoori chicken and tomato gravy. After that, it came together very quickly. I hope that this helps you as well. You can find my recipe below.
Butter Chicken
A staple of Indian restaurants the world over, now you can make it at home. Delicious, creamy, butter chicken.
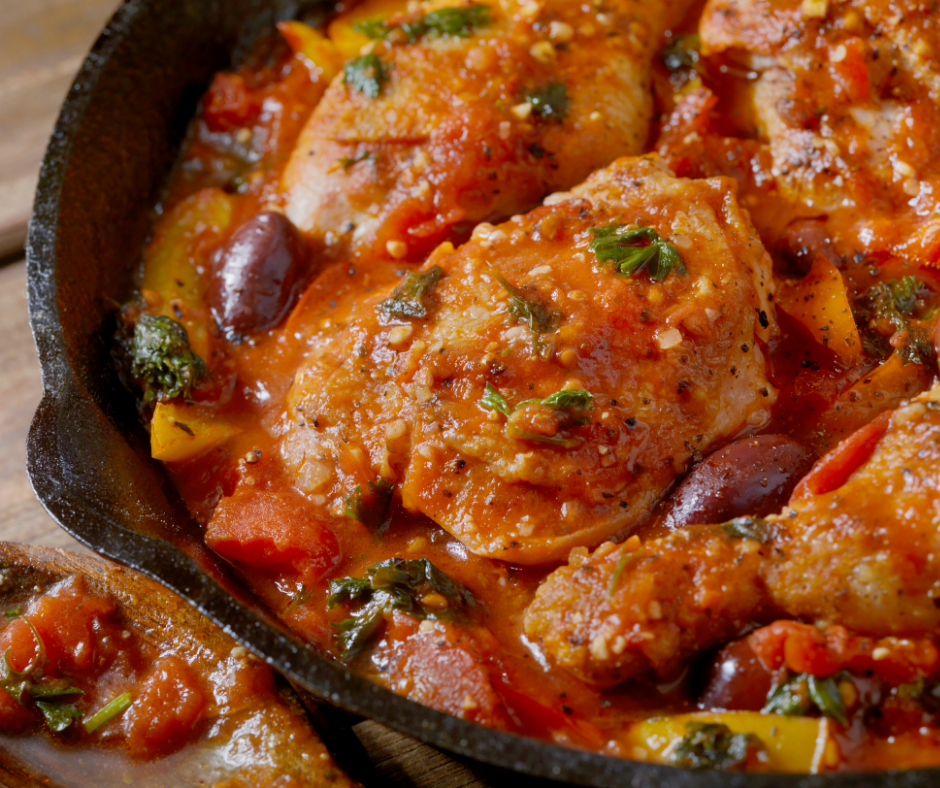
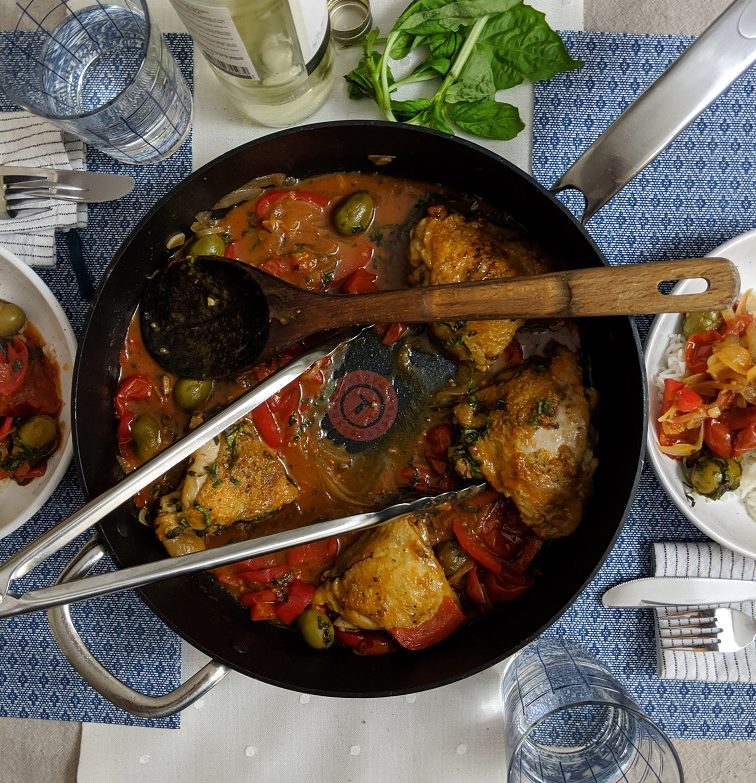
Like Coq au vin is a rustic French dish, Chicken Cacciatore is a rustic Italian dish. Cacciatore translates to “Hunters Chicken.” Essentially, Cacciatore is a dish that an Italian hunter would put together with whatever meat they had harvested. This could easily be a recipe for Rabbit Cacciatore or Quail Cacciatore. The dish comprises the main protein, olives, onions, peppers, wine, tomato sauce, and fresh herbs. It is a wonderful dish that is full of flavour and is classic Italian comfort food. Make this cold weather dish to warm your body and soul. You will be so happy that you did.
35 Minute Chicken Cacciatore
A delicious Chicken Cacciatore recipe that only takes 35 minutes from start to finish.
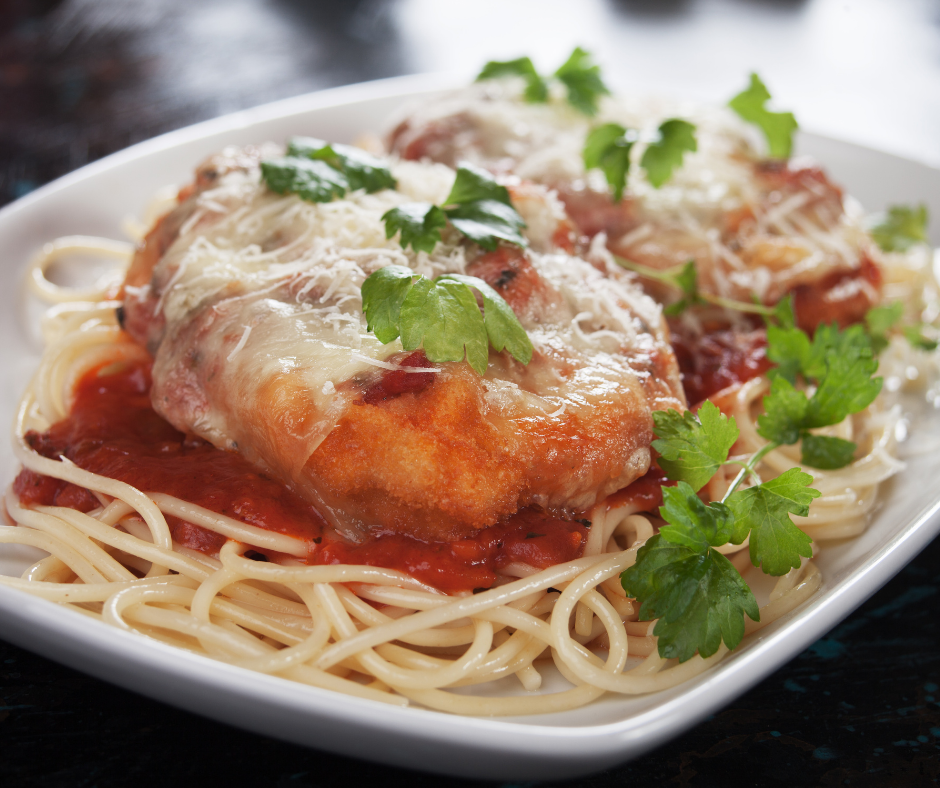
Chicken coated in flavoured breadcrumbs, pan-fried in butter and olive oil, topped with marinara sauce, parmesan and mozzarella cheese, then baked. What’s not to love about that? Chicken parmesan can be served with pasta, the classic accompaniment in North America, or potatoes and vegetables, which is more common in Italy. Whatever you choose to serve your chicken parm with, you’re going to enjoy it. Chicken parmesan also happens to make a delicious sandwich if you’re into that sort of thing.
If I’m honest, I’m thrilled that the weather has turned colder temperatures are coming. Cold weather means braises and stews and really hearty dishes, which I love. When the snow starts to fall and the windows are frosted over, it will likely be one of the dishes from this post that I turn to for comfort. Over the course of the winter, I will likely turn to all of these dishes, among many others, to get me through the long nights. What dishes will you turn to?
Thank you for reading the post. If you liked it, remember to share it on Facebook, Pinterest, or Twitter by clicking the icon to the left of the page. Did you know that Chefsnotes.com has almost 400 posts just like this one? Don’t ever miss a post again. Become a Chef’s Notes member right here. You will be notified of every new post. And if you would like to know more about me, click the link below to read my story.
We use cookies on our website to give you the most relevant experience by remembering your preferences and repeat visits. By clicking “Accept”, you consent to the use of ALL the cookies.
This website uses cookies to improve your experience while you navigate through the website. Out of these, the cookies that are categorized as necessary are stored on your browser as they are essential for the working of basic functionalities of the website. We also use third-party cookies that help us analyze and understand how you use this website. These cookies will be stored in your browser only with your consent. You also have the option to opt-out of these cookies. But opting out of some of these cookies may affect your browsing experience.
Necessary cookies are absolutely essential for the website to function properly. This category only includes cookies that ensures basic functionalities and security features of the website. These cookies do not store any personal information.
Any cookies that may not be particularly necessary for the website to function and is used specifically to collect user personal data via analytics, ads, other embedded contents are termed as non-necessary cookies. It is mandatory to procure user consent prior to running these cookies on your website.