Salt cod fish cakes are a versatile and delicious dish that can be enjoyed for both light lunches and filling brunches. This recipe is my personal best, and I am excited to share it with you. The flaky salt cod is paired with a perfect blend of lemon, thyme, parsley, and pepper, which provides a complementing flavour without overpowering the taste of the fish. Whether you’re an experienced home cook or a beginner, this recipe is easy to follow and guarantees great results. In this blog post, you’ll find detailed instructions and helpful tips to guide you through making the best salt cod fish cakes ever. So, let’s jump right in and get started on this delicious and satisfying dish.
What is Salt Cod?
Salt cod, also known as bacalao or bacalhau, is a traditional form of preserved fish used for centuries. The preservation process involves covering the fish in salt, which draws out the moisture and dries it, allowing it to be stored indefinitely. This method of preservation was commonly used during the days of long sea voyages before the advent of refrigeration or canning. Salt cod has a rich history and is a staple ingredient in many traditional cuisines, mainly Portuguese, Spanish, and Eastern Canadian cuisine.
Salt cod is available in various forms, including bits, fillets, or whole fish. For today’s recipe, we suggest using bits, which are readily available in most grocery stores. Additionally, salt cod is a versatile ingredient that can be used in many dishes, such as fish cakes, stews, soups, and more. It’s a great source of protein and packed with essential vitamins and minerals, which is why it has been a staple in the Mediterranean diet for centuries.
Preparing The Salt Cod
Soak The Cod
Salt cod, by definition, is salty, which is a result of the preservation process. However, to make it edible and to bring out its full flavour, it is important to remove some of the salt and rehydrate the fish. This process is known as soaking, and it is a crucial step when preparing salt cod.
To properly soak salt cod, start by rinsing the fish under cold running water to remove any excess salt on the exterior. Then, place the fish in a container and cover it with cold water. It is important to use cold water as it helps to keep the fish firm and preserve its texture. Next, place the container in the refrigerator and let it soak overnight. For best results, it is recommended to change the water at least once while the fish is soaking. This will help to remove any remaining salt and ensure that the fish is properly rehydrated.
Soaking salt cod not only helps to remove the excess salt but also helps to enhance the fish’s natural flavours and makes it more tender and moist. It’s also a critical step to follow when preparing any dish that calls for salt cod, whether it’s fish cakes, stews, soups, or any other traditional dishes.
Cooking Salt Cod
After the fish has been soaked, it’s time to cook it. Boiling the cod is an effective method to remove any remaining salt and also to infuse it with extra flavour. To begin, drain the soaking water from the cod and rinse it once again.
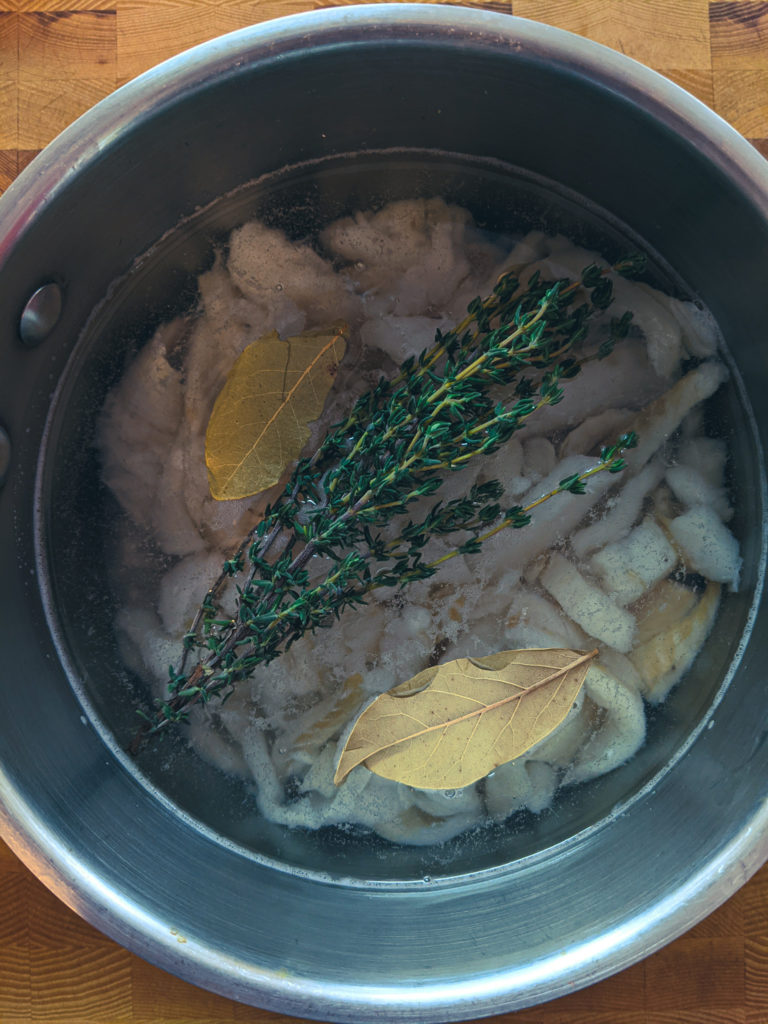
Place the cod in a pot, cover it with cold water and add a couple of bay leaves and a big sprig of thyme. The bay leaves and thyme impart a subtle and delicious flavour to the cod and help remove any remaining salt. Bring the contents of the pot to a boil over high heat, then turn the heat to low and simmer for about 5 minutes.
Once the cod is cooked, strain it and remove the thyme and bay leaves. The fish is now ready to be used for the fish cakes.
Making Salt Cod Fish Cakes
Onions
While the cod is cooking, prepare the onion. You’ll need about a cup of diced onion in total. Start by finely dicing one medium-sized onion. Also, chop up some thyme, about two teaspoons in total. This will add a subtle and delicious flavour to the fish cakes.
Put a small pot or pan on the stove on medium heat. Add a tablespoon of butter and a tablespoon of olive oil. Once the butter starts to foam, add the onions and thyme. Cook the onions for about three to four minutes or until they soften, turn translucent and start to slightly brown. Slightly browning the onions brings out the natural sweetness and enhances their flavour.
As you cook the onions, occasionally stir them to prevent burning. Slightly browned onions are a key ingredient in many dishes, and adding them to fish cakes will give your dish a unique and delicious flavour.
Assembling Salt Cod Fish Cakes
To make the fish cakes, start by putting the cooked cod and cooked onions in a medium mixing bowl. Add two cups of leftover mashed potatoes, two tablespoons of chopped parsley, a quarter teaspoon of black pepper, and the zest of one lemon. Parsley adds a fresh and herby note, the lemon zest provides a bright and tangy flavour, and the black pepper gives a nice kick of heat. These ingredients help to balance out the flavours of the fish and onions and provide a well-rounded taste.
With your hands or a wooden spoon, mix everything until it just comes together. The goal is to just combine the ingredients. It’s important not to over-mix the ingredients as it will cause the fish cakes to lose their delicate, flaky texture. Over-mixing causes the fish to release its moisture and bind together with the other ingredients, creating a gummy paste instead of a light and flaky fish cake. Additionally, over-mixing may lead to the fish cakes falling apart when they are cooked, so it’s important to handle the ingredients gently and mix them until they’re just combined.
You may also consider adding some additional ingredients like garlic, diced red pepper, or chopped olives to give the fish cakes more depth of flavour and make them more unique. Also, you can experiment with other herbs like dill or cilantro to give the fish cakes a different twist.
Forming The Fish Cakes
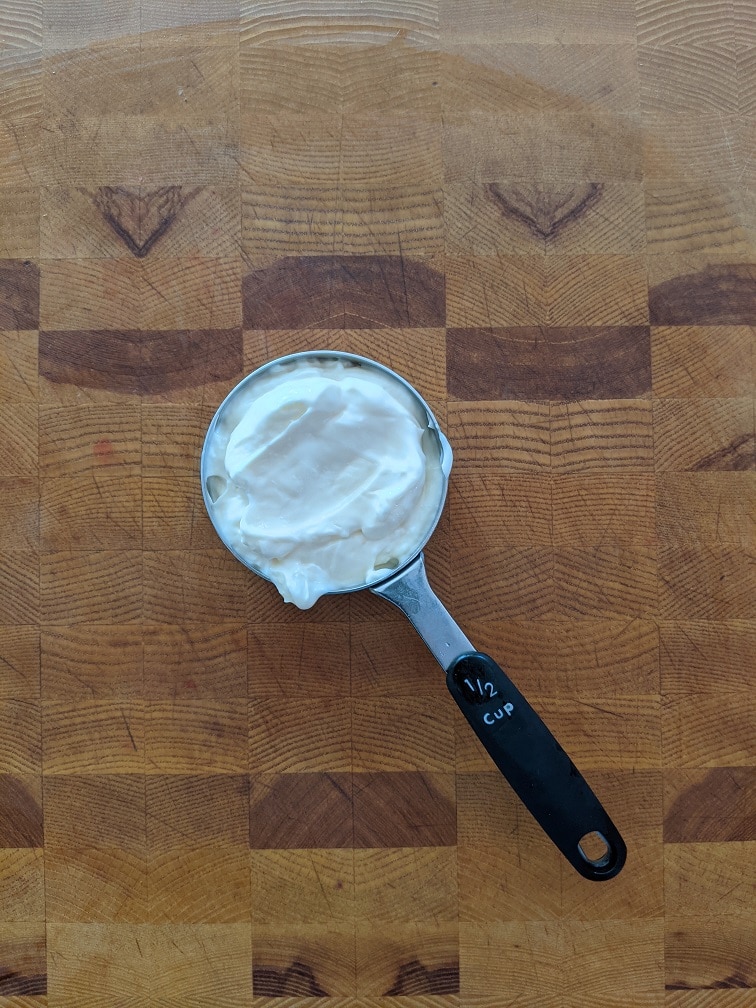
When forming the fish cakes, you can make them in different sizes depending on your preference. I prefer smaller fish cakes, so I measured mine with a quarter cup measure. However, if you prefer larger ones, you can use a half-cup measure or, for even bigger fish cakes, a full-cup measure. Ice cream scoops work well for this.
Simply measure out the mixture and form it into patties. You can cook the fish cakes right away or store them for later. They will last in the refrigerator for up to three days, and they can also be frozen for up to three months. Before cooking, chill the fish cakes in the fridge for 30 minutes to give them time to firm, making cooking easier. This is optional but highly recommended.
Cooking and Serving The Salt Cod Fish Cakes
To cook the fish cakes, heat a medium skillet over medium heat. Add a tablespoon of butter and a tablespoon of olive oil. Once the butter starts to foam, add the desired number of salt cod fish cakes to the pan. Cook the fish cakes for about three to four minutes per side or until golden brown and warm in the middle. Serve the fish cakes with a bit of salad and some tartar sauce or poached eggs.
The Wrap-Up
Cooking the fish cakes is a simple process that results in a delicious and crispy golden brown exterior and a warm and flaky interior. To cook the fish cakes, heat a medium skillet over medium heat. Add a tablespoon of butter and a tablespoon of olive oil. The combination of butter and oil creates a flavorful and rich base for the fish cakes to cook in and helps prevent sticking.
Once the butter starts to foam, add the desired number of salt cod fish cakes to the pan. Cook the fish cakes for about three to four minutes per side or until golden brown and warm in the middle. The fish cakes should be cooked through, and the internal temperature should reach at least 74°C (165°F) to ensure they are safe to eat.
When the fish cakes are ready, remove them from the pan and let them rest for a couple of minutes before serving. This will allow them to firm up and retain their shape.
Serve the fish cakes with a bit of salad and some tartar sauce or poached eggs. The salad provides a fresh and crunchy contrast to the fish cakes, while the tartar sauce or poached eggs adds a rich and creamy element to the dish. You can also serve the fish cakes with a side of roasted vegetables, mashed potatoes or even with a side of pasta or rice.
Subscribe now and never miss a delicious recipe! Put your email in the box below.
Best Ever Salt Cod Fish Cakes
Indulge in the ultimate fishcake experience with our "Best ever salt cod fishcakes" recipe. Made with succulent salt cod and infused with lemon, thyme, parsley and pepper, these fishcakes are a deliciously satisfying twist on a traditional favorite. Soak, cook, mix, shape and fry to perfection, these fishcakes are perfect for a light lunch or a filling brunch. Get the recipe now and taste the difference!
Rinse the excess salt off the cod under cold running water.
Put the fish in a container, cover it with cold water, and put it in the fridge for at least 12 hours or up to 24. For best results, change the water at least once.
Drain the water off the fish and rinse it once again.
Put the fish in a pot, cover it with cold water, and add 2 bay leaves and a big sprig of thyme.
Bring the pot to a boil on high heat. Once it comes to a boil, turn the heat to low and simmer for 5 minutes.
Drain the fish, and remove the bay leaves and thyme.
Onions
Put the butter and olive oil in a small pot or pan on medium heat.
Once the butter melts and starts to foam, add the onions and thyme.
Cook the onions, stirring, for 3 to 5 minutes or until the onions soften, turn translucent and just start to brown.
Fish Cakes
In a large mixing bowl, combine the cooked cod, cooked onions, mashed potatoes, lemon zest, parsley, and pepper. Mix just enough to bring everything together. You don't want to break the fish up too much.
Measure the mixture into 1/4 cup portions for small cakes or 1/2 cup portions for larger ones. Form into fish cakes.
Store the fishcakes in the fridge for up to three days or freeze them for up to three months.
To cook the fishcakes, heat a medium frying pan over medium heat. Add 1 tbsp of butter and 1 tbsp of olive oil. Once the butter starts to foam, add 3 to 4 fishcakes to the pan. Cook for about 3 minutes per side or until golden brown and warm in the middle. Serve.
Eating gluten-free can be very frustrating. I crave lots of foods but rarely do the gluten-free versions live up to their gluten-containing cousins. I find this to be especially true in restaurants. All too often, restaurants treat gluten-free food like health food. There is a place for that, no doubt. But, just because I have to eat gluten-free doesn’t mean I don’t also want junk food. Luckily, I’m a chef, and I can make whatever I want. What’s more, is that I can then share that with you. And boy, am I excited to share this gluten-free fish and chips recipe with you!
What’s great about this gluten-free fish and chips recipe is that whether you eat gluten or not, I am willing to bet that this will be one of the best fish and chips you’ve ever had. I know. That’s a bold statement. But I stand behind it. If you do eat gluten, substitute the gluten-free flour for regular all-purpose flour. Are you ready for this? I know I am. Let’s get to it!
You can always find the recipes directly below but keep reading for more information and a more detailed walkthrough.
Gluten-Free Fish and Chips Recipe
Gluten-Free Fish and Chips
Whether you eat gluten-free or not, this will probably be one of the best fish and chips you've ever eaten. I know that's a bold statement, but I stand behind it. The Fries are extra crispy but fluffy inside. The fish is tender with a light and crispy, flavourful batter. Oh, and did I mention that it's gluten-free?
Keyword: Fish and Chips, Fish and Seafood, Fries, Gluten Free, Potatoes
Servings: 3servings
Author: Chef Ben Kelly
Ingredients
Fish
2 largecod filletscut into two to three pieces each
1 1/2cupsgluten-free all-purpose baking flour, separatedI used Bob's Redmill
1tspbaking powder
1/2tspdried dill
zest of 1 lemon
1/2tspkosher salt
1/4tspblack pepper
1egg
1cup soda water
oil for frying
Fries (chips)
2largerusset potatoes
oil for frying
salt
Instructions
Fish
In a large mixing bowl, combine 1 cup of flour, the baking powder, dill, salt, pepper and lemon zest. Mix well.
Add the egg and soda water. Mix until fully incorporated.
Put the batter in the fridge for 20 minutes before using it.
Dredge the cut fish in the remaining flour, shake off any excess.
Dip the fish in the batter, and fry two to three pieces at a time in a deep fryer or high-sided pot at 365°f. Fry for about 7 minutes, flipping halfway through.
Serve right away.
Fries (chips)
Wash the potatoes with a brush under cold running water.
Cut the potatoes into rectangles about 2 cm (3/4 of an inch) wide and the length of the potato.
Put the cut potatoes in a pot, and rinse with cold water until the water runs clear. Fill the pot with water, add a big pinch of salt, and bring to a boil on high heat.
Cook the potatoes until they just start to break when poked with a fork.
Drain the potatoes and spread them out onto a cooling rack. Let the potatoes sit for about 10 minutes.
Fry the potatoes in batches on 325°f until they just start to turn golden brown. This will take between 5 to 7 minutes. Shake the excess oil off the fries and return them to the cooling rack. Allow the potatoes to cool to room temperature before frying again.
Turn the heat up on the oil until it reaches 165°f.
Fry the fries again for about 5 minutes or until a deep golden brown. Drain, and toss in a medium mixing bowl with a big pinch of kosher salt. Serve immediately.
So, what makes good fish and chips? Well, let’s start with the fish. The fish should be tender and flaky and not overcooked. The batter should be cooked all the way through, crisp, golden brown, and flavourful. It shouldn’t be greasy or soggy at all. The fries should crunch when you bite into them, but the inside should be soft and fluffy. Sound good? Well, that’s exactly what we are going to make.
The Fries (Chips)
Let’s start with the fries. Now, these are no ordinary fries. These are thick hand-cut fries that are the crispiest on the outside, fluffiest on the inside fries you will probably ever have. There is a secret technique that I first learned from Heston Blumenthal that we would look at. Let’s take a look.
Hand Cutting Fries
Often when you see “Hand-cut fries” on a menu, they mean that the fries are cut in-house using a fry cutter. Here, when I say “hand-cut,” I mean hand-cut. I really wanted to make these fries extra crispy and do that properly the fries need some body. That’s why I went with thick-cut fries. The fact that they are much easier to cut never even crossed my mind.
First, wash the potatoes with a brush or cloth under cold running water. Pat them dry and cut the potato, lengthwise, into thumb-width sticks. Put the fries in a pot and rinse them with few changes of cold water. Do this until the water runs clear.
Boiling The Fries
Put the fries on the stove on high heat and bring them to a boil. Cook the potatoes until they are soft enough to break when poked with a fork, but not so much they are complete mush. This should take about 10 minutes of boiling, maybe a little longer. Once the potatoes are cooked, drain off the water and put the fries on a cooling rack. As the potatoes sit on the rack, all the excess moisture in the potato will evaporate, and the potatoes will dry. They will also change from a yellow-ish colour to white. Let the potatoes sit for at least 20 minutes.
Why boil the potatoes?
Boiling the potatoes obviously softens them, but it also adds texture to the potato’s surface. This texture is vital to getting that really crispy outer shell on the finished fries.
Blanching The Fries
The next step to making these ridiculously crispy fries is to blanch them in oil. If you’ve ever made fries before you are probably familiar with this step. Usually, this first cook in oil is done at a lower temperature than the final fry. The purpose is to cook the potato all the way through. But, our potatoes are already cooked, so why bother to do this? That’s a good question. This first fry is going to do two things. First of all, it is going to help remove any residual moisture hiding out within the fries. Secondly, it is going to start building up that crispy outer layer. Generally, this first fry would be done at 300°f. But, for our purposes, we will fry the potatoes at 345°f for about 5 to 7 minutes or until the potatoes start to turn golden brown.
Cooling the fries
Once the fries have been blanched in the oil, they will need to cool to room temperature before being fried again. It’s actually best if you cool them in the fridge, but it isn’t strictly necessary. Cooling the potatoes will help them get really crispy. Cool the fries on a cooling rack rather than on a flat surface. This will help prevent the fries from becoming greasy. Also, keep in mind not to overload your fryer. Fry the potatoes in two to three batches, giving the fryer time to come back to temperature after each fry.
Frying The Fries
Okay, you’ve washed, hand-cut, boiled, dried, fried, and cooled your potatoes. All that’s left is to fry them once more, add a pinch of salt and enjoy. For this final fry, turn your fryer up to 365°f. Put the fries in. You can do more per batch than when blanching. Fry for 5 to 7 minutes or until the fries are deep golden brown and very crisp. Take the fries out of the oil, drain, and then toss in a mixing bowl with a large pinch of kosher salt. Serve immediately.
Do you need a deep-fryer to make this?
You don’t absolutely need a deep-fryer to make this, but it is the safest option. Your other choice is to fry the fish and potatoes in a pot or wok full of oil. If you go this route, make sure to leave at least 2 to 3 inches of headroom in the pot, so the oil doesn’t overflow. Also, put the pot or wok on the back burner, so it is less likely to be bumped or knocked. If using a pot or wok, you will also need a candy or a deep-frying thermometer to know the temperature of the oil. If you do this, please be careful. Hot oil is hazardous, and you do not want to spill it on yourself or someone else. Also, if the oil overheats, it can catch on fire. If that happens, cover the pot with a lid and call 911. DO NOT PUT WATER ON A GREASE FIRE!!
What type of oil should you use?
Typically, canola oil is used for frying. It is fairly cheap and has a high smoke point. However, for a cleaner flavour and to possibly be a little healthier, use peanut oil. It is more expensive, but I prefer it for frying. And, you can strain it, put it in a sealed jar and keep it in the fridge for months. Just pull it out anytime you want to fry something.
Gluten-Free Battered Fish
How-To Make Gluten-Free Fish Batter
Okay, we’ve made the fries now. Let’s move on to the fish. The fish batter is actually the same as the gluten-free sweet and sour chicken ball recipe I made a while back. The only difference is that I add dill, lemon zest, and black pepper for the fish batter. This battered is made gluten-free not by adding a bunch of crazy ingredients but rather by using gluten-free all-purpose or baking flour. To make it not gluten-free, use normal all-purpose flour. The other ingredients in the batter are baking powder, salt, an egg, soda water, and, as I said, dill, lemon zest, and black pepper. Mix the batter and put it in the fridge for 20 minutes to chill. The colder the batter, the crisper it will be.
Prepping The Fish
You can use any flakey white fish for this recipe. Haddock and catfish are good options, but I was lucky enough to get some cod, so that’s what I went with. I had two huge cod fillets so I cut each into three pieces. Pat, the fish, dry, then toss it in half a cup of gluten-free flour (or regular all-purpose).
Batter and Fry The Fish
Shake the excess flour off the fish and dip it in the batter. Lift the fish out of the batter, letting any excess drip off and place it in the fryer. When you do this, have the fryer basket down. If you put the fish on the basket then put it in the oil, the fish will cook onto the basket. Use a fork and make sure the piece of fish the fork is through isn’t going to break off. Dip the fish in the hot oil about halfway, then gently swirl it around for a few seconds before letting it gently slip off the fork and into the oil. This will help start the crust formation, which will help prevent the fish from sticking—Fry the fish at 365°f for about 6 to 7 minutes. If you want to serve it right away, fry it for 10 to 12 minutes. Either way, flip it halfway through.
Double Fry The Fish
You can single fry this fish, and it will be great. But, I find a double fry is a better option. Double frying allows you to have all the fish cooked and ready to go, then you can finish it in the fryer right before serving to get it really crispy. This is best if you are cooking for a group of people because you can fry more fish at a time on the second fry. You can also batter the fish and do the first fry a day ahead, store it in the fridge on a cooling rack uncovered, then fry it when you want. The second fry should be done at 365°f and will take about 5 minutes.
I can’t believe it’s gluten-free fish and chips
That little bit of lemon and dill really comes through and compliments the flavour of the fish perfectly. Serve the gluten-free fish and chips with tartar sauce and coleslaw. If you have the option, eat the fish and chips by the water to really make the whole experience special.
The Wrap-Up
I am so excited for you to try this recipe. I cannot express enough how delicious it is. I’d been craving fish and chips for a while, and this really hit the spot for me. Yes, I know it takes a while to make, but make a Sunday of it. Invite some friends over, have a few drinks (not too many around the hot oil) and enjoy yourself. That’s what food like this is for. Happy cooking and even happier eating, everyone!
Thanks for reading, and remember to check out my brand new cookbook, “The How-To Cookbook For Men” It comes out on August 10th and is available for preorder here.
Never miss a post again. Put your email address in the box below and receive chef’s notes in your inbox.
Well-cooked scallops are like little tender morsels of ocean candy. But, poorly cooked scallops are like bland little rubber bullets. Unfortunately, the line between a well-prepared and a poorly prepared scallop is pretty thin. Today you’ll learn how to make one of my favourite scallops dishes; Tequila Lime Scallops. But, more importantly, you’ll learn how to prepare and cook scallops like a chef so that you can have tender morsels of ocean candy whenever you want. Let’s get to it.
How To Buy Scallops
The best way to ensure that you end up with great scallops is to start with great scallops. Buy fresh whenever you can. If you are buying fresh, make sure they are actually fresh. The scallops at the seafood counter in your local grocery store probably aren’t fresh even though they aren’t frozen. They are likely previously frozen. Ask if the scallops have been frozen or not before you pay a premium for “fresh scallops.”
There are two big differences between fresh and frozen scallops. First of all, fresh scallops are more tender and have a better texture. Frozen scallops tend to be slightly chewier. Frozen scallops also release a lot more liquid than fresh scallops when cooked. This makes it more difficult to get a nice sear on the scallops, and that sear is important for flavour development. If you aren’t sure if your scallops are fresh or previously frozen, cook one up, put it on a plate, and wait two minutes. With a fresh scallop, there will be little to no liquid on the plate after 2 minutes. If the scallops are previously frozen, there will be a white milky liquid on the plate after two minutes.
Size matters.
Usually, when you buy scallops, they come as either tiny bay scallops or sea scallops, which are large. However, a rating scale for scallops (and shrimp) is measured by a “U” followed by a number. For example, U10 or U20-30. The “U” stands for “under a pound,” and the number is how many scallops there should in a pound. So, the lower the number that follows the “U,” the bigger the scallops. If you buy U10 scallops, you can expect there to be 10 or less in a pound. Those are good-sized scallops. More often than not, the scallops you buy at the store are U20 to 30, so there are 20 to 30 scallops in a pound. These are a good medium-sized scallop. But, if you want large ones, ask for the U10s, especially if you are talking to a specialty seafood purveyor. To learn more about sizing and other scallop cooking tips, check out this post I did back in 2019.
It’s okay to buy frozen.
If all you can get are frozen scallops, it’s okay. They can still be delicious. You’ll have to be a little more diligent with them. For starters, you must give the scallops enough time to defrost properly. This means that you will have to transfer them from the freezer to the fridge at least 24 to 48 hours before you want to cook them. Never put them in the microwave to defrost them and never submerge them in water. The microwave will make them rubbery. Submerging them in water will cause them to absorb loads of extra water.
Defrosting Scallops
When defrosting scallops, remove them from their original package and place them on a plate or a sheet pan lined with a paper towel or a kitchen towel. Make sure the scallops have a little space between each one. This space will help them defrost. It’s best not to cover the scallops when they go in the fridge, but if you do need to cover them, do it with a paper towel or kitchen towel rather than a plastic wrap. The towels would be changed in an ideal world after about 12 hours, but you don’t have to do this. Changing the towel will help dry the scallops.
If you need frozen scallops in a hurry.
If for some reason, you need scallops in a hurry and they are frozen, you can quickly defrost them in cold running water. “But wait, you said not to submerge them in water.” Yes, I did say that, and I meant it. If you quickly defrost scallops under cold running water, the scallops must be in a sealed bag. Either the bag they came in or a zip-top bag. Put the bag of frozen scallops in a deep container, put the container in your sink (make sure the sink isn’t plugged) and run cold water over the bag in a slow, steady stream. Defrosting the scallops this way will take about an hour, give or take. It is important to keep the water running to maintain a safe temperature and so that the water doesn’t get too cold.
How To Prepare Scallops For Cooking
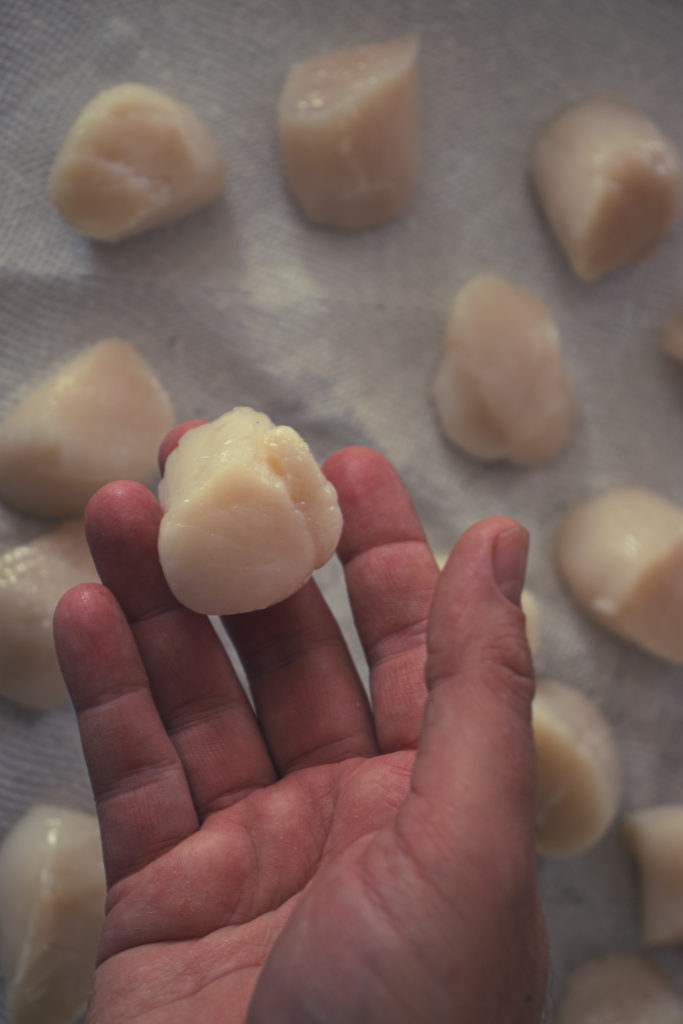
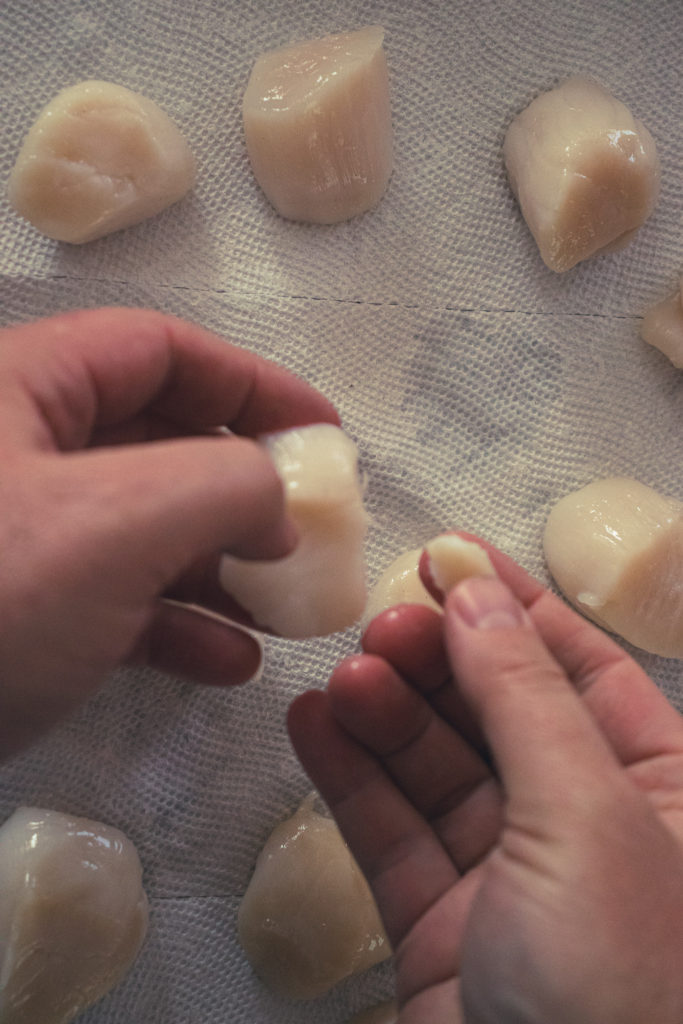
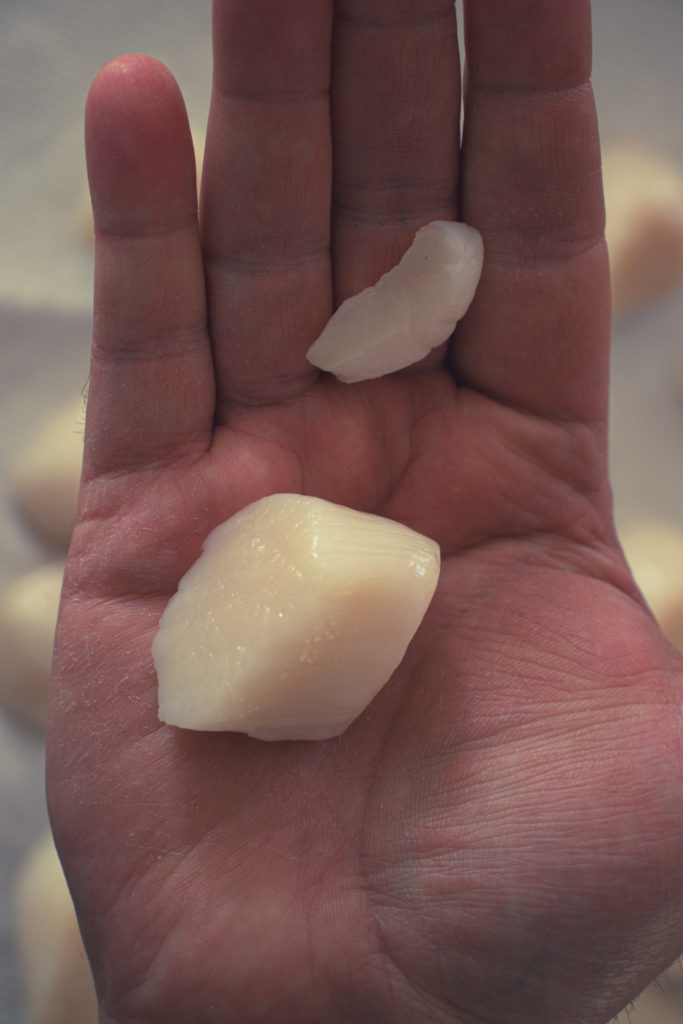
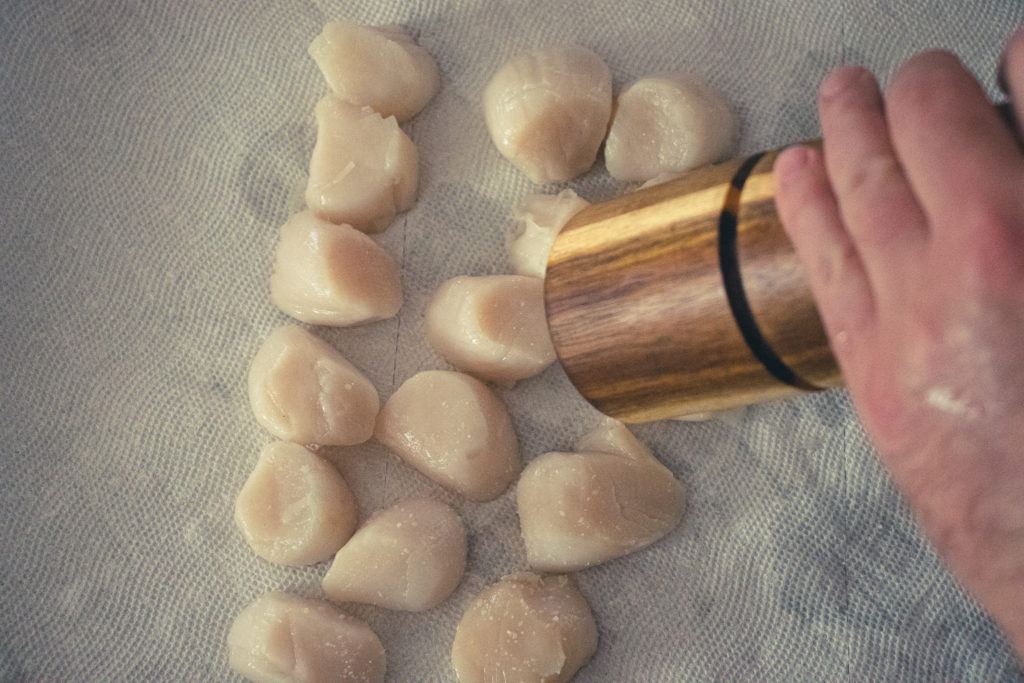
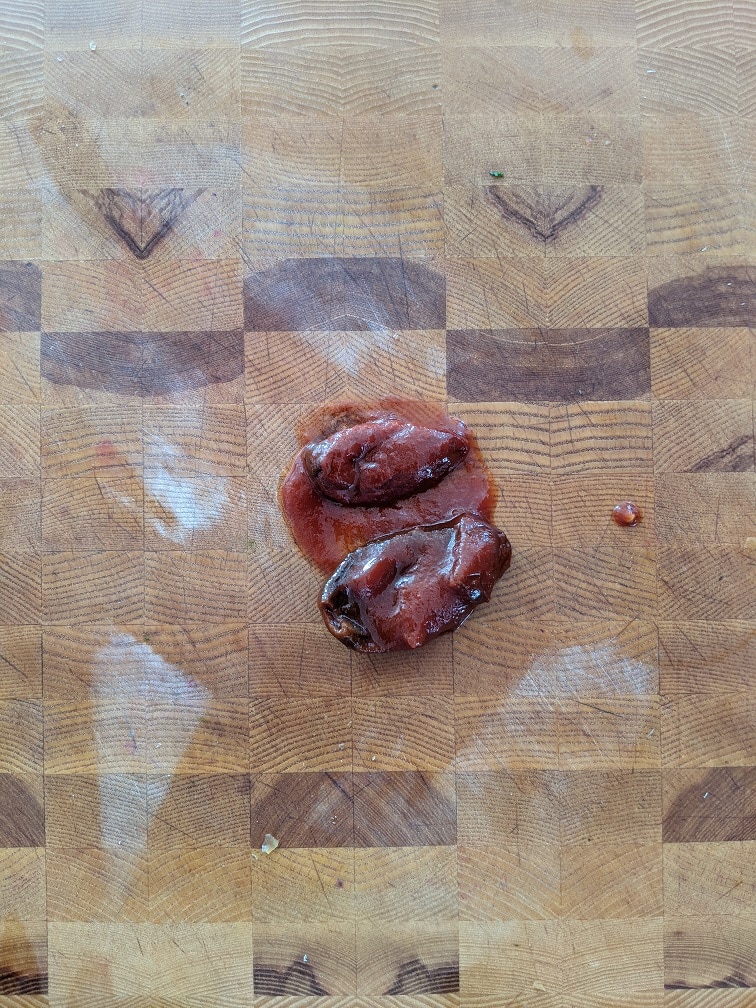
Whether you use fresh or defrosted scallops, they will be prepared for cooking the same way. First of all, remove the foot (it isn’t actually a foot, but that’s what people call it). The foot is the little piece of white meat that hangs off the side of the scallops. It is edible, but it gets very chewy when cooked, so it’s always best to remove it. Once that’s done, pat the scallops dry on both sides with a clean kitchen towel or paper towel. Again, the surface of the scallops must be as dry as possible to get that perfect sear.
How To Cook Scallops
Choosing the right pan for cooking scallops
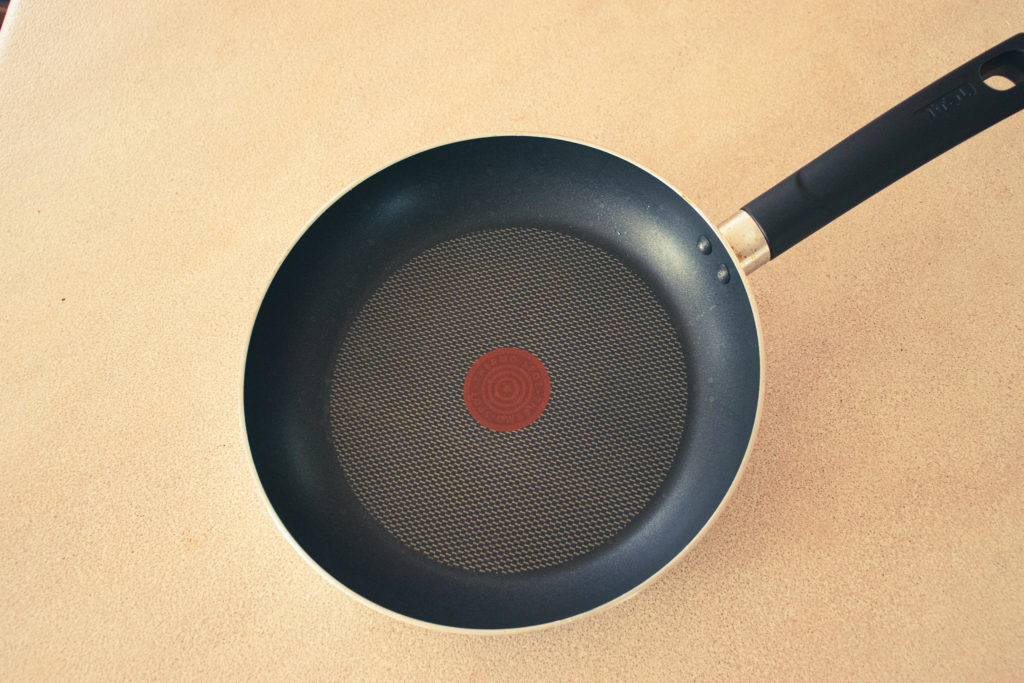
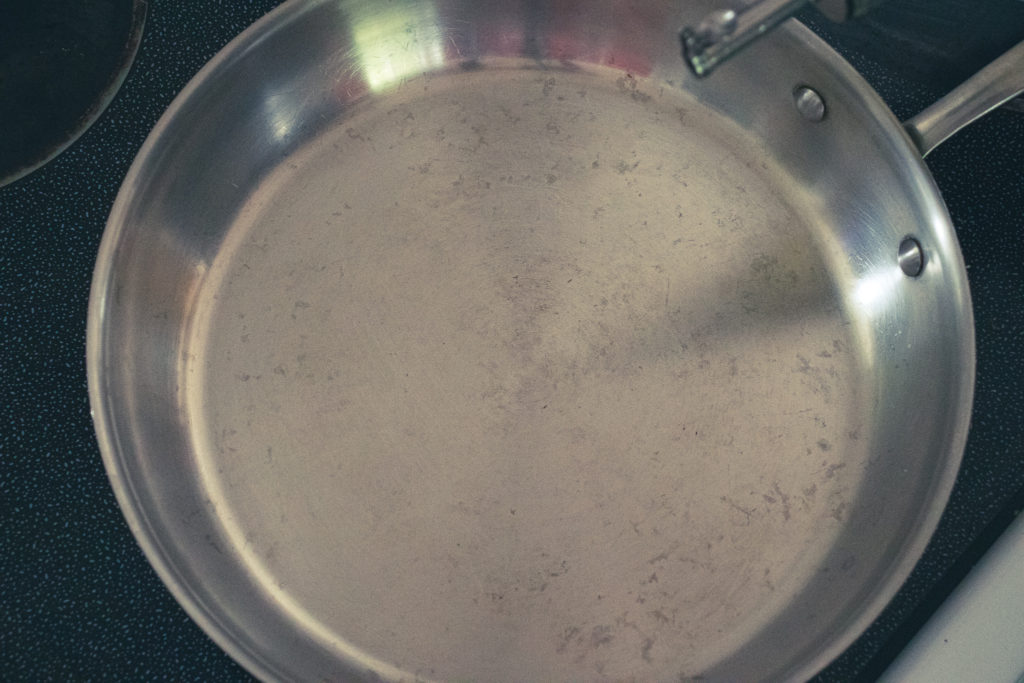
Scallops are very quick and easy to cook once you know how. The key is to get your pan very, very hot. I know that a lot of people don’t like to cook on high heat. I get it. But, with scallops, if you want that nice sear and rich flavour, high heat is vital. The pan you use should be either a heavy-duty non-stick pan, a very heavy-duty stainless steel pan, or a cast-iron skillet. My preference is cast iron becasue you can get it really hot. But, becasue of the sauce we’re making for the scallop recipe today, a non-stick or stainless pan is best. Again get the pan very hot. If your burner goes to 10, turn it on to 8 or 9 and leave it alone for 2 to 3 minutes.
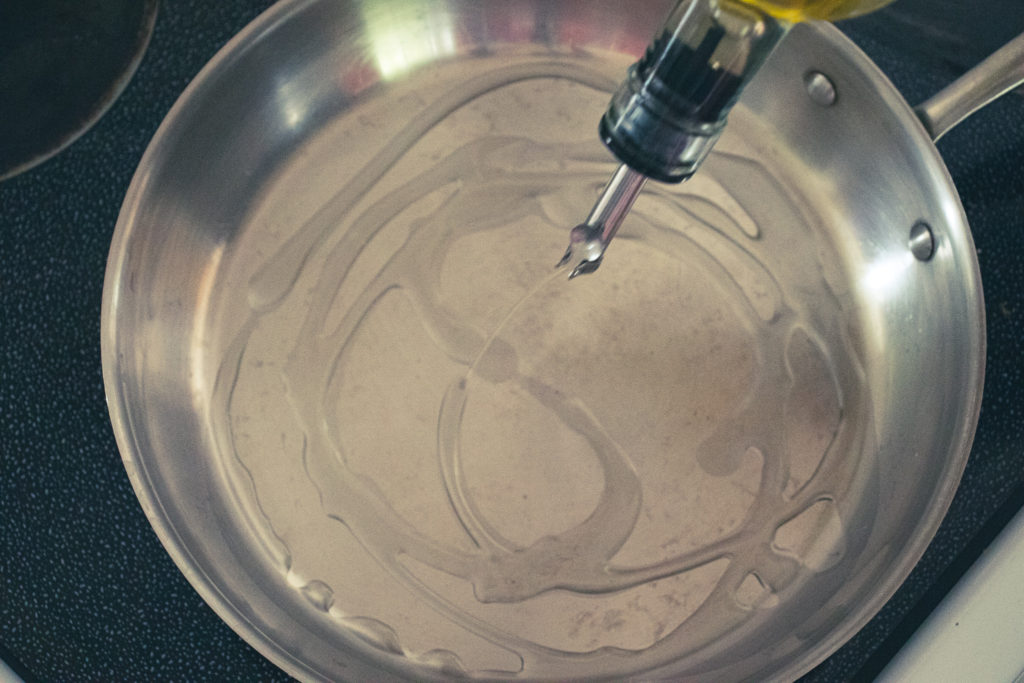
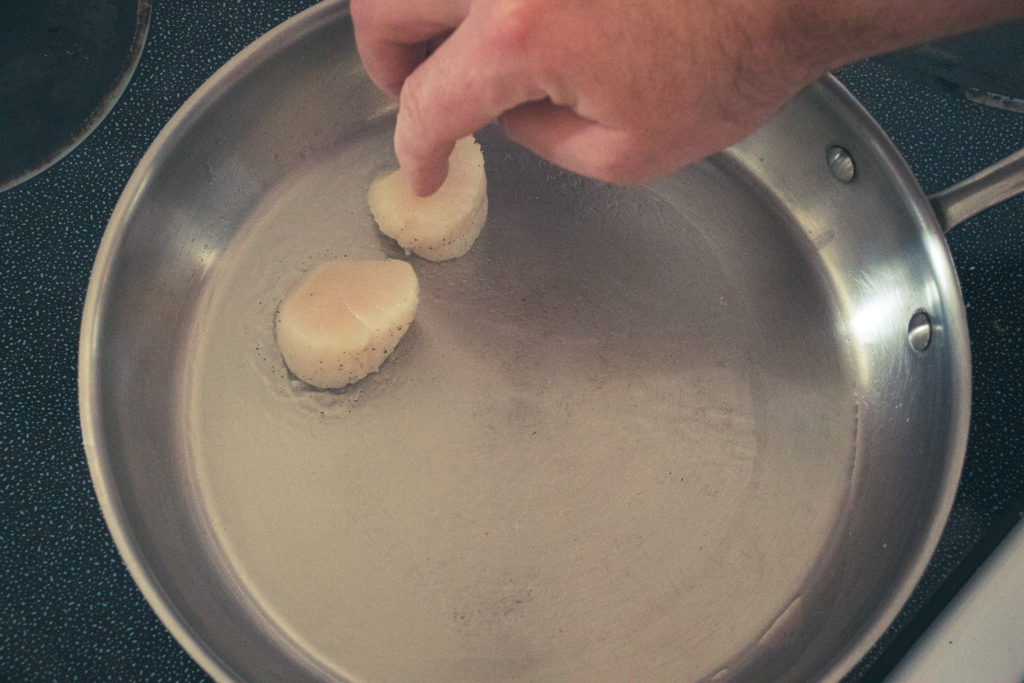
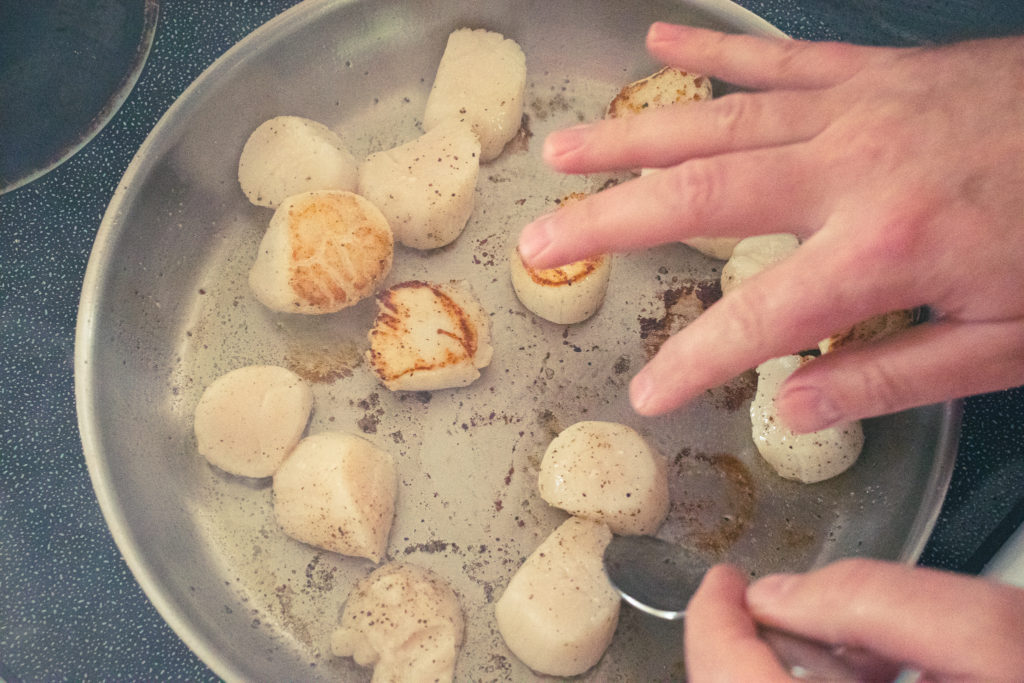
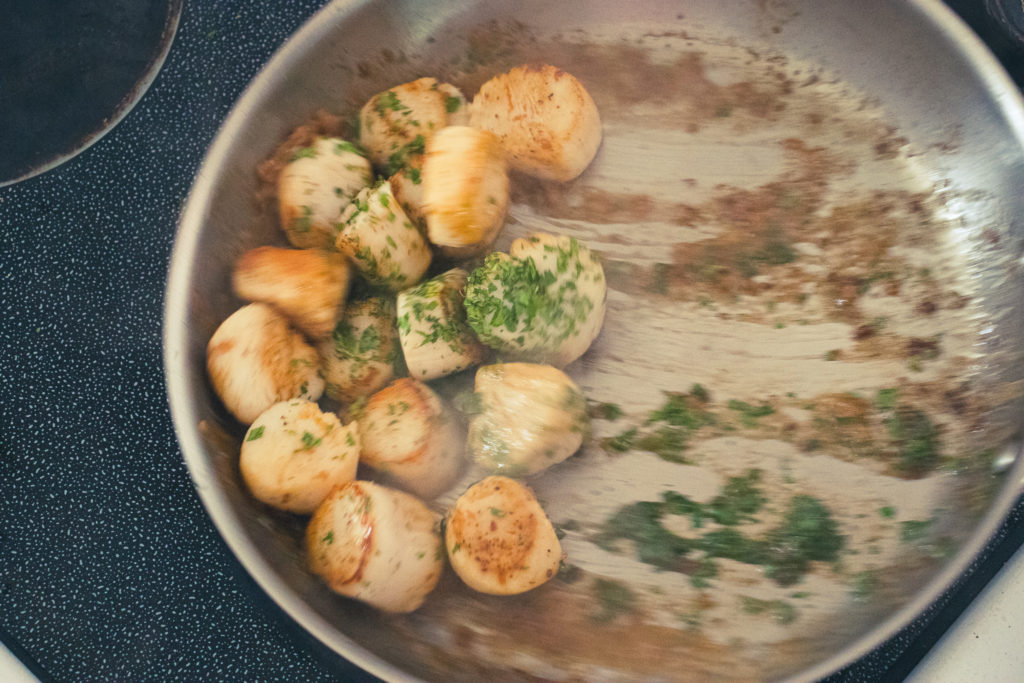
Cooking the scallops
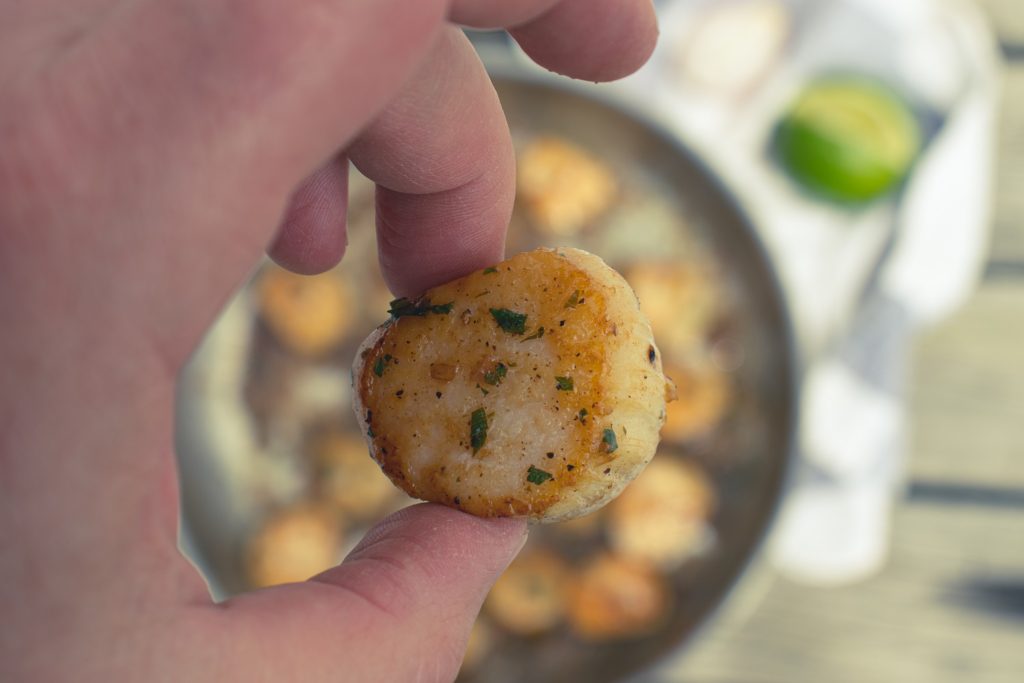
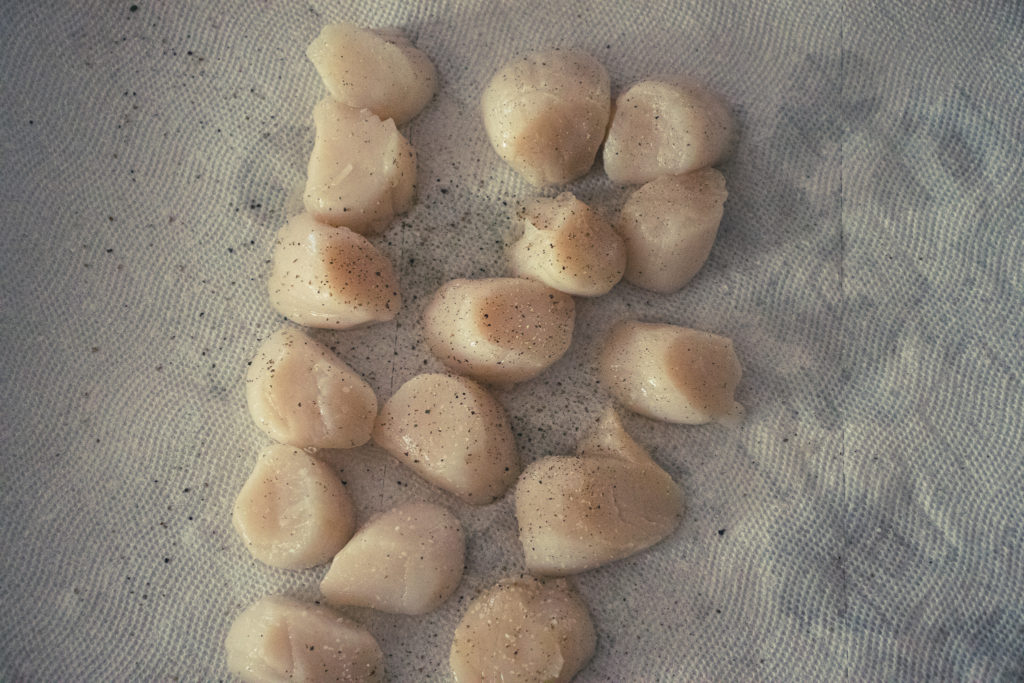
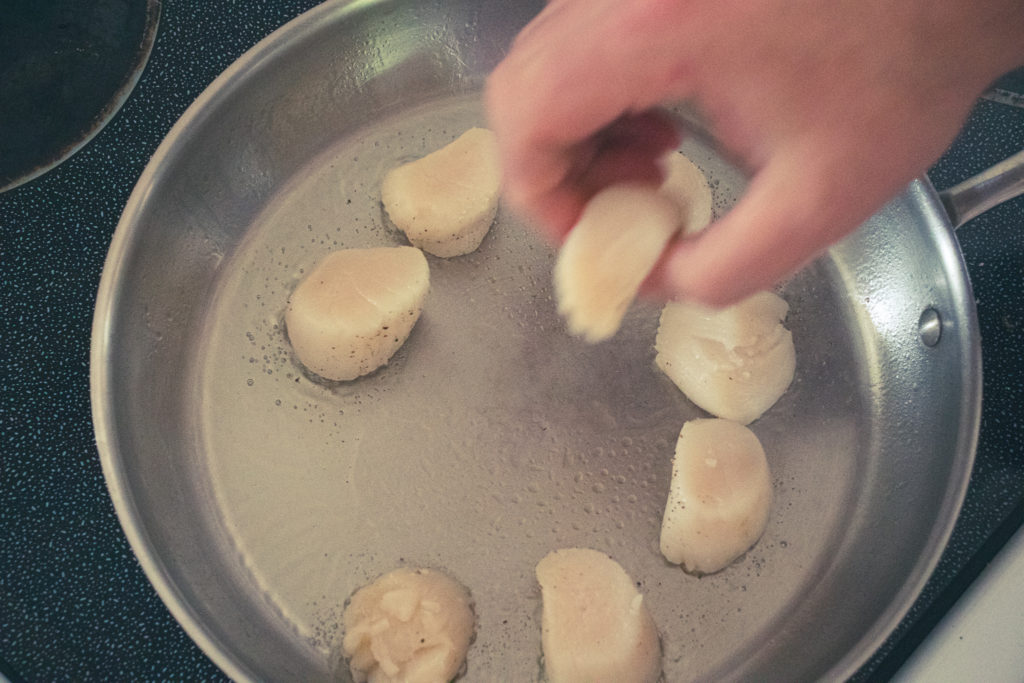
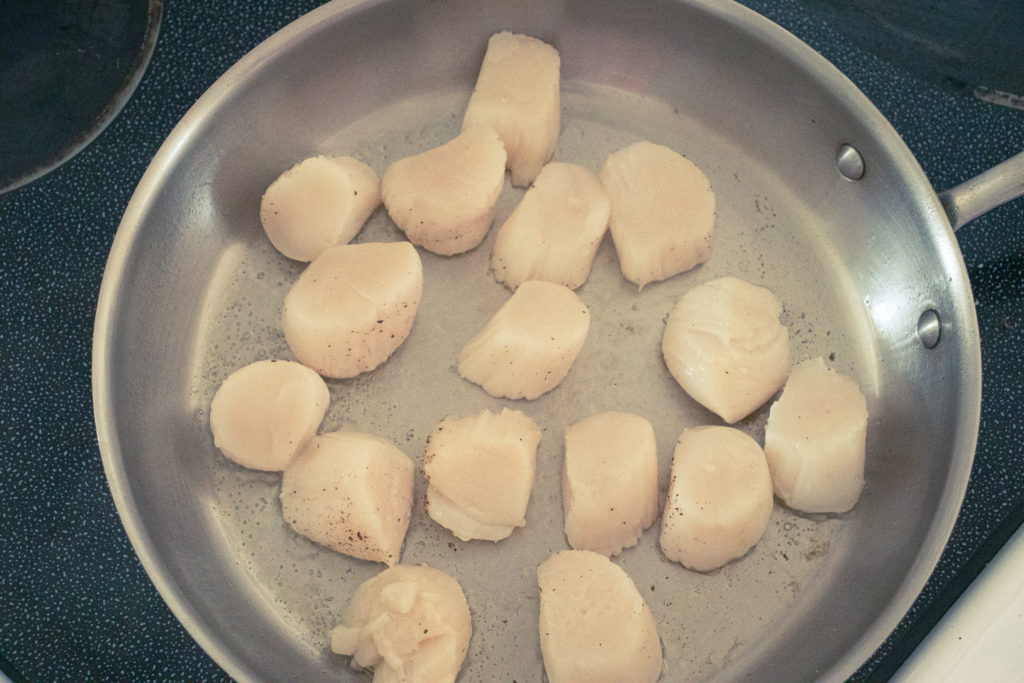
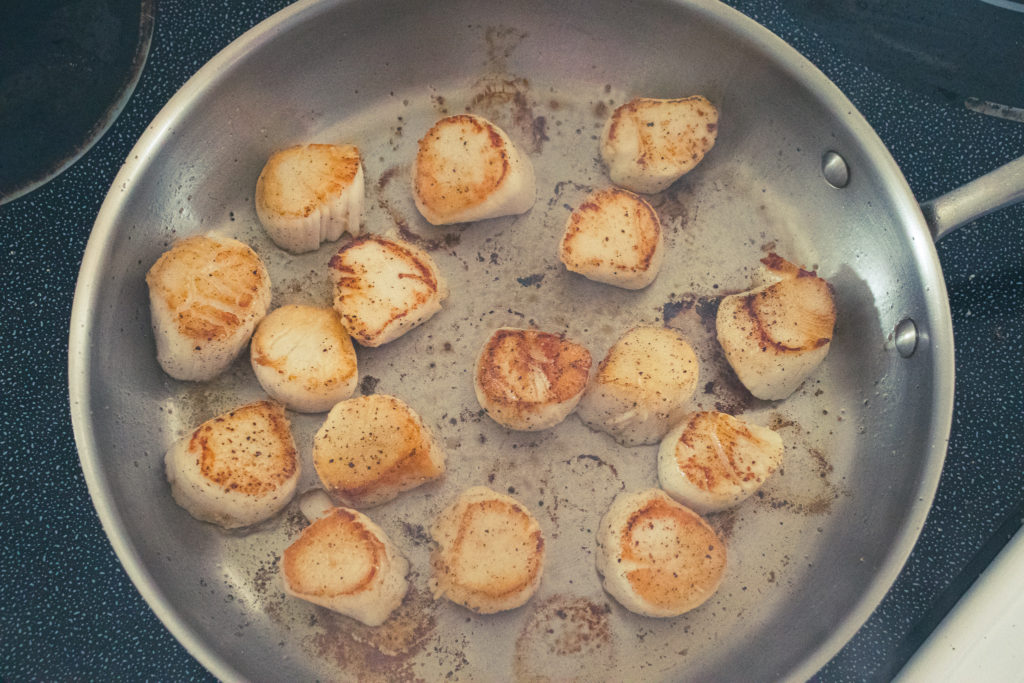
Once your pan is very hot, add just enough oil to cover the pan’s surface. Don’t use olive oil for this because it will burn and smoke. Instead, use an oil with a high smoke point like canola, peanut, or grapeseed oil. Season the scallops lightly with salt and pepper, then gently place them in the pan one at a time, leaving space between each scallop. When placing the scallops in the pan, start by placing them around the outside edge of the pan, then work your way in. Once you get the last scallop in the pan, go back and check the first one to see how well its colour is developing. Once the first scallop develops a deep caramel brown colour (about 90 seconds of cooking), flip it. Next, go around the pan and flip each scallop in the order they entered the pan and as they colour. Once the last scallop is flipped, go back and recheck the first one. Once the bottom is browned, take it out of the pan and place it on a plate lined with a paper towel. Repeat until all the scallops are brown on both sides and are out of the pan.
Don’t crowd the pan!
Wheater using fresh or frozen scallops, you can’t crowd your pan. You need to leave about 20% of the surface of the pan uncovered. This helps the pan maintain its heat. If the pan’s temperature drops too much from overcrowding or becasue it wasn’t hot enough to start with, the liquid will escape the scallops, pool in the bottom of the pan, and boil your scallops instead of searing them. Though this will happen with fresh scallops, it will be much more extreme with previously frozen ones.
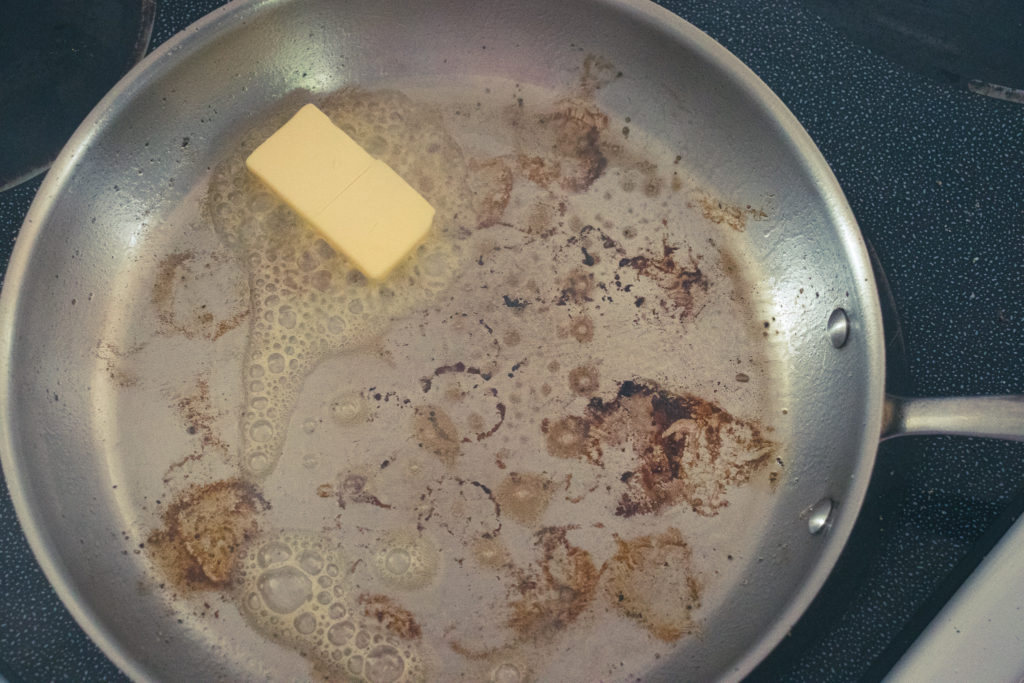
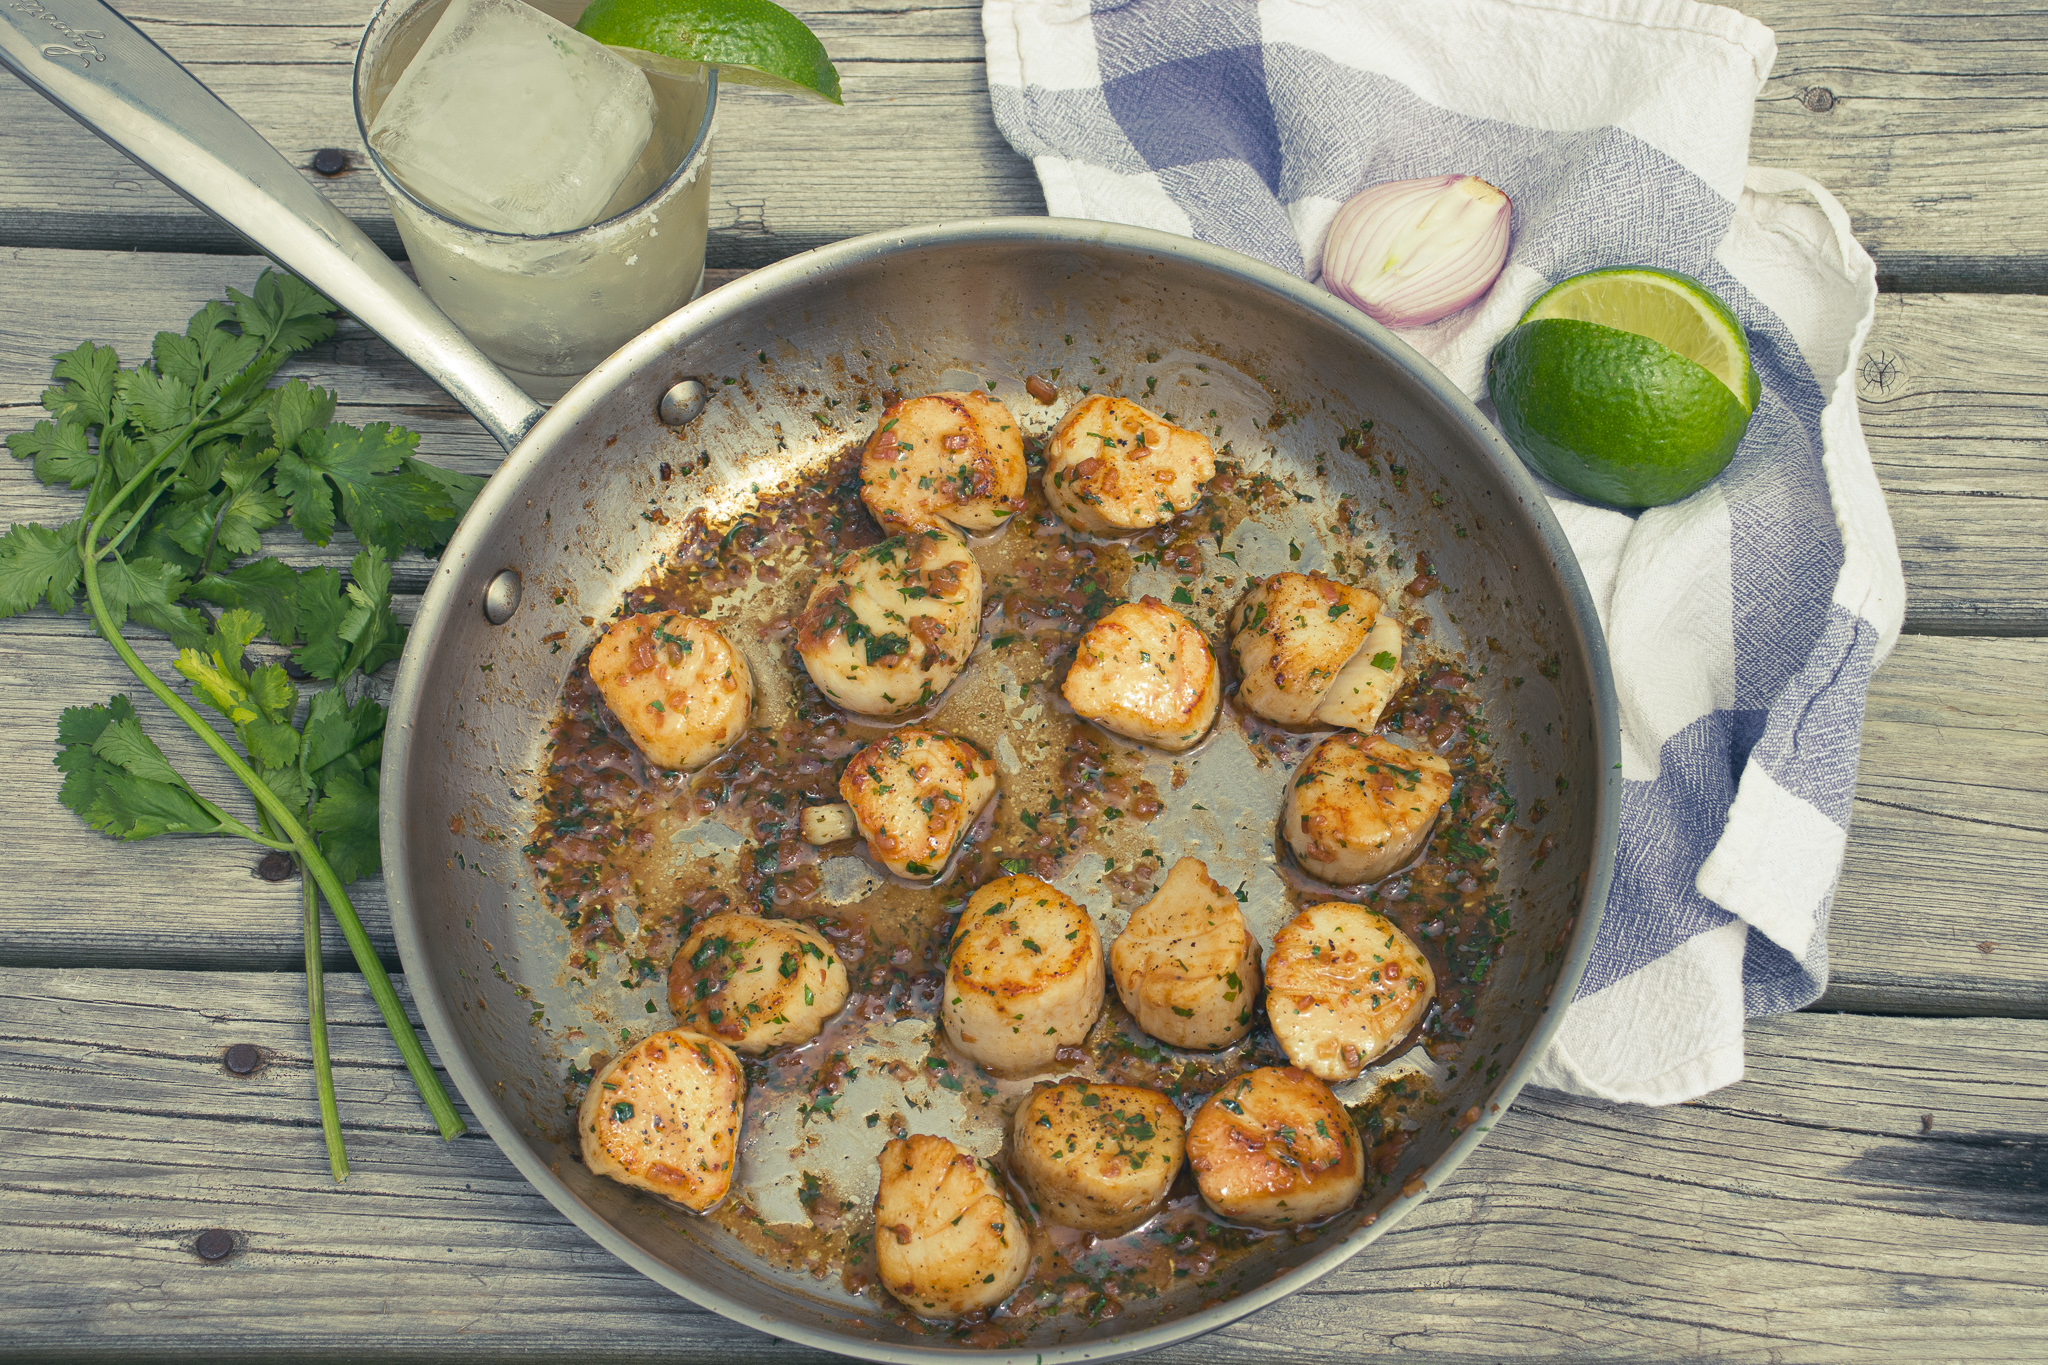
Tequila Lime Sauce
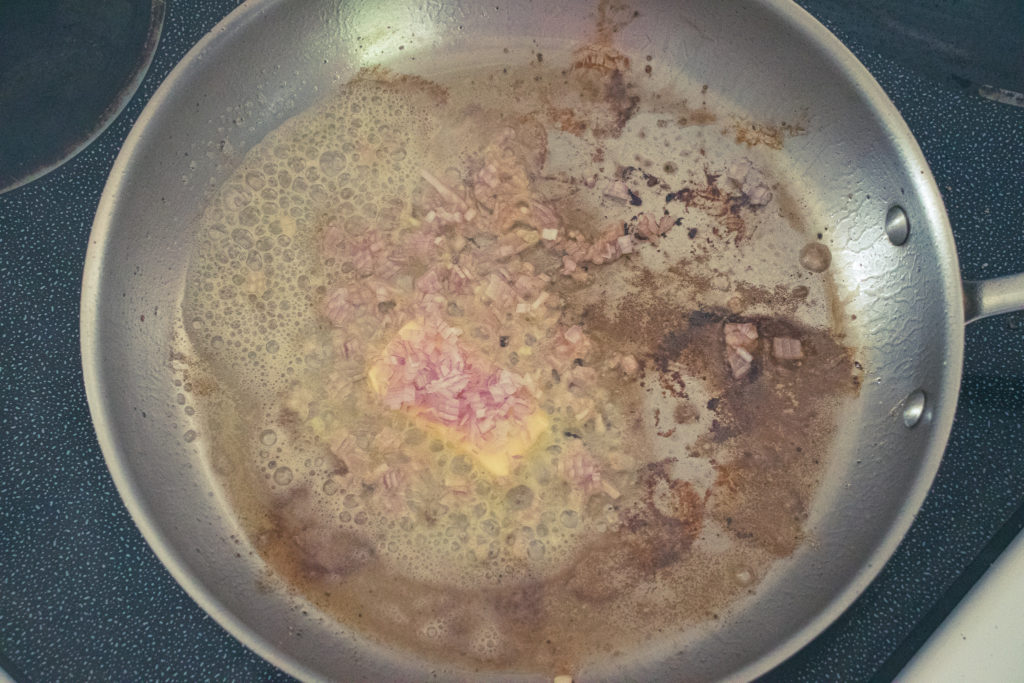
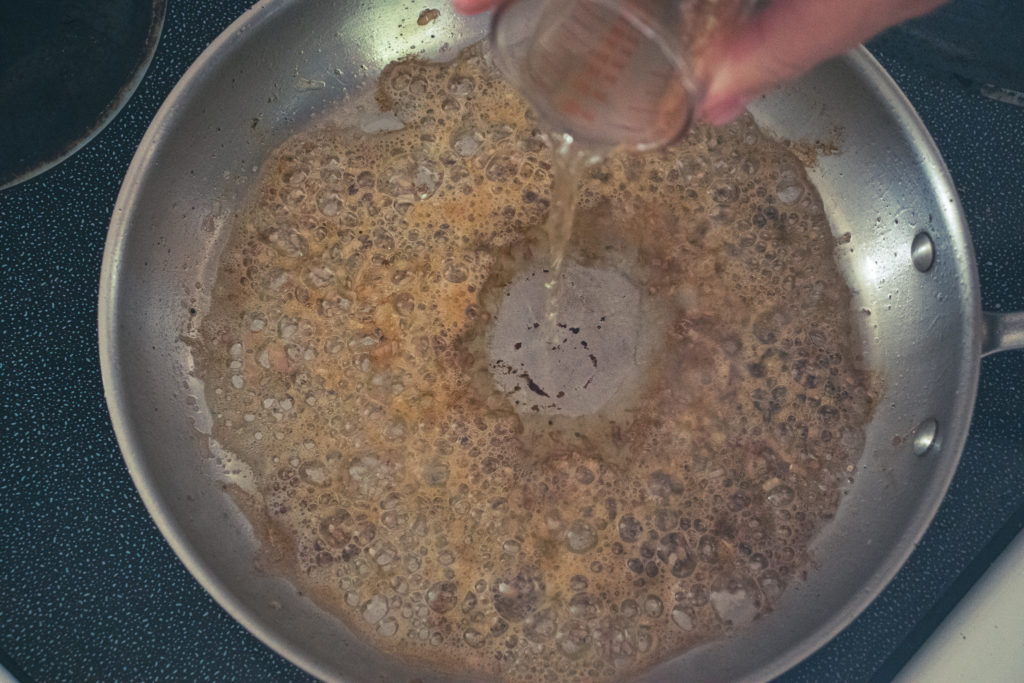
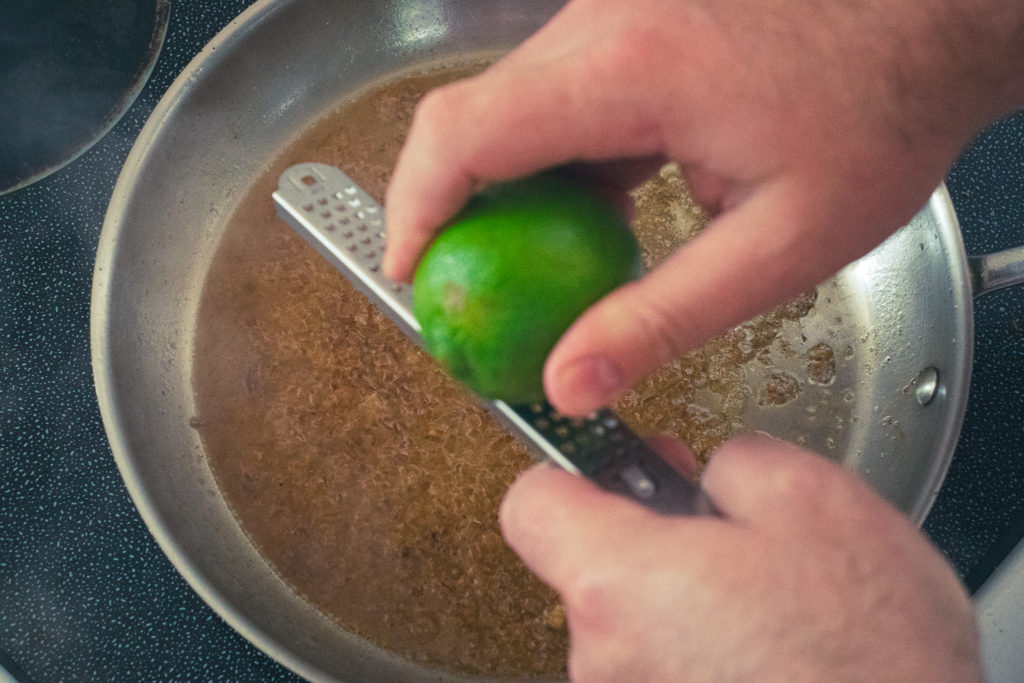
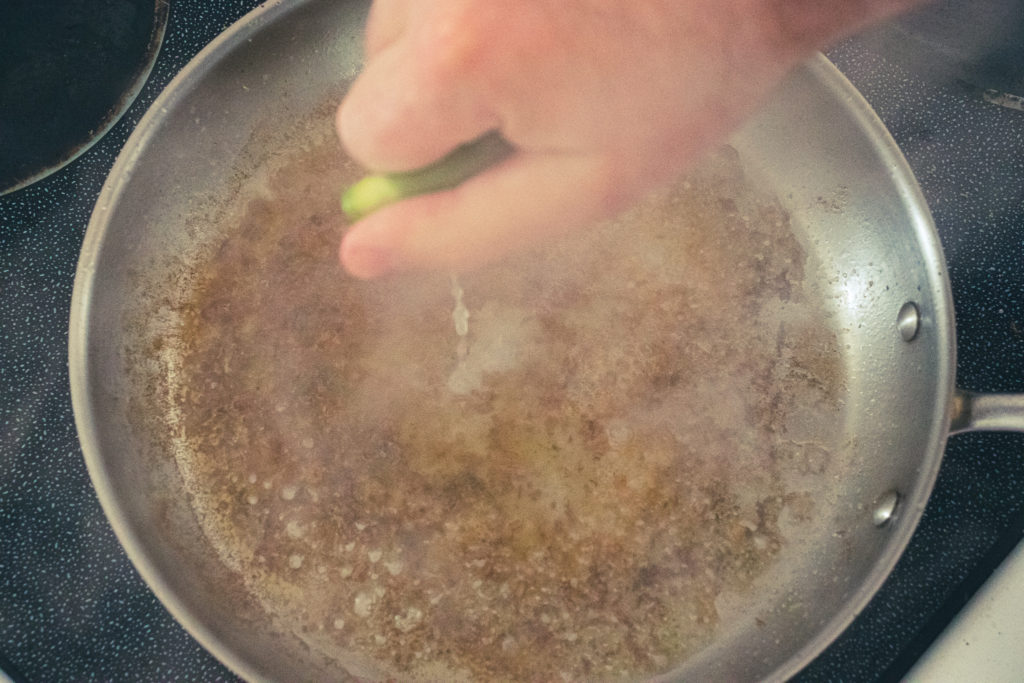
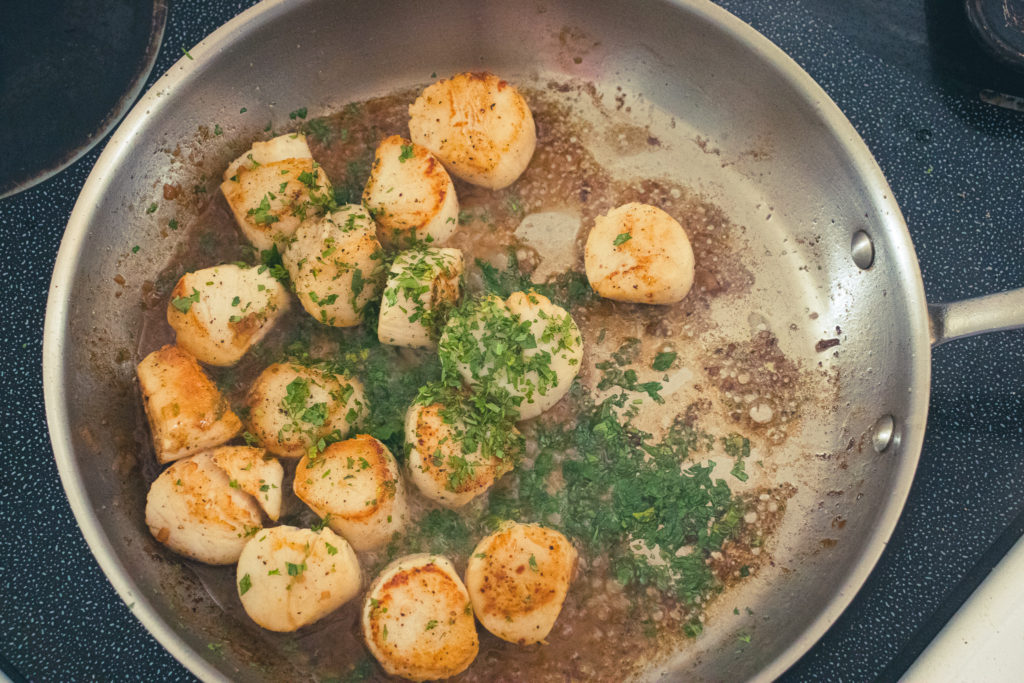
At this point, you’ve perfectly cooked some scallops. You can enjoy them as they are, or you can take them one step further and make this delicious Tequila Lime Sauce. To make the sauce, remove the scallops from the pan and take the pan off the heat to let it cool down slightly. Add 2 tablespoons of butter to the pan, wait for it to melt, then add 2 tablespoons of minced shallot or onion. Put the pan back on the heat and cook for about 2 minutes before adding 2 ounces of good quality tequila (the one I used). Cook the tequila for about a minute, then add the zest of half a lime and the juice of a whole lime. Add the scallops back into the pan and toss with about 1 tablespoon of fresh chopped cilantro, then serve.
Tequila Lime Scallops
Seared scallops in a quick Tequila lime sauce finished with cilantro. A quick scallop dish that tastes like summer.
Keyword: alcohol, Fish and Seafood, Scallops, Seafood, Summer, summer cooking
Servings: 4people
Author: Chef Ben Kelly
Ingredients
1lbScallops, foot removed and patted dry454 g
1 tbsp canola oil
Salt and pepper
2tbspsalted butter
2tbspminced shallotor onion
2ozTequila
1tbspchopped cilantro
1limejuice and zest
Instructions
Heat a large non-stick skillet over medium-high heat. Make sure the pan is very hot.
Lightly season the scallops with salt and pepper.
Add the oil to the pan and gently place the scallops in one at a time. Leave the scallops alone for 90 seconds.
Gently lift one of the scallops. If the bottom is a deep caramel brown, flip the scallops and cook for 1 more minute. If the scallop is still white or just turning brown, leave it for another 30 seconds or so, then flip it and finish it on the second side for 1 minute.
Remove the scallops from the pan and onto a warmed plate. Set aside.
Take the pan off the heat and add the butter. Once the butter melts, add the shallots and return the pan to the heat. Reduce the heat to medium-low and cook for 1 to 2 minutes or until the shallots soften and turn translucent.
Pour the tequila into the pan. If you use a gas range, lift the pan away from the flame before adding the tequila, then return the pan to the heat. Cook until the tequila has almost completely evaporated.
Take the pan off the heat and zest half the lime into it, then squeeze the juice from the whole lime into it. Return the pan to the heat for 30 seconds. Taste the sauce and add salt and pepper as needed.
Take the pan from the heat and add the scallops into the pan, toss with the cilantro and serve.
I hope that you’re now excited to buy some scallops and cook them up for yourself. I know the process may seem complicated, but really, at its core, it’s just dry the scallops and cook them quickly in a very hot pan. There isn’t that much to it. If you’re wondering how to tell if your scallops are cooked, that’s not too difficult either. Right now, as you read this, hold your hand out and gently touch the tip of your middle finger to the tip of your thumb. Now, poke the bit of meat on your palm right below your thumb. A perfectly cooked scallop will feel the same when you poke it. I hope that helps. Thanks for reading, remember to share it, and have a great day and a great week! Oh, and if you cook some scallops, share some pictures of them on my Facebook page. I’d love to see them.
Remember to share this post on Facebook or Pinterest if you enjoyed it. Thank you for reading, and have a great day! Remember, there are new Chef’s Notes posts every Wednesday, and you can subscribe below, so you never miss one.
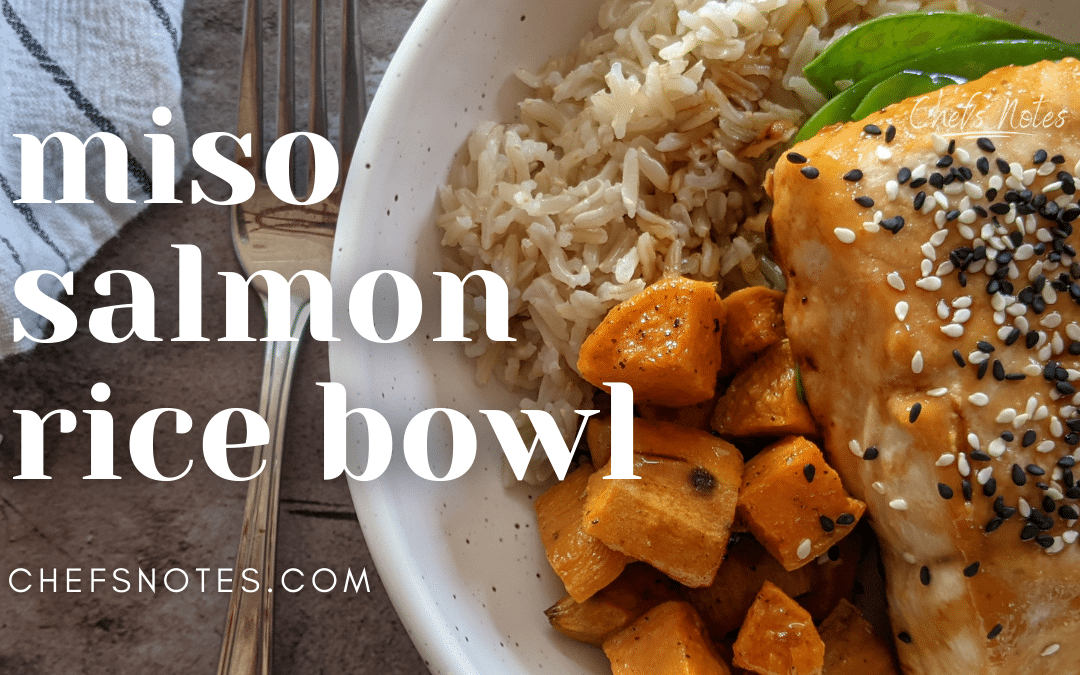
If you are looking for a new and exciting salmon recipe, look no further. This Miso Salmon Rice Bowl is everything you want and more. It’s got lots of vegetables, sweet and salty salmon, creamy avocado, and it’s all tied together by the nutty brown rice. What more could you want from a meal? Before you get too far into this, I want to say that this recipe may seem intimidating at first. There are a few different components that make it seem a lot more complicated than it is. Really, it’s no different than making any meal. If you make marinaded pork chops, mashed potatoes, and vegetables, you’re making the same number of components. All this to say, don’t miss out on this recipe. It is worth every second that goes into it. Now let’s get to it.
Miso Salmon Marinade
The marinade for the salmon is a combination of 1 tablespoon miso paste, which you can find in most grocery stores and all Asian specialty markets, 2 tablespoons mayonnaise, 1 teaspoon honey, and 1/2 a teaspoon of sriracha. Whisk these ingredients together. Put two 170 g (6-ounce) salmon portions in the bowl with the marinade, roll the salmon to coat it. Cover the bowl with plastic wrap and put it in the fridge for 30 minutes.
Sweet Potato
While the salmon is marinating, peel and dice two small (or 1 medium) sweet potatoes. You want about 2 cups of diced sweet potato in total. A little more or less is fine. Toss the sweet potato with 1 tablespoon of olive oil and a pinch of salt and pepper. Put the sweet potato in a small roasting pan and roast in a 400°F oven for 30 minutes. Flip the sweet potato halfway through cooking. Take the cooked sweet potato out of the oven and set it aside to cool.
Brown Rice
Once you get the sweet potato in the oven, start cooking your brown rice. For two portions, use 1/2 cup of rice and 11/2 cups of water. Ratios may vary by brand, so make sure to read the instructions on the rice package. Rinse the rice under cold running water until the water runs clear. Drain well. Put the rice and the 11/2 cups of water in a medium pot. You can add a pinch of salt and pepper and a teaspoon of olive oil if you want to. Bring the rice to a boil on high heat, stirring once or twice. Put a lid on the pot, turn the heat to low, and simmer the rice for 20 minutes. Take the pot off the heat, and set it aside to rest for 10 minutes.
Roasting The Salmon
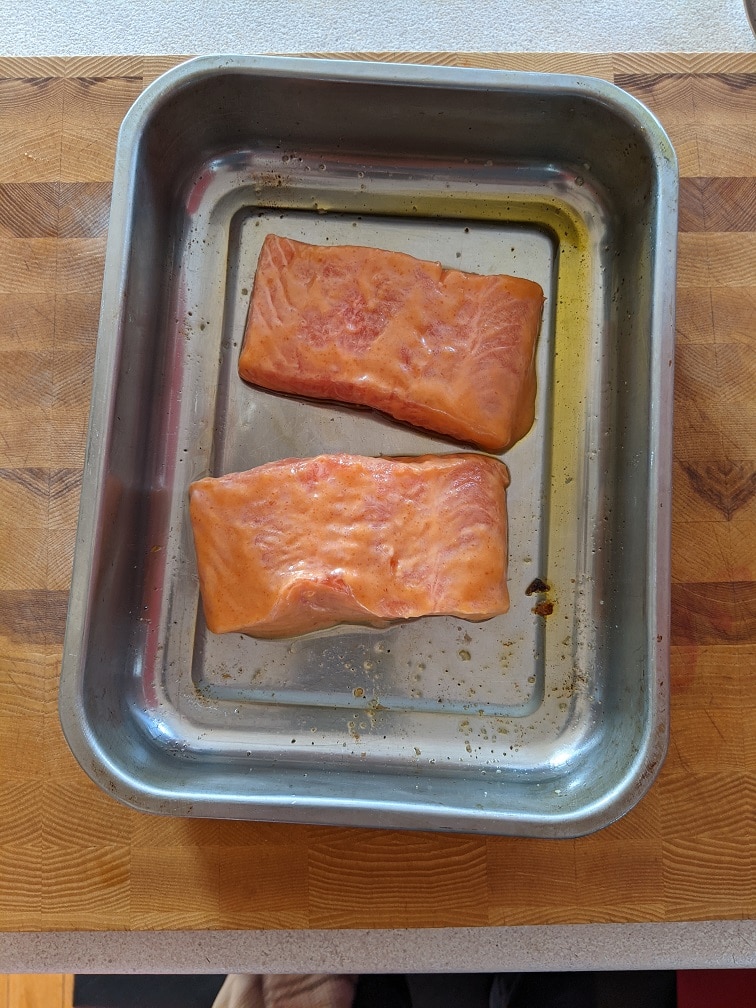
Take the salmon out of the marinade, gently shaking off the excess. Put the salmon in a lightly oiled roasting pan and cook it in a 400°f oven for 12-15 minutes or until cooked. You can use the same roasting pan you cooked the sweet potatoes in if you put the cooked sweet potatoes in a bowl. That’s what I did to save on washing a bunch of roasting pans.
Snow Peas
While the salmon is in the oven, pull the strings off 200 g of snow peas. See this post for more clear instructions on how to do that. Heat a large skillet over medium-high heat. Add 2 teaspoons of canola oil to the pan along with the cleaned snow peas. Stir-fry the snow peas for 3 minutes, then add 2 teaspoons of soy sauce. Cook for 30 seconds more, then take the pan off the heat.
Avocado
Finally, cut an avocado in half and remove the pit. Hopefully, your avocado is better than mine was. Gently pull the peel off the avocado and discard it. Dice the avocado into bite-sized pieces.
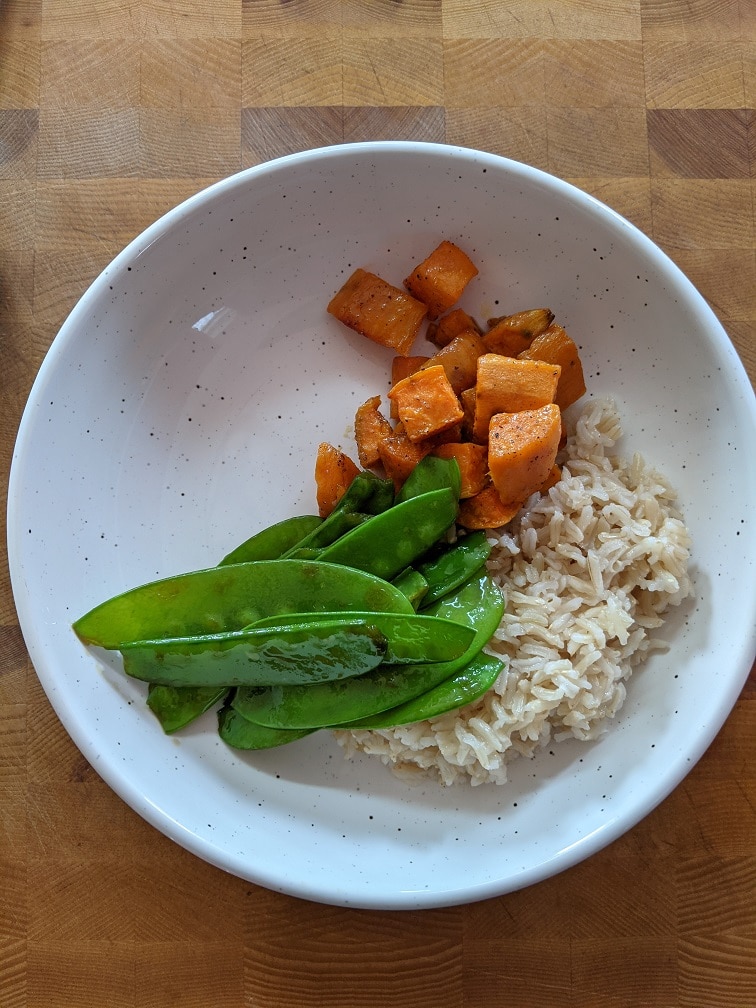
Plating the Miso Salmon Rice Bowl
Divide the rice between two bowls. Push the rice to one side of the bowl. Put the sweet potato at the top of the rice and the snow peas at the bottom. Lay the salmon across the rice and use the avocado to fill any gaps. To make the miso salmon bowl look a little fancier, you can garnish it with sesame seeds. Also, I had some homemade Teriyaki sauce left in the fridge from the Sushi Bowl Post, so I drizzled that over the miso salmon to finish it. You don’t have to do that, but if you happen to have some in the fridge or want to throw a batch together, it is worth it.
Miso Salmon Bowl
There are a few different components to this miso salmon bowl. On their own, the components are all simple. When combined, they created something slightly complex and incredibly delicious. Don't let this recipe intimidate you. It is well worth the effort.
In a medium mixing bowl, combine the miso paste, mayonnaise, honey, and sriracha. Mix well. Add the salmon to the miso mixture, gently toss it to coat it in the sauce, cover the bowl and put it in the fridge for 30 minutes.
In a separate bowl, toss the diced sweet potato with olive oil, salt, and pepper. Spread the sweet potato out in a roasting pan and cook in the oven for 30 minutes, flipping halfway through. Once the sweet potato is cooked, take it out of the oven and set it aside to cool.
While the sweet potato is in the oven, make the rice. Rince the brown rice under cold running water until the water runs clear. Drain well. Put the rice in a medium pot with 1 1/2 cups of water. Bring the rice to a boil on high heat, turn the heat down to low, cover the pot with a lid and cook the rice for 20 minutes. Take the pot off the heat and let it rest for 10 minutes. Rice to water ratios may vary by brand, so always read the instructions on the package.
Lightly oil a small roasting pan. Place the salmon on it. Roast the salmon in the oven (still at 400°F) for 12 to 15 minutes or until cooked. Take the salmon out of the oven and assemble the bowl. Discard the leftover marinade.
While the salmon is cooking, heat a large skillet over medium-high heat. Add in canola oil and the snow peas. Stir-fry the snow peas for 3 minutes, add soy sauce and cook for 30 more seconds. Take the pan off the heat and set it aside.
Divide the rice, sweet potato, snow peas and avocado among two bowls. Top with the salmon and serve. Optionally, garnish the salmon with homemade Teriyaki sauce and sesame seeds.
My wife and I both went crazy for this Miso Salmon Rice Bowl. It may actually be my favourite in the bowl series so far. And with only one post left in the series, I’d say it has a good chance of being my number one. As I said in the intro, this recipe may seem intimidating becasue there are a few different components. Still, it’s no different from making a meal with mashed potatoes, vegetables, and protein. If you only make one recipe from this whole series, it should be this one. Have a great weekend everyone!
Remember to share this post on Facebook or Pinterest if you enjoyed it. Thank you for reading, and have a great day! Remember, there are new Chef’s Notes posts every Monday, Wednesday, and Friday, and you can subscribe below, so you never miss one.
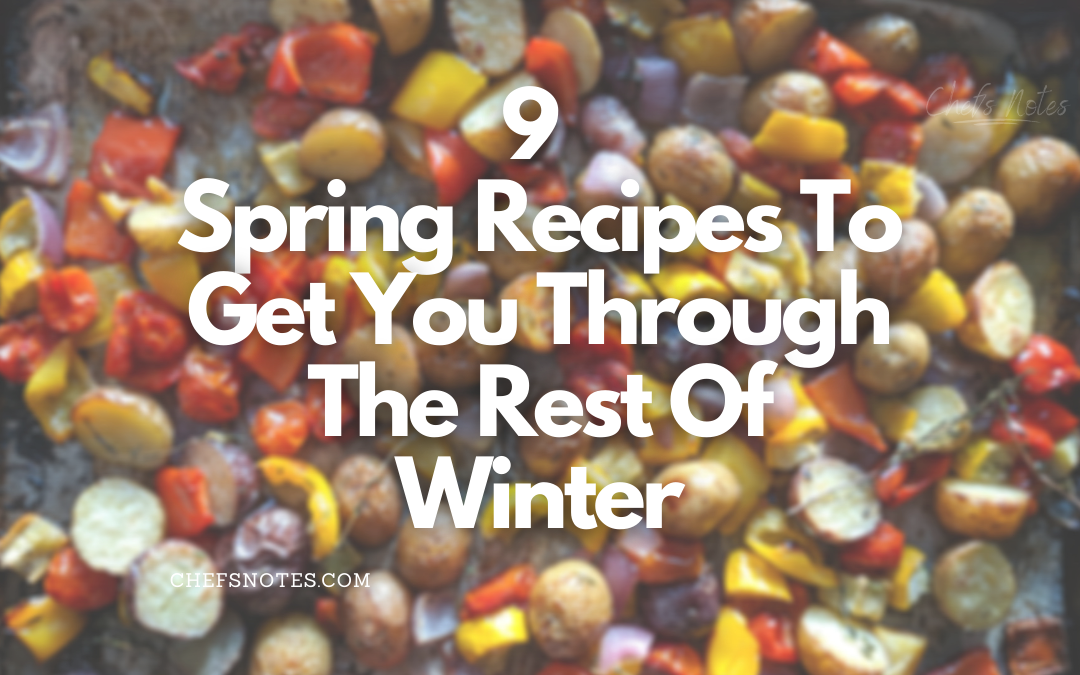
Spring is officially nine days away. What better way to say goodbye to winter than with nine spring recipes. These are a collection of recipes from the Chef’s Notes archives that I think you will love and that are perfect for ushering in spring. If I can promise you anything, it’s that when you have finished reading this post, spring will be closer than it is right now. It’s true. Let’s get to it.
1. Cajun Salmon and Citrus Salad
Nothing says goodbye to cold weather, hello sunshine like throwing a piece of fish on the grill. In the case of this Cajun Salmon and Citrus Salad, the fish (salmon) is flavoured with olive oil and cajun seasoning, grilled and put on a salad of arugula, orange, and lime. This dish has the flavour of spring and summer in every bite.
Cajun Grilled Salmon and Citrus Salad
Cajun Grilled Salmon, On Top Of Arugula With Citrus Vinaigrette.
Keyword: Barbecue, Best Pasta Salad, Citrus, Salmon, Summer Barbecue, Summer food
Servings: 2Servings
Author: Chef Ben Kelly
Ingredients
Cajun Salmon
2filletsSalmon
2tbspOlive Oil
1tbspCajun Seasoning
Citrus Salad
1lgOrange, Cut into Segments
1Lime, Zested and Cut into Segments
1tspHoney
1tspMustard
4cupsArugula
1/4cupOlive Oil
Salt and Pepper to taste
Instructions
Salmon
Combine the olive oil and Cajun seasoning in a medium bowl.
Roll the salmon in the Cajun Seasoning Mixture to coat it. Cover the bowl with plastic wrap and put it in the fridge to marinate for 2 hours.
Preheat your grill to 400°f for about 15 minutes.
Depending on how thick your salmon is, cook it 3-6 minutes per side over medium heat with the lid down.
Once the salmon has reached your desired level of doneness remove it from the grill and place it on the salad.
Citrus and Arugula Salad
Peel a large orange and using a small sharp knife cut between the membrane of each segment so that each segment comes away freely leaving the fibrous membrane behind. Once all of the orange segments have been cut free, squeeze the juice out of the remaining bit of orange into a bowl with the segments.
Using a microplane, grate the zest of the lime into the bowl with the orange. Once zested, peel the lime and segment it as you did with the orange, then squeeze any juice out of the bit that is left behind.
To the bowl with the orange and lime segments and juice add the honey, and mustard then gently whisk to combine.
Slowly whisk in the olive oil, then season to taste with salt and pepper.
Toss the arugula with the dressing divide it among two bowls and top with the Cajun Grilled Salmon. Finish the salad by spooning the citrus segments and dressing over the salmon.
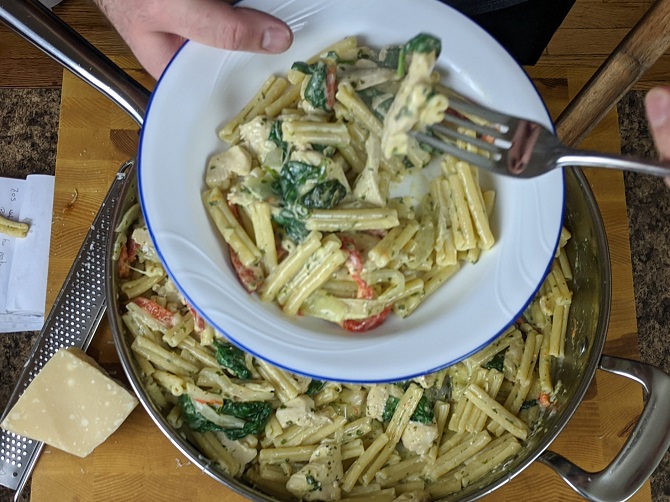
When we think of spring recipes we don’t often think of cream sauces. They seem like more of a fall/winter dish. But when the cream sauce in question is flavoured with homemade pesto and tossed with chicken, red pepper, and spinach, it’s a bit of spring in a bowl.
Creamy Chicken Pesto Pasta
What more is there to say? It's creamy, it's chicken, and it's pesto. Delicious!
Lettuce wraps are a great light meal, and this spring recipe for Sweet and Spicy Chicken Lettuce Wraps is going to put a spring in your step. Bad puns aside, this recipe is a little sweet, a little spicy, and a lot delicious.
Sweet and Spicy Chicken Lettuce Wraps
A new year a new you! What better way to kick off that new years diet than with some deliciously sweet and spicy chicken lettuce wraps?
Keyword: 30 minute meals, 30 Minutes or less, Asian Food, Butter Chicken, Chicken, chicken recipes
Servings: 4servings
Author: Chef Ben Kelly
Ingredients
1lbGround Chicken
1/2lg White Onion, Minced
3clovesGarlic, Minced
1/2Red Bell Pepper, Minced
4eaGreen Onionswhites and greens separate and diced
1tbspGrated Ginger
2tspChinese 5 Spice
1/2 tspRed Chilli Flakes
2tbspSesame Oil
3tbspSoy Sauceor GF Tamari
2tspRice Vinegaror white vinegar
2tbsphoney
1headBibb Lettuceaka Boston Bibb Lettuce
Salt to taste
1tbspSesame Seeds
Instructions
Heat a wok over medium-high heat.
Add the sesame oil along with the chicken and cook until the chicken is browned, stirring occasionally.
Once the chicken is browned and cooked through add in the onion, green onion (whites), and the garlic. Cook for 1-2 minutes or until the onions start to soften.
Next up add in the red bell pepper and red chilli flakes, cook for 1 minute then add in the Chinese 5 spice.
cook the spices for 1-2 minutes before adding in 1/4 cup of water along with the honey, soy sauce, and vinegar.
Turn the heat down and simmer for 4-5 minutes.
Add in the sesame seeds and the tops (greens) of the green onions.
Season to taste with salt.
Wash and pat dry the lettuce and serve with sticky rice.
It may seem odd to include a sandwich on this list (that isn’t a BLT), but this Cuban Sandwich has a surprisingly fresh flavour that really invokes spring. It’s roasted pork that has been marinated in orange juice, thyme and some other stuff. The pork is sliced thin and put on a Cuban roll (I’m using a gluten-free burger bun) with yellow mustard, dill pickle, cheese, and ham. The sandwich is grilled and is perfect in every way.
Cuban Sandwich
A delicious and flavourful sandwich made with roasted pork, ham, cheese, mustard, and pickles.
Brush the inside of the rolls with mustard then tops with pickles, ham, Swiss cheese, and the pork.
Heat a large frying pan on medium heat. Brush the outside of the rolls with butter and put them in the pan. Toast on one side for 2-3 minutes then flip. Press the sandwiches with a spatula to flatten slightly. Cook the sandwiches until the cheese starts to melt then serve.
This spring recipe is Roasted Cherry Tomato Soup. It’s a little twist on the classic tomato soup becasue the tomatoes are roasted, and the recipe uses cherry tomatoes instead of roma tomatoes or something like that. Whenever you pair tomato and basil, it’s going to taste like sunshine, and this soup is no exception. Like all tomato soups, it is best served with a grilled cheese sandwich.
The Ultimate Roasted Cherry Tomato Soup
A delicious homemade tomato soup using up all the extra cherry tomatoes from the garden.
Toss the tomatoes, onion and garlic with the olive oil and a pinch of salt and pepper.
Roast the tomatoes, onion and garlic on a parchment-lined sheet pan for 40-50 minutes on 400°f or until the tomatoes start to shrivel and the onions and garlic are slightly browned.
Put the roasted vegetables in a medium pot over medium heat and add in the milk.
Cook the soup only until the milk is hot then add in the basil and purée.
Taste the soup and season with salt, pepper, and sugar as needed.
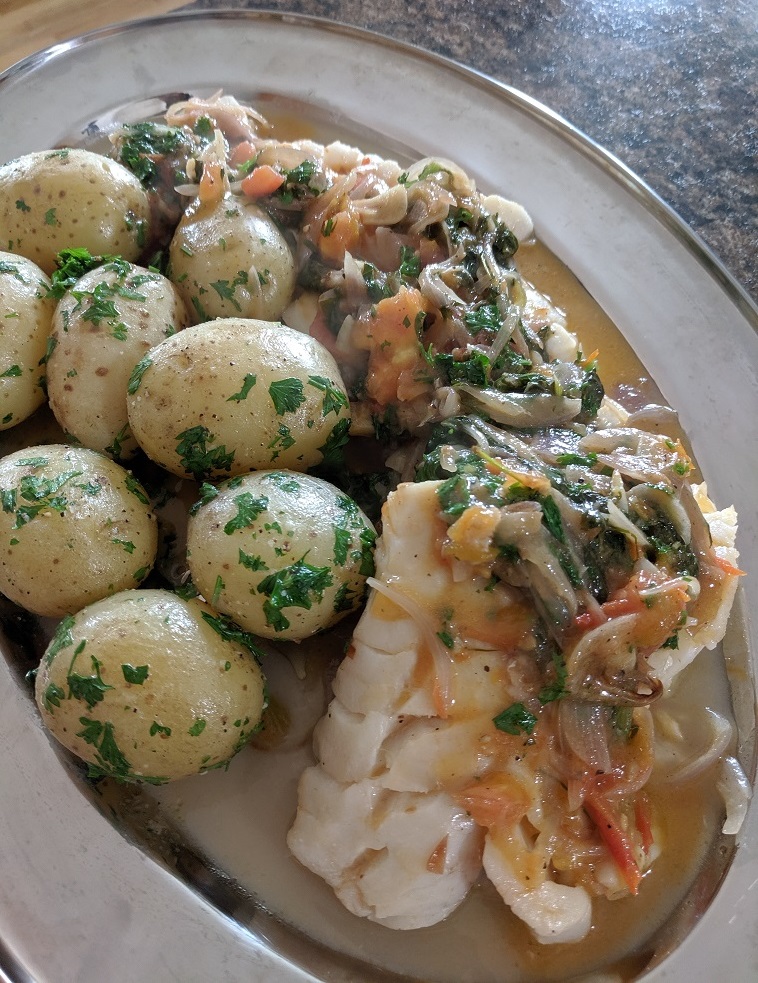
White wine poached cod with parsleyed potatoes to me is kind of the ultimate spring recipe. It has tomato and basil in it, lots of fresh flavours, and a light flakey fish. What more good you want on a warm spring day? As a side note, the potatoes are boiled new potatoes tossed in butter, salt, pepper, and fresh parsley, and they are one of my all-time favourite potato dishes. Seriously, they are so simple and so delicious. They are a definite must make.
White Wine Poached Cod with Parsleyed Potatoes
A quick and delicious cod dish that will knock the socks off any one you serve it to.
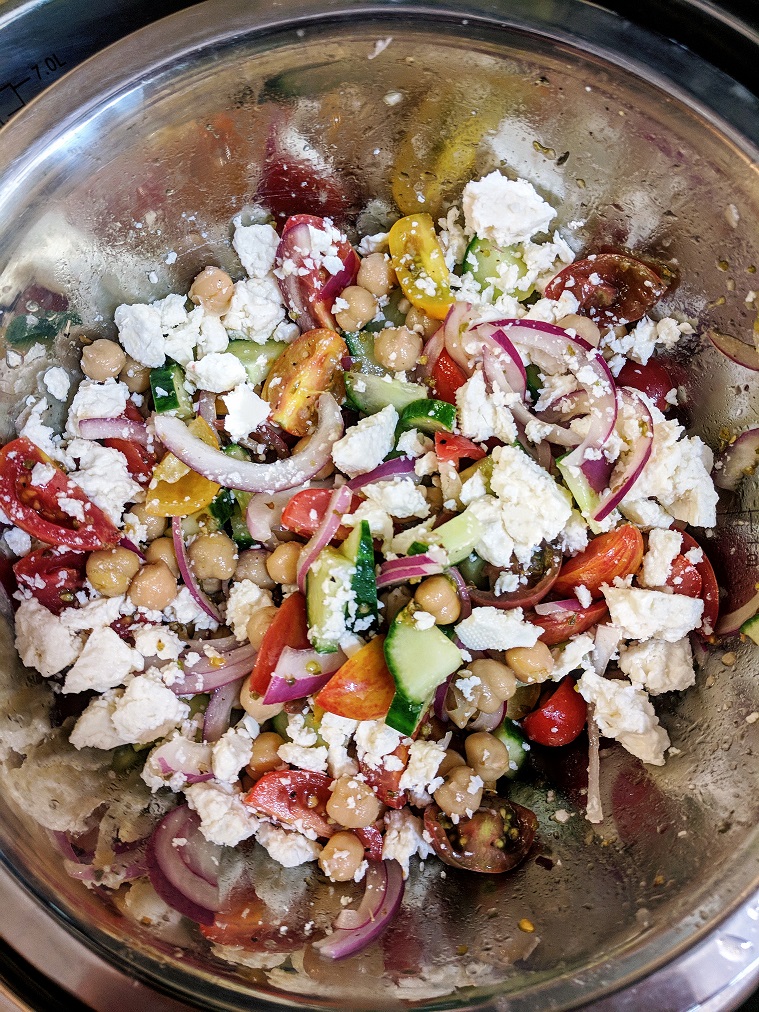
Greek Salad, by its nature, screams spring and summer. The balance of sweetness from the vegetables, saltiness from the cheese, and acidity from the dressing is everything you could want in a salad. When you replace the lettuce with chickpeas, you a more substantial meal with the same great taste.
Mediterranean chickpea salad
A quick, delicious and healthy salad that works just as well as a side dish as it does a lunch.
Salad bowls are a great spring food. That’s why I’m doing a whole series of them every Friday. This chicken quinoa Greek salad is great for all the reasons the chickpea greek salad is great. Plus, it has chicken for protein and quinoa, which is really good for you. So, you’ve got lots of fresh flavours, and it’s good for you. Sound like a great spring recipe to me.
Chicken Quinoa Greek Salad
A delicious and filling salad. The perfect meal for a hot summer day.
1/2cup Good Quality Olive Oilhalf for dressing half for the chicken
2 tbspDried oreganohalf for dressing half for the chicken
1tbspRed Wine vinegar
2clovesMinced Garlic
1lemonJuiced
1/4cupChopped Parsley
1tspDried Dill
Salt & Pepper
2tbspPlain Greek Yogurt
Instructions
Quinoa
Combine the quinoa with two cups of water and a pinch of salt in a medium pot and bring to a boil over high heat.
Once the pot begins to boil, cover it with a tight fitting lid and reduce the heat to low.
Let the quinoa simmer for 15 minutes.
Remove from the heat and let rest, covered for an additional 5 minutes.
Fluff with a fork and serve.
Chicken
Cut the two chicken breasts in half horizontally.
Lay flat on the cutting board and drizzle with olive oil, salt, pepper, and dried oregano on both sides.
Heat a large skillet on medium heat.
Sear the chicken on one side. Flip the chicken and cover. Reduce the heat slightly and cooked covered, flipping once or twice until the chicken is cooked through.
Let the chicken rest, then slice and serve.
Salad
Cut, wash, and spin dry the lettuce.
Combine all the vegetables in a large mixing bowl, except the lettuce.
Add the olive oil, red wine vinegar, lemon juice, oregano, dill, garlic, parsley, and salt and pepper into the bowl. Taste and adjust seasoning as needed.
Mix the warm quinoa into the vegetables along with 1/4 cup of crumbled feta cheese. Mix well.
Add the lettuce and mix.
Serve the salad in a large bowl, top with sliced chicken, the remaining feta, and a spoon full of yogurt.
The last spring recipe on the list is my Nicoise Pasta Salad. It is everything you love about a Nicoise Salad but with pasta in it. The salad starts with a basic red wine vinaigrette to which tuna, olives, blanched green beans, tomatoes and pasta are added. The salad is finished with slices of hard-boiled egg. It is even better than it sounds.
Nicoise Pasta Salad
Nicoise salad is often considered by Chefs to be one of the best salads ever created. Now, you can have it in pasta salad form.
If these nine spring recipes can’t get you through the last few days of winter, nothing will. They are all packed with loads of fresh ingredients and flavours and are simple enough that anyone can make them. What are some of your favourite spring recipes? Tell me in the comments below or on Facebook.
Did you know that I wrote a cookbook? It’s called the 5-Ingredient Cookbook for men (of course, it is for everyone). The kindle version is officially on sale now and the physical version goes on sale March 16th, but you can preorder it now from Amazon in Canada here, and Amazon in the US here.
Thank you for reading this post. Please share it on Facebook, Pinterest, or Twitter to help Chef’s Notes grow. Subscribe to Chef’s Notes below, and you will never miss a post again.
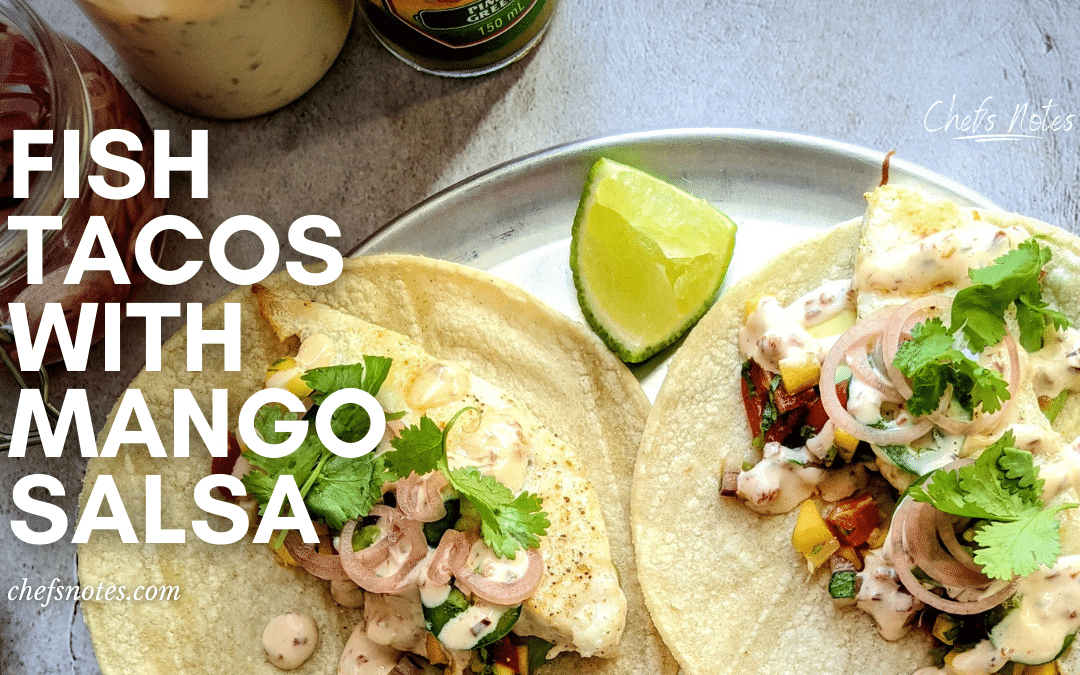
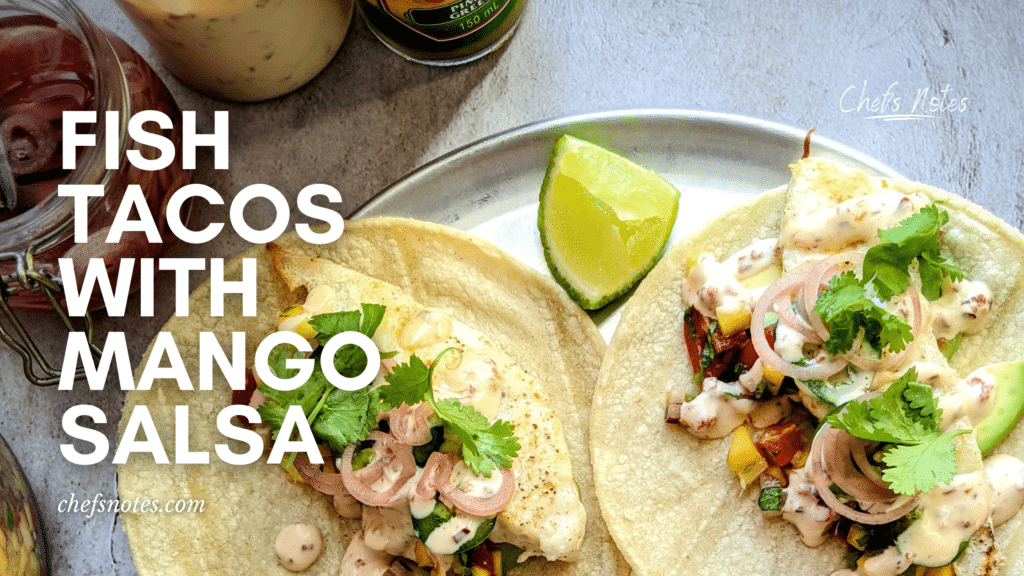
As I sit here and write this, it is -10°c outside. This hasn’t been the worst winter I’ve ever seen, but when compounded with everything else, it seems never-ending. Like a lot of other people, I am craving warmer days and sunshine. Unfortunately, I can’t change the weather, but I can make summer food to cure those winter blues. These Fish Tacos with Mango Salsa are that cure. Every bite is like a little taste of your own personal summer. You can almost feel the sunshine. Let’s get to it.
Mango Salsa
The first step in making these fish tacos is to make the mango salsa. You can use store-bought salsa if you want, but you won’t get that same fresh summery flavour. If you have the time, make the salsa. It’s worth the effort. If you don’t like or can’t find mango, it can be substituted with pineapple, peaches, or oranges.
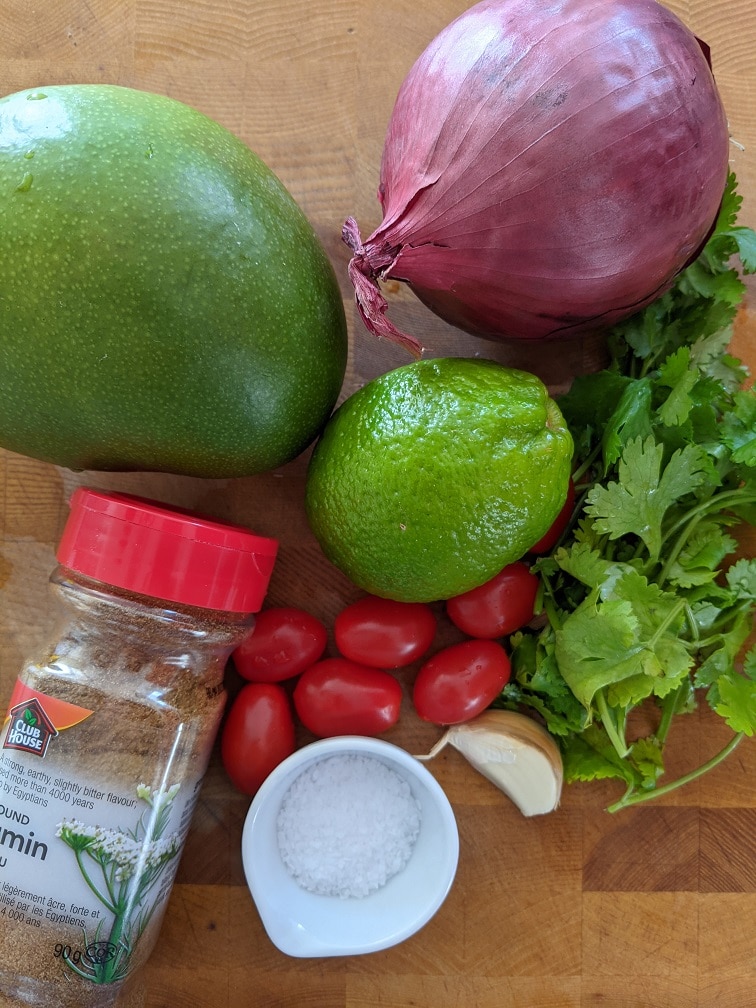
Ingredients
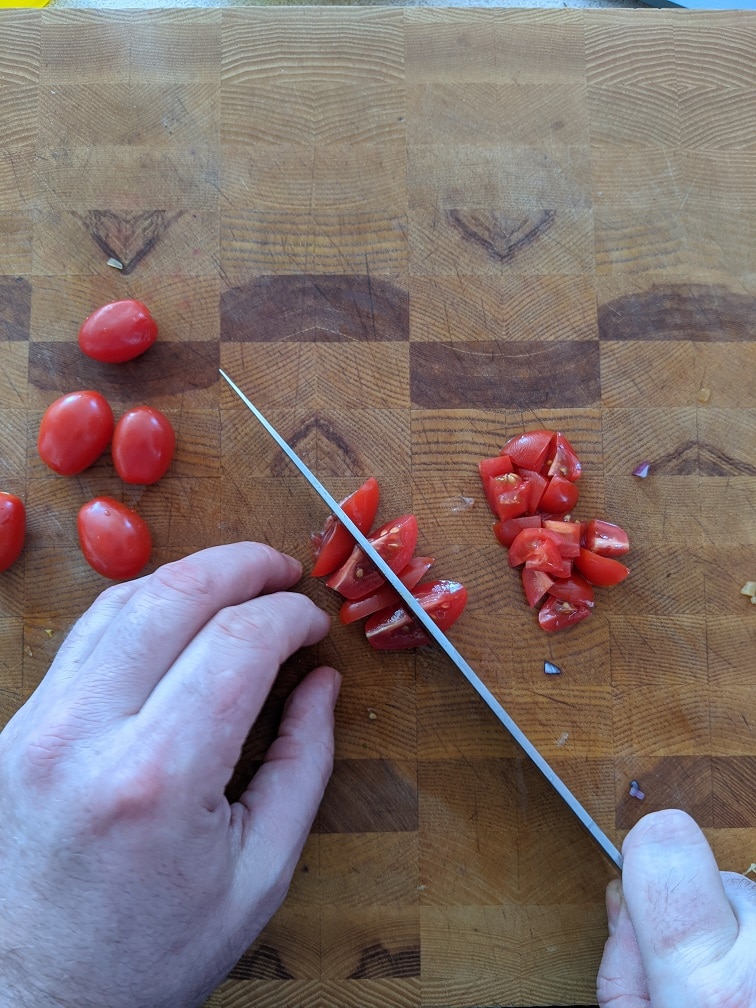
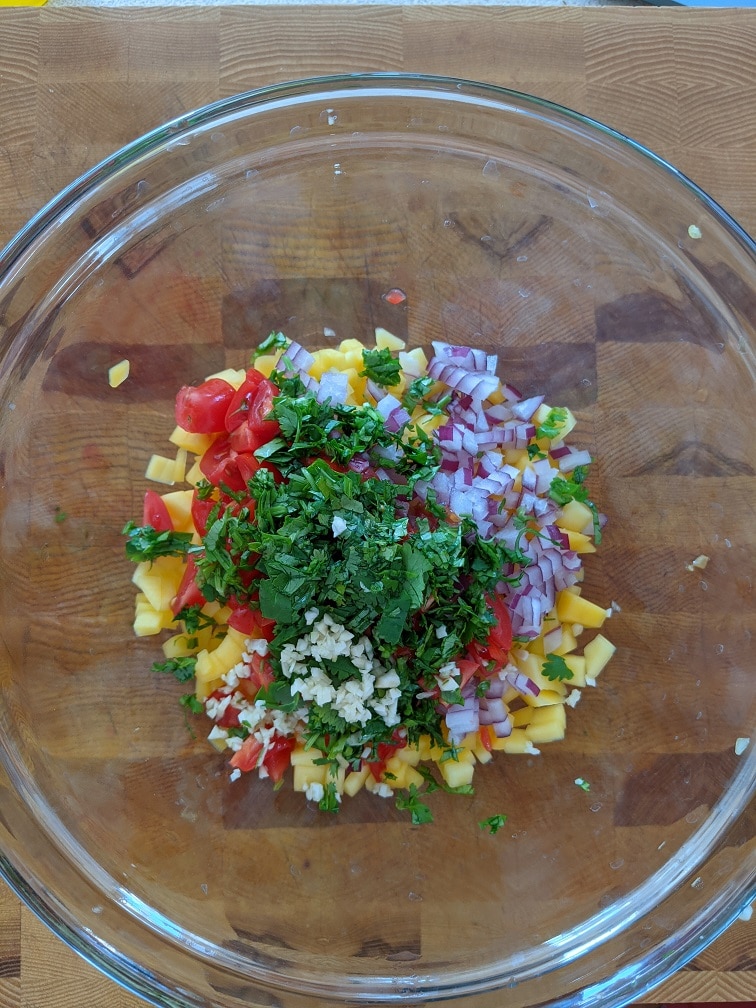
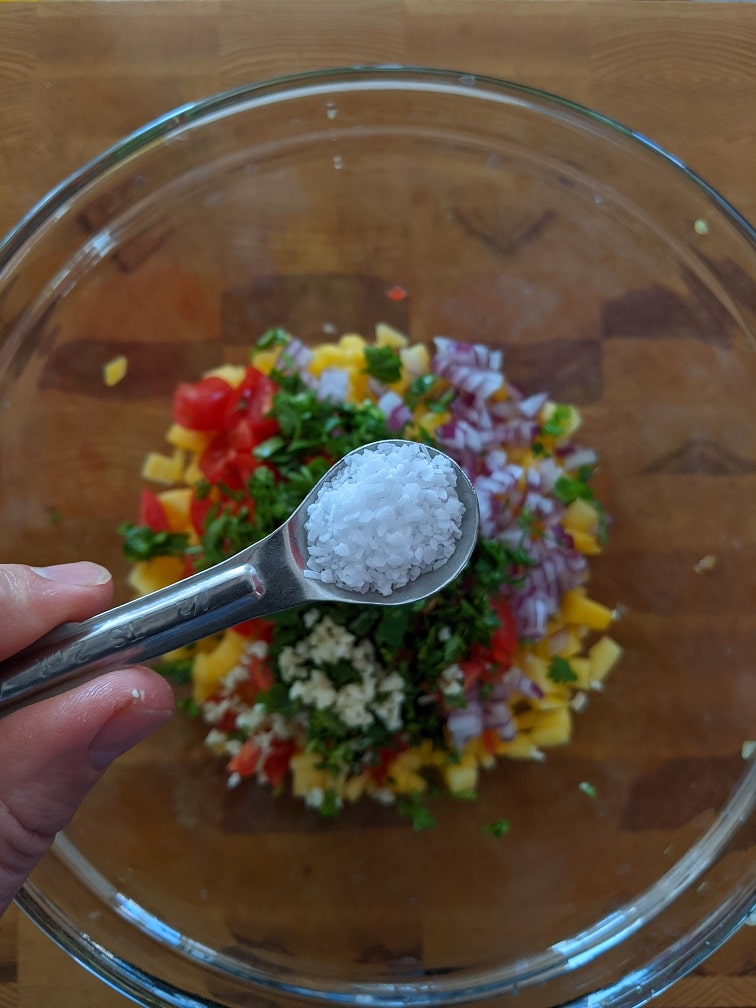
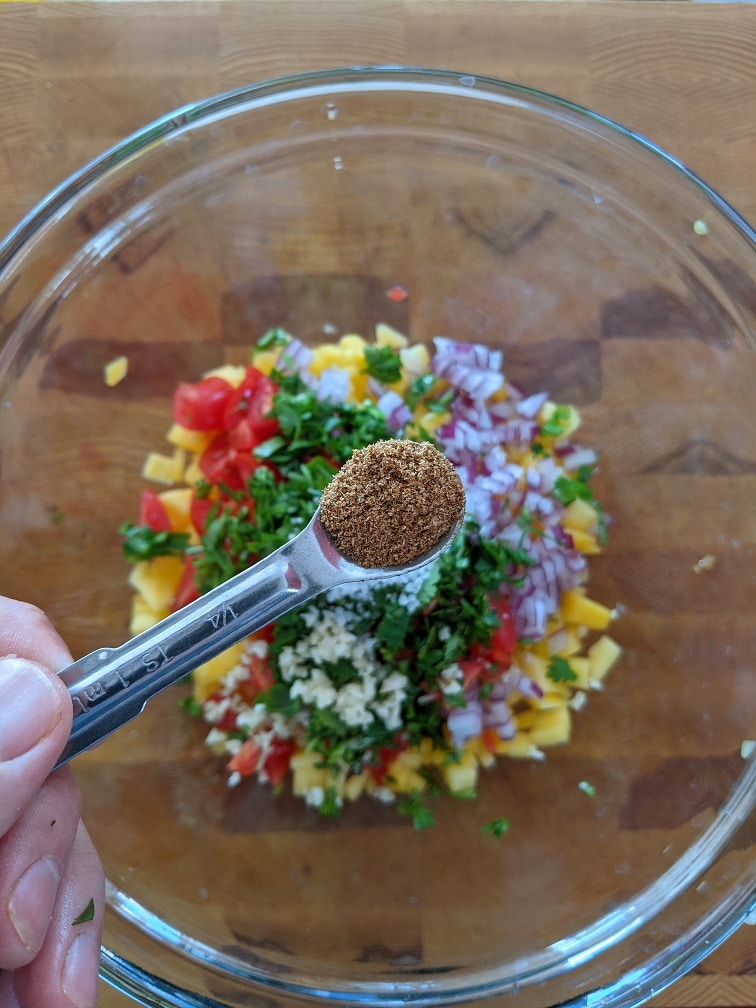
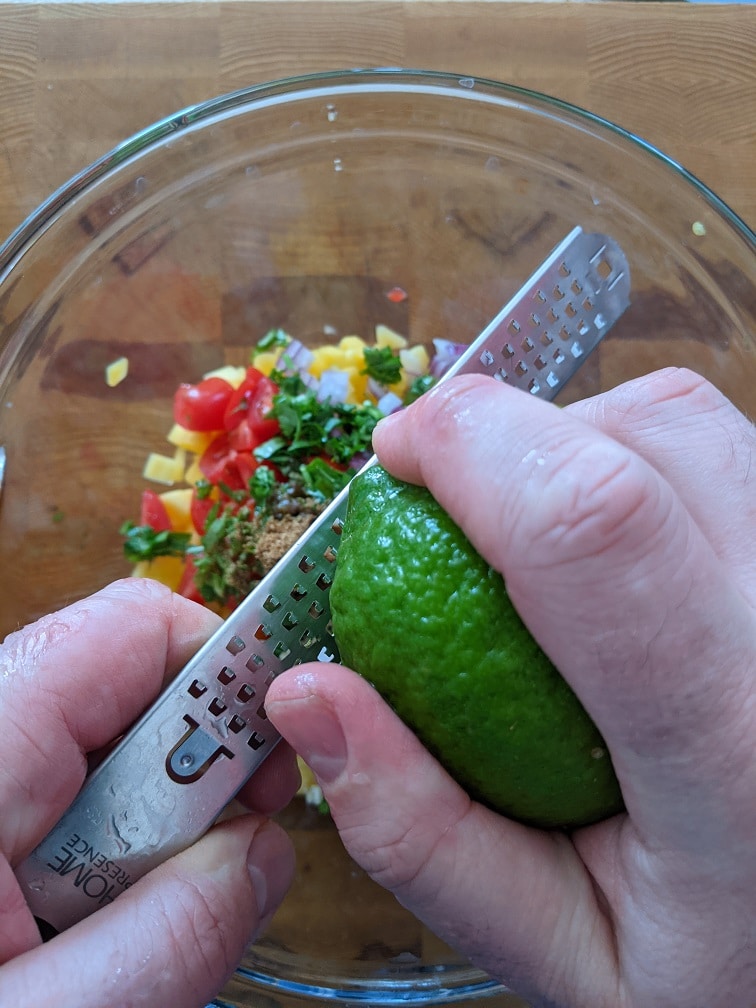
The salsa ingredients are mango, red onion, lime juice and zest, cilantro, cumin, garlic, grape tomato, kosher salt, and pepper. I didn’t add anything spicy to the salsa because the tacos have chipotle lime mayo on them and fresh jalapeno. Of course, if you want to slice up a jalapeno or habanero and add it to the salsa, go for it.
Cutting The Mango
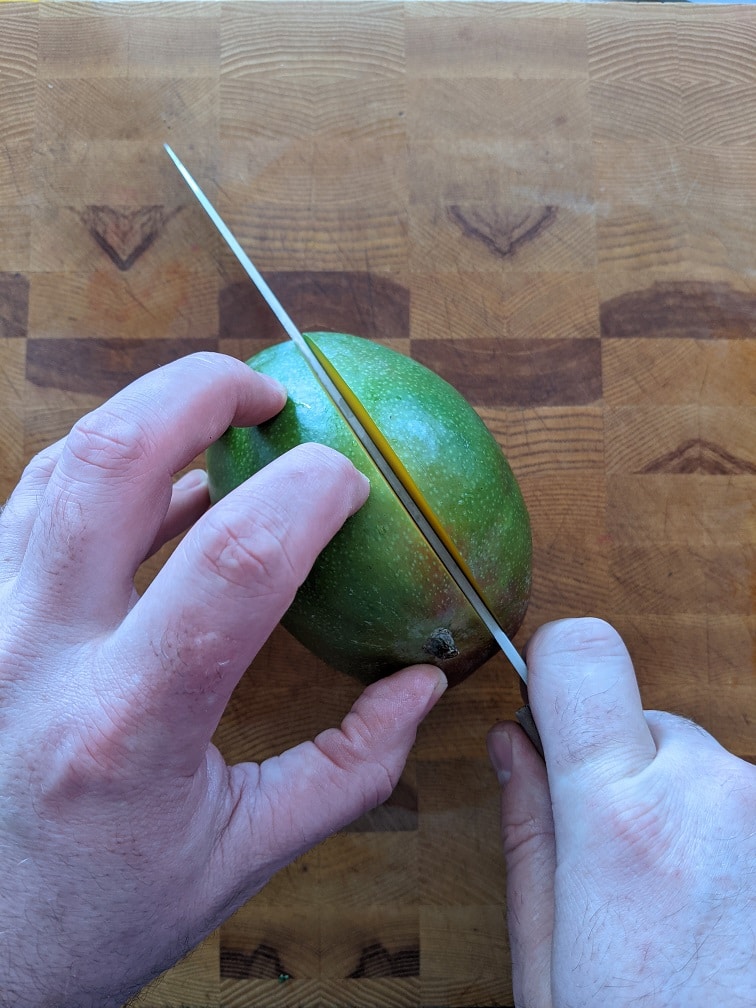
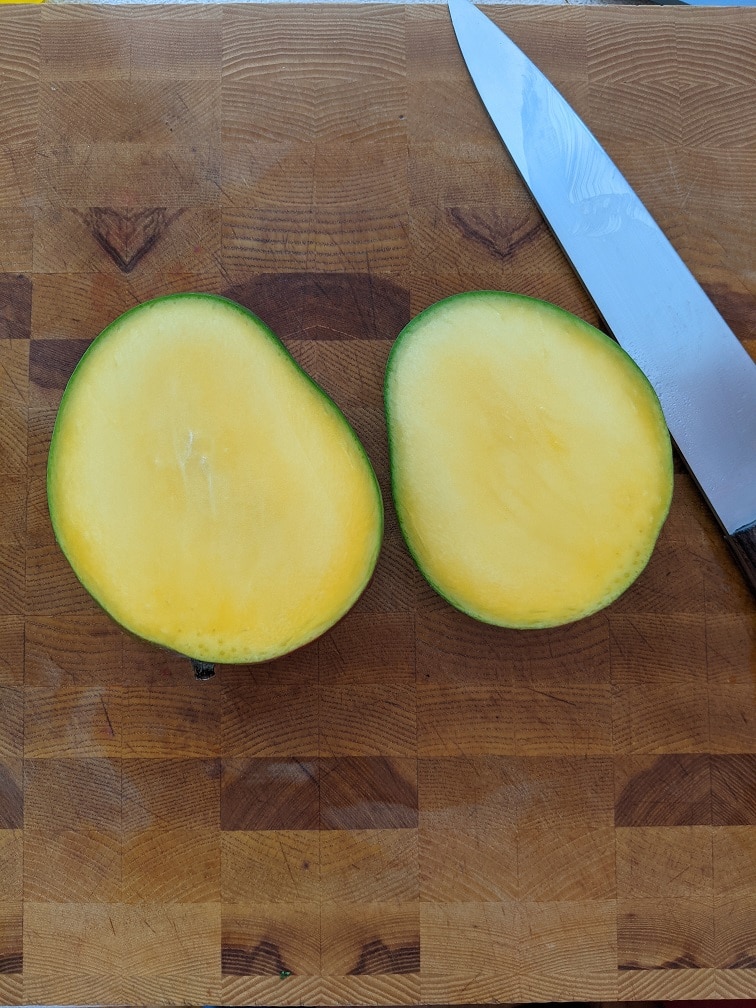
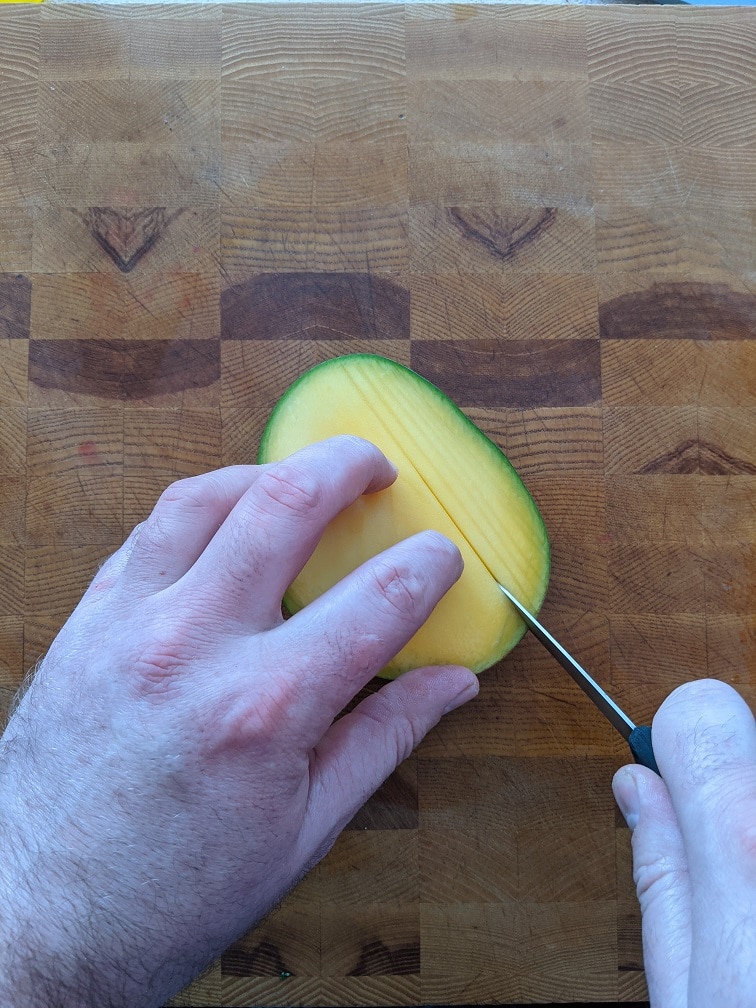
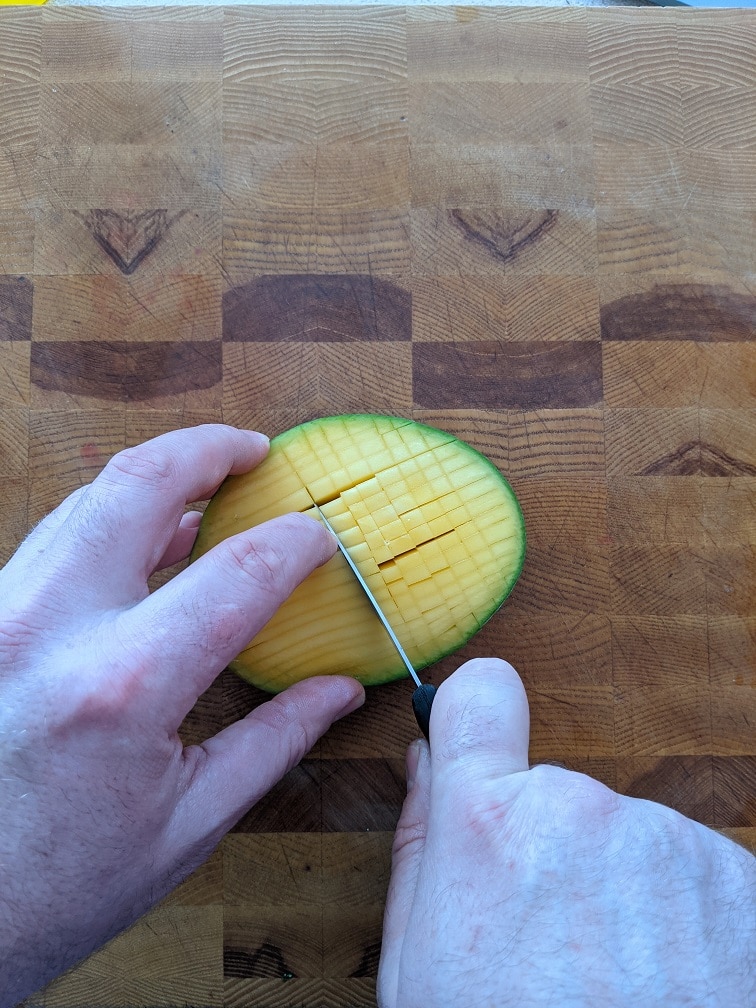
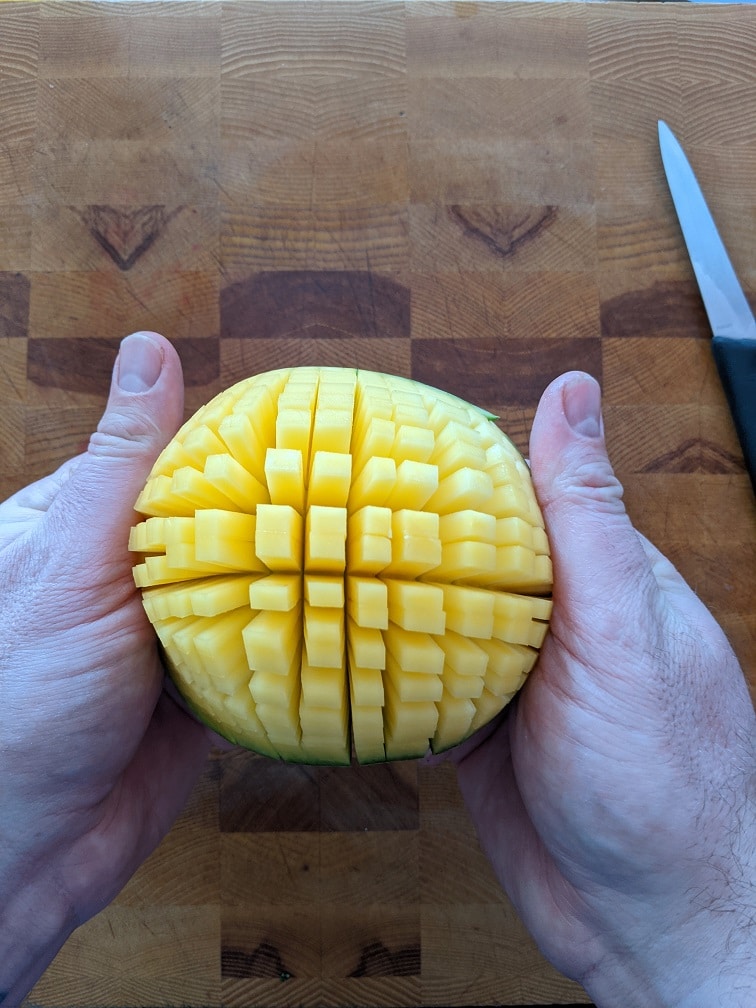
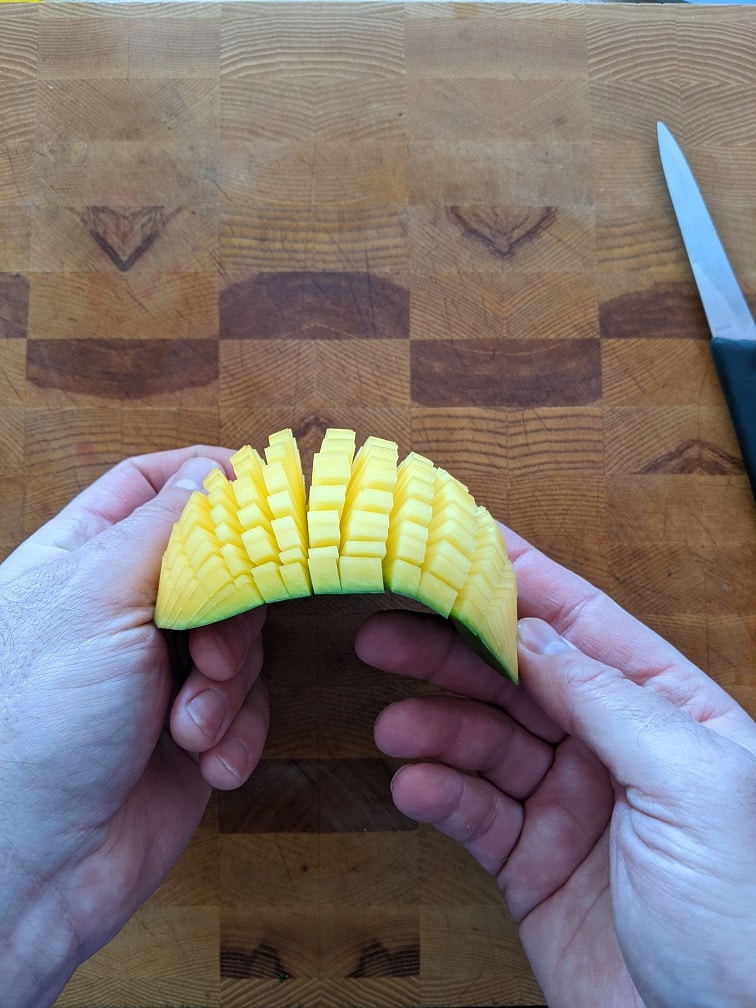
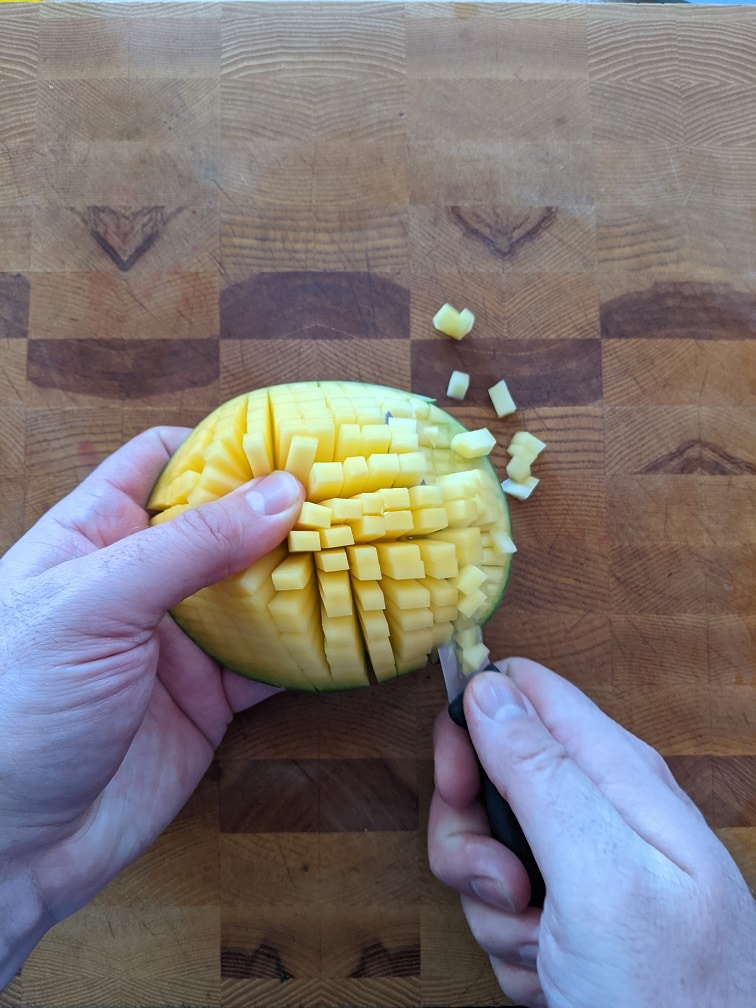
Cutting the mango is the trickiest part of making this salsa. You can peel the mango, cut it into thin slices, cut those slices into sticks, then cut those sticks into small cubes but doing that will take a lot more time than the technique I’m about to describe. Stand the mango up on your cutting board and cut the two sides off. There will be about a half-inch pit in the middle that you can’t cut through. Take those sides and make small even slices in the flesh but not through the peel. Rotate the mango by 90° and make more slices the same width apart. Push up on the mango’s bottom to make it look like a porcupine and cut the little squares away from the skin. The only thing to keep in mind when doing this is that you do not want to cut through the skin. The mango won’t pop up properly if you do. Once you get the sides of the mango diced, go back to the pit and cut off any excess fruit and dice it.
Finishing The Salsa
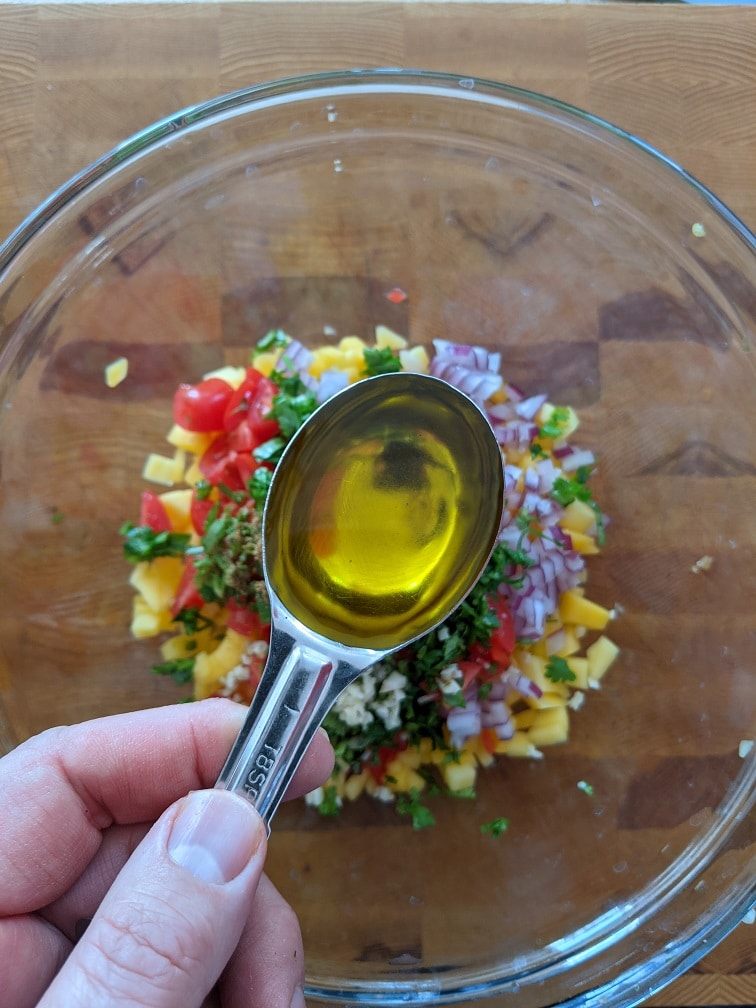
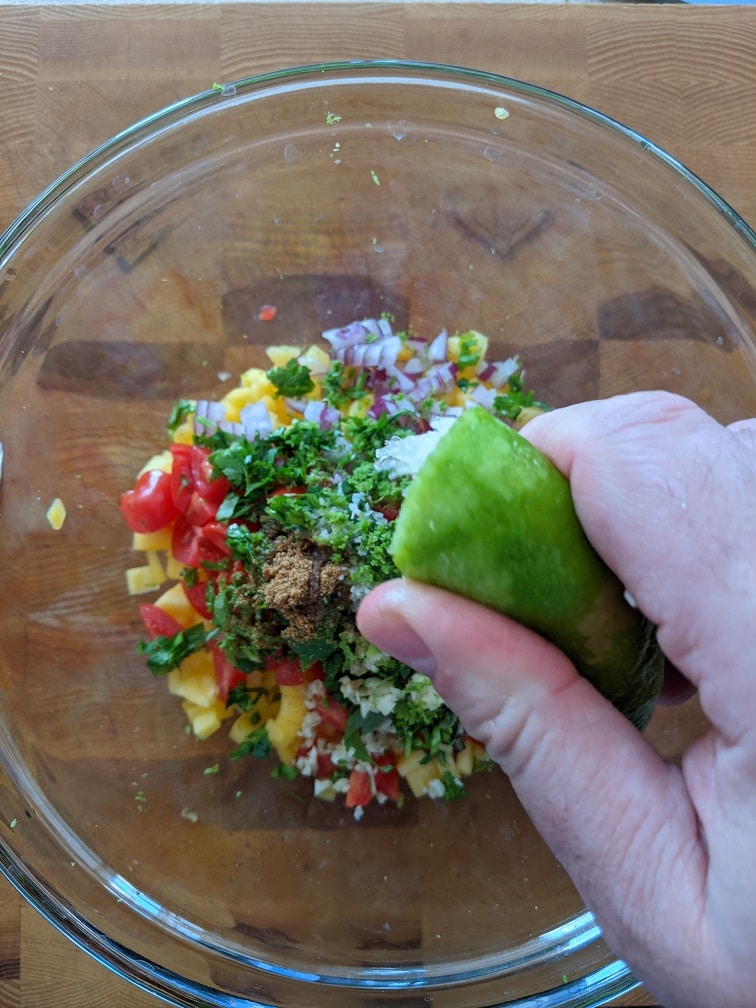
Put the diced mango in a mixing bowl, mince some onion, dice the tomatoes, chop the cilantro, and mince the garlic. Put all the ingredients in the mixing bowl, including the cumin, olive oil, salt, pepper, lime zest and juice. Stir. Cove the salsa with plastic wrap and put it in the fridge for an hour before serving.
Mango Salsa
Use this fresh Mango Salsa on tacos, nachos, or burritos.
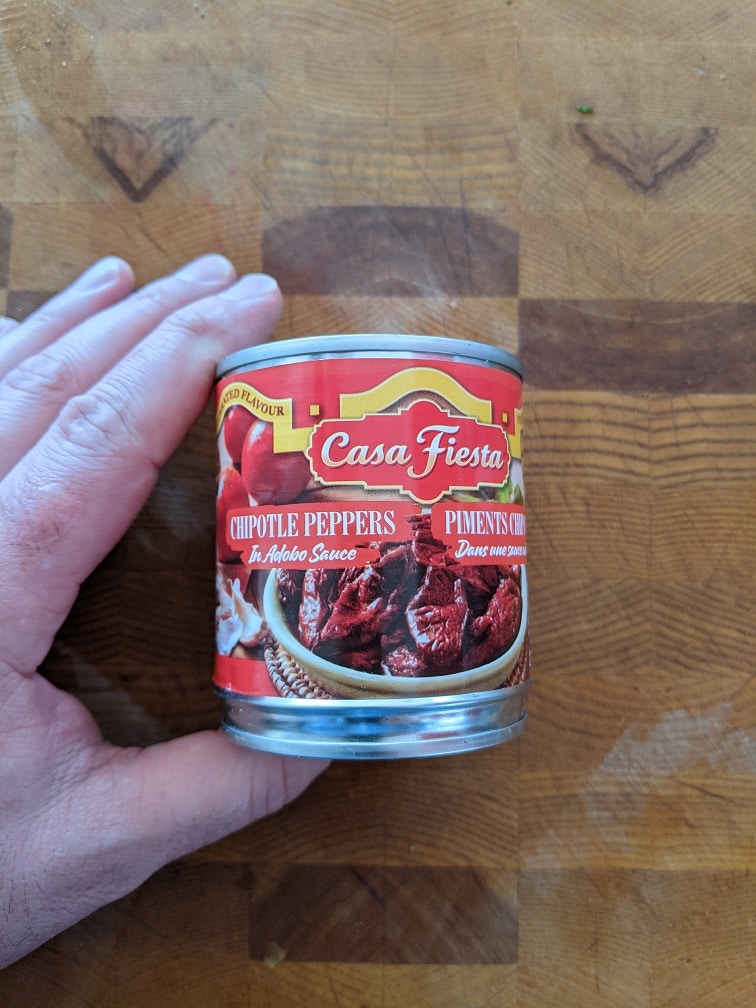
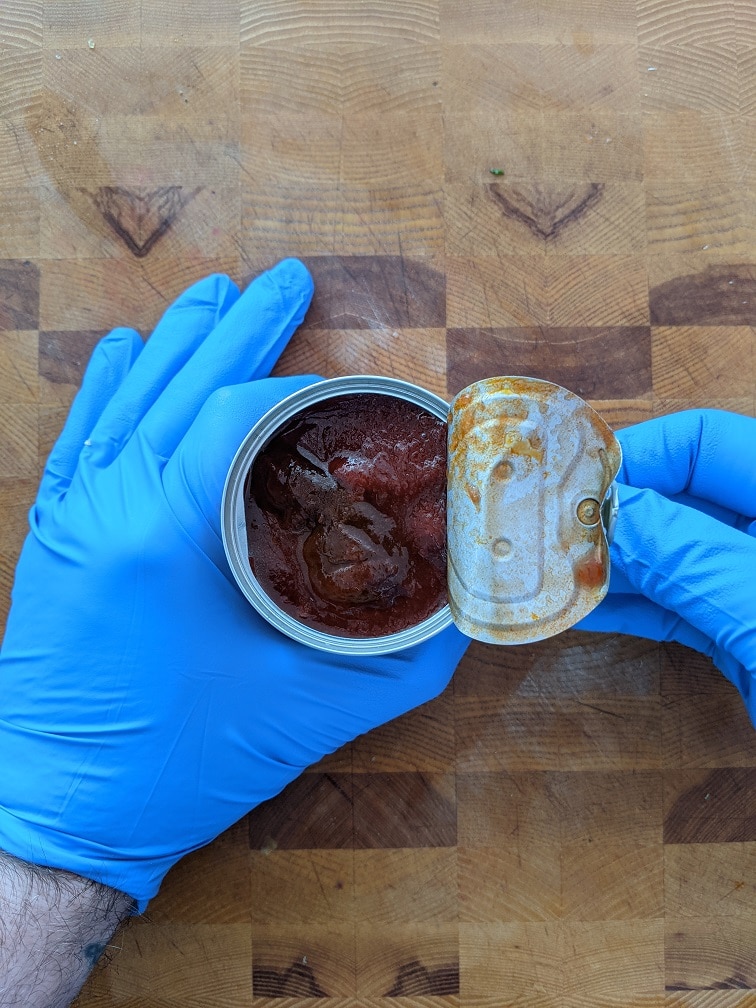
Chipotle peppers are smoked and dried jalapenos. You can buy them in three ways, as the whole dried pepper, dried and ground, or canned and packed in adobo. Adobo is like a Spanish pickling liquid. For this recipe, use the canned ones. I find they have more flavour and are easier to use than the dried ones because you don’t have to rehydrate them. You can buy canned chipotles in most grocery stores by the taco kits. You won’t use the whole can for this recipe, but any leftovers can be frozen and used later.
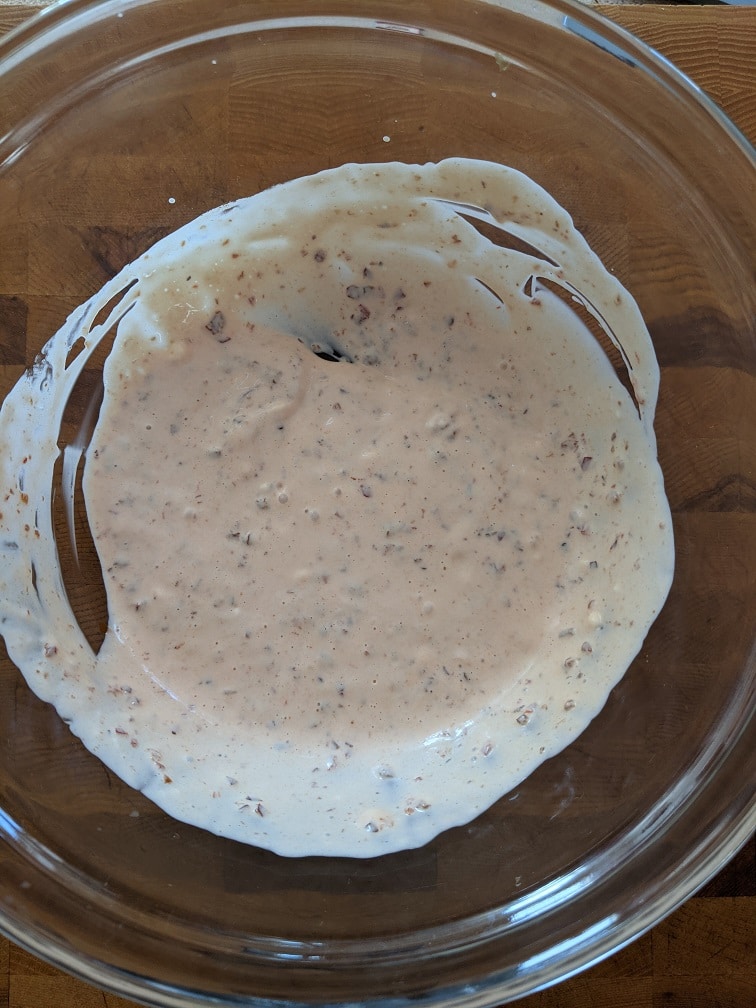
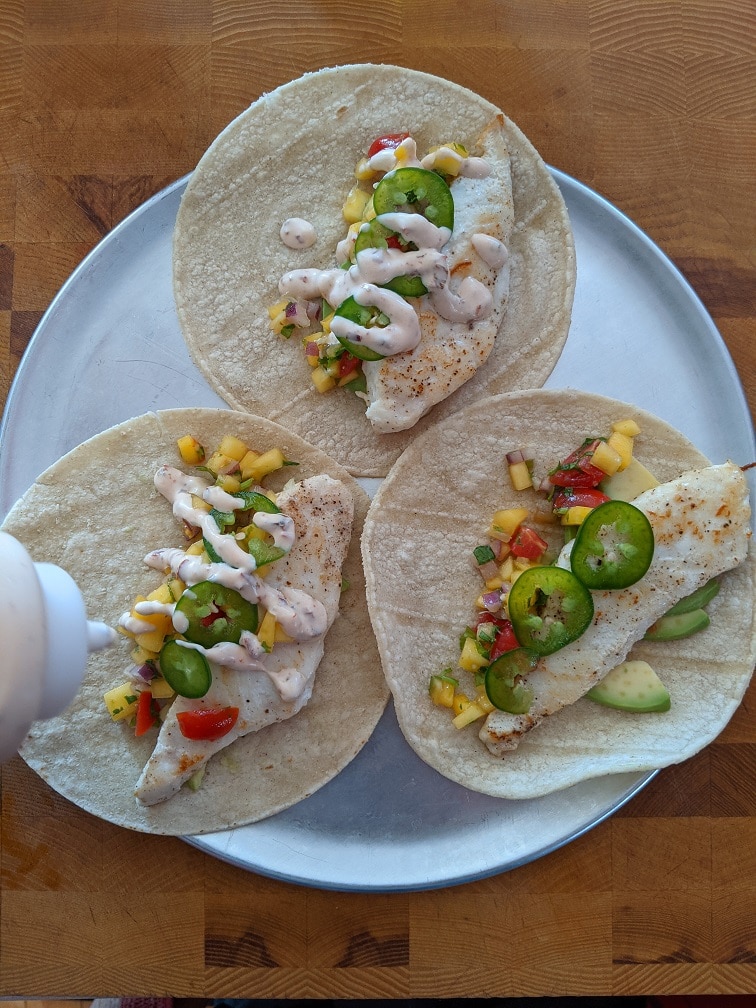
Making the chipotle lime mayo
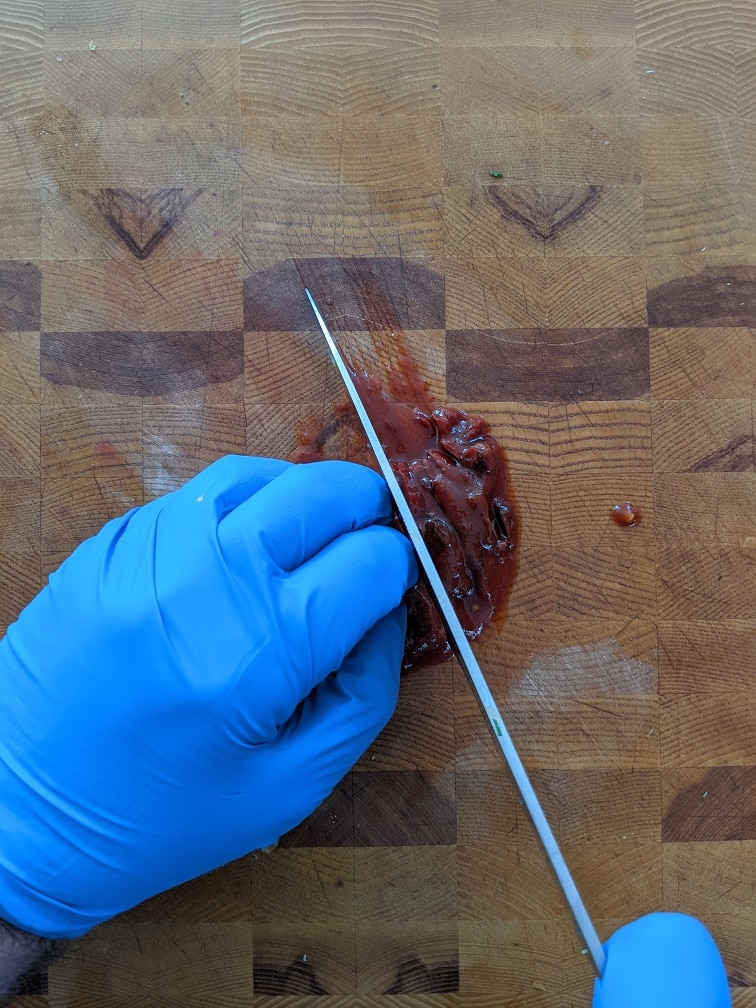
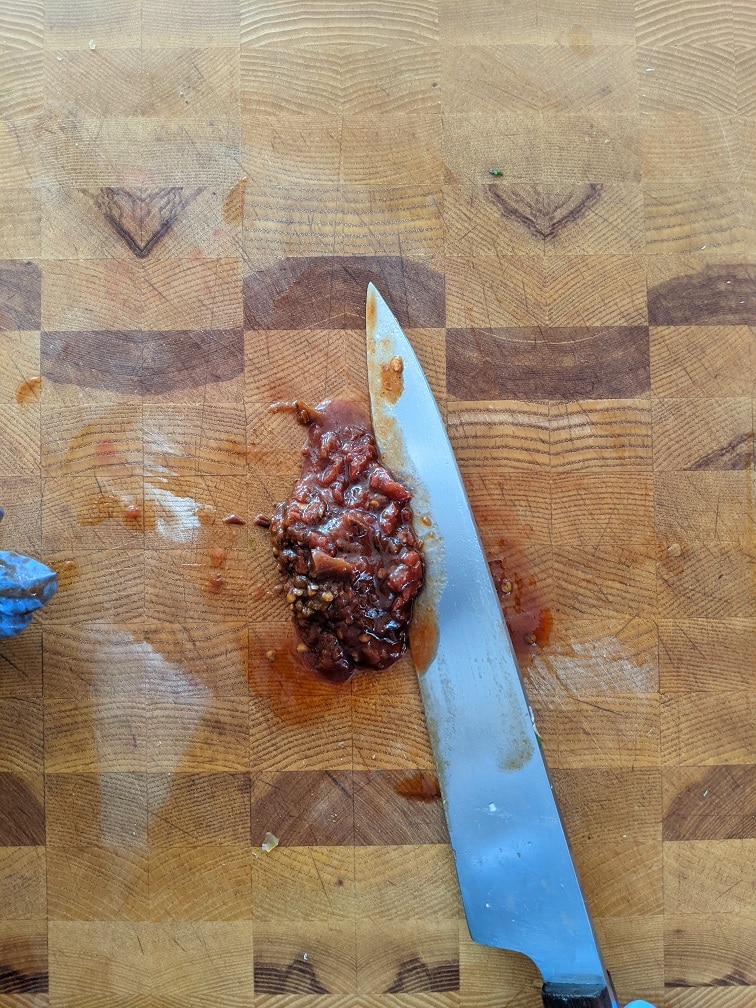
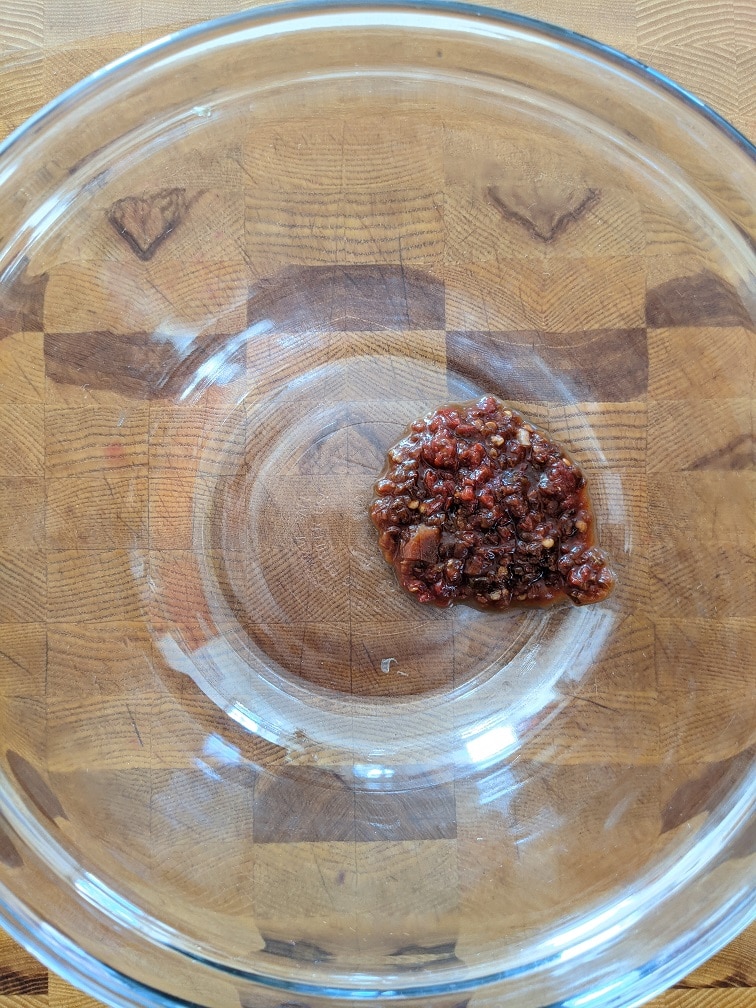
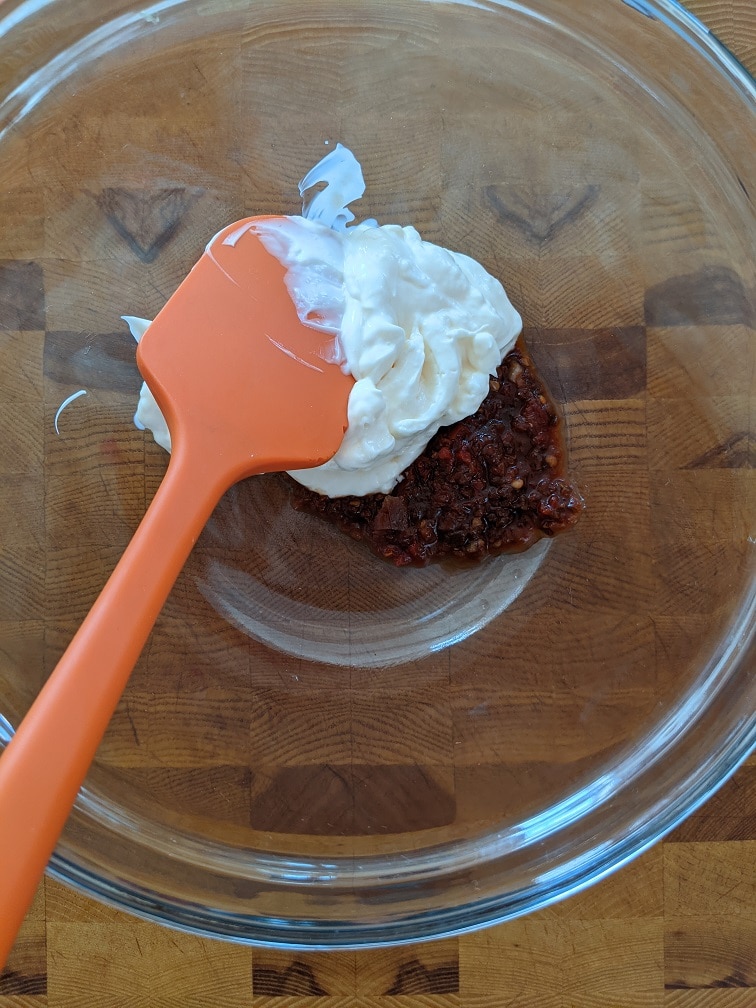
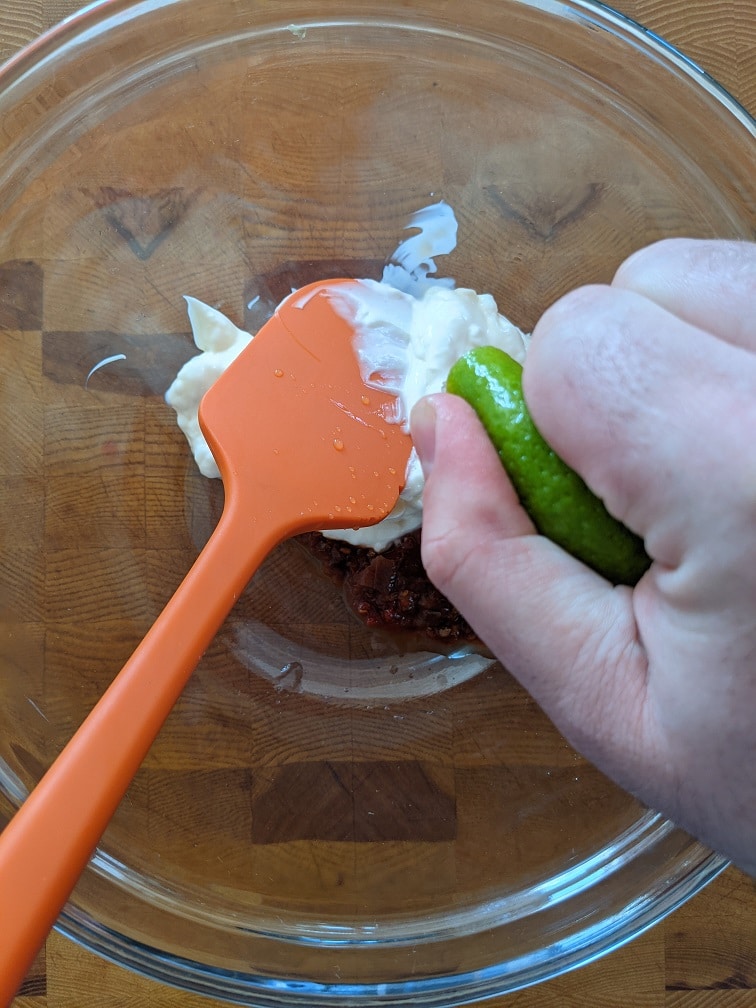
To make the chipotle lime mayo, cut two chipotles as small as you can and combine them with mayonnaise, lime juice and a bit of salt. Put the chipotle lime mayo in a small dish or squeeze bottle and put it in the fridge for 20 minutes before serving. If you’d like, you can use sour cream instead of mayonnaise.
Chipotle Lime Mayonnaise
A quick and simple chipotle mayo that you can use on tacos, sandwiches, burritos, or burgers.
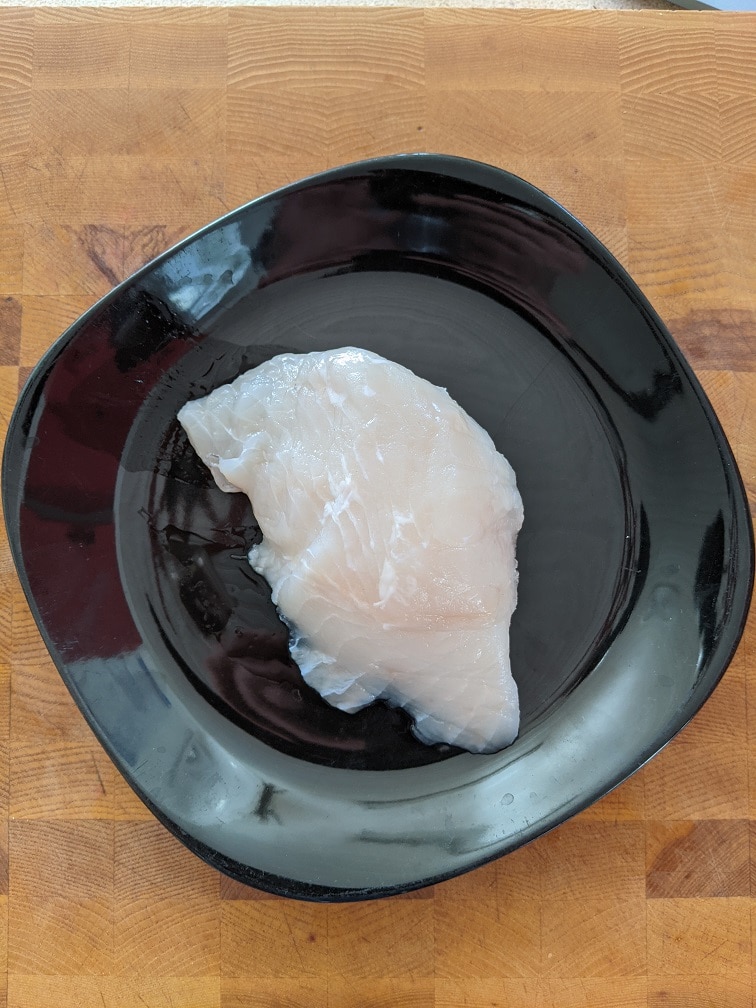
For my fish tacos, I used halibut, but you can use literally any fish you’d like. You may need to change how you cook the fish and cooking times depending on the fish you use, but other than that, everything can stay the same. If you’d like to, you could also use shrimp or scallops in place of the fish.
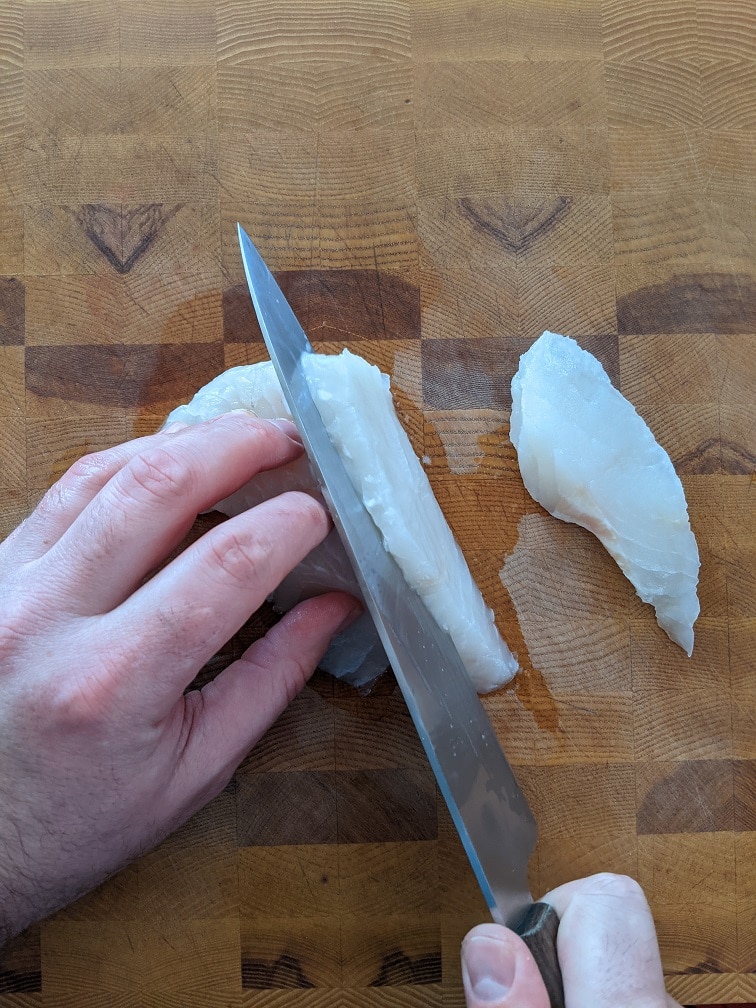
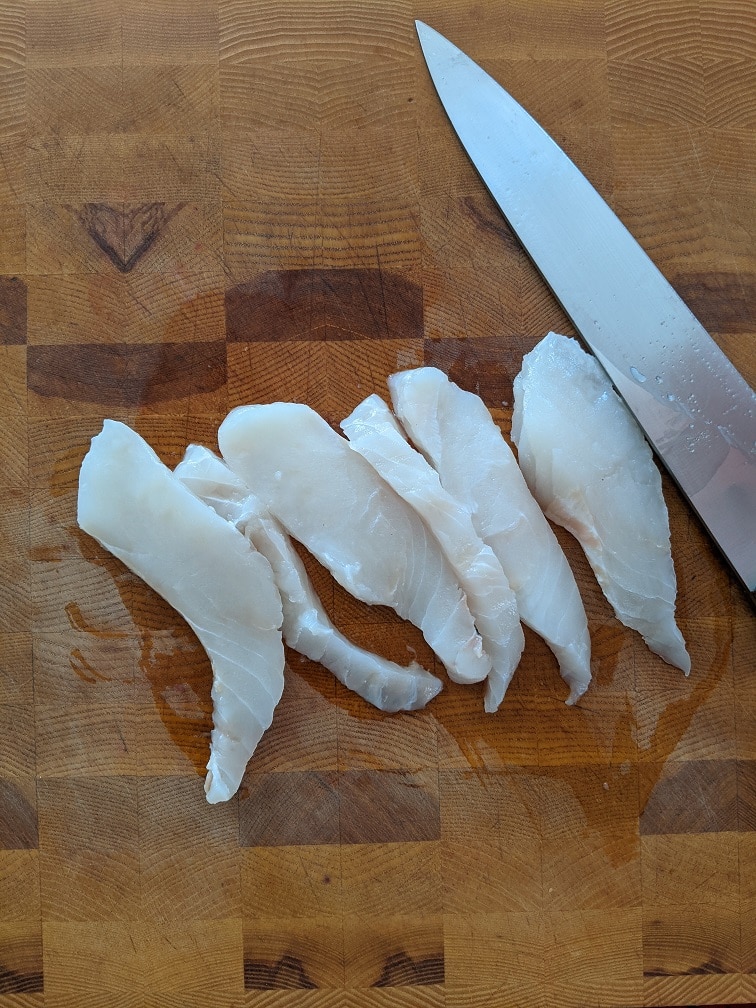
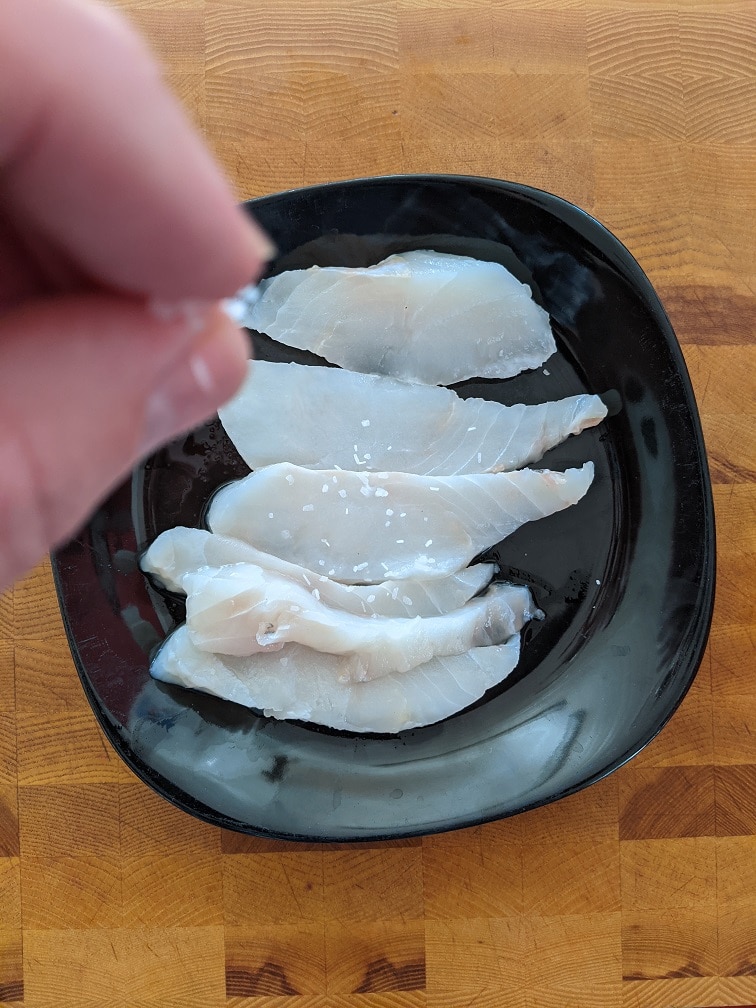
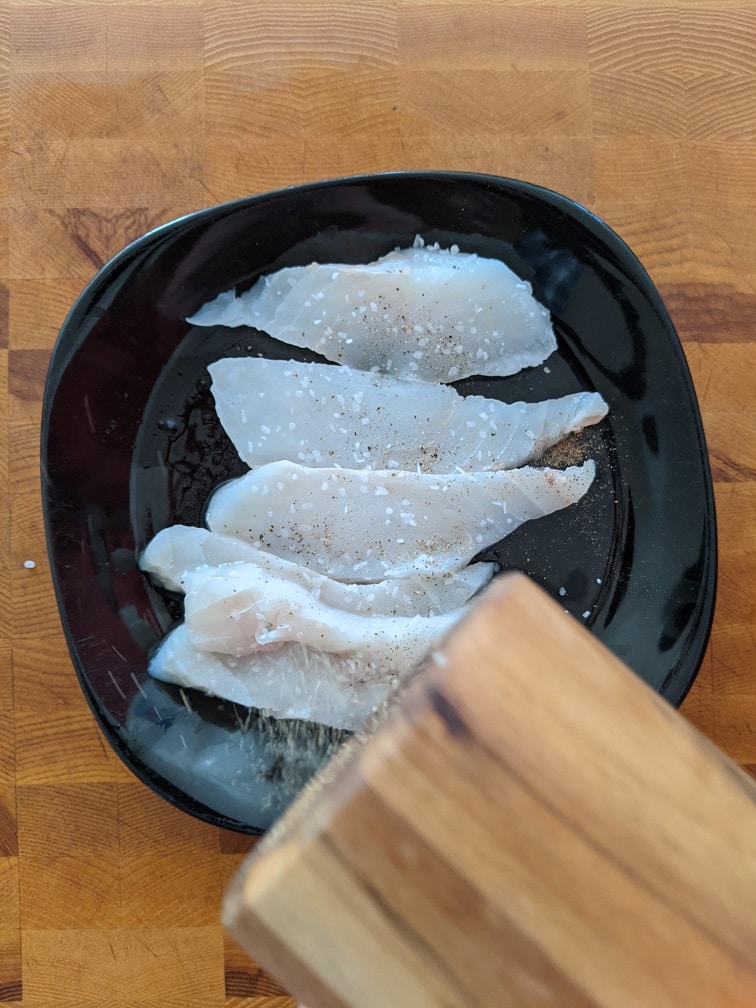
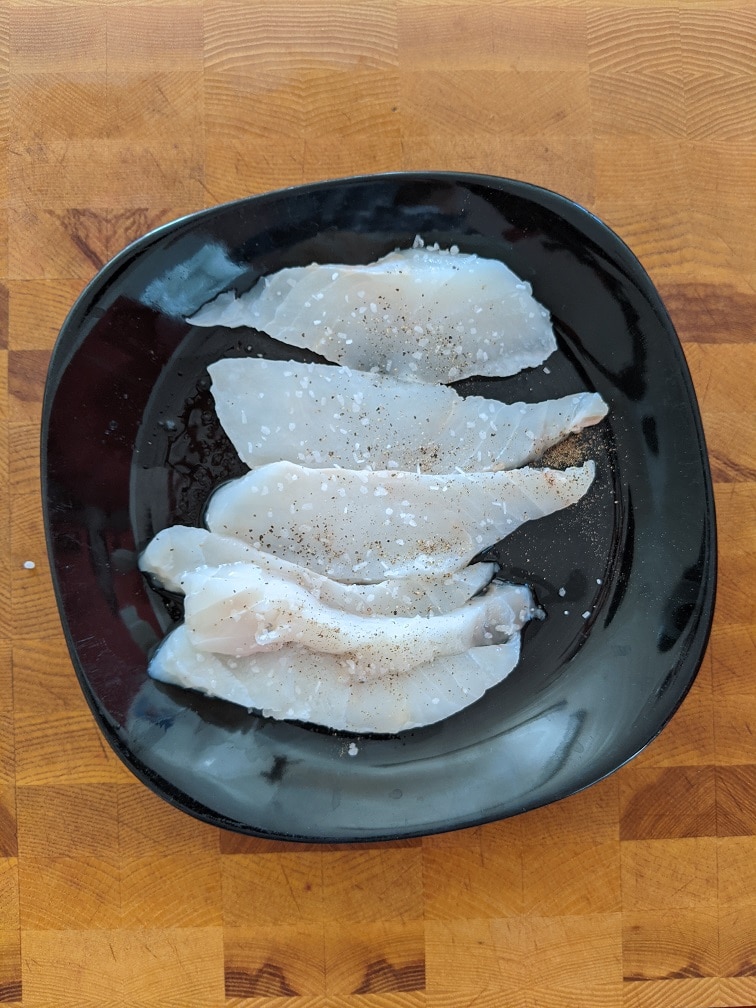
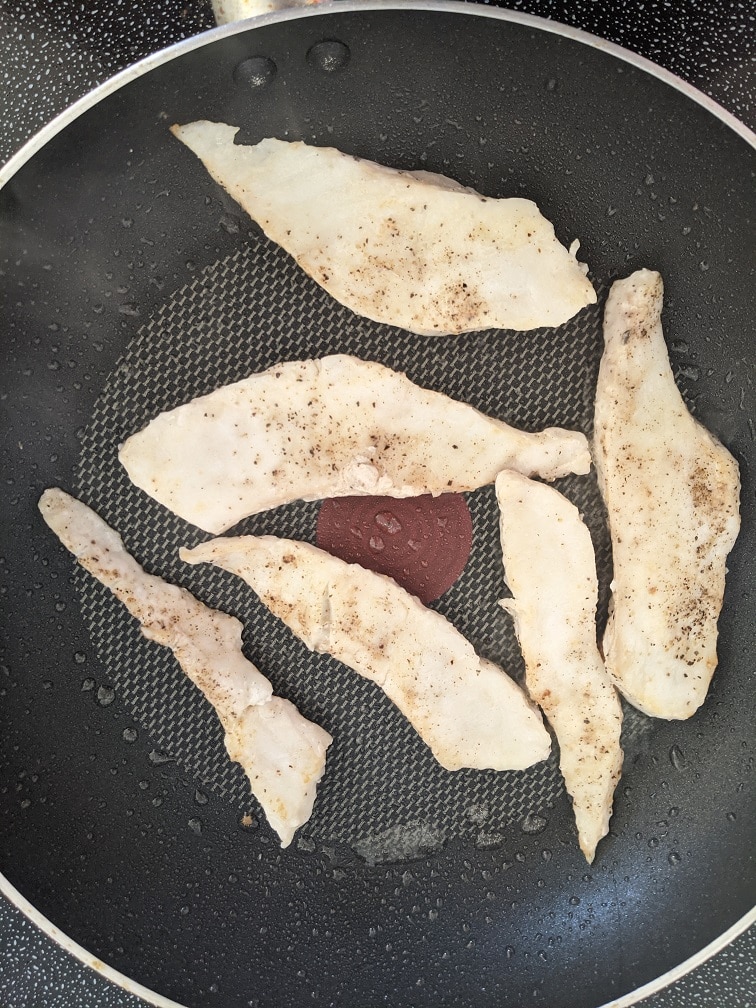
Preparing the fish
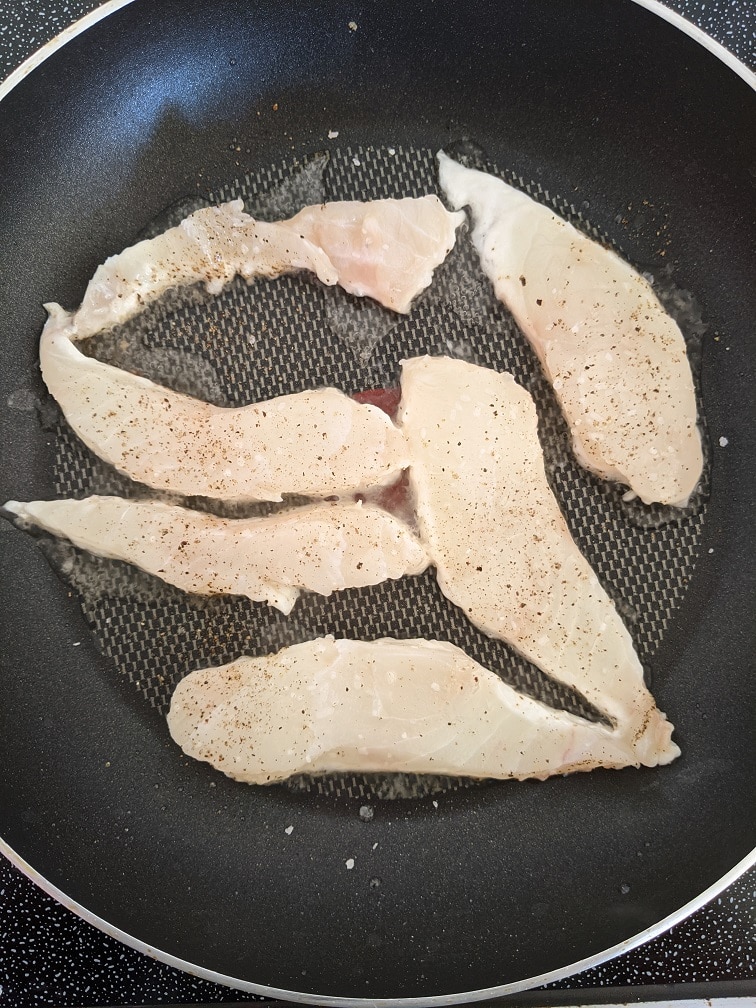
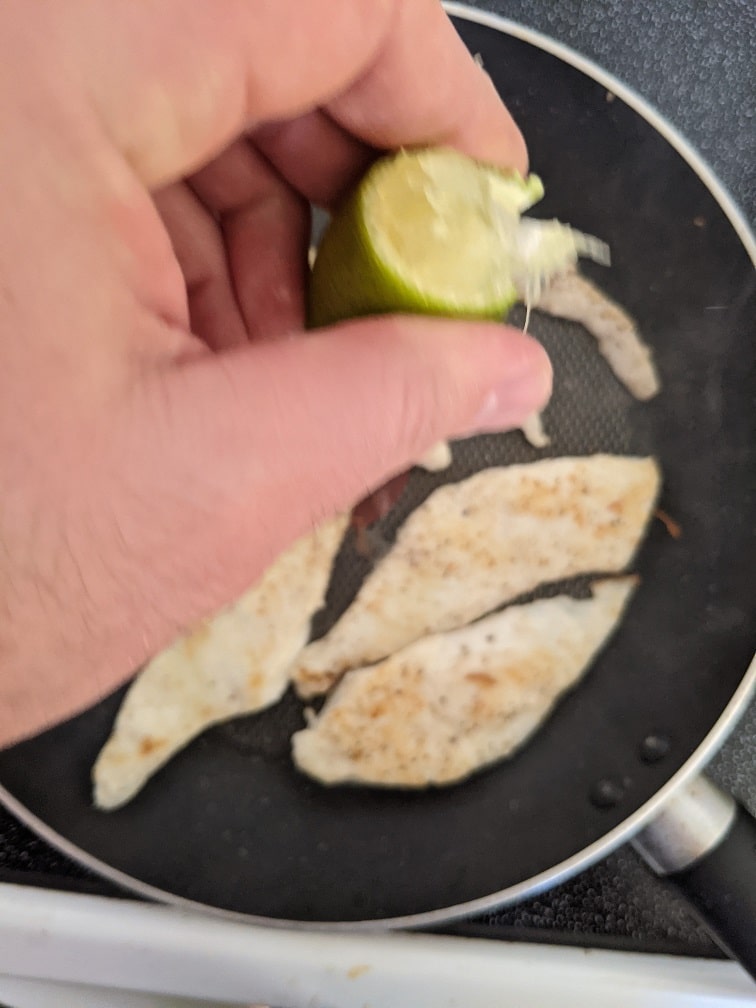
To prepare the fish, again, in my case, it is halibut; cut it into thin strips and season it with salt and pepper. Heat a medium non-stick pan over medium-high heat. Add a bit of oil to the pan, then the fish. Cook the fish until it is very light brown, then flip it and brown it on the other side. It should take two to three minutes per side. You have to make sure to let your pan heat fully before adding the fish; otherwise, your fish may boil in its own juices. Finish the fish by squeezing the juice from half a lime over it.
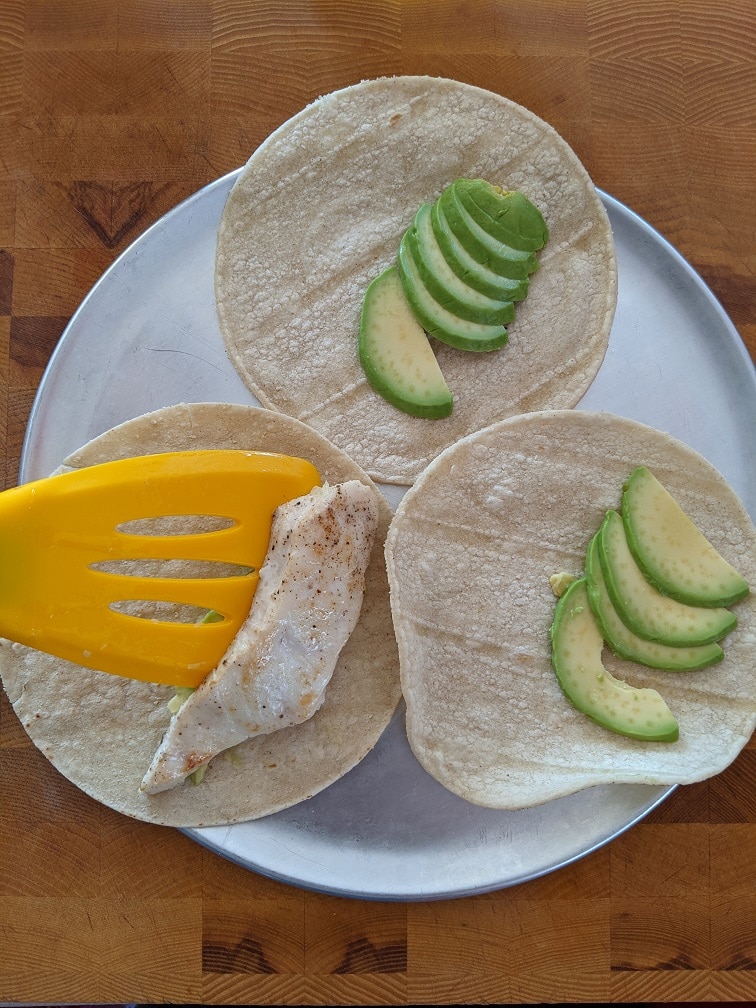
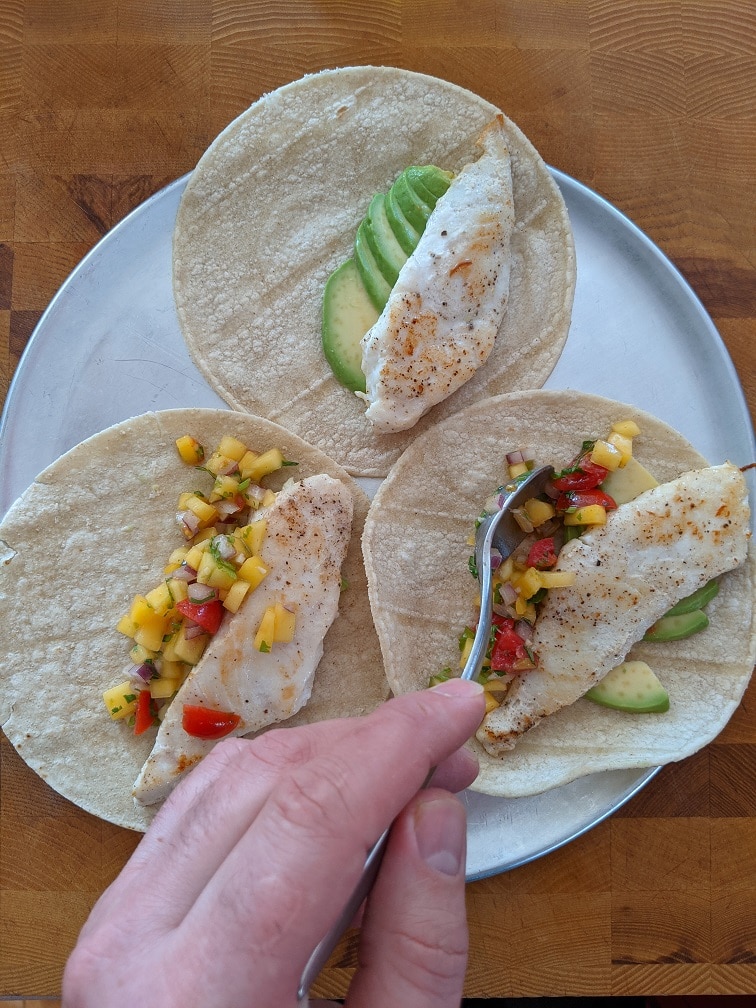
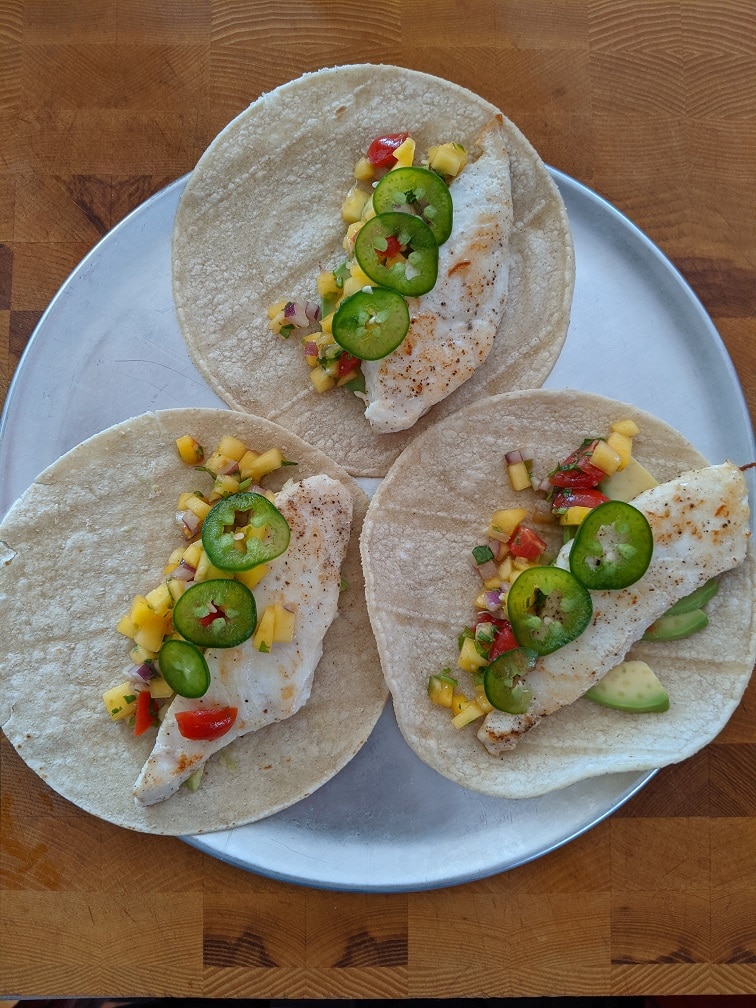
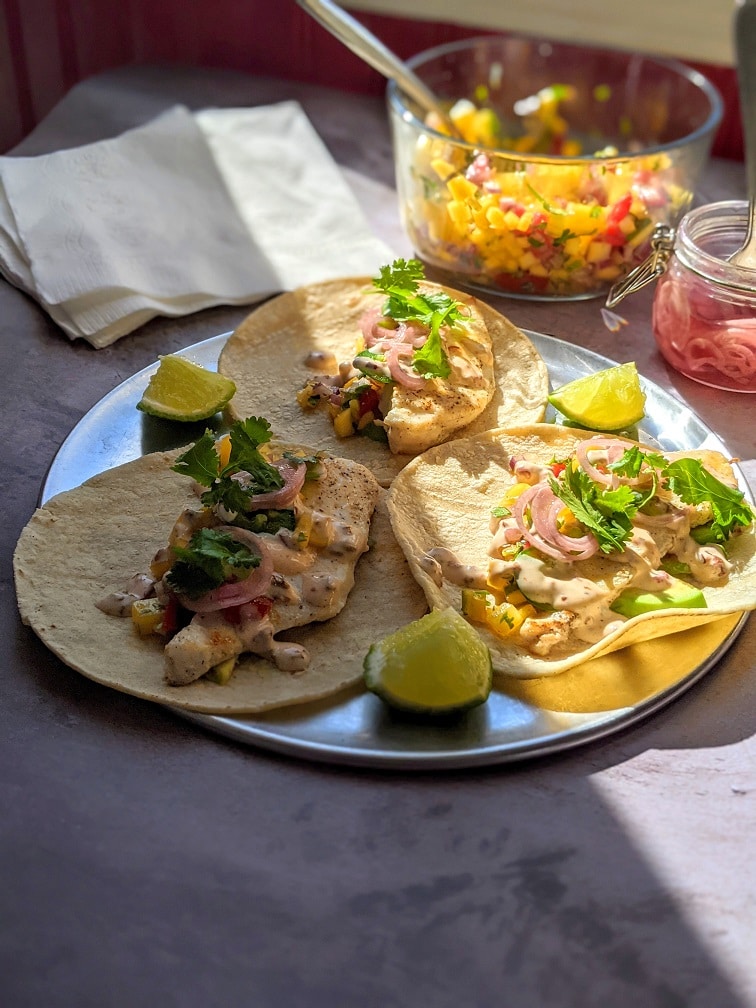
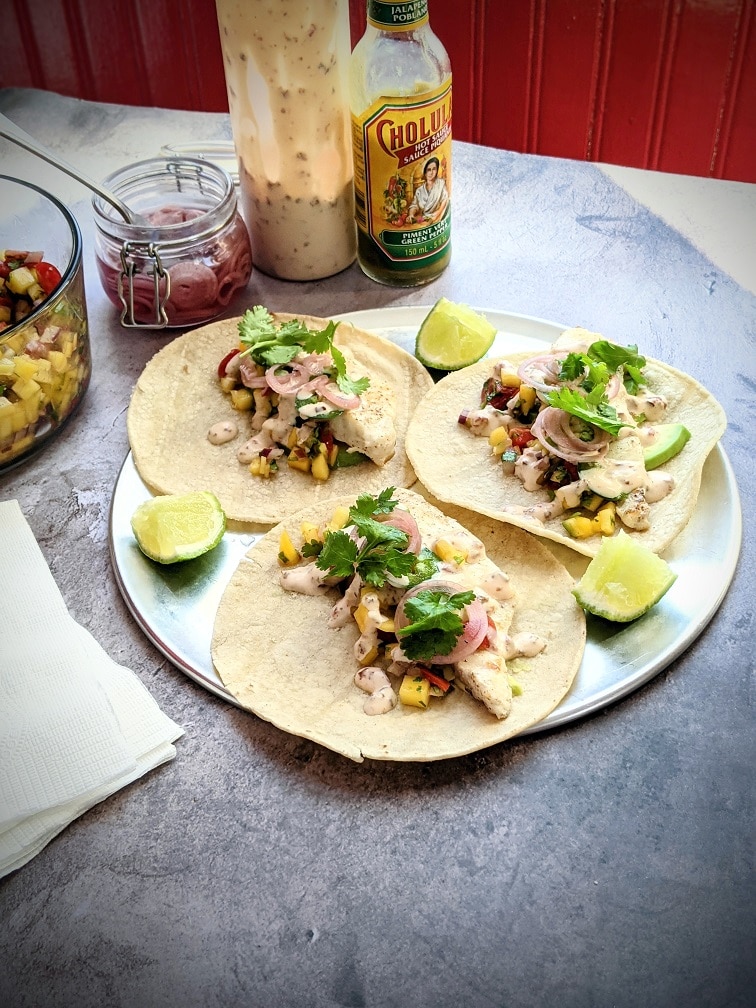
Making The Fish Tacos
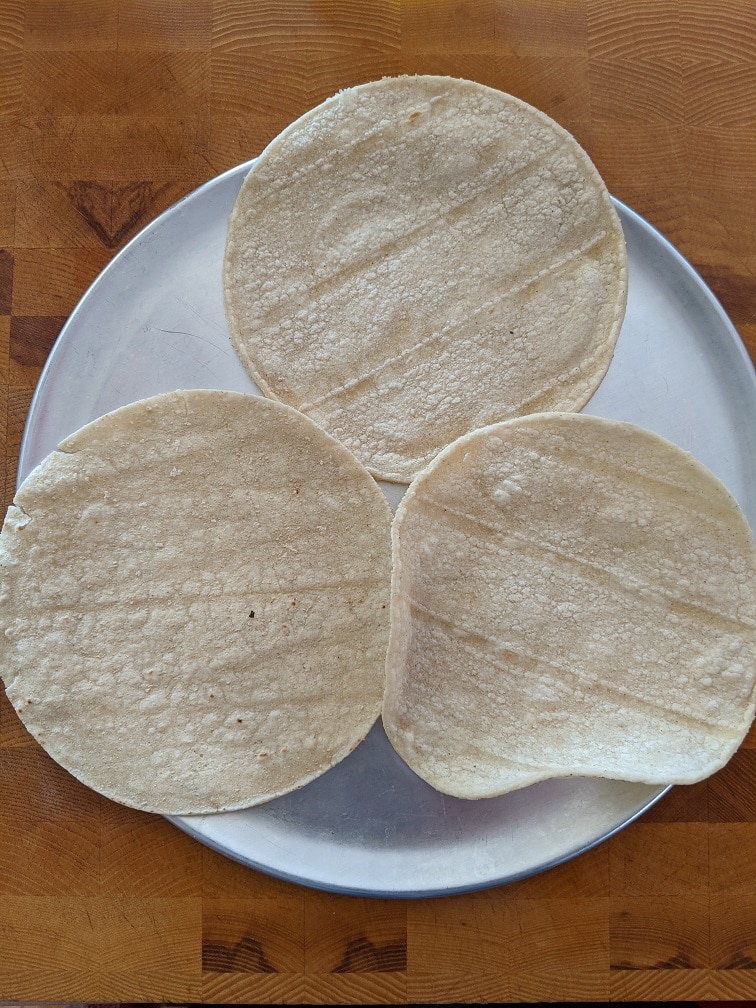
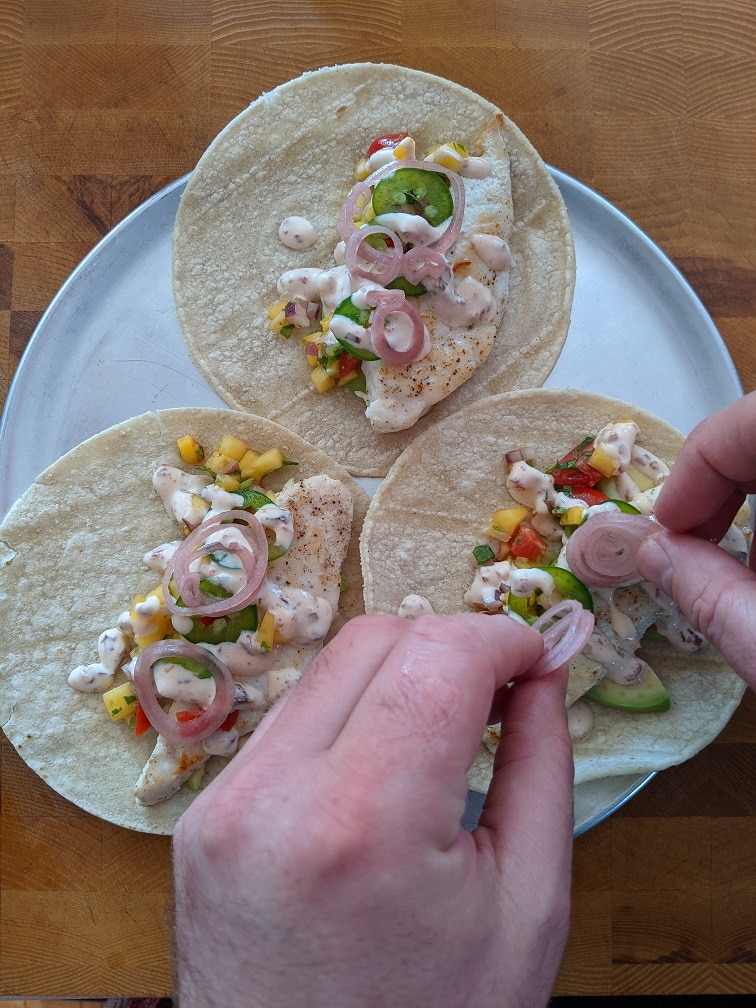
To assemble the fish tacos, warm six corn tortillas and spread some sliced avocado out onto them. Put the fish on the avocado, then the mango salsa on the fish. Top the fish with thinly sliced jalapeno and chipotle mayo. Finish the tacos with pickled red onion and a few leaves of fresh cilantro. Serve the tacos with lime wedges on the side.
Pickled Red Onion
I had a jar of pickled red onions in my fridge that I made a few weeks ago, so I don’t have a recipe to share. The pickled onions do add a lot to the tacos, so I suggest making some. At a glance, this recipe seems good, but I haven’t made it myself. I usually eyeball my ingredients when pickling onions. Still, if I had to guess, I would say I usually use 1/4 cup of red wine vinegar, 2 tablespoons of water, 1 tablespoon of sugar, 2 teaspoons of kosher salt, and 1/2 cup of thinly sliced red onion. Put all the ingredients in a pot, bring to a boil, then turn off and cool. Store the pickled onions in the fridge for up to a month. Again, this is not a tried and true recipe, just an estimation of what I usually do.
Fish Tacos
These fish tacos are made with seared halibut, but they work with any fish. Get the fish preparation simple and let the rest of the ingredients do the heavy lifting flavour-wise.
Slice the halibut into 6 evenly sized strips. Heat a medium non-stick pan over medium-high heat. Add the oil to the pan, season with fish with salt and pepper, and cook on both sides for 3 minutes or until lightly brown. Finish the fish by squeezing the juice from half a lime onto it.
Warm the tortillas in a pan, in the microwave in a tortilla warmer, or in a 350°f oven, wrapped in foil for 10 minutes.
Put the fish on the warmed tortillas, top with the remaining ingredients. Serve with lime wedges on the side.
Fish tacos are the epitome of summer food. When paired with fresh mango salsa, you’ll feel like you’re eating pure sunshine, but in a good way. At first glance, this recipe may seem complex and like there are many steps, but really you’re only making the salsa, and the chipotle mayo, then cooking some fish for a few minutes. You can even make the salsa and mayo a day ahead to cut down on prep time. If like me, you would like a little break from the cold weather and a preview of what’s to come in a few months, these fish tacos may be the exact thing you need. Try them for yourself.
Thank you for reading this post. Please share it on Facebook, Pinterest, or Twitter to help Chef’s Notes grow. Subscribe to Chef’s Notes below, and you will never miss a post again.
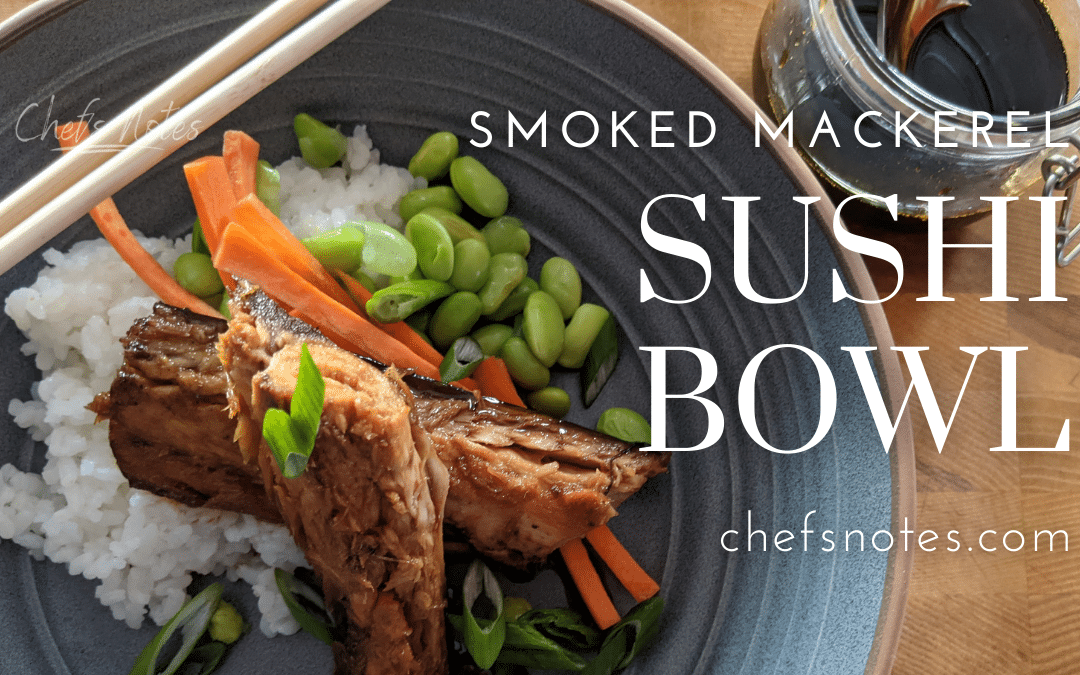
When you want sushi but don’t want to buy or make it, a sushi bowl is the next best thing. It’s everything you love about sushi, but without having to roll it. This particular sushi bowl is made with smoked mackerel, homemade teriyaki sauce, carrot, edamame, sushi rice, and smoked nori snacks. You can follow the recipe as is or create your own ingredient combination based on your favourite sushi roll. Alright, let’s get to it.
Teriyaki Sauce
Teriyaki, as we know it, is not really teriyaki sauce. The stuff you buy at the grocery store is thickened with cornstarch and usually has garlic and ginger in it. Authentic teriyaki sauce is basically sweetened soy sauce. The sweet and salty flavour of teriyaki sauce is the perfect thing to put on the smoked mackerel in this sushi bowl. The sauce works just as well on smoked salmon, fresh salmon, scallops, chicken, or whatever else you can think of. To make it combine a 1/4 cup of soy sauce with 2 tablespoons of brown sugar, 1 tablespoon rice vinegar, and 2 tablespoons of sake or water. Bring the mixture to a boil in a small pot and cook for 2 1/2 minutes. Keep an eye on the pot as it may boil over. Store the sauce in an airtight container in the fridge for up to a month.
Teriyaki Sauce
A simple and delicious teriyaki sauce recipe that you will want to always have in your fridge.
The sushi bowl ingredients are sushi rice, seasoned rice vinegar(which you can buy at most grocery stores), edamame, carrots, scallion, smoked mackerel, wasabi, teriyaki sauce, and smoked nori snacks(you can find these in most grocery stores too).
Prepping The Sushi Bowl
To prepare the sushi bowl’s ingredients start by cooking the rice. Follow the rice package instructions for two servings, then mix the seasoned rice vinegar into the cooked rice. Put the edamame in a small pot, cover with water, boil for four minutes and drain.
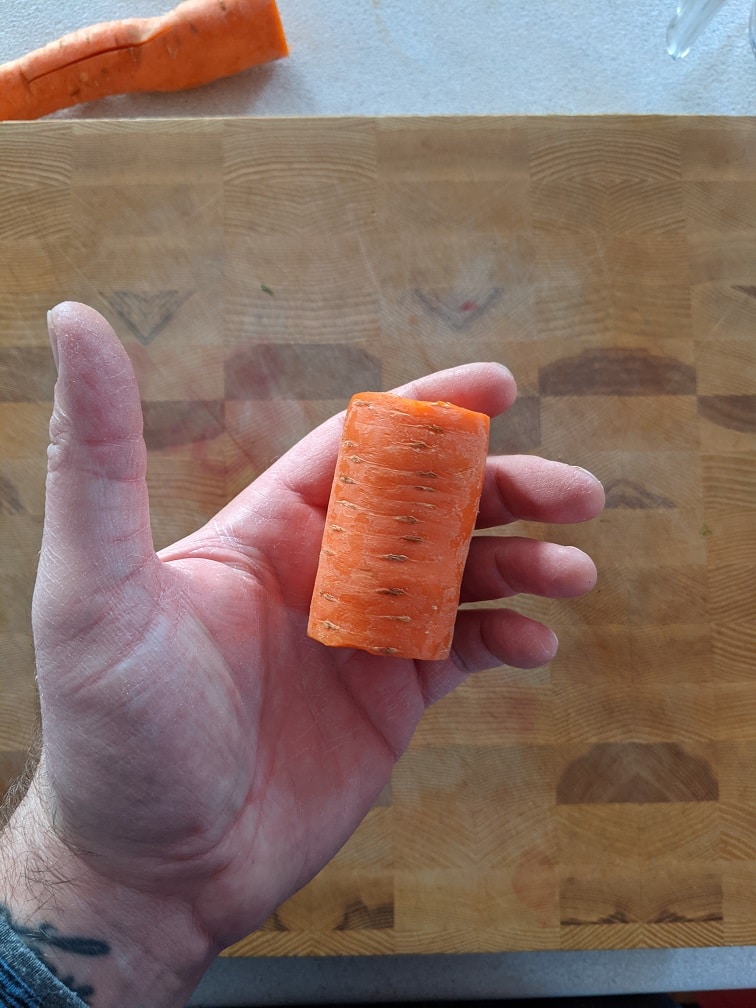
Cut the vegetables
While the rice and edamame are cooking julienne (cut into matchsticks), a two-inch chunk of carrot, and thinly slice two scallions.
The Mackerel
Heat a medium non-stick frying pan over medium heat and add in a teaspoon of cooking oil. Sear the mackerel on both sides for a minute or two to heat it through. I used homemade smoked mackerel that I smoked this summer, but you can buy it in most grocery stores. If you don’t want to use smoked mackerel, you can use smoked salmon instead (don’t heat it). You can also roast a piece of salmon or any other type of fish you’d like to use.
Putting the Smoked Mackerel Sushi Bowl Together
To put the sushi bowl together, start by putting the rice down, then the edamame, the carrot, the fish, dress the fish with the teriyaki sauce, put a few dabs of wasabi around the bowl, garnish with the scallions, and put the nori sheets on the side.
Cook the sushi rice according to the instructions on the package. Then stir in the seasoned rice vinegar.
Put the edameme in a small pot, cover with water, bring to a boil and cook for 4 minutes. Drain the beans.
Heat a medium non-stick frying pan over medium-high heat. Add the cooking oil and the mackerel to the pan. Cook for a minute or two per side or until the mackerel is browned and warm.
Divide the cooked rice among two plates. Top the rice with the edamame, carrots, mackerel, teriyaki sauce, and scallions. Put a few dots of wasabi around the plate.
For an authentic sushi taste serve the bowl with a side of smoked nori snacks.
What I love about this sushi bowl is how simple it is and how fresh it tastes. You can throw the whole thing together in as long as it takes to cook the rice, and you get the flavour of good sushi with much less effort. Make this recipe as is, or use it as a template to make your own sushi bowl creations.
Thank you for reading this post. Please share it on Facebook, Pinterest, or Twitter to help Chef’s Notes grow. Subscribe to Chef’s Notes below, and you will never miss a post again.
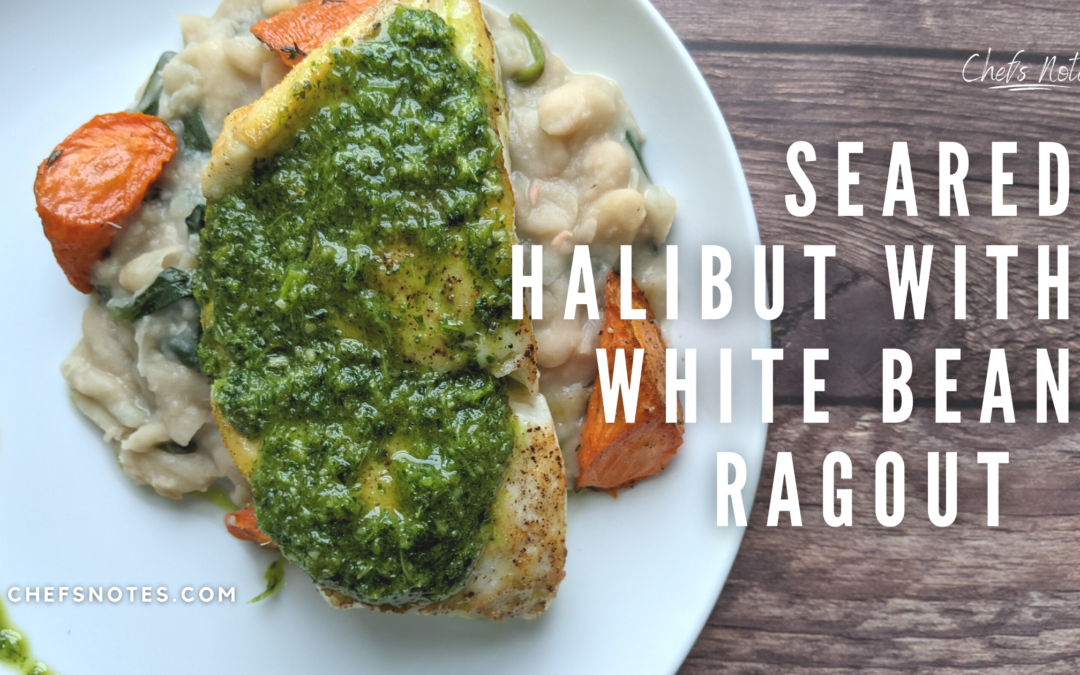
Continuing with my Valentine’s Day meal that started on Monday, the appetizer of Butternut Squash and Goat Cheese salad, today, we are making the main course. Specifically, seared halibut with white bean ragout. This dish seems much more complicated than it is; that’s part of the beauty of it. It’s actually a straightforward dish that tastes and looks amazing. If you can’t find halibut or don’t like it, you can substitute it with salmon, haddock, cod, or just about any other kind of fish you’d like. Alright, let’s get to it.
Roasted Carrots
I really like serving roasted carrots with this dish becasue they add a pop of orange and a bit of sweetness. You can use roasted beets instead if you’d like. Peel two carrots, and cut the ends off. Take one carrot and cut it on a 45° angle, about an inch thick. Roll the carrot forward a quarter turn, so the tip of the carrot is on top. Then, make another 45° angle cut. This gives the carrots an oblong shape that looks professional and really cool. You can cut the carrots as you normally would, but this technique adds that little extra that helps make a dish seem fancy. Toss the carrots with a tablespoon of olive oil, a few sprigs of thyme, and some salt and pepper, then roast at 400°f for 35 minutes.
White Bean Ragout
While the carrots are cooking, make the white bean ragout. Start by opening a 400ml can of white beans, then drain and rinse them. Heat a 2qt pot over medium heat, add in a tablespoon of olive oil, along with 1/2 cup of diced onion. Cook the onion for 3 minutes, then add in 1 tablespoon of garlic and cook for another minute. Pour a 1/2 cup of white wine into the pot and cook until it has almost all evaporated. Put the beans in the pot along with a few sprigs of thyme, season with salt and pepper, then add just enough water to come up to the top of the beans. Bring the pot to a boil, then turn the heat down to medium-low and simmer for 10 minutes. Using a potato masher, mash about half the beans. Add two cups or two big handfuls of baby spinach to the pot, turn the heat up to medium-high, and stir until the spinach is cooked into the beans. Keep cooking until the mixture is thick enough to stand up on a spoon. Squeeze the juice of half a lemon into the beans, taste and adjust the seasoning with salt and pepper as needed.
Sauce Verte (green sauce)
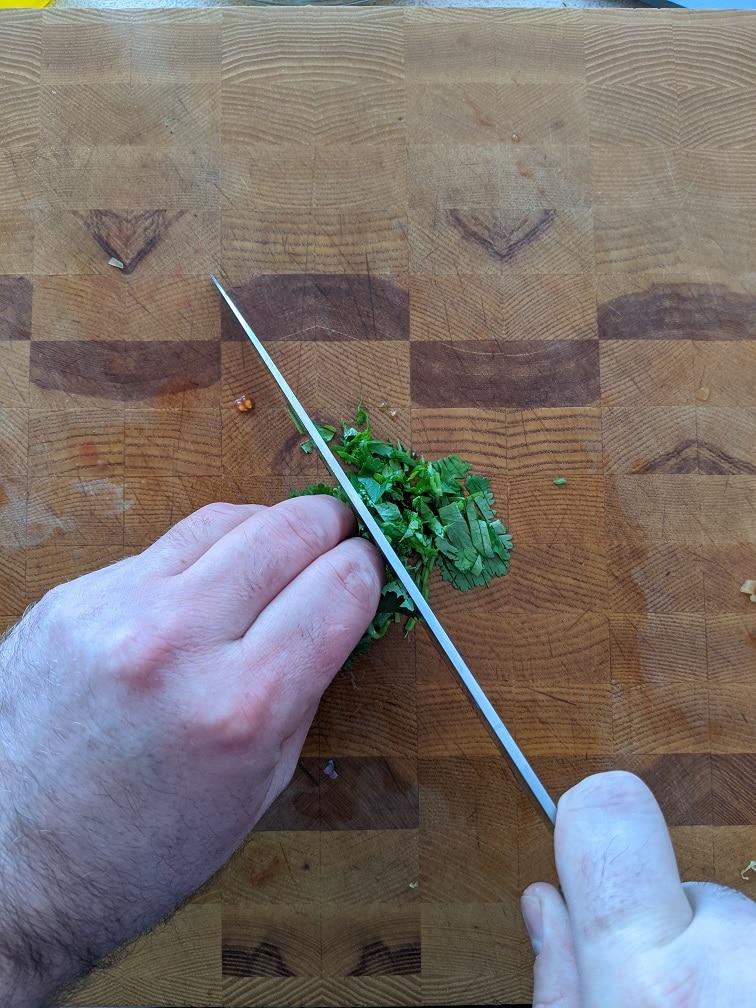
While the beans are cooking, put 1 cup of parsley, 1/4 cup sage leaves, 1/4 of almonds, 1 tsp of kosher salt, the juice of half a lemon, and 1/2 cup of oil into the bowl of your blender. Blend until smooth. Taste and adjust the seasoning with salt and pepper as needed.
Halibut
Heat a medium-sized non-stick pan over medium-high heat. Add in a teaspoon of olive oil. Season your halibut with salt and pepper, then place it in the pan. Cook the fish for about 3 minutes, or until golden brown, then flip and cook it for 1 more minute. Put the halibut in the oven for 5 to 10 minutes, depending on your fish’s thickness. When cooked, the halibut, or whatever fish you are using should be firm in the middle but not springy. I only cooked one piece of fish because my wife wasn’t home when I made this, but you will want to cook two portions if serving two people.
Plating the halibut
To plate the halibut, get two round plates. Imagine the plates are divided into four. There is a line through the middle vertically and a line through the middle horizontally. Spoon half your beans onto each plate in one of the imaginary quarters. Divide your carrots among the plates and place them around the beans. Put your fish on top of the beans and carrots and top with a spoonful or two of the sauce.
Seared Halibut with White Bean Ragout
If you are looking for that perfect Valentine's Day meal, look no further. This seared halibut with white bean ragout is the perfect thing to impress the person you love. And, it seems much more complicated and like much more work than it actually is. You can't beat that.
Keyword: Fish and Seafood, Halibut, Valentine’s Day
Servings: 2servings
Author: Chef’s Notes
Ingredients
Roasted Carrots
2med.carrots
2-3sprigsthyme
1tbspolive oil
pinchof salt
pinchof pepper
White Bean Ragout
400mlcan white beansdrained and rinsed
1/2cupminced onion
1tbspminced garlic
1/2cupwhite wine
2-3sprigsThyme
1tbspolive oil
2cupsbaby spinachor two big handfuls
pinchof salt
pinchof pepper
The juice of half a lemon
1cupwater
Green Sauce
1cupparsely
1/4cupsage leaves
1/4cupsliced almonds
1/2cupolive oil
the juice of half a lemon
1tspkosher salt
Seared Halibut
2Halibut Fillets (140-170 g each)
1 tspolive oil
pinchof salt
pinchof pepper
Instructions
Roasted Carrots
Peel the carrots and cut the tops off.
Cut the carrots on a 45° angle about an inch thick, rolling forward a 1/4 turn after every cut.
Toss the carrots with olive oil, salt, pepper and thyme, spread out in a roasting pan and cook for 35 minutes on 400°f, turning half way through.
White Bean Ragout
Heat a medium pot over medium heat. Add in the olive oil and onion and cook for 3 minutes or until the onion is tender. Add the garlic and cook for 1 more minute.
Add the white wine and thyme to the pot and cook until the wine has almost all evaporated.
Add enough water into the pot to just come up to the top of the beans. Season with salt and pepper, bring to a boil, turn the heat down to medium-low and simmer for ten minutes.
Use a potato masher to mash about half the beans, then add in the spinach. Turn the heat up to medium-high, and cook stirring, until the beans are thick enough to stand up on a spoon, about 6 minutes. Add the lemon juice to the beans, taste and adjust the seasoning with salt and pepper as needed.
Green Sauce
Put the herbs, almonds, olive oil, and salt in a blender and blitz. Stir in the lemon juice and adjust the seasoning with salt and pepper as needed.
Halibut
Heat a medium non-stick skillet over medium-high heat. Add the olive oil into the pan. Season the halibut and add it into the pan.
Cook the halibut for about 3 minutes or until golden brown. Flip the halibut, cook for 1 more minute, then put it in the oven at 400°f for 5 to 8 minutes or until cooked through. The fish should be firm in the middle but not springy.
Plate the beans on two round plates. Top with the carrots, then the fish. Top the fish with the sauce and serve.
This a beautiful dish that most people would be happy to buy in any restaurant. I know there are multiple components and steps, but when you look at this just as those steps, there is nothing hard about it. I know that to a lot of you, this dish is going to seem intimidating, but don’t let that hold you back. It’s worth the effort, especially on Valentine’s Day when you are making it for someone you love. Also, the carrots, sauce and beans, may all be made a day ahead. You’ll have to reheat the carrots in the oven for ten minutes and the beans on the stove., but that’s it. And again, you can use any fish you’d like. Remember to come back Friday for your dessert. Enjoy!
Thank you for reading this post. Please share it on Facebook, Pinterest, or Twitter to help Chef’s Notes grow. Subscribe to Chef’s Notes below, and you will never miss a post again.
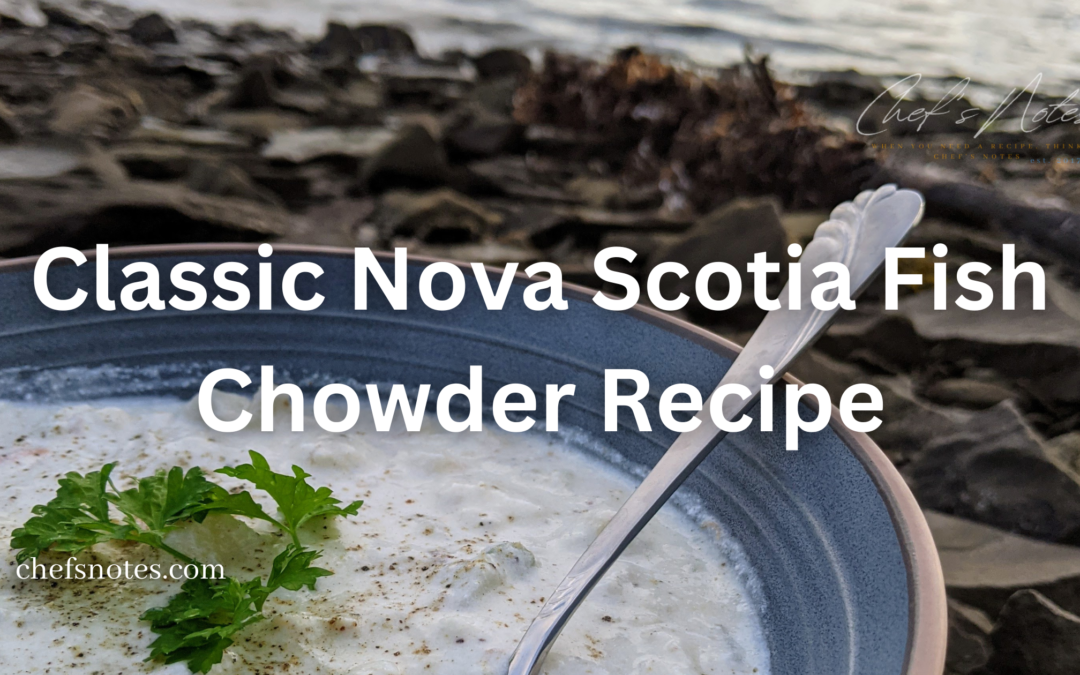
Nova Scotia Fish Chowder holds a special place in my heart because of a childhood memory that has stayed with me for nearly two decades. When I was younger, my father would take my sisters and I to his work Christmas party, and the one thing that stood out to me the most about those events was the giant pot of chowder that was served in little cardboard cups. Even though I haven’t had the chance to attend one of those parties in many years, the taste of that chowder is still fresh in my mind.
Inspired by that memorable experience, I decided to recreate the recipe and share it in this post. Nova Scotia seafood chowder is known for its hearty, filling qualities, and this recipe is no exception. It is creamy, thick, and packed with a variety of fish, just as a true Nova Scotia fish chowder should be. This is not a delicate or refined soup – it is a hearty, satisfying meal that will warm you from the inside out on a cold, blustery day. So if you’re looking for a comforting, satisfying chowder that will stick to your bones and chase away the chill, this recipe is for you.
Where’s the lobster?
One thing you might notice about this chowder recipe is that it does not contain lobster or shrimp. There are a few reasons for this. Firstly, while this chowder does include scallops, it is primarily a fish chowder and not a seafood chowder. Secondly, the chowder that I am recreating in this post did not originally contain lobster or shrimp, so I wanted to stay true to that recipe. Finally, and most importantly, I have a severe allergy to shrimp, lobster, and crab, so for my own safety and well-being, I have chosen to omit these ingredients from the recipe. That being said, if you do not have a lobster allergy and would like to add some lobster or shrimp to the chowder, you are welcome to do so. Simply omit the scallops and add in your preferred seafood to taste.
Potatoes
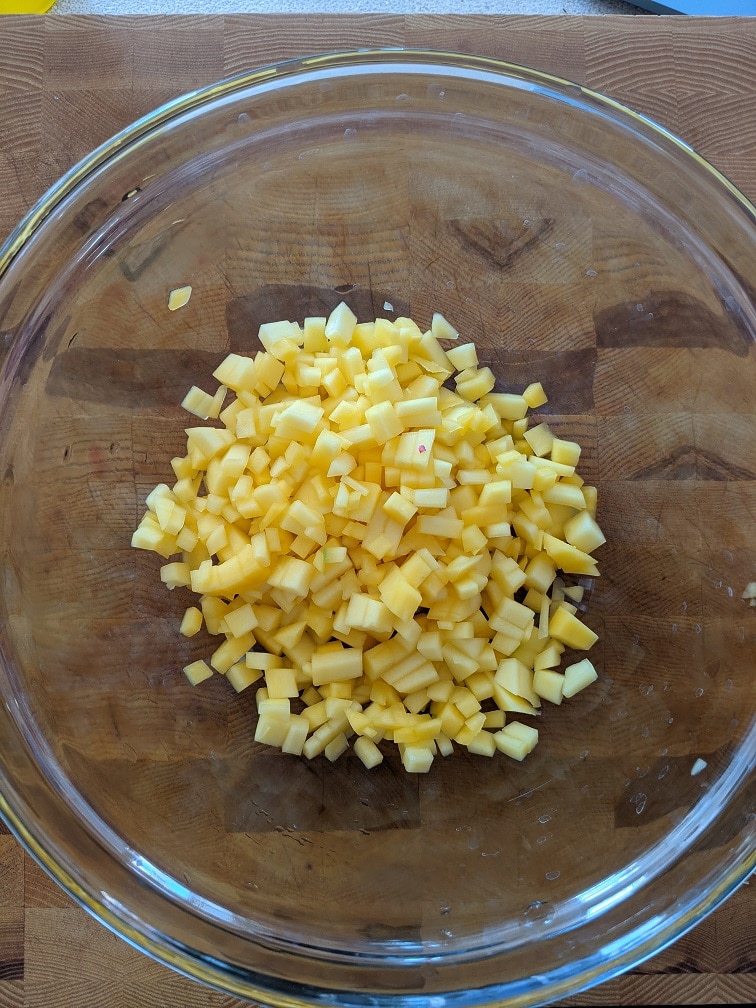
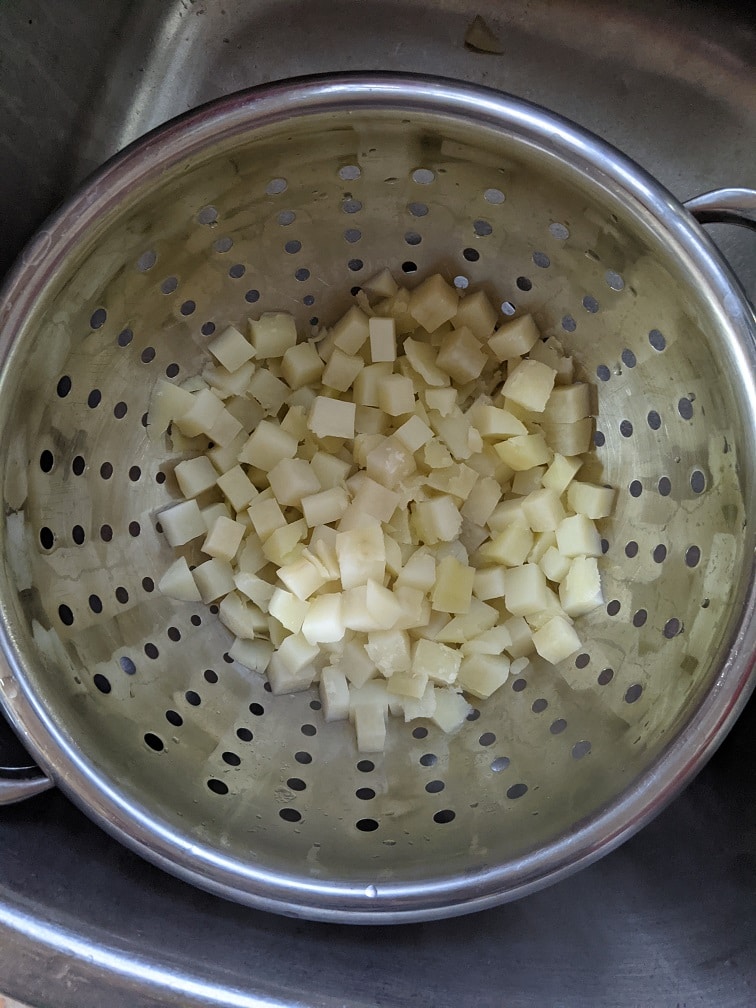
Potatoes are a key ingredient in any good chowder, and this recipe is no exception. I used russet potatoes, approximately two cups of peeled and diced (one to two-centimetre cubes) potato. While I typically prefer to use Yukon gold potatoes in soups and chowders because they hold their texture better, I happened to have a large bag of russets on hand, so that’s what I used. To prepare the potatoes, simply peel, wash, and dice them, then bring them to a boil in a pot of salted water. Cook the potatoes until they are tender, then drain them and set them aside. There is no need to rinse the potatoes in cold water to cool them down – they will be fine as they are.
Vegetables
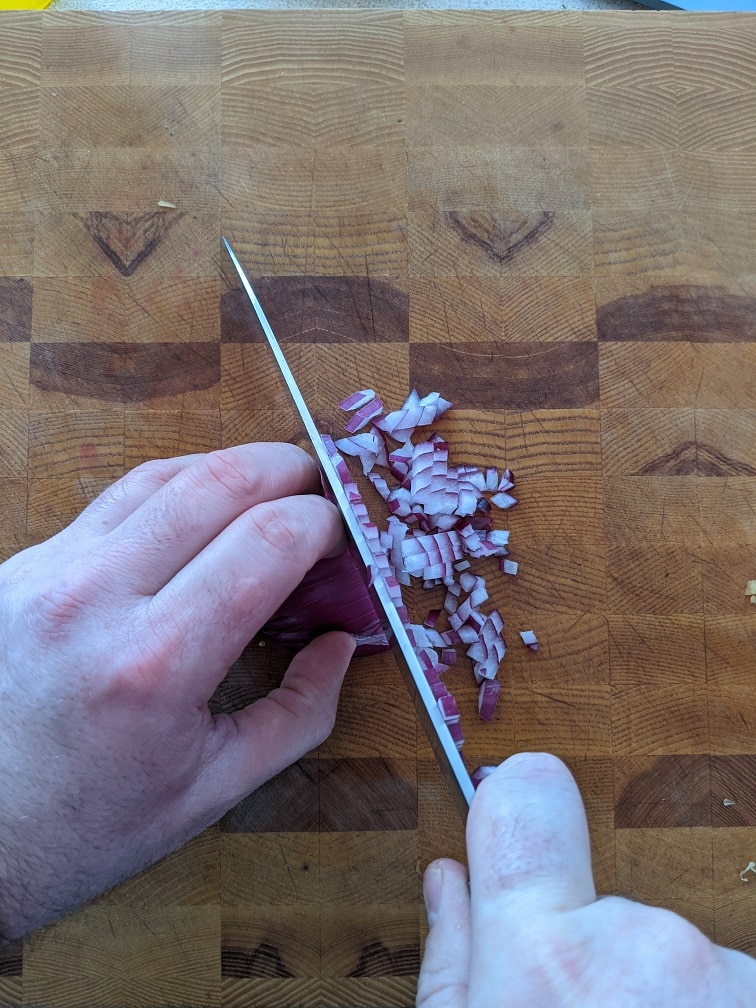
This Nova Scotia Fish Chowder Recipe follows the traditional French technique of using onions, carrots, and celery as the base vegetables. I used a total of one cup of diced yellow onion, and half a cup each of diced carrot and celery. It is important to dice the vegetables into small, even pieces, ideally about one centimetre in size. This helps to ensure that the vegetables cook evenly and contribute to the overall texture of the chowder. By using a combination of these three classic vegetables, you can create a flavorful foundation for the chowder that complements the fish and other ingredients.
Fish
For this Nova Scotia Fish chowder, I used a variety of fish, including halibut, haddock, scallops, and smoked mackerel. I used approximately one pound of each of these fish, except for the smoked mackerel, which was about a half cup (possibly a little more) after it was deboned and torn into small pieces. To prepare the fish, cut it into small, two-centimetre cubes. If you are unable to find these specific types of fish in your area, there are several alternatives that you can use. For example, cod, pollock, or hake would all work well in this chowder. You could also use a combination of different types of fish to add more depth of flavour. If you are unable to find scallops, you could try using clams, mussels, or even crumbled seafood sausage. The key is to choose fresh, high-quality ingredients and cut them into small, evenly-sized pieces for the best results.
Making The Chowder
To begin making the chowder, start by heating a large pot over medium heat. Add one tablespoon of canola oil to the pot, followed by the diced vegetables and two tablespoons of butter. Cook the vegetables until they are tender and the onions are translucent, which should take about five minutes. Once the vegetables are cooked, add a half teaspoon of poultry seasoning blend, a half teaspoon of salt, an eighth teaspoon of black pepper, and two tablespoons of flour (I used gluten-free all-purpose flour, but you can use regular flour if desired). Stir the ingredients together and cook for an additional two minutes. This will help to create a flavorful base for the chowder and thicken the broth slightly.
Dairy
Nova Scotia fish chowder is typically made with a combination of cream and milk, which helps to create a rich, creamy texture. For this recipe, I used a total of five cups of whole milk and two cups of whipping cream. It’s important to add the cream to the pot first, followed by the milk. This is because the milk may curdle if it is added to the hot pot before the cream. Once both the cream and milk have been added to the pot, gently simmer the mixture, stirring occasionally to ensure that the roux does not stick to the bottom of the pot. Cook the dairy for about ten minutes, or until the raw flour flavor has been cooked out. This will help to create a smooth, velvety base for the chowder.
Building the Fish Chowder
Now that you have prepared the vegetables, roux, and dairy base for the chowder, it’s time to start building the rest of the dish. Begin by adding the cooked potatoes, smoked mackerel, and scallops back into the pot. Let the pot heat back up for four minutes, then add the halibut and haddock. Stir the ingredients together and simmer the chowder for ten minutes. This will give the fish and scallops time to cook through and absorb the flavors of the chowder. As the chowder simmers, the broth will thicken and the seafood will become tender, creating a rich, hearty meal.
Finishing The Chowder
Once the chowder has finished cooking and all of the ingredients are well combined, it’s time to taste and season the dish to your liking. Take a spoonful of the chowder and taste it, then adjust the seasoning as needed with additional salt and pepper. You may find that the chowder needs a little extra salt to bring out the flavours, or you may prefer a more heavily-peppered chowder. Experiment with different amounts of salt and pepper until you find the combination that tastes best to you.
When the chowder is seasoned to your liking, it’s time to serve it. Ladle the chowder into bowls and serve it with butter biscuits, crackers, or rolls on the side. You can also top the chowder with a sprinkle of fresh herbs or a drizzle of olive oil for added flavour and visual appeal. Enjoy your delicious, hearty Nova Scotia seafood chowder and savour the comforting, warming flavours of this classic dish.
Nova Scotia Fish Chowder
A classic Nova Scotia Fish Chowder is thick, creamy, and loaded with fish. If that is what you're looking for, this recipe will not disappoint.
Keyword: Chowder, Fish and Seafood, Nova Scotia, Seafood
Servings: 6servings
Author: Chef’s Notes
Ingredients
1tbspcanola oil
2cupsdiced potatoes
1cupdiced onion
1/2cupdiced celery
1/2cupdiced carrot
2tbspbutter
2tbspflourgluten-free all-purpose
2cupswhipping cream
5cupswhole milk
1lbscallops, cut into quarters
1/2cupsmoked mackerel, shreddedoptional
1lbhalibut, diced
1lbhaddock, diced
1/2tsppoultry seasoning spice blend
1/2 tspsalt
1/4tsppepper
Instructions
Boil the diced potatoes in salted water until they are tender. Drain and set aside.
Heat a large pot over medium heat. Add the canola oil carrots, onion, and celery and cook until the vegetables soften and the onions turn translucent.
Add the butter, poultry seasoning, salt and pepper into the pot. Wait for the butter to melt, then add in the flour and stir until the flour has been completely moistened by the butter. Cook for two minutes or until the roux (butter and flour mixture) turns from white to blond.
Add the whipping cream and whole milk into the pot, in that order. Heat the dairy, stirring to ensure the roux doesn't stick to the bottom. Let the dairy simmer for ten minutes.
Add the potatoes into the pot and slowly add the fish into the pot. If you add it all at once, it will change the dairy's temperature too quickly and may cause it to split. So, add smoked mackerel and scallops first. Let those cook for three to four minutes, then add in the halibut and haddock, simmer for about ten minutes or until the seafood is cooked.
Taste the chowder and adjust the seasoning with salt and pepper as needed. Serve with buttered biscuits, crackers, or rolls.
Notes
If you can’t find smoked mackerel you can use the same amount of smoked haddock or half a can of smoked kipper snacks.
Nova Scotia Fish Chowder is a hearty, comforting dish that represents the spirit of the people who call this region home. Hardworking, resilient, and always ready to lend a helping hand to their neighbours, Nova Scotians know how to weather life’s storms with stoic determination. And what better way to do that than with a big bowl of chowder? This recipe is my own interpretation of the classic Nova Scotia fish chowder, a creamy, thick, and filling soup that is perfect for chasing away the chill of a cold, blustery day. Whether you are from Nova Scotia or simply looking for a comforting meal to warm your bones, this chowder is sure to hit the spot. So why not give it a try and let your cares, worries, and problems melt away as you savour the flavours of this classic dish? Simply make a batch of chowder, grab a buttered roll, and sit back with a big bowl of it as you imagine the cold, salty air of the North Atlantic and the seagulls cawing in the distance. That’s what this chowder is all about – a moment of peace and comfort in a world that can sometimes be a little overwhelming.
What could be better on a chilled late summer day than a big bowl of Clam and Bacon Chowder? Nothing! The answer is, there is nothing better than a big bowl of Clam and Bacon Chowder on a chilled late summer day. “But, Mr. Chef’s Notes Guy,” you say. “I don’t know how to make Clam and Bacon chowder.”. “Hahaha,” I say. Don’t you worry, old Mr. Chef’s Notes Guy will show you everything you need to know. The only question you have to ask yourself is, are you ready?
Let’s make some chowder!
Ingredients:
The first step in making anything is to gather your ingredients. For this recipe, you will need a few potatoes (about 2 cups in total once they are peeled and diced). You will also need an onion, two celery stalks, four strips of bacon, about one pound of cooked clams that your friend’s parents gave you (or clams from any other source). To tie it all together, you will also need one litre of whole milk, one teaspoon of fresh chopped thyme, and some salt and pepper.
Potatoes
Let’s start with the potatoes. First, peel them. Next, dice them about 1cm x 1cm or as close to that as you can get. Rinse the diced potatoes under cold water until the water runs clear. Cover the potatoes with hot water, season with a big pinch of salt and put the pot on the stove on high. Boil the potatoes until they are tender. Drain the potatoes, and divide in half. Leave one half of the potatoes whole, mash the other half as fine as you can. I pushed my potatoes through my sieve with a spoon to get extra smooth potatoes. Set the potatoes aside and move on to the next step.
Onion and Celery
Next up, dice the onion and celery into small, evenly sized pieces. In total, you want about two cups of onion and celery. The ratio of each isn’t that important though I suggest having a bit more onion than celery.
Bacon
You’ve cooked the potatoes, half of them are mashed. You have diced the onions and celery. Now, it’s time to cook the bacon. Cut the bacon strips into 1 cm pieces and put them in a room temp pot. Turn the burner to medium and cook the bacon. Stir it every once in awhile until the bacon is browned and crisp. Drain off all the fat except one tablespoon.
Clams
The clams I used came from my friend’s parents who dug them on a local beach. They were the biggest clams I’ve ever seen. I cleaned the clams by cutting off the vent and eviscerating their bellies. Then I chopped them into smaller pieces. If you don’t have a friend with super cool parents who will give you a bag of giant clams, don’t worry, there are other options. For clam chowder, you can use fresh, canned, or frozen clams. I generally prefer canned clams for chowder because you get all the liquid they are packed in, which you can use to flavour the chowder. Whatever clams you choose, you want about one cup of them when all is said and done.
How To Make Clam Chowder With Bacon
Step 1
The bacon should be already crispy and ready to go. While the pot is still hot, add in the onion and celery and cook for about five minutes, stirring every minute or so. Make sure to scrape the bottom of the pot to lift up all of those delicious brown bits.
Step 2
Once the onions and celery are soft, and the onions are translucent, add the whole milk. You can use cream here too but don’t use anything less than whole milk. 2% milk, for example, will likely curdle. That’s not what you want. Heat the milk just until it is hot. If you are using canned clams, you can add the liquid from them before the milk. Cook the clam liquid until it has almost completely evaporated before adding in the milk.
Step 3
Once the milk is hot, stir in the mashed potatoes, then the whole potatoes and the thyme. The mashed potato is going to act as the thickener for the chowder. This chowder is not overly thick. I prefer a slightly thinner chowder than most people. If you would like it to be thicker, you can either add more mashed potatoes. Alternatively, you can make a bechamel instead of using just milk as the base. At this point, season the chowder with a pinch of salt and pepper too.
Turn the heat down to low and let the chowder simmer for about five minutes. Stir it now and then to make sure the mashed potatoes aren’t settling to the bottom of the pot.
Step 4
The final step is to add the clams into the chowder, then taste and adjust the seasoning as needed. Because the clams are cooked, they will only take a minute or two to heat. If you are using fresh clams, add them when you add the potatoes.
Serve the Clam and Bacon Chowder
Serve the clam and bacon chowder with soda crackers, a roll or tea biscuit. It is best, if you can, to enjoy the chowder while gazing out over the ocean.
Conclusion
There you go, I told you that old Chef’s Notes guy was going to tell you everything you need to know to make Clam and Bacon chowder all for yourself. Now, and most importantly, go do it. You’ll be happy you did.
Thank you for reading the post. If you liked it, remember to share it on Facebook, Pinterest, or Twitter by clicking the icon to the left of the right of the page. Did you know that Chefsnotes.com has almost 400 posts just like this one? Don’t ever miss a post again. Become a Chef’s Notes member right here. You will be notified of every new post. And if you would like to know more about me, click the link below to read my story.
Clam and Bacon Chowder
A simple and delicious clam and bacon chowder flavoured with thyme. The perfect chowder for those who dislike overly thick chowders.
We use cookies on our website to give you the most relevant experience by remembering your preferences and repeat visits. By clicking “Accept”, you consent to the use of ALL the cookies.
This website uses cookies to improve your experience while you navigate through the website. Out of these, the cookies that are categorized as necessary are stored on your browser as they are essential for the working of basic functionalities of the website. We also use third-party cookies that help us analyze and understand how you use this website. These cookies will be stored in your browser only with your consent. You also have the option to opt-out of these cookies. But opting out of some of these cookies may affect your browsing experience.
Necessary cookies are absolutely essential for the website to function properly. This category only includes cookies that ensures basic functionalities and security features of the website. These cookies do not store any personal information.
Any cookies that may not be particularly necessary for the website to function and is used specifically to collect user personal data via analytics, ads, other embedded contents are termed as non-necessary cookies. It is mandatory to procure user consent prior to running these cookies on your website.