In the world of appetizers, where complexity often reigns supreme, there exists a timeless classic that champions the beauty of simplicity without compromising on flavour. The Knorr Spinach Dip Recipe is a testament to the culinary principle that sometimes, less truly is more. With its straightforward list of ingredients and minimal cooking requirements, this dip has secured its place as a go-to choice for hosts and hostesses aiming to impress without the stress.
The Magic in the Mix
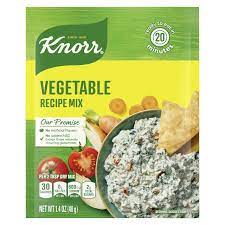
At the heart of this spinach dip recipe, Knorr Vegetable Recipe Mix, a blend of seasonings and dried vegetables that when combined with the right ingredients, transforms into something truly special. The mix serves as the backbone of the dip, providing depth and a burst of flavour that is both unique and comforting.
The Ensemble of Ingredients
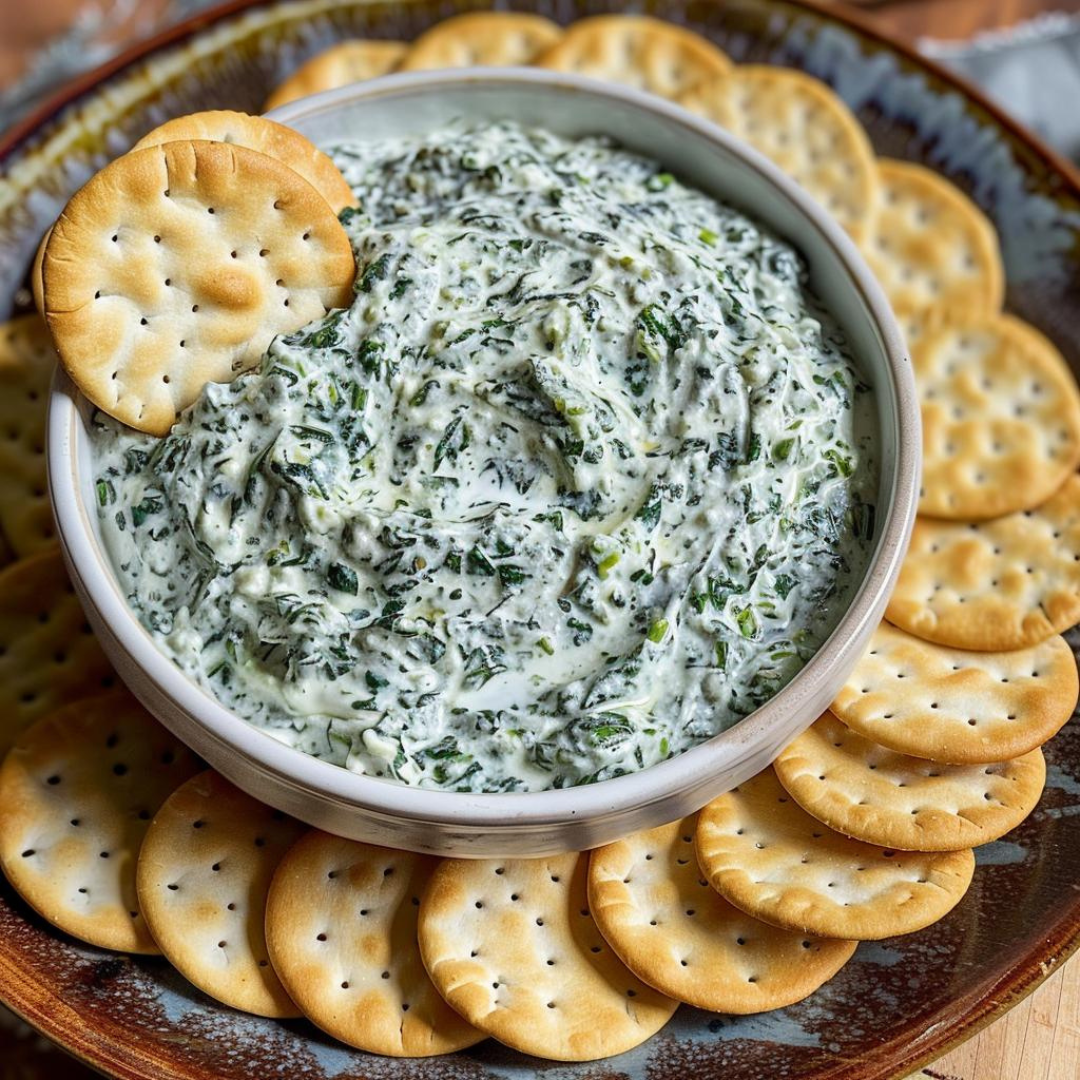
The beauty of the Knorr Spinach Dip lies in its harmonious blend of ingredients. Frozen chopped spinach, once thawed and drained, brings a fresh and slightly earthy base to the dish. Sour cream and mayonnaise together create a rich, creamy texture that is irresistible, serving as the perfect canvas for the flavours to meld together. Water chestnuts add a delightful crunch, offering a contrast in texture that elevates the dip to new heights. Finally, chopped green onions sprinkle in a touch of sharpness and colour, rounding off the dish with a fresh burst.
Ease and Versatility
One of the best things about this dip is its quick and easy preparation. With no need for extensive cooking or complicated steps, it’s a recipe that invites even the most kitchen-shy individuals to try their hand at creating a delicious appetizer. This ease of preparation does not come at the cost of versatility. The Knorr Spinach Dip Recipe is a chameleon of sorts, pairing beautifully with an array of dippers. From the traditional crackers and bread chunks to a healthier array of veggie sticks, this dip accommodates all preferences, making it a perfect addition to any gathering.
A Crowd-Pleaser for All Occasions
There’s a reason why the Knorr Spinach Dip Recipe remains a favourite among hosts and guests alike. Its appeal lies not just in its flavour and simplicity but also in its ability to bring people together. It’s a dish that feels at home in a casual family gathering, a sophisticated cocktail party, or a festive holiday event. The dip’s versatility extends beyond its pairing options, adapting effortlessly to the mood and theme of any occasion.
In Conclusion
The Knorr Spinach Dip Recipe is more than just an appetizer; it’s a culinary experience that celebrates the joys of simple cooking. It reminds us that in the world of food, simplicity does not equate to blandness or monotony but opens the door to elegance and flavourful delights. As we gather around tables filled with conversation and laughter, this dip serves as a reminder of the beauty of sharing good food with good company. Whether you’re a seasoned chef or a novice in the kitchen, the Knorr Spinach Dip is a recipe that promises satisfaction in every bite, proving that sometimes, the simplest dishes leave the longest-lasting impressions.
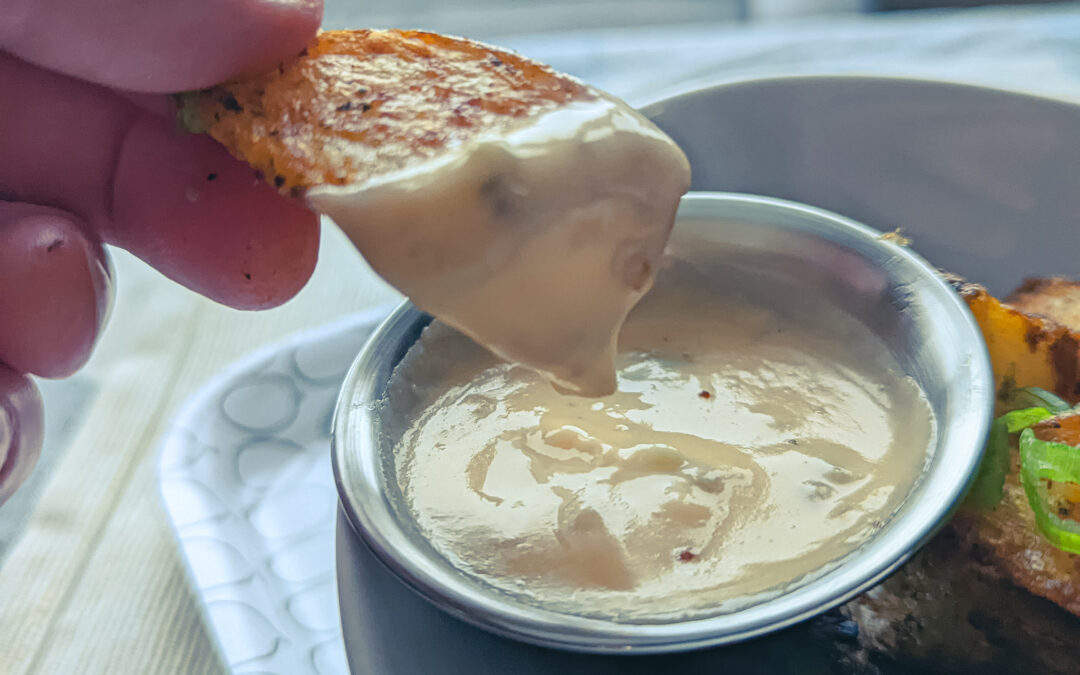
Crispy Oven-Baked Potato Wedges with Jalapeño Cheese Sauce
Are you having a party for the big game? Friends coming over? Or, do you just want an indulgent snack? Crispy Oven-Baked Potato Wedges with Jalapeño Cheese Sauce are the answer no matter what the question is.
Scrub the outside of the potatoes. Cut each potato in half lenghtwise. Cut each potato half into four wedges and put them in a pot with the salt.
Cover the potatoes with cold water and bring to a boil. Cook for about 8 minutes or until the potatoes are fork tender.
Drain the potatoes, and let them sit in the colander for about 5 minutes to dry.
In a large mixing bowl, combine the olive oil and cajun seasoning. Gently toss in the potatoes.
Spread the seasoned potatoes out onto two parchment-lined sheet pans making sure to leave at least a fingerswidth between each potato.
Put the potatoes in a 425°f oven for 20 minutes. Take the potatoes out of the oven, flip them, and put them back in the oven putting the sheet pans on oposite oven racks. Cook for another 15 to 20 minutes or until the potatoes are crisp.
Take the potatoes out of the oven and serve immediately with jalapeno cheese sacue.
Jalapeno Cheese Sauce
In a small pot, whisk togehter the milk, cornstarch, onion powder, garlic powder, mustard powder, and salt. Turn the heat on to medium-high and heat the milk, whisking until it starts to boil.
Whisk in the cheese, and the jalapenos. Once the cheese is melted, taste and adjust the season with salt, and a little juice from the jalapenos as needed.
The cheese sauce can be made a day or two ahead of time and stored coverd in the fridge. Reheat in the microwave, or in a small pot with two tablespoons of milk.
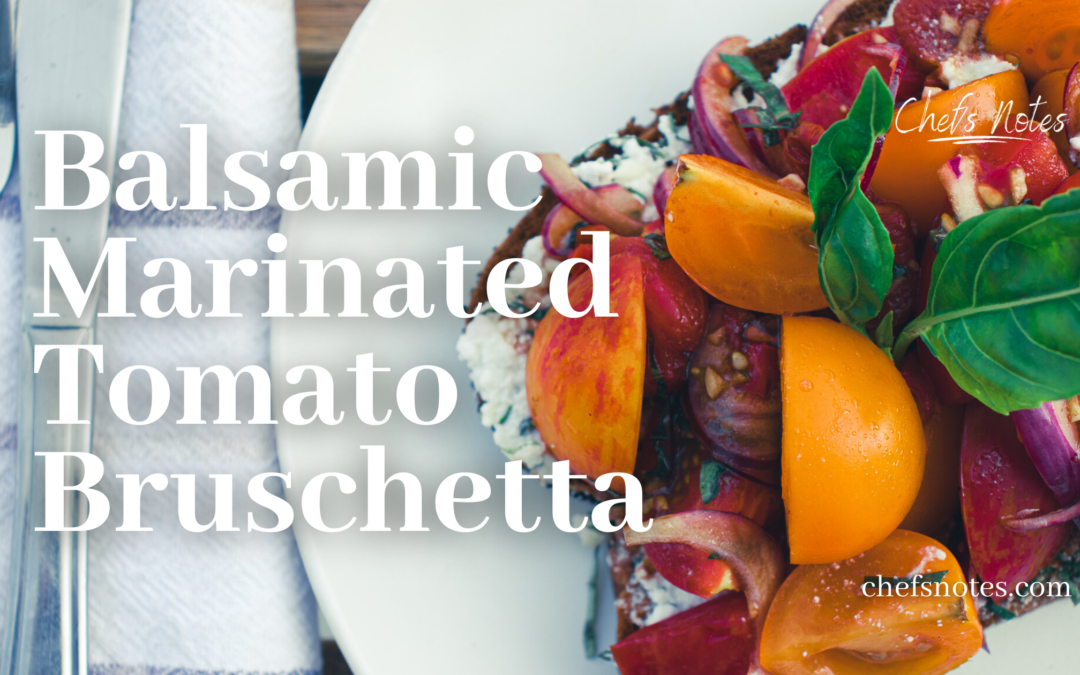
I’ve said before, many times, in fact, that the sign of a great cook is someone who knows when not to add too many ingredients. The cook’s job is never to keep adding ingredients until something tastes good. A cook’s job is to add just enough to bring out the great natural flavour of the ingredients. I don’t think that I could come up with a dish that better illustrates that point than this balsamic marinated tomato bruschetta. It is about as basic as it comes. Take some fresh tomatoes, add a few fresh herbs, a bit of garlic, salt, pepper, sugar, and a touch of balsamic vinegar. Put the tomatoes on bread with herb and garlic ricotta and call it a day. Let the flavour of those beautiful tomatoes shine through. Ready to see exactly how to make this? Good, because I’m ready to show you. Find the recipe directly below but keep reading for more expanded instructions.
Marinated Tomato Bruschetta with Herbed Ricotta
Whether you are looking for a great snack, a delicious summer lunch or the perfect party hors d'oeuvre this balsamic marinated tomato bruschetta with herb and garlic ricotta is all you ever wanted.
4sliceegluten-free sour dough breador whatever bread you want
1tbspolive oil
Instructions
Marinated Tomato
Toss the grape tomatoes with 1 tbsp of olive oil, season with salt and pepper, and roast in a 400°f oven for 15 minutes.
While the grape tomatoes are roasting combine the cherry and vine tomatoes in a medium mixing bowl with the garlic, herbs, remaining olive oil, balsamic vinegar, salt, pepper, and sugar. Add the roasted tomatoes, mix well. Cover the bowl and put it in the fridge for 2 hours.
Herb and Garlic Ricotta
In a small mixing bowl, combine the ricotta with the herbs and garlic. Mix well.
Cover the bowl with plastic wrap and set it in the fridge until you are ready to use it.
Assemble the bruschetta
Spread the slices of bread out onto a sheet pan and drizzle with olive oil.
Toast in a 400°f oven for 5 to 6 minutes per side.
Remove the bread from the pan and divide the ricotta mixture evenly among the 6 slices. Spread the mixture right to the edges of the bread.
Using a slotted spoon, top each slice of bread with the tomato mixture and serve.
For an hors d'oeuvre, slice a baguette into thin slices, drizzle with olive oil and toast in the oven then top as directed above. This recipe should make about 48 hors d'oeuvres.
Unsurprisingly, the first step in making this delicious bruschetta is to make the bruschetta mix. It starts with a pint of grape tomatoes. Toss the tomatoes with a bit of olive oil, about a tablespoon, then season them generously with salt and pepper. Put the tomatoes in a small roasting pan and roast them at 400°f for 15 minutes.
Quartered Cherry Tomatoes
The next step is to quarter some cherry tomatoes. If you can, get cherry tomatoes in a variety of shapes and colours. This will add to the visual appeal of the bruschetta. Once quartered, put the cherry tomatoes in the bowl you tossed the grape tomatoes in.
Sliced Vine Ripened Tomatoes
Finally, take two vine-ripened tomatoes, cut them in half, then slice them about half a centimetre thick. Add them to the bowl with the cherry tomatoes.
Onion and Garlic
Now that all the tomatoes are in the bowl or still in the oven, it’s time to move on to the other bruschetta mix ingredients. Take half a small red onion and slice it as thinly as you can. You want about half a cup. Then, mince two to three cloves of garlic. Add the onion and garlic to the tomatoes.
Herbs and Seasoning
To finish the bruschetta mixture, slice (chiffonade) six basil leaves and add them to the tomatoes. Season the mixture with a big pinch of kosher salt and a few turns of a pepper mill. Add a teaspoon of sugar, a tablespoon of olive oil and three tablespoons of balsamic vinegar. At this point, the roasted grape tomatoes should be ready to come out of the oven and can be added to the mixture. Stir well. Cover the bowl with plastic wrap and put it in the fridge for at least two hours. The longer this sits, the more flavour it will develop, so feel free to make it the day before you want to serve it.
Herb and Garlic Ricotta
Okay, the bruschetta mixture is great on its own. Really, you can eat it as is. But, if we can make it that little bit better, why wouldn’t we? So, now it is time to make the herb and garlic ricotta. If you want to skip this step, you can use herb and garlic Boursin or cream cheese. Start with three sprigs of fresh thyme, one sprig of fresh rosemary, and about six basil leaves. Mince the thyme and rosemary. Slice (chiffonade) the basil. Mince two cloves of garlic, then mix the herbs and garlic with a 280 g container of ricotta. Keep the mixture covered in the fridge until you are ready to use it.
Assemble The Bruschetta
Just two little notes before we finish this off. First of all, my new book officially comes out today!! You can get your copy here. When you get your copy, it would mean the world to me if you left a review on amazon. Secondly, in the recipe above, I say to drizzle the bread with olive oil, then toast it in the oven. I only made one piece of toast, so I toasted it in my toaster. You can do the same. But, if you are making the full recipe for using baguette rounds to make hors d’oeuvres defiantly toast it in the oven.
Take your toasted bread and spread the ricotta mixture in a thick layer, right to the edges of the bread. Use a perforated spoon to scoop out the tomato mixture and top the bread with it.
Serving The Balsamic Marinated Tomato Bruschetta
Serve the bruschetta as is or garnish with basil leaves or microgreens. A nice crisp white wine or prosecco goes very well with this, BTW.
The Wrap Up
If you are wondering how good this actually is, let me tell you that I recently served this as the first course at a wedding and the bride’s mother liked it so much that she requested I share the recipe. So, this recipe is dedicated to her. If that isn’t a solid endorsement of this bruschetta, nothing is.
Enter your email address below to subscribe to chef’s notes to get every post in your inbox.
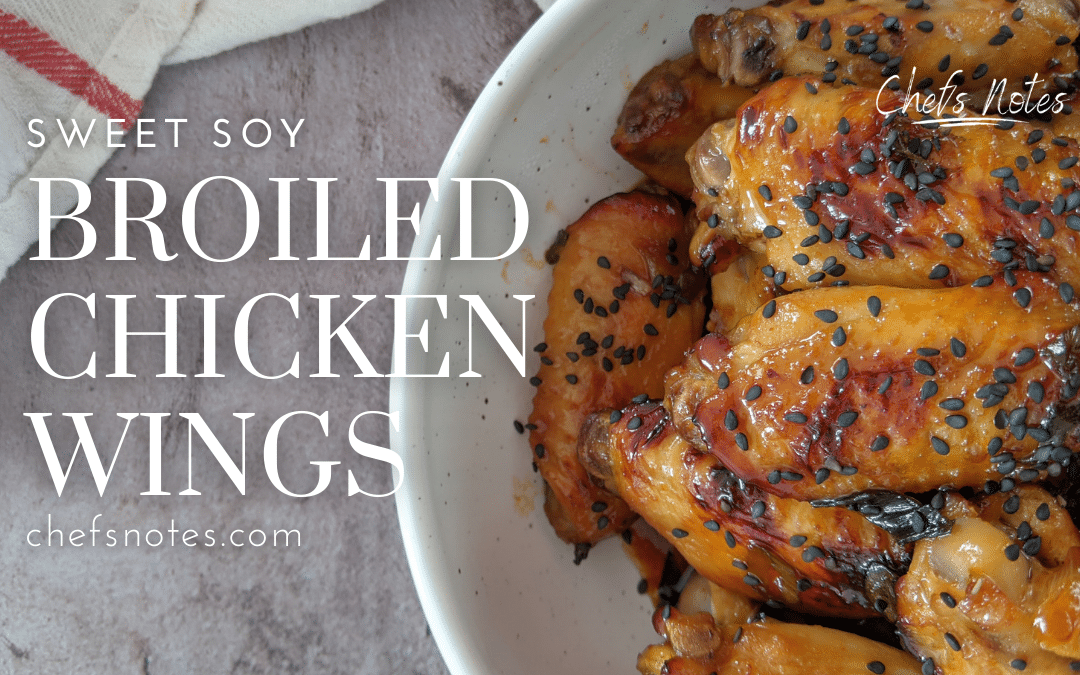
I’m a big fan of chicken wings. In fact, I’ve done a few other chicken wing posts here on Chef’s Notes. You can find those here and here. In those other two posts, the wings are either grilled or deep-fried. Today, we will look at a slightly different technique for cooking the wings; broiling. The great thing about broiling wings is that it’s quick, and the wings caramelize, which is what you want. From raw, it only takes twelve minutes to cook the wings under the broiler. They come out juicy, tender and full of flavour. In other words, delicious. The wings I will show you in this post are marinated in soy, honey, sriracha and a few other things for an hour, broiled, then tossed in a sauce similar to the marinade, but slightly different. Although this recipe is great, and I recommend you try it, it’s really the method for broiling the wings that I want to pass on to you today. So, without further ado, let’s get to it.
Marinade
First things first, we have to make the marinade. The ingredients are 2 teaspoons honey, 2 tablespoons soy sauce, 1 teaspoon sriracha, 1 teaspoon rice vinegar, 1 teaspoon sesame oil, and 1/4 teaspoon fish sauce. Put all the ingredients in a bowl and mix well.
The Wings
In total, I used about 2 pounds of spit chicken wings. Split means that the flat and the drum of the wing have been cut apart. You can use whole wings if you want though it might alter the cooking time slightly. Put the wings in the marinade, make sure they are coated and put them in the fridge for an hour or up to a day. It’s easiest to put the wings in a large ziplock bag, pour the marinade in, remove any excess air and seal the bag. This ensures more even coverage of the marinade on the wings.
Broiling The Wings
Once the wings have marinated, turn your oven’s broiler on too high and ready your broiler pan. If you don’t have a broiler pan, you should get one. They are handy. In the meantime, get a sheet pan, line it with foil, and set a stainless steel cooling rack on it. If you do have a broiler pan, line it with foil, put the rack in place and lightly oil it. Lay the chicken wings out on the rack in an even layer with a little space between each wing. Put the wings in the oven on a rack set slightly above the center and cook the wings for 6 minutes. Take them out, flip them and cook them for another 6 minutes.
I’m confident that after 12 minutes, your broiled chicken wings will be fully cooked, but it’s always a good idea to double-check. You can do this in one of two ways. The first and most reliable way is to use a meat thermometer. Check the three biggest wings by poking the thermometer into their thickest part, making sure not to touch bone. The internal temperature of the wings should be a minimum of 165°f. The second method is to stick the three biggest wings with two forks and pull in opposite directions. If the meat comes away from the bone easily, the wings are done. If it doesn’t, cook the wing for an additional minute or two.
The Wing Sacue
While the wings are in the oven, make the sauce by combining 2 tablespoons of soy sauce, 1 teaspoon sriracha, 1 tablespoon honey, 1 teaspoon rice vinegar, and 1 sliced green onion in a small pot. Put on the stove on high, bring to a boil and cook for 1 1/2 minutes.
Saucing The Broiled Chicken Wings
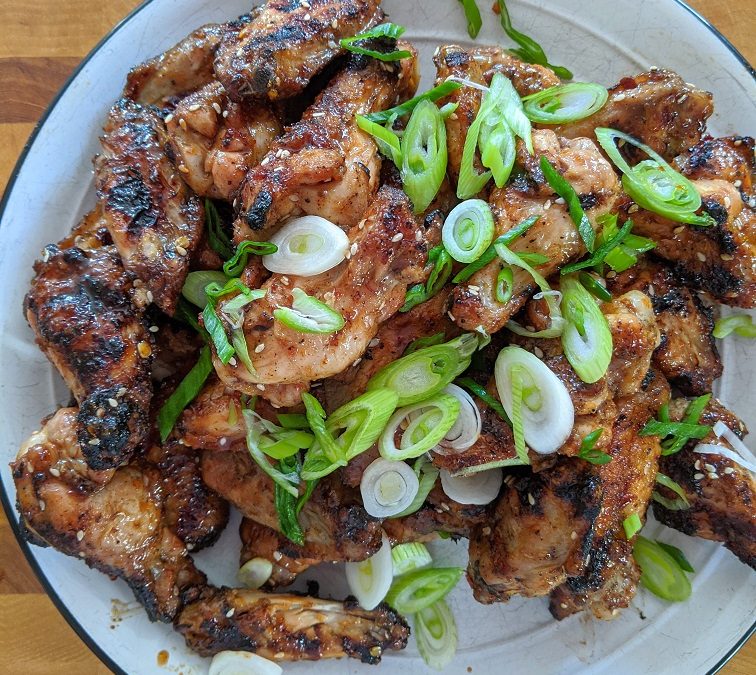
When the wings are cooked, put them in a large mixing bowl and pour the sauce over them. Toss the wings to coat them, and serve garnished with sesame seeds or green onions.
Sweet Soy Broiled Chicken Wings
Simple homemade wings, bursting with flavour. Marinate the wings for an hour, broil for 12 minutes and enjoy.
I don’t have the words to express how good these wings are and how happy I think you will be with them. They are so tender. They have so much flavour. I think you will love them. Of course, you don’t need to follow my recipe, but you should try the technique. You can broil the wings without the marinade, then toss them in your favourite sauce. Also, for crispier wings, toss them in a few teaspoons of oil before broiling.
Alright, that does it for today. I hope you’ve enjoyed this post. Come back on Wednesday for the thrilling conclusion of my hearty soup series. It’s a doozy. Oh, and if you haven’t already pre-ordered your copy of my brand new cookbook, you can do that by clicking the links below.
I can finally announce that I have written a cookbook. It’s called the 5-Ingredient Cookbook for men (of course, it is for everyone). It officially goes on sale on March 16th, but you can preorder it now from Amazon in Canada here, and Amazon in the US here.
Thank you for reading this post. Please share it on Facebook, Pinterest, or Twitter to help Chef’s Notes grow. Subscribe to Chef’s Notes below, and you will never miss a post again.
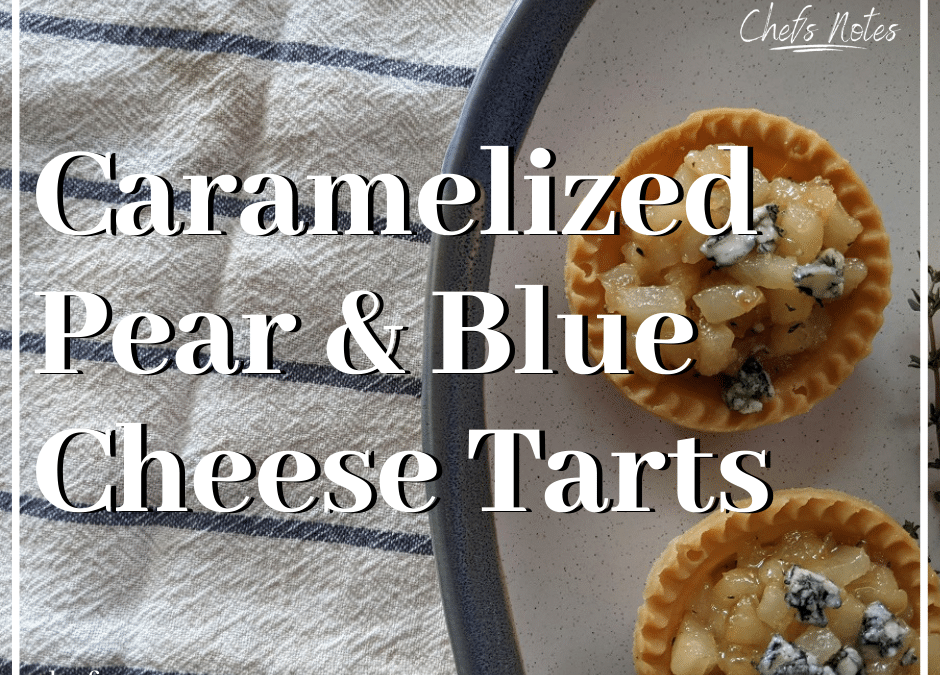
Last week I shared My Mom’s Cheese Ball Recipe, and it got me thinking that it would probably be a good idea to share some other holiday or Christmas hors d’oeuvre recipes. So, for the next few Fridays until Christmas, I am going to do exactly that. This week I will share my recipe for Caramelized Pear and Blue Cheese Tarts. Don’t let the name scare you. These are not complicated to make at all. I promise. I feature an item very similar to this on my hors d’oeuvres menu, and it is always popular, so I’m excited to share it with you. Obviously, most of us won’t be getting together in big groups this Christmas, so I’ve cut back all the recipes in this mini-series to suit two to four people, which should be ideal. Let’s get to it!
Tart Shells
When it comes to entertaining during the holidays, premade tart shells, puff pastry, and phyllo dough are your best friends. You can do so much with those three items as the base. I’ve never seen gluten-free puff pastry or phyllo here, but I did manage to get a hold of some gluten-free tart shells. I found them at Sobeys if anyone is looking for them.
To prepare the tart shells, I first defrosted them then poked them, or docked them, which is the technical term, with a fork and baked them at 375°f for fourteen minutes. The cooking time and temperature may vary depending on the tart shells you use, so always make sure to read the package’s instructions.
Caramelizing the pears
While the tart shells are baking get to work on the caramelized pears. Peel, core, and dice (1 cm x 1 cm) three bosc pears. Set them aside.
Additional Ingredients
Next up, peel and mince two shallots. You want about half a cup of minced shallot in total. If you don’t have or don’t want to buy shallots, you can use an equal amount of yellow onion, make sure to cut them as small as you can. Also, chop about one teaspoon of fresh thyme. You can use dried thyme for this, but fresh is much better. If you use dried thyme, use half as much and add into the pan with shallots, right in the beginning. You will need one tablespoon of cider vinegar, two tablespoons of sugar, two tablespoons of hot water, and a pinch of salt along with the shallots and thyme.
Cooking the pears
Heat a medium frying pan over medium heat. Put one tablespoon of butter in the pan and wait for it to melt and start to foam. Add the shallots and cook for two to three minutes or until they soften. If you are using dried thyme, add that in as well. Once the shallots have softened, add in the diced pears and cook for another three minutes or until they start to soften. Add in the sugar, vinegar, water, salt, and fresh thyme if you are using it. Cook the mixture, stirring, until all the liquid has evaporated. Take the pan off the heat.
Making the Pear and Blue Cheese Tarts
Assemble the pear and blue cheese tarts by spooning the pear mixture into the cooked tart shells. Top each tart with a few crumbled blue cheese pieces. Serve with dry white wine and enjoy. For lunch, you can also serve two of these tarts with a small green salad.
Pear and Blue Cheese Tarts
Things are going to be different this year, but they don't have to be THAT different. Enjoy pear and blue cheese tarts with the ones you love.
Cook the tart shells according to the package instructions.
Heat a medium skillet over medium-high heat. Add in the butter, wait for it to melt and foam, then add in the shallots and cook for two to three minutes or until they soften.
Add the pears to the pan and cook for three more minutes or until the pears start to soften as well.
Add the sugar, vinegar, and hot water. Cook for two minutes, then add in the thyme and a pinch of salt.
Cook until all the moisture has evaporated.
Remove the pan from the heat, spoon the pears into the pre-baked tart shells, and top with the crumbled blue cheese.
These Caramelized Pear and Blue Cheese Tarts are super simple, delicious and they look great. All the components can be prepared ahead and then assembled at the last minute, or you can make them all at once, as I did. Any guest, husband or wife, will be thrilled that you made these for them. They are the perfect thing for Christmas eve or New Years.
Thank you for reading the post. If you liked it, remember to share it on Facebook, Pinterest, or Twitter. Did you know that Chefsnotes.com has over 400 posts just like this one? Subscribe to the blog below, and you will be notified of every new post so you will never a helpful tip or recipe again. And if you would like to know more about me, click the picture of me below to read my story “Life on the line.”
Anyone who has lost someone knows how hard the holidays can be. It doesn’t matter how much time has passed; there’s always going to be a bit of sadness. My mom passed away almost eight years ago, and though it is easier, it is never easy. A long time ago, my mom, whether she knew it or not, gave me a gift that helps me feel that she is with me during the holidays. The gift she gave me is her recipes and the skills and know-how to cook them. This cheese ball is one of those recipes. This has been a staple of my family’s Christmas since before I was born. Even though my mom is gone, I still enjoy her cooking, which feels like a big hug through time and space. Each bite takes me back to every Christmas I did get to spend with her. And even though my son never got a chance to meet his grandmother, he will get to know her, in some way through these recipes. What an amazing gift she gave me.
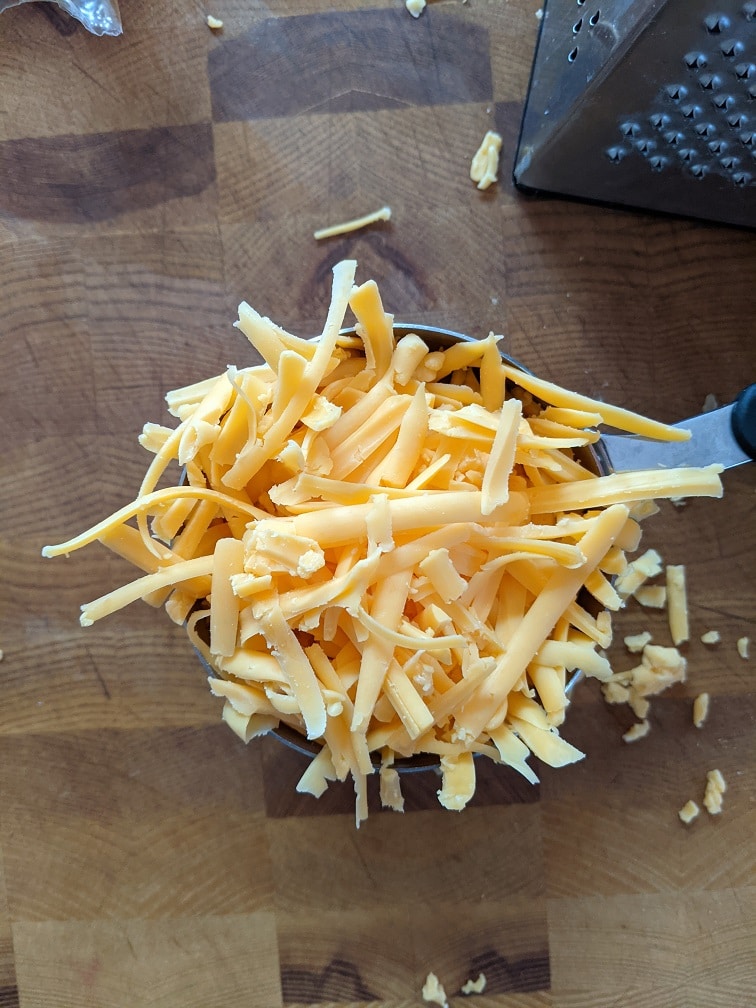
Cheese Ball Ingredients
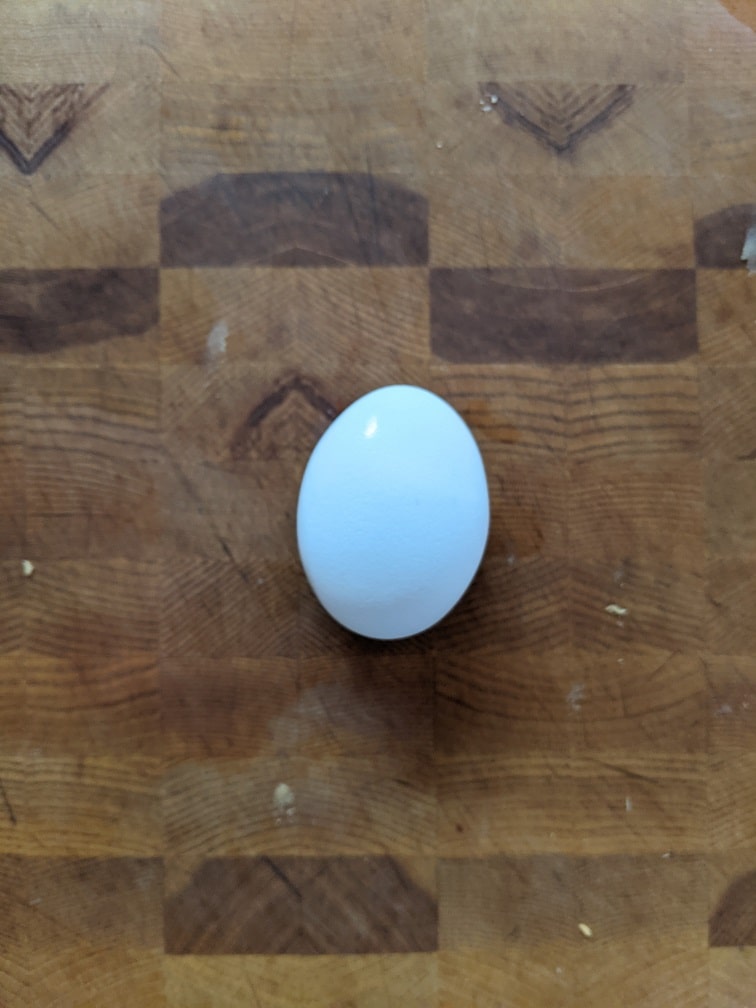
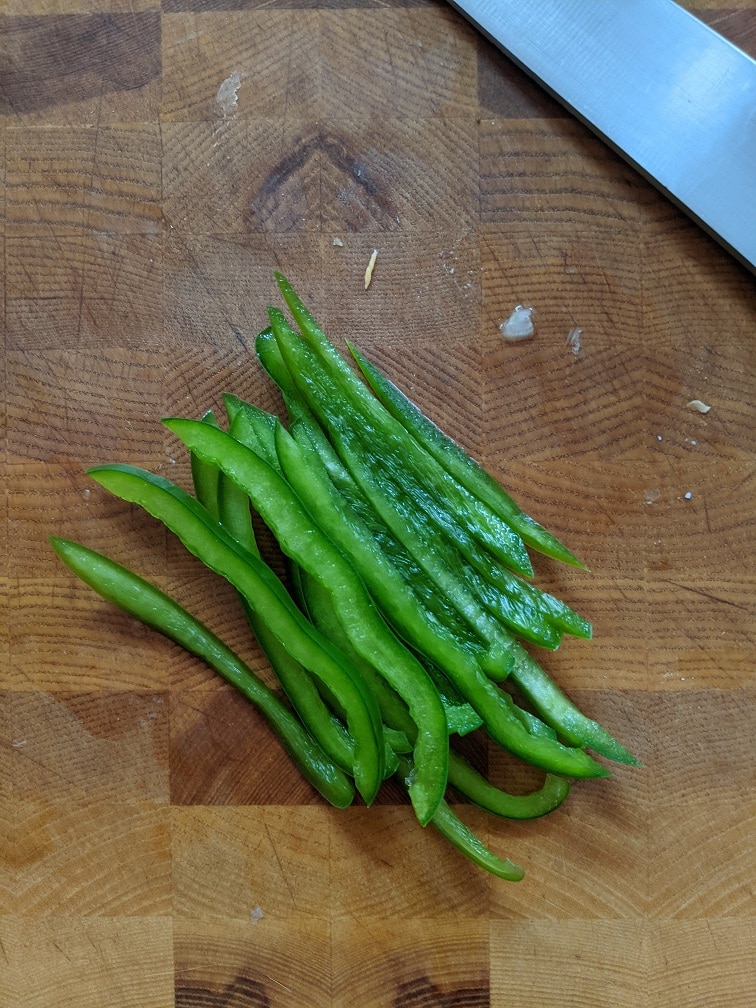
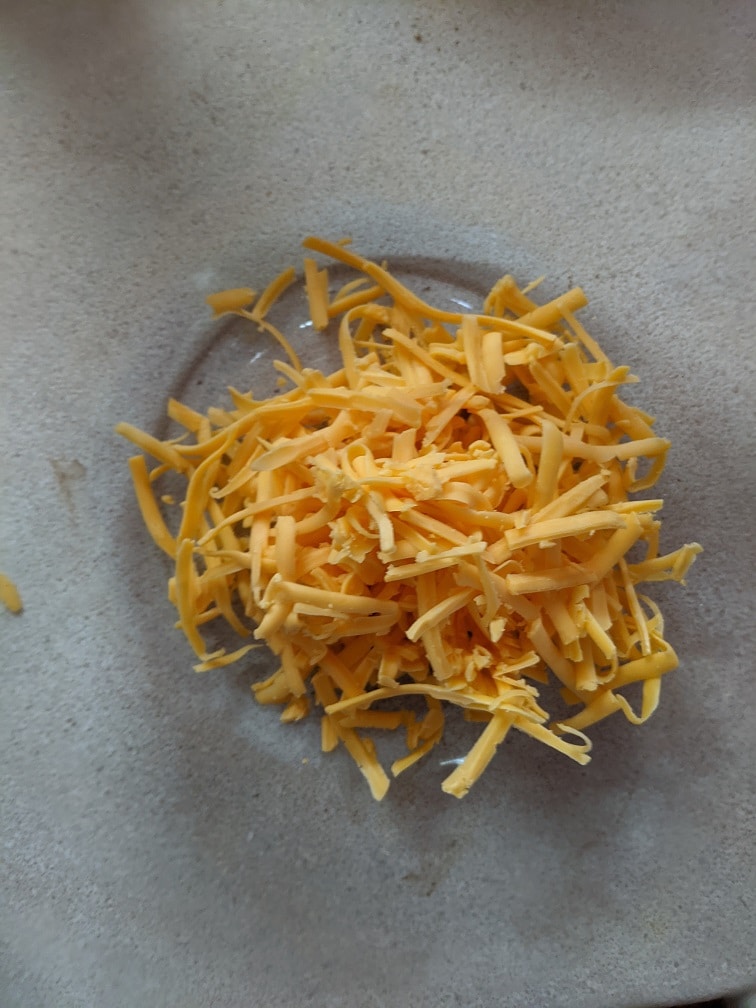
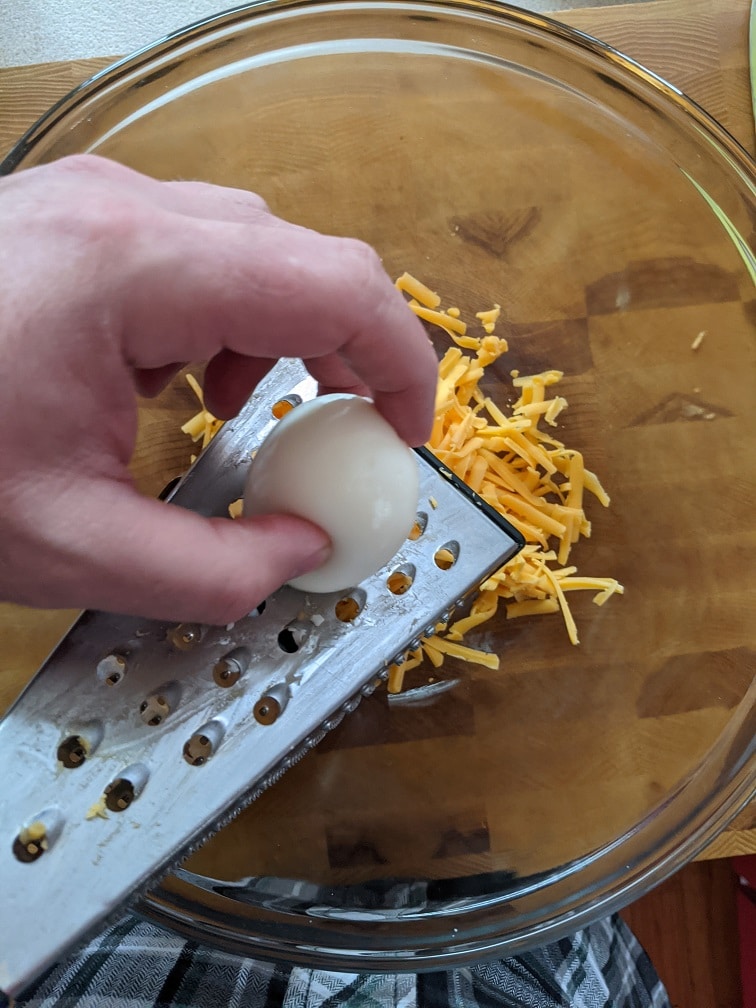
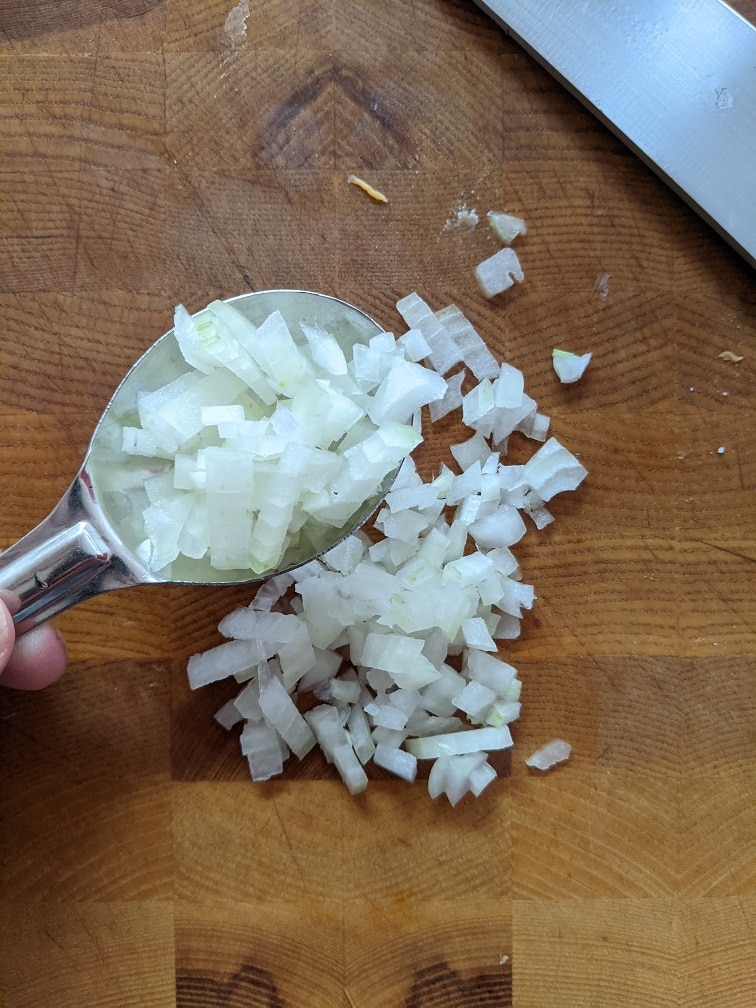
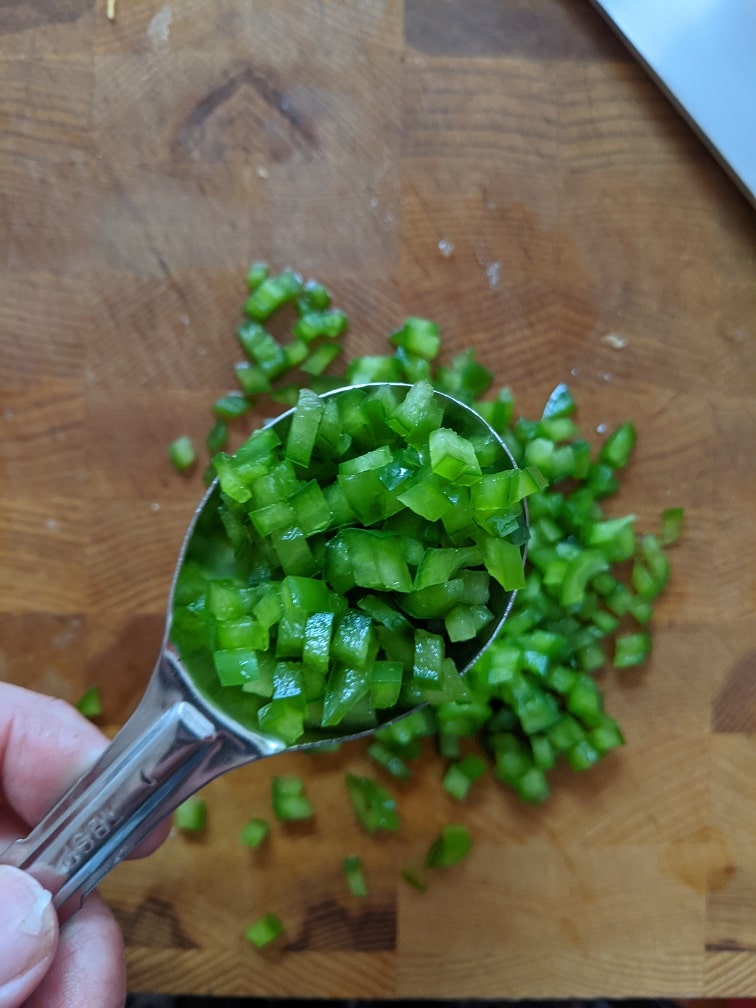
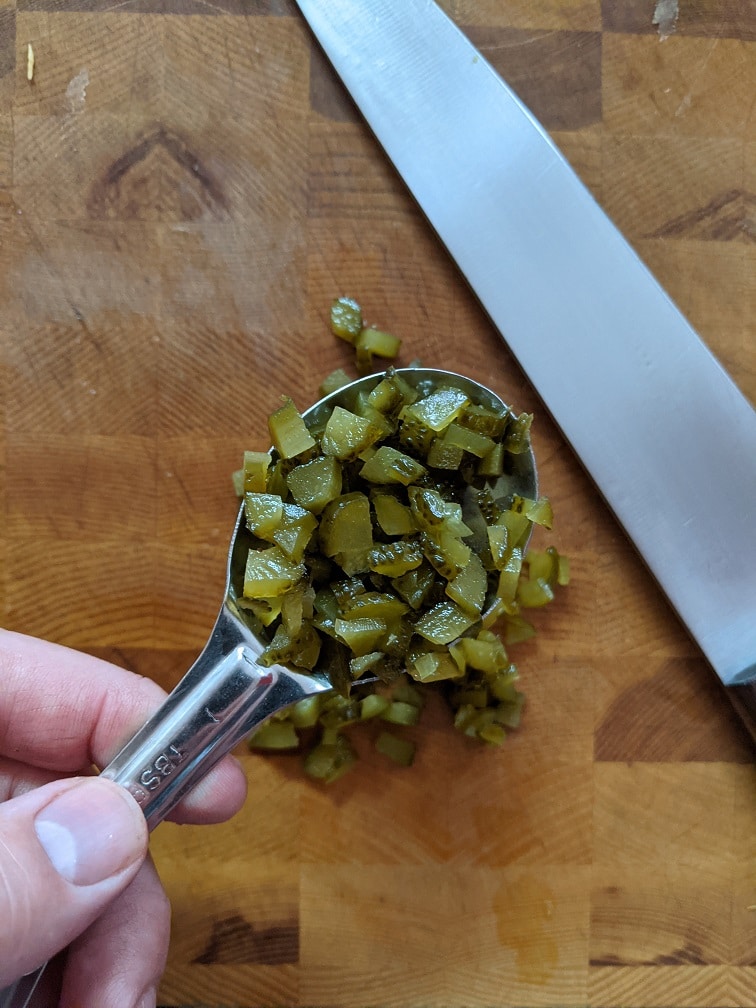
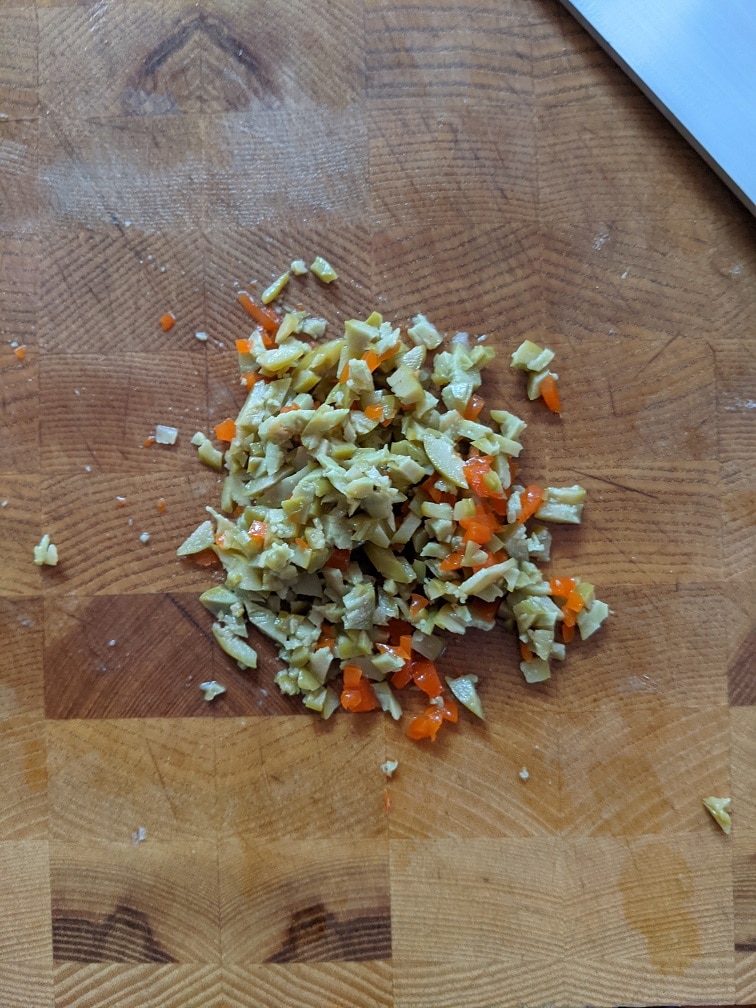
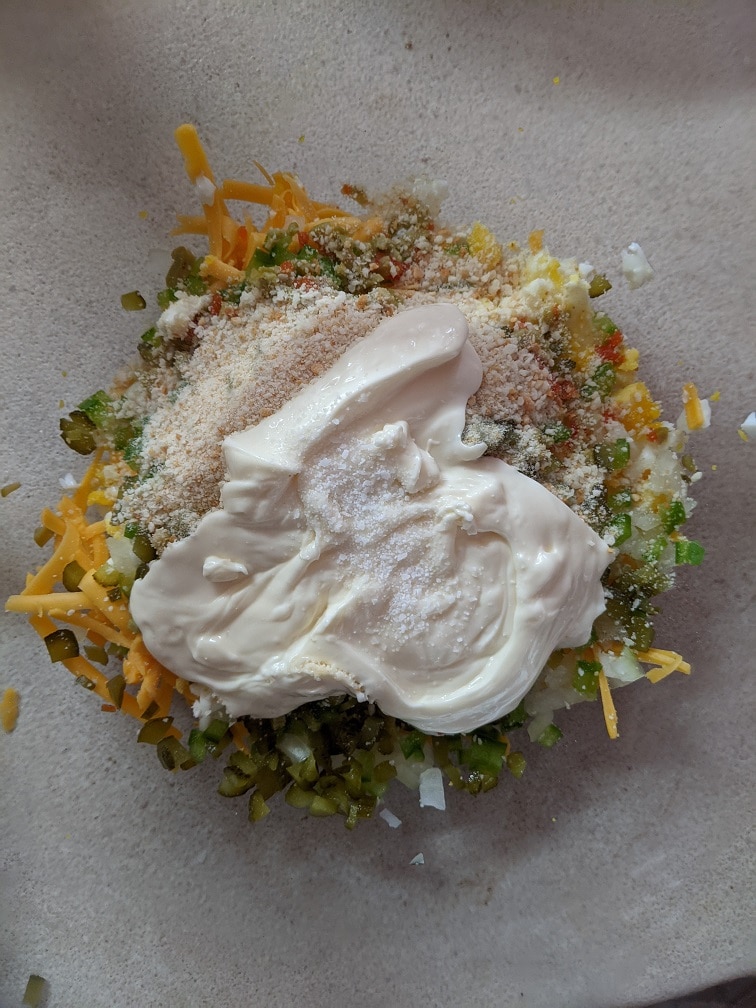
You obviously can’t have a cheese ball without cheese, so we’ll start there. For this recipe, use two cups of old or extra old cheddar cheese. Along with the cheese, there is one hard-boiled egg, some green bell pepper, sweet gherkins, pimento-stuffed olives, cracker crumbs, minced onion, mayonnaise, and salt. It is important to cut everything as small as possible; otherwise, the cheese ball will fall apart. For the egg, it is easiest to grate on a cheese grater. You can find the full list of measurements in the printable recipe at the end of the post.
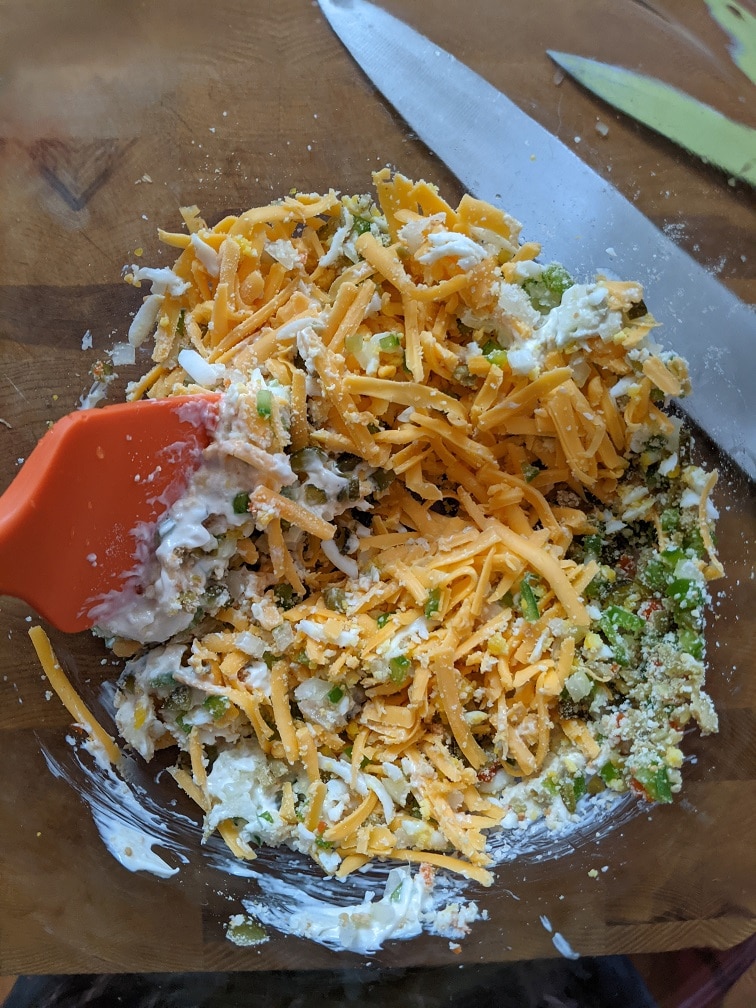
Putting The Cheese Ball Together
To make the cheese ball put the cheese in a medium mixing bowl, grate the egg into the bowl, then add the remaining ingredients and mix well.
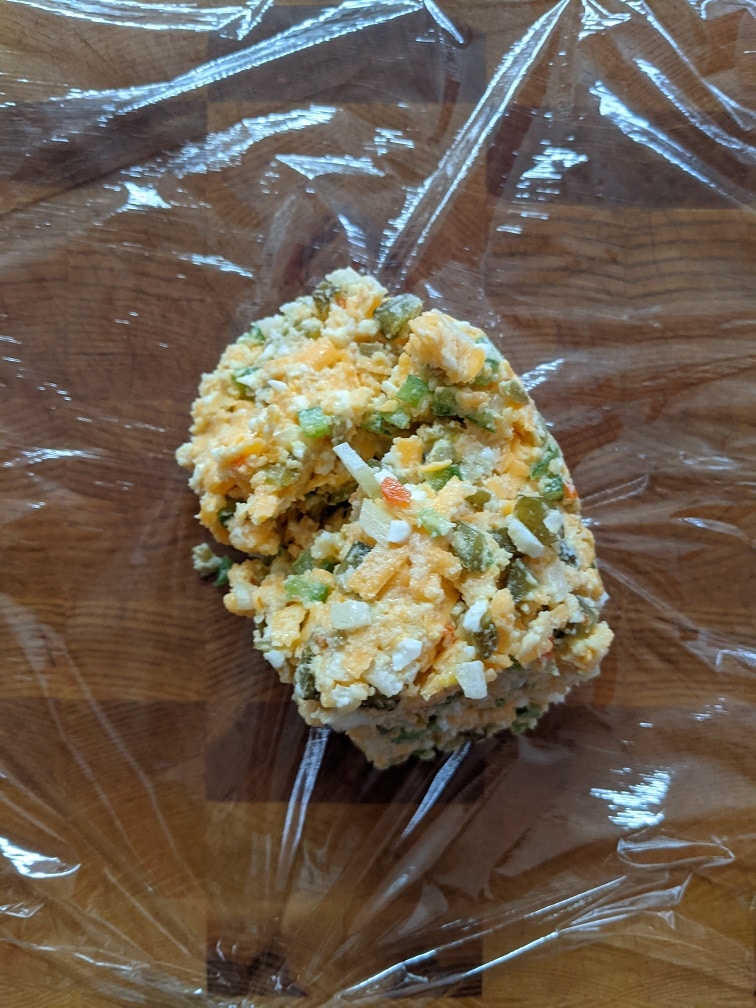
Forming and Resting The Cheese Ball
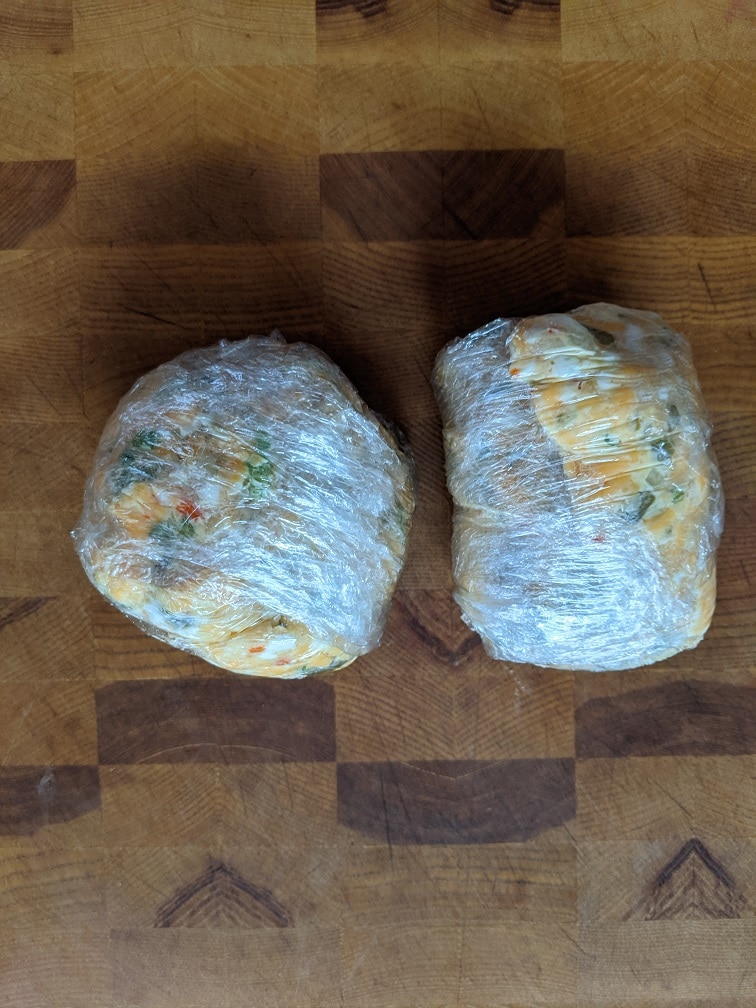
Once the ingredients have been mixed, divide the mixture into two and form into two balls. Then, wrap the balls tightly in plastic wrap. Put the cheese ball in the fridge for at least two hours to rest. It’s best if you let it sit in the fridge overnight. This time allows all the flavours to combine and is crucial in getting the right taste.
Serving The Cheese Ball
Take the cheese ball out of the fridge, unwrap it and serve it with assorted crackers, sweet gherkins, and olives. You may want to make a double batch becasue it isn’t going to last long.
Mom’s Cheese Ball
My Mom made this every year as part of our Christmas spread. It was always one of my favourite parts of the holiday. I still make it every Christmas and probably always will.
Combine and mix all ingredients in a medium mixing bowl. Mix well.
Divide the mixture into two and form into two balls.
Wrap the balls in plastic and store in the fridge for two hours before serving with crackers, olives, and pickles. It is best to rest the cheese ball in the fridge overnight to allow the flavours to come togehter.
This cheese ball, more than almost anything else, is Christmas to me. I can do without the presents or decorations, but not without this. I hope you enjoy the recipe, and I hope that it brings you a little cheer even if you can’t be with the ones you love. And, if you’re feeling a little extra lonely this year, know that every bite you take of this cheese ball is like a big hug from my mom and me. Enjoy.
Thank you for reading the post. If you liked it, remember to share it on Facebook, Pinterest, or Twitter. Did you know that Chefsnotes.com has over 400 posts just like this one? Subscribe to the blog below, and you will be notified of every new post so you will never a helpful tip or recipe again. And if you would like to know more about me, click the picture of me below to read my story “Life on the line.”
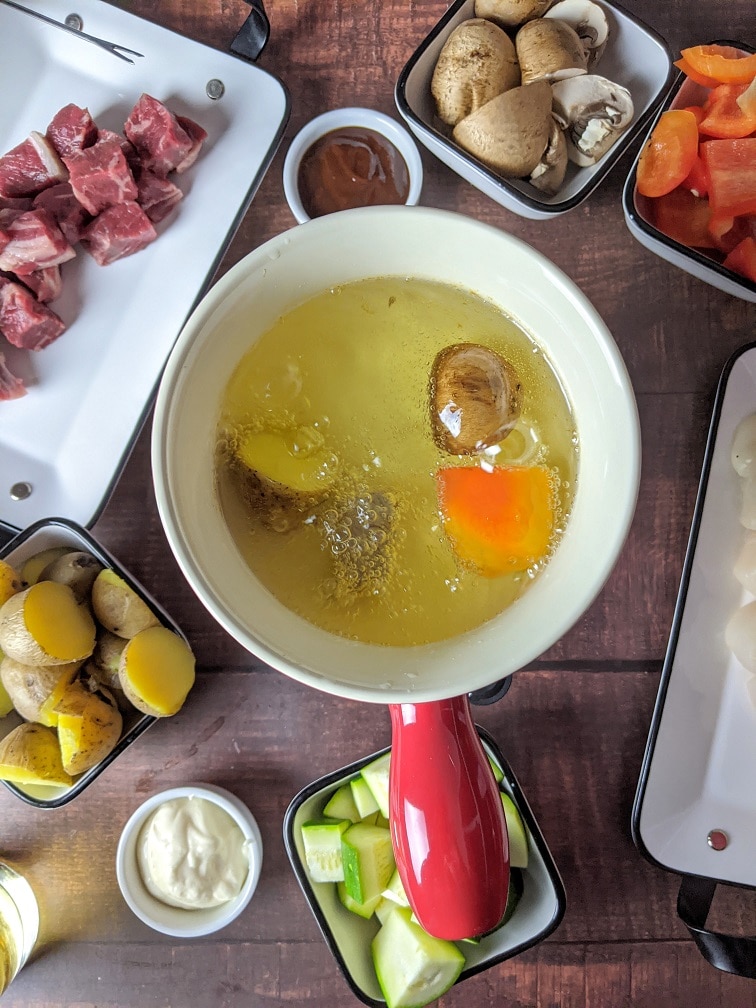
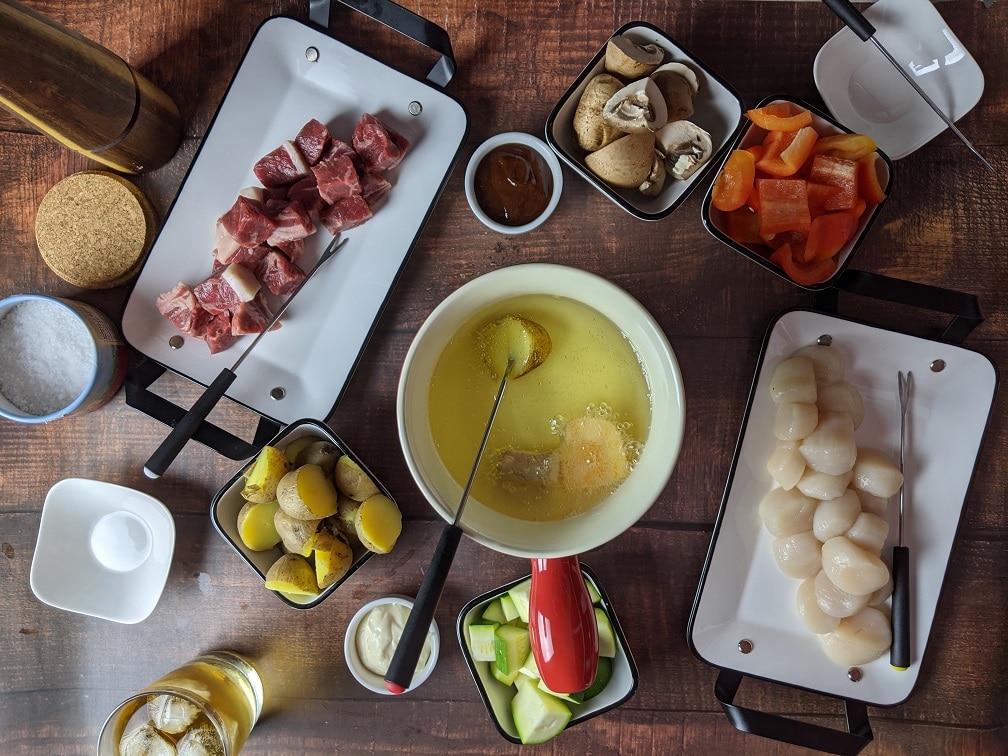
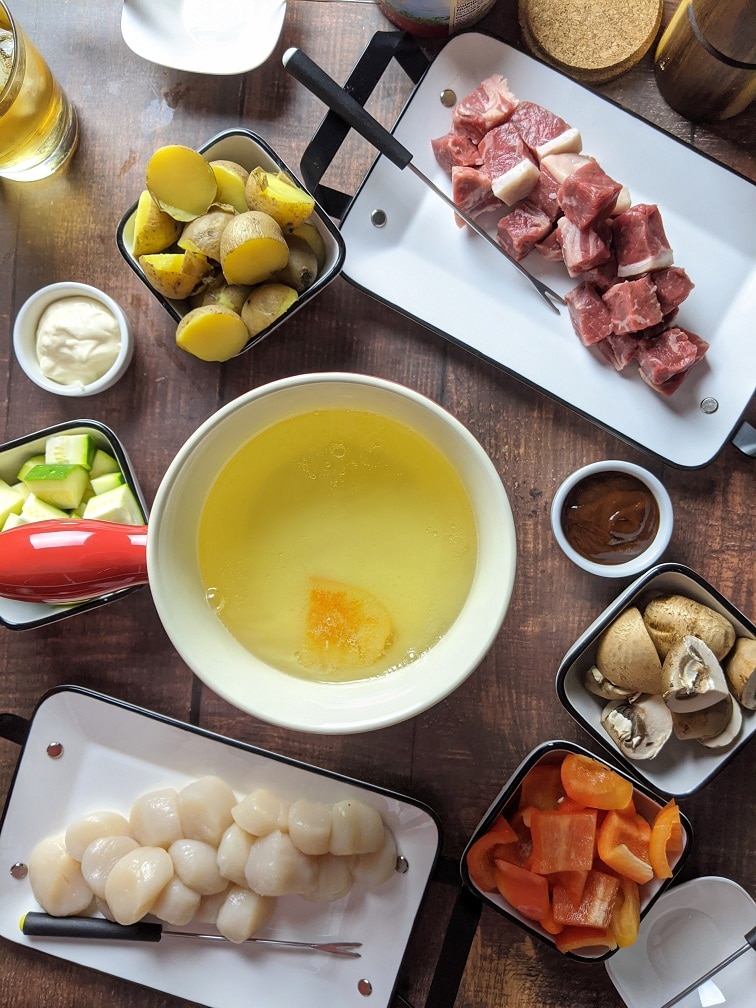
Oil fondue is a delicious and interactive way to enjoy a meal with friends and family. In this post, we’ll go over everything you need to know to enjoy oil fondue deliciously, including choosing the right oil, maintaining the proper oil temperature, selecting the best ingredients, and serving up tasty dipping sauces. From the best oils for fondue to tasty ingredients and sauce ideas, we’ve got you covered. So read on and get ready to experience all the deliciousness of oil fondue.
Is oil fondue dangerous?
Oil fondue can be a delicious and fun addition to any gathering, but it’s important to prioritize safety to ensure everyone can enjoy the experience fully. Hot oil can be dangerous if not handled properly, so it’s crucial to exercise caution and be mindful of your surroundings while enjoying oil fondue. If children are present, supervise them at all times and keep them safe from the fondue pot to avoid accidental burns or spills. It may also be a good idea to have a separate, child-friendly fondue option available, such as cheese or chocolate fondue. Remember, the most important thing is for everyone to have a safe and enjoyable time together. With a little caution and mindful behaviour, you can enjoy all the deliciousness of oil fondue without any mishaps.
Best oil for fondue
The best oil for meat fondue, or the best oil for fondue as it is usually known, is an important factor to consider when it comes to enjoying oil fondue. Choosing a neutral oil with a high smoke point is important to ensure that the fondue is safe and flavourful. Olive oil, while delicious, is not the best choice for fondue because it has a strong flavour and a relatively low smoke point. Instead, consider using Canola oil, which is inexpensive, has a neutral flavour, and has a high smoke point. You can fondue peanut oil, grapeseed oil, and sunflower seed oil. These are all good options.
No matter which type of oil you choose, it’s important to be mindful of the volume of oil you use. Don’t fill the fondue pot more than halfway, as the oil will expand and bubble when it gets hot. Overfilling the pot can lead to a hot, dangerous mess.
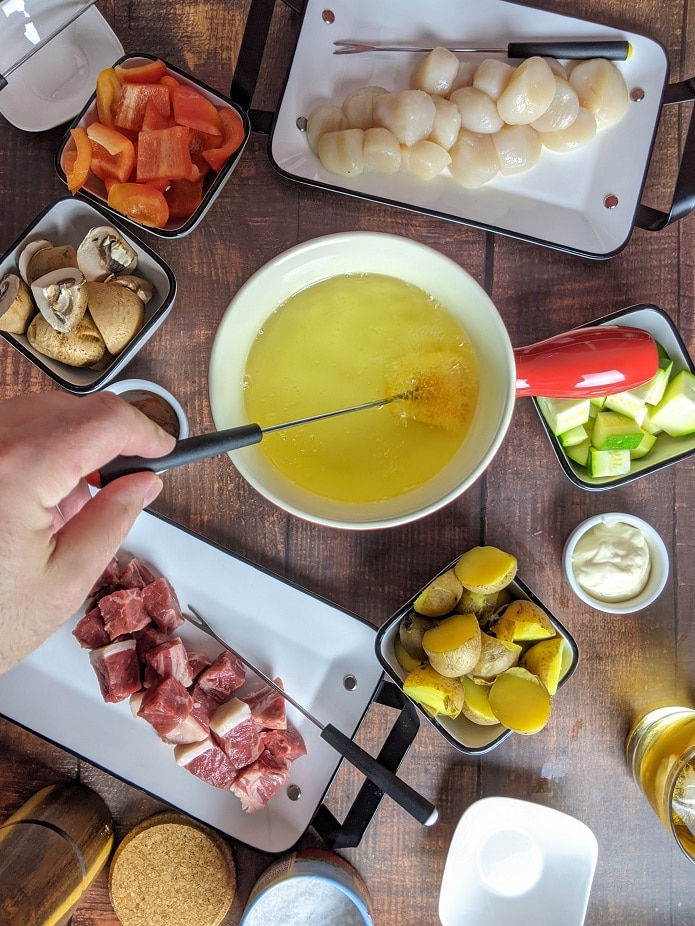
How hot should fondue oil be?
Maintaining the right fondue oil temperature is crucial for enjoying oil fondue. The process of cooking food in an oil fondue set is similar to a combination of deep-frying and oil poaching, with the oil being heated to a high temperature. However, the amount of oil in the fondue pot is insufficient to maintain that temperature when cold food is added. This means that when you first add food to the oil, it will get a sear, but then it will need to sit and essentially poach rather than fry. Keep in mind that the more food you add to the oil, the lower the temperature will get and the longer it will take to cook.
The perfect temperature for fondue oil is between 300°f and 350°f. This temperature range will ensure your food cooks and that the oil regains its temperature quickly. When you first light the burner under the fondue pot and begin heating the oil, allow it to heat up for ten to fifteen minutes. This will give the oil time to reach the right temperature. You can test the oil’s readiness by placing a piece of cubed bread into it. If the bread browns in less than a minute, the fondue oil is ready.
As you continue cooking, keep in mind that you are not deep-frying your food – this is fondue, not deep-frying. To maintain the right oil temperature, try to balance the amount of food you add to the pot with the time it has to recover after the food has been taken out. As a general rule, try not to cover more than 60-70% of the pot’s surface with food. If you have a mix of room-temperature and fridge-temperature ingredients, put them in the pot together. If all the ingredients are fridge-temperature, the oil temperature will drop dramatically and take a long time to recover.
What’s the difference between oil fondue and deep frying?
Earlier, we mentioned that oil fondue is a combination of deep-frying and oil poaching. It can be helpful to keep this in mind as you cook, as it will influence the texture and flavour of the food. With oil poaching, the food is slowly cooked in the oil and takes on a silky texture, similar to olive oil-poached fish. In an oil fondue, you want the oil to be hot enough to brown the food slightly, but then the temperature should fall, and the food will essentially poach. This creates the best of both worlds and, in my opinion, is the true glory of oil fondue.
As you choose your ingredients, keep in mind that you are not cooking mini spring rolls or breaded chicken fingers in the fondue pot. Foods with breading or coatings will absorb the oil if it isn’t hot enough, and they can also quickly ruin the oil. Instead, opt for fresh, un-breaded foods for the best results.
Things to fondue in oil: Ingredient Options
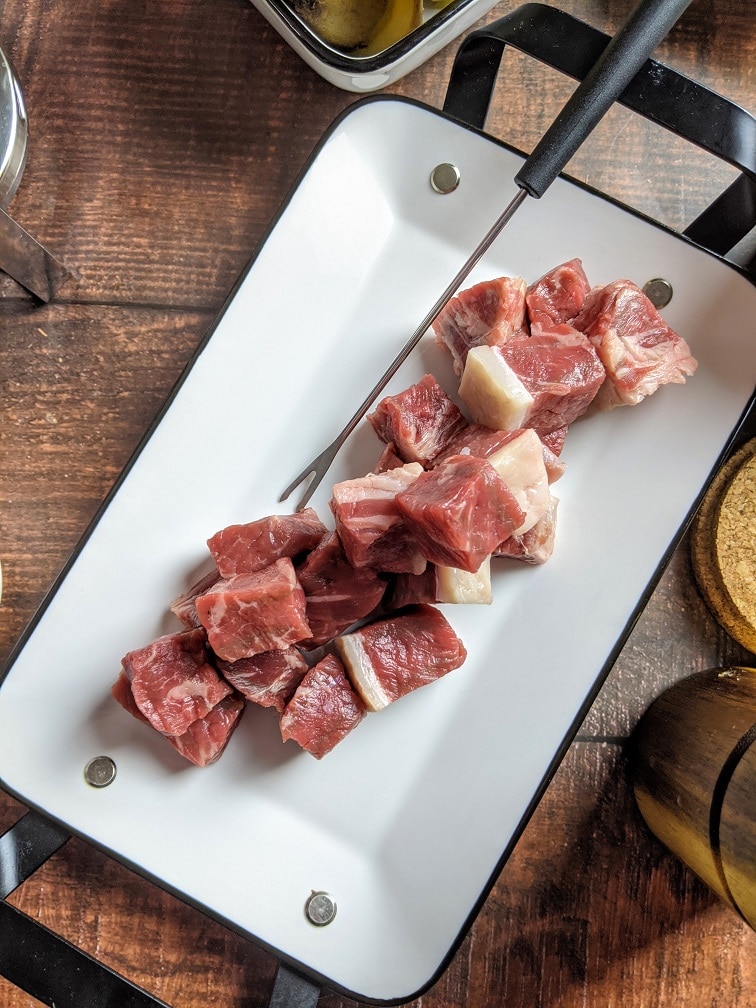
When it comes to hot oil fondue ideas, the most important thing to keep in mind is to make sure all ingredients are dry. Wash and dry your vegetables, and pat your meat and seafood dry with a paper towel. Any water droplets can cause the oil to spit and potentially bubble over, so it’s important to ensure that your ingredients are as dry as possible before adding them to the hot oil.
Meat and fish are typically the main components of an oil fondue. Some people like to use chicken and pork, but I prefer to stick with beef because it is less likely to cause problems if it is slightly undercooked. When choosing the cut of beef, consider using strip loin or tenderloin rather than a fatty cut like rib-eye, as the fat may not have time to render, and you may end up eating chunks of unrendered fat. Bison and lamb are also good substitutes for beef. To ensure that everything cooks evenly and there is enough space in the fondue pot, be sure to cut all of your ingredients to the same size.
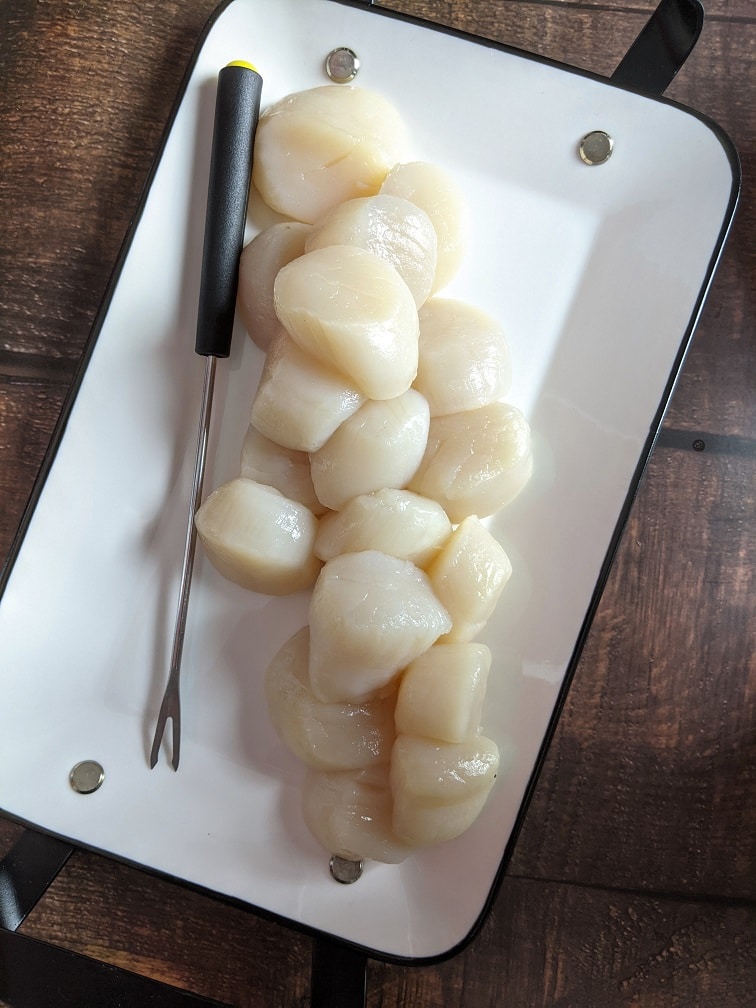
In terms of seafood, shrimp and scallops are excellent ingredients for an oil fondue if you can eat them. Fish can also be used, but avoid overly flaky options like haddock or cod, as they may fall apart. Salmon and tuna are good alternatives.
It’s important to note that if you or anyone in your group has allergies, you should be aware of the potential for cross-contamination. If you are using the same oil to cook a variety of ingredients, be sure to label the different items clearly and keep track of which ingredients have been cooked in the oil. This can help prevent any accidental exposure to allergens. You may want to have a few pots going if there is someone with an allergy present.
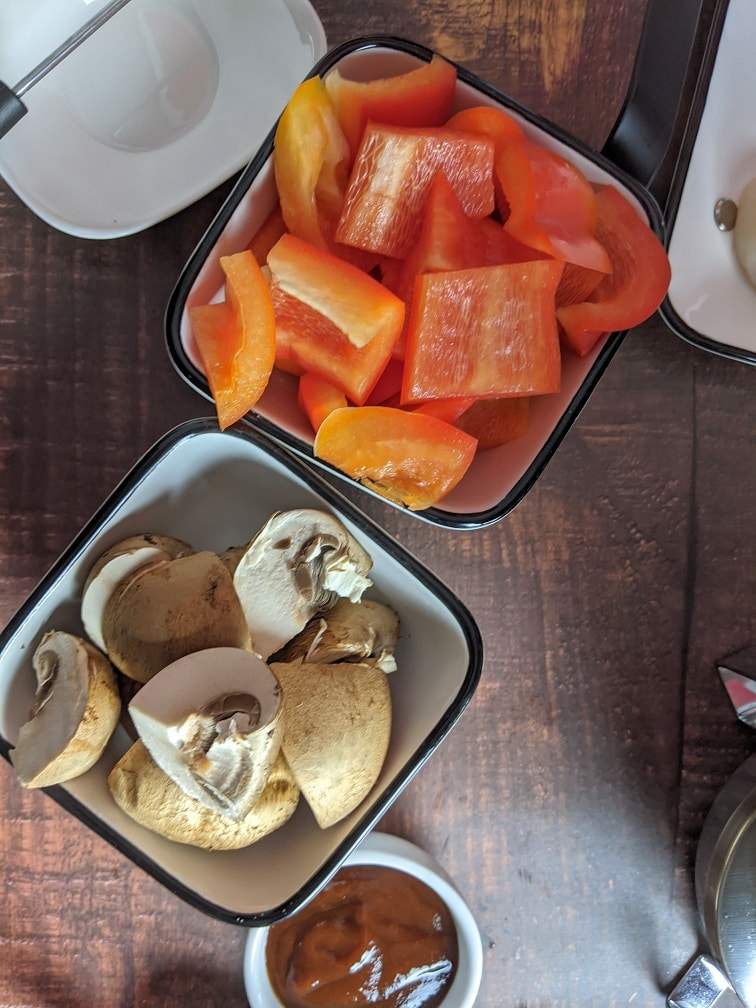
Best vegetables for oil fondue
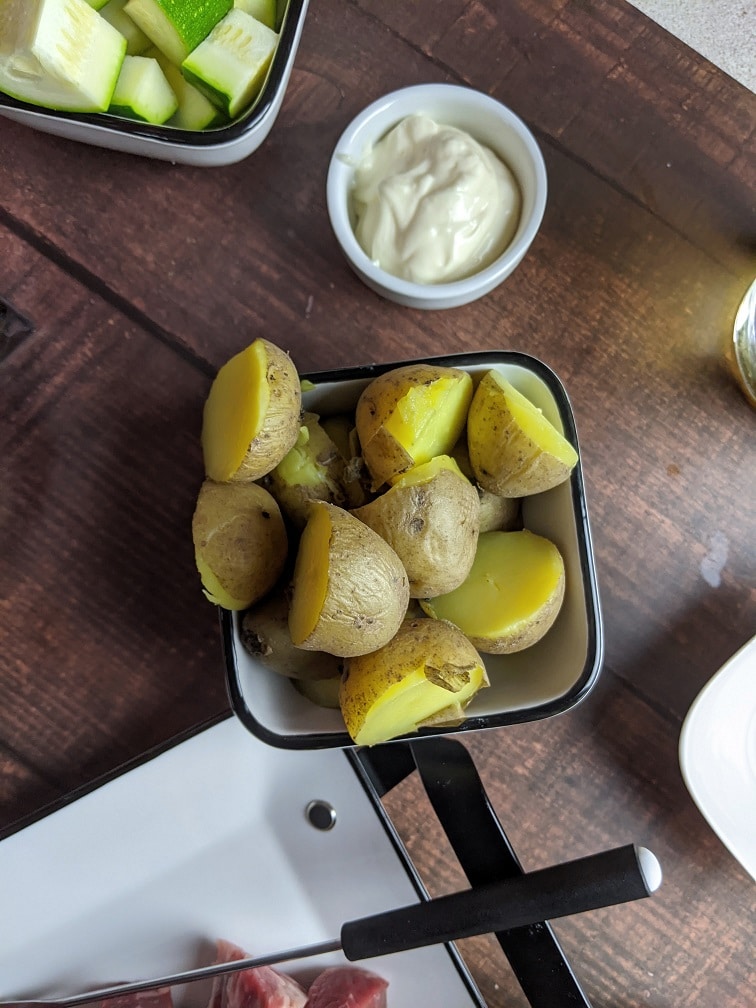
When it comes to vegetables for an oil fondue, the options are virtually limitless. However, it’s important to avoid using frozen vegetables, as they can cause the oil to boil over. If you want to include potatoes or sweet potatoes, it’s best to precut them and precook them slightly, as they will take a long time to cook from raw in the oil. Waxy potatoes, like yellow potatoes, tend to work better in an oil fondue than other varieties.
In terms of variety, try to include a mix of vegetables to add flavour and nutrition to your fondue. Just make sure to wash and dry the vegetables thoroughly before adding them to the hot oil to prevent spitting and bubbling. Some vegetables that work well in an oil fondue include:
Bell peppers
Zucchini
Squash (pre-cooked)
Asparagus
Broccoli
Cauliflower
Eggplant
Mushrooms
Onions
Garlic
Remember to cut the vegetables into small, evenly-sized pieces to ensure that they cook evenly and there is enough space in the fondue pot. Experiment with different combinations to find the ones that you and your group enjoy the most!
Oil fondue dipping Sauces
When it comes to dipping sauces for an oil fondue, the options are endless. Having a variety of sauces on hand allows you to mix and match different flavours to create unique and delicious combinations. Some options to consider include:
Mustard
Barbecue sauce
Mayonnaise
Horseradish
Ranch dressing
Sour cream
You can also get creative and mix together different sauces to create your own custom dips. This is a great opportunity to use up any extra condiments that may be taking up space in your refrigerator. Experiment with different flavour combinations to find the ones that you and your group enjoy the most. You can also provide a selection of herbs and spices, such as chopped chives, parsley, cilantro, or paprika, to allow your guests to add a finishing touch to their dips.
How long to cook in oil fondue
Cooking time can vary significantly when it comes to an oil fondue, as it depends on a number of variables, including the temperature of the oil, the starting temperature of the food, the size of the food, and how much food is in the pot. For this reason, it can be challenging to provide exact cooking times for specific ingredients. To ensure that your food is cooked properly, it’s best to choose ingredients that are okay to be eaten slightly undercooked, such as steak, scallops, and vegetables. This will allow for some leeway in terms of cooking time while still ensuring that the food is safe to eat.
As you cook different pieces of food, you will get a feel for how long they take to cook in your fondue pot. For example, thin slices of meat will cook faster than thicker pieces, and small pieces of vegetables will cook faster than larger ones. Pay attention to the food as it cooks, and use a thermometer to check for doneness if necessary. With practice, you’ll be able to determine the optimal cooking times for the ingredients that you enjoy in your oil fondue.
Best fondue pot for oil
When it comes to the best fondue pot for oil, there are many great options on the market. I recommend either a stainless steel one with a guard on top or this oil fondue set from Swissmar. They are typically known as the best-founded sets out there.
Conclusion
Oil fondue, and fondue in general, is a wonderful way to bring people together, slow down, and have a fun and relaxed evening. One of the great things about fondue is that it encourages conversation and socialization, as you can’t rush the process of cooking your food. Instead, you are forced to stand and chat while your food is cooking, creating a sense of camaraderie and connection. As a chef, one of the things I love about fondue is that it provides an opportunity to enjoy a meal for a longer period of time. Unlike many meals that are prepared over the course of hours but eaten in just a few minutes, fondue takes just a few minutes to prepare but can be enjoyed over a longer period of time.
Whether you’re looking for a fun family evening, a romantic dinner with your partner, or a social gathering with friends, oil fondue is a great choice. It’s a unique and interactive way to enjoy a meal and spend quality time with the people you care about. So why not gather your loved ones around the fondue pot and create some lasting memories? Like this post? You might also like the Cheese Fondue. Or, if you’re looking for something sweet, the Chocolate fondue is for you.
After reading this post, the only question you’ll have about cheese fondue is, why aren’t you eating it right now? Before jumping into cheese fondue, this post will talk briefly about what fondue is generally and the different types, such as oil and chocolate. Then, it will get into how to make cheese fondue and some variations on the recipe, including how to make a traditional fondue and a beer cheese fondue. Then, it will cover what to serve with your cheese fondue. And finally, this post will give a brief guide for what to look for when buying a fondue set, new or used. If you have any questions about cheese fondue that this post doesn’t answer, please ask them in the comment section below, and I will answer them to the best of my ability.
*THIS POST CONTAINS AFFILIATE LINKS
Imagine it is a beautiful winter day, and you’ve been hitting the slopes for hours with your best friends. As you enter the warm cabin overlooking the valley below, your wind burnt face stings. You and your friends joke as you prepare a meal of meat, vegetables, bread, and melted cheese. You sit back, sipping wine, discussing the day’s adventures and laughing about the misadventures. All the while spearing morsels of food on a long metal fork and dipping them into the molten cheese that sits atop a flame in the centre of the table. Is this a dream? Some nirvana that could only exist on the plains of fantasy? No, this, my friend, is Fondue.
Fondue
Fondue was very popular in 1970s North America. Even though we often think of it in a romantic context, it comes originally from Switzerland, where it is eaten after a long day of skiing the Alps. It is just as likely to be shared among a family as it is by a couple on a romantic getaway. It’s unclear when or why Fondue fell out of favour in North America. However, it would be fair to guess it had to do with the health craze of the 1980s and the low-fat craze of the 1990s. Whatever the reason for losing popularity, it’s a shame because sitting down with people you love drinking wine and dipping food in melted cheese is a wonderful experience.
What exactly is Fondue?
Fondue is a serving style where food is dipped into a pot of hot cheese, oil, chocolate, or broth. Each diner is given a long metal fork or skewer that they use to pick up food to be dipped into the fondue pot. The fondue pot is a metal or ceramic pot that is set in a frame above a small flame. The flame can come from a candle, a Sterno, or a specific fondue fuel.
Types Of Fondue
There are three main types of fondue. They are cheese, oil, and chocolate. Cheese fondue is traditionally a combination of melted Swiss Cheese (such as gruyere) mixed with wine. The recipe in this most varies from the traditional recipe slightly, as you will see in a moment. Oil fondue is when oil is heated and added to the fondue pot. Raw bits of steak and seafood are common accompaniments of an oil fondue. Chocolate fondue is typically a combination of Swiss chocolate melted with sweet wine, liquor, or Irish cream. Often berries, bananas, oranges, marshmallows and sweet bread such as brioche are dipped in chocolate fondue.
How To Make Cheese Fondue
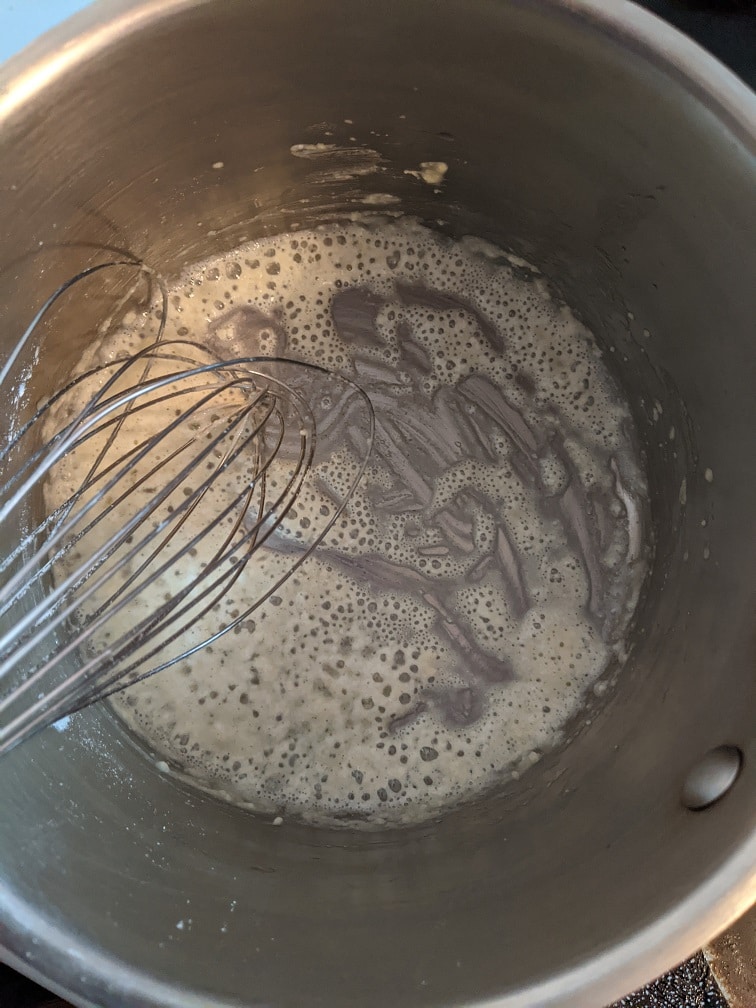
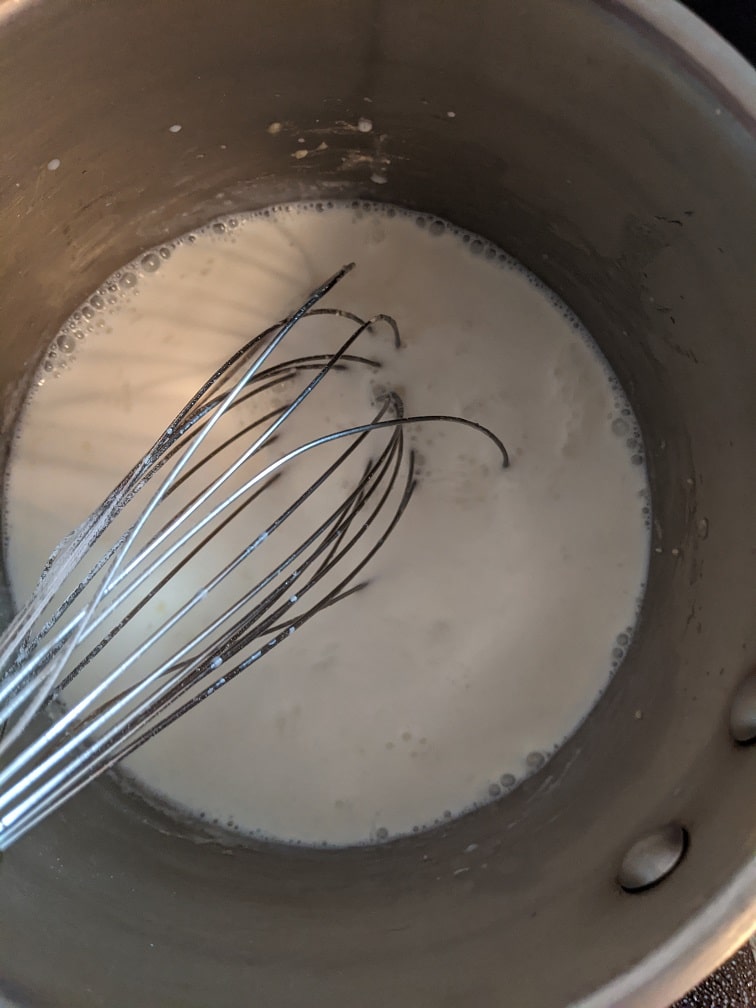
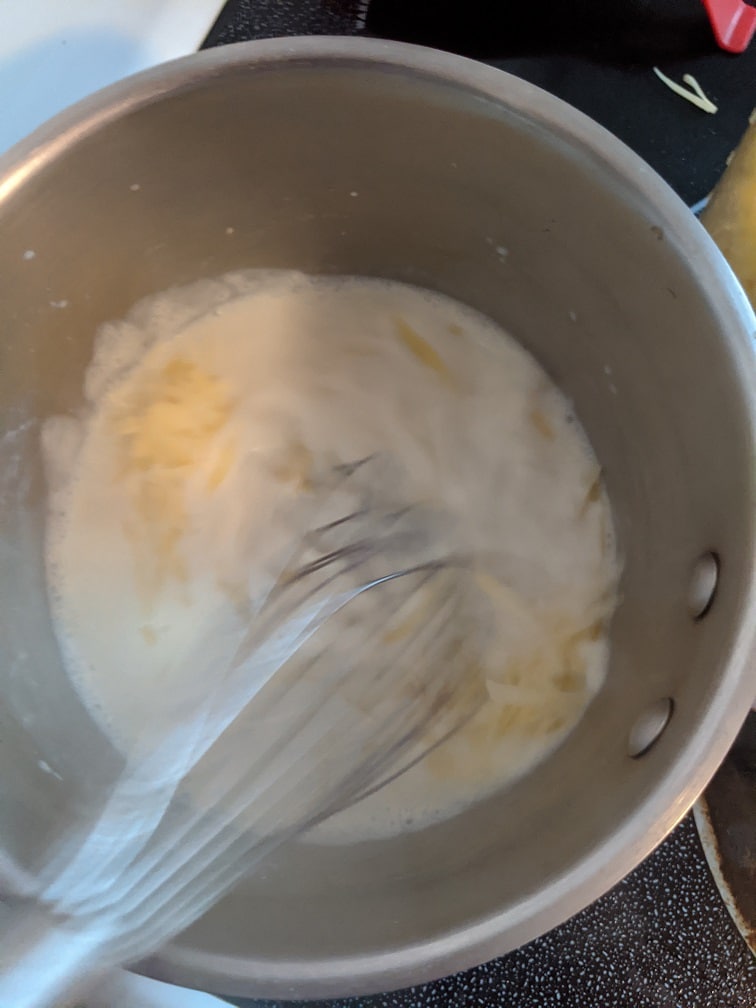
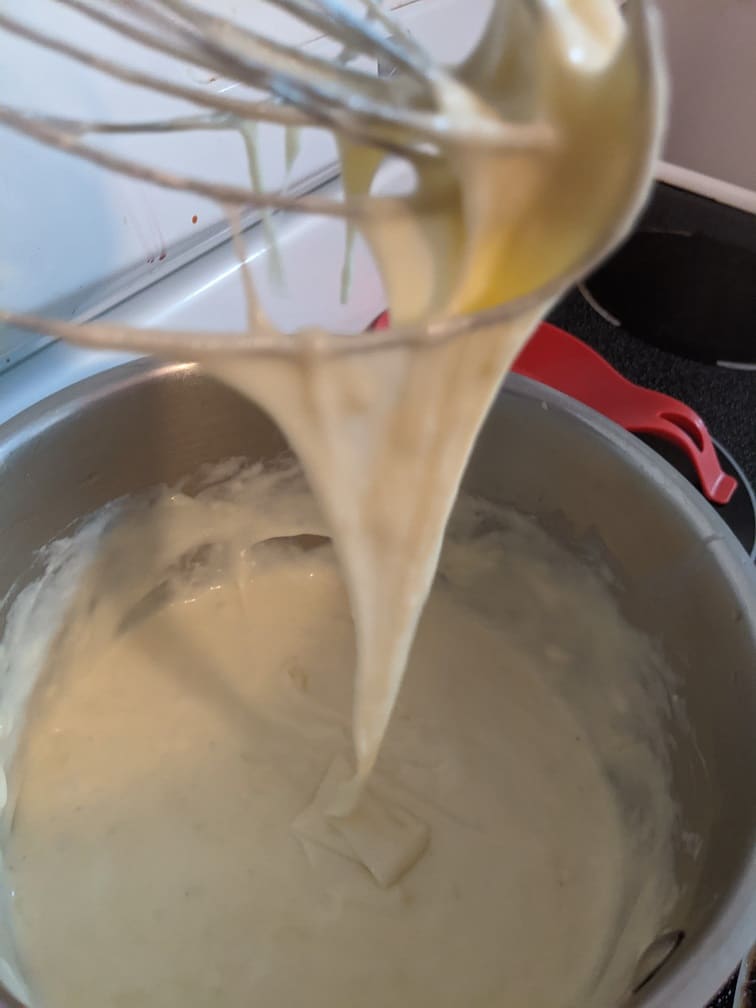
There are different ways to make cheese part fondue. The most traditional method is to melt cheese with wine. However, the method used in this post is to make a cheese sauce starting with a bechamel. This cheese sauce method is preferred because the cheese goes a little further, making the fondue more cost-effective. To make the bechamel, melt one tablespoon of butter, and whisk one tablespoon of flour into it. Cook, whisking for two minutes. Next, whisk in one cup of milk, salt, white pepper, mustard powder, onion powder, and garlic powder. The measurements can be found below. Simmer the sauce, whisking, for about eight to ten minutes.
The Best Cheese For Fondue
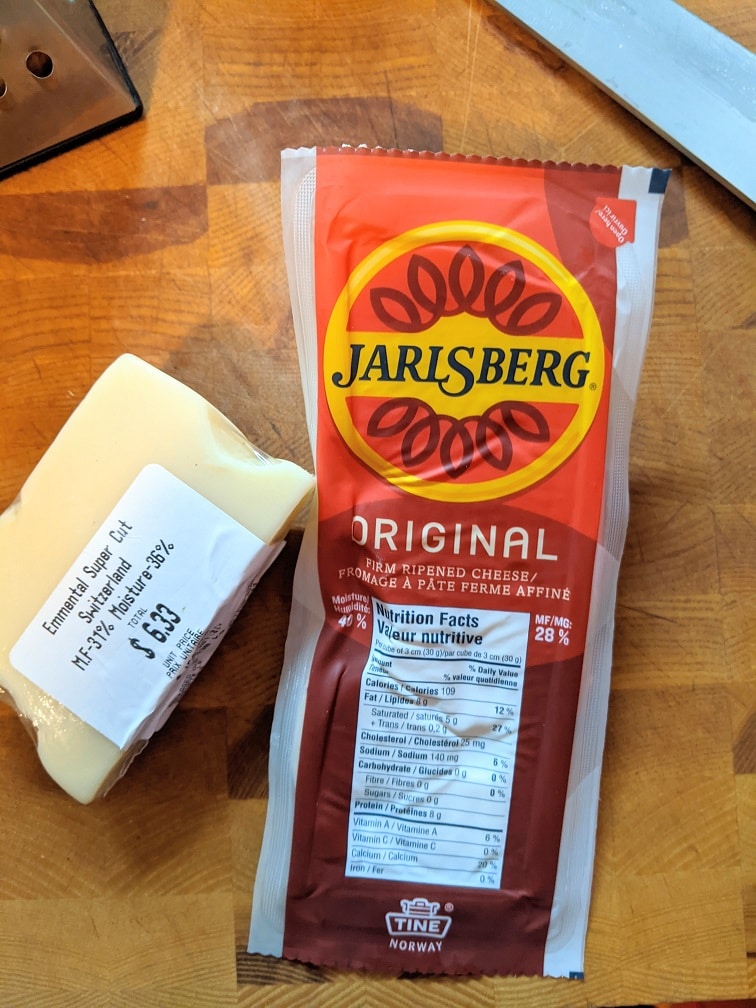
The best cheese to use for a cheese fondue is the cheese that has always been used to make cheese fondue. That is Emmenthal. However, Emmenthal can be expensive. Because of this, it is preferred to cut the Emmenthal with an equal amount of a less expensive but equally good cheese such as Jarlsberg. If making a beer cheese fondue, sharp cheddar is a more complimentary flavour.
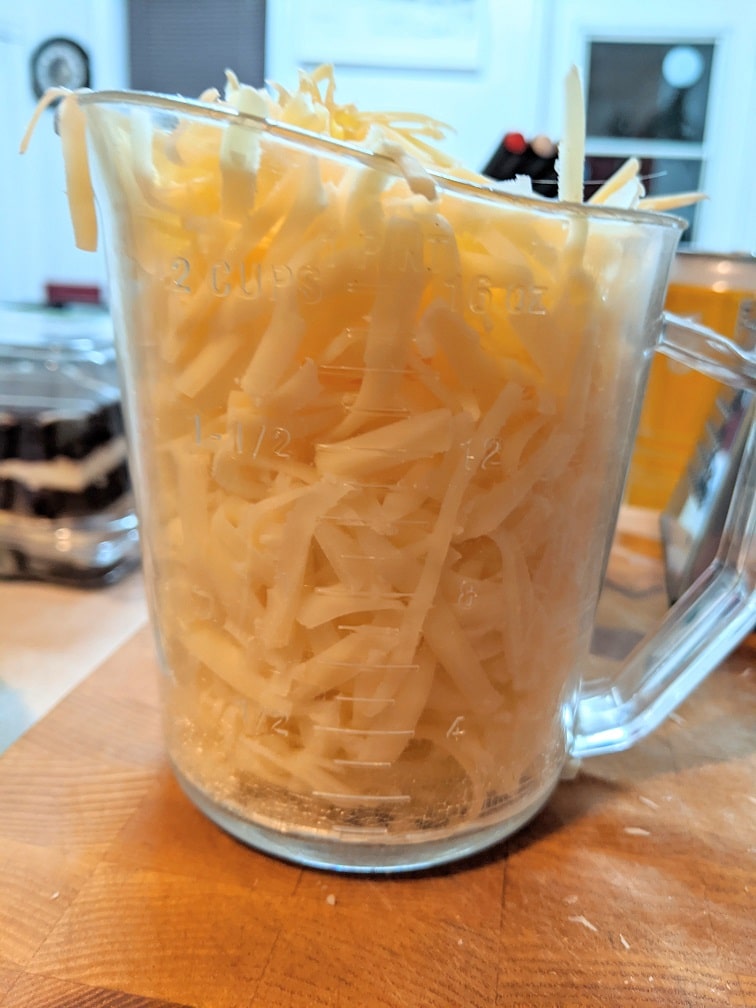
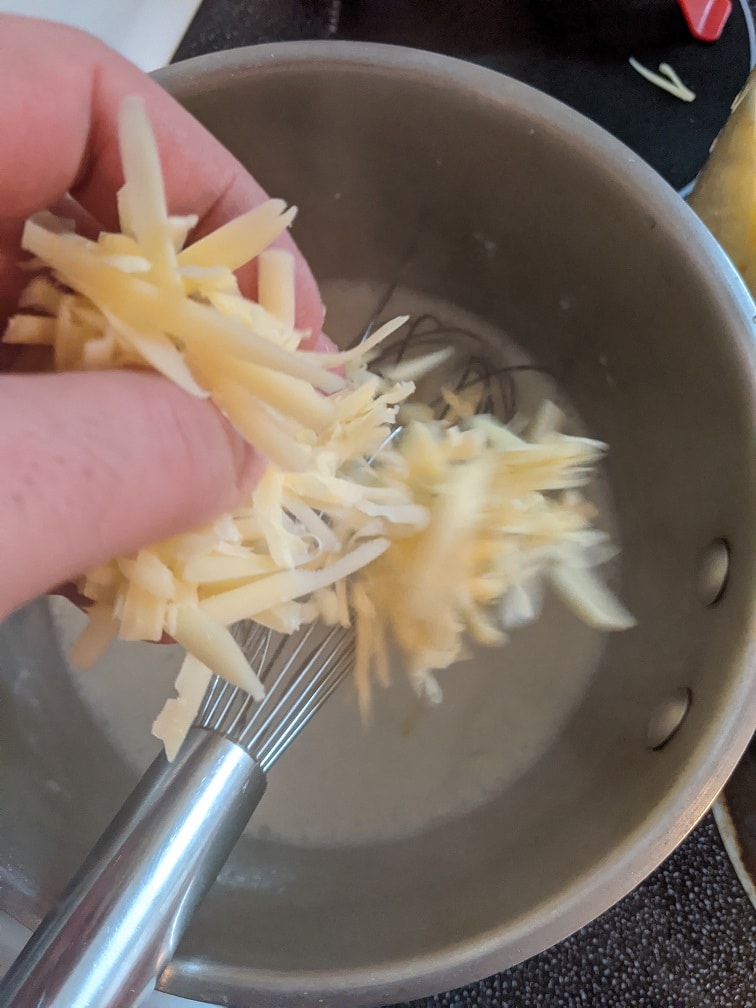
This recipe requires three cups of grated cheese in total. A 50/50 mix of Emmenthal and Jarlsberg is preferred, but any combination of those types of cheese will work. Swiss Knight Cheese is another good option. Whisk the cheese into the hot bechamel, a little bit at a time, until it has all been incorporated and it’s all melted. The final step is to taste the sauce and adjust the seasoning as needed with salt, pepper, and a little lemon juice or hot sauce as needed. A few drops of lemon juice or hot sauce will add a slight acidity to the flavour of the fondue, drawing out and brightening the natural flavour of the cheese. Transfer the cheese sauce to your fondue pot and set it over a flame.
What to serve with the Cheese Fondue
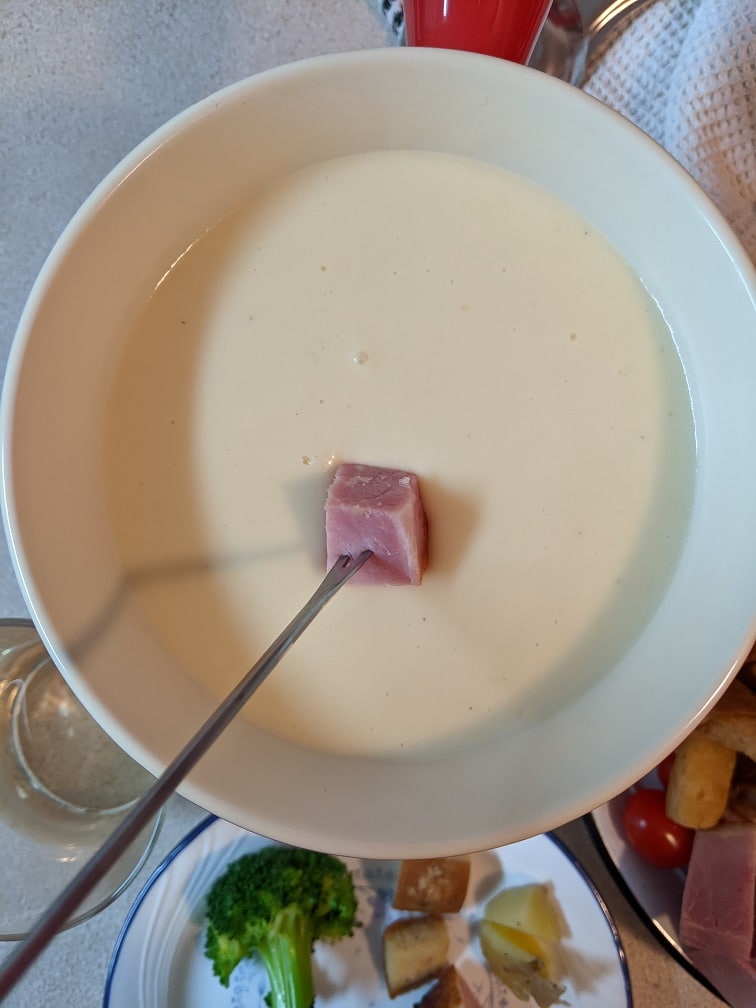
There are many options for what to serve with your cheese fondue. An important point to remember is that accompaniments should be fully cooked as the cheese will not be hot enough to cook meat or vegetables. Another point is that it is best to offer a variety of ingredients, but it is not necessary to go overboard. A few good quality ingredients, such as bits of ham, roasted mushrooms, slightly cooked broccoli, rare beef tenderloin, good bread, and boiled potatoes, are more than enough. Other vegetables that would work include roasted zucchini, asparagus, cauliflower, and Brussels sprouts. You can also serve cold cuts like roast beef, smoked turkey, etc.
Cheese Fondue
Common in the 1970s and throughout Switzerland, cheese fondue is making a come back it's time that you got into the game. Delicious bits of food dipped in melted cheese, how could it not be delicious?
1 tbspFlouryou can use gluten-free all purpose flour
1 cupWhole Milk
1/2tspSalt
1/4tspWhite Pepper
1/4tspMustard Powder
1/2tspgarlic powderoptional
1/2tsponion powderoptional
1 1/2 cupsEmmenthal Cheese, grated
1 1/2 cupsGruyere, grated
Instructions
Melt the butter in a medium pot on medium heat. Whisk in the flour and cook for two minutes while continuously whisking.
Pour the milk into the pot and whisk in the salt, white pepper, mustard powder, garlic powder (optional), and onion powder (optional). Whisk until the mixture is just below a boil. Turn the heat down to low and simmer, while whisking for 8 to 10 minutes.
Remove the pot from the heat and whisk in the grated cheese a little at a time until all the cheese is incorporated. Taste the cheese fondue, and season it with salt as needed.
Transfer the fondue to a fondue pot and serve.
Notes
Replace the milk with beer and substitute the Emmenthal with a sharp cheddar to make beer cheese fondue. To make a more traditional fondue, substitute the milk for wine and omit the flour and butter. If the fondue lacks sharpness, add a few drops of Tabasco sauce.
Beer Cheese Fondue is made by mixing an amount of beer with the cheese while it’s melting. For four cups of grated cheese, one cup of beer would be more than enough. Beers such as porter, stout, ale, IPA, or many others may be used. When making beer cheese fondue, traditional Swiss-Style Cheese can be used, but it can also be substituted with Cheddar of any kind.
Buying The Best Fondue Set
Before buying a fondue set, consider how often you will actually use it. A fondue set is a great thing if used a few times a year. But it’s also the type of thing that gets pushed to the back of a cupboard, never to be seen again. If you think you’ll only use your fondue pot once or twice, consider buying a used one at a yard sale or even borrowing one from a friend or family member. However, if you are the type of person that loves to entertain and you always have people over for dinner or game nights, it might be worth investing in a nice set or even a few different sets of varying sizes.
When buying a fondue set, ceramic is a better material than stainless steel. Ceramic will hold its heat longer, heat more evenly, and is less likely to burn your cheese or chocolate on the bottom. Avoid electric models if for no other reason than it takes the romance out of fondue. Fondue is also a great way to prepare a meal or occupy some time when the power is out, which is another strike against the electric models. Any other fuel type is fine, and fuel can be found in any kitchen store and most grocery or hardware stores.
Conclusion
Fondue is a wonderful way to bring your family and friends together, slow down, and share a delicious meal that isn’t difficult to prepare. Don’t stress about what to serve with your fondue. It’s meant to be a relaxed affair and an enjoyable experience. Experiment with different types of cheese and other ingredients to create your own unique fondue recipe. And, unless you will use it often, don’t spend a lot of money on a new fondue set, as used ones are easy to find for sale or even to borrow. That leaves only one more question, why aren’t you eating cheese fondue right now?
If you have any questions about cheese fondue that this post didn’t answer please leave them in the comments below.
I have made no secret on this blog about the fact that I love chicken wings. I love them baked, roasted, deep-fried and of course barbecued. Today we are going to look at that last one, BBQ Chicken Wings. If you have never had BBQ Chicken Wings you are seriously missing out. I consider them to be superior to most other types of wings for a lot of reasons. The skin gets crispy, the meat stays tender, and a lot of the fat renders out making them a little bit better for you.
In this post we are going to talk specifically about how to make Sweet and Spicy BBQ Chicken Wings including a quick homemade sauce. However, more broadly, we are going to look at one of the many techniques for barbecuing chicken wings. Don’t worry, we will get to the other techniques over the next few months.
Okay, let’s get to it. This is how to make…
Sweet and Spicy BBQ Chicken Wings
The Sauce
If you want a delicious chicken wing, you need a delicious sauce. For the sauce I decided that I wanted to go with a Southeast Asian influence. To do this I used Sambal as the base which is an Indonesian Chili Sauce. You can usually find it at most grocery stores but if you can’t find it you can use Sriracha or any other hot sauce you prefer. Along with the sambal I used soy sauce (Gluten-Free Tamari), honey, powdered ginger, garlic, and onion. To add a little more tartness to the sauce I also used a touch of rice vinegar. To bulk up the umami flavour I added a touch of fish sauce then finished the sauce with some sesame seeds. This all got whisked together and the sauce was ready.
You can find the full sauce recipe below.
Sweet and Spicy Chicken Wing Sauce
A quick and delicious Sweet and Spicy Chicken Wing Sauce
First things first, I heated my barbecue up over medium heat. Then I went to work on the wings. For the wings I used about two pounds which were slipt meaning the wings and drums were separated. I seasoned them lightly with salt and pepper. Lined them up on the grill then shut the lid and let them cook for four or five minutes.
After five minutes I flipped the wings, turned the heat down a little bit, moved the wings around a little bit to make sure they were all getting even heat. I put the lid back down and cooked them for another five minutes.
Once the wings cooked for about ten minutes in total I took them off the heat, tossed them in the sauce, then placed them back on the barbecue. I cooked the wings for about three minutes per side to bake the sauce on and caramelize a little bit. To me baking the sauce onto the wings is key. This makes the sauce sticky, and a little sweeter. It’s what really makes wings like this special. You can do this with any sauce, not just the sauce I used here.
I check the wings to make sure they were cooked by picking up the biggest wing and pulling the meat away from the bone. If the meat comes away from the bone easily, the wings are done. You can also use a thermometer to make sure the wings reach an internal temperature of 170°F.
With the wings fully cooked, I removed them from the heat, put them on a nice plated and garnished them with some sliced green onions.
Conclusion
It will come as no surprise that I thought these wings were absolutely delicious and I think you will too. As delicious as these were, and yes, you should make them, the important part of this post is really the technique for barbecuing the wings. Season the wings lightly with salt and pepper. Grill them on medium heat for about five minutes per side, sauce them then cook for another three minutes per side. Done and delicious.
A very important thing to remember when barbecuing chicken wings or anything for that matter is heat management. If the wings are flaring up, turn the heat down a little or move them to a cooler part of the grill. If some of the wings aren’t crisping up and others are getting too crisp, switch them. Barbecuing is not a passive style of cooking like baking is for example. With baking you put something together, put it in the oven, then forget about it until it’s cooked. Barbecuing requires much more attention and activity than that.
Thank you for reading and remember to follow the blog so that you never miss a post again. Also, if you enjoyed this post share it on Facebook, Twitter, or Pinterest.
The holidays are almost upon us and we all know what that means; potlucks, parties, and entertaining. For one final time this year I have partnered up with ThinkTurkey.ca and Turkey Farmers of Canada to create not one, not two, not even three, but five delicious Turkey hors d’oeuvres to help you get through this Holiday Season.
So, what did I come up with? To start, Mini Moroccan Spiced Turkey Meatballs, and Turkey and Brie Sliders, then on to Oven-Baked Turkey Tenders with Cranberry Sweet and Sour Sauce, Teriyaki Turkey Skewers, and finally, Southern Braised Turkey on Corn Bread Muffins. Drooling yet?
Let’s take a look!
Mini Moroccan Spiced Turkey Meatballs
With Moroccan spices and apricot, these turkey meatballs are flavourful and have a little pop of sweetness. These could easily be made ahead, frozen and reheated so there ready when you are. One pound of ground turkey makes about two dozen mini meatballs, of course, you can make larger ones and just have them for dinner too.
To make these Mini Turkey Meatballs, combine all the ingredients listed in the recipe below, mix and form into 24 balls. Heat a frying pan over medium heat, add a touch of oil and sauté until cooked through. Easy peasy.
Mini Moroccan Spiced Turkey Meatballs
Delicious little meatballs made with Moroccan Spices and apricot.
The second item I made was Turkey and Brie Sliders with Homemade Green Apple Relish. The turkey patties I made for this could easily be made a bit bigger and used as a great turkey sausage breakfast patty. Seriously, try it.
To make the sliders I mixed some ground turkey with the spices listed below and formed it into small patties. I fried these and then topped them with a slice of brie. I put mine on a gluten-free baguette with a bit of mayo, you can use any kind of bread you’d like.
For the relish, I combined vinegar, sugar, water, salt, and spices in a small pot, brought it to a boil then added in 1 green apple cut into match sticks and half an onion thinly sliced. I cooked this all together for a minute or two, then it was ready to top the sliders.
Turkey and Brie Sliders
Delicious turkey sliders with brie and homemade green apple relish.
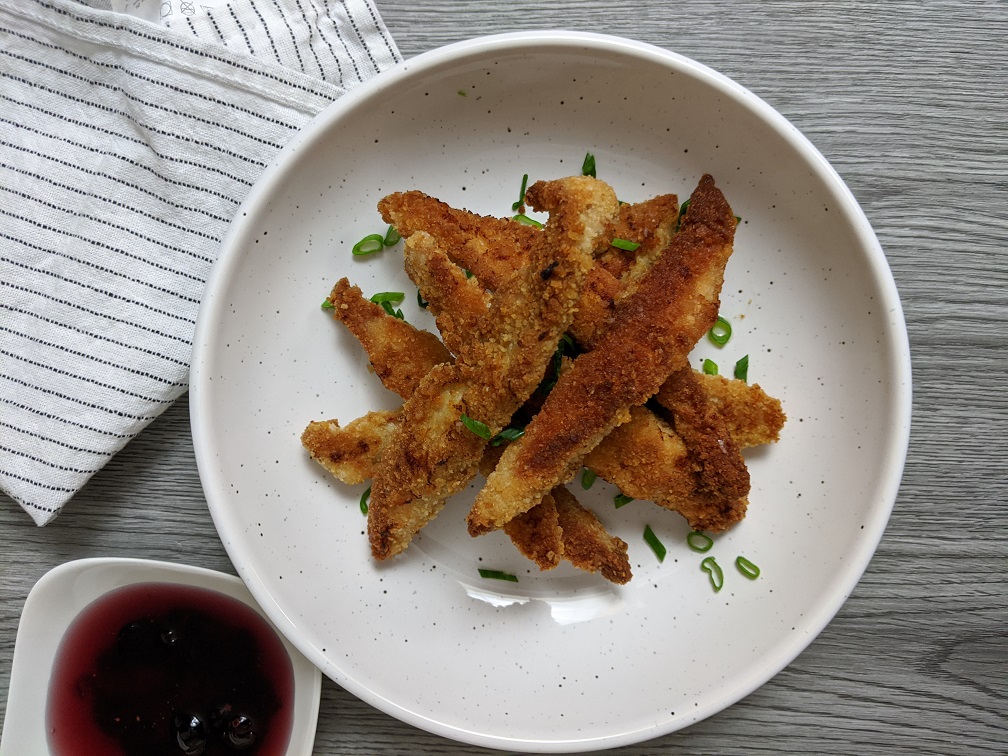
Oven-Baked Turkey Tenders with Cranberry Sweet and Sour Sauce
If I had to choose my number one favourite item from this list, this would be it. The turkey was tender, the breading was crisp, and the sauce was out of this world. I will definitely be adding this into the meal rotation and putting it on my hors d’oeuvre menu.
To make these Turkey Tenders I seasoned some flour (I used gluten-free flour and bread crumbs) with the spices listed below. I breaded the turkey using the standard breading procedure of flour, egg, breadcrumbs. Then I baked the turkey on a greased baking sheet on 400°F for a total of about 25 minutes.
For the sauce, I combined sugar, vinegar, cranberry juice, and dried cranberries in a pot and brought it to a boil. I then added a mixture of cornstarch and water to thicken it.
I cannot stress enough how much you need to make these. You will be so, so happy that you did.
Oven-Baked Turkey Tenders
These Turkey Tenders will not only become an entertaining staple but you will want to eat them every day of the week. Pair them with the cranberry sweet and sour sauce and you have a real winner.
Little pieces of turkey breast put on a skewer and baked with a simple homemade teriyaki sauce, who isn’t going to love that?
These are about as straightforward as it comes. Thinly slice the turkey, put it on skewers, baste with the sauce and bake.
The sauce is a mixture of soy sauce (I used gluten-free tamari), sugar, rice vinegar, and water. That’s it. Boil this until it’s thick and you are good to go.
Teriyaki Turkey Skewers
Simple and delicious Turkey Skewers with homemade Teriyaki Sauce
Southern Braised Turkey Breast on Cornbread Muffins
There really isn’t too much I can say about these except, “OH MY GOD!” These are my second favourite on this list and for good reason. They taste amazing. The turkey is braised in a southern style BBQ sauce made with ketchup, vinegar, liquid smoke (can be found at most grocery stores), brown sugar, garlic, onion, and a touch of chili. Once the turkey was cooked I pulled it apart with two forks pulled pork style and served it on the best cornbread muffins I have ever had. (Find the cornbread recipe here)
While I was making these Southern Braised Turkey Cornbread Muffins, I debated adding cheese, or jalapeno, or any number of other things, but at the end of the day, nothing was needed. These were so good on their own that I left them alone and let the simplicity of them speak for itself.
I can’t really express how much fun I had creating these recipes and making this post. Not only did I get to push my creativity a little but I got to eat some really, really good food. I can not be more serious when I say that you need to try at least a couple of the apps on this list. You, your family, your friends, and your guests will be so happy that you did.
Remember to think turkey all year round not just at the holidays, it can be so many delicious things. And for even more great turkey recipes go to ThinkTurkey.ca
We use cookies on our website to give you the most relevant experience by remembering your preferences and repeat visits. By clicking “Accept”, you consent to the use of ALL the cookies.
This website uses cookies to improve your experience while you navigate through the website. Out of these, the cookies that are categorized as necessary are stored on your browser as they are essential for the working of basic functionalities of the website. We also use third-party cookies that help us analyze and understand how you use this website. These cookies will be stored in your browser only with your consent. You also have the option to opt-out of these cookies. But opting out of some of these cookies may affect your browsing experience.
Necessary cookies are absolutely essential for the website to function properly. This category only includes cookies that ensures basic functionalities and security features of the website. These cookies do not store any personal information.
Any cookies that may not be particularly necessary for the website to function and is used specifically to collect user personal data via analytics, ads, other embedded contents are termed as non-necessary cookies. It is mandatory to procure user consent prior to running these cookies on your website.