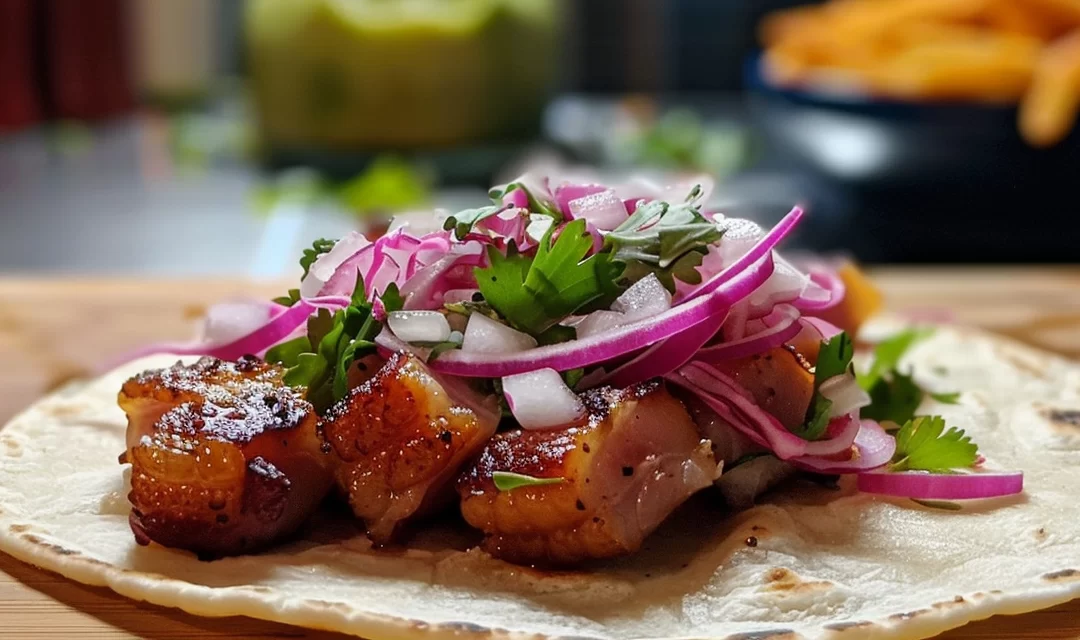
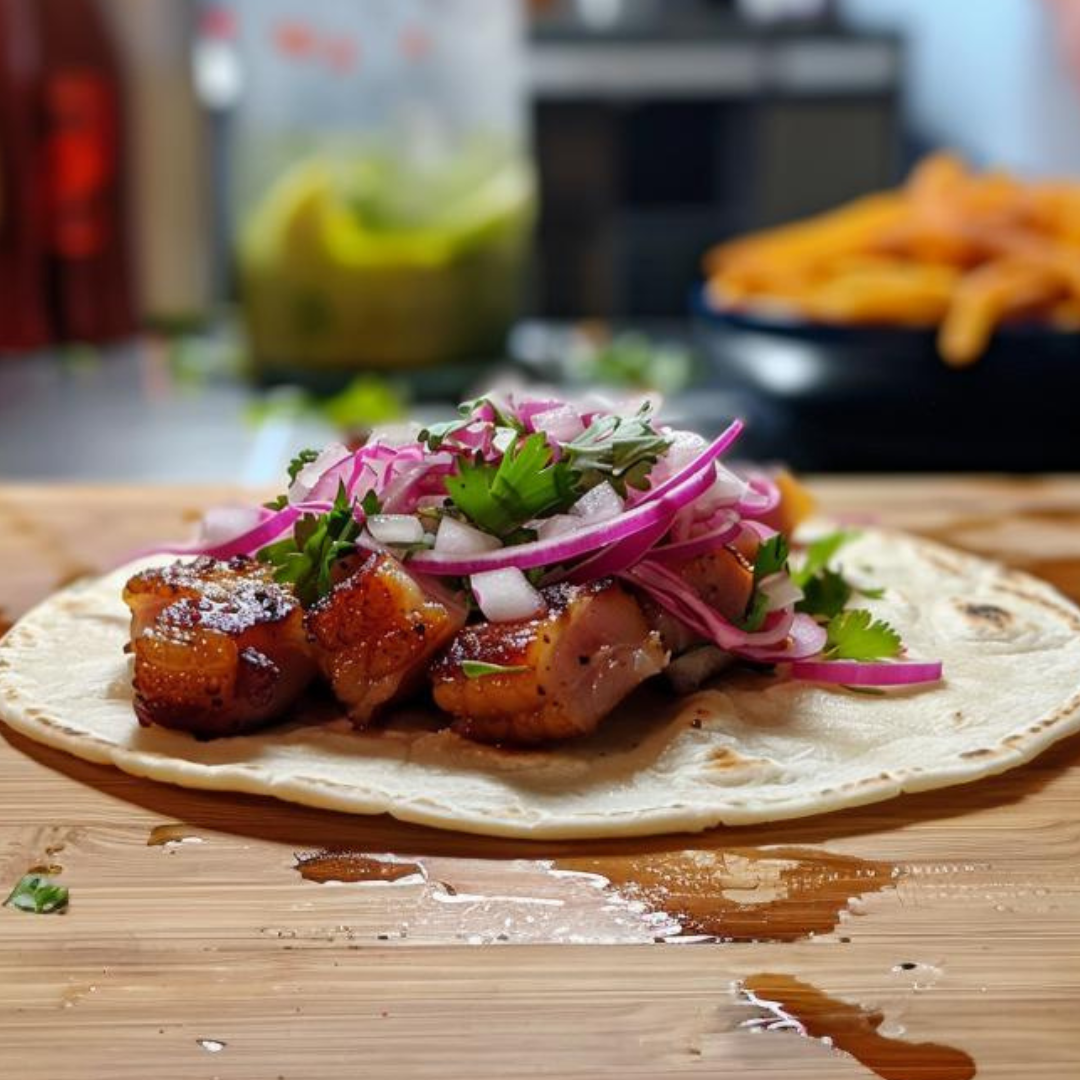
Diving into the world of tacos, there’s one variation that stands out for its bold flavours and irresistible crunch: the crispy pork belly taco recipe. This dish is a game-changer for anyone looking to elevate their taco night. It marries the deep, savoury notes of crispy pork belly with the vibrant zing of pickled red onions and fresh cilantro, all tucked into a soft tortilla embrace. It’s not just a meal; it’s a sensory journey that balances richness with freshness, creating a taste profile that’s hard to forget.
The Star Ingredient: Crispy Pork Belly
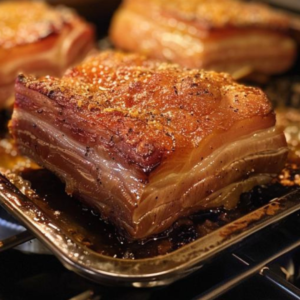
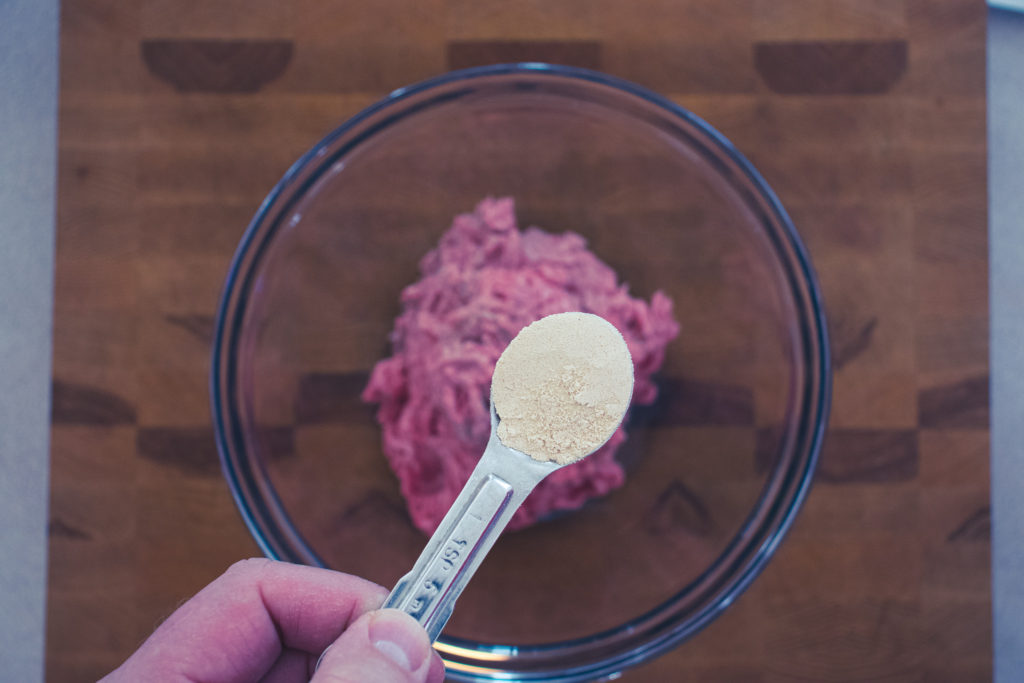
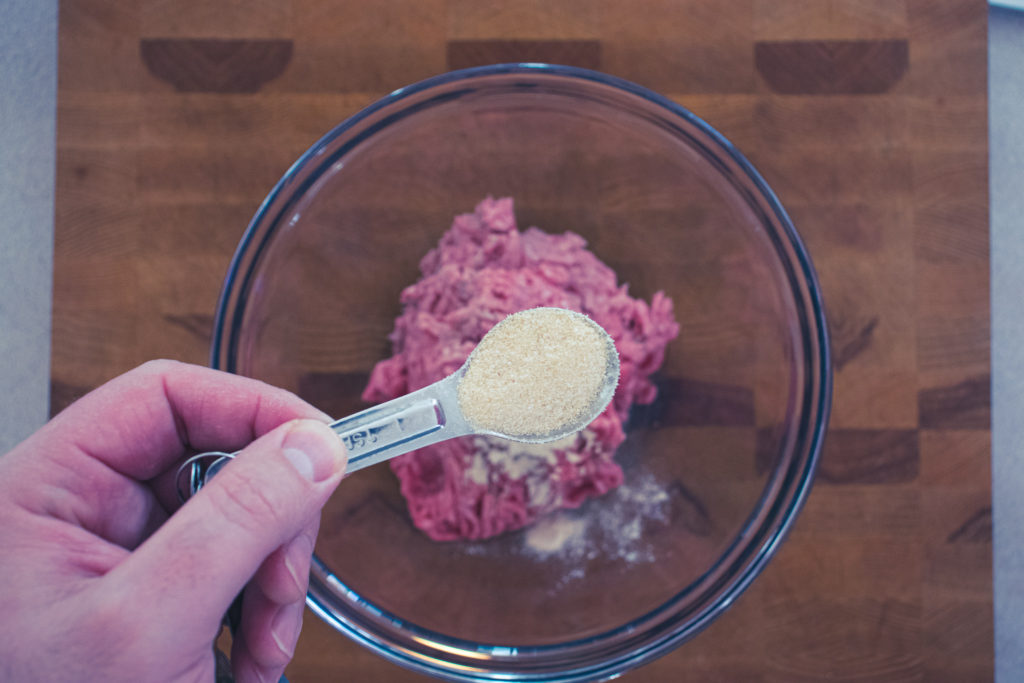
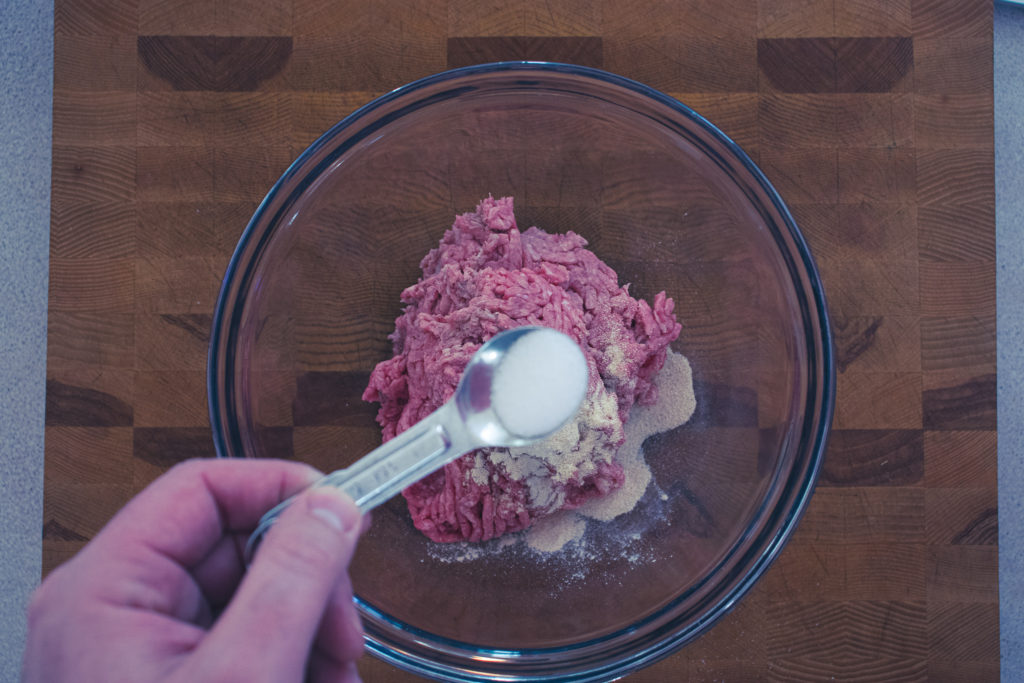
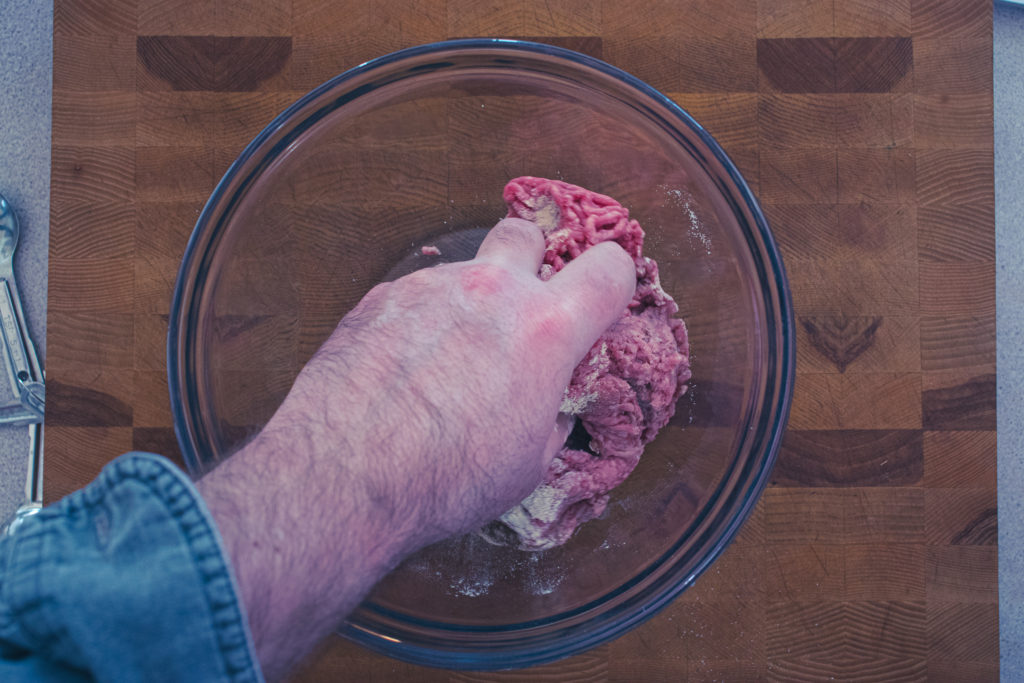
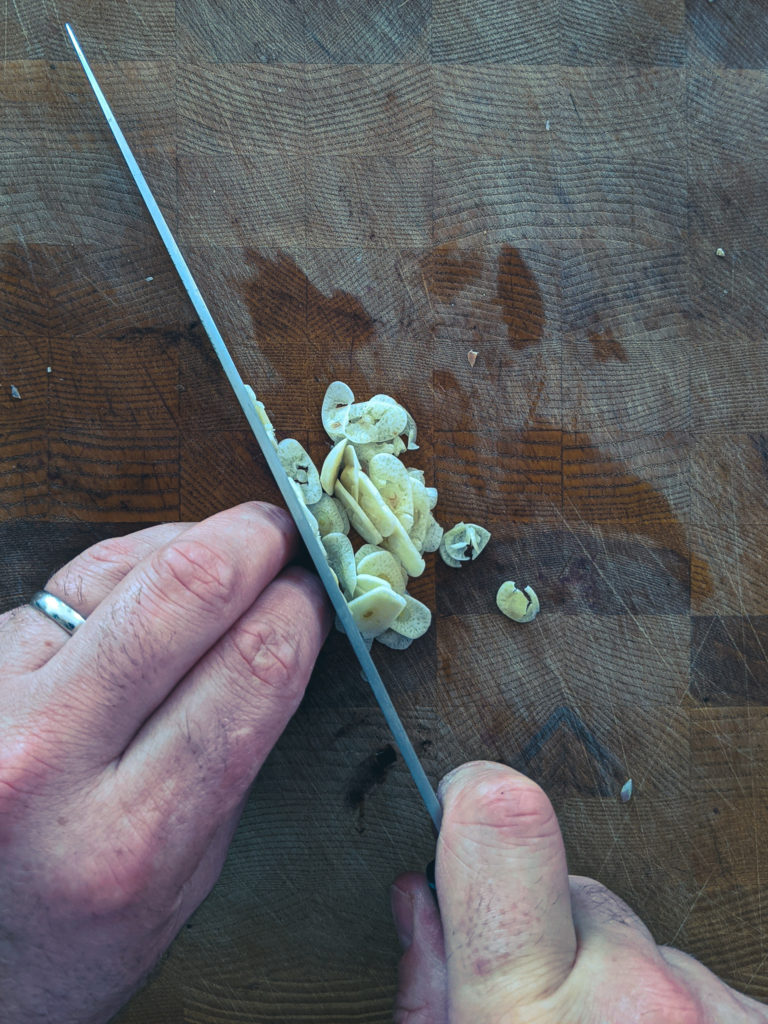
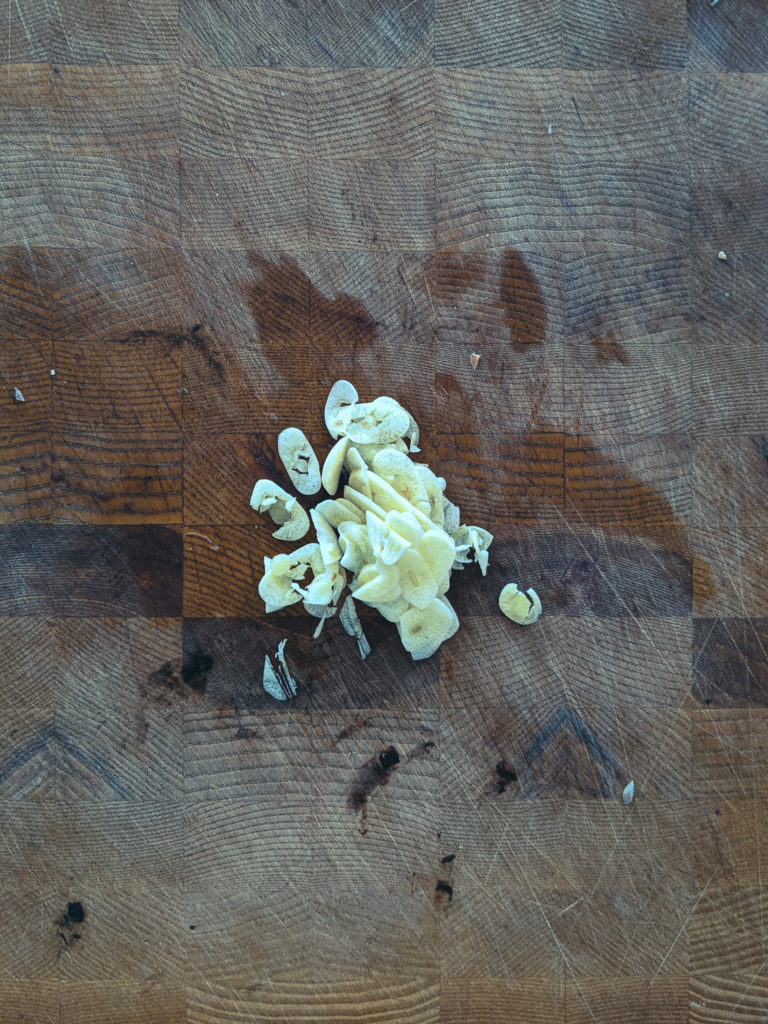
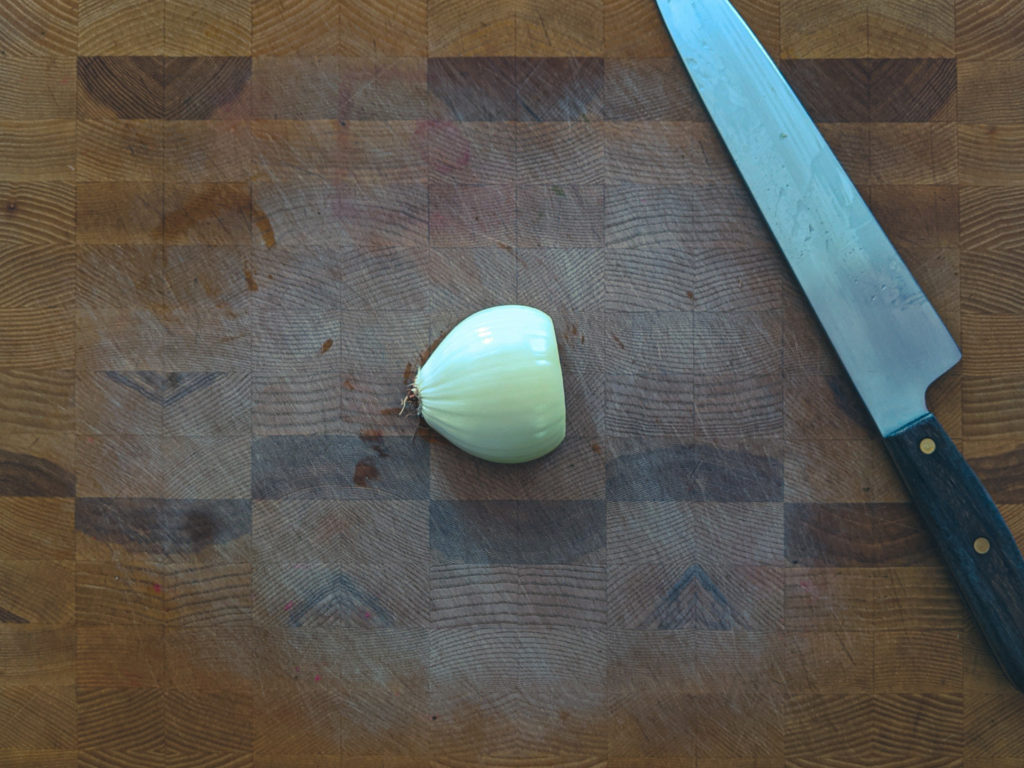
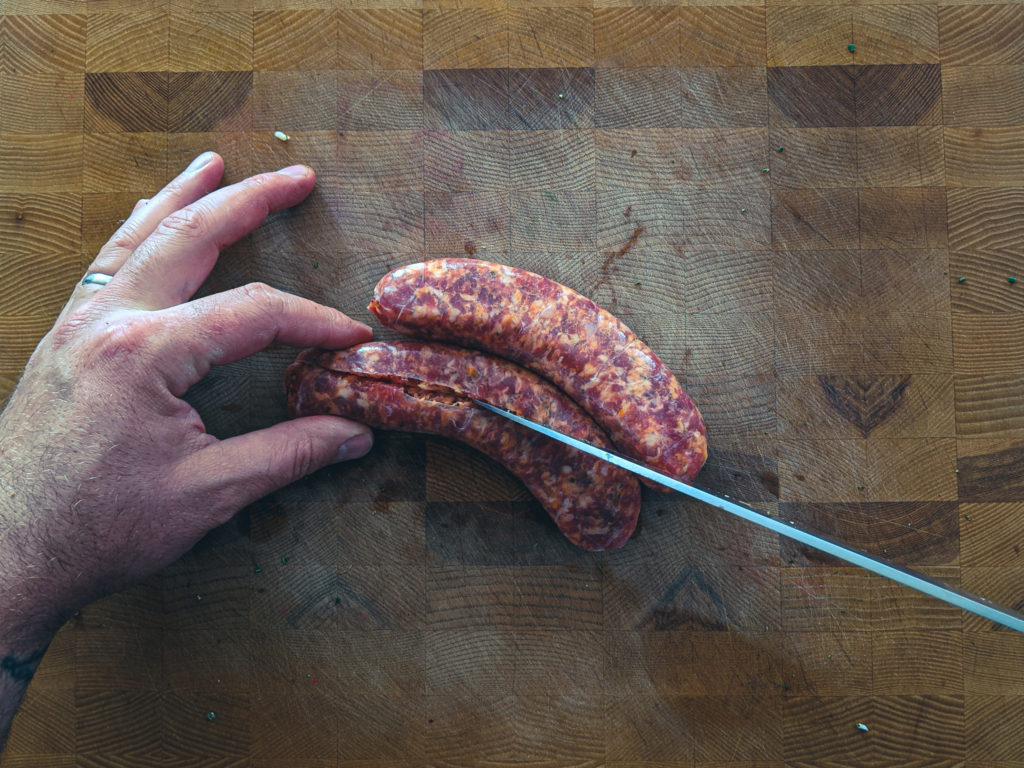
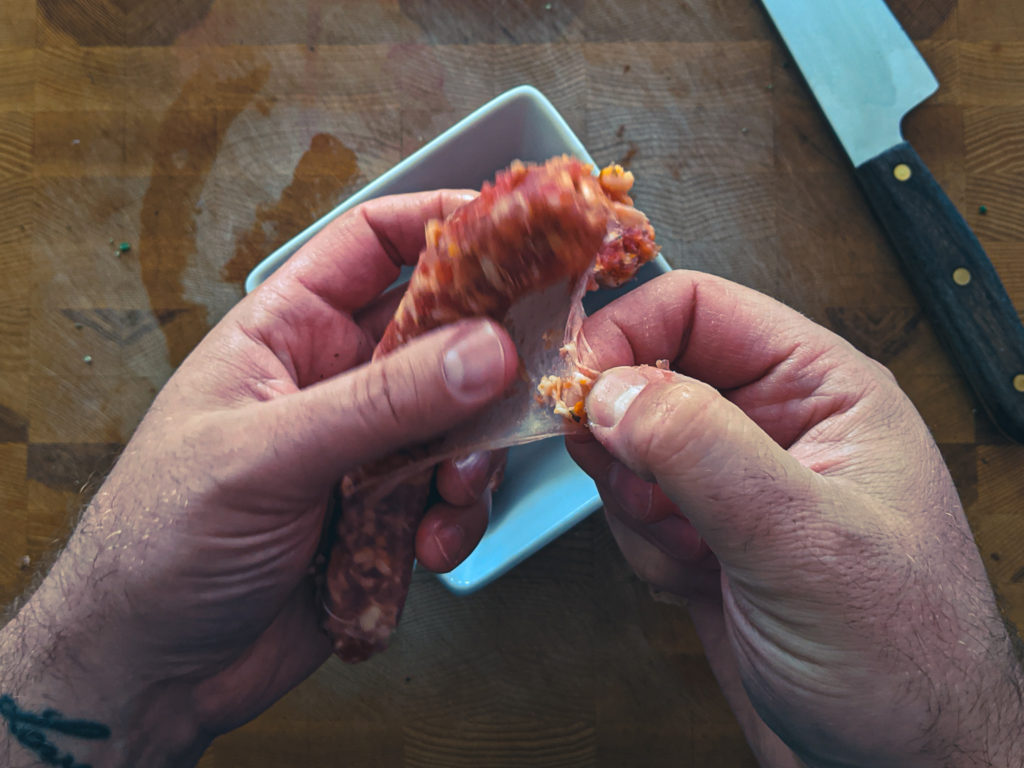
Pork belly, with its perfect ratio of meat to fat, is the heart of this recipe. Seasoning it with a mix of sea salt, black pepper, and smoked paprika not only enhances its flavour but also sets the stage for that ultimate crispy finish we’re all after. The secret lies in slow-roasting it first to tender perfection, then giving it a high-heat blast to crisp up the skin. This process might test your patience, but the result is succulent pork with a crackling exterior that’s totally worth the wait.
The Fresh Twist: Pickled Red Onions
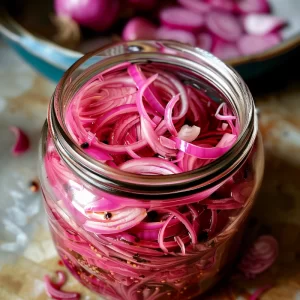
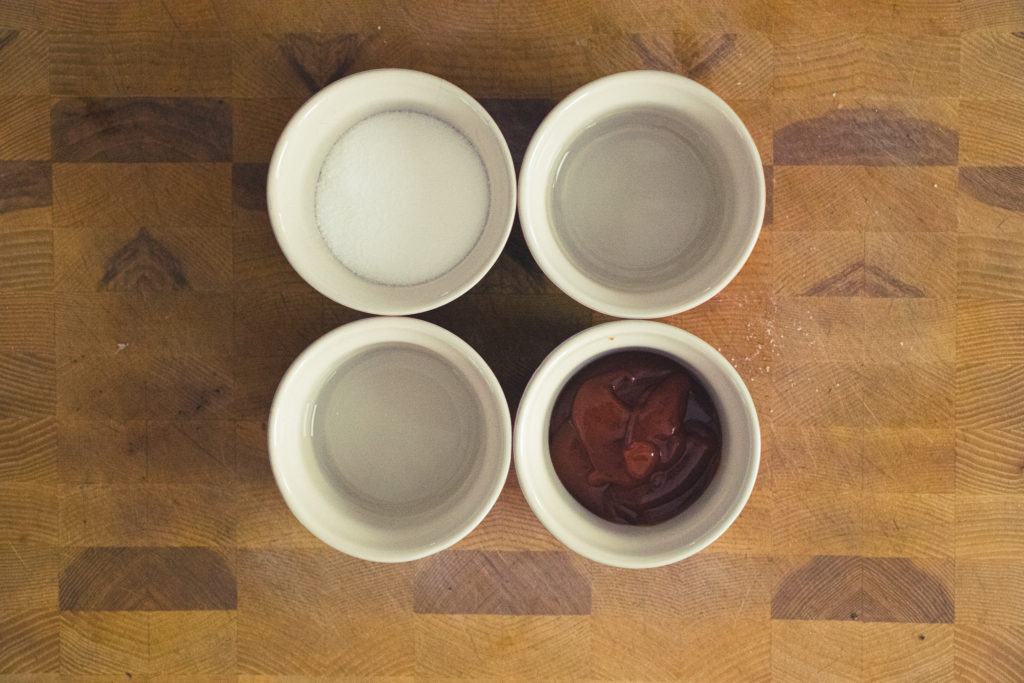
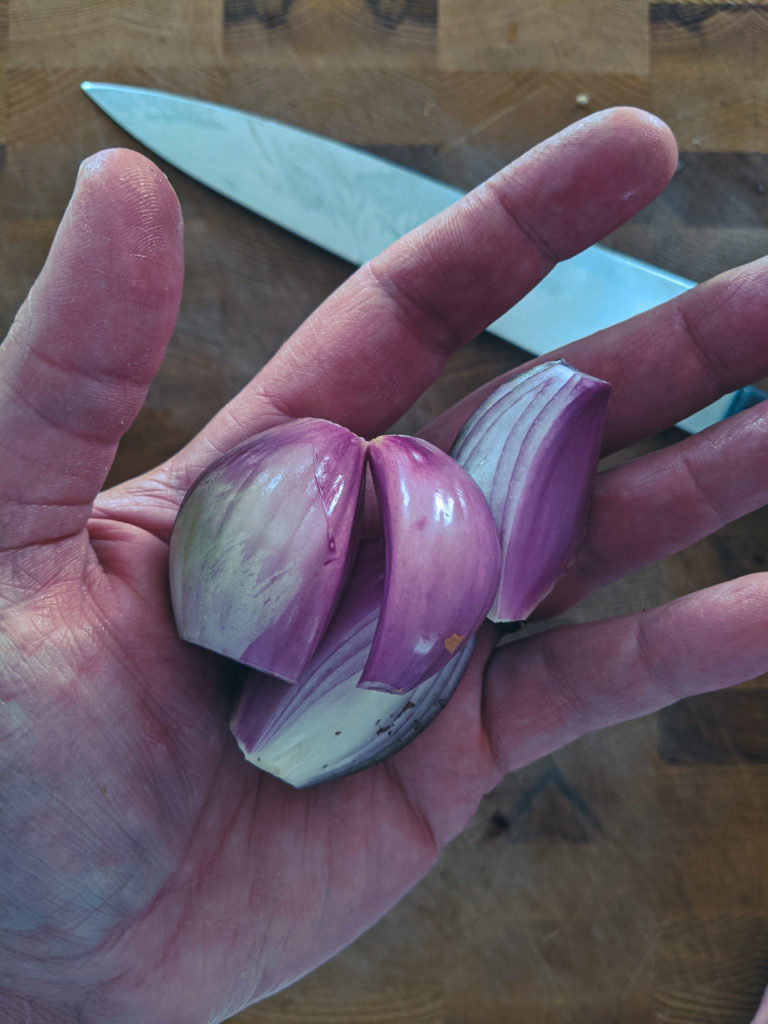
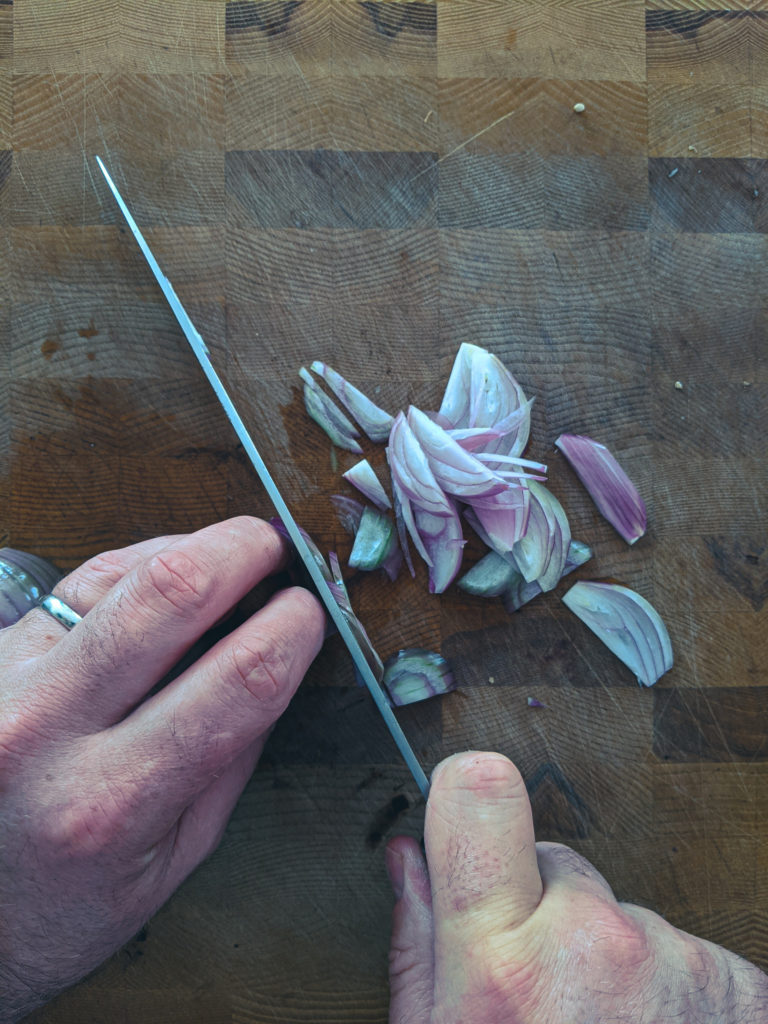
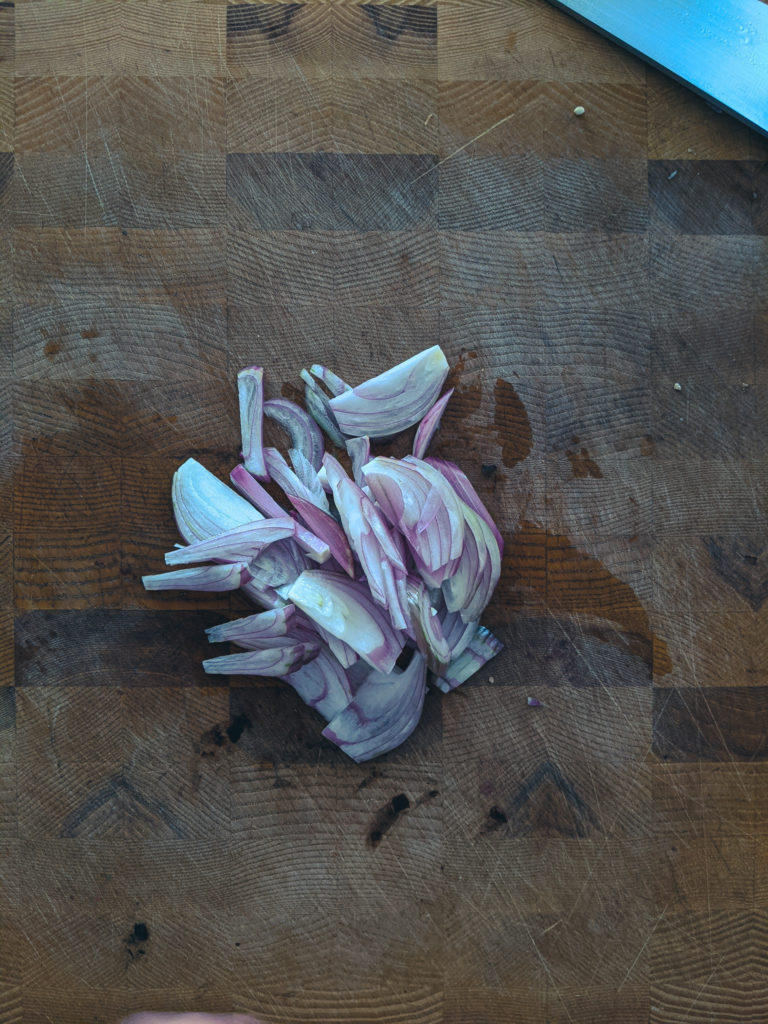
What really brings these tacos to life is the pickled red onions. Their sharpness and slight sweetness cut through the richness of the pork belly, adding a layer of complexity to each bite. Making them is simple. Combine apple cider vinegar, sugar, salt, and warm water. Letting the onions sit in this pickling solution, whether for an hour or overnight, transforms them into a tangy condiment that you’ll want to add to everything.
Assembly: The Final Touch
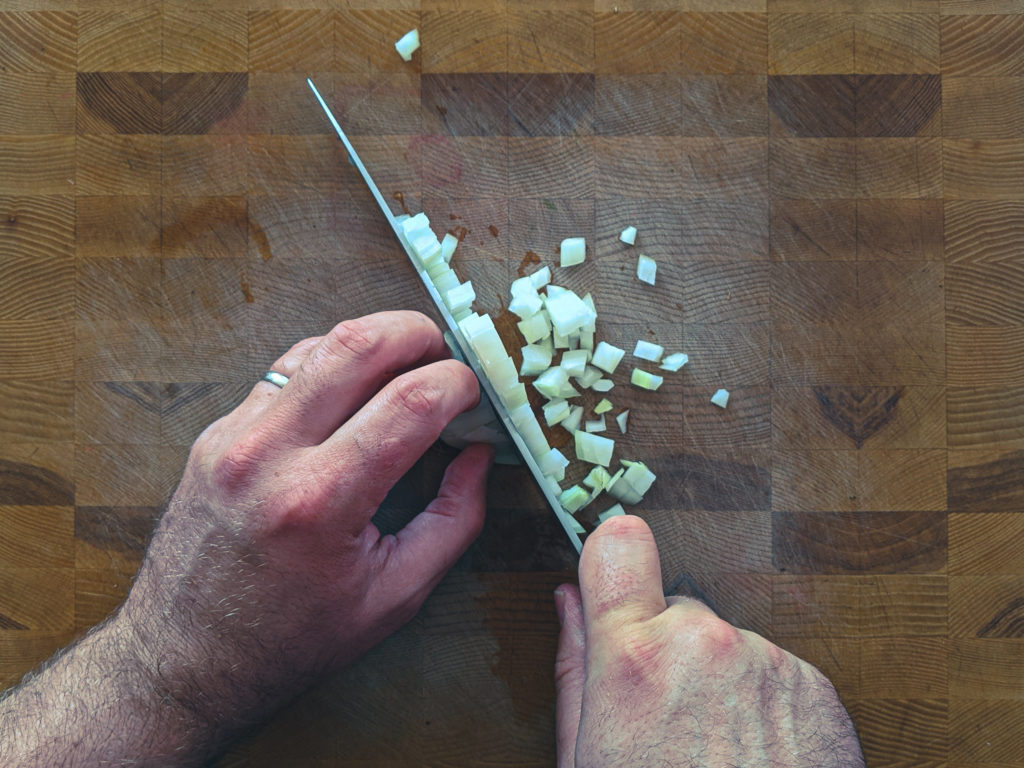
With the pork belly perfectly roasted and the onions pickled, assembling the tacos is where the fun really begins. Lay down a warm tortilla, add a generous helping of pork belly cubes, and top them with vibrant onions and fresh cilantro leaves. A squeeze of lime juice over the top brings a bright pop of acidity that ties everything together beautifully.
Why It Works
This crispy pork belly taco recipe isn’t just about combining ingredients; it’s about creating a balance. The richness of the pork is offset by the acidity of the pickled onions, while the cilantro adds a burst of freshness that elevates the entire dish. The contrast of textures—from the crunch of the pork skin to the softness of the tortilla—makes every bite a delight.
In summary, crispy pork belly tacos are more than just a meal; they’re an experience. They bring together the best of what tacos have to offer: bold flavours, contrasting textures, and the joy of customization. Whether it’s a casual dinner or a special occasion, these tacos promise to be a hit, proving that with the right ingredients and a bit of patience, taco night can be nothing short of extraordinary.
Pork Taco Recipe
Pork Belly Tacos
These tacos combine the rich, savory flavor of crispy pork belly with the fresh punch of pickled red onions and cilantro, all nestled in a soft tortilla. It's a fusion of textures and tastes that'll give your taste buds a real fiesta.
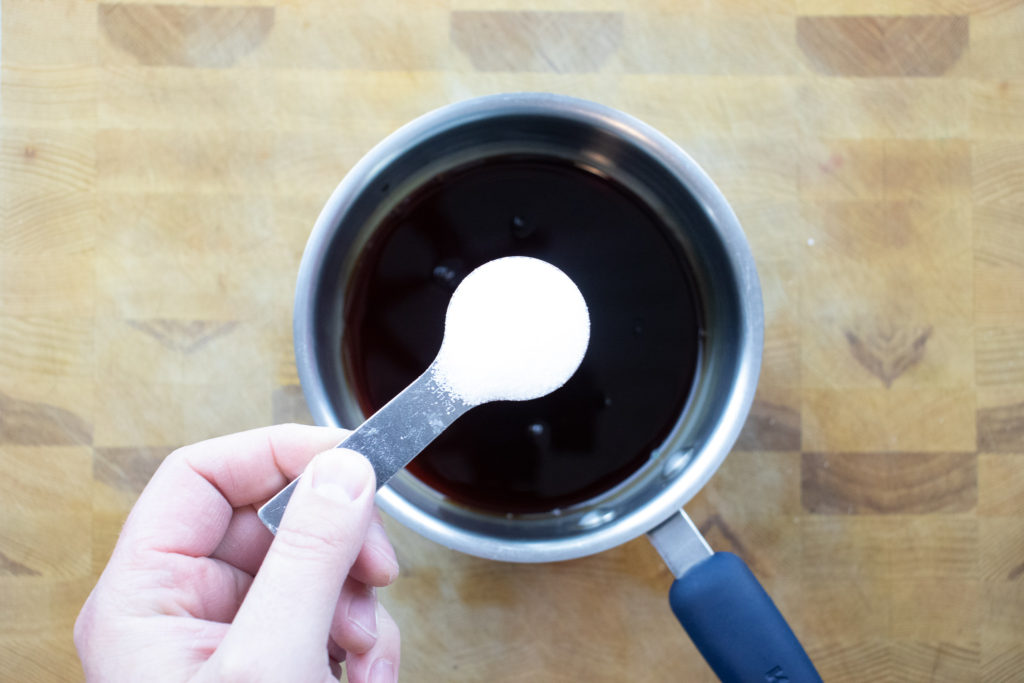
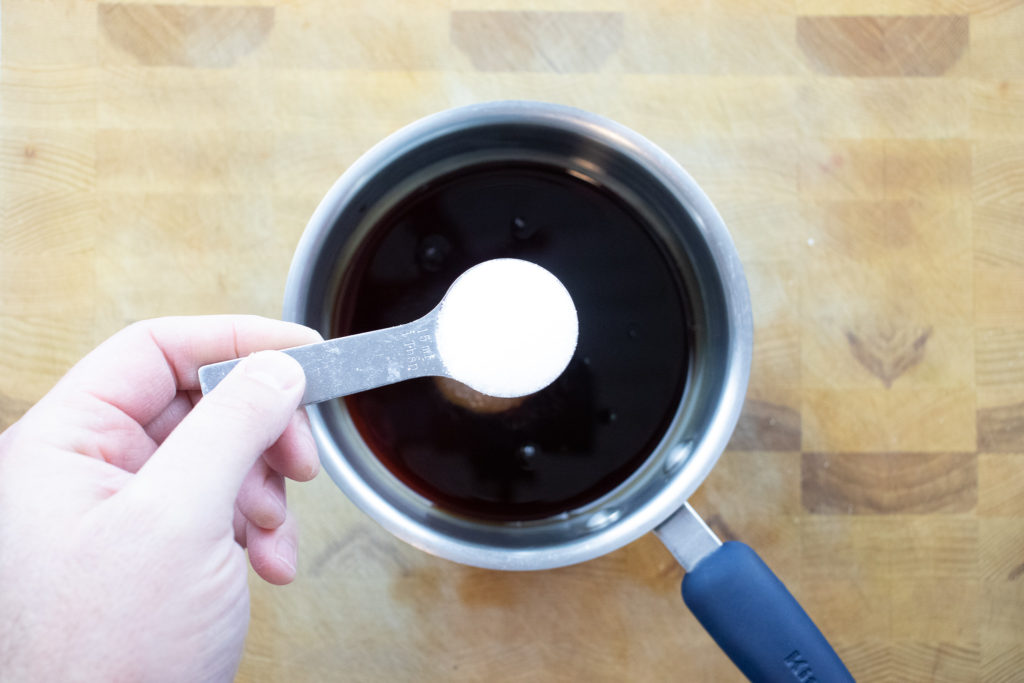
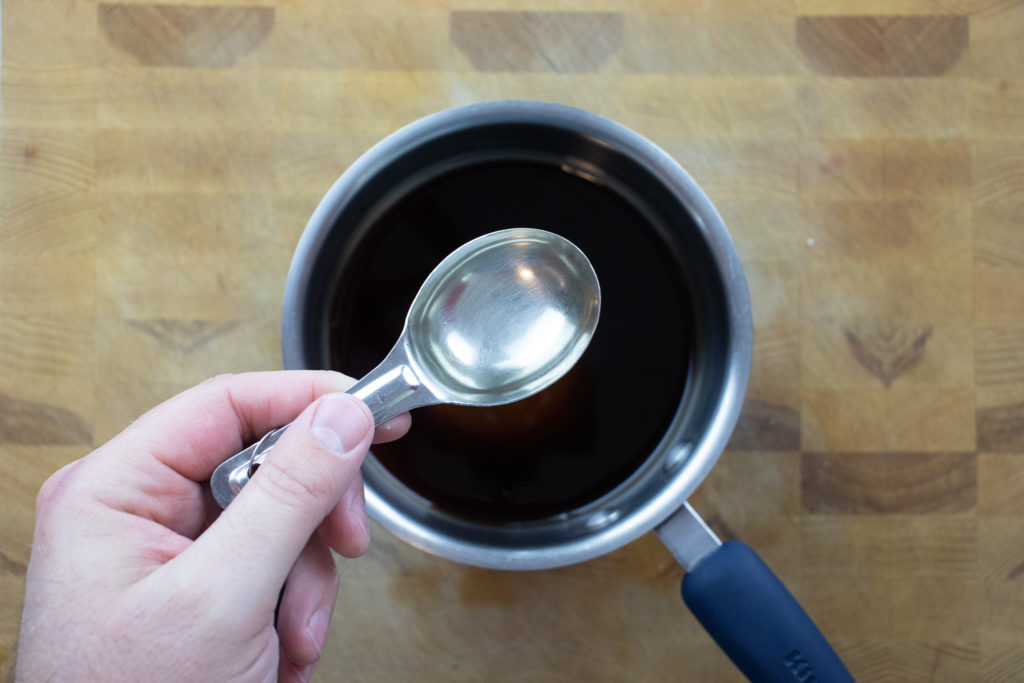
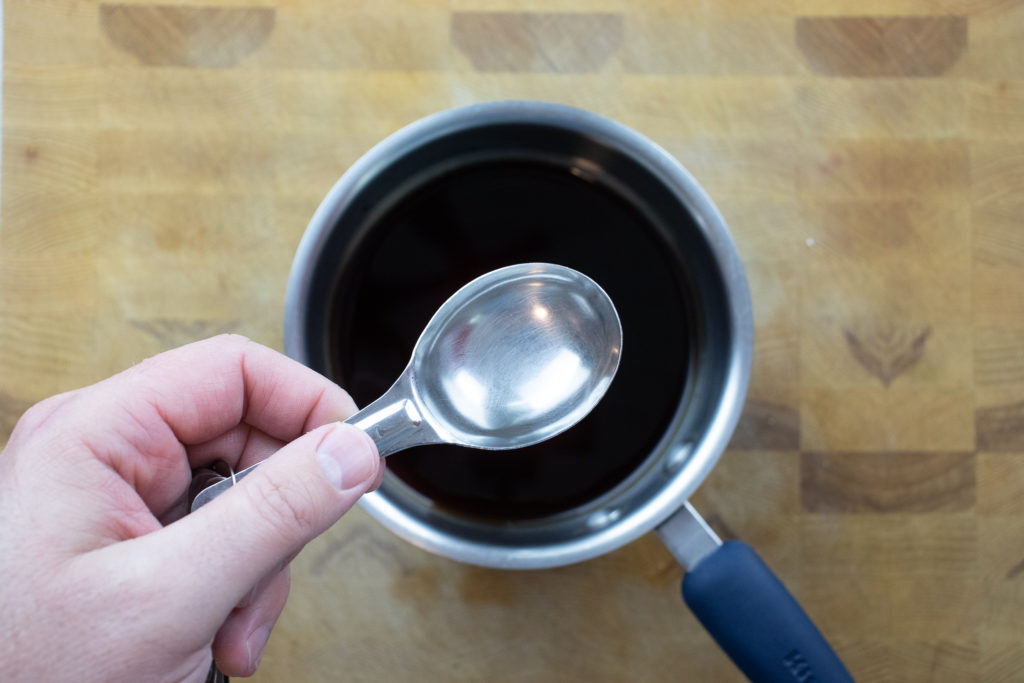
Start by pickling the onions: In a jar, combine apple cider vinegar, sugar, salt, and warm water. Stir until the sugar and salt are dissolved. Add the red onions, ensuring they are fully submerged. Let sit for at least 1 hour or refrigerate overnight for best results.
Preheat the oven to 250°F (120°C). Season the pork belly on all sides with salt, pepper, and smoked paprika. Place on a wire rack over a baking sheet and cook for 2-3 hours until tender.
Increase oven temperature to 400°F (205°C) and roast the pork belly for an additional 20-30 minutes until the skin is crispy.
Remove the pork belly from the oven and let it rest for 10 minutes before cutting into bite-sized cubes.
To assemble the tacos, place a few pieces of crispy pork belly on each warmed tortilla.
Top with pickled red onions, fresh cilantro leaves, and a squeeze of lime juice.
Serve immediately with extra lime wedges on the side.
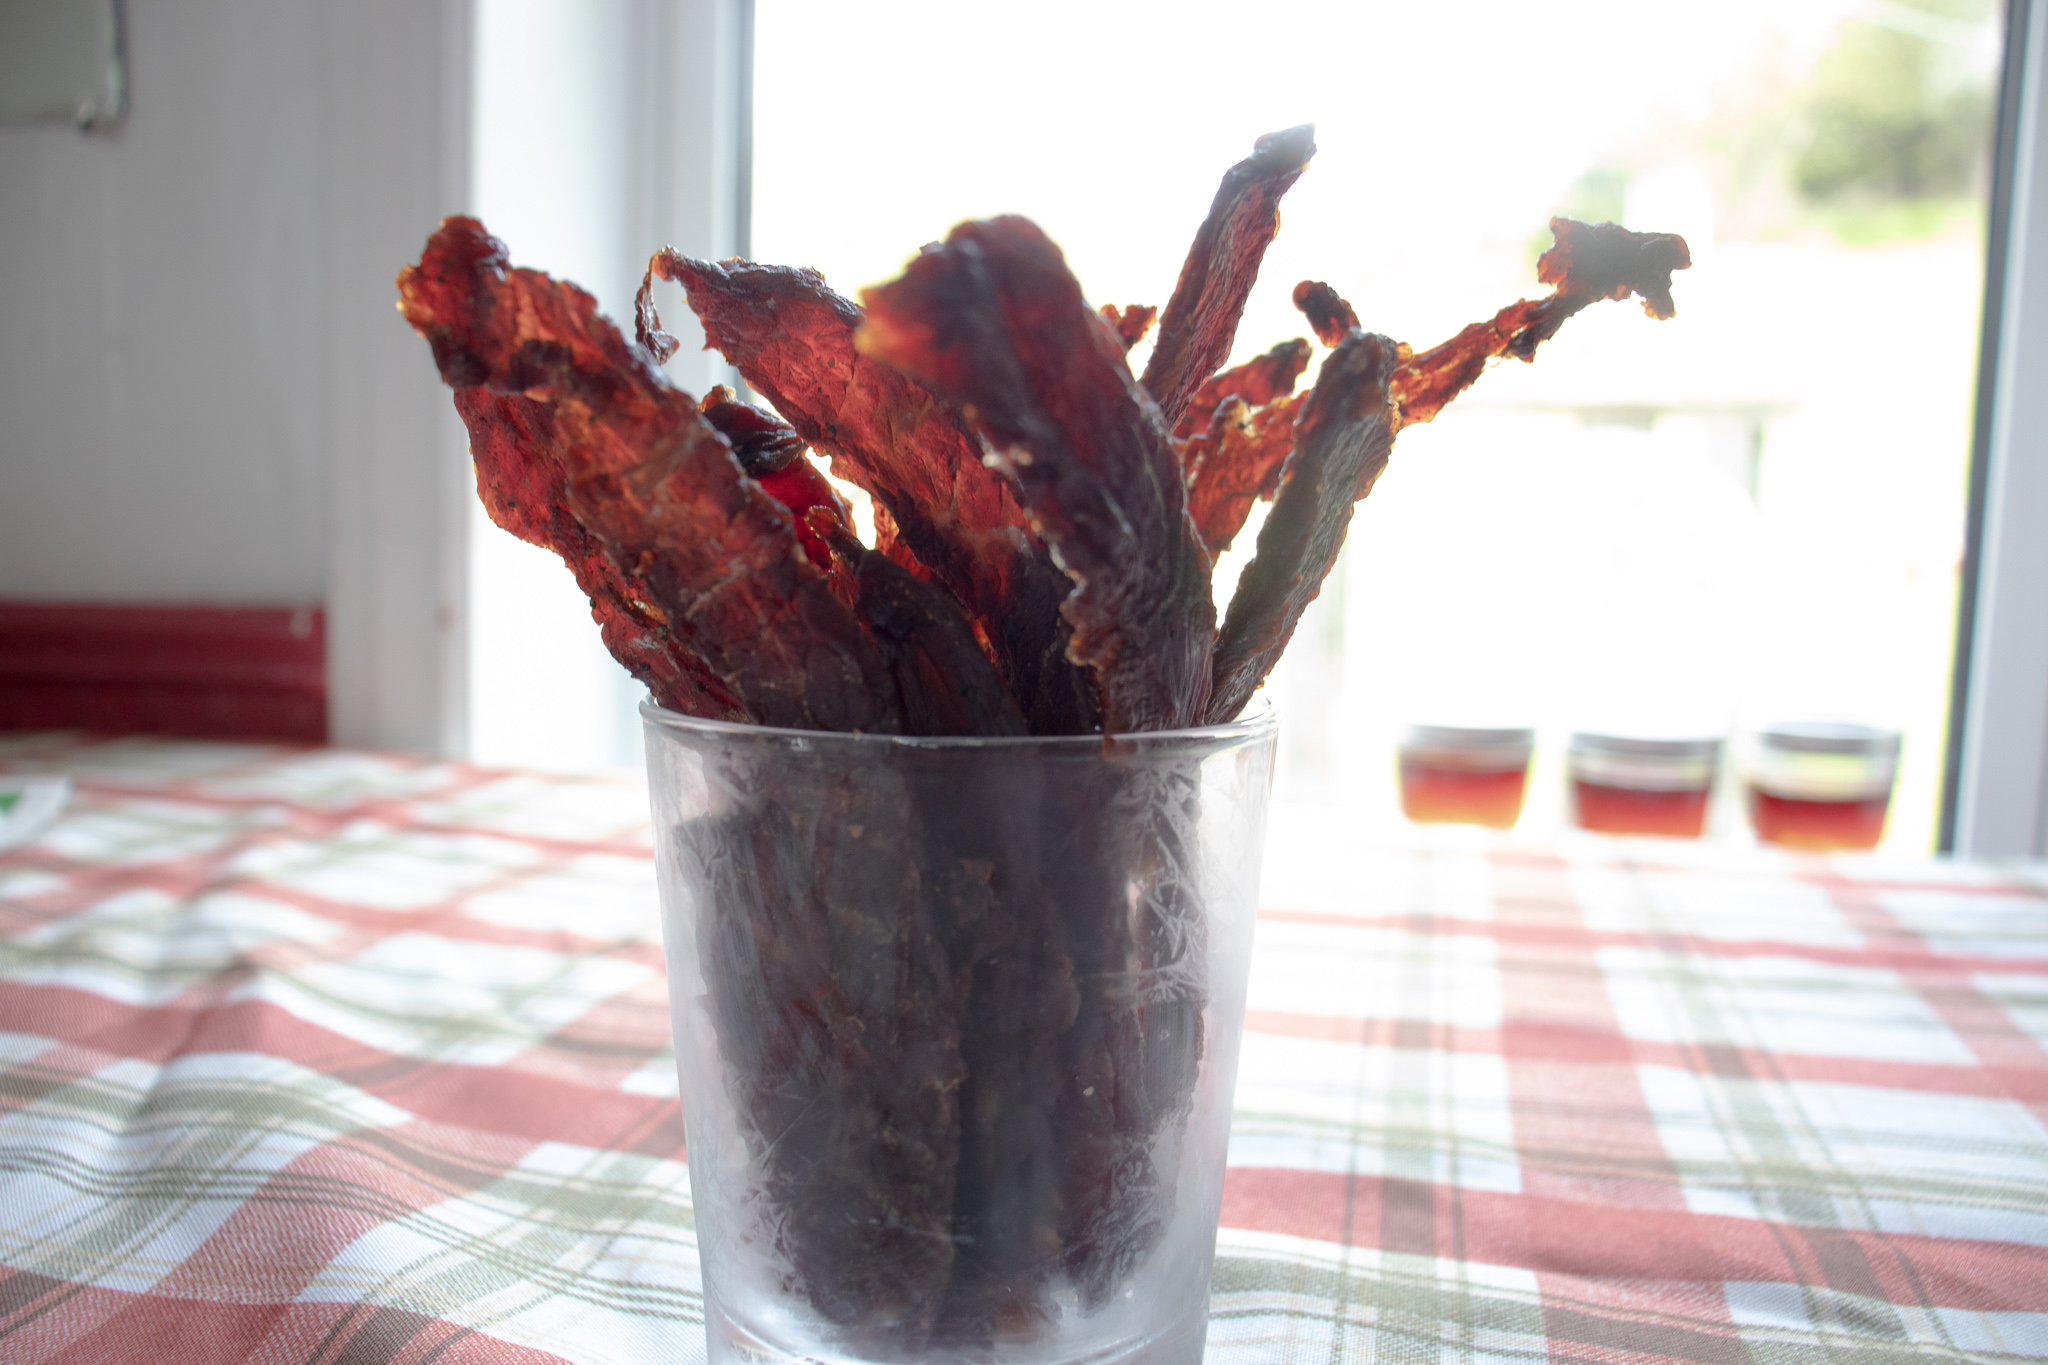
Looking for the ultimate snack to fuel your next adventure? Look no further than homemade teriyaki beef jerky! Not only is this savoury treat low in fat and high in protein, but it’s also free of preservatives and nitrates, making it a healthier choice than store-bought jerky. And the best part? It’s easy to make! Follow the step-by-step recipe for a mouthwatering, protein-packed snack that will satisfy your cravings and keep you going strong. This is my go-to recipe for homemade teriyaki beef jerky, and I’m sure it will be yours too.
How To Make Teriyaki Beef Jerky Marinade
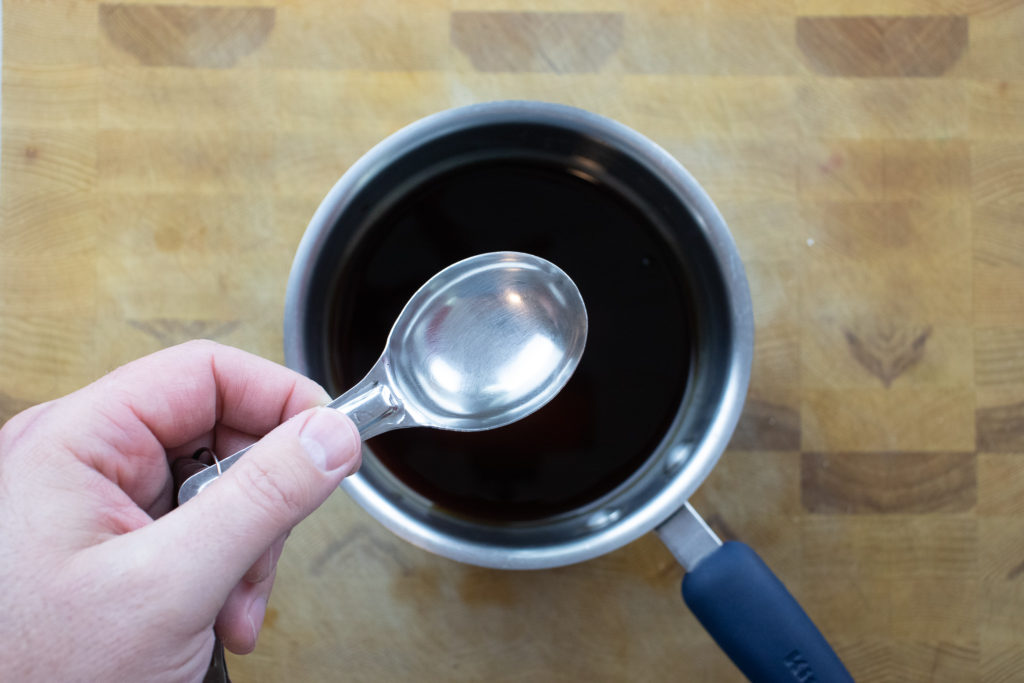
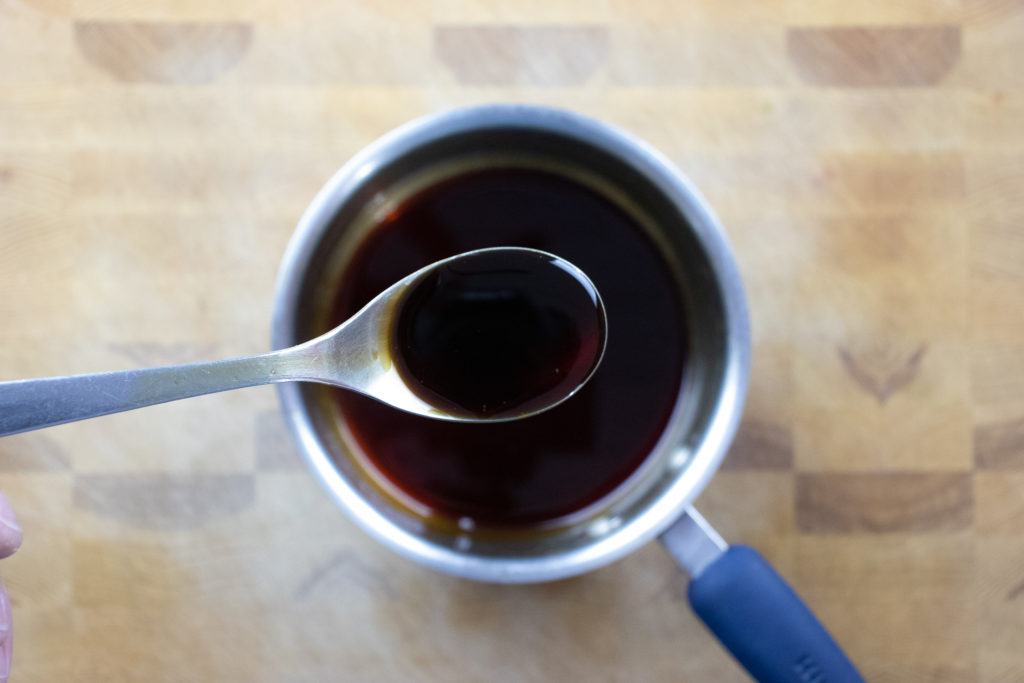
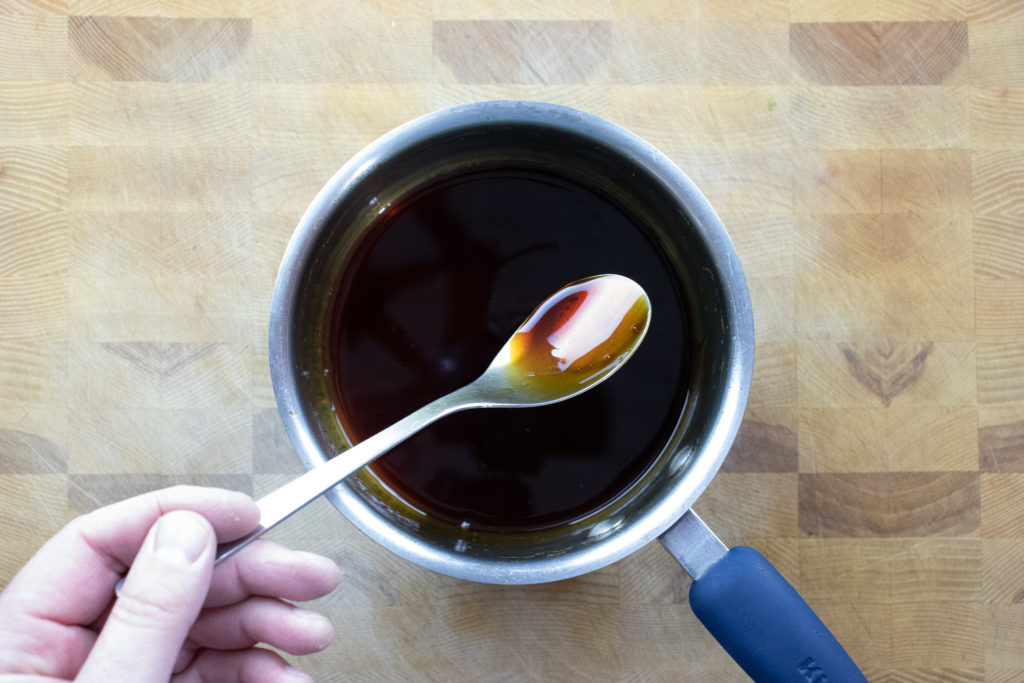
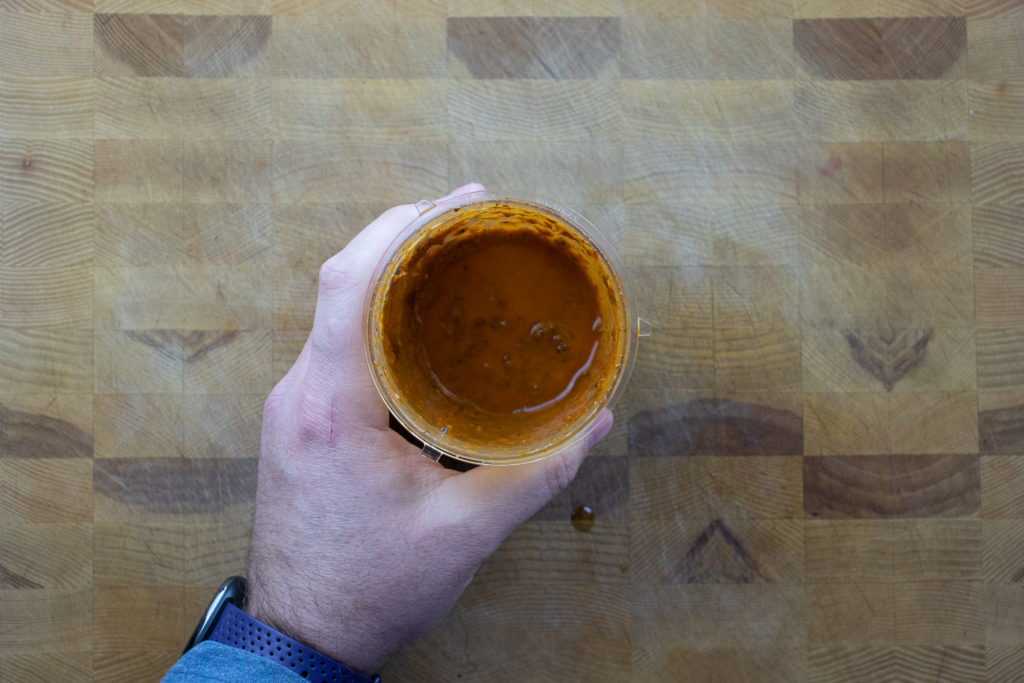
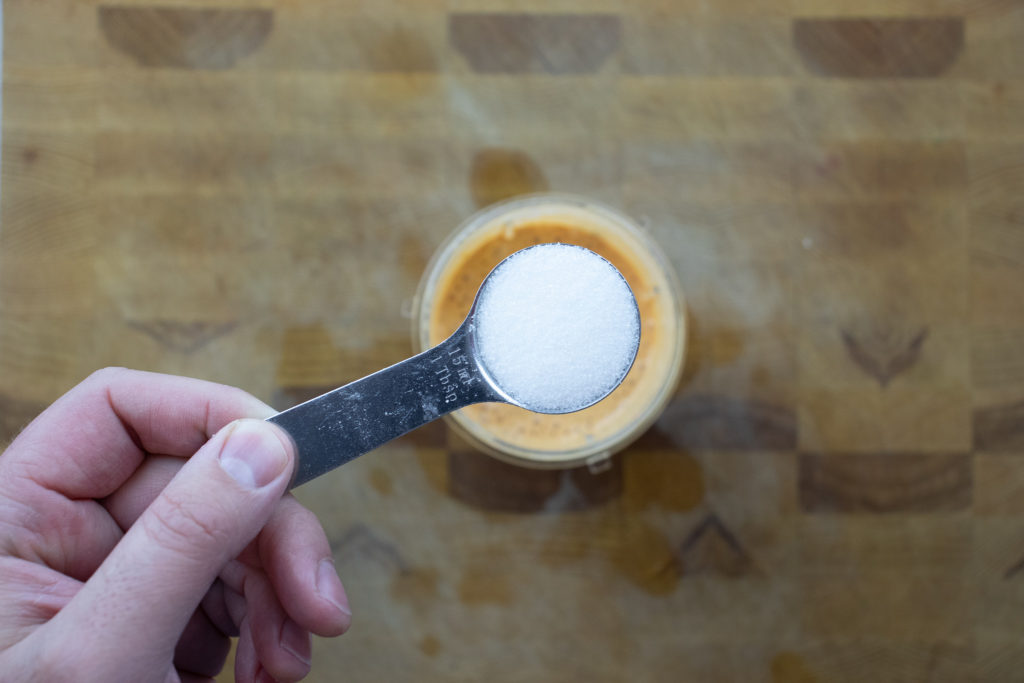
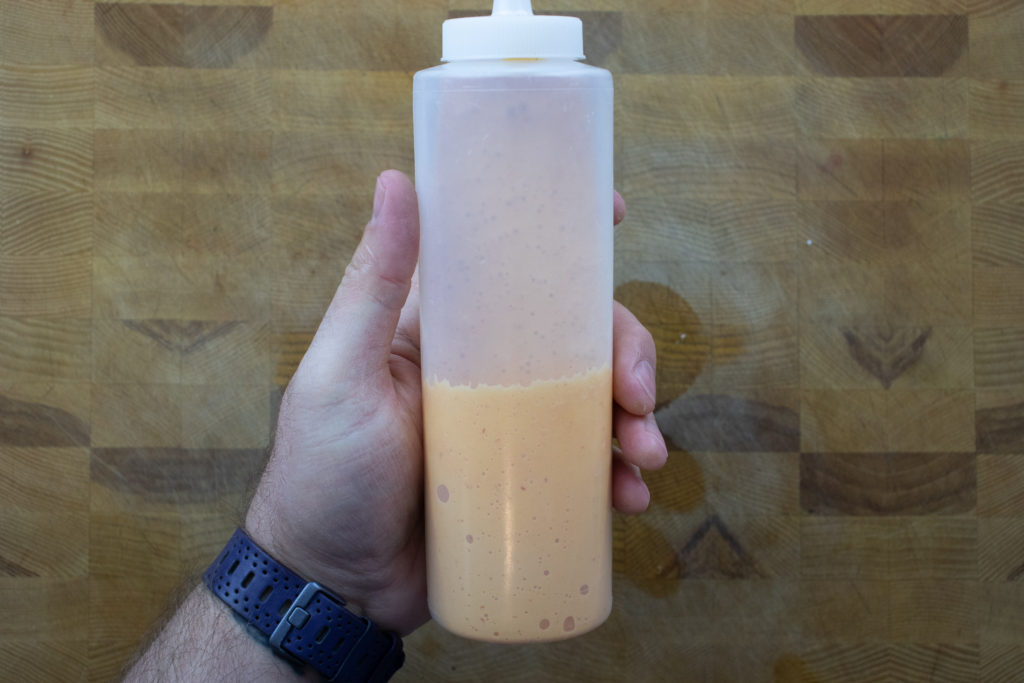
The first step in this Teriyaki Beef Jerky recipe is to make the Teriyaki marinade. Start with soy sauce or gluten-free tamari (that’s what I used), add some sugar, rice or white wine vinegar, and a bit of water. Bring all of that to a boil, and cook it for about two and a half minutes. Next, take the Teriyaki marinade off the heat and let it cool to room temperature. If you’d like, you can add one teaspoon each of puréed ginger and garlic to the marinade as it is cooking. The measurements are in the recipe at the bottom of the page.
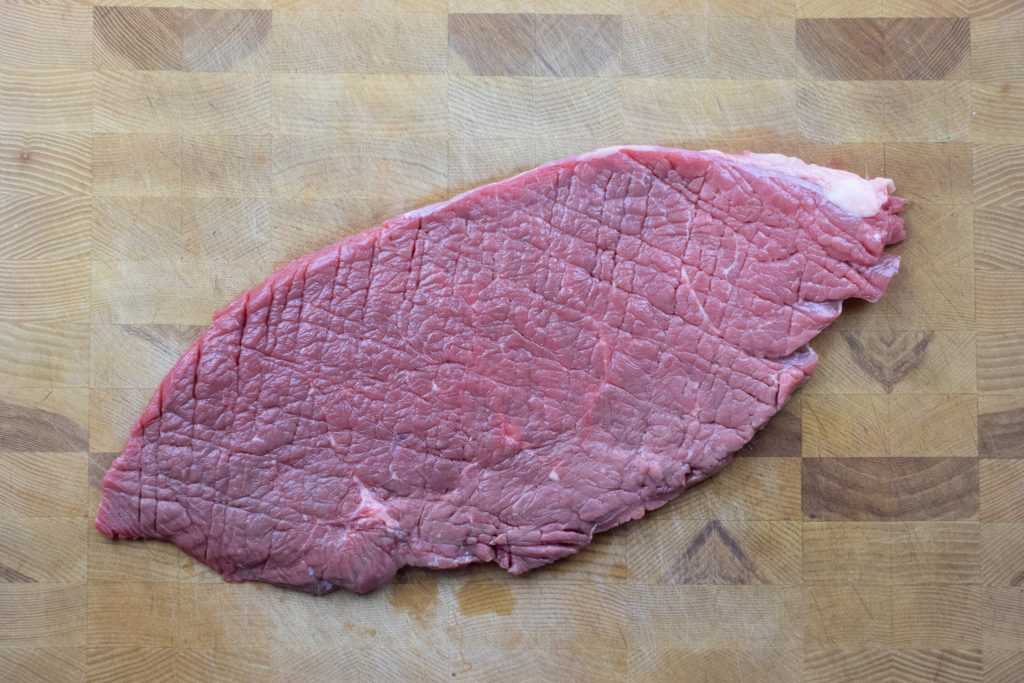
Preparing Beef For Jerky
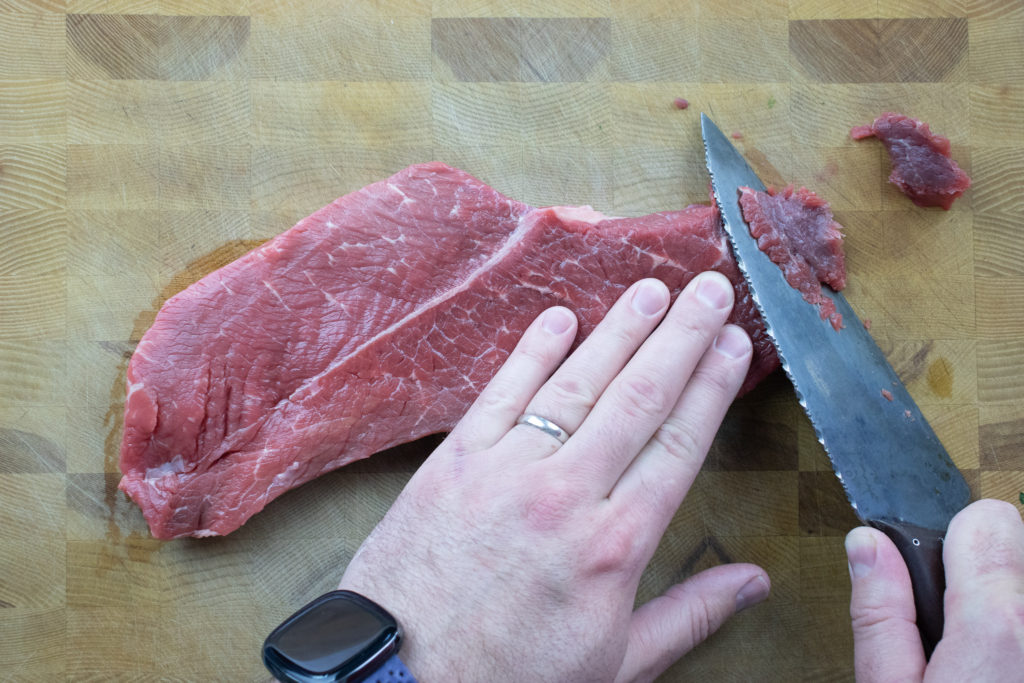
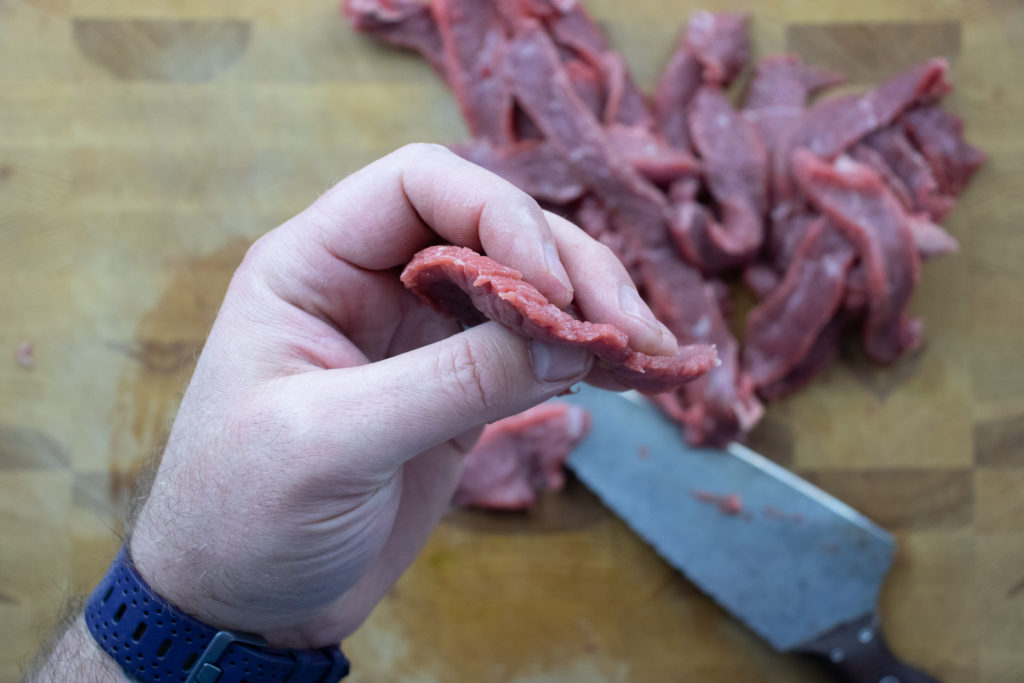
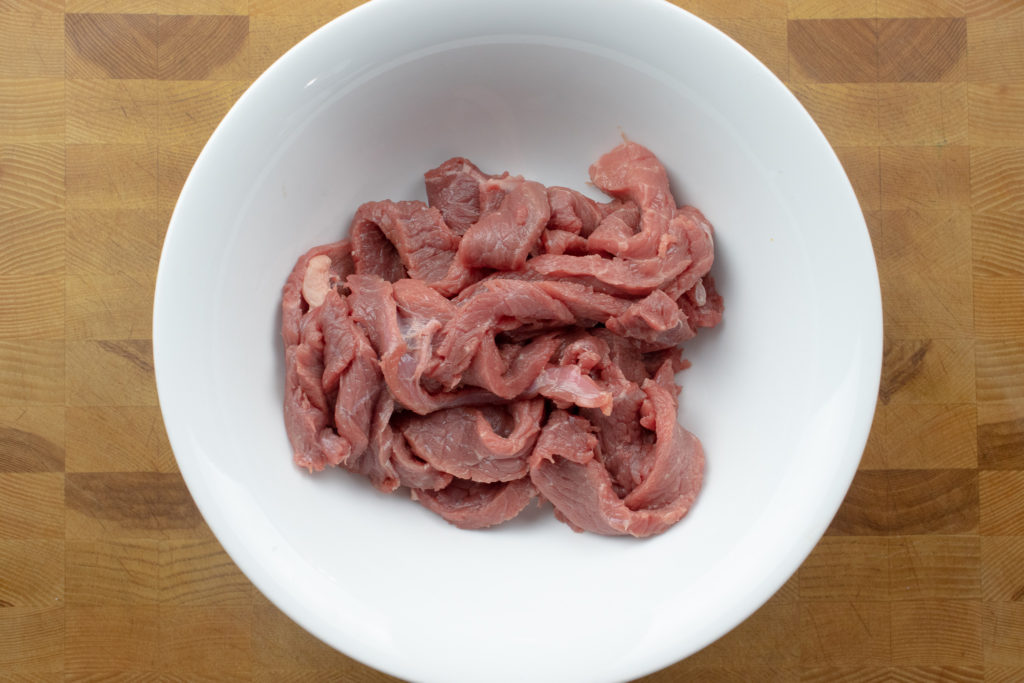
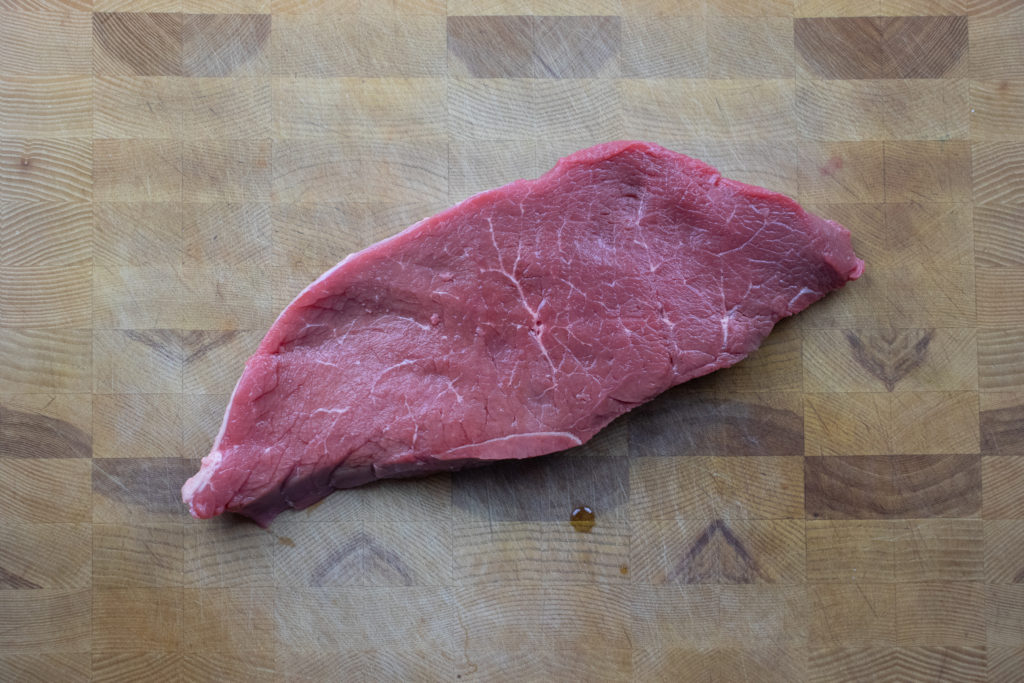
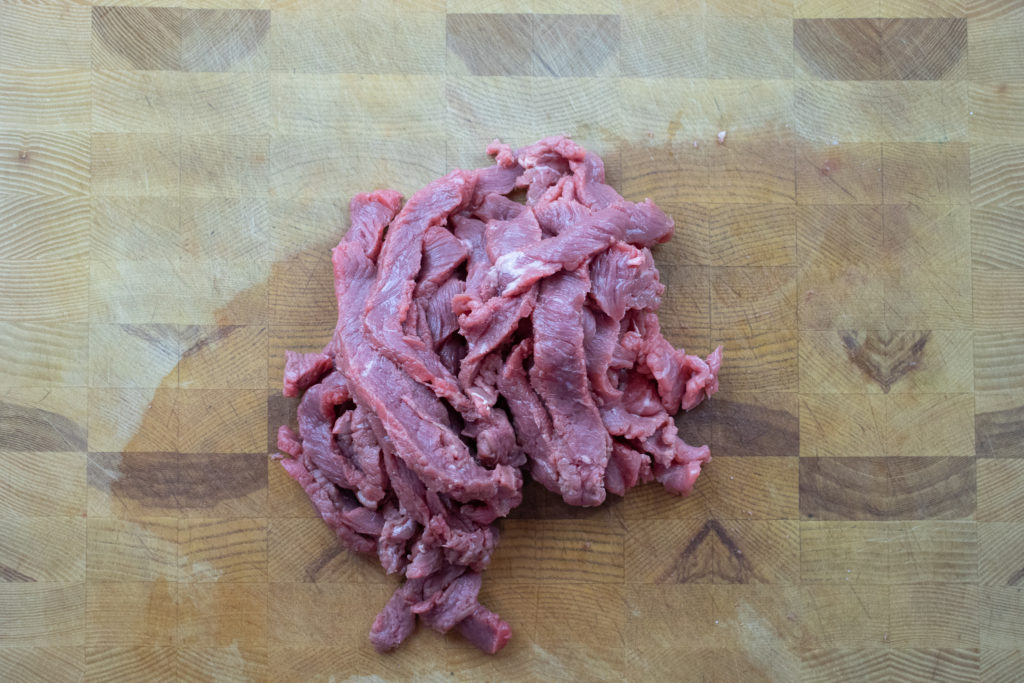
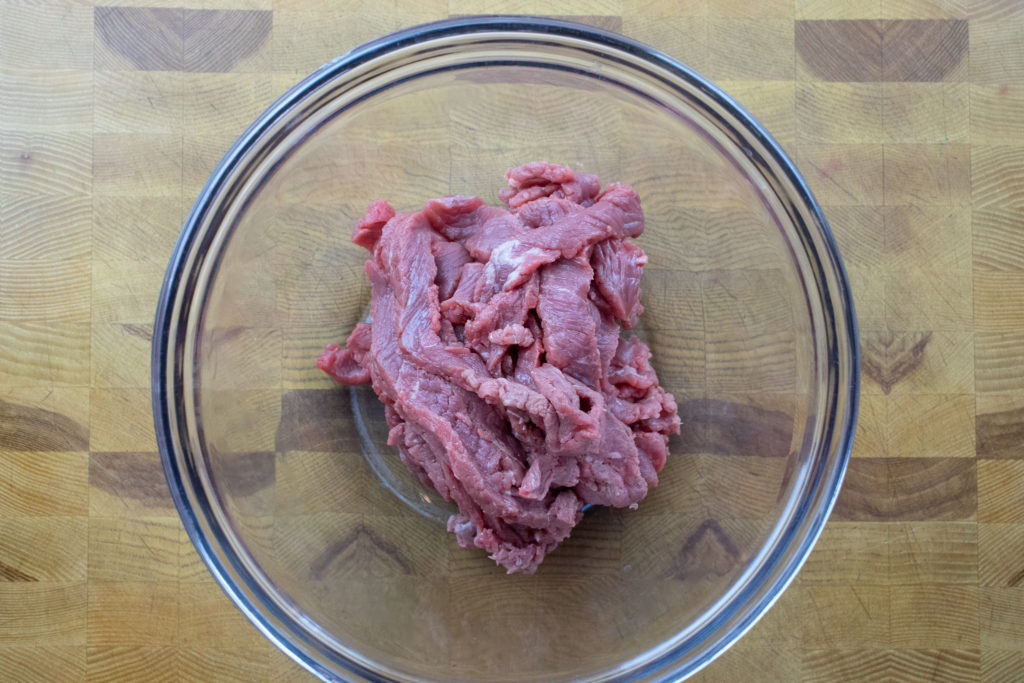
In total, you want about one pound or 454g of beef. You can use sirloin or inside round. You want a lean cut of meat for jerky because the fat won’t dehydrate and will potentially go rancid. Slice the beef into thin strips (1/4 to 1/2 mm) across the grain to shorten the muscle fibres making the meat less tough. Once the beef is all sliced, put it in a medium bowl.
Marinating the Beef for Jerky
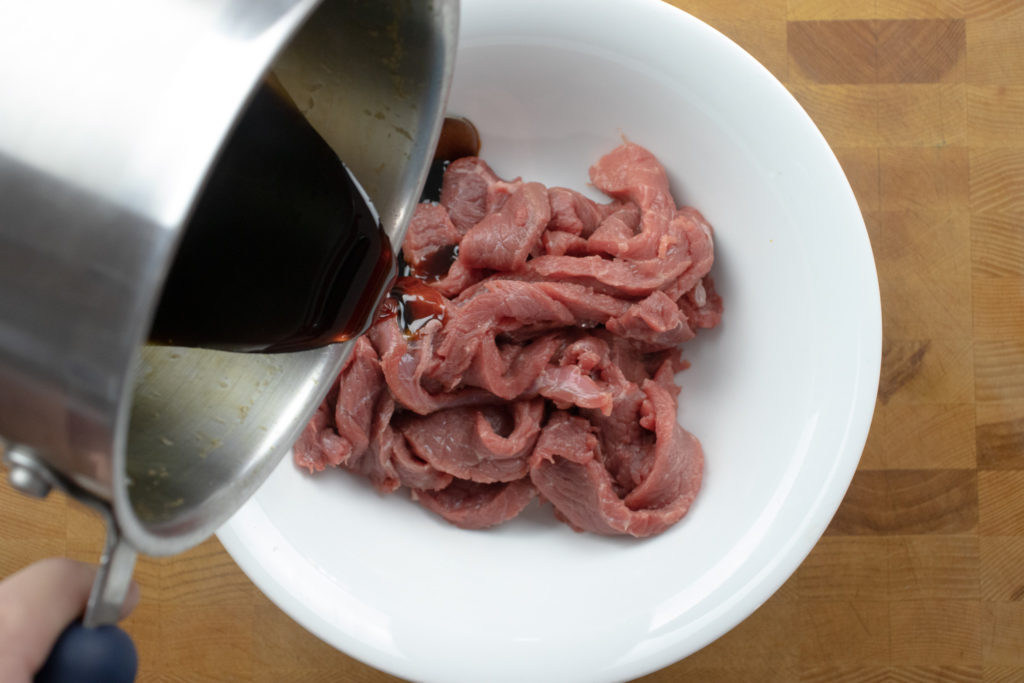
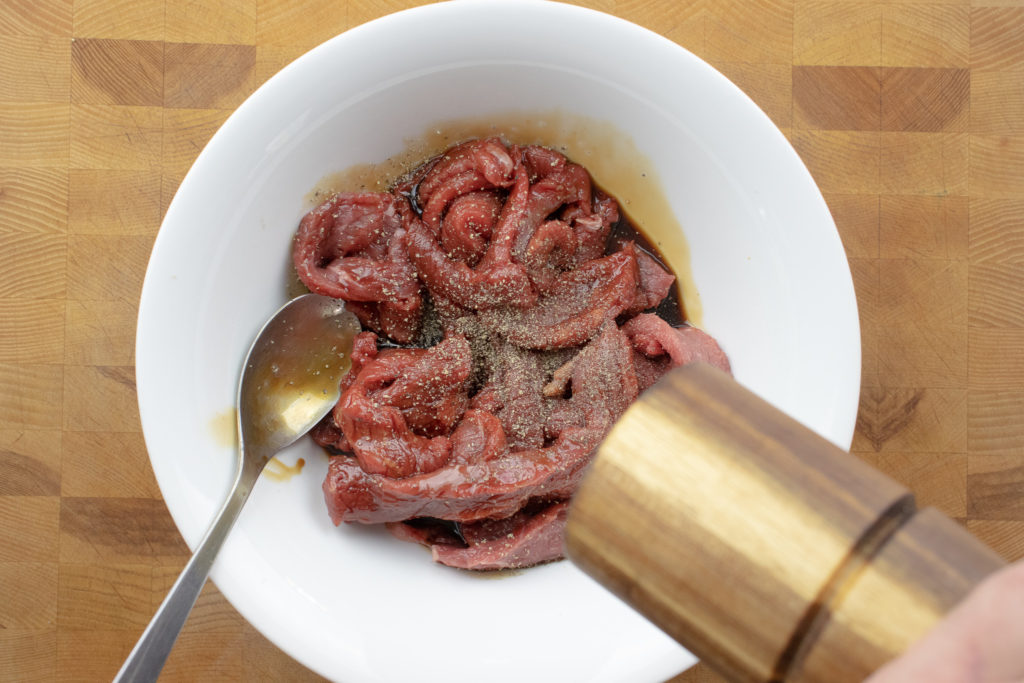
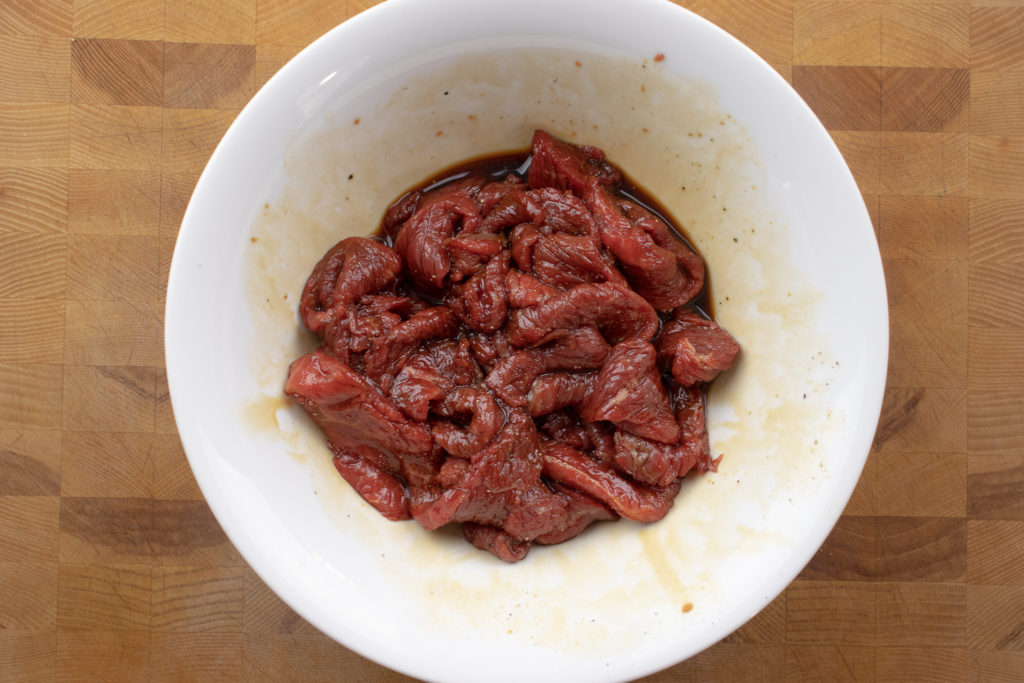
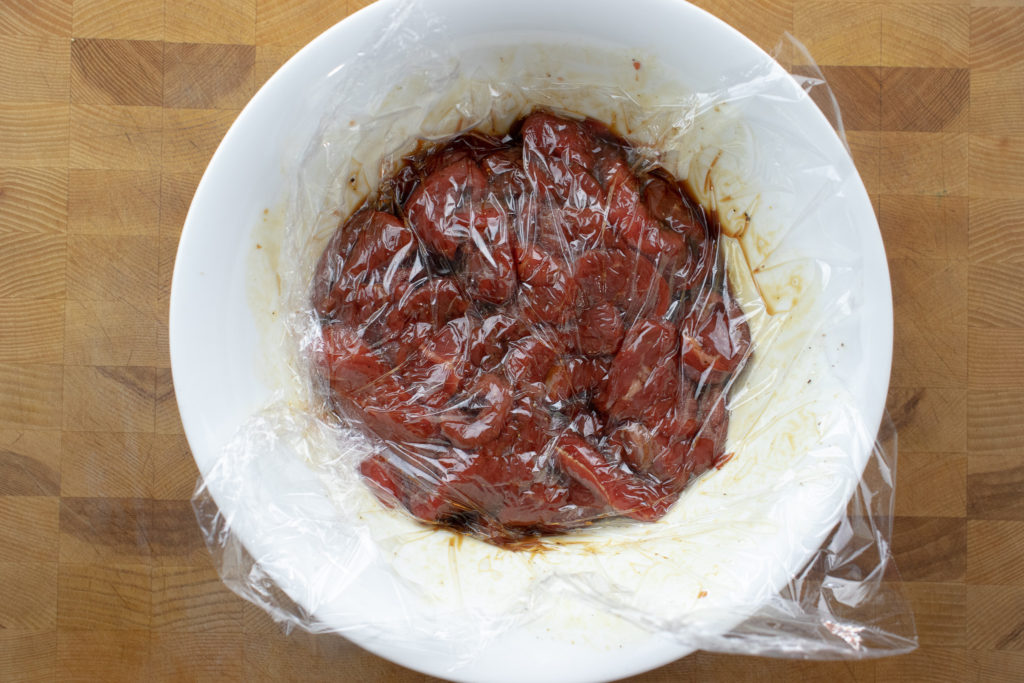
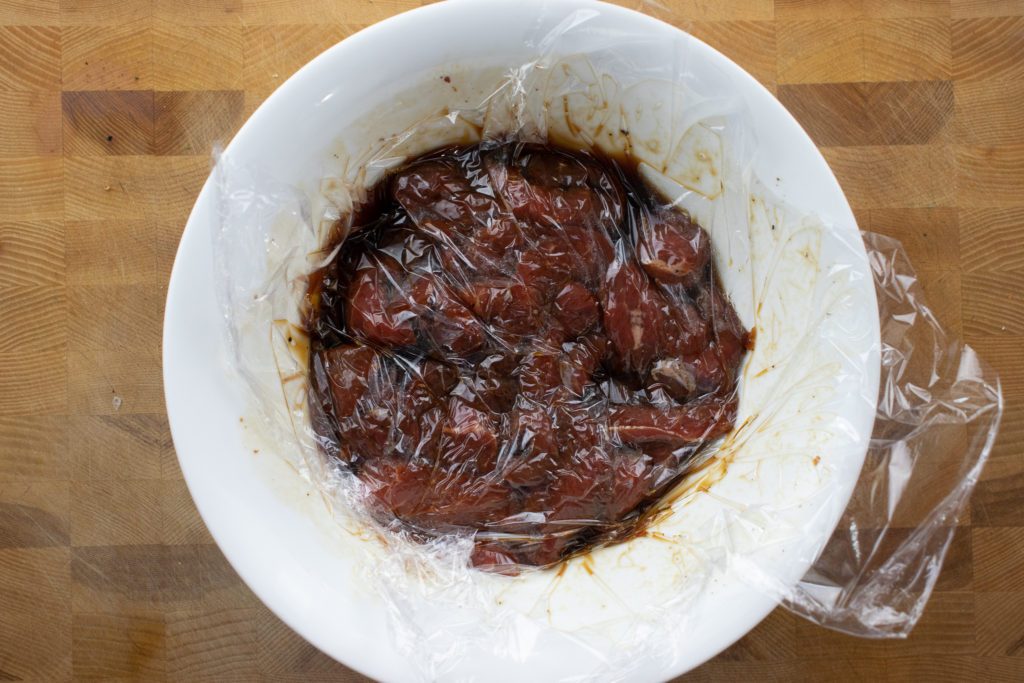
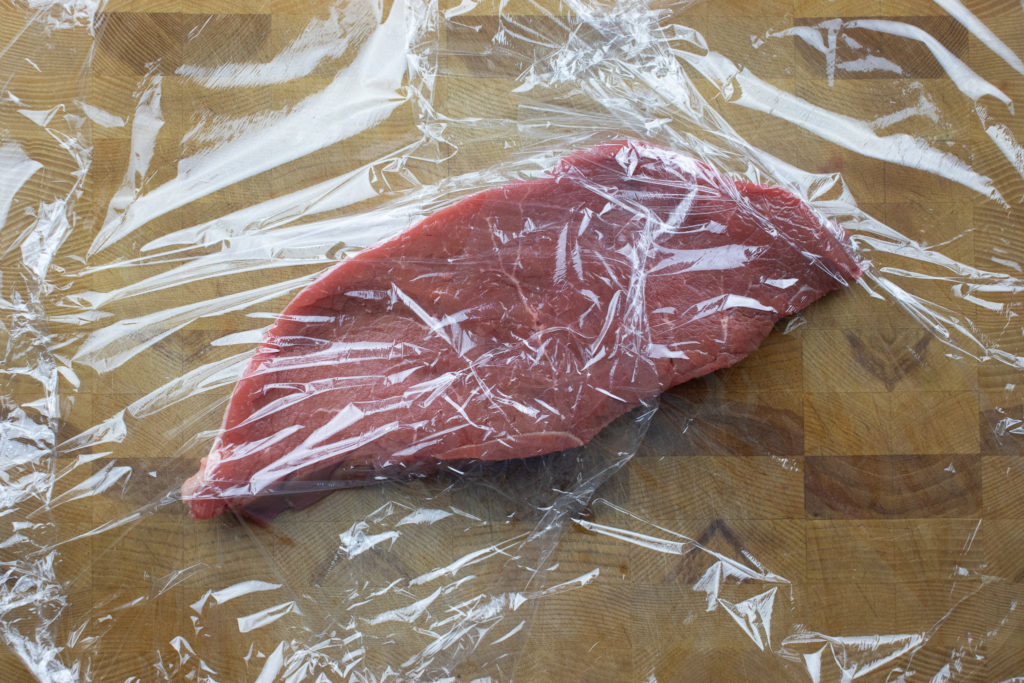
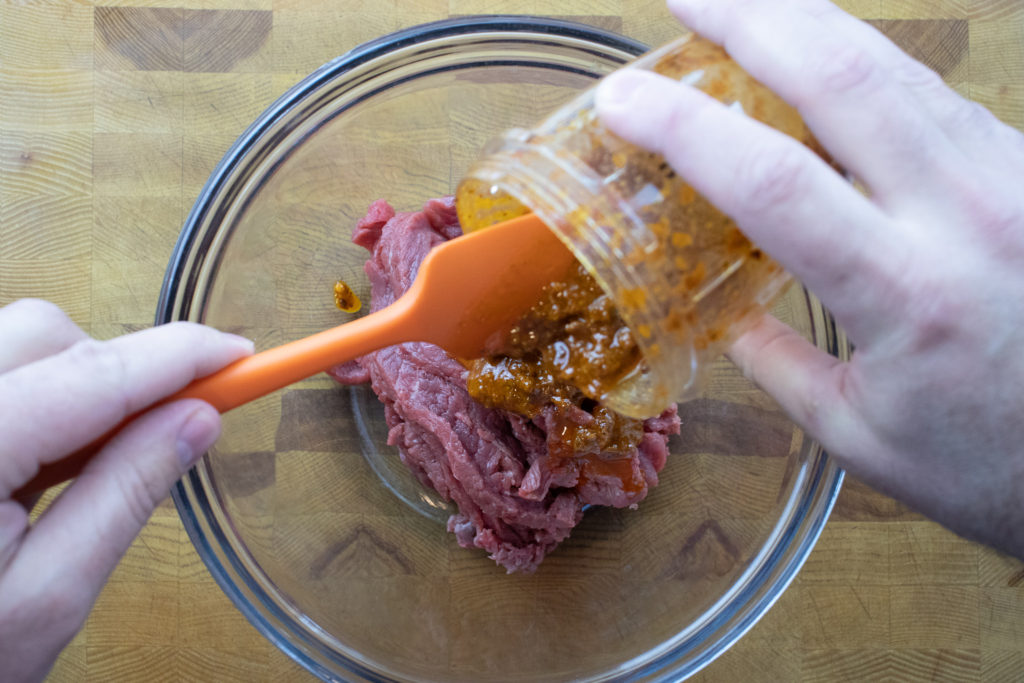
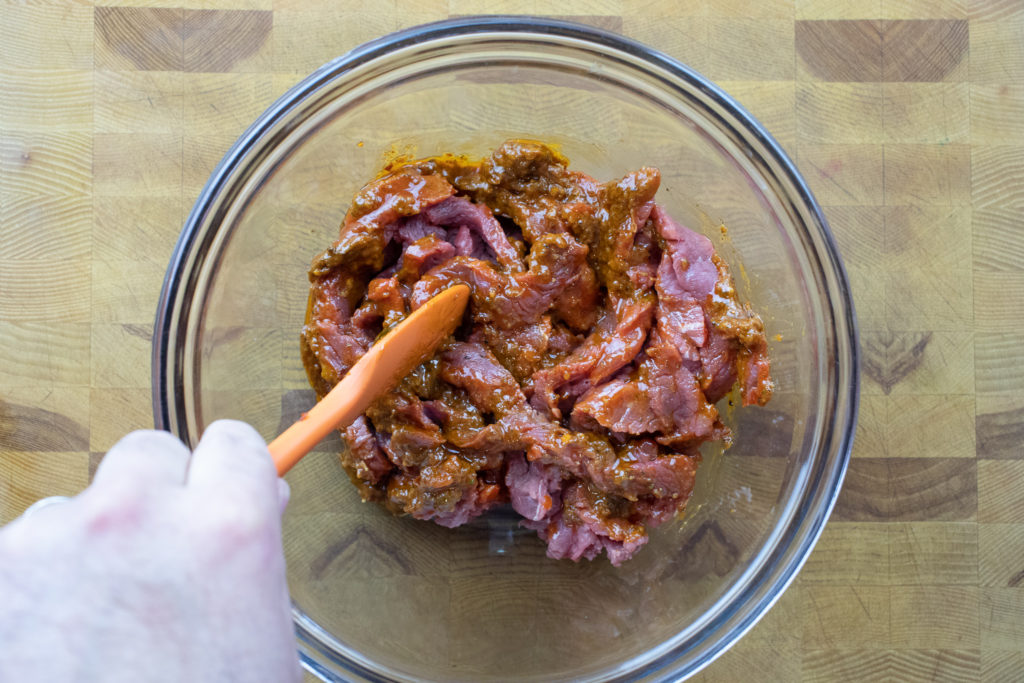
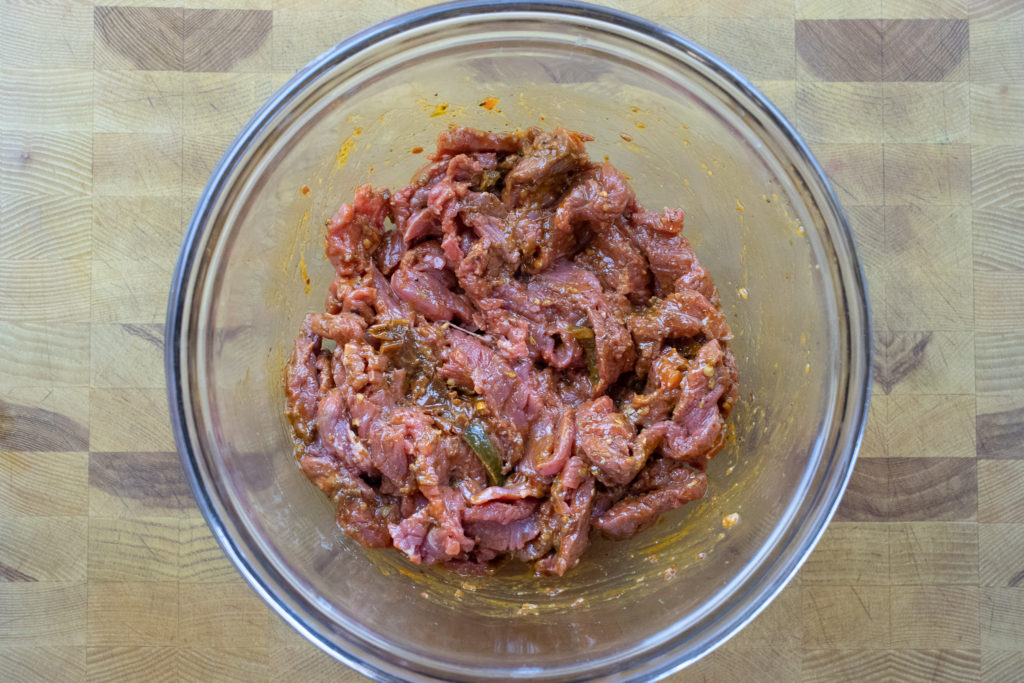
Pour the cooled Teriyaki Marinade over the beef and add about half a teaspoon of black pepper. Mix the meat and pepper into the marinade to ensure all the meat is coated. Cover the bowl with plastic wrap and put it in the fridge. The meat should marinate for a minimum of two hours, but it can go as long as twenty-four hours.
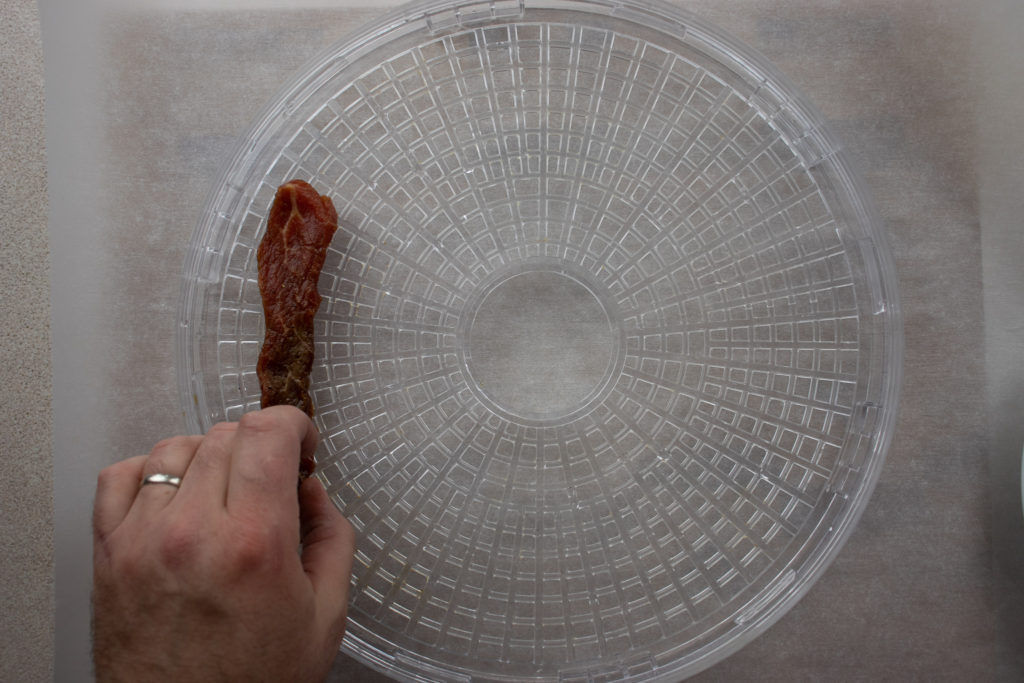
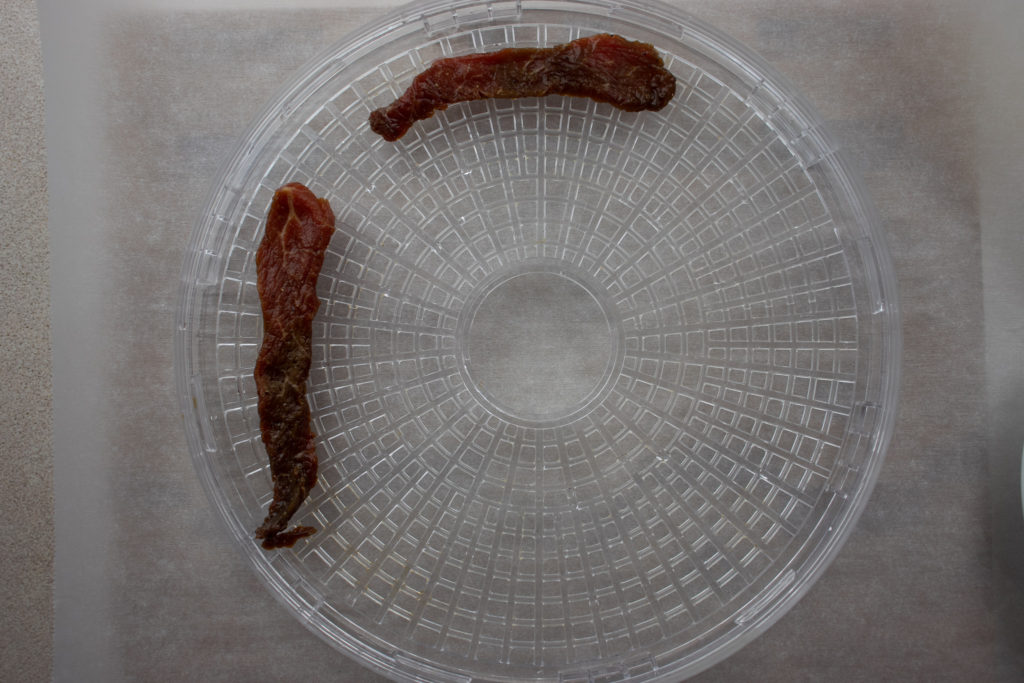
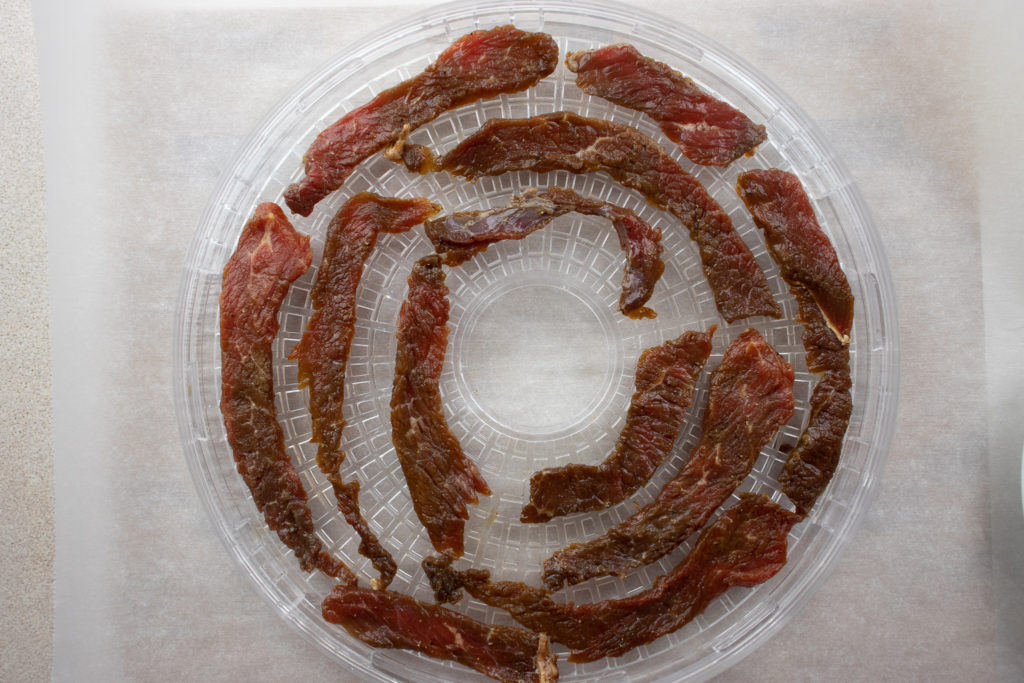
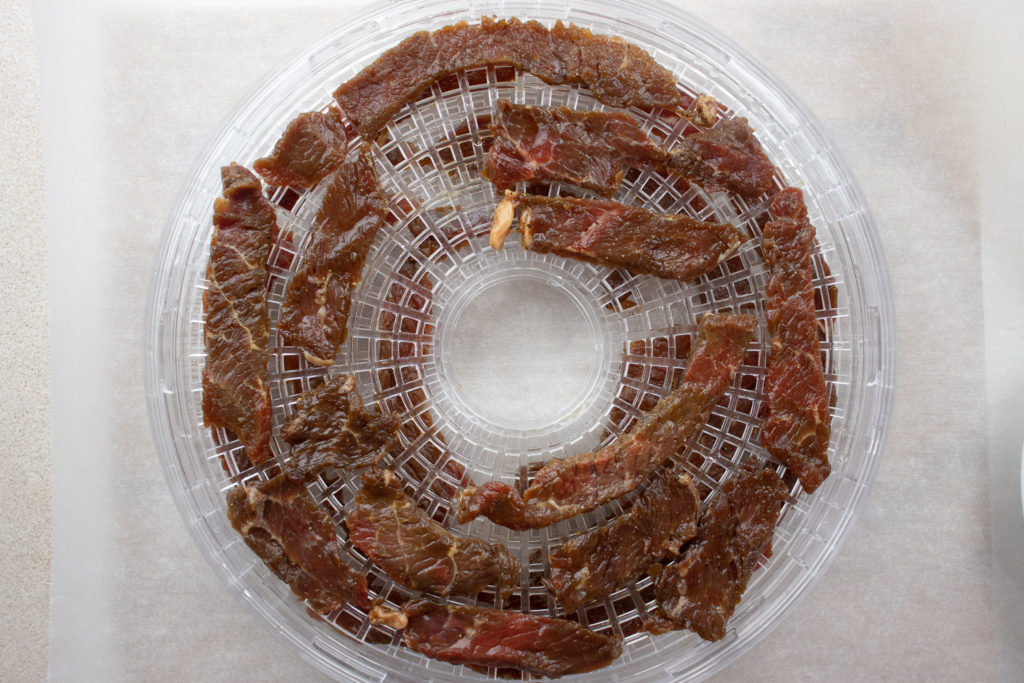
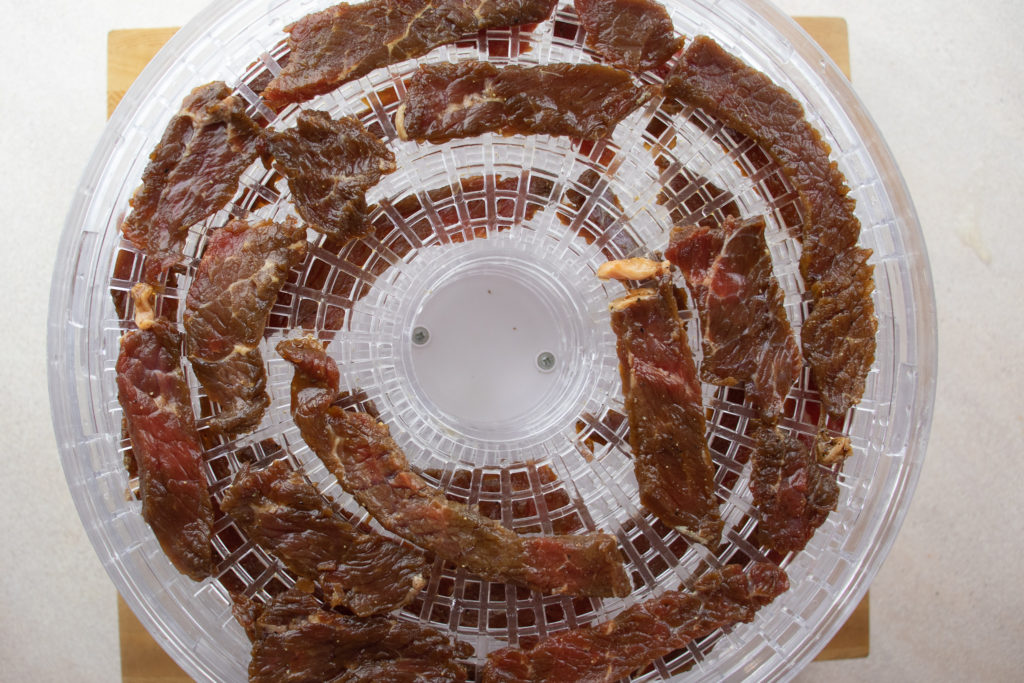
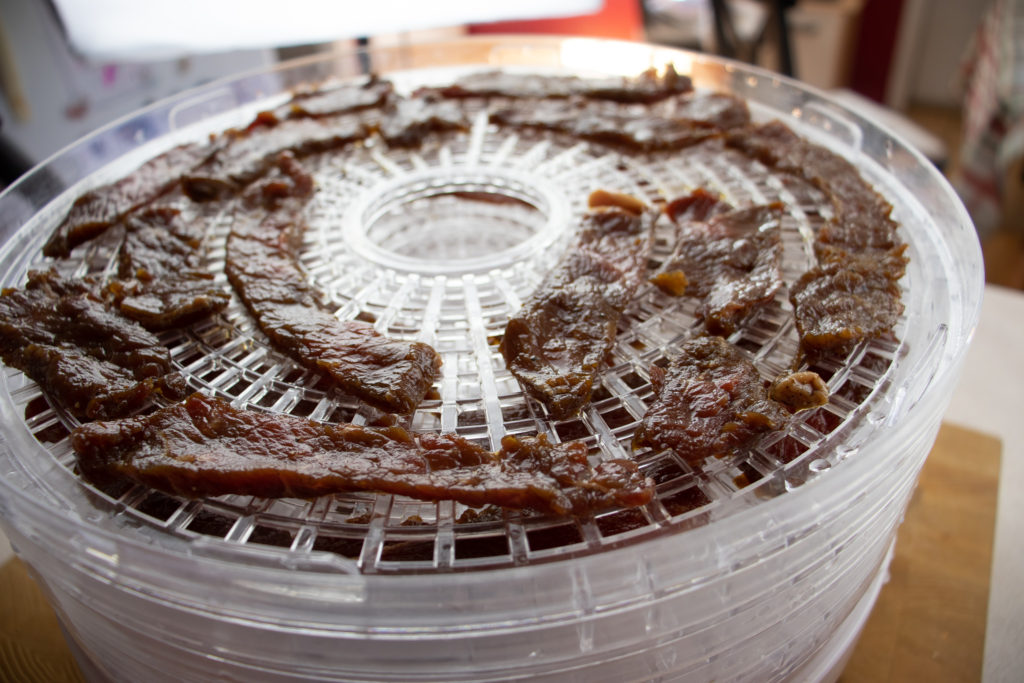
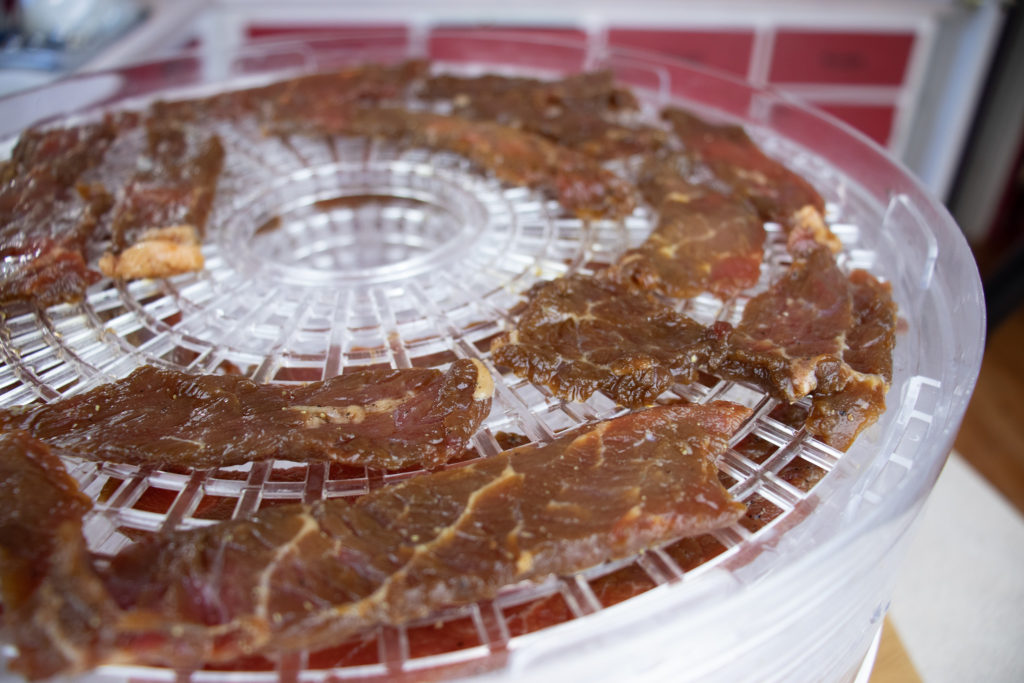
Dehydrating The Teriyaki Beef Jerky
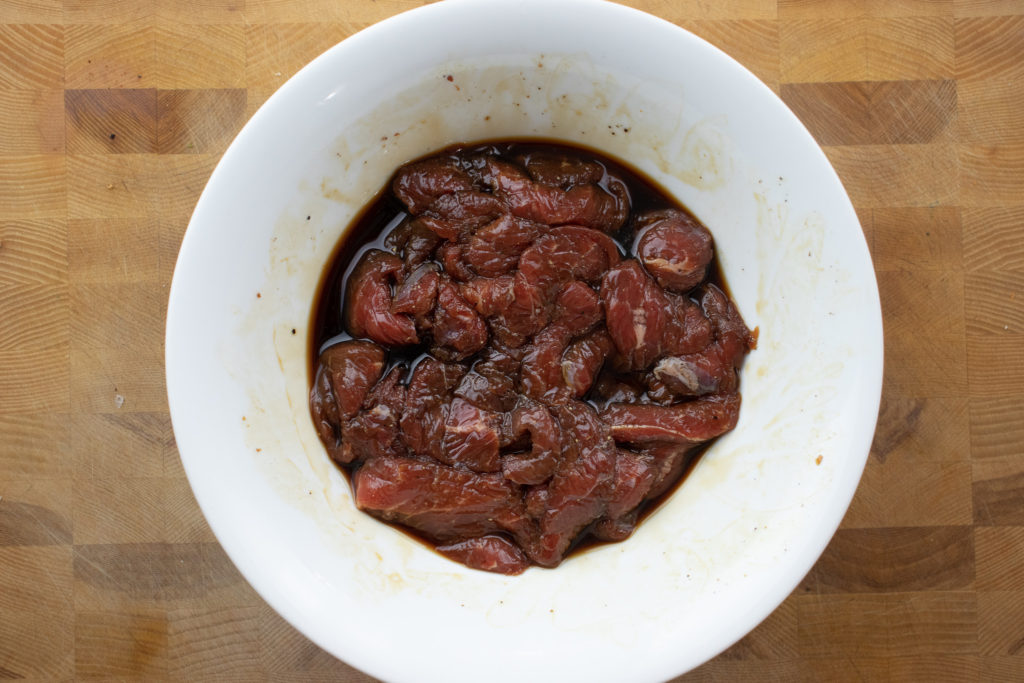
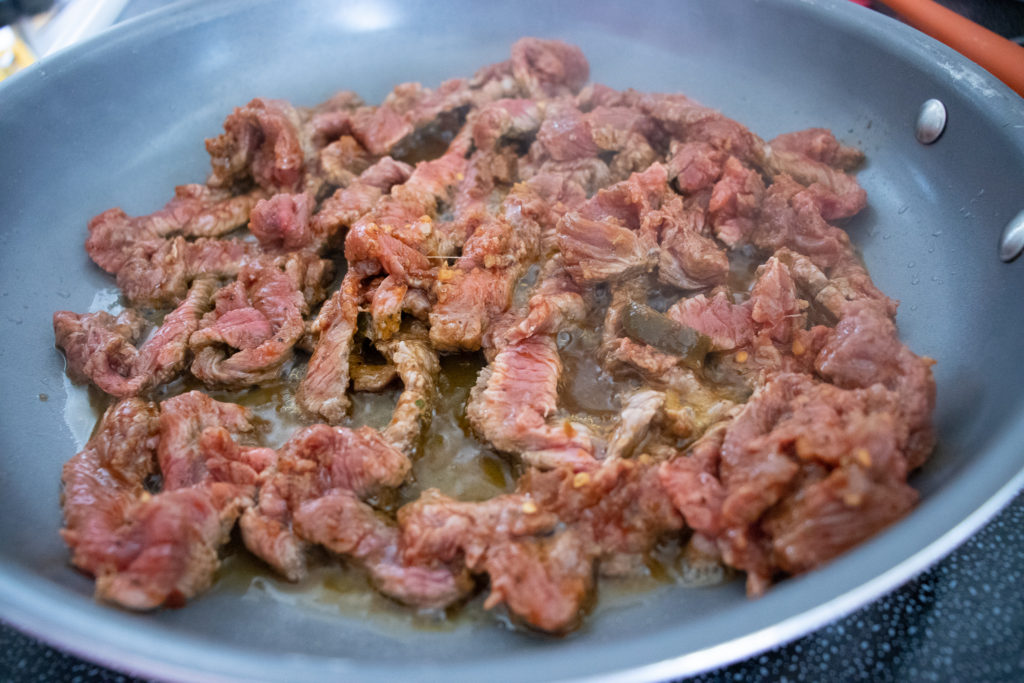
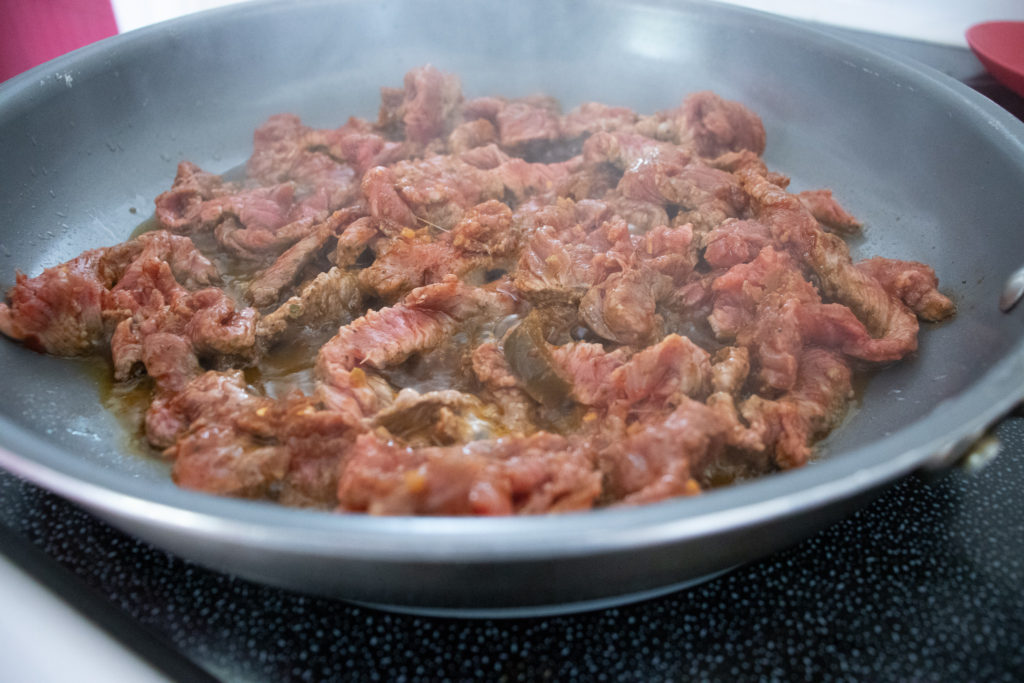
Once the meat has had time to marinate, remove it from the marinade shaking off the excess. Place the marinated beef in a single layer onto the racks of a dehydrator. Turn the dehydrator to 150°f – 160°f. Assemble the dehydrator and dehydrate the beef for two to three hours or until the meat is dry and chewy but not brittle. Store the beef in the fridge in an airtight container or ziplock bag for up to a month. I’m sure you can dehydrate the jerky in your oven though I’ve never done that. But, I would imagine that if you turn your oven to the lowest possible setting, lay the jerky on wire racks and cook it for an hour or two, it should be fine. You can also dehydrate the Teriyaki Beef Jerky in a smoker, as I demonstrate in this post.
Wrap-Up
After trying this homemade teriyaki beef jerky, you may find it hard to resist the sweet, salty, and savoury flavours that make it so addictive. In fact, you may find yourself finishing the entire batch in just a few days! But if you can resist temptation, this jerky will last in the fridge for about a month. Not only is this recipe a delicious snack, but the teriyaki marinade is also perfect for grilling up salmon, pork, or chicken. And if you’re looking to make your own jerky at home, be sure to check out the dehydrator that I use and recommend. It’s a reliable and easy-to-use appliance that will help you create the perfect homemade teriyaki beef jerky every time.
Teriyaki Beef Jerky
Are you going for a hike in the woods? A long car ride? What's better for a trip like that than some homemade Teriyaki Beef Jerky? This recipe is easy to follow, and gives you a delicious treat at the end.
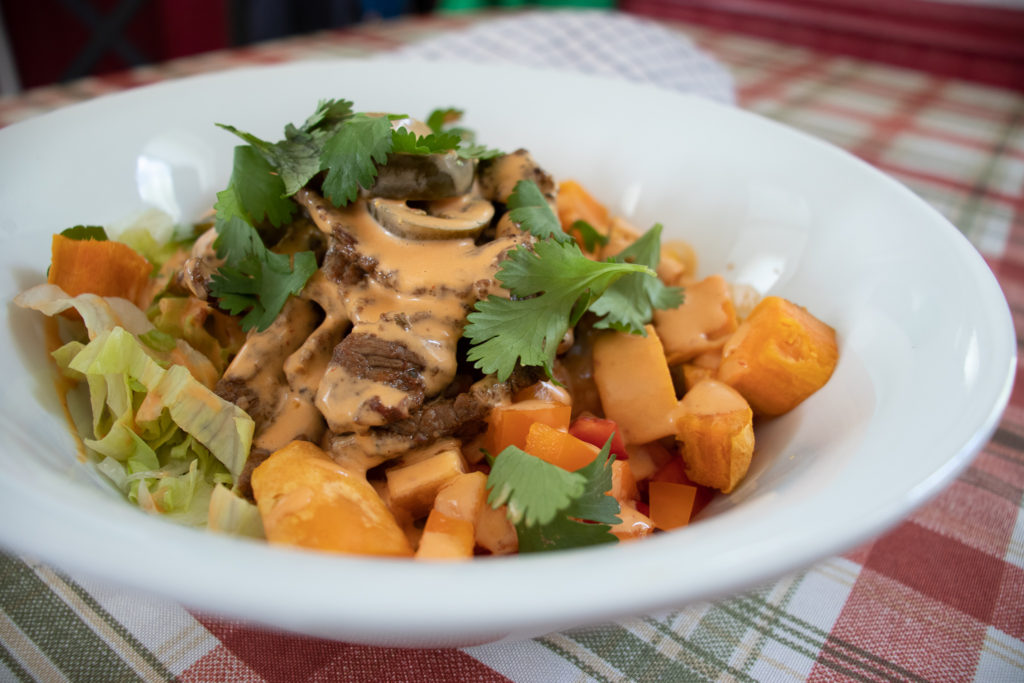
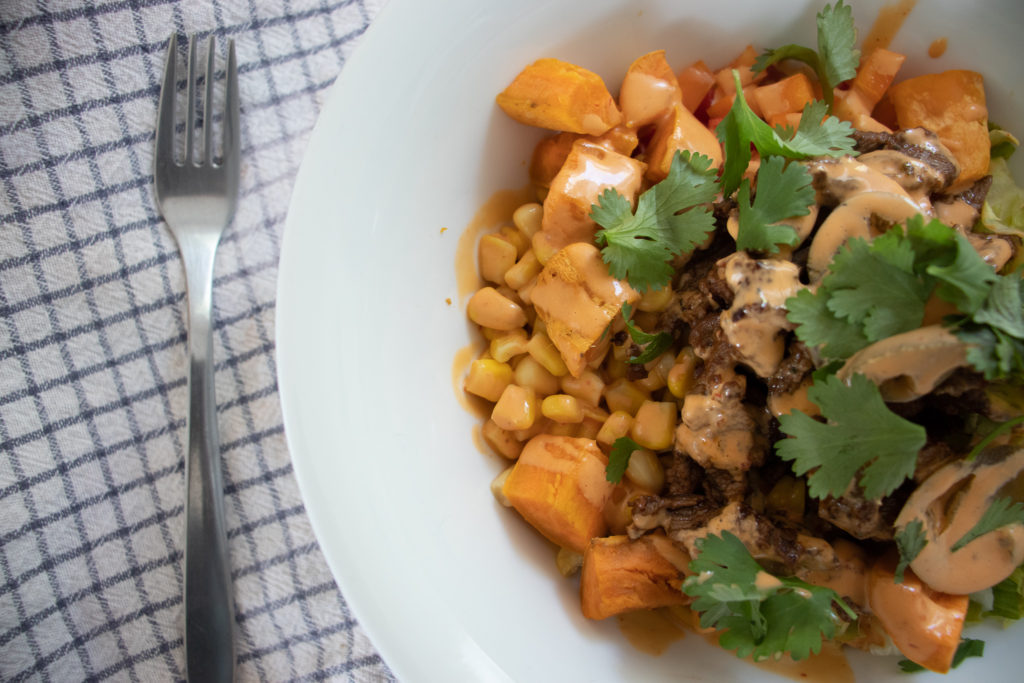
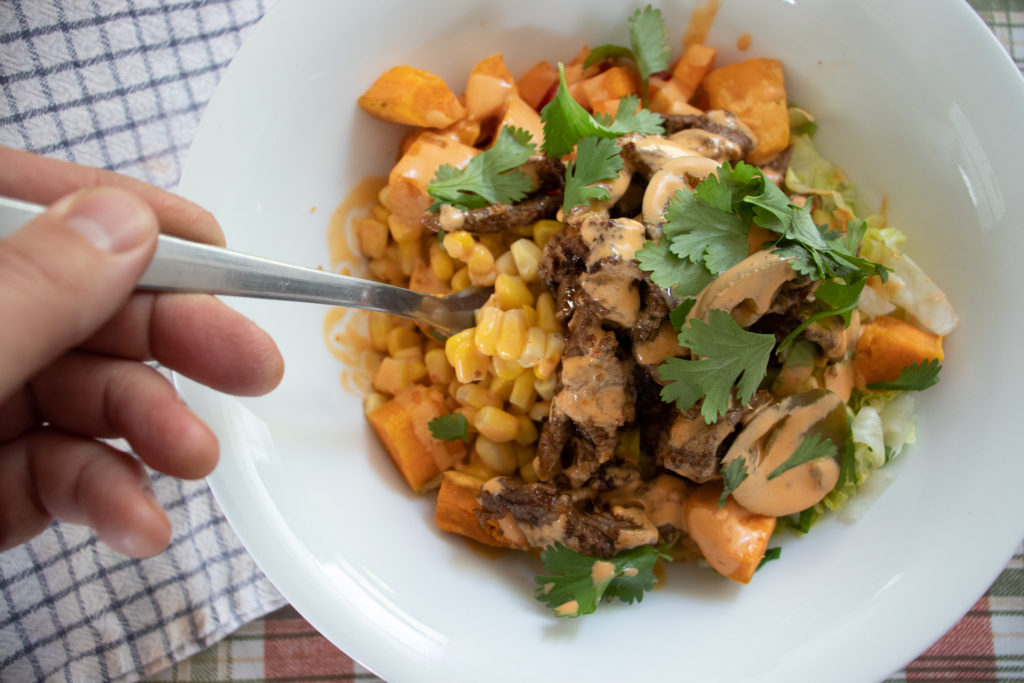
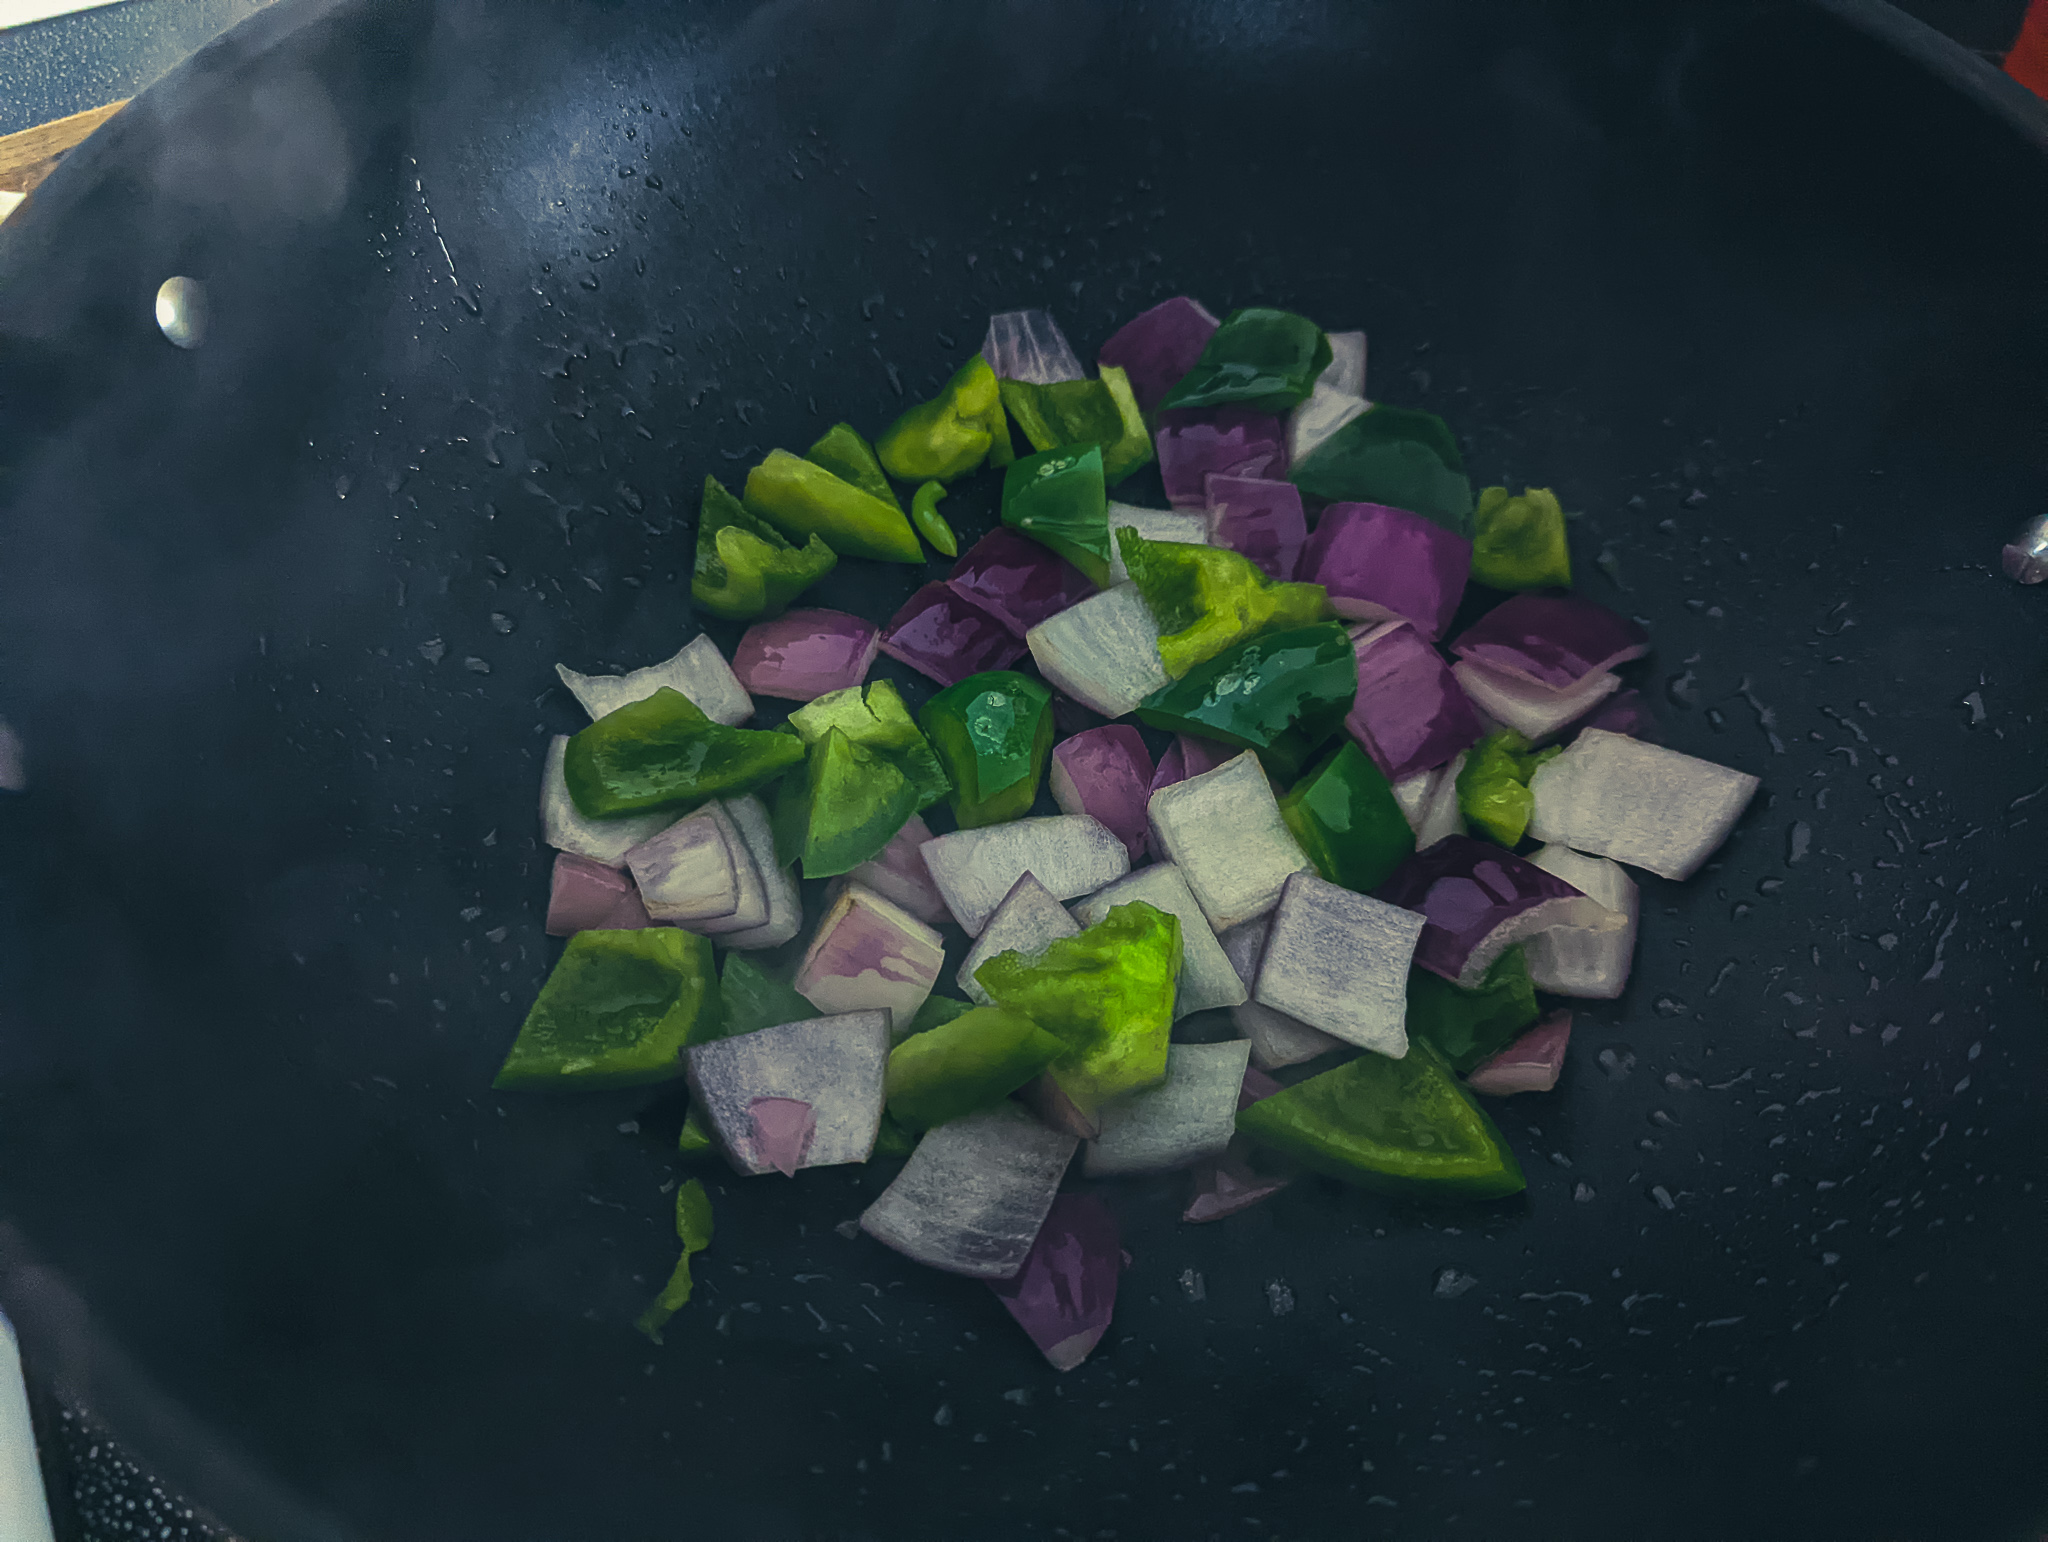
Looking for a spicy, flavour-packed bowl recipe? Look no further! Our spicy beef bowl recipe with tangy chipotle lime sauce will become your new favourite. It’s loaded with marinated beef, lots of veggies, and a little bit of rice for a crave-worthy meal perfect for sharing. Don’t want to use beef? No problem – this recipe is versatile enough to work with your preferred protein. Keep reading for all the delicious details, and get ready to cook up a storm!
Spicy Beef Bowl: What’s Inside?
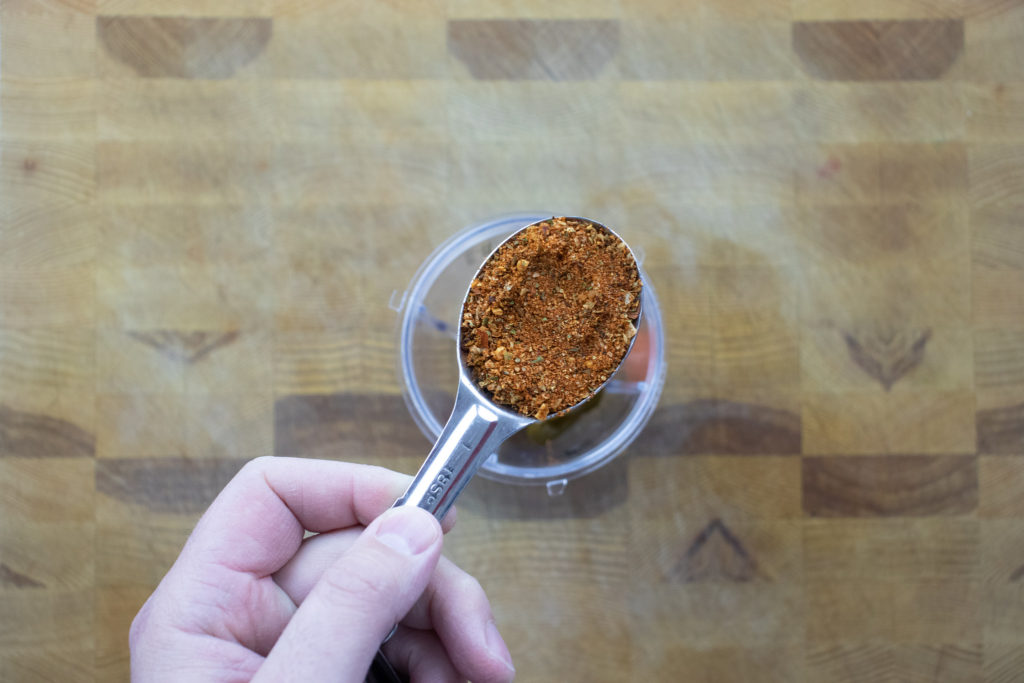
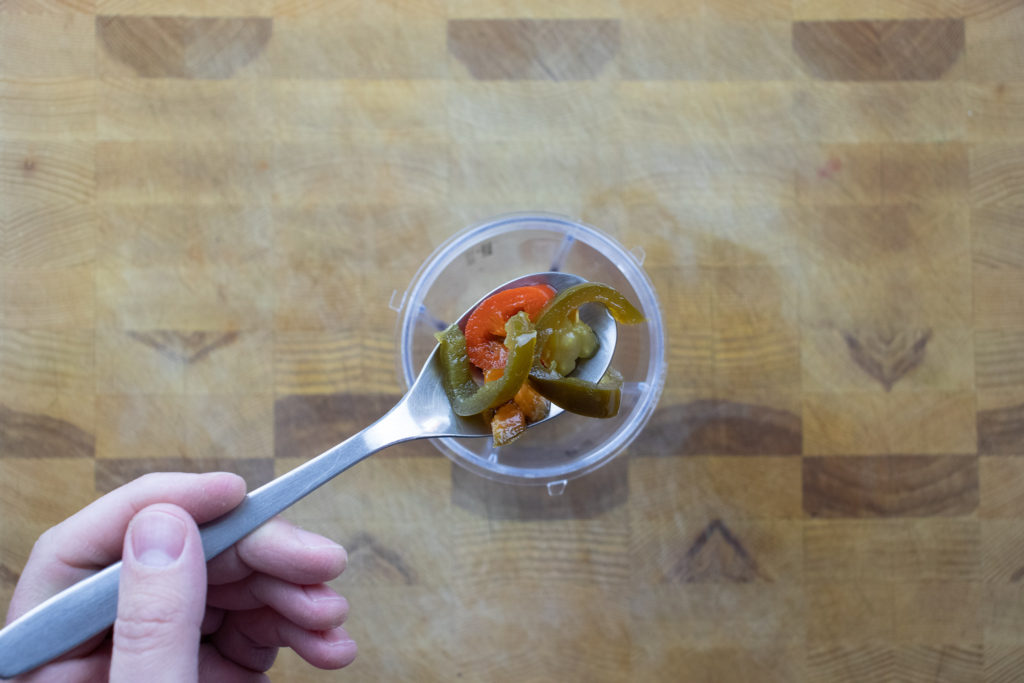
This spicy bowl recipe is loaded with bold, flavourful ingredients that are sure to satisfy your cravings. I’ve included chipotles in adobo, cajun seasoning, and pickled jalapenos in the marinade for the beef and the chipotle lime sauce. These spicy ingredients add a ton of flavour to the dish. If you’re looking for an extra kick, add half a habanero pepper to the marinade and sauce. From the marinated beef to the standalone jalapenos, every ingredient in this bowl is carefully chosen to deliver maximum flavour and spice. Keep reading to learn more about this recipe and how to make it at home.
Marinating The Beef
Making the spicy beef marinade
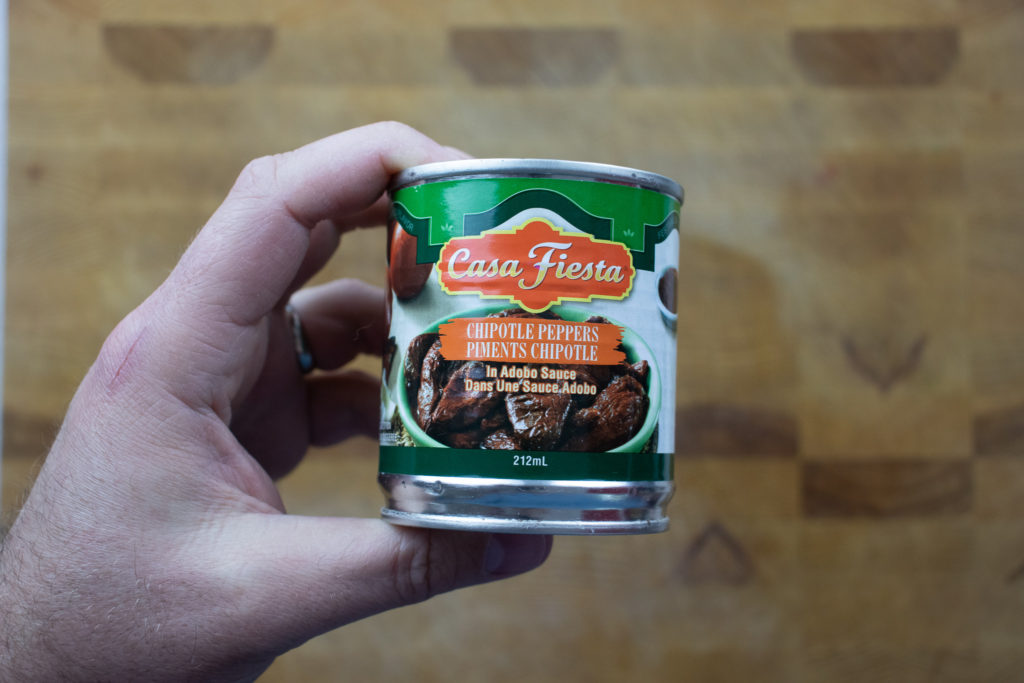
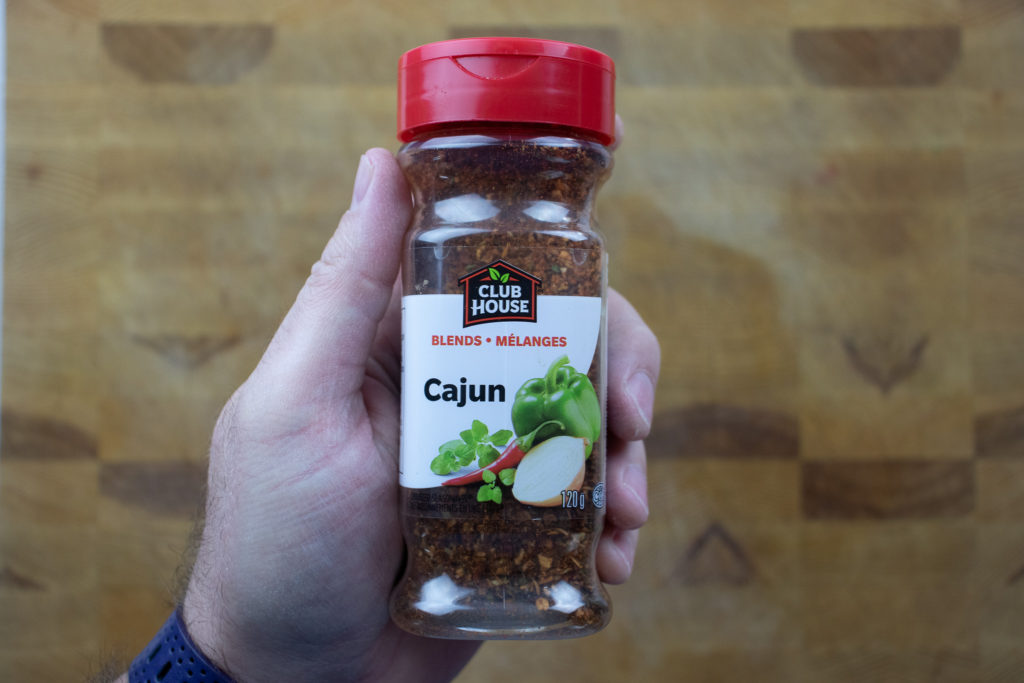
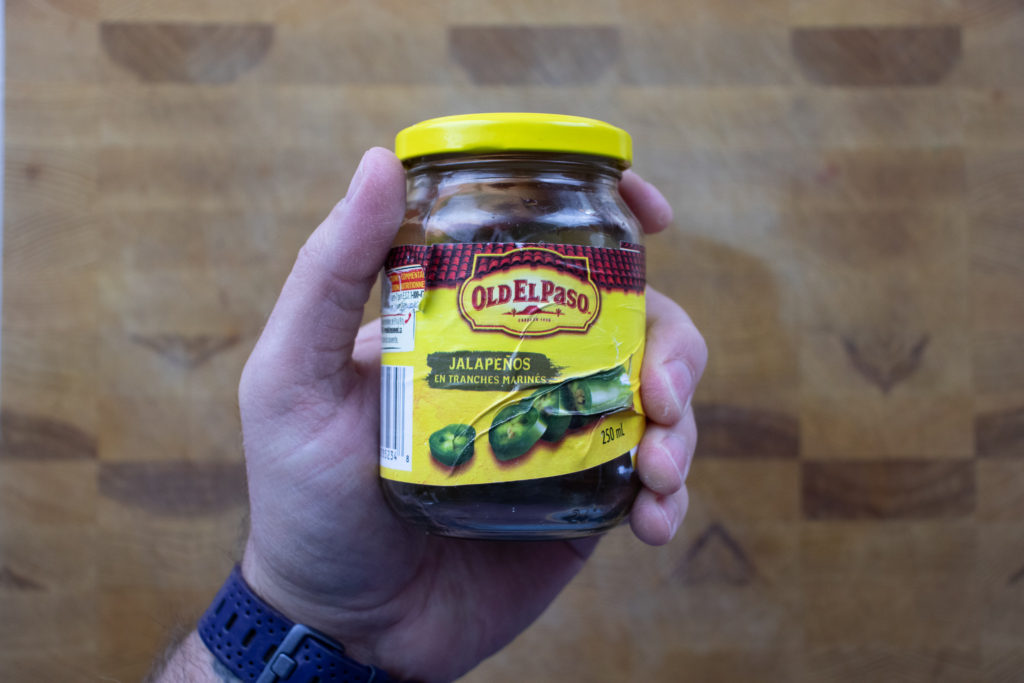
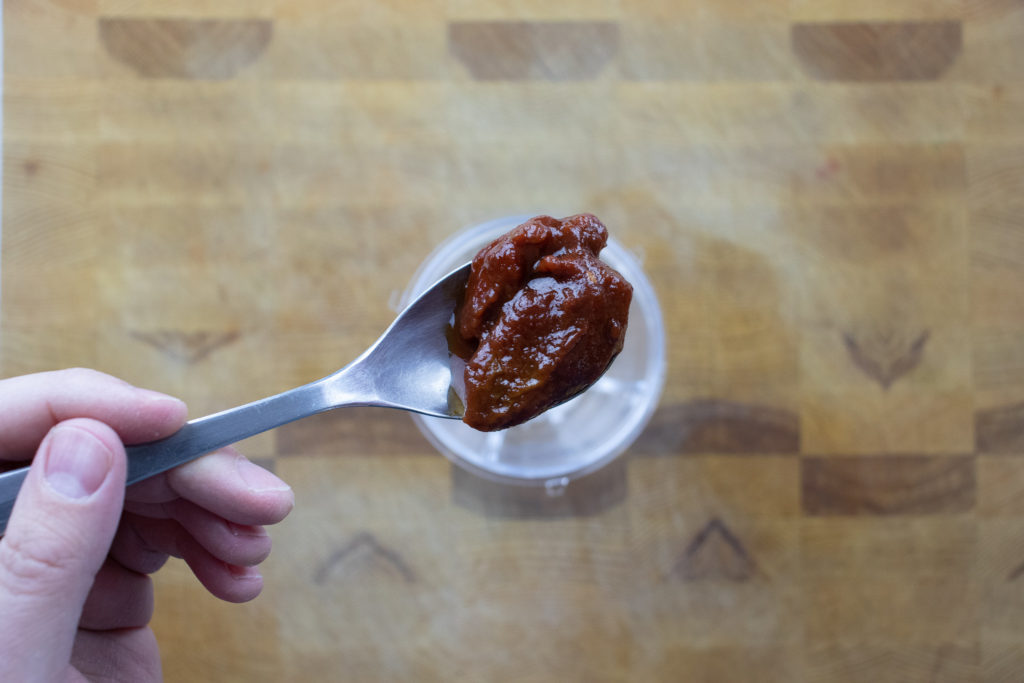
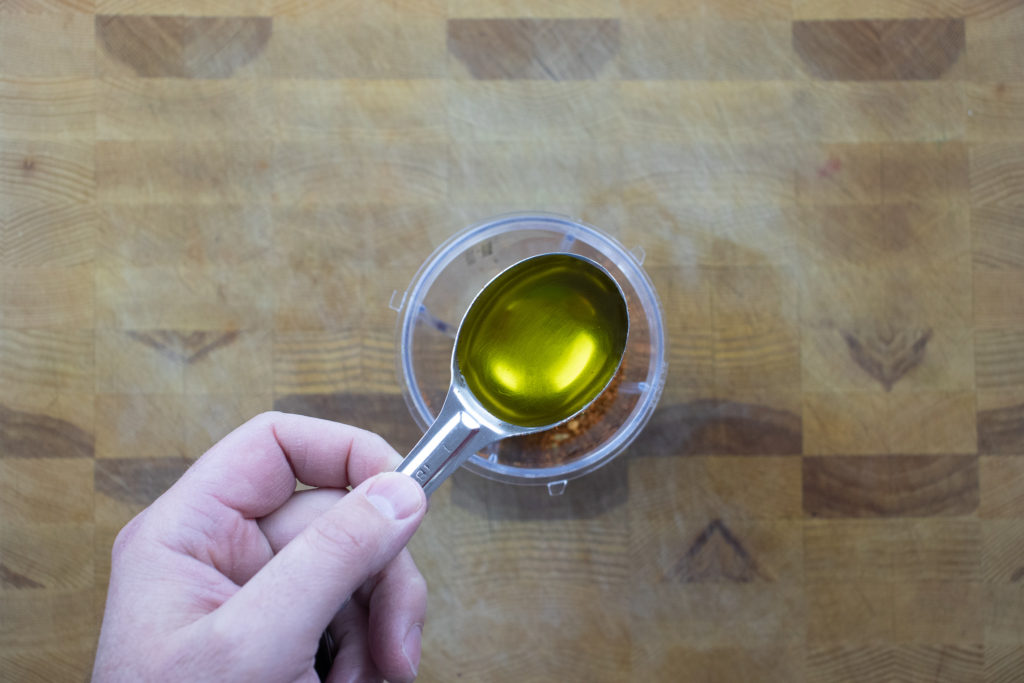
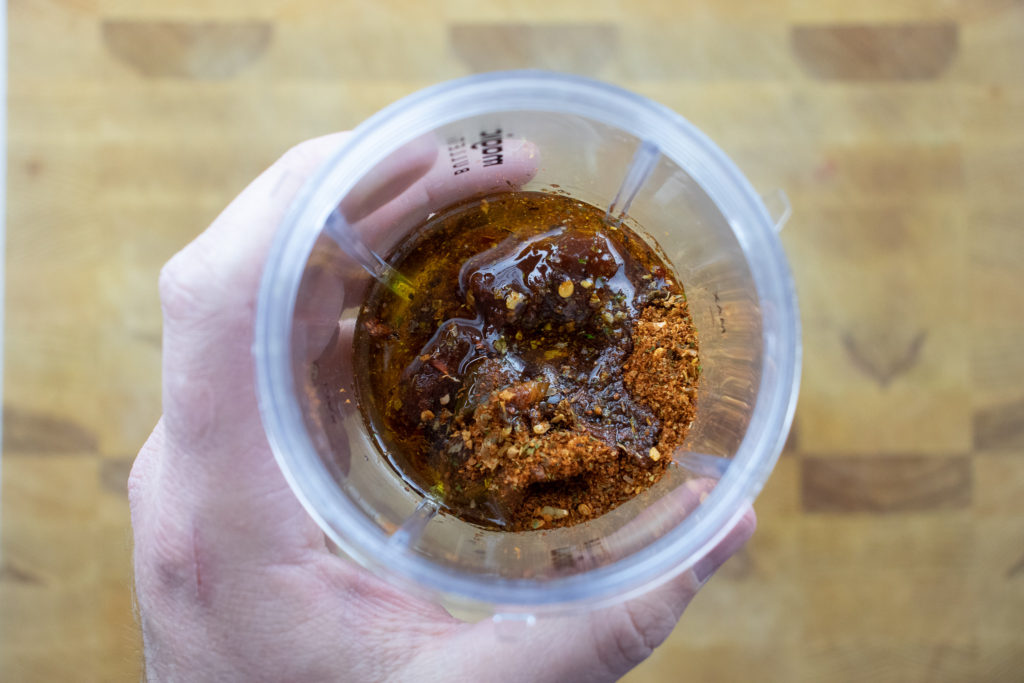
This spicy beef marinade is packed with bold, flavourful ingredients to boost your meat’s taste. One of the key players in this marinade is chipotles in adobo sauce – have you heard of it? It’s a Mexican condiment made from smoked and dried jalapeno peppers that have been rehydrated and canned in a sauce made of tomato, vinegar, and spices. In addition to the chipotles, you’ll also need cajun seasoning, pickled jalapenos, olive oil, and salt. Just toss all these ingredients into a blender or food processor and blend until smooth. If you don’t have either of these appliances, it’s no problem – finely chop the chipotles and jalapenos by hand and mix them with the other ingredients. This marinade works well with various proteins, including beef, chicken, pork, salmon, or tofu. Use your favourite, or mix it up and try something new! Keep reading to learn more about using this marinade in the spicy beef bowl recipe.
Preparing the beef
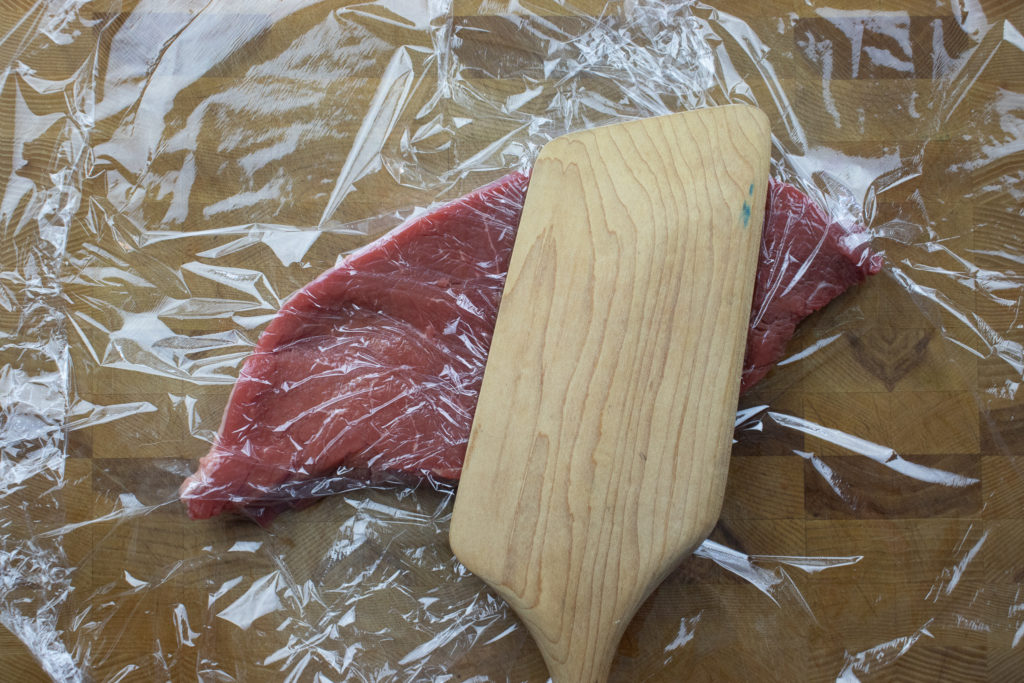
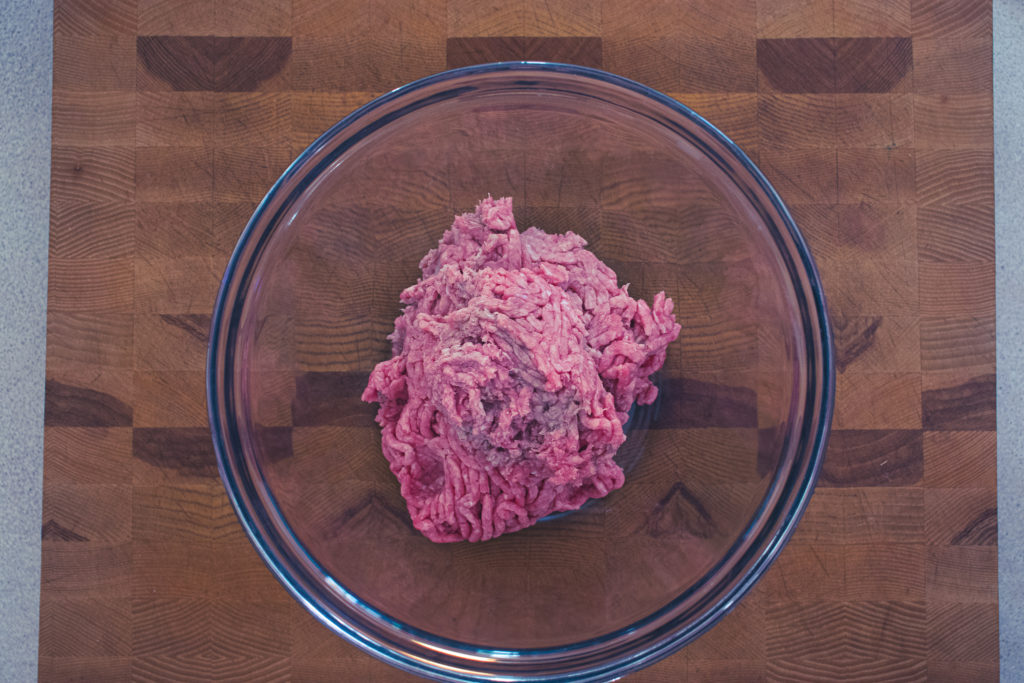
For this spicy beef bowl recipe, I recommend top sirloin, but sirloin tip, inside round, or top round would also work well. Sirloin is a lean cut of meat that comes from between the loin and the round or rump of the cow. It is often used for grilling but can be tough if not prepared correctly. To make it more tender, it is best to pound the meat thinly and then slice it across the grain into thin strips. This helps shorten the muscle fibres and makes the meat more enjoyable and easier to eat.
Marinating the spicy beef
Put the sliced top sirloin in a medium mixing bowl or zip-lock bag. Add the marinade to the beef and mix well to ensure all the beef is coated. Cover the beef and put it in the refrigerator for a minimum of two hours and a maximum of twenty-four hours. Any less than two hours and the meat isn’t going to pick up much of the marinade’s flavour. Any longer than a day, the meat will start to cure, making it tough.
Tangy Chipotle Lime Dressing
While the beef is sitting in the marinade, take a minute to make the dressing. The chipotle lime dressing combines Greek yogurt or sour cream, mayonnaise, lime juice, chipotle in adobo, sugar, and salt. Put all the ingredients in a small blender and blitz until smooth. Again, if you don’t have a blender or food processor, you can chop the chipotles as fine as possible by hand and mix them with the other ingredients.
What to do with leftover chipotles?
If you find that you have leftover chipotles in adobo sauce, don’t worry – there are plenty of ways to put them to good use! One option is to chop or purée the remaining chipotles and freeze them in an ice cube tray. This way, you can easily pop out a few cubes as needed the next time you want to add a spicy kick to a recipe. Another option is to mix the leftover chipotles with mayonnaise or sour cream to create a spicy condiment for sandwiches or burgers. You can add them to scrambled eggs or omelets for a spicy breakfast or use them to marinate chicken, pork, or tofu before grilling or roasting. Finally, you can mix the leftover chipotles with melted butter or oil to create a spicy drizzle for roasted vegetables or seafood. These are just a few ideas, but the possibilities are endless with a bit of creativity and some leftover chipotles in adobo sauce! You could also try these delicious Chipotle Lime Turkey Tacos.
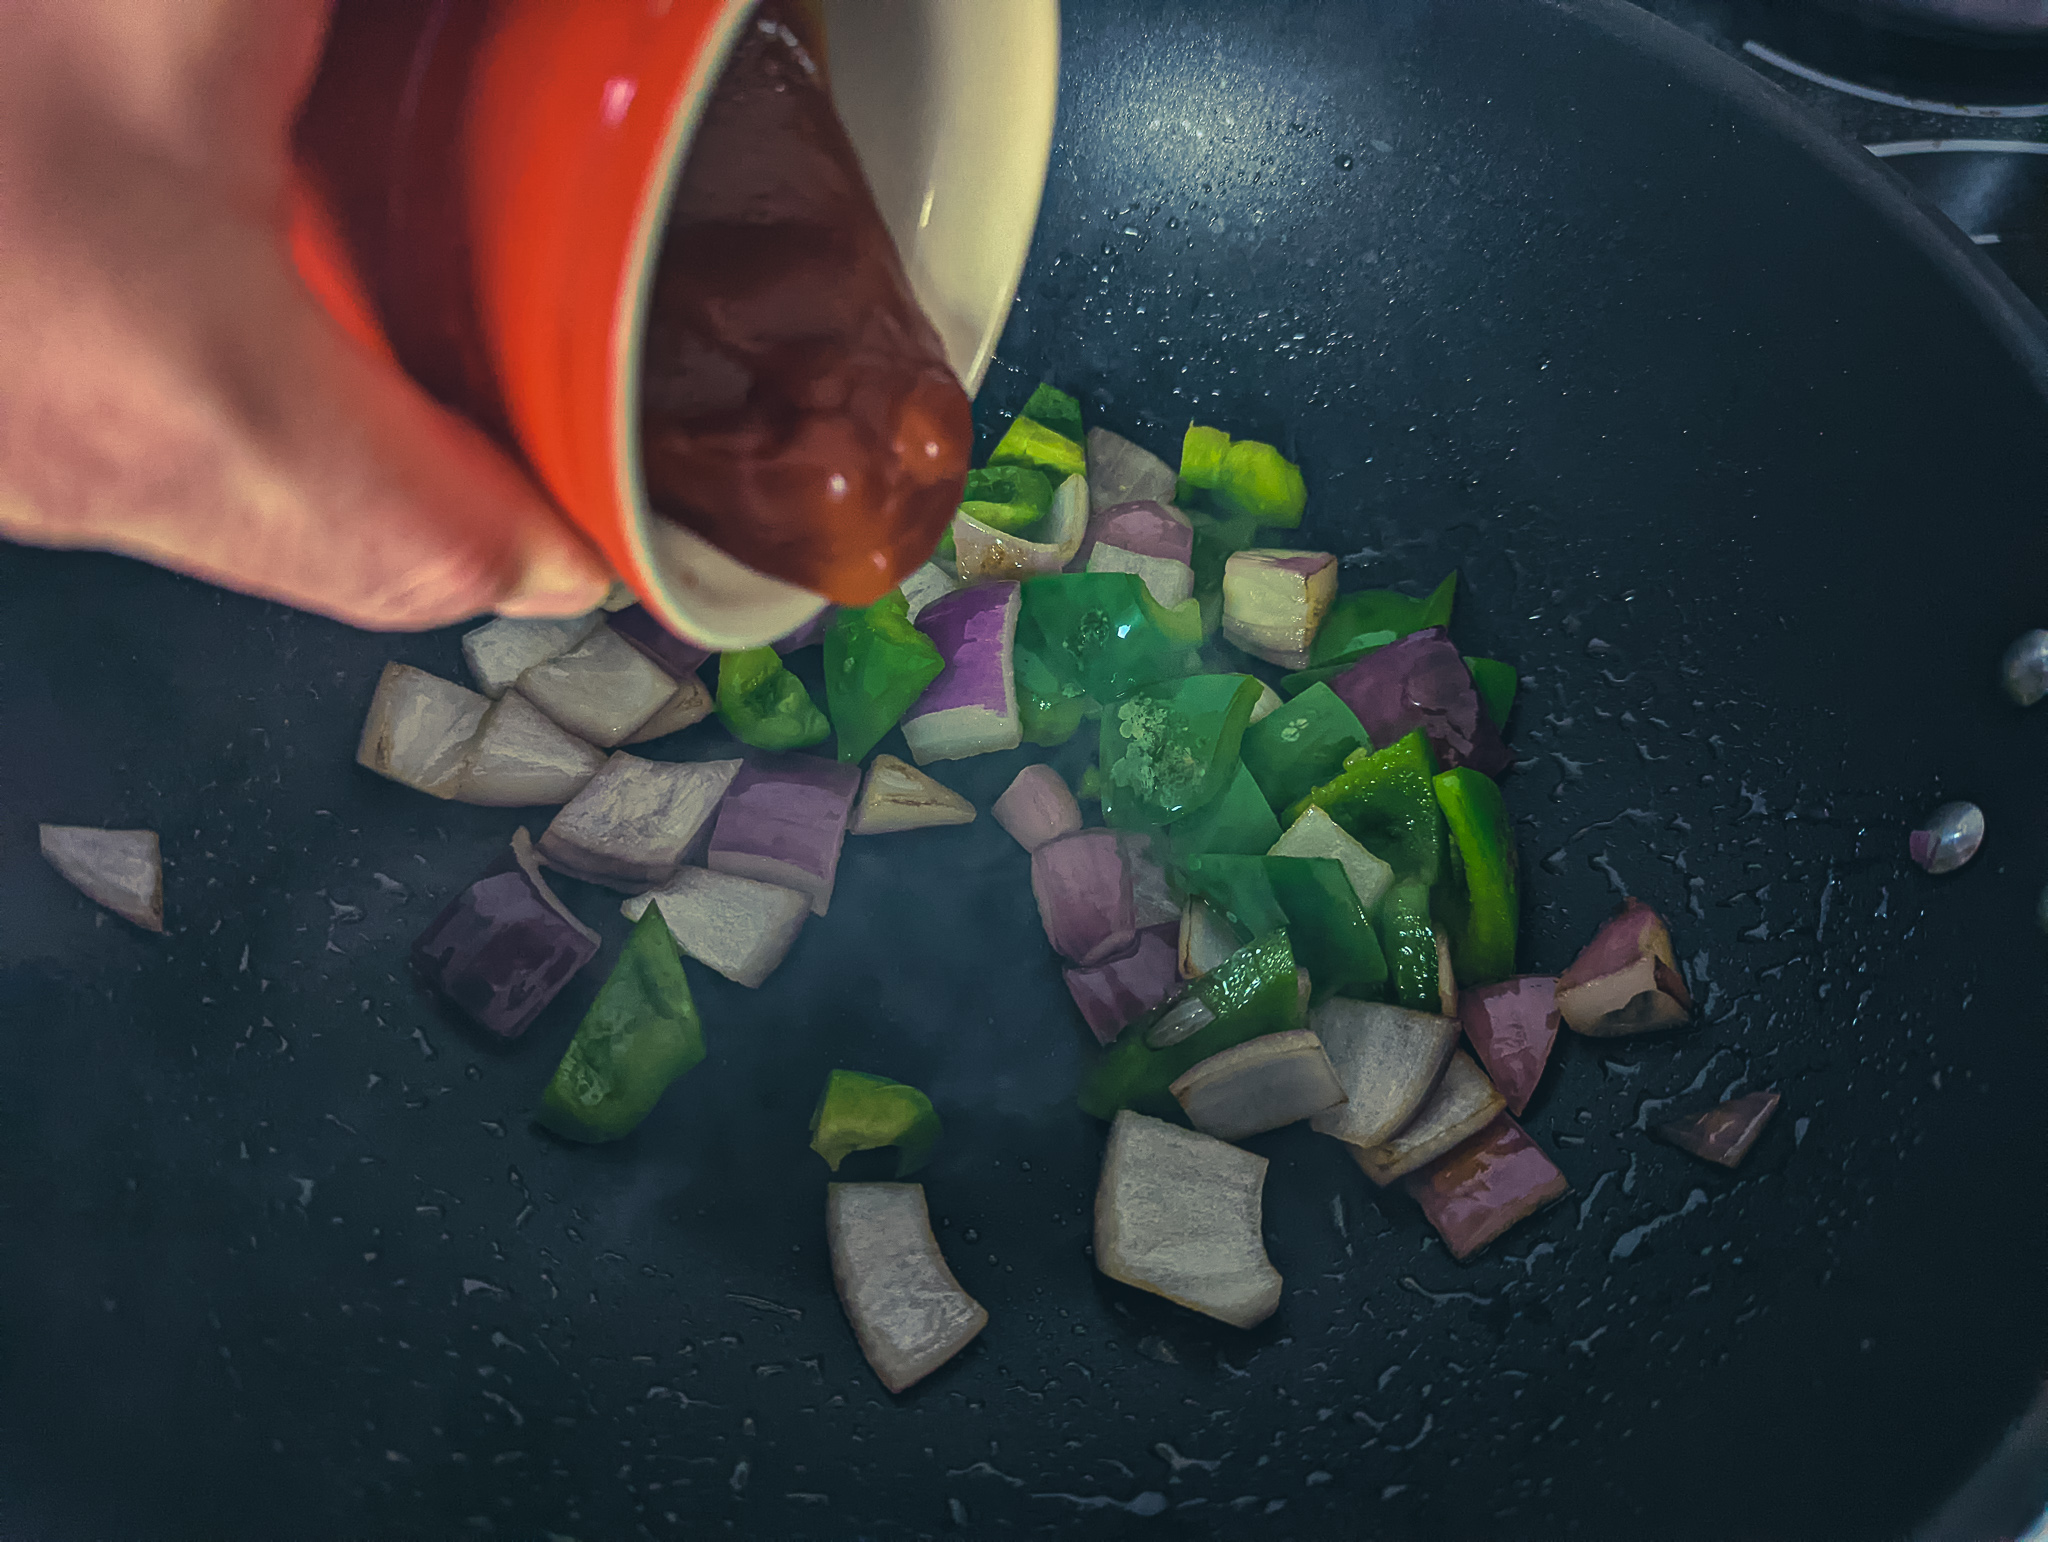
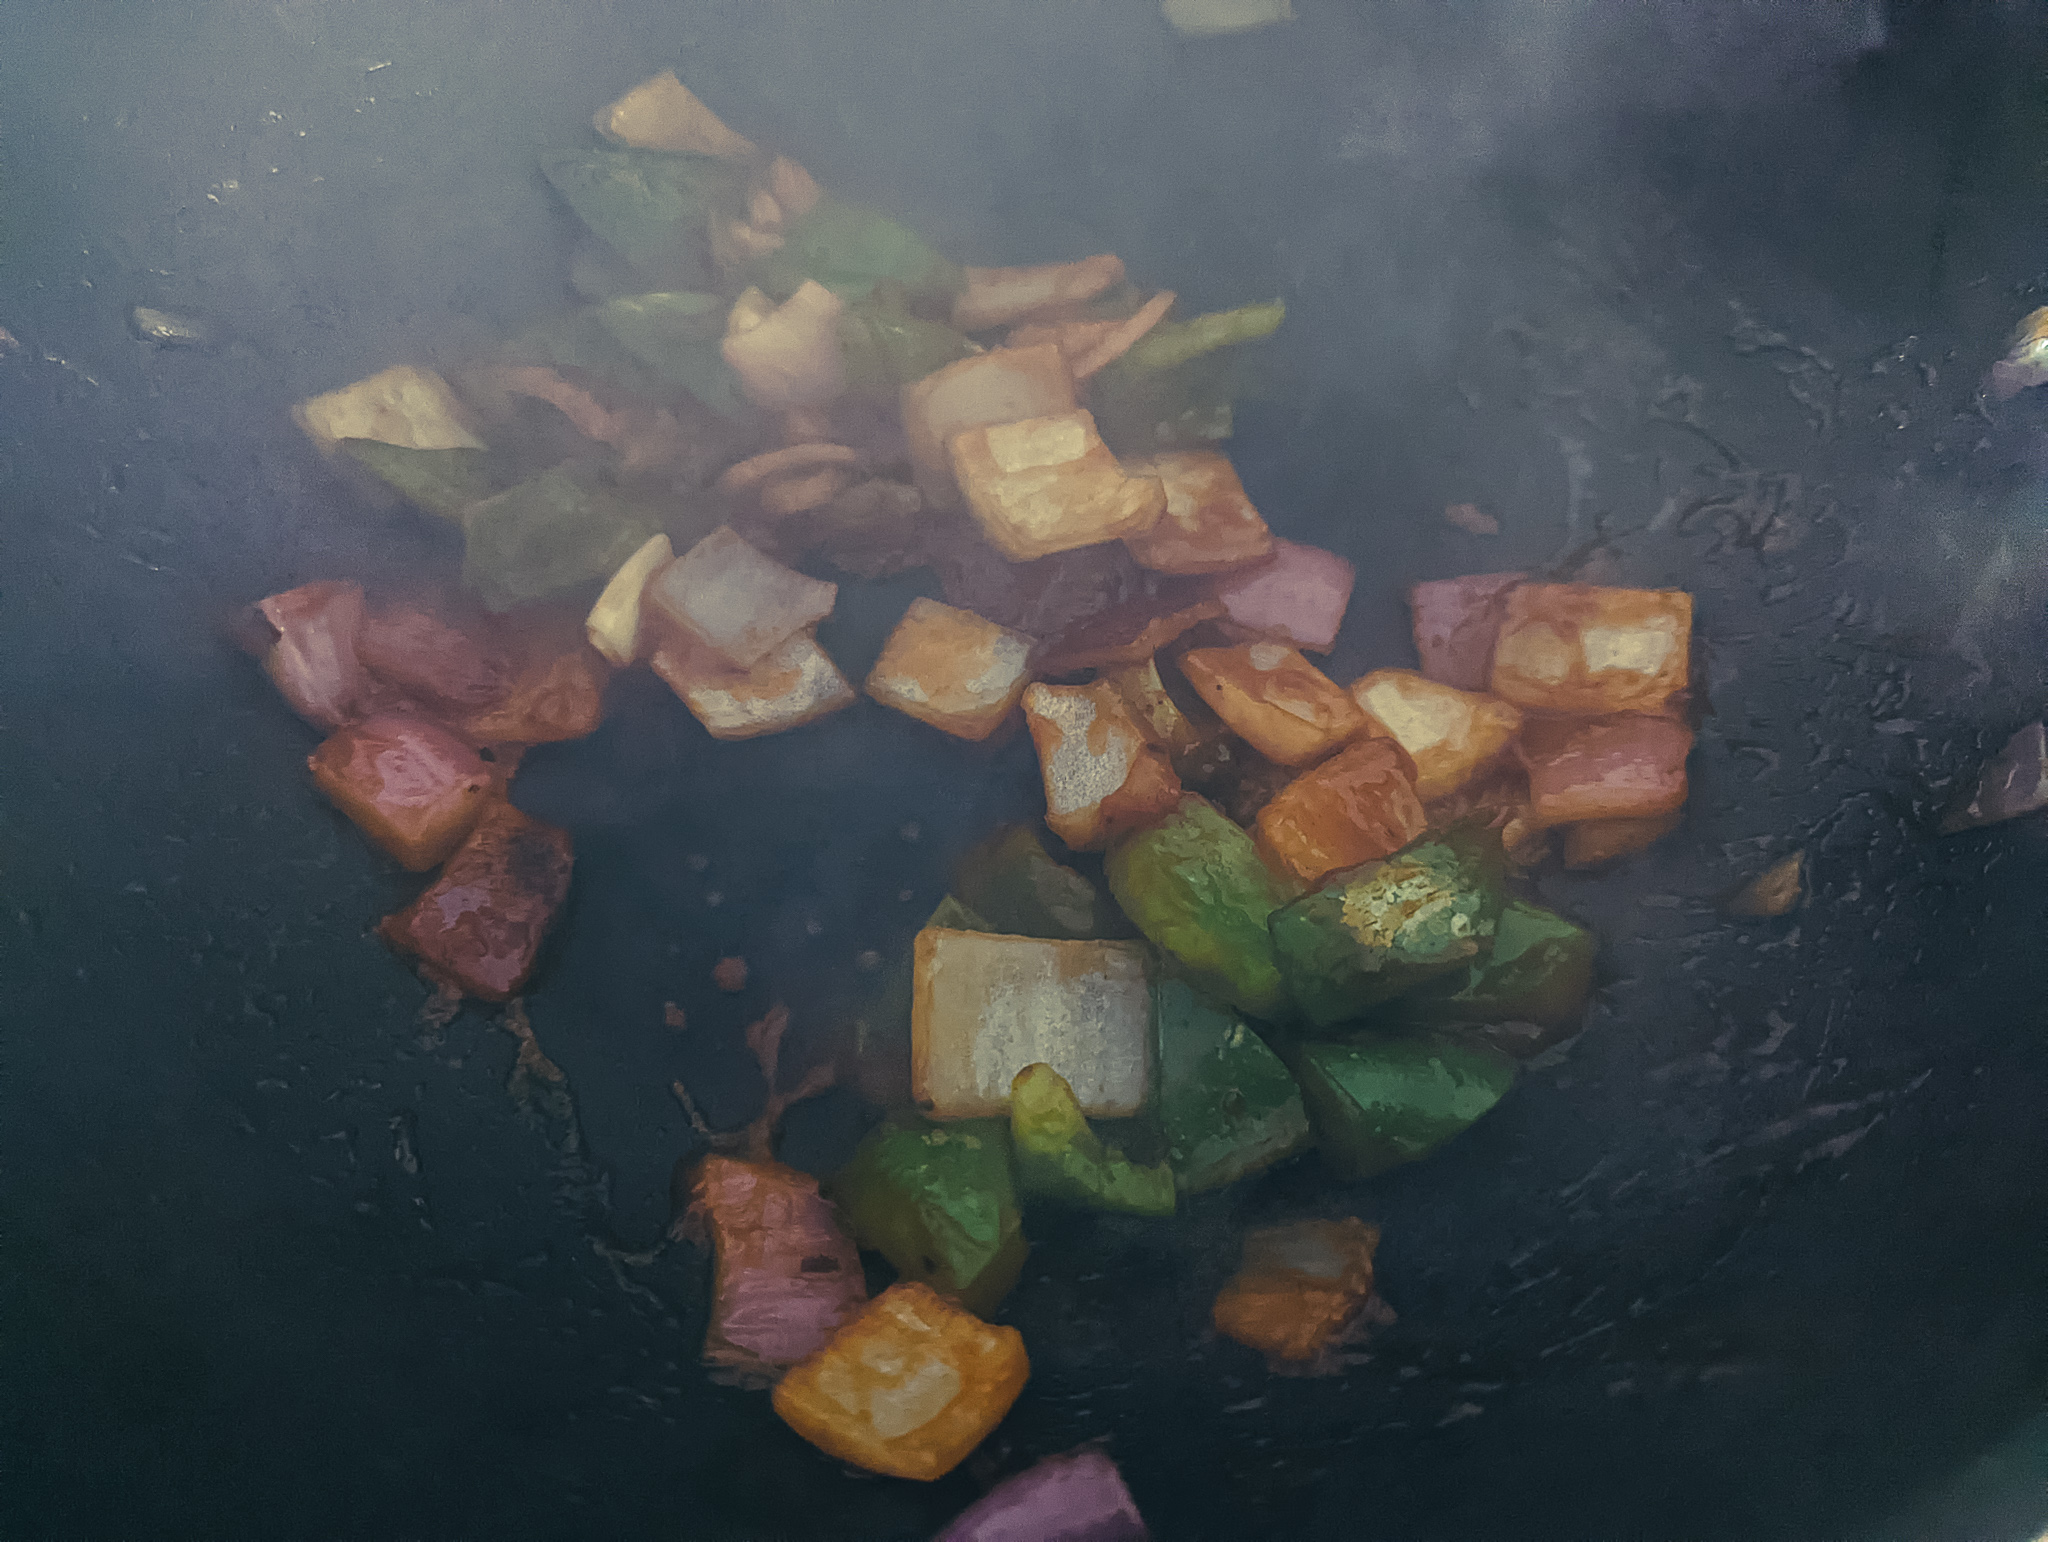
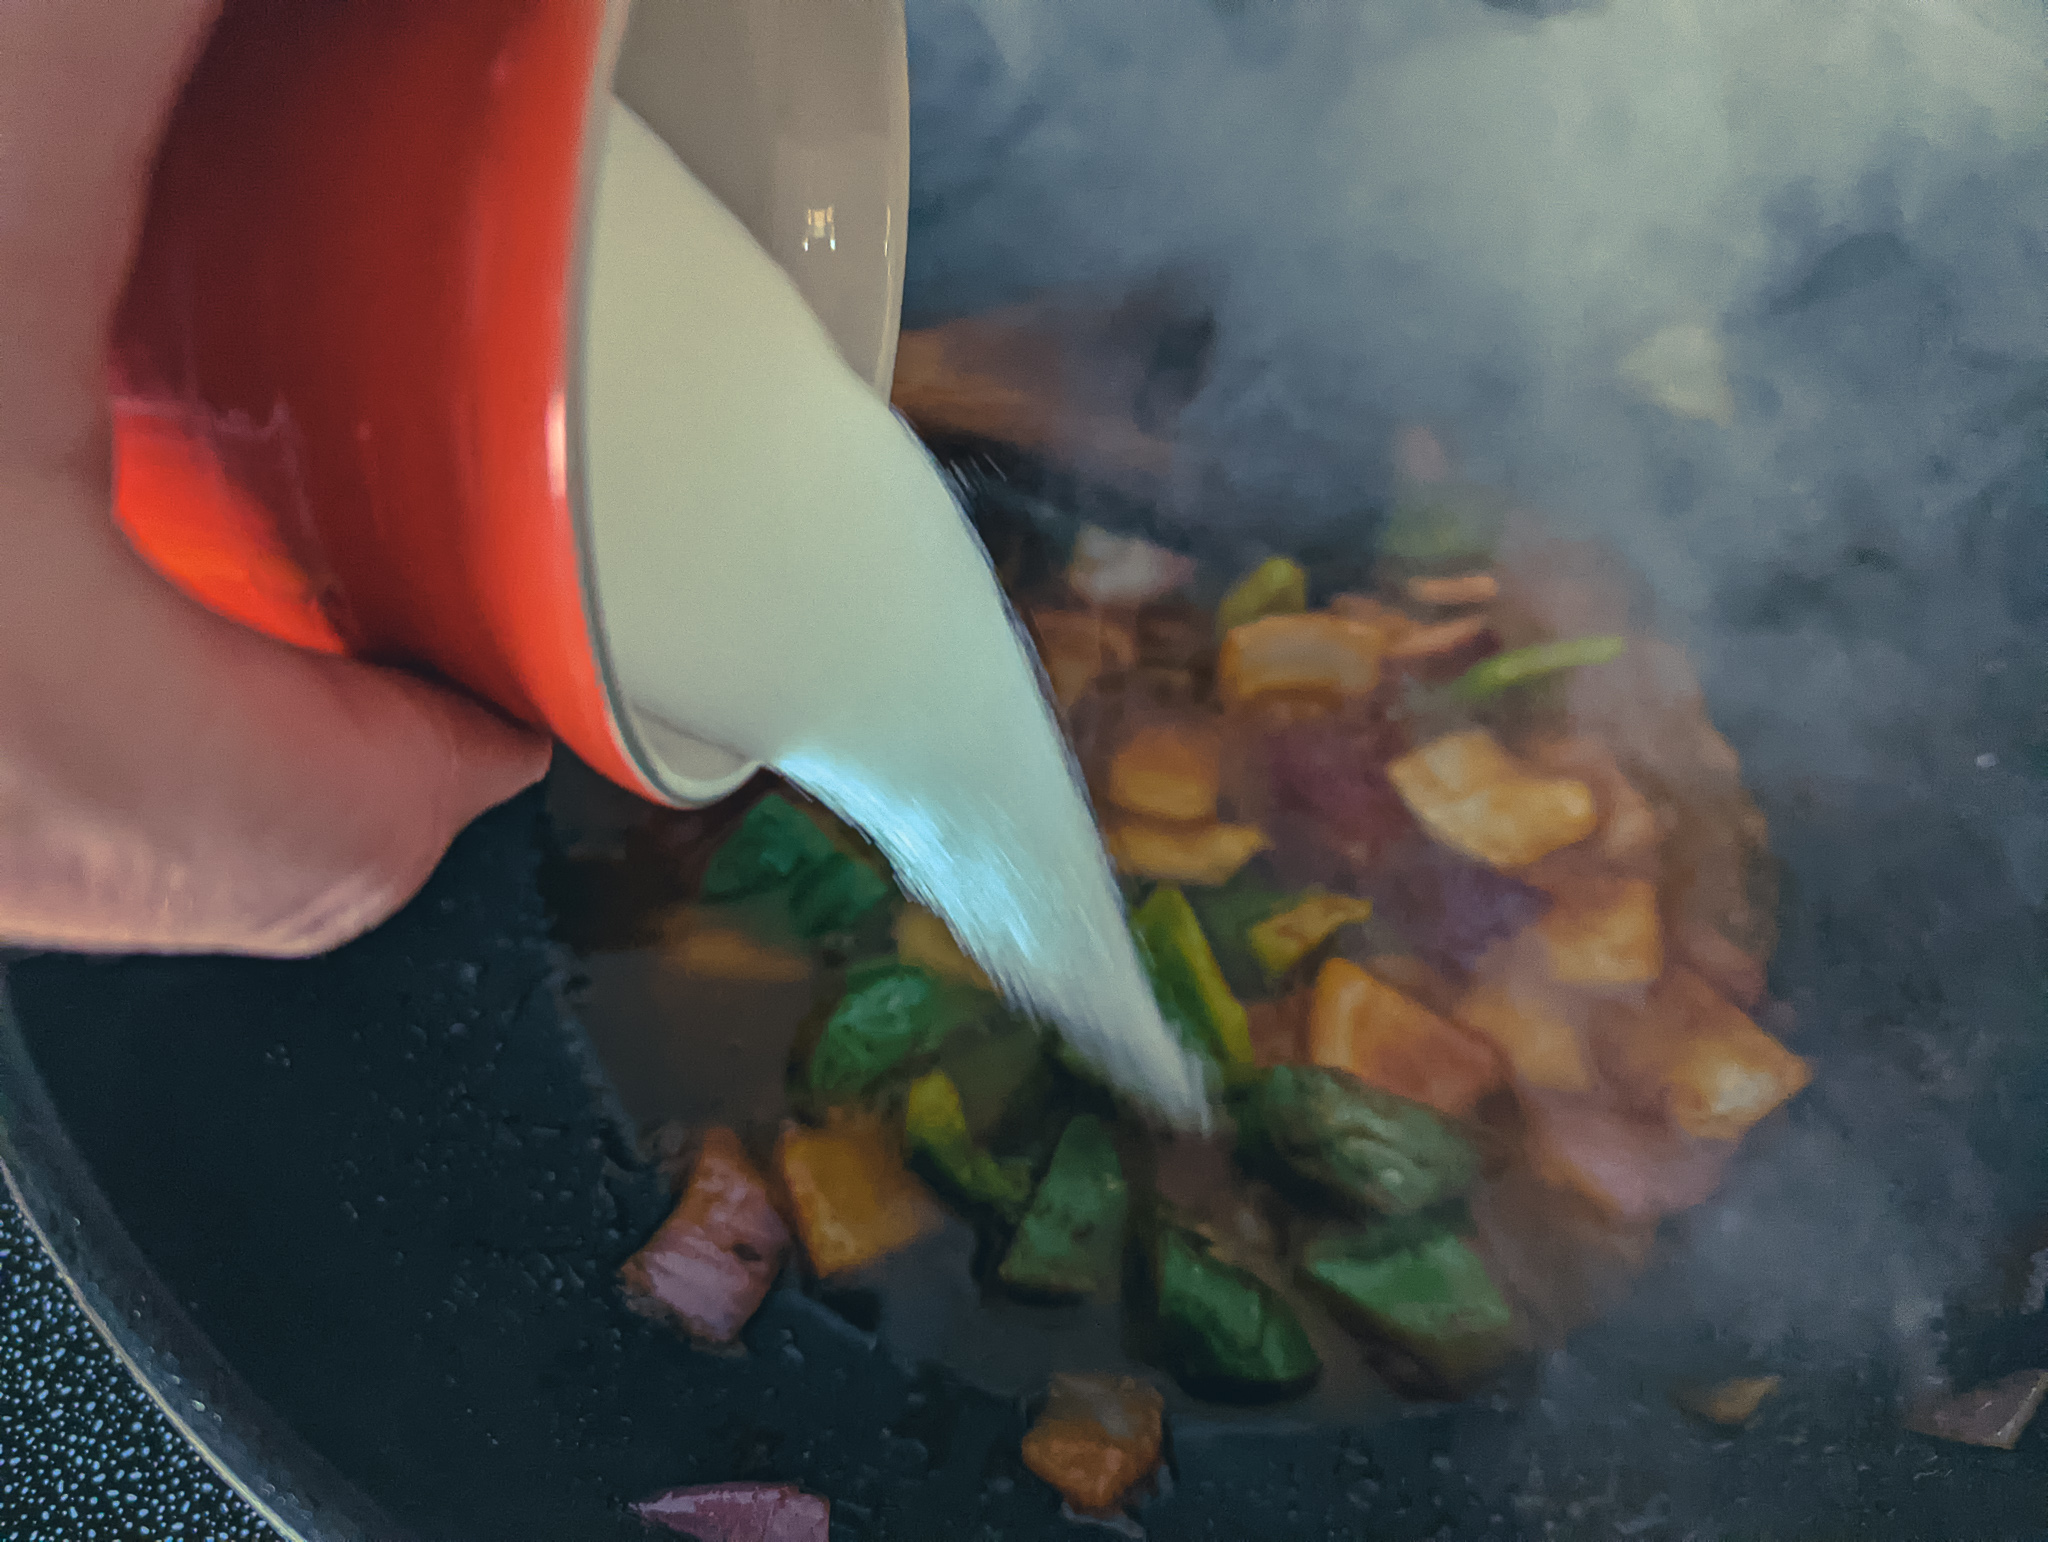
Cooking The Spicy Beef
Before you start cooking the spicy beef, you should get your ingredients prepped and ready to go. This includes cooking the rice and sweet potato (or using leftovers from the night before), defrosting frozen corn or opening a can of corn niblets, and of course, making the Tangy Chipotle Lime Sauce.
Once everything is ready, it’s time to cook the beef. You have a few options here – you can skewer the beef and cook it on the grill for a delicious, smoky flavour, or cook it in a pan on the stove. If you opt for the latter, heat a large, non-stick skillet over medium-high heat and add a teaspoon or two of cooking oil. Cook the beef in two batches, wiping the pan out between each and making sure it heats back up before adding the second batch. Once the beef goes in the pan, let it sit for a minute or two, flip it, and cook for another minute. You don’t want to overcook the beef, so aim for a medium-rare to medium doneness. Once the beef is cooked, remove it from the pan and set it aside while you cook the second batch.
With everything prepped and the spicy beef cooked to perfection, it’s time to assemble your spicy bowl and dig in! Enjoy!
Assembling The Spicy Beef Bowl
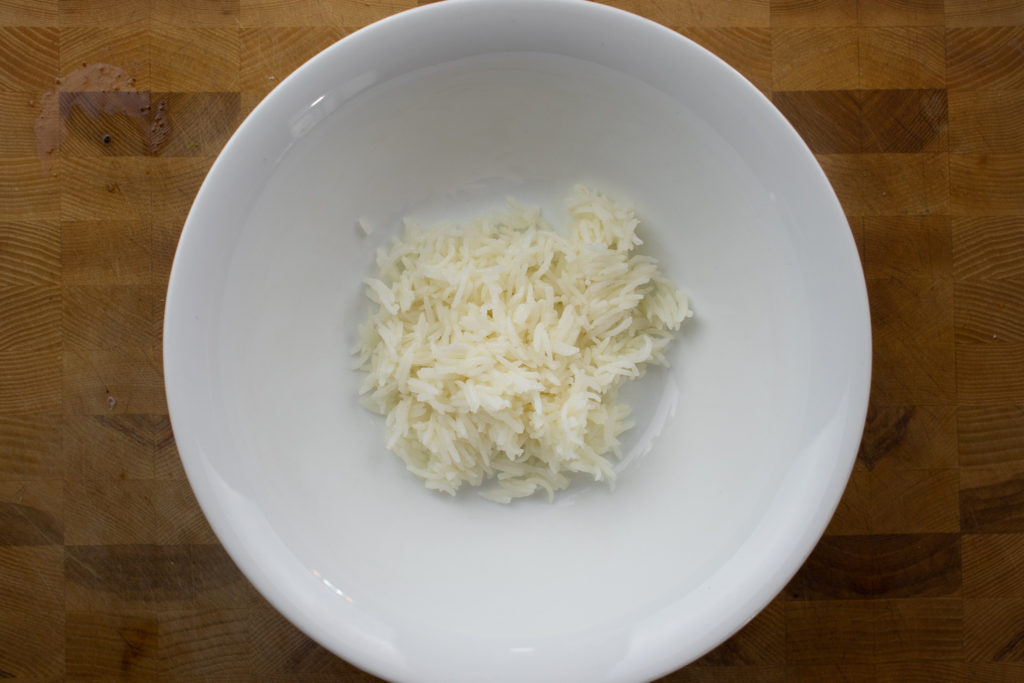
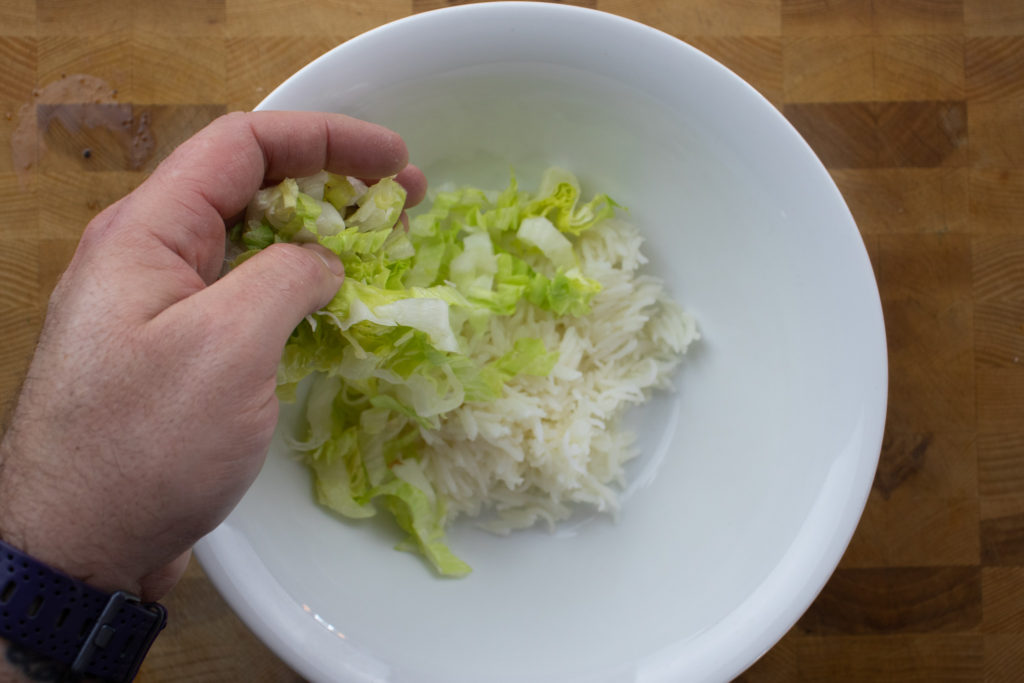
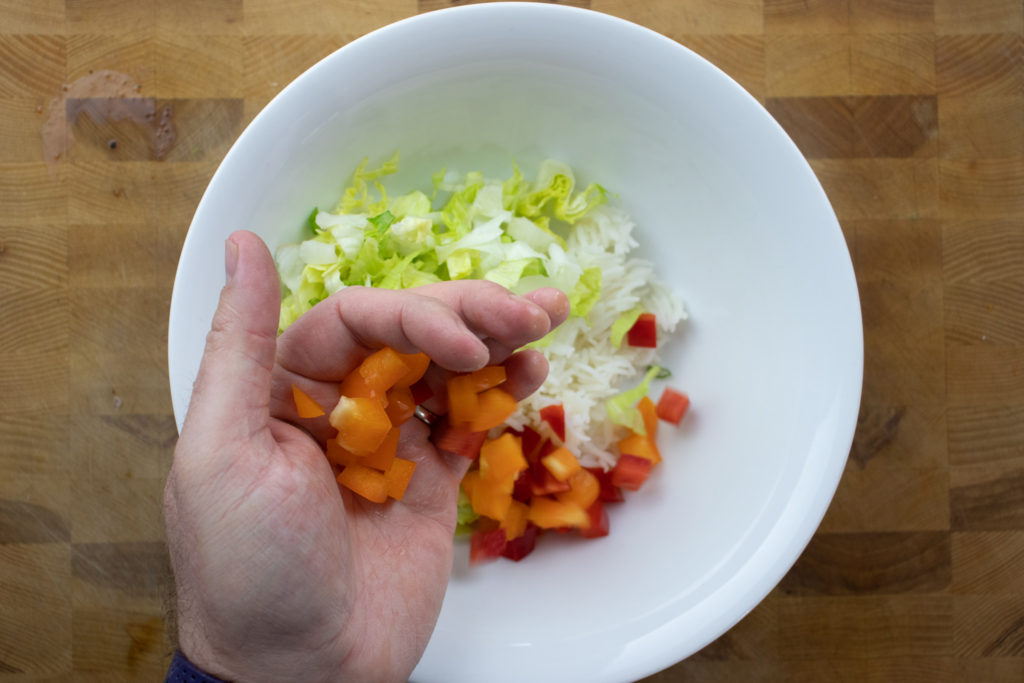
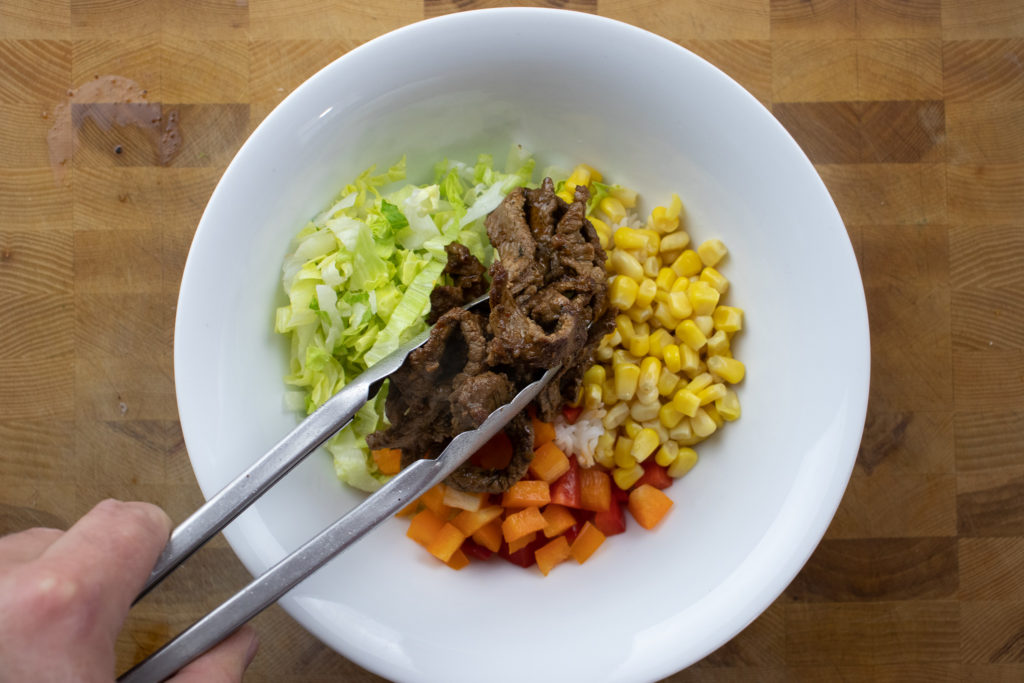
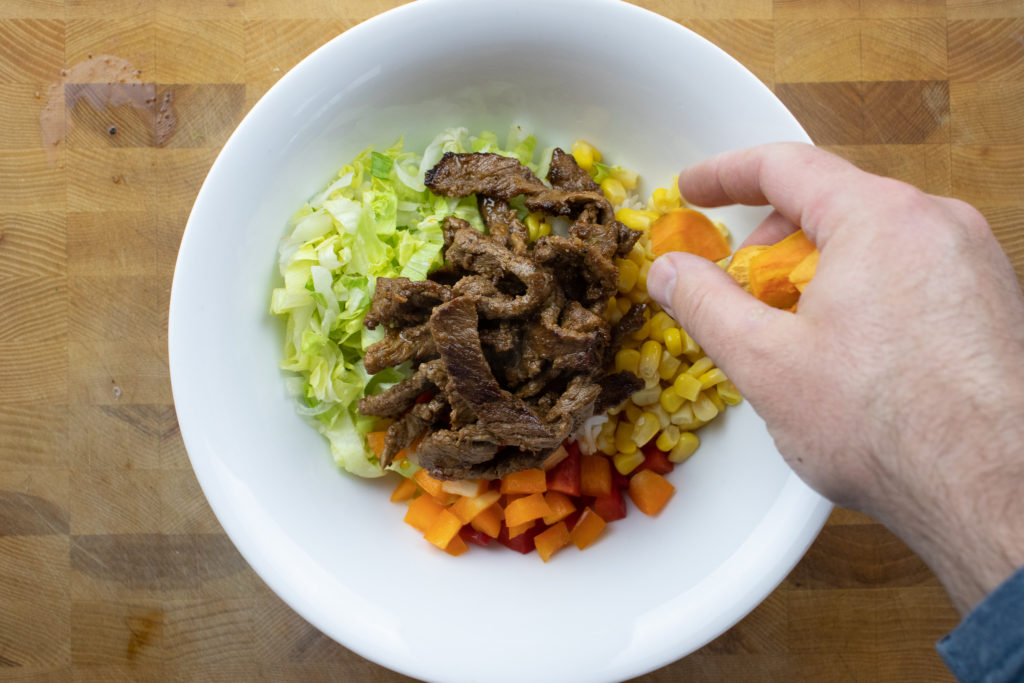
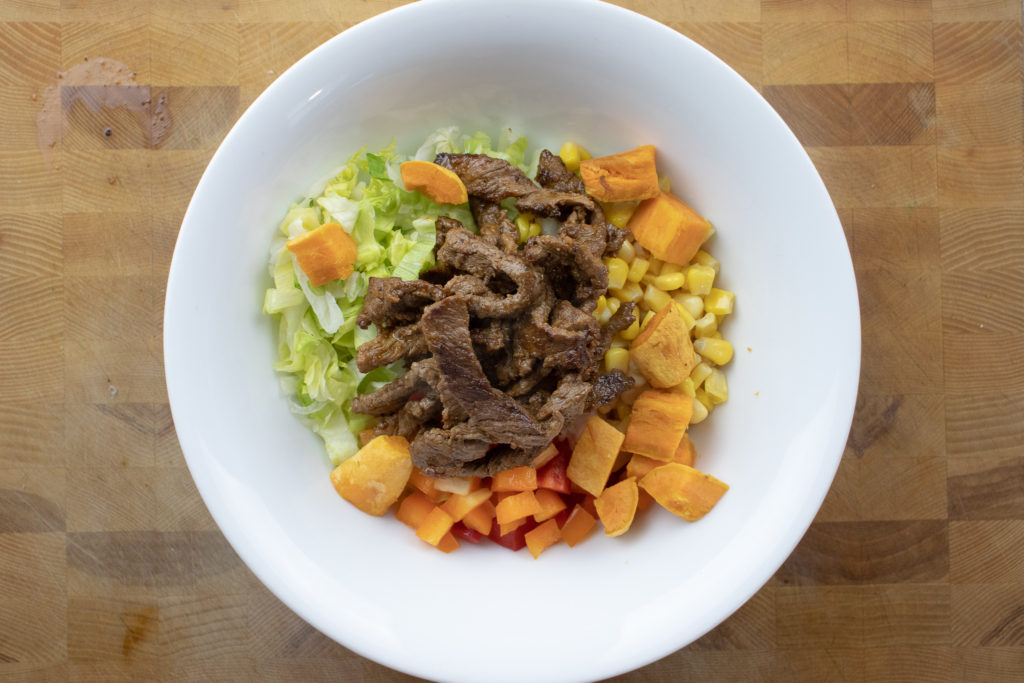
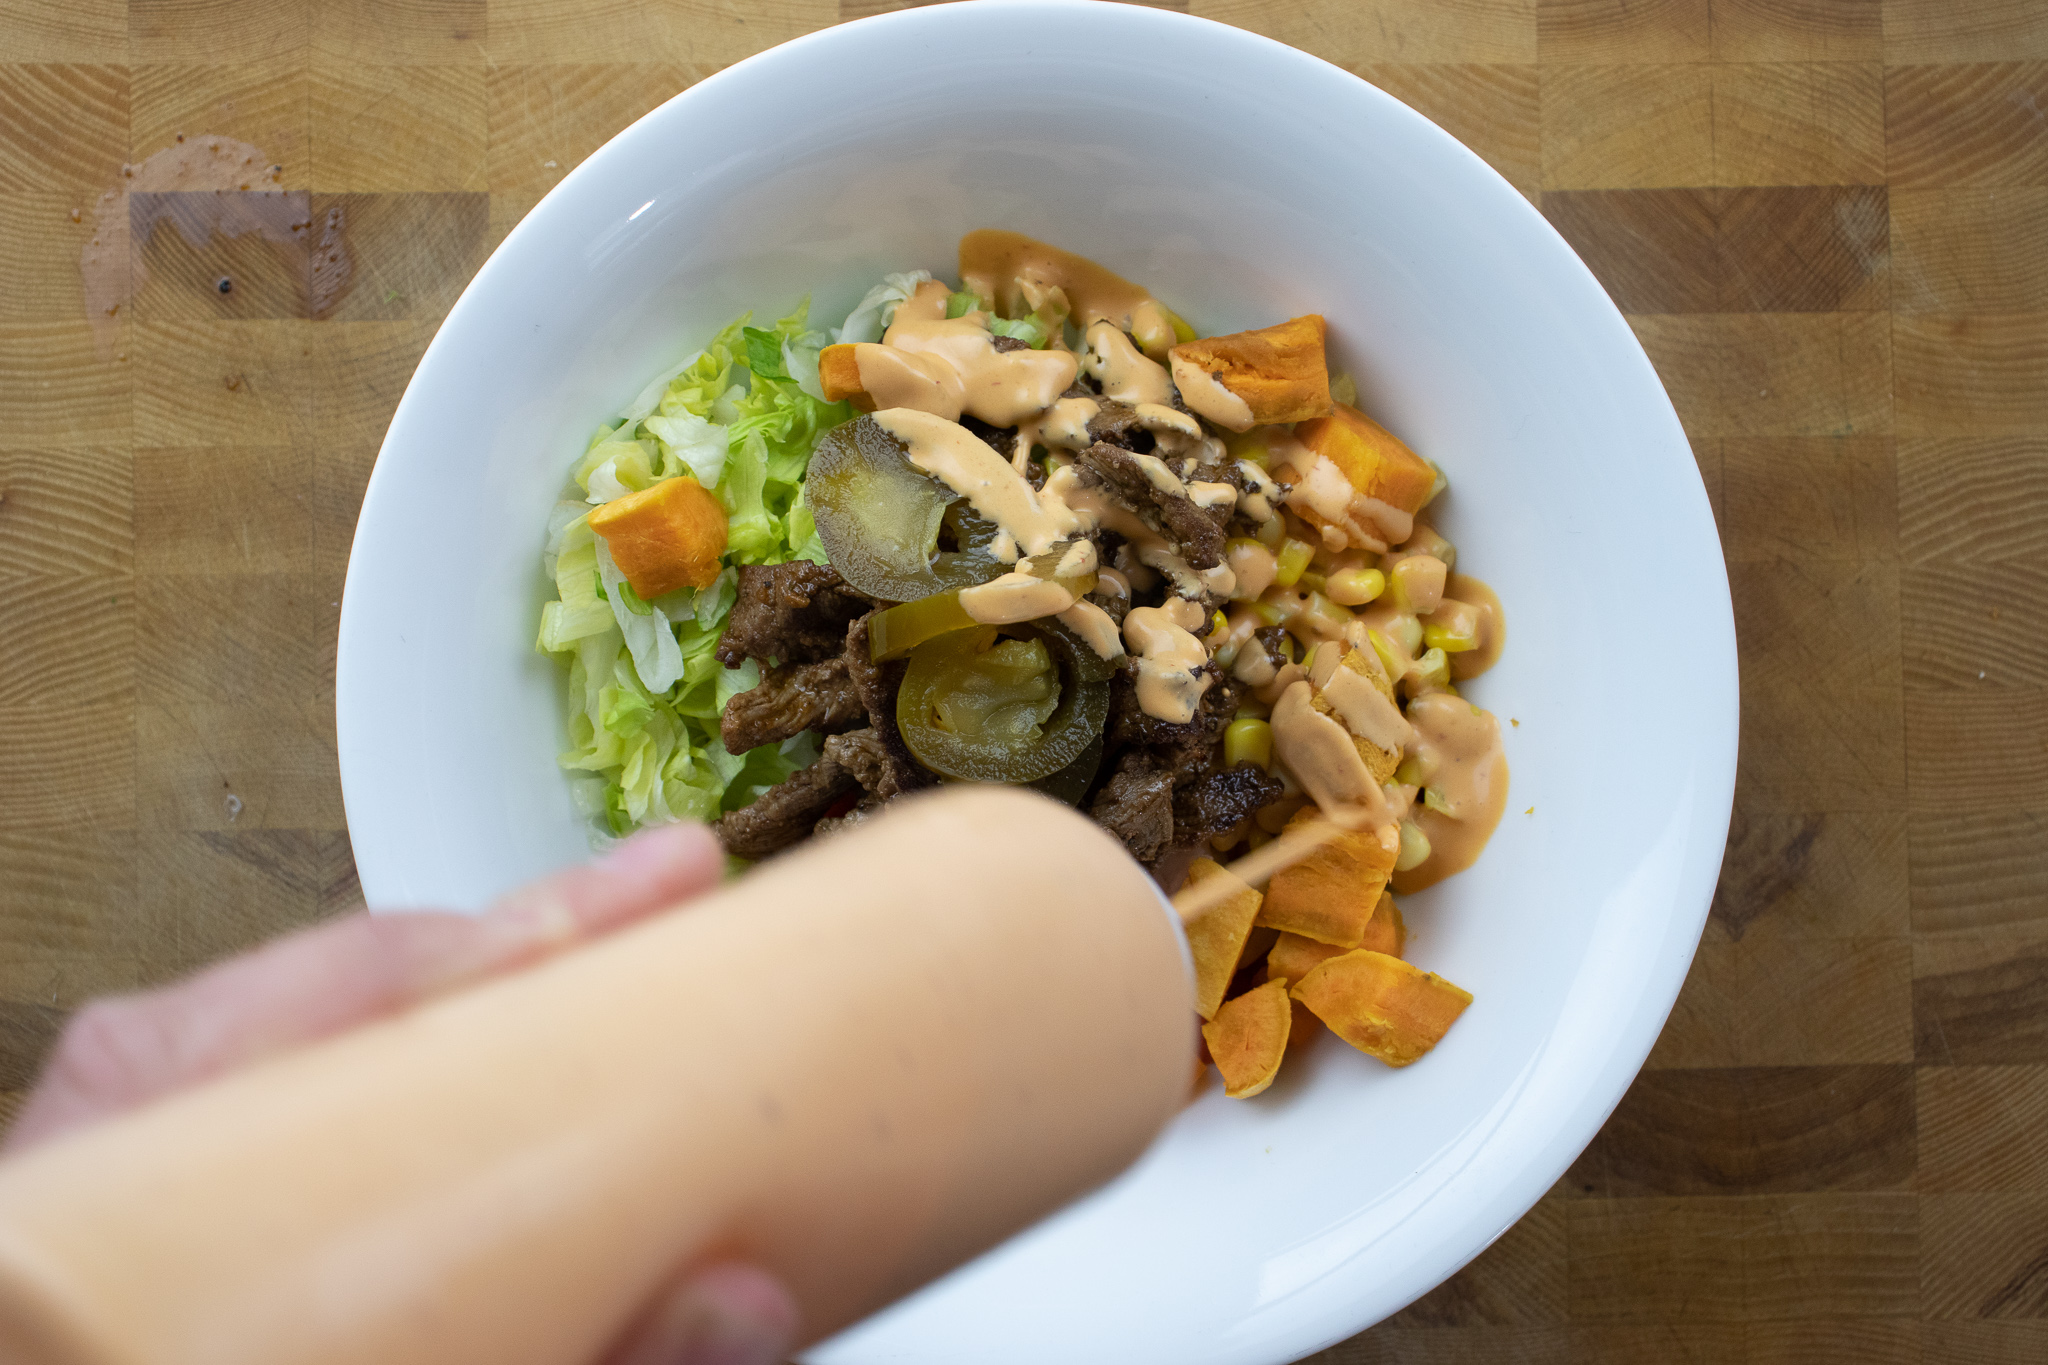
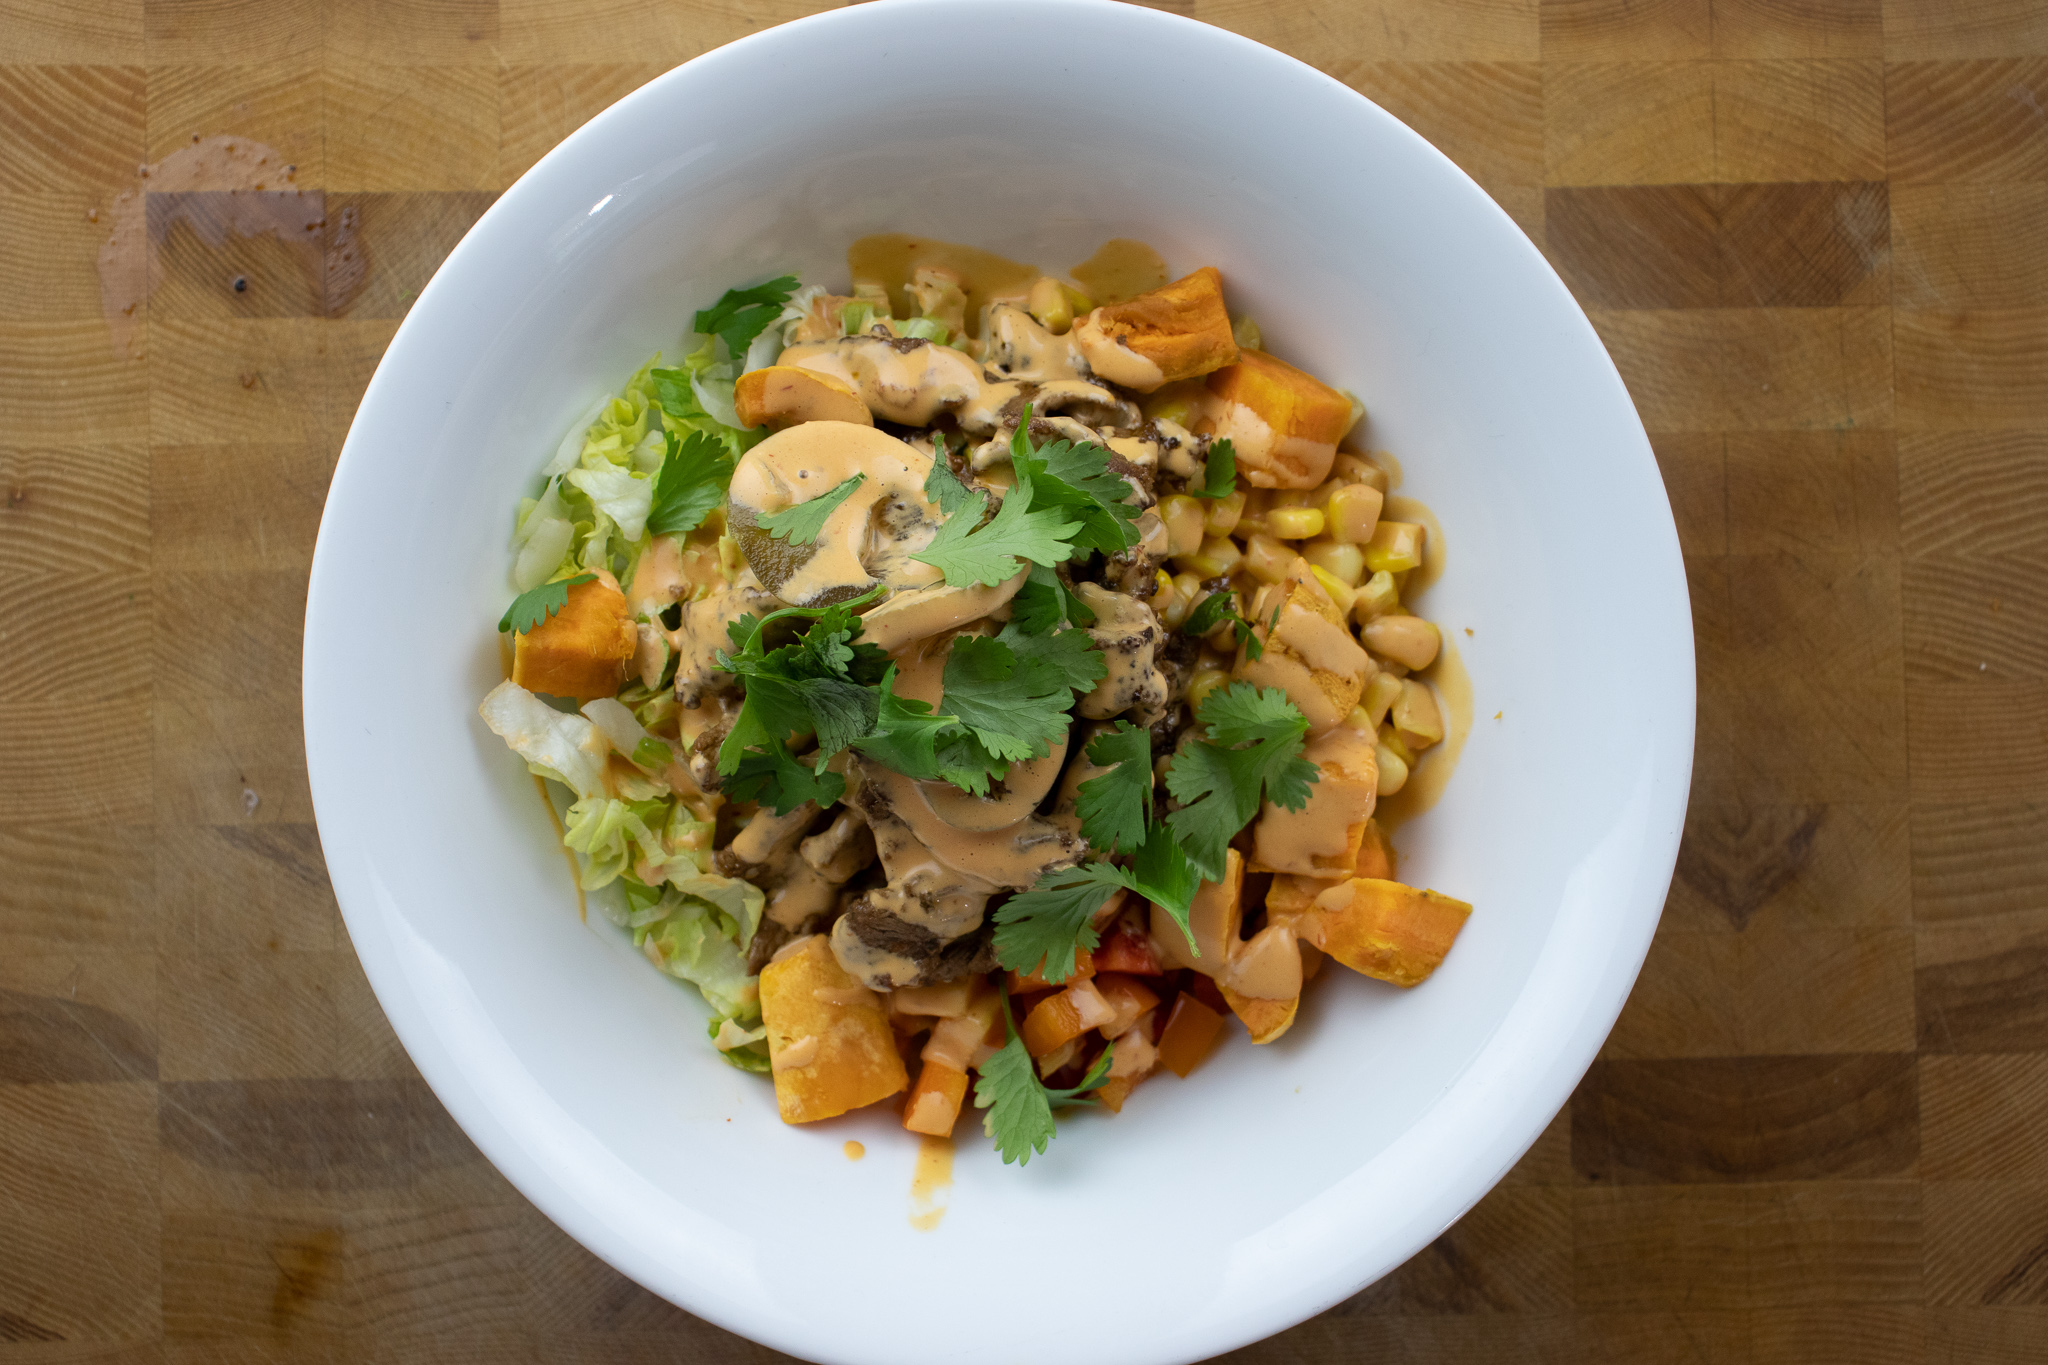
Assembling your spicy beef bowl is easy and fun! Start by adding half a cup of cooked rice to the bottom of two bowls. You can use any kind of rice you like – white, brown, jasmine, basmati. The list goes on. Next, top the rice with shredded lettuce, diced bell peppers, corn, spicy beef you cooked earlier, sweet potato, pickled jalapeno, and Tangy Chipotle Lime Sauce. You can add as much or as little of each ingredient as you like, depending on your personal preferences. Finally, top the spicy bowl with thinly sliced green onions and a sprinkle of cilantro for a fresh, aromatic finish.
With everything assembled and ready to go, it’s time to dig in and enjoy your delicious spicy bowl! You can eat it as is, or add your favourite hot sauce or salsa to give it an extra spicy kick. Whatever you choose, I hope you enjoy your spicy bowl as much as I do!
Wrap Up
Whether you’re looking for a hearty lunch or a light dinner, this spicy beef bowl recipe is sure to satisfy you. One of the great things about it is that it’s highly customizable – you can try it with different proteins like pork, chicken, salmon, or tofu, or add in other ingredients like black beans, red onion, or cheese. The chipotle lime sauce is also excellent on sandwiches, especially with grilled chicken, or even on these Fish Tacos With Mango Salsa. The point is, the components of this spicy bowl recipe are versatile, so you don’t have to worry about the leftovers going to waste.
Thank you for coming to my blog and reading this post. I appreciate your support and I hope you continue to enjoy my content. Until next time!
Spicy Beef Bowl
Spicy marinated beef, rice, and vegetables with chipotle lime sauce make this spicy beef bowl one to remember.
Put the olive oil, chipotle, jalapeno, and cajun seasoning in a blender and blitz.
Thinly slice the beef and combine it with the marinade. Cover it and put it in the fridge for 1 to 2 hour.
Heat a large skillet over medium-high heat. Add the cooking oil and the beef. Brown on both sides then remove the meat from the pan and set it aside.
Spicy Chipotle Sauce
Combine all the sauce ingredients in a blender and blitz until smooth or, mince chop the chipotles and mix with the yogurt, mayonnaise, sugar, and lime juice.
Taste the sauce, and season with salt to taste.
Use the sauce right away or cover and store in the fridge for up to four days.
Spicy Bowl
Divide the rice among two bowls.
Add the lettuce, corn, bell peppers, green onion, jalapeno, and beef in the bowl. Top the bowl with the sauce, and cilantro then serve.
Notes
Substitute the beef with chicken, pork, or tofu and keep the recipe as is.
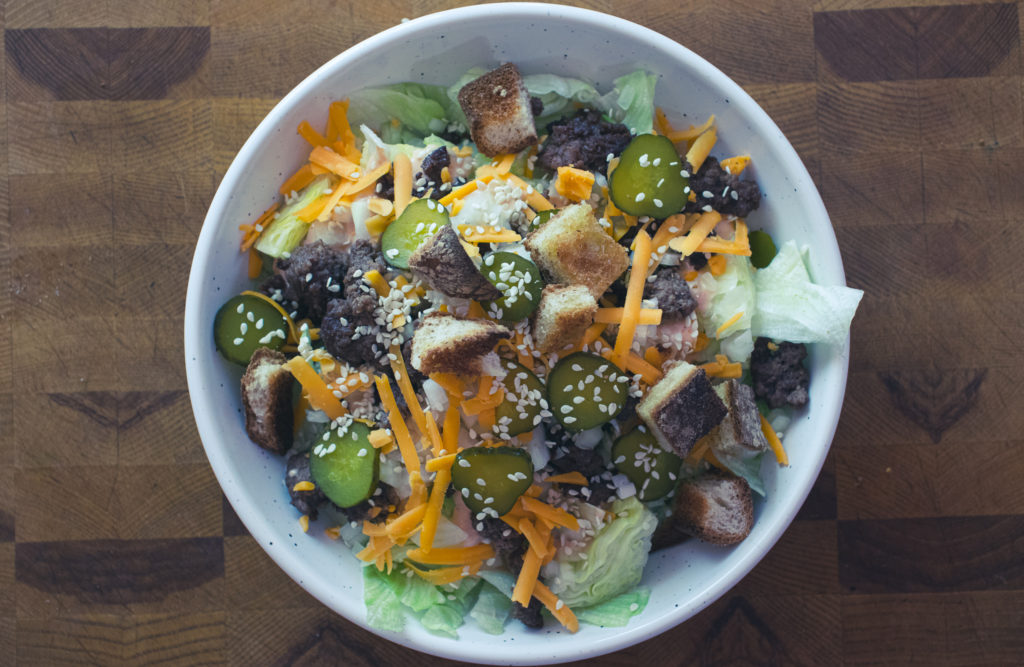
I have to admit, back in the day when I didn’t know I had celiac disease, I was very fond of the occasional Big Mac. I know that people love to hate McDonald’s but come on, as far as fast food burgers go, the Big Mac is one of the best. So, a few weeks ago, I was cruising the internet, and I found a few recipes for a Big Mac salad. Well, I knew right away that I had to make my version. This is my version and I’m very happy with it. This Big Mac Salad is the closest I’ve had to the real thing in years. I am so excited to share this recipe with you. So, let’s get to it.
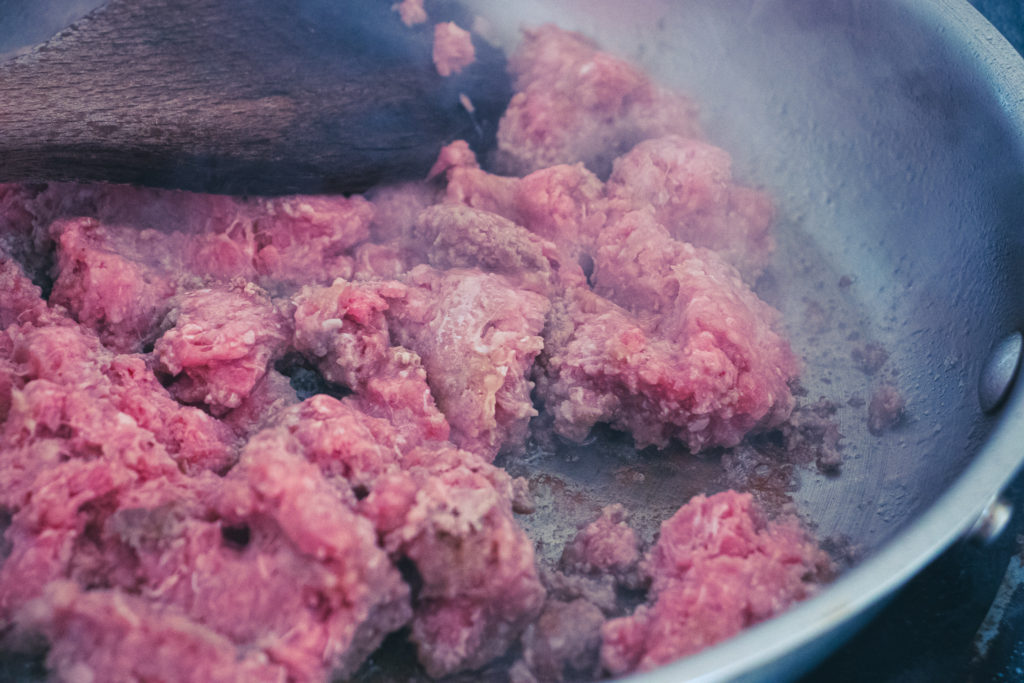
“Burger” Meat
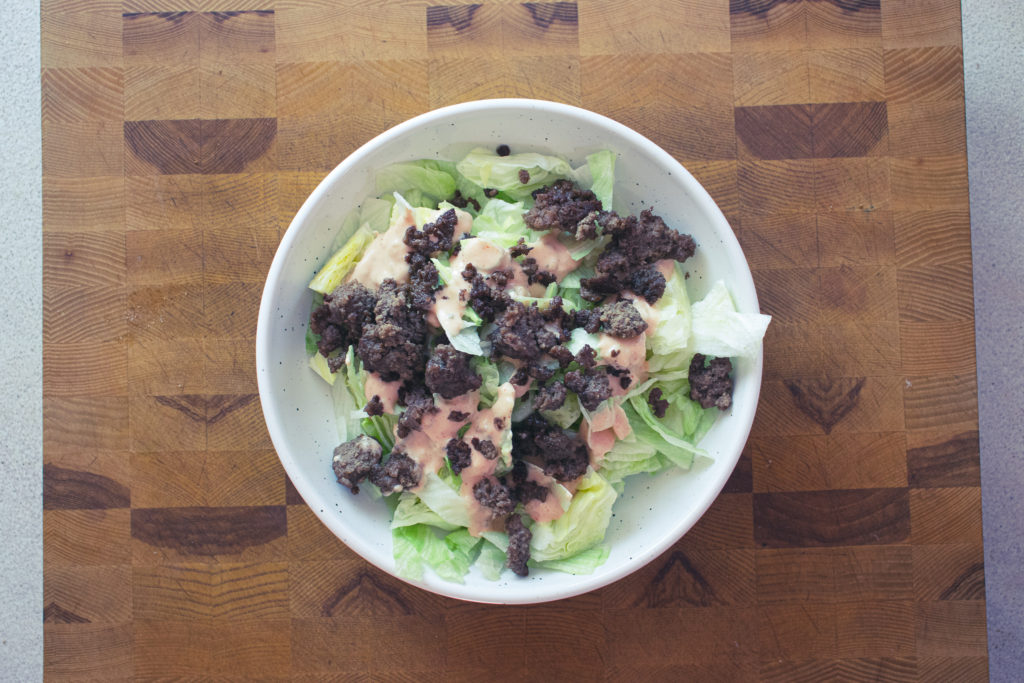
Most of us know the song that goes along with the iconic burger. If you don’t, it starts with, “Two all-beef patties…”. So it makes sense that’s where we will begin to too. However, since we’re making a salad and not a burger, I don’t see the point in making patties. So instead, I seasoned some ground beef with onion powder, garlic powder, and salt then browned it in a hot pan. Once cooked, I drained the oil off the meat. Like that, the “patties” are ready to go.
How To Make Big Mac Sauce
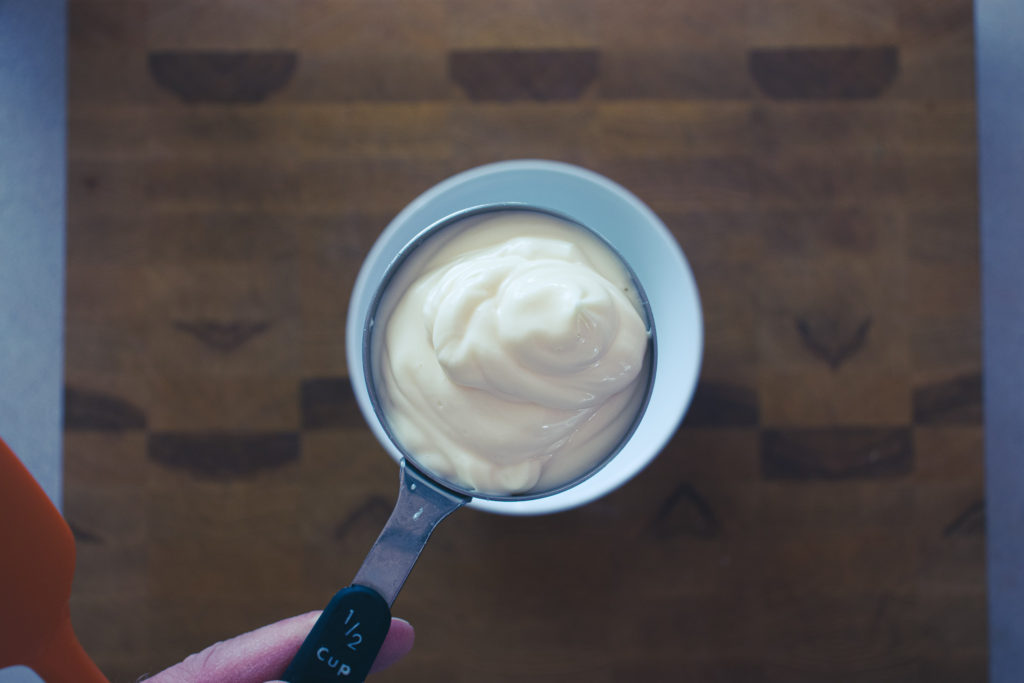
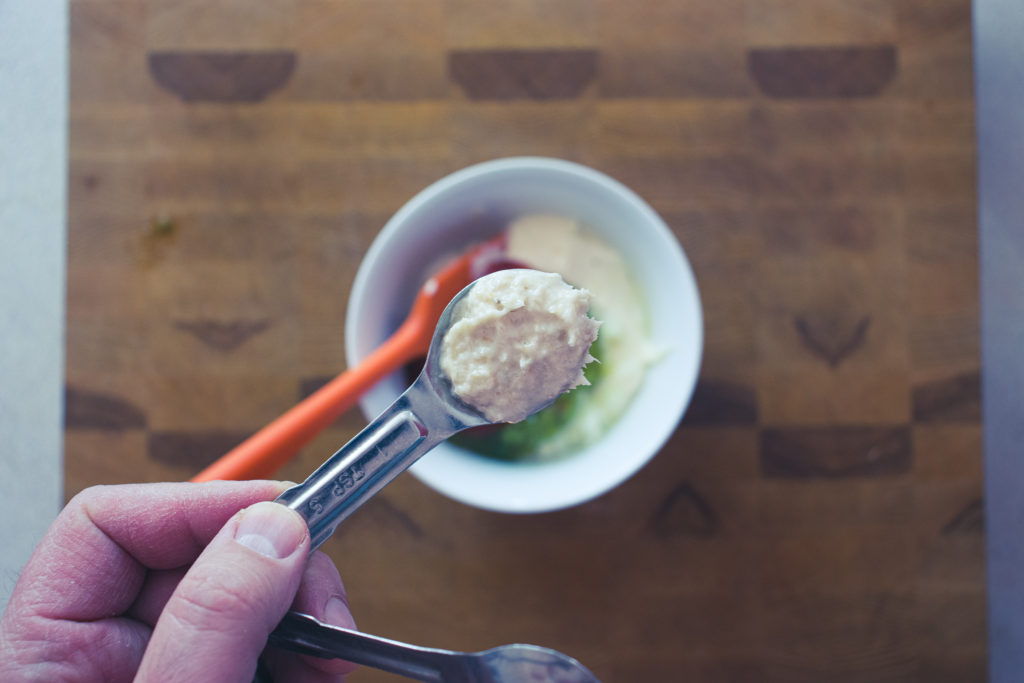
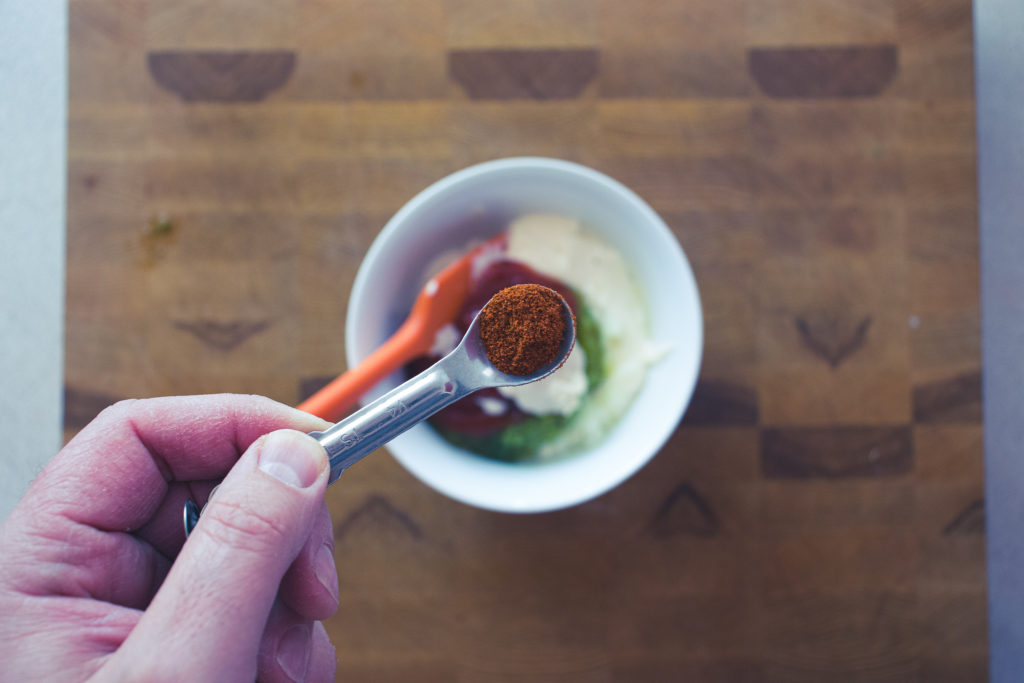
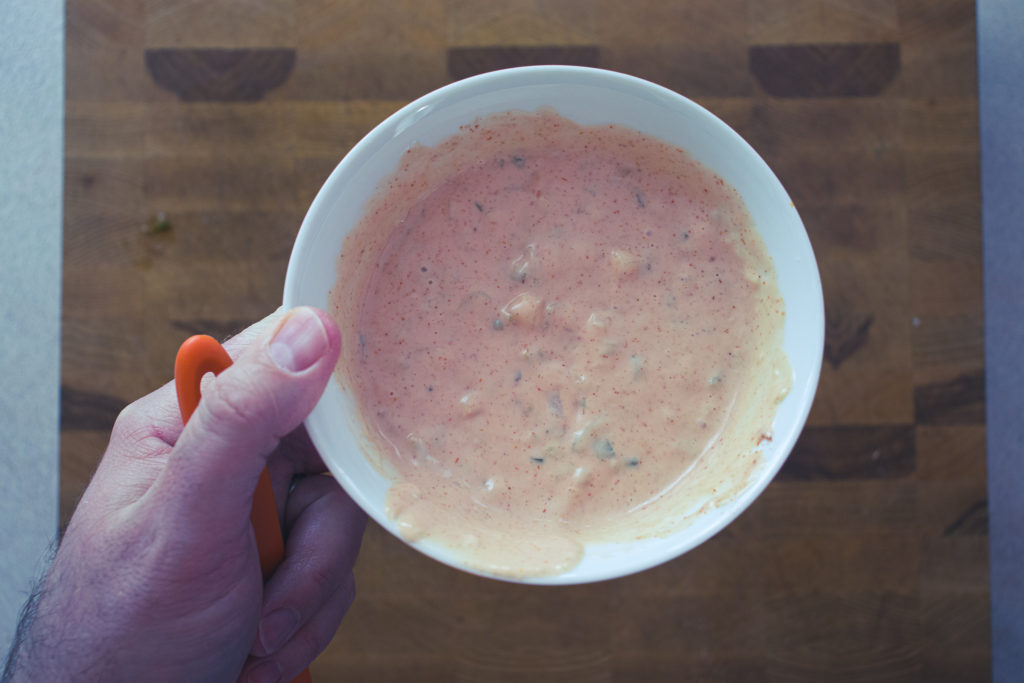
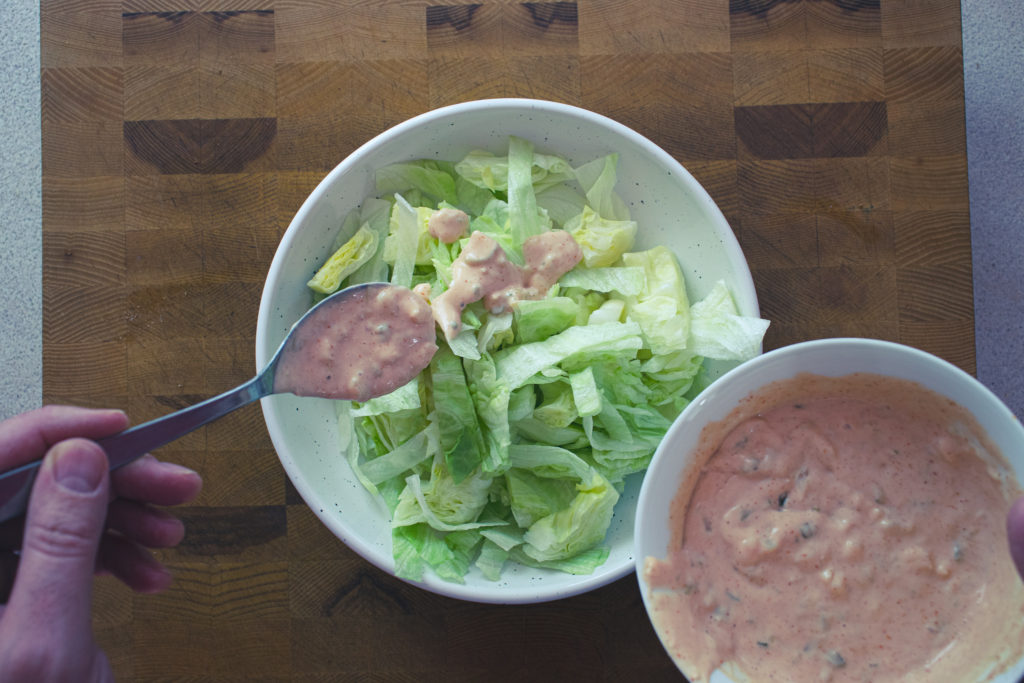
After “two all-beef patties” comes the “special sauce.” Big Mac sauce is essentially a version of Thousand Island Dressing, which itself is a version of Russian Dressing. In all honesty, the difference between the two dressings isn’t obvious. The main difference that I can see is that Russian Dressing has a bit of horseradish in it, making it a bit more pungent than Thousand Island. For my money, I think Russian Dressing makes a better Big Mac sauce than Thousand Island.
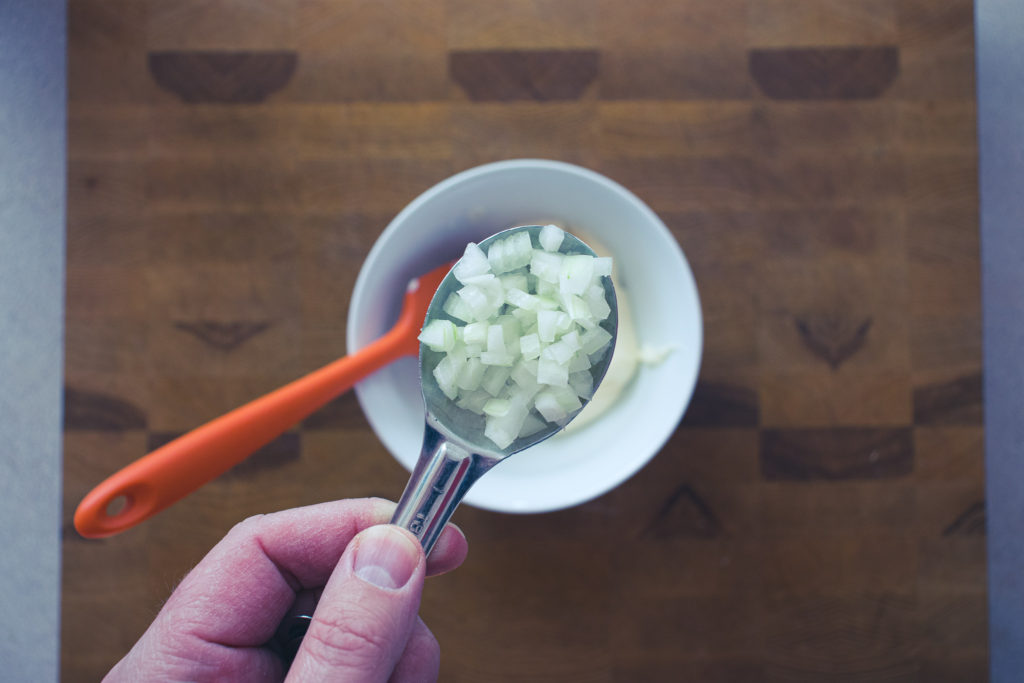
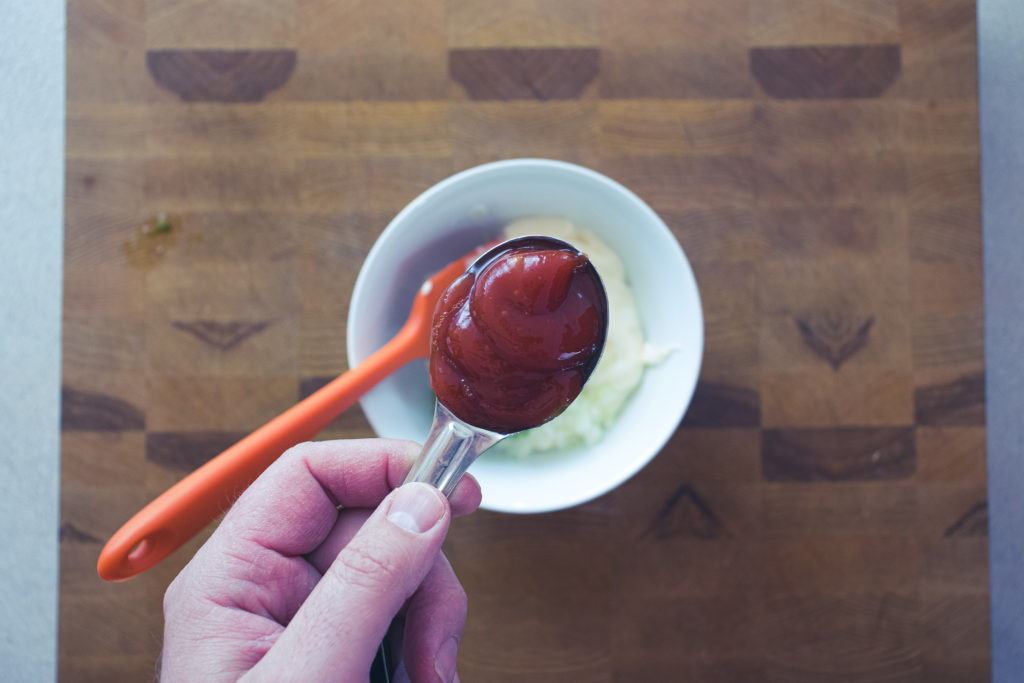
To make Russian Dressing combine mayonnaise, minced onion, relish, ketchup, vinegar, horseradish, paprika, salt, and hot sauce. You can find all the measurements in the recipe above. You can use the sauce immediately after mixing all the ingredients, but I think it’s better to let it rest in the fridge for at least thirty minutes. This resting time gives the dressing a more full flavour. After that, you can store it in the refrigerator in an airtight container for up to five days.
Croutons
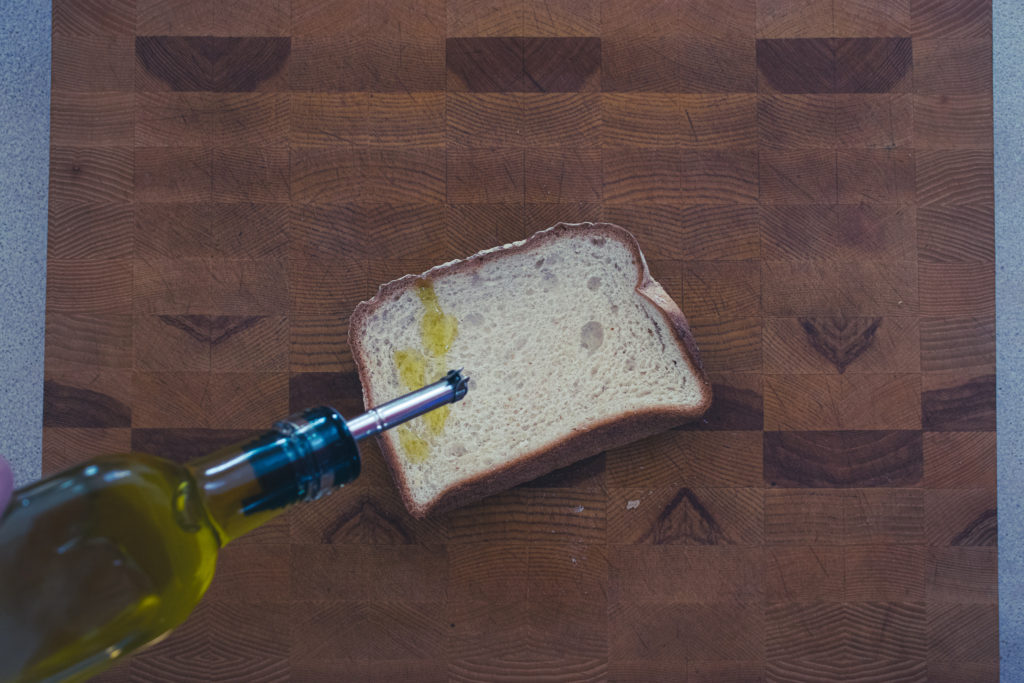
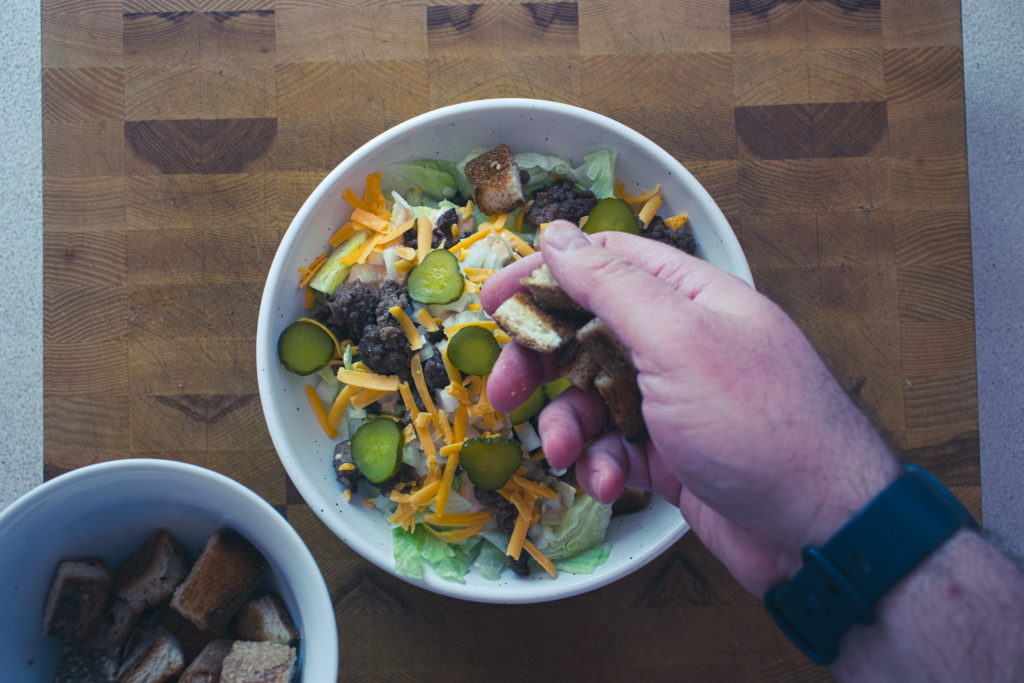
After “special sauce” comes “…lettuce, cheese, pickles, onions…” We’ll worry about all that next. For now, our focus is on the “…sesame seed bun.”. You can’t have a Big Mac Salad without some bread element. So, I decided to make some croutons. Take two pieces of bread, drizzle with olive oil, season lightly with salt and pepper, then bake at 400°f for about eight to ten minutes. Let the toasted bread cool, then cut it into small bite-sized cubes. I made the croutons this way rather than cutting the bread first because I wanted the croutons to be a bit soft in the middle.
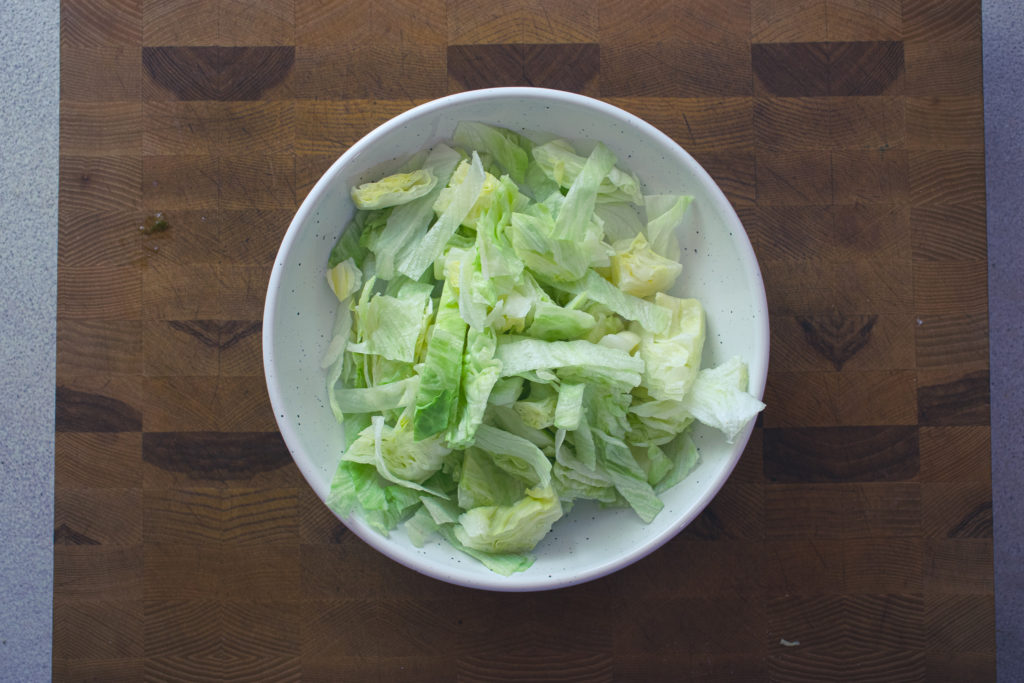
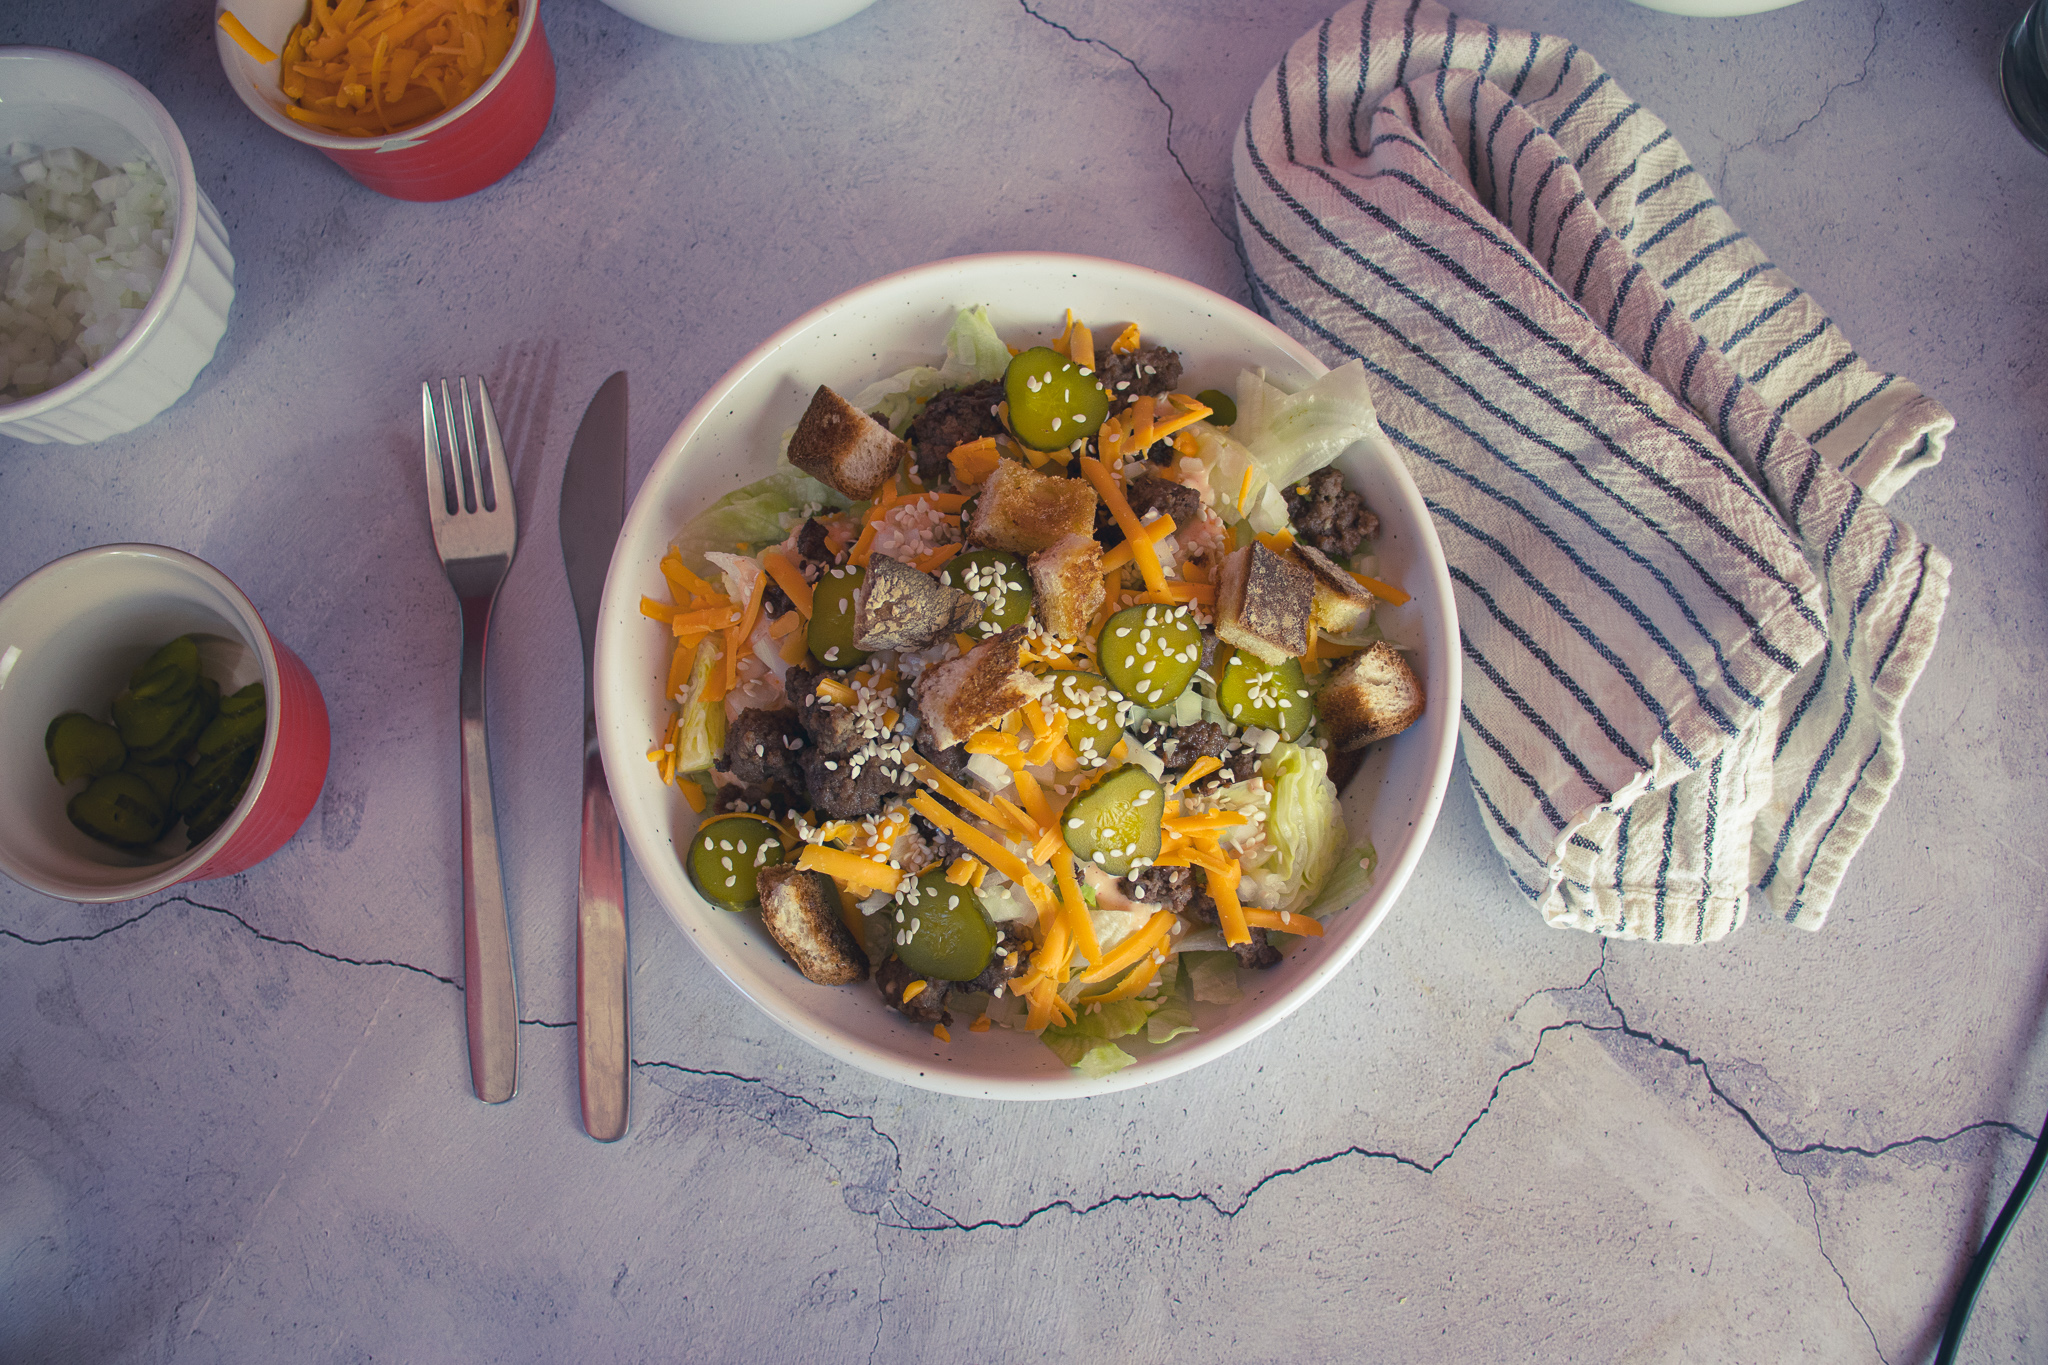
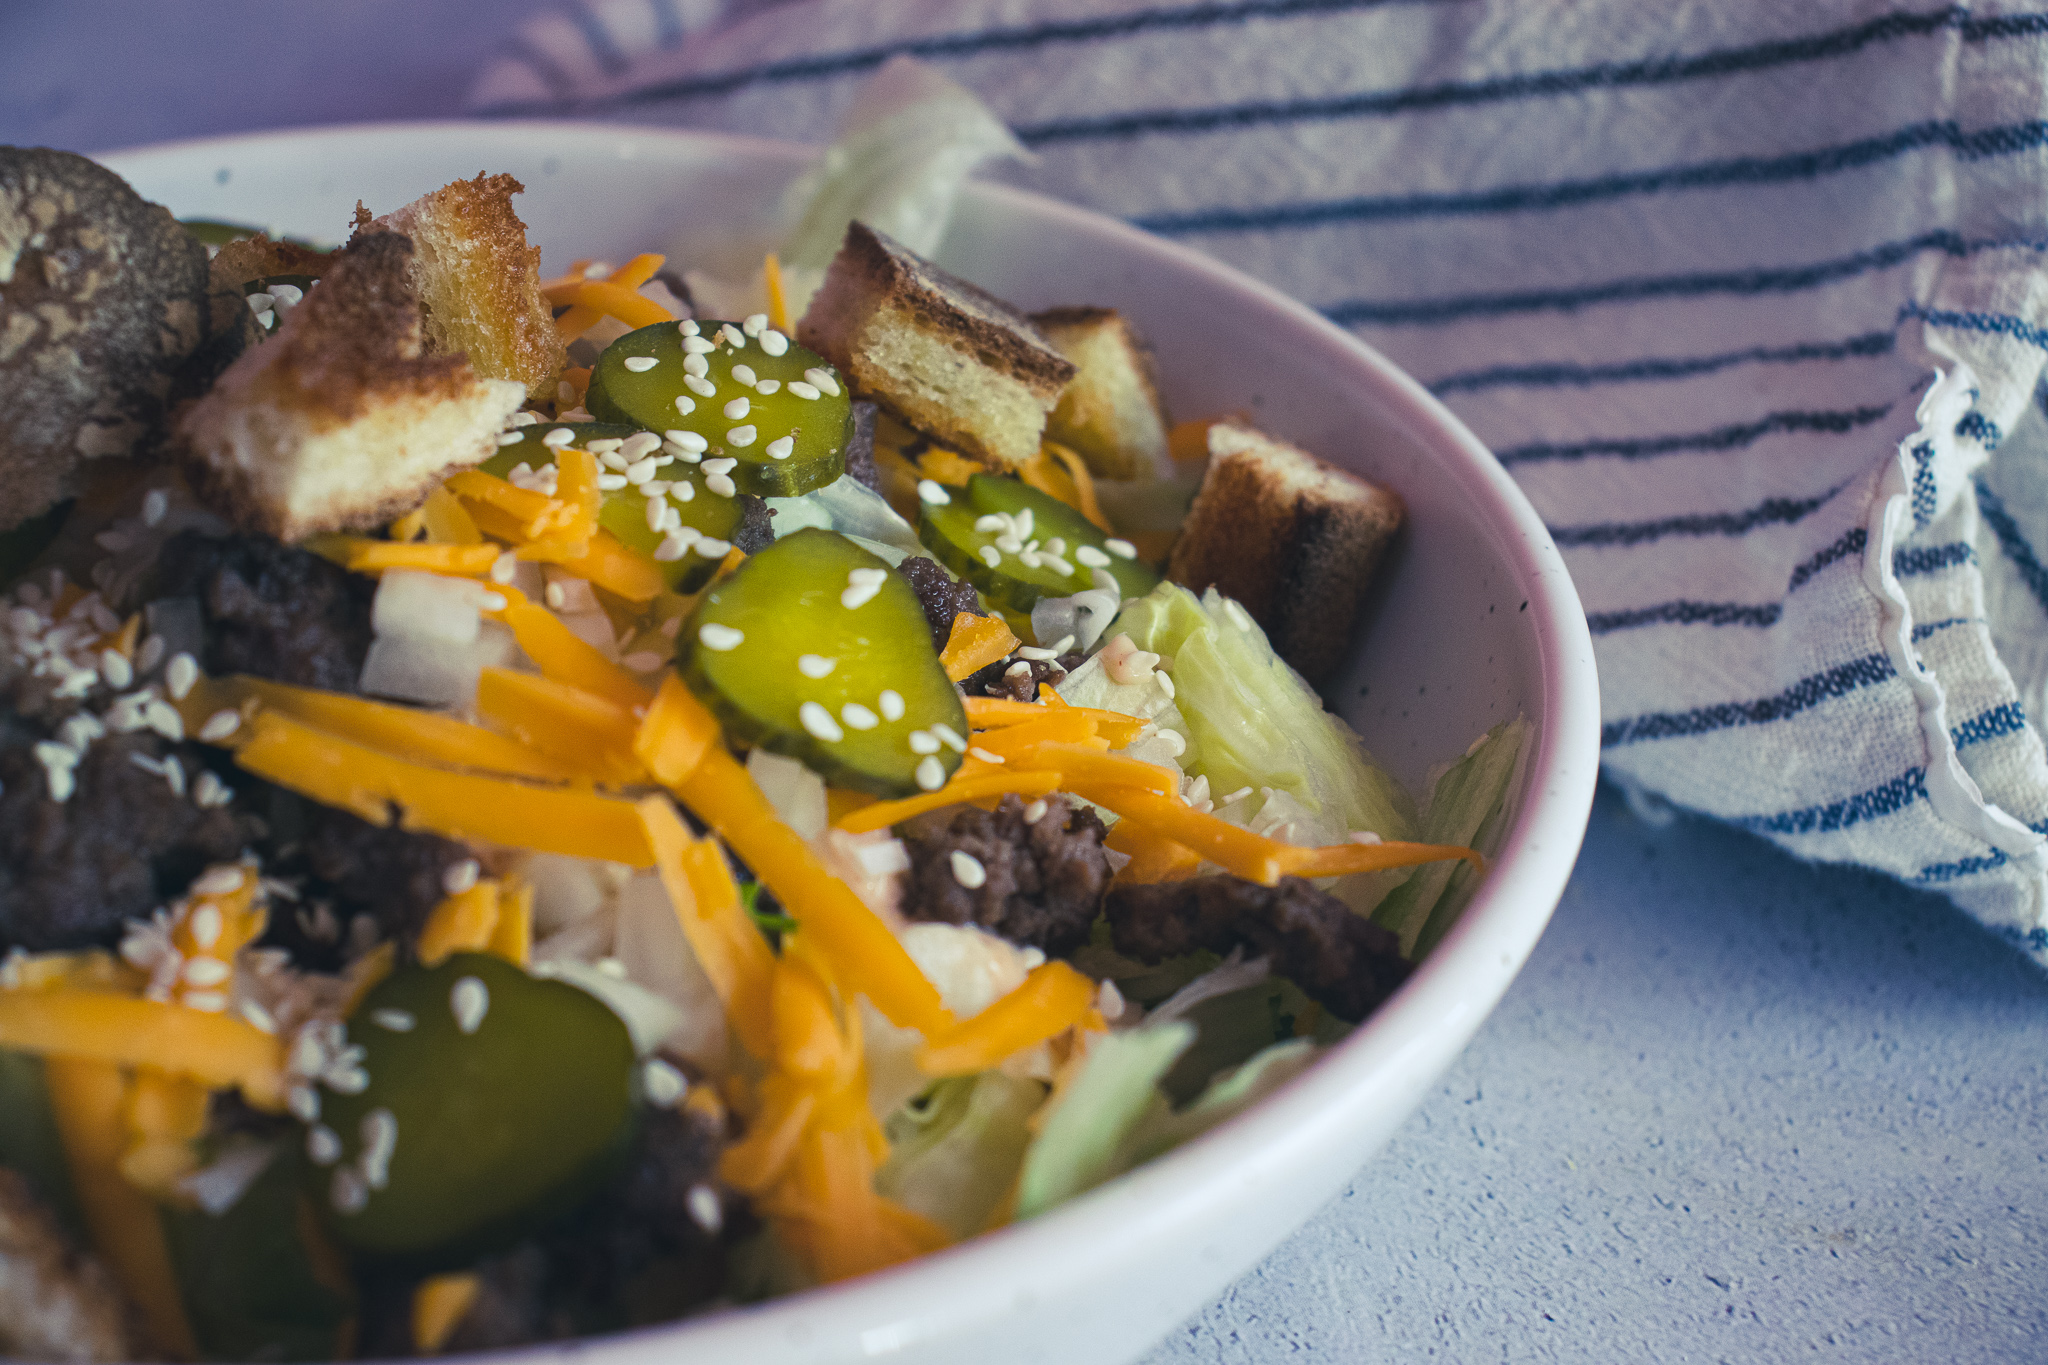
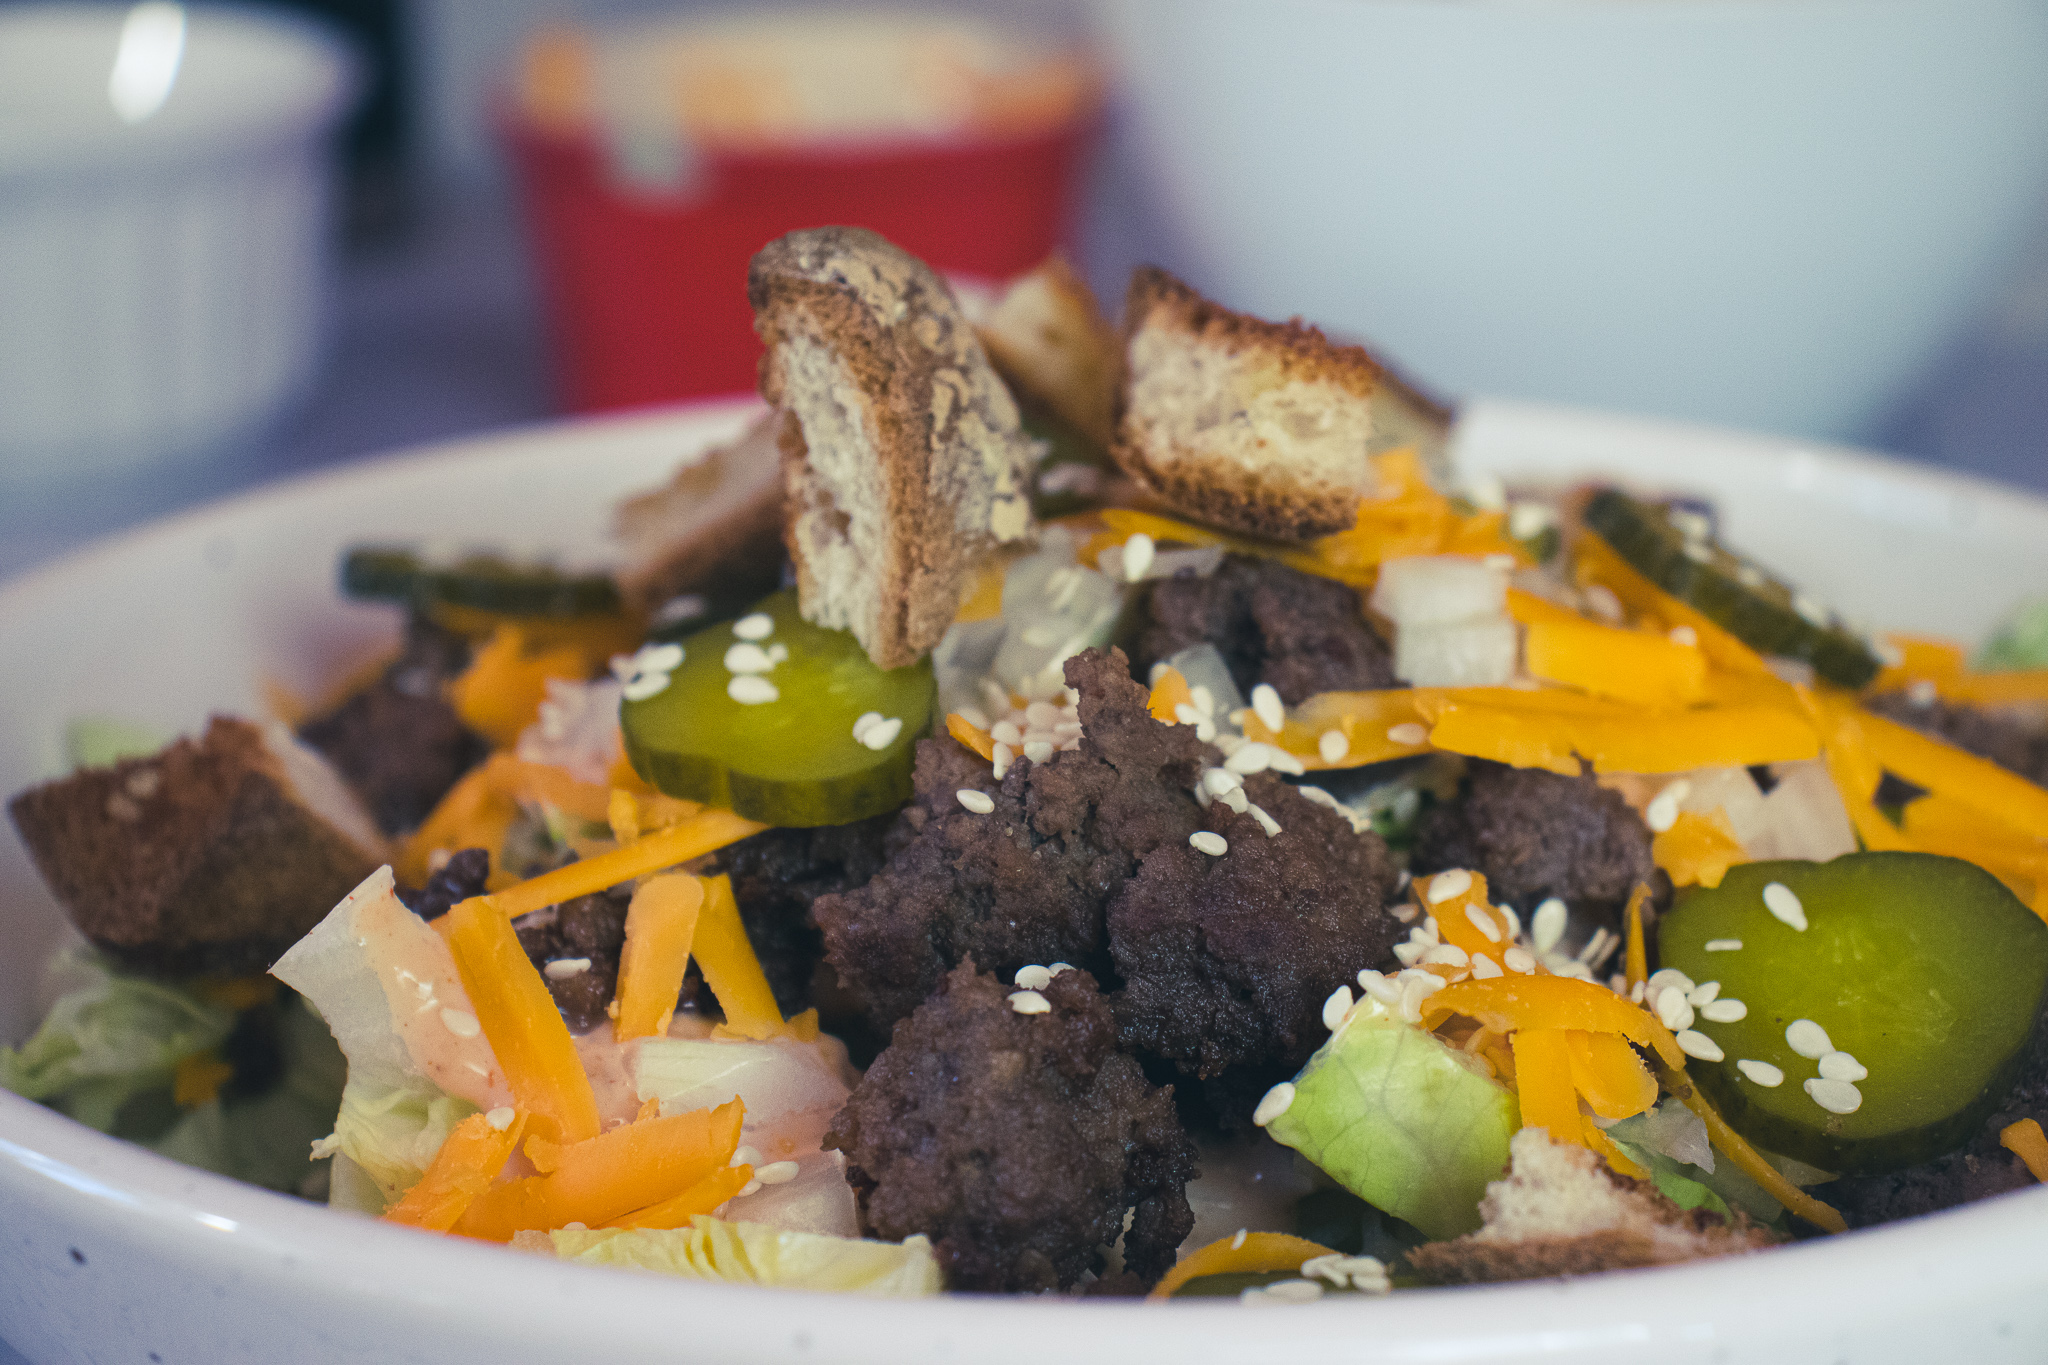
Making The Big Mac Salad
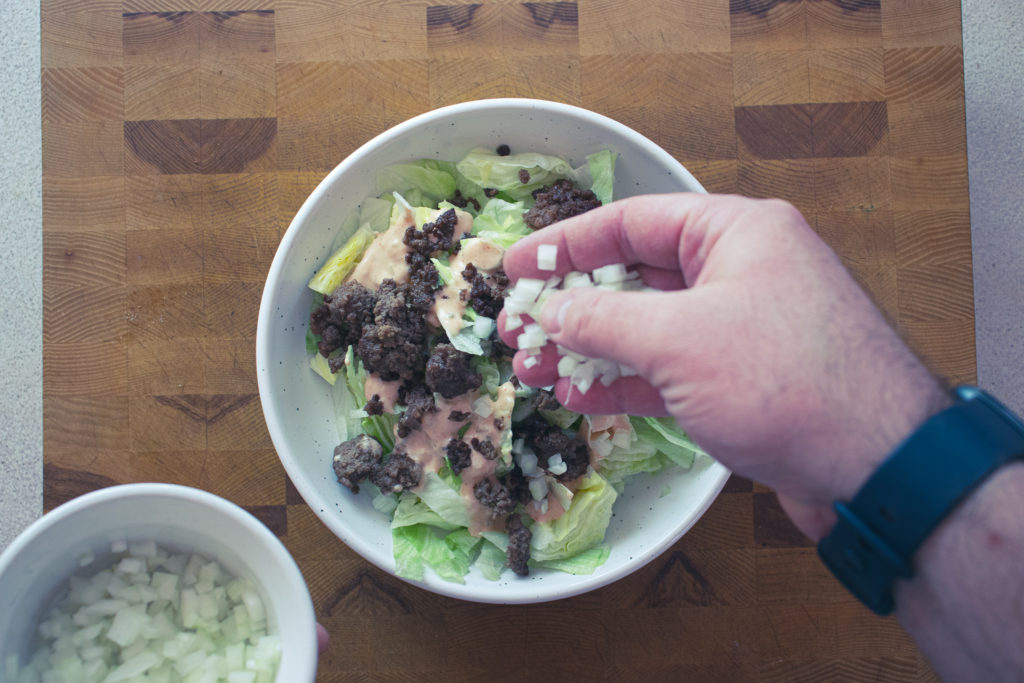
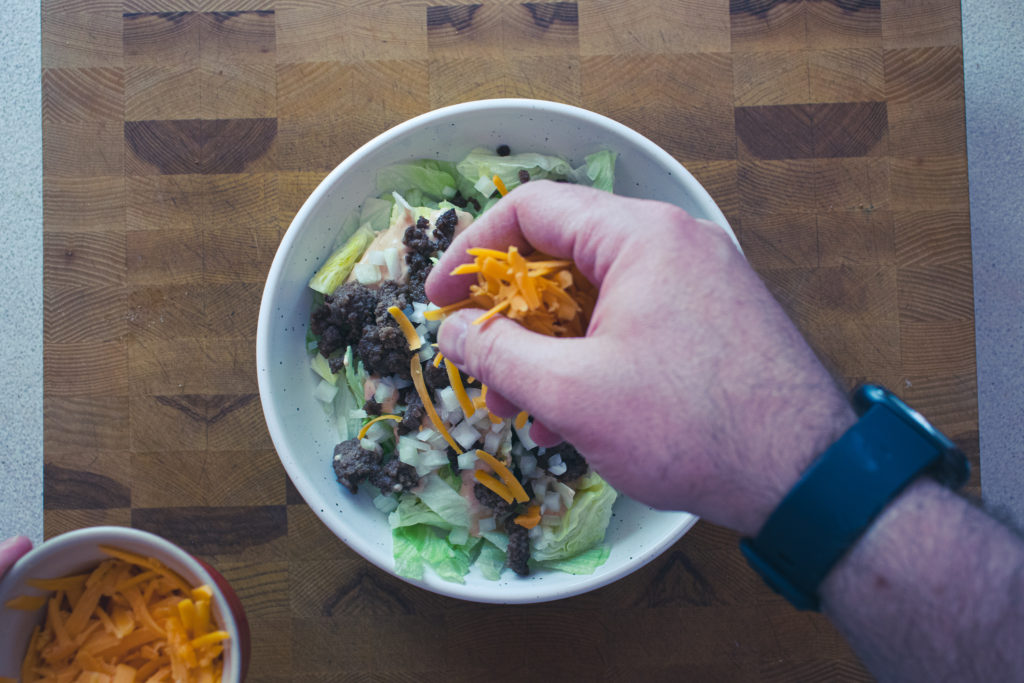
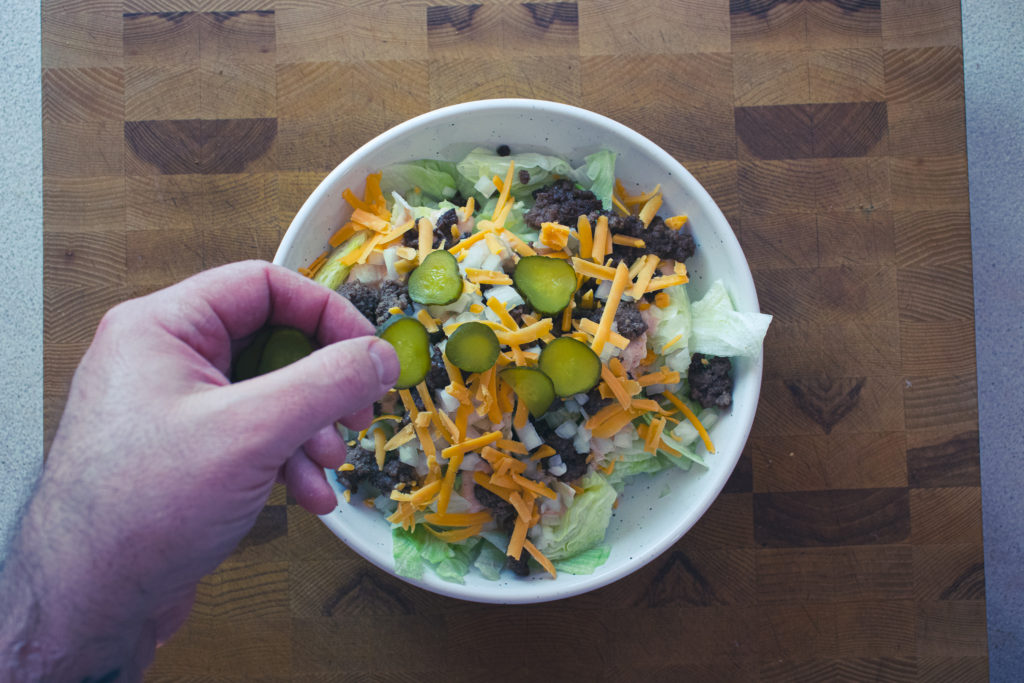
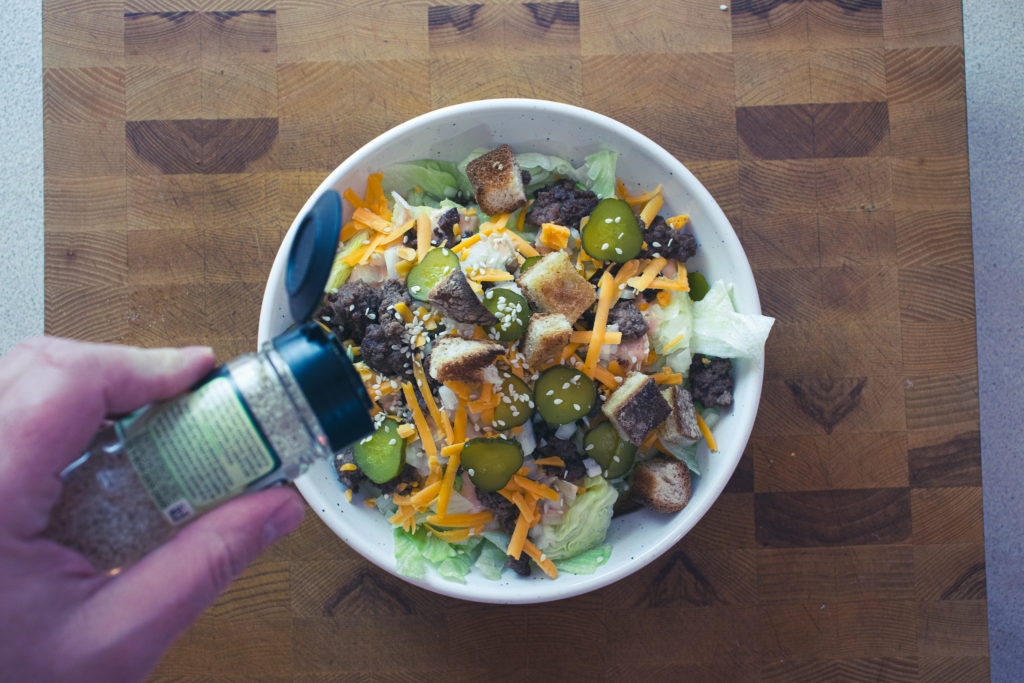
Okay, we’ve got the beef, special sauce, and bun. It’s time for the “…lettuce, cheese, pickles, onions…”. Take a head of iceberg lettuce remove and discard the outer leaves. Cut the lettuce into bite-sized pieces, then wash and dry well. Put the lettuce in four bowls. Top with the Dressing, then the beef. Next, add a tablespoon or two of minced white onions and grated cheddar cheese. I used a good quality cheddar, but if you want to through some processed American cheese on here, I’m not going to judge you. Next up, pickles. I find that Vlasic garlic dill pickles taste the most like the pickles on a Big Mac. Whatever dill pickles you want to use will be fine. Cut the pickles thin and spread them around the salad. Add the croutons to the salad and finish with a sprinkle of sesame seeds. It’s a Big Mac in a bowl!
The Wrap-Up
I GIGGLED when I took my first bite of this Big Mac Salad because it tasted so much like the original burger. I am so happy with how this turned out. Whether you can’t eat a Big Mac like me or love a Big Mac but are trying to stay on the healthy side of things, this Big Mac Salad is for you. Honestly, though, if you just wanted a delicious salad, this Big Mac Salad is for you too. Thanks for reading. I hope you enjoyed this post. Remember to leave a comment below, a rating on the recipe, and share. Sharing is caring. Have a great day! I’ll see you back here next Thursday.
Have you signed up for the Chef’s Notes Monthly Newsletter? No? Why Not? Don’t miss exclusive recipes, cooking tips, and behind-the-scenes pictures and stories.
Big Mac Salad
Everything you love about a Big Mac in a salad. You won't believe how much this tastes like the original.
Keyword: Big Mac Sauce, creamy salad dressing, Salad, salad dressing
Servings: 4
Author: Chef Ben Kelly
Cost: 10
Ingredients
"Burger" Meat
1lbground beef
1tspgarlic powder
1tsp onion powder
3/4tspsalt
Big Mac Dressing
1/2cupmayonnaise
2tbsp minced onion
2tbspketchup
2tbsp relish
1tspwhite vinegar
1tsphorseradish
4dropshot sacue
1/4tsppaprika
1/4tspkosher salt
Croutons
2piecesWhite BreadI used Promise Gluten-Free Bread
1tbspOlive Oil
Salt and Pepper
Big Mac Salad
1headiceberg lettuce
1batch"burger" meat"
1batchBig Mac Dressing
2slicedgarlic dill pickles
1/4cupminced onions
1/2cupgrated cheddar cheese
1batchcroutons
4tspsesame seeds
Instructions
"Burger" Meat
In a medium bowl, combine the ground beef, onion and garlic powder, and salt. Mix well.
Heat a large non-stick skillet over medium-high heat. Add the ground beef and cook until browned using a wooden spoon to break the meat into small pieces.
Drain the fat off the meat and serve.
Big Mac Dressing
In a medium bowl, combine all the ingredients and mix well.
Cover the bowl with plastic wrap and put the dressing in the fridge for 30 minutes before serving.
Croutons
Drizzle the bread with olive oil and season with salt and pepper.
Toast the bread in a 400°f oven for 8 to 10 minutes or until crisp. Let the bread cool on a rack then cut into small cubes and serve.
Big Mac Salad
Cut the lettuce into bit-sized pieces. Wash and dry it.
Divide the lettuce between four salad bowls.
Divide the "Burger" meat among the four bowls putting it on top of the lettuce.
Top the "Burger" meat with the Big Mac Dressing.
Finish dressing the salad with the pickles, onion, cheese, and croutons. Garnish with sesame seeds and serve.
What’s better than a delicious meal? How about a delicious meal that you can make in under an hour? Sound good to me. Well, that’s exactly what these Sweet and Sour Meatballs are. They make a quick and delicious meal that you can make and eat any day of the week. And, you can make them from scratch with ingredients you probably already have on hand. Let’s get cooking!
Making The Meatballs
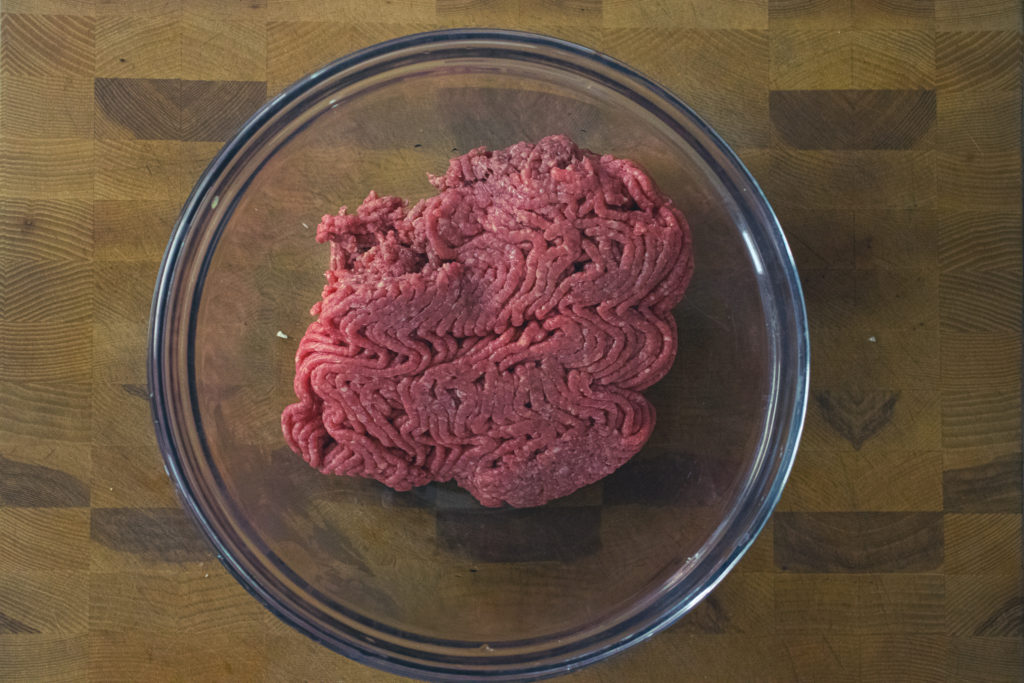
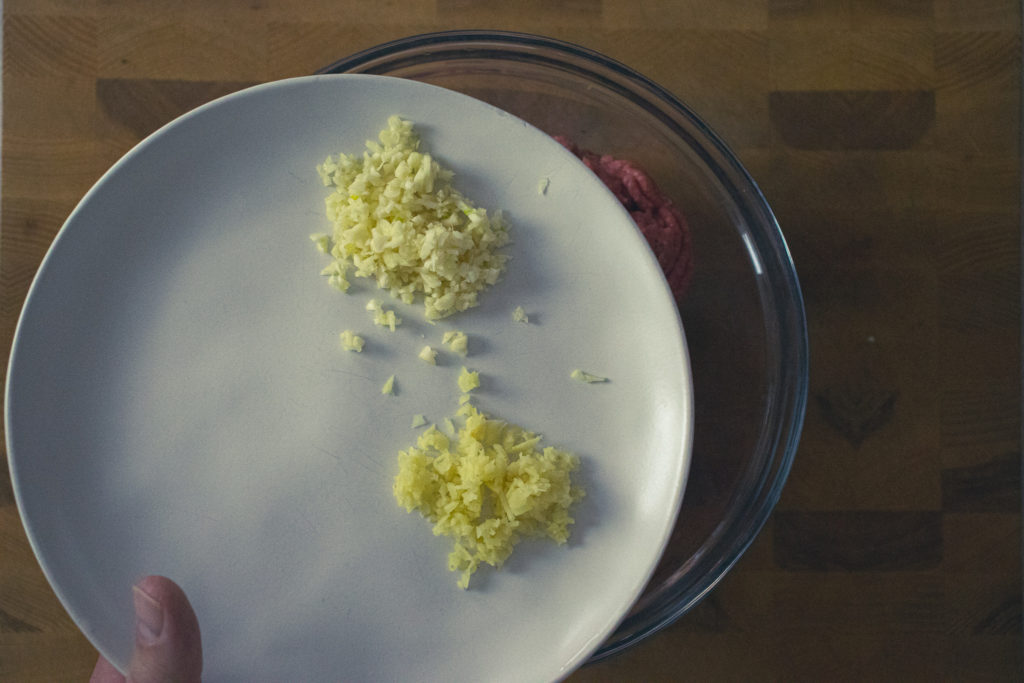
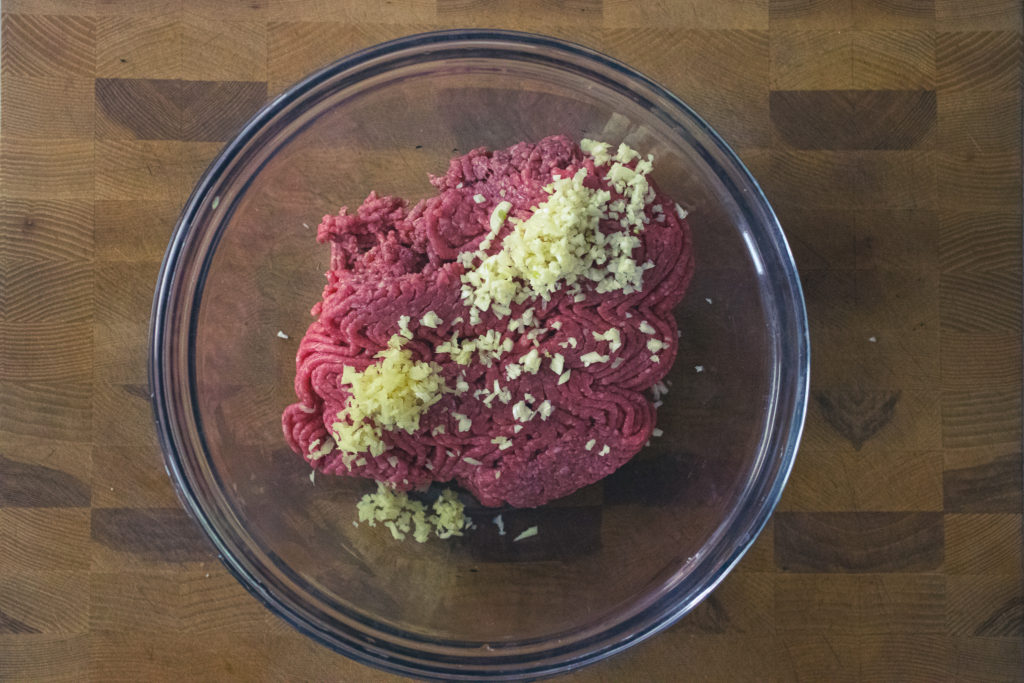
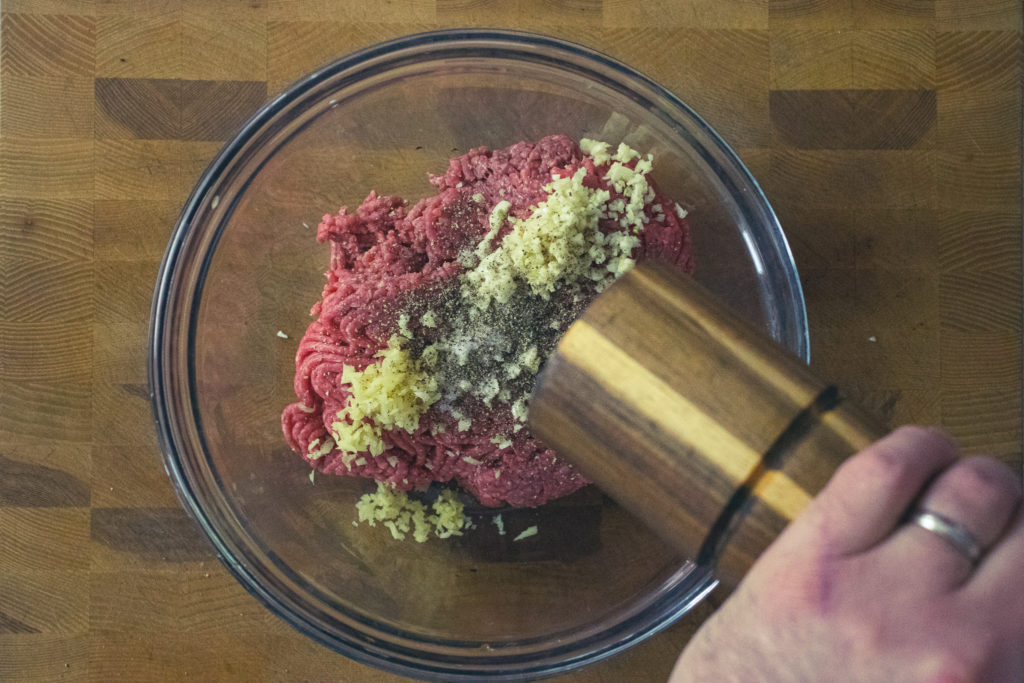
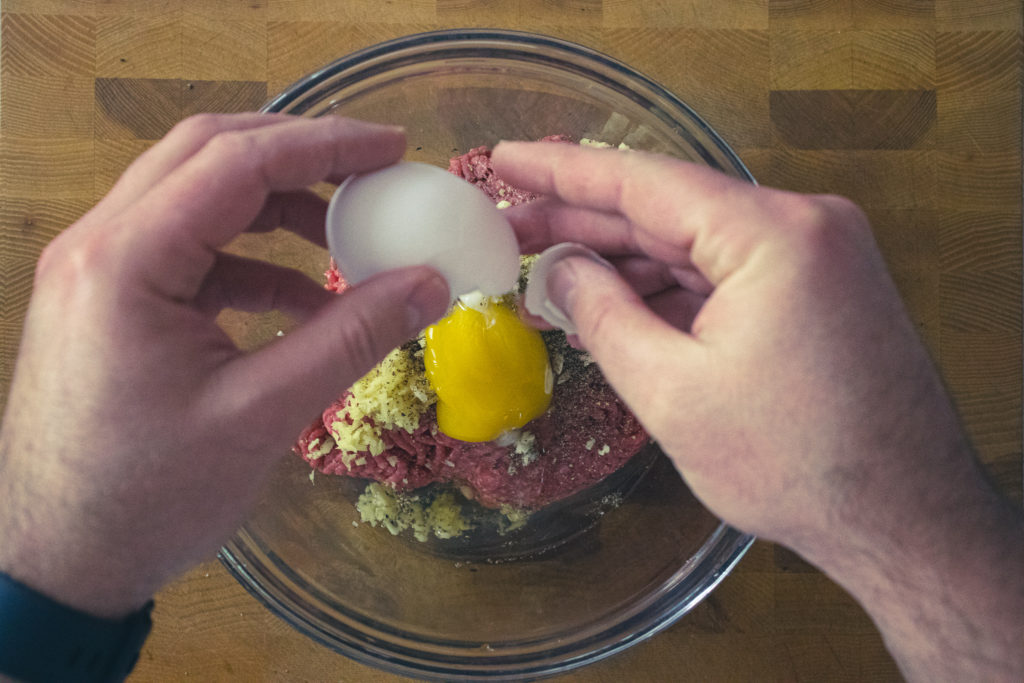
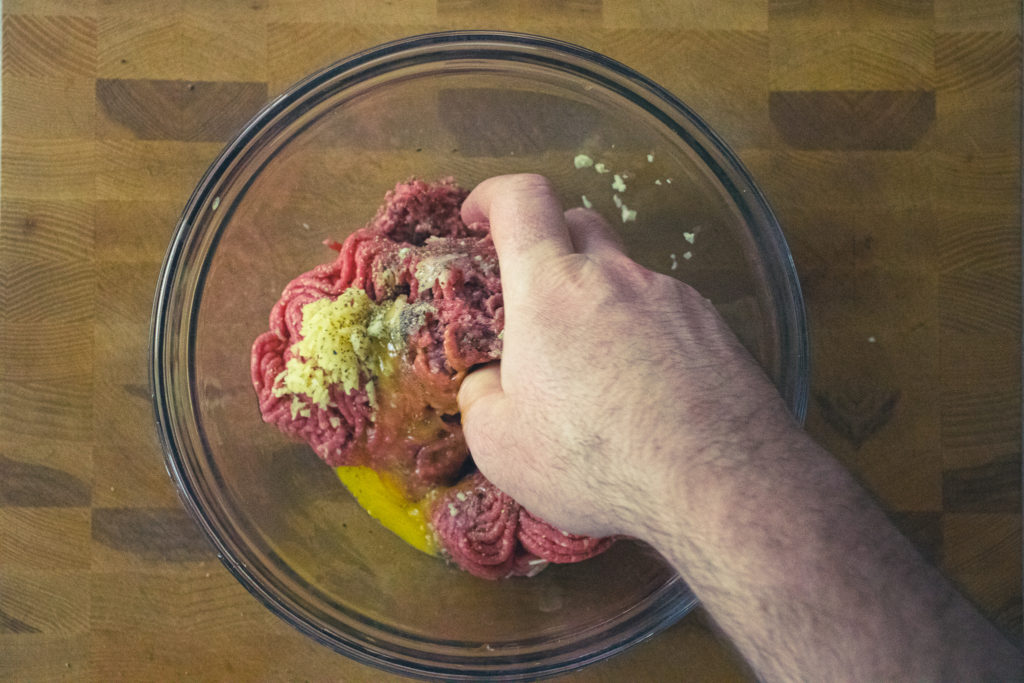
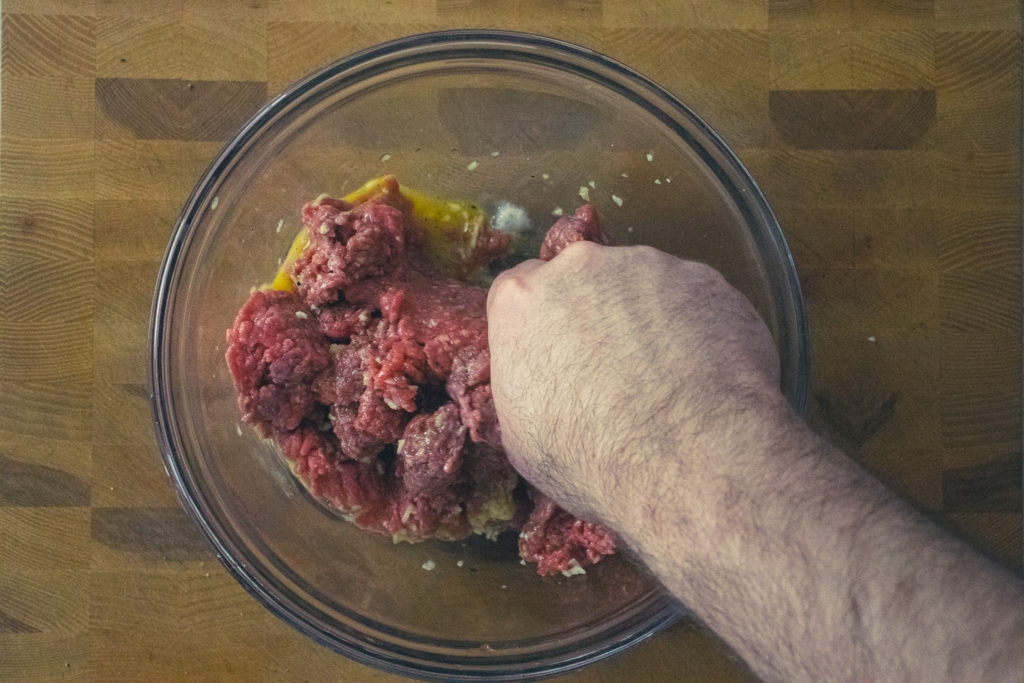
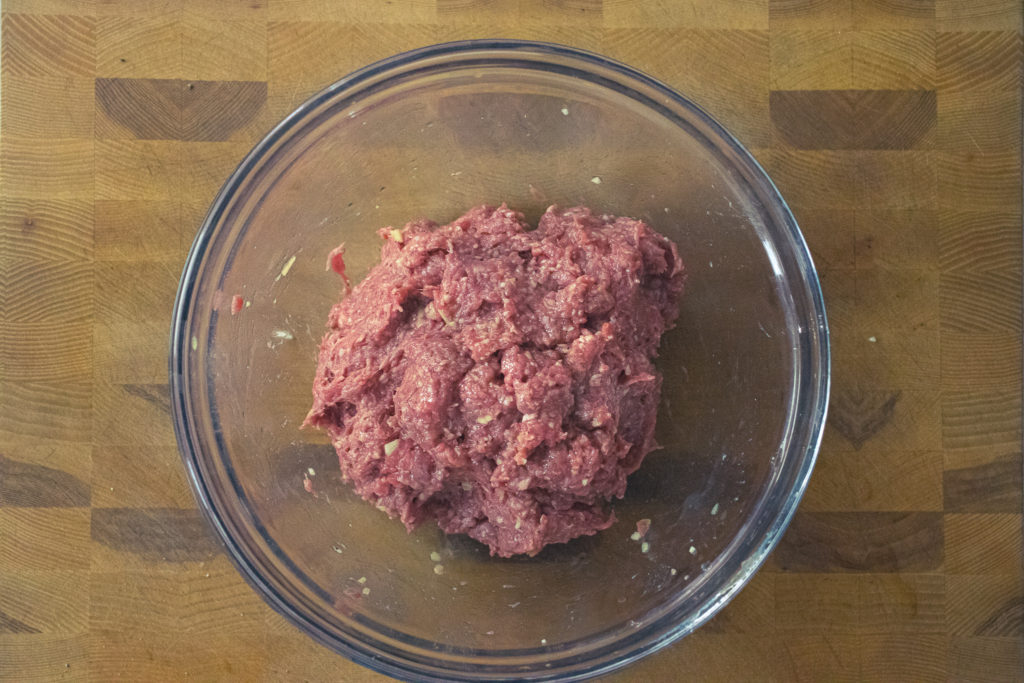
These meatballs are pretty straightforward. Put some ground beef in a mixing bowl, add some minced or grated ginger and garlic (you can use ginger and garlic powder if you want. Use 1 tsp of each per pound of meat.) Add a bit of salt and pepper to the meat and one egg to help bind it all together. If you want to stretch the meat a little further, you can also add half a cup of fine dry breadcrumbs. Once all the ingredients are in the bowl, mix well.
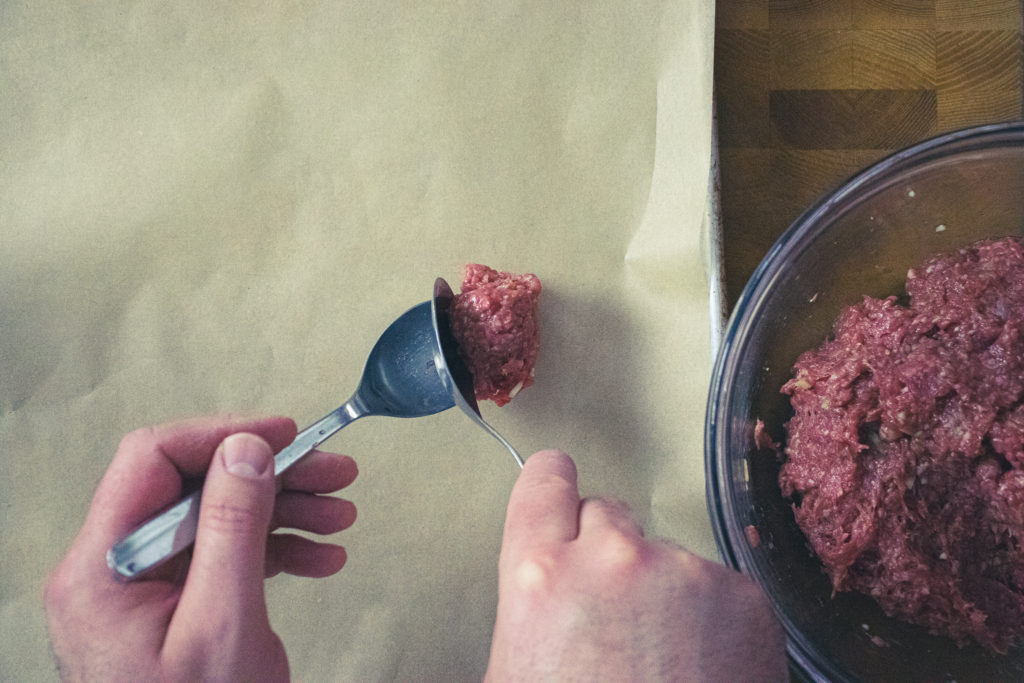
Forming The Meatballs
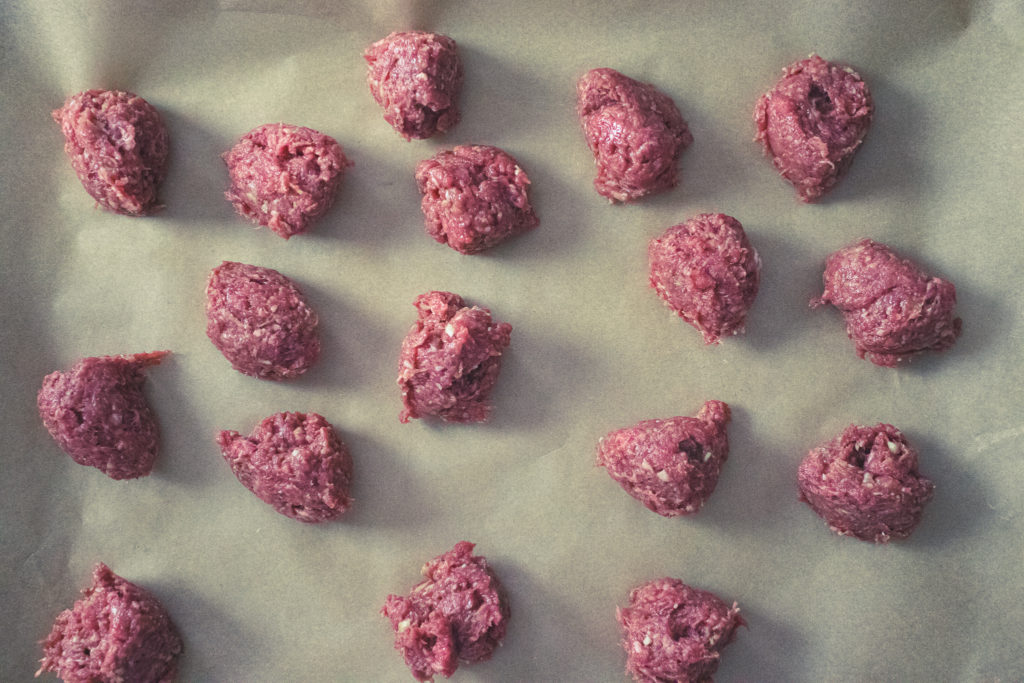
I find that forming these meatballs, or any meatball for that matter, is best down in two stages. Stage one is portioning out the meat. In this case, use a tablespoon to divide the meat into portions. The second stage is to roll the meat portions into balls. The easiest way to roll the balls is to have a bowl of cold water handy (no pun intended). Wet your hands and roll the meat into balls. Re-wet your hands after every two or three balls. Wetting your hands will prevent the meat from sticking to your hands and forming a thick layer of fat on your hands. It will also help give the balls a smooth appearance. Keep in mind your hands don’t have to be dripping wet. Just a little wet is fine.
Cook the Meatballs
Once the meatballs are formed, place them on a parchment-lined sheet pan and roast them in the oven at 400°f for 15 minutes. While the meatballs are cooking, you can make the sweet and sour sauce.
How To Make Sweet and Sour Sauce
There are a few different ways to make a sweet and sour sauce. I wanted to keep this recipe simple and use ingredients you probably have on hand, so I used ketchup as the base. If you’d like to see another way to make a sweet and sour sauce, take a look at this Sweet and Sour Chicken Ball Recipe.
Sweet and Sour Sauce Ingredients
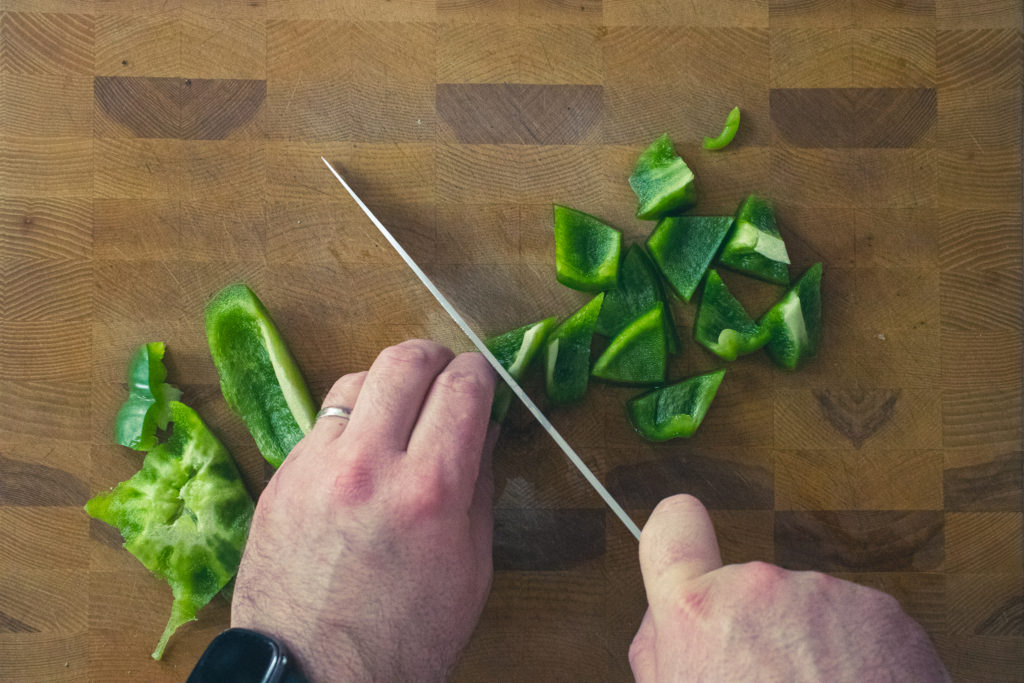
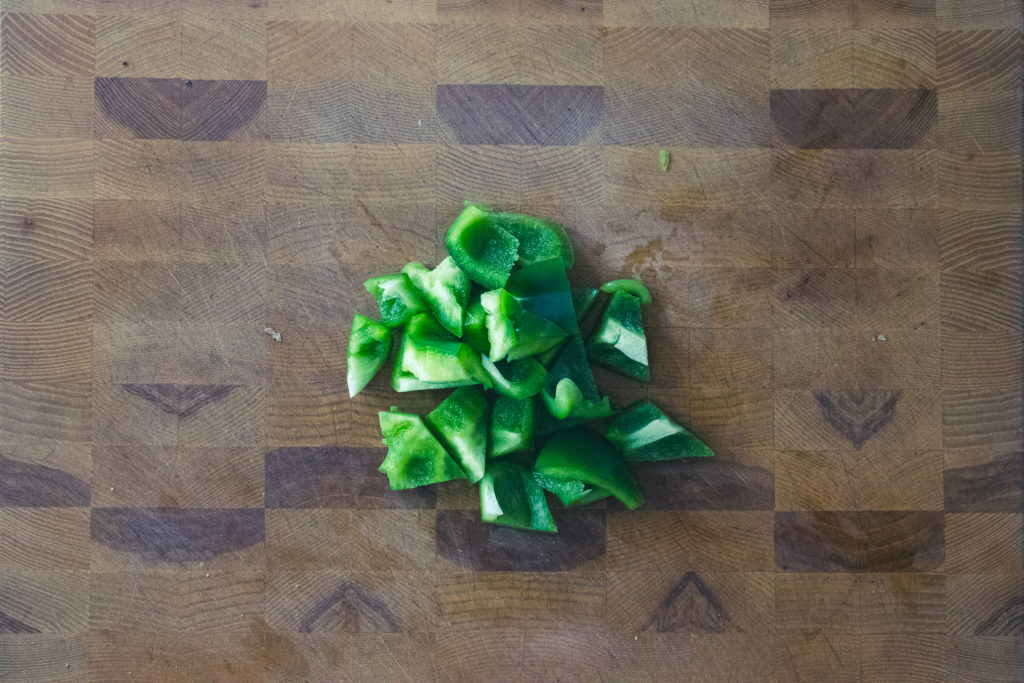
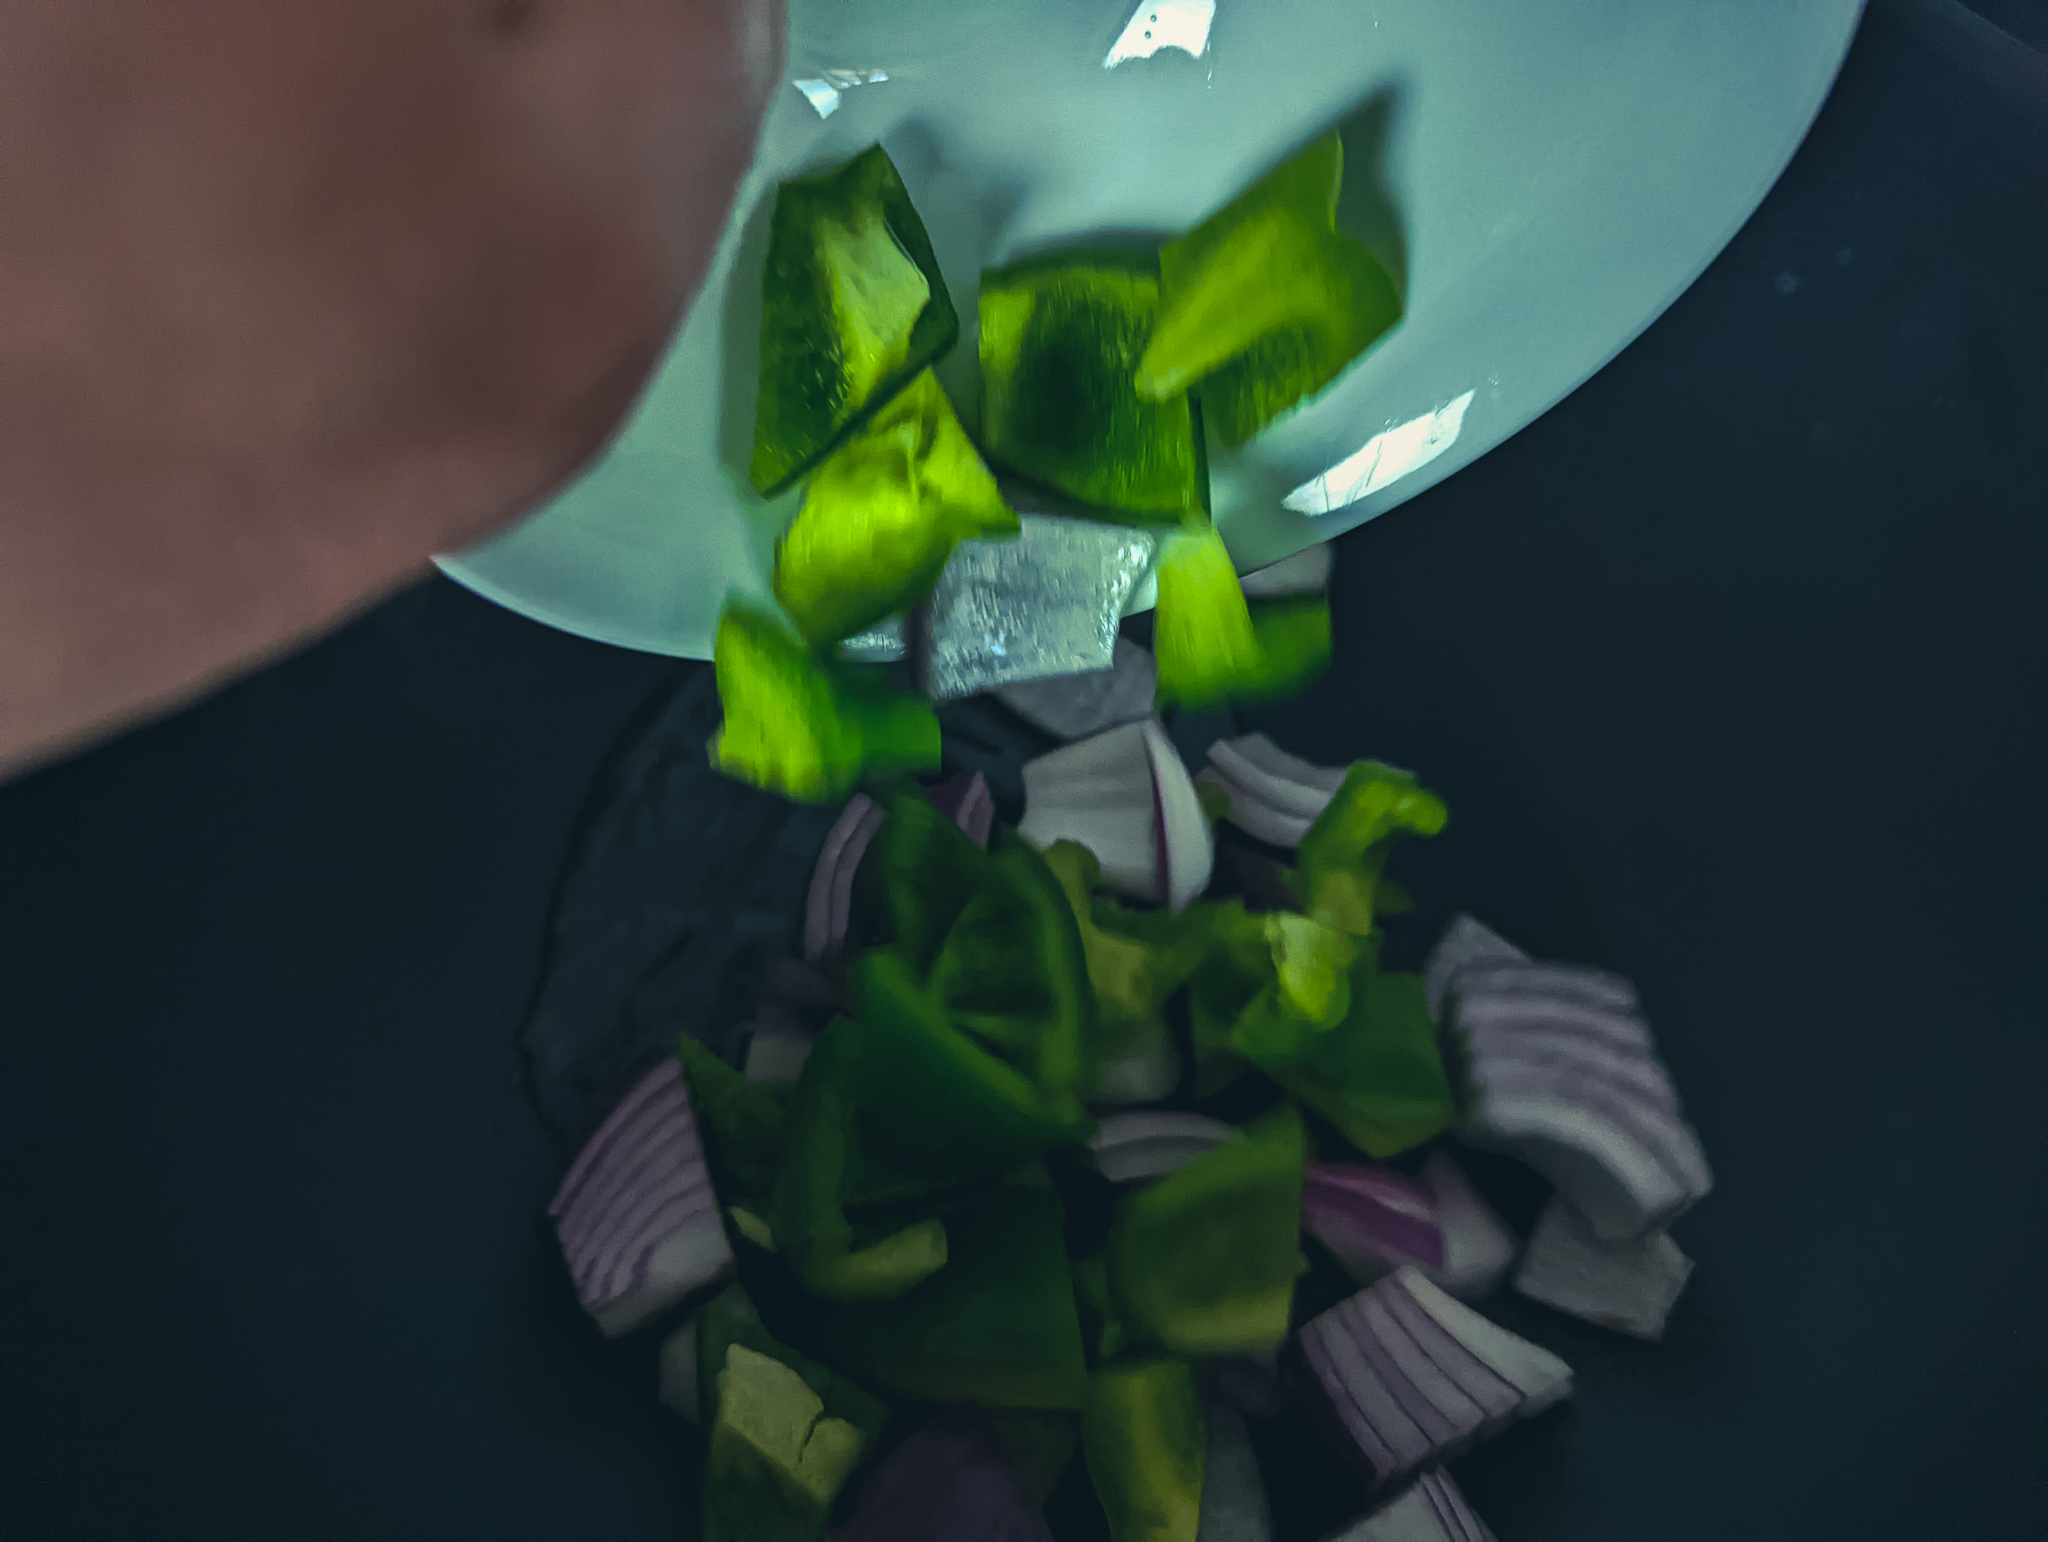
You will need one green bell pepper and half a red onion for this recipe. Cut both into bite-sized pieces. I like to cut the green pepper into odd shapes because I think it adds to the dish’s appearance. You don’t have to take the time to do that if you don’t want to. Cut the pepper however you’d like. The other sauce ingredients are ketchup, white vinegar, sugar, and water. You can find the measurements in the recipe at the top of this post. Finally, you will need a bit of cooking oil. I like to use peanut oil, but you can use grapeseed, avocado, or canola oil if you’d like.
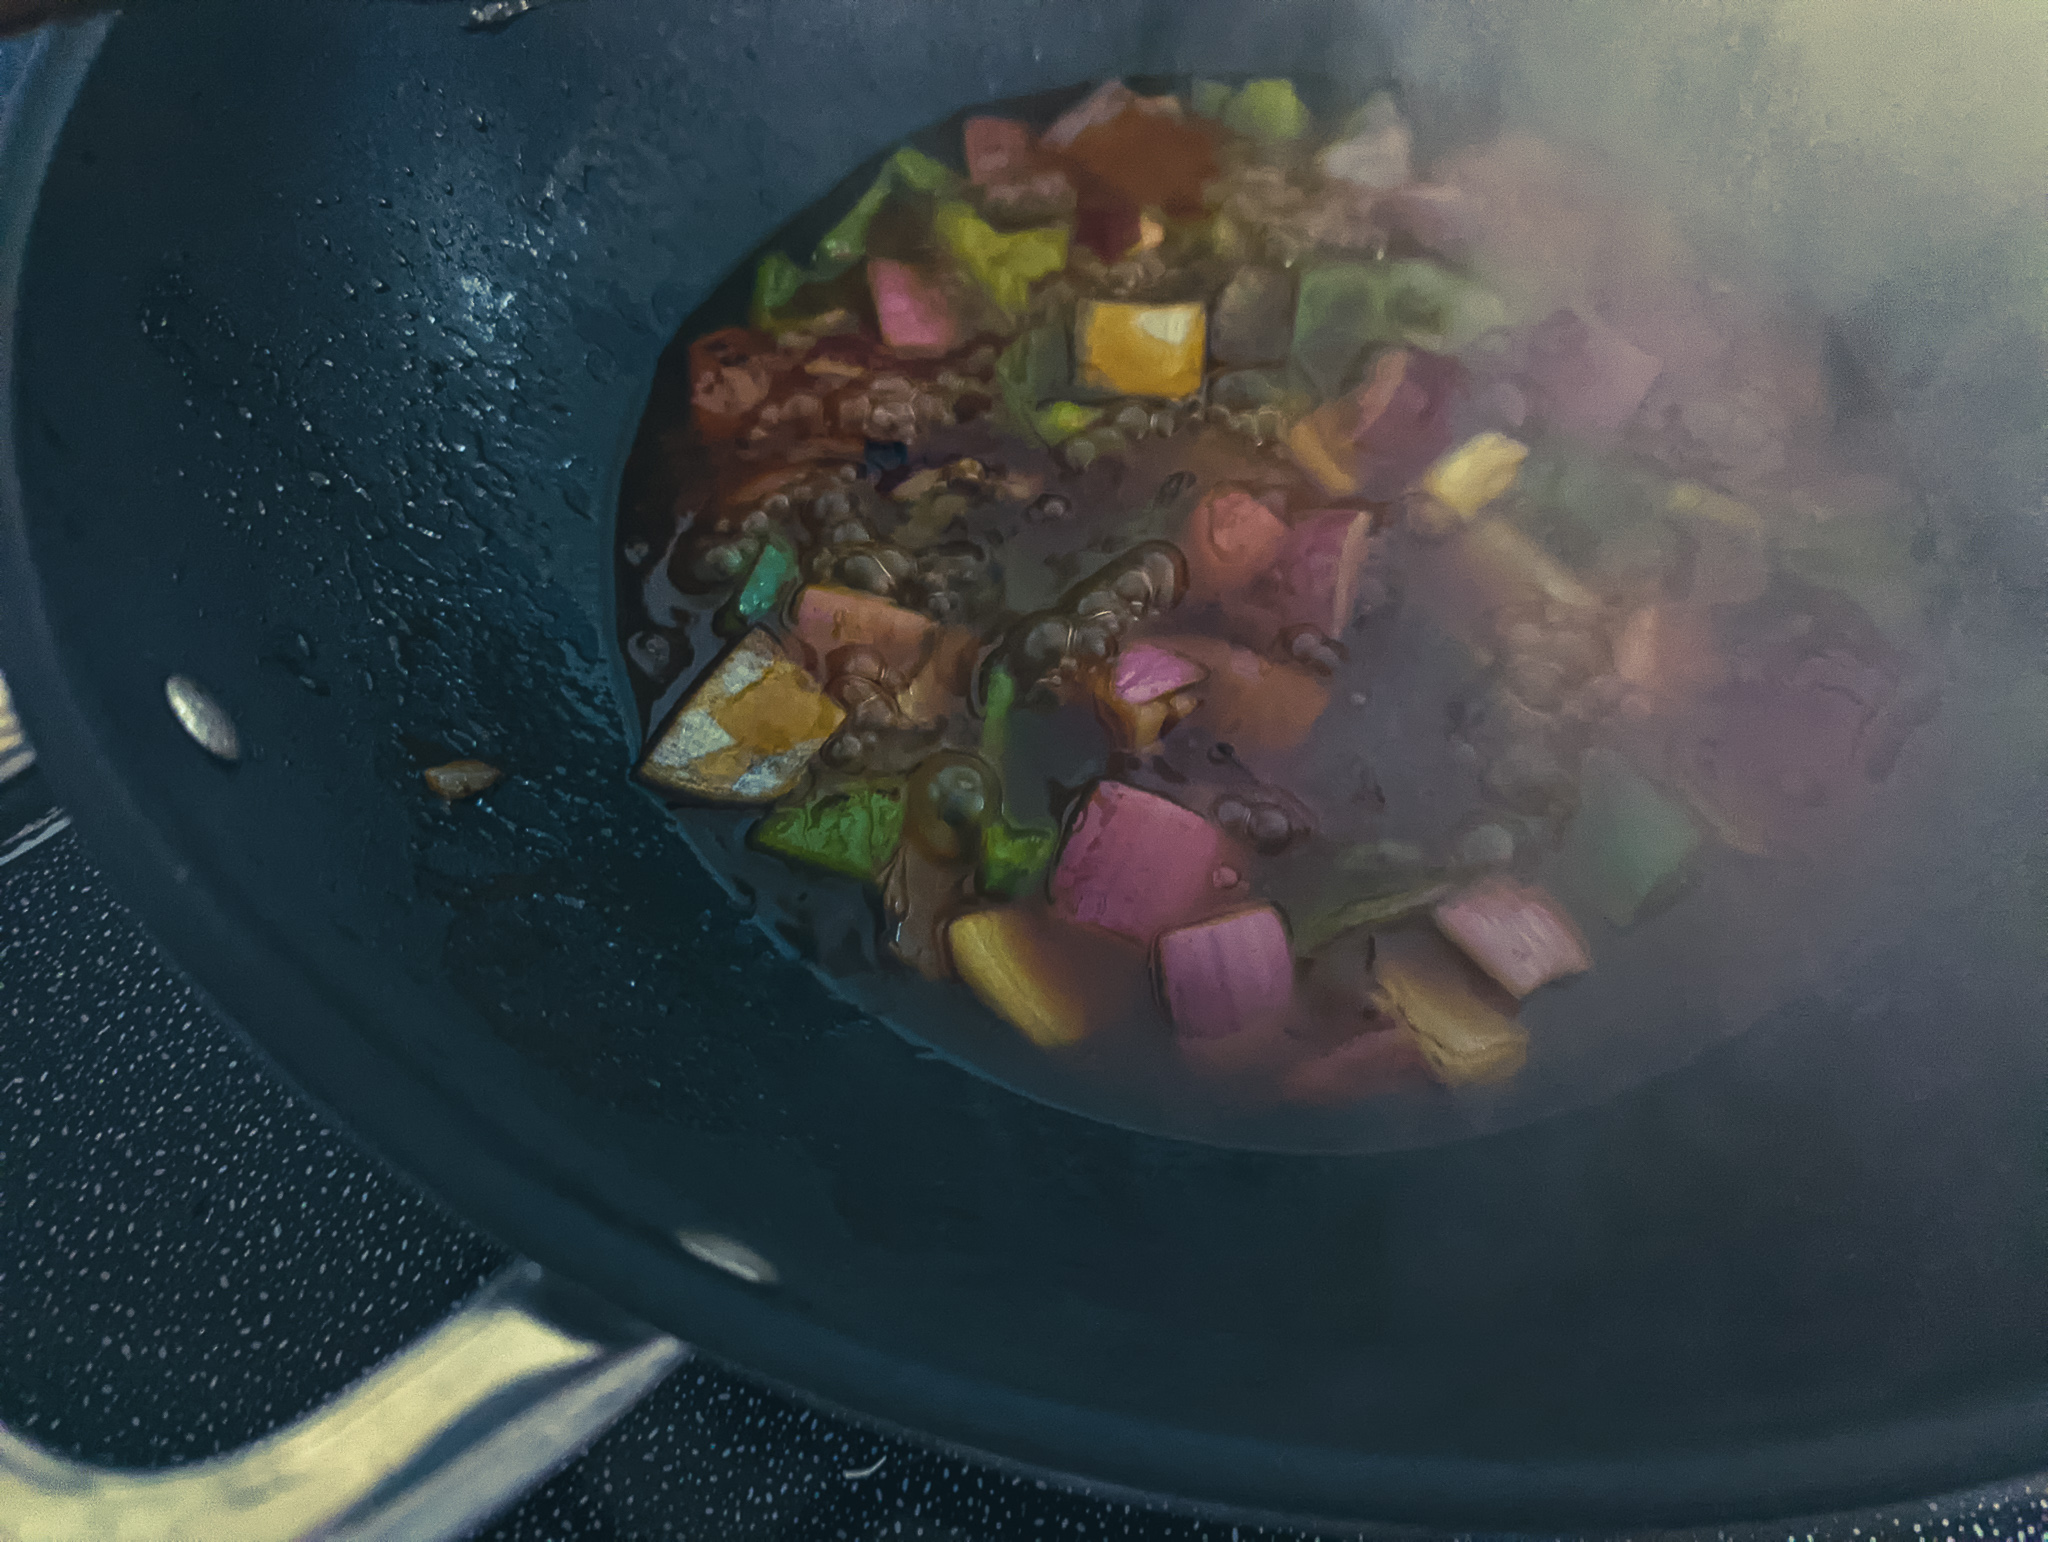
Making the Sweet and Sour Sauce
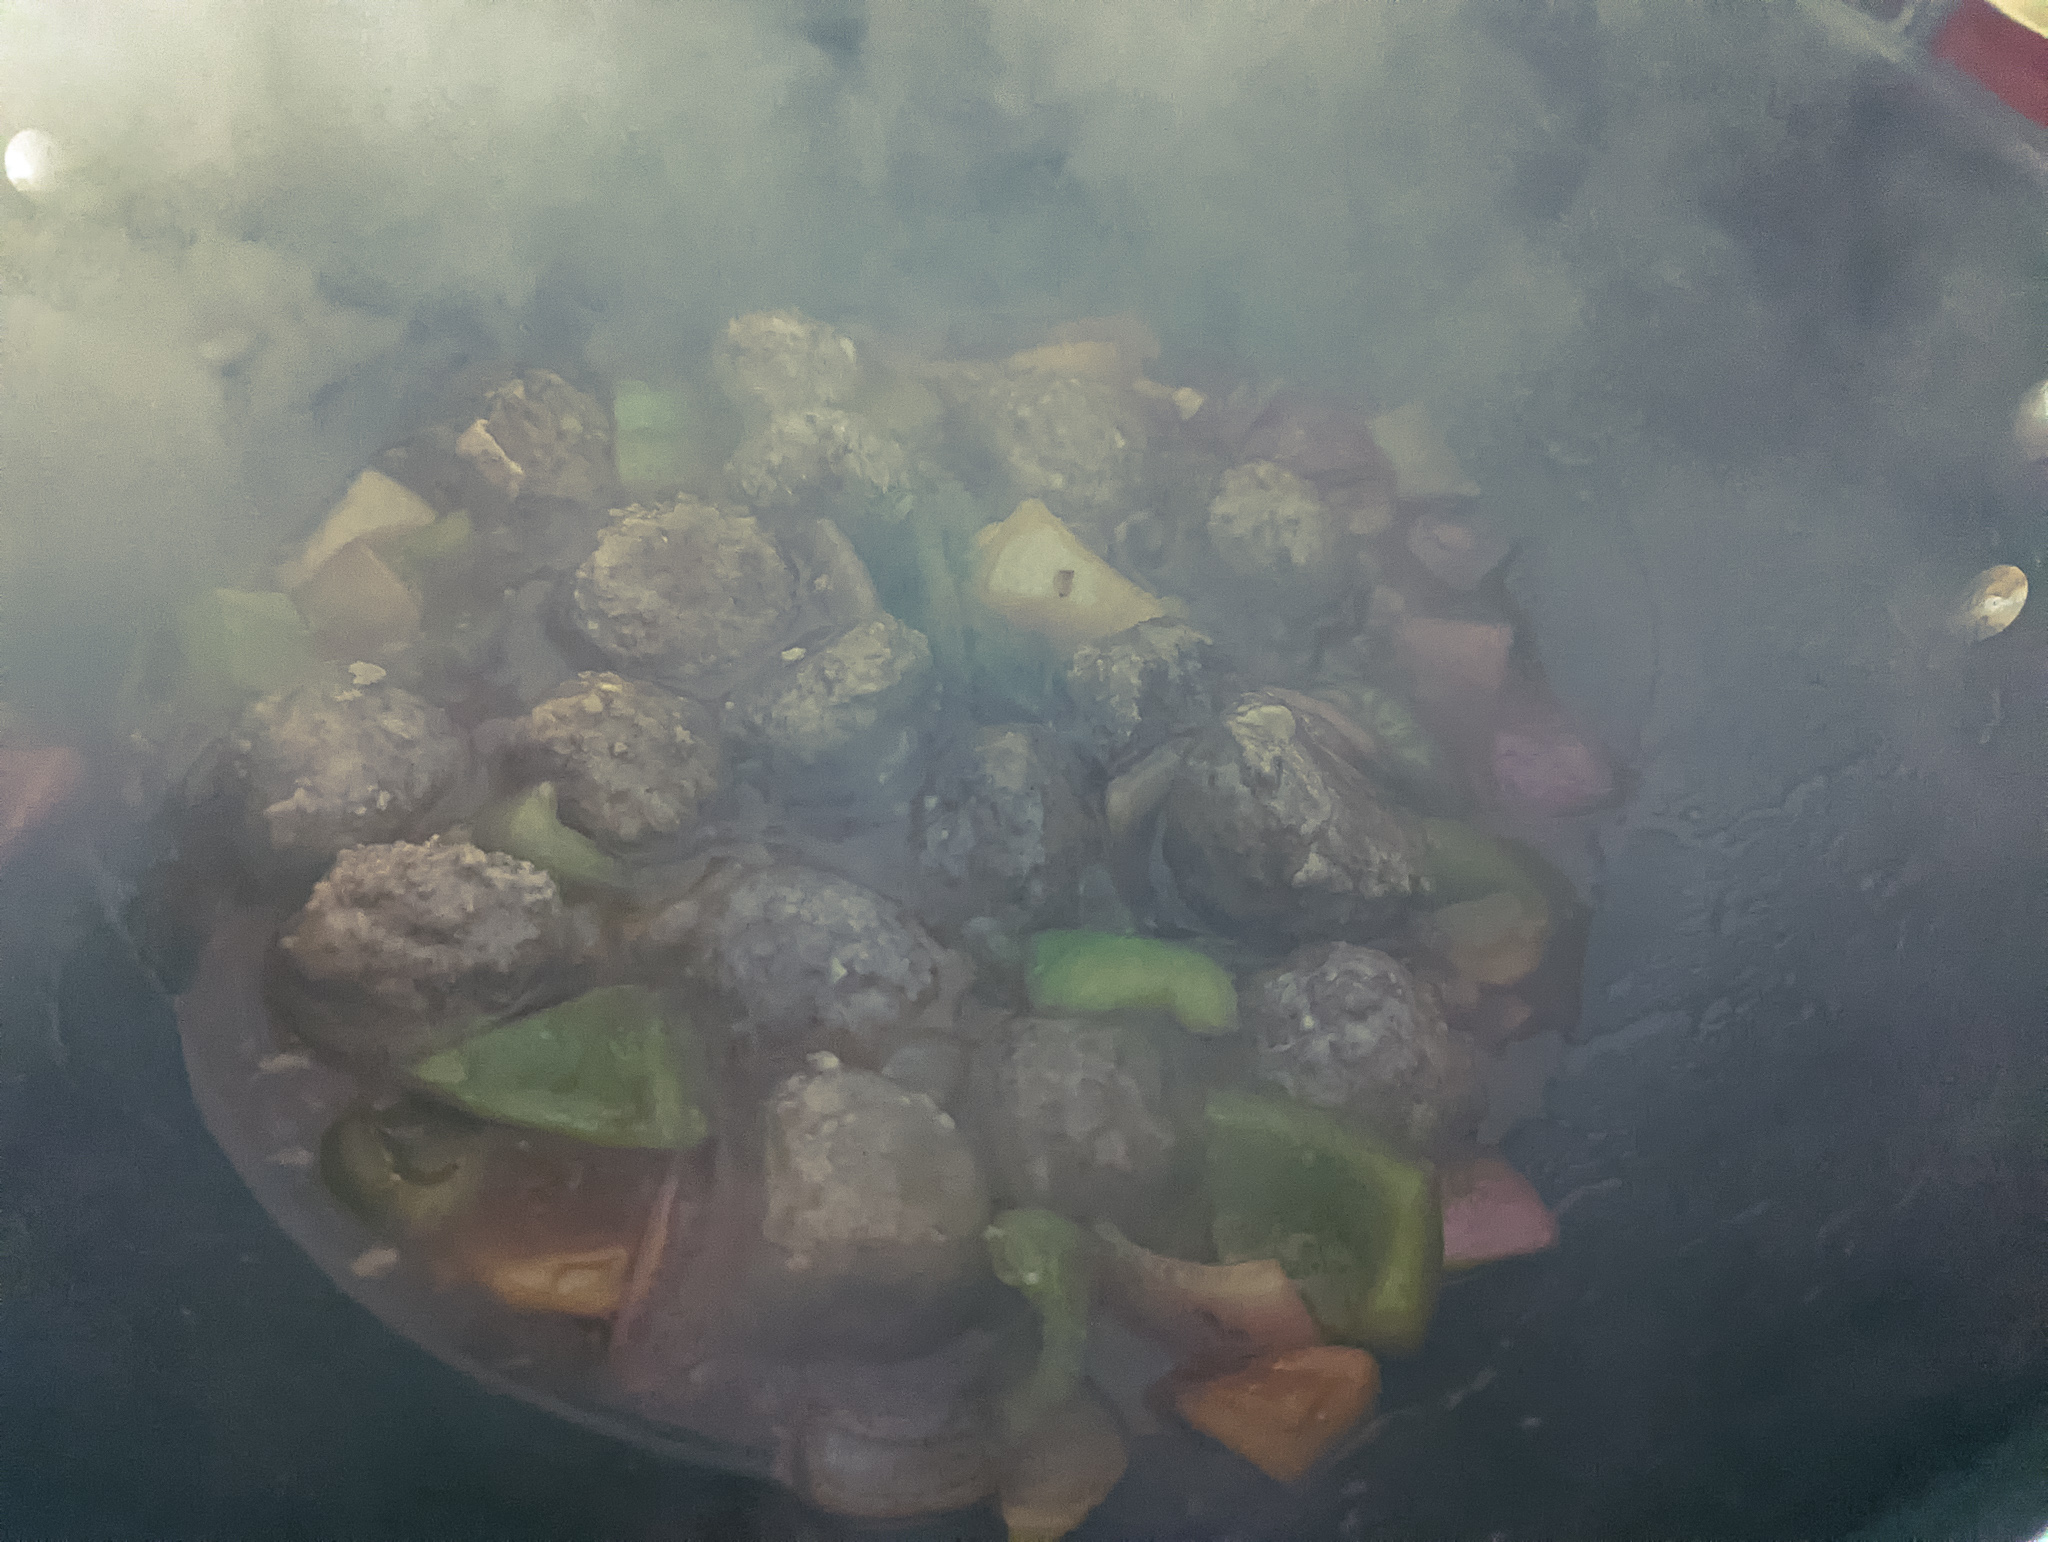
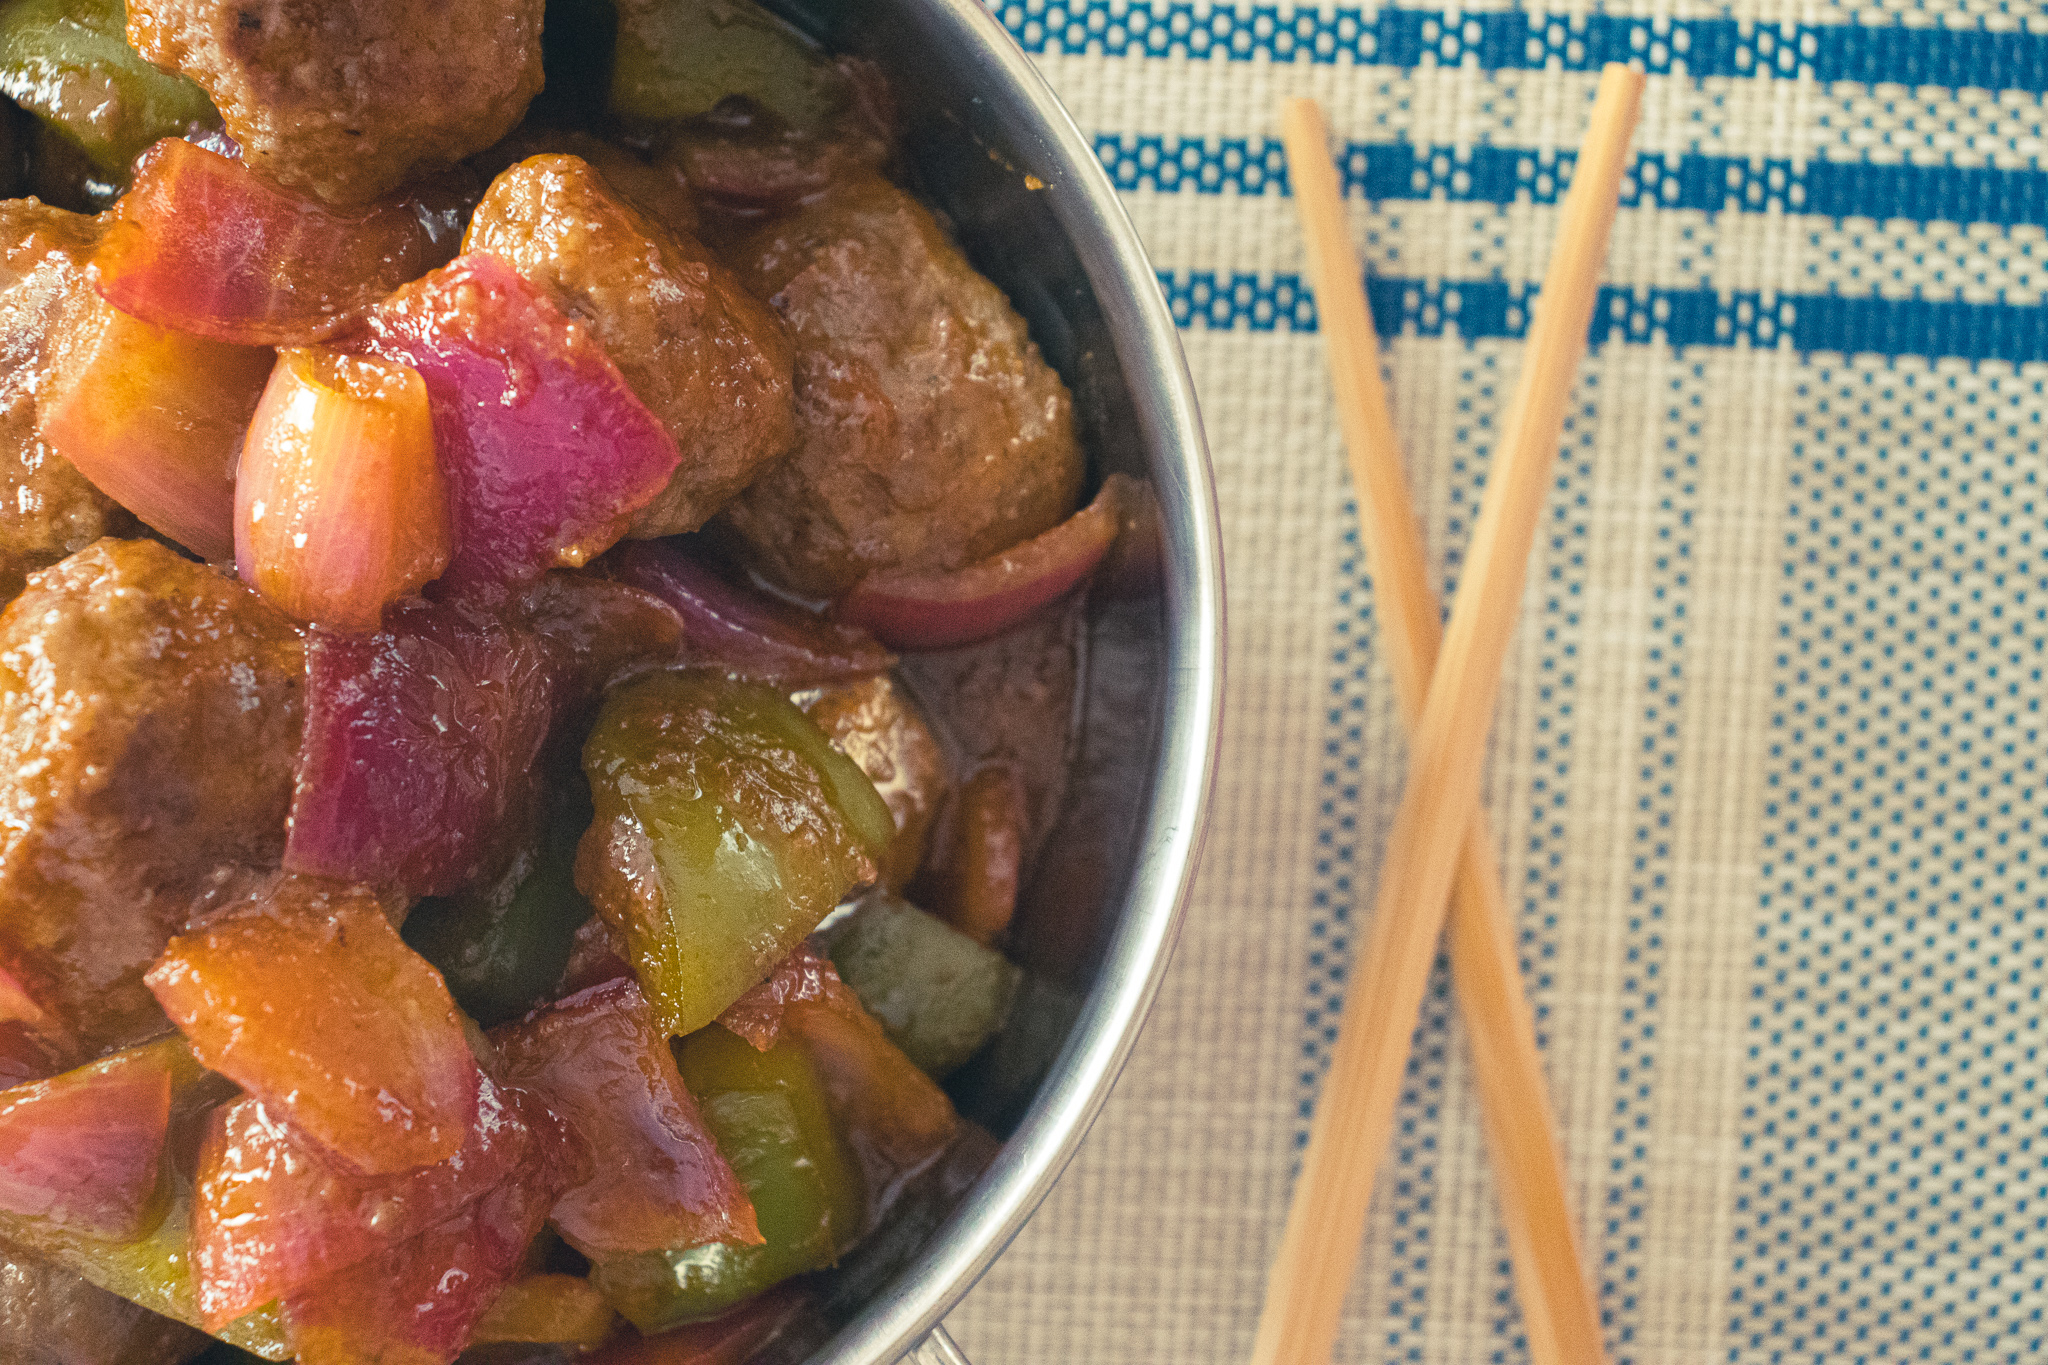
To make the sweet and sour sauce, heat a wok or large skillet on high heat. Add in the cooking oil, bell pepper, and onion. Stir-fry the pepper and onion until they start to brown, about two to three minutes. Then, add the ketchup and stir-fry for another minute. Next, add the sugar, vinegar, and water. Bring to a boil, then add in the cooked meatballs. Turn the heat down to medium-low and simmer for about three to five minutes or until the sauce is thick.
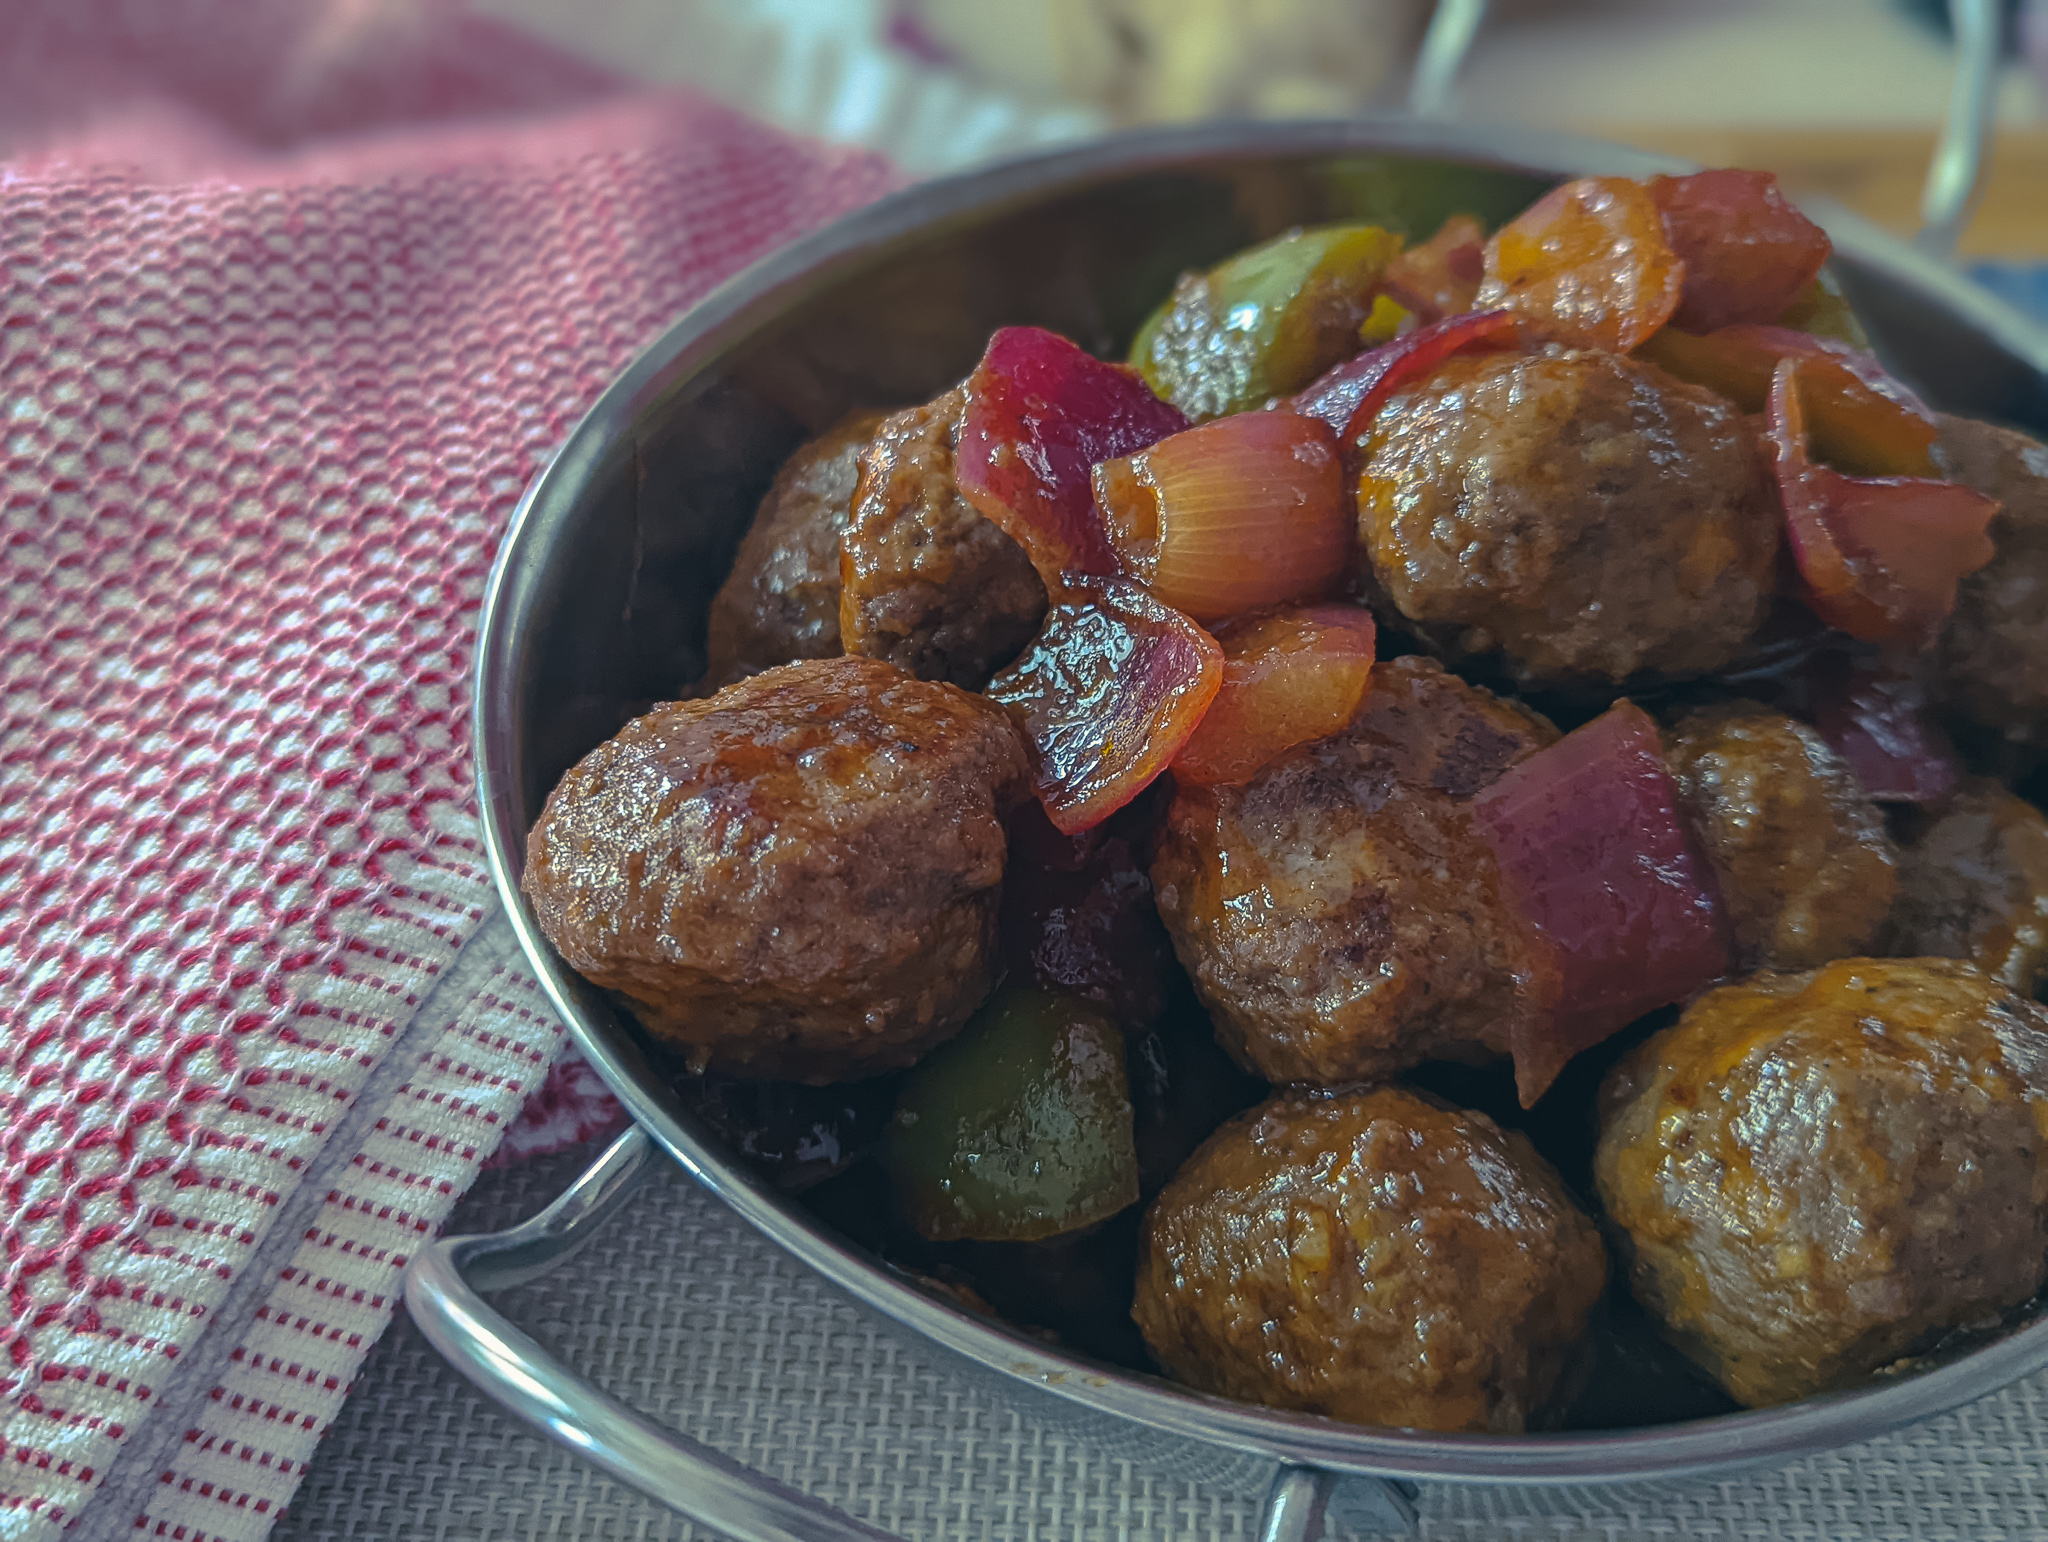
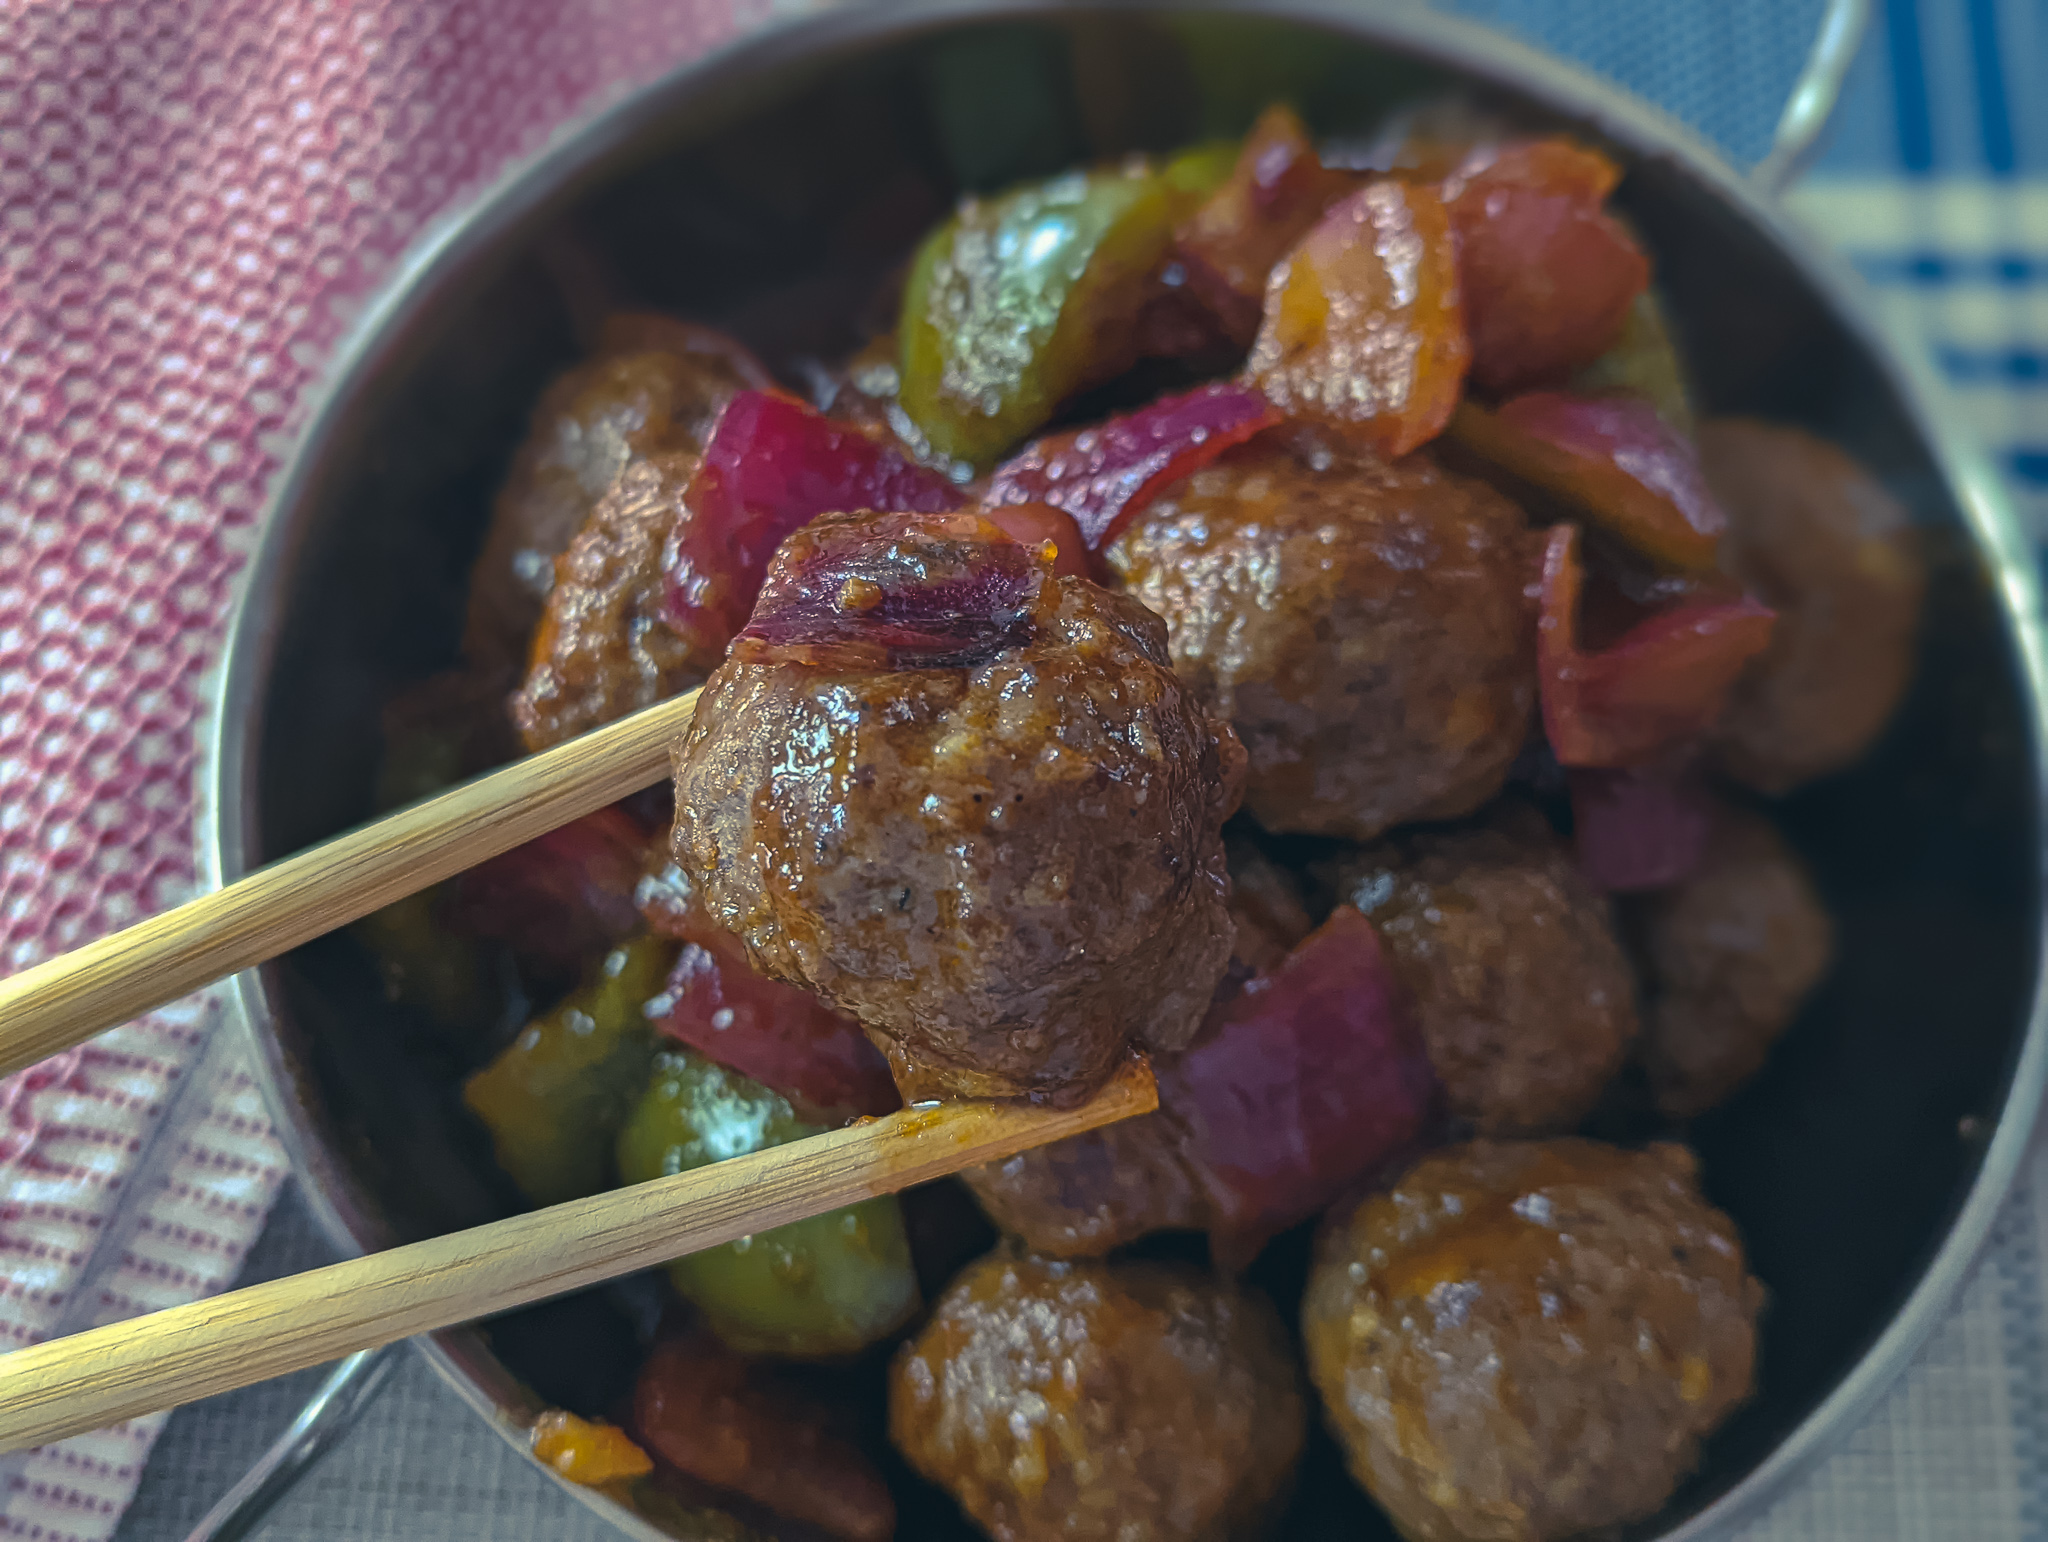
Sweet and Sour Meatballs
Just like that, your Sweet and Sour Meatballs are ready to go. Serve them with rice or noodles for a full meal. These meatballs also make a great hors d’oeuvre. Just stick them with some toothpicks, and you’re good to go. And these can be made ahead, kept in the fridge for up to four days and reheated. You just can’t go wrong.
The Wrap-Up
I love anything Sweet and Sour from my Sweet and Sour Chicken Balls, to my Sweet and Sour Chicken Legs, and of course, these Sweet and Sour Meatballs. With sweet and sour, you just can’t go wrong. So, what are you waiting for? Get cooking!
That does it for today but thank you for coming. I hope you enjoyed the post. And, if you haven’t already, remember to sign up to my newsletter at the bottom of the page to get exclusive recipes, cooking tips, behind-the-scenes stories etc., in your inbox once a month. The first edition of my new newsletter comes out next Monday. Don’t miss out! Have a great week and a fantastic weekend! I’ll see you right back here next Thursday.
Sweet and Sour Meatballs
Sweet and Sour Meatballs are a delicious and easy thing to make with a pound of ground beef. This simple recipe uses things you probably already have on hand to make a delicious sweet and sour sauce that you'll want to put on everything. Serve with rice to make a full meal. These meatballs also make a great appetizer for any party.
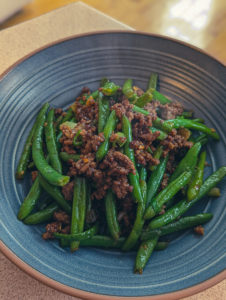
With rising grocery prices, I think we could all use a few quick, low-cost, delicious meal options. Well, I have one for you today. This is my ground beef and green bean stir-fry. You can put the whole thing together in less than 30 minutes, it costs less than ten bucks, it tastes amazing, and you can feed a bunch of people with a pound of ground beef and a bag of frozen green beans. Does that sound too good to be true? It’s not. Let me show you. As always, you can find the recipe directly below but keep reading for more details.
Making Stir-Fry Sauce
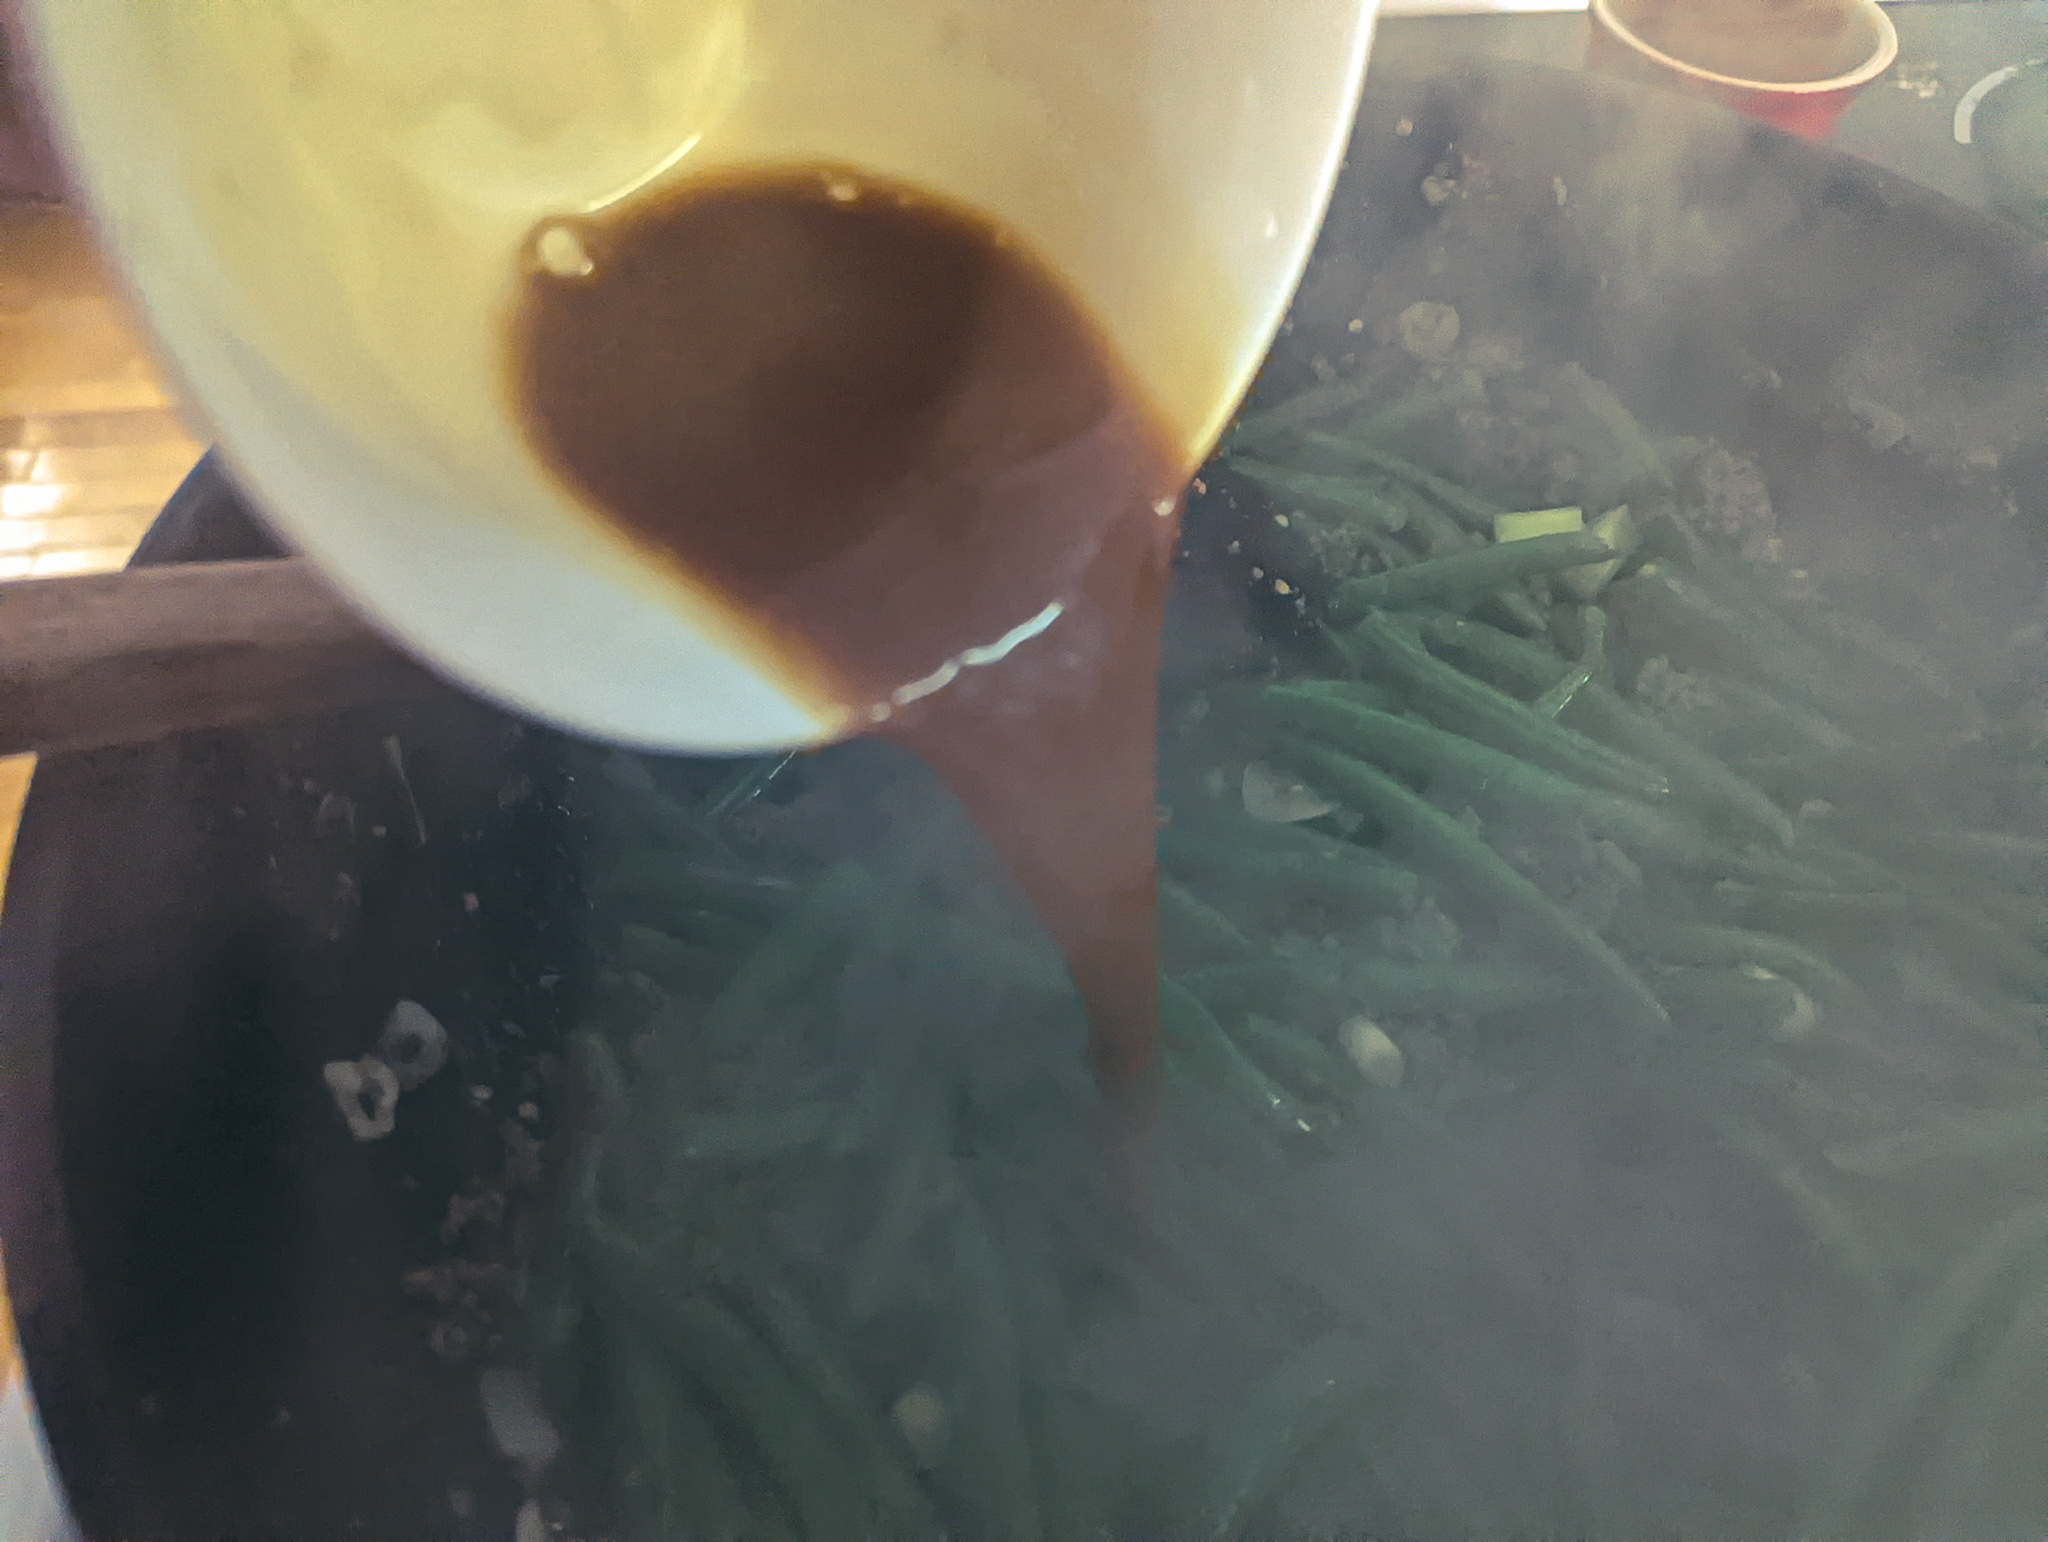
You can’t have a stir-fry without a delicious stir-fry sauce. Okay, you can but it’s much better with a sauce. The sauce for this ground beef and green bean stir-fry is about as straightforward as they come. Get a small bowl and put in it two teaspoons of cornstarch, one tablespoon of brown sugar, a quarter cup of beef stock (chicken stock or water will work too), two tablespoons of soy sauce, and two teaspoons of rice vinegar (white wine vinegar will work). Mix all the ingredients and set them aside until you’re ready to use them.
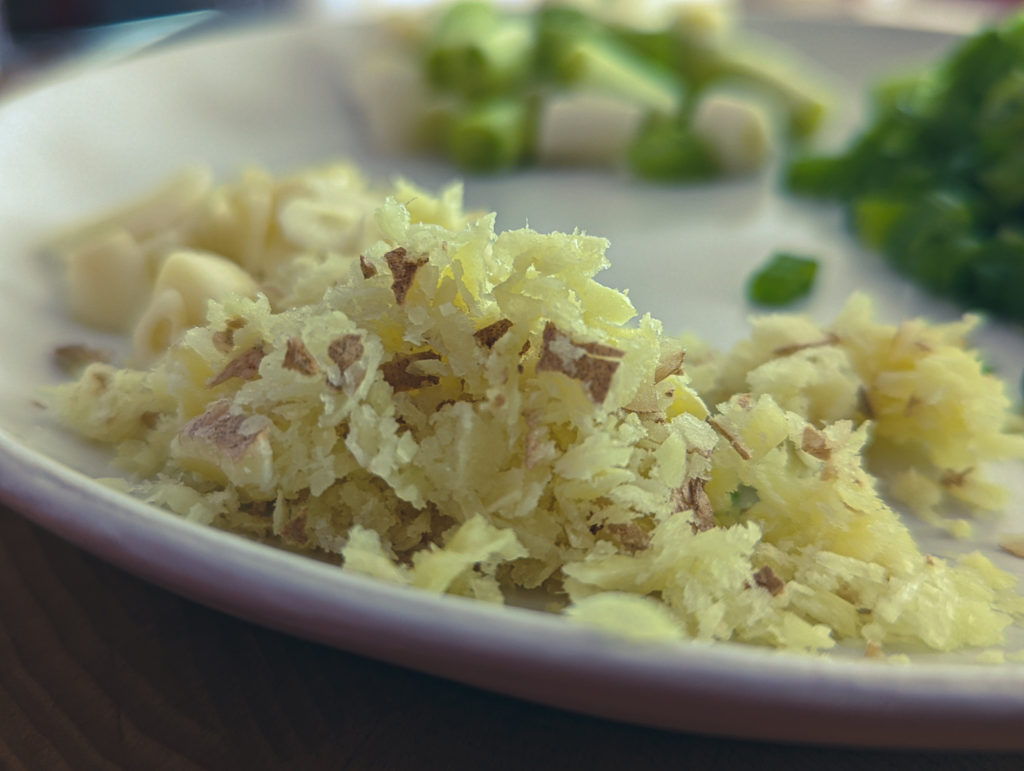
Prepping The Ingredients
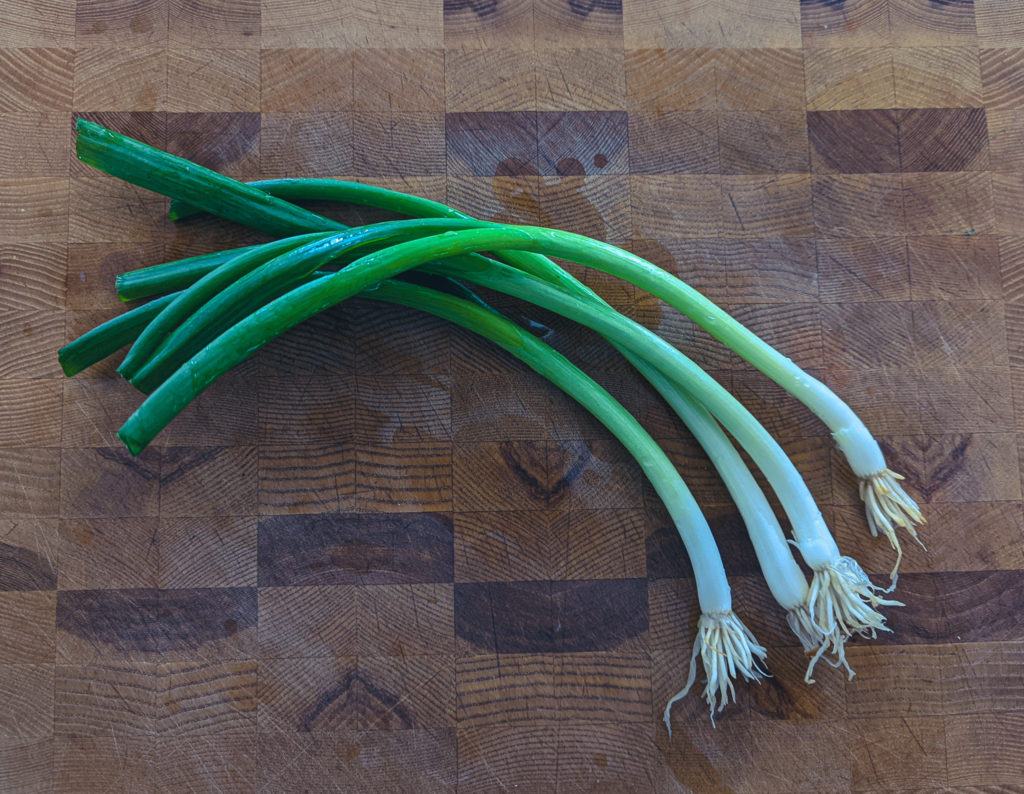
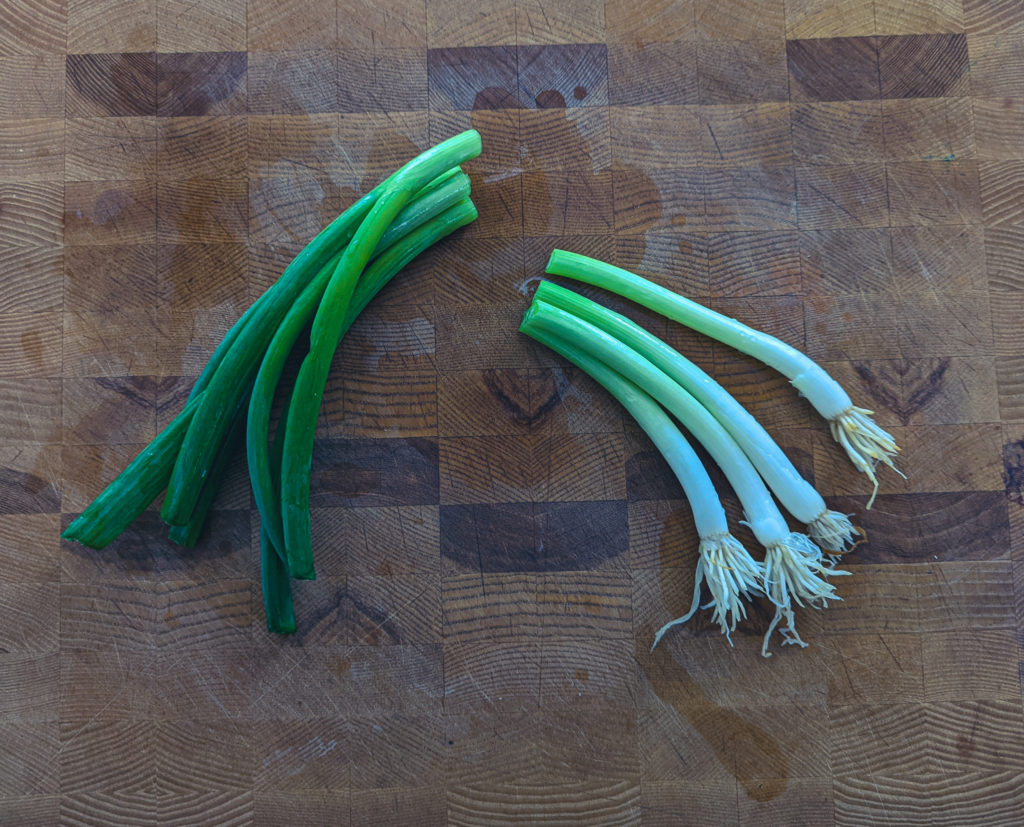
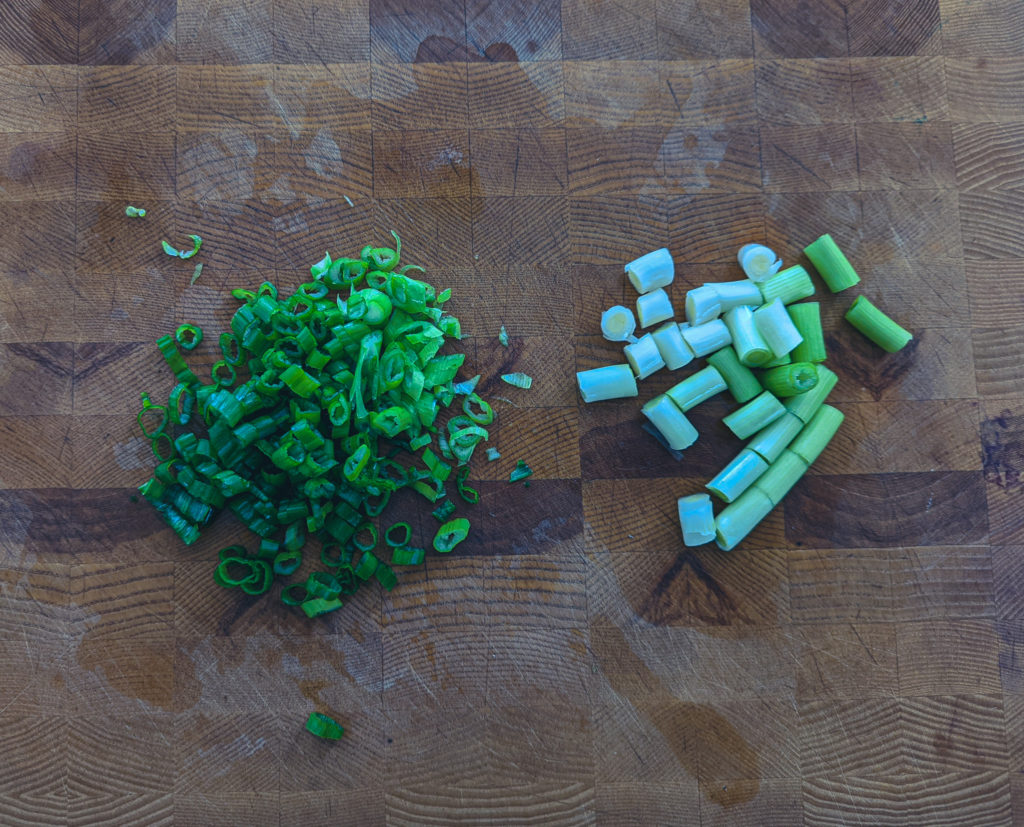
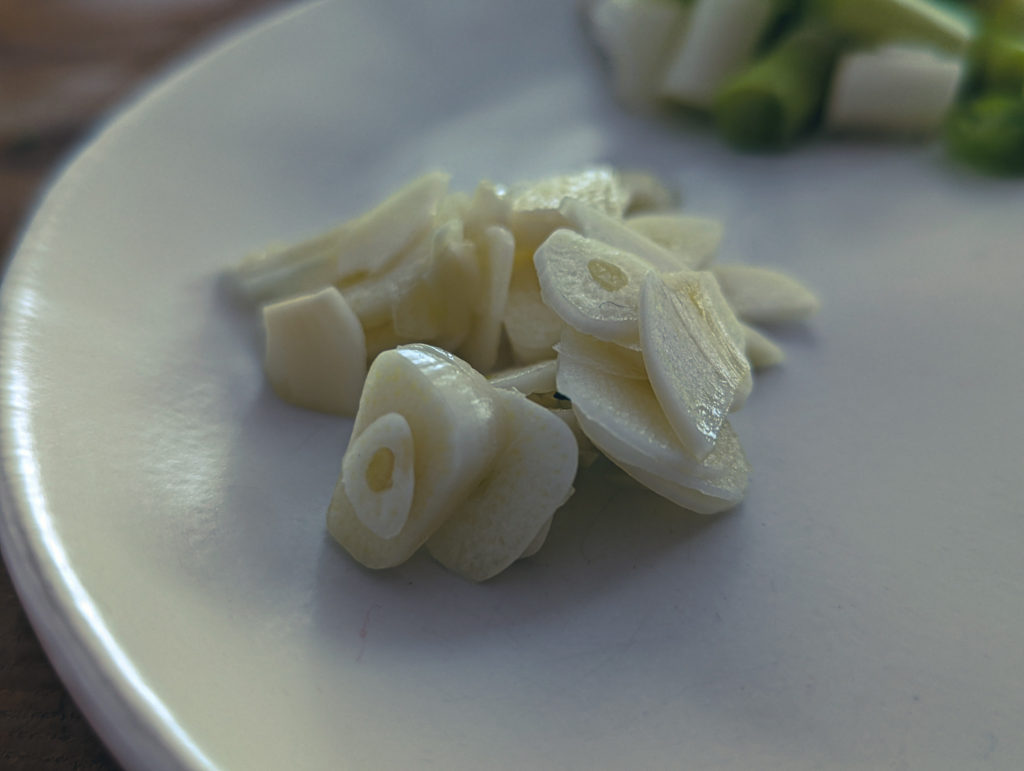
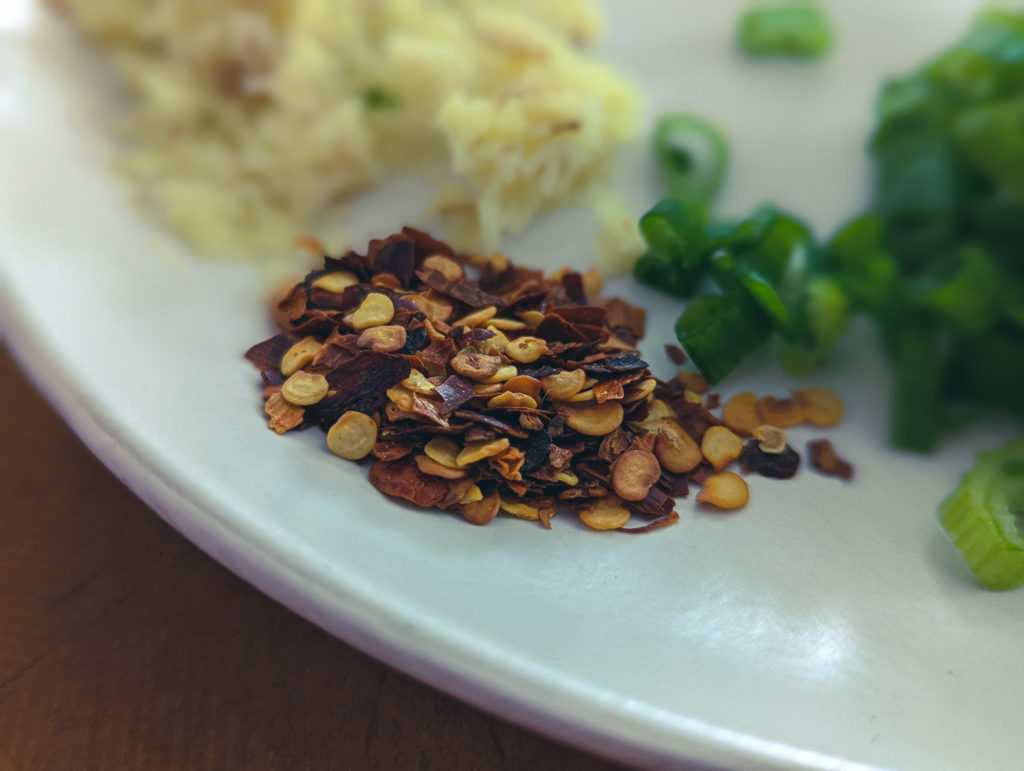
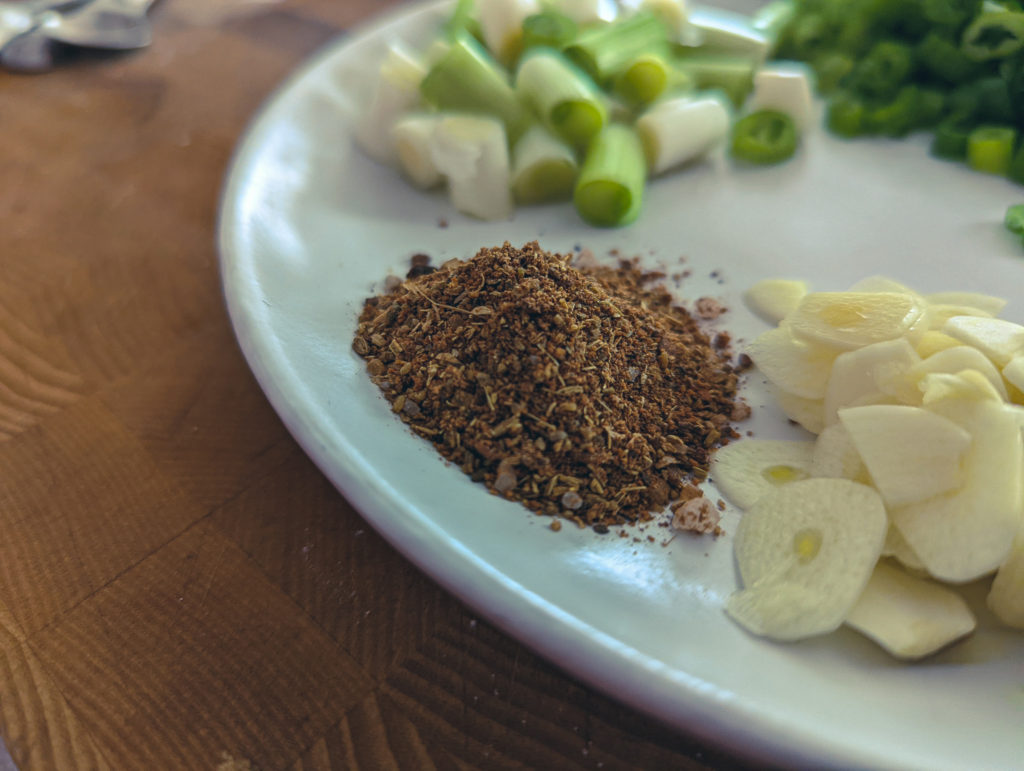
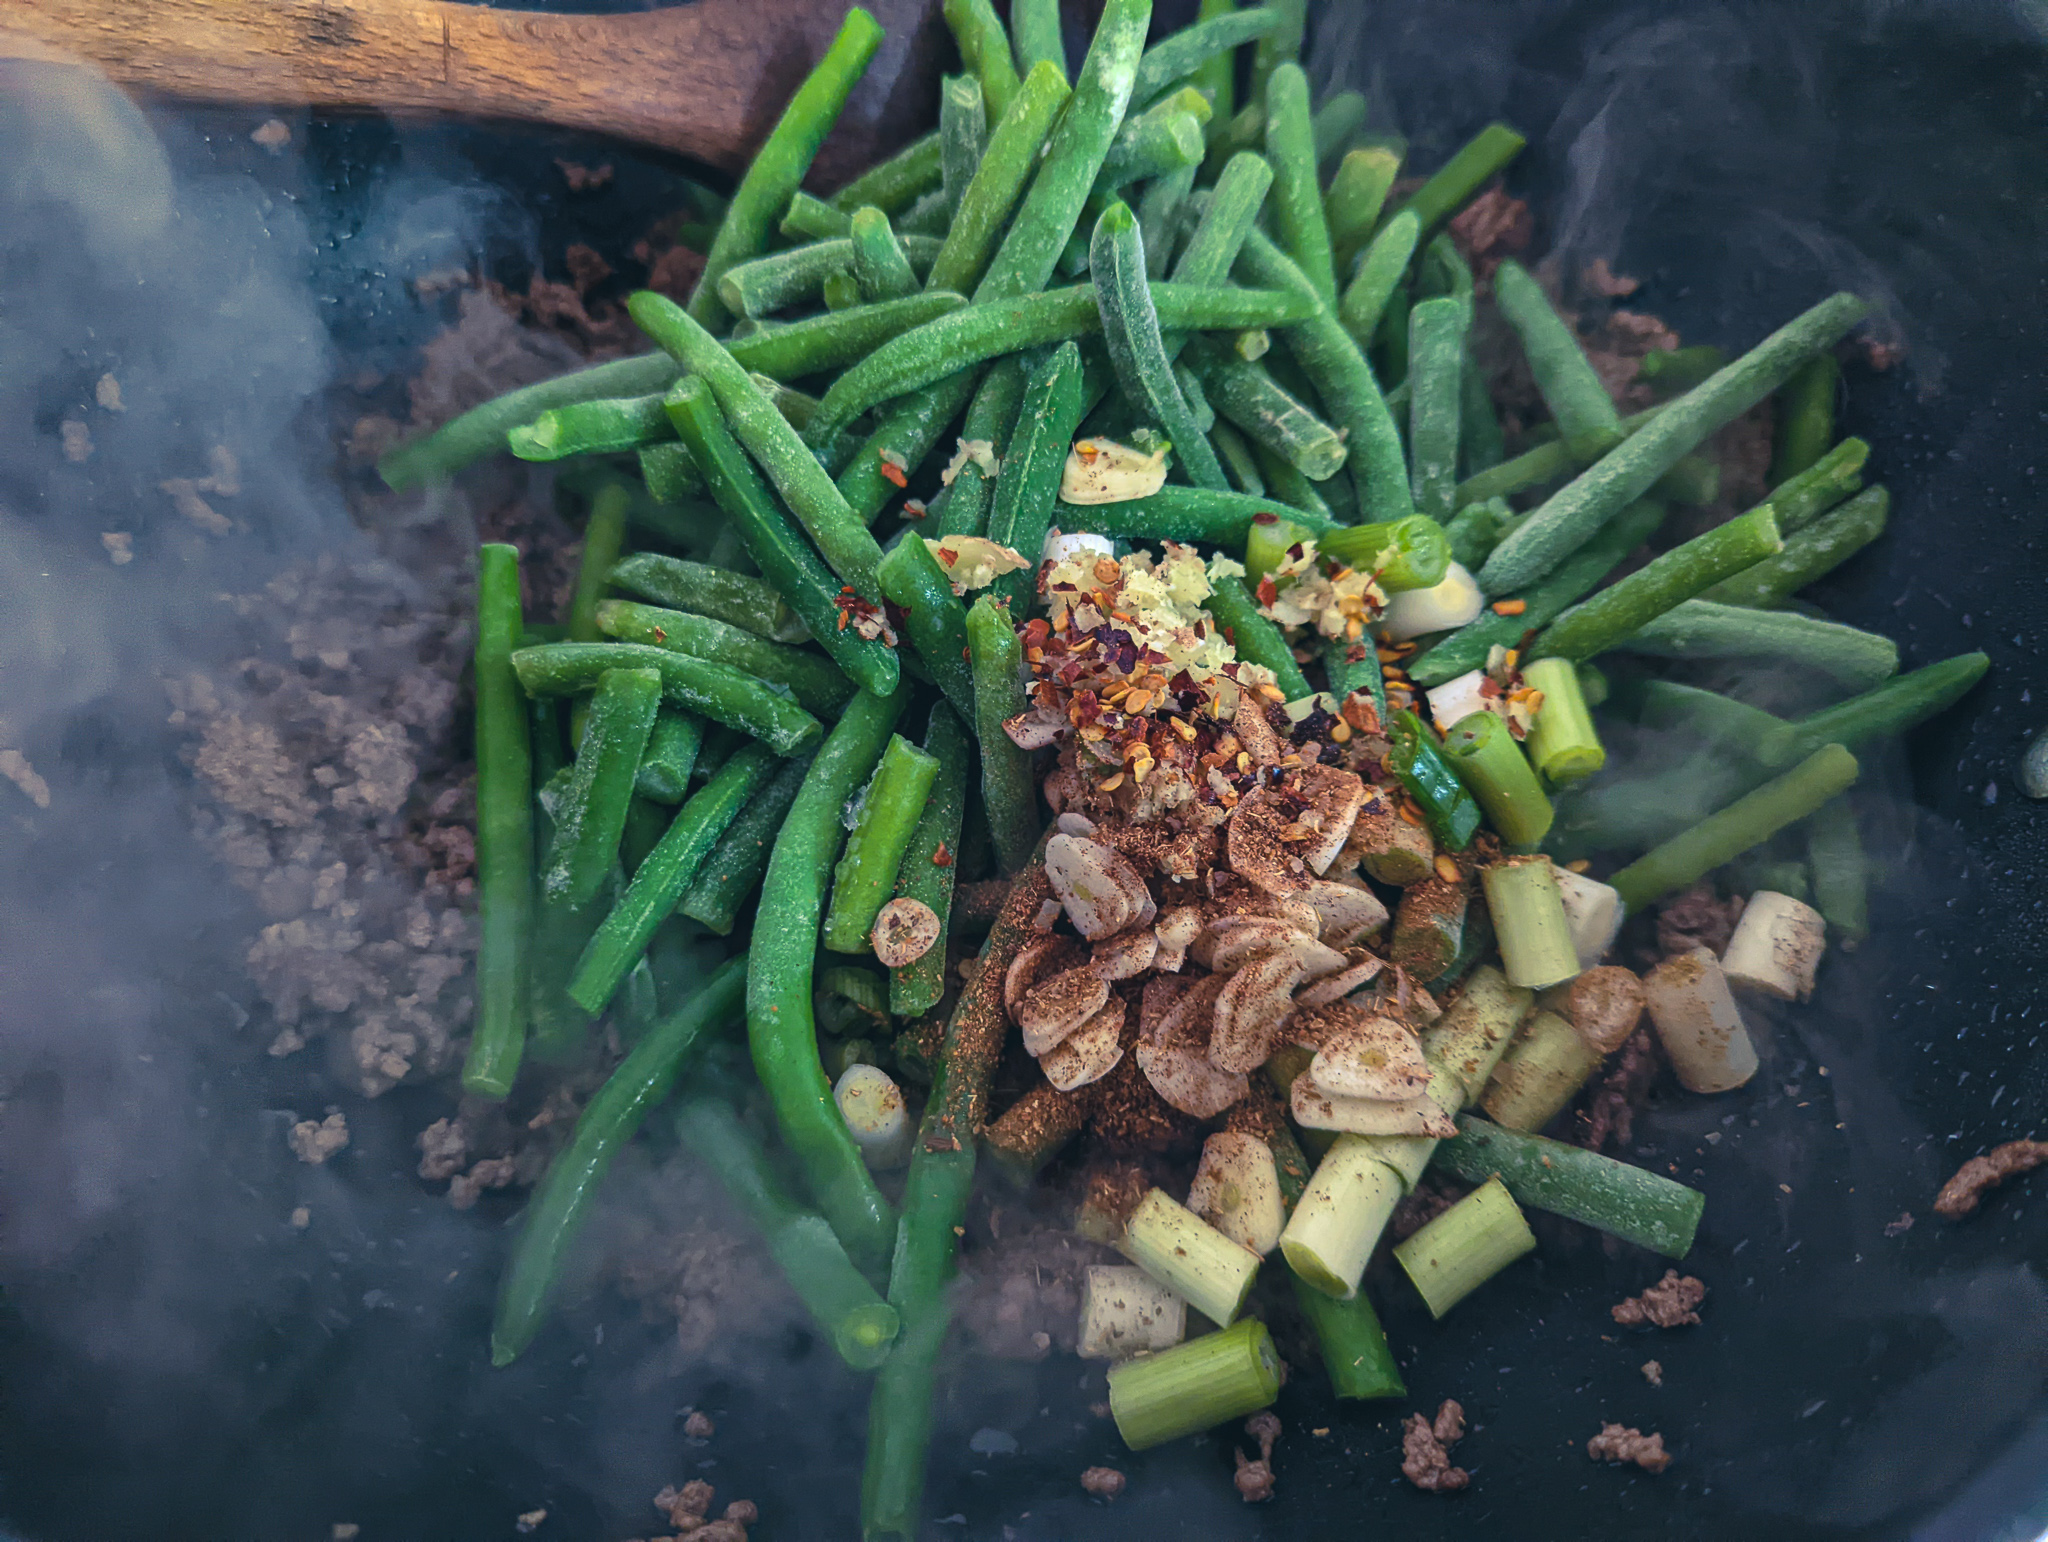
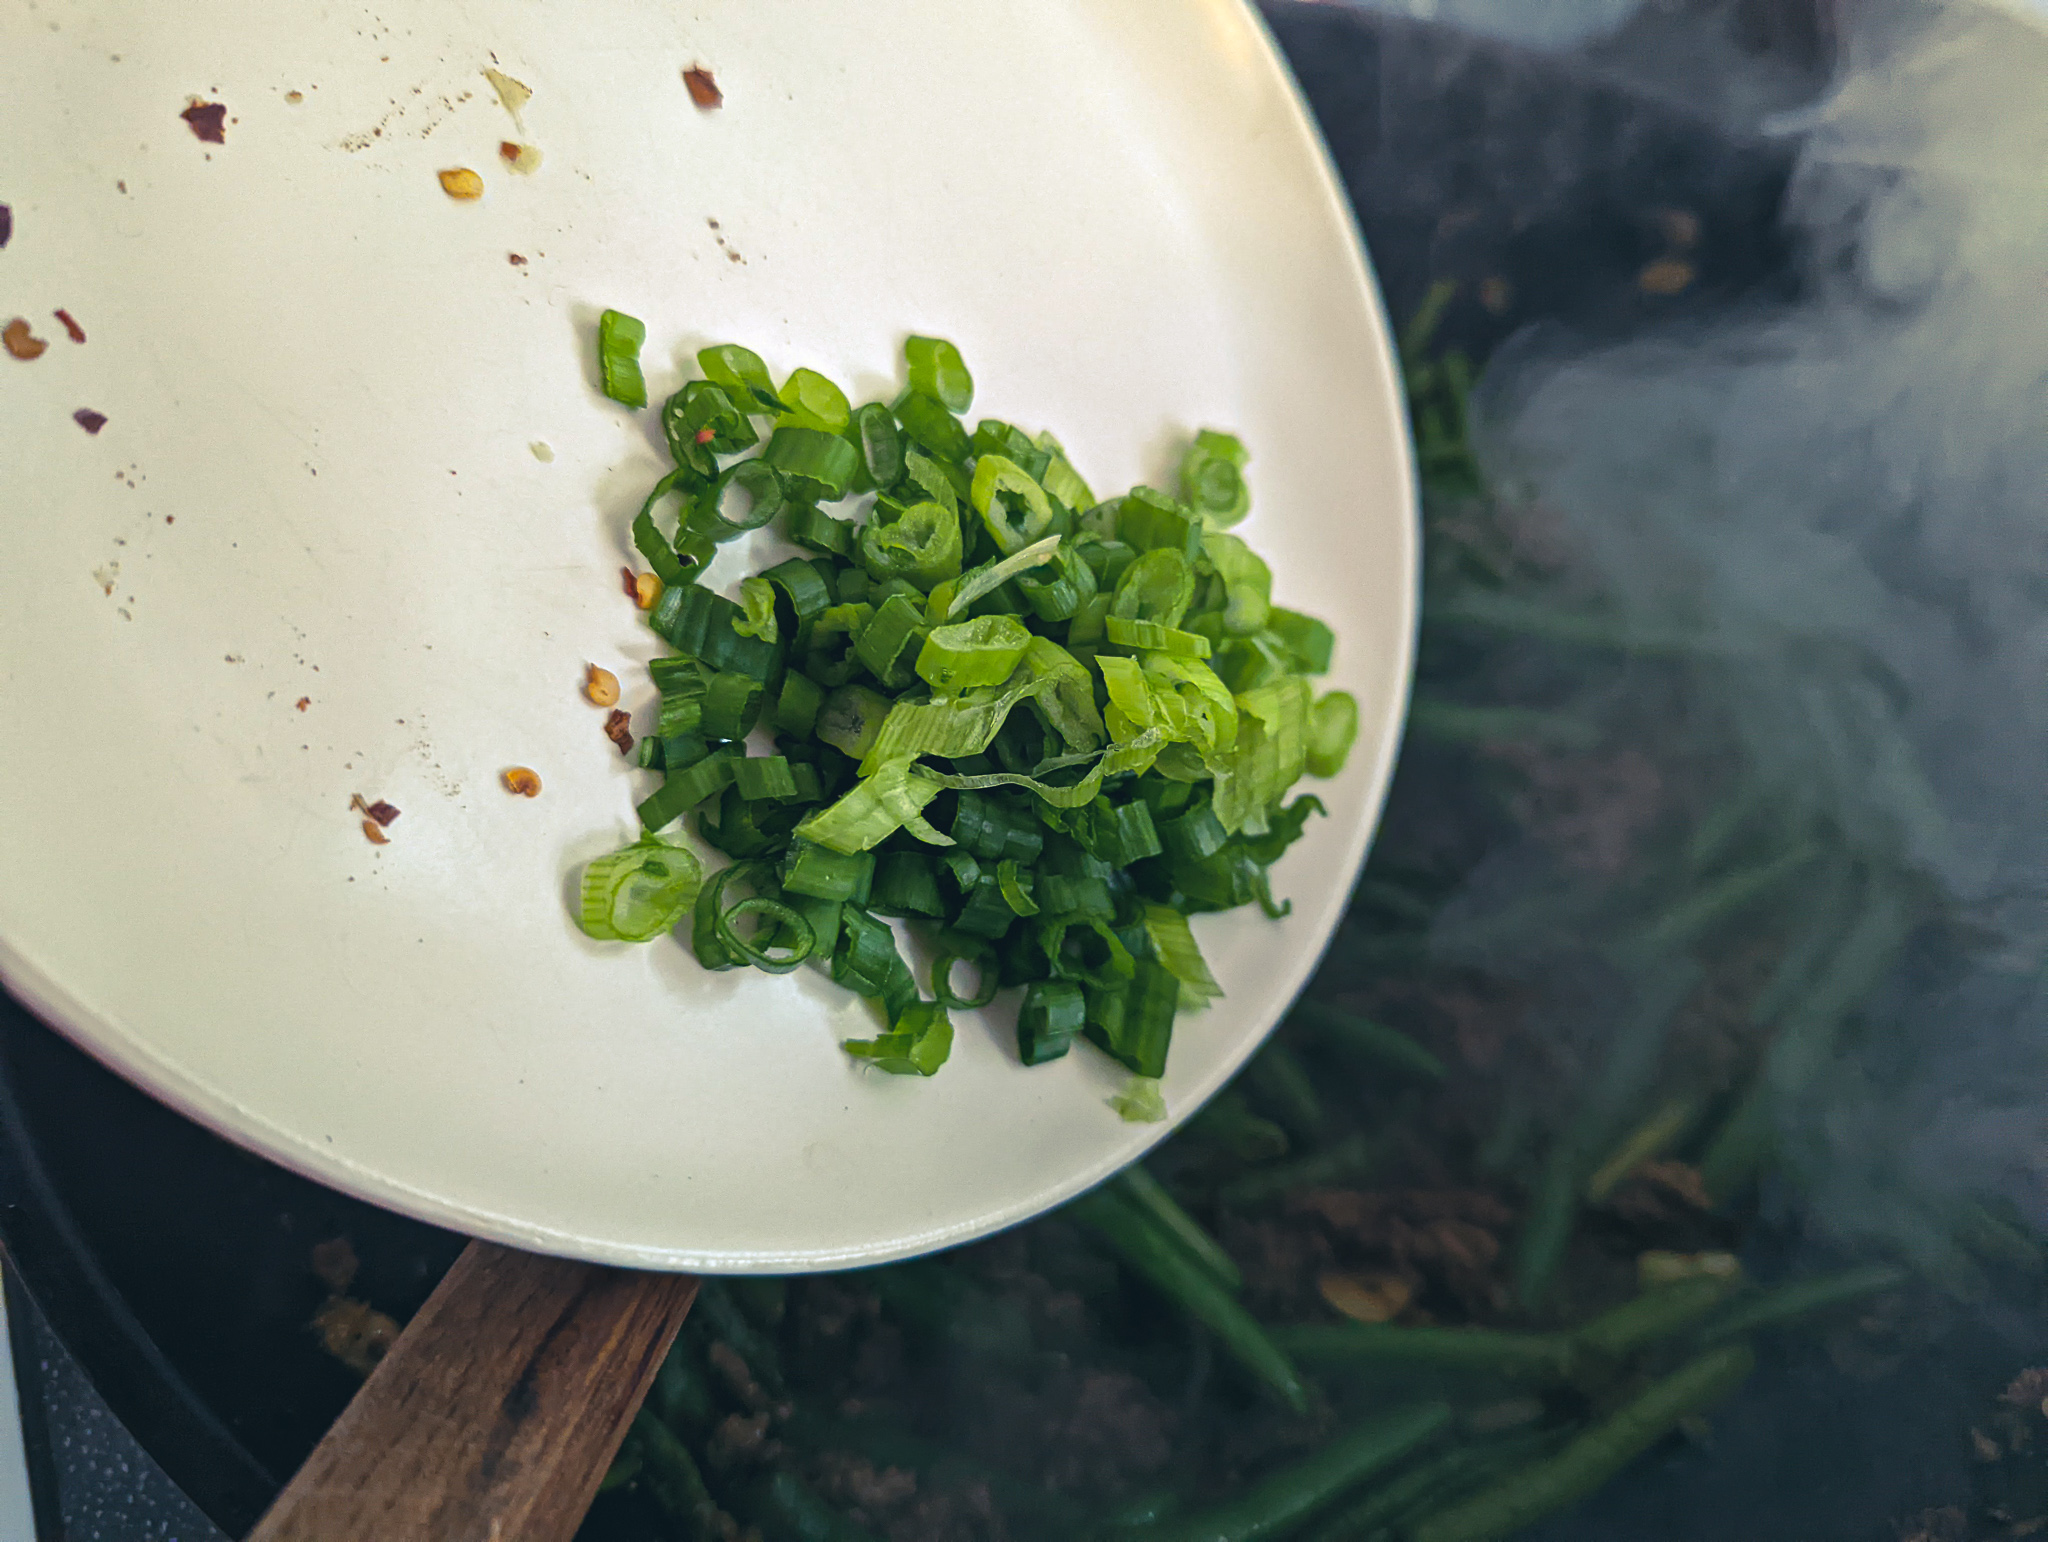
Any stir-fry will benefit from a bit of onion. For this ground beef and green bean stir-fry, I use green onions, but you can use any other type of onion you want. If you use white, yellow, or red onions, use about a quarter of a cup of sliced onions. If using green onions, separate the whites and the greens as I did in the picture below. Cut the whites into finger-width pieces, and thinly slice the greens. The greens and the whites of the onion cook differently so we don’t want to add them to the stir-fry at the same time. The whites will go in first and cook with the other ingredients. The greens will be added near the end of cooking to add a fresh flavour to the dish. Along with the green onion, you need two cloves of thinly sliced garlic, two teaspoons to a tablespoon of minced or grated ginger. If you add a little more or less it isn’t going to change too much. Finally, you will need half a teaspoon of crushed red pepper flakes and two teaspoons of Chinese 5 Spice.
Ingredient Substitutions
If you don’t have fresh ginger and garlic, you can use one teaspoon each of garlic and ginger powder. Add the powders to the sauce. You can buy Chinese 5 Spice at most grocery stores now in the spice aisle. You can also make it using my recipe here. If you don’t have Chinese 5 Spice, you can use Garam Masala or Yellow curry powder with a pinch of cinnamon and clove.
Making The Ground Beef and Green Bean Stir-Fry
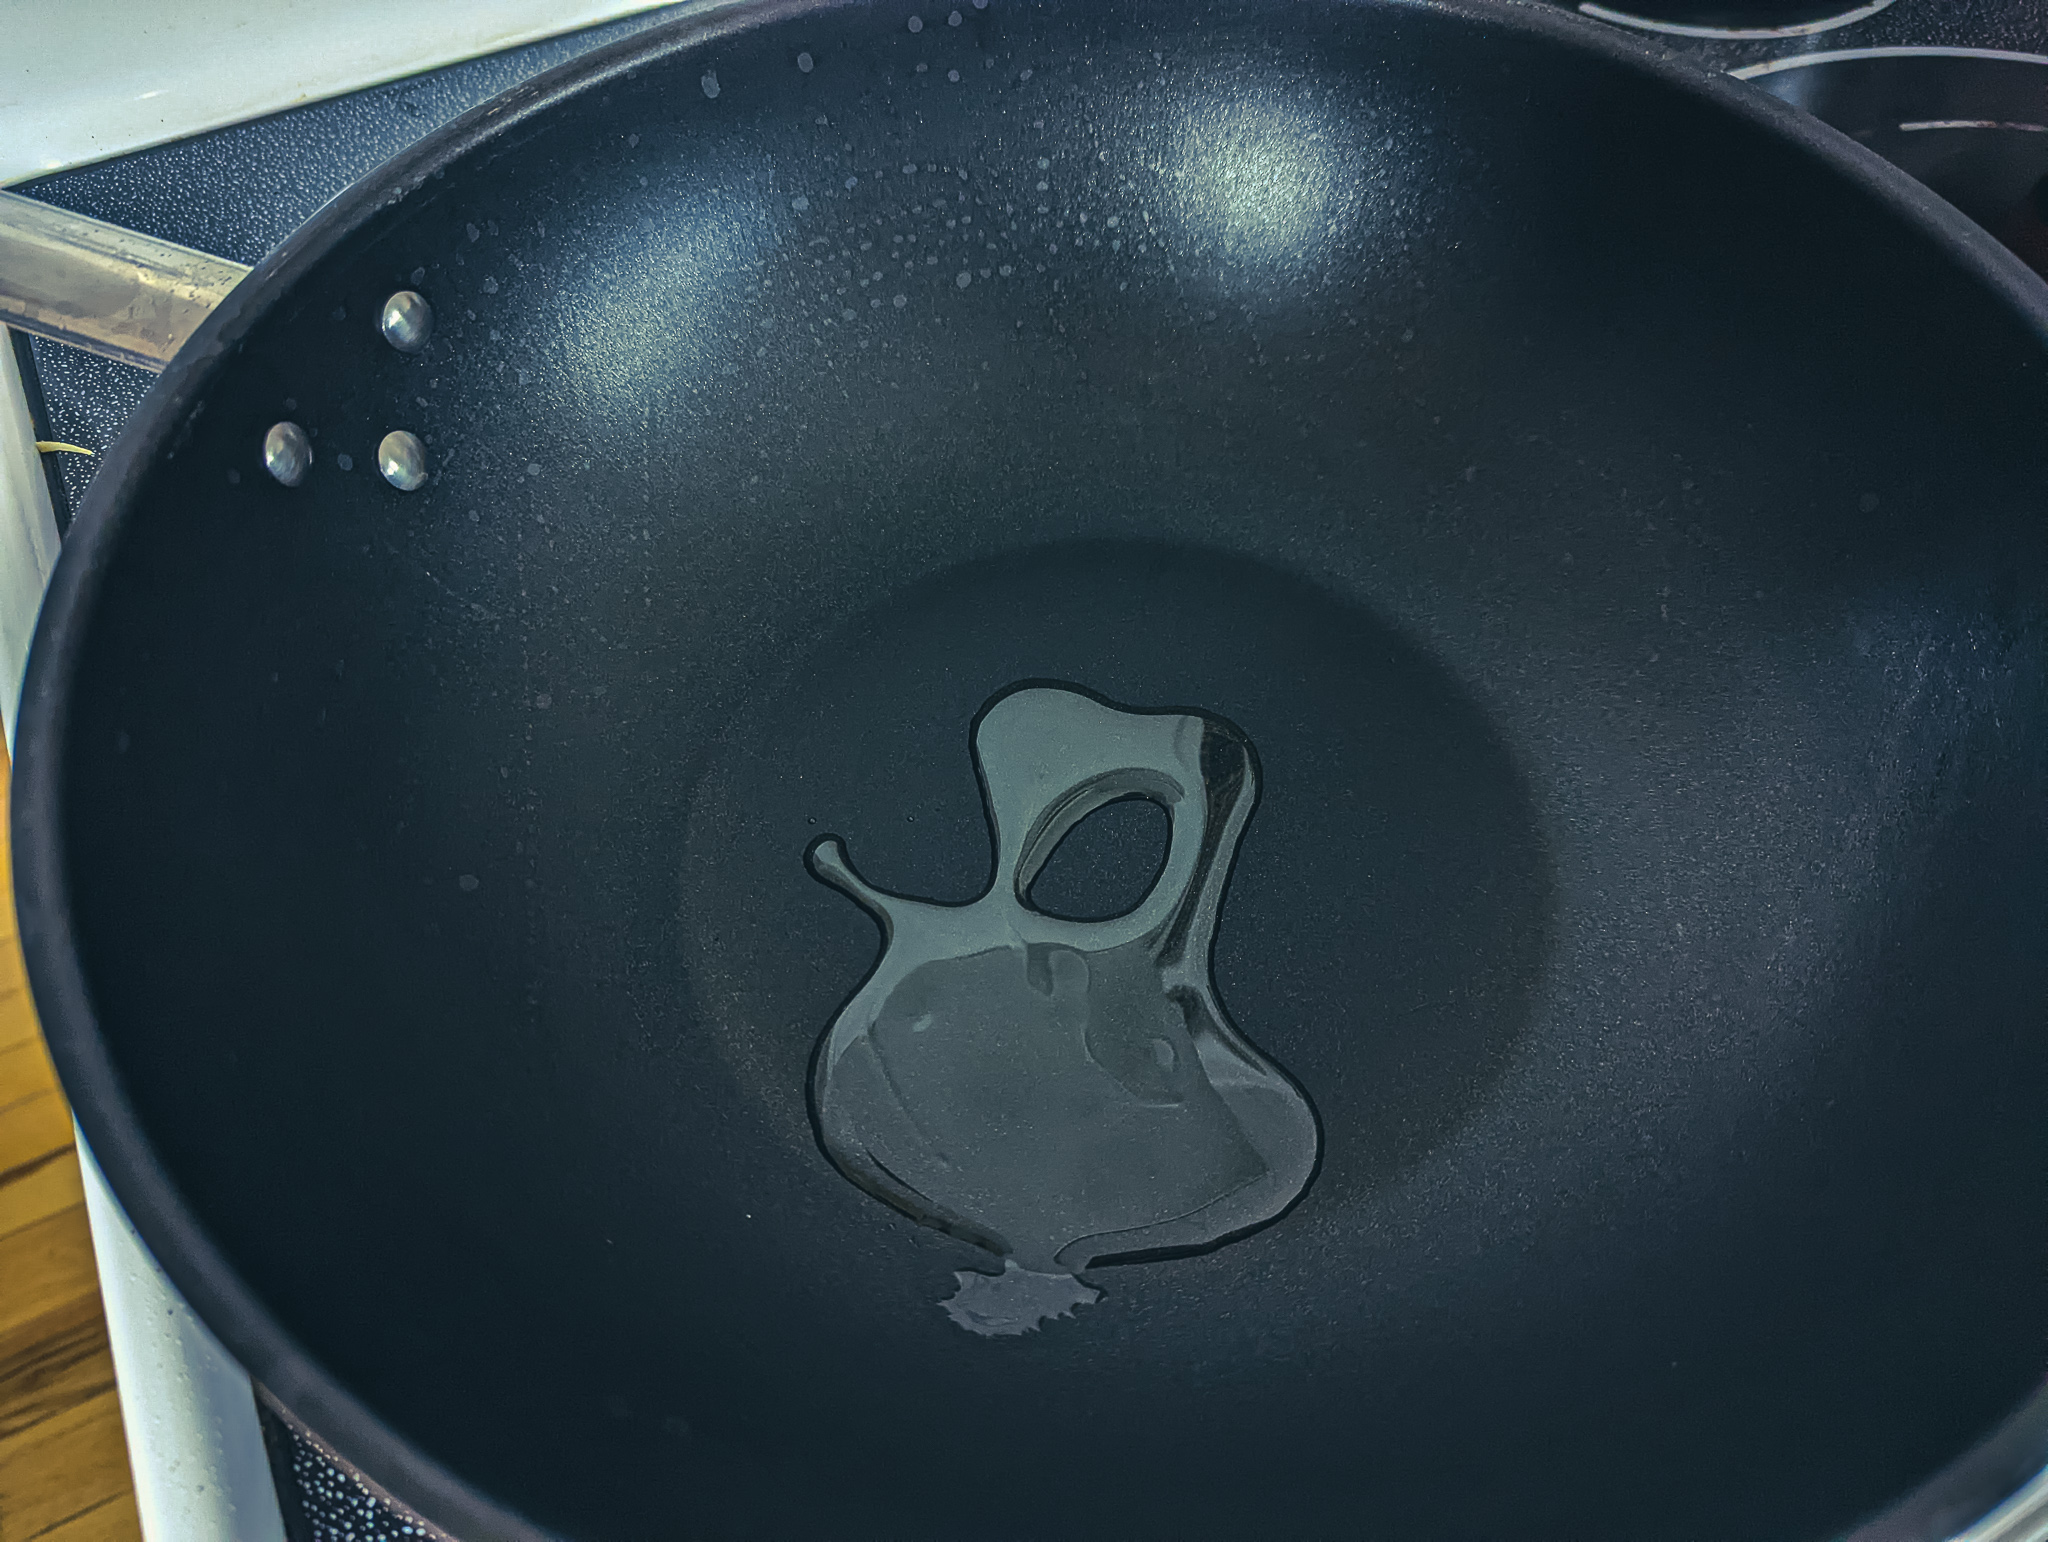
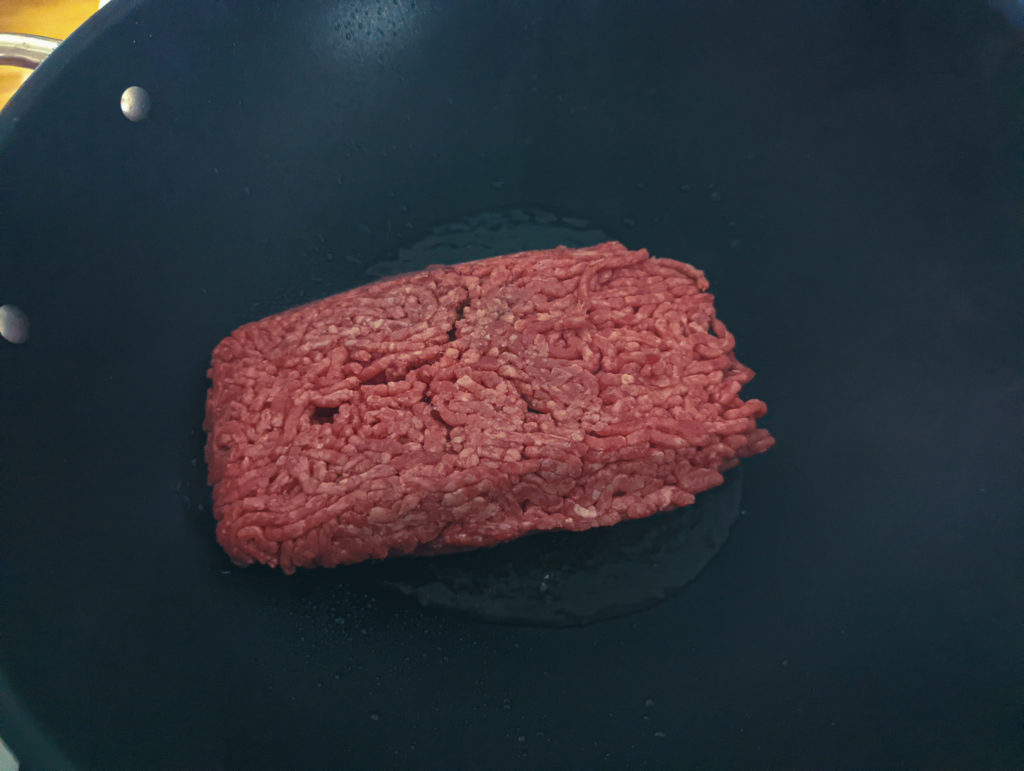
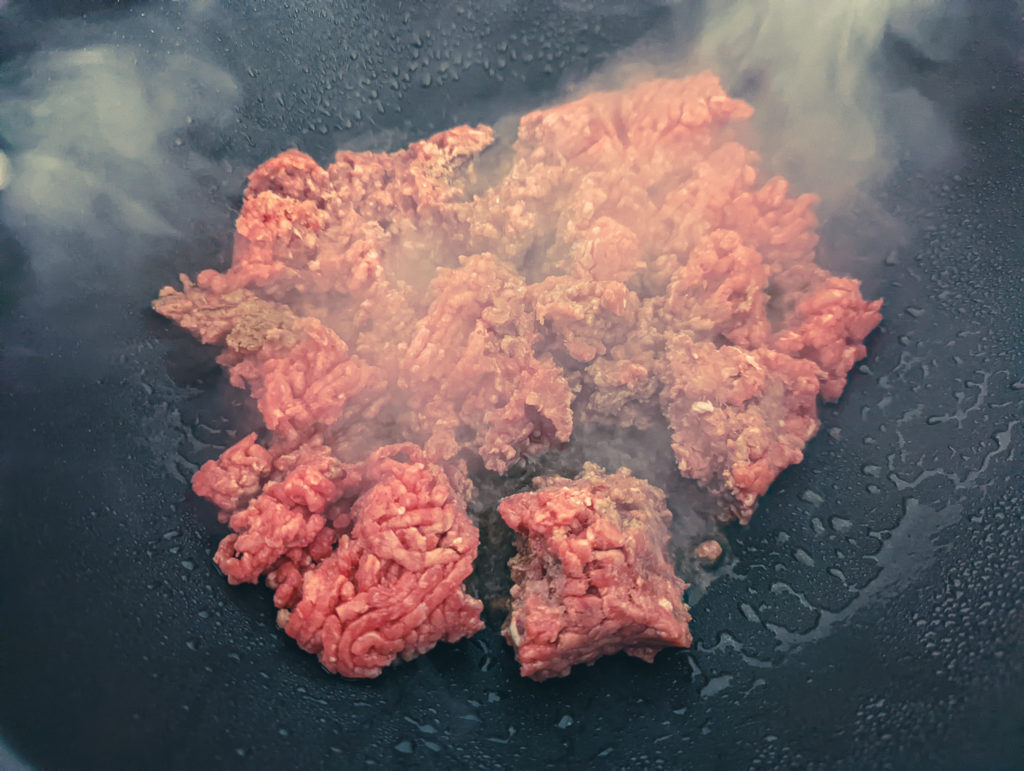
The key to a good stir-fry is a very hot wok (or pan if you don’t have a wok). The wok has to be hot so that the moisture that comes off the ingredients while cooking hits the pan’s surface and evaporates. If the wok isn’t hot enough, all that moisture will hit the pan’s surface, turn from a gas to a liquid, and pool, further cooling down your wok. This leads to a mushy boiled dinner rather than a crisp and fresh-tasting stir-fry. You can read more about the stir-fry technique here. In the meantime, put your wok on the burner, crank it up to high, and let it sit for a minute or two to get really hot. Next, add a teaspoon or two of cooking oil (I like peanut oil for stir-frying). Swirl the oil around the wok and add in the ground beef.
Browning the ground beef
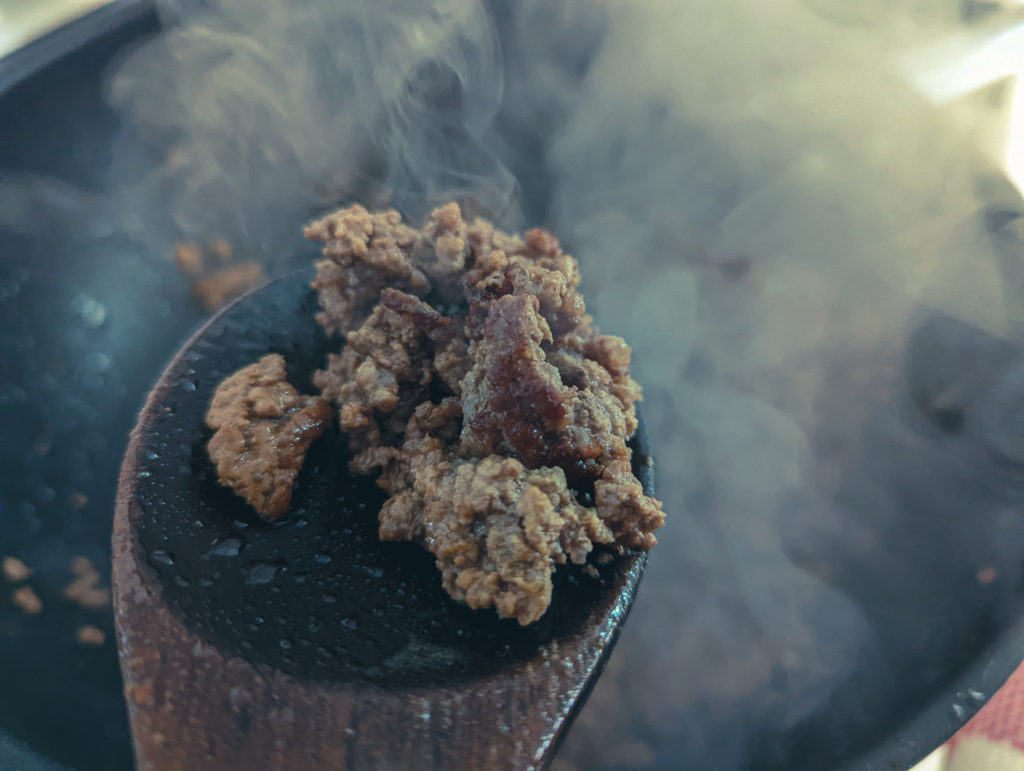
There is a common mistake that people make with ground beef. When a recipe says to “brown the ground beef” they see that and think it means to “grey the ground beef“. Browning is a form of caramelization. Think about the surface of a burger cooked in a pan or a seared steak. That deep mahogany brown is what you want. This takes a little time but it is well worth the wait as the flavour will be deeper and richer. So, put the beef in the pan, break it up a little bit, then leave it alone for a few minutes. Let the bottom of the beef turn that deep brown before you stir it. Then, stir it and leave it alone for another few minutes. Once most of the meat is browned and it is all cooked, drain the excess fat and put the wok back on the burner.
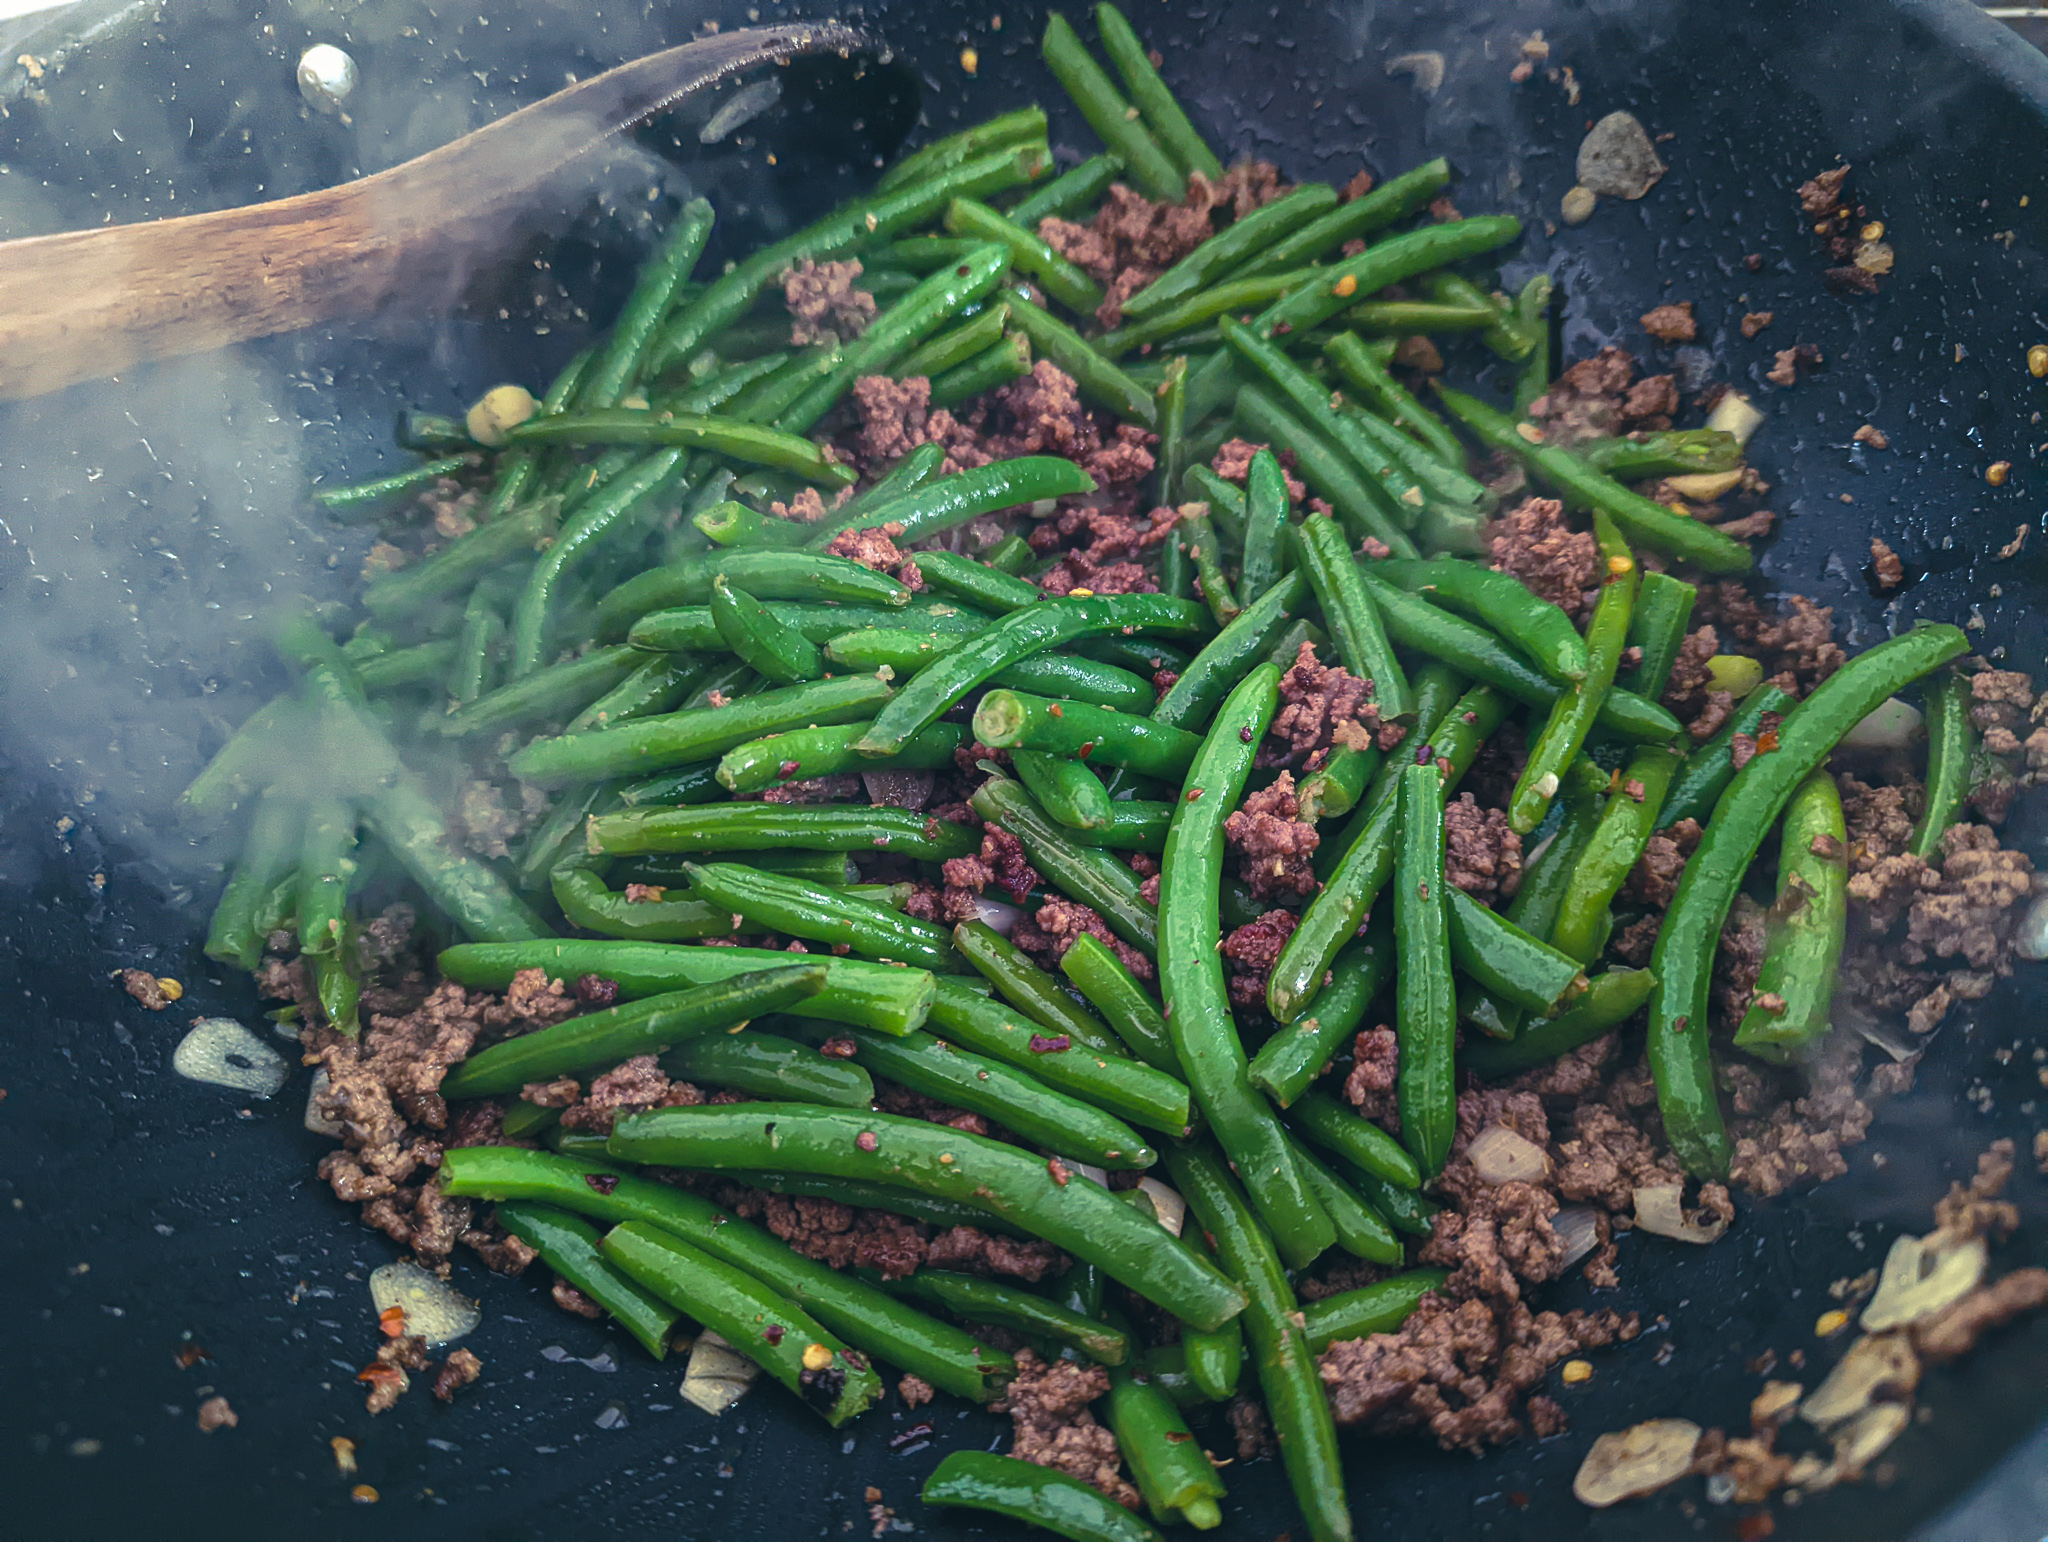
Adding The Other Ingredients To The Stir-Fry
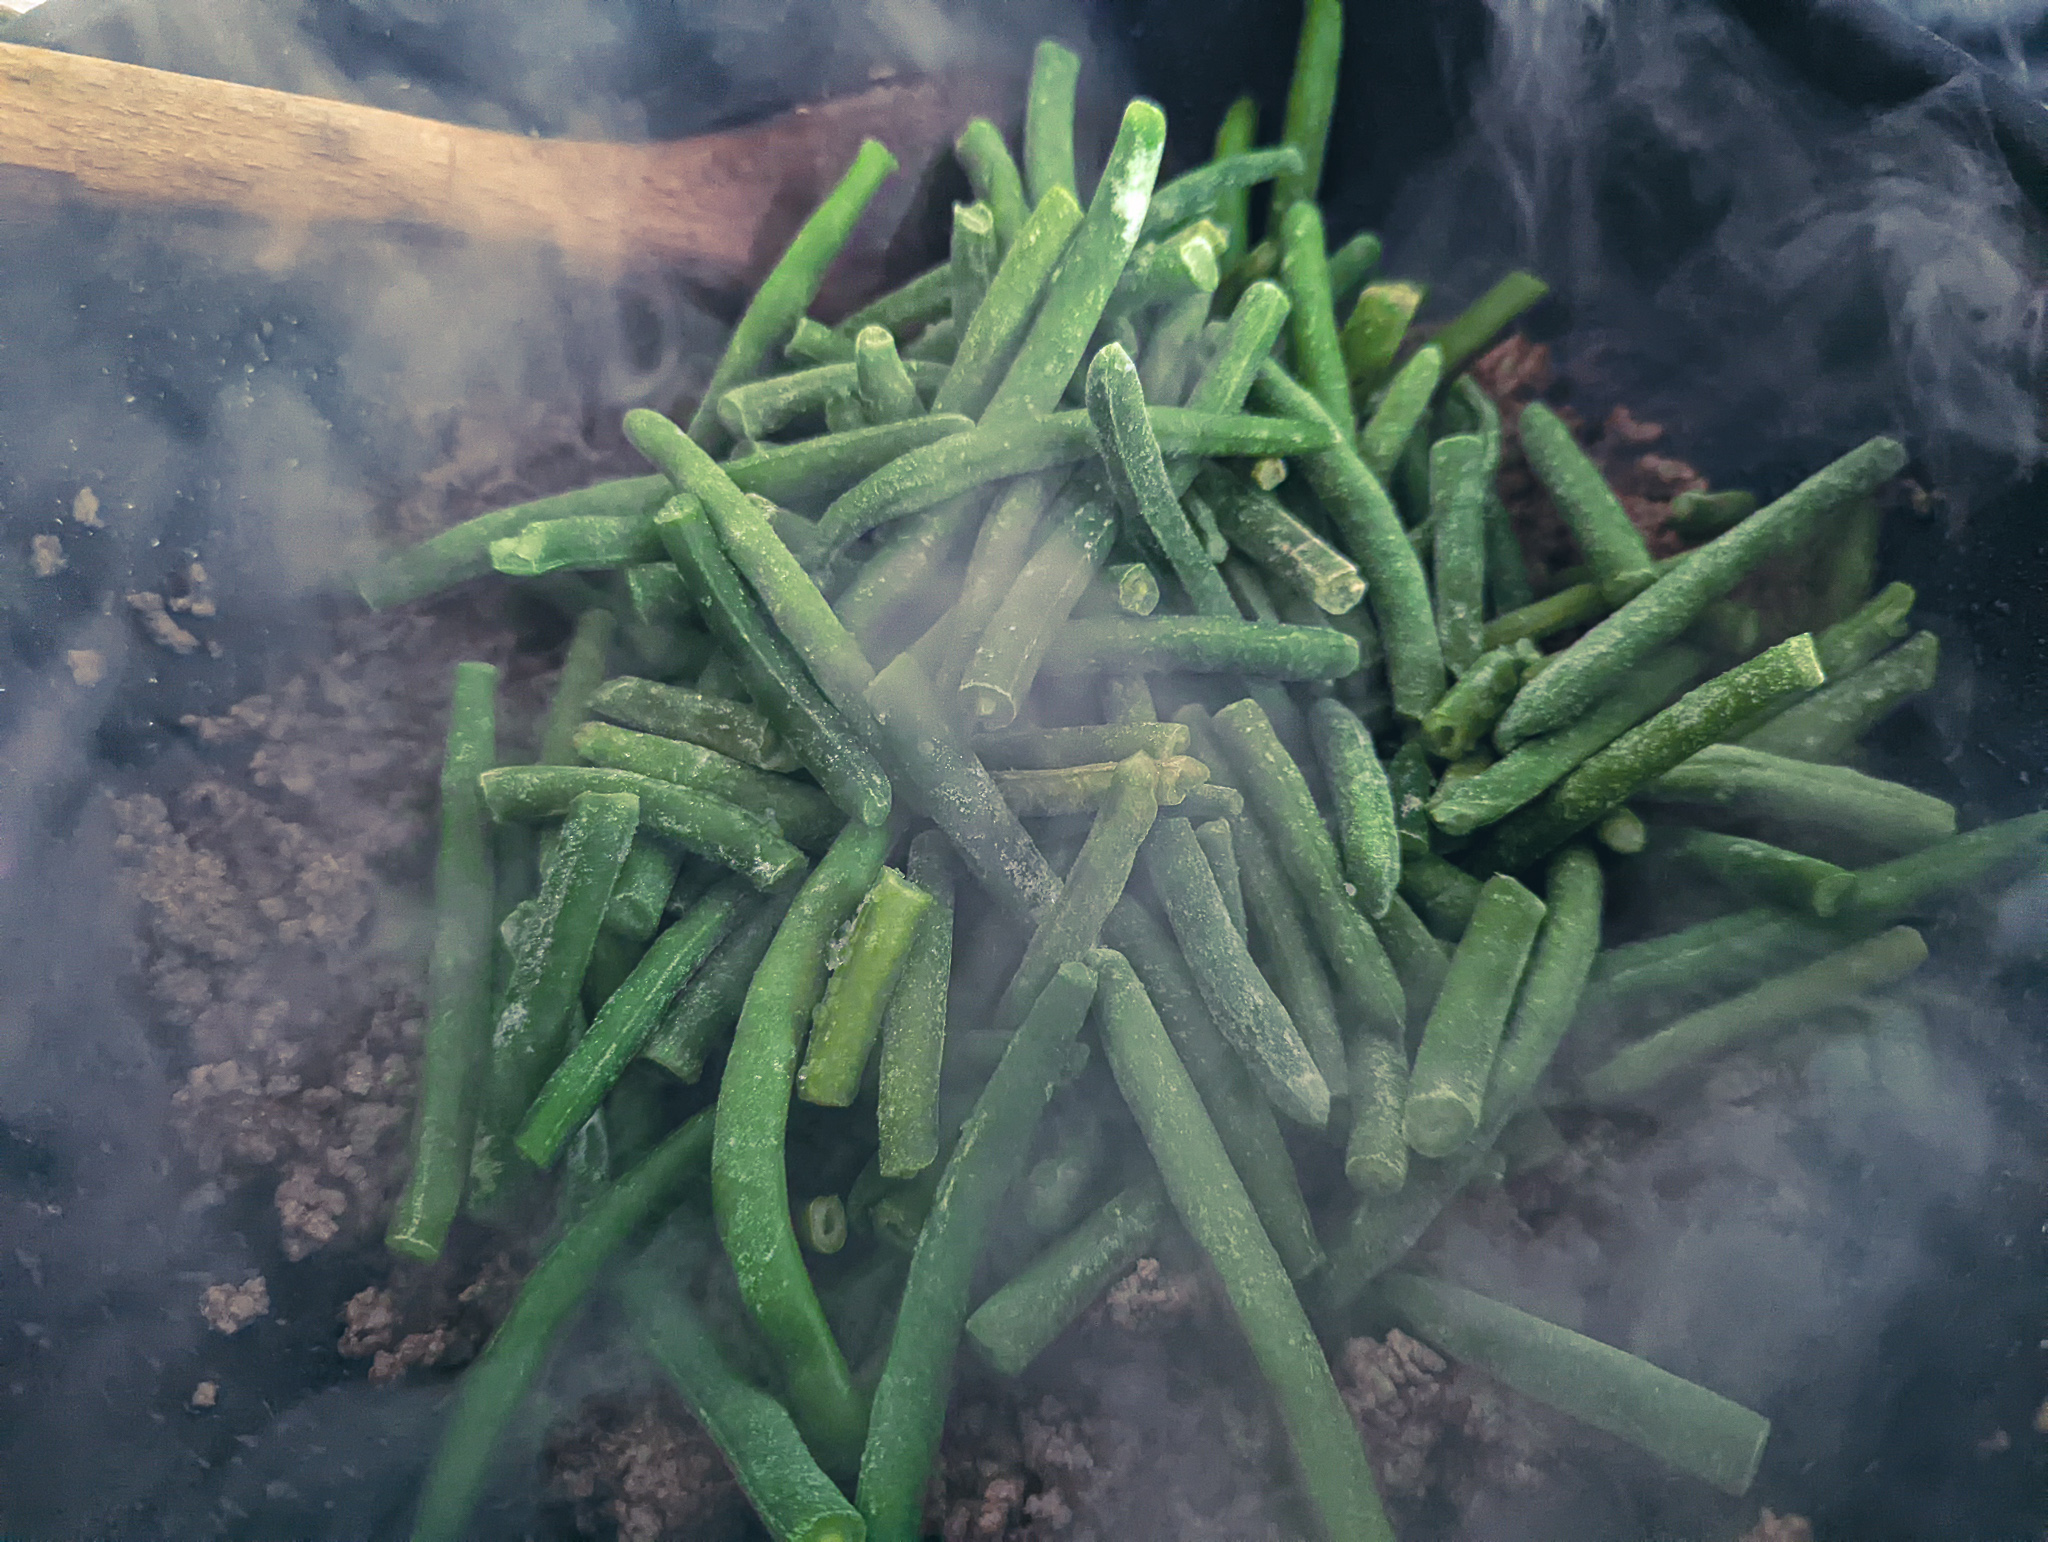
The ground beef is brown, you’ve drained the excess oil, and the pan is back on the burner. Make sure the pan is very hot again, then add the frozen green beans, garlic, ginger, Chinese 5 Spice, and crushed red pepper flakes. Now stir-fry for about three to four minutes or until the green beans are no longer frozen. This may take a little longer depending on how hot your wok was when you added everything in. Also, if you notice that your wok is cooling down, push the green beans to the sides and let it heat up. Once the green beans are no longer frozen, stir the sauce, then pour it into the wok. Stir-fry until the sauce is thick and the green beans are tender. Take the wok off the heat and stir in the tops of the green onions. Taste a green bean and a bit of the meat. Add a bit of salt and pepper as needed.
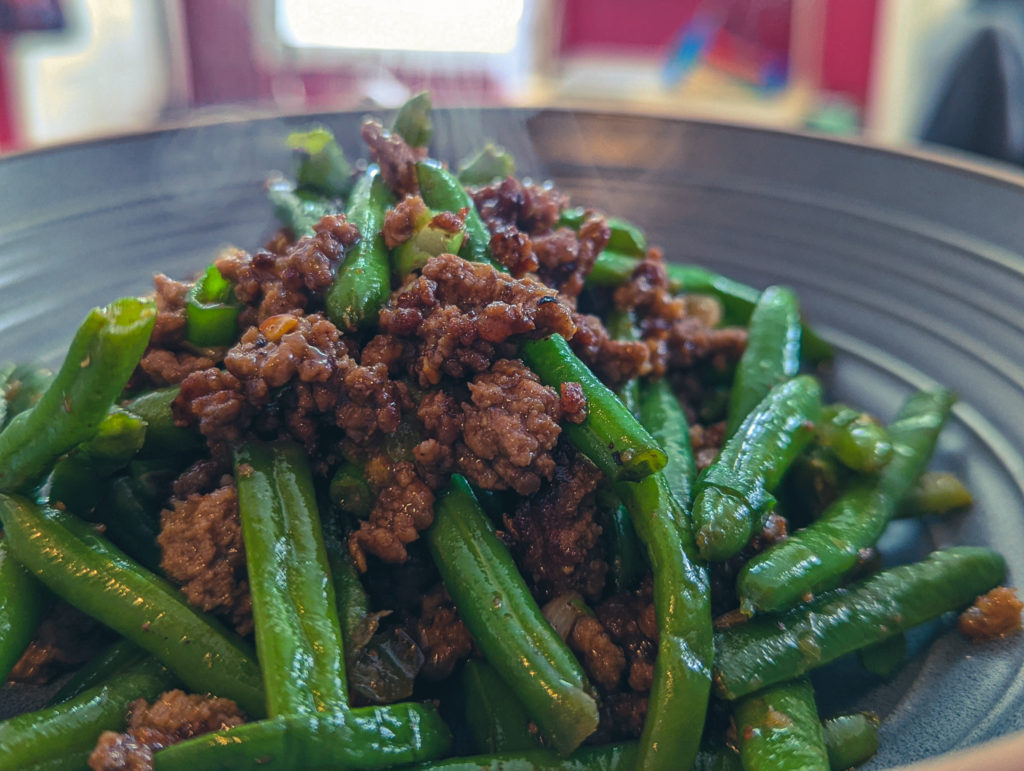
How To Serve The Ground Beef and Green Bean Stir-Fry
Serve the ground beef and green bean stir-fry with some rice, and you’ve got a delicious meal that took less than thirty minutes to make. It’s enough to feed four to six people, and it is delicious. Even if only one or two of you are eating this, I suggest making the whole batch. It makes excellent leftovers. I also like to serve it with a zig-zag of sriracha hot sauce over the top. This adds a little more heat and a little more acidity. The stir-fry doesn’t need it, but it does bump up the flavour that extra notch. Oh, and for a little more flair, you can sprinkle some white and black sesame seeds or the top for garnish. I would have, but I didn’t have any.
The Wrap-Up
I’ve made this twice now, and I’ve eaten way more than I should have both times. It’s a little sweet, a little spicy, and completely delicious. It is very much the kind of thing that you don’t want to stop once you start eating it. And, it’s a great meal for four to six people for less than ten dollars. You can’t beat that.
That does it for today but thank you for coming. I hope you enjoyed the post. And, if you haven’t already, remember to sign up to my newsletter at the bottom of the page to get exclusive recipes, cooking tips, behind-the-scenes stories etc., in your inbox once a month. Have a great week and a fantastic weekend! I’ll see you right back here next Thursday.
Ground Beef and Green Bean Stir-Fry
Do you have a pound of ground beef and don't know what to do with it? While, grab some green beans out of the freezer and throw this ground beef and green bean stir-fry together for a quick, cheap and delicious dinner.
4eagreen onions, whites and green separated and diced
tspsalt and pepper to taste
Instructions
In a small bowl whisk together the cornstarch, brown sugar, beef stock, soy sauce, and rice vinegar. Set aside.
Heat a wok over high heat.
Add the peanut oil to the wok and swirl it around. Add the ground beef and cook until browned. Drain off excess oil.
Add the green beans, garlic, ginger, crushed red pepper flakes, Chinese 5 Spice, and the whites of the green onions to the wok. Stir-fry for 3 to 4 minutes or until the beans are tender.
Stir the cornstarch mixture and pour it into the wok. Cook until thick.
Taste and season with salt and pepper as needed.
Garnish with the green parts of the green onions and serve with rice.
For a little more kick stir in a few teaspoons of sriracha.
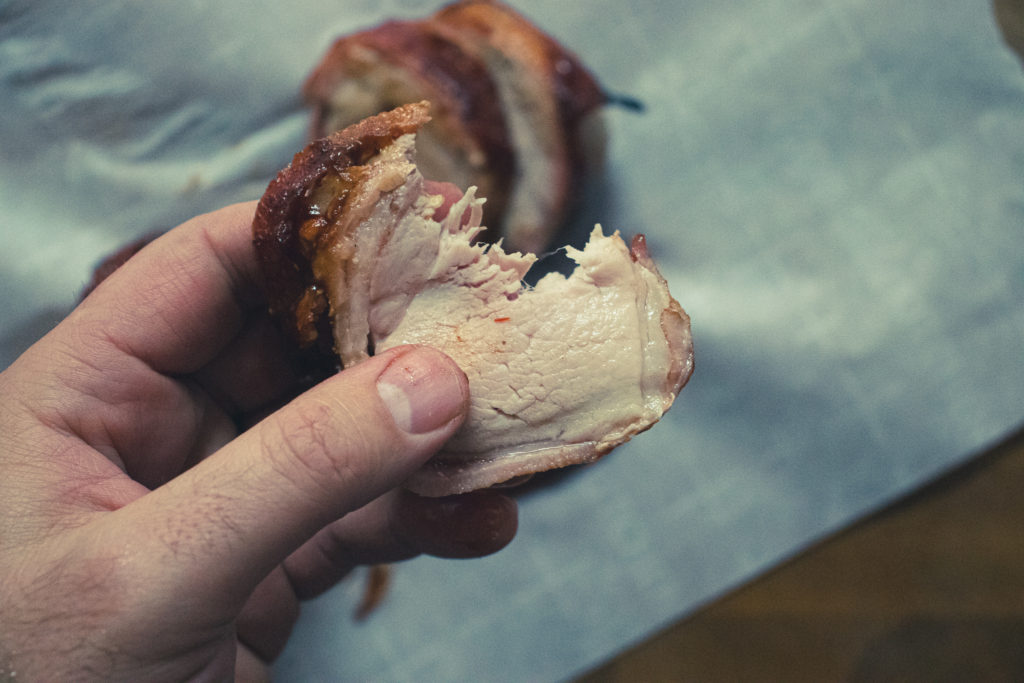
Bacon-Wrapped Pork Tenderloin. What more do I need to say? Make it for dinner tonight, your next special occasion, or dinner party. It is guaranteed to please. You can find the recipe directly below but keep reading for a more detailed explanation.
A quick note about the pork tenderloin.
Usually, when making something like this bacon-wrapped pork tenderloin, I would use a whole tenderloin. However, when I went to the grocery store to buy a pork tenderloin, they were all cut into pieces. That’s the only reason why this recipe calls for half a pork tenderloin. You can double up the bacon and easily do this with a whole tenderloin. You may need to add five minutes to the cooking time, but otherwise, nothing else needs to change.
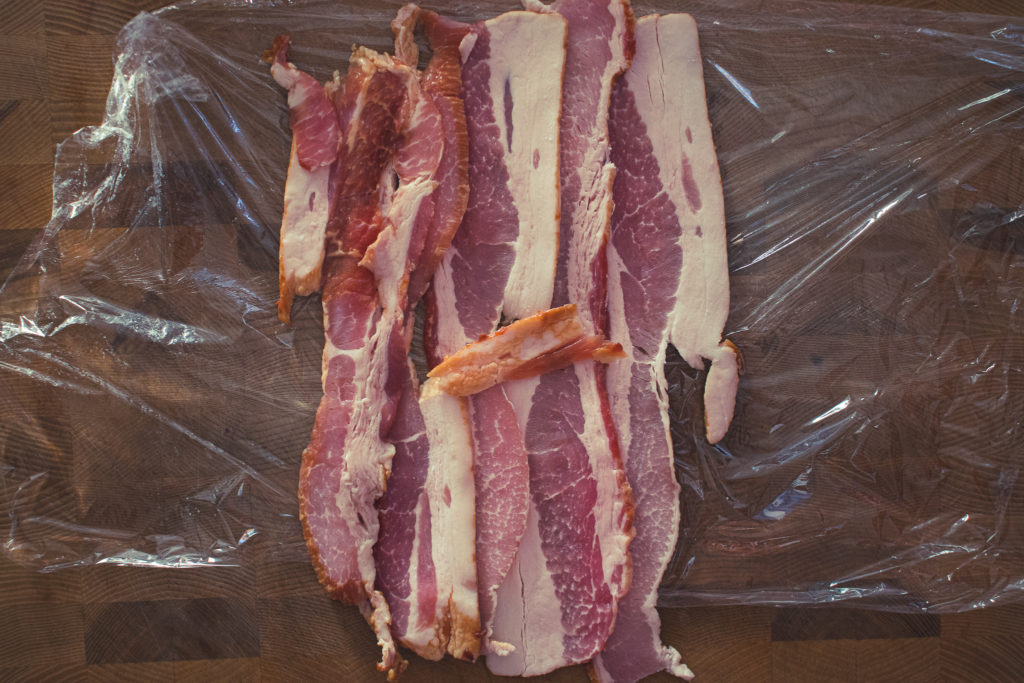
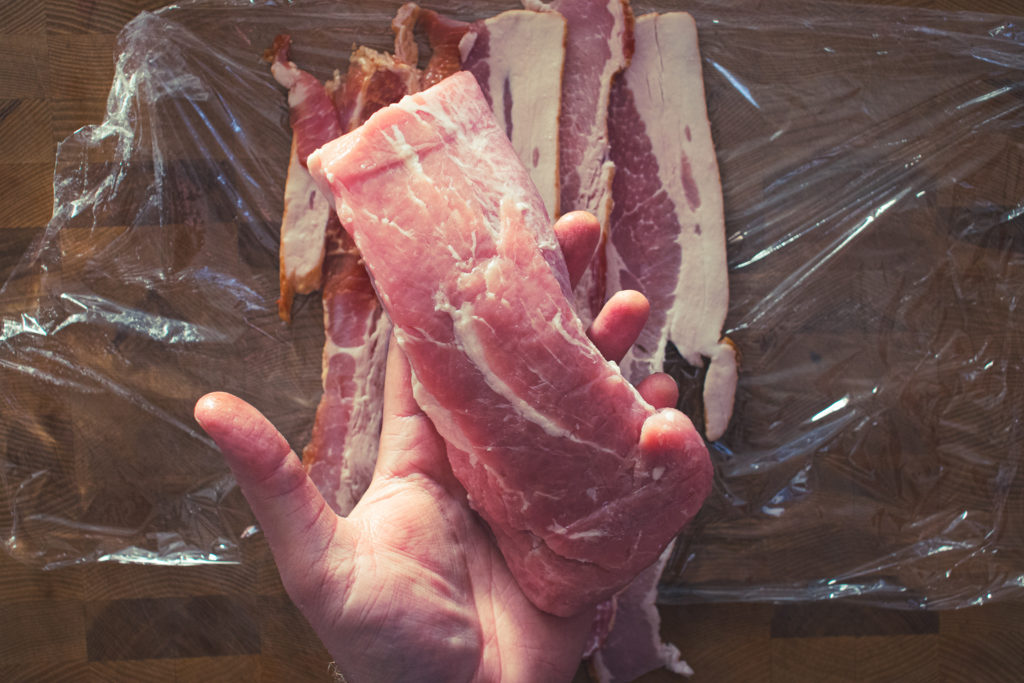
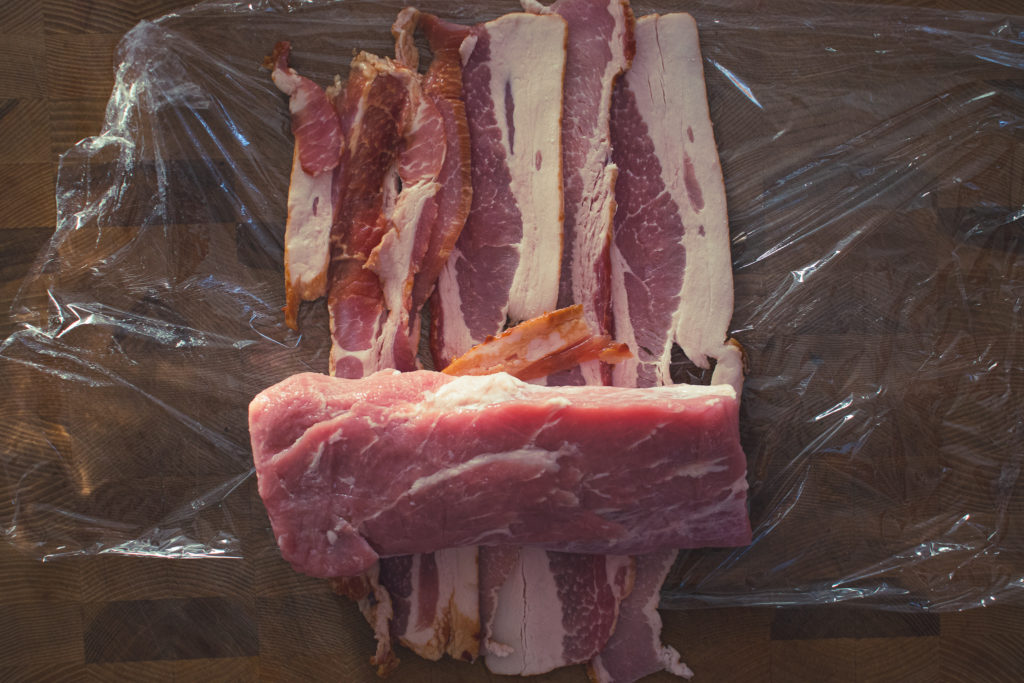
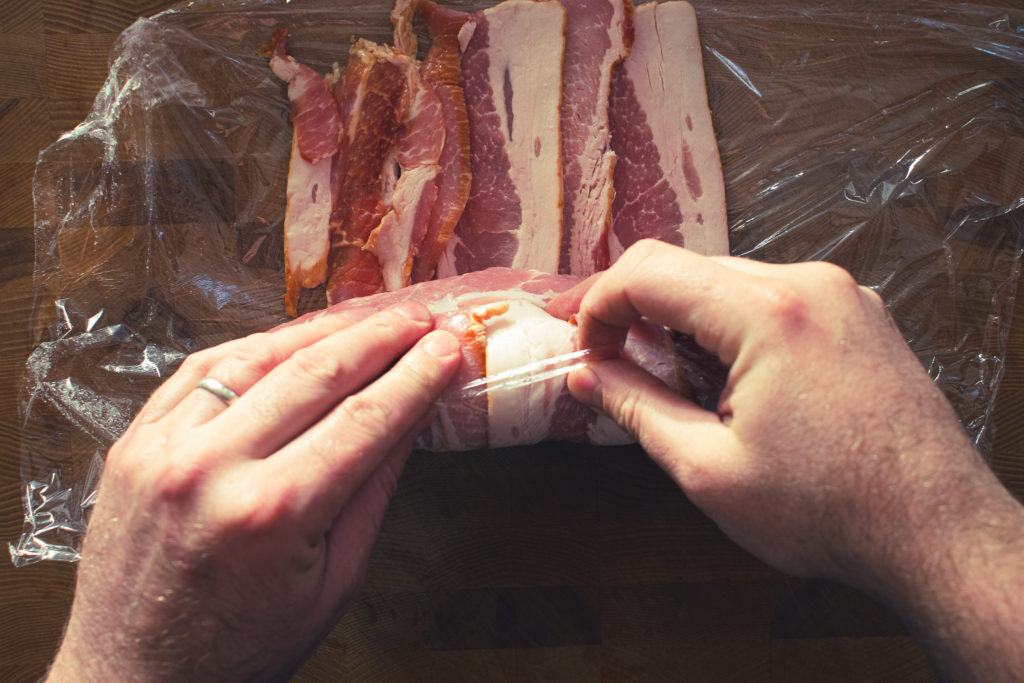
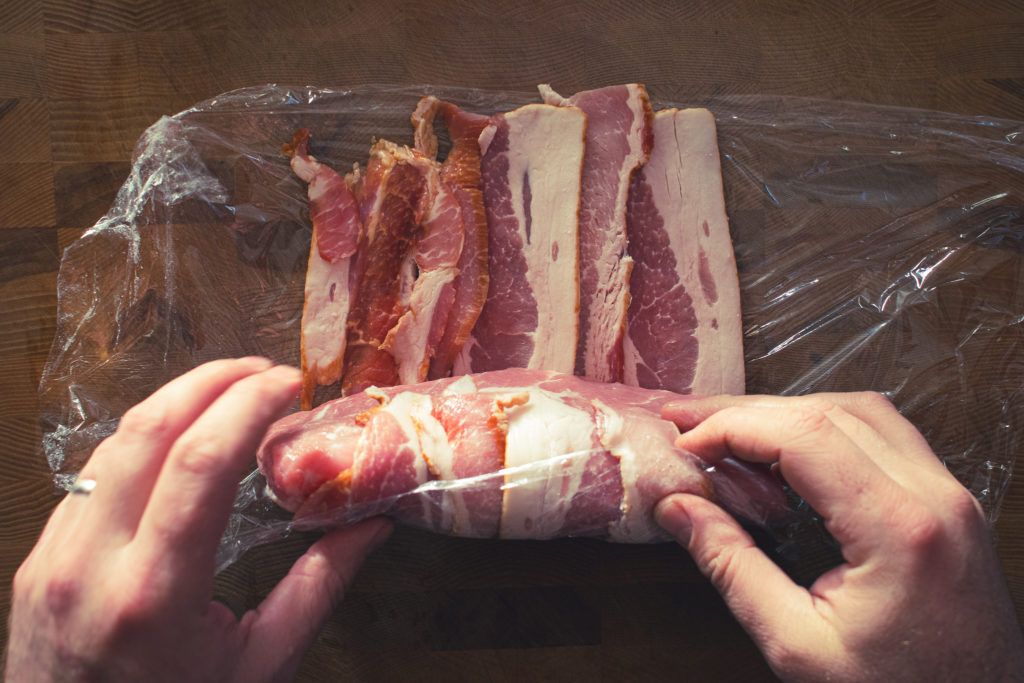
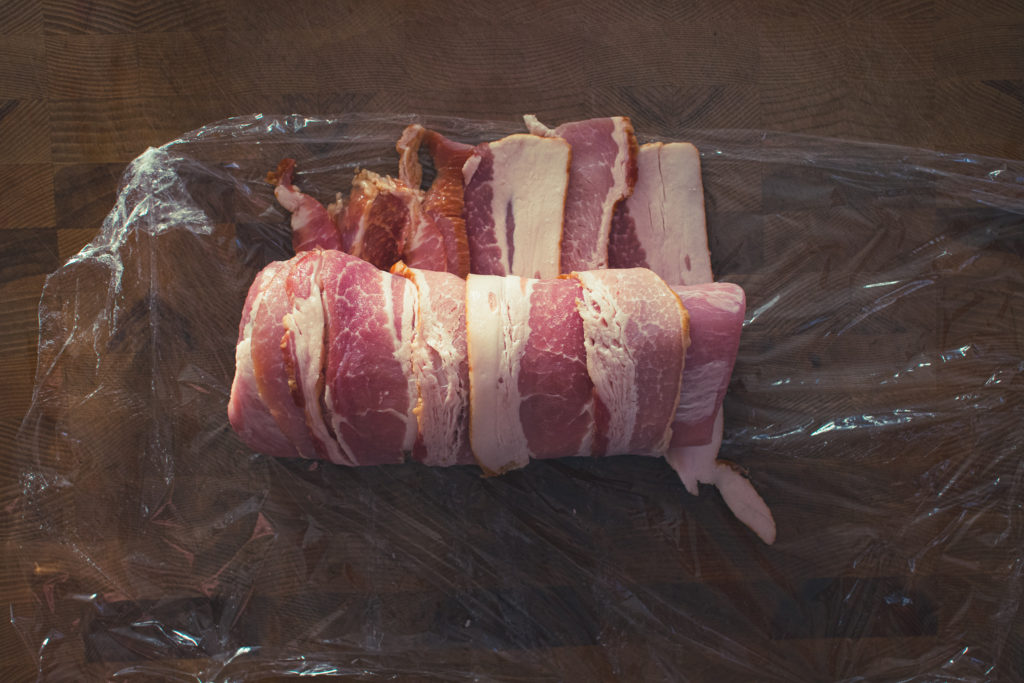
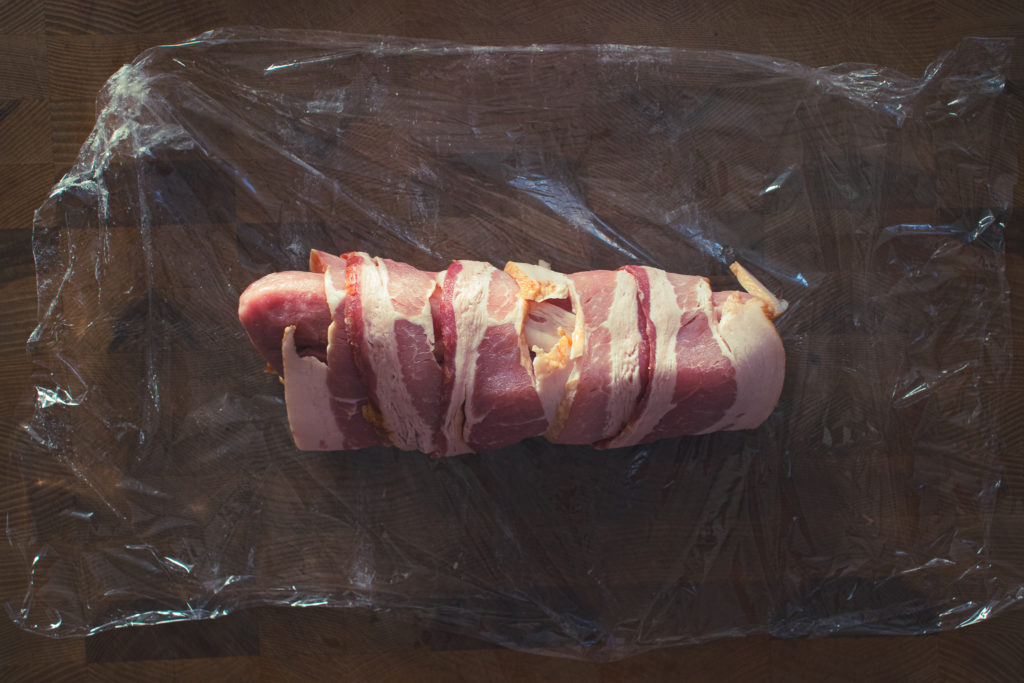
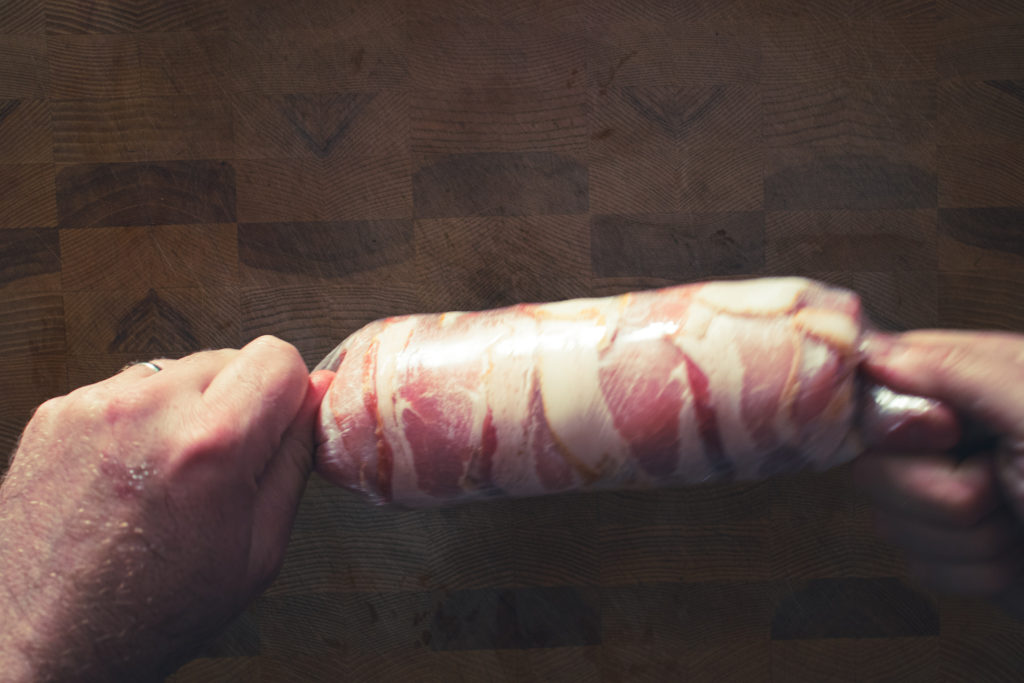
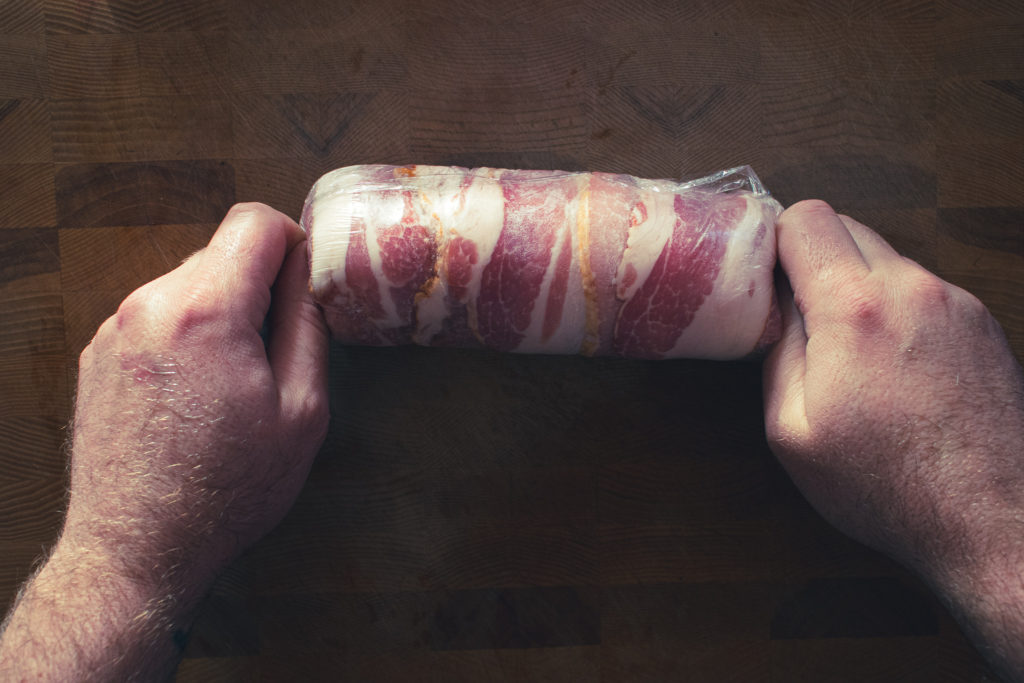
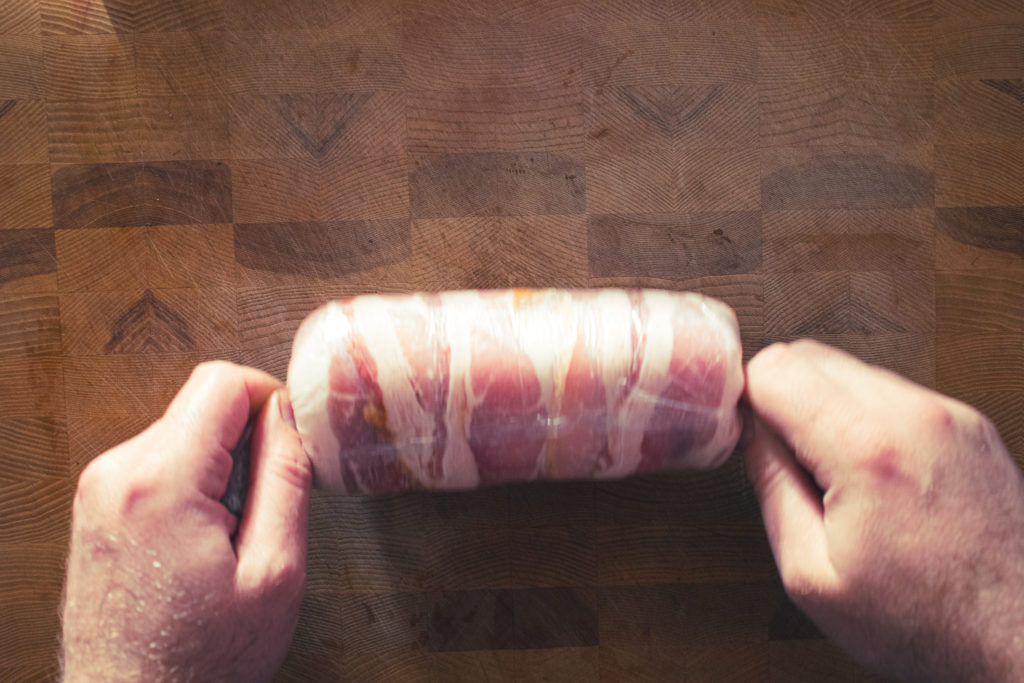
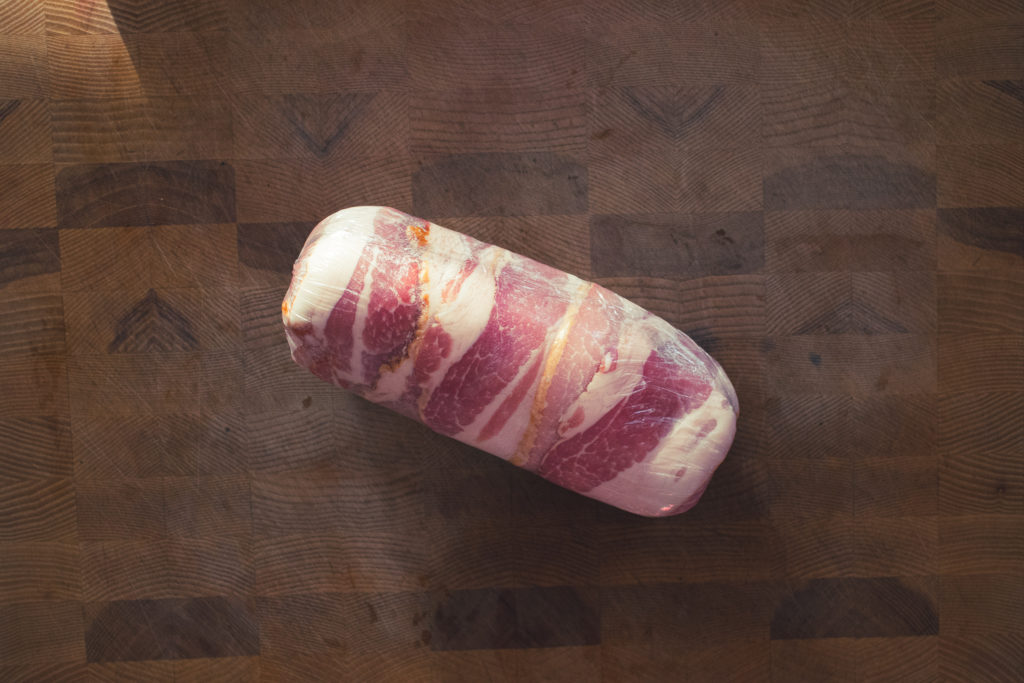
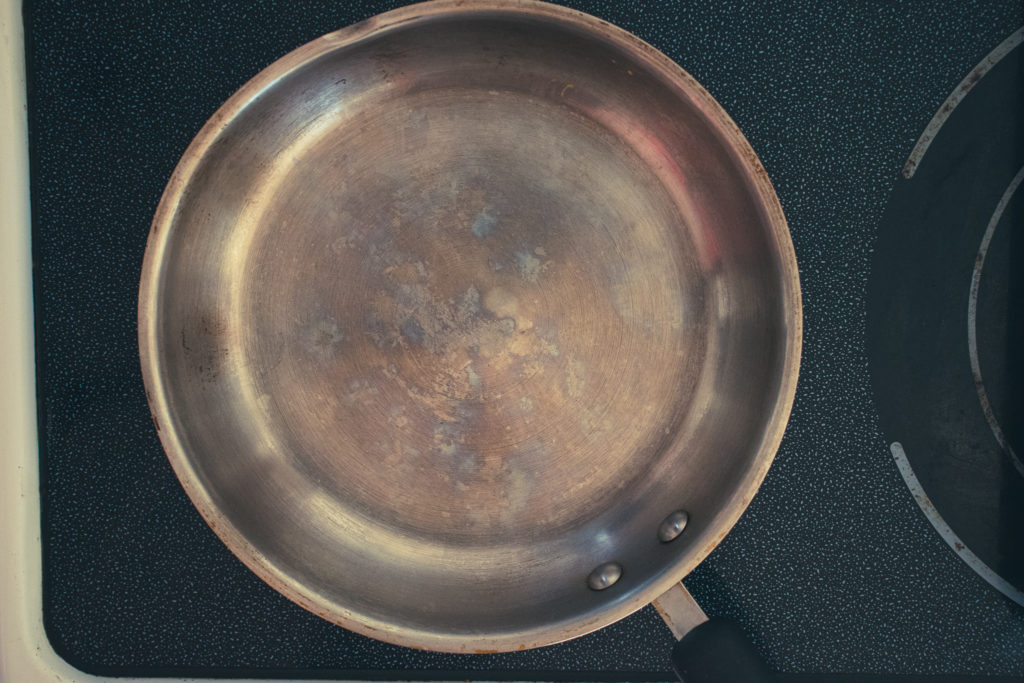
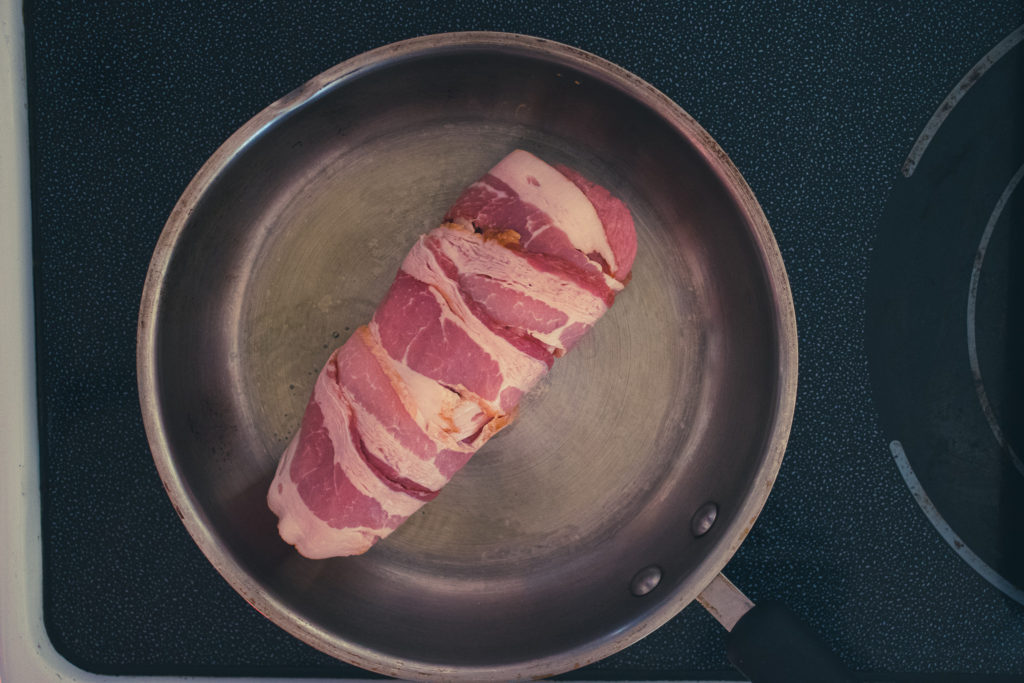
Bacon-Wrapping The Pork Tenderloin
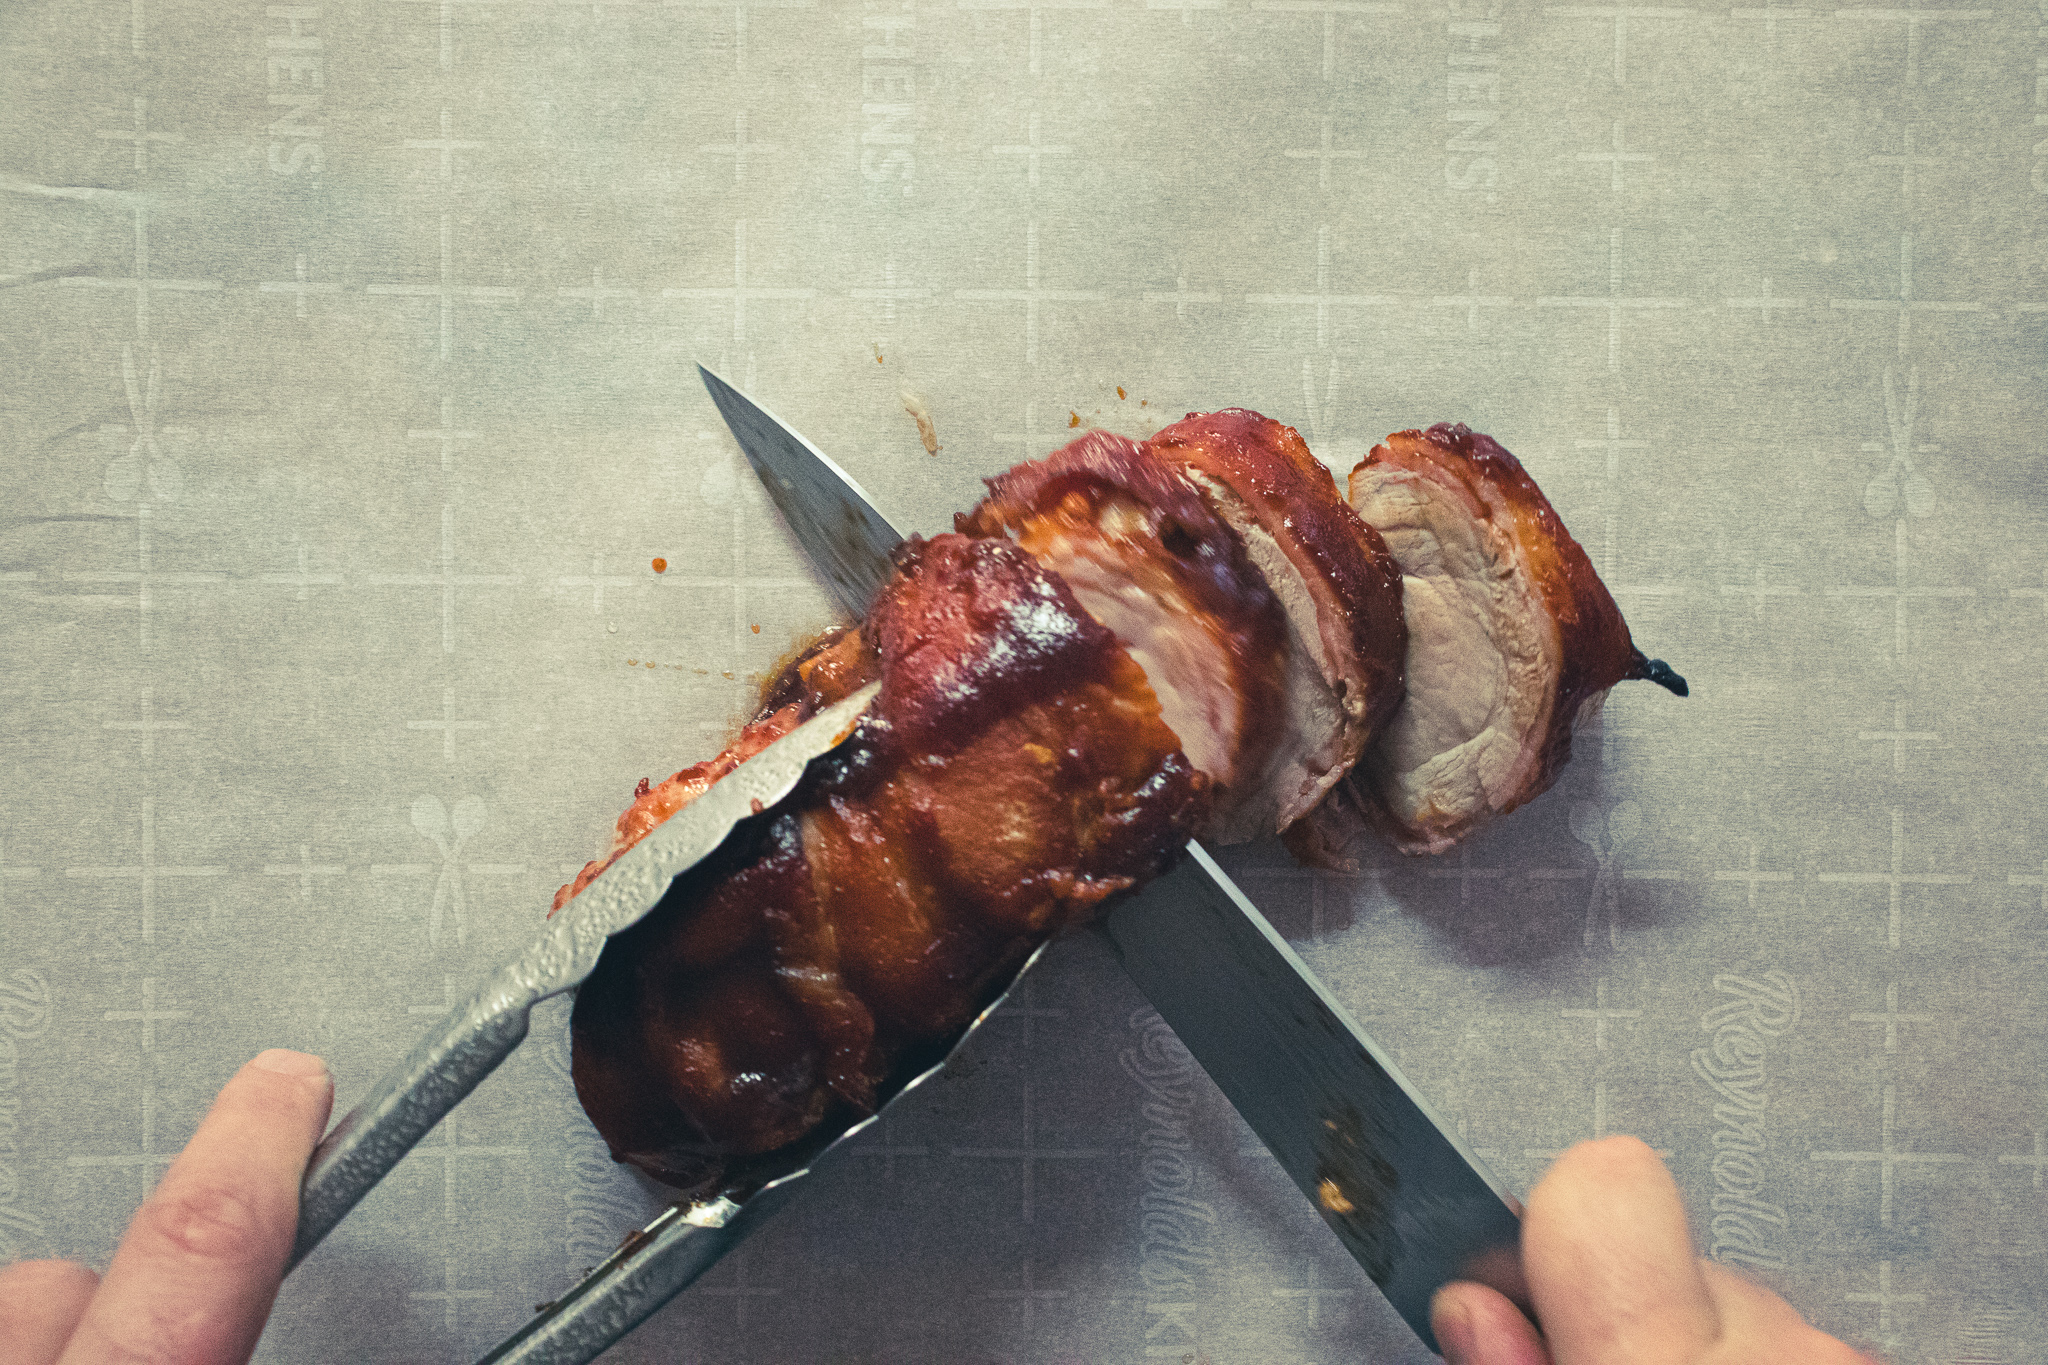
To wrap the tenderloin, start by placing a 12-inch length of plastic wrap flat on your cutting board. Place five slices of good-quality bacon in an overlapping pattern in the middle of the plastic. Put the pork tenderloin at the end of the bacon strips. Use the plastic wrap to lift the bacon while you roll the tenderloin forward—Tuck the bacon around the tenderloin and roll forward to finish the wrap. Close the plastic wrap around the bacon-wrapped pork tenderloin. Grap the ends of the plastic wrap and roll the wrapped tenderloin along on the cutting board to twist the edges tightly. Let the tenderloin sit in the plastic for ten minutes or up to two days in the fridge.
How to cook the bacon-wrapped pork tenderloin.
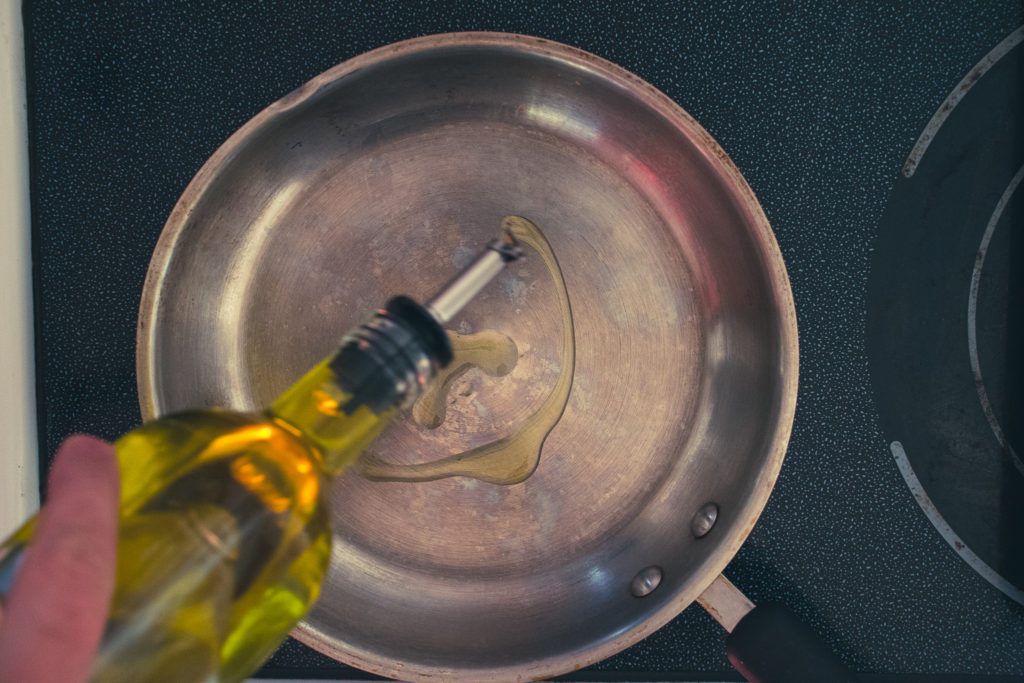
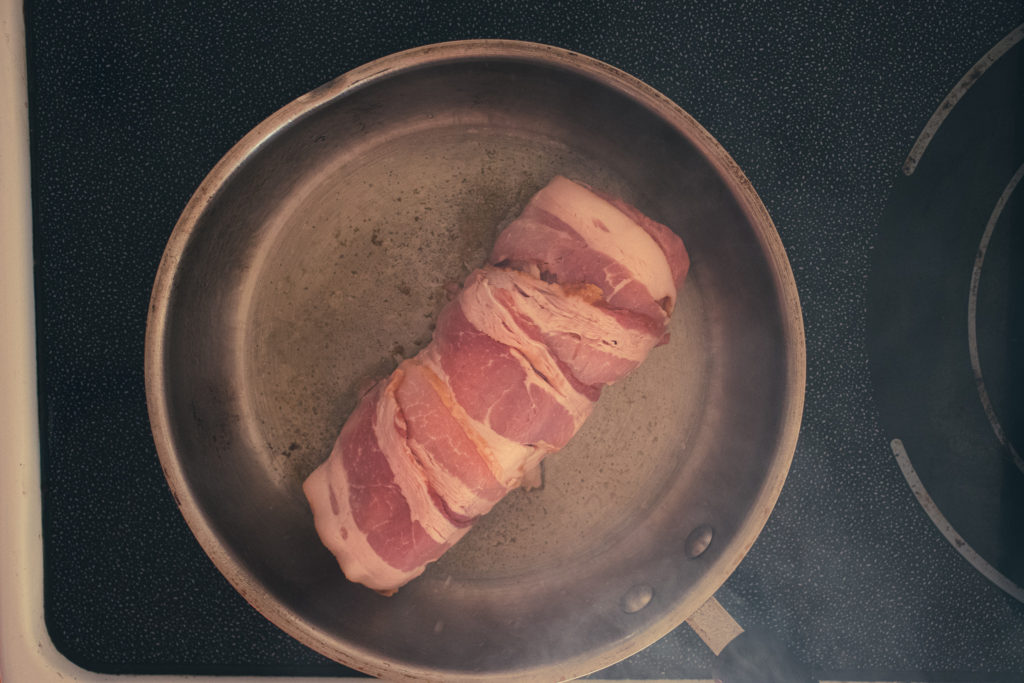
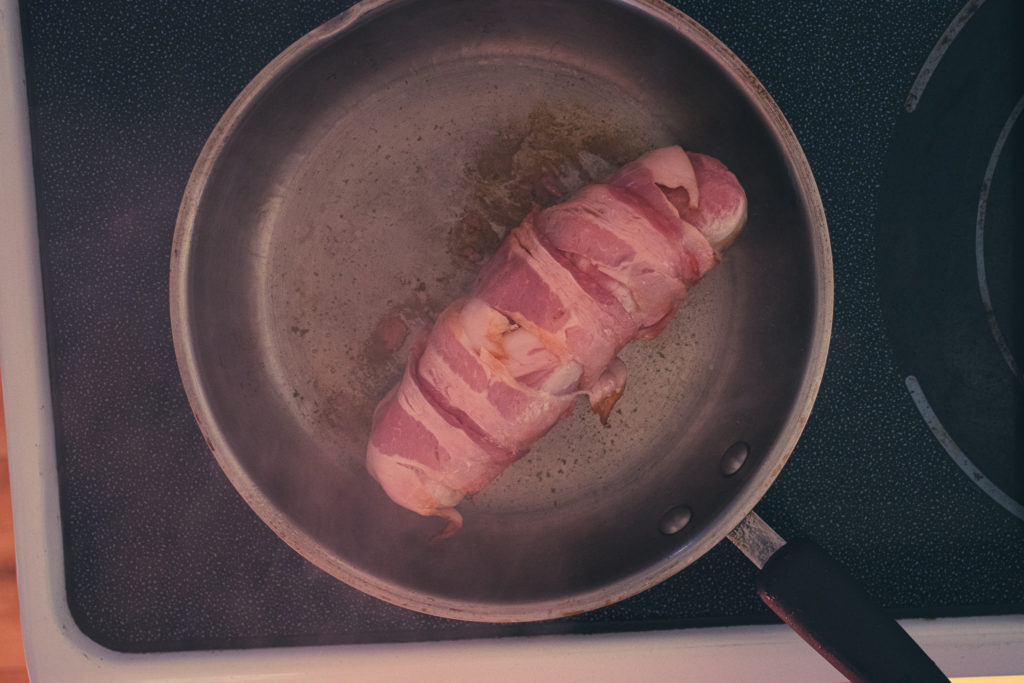
Searing
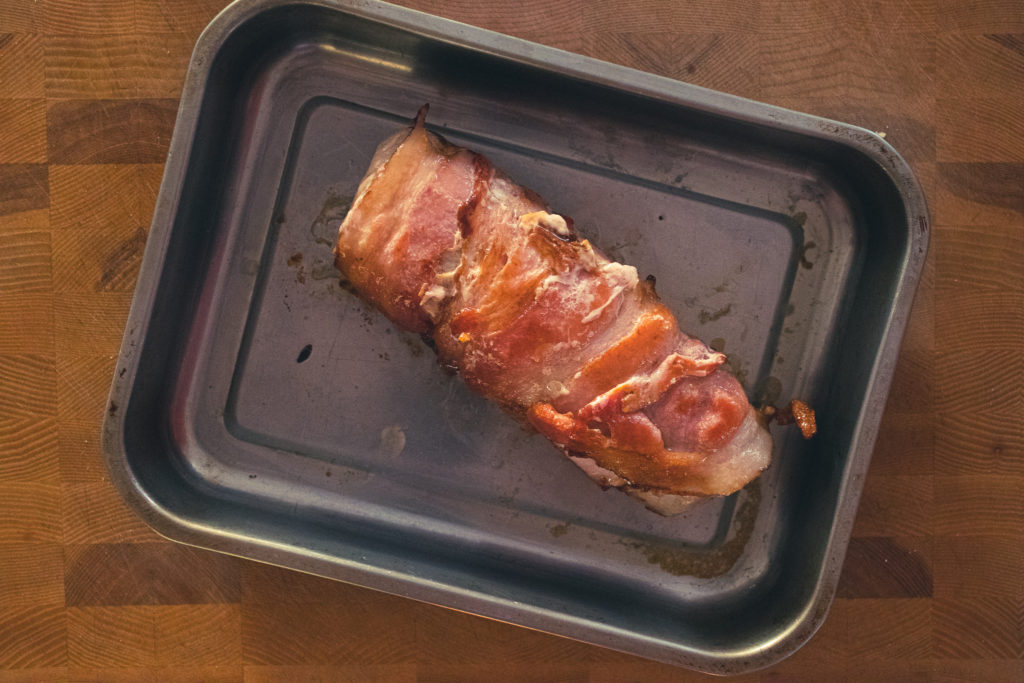
Heat a large skillet on medium-high heat. Add two teaspoons of cooking oil. Remove the plastic wrap from the pork tenderloin. Put the tenderloin in the hot pan with the seam of the bacon down. Cook for a minute or two or until the bacon is browned. Flip the tenderloin and brown on the top. Then, brown on both sides. It is very important that your pan is hot when the tenderloin goes in otherwise the bacon will stick.
Roasting
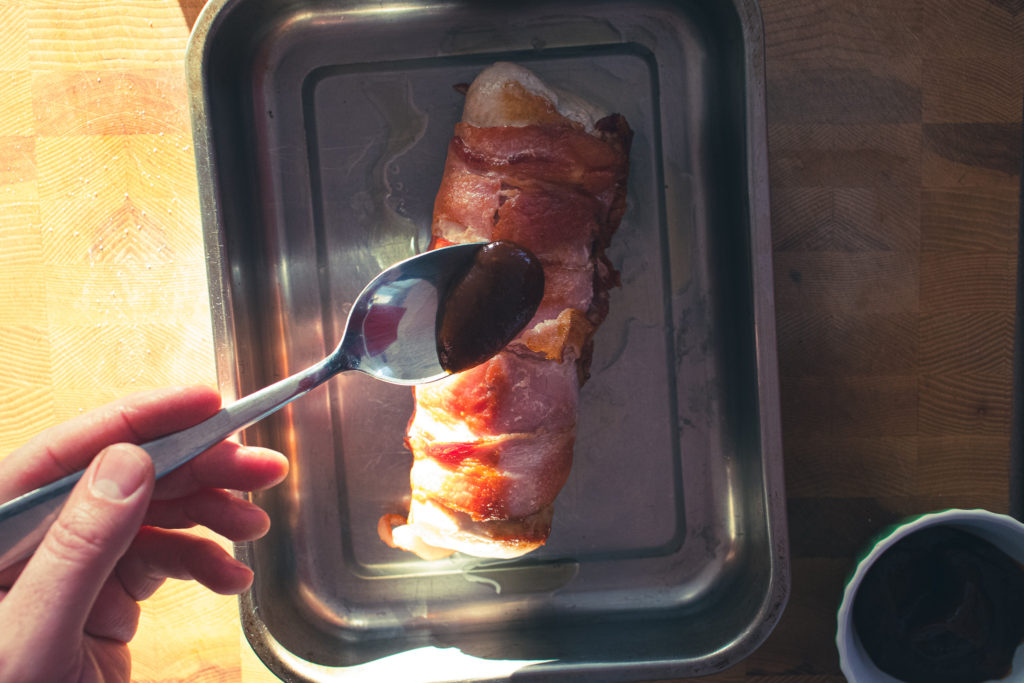
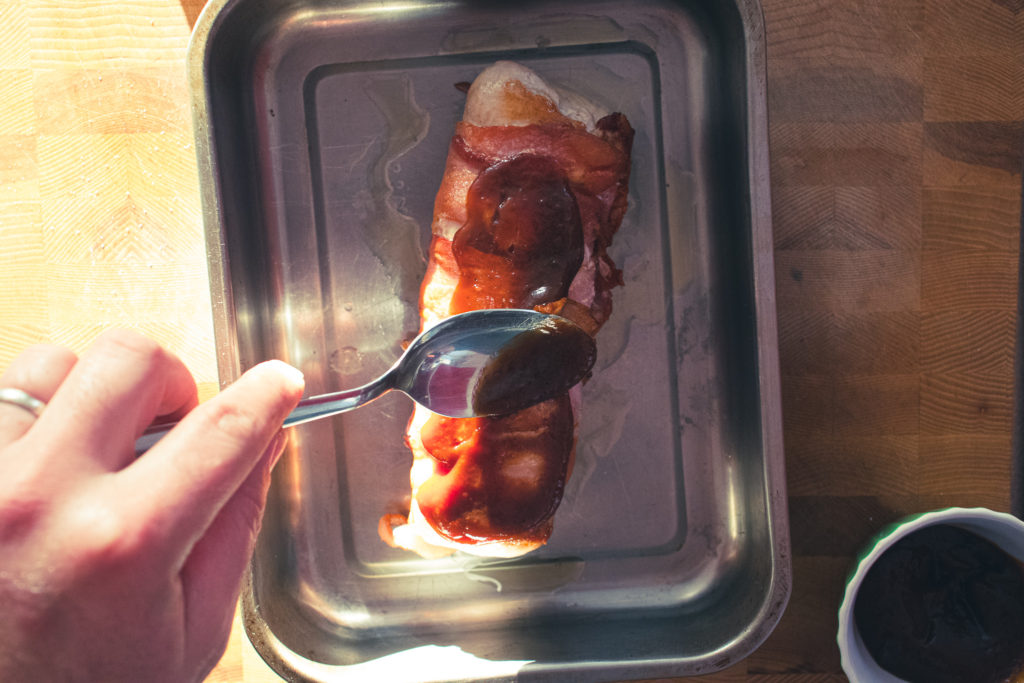
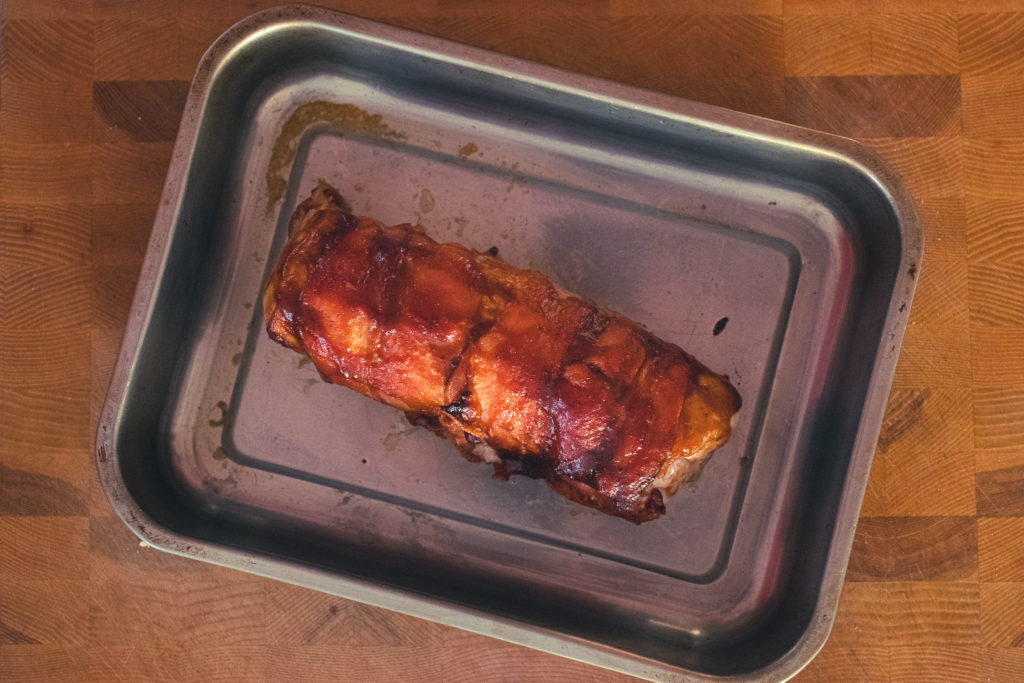
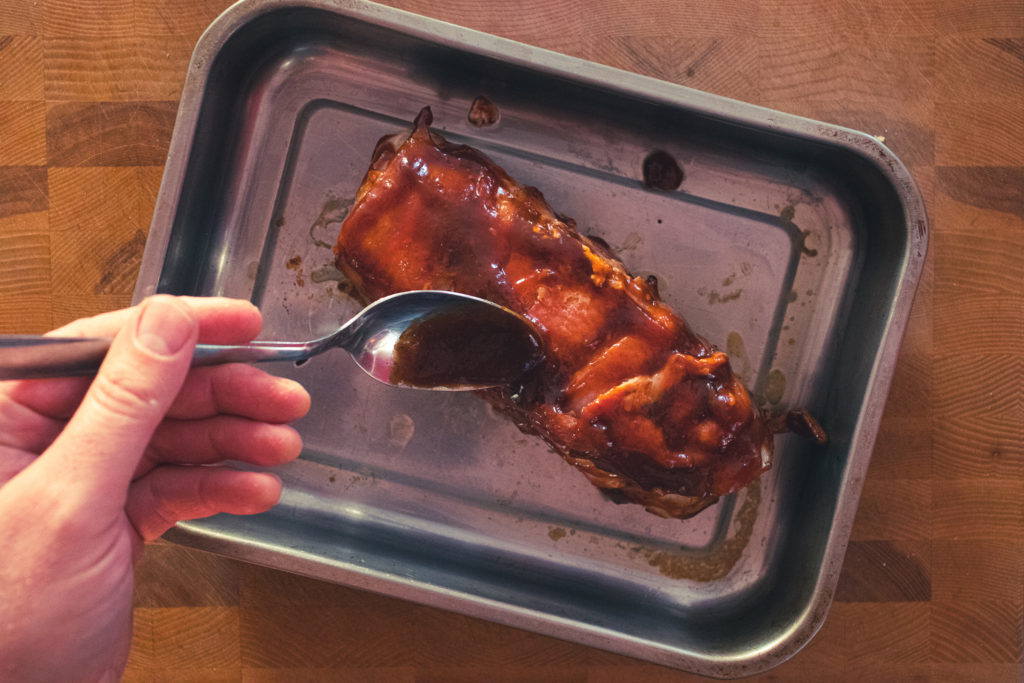
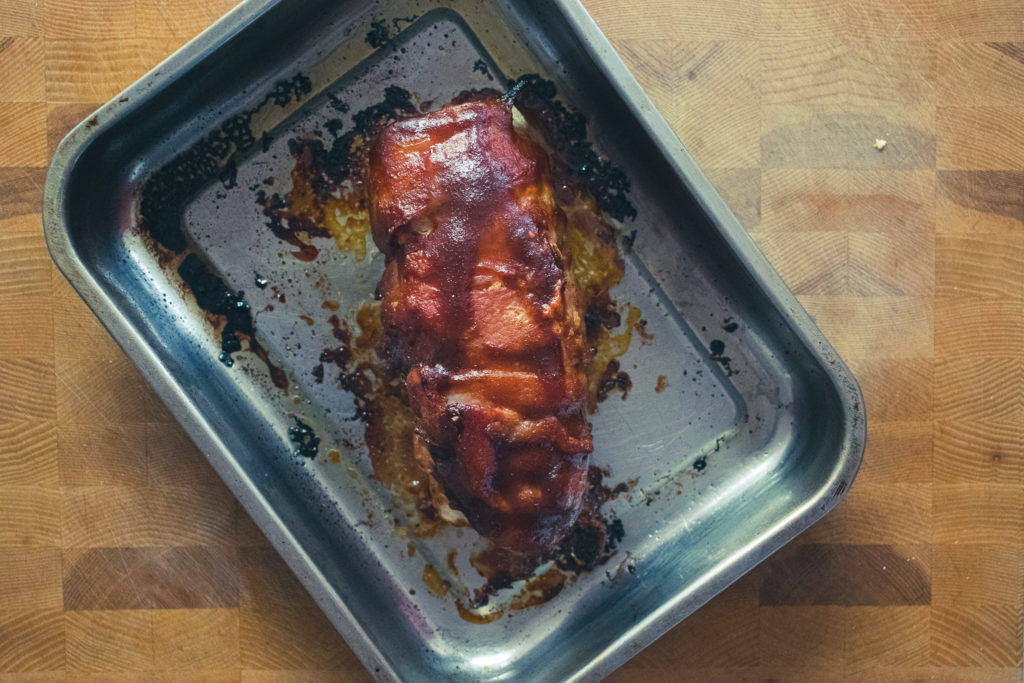
Put the tenderloin in a small roasting pan or casserole dish and brush with your favourite barbecue sauce or follow my guide to homemade barbecue sauce here. Put the roasting pan in the oven at 375°f for 12 minutes. Flip the tenderloin, brush with some more barbecue sauce, and cook for another 8 to 10 minutes or until the tenderloin is firm to the touch or a thermometer inserted into the thickest part of it reaches 150°F. Take the pork out of the oven and let it rest for 5 minutes before you cut into it.
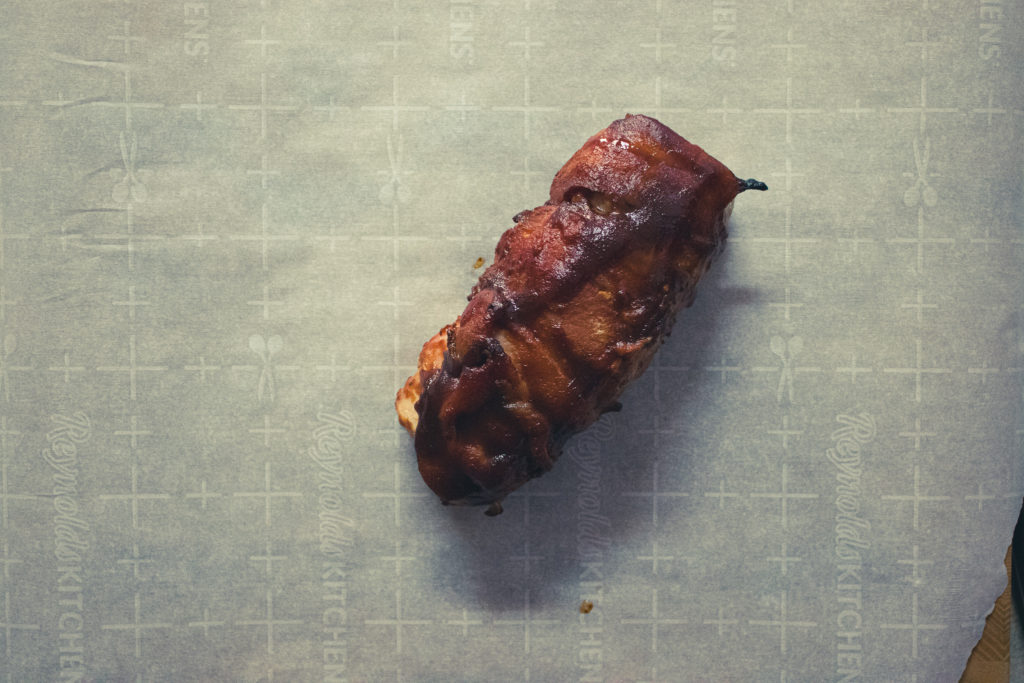
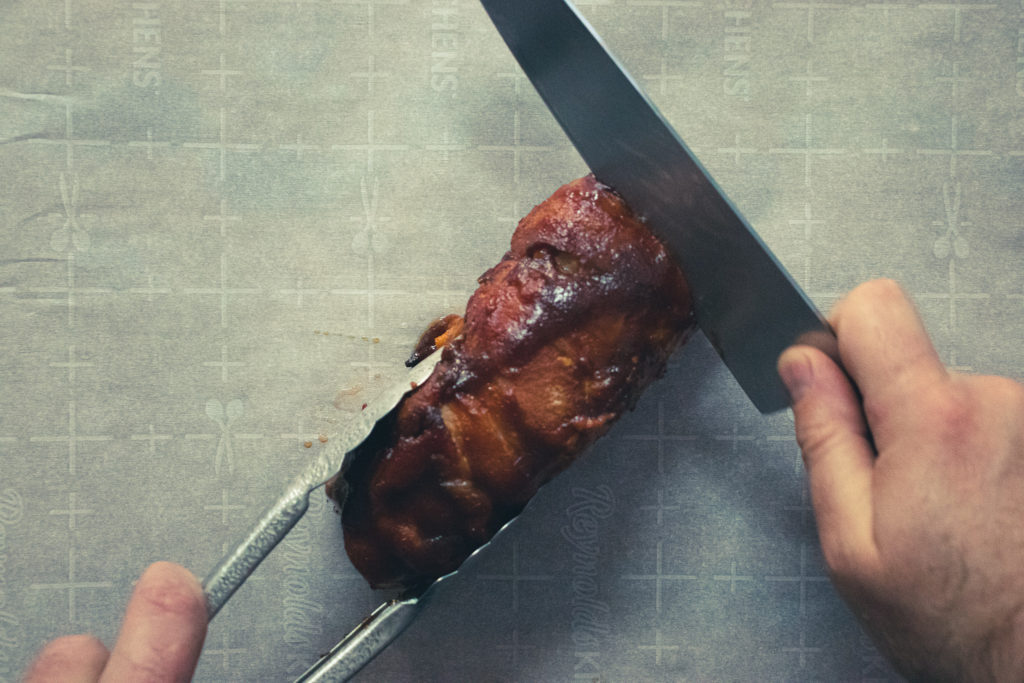
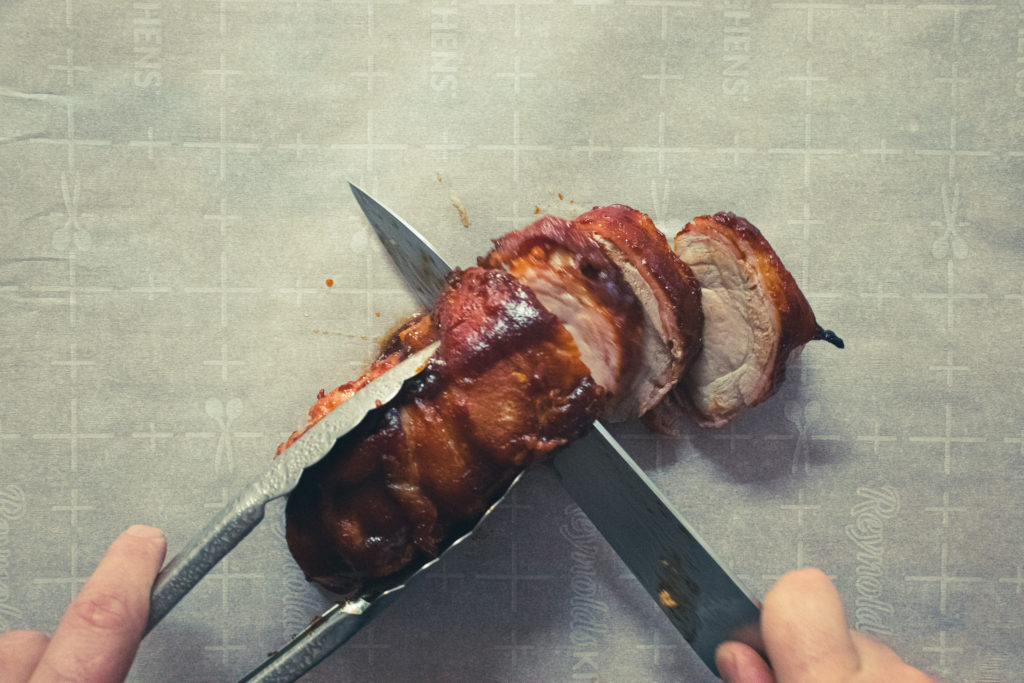
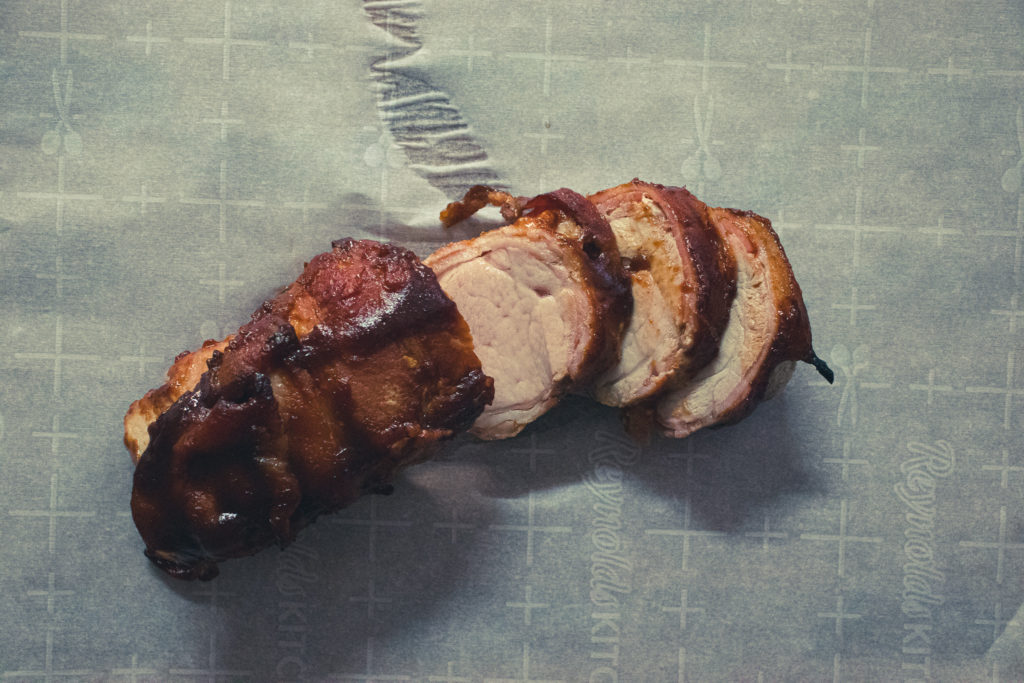
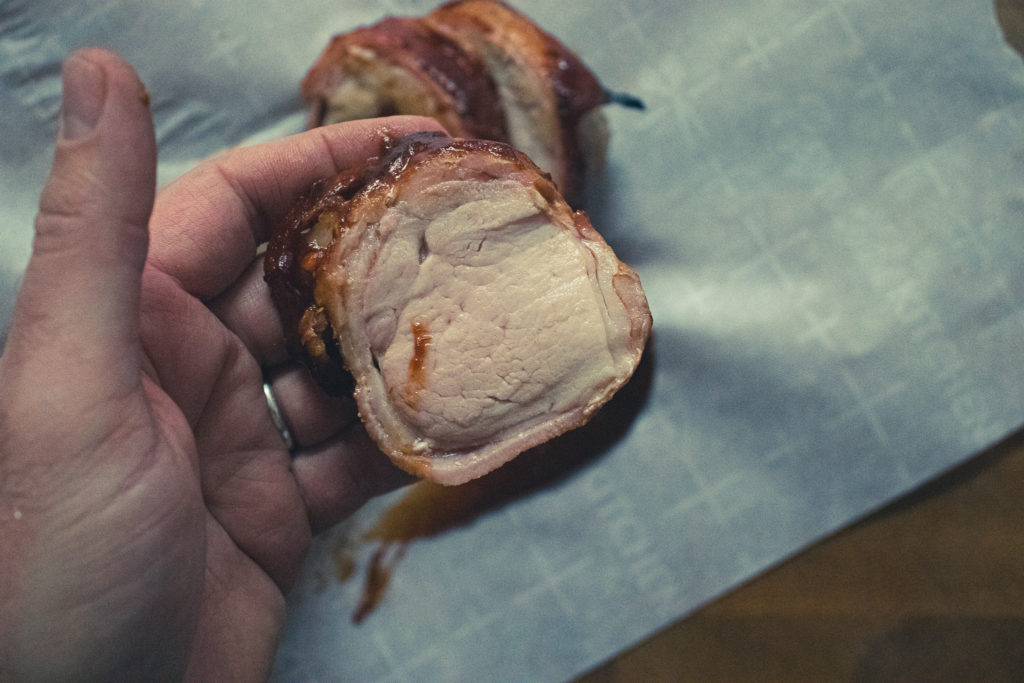
Serving The Pork Tenderloin
Once the pork has rested, slice it into pinky-finger width pieces. For appearances purposes, cut it on a slight bias. Serve the pork with roasted or mashed potatoes and vegetables.
The Wrap-Up
Bacon-Wrapped Pork Tenderloin is the kind of dish that seems very impressive, but as you’ve seen, it is pretty simple. However, that simplicity doesn’t take away from the appeal or the delicious flavour. If you have people over for dinner or want to make something special, bacon-wrapped pork tenderloin is the perfect option. You can also wrap it a day ahead which is great to cut down on prep time when hosting a dinner party.
[jetpack_subscription_form subscribe_placeholder=”Email Address” show_subscribers_total=”false” button_on_newline=”false” custom_font_size=”16px” custom_border_radius=”0″ custom_border_weight=”1″ custom_padding=”15″ custom_spacing=”10″ submit_button_classes=”” email_field_classes=”” show_only_email_and_button=”true” success_message=”Success! An email was just sent to confirm your subscription. Please find the email now and click ‘Confirm Follow’ to start subscribing.”]
Perfect Bacon-Wrapped Pork Tenderloin
Pork tenderloin wrapped in cripsy bacon and coated in barbecue sauce. Doesn't that sound good? Make it for dinner or your next dinner party. Either way, everyone will be happy.
Lay a 12-inch piece of plastic wrap on your cutting board.
Place the bacon on the plastic wrap, overlapping the pieces.
Place the pork tenderloin on the bacon and wrap using plastic wrap to lift the bacon. Grap the end of the wrap and twist to tighten. Let sit for 10 minutes or put in the fridge for up to 2 days.
Heat your oven to 375°f.
Put a pan on the stove on medium-high heat. Once the pan is hot add the vegetable oil. Take the pork out of the plastic wrap and place in the hot pan with the ends of the bacon down. Cook for 2 to 3 minutes or until the bacon is browned. Then repeat on all sides.
Take the bacon out of the pan, and put it in a small roasting pan. Brush with half of the barbecue sauce and put in the oven for 12 minutes.
Take the pork out of the oven, flip, and brush with the remaining sauce. Return the pork to the oven for another 8 to 10 minutes or until it is cooked.
Let the pork rest for 5 minutes, then thinly slice on a slight bias and serve.
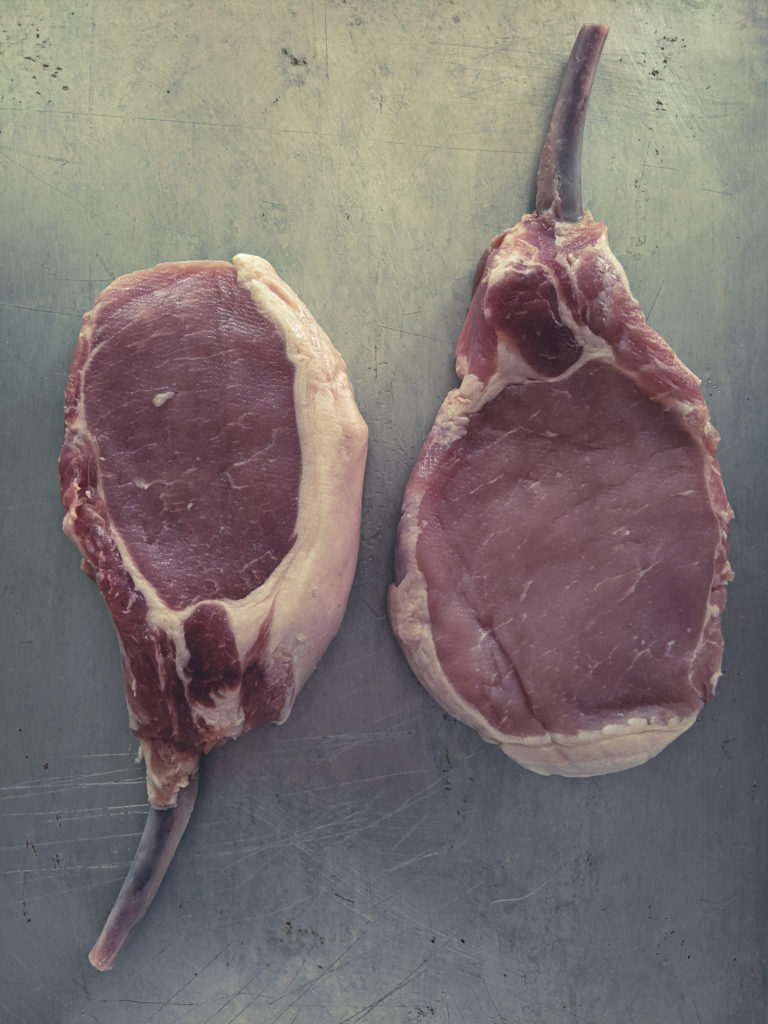
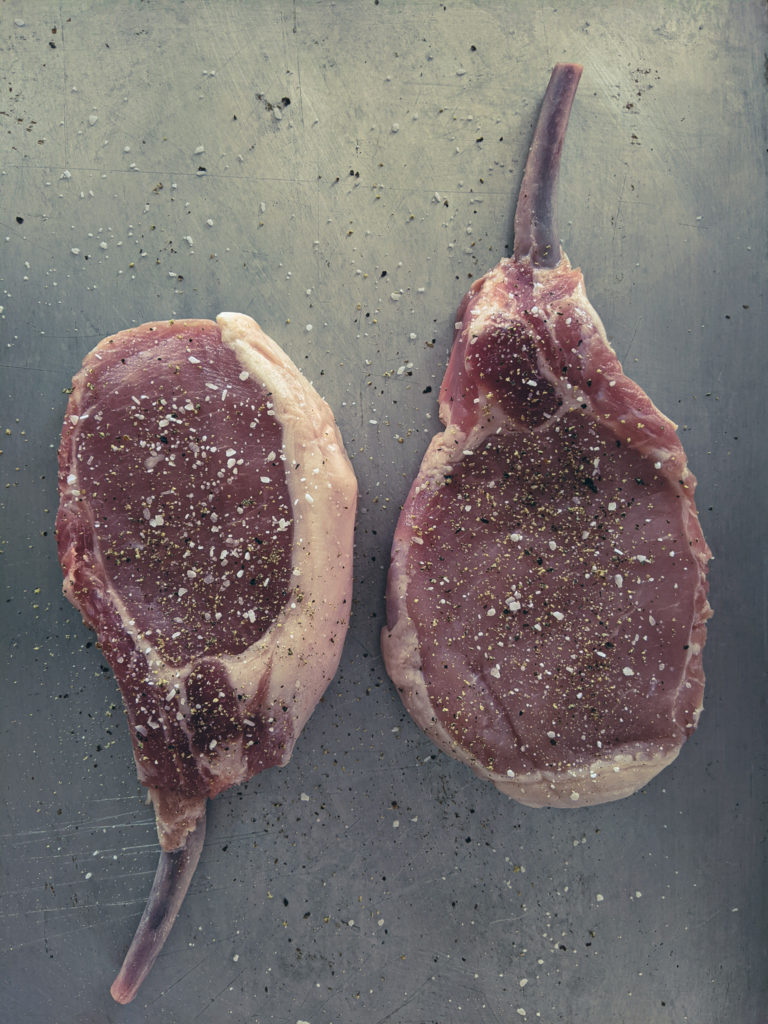
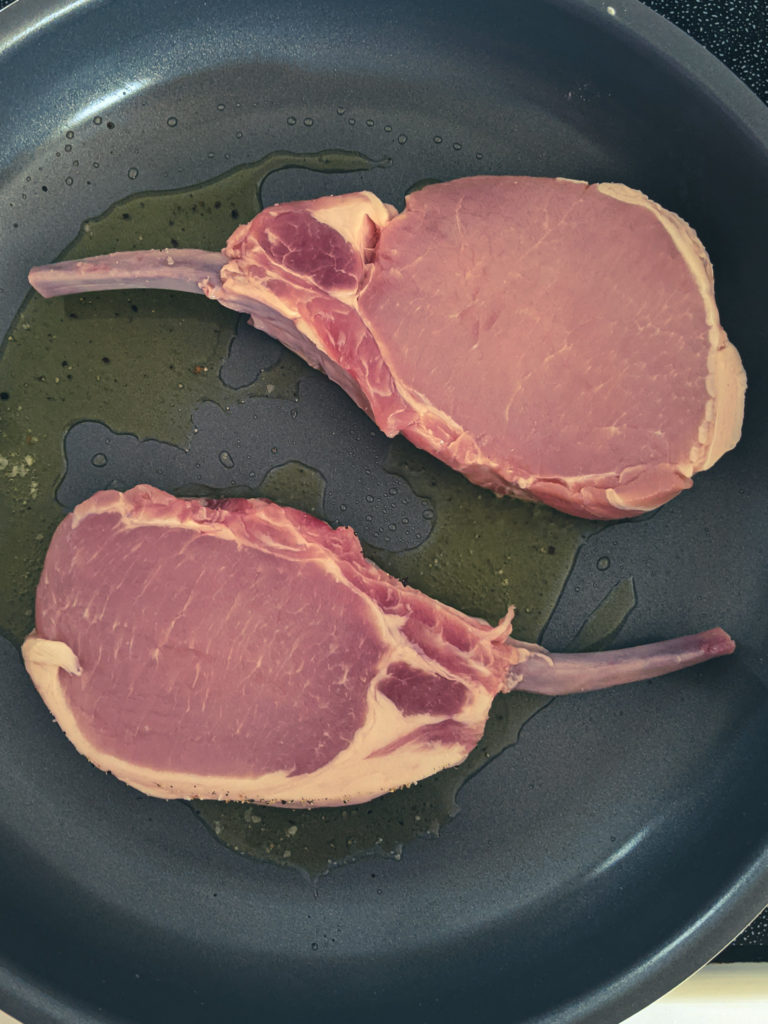
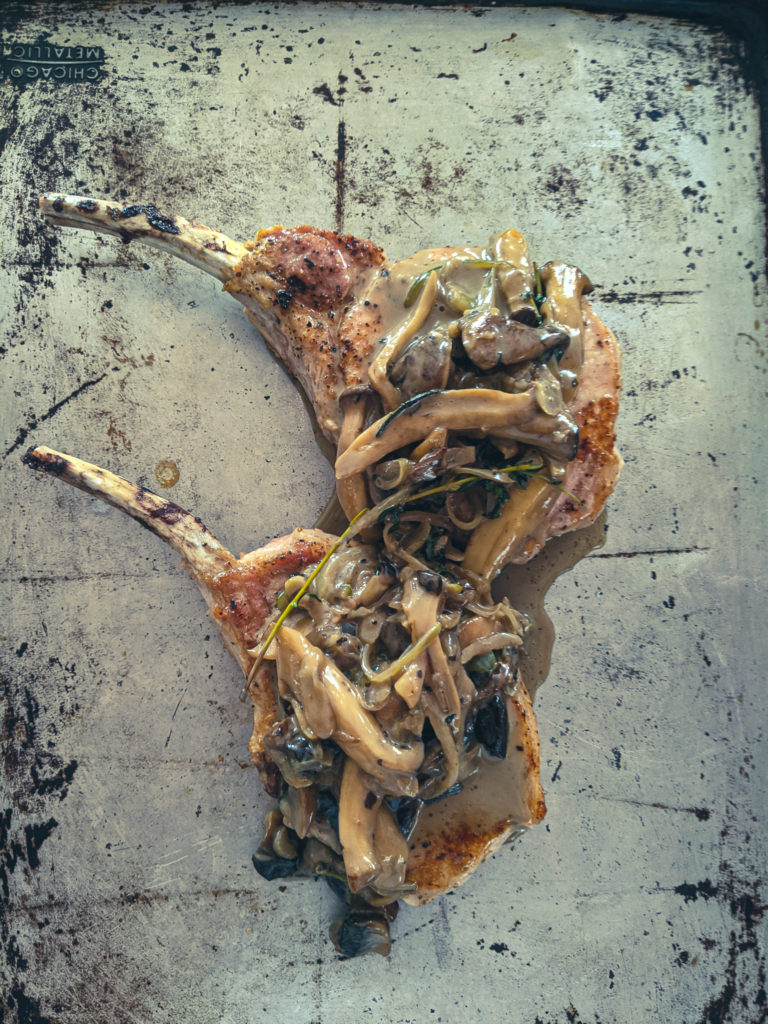
You know that old pork chop recipe where you take a can of cream of mushroom soup and cook the pork chops in it. This recipe for Pork Chops with Creamy Mushroom Sauce is like the elevated restaurant-quality version of that dish. Rather than using store-bought canned soup, the creamy mushroom sauce is made using high-quality mushrooms, fresh herbs, brandy, stock, and cream. The pork chops are thick-cut, seared in a hot pan, then finished in the oven to ensure an even and perfect cook. Whether you are looking for a quick weeknight meal or something high-end to make for a special occasion, this is it. Serve it with mashed potatoes and vegetables, and you’ve got a delicious dish that anyone would be happy to pay money for. You can find the recipe directly below and keep reading past that for a more detailed explanation.
Pork Chops with Creamy Mushroom Sauce
We've all had pork chops with cream of mushroom soup. This is like that but elevated. Rather than using a store-bought can of cream of mushroom soup, the sauce is made of high-quality mushrooms, brandy, herbs, chicken stock and cream. This is a restaurant-quality dish that you can make at home any day of the week.
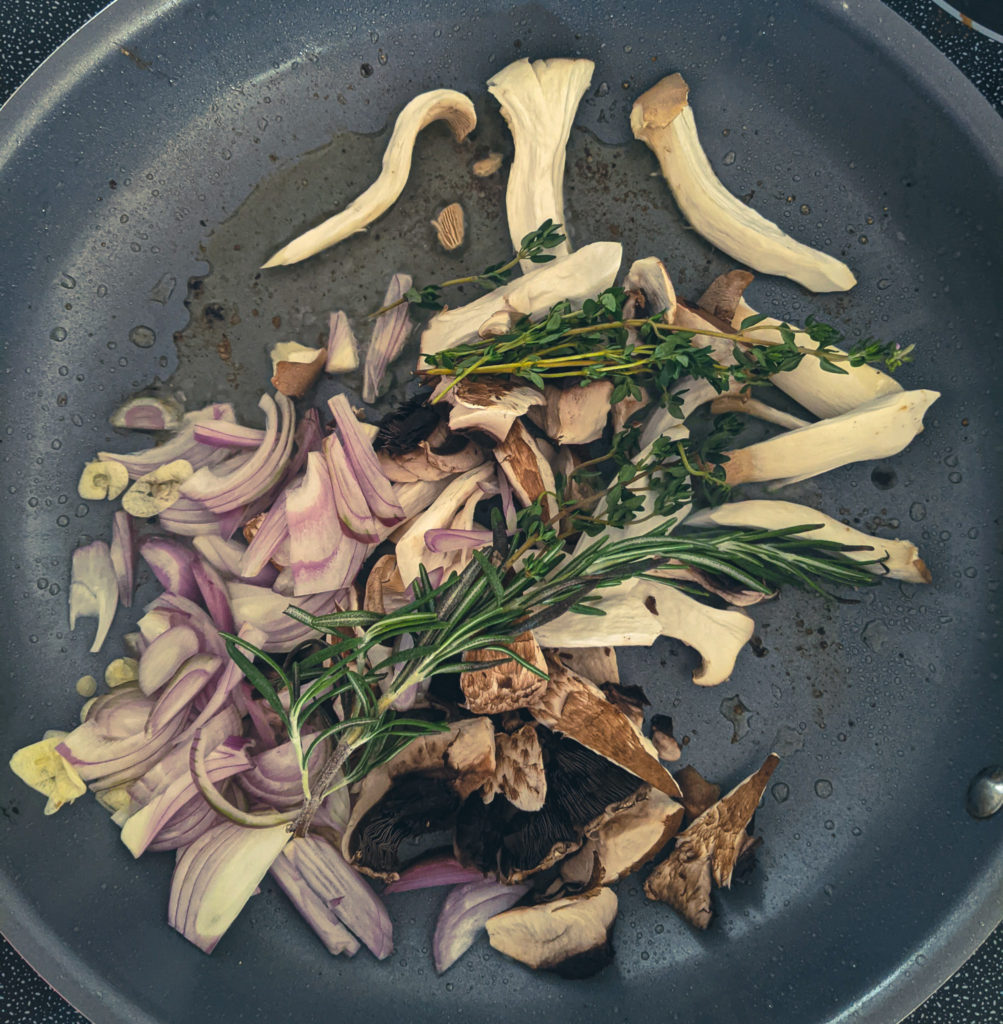
Pull or cut the king oyster mushrooms into thin strips.
Pull or cut the portobello mushrooms into thumb-width chunks.
Heat a skillet over medium-high heat.
Pat the pork chops dry with paper towel and season on both sides with salt and pepper.
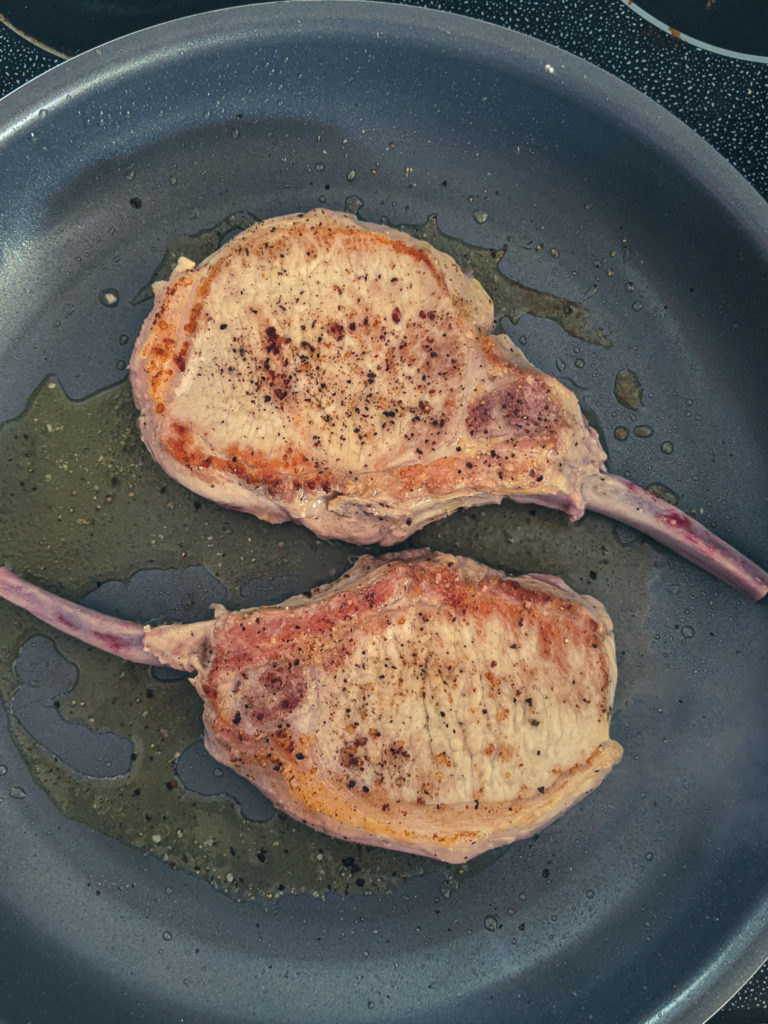
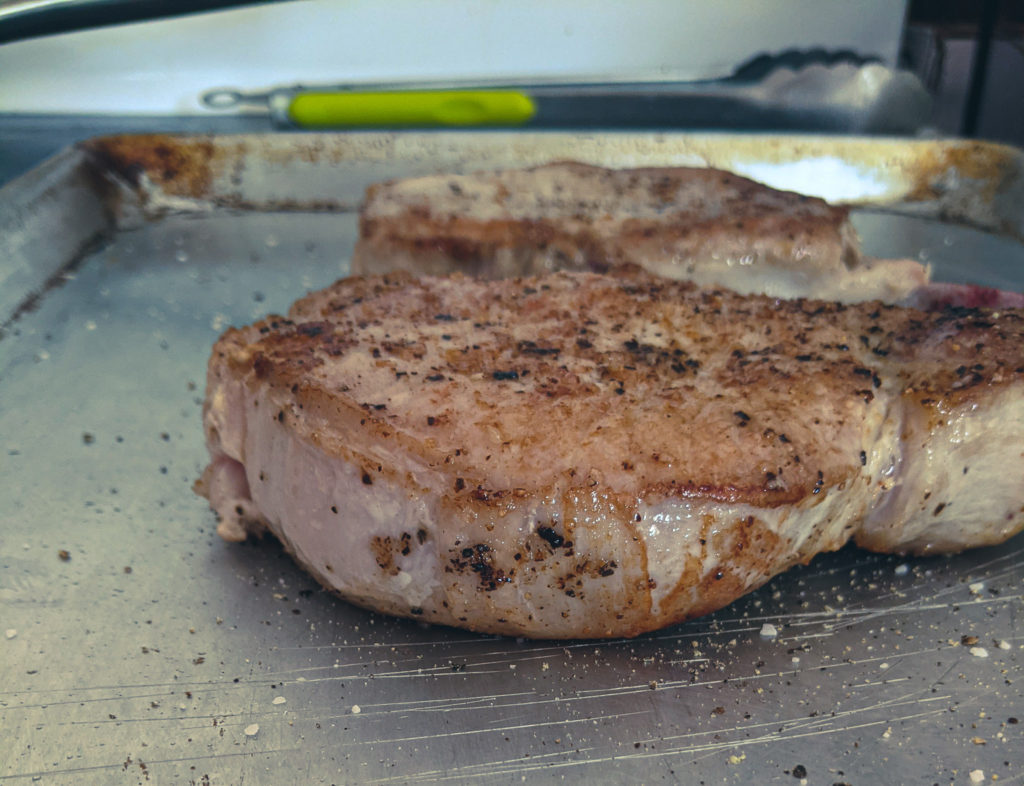
Add the olive oil to the pan and sear the pork chops on both sides until brown. About 1 to 2 minutes per side.
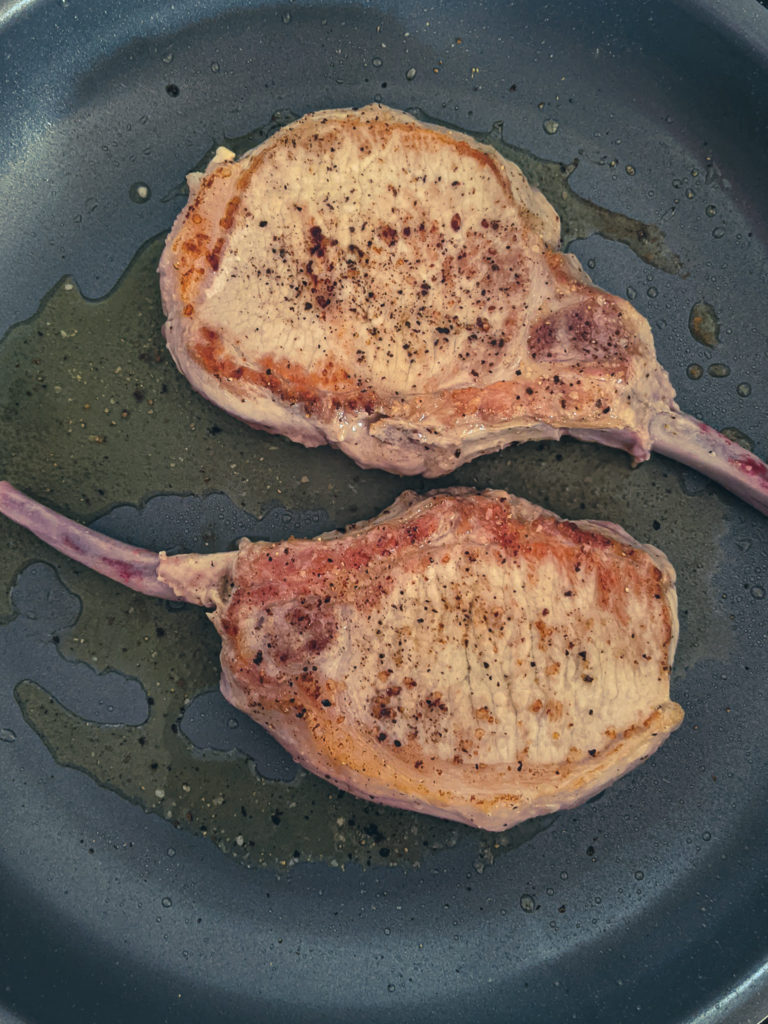
Remove the pork chops from the skillet and place them on an oven-safe sheet pan. Put the pork chops in the oven for 10 minutes.
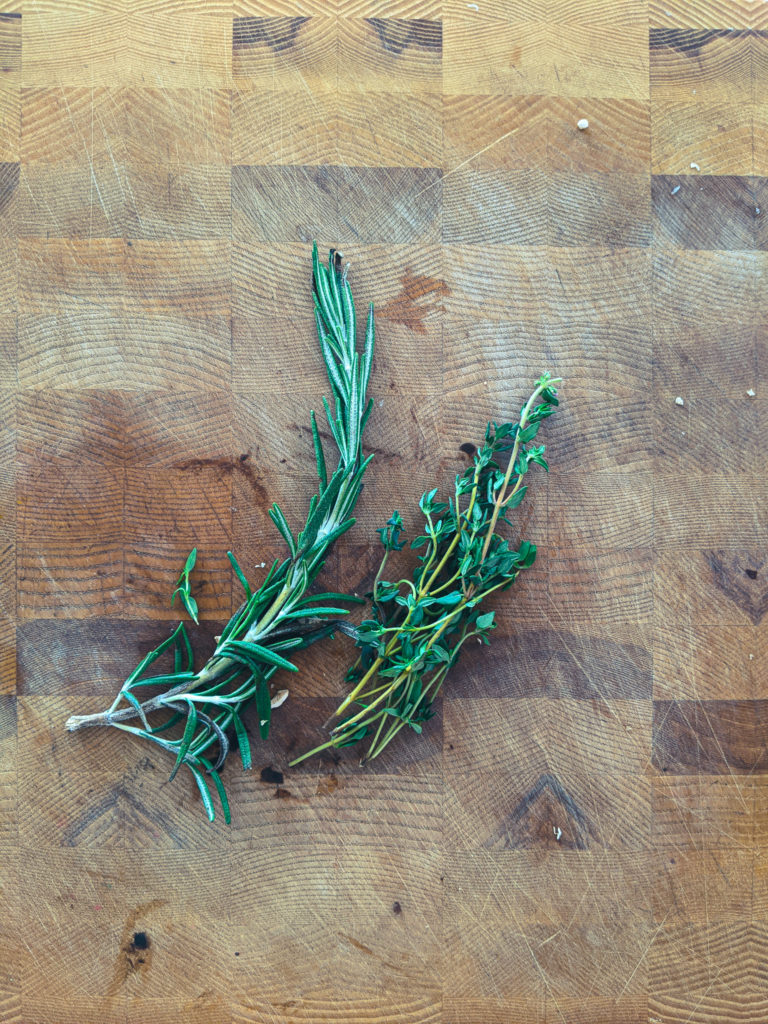
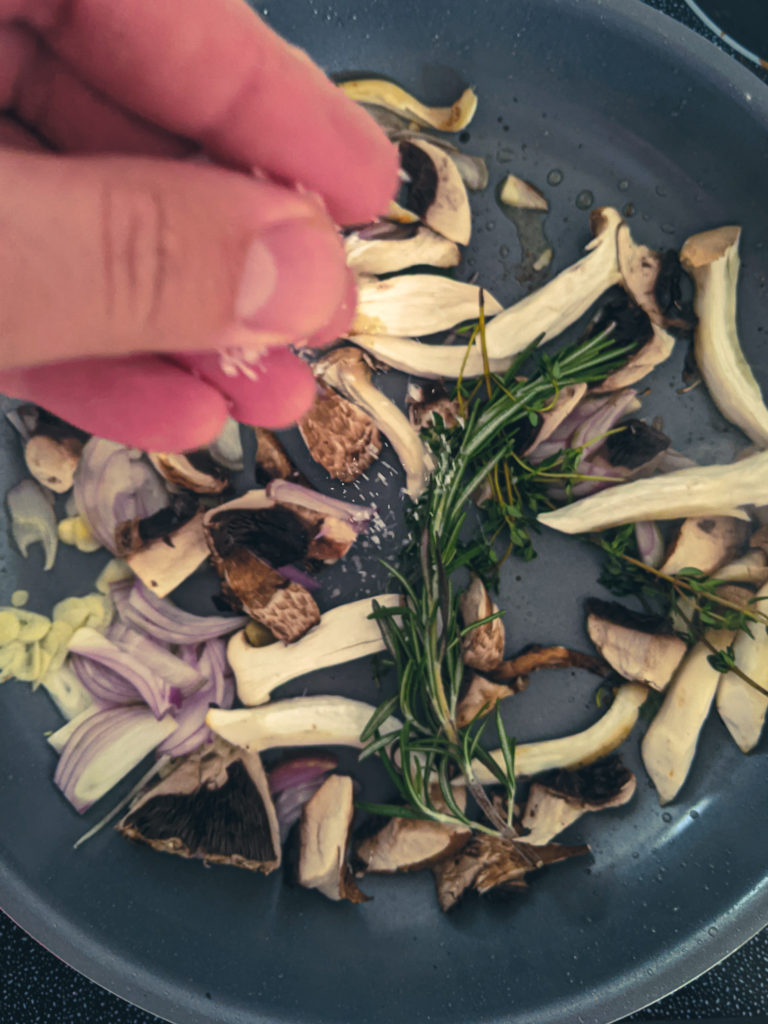
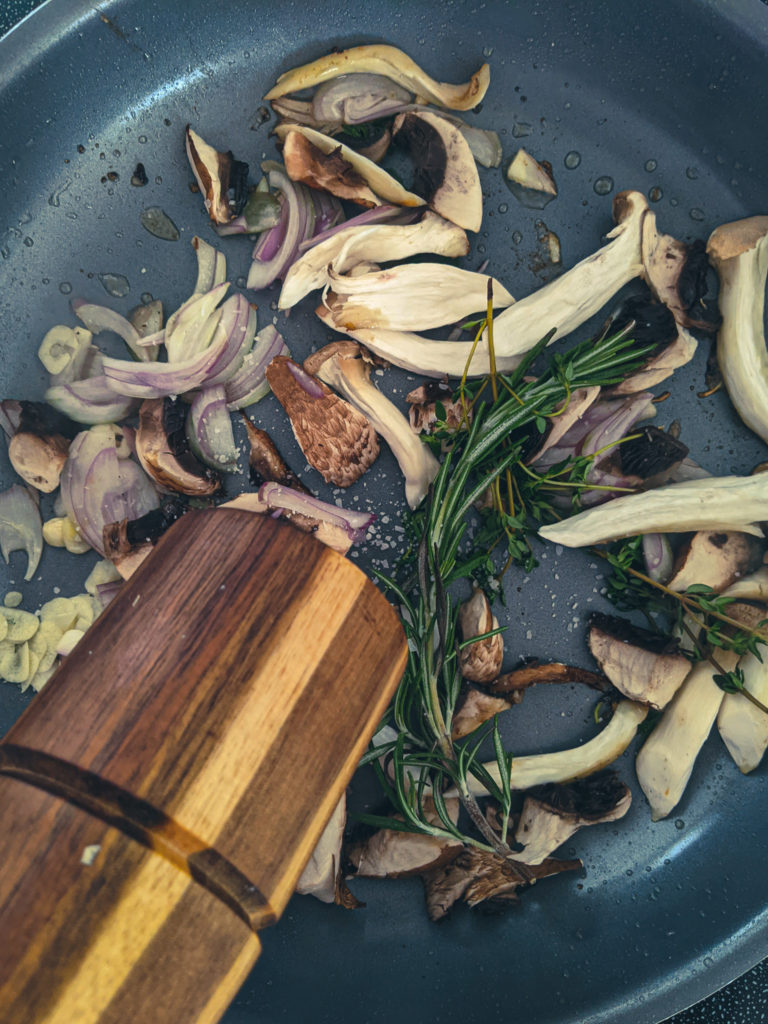
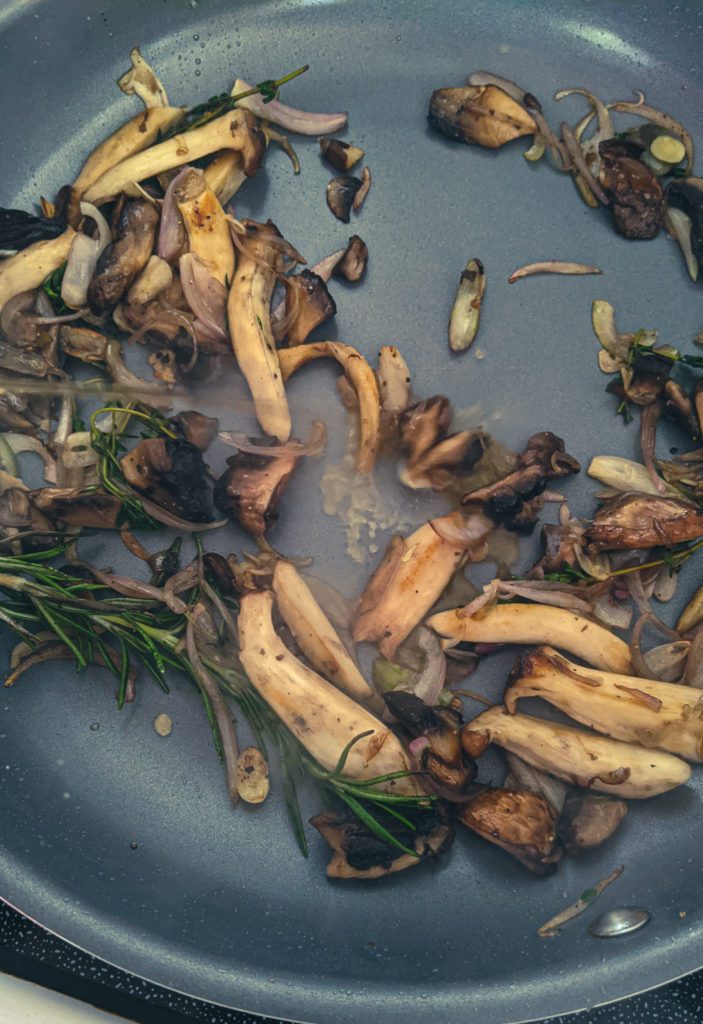
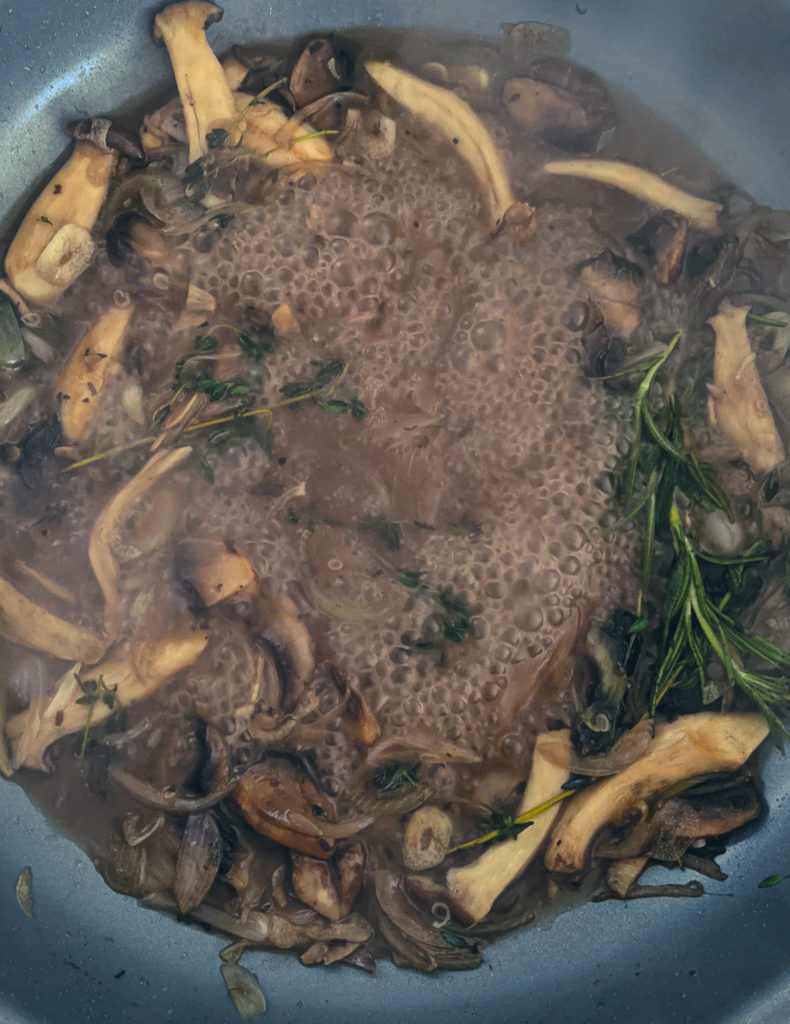
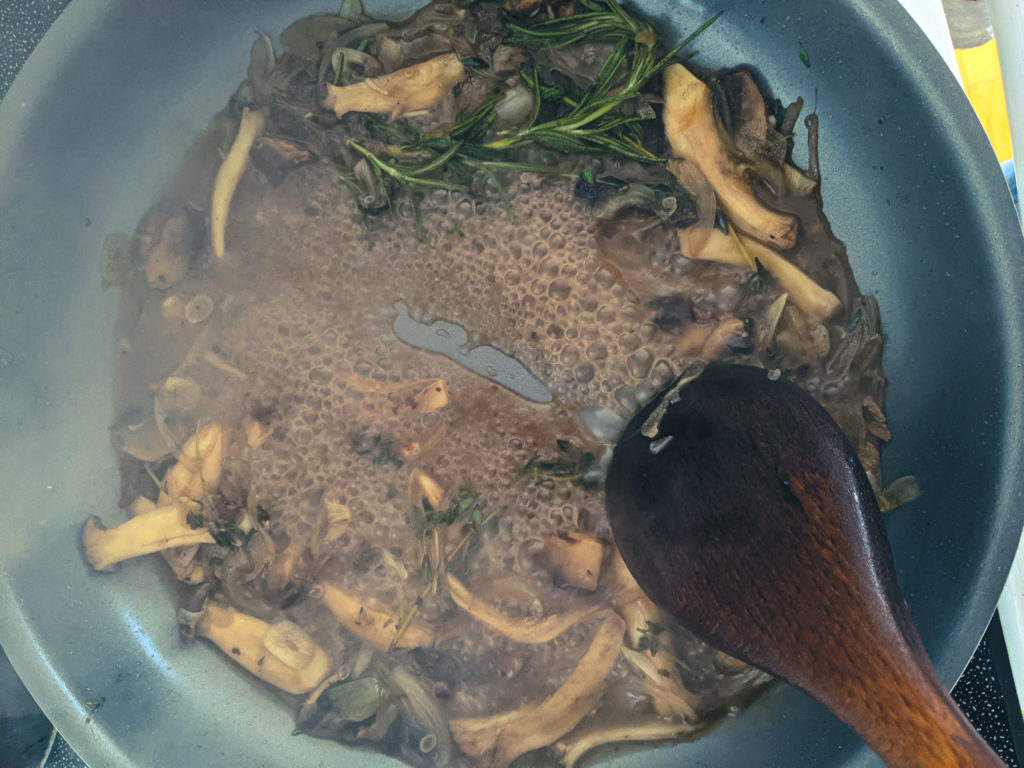
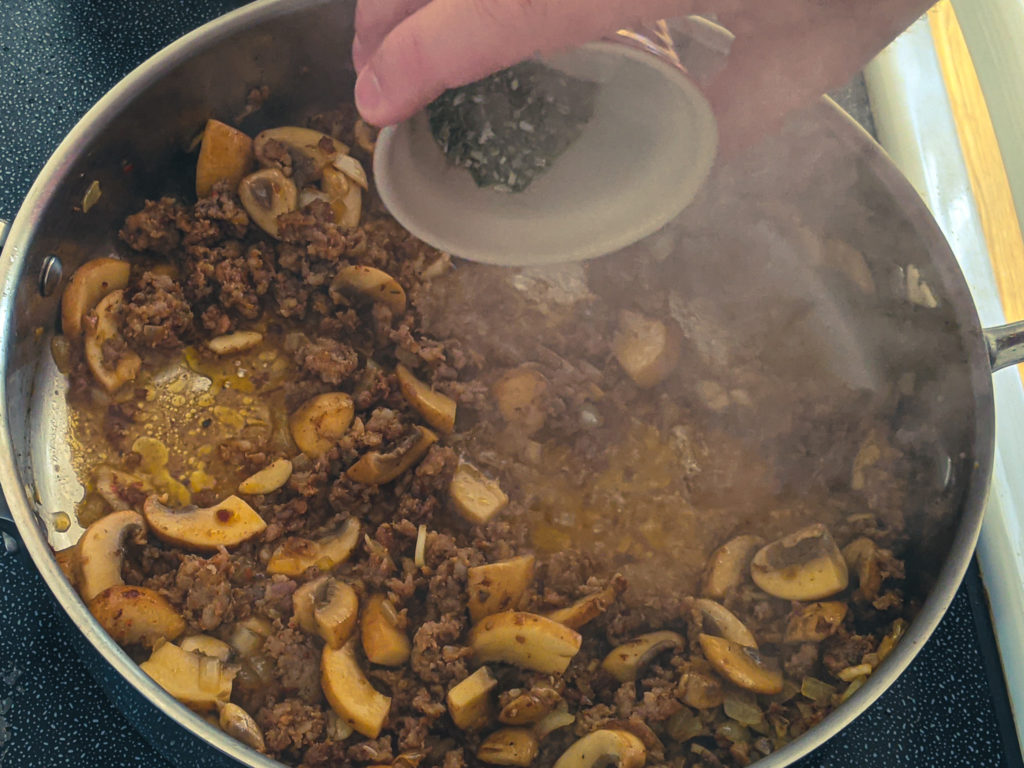
Drain the excess oil out of the skillet, leaving about 1 tbsp. Add the shallots, garlic, mushrooms, rosemary, and thyme. Cook, stirring, for 2 to 4 minutes or until the shallots soften and the mushrooms are cooked.
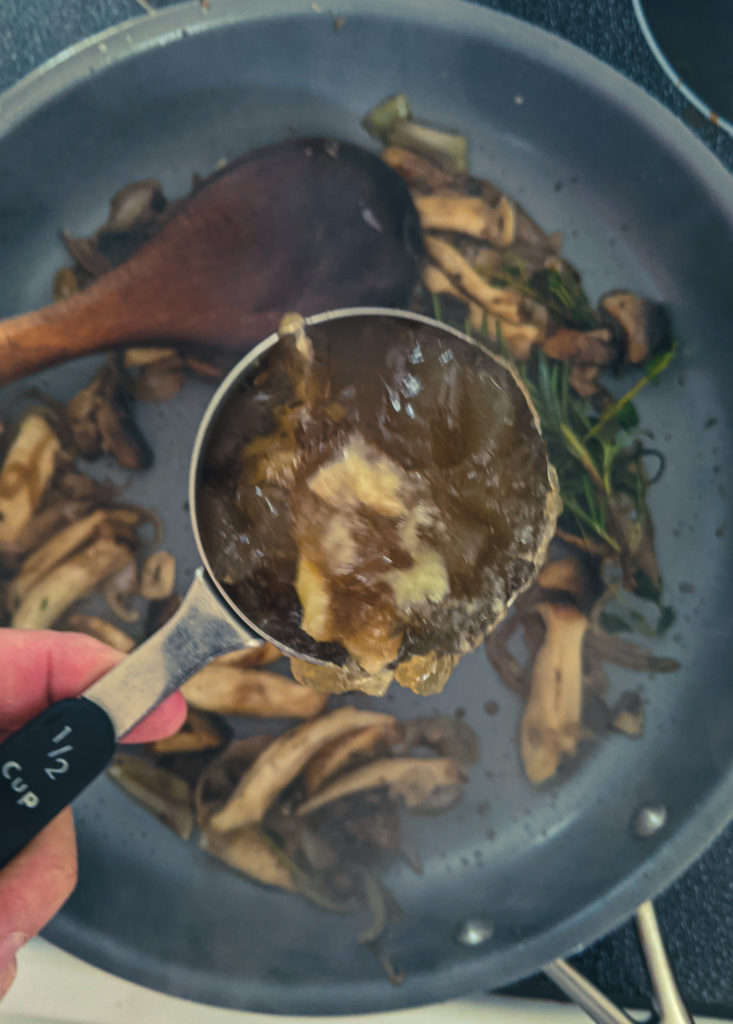
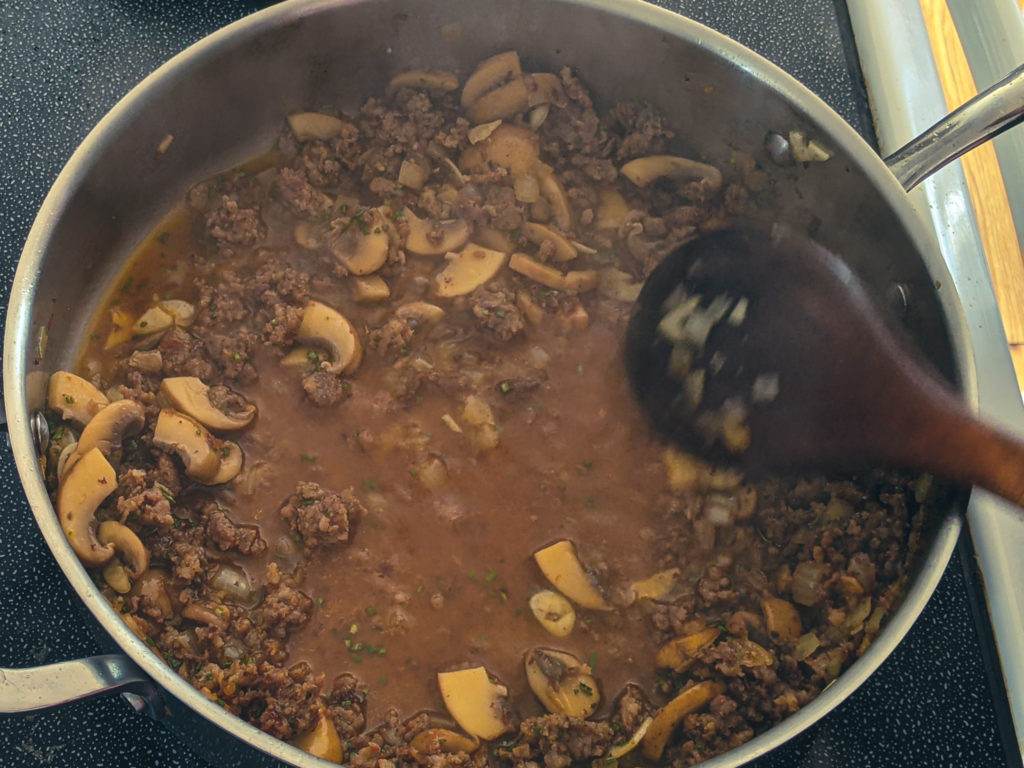
Add the brandy to the skillet and cook for about a minute or until it has all but evaporated.
Add the chicken stock, bring to a boil, and cook until it has reduced by half. About 2 minutes.
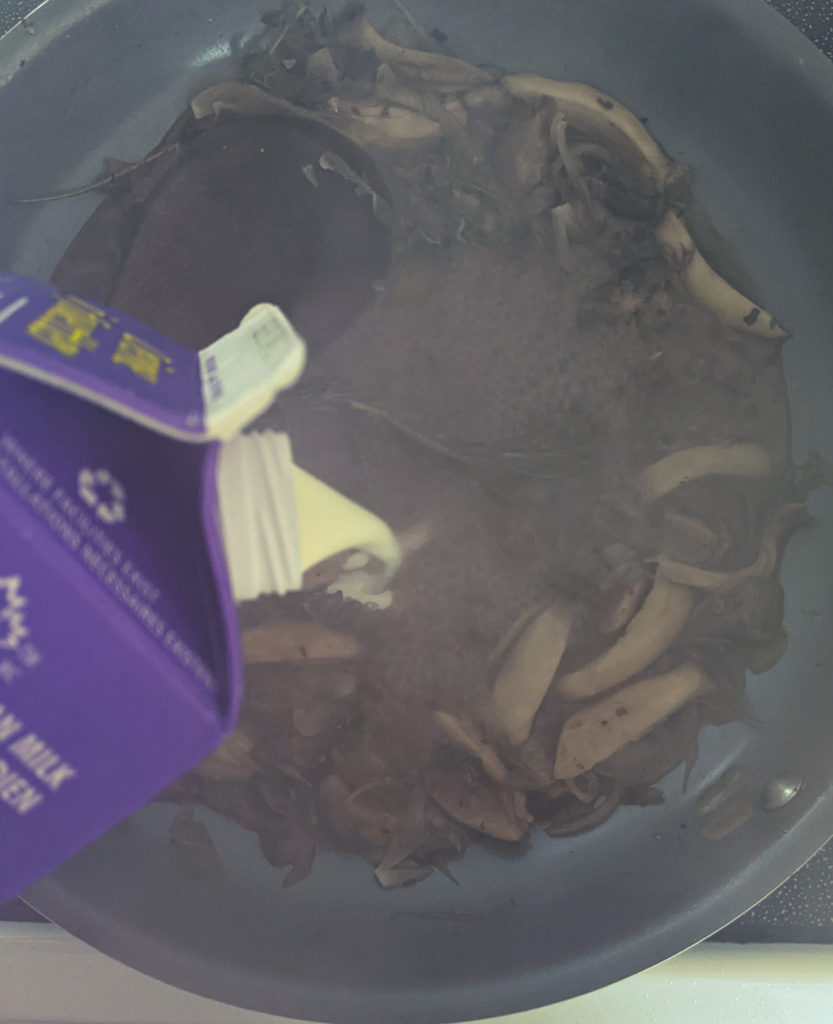
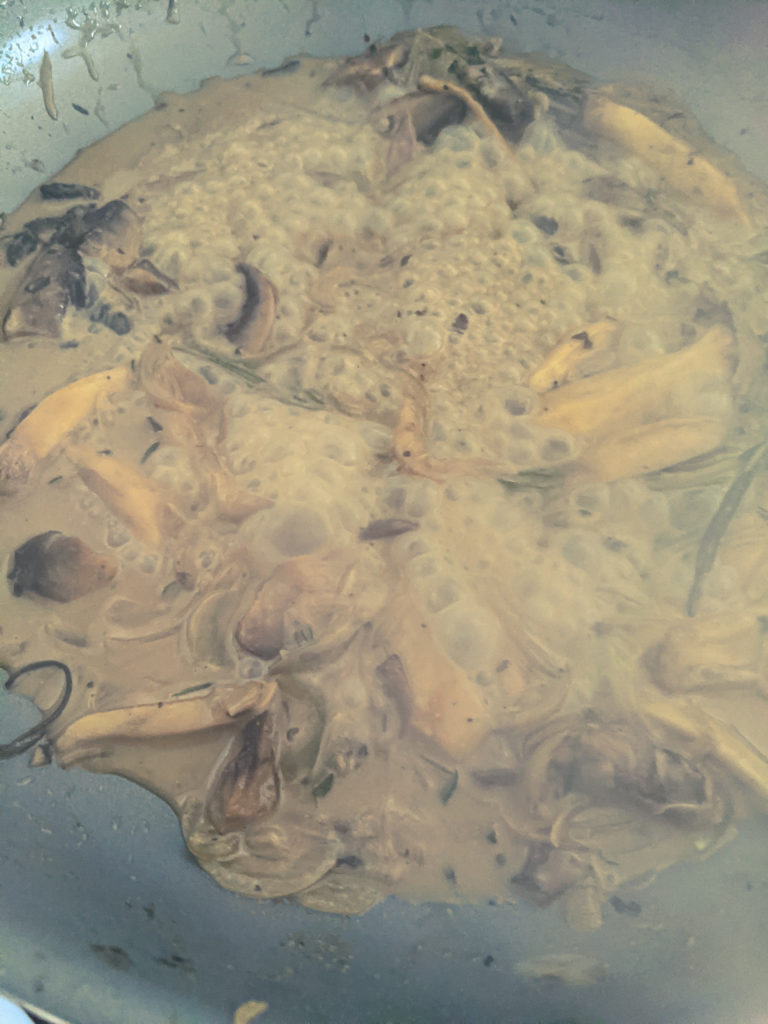
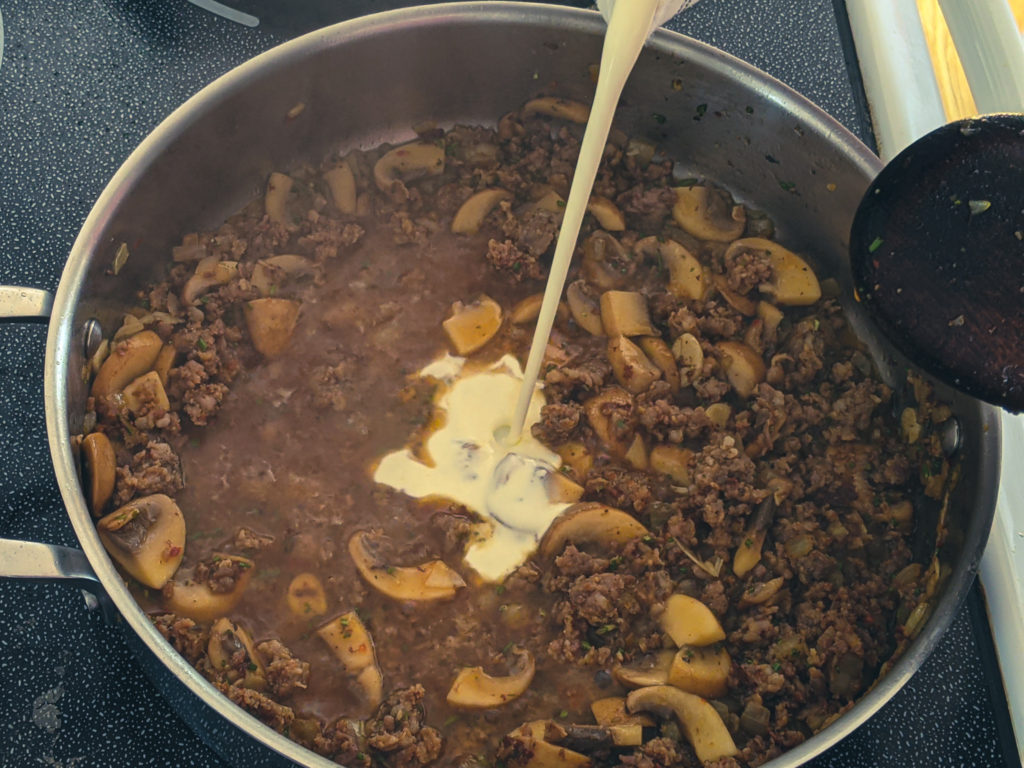
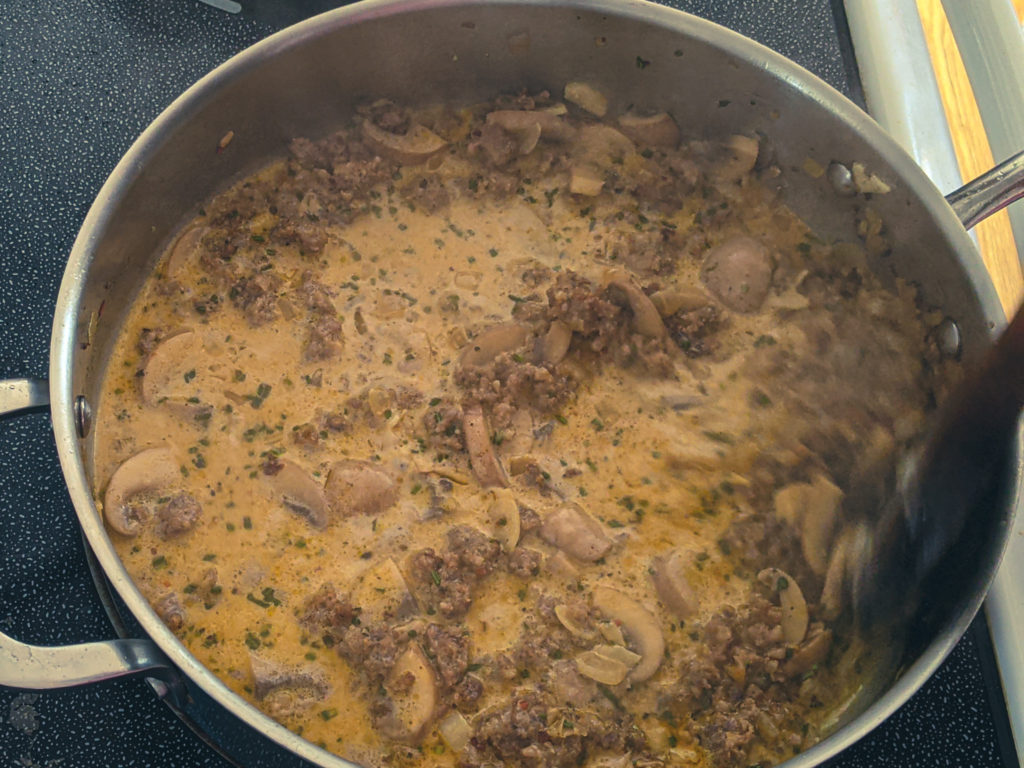
Add the cream and continue to cook the sauce until it is thick enough that a wooden spoon dragged across the bottom of the skillet leaves a line for at least 1 second.
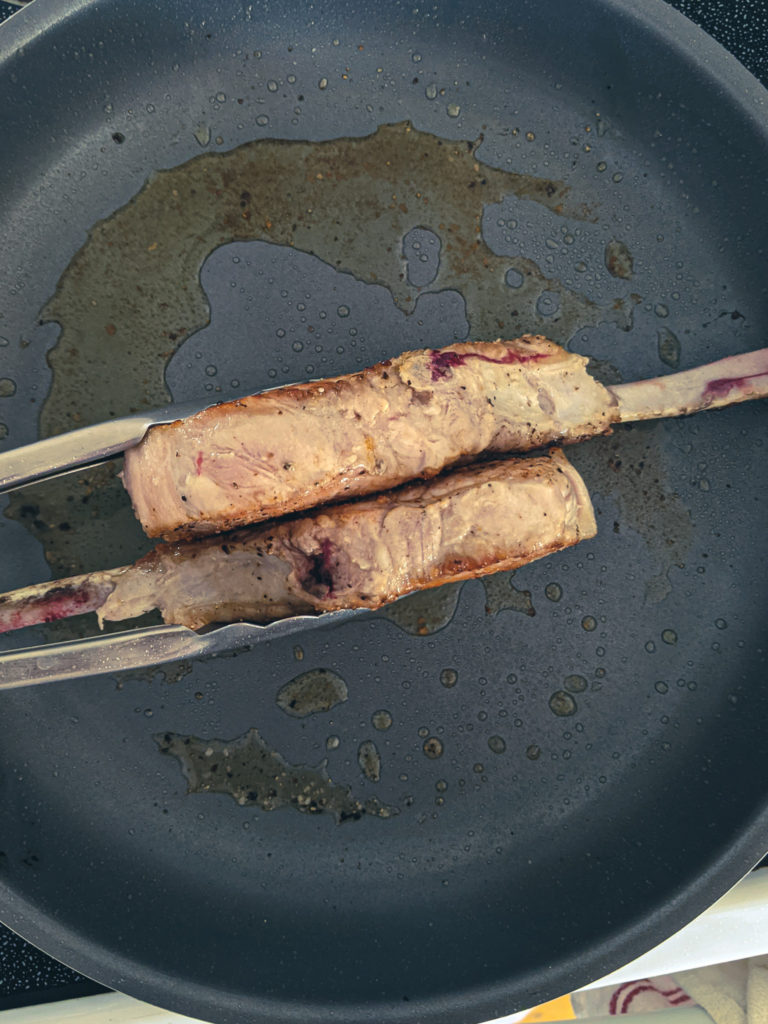
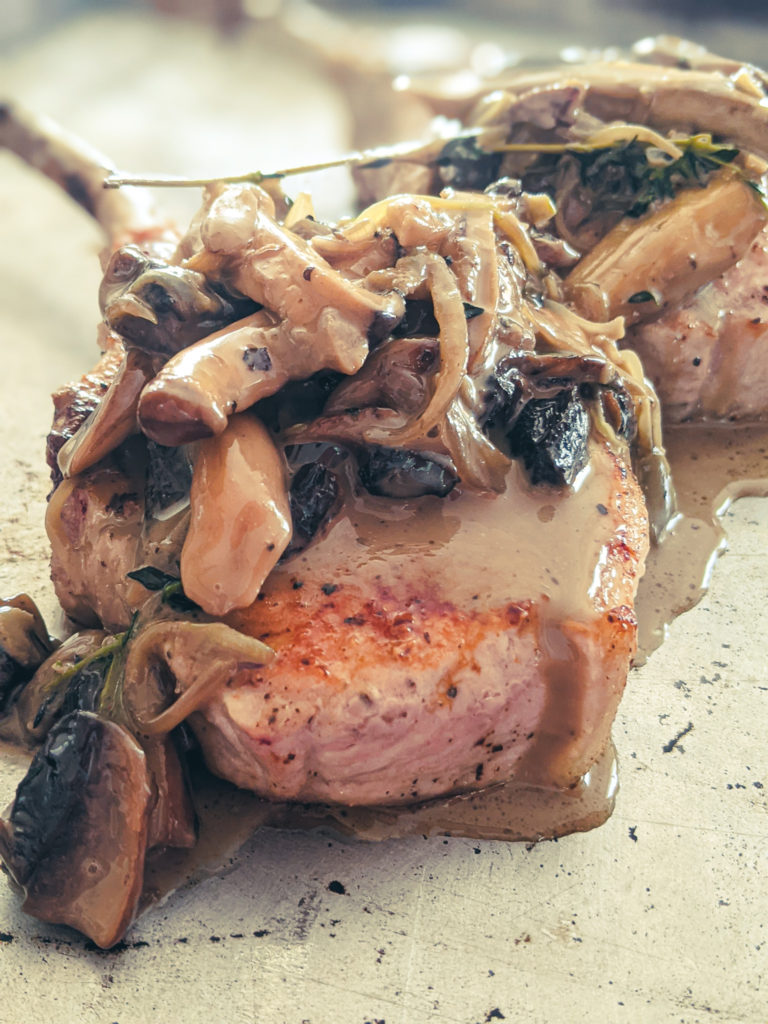
Remove the pork chops from the oven, top with the creamy mushroom sauce and serve.
Notes
You can substitute the two thick-cut pork chops for 4 thinner pork chops. Once seared, cook the thinner pork chops in the oven for 5 to 7 minutes. There is no need to adjust the sauce recipe as it will be enough for 4 pork chops.
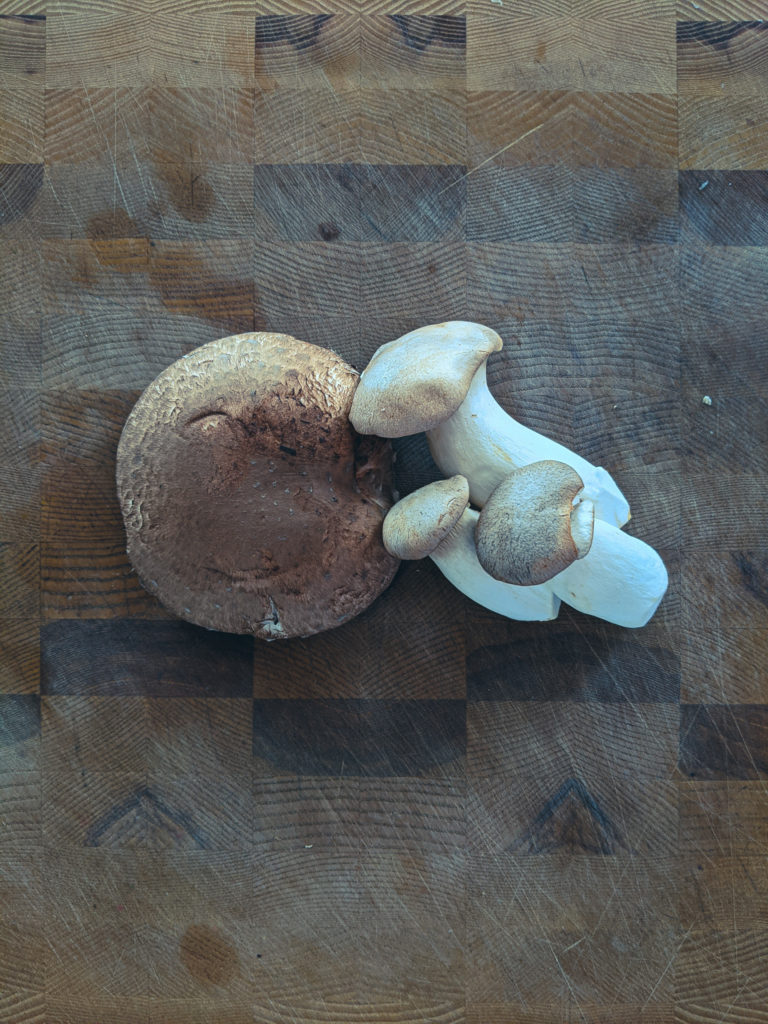
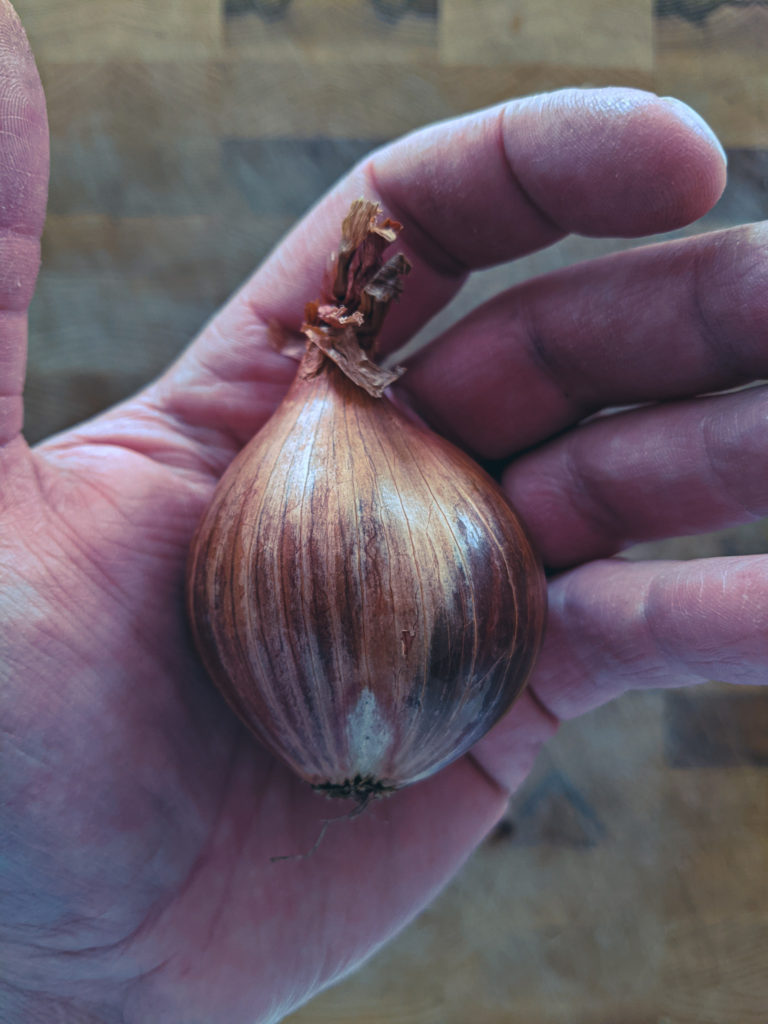
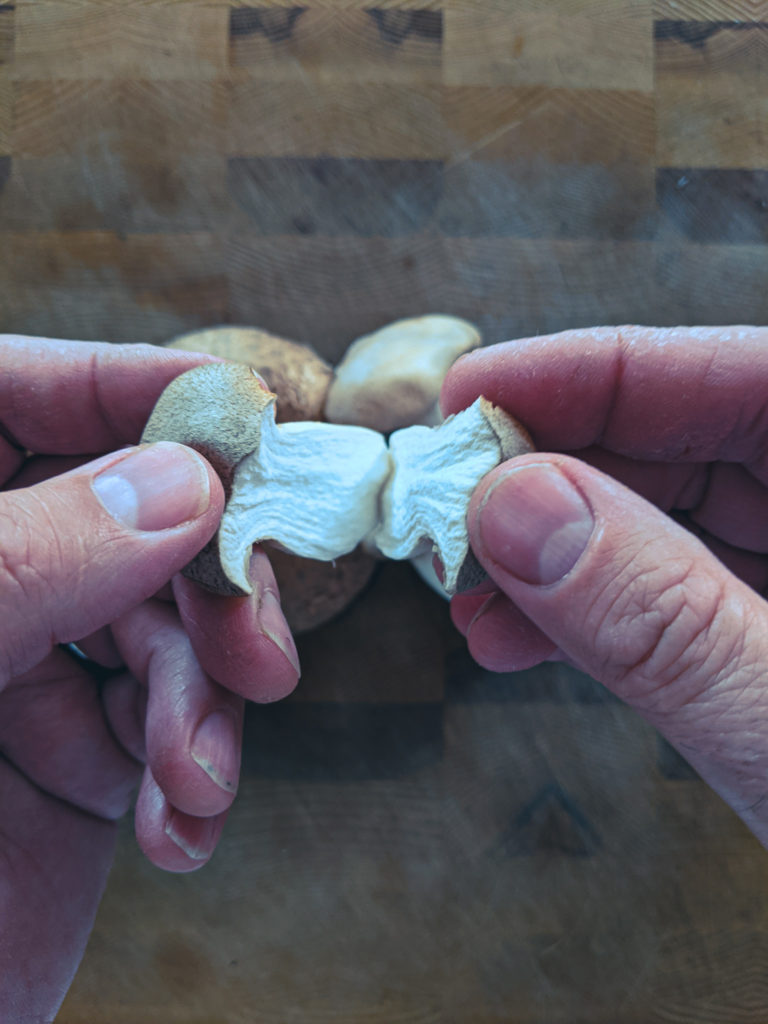
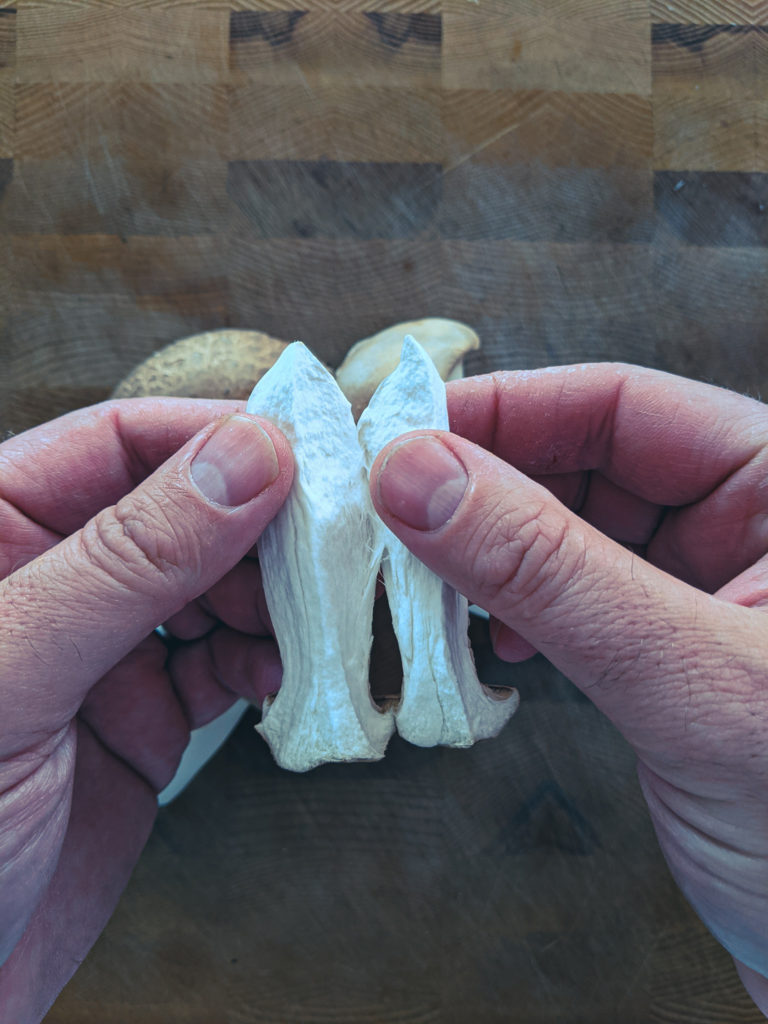
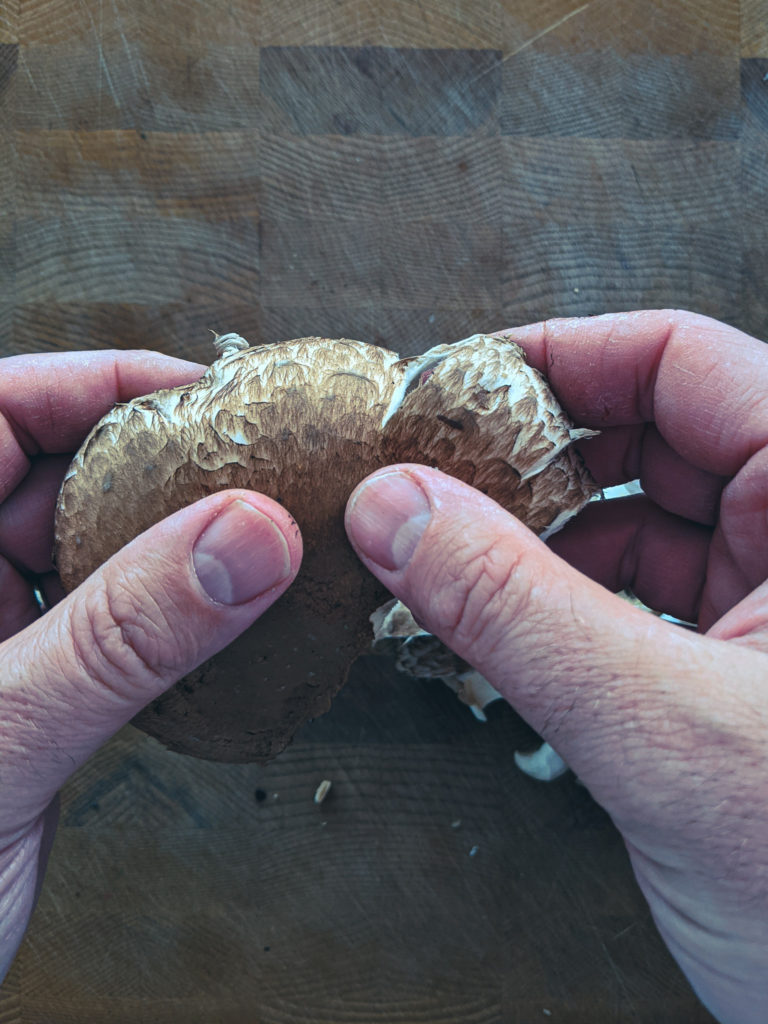
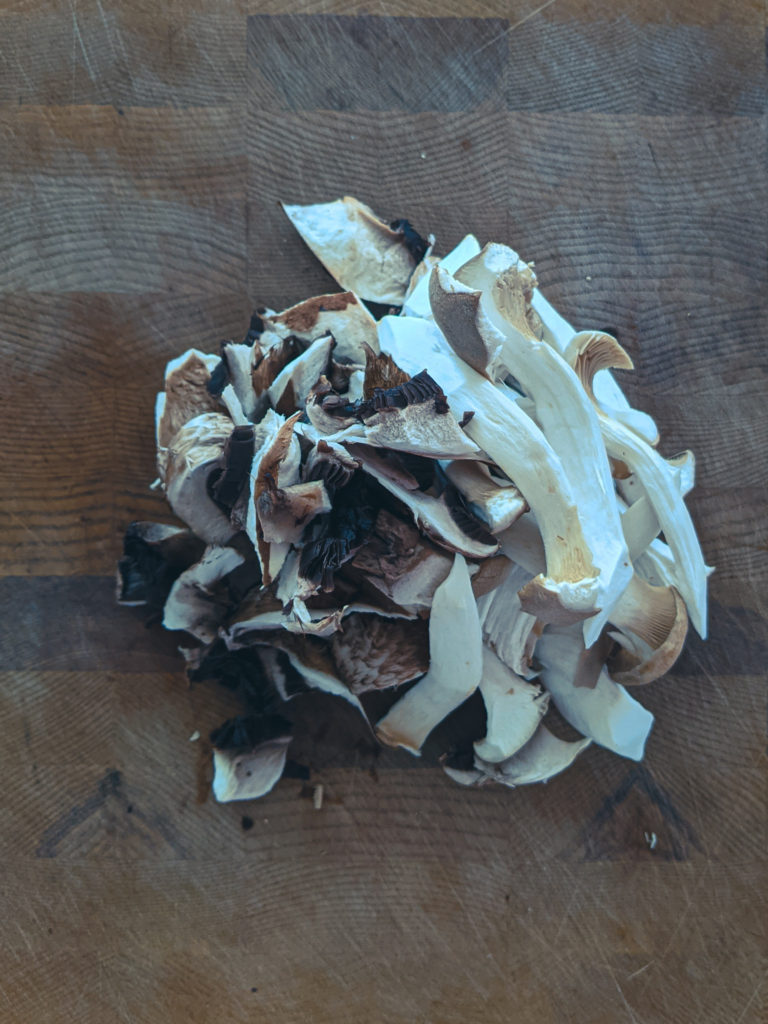
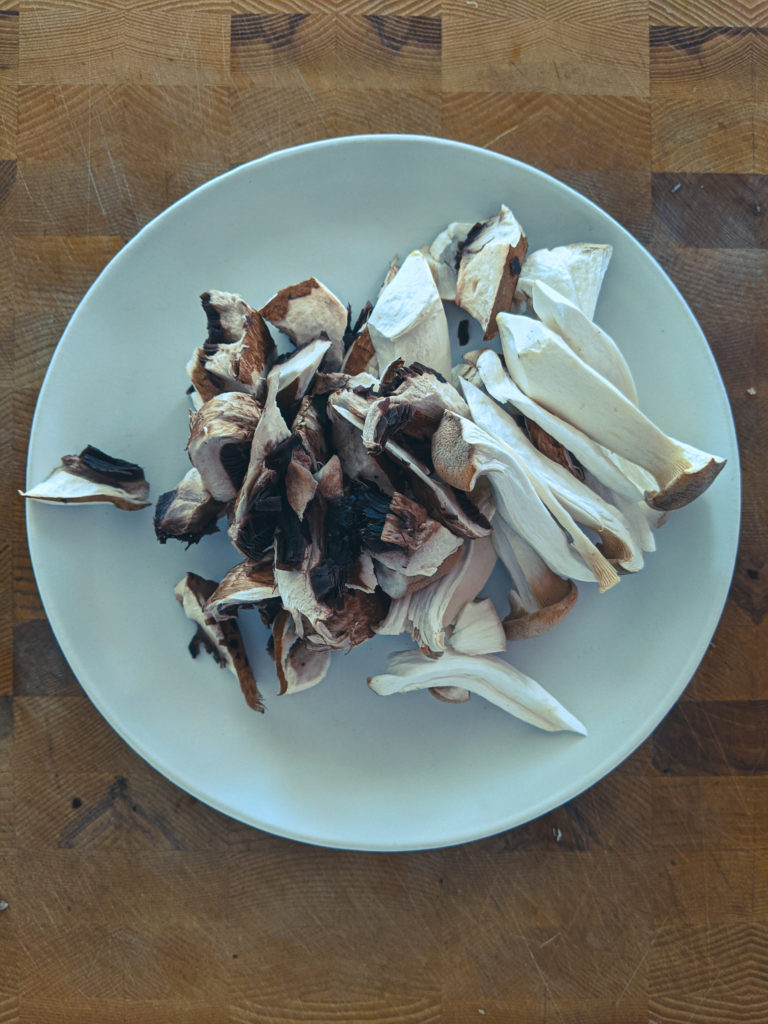
The ingredients for my Pork Chops with Creamy Mushroom Sauce are pretty straightforward, but if you don’t have some of the ingredients, you can substitute them for others. To start, I have these beautiful bone-in thick-cut pork chops. You don’t have to use these, they just look excellent in pictures, and honestly, they are of outstanding quality. I got them at Sobeys for anyone in Canada. But whatever pork chops you have will be fine. You will have to adjust the cooking time a little so that thinner chops don’t end up overcooked. The mushrooms for the recipe are one portobello and three king oyster mushrooms. You can use button mushrooms, creminis, or any other mushroom you want. The key is that you have about two cups of loosely packed mushrooms. Herbs, I used thyme and rosemary, but sage, parsley, tarragon, or even just Italian seasoning will work well. You can switch out the shallot for half a small onion, and you can substitute the brand for white wine, sherry or leave it out altogether. Leave the cream as whipping cream as the recipe requires a high-fat content.
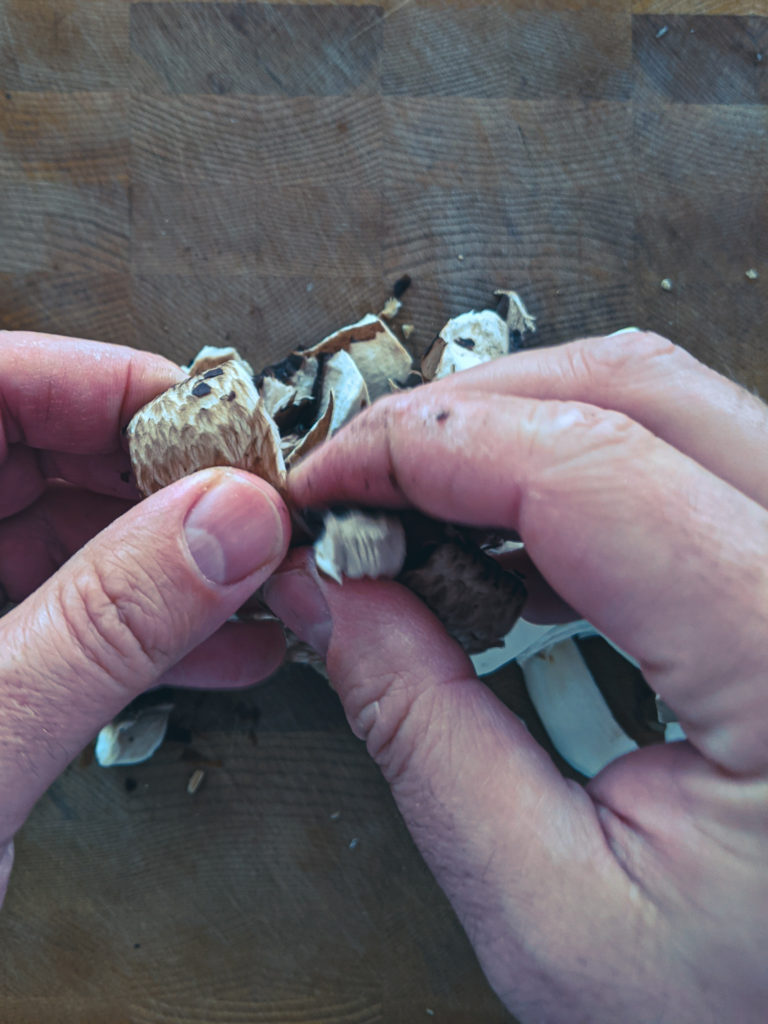
Preparing the Mushrooms
To prepare the mushrooms, you can cut them into strips or chunks, but the easiest and quickest thing to do is pull the mushrooms apart with your hands. Pull the king oyster mushrooms into long thin strips, and break the portobello into thumb-width chunks.
Preparing the Shallot and Garlic
To prepare the shallot and garlic, peel them and slice them as thinly as you can. The herbs, just leave whole.
Preparing and Cooking the Pork Chops
Pat the pork chops dry with a paper towel. Season generously with salt and pepper. Heat a skillet over medium-high heat and add in 2 tbsp of olive oil. Sear the pork chops for a minute or two or until browned. Season the upside, then flip and sear for another minute or two. Take the pork chops out of the skillet, put them on a sheet pan, and put them in a 400°f oven for 10 minutes. For thinner pork chops, reduce that amount of time to 5 to 7 minutes. That may not seem like much time, but they don’t need to cook too much more because the pork chops are already partially cooked after searing in the pan. Make sure to sear the fat on the side of the pork chop as well before putting them in the oven.
Making the Creamy Mushroom Sauce
Drain the excess fat out of the pan, leaving about one tablespoon. Add the mushrooms, shallots, garlic, thyme and rosemary. Season with salt and pepper and cook for about three minutes or until the shallots have softened. Pour a quarter cup of brandy into the pan and cook until it has almost all evaporated. Add half a cup of chicken stock, bring to a boil and let it cook for about two minutes or until it has reduced by half its volume. Finally, add a quarter cup of whipping cream. Continue to cook the sauce until it is thick enough that a spoon dragged across the bottom of the pan leaves a line for at least one second.
Finishing The Pork Chops with Creamy Mushroom Sauce
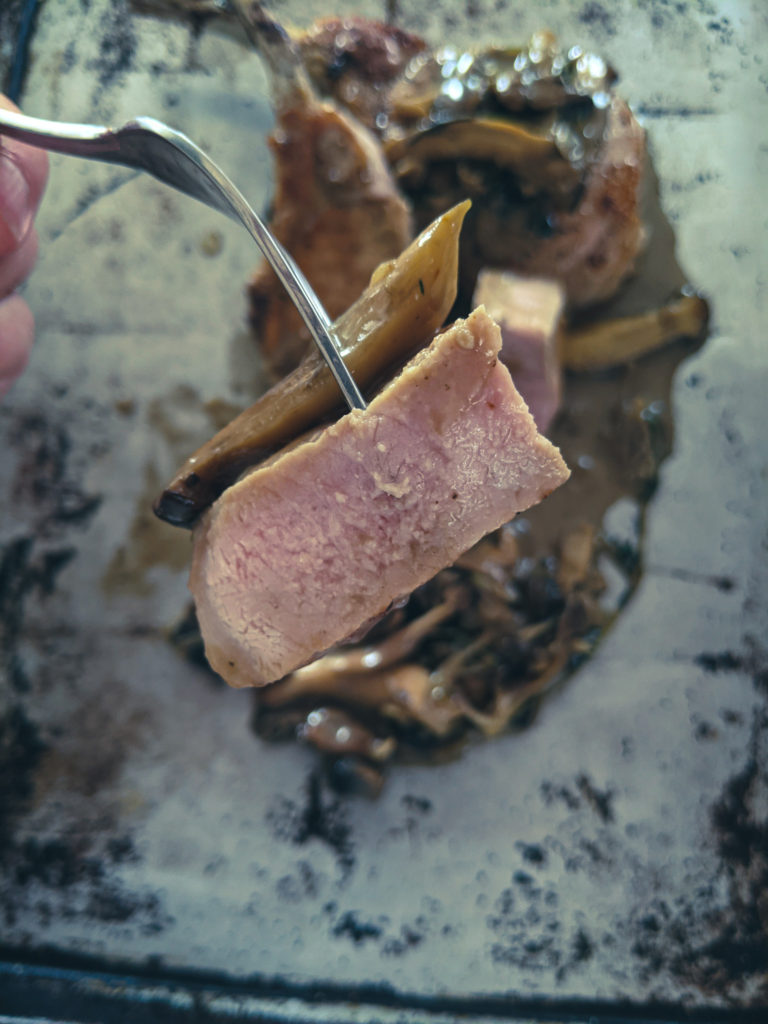
Remove the pork chops from the oven, let them rest for two minutes, spoon the sauce over them and serve. When cooked, the pork chops should be juicy and tender with a slight pink colour. If the pork chops are solid white and dry, they have been overcooked. All in all, with prep and cooking, this recipe for Pork Chops with Creamy Mushroom Sauce should take less than 25 minutes, but it will taste like you’ve been cooking all day. Try it for yourself.
The Wrap-Up
Something about the air cooling down makes me crave mushrooms, especially in a cream sauce. That flavour, for whatever reason, is the taste of fall to me. What is your favourite fall flavour? Keep in mind that this sauce work just as well on beef, chicken, or pasta as it does on pork chops. Add it to your repertoire, change the mushrooms, change the protein, and you’ve got a secret weapon up your sleeve that you can break out whenever you want to impress or have something special. Now, get cooking!!!
Thank you for reading this post. I hope you enjoyed it. Remember to subscribe to Chef’s Notes by putting your email address in the box below, so you never miss a post.
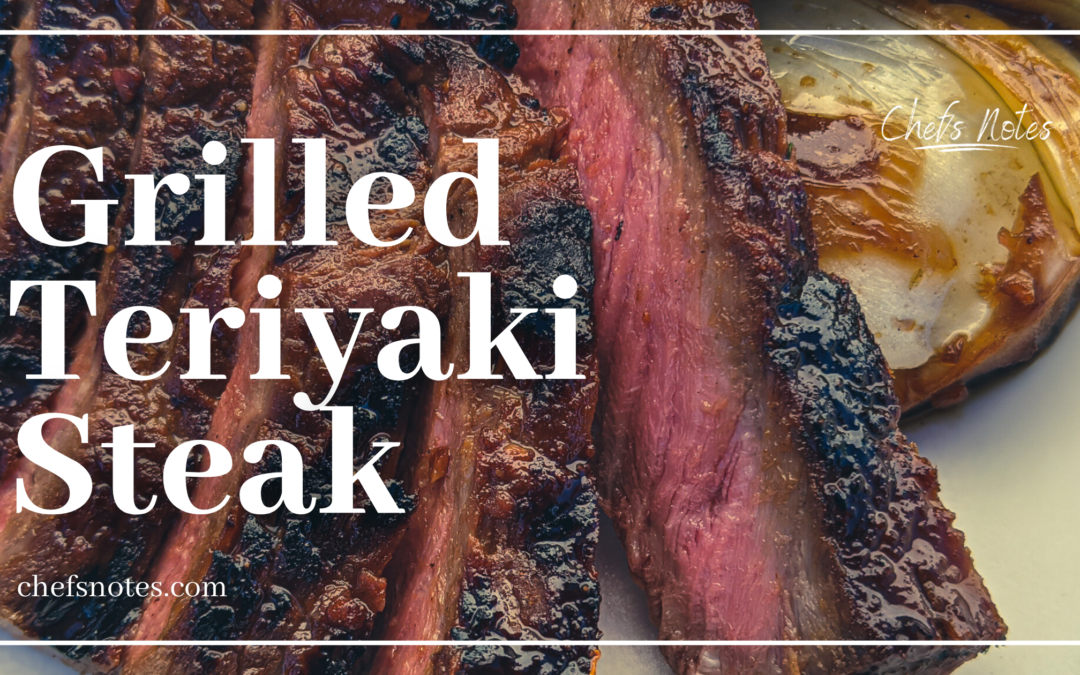
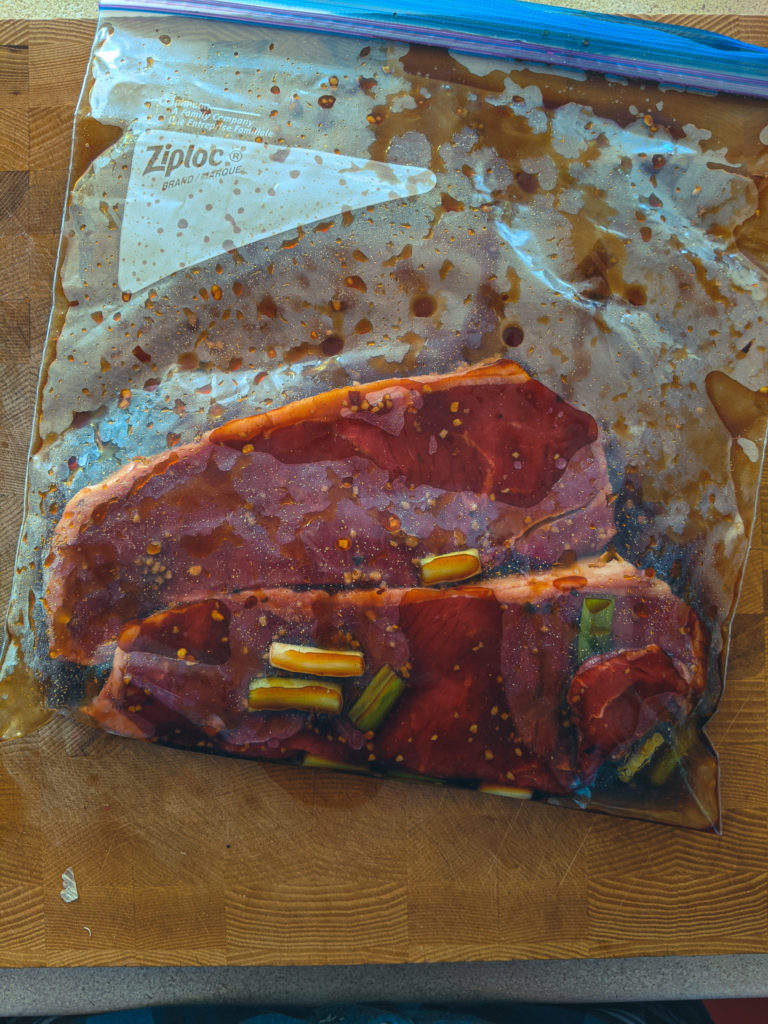
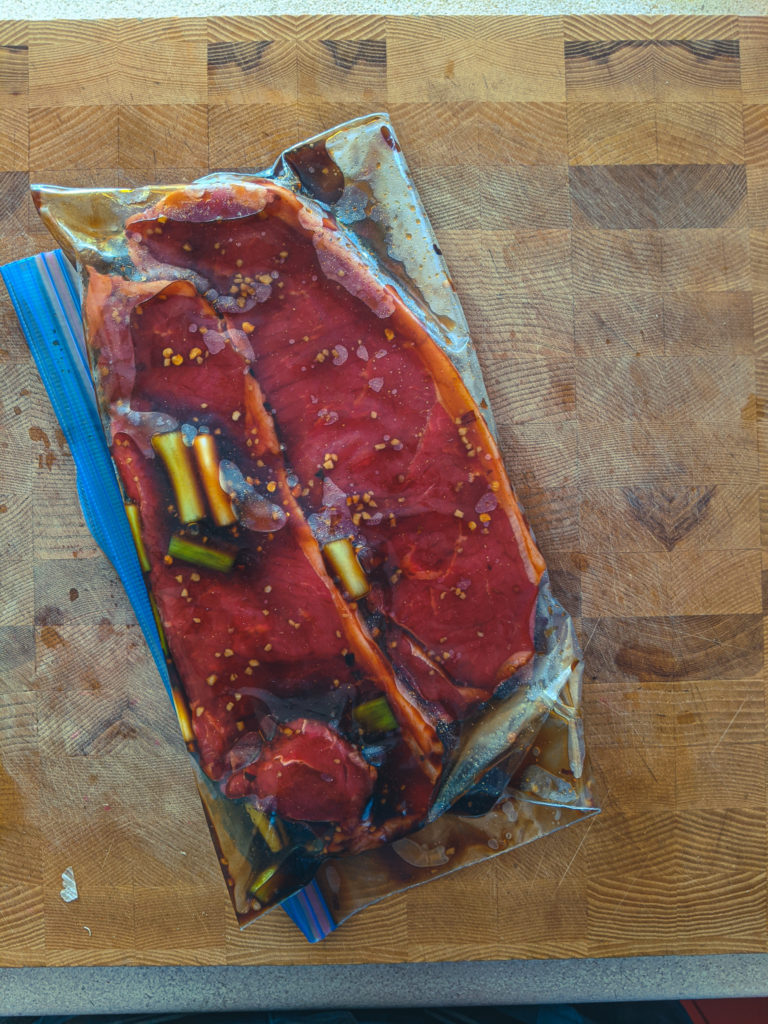
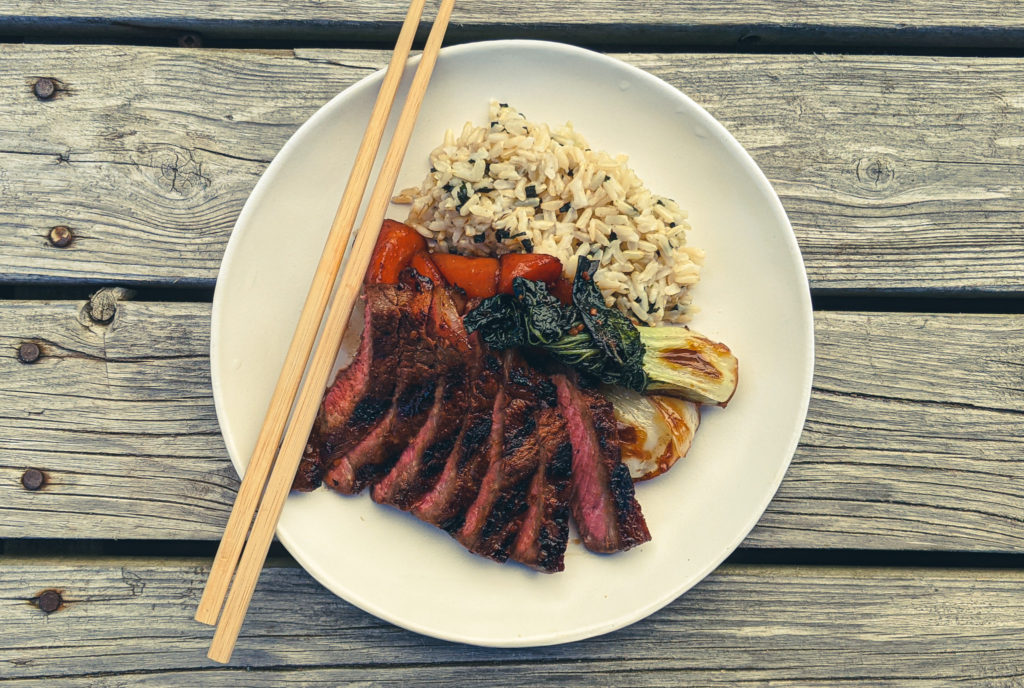
When you’re craving steak but also want something a little different, look no further than this Grilled Teriyaki Steak. The homemade teriyaki marinade, which doubles as a glaze, perfectly pairs with the flavour of the steak to give you something you’ll be happy to throw on the grill again and again. As always, you can find the recipe directly below, but you can keep reading after that for a more detailed explanation.
Grilled Teriyaki Steak
Homemade Teriyaki sauce is much different than what you get at the grocery store. It is less sweet, often doesn't have any ginger or garlic. This version does have some ginger and garlic, which really compliments the flavour of the beef.
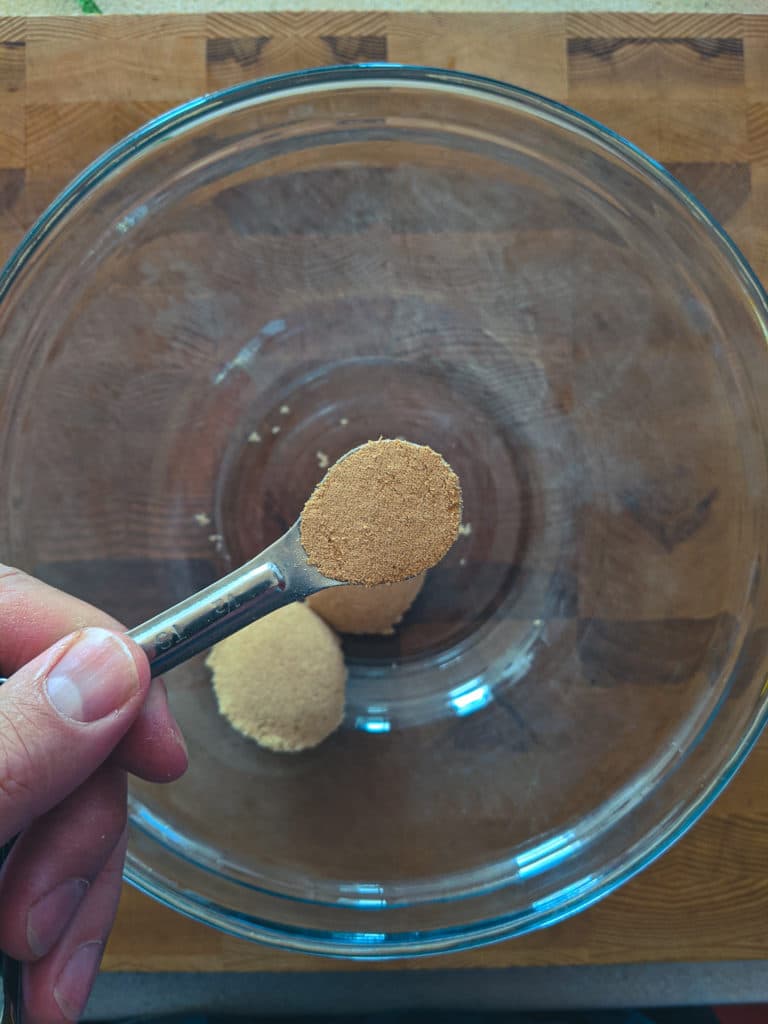
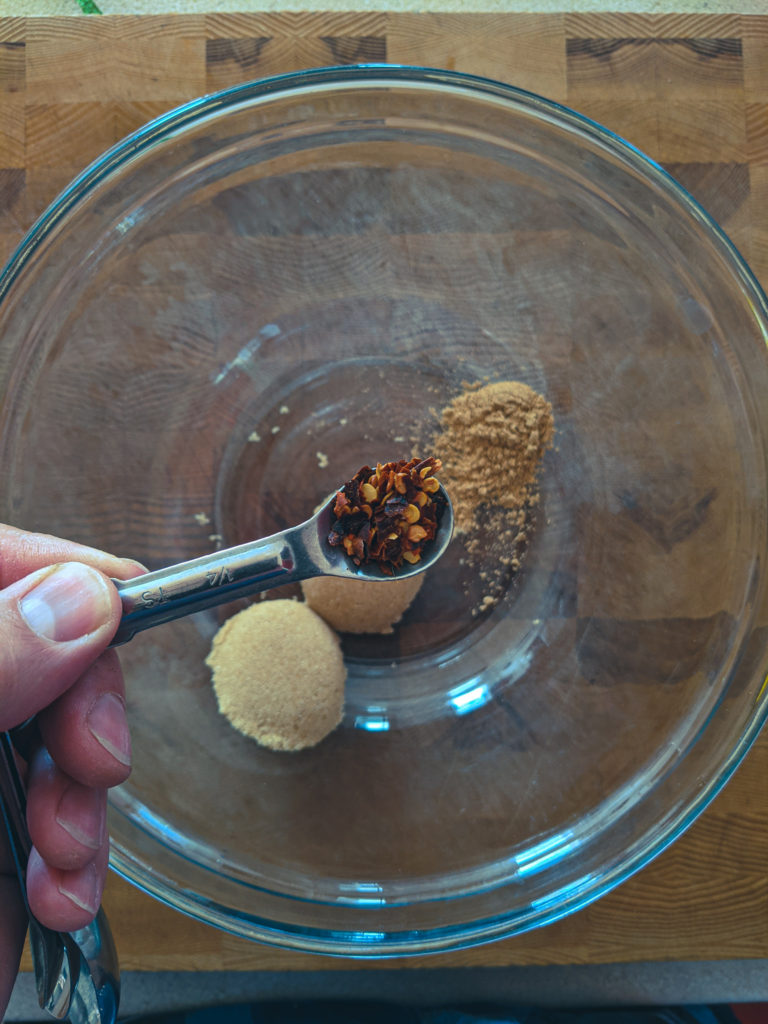
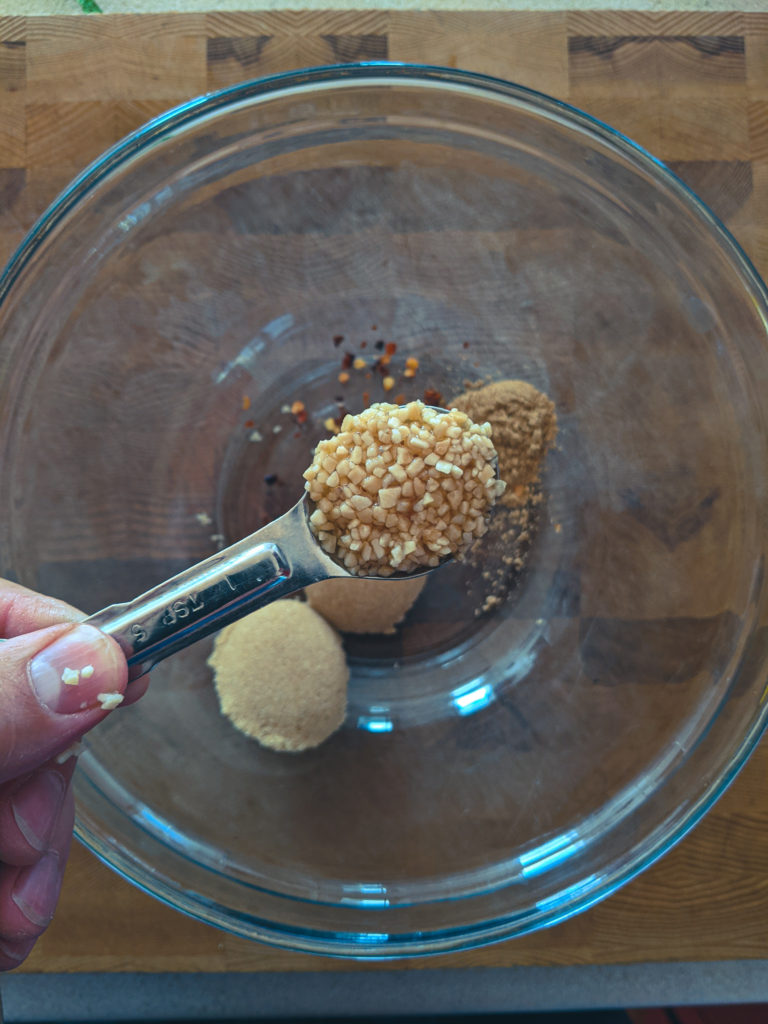
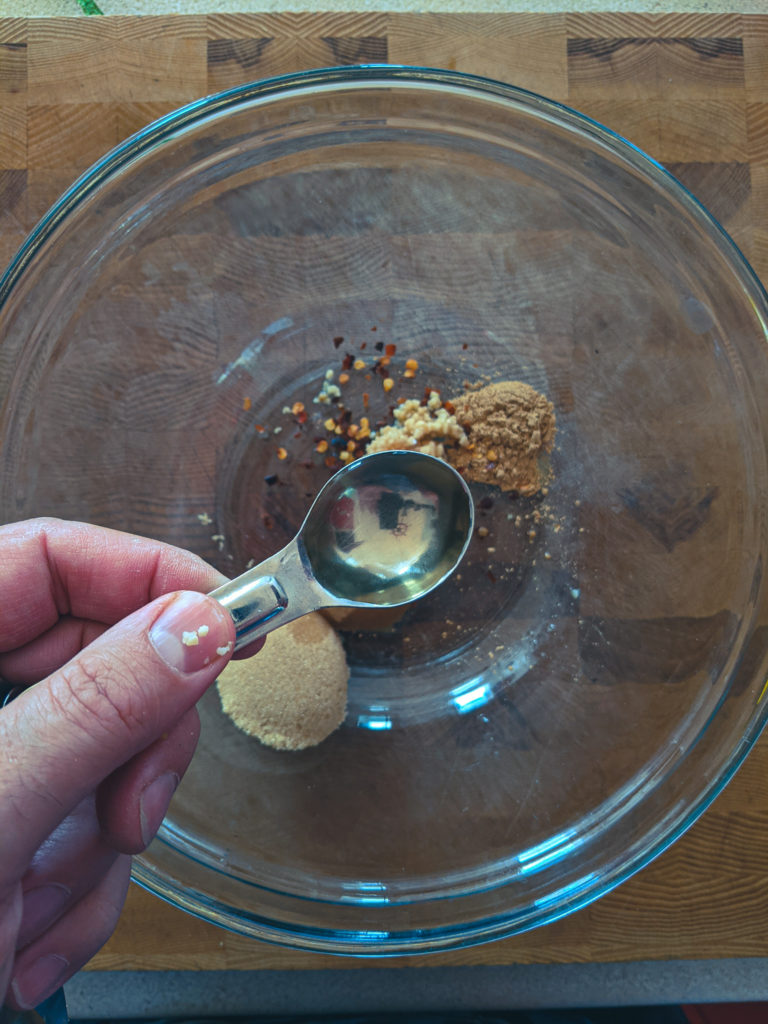
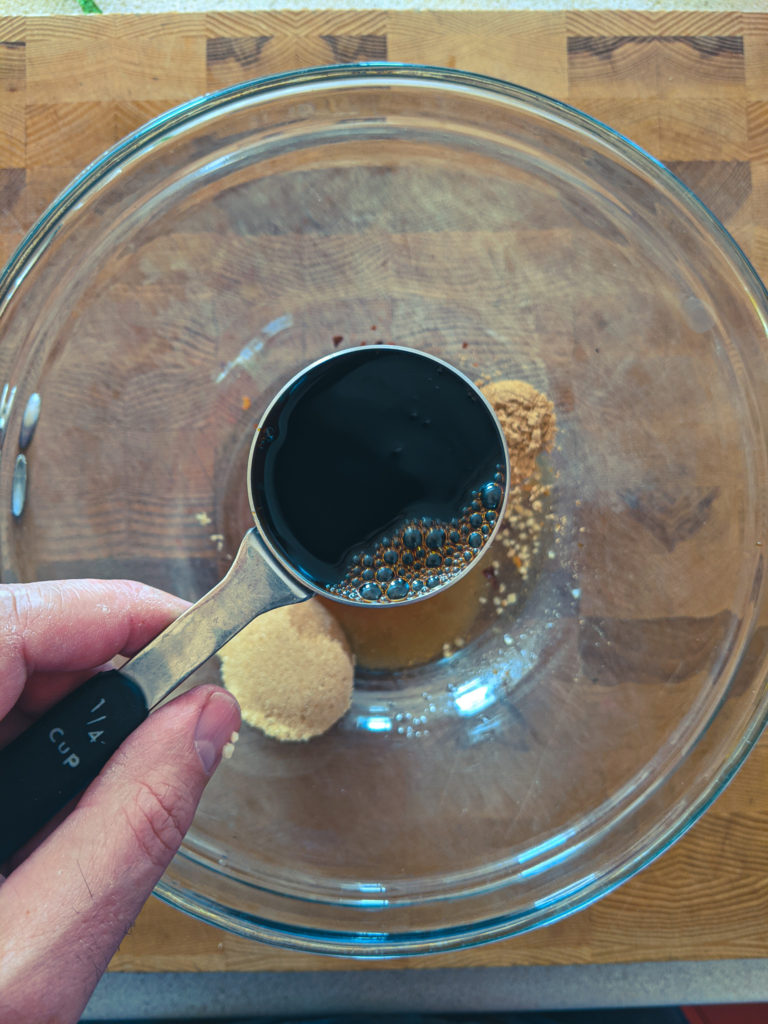
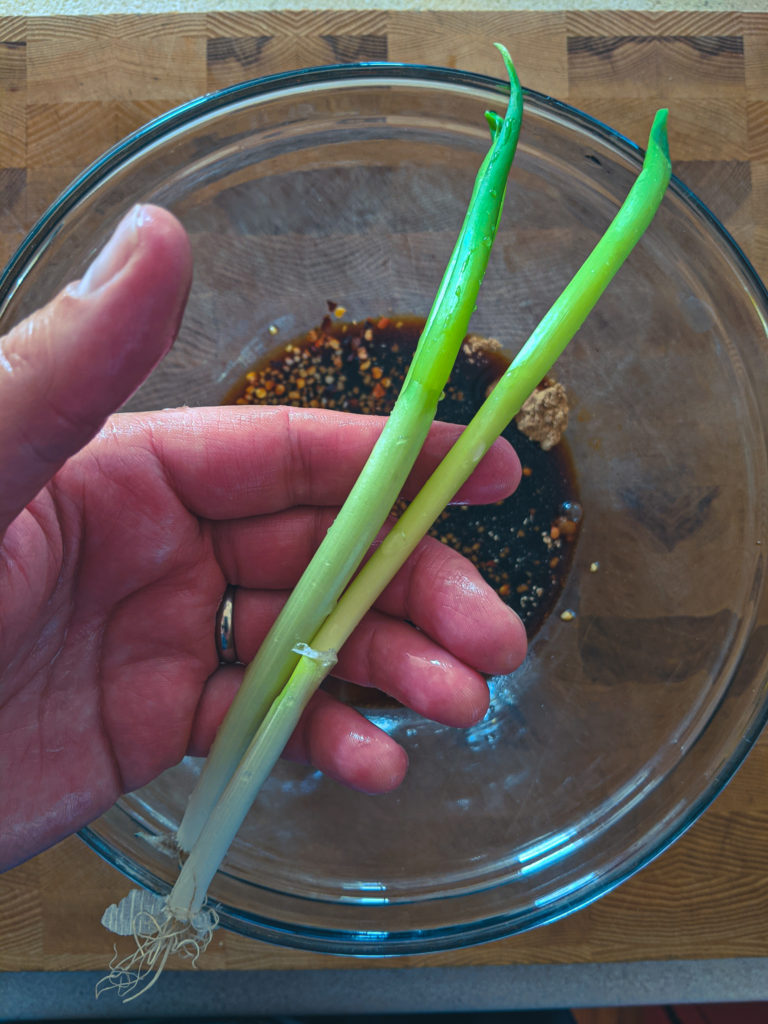
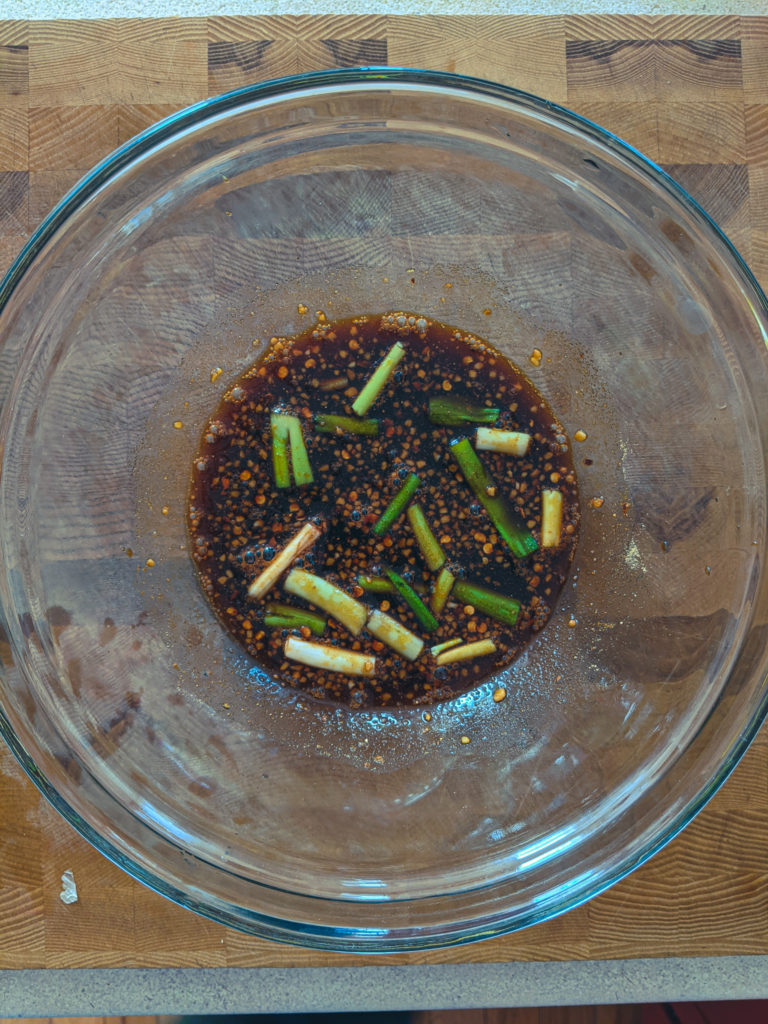
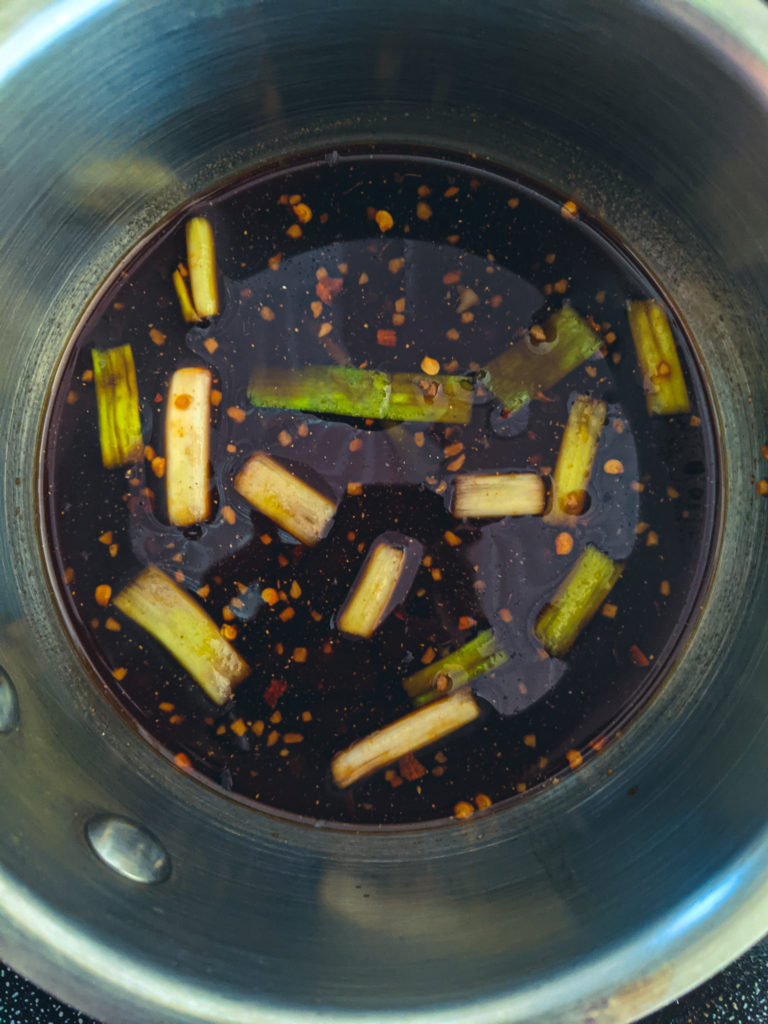
In a medium mixing bowl, combine the brown sugar, ground ginger, crushed red pepper flakes, garlic, vinegar, soy sauce, and scallions. Stir until the sugar has dissolved.
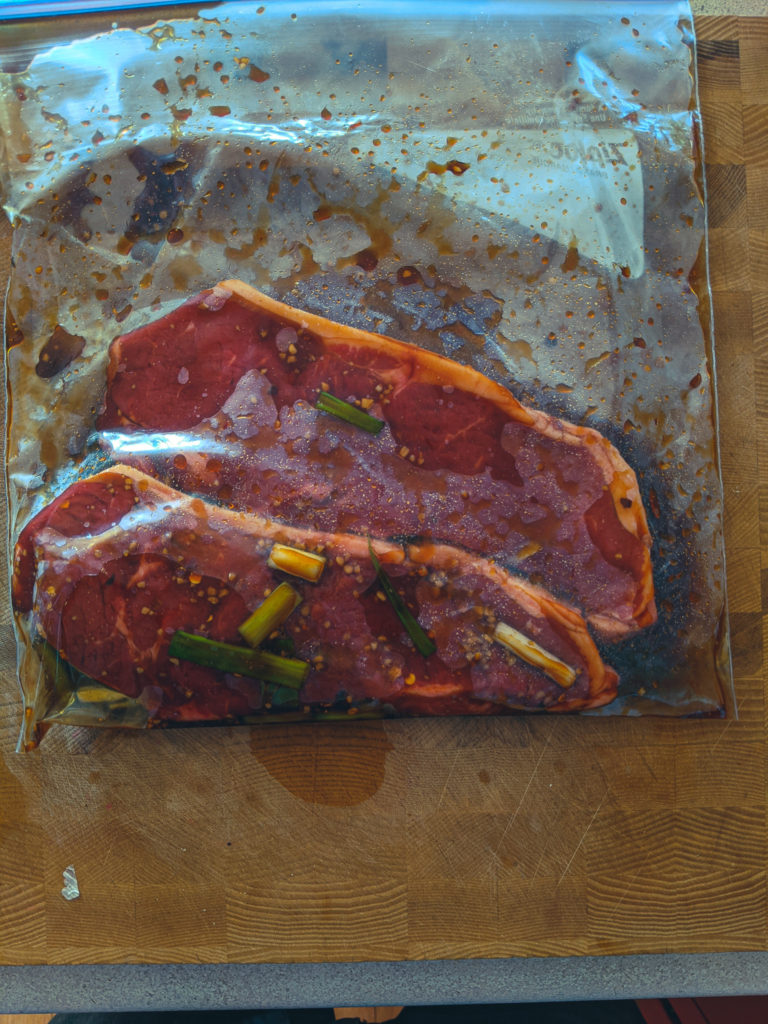
Put the steaks in a large ziptop bag and pour in the marinade.
Seal the bag and shake it to coat the steaks.
Open the bag a little and squeeze out all the excess air. Then reseal the bag.
Put the steak in the fridge to marinate for 1 hour or up to 6 hours.
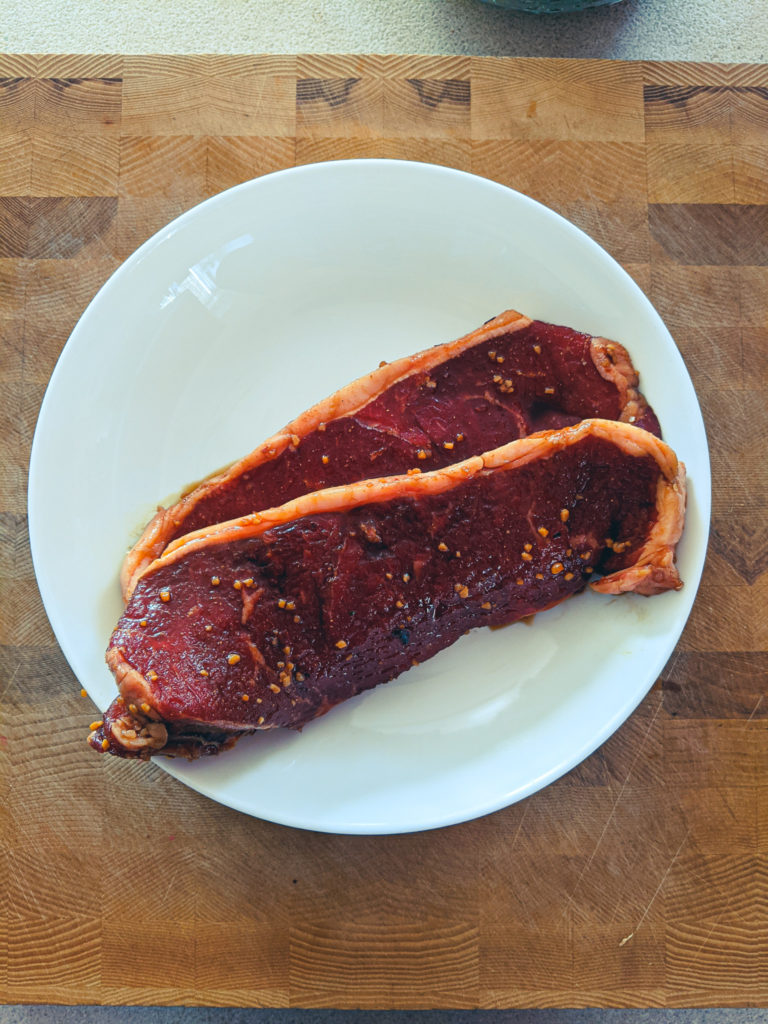
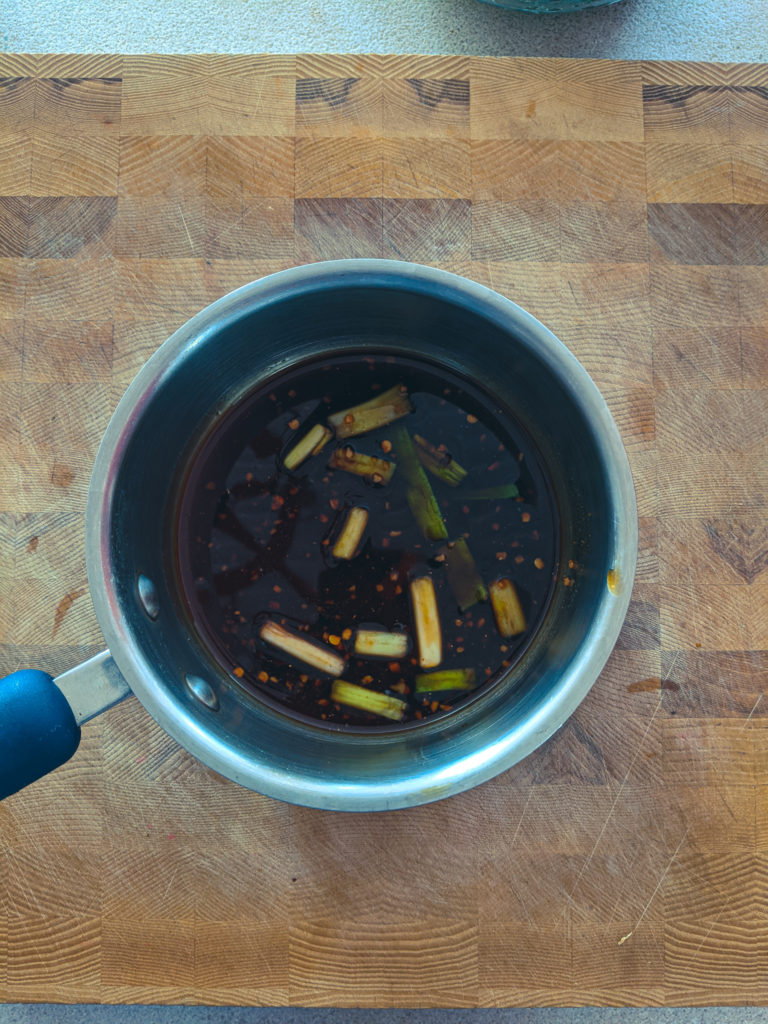
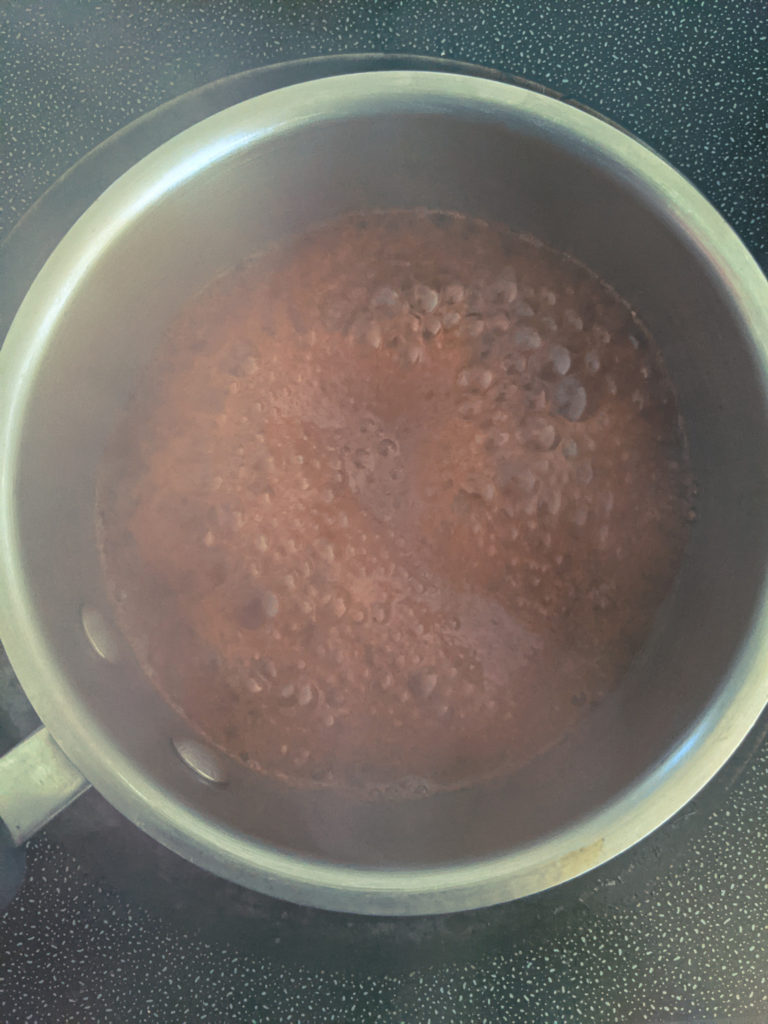
Remove the steak from the marinade and pour the marinade into a small pot. Bring the marinade to a boil over high heat and boil for 1 minute.
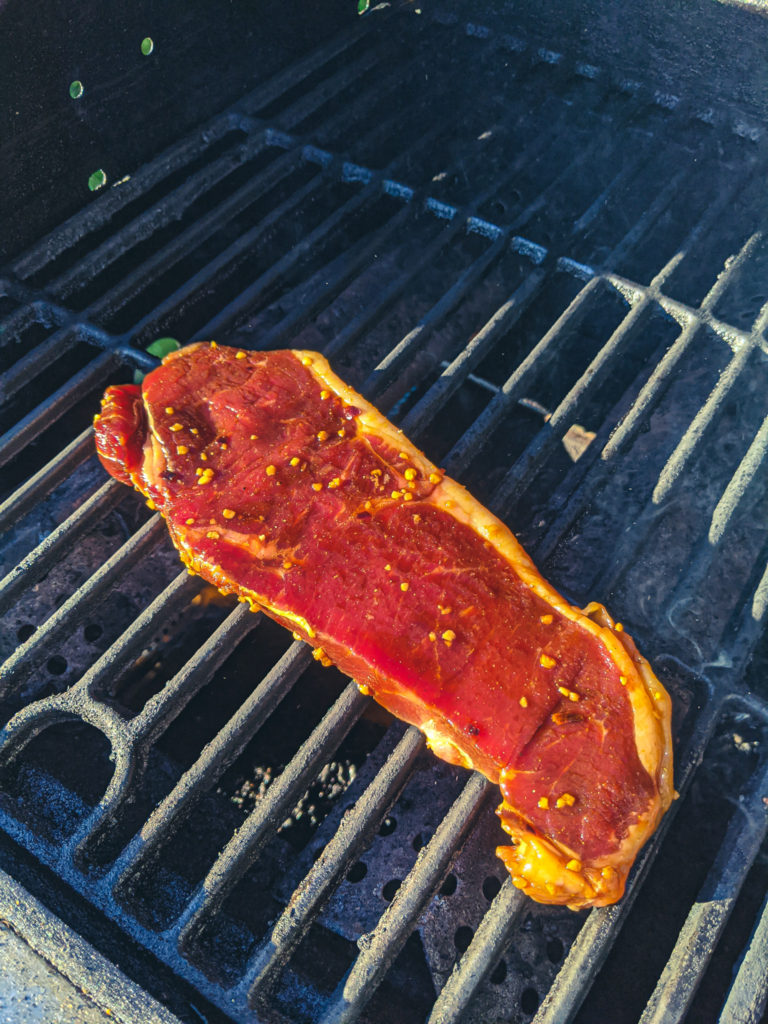
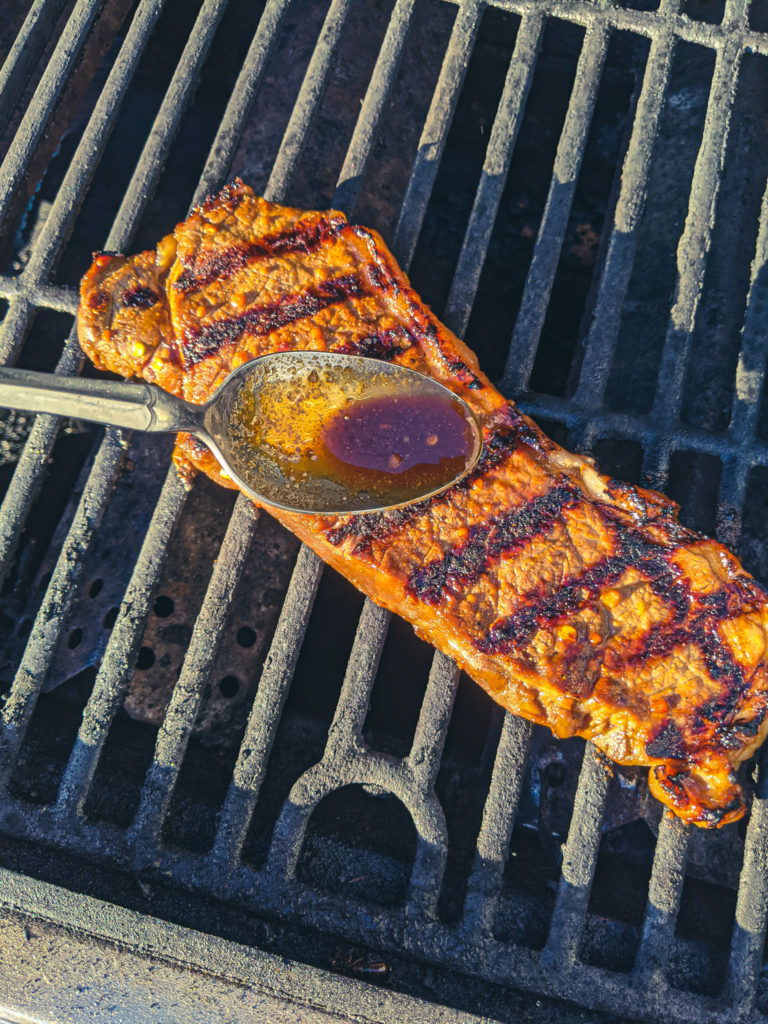
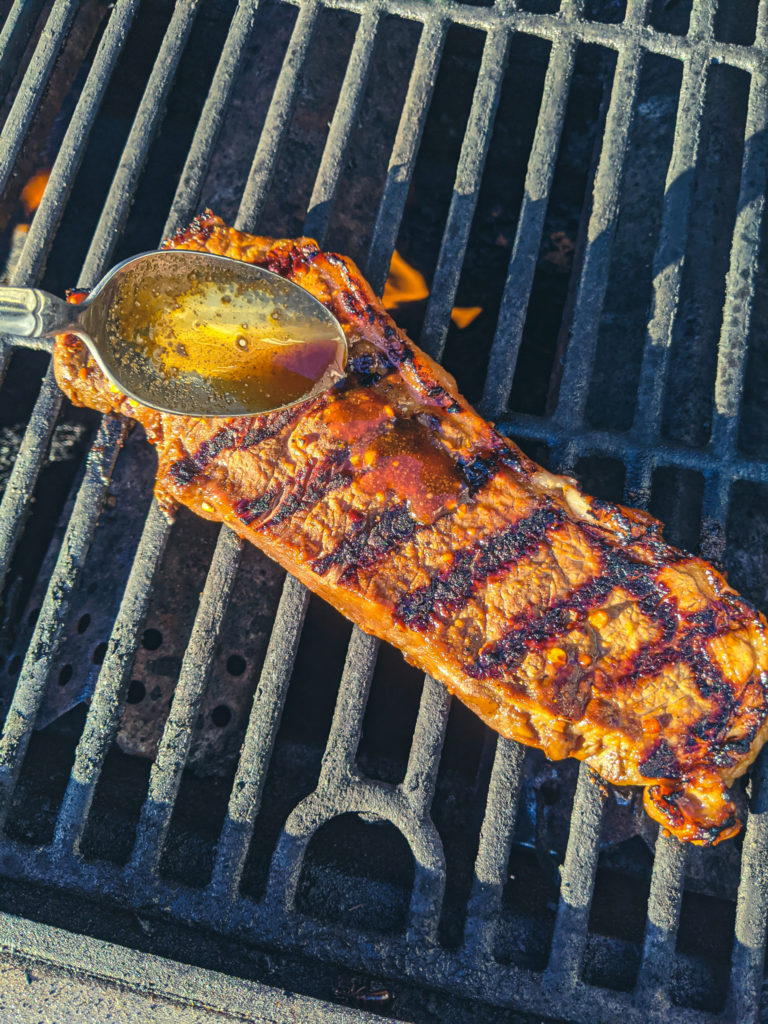
Heat your grill on high for 10 minutes. Grill the steak for 2 minutes then flip it and brush on half the boiled marinade.
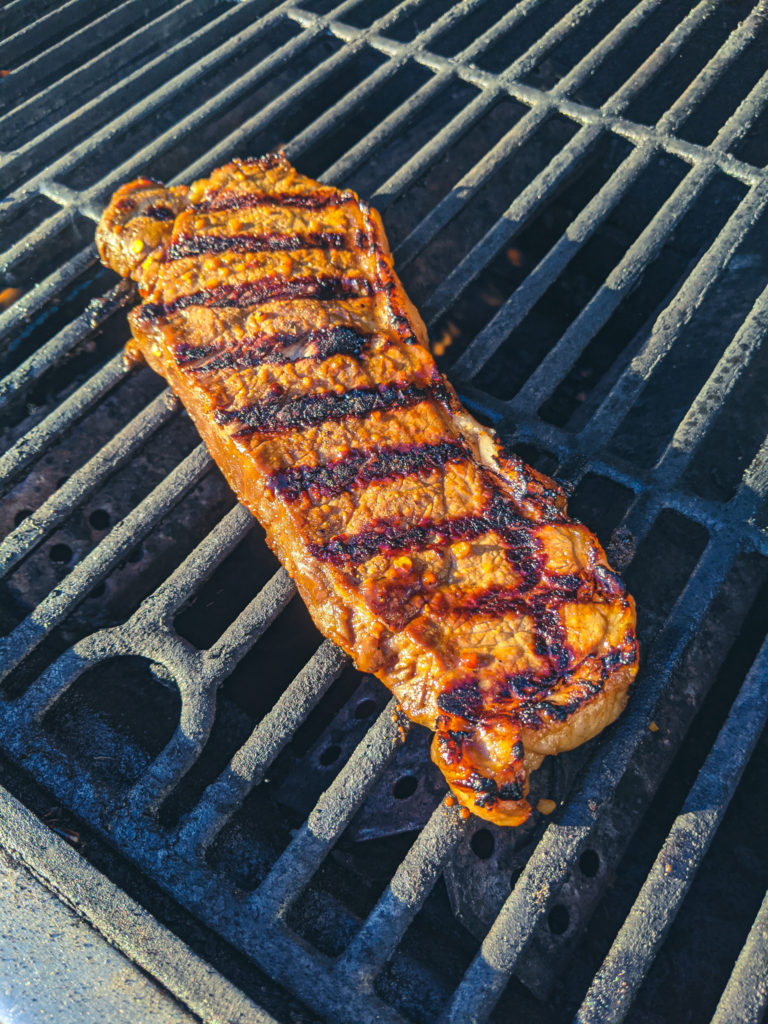
Cook the steak for 1 minute 30 seconds, then rotate by 90°. Cook the steak for another 1 minute 30 seconds, then flip and pour over the remaining marinade. Cook for another two minutes, then remove the steak from the grill, let it rest for 4 minutes then serve.
To start, we will make the marinade for the Teriyaki Steak. To make the marinade combine brown sugar, ground ginger, crushed red pepper flakes, minced garlic, rice wine vinegar, soy sauce, and green onions. You can find all the measurements in the recipe above. Mix all the ingredients until the sugar dissolves. At this point, you could boil the sauce for a minute or two and make a delicious teriyaki glaze for chicken, fish, or anything else, but we will use it as-is for a marinade.
Marinating The Teriyaki Sauce
Take two New York Striploin about 200g each or a comparable steak, and put them in a ziptop bag with the marinade. Seal it and give the bag a shake to ensure the steaks are completely coated in the marinade. Open the bag a little bit and squeeze out all the excess air. Reseal the bag and put it in the fridge for at least an hour. You can marinate the steak in the Teriyaki marinade for up to 12 hours.
Boil the Marinade
Once the steaks have been in the marinade for at least an hour, take them out and set them aside. Pour the marinade into a small pot and bring it to a boil. Boil for at least 1 minute. The marinade is now safe to use as a glaze.
Grilling The Teriyaki Steak
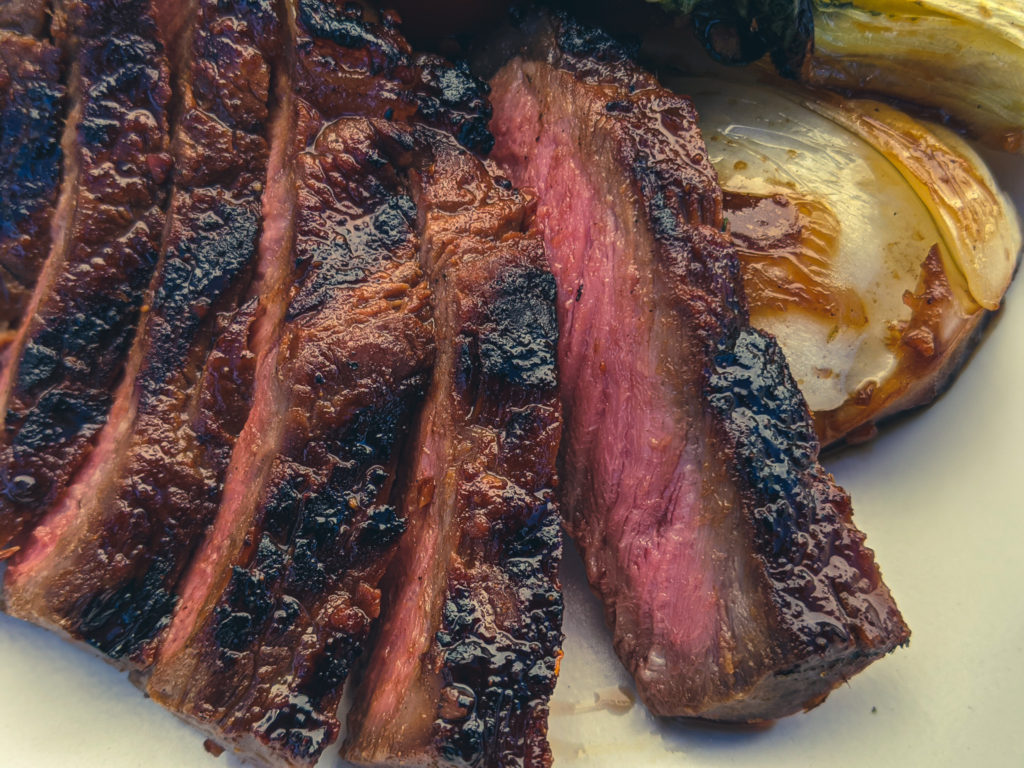
Heat your grill on high for at least 10 minutes. You want to make sure the grate has enough time to absorb the heat so that you get the nice grill marks on your steak and so your steak doesn’t stick. Put the steak on the grill at an angle, shut the lid and cook for 2 1/2 to 3 minutes. Flip the steak and brush with half the marinade. Shut the lid, cook the steak for 1 1/2 minutes, rotate it by 90°, shut the lid, and cook it for another 1 1/2 minutes. Finally, flip the steak, brush it with the remaining marinade and cook, lid down, for another minute. Remove the steak from the grill and allow it to rest for 4 to 5 minutes before serving.
Serving the Grilled Teriyaki Steak
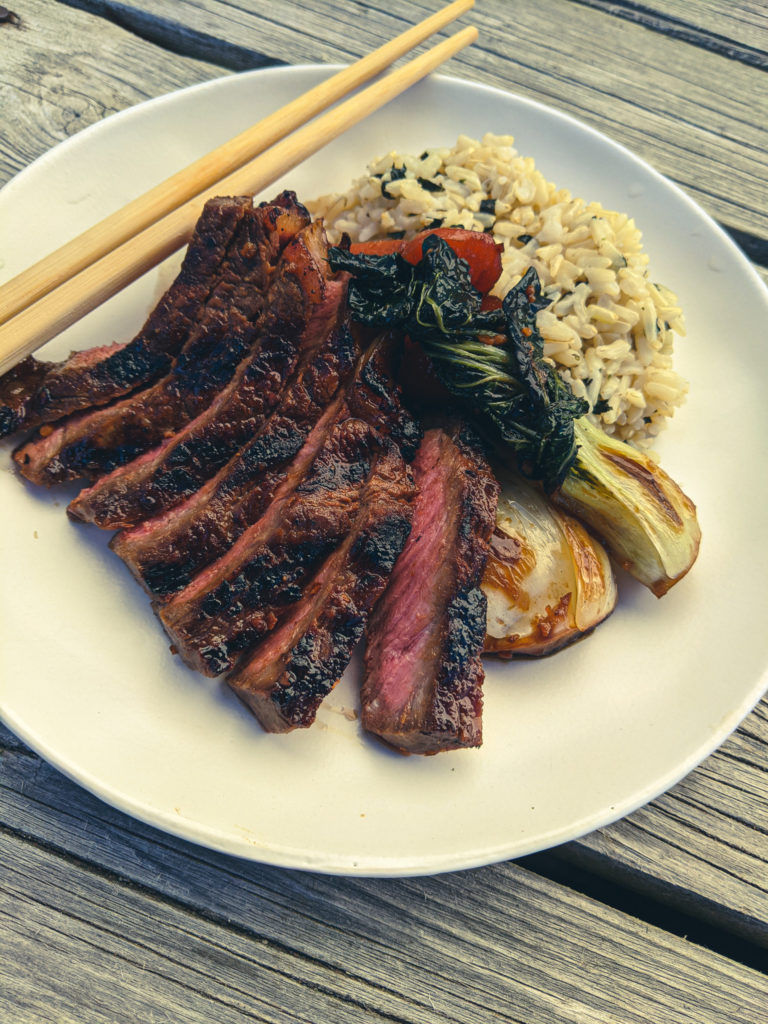
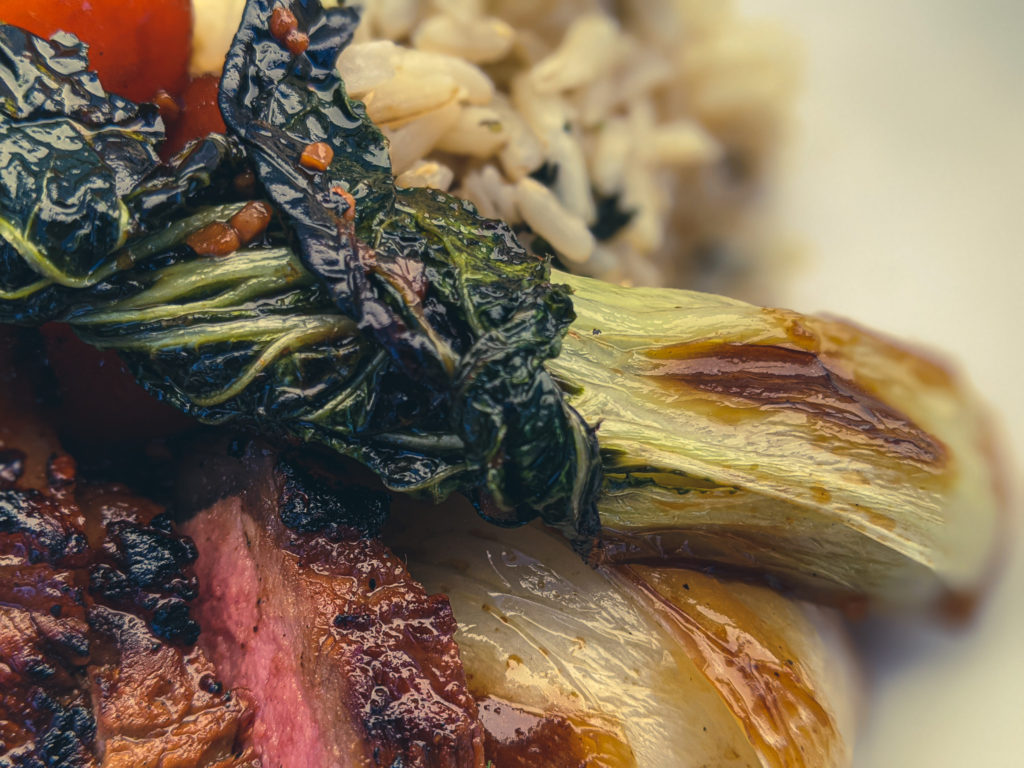
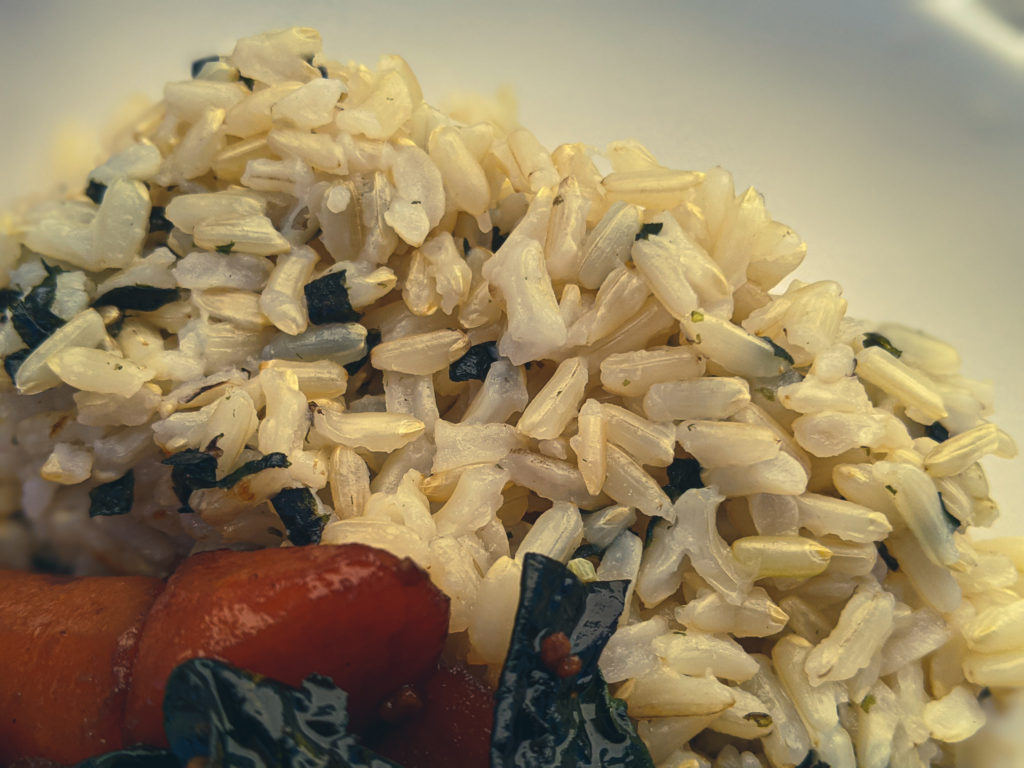
You can serve your steak with whatever you’d like, but I went for brown rice with nori and soy glazed bok choy and carrots. Of course, mashed potatoes and other vegetables will be just as good and go just as well with the steak.
The Wrap Up
It is a rare occasion that I marinate a steak. I’m generally more of a purist and prefer the flavour of the meat with a little salt and pepper. Having said that, I will be using this marinade again to marinate steaks. Also, I think it would work just as well on chicken, salmon or pork chops. I’ll have to try those next.
Thank you, everyone, for reading, and have a great week!
Tired Of Missing Chef’s Notes Recipes? Put your email address in below and get every post in your inbox.
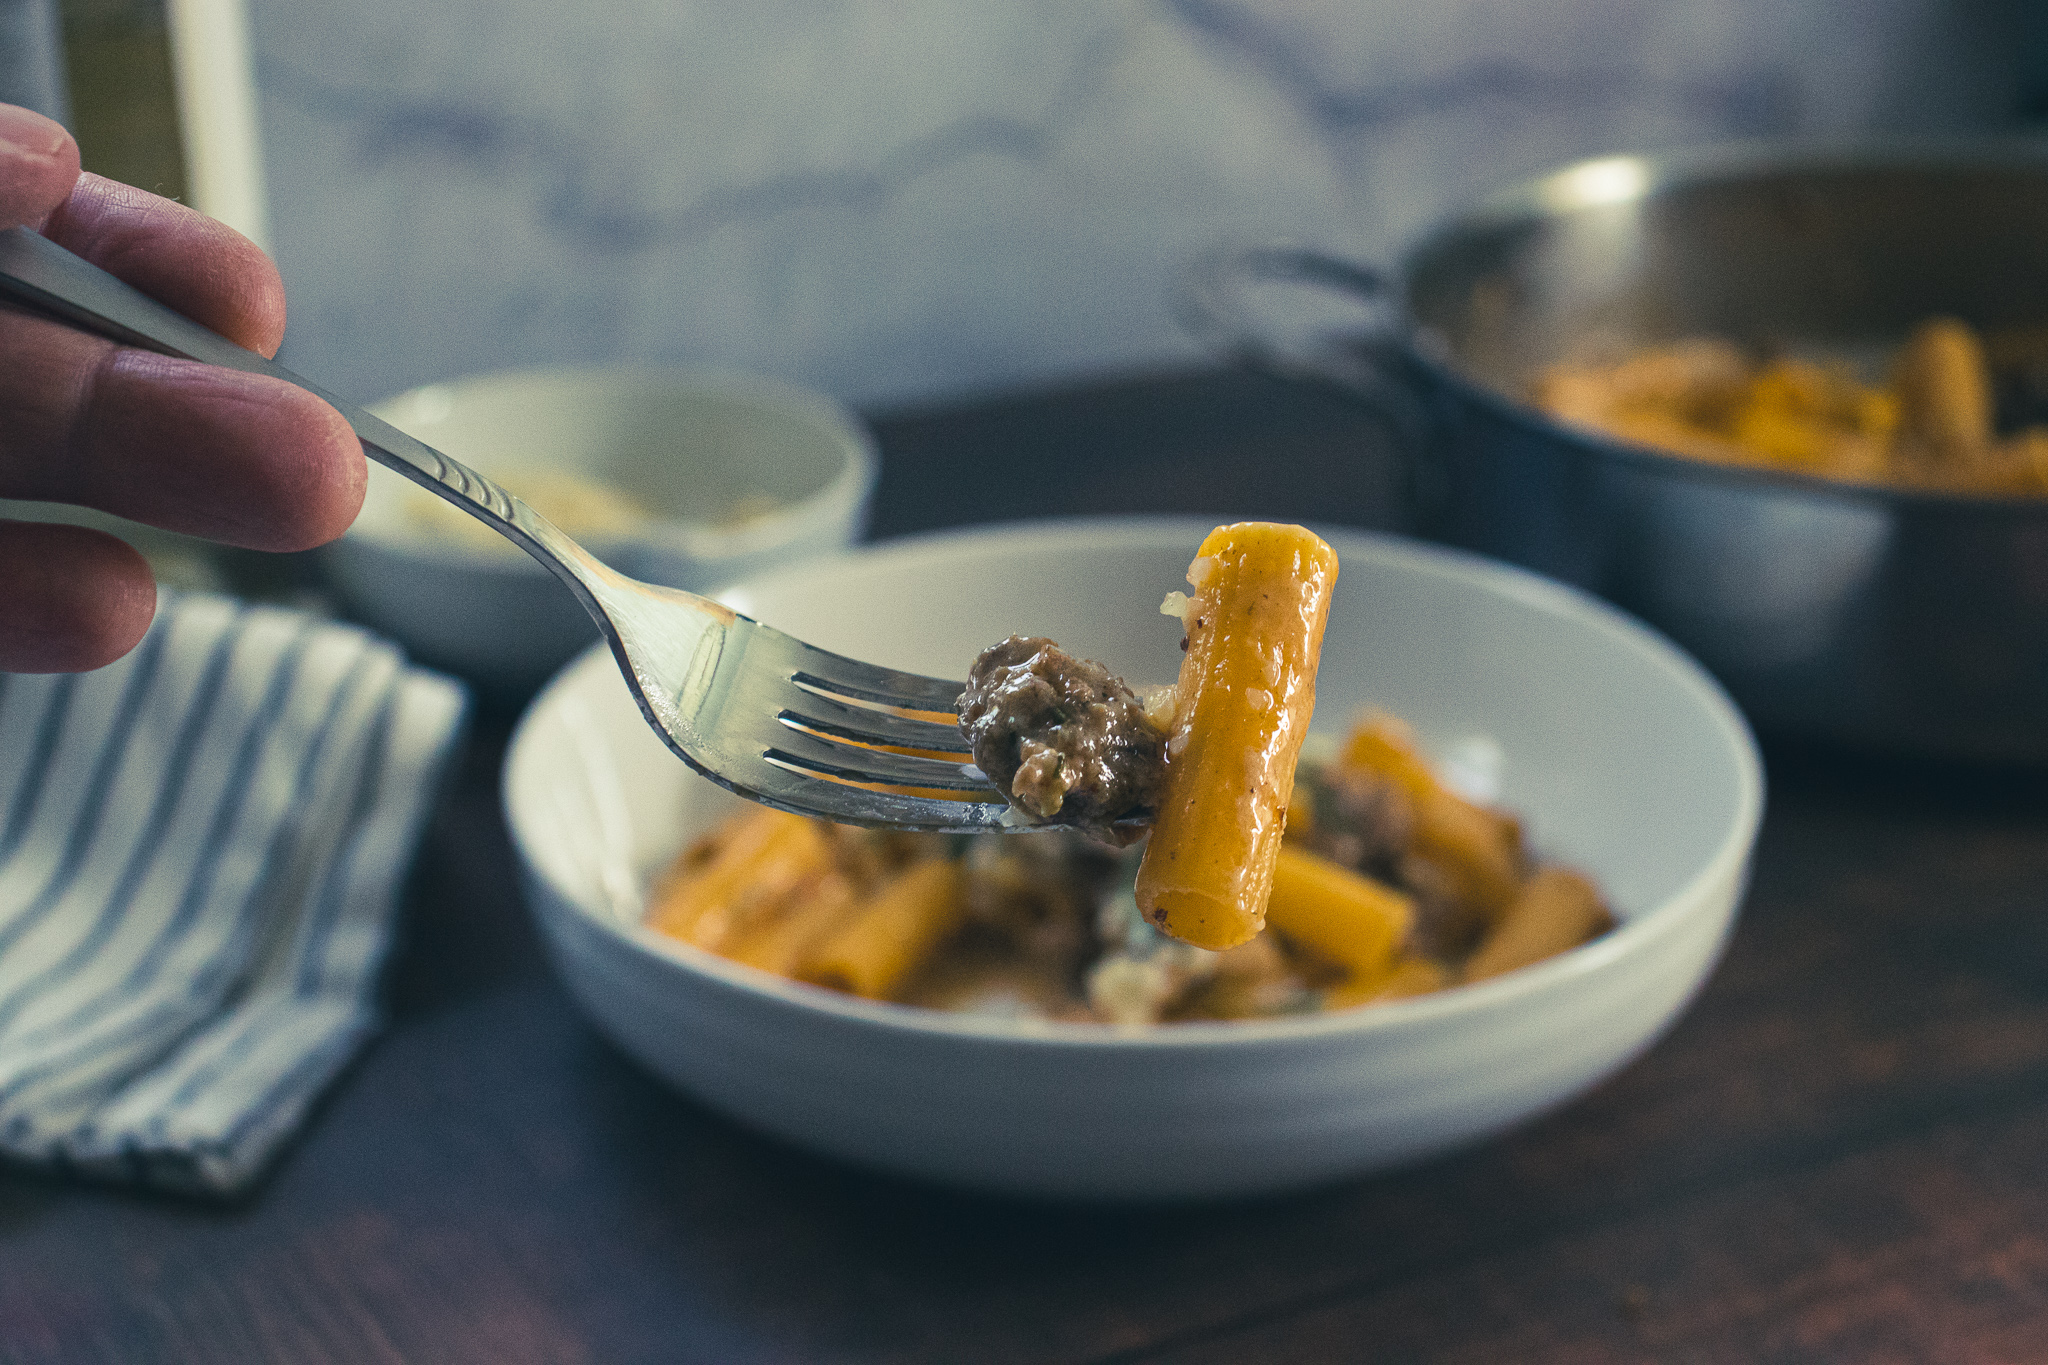
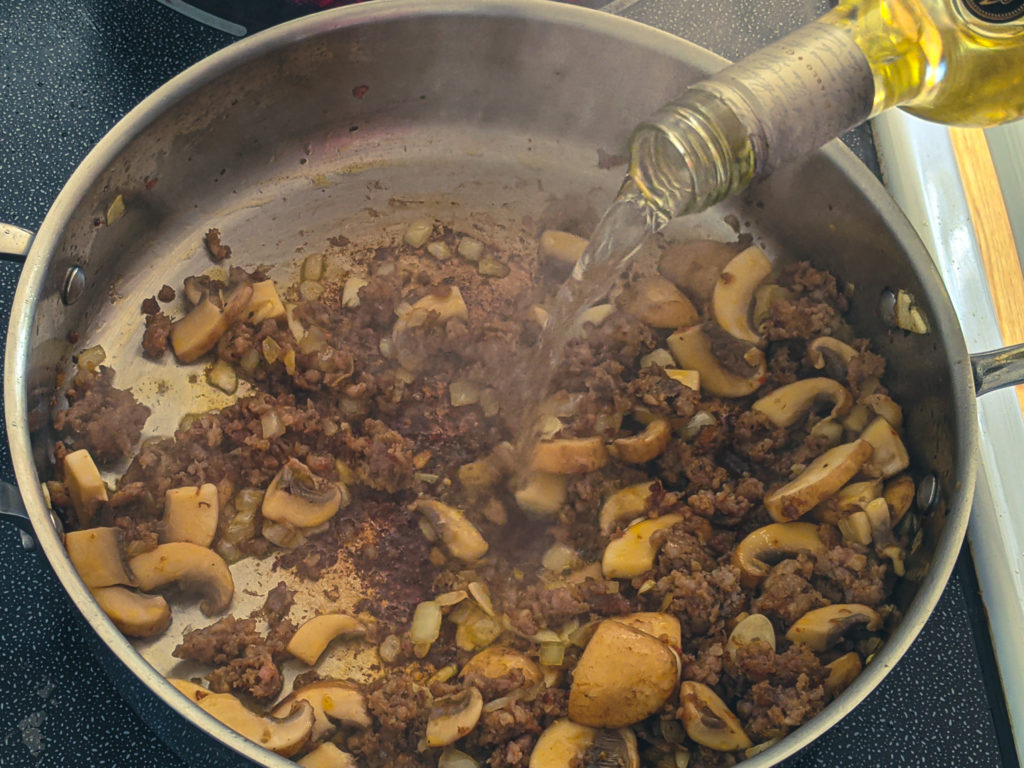
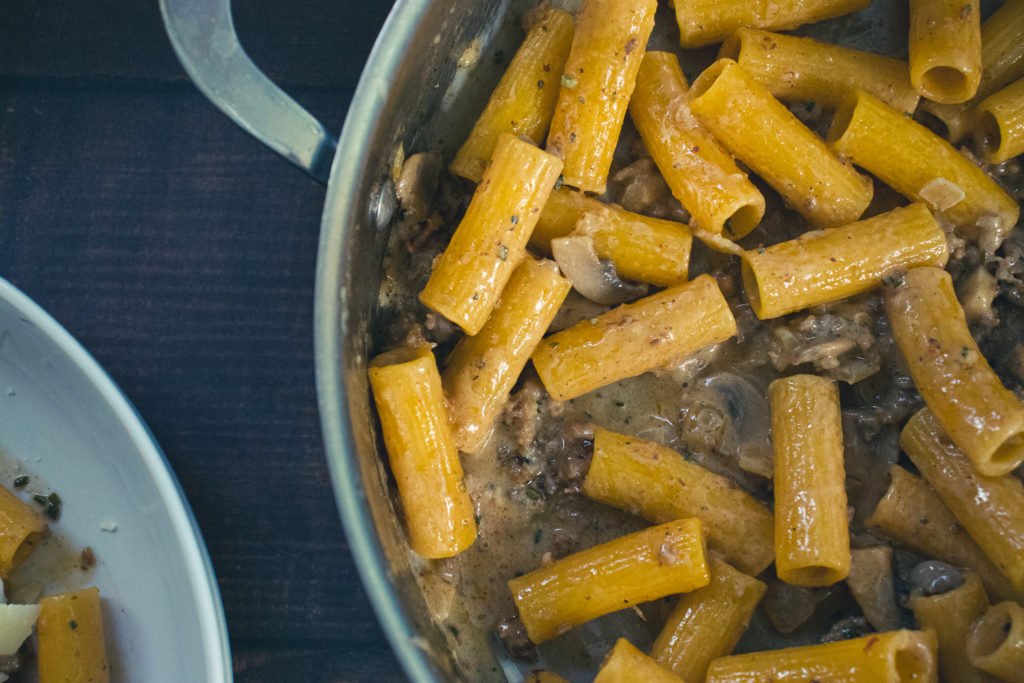
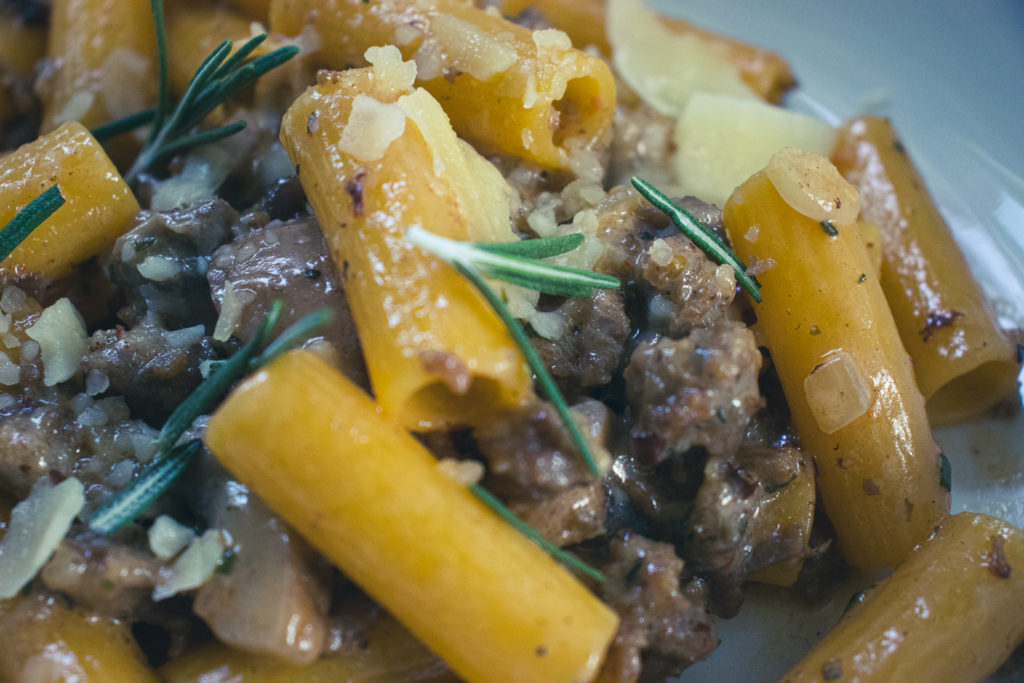
If you are looking for a quick and delicious meal, look no further. This Sausage and Mushroom Penne ticks all the boxes. Italian sausage provides a base flavour that gives this pasta a big impact with only a few ingredients. Cremini mushrooms and rosemary add depth and body. White wine, stock, and cream create a rich yet elegant sauce. And parmesan cheese ties it all together to create a dish that you would happily pay good money for in any high-end restaurant. Oh, and it takes less than 30 minutes to make, start to finish, even with limited culinary skills. Sounds good, right? Well, what are you waiting for? The recipe is directly below, and you can keep reading past that for a more detailed explanation.
Quick and Delicious Sausage and Mushroom Penne
Italian Sausage and Cremini Mushrooms combine in the quick pasta dish with white wine, stock, and cream and create something so delicious and elegant you'll feel like you're eating in a fancy restaurant.
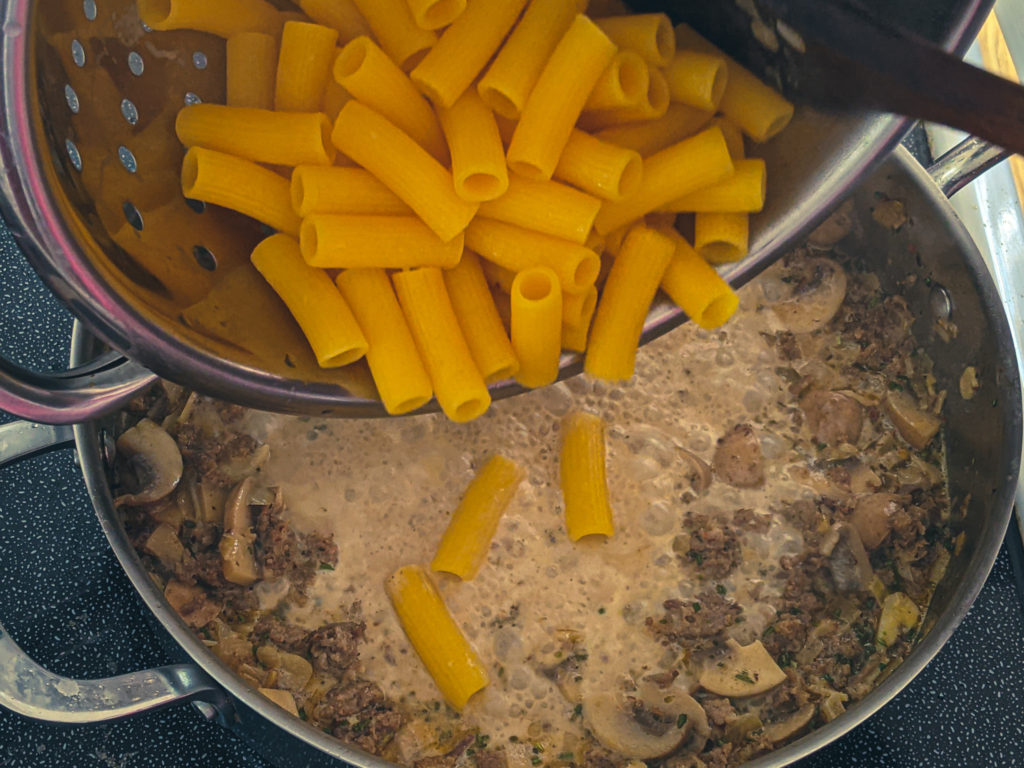
Fill a large pot 3/4 of the way with hot water, add 1 teaspoon of salt. Cover the pot and put it on the stove on high heat. Bring to a boil and cook the pasta according to the package instructions.
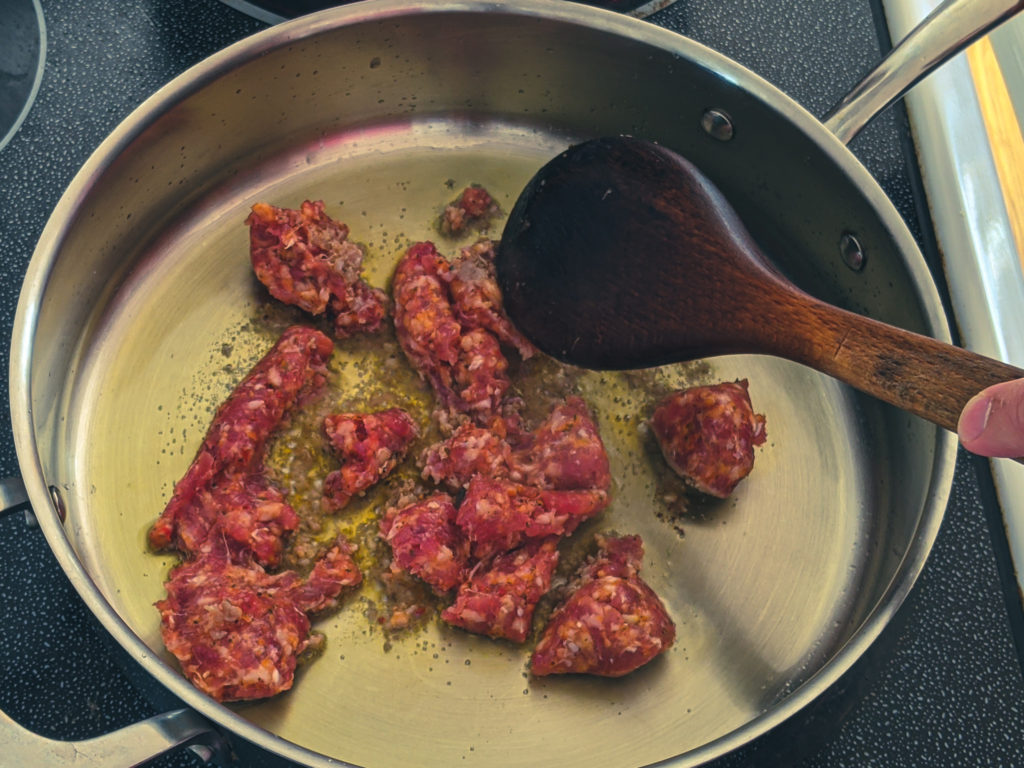
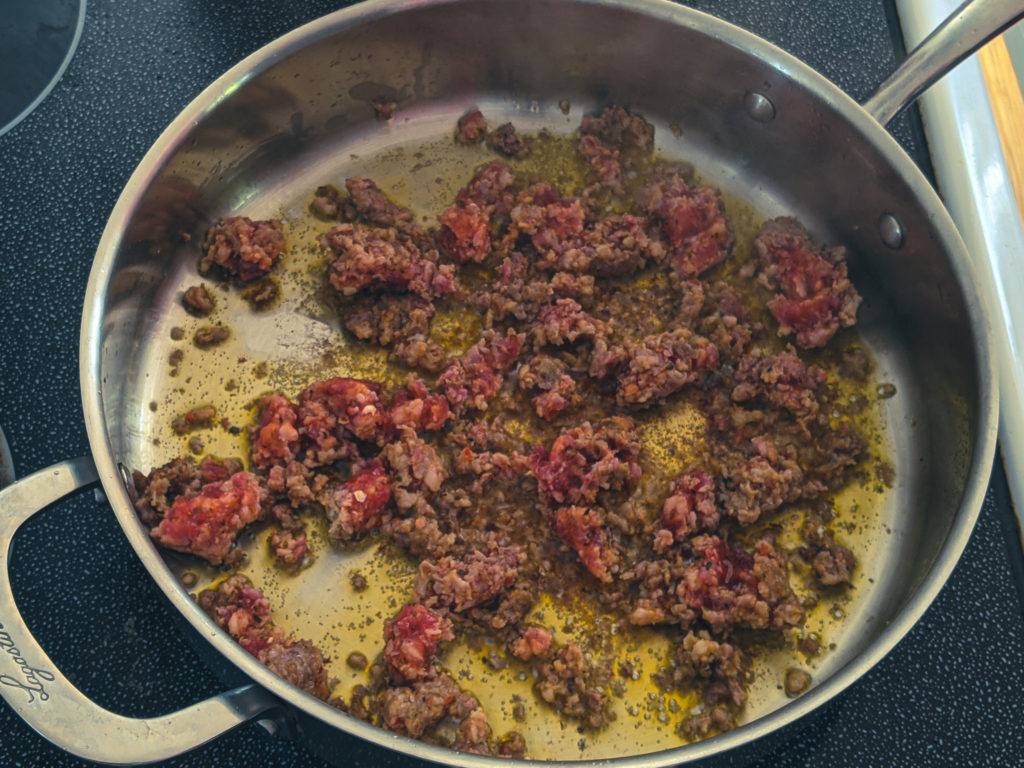
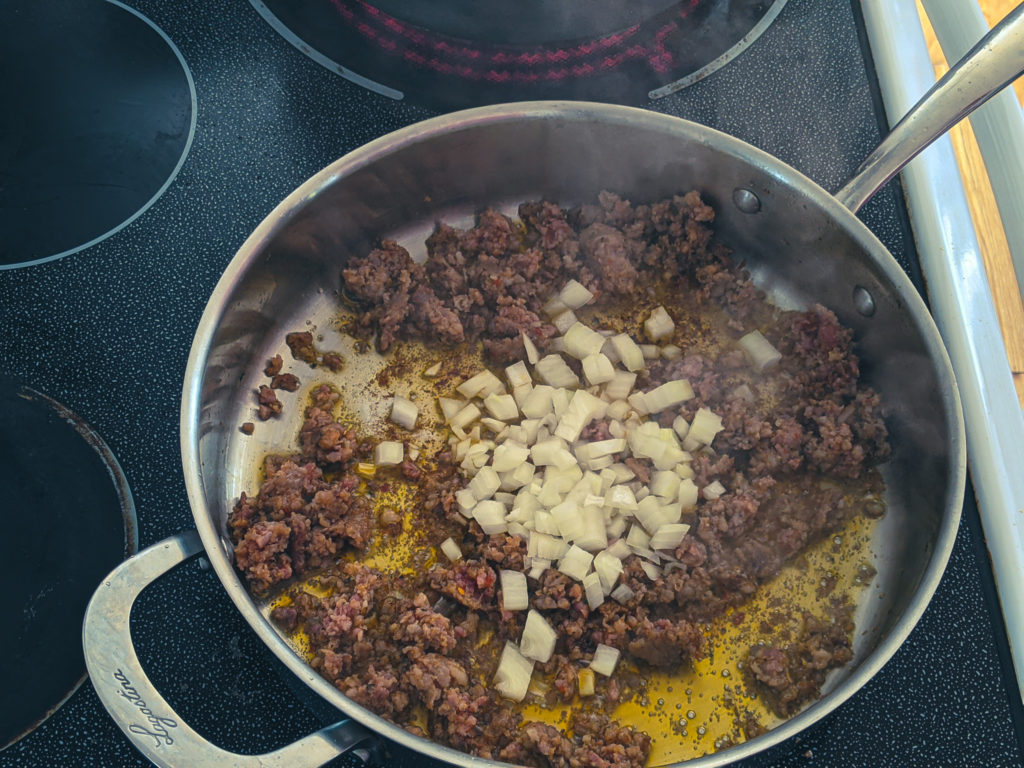
While the pasta is cooking, heat a large skillet on medium-high heat. Put the olive oil and sausage meat in the skillet. Use a wooden spoon to stir and break the meat up. Cook, for 3 to 4 minutes or until browned.
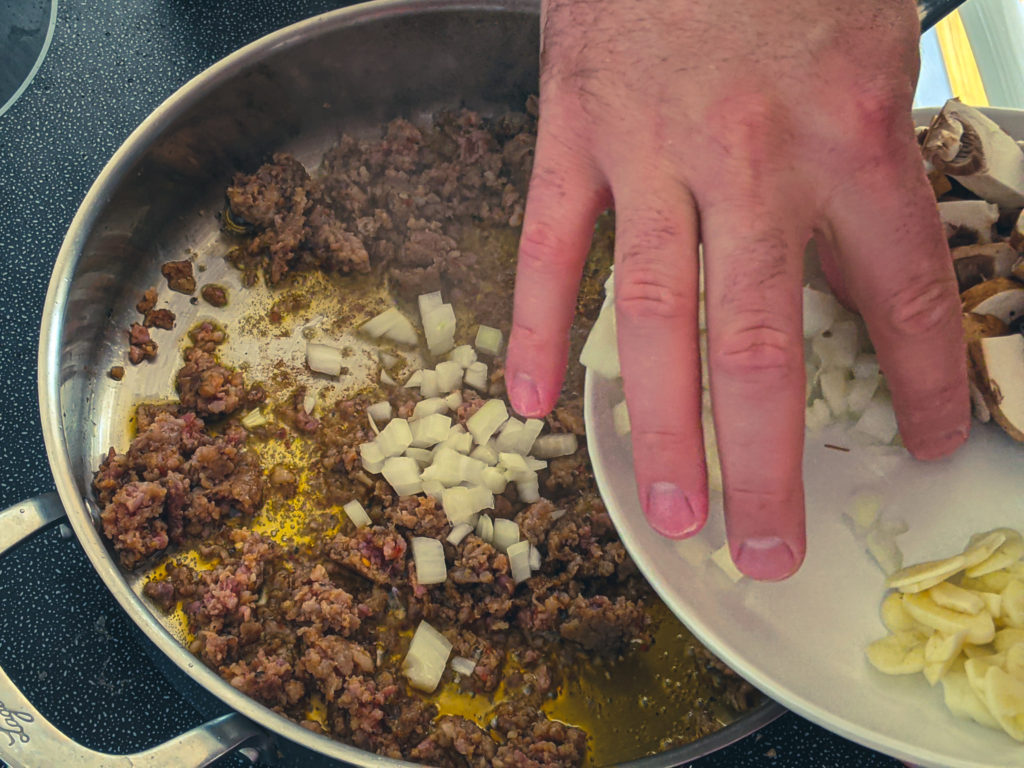
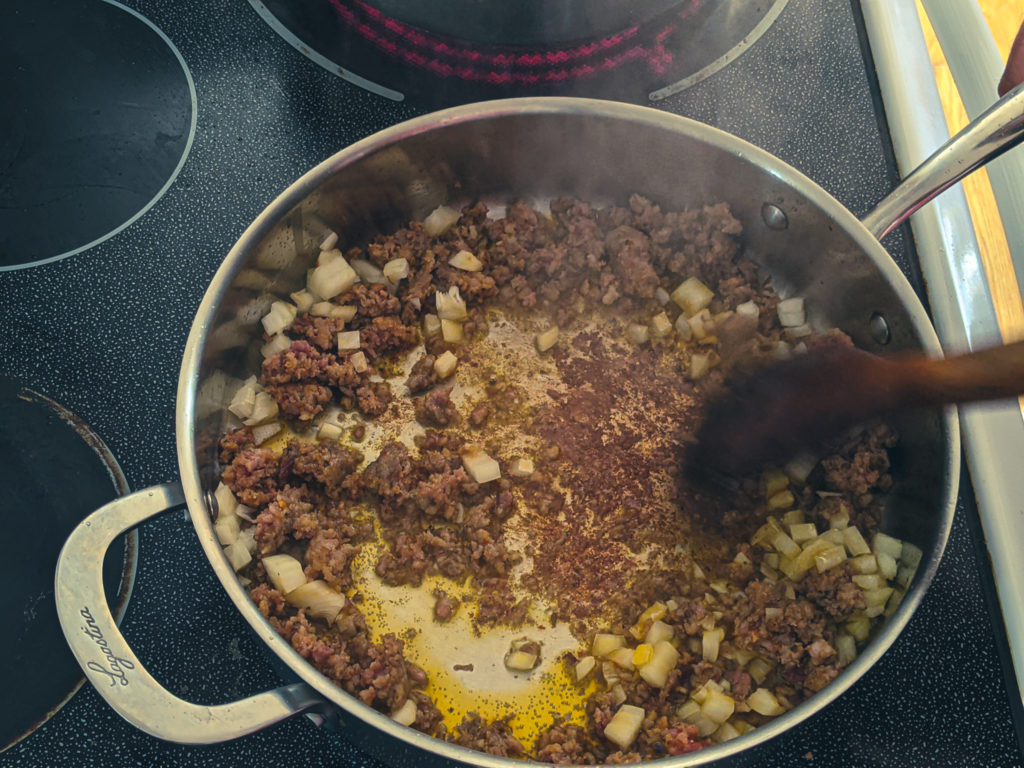
Add the minced onion to the sausage meat and cook for 2 minutes.
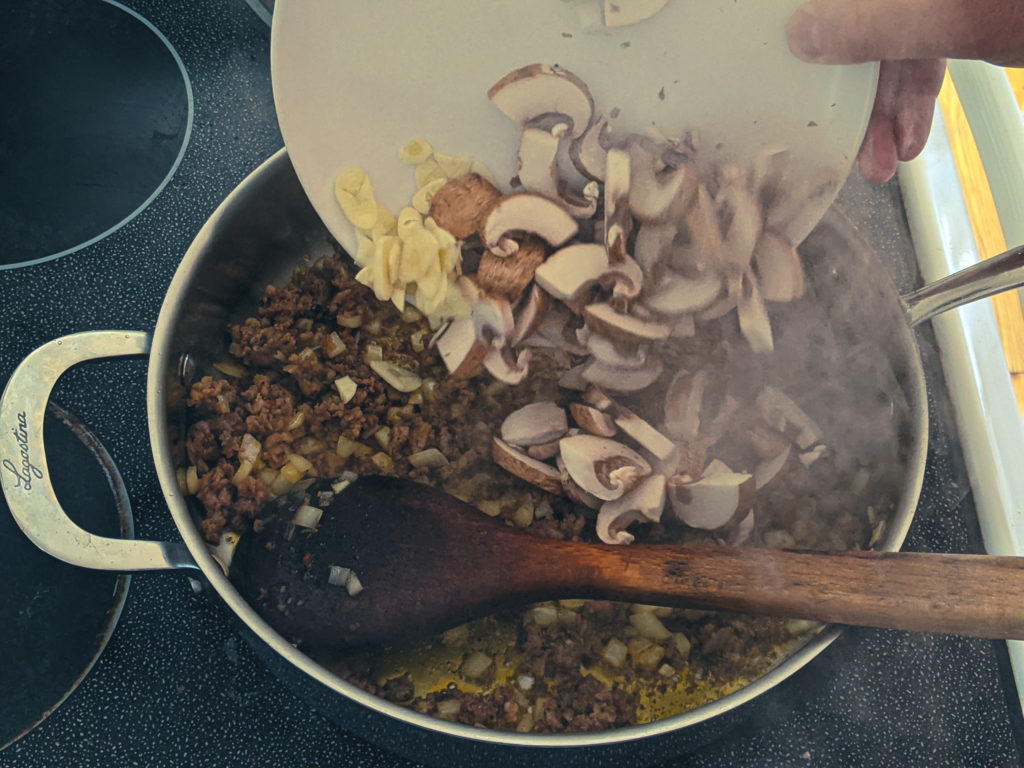
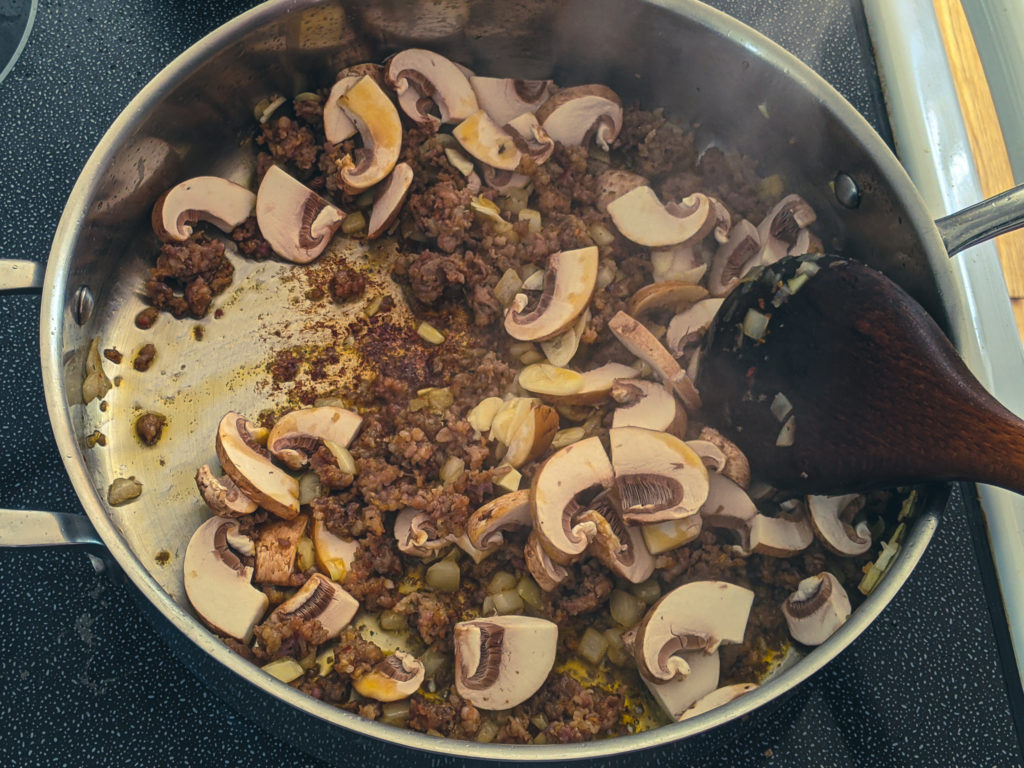
Put the mushrooms and garlic in the pan with the sausage meat and onions. Cook for 2 more minutes.
Deglaze the pan with the white wine and cook for 2 minutes.
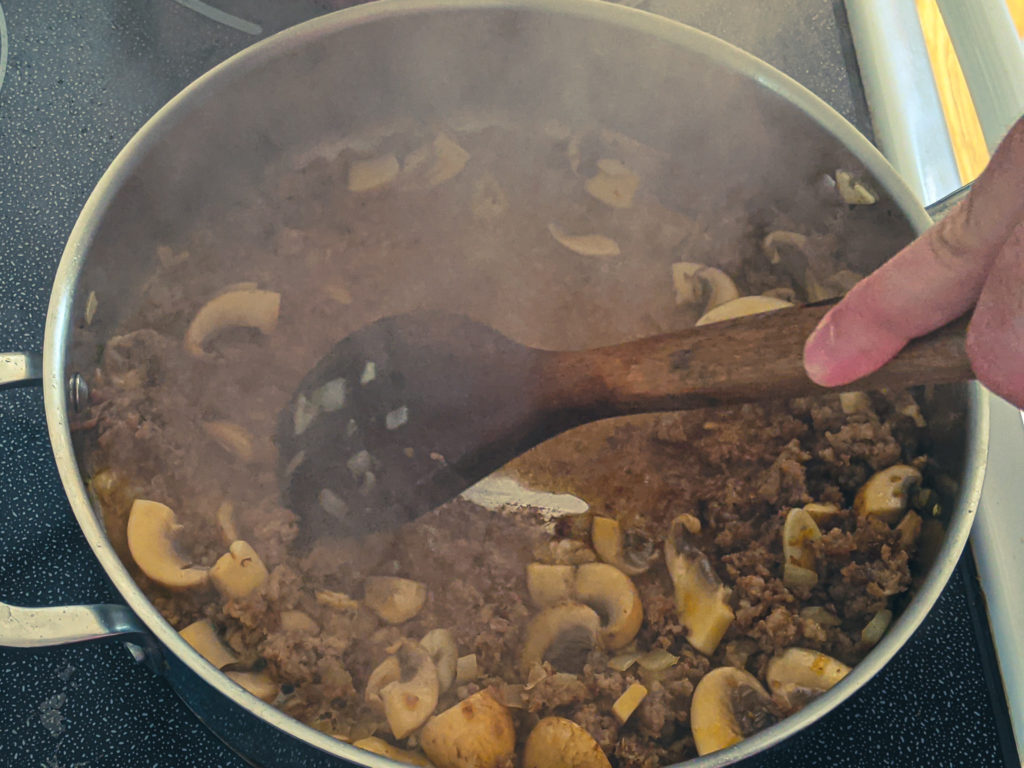
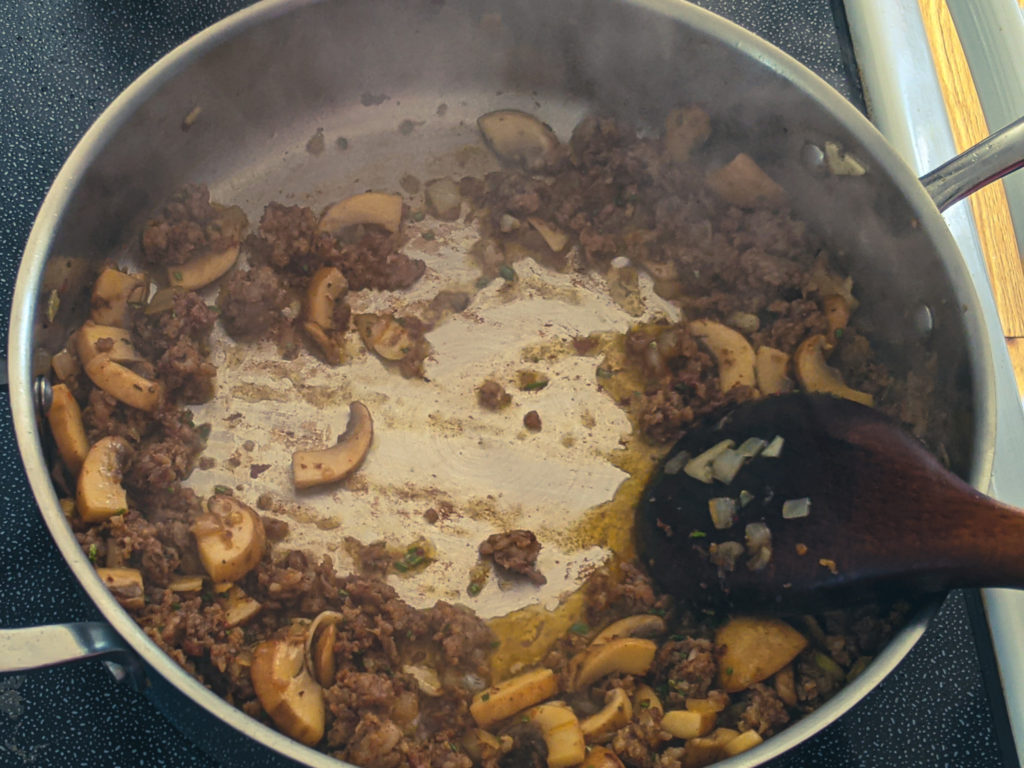
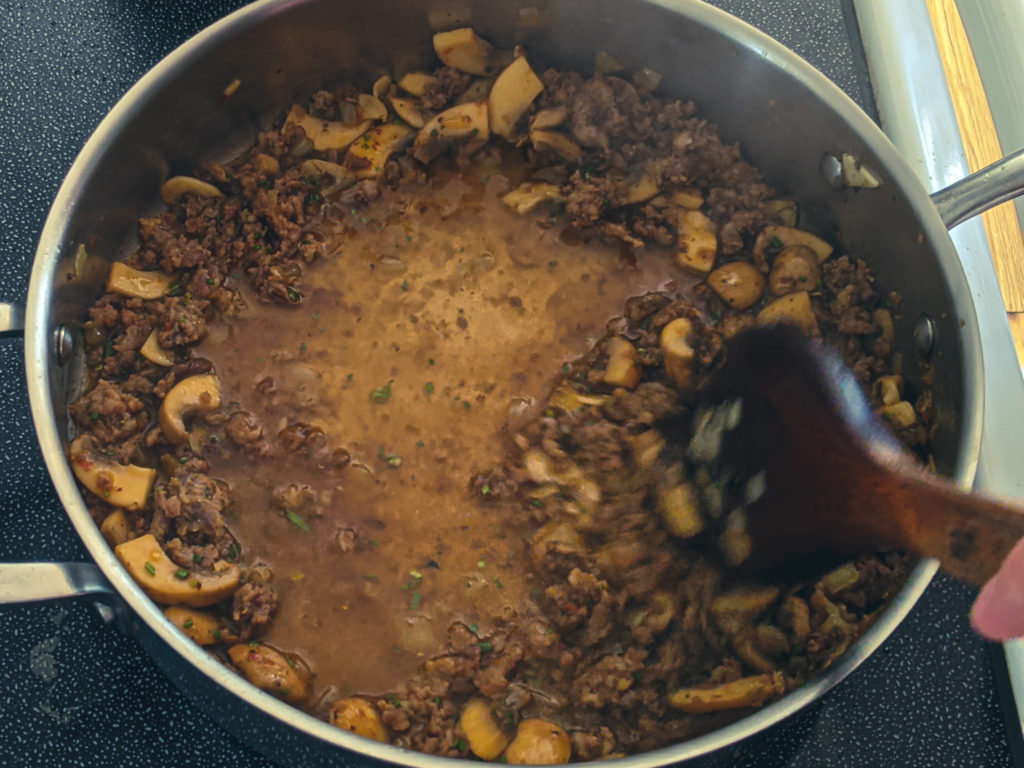
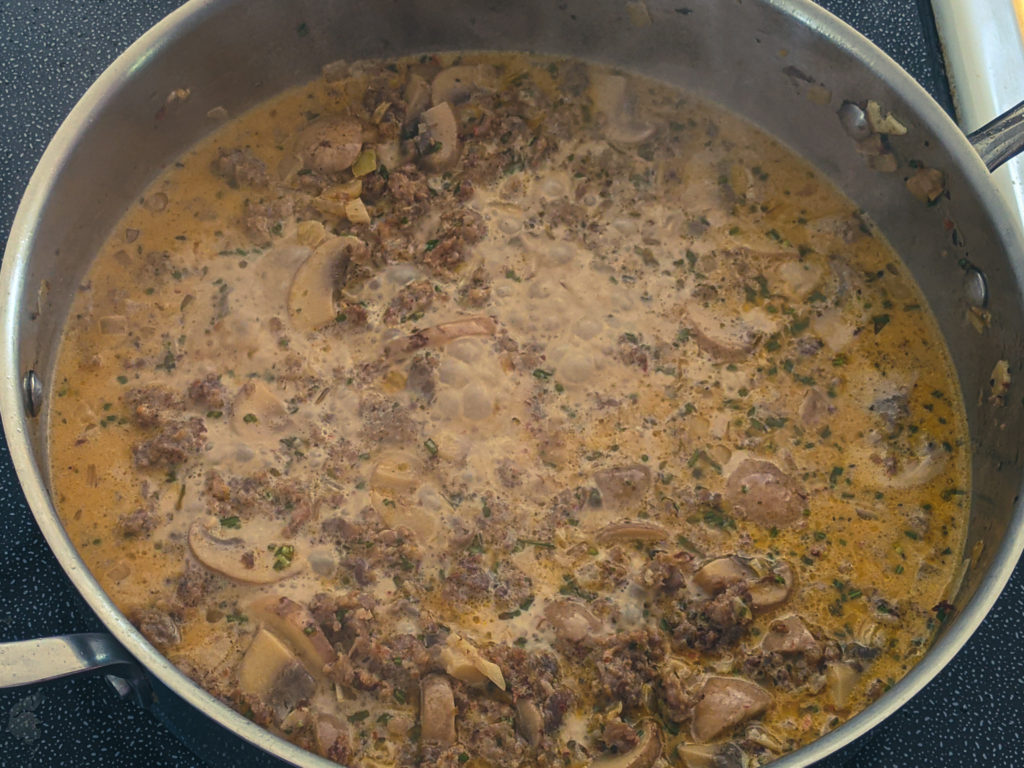
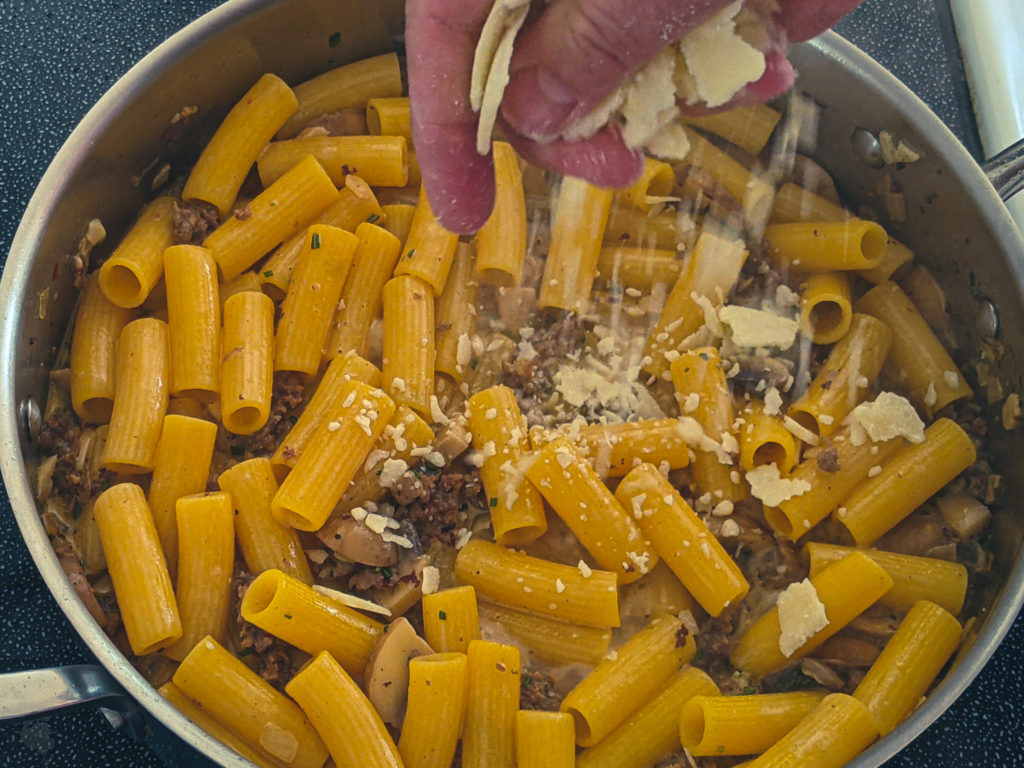
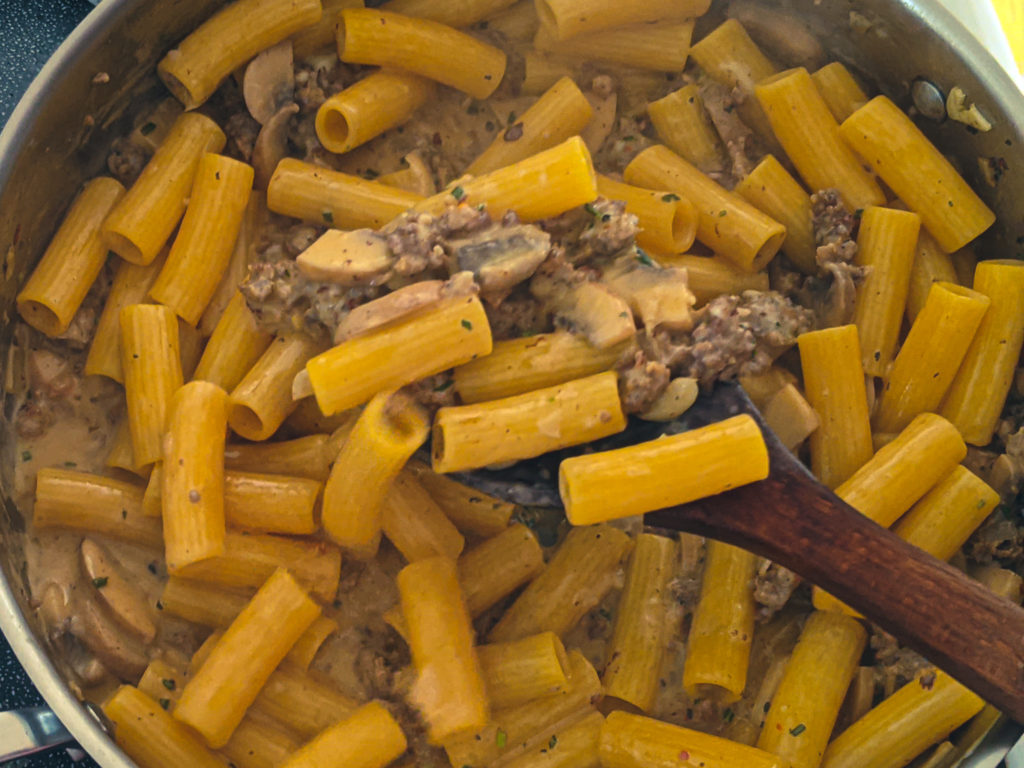
Add the stock and rosemary. Cook for 2 minutes, then add the cream. Bring to a boil, add the cooked pasta and parmesan. Cook until the sauce is thick enough to coat the pasta.
Taste the sauce, season as needed with salt and pepper and serve.
The first thing you need to do when making this pasta is to get a large pot of hot water on the stove on high heat. Add a teaspoon of salt to it. Put a lid on it, and forget about it while you prep your ingredients.
Minced Onion
First up, take half an onion and mince it. Really just cut it as small and as evenly as you can. The recipe above says you need half a cup of onion, but if you have a little more or a little less, it isn’t going to hurt anything. Just use half an average-sized onion. It will always be enough and never be too much.
Sliced Garlic
Peel two cloves of garlic and slice them as thin as you can. You can mince the garlic if you’d prefer, but I like to have those nice thin slices in the pasta. Also, just like with the onion, if your cloves are a little bigger or a little smaller, it isn’t the end of the world. If they are a little small, add a third clove, otherwise, don’t worry about it too much. I promise it will not have a noticeable effect on the final dish. As long as there are about two cloves of garlic in there, it will be fine.
Cremini Mushrooms
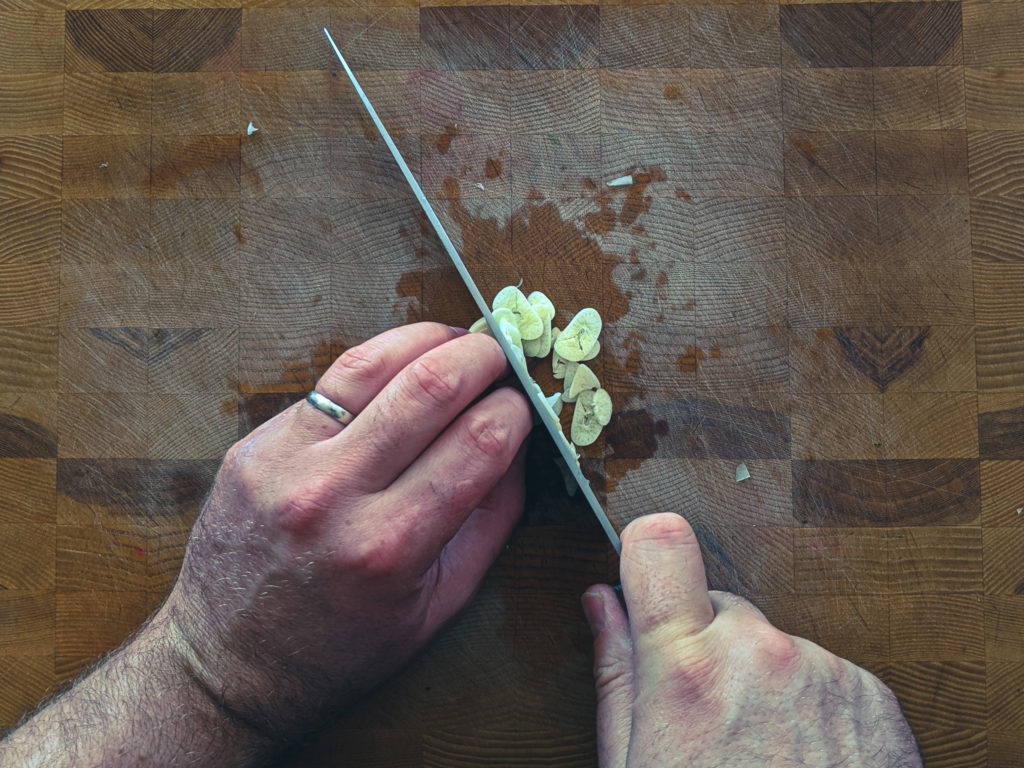
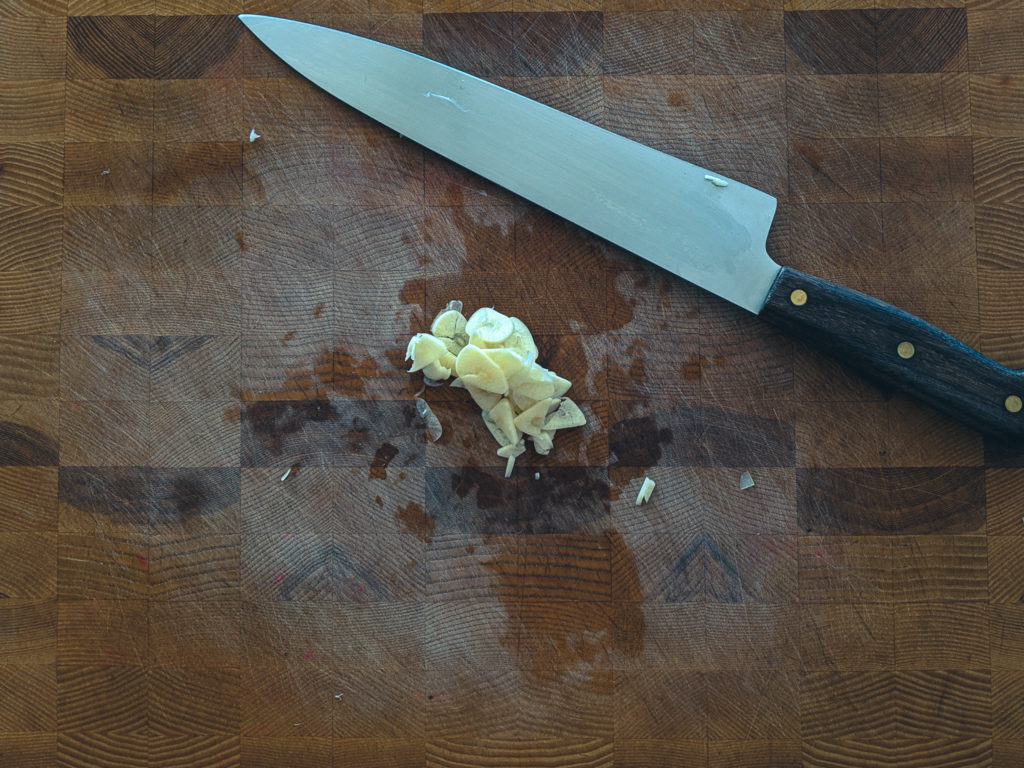
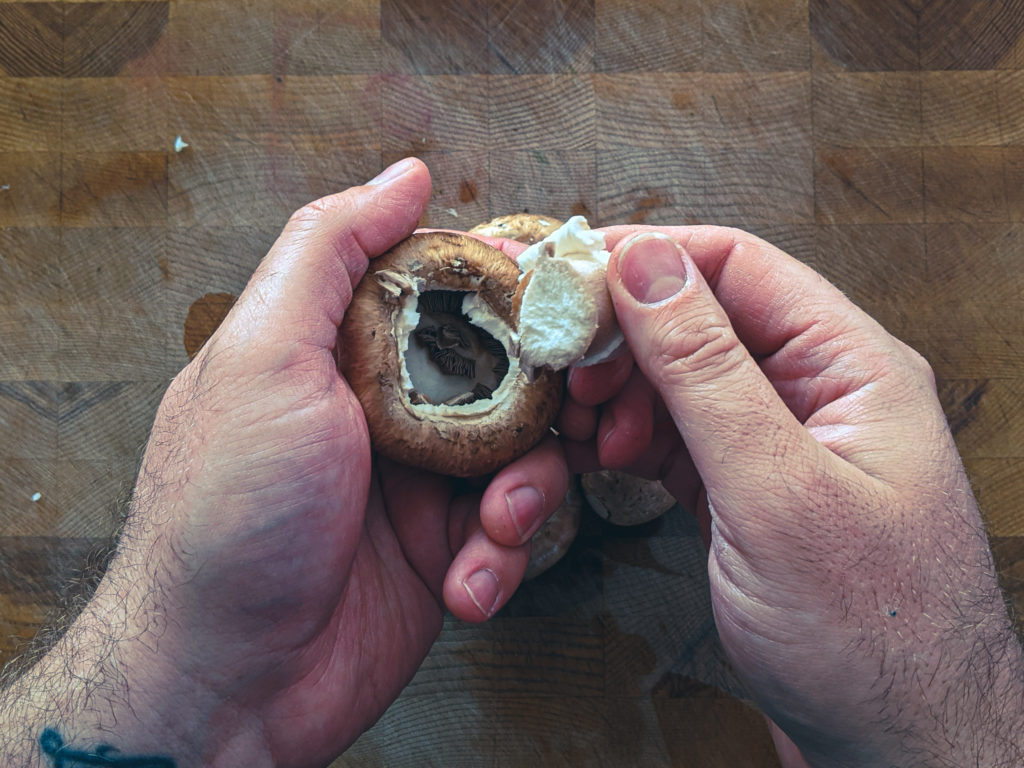
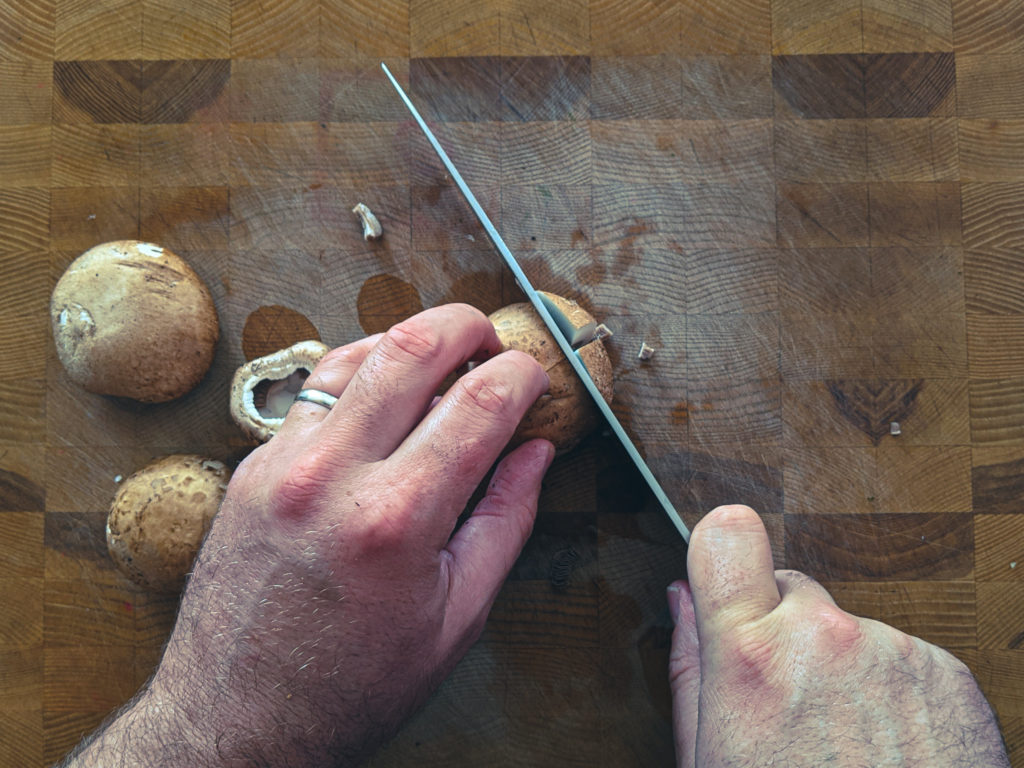
Cremini mushrooms are available in almost every grocery store nowadays though they may be listed as brown mushrooms, mini-bellas, or some other name I’ve never heard before. Just look for a small brown mushroom. These have much more flavour than standard white mushrooms and a nicer texture too. Remove and discard the mushroom stems. Cut the mushroom in half, then cut it into slices. I like to make slices about half a cm or an eighth of an inch thick. Use four to five mushrooms, depending on their size.
Rosemary
Get one sprig of fresh rosemary. Hold it at the top of the stem between your thumb and index finger. With your other hand, grab the rosemary sprig with a gentle but firm grip right below your first hand. Now, pull down. This should strip most if not all of the needles off the sprig. Pull the top off and add it to the needle pile. Discard the stem. Bunch the needles into a nice little pile and cut them as small as you can. One sprig of rosemary should be about a teaspoon once chopped. What I’m about to say may come as a surprise to you, but it doesn’t matter if you have a little more or less chopped rosemary than what is listed in the recipe. Just go with what you get off of one sprig.
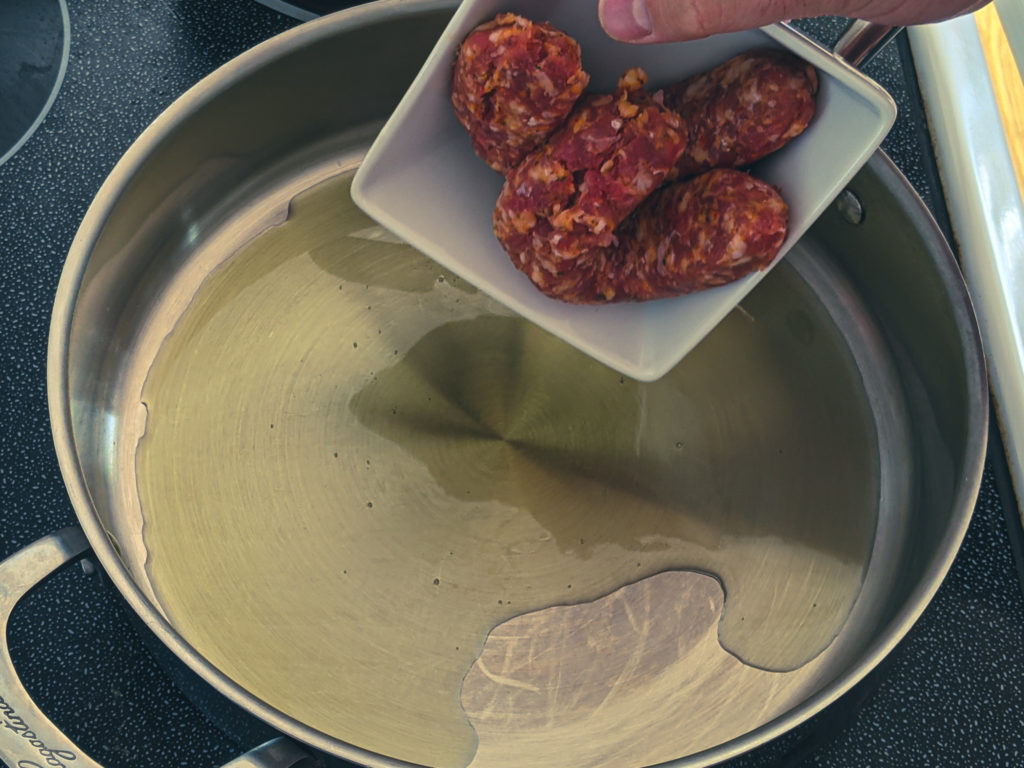
Sausage
Take two Italian Sausages (I used mild-Italian Sausage), make a slice down the length of the sausage and remove the meat from the casing. Discard the casing and set the meat aside. Whatever Italian sausage you can get from your local grocery store will be fine. I didn’t use anything fancy, and you don’t need to either. Though, if you want to use a locally sourced, organic Italian sausage, go for it.
Sausage and Mushroom Penne
By the time you’re done preparing all of your ingredients, your pasta water should be boiling. Before you put your pasta on, get a large skillet on the stove over medium-high heat. Let the pan heat up for a minute or two, then add a few tablespoons of olive oil and the sausage meat. Break the sausage meat apart with a wooden spoon and cook it for 3 to 4 minutes or browned. Drop the pasta in the water and cook according to the package instructions.
Onions in the pan
Add the onion into the pan with the sausage meat and cook for 2 minutes.
Mushrooms and Garlic in the pan
Put the mushrooms and garlic in the pan and continue to cook for 2 to 3 more minutes or until the mushrooms are cooked, and the onions have softened.
Deglaze the pan
At this point, there are probably some bits of food stuck to the bottom of your pan. Worry not, my friend, because it is now time to grab a nice bottle of white wine and deglaze your pan. Pour about a quarter cup of white wine into the pan and scrape up any bits of food that have stuck to the surface of the pan. These bits add lots of flavour to the sauce. Continue cooking the wine until it has all but evaporated and the pan starts to sizzle.
Rosemary and Stock
Throw the chopped rosemary into the pan along with about half a cup of beef or chicken stock. The store-bought stuff is fine, and if anyone tells you differently, send them to me, and I’ll set them straight. Of course, if you want to make the stock from scratch, go for it. It is easy to do. See below.
How to make stock
Put a chicken carcass in a pot (leftoverfrom a roast chicken is fine) with sliced onion, half a carrot, sliced, and half a stalk of celery sliced. Add in a bay leaf, a few sprigs of thyme or a sprig of rosemary and cover it all with cold water. Put it on the stove on high heat, bring it to a boil, then turn the heat down to low and simmer it for an hour. Strain the liquid. Discard the bones and vegetables. That golden liquid you have is chicken stock. You can do the same thing with beef, pork, or fish bones. The broth is made the same way but with meat instead of bones.
Cream
Let the beef stock and rosemary boil for about 2 minutes, then add in half a cup of whipping (heavy) cream. Before you ask, no, you can’t use a blend, coffee cream, or milk. It has to be whipping cream because you need that high-fat content, so the dairy doesn’t curdle. You aren’t using enough of it to worry that much about the calories, so just go for it.
Pasta
Once the cream goes in, bring it to a boil, add in the cooked and drained pasta, and about a quarter cup of grated or shaved parmesan cheese. Continue to cook for another minute or so or until the sauce is thick enough to coat the pasta. You might find it helpful to cook the pasta one minute less than the package instructions say. That way, the pasta can finish cooking in the sauce and won’t be overcooked. That’s it! You’ve just made Sausage and Mushroom Penne worthy of any restaurant menu.
The Wrap Up
Not many things in this life are better than the pleasures of a really good pasta dish. I include pasta from all parts of the world in that be it a nice Italian-style pasta, Japanese, Chinese, Thai, whatever it is, when it’s down well, it is an extraordinary thing. One thing that is as true with pasta as it is with any other food is that the less you mess with it, the less fuss, and the fewer ingredients you add, the better it is likely to be. I hope that this Sausage and Mushroom Penne illustrates that point to you. Make this. You won’t be disappointed.
Thanks for reading, and have a great week! And subscribe below so that you never miss a post.
We use cookies on our website to give you the most relevant experience by remembering your preferences and repeat visits. By clicking “Accept”, you consent to the use of ALL the cookies.
This website uses cookies to improve your experience while you navigate through the website. Out of these, the cookies that are categorized as necessary are stored on your browser as they are essential for the working of basic functionalities of the website. We also use third-party cookies that help us analyze and understand how you use this website. These cookies will be stored in your browser only with your consent. You also have the option to opt-out of these cookies. But opting out of some of these cookies may affect your browsing experience.
Necessary cookies are absolutely essential for the website to function properly. This category only includes cookies that ensures basic functionalities and security features of the website. These cookies do not store any personal information.
Any cookies that may not be particularly necessary for the website to function and is used specifically to collect user personal data via analytics, ads, other embedded contents are termed as non-necessary cookies. It is mandatory to procure user consent prior to running these cookies on your website.