Gnocchi, you’ve probably had it at your favourite Italian restaurant, or maybe you’re lucky enough to come from an Italian family or at least are friends with one. Either way, if you’ve eaten gnocchi, you’ve likely wondered how to make it. Well, wonder no more. Today, I will show you, step by step, how to make delicious, light gnocchi from scratch whenever you want. What’s going to blow your mind is just how simple this is. Are you ready? Yeah, me too. Let’s learn how to make homemade gnocchi.
What is Gnocchi?
I’m guessing that there are some people out there that don’t know what gnocchi is. No problem! Let’s get that out of the way first. You can think of gnocchi in two ways. The first way is as a little potato dumpling. Or, you can think of gnocchi as small balls of pasta made with potato. Both of those are correct. But here’s the thing, gnocchi is easier to make than pasta and dumplings. Really. You cook potatoes, peel them, mash them, mix them with egg, flour, butter, and a few flavourings, roll it, cut, and cook it. That’s it. Let’s look at that process in a little more depth.
How To Make Gnocchi
The Right Potato For Making Gnocchi
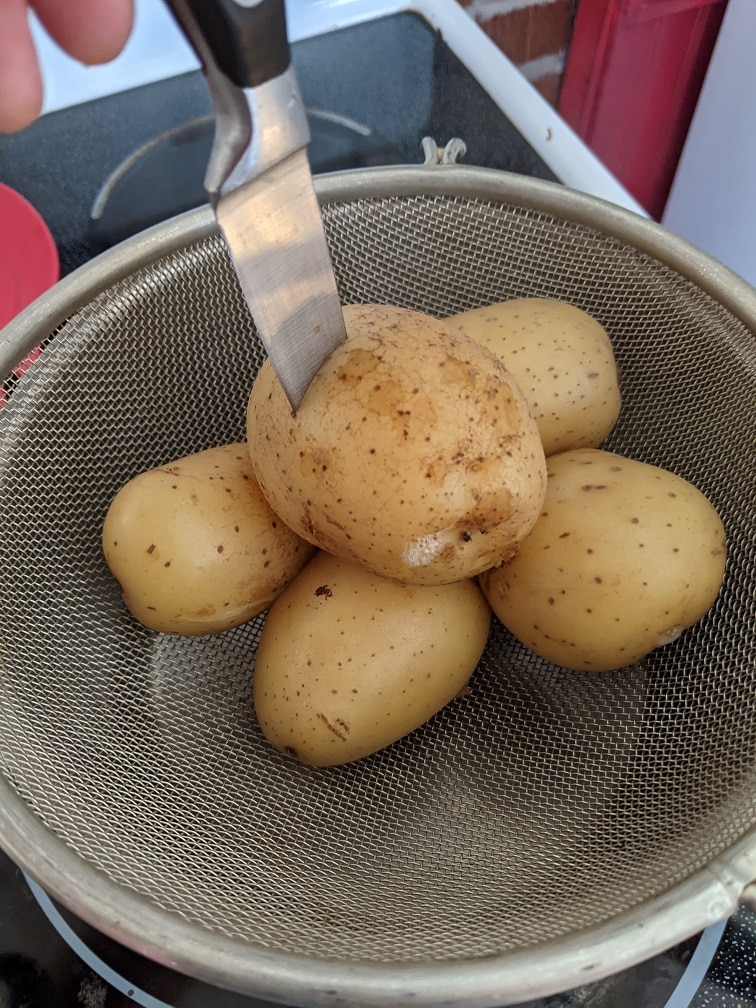
As I said, gnocchi is little bits of pasta or dumplings made with potato. So, we have to start with potatoes. Typically, for gnocchi, you don’t want to use a mealy potato like russets. You want a potato with a reasonably high starch content to help bind the dough. I suggest Yukon gold potatoes or other yellow-fleshed variety. These will provide a great flavour and the right consistency for your gnocchi.
Cooking The Potatoes
Some people say that when making gnocchi, it is best to bake the potatoes to prevent them from retaining too much moisture. I always either boil or steam my potatoes for gnocchi, and I have never found that there has been an issue with the moisture content being too high. However, I do find that boiling or steaming the potatoes whole, with the skin still on, does help prevent the potatoes from getting too wet.
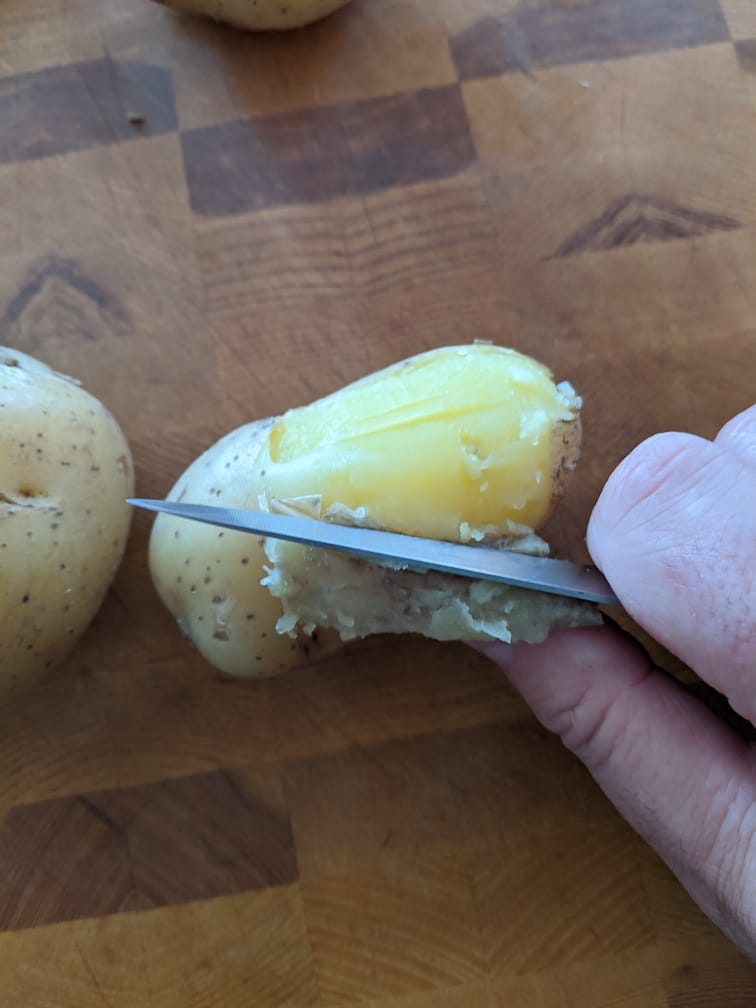
To cook the potatoes, put them in a pot of cold, salted water. The cold water will help the potatoes cook more evenly than if they started in hot water. The last thing you want is for the outside of the potatoes to be mushy, while the middle is still hard. Boil the potatoes for 20 minutes or so depending on their size. Really, time isn’t what you should be paying attention too. What’s important is that the potatoes are cooked through but not overcooked. Cook the potatoes just until a knife slides easily into the middle of the potato.
Steam Drying The Potatoes
One other little thing that I find helps prevent any moisture issues is allowing the potatoes to steam dry for a few minutes before peeling them. All I mean by steam drying is that once the water is drained off the potatoes, they are left to sit in the colander for a few minutes before peeling. All the steam that is coming off of the potatoes is excess moisture leaving the potatoes. I go into this in more depth in this post I did way back in January all about 5 Tips For Better Mashed Potatoes. Make sure not to let the potatoes sit for more than a few minutes because you want them to be hot as you mash them. Cold potatoes will become a gummy mess that is next to impossible to work with.
Peeling The Potatoes
Because the potatoes are cooked, the peels will come off fairly quickly. However, the potatoes will still be hot. So, either hold the potato in a towel in one hand and scrape the skin off with a paring knife in the other hand. Or, rub the skin off using a kitchen towel. Rubbing the skin off works well, but it makes a pretty big mess.
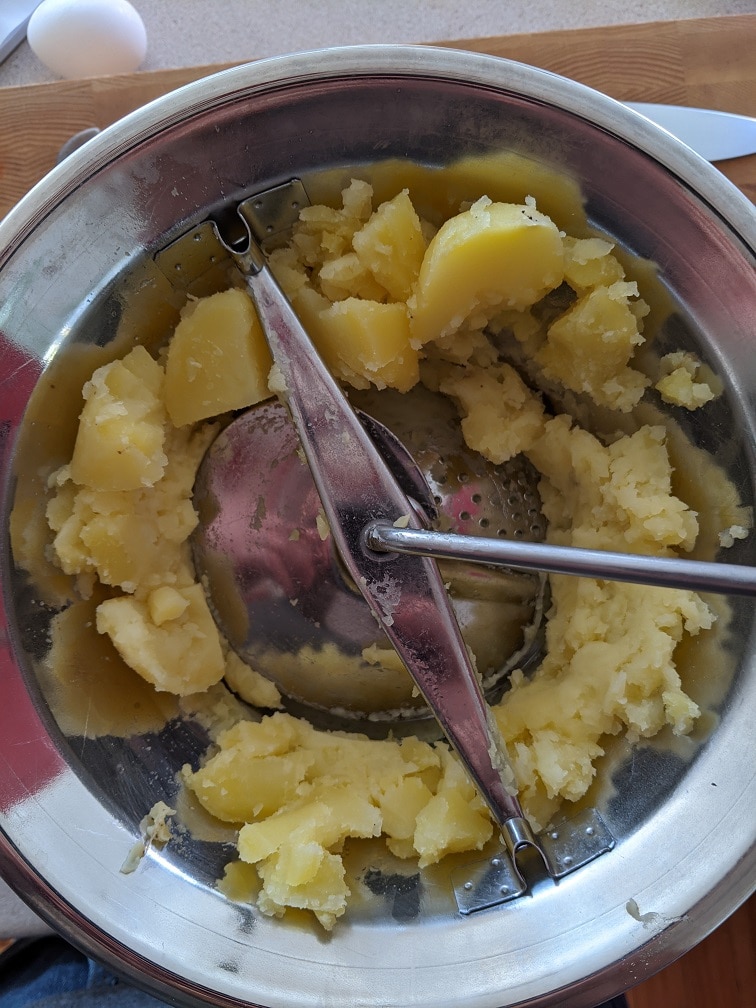
Mashing The Potatoes For Gnocchi
There are a few ways that you can “mash” the potatoes for gnocchi. The first and my least favourite is to use a regular old potato masher. I’m not a fan of this method because it is next to impossible to get perfectly smooth potatoes without overworking them and turning them into a gummy mess. The same goes for a mixer. The methods that I prefer are to use a food mill, potato ricer, or if you don’t have either of those, a cheese grater. The goal is to get the mash as smooth as possible while working the potato as little as possible. You also have to work quickly enough so that the potatoes don’t cool down too much. I promise that this is the most complicated this process gets.
Adding Other Ingredients To That Potatoes
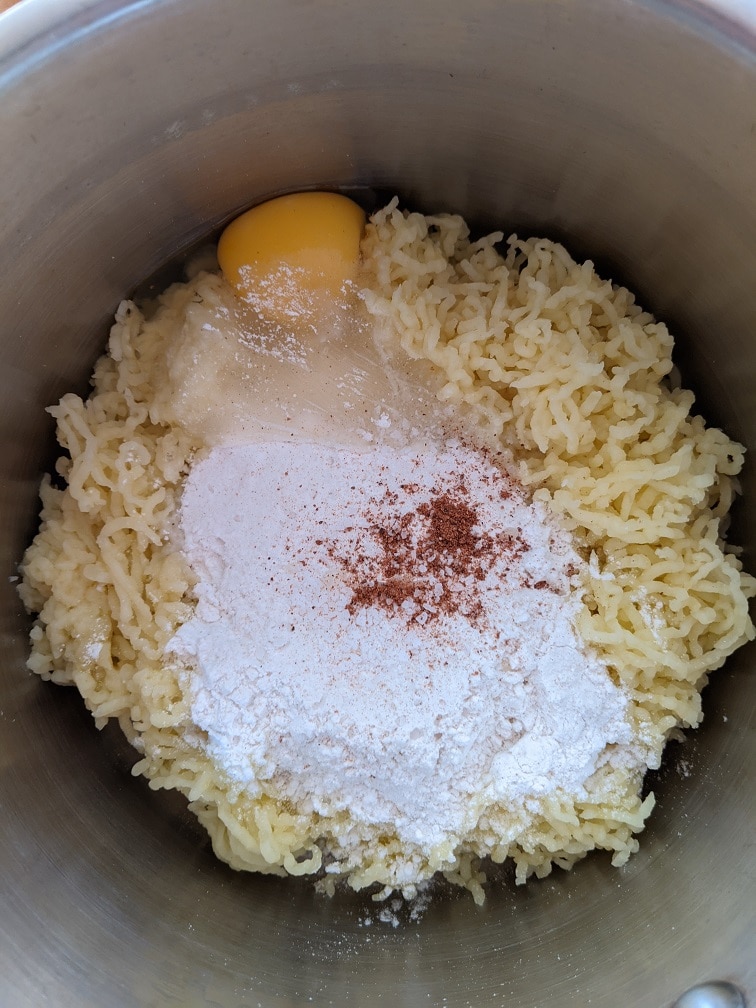
Okay, I think that we have covered just about everything there is to cover about the potato portion of the gnocchi. Of course, gnocchi isn’t just potato so let’s look at what else there is. Two ingredients that pretty much stay the same are egg and butter. For one pound of potatoes (before being cooked), use one large egg and a quarter cup of butter. To the mix, add in a big pinch of salt and a little bit of freshly grated nutmeg. Now, this is where things get mildly complicated again.
The Flour
First of all, I use all-purpose gluten-free flour to make my gnocchi. I notice no difference between my gnocchi now and when I could eat it with regular flour. So, gluten-free people, don’t despair. Our gnocchi can be just as good as everyone else’s.
Whether you are using gluten-free flour or regular flour, you have to keep a few things in mind when adding it into the gnocchi dough. The moisture content in the potatoes and the level of humidity in the air will affect how much flour the dough will need. Whatever recipe you’re using (I hope it’s mine which you can find at the end of this post), starts with only half the flour listed. Mix it in and add more as needed. You only want to add enough so that a cohesive dough forms. You want the gnocchi to be light but still hold together. The more flour you add, the heavier the gnocchi will be.
Forming the Gnocchi
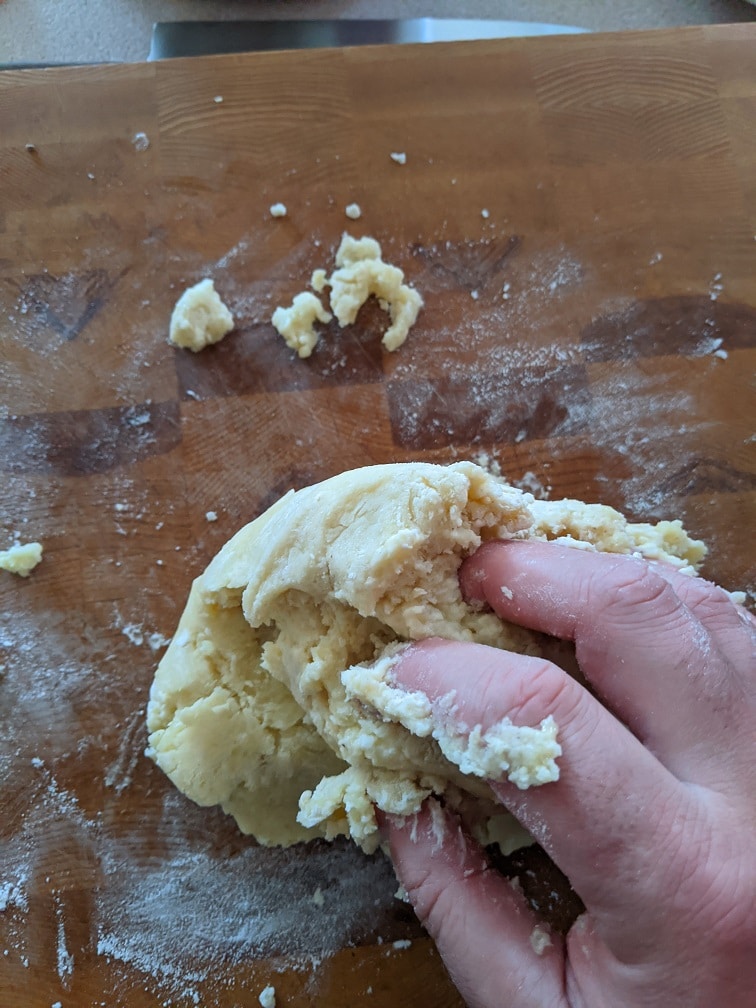
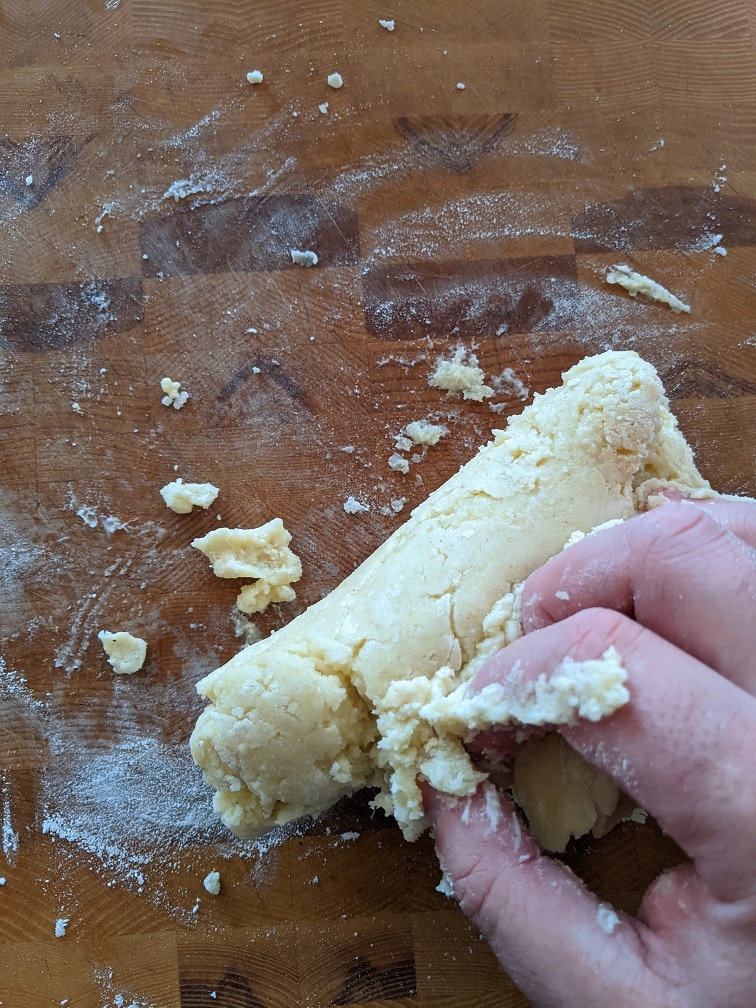
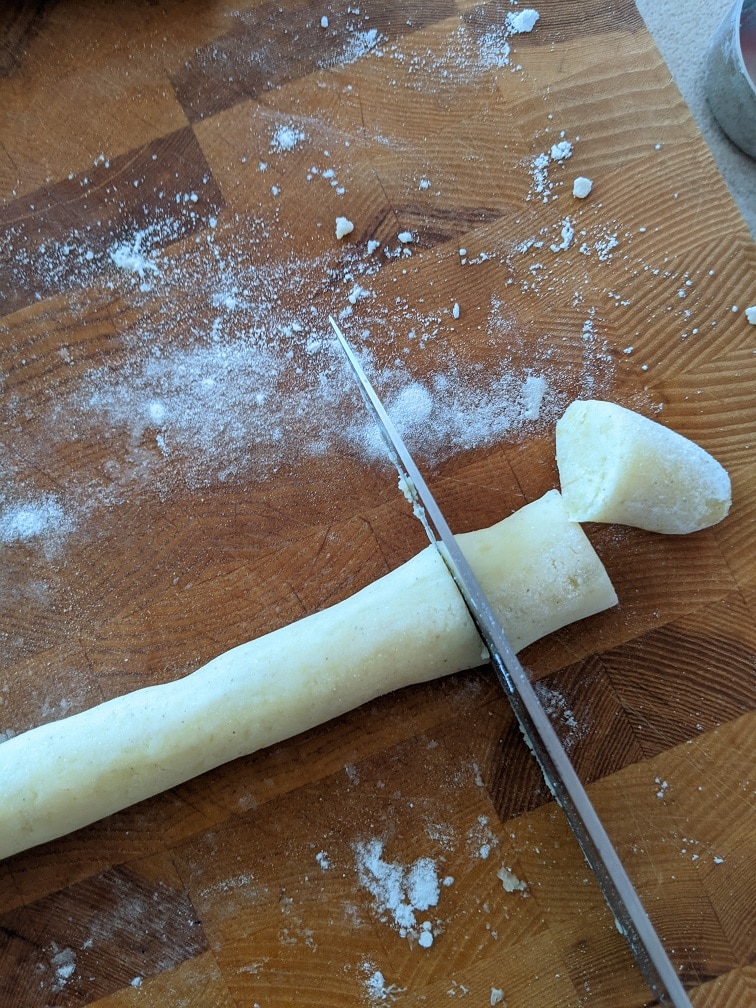
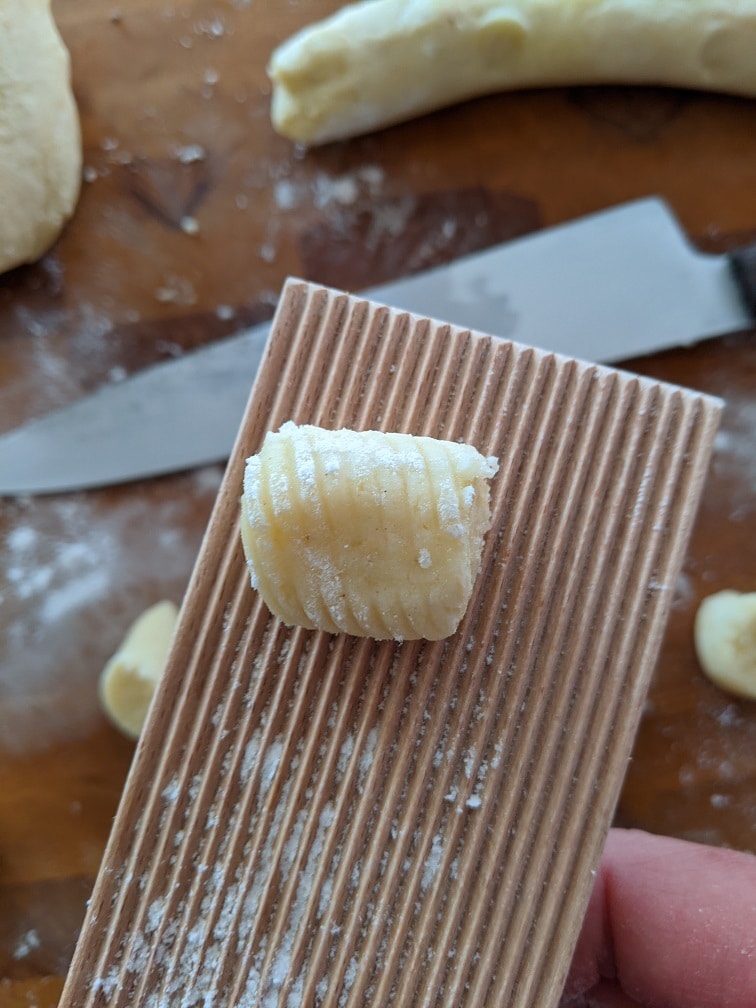
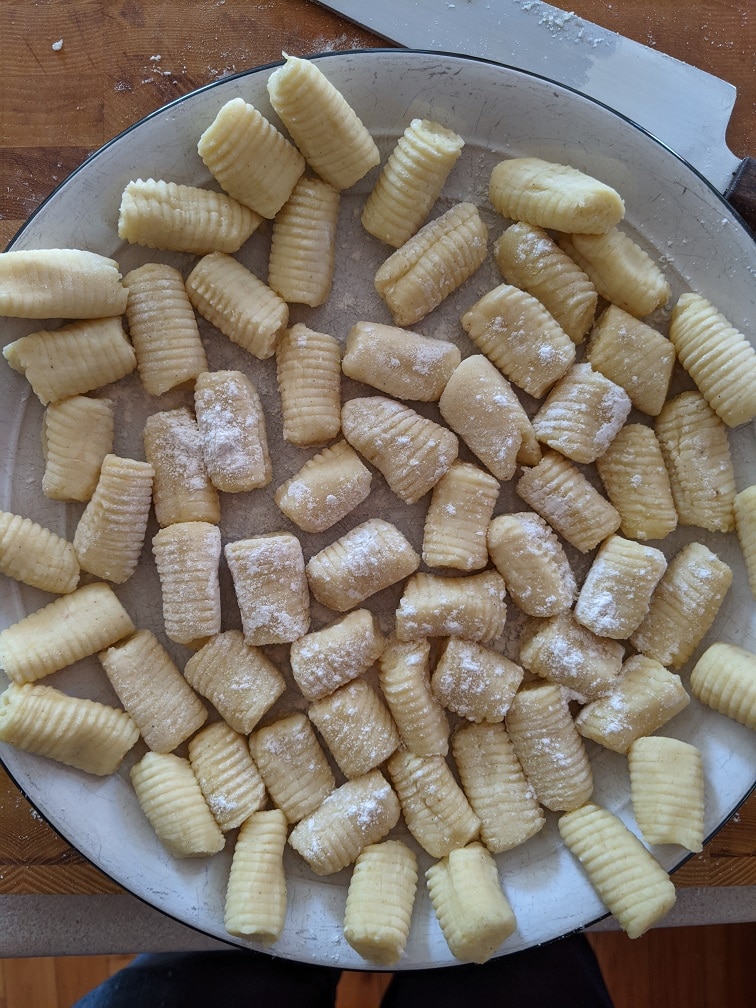
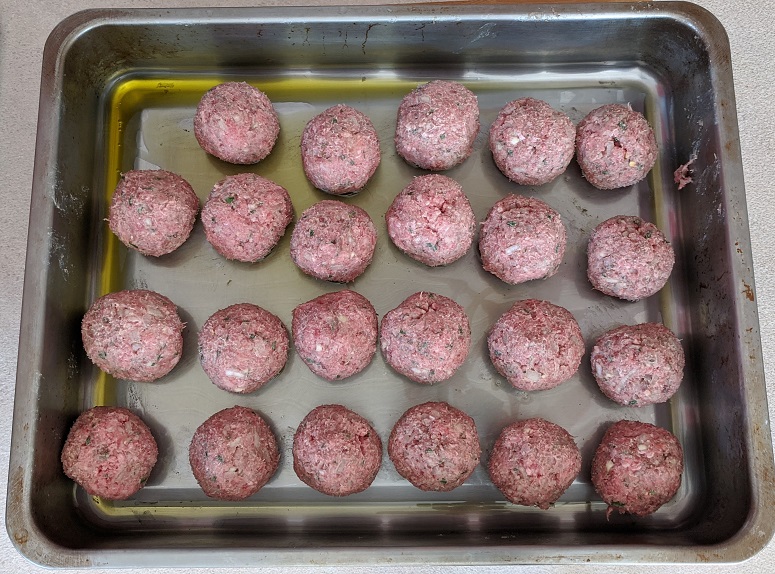
To form the gnocchi, divide the dough into four pieces. Roll each piece on a lightly floured surface into a snake about the width of your thumb. Cut the snake into pieces that are as big as your thumb from the tip to the first knuckle. While you are rolling the dough, keep the rest covered with a clean dishcloth. Once the gnocchi is formed, you can roll them on a gnocchi board or on a fork to get the classic gnocchi lines. Those lines will help the gnocchi hold on to whatever sauce you toss them in. You don’t have to do this last step, but it does make the gnocchi look cool and helps them collect the sauce a little better. Once the gnocchi is formed, put them on a lightly floured plate or sheet pan. Do not stack them. Be gentle with them. They should be pretty soft, and you don’t want to deform them.
One thing to keep in mind is the longer the other pieces of dough sit, the wetter they will get. So, you want to work as fast as you can. Even so, you may notice that the last two pieces of dough will be stickier than the first few. That’s okay. You’ll just need to put a little extra flour down on the counter when you are rolling them.
Storing the Gnocchi
With the gnocchi all formed, you have three options. You can cook the gnocchi right away. You can store them in the fridge for a few hours covered with a floured tea towel. Or, you can freeze them in a single layer on a floured sheet pan. Once they are frozen, you can break them apart and store them in the freezer in a ZipLock bag for a few months. Then, cook them right from frozen the same as you would with fresh gnocchi.
Cooking Gnocchi
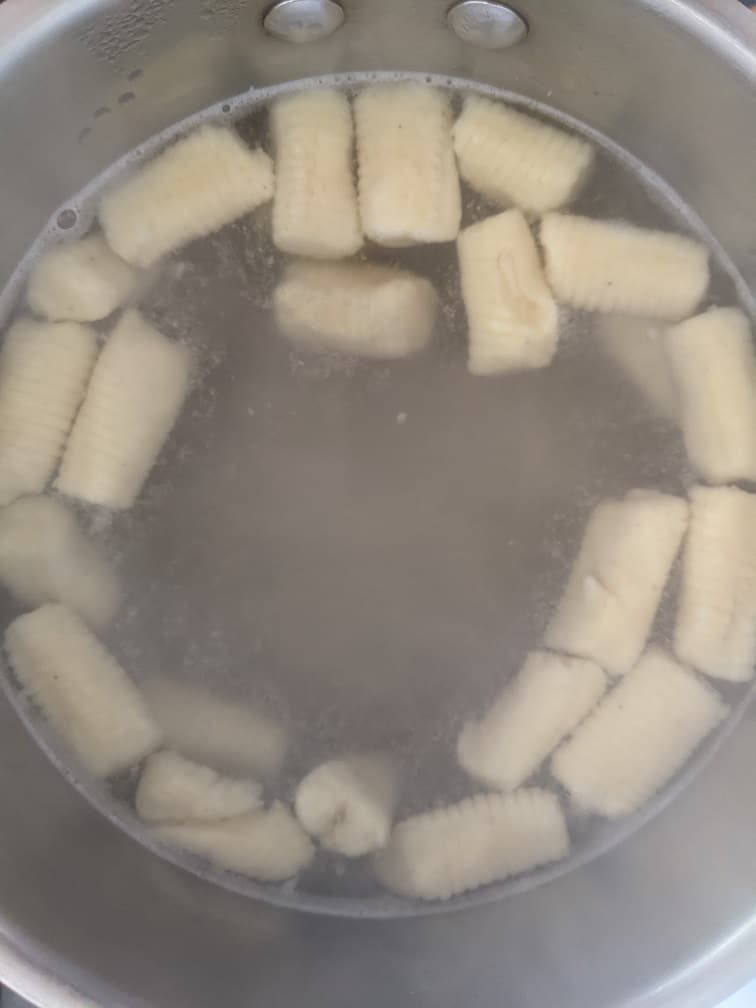
You want to cook the gnocchi in two to three batches. The reason being that you don’t want to cool the cooking water down below the boiling point. If the water stops boiling, the gnocchi will sit on the bottom of the pot. If the gnocchi sits, they are going to stick and break apart. So, to cook the gnocchi, bring a large pot of water to a boil. Divide the gnocchi into three batches. Take the first batch of gnocchi and gently drop them into the boiling water a few at a time until the whole batch is in the pot. If you dump them all in at once, you risk them breaking and sticking together.
The gnocchi are cooked when they float. Scoop them out of the pot and into your sauce using a slotted spoon. Don’t dump the gnocchi into a colander like you would with pasta. The force of the water will crush and break them. Just scoop them out. And just like that, you’ve made gnocchi.
Additions To The Dough
Like pasta, you can add other ingredients into gnocchi dough for colour and flavour. Cooked, chopped, well-drained spinach makes a great addition to gnocchi dough. You can substitute up to two-thirds of the potato for sweet potato or squash, but you may need to up the amount of flour. You can even add some ricotta or parmesan cheese into the mix. The point is that you can take this basic recipe, add another ingredient or two to it and make it something completely new. But of course, that is up to you and how creative you are feeling.
Sauces For Your Gnocchi
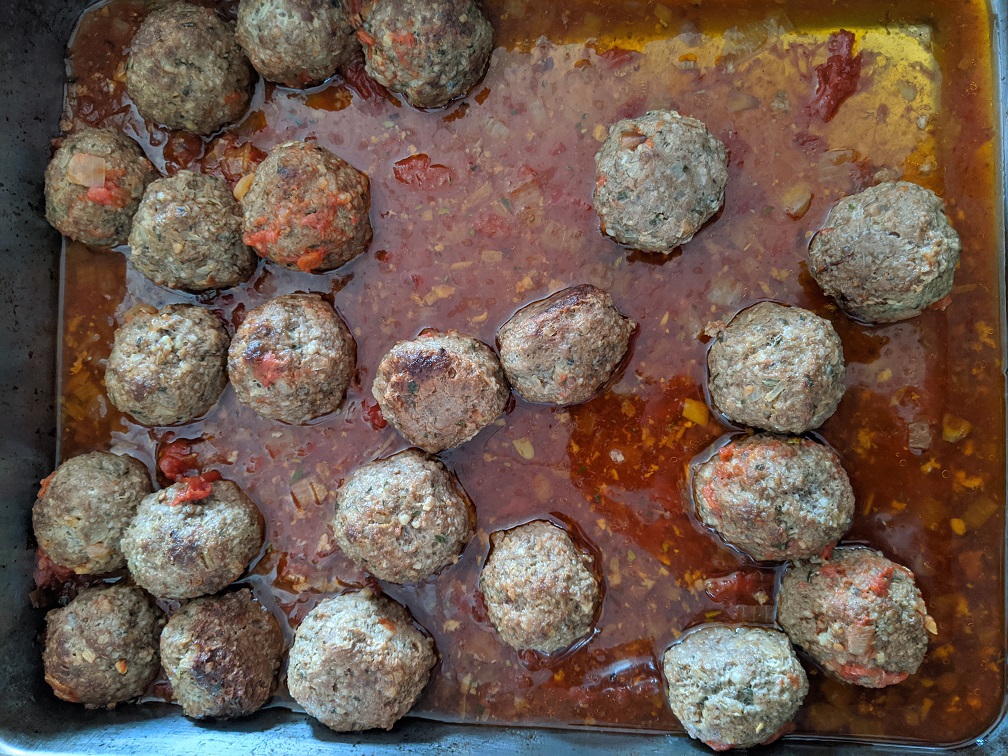
Gnocchi, like other forms of pasta, goes well with a variety of sauces. You can serve it with bolognese sauce, as I did in the picture at the beginning of this post. It goes well with classic tomato and basil. Gnocchi is fantastic in a blue cheese cream sauce. It even pairs perfectly with sage and brown butter, or pesto. Essentially, any sauce you can think of to put on pasta will probably be really good on gnocchi as well.
Gnocchi
An easy and delicious recipe for light and flavourful homemade gnocchi.
Boil the potatoes whole until they are tender when poked with a fork.
Let the potatoes cool slightly then peel.
Pass the potatoes through a food mill or grate on a cheese grater into a large mixing bowl.
Add the egg, butter, flour, salt and nutmeg into the potatoes and mix just enough to combine all the ingredients.
Divide the dough in two. Cover half the dough with a tea towel and roll the other half of the dough on a floured surface into a finger-width rope.
Cut the rope of dough into 1-inch pieces and place them on a floured baking sheet.
Roll and cut the other piece of dough.
Bring a large pot of salted water to a boil.
Place the gnocchi into the water and wait for about 3 minutes for them to cook. Once the gnocchi starts to float scoop them out of the pot with a slotted spoon and into your sauce.
Once all of the gnocchi have been scooped out of the pot, toss them with the sauce, garnish with parmesan and fresh parsley and serve.
Nothing about making gnocchi is hard. Yes, you have to put some thought into it regarding moisture and flour and all of that, but it is not difficult. But here is the thing, it seems like it is. People think that it is. Even now, you probably are skeptical about how easy I’m making it seem. Because most people believe that gnocchi is hard to make, when you serve it to them, it will blow their minds. So, make this, get a feel for it, then the next time you have people coming over for dinner, make it again. You won’t believe the reaction you’ll get. Plus, it’s fun, and gnocchi is delicious, so what do you have to lose?
Thank you for reading the post. If you liked it, remember to share it on Facebook, Pinterest, or Twitter by clicking the icon to the left of the right of the page. Did you know that Chefsnotes.com has almost 400 posts just like this one? Don’t ever miss a post again. Become a Chef’s Notes member right here. You will be notified of every new post. And if you would like to know more about me, click the link below to read my story.
Fried Rice. It is one of my favourite things to cook and to eat. Not only is it delicious, but it is a great way to use up leftovers. It is cheap to make, and it is quick. I don’t know about you, but that ticks all of my boxes. Because I love fried rice so much, whether it’s chicken fried rice, pork fried rice, or any other type, I thought it was high time that I shared my secrets to making it with you. So, here we go.
1. The Rice
I’ve made fried rice out of almost any kind of rice you can imagine. That is unless you know a lot about rice, then maybe not. In that case, I would like to know why you know so much about rice? But I digress. My point here is that you, too, can make delicious fried rice out of any rice you have on hand. But, and that’s a big but, sticky rice(aka sushi rice) makes the best-fried rice by far.
Sticky rice is the rice that would traditionally be used to make fried rice (and sushi). If you use basmati or something like that to make fried rice, you will notice that it gets very soft. Sticky rice, on the other hand, when fried, will develop a little chew to it. It gets a little bite, which adds a nice texture to the fried rice. It also adds to the overall flavour of the dish in a way that basmati or another rice just doesn’t. On a side note, sticky rice is also much easier to eat with chopsticks.
Fresh versus Day Old Rice
There is some debate about whether it is best to use fresh rice or leftover, day-old rice to make fried rice. The argument from the leftover crowed is that the rice has time to dry out a bit in the fridge. In all honesty, I used to be of this mind. However, I’ve changed my view. I find that when using sticky rice, there is no need to use leftover rice. It will cook up perfectly well straight from the pot to the wok. The added bonus to this is that you don’t have to wait twenty-four hours for your rice when you get hit with a fried rice craving. Having said that, if you have leftover rice, of course, you can use that to make fried rice, it is the perfect application for it. But, if you want fried rice and don’t have any leftover rice, there is nothing to worry about.
2. Meat
I like meat in my fried rice, probably because I like meat in just about everything. If you don’t want meat, that’s fine, but I feel like I should talk about it. One thing that I really love about fried rice is that it is a great way to use up leftovers. So, if I have leftover pork chops, steak, chicken, turkey, duck, bison, scallops, salmon, whatever it is, you better believe that it is going in some fried rice. Of course, you don’t have to use leftovers to make fried rice, but it is a great way to stretch and use up last night’s dinner.
If I am using leftover meat to make my fried rice, I dice the meat into small cubes, reheat and brown it in a hot wok or frying pan, take it out, make the rest of my fried rice, then add the meat back in. If I am using fresh meat, I follow the same steps, except I leave the meat in the pan the whole time I’m cooking. For fish, I will usually cook it separately then mix it into the rice at the end.
3. Vegetables
When it comes to the vegetables I like to add to my fried rice I usually keep it pretty simple. I have three ingredients that I just about always add. They are onion, carrot, and celery. Along with those, I often add green onions (the whites at the beginning of cooking and the greens at the end of cooking), peas, and sometimes cabbage or bok choy or kimchi. Obviously, you can add whatever you’d like. It is best to cut all the vegetables about the same size, so they cook evenly. As fried rice is supposed to be a quick dish, I like to cut the vegetables small, about the size of a pea.
When cooking the vegetables for fried rice, I find that it is important to get a little colour on them. When you think about fried rice, there really isn’t a lot going on. There aren’t a lot of ingredients or flavourings being added. That means that the ingredients that are being used have to bring a lot to the party. Getting some colour on the vegetables will add a tonne of flavour to the dish with little to no extra effort. We will talk about this in a little more detail in a second.
4. Flavourings
There are a lot of things that you can add to fried rice to give it flavour. My go-to flavourings are garlic, ginger, chilli, salt, a pinch of sugar, and of course, soy sauce. However, I sometimes make kimchi fried rice, in which case the kimchi provides the bulk of the flavour. Sometimes I will add a few spoon fulls of sambal to add a bit of a kick to the rice.
The soy sauce in fried rice kind of does double duty. It adds flavour and saltiness of course, but it also adds colour, turning the white rice kind of brown. I’m sure you noticed that I said I like to add salt and sugar to the rice. Now, why add salt when I’m using soy sauce? I find that soy sauce and salt, though both are “salty”, they are salty in different ways. Of course, this depends on the soy sauce you are using. But, I do usually add a pinch of salt in along with my soy sauce. Of course, you should taste your rice after adding the soy sauce before you decide if you should add salt or not. As for the sugar, I find that a very small amount will go a long way. You probably won’t even know it’s there, but a side by side taste comparison of the same fired rice with and without sugar would make the reason for it obvious. It enhances all the other flavours.
Egg
All good fried rice has an egg stir-fried into it. The egg will help bind the rice but also adds a tonne of flavour. Once the rice is done, push it all to the side of the wok or pan, making a well in the center. Add a touch of oil, then break an egg into. Let the egg cook for a few seconds, then scramble it and mix it into the rice. This may sound crazy, but it isn’t a bad idea to overcook the egg here. You won’t notice it texturally, but it will add a lot of extra flavour to the rice.
5. Cooking
At this point, we’ve talked about all the things that you can and should add to your fried rice, but none of that matters if you don’t cook it properly. The key to great fried rice or any stir-fry for that matter, is heat. The wok or pan has to be hot, like hot. Heat it up over medium-high to high heat. Add in a touch of oil the start by cooking and browning your meat. Next, add in the vegetables, cook and brown those. Next, add in flavourings like ginger and garlic, those will only take a few seconds. In goes the rice, which you should also cook to brown a bit. A little crispy rice never hurt anyone and will add a nice textural change to the rice. Once the rice is hot and a little brown, add in the soy sauce, sugar, and salt. Cook for another minute or two, then add your egg. Once the egg is mixed in, add the greens from the green onions, taste the rice, and season as needed with a bit more salt and pepper.
Conclusion
Making fried rice is a great way to use up leftovers, stretch meat and vegetables, or throw together a quick meal. Hopefully, with the tips I’ve shared in this post, you can approach fried rice with more confidence and learn to love such a humble dish.
Thank you for reading the post. If you liked it, remember to share it on Facebook, Pinterest, or Twitter by clicking the icon to the left of the right of the page. Did you know that Chefsnotes.com has almost 400 posts just like this one? Don’t ever miss a post again. Become a Chef’s Notes member right here. You will be notified of every new post. And if you would like to know more about me, click the link below to read my story.
Let’s face it; these are strange days. Millions of people are still not back to work full time, and those that are will be playing financial catchup for months or years. On top of that, grocery prices are climbing. Whether you lost your job due to the pandemic, you’re retired and living on a fixed income, or you are just trying to save some money. I want to help. For the next couple of weeks, Monday’s here at Chef’s Notes will be dedicated to cooking and eating on a budget. The idea is to cut back on grocery spending without giving up flavour or quality. It seems crazy, I know, but we can do it.
This series will mostly focus on recipes and dishes that you can make with budget ingredients, but today, we are going to look at grocery budgeting as a whole. What it is and how to do it. In all honesty, this series is as much for me as it is for you. I am not great at budgeting, so we will learn this together.
Introduction to Grocery Budgeting
Throughout this series, I am going to use my grocery spending as an example. I know how much I have been spending (I say “I” because since the pandemic hit, I do all the grocery shopping) and that I need to cut back. I think a real example is better than a hypothetical one, so every week of this series, I will break down my grocery spending and how I did with my budget.
What is my budget?
I did some research to find out what the average Canadian family spends on groceries. I found a Global News article from 2017 that says the average Canadian family of four spends about $220 a week on groceries. However, a lot has changed in the time since that article was written. Last December, Dalhousie University released a report saying that the average cost of food in Canada was going to go up by between 2% to 4%, that report was before COVID-19. I can’t find any studies or real information on how the pandemic has altered grocery prices,. Anecdotally, things seem more expensive.
If we take the 2017 numbers from Global and add the high range of increase that Dalhousie was predicting for 2020, plus add another 2% for the years in between, we get a weekly average budget of $233.37 for a family of four. The Global article breaks the budget down by family member which works out to be about 28% ($65.35)* of the budget for Dad, 24% ($56.01) of the budget for Mom, 32% ($74.68) for a teenage boy, and 16% ($37.34) for a young girl (4-8 years old). I don’t have a teenage boy or a 4 to 8-year-old girl. I do have a 10-month-old baby who I assume eats (or throws on the floor) about 12% of our grocery budget. So, for my family of three, our budget based on those numbers should be around $148.72 per week. That number will be my goal from here on out.
*percentages include the forcasted 4% incrase for 2020 plus an additional 2% increase total for the years between 2017 and 2020
What I currently spend on Groceries
From Sunday, August 9th, to Sunday, August 16th, I spent $406.18 at the grocery store. Now, that seems like a lot, and it is, but there are a few caveats in there. One, we bought diapers, which were $29.99, and I had to test a bunch of recipes for a project I’m working on that cost $107.80. So, what I actually spent on groceries last week was about $268.39, which puts me about $119.67 ($268.39 – $148.72 = $119.67) over what I should be spending. It looks like I have some work to do.
I should point out that included in my grocery budget are all the meals you see here on Chef’s Notes, on my Instagram, and when I appear on CTV. Those things can kind of skew my numbers a bit. I think it is valuable to stick to the budget, but I also believe that it is important to provide quality recipes and posts. That means that I sometimes have to go over the budget a little (or more than a little) for a blog post. I’m alright with that as long as it is within reason.
What is a Grocery Budget and How Do You Make One?
Before we move on to the 7 Tips For Eating On A Budget, let’s first clarify what a grocery budget is and how to make one. A grocery budget is a realistic weekly, monthly, and yearly spending limit you set for yourself to spend on groceries. Your budget can be set based on averages as I did with mine above, or you can look back at your grocery spending over the last six months, figure out what you can and cannot cut, and build your budget based on that. We will get into more detail in a minute.
Now that we are all on the same page, let’s finally move on to our 7 Tips For Eating On A Budget.
7. Keep an Inventory of Your Kitchen
Knowing what you do and don’t have in your kitchen is an essential key to understanding what you should and shouldn’t buy. You don’t have to be a tyrant about this, but you should, at the very least, go through your kitchen entirely before you go to the grocery store. It helps if you have some inventory sheets made up. I’ve made some for site members, which can be downloaded for free from the member’s downloads page. You can become a member for free here.
A useful inventory sheet breaks your kitchen into sections like “Fridge,” “Cupboard,” and so on. Ideally, you have on the sheet everyday things you have on hand like Milk, bread, salt, pepper, etc. With the sheet in hand, you take ten minutes and go through your kitchen, seeing what you have, what you are low on, and what you don’t have. You build your shopping list off of the inventory sheet and your meal plan, which we will cover in a minute.
Keeping an inventory of your kitchen does not have to take a lot of time, and it does not have to be complicated. The benefits of doing this greatly outweigh any annoyance and inconvenience.
6. Shop the Flyers
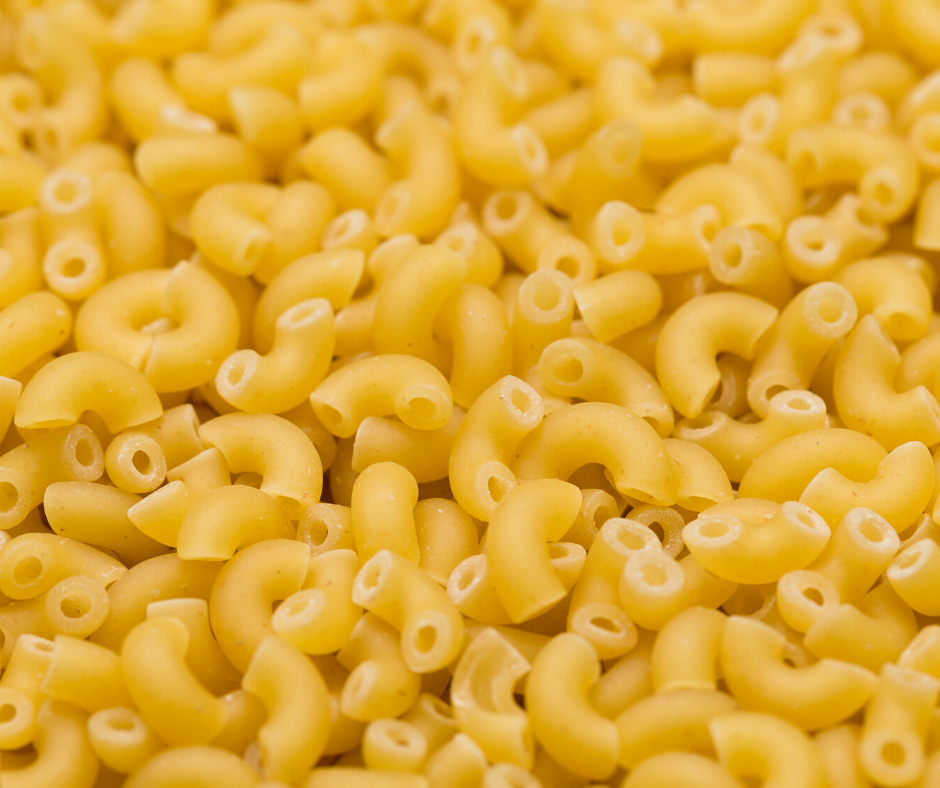
If you live in or near a town or city, there is a good chance that there are at least two grocery stores within a few minutes of each other. Most people will go to one store or the other, but I think it is better to go to both. Use the flyers to help make your meal plan, then go to one store for the things they have on sale that you want and go to the other store for the things that they have on sale. The more you do this, the more you will get a feel for the slight differences in the prices of everyday items between the stores. You would think that pasta would be the same price at two grocery stores that are within a few blocks of each other, but that isn’t always the case.
5. Meal Plan
Meal planning is the most critical thing you can do to eat on a budget. Use the flyers and your kitchen inventory to build a meal plan for your week. This will only take a few minutes. Then stick to it. Include all three meals of the day plus snacks. Be honest with yourself when planning your meals and your snacks. Write down what you are really going to eat, what you are going to snack on and work snacks into your budget. If you try and cheat, you will end up going to the corner store for some treats and blow your budget. There is a printable weekly meal planning template for members of the site. You can become a member for free here.
4. Plan your grocery store trips
Nowadays, a lot of grocery stores let you shop online. I prefer to pick out my fruits, vegetables, and meats, so I don’t use the shopping feature in the same way that most people do. I use it to plan out my trip to the grocery store and to help build my budget. The online shopping section of your local grocery store’s website will show you what things cost, so you can know what you are spending before you go. You can also use the online shopping section of the store’s website to help cost out and budget your meal plan.
3. Buy In Bulk When It Makes Sense
Buying in bulk is a great way to save money, sometimes. It is also a great way to spend a lot of money unnecessarily. For example, if you like white rice, it is great to buy it in bulk. It will last for a very long time. Brown rice, however, has a much shorter shelflife than white rice. So, unless you plan on eating brown rice for every meal for the next two months, it probably isn’t a great idea to buy it 20 kgs at a time.
Check Your Math
When buying in bulk is also important to make sure that the math makes sense. It doesn’t always. The easiest way to break the numbers down is to divide the unit size by the cost. If 20 kg of rice costs $50, then each kilo costs $2.50. The average suggested portion of dried rice is about 9g. There are 1000g in a kilo, so each gram equals $0.0025, meaning a single portion of rice is about $0.02. Compare that to a small (500g) bag of rice that costs $6.00. That same 9g portion now costs $0.10 or five times as much.
Think about chocolate for a second. I needed to buy chocolate the other day. The store had packages of semi-sweet baker’s chocolate squares on sale for $2.00 off per box, but I had to buy more than one to get the deal. It seemed like a good deal at a glance, but was it? Right beside the baker’s chocolate, there was a 1kg bag of semi-sweet chocolate chips, not on sale that cost $12. On the surface, the baker’s chocolate seemed like a better deal, but each package of baker’s chocolate was only 225g. The total price for two boxes (the minimum number I needed to buy to get the deal) would have been around $9. That is fantastic when compared to the regular price of the baker’s chocolate, but it is terrible when compared to the bag of chocolate chips. Even with the deal, 1 kg of baker’s chocolate would have cost $20. Did I need 1 kg of chocolate at that moment? No. Will I use it before it expires? Yes, I will. So, even though the baker’s chocolate was on sale, it made much more sense to buy the bulk bag of chocolate chips despite having to spend more money in the moment.
Divide bulk prices over multiple weeks
One vital thing to keep in mind when buying in bulk is that the price of the bulk item needs to be extrapolated over multiple grocery budget weeks. Looking back at the chocolate for a second, I did not need 1 kg of chocolate for what I was cooking. Even though the baker’s chocolate was more expensive per gram, it would have cost me less money to buy one package rather than the chocolate chips. But because I will be using chocolate again soon, it made more sense to buy the more expensive item. So, let’s say I used 250 g (or one-quarter) of the chocolate chips for what I was making. The price I would subtract from my grocery budget would be one-quarter of the total cost of the chocolate chips, not the total cost. That means that even though I spent $12 on the chocolate, only $3 came off of my grocery budget. But, that also means the next time I use the chocolate chips, whatever I use has to come off that week’s budget. In four weeks, if I use another quarter of the bag of chocolate chips, I have to make sure to subtract $3 from that week’s grocery budget to cover the cost of that chocolate. I know that this may seem complicated, but it is important, so if it is at all unclear, go back and reread this paragraph.
I find that with budgeting and buying in bulk, especially, it is best to think about the larger picture. Focus on the day to day, week to week, but keep the whole month or year in mind. A big bag of rice is going to cost you $50, but it will last you a few months. Don’t beat yourself up too much if you go over budget a little on weeks when you buy bulk items. It will work out over time as long as you are conscious of it.
2. Buy Off Brand
Store brands and off-brand products are often much cheaper than name brand products. But, if you hate off-brand ketchup and are never going to use it, it doesn’t make much sense to buy it. If there is a name brand that you just have to have, then go for it. But, if you can try and buy it when it is on sale. If it is an item with a long shelflife like ketchup, buy a few at once. As long as you don’t buy more than you can use before it spoils, it makes sense. Buy off-brand when it makes sense for you.
1. Only shop once a week
A lot of research, time, effort and money has gone into designing your grocery store experience. The goal of those efforts is to get you to spend as much money as you can. One thing I’ve noticed over the years is that the more time I spend in the grocery store, the more money I spend. That is not an accident. There is always something small that you see that you treat yourself, too or something you’d never thought you needed or wanted until you saw it. Those things all add up very quickly. It may only be $4 or $5 here and there, but when added up over a year, it becomes quite a bit of money.
To make sure that you stick to your budget, only go to the grocery store once a week. Plan it out, make a detailed list and stick to it. I also find that it helps to have your shopping list written in the order of how you go through the store. You know that you will be going through the fruits and vegetables first, then the bakery, then the meat. When you make your list, have all the fruits and vegetables at the top, then the bakery stuff, then the meat, and so on. Your goal should be to get everything you need in as little time as possible, the less backtracking through the store you have to do, the better.
Conclusion
I am excited about this eating on a budget series, I think I am going to learn a lot and I hope that you do too. It is going to be a challenge staying within a $148 budget, but I will do my best. If you want to challenge yourself to stick within a weekly grocery budget, I’d love to hear from you. You can leave a comment below or send me an e-mail on my contact page, and you and I can go through this together.
There is also now a members-only section of Chef’s Notes (I’ve mentioned a few times now I know). There are three levels, all with different benefits, but with the free membership, you get access to weekly downloadables. Right now, there are three downloadables in the member’s section. They are a meal planner, a grocery budget template, and a kitchen inventory template. You can sign up here for access to those things and more.
Thank you for reading the post. If you liked it, remember to share it on Facebook, Pinterest, or Twitter by clicking the icon to the left of the right of the page. Did you know that Chefsnotes.com has almost 400 posts just like this one? Imagine all the great tips, tricks, and recipes you’ve missed. Don’t miss any more! Subscribe to Chef’s Notes by putting your email address in the subscription box below or by becoming a Chef’s Notes member right here. You will be notified of every new post. And if you would like to know more about me, click the link below to read my story.
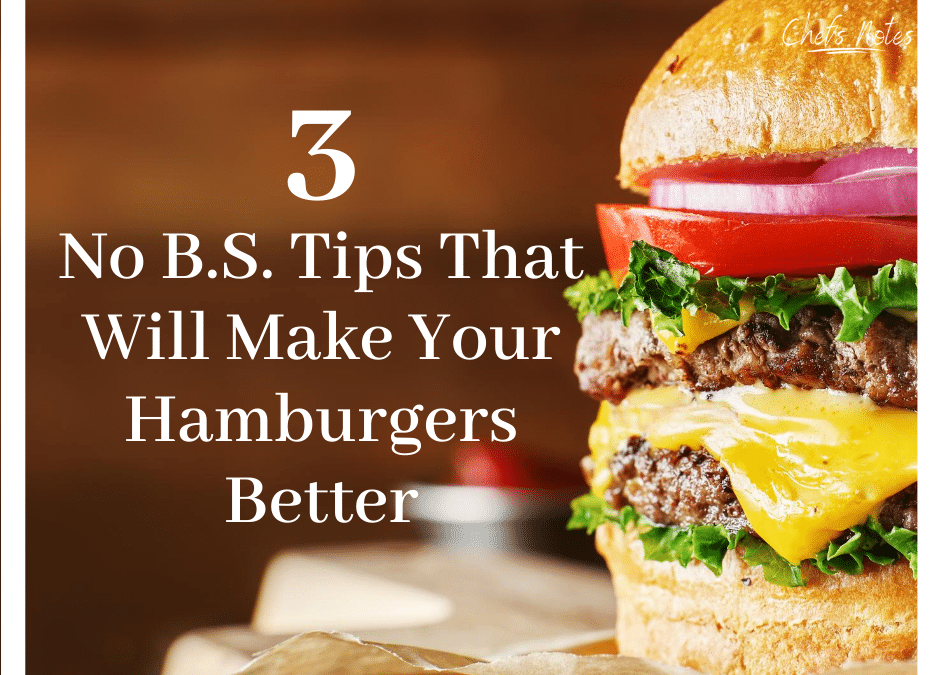
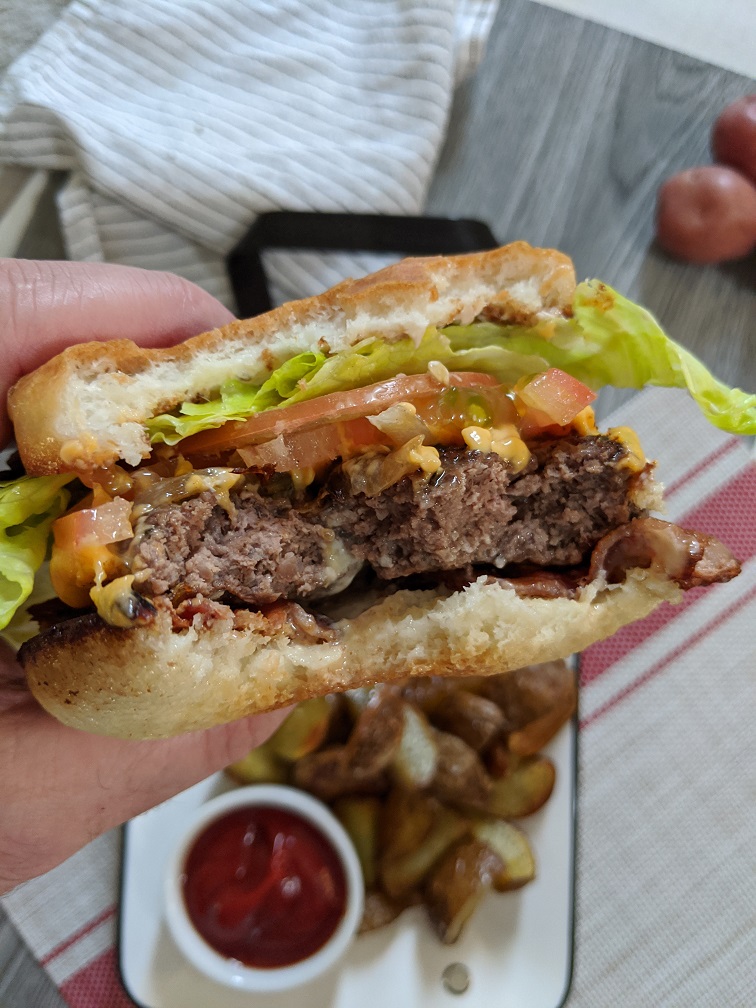
Let’s face it, everyone has tips and secrets to making the best burger. The thing is, a lot of those tips and secrets are garbage. I recently saw a post that suggested you use the leanest meat you can buy, and load it up with vegetables and oats. Does that sound like a good idea to you? If it does send me a message and I’ll give you the link to the site. If you think that sounds terrible like I do, stay here. I am going to give you a very short list, only three things, that will actually make your burgers better. Don’t believe me? Keep reading.
The Beef
First things first, let’s talk about the meat. One thing I’m not going to tell you to do is to grind your own meat. Do you know why? Because you aren’t going to do it. I don’t even do it. Will grinding your own beef make a better burger? If you get the ratio of fat and meat right, then yes, it can. Can you make a delicious burger with store-bought meat? Of course, you can. Anyone who tells you different is full of it.
For hamburgers, you want to buy medium ground beef. The ‘medium” refers to the ratio of meat to fat, not the size of the grind. Medium ground beef has no more than 23% fat, leaving 77% meat. Typically, 80/20 is the perfect ratio, but 77/23 is pretty close. You might be tempted to go with leaner beef, but don’t do it. Leaner meat will lead to a dry burger unless you are very careful. Keep in mind that a lot of the fat will melt out of the burger while cooking.
Seasoning the Meat and Other Additives.
I’ve seen a lot of people put a lot of things in their burgers. Don’t. Keep it simple. Your meat does not need a binder. It does not need filler. It needs very little. I’m not going to tell you exactly what you should put in your burger mix. I think that is up to you. But, here is what I put in mine; salt, pepper, onion powder, garlic powder, and sometimes Old Bay Seasoning. That’s it.
You may be looking at what I put in my burger mix and thinking to yourself that those burgers must taste bland. “That Ben guy is so uncreative. He can’t even think of interesting things to put in his burgers.” Wrong. If I’ve learned anything in my career, it is this: Making things unnecessarily complicated is a recipe for disaster. I’m making a recipe for burgers, not a disaster. The burgers have loads of flavour, and they make the perfect base for whatever toppings I want to add. What more does a hamburger patty have to be?
Forming and Cooking Hamburgers
I have made thousands of hamburgers in my life, literally. It’s to the point that I can eyeball a 6 oz handful of meat with a very high level of accuracy. I assume you can’t do that. Why would you be able to? But there is a simple enough way to form evenly sized patties. Figure out how many burgers you want. It’s best if it is an even number. Flatten and square off your meat mound as best you can. Divide the mound-o-meat in half. Do that again. Do that again. Do it again until you have the number you want. Roll all of those divisions of meat into balls, then form them into patties. Who cares if they are 6 oz, 5 oz, or 4 oz as long as they are all the same size and you have enough.
Making Hamburger Patties
I do not like thick hamburger patties. I would rather have two thin patties stacked on top of each other than one big one. The reason is simple. A lot of the burger flavour comes from the browning on its surface. Two patties, no matter the width, have double the surface area of one patty. So, two thin patties equal more flavour. Plus, you can melt cheese on both. And, two patties make for better pictures, if that’s your thing.
To make it a little more clear, I very rarely make a burger patty more than a 1/4 inch thick. Oh, and season the outside of the burger with the same stuff as the inside.
BS Check
I’ve seen a lot of people lately saying not to put salt in your burger meat because it will affect the texture. I’m positive that salt will alter the texture of a raw burger patty that sits in the fridge for even a few hours. But, it isn’t going to make that big of a difference. The benefit of flavour that comes from seasoning the meat with salt far outweighs any possible negative effect on texture. I call BS.
Cooking the burgers
I don’t care if my burgers get cooked on a grill, in a skillet or on a griddle. All three options will make a good burger. I care that the burger tastes good, and I care that the burger is cooked all the way through. Anyone that tells you to eat a burger anything less than well done is putting your life at risk. The only time it is okay to eat a hamburger less than well done is when you have ground the meat yourself (see the science fact below for more information). For cooking, the barbecue has a slight advantage over a skillet or griddle. On the grill, the fat melting out of the meat drops away instead of pooling around the patty. Other than that, it doesn’t matter. It is going to taste good no matter what.
Science Fact
You can eat a steak rare. Why shouldn’t you eat a burger rare? Surface area. A steak has a top, a bottom, and sides. Bacteria can live and grow on all of these surfaces. But, when the steak is cooked, the high heat that hits those surfaces is enough to kill the bacteria. If you take that same steak and throw it through a meat grinder, you will create thousands of little steaks. Each small piece of ground meat has a surface area for bacteria to grow. If the grinding equipment had bacteria on it, or if someone didn’t wash their hands before grinding your meat, that has now been transferred to the meat. The more time that passes from grinding to cooking, the more bacteria will grow. When you form that meat into a burger, the majority of that bacteria gets tucked nicely inside protected from direct heat. The only way to kill the inside bacteria is to cook the hamburger to an internal temperature of 165°F. That’s well done.
Bonus Tip
.Whatever you put on your burger, cut it as thin as possible. Tomatoes, cut them thin. Onion, cut it thin. Pickles, cut them thin. The thinner the toppings, the easier your burger is going to be to eat and the more structurally sound it is going to be.
Conclusion
If you love your hamburgers and think that there is no room for improvement, don’t listen to me. If that is the case, I’d love to hear about what makes your burger so great in the comments. If you think that you’re burgers could be better, follow these three tips and you will find an improvement.
What are your top hamburger tips? Tell me in the comments section below.
Did you know that Chef’s Notes has over 300 posts on all things food and cooking? Think of all the great tips and recipes you’ve missed! If you want to stop missing out, subscribe to Chef’s Notes at the top right of this page. You’ll get notified of new posts right in your inbox. And, if you liked this post, remember to share it on Facebook and/or Pinterest or wherever else you see fit. Just click the icon to the right or the left. It’s that simple.
Walking around the grocery store, you will see dozens of different types of Barbecue sauce. Many of those sauces are delicious and make great options for whatever you are cooking. If you are happy with your store-bought sauce, then, of course, keep using it. However, if you want something a little different, it may be time to start making your own homemade barbecue sauce. To be clear, this is not about convincing you to stop buying barbecue sauce. This is for people who want something a little different and are ready to level up to make their own homemade barbecue sauce. Let’s take a look.
What is Barbecue Sauce?
Before you can make homemade barbecue sauce, you first need to understand what it is. The Merriam-Webster dictionary defines barbecue sauce as “: a spicy sauce usually eaten with barbecued food.”. That’s a pretty loose, but also a standard definition. As I’m sure you are fully aware, most barbecue sauces on the market today would never be classified as “spicy.”. Does that mean they aren’t barbecue sauce? No, of course not. For our purposes here today, we are going to define barbecue sauce as an acidic/sweet/occasionally spicy sauce eaten with barbecued food.
In all honesty, there are a lot of different types of barbecue sauces from Carolina Gold mustard-based sauce, to Kansas City White Sauce which is mayonnaise-based, to Texas Vinegar Sauces. However, today, our focus is going to be on the classic tomato-based sauces that most of us use most often. If you would like more information on those other sauces, check out this post I did last year.
The Base of the Sauce
When making homemade barbecue sauce, there are two main starting points. You can begin with fresh tomatoes, or you can begin with ketchup. Both of these bases have their benefits and their drawbacks, let’s take a quick look at each.
Starting with Fresh Tomatoes to Make Your Barbecue Sauce
When using fresh tomatoes to make your homemade barbecue sauce, you typically have to roast or bake the tomatoes first. You can also smoke the tomatoes to get a more “authentic” barbecue sauce taste. This roasting removes the sharp acidity of the tomato and intensifies their natural sweetness. To cook the tomatoes start by slicing them in half, drizzling them with olive oil, and seasoning them lightly with salt and pepper. Put them in a 400°f oven for 30-45 minutes or until they soften and start to brown around the edges. Once the tomatoes are roasted, combine them with the other ingredients, then purée the sauce and pass it through a fine-mesh sieve to ensure a smooth consistency. Tomato paste is often added to sauces made from fresh tomatoes to ensure the texture of the final sauce is that of a typical barbecue sauce.
Benefits
You have complete control over the flavour of the sauce.
You know exactly what is in the sauce.
Usually, tastes better than ketchup-based sauces.
Drawbacks
More preparation is required.
More effort is required to perfect the flavour of the sauce.
The sauce must be puréed and strained to ensure a smooth consistency.
Mush more time is required to make this type of sauce.
Starting with Ketchup as the base of your Homemade Barbecue Sauce
In truth, either way, you are basically starting with ketchup. The difference is that you are either making the ketchup from scratch and adding the ingredients to make it a barbecue sauce as you go. Or, you are using store-bought ketchup and adding the elements to make it a barbecue sauce. The benefit of using store-bought ketchup is that you are removing five or six steps from your sauce-making process.
Typically, when store-bought ketchup is the base of a barbecue sauce, there are only a handful of ingredients used in the sauce. These are vinegar, sugar (could be white or brown sugar, molasses, honey, or maple syrup), and spices (commonly onion powder, garlic powder, cayenne, etc.). For a more “authentic” barbecue sauce taste, liquid smoke or smoked salt are sometimes added. Making barbecue sauce in this way takes only a few minutes and requires no cooking. However, some people prefer to use ketchup as the base but to use fresh onions and garlic, which they sauté until soft. The other ingredients are added to the onion and garlic, puréed and passed through a fine-mesh sieve.
Benefits
Quick to make.
Less effort.
Fewer ingredients are required.
Don’t have to cook.
Drawbacks
You have slightly less control over the flavour.
There may be hidden ingredients in the ketchup.
Most often, I use store-bought ketchup as the base of my sauce, it is much more convienteant and much quicker than using fresh tomatoes. However, I do prefer the flavour and the control I have over the flavour more when making a sauce with fresh tomatoes.
Acid
The standard barbecue sauces that we are talking about today have four main elements. The first, which we’ve already talked about, is the tomato element. The second is acid, more specifically, vinegar. The type of vinegar you chose to make your sauce will affect its final flavour and appearance. The three most common options are white distilled vinegar, apple cider vinegar, and balsamic vinegar. I find that apple cider vinegar is the best all-around, go-to vinegar for barbecue sauce. However, that is not to discount either white or balsamic vinegar, which both have their place. Balsamic adds a deeper, more complex acidic taste to the sauce. White vinegar, on the other hand, has a much more upfront, punch you in the face, kind of flavour. Apple cider vinegar is somewhere in between these two. Balsamic will also give your sauce a much darker appearance.
Sweet
The third element of these sauces is something sweet. Now, some barbecue sauces are very sweet, and some are not, but most, if not all, have some sweet element to them. Like the vinegar, the sweetener you choose to use will affect the flavour and appearance of the sauce. Most commonly, brown sugar, molasses, and maple syrup are used to sweeten barbecue sauces. Molasses will add the most depth to the flavour of the sauce, and will also have the most significant impact on the appearance of the sauce. Brown sugar adds depth to the sauce, though not as much as molasses. Sauces with solid sugars like brown sugar or white sugar, usually have to be cooked to ensure that the sugar dissolves into the sauce. Maple syrup adds that earthy, maple flavour to a sauce though it is more expensive than both molasses and brown sugar.
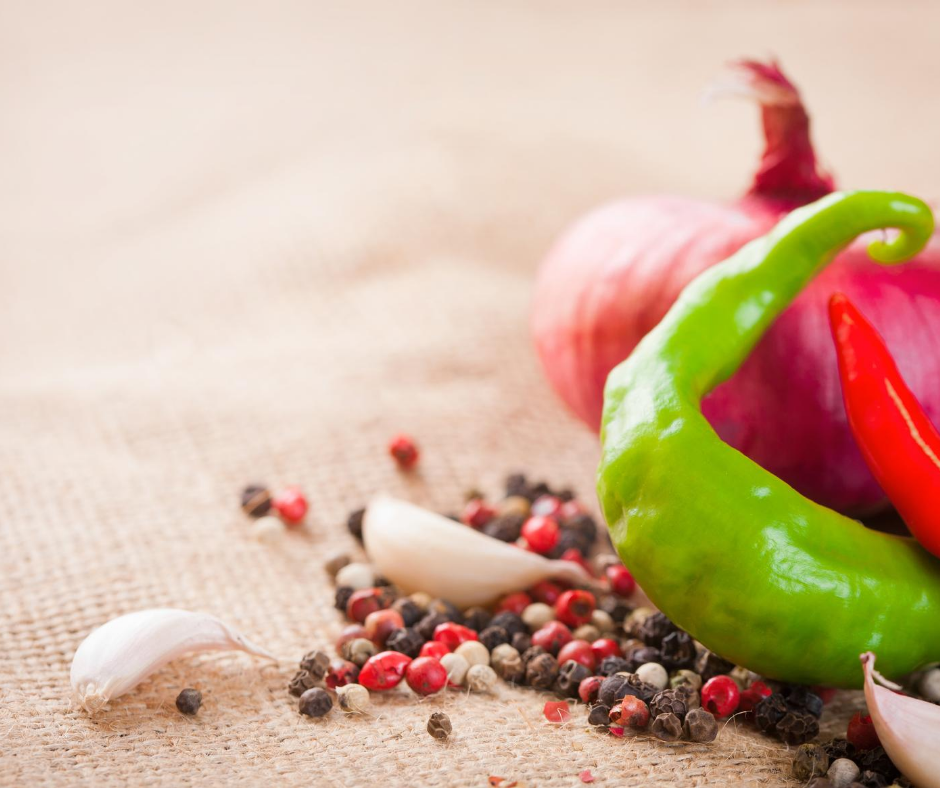
Flavourings
Flavourings are the final element to a barbecue sauce. Depending on how you are making your sauce, these may include either onion, or onion powder, garlic or garlic powder, and chilli or chilli powder. Black pepper is commonly used in relatively large amounts in barbecue sauce as well. If you are making the sauce from scratch, you may include spices like cinnamon, clove, and nutmeg, which are found in most ketchup. As I mentioned earlier, you may choose to use liquid smoke or smoked salt to achieve a more “authentic” barbecue sauce flavour. All that means is that the smokey element will make your sauce taste more like bottled sauces.
Typically, if I am making a quick sauce, I will use ketchup as the base, add to it cider vinegar, molasses, onion powder, garlic powder, cayenne pepper, black pepper, and sometimes liquid smoke. I stir all of these ingredients together and have a useable and tasty sauce in minutes. When making the sauce from scratch, I use my roasted or smoked tomatoes, along with sautéd onions and garlic. To that, I add in some tomato paste, brown sugar, cider vinegar, a cinnamon stick, some chilli flakes, a few cloves, and maybe some thyme and mustard powder. I simmer all of these ingredients with a bit of water for about an hour, then purée it in a blender, and pass it through a food mill or a fine-mesh sieve.
Conclusion
You can make a delicious sauce from scratch, and you can make a delicious sauce using ketchup as the base. It just comes down to what you prefer. I do recommend that you make barbecue sacue from scratch at least once. It is a fair amont of effort, but you will gain an appreciation for the sauce, that you didn’t have before, and you may even find that you love it much more then ketchup based sauces.
Below I have included three recipes for barbecue sauce made with store-bought kethcup as the base. Take a look at them and you will immediately notice how similare, yet different they are. I hope what you take away from this is that even though the ingredients are mostly the same, small variations in ratios, and a few additional ingredients can make a world of difference.
Thank you for reading. If you enjoyed this post remember to share it on Facebook or Pinterest because that will help the blog continue to grow. And, remember to subscribe by entering your email address in the top right of the sidebar so you never miss a post again.
Standard Barbecue Sauce
A very basic barbecue sauce that can be used on almost anything.
This Barbecue sauce is pack with flavour from ingredients from South East Asia. It is the perfect sauce to marinade your pork tenderloin for your Banh Mi.
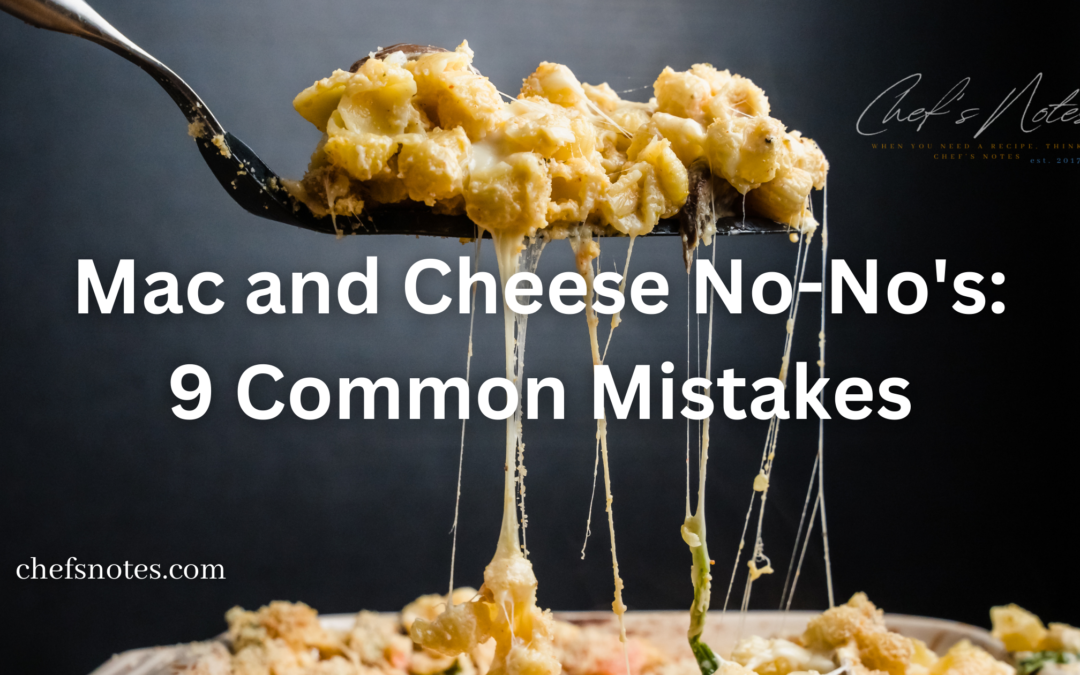
Looking for the perfect Mac and Cheese recipe? Avoid these 9 common mistakes to make sure your dish is a hit at your next potluck. From overcooking the pasta to using the wrong type of cheese, these mistakes can ruin your Mac and Cheese and leave it inedible. Don’t be the one to bring the bad Mac and Cheese to the party. Follow these tips to ensure your dish is a delicious success.
Mistake #1 Not Using a Roux
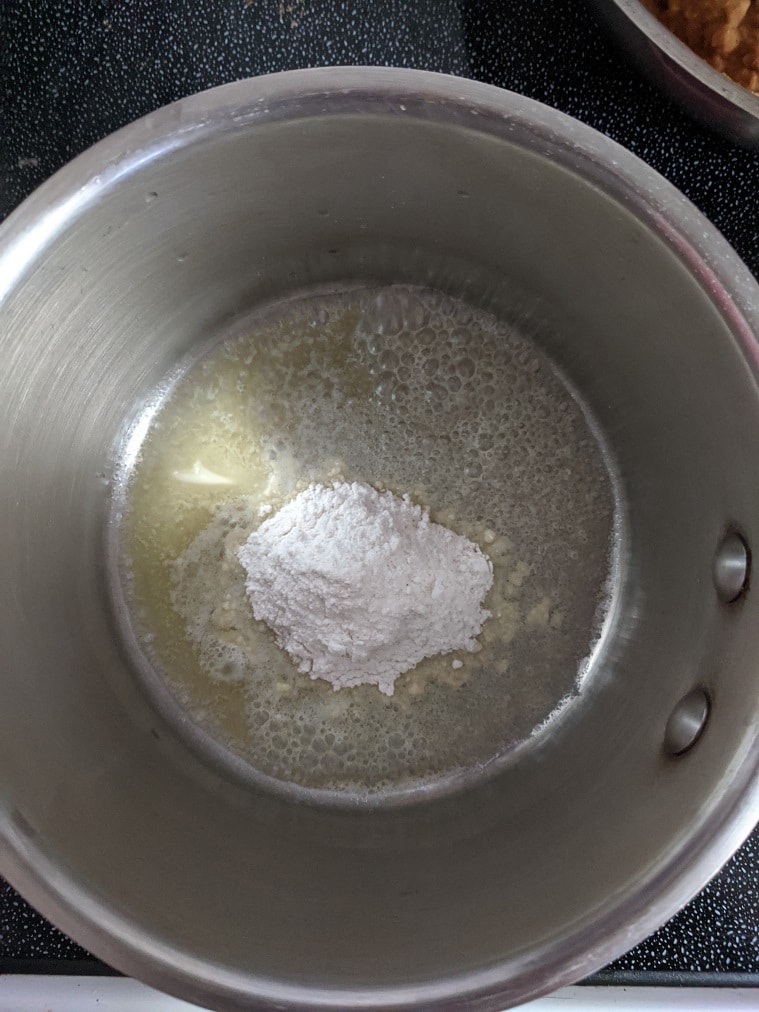
Roux is a crucial component in many classic dishes, including the beloved Mac and Cheese. It’s a simple mixture of equal parts flour and butter that’s cooked together and used to thicken sauces and gravies. Without a roux, your cheese sauce can turn out unstable and may even curdle during cooking.
To make a roux, start by melting butter in a pot. Once melted, whisk in an equal amount of flour and continue cooking and whisking for 4-5 minutes. You can then use the hot roux to thicken cold milk, or whisk cold milk into the hot roux. By using a roux, you’ll create a stable base for your cheese sauce that will result in a creamy and delicious Mac and Cheese.
Mistake #2 Wrong Milk For The Job
When making Mac and Cheese, it’s important to choose the right type of milk. While it may be tempting to use lower-fat milk to save on calories, it’s important to use at least whole milk (3.25% Milk Fat) to ensure the best texture and stability. The higher fat content helps to prevent the Mac and Cheese from becoming greasy or separating during cooking. If you only have 2% milk on hand, consider adding a bit of whipping cream to it in a ratio of 1:3 (1 part whipping cream to 3 parts milk) to increase the fat content. Trust me, your Mac and Cheese will thank you!
Mistake #3 Undercooking Bechamel
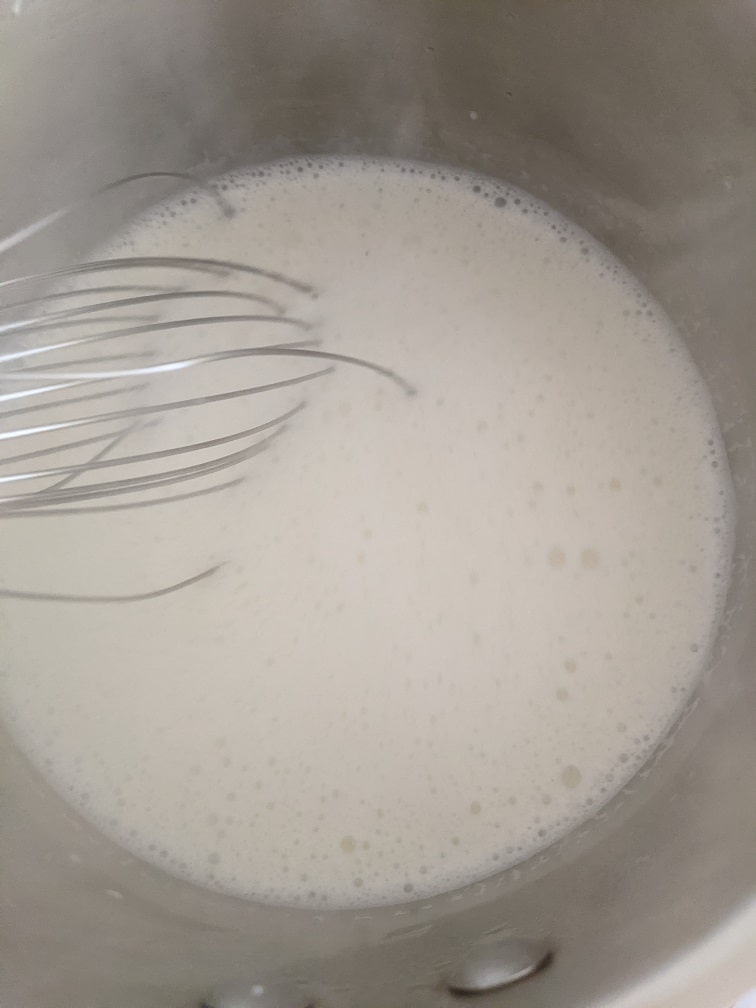
If you want to make the perfect Mac and Cheese, it’s important to pay attention to the details, including the Bechamel sauce. Bechamel is made by thickening milk with a roux, a mixture of flour and butter that’s cooked together to various degrees to achieve different flavours and colours. The roux is an essential component of the Bechamel, as it helps to thicken the sauce and give it structure. However, if the roux is not cooked long enough, it can impart a raw, floury taste to the Bechamel. This can ruin the texture and flavour of your Mac and Cheese, leaving you with a dish that’s grainy and unpalatable.
To avoid this common mistake and ensure a smooth and creamy Bechamel sauce for your Mac and Cheese, it’s important to simmer the sauce while gently whisking it for at least 10 minutes before adding in the cheese. This will help to cook out any raw flour flavour and give you a sauce that’s perfect for your Mac and Cheese. Don’t skimp on the cooking time – a little extra effort will pay off in a delicious and satisfying dish that’s sure to be a hit with your friends and family. So next time you’re making Mac and Cheese, be sure to give the Bechamel the time it deserves. Trust us. Your taste buds will thank you!
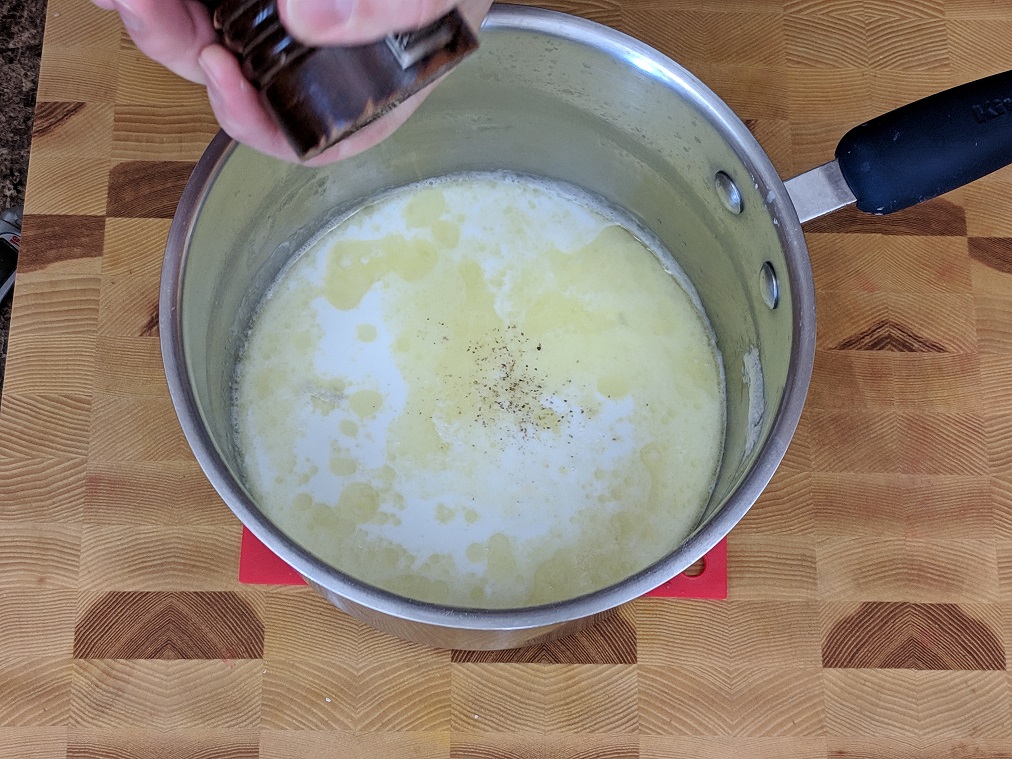
Flavour is key when it comes to making delicious Mac and Cheese, and the Bechamel sauce is no exception. While a basic Bechamel made of butter, flour, and milk provides the base for the Mac and Cheese sauce, it’s important to add in some extra flavourings to make it truly stand out. Some options to consider include nutmeg, cayenne, salt, pepper, onion powder, and garlic powder. These ingredients can help to enhance the taste of the Bechamel and add depth and complexity to the overall cheese sauce. A few drops of lemon juice can also help to brighten the flavour and add some balance.
When adding these flavourings to your Bechamel, it’s best to do so after the roux has been cooked and the milk has been added. This will give the flavours time to infuse into the sauce and develop fully. Be sure to add in enough flavourings to make your Bechamel shine in your Mac and Cheese, but be careful not to overdo it – a little goes a long way when it comes to seasoning. With the right balance of flavours, your Bechamel sauce will take your Mac and Cheese to the next level.
Mistake #5 Making Poor Cheese Choices
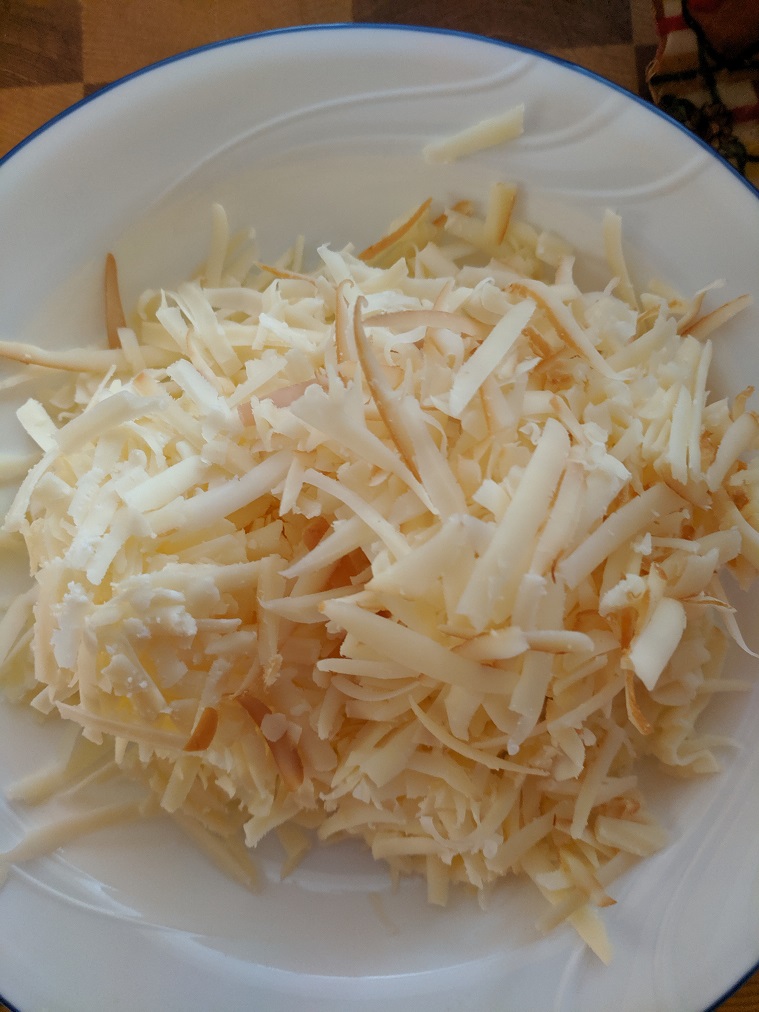
When it comes to making the perfect Mac and Cheese, the cheese you choose can make all the difference. To add depth and complexity to the flavour, it’s best to use a minimum of three different types of cheese. Aged cheddar is a great choice for flavour and colour, and adding in a little turmeric or paprika can help to enhance the colour if you’re using white cheddar. Swiss or Monterey Jack cheese can also add texture and flavour to the dish. For an extra layer of flavour, consider using an aged cheese like parmesan or asiago or a bold blue cheese like cambozola or gorgonzola. A smoked cheddar is another excellent option that can add depth and character to the dish.
However, it’s important to avoid using cheeses that won’t contribute to the desired flavour and texture. Processed cheese like American cheese or Velveeta may melt easily, but they don’t have much flavour and can result in a bland, uninspiring dish. Similarly, soft and crumbly cheeses like feta or goat cheese may not melt well and can lead to a grainy or uneven texture. To get the best results, stick with cheese varieties that are known for their melting abilities and bold flavours. Experiment with different combinations to find the perfect blend for your tastes.
Mistake #6. Adding The Cheese Too Quickly
When it comes to adding cheese to your Bechamel sauce for Mac and Cheese, timing is everything. If you add the cheese too quickly, it can cause the sauce to split or become unstable during cooking. To avoid this, it’s important to take a few extra steps to ensure that the cheese is fully incorporated into the sauce.
First, be sure to grate any firm or hard cheese before adding it to the sauce. This will make it easier to incorporate and prevent the sauce from becoming clumpy or grainy. Then, add the grated cheddar to the Bechamel a little bit at a time, whisking it in until it’s fully incorporated. Repeat this process with the Swiss cheese, and finish with the parmesan or blue cheese.
This process will help to emulsify the oils in the cheese into the sauce, which can prevent oil separation during cooking and give you a smooth and creamy Mac and Cheese. By following these steps, you can ensure that your cheese is perfectly integrated into the Bechamel, resulting in a delicious and satisfying dish.
Mistake #7 Cold Pasta
When making Mac and Cheese, it’s important to pay attention to the temperature of the pasta and cheese sauce to ensure that the finished dish is creamy and flavorful. Here are a few tips to keep in mind:
Avoid adding cold pasta to a hot cheese sauce, as this can cause the sauce to solidify and the emulsion of the cheese to weaken. Instead, make sure to keep the pasta hot while preparing the cheese sauce and add it to the sauce while it’s still warm.
To achieve perfectly cooked pasta in your Mac and Cheese, slightly undercook the pasta before adding it to the cheese sauce. This will help to prevent the pasta from becoming overcooked and mushy when the dish is finished baking. Just be sure to test the pasta for doneness before adding it to the sauce, as it should still have a slight bite to it.
To keep the pasta hot, you can try placing it in a large bowl and covering it with a clean dish towel or foil. Alternatively, you can heat the pasta briefly in the microwave or on the stove before adding it to the cheese sauce.
By following these simple tips, you can help to ensure that the cheese sauce stays smooth and creamy and that the pasta is perfectly cooked in your Mac and Cheese. The result will be a delicious and satisfying dish that’s sure to be a hit with your friends and family.
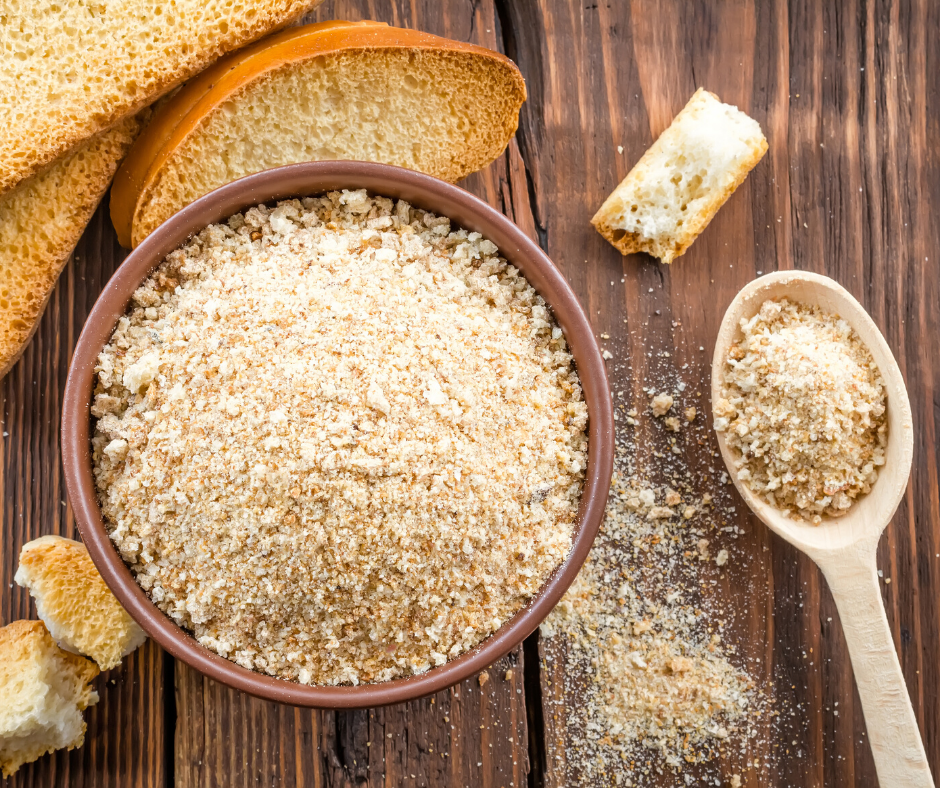
Mistake 8 Plain Bread Crumbs
The breadcrumb topping on Mac and Cheese serves two main purposes: to add a crunchy texture and to help the dish brown in the oven. However, it’s important to remember that the topping should also be flavorful in order to enhance the overall taste of the dish.
One way to add flavour to the breadcrumb topping is to mix it with grated parmesan and cheddar cheese. This will give the topping a savoury and slightly sharp flavour that complements the creamy cheese sauce. You can also add in other seasonings like onion powder, garlic powder, salt, pepper, and fresh parsley to give the topping an extra boost of flavour.
It’s also a good idea to taste the breadcrumb mixture before adding it to the top of the Mac and Cheese to ensure it has enough flavour. If it tastes bland, add a little more of the cheese or other seasonings until you get the desired taste. Remember, the breadcrumb topping may seem like a small detail, but it can make a big difference in the final flavour and texture of your Mac and Cheese. Don’t skip this step – a little effort in seasoning the topping can go a long way in creating a delicious and satisfying dish.
Mistake #9 Over Baking/Temperature Too High
When making Mac and Cheese, it’s important to pay attention to the cooking time and temperature to ensure that the dish is creamy, flavorful, and not overcooked. If you’re using the broiler to set the sauce and brown the top of the Mac and Cheese, it’s essential to make sure that the sauce and pasta are already hot before placing the dish under the broiler. This will help to ensure that the dish is heated through and the breadcrumb topping browns evenly.
If you’re heating up a batch of Mac and Cheese that was made ahead of time or is cold from the fridge, it’s best to bake it in the oven at a lower temperature for a longer period of time. This will help to gently heat the dish without drying it out or causing the cheese sauce to separate. A good starting point is to bake the Mac and Cheese at 350°F for 20-30 minutes or until the sauce is hot and bubbly and the breadcrumb topping is nicely browned. If the top of the dish isn’t browned to your liking, you can finish it off under the broiler for a few minutes. Just be sure to keep a close eye on the dish while it’s under the broiler to prevent burning.
By following these simple tips, you can help to ensure that your Mac and Cheese is cooked to perfection and enjoy a delicious and satisfying meal.
Conclusion
In conclusion, making the perfect Mac and Cheese involves paying attention to a few key details. From choosing the right kind of milk and cheese to cooking the Bechamel sauce and pasta to the right consistency, to seasoning the breadcrumb topping and avoiding overcooking, there are many ways to take your Mac and Cheese from mediocre to amazing.
By following the tips and tricks outlined in this post, you’ll be well on your way to creating a Mac and Cheese that will be the talk of the town. Don’t be afraid to get creative and add your own personal touches to the dish – after all, that’s what makes cooking so much fun!
And as a bonus tip, consider mixing in some extra gooey cheese like Swiss or gorgonzola into the Mac and Cheese before adding the breadcrumb topping. This will give the dish that delicious, stringy cheese look that we all know and love from TV Mac and Cheese.
Thanks for reading, and don’t forget to share this post with your friends on social media or via email. And if you enjoyed it, be sure to subscribe to the blog to stay up-to-date on all our latest posts and recipes. Happy cooking!
Are you tired of producing mediocre meals? Are you ready to take your cooking to the next level? Look no further! These 5 surprising tricks will revolutionize the way you cook and impress your friends and family with delicious, restaurant-quality dishes. Best of all, they’re easy to implement and won’t require any fancy equipment or hard-to-find ingredients. So get ready to transform your cooking and become the master chef of your kitchen!
1. Learn to taste
The simple act of tasting your food as you cook is the most effective way to improve the quality of your dishes. Tasting isn’t just about determining if your food tastes good – it also helps you identify and correct any deficiencies in your recipes. For example, tasting can help you determine if a dish needs more salt, acid, or sweetness to bring out the flavours. It can also help you detect if a dish has too much of a particular ingredient, such as herbs or spices, which can overpower the other flavours.
When should you taste your food?
Make a habit of tasting everything you can, including vegetables, sauces, soups, and starches before serving. Don’t be afraid to taste and adjust the seasoning multiple times, especially with soups and sauces. The more you taste, the more you’ll learn about the flavours and how to balance them in your dishes.
When it comes to vegetables and starches, it’s best to taste them just before serving. Cook them, season them, taste them, adjust the seasoning as needed, taste them again, re-adjust if necessary, and taste one more time before serving. This will ensure that the flavours are well balanced and the seasoning is just right.
For soups and sauces, it’s a good idea to taste and adjust at least three times during the cooking process. Once in the middle of the cooking time (if it is safe to do so), once about a third of the way through the cooking time, and once at the end. Tasting soups and sauces that often will give you a much more accurate profile of the flavour and allow you to adjust as needed without extending the cooking time.
2. Temperature Control
One of the biggest mistakes home cooks make is not using high enough heat when cooking. This can result in food that is grey, sticks to the pan, and is overcooked or undercooked. For example, if you are cooking a steak, pork chop, or chicken breast in a pan and the heat isn’t high enough, three things are likely to happen. The meat will turn grey rather than getting that nice browning on the surface. The meat may (and likely will) stick to the pan because the heat wasn’t high enough to sear it on contact, allowing it to release from the surface of the pan. And, the liquid will probably come out of the meat, pooling in the pan, causing the meat to boil. This will lead to very grey, tough, chewy meat. All of these are undesirable outcomes. Similar issues can occur when cooking vegetables.
The way to resolve all of these issues is very simple – let your pots, pans, ovens, or other cooking equipment heat up properly before adding any food. This doesn’t have to be over high heat, though sometimes (when using a wok especially) that is what you want. Heating a pan over medium heat for a few minutes should be enough. Test the temperature of the pan by splashing a little water on its surface. If the water spits and forms droplets that roll around the surface of the pan before evaporation, the pan is hot enough. If the water just sits there, the pan isn’t ready. Make sure the pan is dry before adding oil to prevent splattering. Hot oil and water can burn you, so be careful when heating up your cooking equipment.
Proper heating is essential for great cooking. Don’t be afraid to turn up the heat and allow your cooking equipment to heat up properly before adding food. This will result in better browning, more tender and juicy meat, and perfectly cooked vegetables.
The 5 P’s of Cooking
When cooking, or getting ready to cook, keep in mind the 5 P’s of cooking: prioritize, plan, prepare, patience, and produce. Let’s look at each one in more detail:
Prioritize: Before you start cooking, take a few minutes to think about each task you need to achieve. Rank them in order of importance and in the order they need to be completed. This will help you execute the recipe more efficiently and prevent you from missing a step.
Plan: Once you have prioritized your tasks, take a few minutes to plan how you will execute them. Are there things you can do simultaneously without disrupting the rhythm of cooking? Should you chop extra garlic because you’ll need some for the sauce too? Even minor planning will help you stay organized and on task, making cooking more efficient and enjoyable.
Prepare: Before you start cooking, get everything ready that you can. Measure out spices, pick herbs, and do everything you need to do to your ingredients. There’s nothing worse than being at a crucial point in the cooking process and having to dig around for an ingredient or prepare an ingredient that should be ready to go. This can cause chaos, confusion, and stress.
Patience: Once all your ingredients are ready, turn on your cooking equipment and be patient. Give your equipment time to properly heat up and be patient throughout the cooking process. Wait until the meat is browned, the onions are soft, or whatever it is. It will be worth the wait.
Produce: The final P is produce – cook the food, serve it, and enjoy it. Employ all of the P’s and things should run smoothly.
Knife Skills
Knowing basic knife skills makes cooking faster, safer, and more efficient. Proper knife skills involve more than just being able to chop an onion – they include everything from selecting the right knife for the task to maintaining a sharp edge and using the correct cutting techniques. Here are a few tips to get you started:
Hold your knife properly: To cut quickly and safely, it’s important to hold your knife in the correct position. Hold the handle of the knife as close to the blade as is comfortable, wrapping your whole hand around the handle in a firm, relaxed grip. Avoid putting your index finger on the spine of the blade, as this decreases the stability of the knife.
Use the correct cutting technique: Your non-knife hand, also known as your guide hand, plays a crucial role in controlling the food you are cutting. The fingertips of your guide hand should be in contact with the food and hold it in place while you are cutting. Curl your fingertips in slightly to avoid getting caught under the knife. The flat part of your fingers, between your first and second knuckles, should be in almost constant contact with the flat side of the blade of your knife. This may seem scary at first, but it will give the knife maximum stability and give you the most control.
Practice proper knife safety: Always use a cutting board to protect your countertop and keep your knife sharp. A dull knife is more dangerous to use because it requires more force to cut, which increases the risk of slips and accidents. Keep your knives sharp and use the correct cutting technique to minimize the risk of accidents.
By practicing proper knife skills, you’ll be able to cook faster, safer, and more efficiently. For more details on knife skills, check out this post.
Seasoning is an essential part of cooking that can make or break a dish. When I say seasoning, I mostly mean salt and pepper, but other seasonings like herbs, spices, and even acid (such as lemon juice) can be used to enhance the flavour of a dish.
To use salt properly, add it in small quantities at different times throughout the cooking process. This gives the salt time to dissolve and disperse throughout the dish. Once the salt has been added, give it a few minutes and then taste the dish. Add more salt as needed and continue tasting until the dish is perfectly seasoned. A perfectly seasoned dish is one where all the flavours are at their peak, but nothing tastes salty. It takes practice to master the art of seasoning, but seasoning your food will have a major impact on its flavour.
Pepper provides a slightly warming sensation on the tongue, opening up your palate and allowing you to taste a little more clearly. It’s important to use the right amount of pepper – too little and the dish will be bland, too much and it will overpower the other flavours. Start with a small amount and add more to taste.
In addition to salt and pepper, there are countless other seasonings you can use to enhance the flavour of your dishes. Herbs like basil, rosemary, and thyme can add depth and flavour to soups, stews, and roasted meats. Spices like cumin, coriander, and paprika can add warmth and depth to dishes like curries and chili. Acid like lemon juice or vinegar can add brightness and balance to a dish. Don’t be afraid to experiment with different seasonings and find what works best for you.
In summary, seasoning is an essential part of cooking that can take a dish from good to great. Use salt to enhance the flavour of your dish and pepper to open up your palate, and don’t be afraid to experiment with other seasonings to find what works best for you.
Conclusion
With a little practice and attention to detail, cooking can be an enjoyable and relaxing activity. By following the tips and tricks we’ve covered in this post, you’ll be able to improve your cooking skills and create delicious, satisfying meals with ease. From learning to taste your food and control the temperature of your cooking, to mastering basic knife skills and seasoning your dishes to perfection, these small changes can make a big impact on your cooking. So don’t be afraid to get creative in the kitchen and have fun! With time and practice, you’ll be well on your way to becoming a confident and skilled home cook.
BONUS TIP
I like to have my sink full of hot soapy water as I’m cooking. That way I can wash any dish that I dirty as soon as I have a second to do so. This prevents clutter and having a big mess to clean up once the cooking is over.
From understanding cooking terms to basic things that everyone should know how to cook and everything in between. Over the last four months, we have covered a lot of ground in my basic cooking course “Kitchen Clueless”. Today marks the end of this particular part of our journey together. As is always good to do at the end of something, we are going to take a look back and review the incredible amount of information that we have covered.
With that, let’s get to it. This is…
From Kitchen Clueless to Food Independent: The Wrap Up
Section 1 – Understanding Cooking Terms
In the first part of this series, we took a look at some basic cooking terms. Cooking has its own language (Spoiler, it’s mostly French) and in order to fully comprehend recipes, you need to know the language. It’s my hope that this section of the course gave you a better understanding of the language of cooking. Here are the terms we covered.
Bake
Blanch
Braise
Brine
Boil
Broil
Brown
Caramelize
Clarify
Chop
Conventional Oven
Convection Oven
Cup
Deglaze
Demiglace
Dice
Dry Roast
Emulsify
Fillet
Garnish
Glaze
Gram
Grill
Gratin
Julienne
Kilogram
Low and Slow
Litre
Marinade/Marinate
Mother Sauces
Mince
Mirepoix
Pan-fry
Pinch
Poach
Reduce
Render/Rendering
Roast
Roux
Sauté
Score
Sear
Season
Shred
Simmer
Skim
Slice
Steam
Stew
Stock
Stir-Fry
tbsp/tsp
Temper/tempering
Toss
Truss
If you are unsure of what any of the words in this list mean, click the link below to read the full post.
In order to become a good cook, you will need to have at least decent equipment at your disposal. In this part of the series that is exactly what we talk about. We take a look at what you need to know when buying knives, pots and pans, vegetable peelers, measuring cups, cutting boards and more. If you have any questions about kitchen equipment I suggest taking a look at this post at the link below.
For the third post in my basic cooking course series, we took a look at some basic knife skills and knife safety. We talked about how to sharpen your knife and why that is important, how to properly hold your knife, and different options for that, and of course how to actually cut things. Even if you think you are an expert knife-wielder I highly recommend taking another look at this post. There is a lot of very valuable information in there.
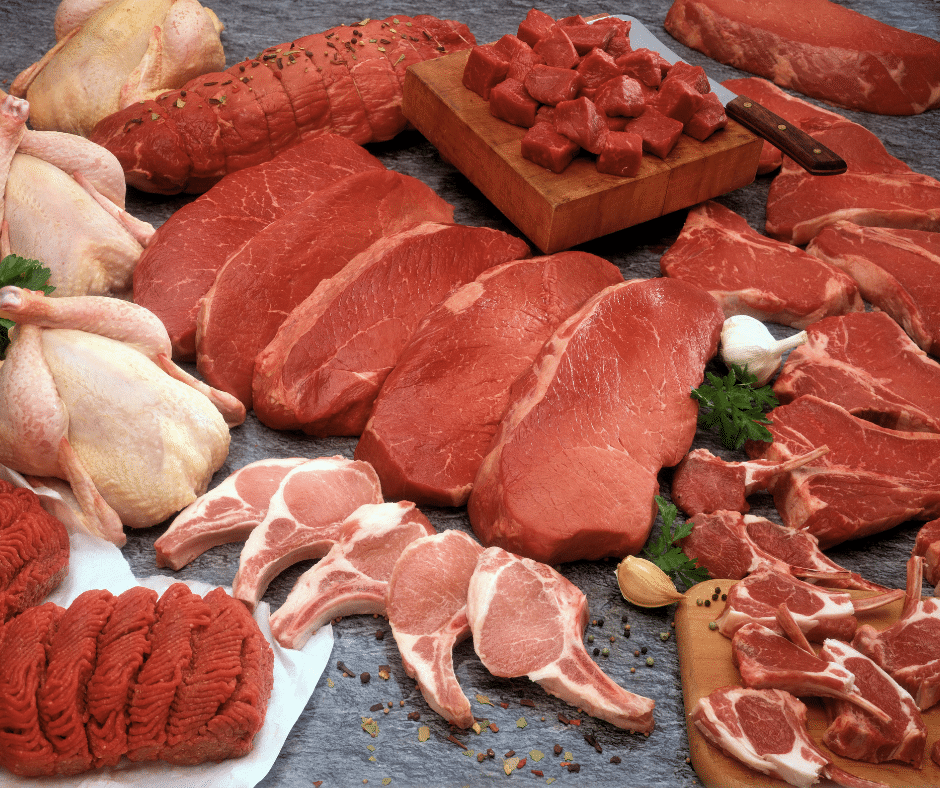
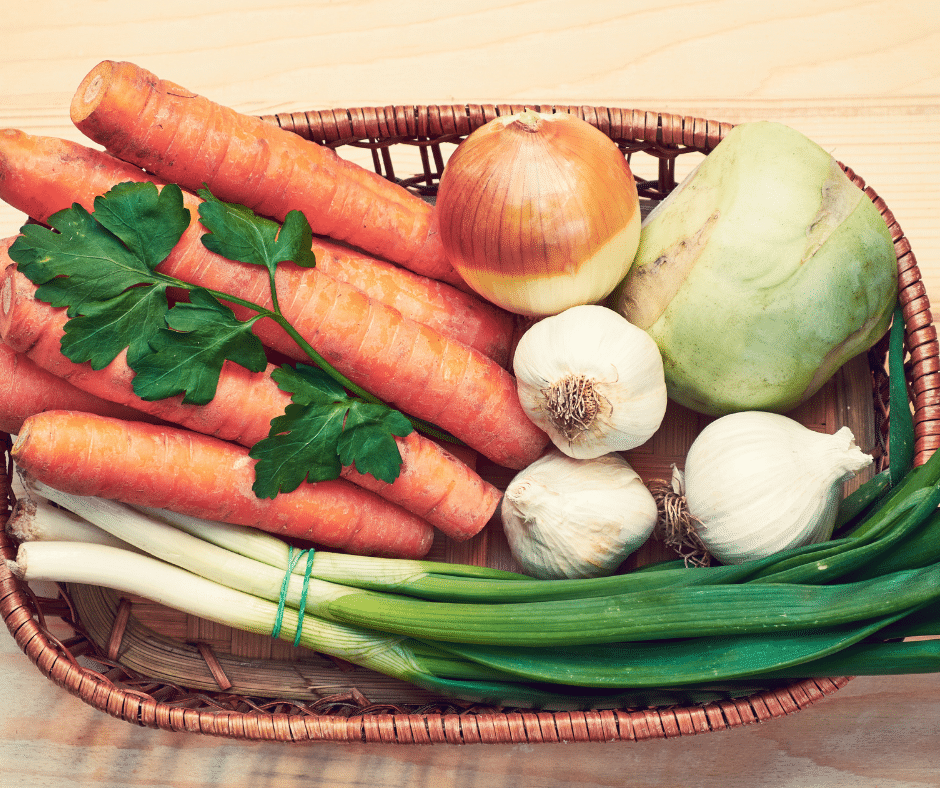
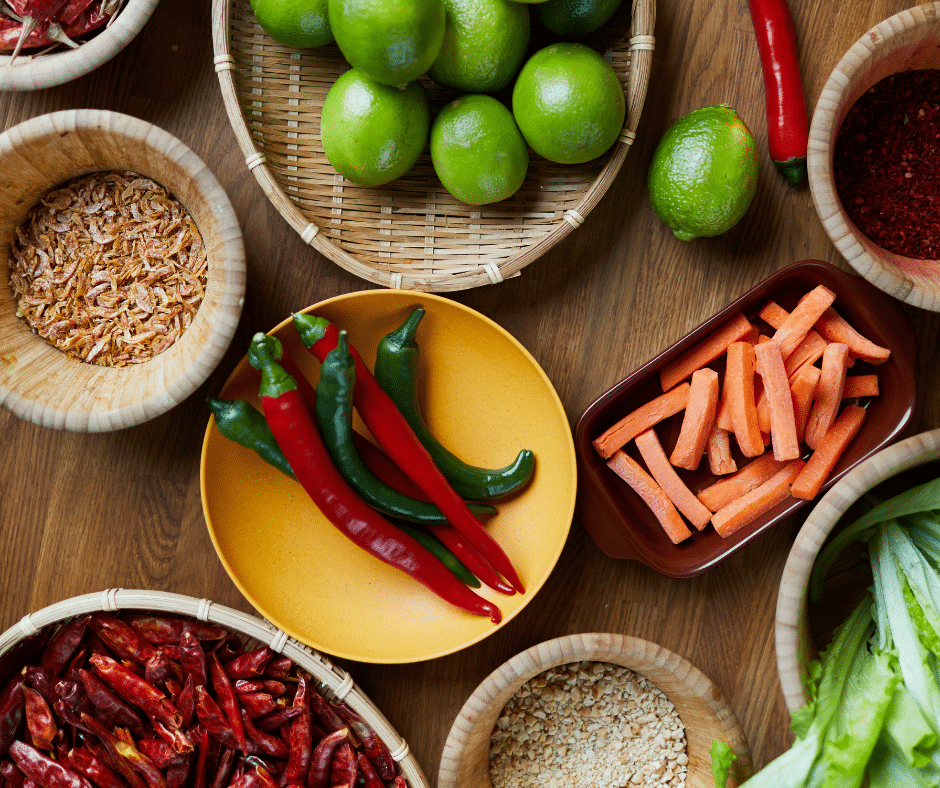
Part four of the course was so chock full of information that I had to break it up into four parts. In the first part, we looked at all kinds of beans and rice. In part two we looked at potatoes and onions. Part three was all about garlic, carrots, celery, bell peppers, and chilli peppers. And, part four was all about beef, chicken, fish and pork.
Looking back on this now I can’t believe how much information is jammed into these four parts. If you’d like to take a look you can click the links below.
In this the broke down and more clearly defined some basic cooking techniques including how to sauté, broil, roast, bake, pan-fry, sear, braise and more. If you want to be a better cook, nailing down every technique in this post will help to get you there.
From looking at basic cooking techniques we moved on to more concrete cooking concepts, like understanding soup. In this post, we looked at different kinds of soup, the basic principles behind the types, and of course how to make them. This post includes soup recipes for French Onion, White Bean and Chorizo, Roasted Butternut Squash, Apple and Parsnip, Bacon and Corn Chowder, and Scallop and Bacon Chowder.
From understanding soups, we moved on to understanding salads. In this section, as with the previous one, we looked at the basic principles of salads. We also looked at common types of greens and what to pair with them. As part of this section, we also looked at salad dressings. This post has recipes for a Basic Vinaigrette which you can alter in countless ways to make any type of vinaigrette you’d like. It also has recipes for Honey Dijon Vinaigrette, Maple Balsamic, Lemon and Chive, Caesar Dressing and more.
Sections 8 – Basic Things Everyone Should Be Able To Cook
In the final section of the series, which is broken up into three parts, we took everything from the previous lessons and applied it to the real world in Basic Things Everyone Should Know How To Cook. There is so much information and so many recipes in these three posts that I’m not even going to break it down. I suggest you go take a look for yourself. If you haven’t read them, you’re in for a treat. If you have, you will find something you missed.
I’m not going to lie to you, putting all of this together has been a tremendous amount of work. Much more work than I had anticipated and I am very much looking forward to taking a break from it. However, I feel really good about the series as a whole and I hope that you have enjoyed it. More importantly, I hope learned a lot from it. Over the next few weeks, my Wednesday posts will be pretty standard posts as I get ready for my next series which will start in a month or so.
Thank you as always for reading and for your continued support. You can find the entire basic cooking course at the link in the menu at the top of the page. And if you have an idea for a series that you would like to see on the blog let me know, you may just get what you asked for.
Good morning everyone and happy Victoria Day. Today we are going to do something a little different on the blog. Generally, on Monday, we look at a recipe that can be made fairly quickly. However, today, in part because it is a long weekend and in part, because someone asked for this post, we are going to look at how to spatchcock a chicken, what that means, and why you should know how to do this.
What is Spatchcock?
Spatchcock is when you remove the backbone from a chicken and flatten it. This is done for a few different reasons, the main reason is that it helps to cook the chicken faster and more evenly. This is very helpful when barbecuing or even oven roasting the chicken. The other reason is when you marinate the chicken the marinade has more surface area to penetrate leading to more flavour in the finished product. One other reason for Spatchcocking the chicken is that once it is cooked it is much easier to cut into smaller pieces.
Okay, let’s take a look at how to Spatchcock a chicken.
How to Spatchcock (Flatten) a Chicken.
Step 1 – Hips and Legs
The first step is to take a whole chicken and put it breast side up on your cutting board with the back opening towards you. Looking into the back of the chicken you can see the backbone running straight down the middle with the legs on either side. The legs are connected to the backbone by a ball joint which is about two inches in as you can see circled in red in the fourth picture in the group below. What you can see in the third picture is that before the ball joint is the hips (for lack of a better term) which come up in kind of a wide “U” shape.
Take your knife and slide it down the outside of the hips guided by their shape until you reach the ball joint that connects the legs. In the second picture in the below group, you can see the angle that your knife should go into the chicken. You also want the knife to be tilted on a 45°f angle. The knife is going to need a little bit of force to go through the hips but once you get to the ball joint it should go through fairly easily. You may need to move the leg around a little to uncover the ballpoint. Use the tip of your knife to cut the leg free of the ball joint, then do the same on the other side.
Step 2 – Ribs
Once the legs are free you want to keep cutting down towards the front of the chicken on either side of the backbone. At this point, you will be directly cutting through the ribs which will take a little force but shouldn’t be too tough. Stay as close to the backbone as you can to avoid cutting into the breast.
Once the backbone has been loosened a little you may find it easier to flip the chicken over, lift up the backbone and cut down through the ribs. Either way will work.
Step 3 – Wings and Wish Bone
Once you get to the front of the chicken your knife is going to hit bone. This is the “V” shaped bone commonly referred to as the wishbone. Run your knife on the outside of this bone until you reach another ball joint, this one connects the wings to the breast bone. Just like with the leg ball joint use the tip of your knife to either cut through it or cut it out. Then pick the backbone up and cut away any skin or meat that is still holding on. At this point, you should have a fully intact chicken with the backbone removed.
Step 4 – Flatten the Chicken
The final step to Spatchcock a chicken is to flip it over so the breasts are facing up and push down. There should be a few crunches as the ribs expand. With that, you should now have a flattened chicken. (My chicken, unfortunately, had a broken leg as you can see. )
Step 5 – Optional
The fifth and final step is completely optional. In this step, you flip the chicken back over and run your knife between the rib bones and the breast meat. Once the ribs have been loosened you cut them free. I prefer not to do this unless I am deboning the whole chicken. This will compromise the structure of the chicken causing it to fall apart when flipped on the grill. Leaving the rib bones on the chicken will also help protect the breast meat from the direct heat of the flame.
I don’t have a picture of this because I didn’t do it. However, you can see the rib cage in the picture below. If you want to remove the ribs run your knife on the outside of the rib cage, then cut the bones away.
Conclusion
This is going to take some practice. It is going to take a few times for you to get a feel for where to place your knife for the first few cuts, and how to cut through the ball joints. Eventually though, after doing this five or six times, this should take you only a few minutes. It takes me longer to scrub my cutting board after doing this than it does to actually do it.
I really cannot stress how valuable a technique this is to master. This single technique will change how you grill and even roast chicken forever, I promise. Oh, and you can do the same thing to turkey, game hen, or any other poultry.
If you have any questions about this or if any part of this is unclear please don’t hesitate to ask me to clarify. Thank you, have a great Victoria Day and remember to follow the blog so you never miss a post. Of course, if you enjoyed this post, please share it on Facebook or Pinterest.
Hello everyone and good morning. Today in the second last post of my free basic cooking course we are going to focus on ground beef. Specifically, we are going to look at a handful of uncomplicated and delicious meals that can be made with ground beef. These are meals that in my opinion, everyone should know how to make some version of. We are going to look at how to make meatloaf, shepherd’s pie, chili, and more. Let’s get to it.
This is…
Basic Things Everyone Should Be Able To Cook pt. 3 – Kitchen Clueless Basic Cooking Course
Hamburgers
I honestly believe that there are few things better in this world than a delicious hamburger. Luckily, making a truly delicious burger is much easier than it seems like it should be. I say this because generally, the big mistake that people make when making hamburgers is that they try to overcomplicate it. There is a tendency to add a pile of ingredients into the burger mix. All these ingredients often overpower the taste of the beef itself. What’s more, is that more often than not, all these flavours just get muddled together and end up tasting like a confusing mess. For this reason, for me, a simple burger is a good burger.
In all of my time cooking professionally the most important lesson I’ve learned, and this was a hard lesson to learn, is when to stop adding ingredients. Cooking is not about adding and adding until something tastes good. It’s about adding as few ingredients as you can to highlight the main ingredients. When I’m creating a recipe I will often list every ingredient that I think should go in it, then I started taking things away that aren’t adding anything to the final dish. Compliment the main ingredient, don’t overpower it. If you take one lesson from this whole series, this should be it. Recite it every time you cook, “Compliment, don’t overpower.” Every time you pick up a knife in the kitchen “Compliment, don’t overpower.” Every time you open your spice cupboard, “Compliment, don’t overpower.” This and this alone will take your cooking further than anything else.
Looking at the recipe below you will notice that the burger mix only has four ingredients in it; salt, pepper, onion powder, and garlic powder. That’s all. I know people who put ten or more ingredients in their burgers. Why? In cases like this, the ground beef is more a vessel for all the other flavours rather than being the start of the show. This to me, defeats the whole purpose of the burger.
Forming the burger
While there are some people out there that prefer a really thick burger, my feet are firmly planted in the opposite camp. I like thin burgers, then if you want more meat you can just add a second patty. The reason for this is pretty simple. The sear on a burger, the browning from the cooking process, adds loads of flavour to the meat and the final burger. When you have one thick patty you only have this sear on two sides. However, when using thinner patties, and doubling them up, you get the same amount of meat but double the seared surface meaning more flavour.
The other bonus to thin burgers is that they cook much quicker than thick burgers. This means that the risk of burning the outside of the burger is greatly reduced and the burger will shrink less, and dry out less. All this leads to a more flavorful and juicy burger.
Cooking the burger
In the recipe below I suggest cooking the burgers on an electric griddle. However, you can cook them in a skillet, or on a grill as well. This to me is actually the least important part of making burgers. Just make sure that whatever you are using to cook the burgers is nice and hot, and that you get a nice sear on the meat.
Bacon Cheeseburger
This recipe makes a delicious burger with onion, bacon, cheese, and horseradish mayo. What could be better?
When I was a kid meatloaf was a weekly staple on our dinner table. I hated it. My mom was a great cook, and I loved most of her food, but I could not stand her meatloaf. To be fair, it wasn’t just hers. For whatever reason, I hated all meatloaf. Someone could have served me the best meatloaf in the world and I still would have turned my nose up at it.
This hatred of meatloaf lasted until I was in my mid 20’s and was tasked with making staff meal in the restaurant I was working in at the time. I was given a pile of ground beef and told to make something. I have no idea why I chose to make meatloaf, but I did, and it was delicious. It was the only meatloaf I’d ever had that I liked up until that point. Now, I wouldn’t say that I developed a love for meatloaf after that, but I did develop more of an appreciation for it.
If you find yourself with a few pounds of ground beef and you are unsure of what to do with it, meatloaf is a great option…for those of us that like meatloaf at least.
One big problem I’ve always had with meatloaf is that they will have big chunks of onion and garlic that didn’t fully cook. This makes the meatloaf especially unenjoyable to eat. The obvious solution then is to pre-cook the onions and garlic and that is what I do in the recipe below. This is what I do in the recipe below. The added bonus is that the cooked onions and garlic add a mild sweetness to the mix adding more balance to the overall flavour of the meatloaf.
It will come as no surprise, that like my burgers (and just about everything else I cook) I prefer a more simplistic approach to my meatloaf. Not everything in the spice cupboard has to go into everything you cook. Add only what is needed and if you are going to add herbs use fresh ones whenever possible.
My Best Meatloaf Recipe
A really great meatloaf recipe with one or two ingredients that you'll want to keep our little secret. It also happens to be gluten-free
Heat a medium skillet over medium heat. Add in the olive oil, and onion. Cook for 2-3 minutes then add in the garlic and cook for an additional 2 minutes. Remove from the heat and let cool to room temperature.
Combine the remaining meatloaf ingredients in a large mixing bowl. Add the cooled onions and garlic and mix well. Knead the meatloaf mixture for 5-6 minutes until the meat becomes tacky and sticky. Push the meat into a loaf pan. Set aside.
Glaze
Combine the glaze ingredients and mix well. Pour the glaze over the meatloaf. Put the glazed meatloaf in the oven on 350°F. Bake for about 1 hour or until the internal temperature reaches 165°F.
Gravy
Heat a small skillet over medium heat. Add the butter and heat until it starts to foam. Add in the mushrooms, and onions and cook for 4-5 minutes. Add in the garlic and thyme and cook for another 2 minutes. Sprinkle the flour into the pan and stir for about 1 minute. Stir in the beef stock, and cook until thick. Season to taste with salt and pepper. Serve over the the meatloaf.
Who doesn’t love a good pot of Chili? The keyword there being good. In truth Chili is a bit like pizza, even bad pizza is still pizza. I think what I’m trying to say is that it is difficult to mess up Chili, it is a very forgiving dish. The recipe below is not a basis Chili recipe by any means. However, it is not at all difficult to make. What you notice right away when looking at the below recipe is that there are a lot of ingredients. Yes, it’s true. My simplistic view of cooking goes right out the window when it comes to Chili and for good reason, Chili benefits from complexity. Of course, there is nothing that says that you can’t make a delicious simply Chili, I just didn’t do that here.
The real benefit to the recipe below is more in the technique. Pay attention to when I added the spices and vegetables. They are timed so that the maximum amount of flavour is in the Chili at the time of eating. As a bit of an aside, don’t listen to people who say that Chili needs to be simmered for hours and hours, they are wrong. Doing this will destroy the flavour. The essential oils in the spices, which is where the flavour comes from are volatile and heat soluble. Cooking them for long periods literally cooks the flavour out of them.
The Best Ever Chili
In my opinion, this is the Best Chili you will ever have.
I just posted about these on Monday so I’m not going to say too much about them here. I suggest checking out the full post at the link below if you haven’t already done so.
Keyword: Chicken Pasta, Meatballs, Spaghetti and Meatballs
Servings: 23meatballs
Ingredients
1.2 kgMedium Ground Beef
1cupMinced Onion
2tbspMinced Garlic
1tbspChopped Parsley
1tbspChopped Rosemary
1tbspDried Oregano
1/2tspCrushed Red Pepper Flakes
1/2cupFreshly Grated Parmesan
1 1/2tspKosher Salt1 tsp if using table salt
3/4 tspBlack Pepper
3/4cupBread CrumbsGluten-Free
1lgEgg
1/3batchBasic Tomato Sauce
2cupBeef Stock
1/4cupOlive Oil
Instructions
Combine all the ingredients except the olive oil, tomato sauce and beef stock in a large bowl and mix until the meat is tacky, about 5 minutes.
Add the olive oil to a roasting pan.
Form the meat into 23-24 even size balls and place in the oiled roasting pan.
Bake the meatballs in a 400°f oven uncovered for 35 minutes flipping them halfway through.
Remove the meatballs from the oven and drain off all the excess fat.
Add the beef stock and tomato sauce to the roasting pan, cover with foil and bake in a 325°f oven for 35-45 minutes. Remove the foil and bake for another 10-20 minutes.
Toss the meatballs with tomato sauce and pasta and serve.
One of my absolute favourite things to do with ground beef is to make Shepherd’s Pie. (It is technically Cottage Pie becasue it is made with beef rather than lamb but where I come from we call it Shepherd’s Pie). Not only is this one of my all time favourite foods form when I was a child, but it is also one of the first things I ever learend to cook. And it is so stragight forward that I’m not even going to give you a recipe. I will hoever give you a quick walk through.
Shepherd’s Pie is made by sauteéing ground beef with onions, and sometimes garlic. Once these are cooked other vegetables like diced carrots, peas, corn, and green beans are added to the mix. Then one large can of creamed corn and some salt and pepper. Some people prefer to use gravy, but in my family, it was always creamed corn. This mix is topped with mashed potatoes and baked on 350°f until the potatoes are golden brown. Amazing!
Conclusion
This concludes the Basic Things Everyone Should Be Able To Cook position of my free basic cooking course. If you missed the first two parts of this section you can check out the first two parts of this section here and here. Next week we will be wrapping up the cooking course with a final post to tie everything together and review all the things that we have covered. I’ll see you then!
I hope that you have enjoyed this post. If you have please remember to like and share it. And of course, remember to subscribe to the blog so you never miss a post again.
We use cookies on our website to give you the most relevant experience by remembering your preferences and repeat visits. By clicking “Accept”, you consent to the use of ALL the cookies.
This website uses cookies to improve your experience while you navigate through the website. Out of these, the cookies that are categorized as necessary are stored on your browser as they are essential for the working of basic functionalities of the website. We also use third-party cookies that help us analyze and understand how you use this website. These cookies will be stored in your browser only with your consent. You also have the option to opt-out of these cookies. But opting out of some of these cookies may affect your browsing experience.
Necessary cookies are absolutely essential for the website to function properly. This category only includes cookies that ensures basic functionalities and security features of the website. These cookies do not store any personal information.
Any cookies that may not be particularly necessary for the website to function and is used specifically to collect user personal data via analytics, ads, other embedded contents are termed as non-necessary cookies. It is mandatory to procure user consent prior to running these cookies on your website.