
Good morning everyone, or good whatever time of day you are reading this. Welcome back to Kitchen Clueless, my free basic cooking course. Today as the cooking course series continues we will be taking a look at some basic cooking techniques for cooking fish, pasta, and a few other things. Let’s get right to it.
This is…
Basic Things Everyone Should Be Able To Cook pt. 2- Kitchen Clueless Basic Cooking Course
Fish
For the vast majority of my life, I have lived less than a ten-minute walk from the Atlantic Ocean. That great blue expanse, teeming with more life than I can imagine. Despite the abundance and proximity of the ocean, it was more common to see pork chops or ground beef on the dinner table, than fish. When we did eat fish it was limited to salmon or haddock.
My family is not unique in our limited exposure to fish. Even in restaurants in Nova Scotia, it is much easier to sell salmon or haddock than any other type of fish. Halibut would be up there too. And with cod becoming more and more available that is also being sold more. But nothing sells better than salmon and haddock. The truth is, I know more people who grew up on the ocean who don’t like fish, than ones that do. How is that possible?
Why, when the ocean is right there, do we limit ourselves to such a narrow selection? And how is it possible that so many people don’t even like fish? I’m sure that there is a complex socio-economic explanation that can be traced back generations, but there is also a simple answer. Whenever I ask someone why they don’t like fish the answer is almost always the same. Their mother always overcooked it, and it turned them off of it forever. I’m serious. That is the answer I get time and time again.
As to why we limit ourselves mostly to salmon and haddock, I honestly don’t know. It could be familiarity. It’s all we know. It could be the price. I remember my mother buying the whole salmon for four or five dollars. It could be availability. Our grocery stores aren’t exactly stocked to the gills with varieties of fish. Who knows?
Whatever the reason, the only solution is knowledge. When you know how to better cook fish, you are more likely to eat it. When you know what you are looking for, you are more likely to buy. And, when you are confident in your ability to buy and cook familiar fish, you are more likely to branch out and try something new.
Buying Fish

Today, it is most common to buy fish in pieces. It could be whole fillets or individual portions and it could be fresh or frozen. No matter how you buy it, there are some things to keep in mind.
Where to buy fish?
First of all, I highly suggest that if you have access to a store or market that specializes in selling fish that you buy it there rather than at the supermarket. In all honesty, where I’m from it is really common to buy fish right from the fisherman from the back of their truck in a hardware store parking lot. It doesn’t get much fresher than that.
I have found that anytime I have had problems with the freshness or quality of fish it has come from the grocery store. Having said that, there is a convenience element to buying your fish where you buy all of your other groceries. I get it and I still do it too.
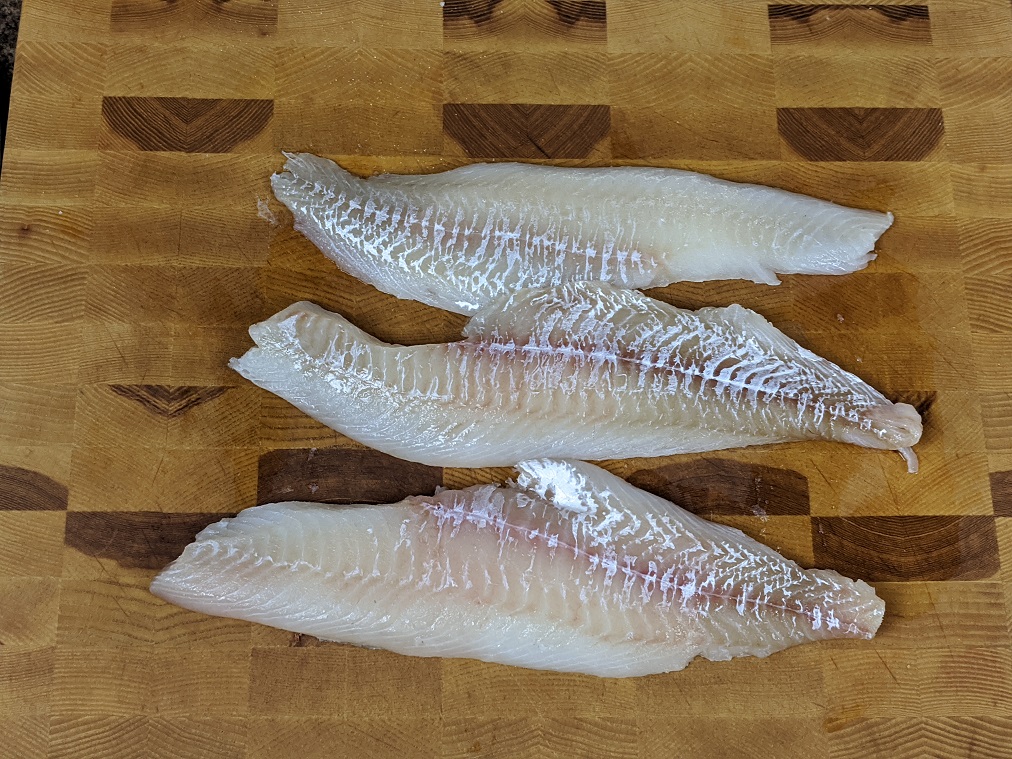
Buying pieces of fresh fish.
When buying pieces of fish there are three main things to look for. The smell, the colour, and the texture. Fresh fish doesn’t smell bad. It doesn’t really smell like much at all. Maybe mildly like the ocean. That’s it. If it smells, don’t buy it. The colour should be bright and crisp. Salmon, trout, and arctic char should be bright pink or red. Whitefish should be white, not grey. Finally, the fish should not be slimy except for arctic char that still has the skin on it. It is perfectly normal for the char skin to be slimy.
It is perfectly acceptable for you to step up to the fish counter, point to a piece of fish and ask for a closer look. They likely won’t let you hold it, but you should be able to get close enough to tell if it smells or to see if it looks odd in any way.
Also, when buying fresh fish it is always best to eat it that day or at the latest the next day. You don’t want it sitting around for longer than that. And always ask if it has been previously frozen or not. If it has been, it’s shelf life is limited and you really shouldn’t freeze it again.
I hope this goes without saying but when buying fish stay away from the discount bin. It isn’t worth the few dollars you are going to save.
Buying pieces of frozen fish.
Modern fishing trawlers are very advanced. It is not uncommon for fish these days to be processed, and flash-frozen right on board the trawler within hours of it being hauled in. So, buying frozen fish isn’t too much of a worry. With a few exceptions.
I always look for where the fish is from. I typically stay away from farmed fish from Asia like tilapia as their health standards and regulations are a lot different than ours. I also generally don’t buy fish that was frozen in-store. You know it when you see it. It is packaged on those blue Styrofoam boards. That is typically fish that was nearing the end of its life in the fresh display and so got frozen to be sold another day.
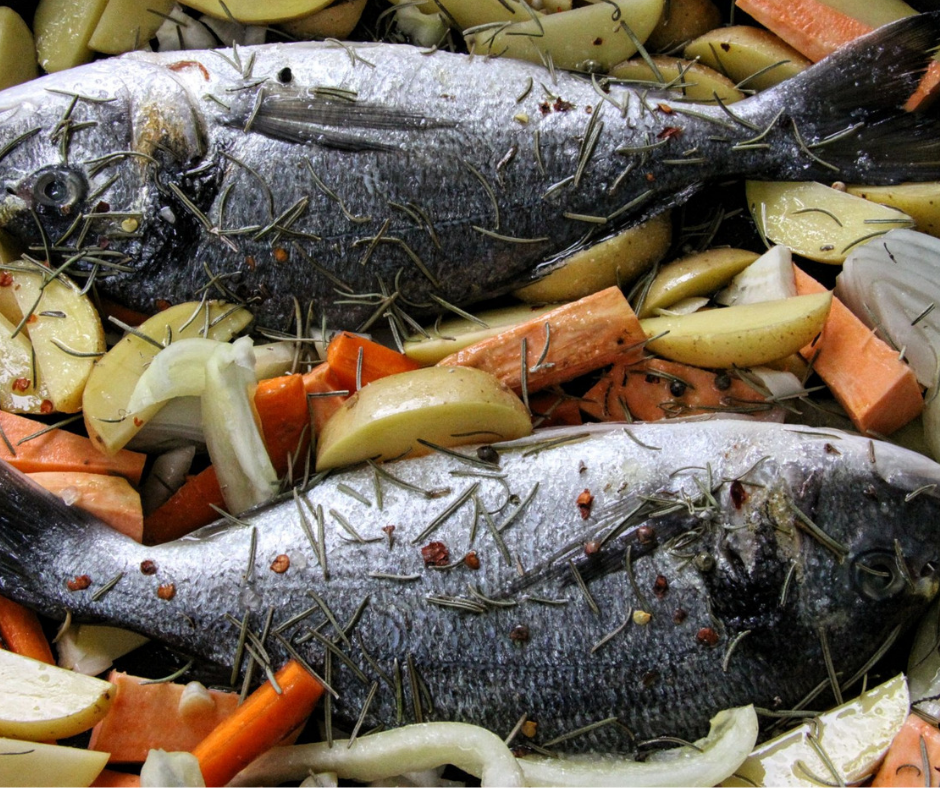
Buying Whole Fish
When buying whole fish the same principles apply as with pieces of fish. It shouldn’t smell, and it shouldn’t look slimy. You also want to look at the eyes of the fish. They should not be cloudy. The clearer they are, the fresher the fish.
I would also typically ask the fishmonger to scale the fish if it isn’t already done, as you don’t want to do that. You can even ask them to fillet it for you if you would like. I will say that in grocery stores the person working behind the fish counter likely knows less about fish than you do. Go to a fishmonger.
Wild Fish vs. Farmed Fish
There is a lot of talk about farmed fish these days and so I thought it was important to talk about it a little. Fish farming is a very old practice that dates back at least as far as ancient Rome. It was common for the wealthy to have tilapia ponds so they could always have fresh fish.
Today, fish farming is becoming increasingly more important. Our demand for fish continues to grow and we are fishing the oceans dry. Before too long, it is likely that farmed fish will be more common than wild-caught. It’s an inevitability. Having said that, there have been issues with farmed fish but the technology is improving and it is becoming more friendly to the environment and the fish. I would suggest doing a little research on the topic.
Cooking Fish
The key to cooking fish is to not overcook it. I know, I know, that is the most obvious statement in the world but it’s true. Fish is not chicken. It doesn’t need to have the crap cooked out of it to be safe. For the record, neither does chicken. When fish is cooked properly it should tender and moist. It should not leave your mouth feeling dry.
Let’s take a look at some common fish and how to cook them.
Cooking Haddock Fillets
Let’s say you want to bake some haddock. You lay it on a baking sheet and season it with a little lemon, salt and pepper, and fresh herbs. Sounds delicious. You turn the oven on to 400°F, how long does it take to cook that fish? 45 minutes? 30 minutes? No. Probably 10-12 minutes depending on the size of the fillets. Really big fillets may take 15-18 minutes.
Haddock, should easily flake when cooked, but not fall apart. It should be firm to the touch but not springy. It shouldn’t feel rubbery. When you do cut into it, the flakes should look shiny. Not translucent, that’s undercooked. Not dry, that’s overcooked.
Cooking Salmon Fillets
The exact same principles of cooking haddock apply to cooking salmon, whether it is portions or whole fillets. There are only really two differences. A salmon fillet, so half a salmon, will take longer to cook than haddock. Likely, 20-25 minutes. A portion of salmon will take about 10-12 minutes. Less if you sear it in a pan first. Just like with the haddock, salmon should flake easily but not fall apart. It should be firm but not springy. When you cut into it it should look shiny, not dull. It shouldn’t look dry. And it shouldn’t look translucent.
Basic principles for cooking fish
These basic principles for cooking fish are pretty much universal. There are of course exceptions, like with tuna. You want a tuna steak to be rare in the middle. Honestly, if your salmon or haddock is slightly undercooked, it isn’t going to hurt you. You’ve probably had salmon sushi before. The key is really, really just don’t overcook it.
Cooking times are based on the thickness of the fish, just like with anything else. But what I can say is that typically, the cooking time is much less than you think it is. It’s okay to check the fish and then keep cooking it if it isn’t ready yet. So, aim to undercook it a little and then pop it back in.
Cooking Fish In A Pan
The key to cooking fish in a pan is to start with a hot pan, don’t overcrowed it, use a bit of oil and butter, and again, don’t overcook it. Fish that you cook in a pan is generally going to be thin fillets which cook quickly. Typically, 3-5 minutes per side is more than enough. Obviously, the thicker the fish the longer it will need to cook.
Start with the presentation side down. That’s just the nicer side of the fish. Leave it alone for 3-4 minutes, flip it and leave it alone again. Only flip it the one time. Check it for doneness (again firm but not springy) and either take it out of the pan or keep cooking it.
For pan-frying fish that still has the skin on you want to get the pan nice and hot. Add some oil and butter and place the fish skin side up. Only cook it for 2 minutes or so. Flip and cook it the rest of the way. You want to cook it 60-70% of the way through the skin side down. This should give you a nice crisp skin as long as the pan stays hot.
Equipment
- 1 pot with lid
- 1 large frying pan
Ingredients
- 4 pieces Cod or other white fish
- 2 ea Shallots, thinly sliced
- 2 cloves Garlic, thinly sliced
- 8-12 ea New Potatoes
- 1/2 ea An Heirloom tomato, diced or 12 cherry tomatoes
- 3 sprigs Fresh Thyme
- 5-6 leaves Basil, Sliced
- 1 lg handful Spinach, stems removed, and leaves roughly chopped
- 1/4 cup` Chopped Parsley
- 2-3 tbsp Olive Oil
- 1 cup White Wine
- 1/4 cup Butter
- Salt and Pepper
Instructions
Potatoes
- Put the potatoes in a pot and cover with very hot tap water.
- Season the water well with salt.
- Cover the pot and bring to a boil over high heat.
- Once the potatoes start to boil, remove the lid from the pot and cook them the rest of the way uncovered.
- One the potatoes are cooked (a fork easily passes through them) drain them well.
- Add 2 tbsp of parsley, 2 tbsp of butter, and a pinch of salt and pepper.
- Gently toss the potatoes to coat with the seasoning and serve.
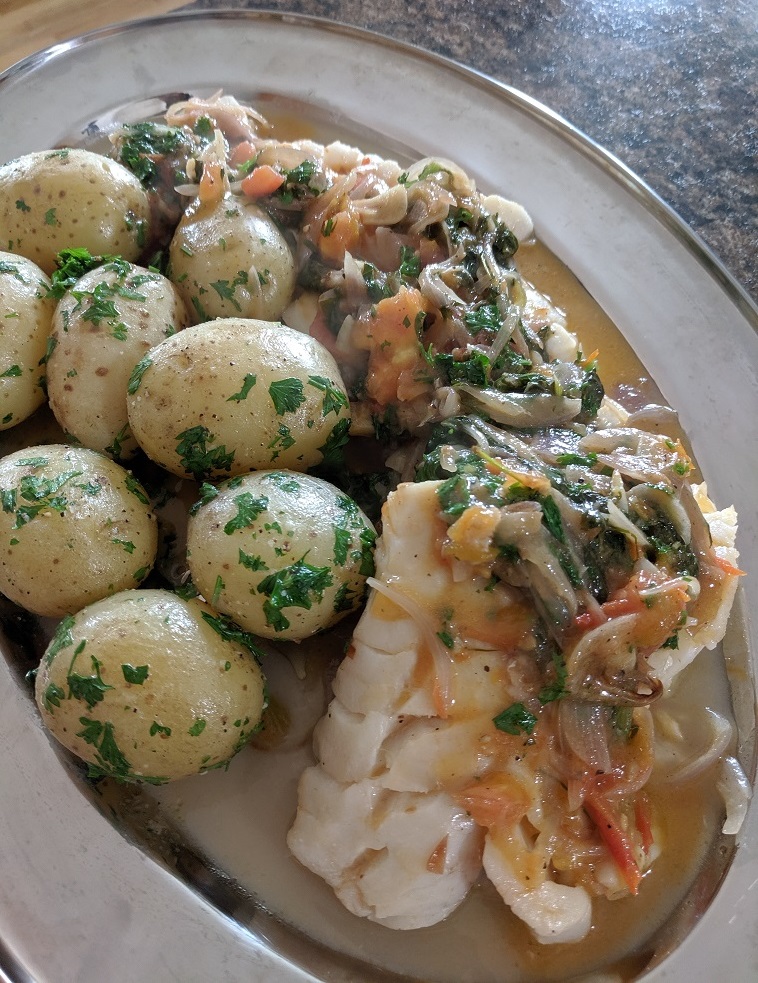
Cod
- Heat the skillet over medium high.
- Add the olive oil along with the shallots, garlic and a bit of salt and pepper.
- Sauté for 2-3 minutes or until the shallots are soft.
- Add the diced tomato along with 2-3 sprigs of fresh thyme. Cook for 2 minutes.
- Add the fish into the pan presentation (white side) down.
- Cook for 1-2 minutes then add the wine.
- Once the wine starts to boil flip the fish and cook for another 1-3 minutes.
- Smaller pieces of fish will be cooked quicker while larger pieces may take a little longer.
- Remove the fish from the pan to a warmed serving tray as the fish pieces are cooked.
- Once all the fish is out of the pan add in the spinach, basil, and 2 tbsp of butter.
- Turn off the heat and mix the butter in to sauce to thicken it.
- Finish the sauce with the remaining parsley and pour over the fish.
Ingredients
- 1 cup Sticky Rice Sushi Rice
- 2 Salmon Fillets
- 1 Sliced Garlic Clove
- 1/2 Bell Pepper, sliced
- 3 Green Onions, Whites and Green Separate
- 1 tsp Canola Oil
- 1 tsp Grated Ginger
- 1/4 cup Chopped Snow Peas
- 2 tbsp Thai Red Curry Paste
- 1 cup Coconut Milk
- 2 tbsp Chopped Cilantro
- 1/2 Lime, juiced
- Salt to taste
Instructions
- Cook the rice according to the directions on the package.
- Heat a non-stick pan over medium heat.
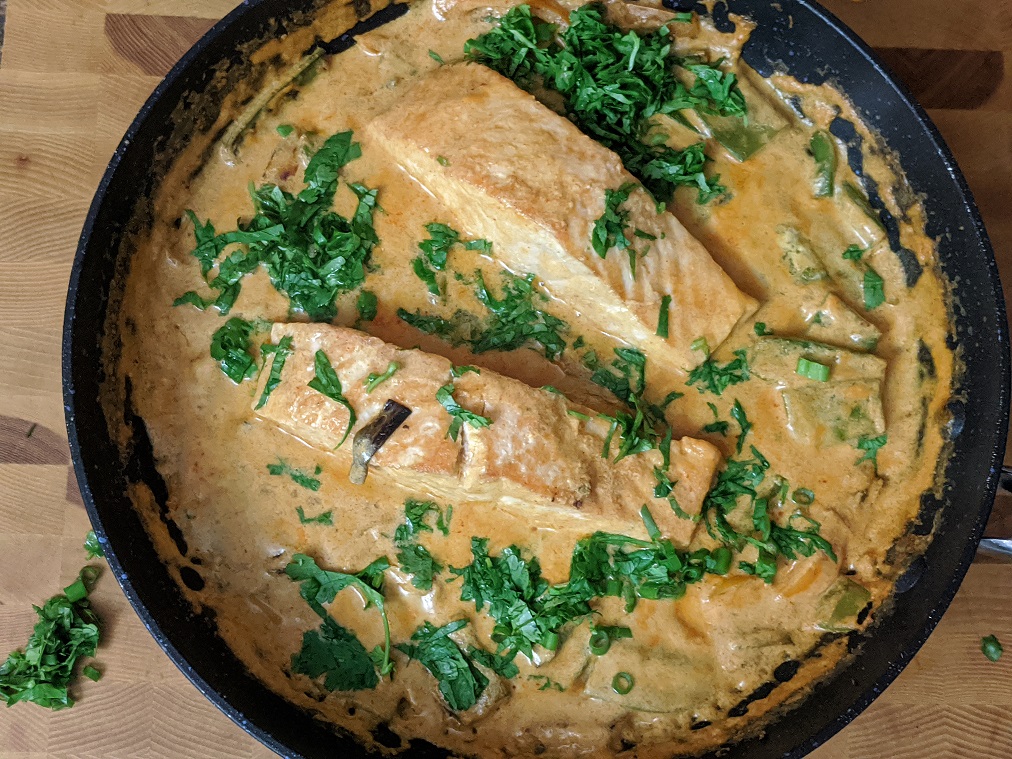
- Add the oil into the pan and sear the salmon on both sides.
- Remove the salmon from the pan and add in the garlic and all the vegetables except the snow peas.
- Cook the vegetables for 2-3 minutes then add in the ginger, cook for a few seconds then add in the curry paste and cook for another 2-3 minutes.
- Add in the snow peas and coconut milk, bring to a boil and add the salmon back in.
- Simmer the sauce, flipping the salmon once or twice, until the salmon is cooked.
- Finish the salmon with cilantro, green onions, and lime juice.
- Serve the salmon over the rice.
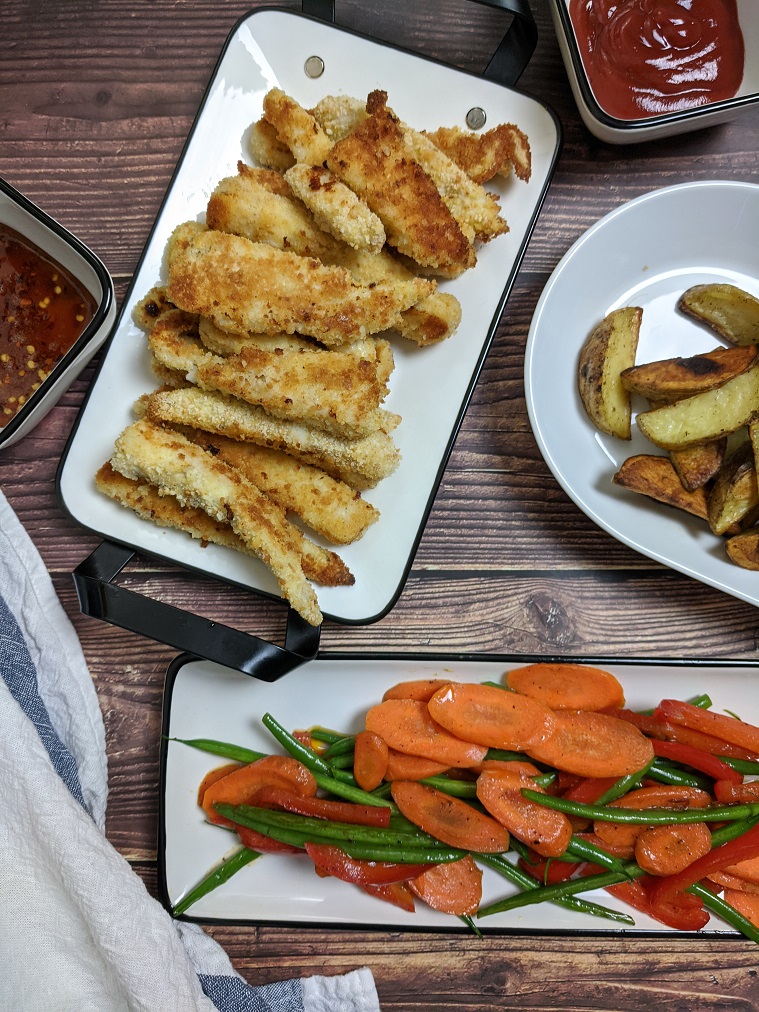
Ingredients
- 3 fillets Haddock
- 1 cup Gluten-Free Bread Crumbs
- 1 cup Gluten-Free Flour
- 2 Eggs, beaten
- 1/2 tsp Salt
- 1/4 tsp Pepper
- 1/2 cup Water
- 1/2 cup Sugar
- 1/2 cup White Vinegar
- 1/2 tsp red chilli flakes (crushed red pepper) more or less depending on tolerance
- 2 tbsp olive oil
Instructions
- Preheat the oven to 425°f
- Combine the salt and pepper with the flour and stir.
- Pour the olive oil onto a baking sheet and spread evenly.
- Dip the fish in the flour, then the egg, then the bread crumbs and place on the sheet pan with at least 1/2 an inch of space between each finger.
- Put the fish in the oven for 7-8 minutes, flip and then bake for an additional 7-8 minutes or until the fish is cooked.
- While the fish is in the oven combine the water, vinegar, sugar, and chilli and bring to a boil.
- Turn the heat down and simmer for 10 minutes.
Pasta
In North American, for whatever reason,q we have a tendency to overcomplicate pasta. We take what should be a straightforward and simple dish and add about 20 ingredients which are about 15 too many. If you look at any authentic Italian pasta recipe you will immediately notice how short the recipe is. They use a handful of high-quality ingredients and do very little to them. I implore you to approach pasta in this way as much as possible. Of course, you can still make your mother’s 20 ingredient tomato sauce, but understand that there is another way.
When we add too many ingredients into a sauce, or anything for that matter, we lose the nuance of flavours. Everything becomes muddled together and not very exciting to eat. If on the other hand, we do as the Italians do and limit what we put into the sauce the flavours can stand for themselves and create a beautiful symphony.
As this is a beginner cooking course we aren’t going to get into making pasta from scratch, though it isn’t nearly as complicated as you may think. However, we will look at matching shapes of dried pasta to types of sauce and why that’s important. But first, let’s look at some different kinds of sauces.
Pasta Sauces
When we think of pasta sauce we generally think of either red sauce or white sauce. So, tomato-based, or bechamel or cream-based. Though these are obviously very popular, they are not the only options. If you get stuck making only these two types of pasta sauce you are seriously missing out. Let’s take a look at those two first, then we will move on to some of the more interesting ones.
Tomato-Based Pasta Sauce
There are few things in the world of gastronomy that are as perfect as a classic tomato sauce. Tomatoes, onion, olive oil, salt & pepper, sugar, and basil combine to make something so simple, so unassuming, and so delicious that it boggles the mind. To this simple sauce meat such as browned ground beef, or seared chunks of pork can be added along with some wine and herbs and what was once a basic tomato sauce becomes something that is truly magical.
Making Tomato Sauce
Start by dicing an onion. Heat a generous amount of olive oil in a medium pot and add the onion to it. You don’t want the heat to be too high, a medium temperature will be fine. The idea here is that you want to cook the onions until they are slightly caramelized. It’s going to take about ten minutes and you will have to stir them every few minutes or so.
While the onions are cooking open a can of whole tomatoes. If you can get San Marzano Tomatoes, which are imported from Italy, that would be best. Open the can, pour the tomatoes into a bowl and crush them with your hand. You don’t need to completely puree them but you don’t want any big chunks either.
Once the onions are slightly caramelized add the tomatoes and a bit of salt and pepper. Heat the tomatoes, give the sauce a taste and adjust the seasoning with salt and pepper and sugar as needed. You don’t want the sauce to be sweet. That’s not what the sugar is for. The sugar is there to take some of the acidity out of the tomatoes. The more you caramelize your onions, the less sugar you may need. Also, the tartness of the tomatoes depends on what time of year they were harvested. If it was sunny that day. How much water they had. So, don’t just blindly add sugar. Taste and then add only as needed.
After the sauce is seasoned, simmer it for ten minutes and then take it off the heat. Chop up one to two tablespoons of fresh basil and add it to the sauce. From here you can puree the sauce or just leave it as is.
This sauce is great to have with a stuffed pasta like ravioli, or tortellini. It’s great to use in the layers of a lasagna. It’s fantastic in seafood linguine with a bit of white wine and chilli. Or it’s great just on its own over spaghetti with parmesan. There is so much you can do with such a simple sauce that you need to master this one A.S.A.P.
Cream Based Pasta
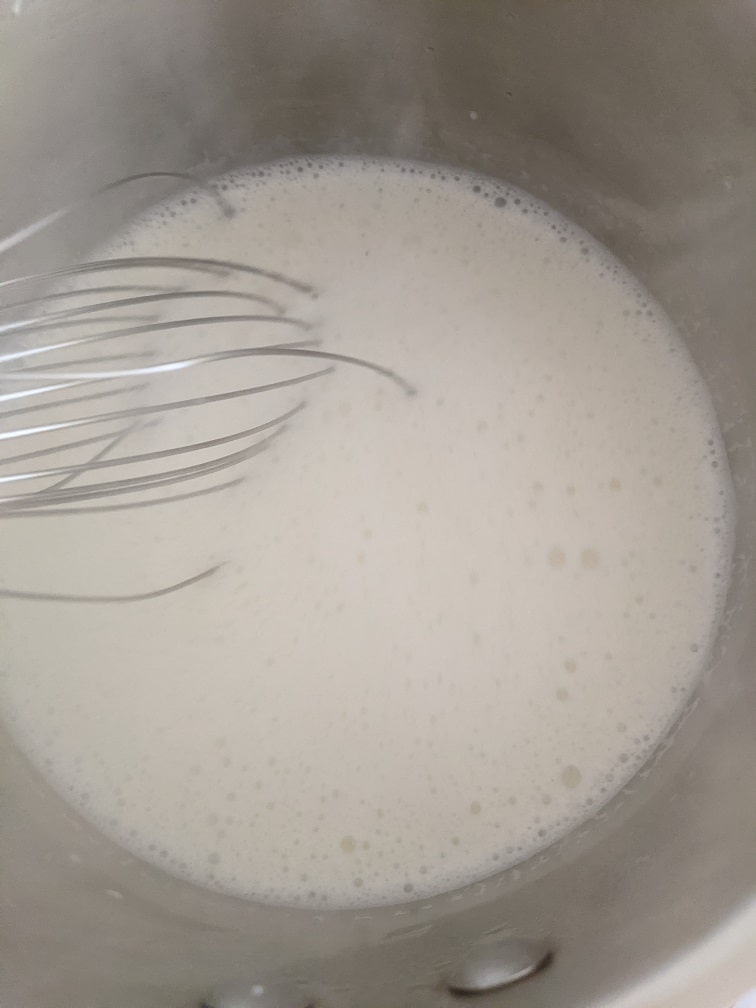
Most commonly cream-based pasta is made with a bechamel which is a white sauce made with milk (sometimes cream) and thickened with a roux. Don’t let the fancy name fool you. It is not nearly as intimidating as it seems. It’s more than likely that you have made bechamel before and didn’t know it. Here is how to make it.
Ingredients
- 2 tbsp olive oil
- 1/2 an onion, diced
- 1/4 cup butter
- 1/4 cup flour
- 5 cups Whole Milk
- 1/4 tsp fresh ground nutmeg
- salt and pepper as needed
Instructions
- Heat the olive oil in a heavy-bottomed pan over medium heat.
- Add the onions and saute until the onions are soft.
- Add the butter and melt.
- Add the flour, mix it with the melted butter and onions, and cook, stirring regularly for about three minutes.
- Add the milk and whisk to fully incorporate the roux.
- Heat the milk, making sure to scrape the bottom of the pot regularly, so the roux doesn't stick.
- Simmer the sauce for about 10 minutes or until it thickens and no longer tastes like raw flour.
- Season with salt, pepper (white pepper if you prefer) and nutmeg.
- Strain the sauce through a fine-mesh sieve.
- Put a layer of plastic wrap on the surface of the hot bechamel to prevent a film from forming on the surface.
- Use the bechamel right away, or keep it in the fridge for up to four days.
A few notes about bechamel
First things first let’s talk about pepper. A lot of people like to use white pepper in their bechamel so they don’t get the black specks you get with black pepper. I happen to hate white pepper. I find it smells and tastes like a horse barn. I also don’t mind the black specks in my white sauce. I’ll leave it up to you whether you use white or black pepper.
It is very easy for the roux to stick to the bottom of the pan and burn as the bechamel is simmering. There are a few ways to help prevent this. Number one is to use a heavy bottom pot. Number two is to stir the sauce regularly making sure to scrape the bottom of the pot. If you do scrape the bottom of the pot and notice brown or black bits floating in your bechamel, strain it right away and put it in a new pot. Taste it before you continue cooking because it may already taste burnt. In that case, you have to start over.
The third and probably safest option is to make the roux separately and add it after the milk has already been heated. In this case, you would simply cook the butter and flour together in a separate pot. The milk would be added to the softened onions and heated. At this point, the roux would be whisked in. You will still have to be vigilant in making sure the roux doesn’t stick to the bottom of the pot, but this way is safer if that is your concern.
Bechamel Based Pasta Sauce
We have now have a pretty good idea about how to make bechamel but on it’s own it doesn’t make much of a pasta sauce. So, how do we turn a basic bechamel into a full blown pasta sauce? The easiet way to do this is to have the bechamel ready to go and set aside. Start a new pan and sauté some onions and garlic. Deglaze the pan with white wine, let it reduce down to just about nothing then add in some of the bechamel. Add some parmesan to the sauce to finish it and you are good to go. This can be served with chicken or seafood.
Alternative to the sauce I just described a few spoon fulls of pesto can be added to a bechamel to make a creamy pesto sauce which is also delicious on chicken or seafood.
Cream
Anoter way to make a creamy pasta is to just use heavy (whipping) cream. I’ll be the first to tell you that this makes a delicious sauce. However, using too much cream can lead to a very heavy and rich sauce that will leave you feeling gross. Not to mention it is very fattening. If you do prefer to use cream (it is definatly easier than making a bechamel) use only a little bit. For example, in the sacue with the white wine I described above rather then fully reducing the white wine, only reduce it by about half then add in only a few tablespoons of the cream. Or for the cream pesto sauce, use a 1/4 – 1/2 cup of cream and a tablespoon or two of pesto.
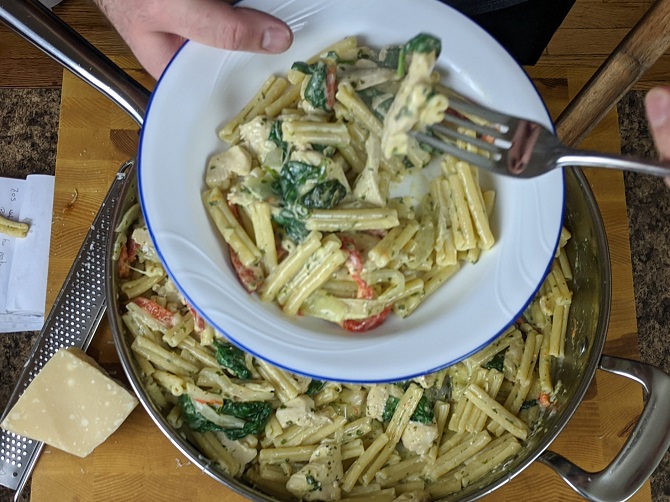
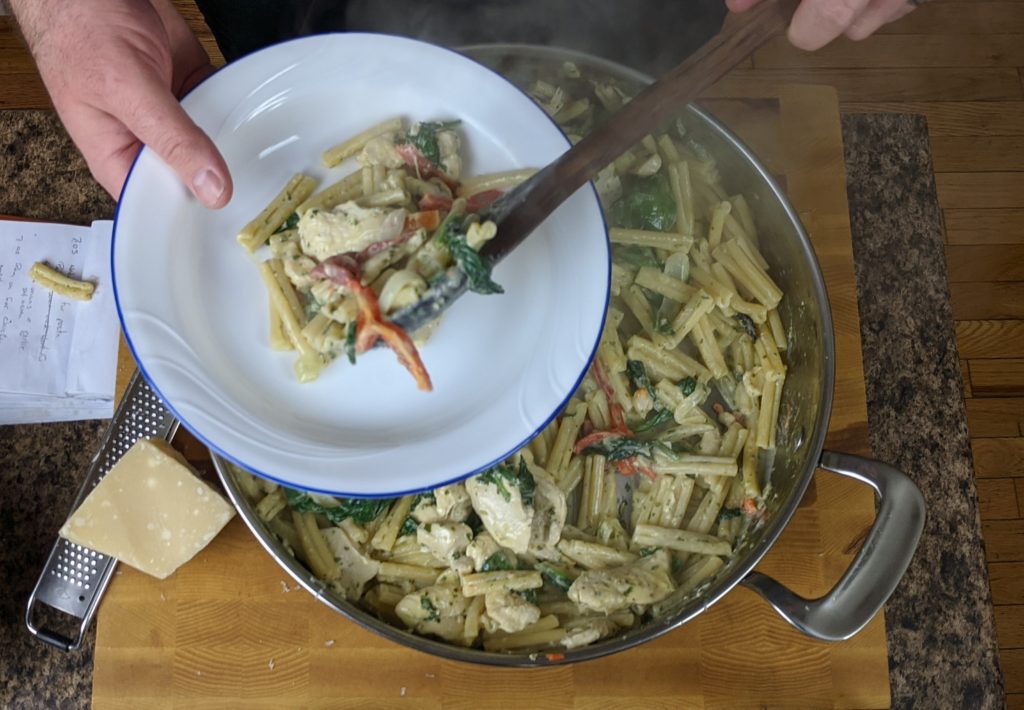
Ingredients
- 2 Chicken Breasts, Sliced
- 1/2 Small Onion, Sliced
- 1 tsp Chopped Garlic
- 1/2 cup Sliced Roasted Red Peppers
- 2 cups loosley packed Spinach
- 1/4 cup Pesto
- 3/4 cup Cream
- 1-2 tbsp Olive Oil
- Salt and Pepper to taste
- 1/4 cup Grated Parmesan
- 4 portions Cooked Pasta
Instructions
- Heat large skillet over medium high heat.
- Add the olive oil and sliced chicken into the pan.
- Season the chicken with salt and pepper and cook until cooked through it will take about 6 minutes.
- Add in the onions and garlic, cook for 2 minutes, then add in the roasted red peppers and cook for 2 more minutes.
- Next up, add in the pesto, cook for about a minute then add in the cream and cook for another 2 minutes.
- Add in the spinach and cook for 2 minutes before adding in the cooked pasta.
- Add in the parmesan, toss the pasta to coat, taste and adjust the seasoning as needed.
Olive Oil Based Pasta
Olive oil-based pasta sauces include sauces like pesto and Aglio e olio or garlic and oil pasta. Let’s take a look at pesto first.
Pesto
Pesto is one of those sauces that people often buy at the grocery store because they don’t know how easy it is to make. The ingredients are fresh basil, parmesan, garlic, pine nuts, olive oil, and salt. That’s it. Take all of these ingredients, but them in a blender and you have pesto. Honestly, that’s it.
If you want to store the pesto for a week or two in the fridge, blanch the basil by dropping it in boiling water for thirty seconds and then into ice water to cool it. Dry the basil off as best you can with paper towels before adding it to the other ingredients. This blanching will help the basil retain its green colour and will prevent your pesto from going black as it sits.
If you have one big bunch of basil, use two cloves of garlic, a quarter to a half cup of good olive oil, two to three tablespoons of parmesan cheese, one to two tablespoons of pine nuts, and a good pinch of salt. Puree this, add more oil if needed and it’s good to go. I know that the pinenuts freak people out because they are really, really expensive. Luckily, you can buy them from the bulk section. So, only get the amount you need. If all you need is two tablespoons only buy that much.
Pesto is great by itself with pasta, added to either tomato or cream sauce, or used in a million other ways that have nothing to do with pasta at all. Definitely get used to making your own pesto. It will be worth the effort.
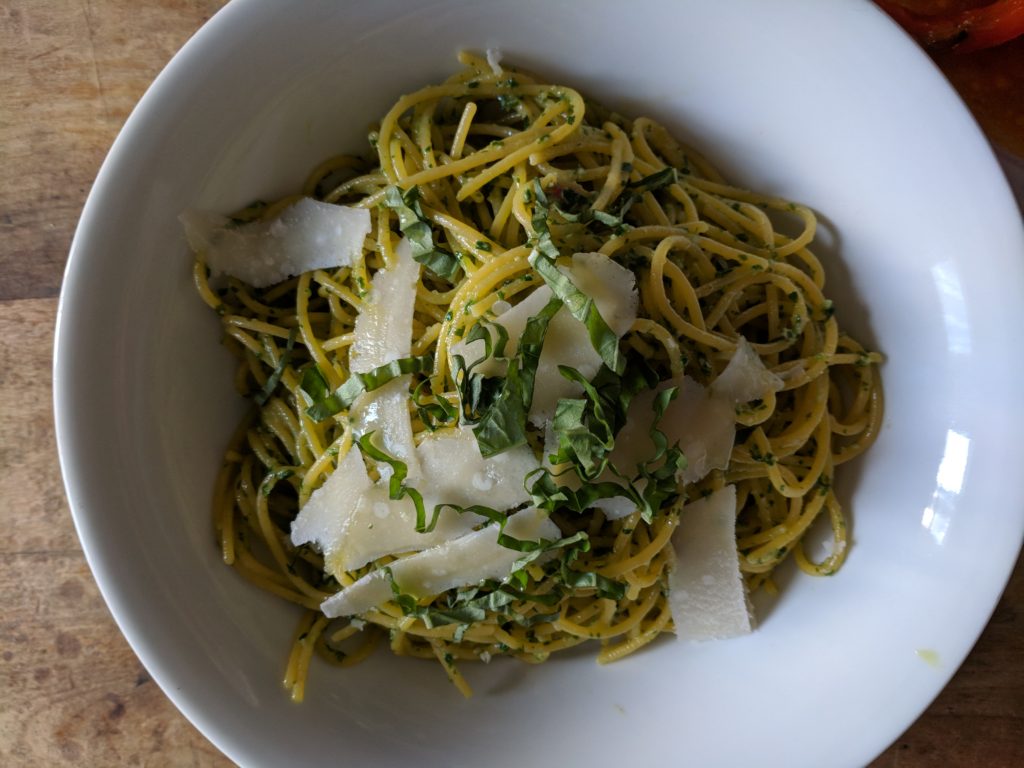
Aglio e olio
Pronounced Ag-li-ol-ee-o this sauce is made of three main ingredients. Olive oil, garlic, and chilli flakes. Parmesan, salt and pepper, fresh parsley and lemon juice are often added as well. If you have ever seen the movie Chef (you definitely should if you haven’t already) this is the pasta Jon Favreau makes for Scarlett Johansson.
To make this sauce heat a generous amount of olive oil (about 1/4 cup) over medium heat, slice two cloves of garlic as thin as you can and add that to the oil. Cook until the garlic softens. You may need to turn the heat down if the garlic starts to colour. After four or five minutes add half a teaspoon of dried chilli flakes. Toss cooked spaghetti into the sauce and season with salt and pepper as needed. Alternatively, finish with parmesan, parsley, and lemon juice.
This is one of those unassuming sauces. You get very big flavours out of very few ingredients. Classic Italian.
Carbonara
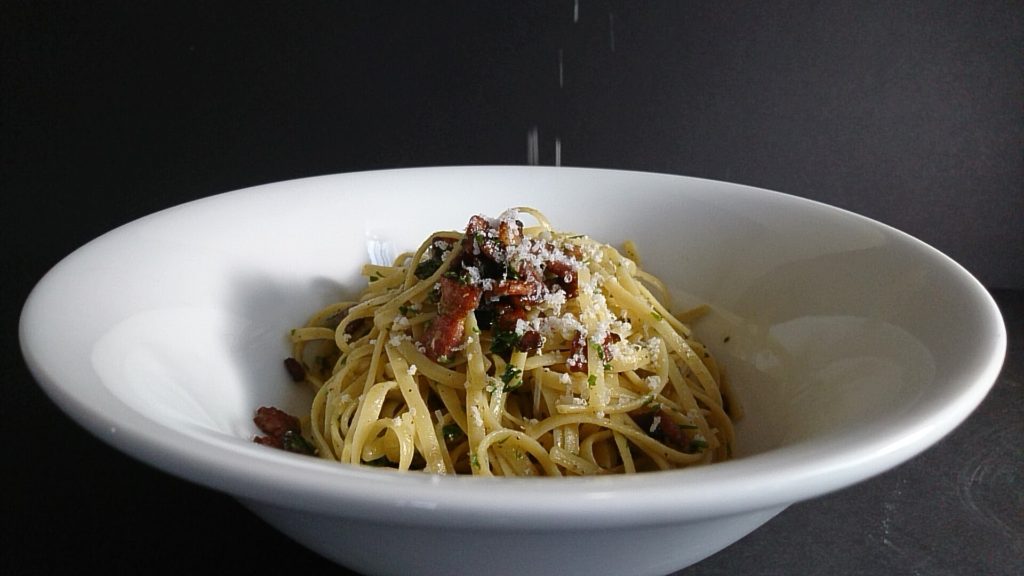
One sauce that I want to mention and that confuses a lot of people is Carbonara. A lot of people think that this is a cream-based sauce but that is wrong. This sauce is made of eggs, cheese, and maybe a little pasta water. The other ingredients are generally a type of bacon, along with salt, pepper, and parsley. That’s it. No cream ever.
To make it put two eggs in a bowl and add two to three tablespoons of grated parmesan cheese, and a quarter teaspoon of black pepper. Whisk this egg and cheese mixture together. Add hot crispy bacon and hot linguine. Stir until the pasta is completely coated and the sauce thickens. Finish with fresh chopped parsley and a bit more parmesan.
It may seem like you are going to be eating raw egg but the heat from the bacon and the pasta cooks the egg. As the heat cooks the egg it melts the parmesan creating the classic creamy carbonara sauce.
This is a dish that only takes as long to cook as it takes to make some bacon and some pasta. It is one of those dishes that confuses people with its simplicity. People try to overcomplicate it and make it much more difficult than it is. It is perfect just the way it is. Don’t believe me? Try it for yourself.
The right pasta for the job
Believe it or not, pasta shapes are not arbitrary. Different shapes have different jobs. Typically speaking the thinner the pasta the lighter the sauce. Long thick noodles like fettuccini are great for thick creamy sauces because there is so much surface area on the pasta for the sauce to stick to. On the other hand, meat sauce goes really well with spaghetti because it is a thinner pasta that when twirled on a fork picks up lots of little bits of meat. Hollow pasta like penne is great for creamy kind of chunky sauces that will fill the voids in the pasta. This way when you bite into the pasta it is filled with sauce.
Obviously use whatever type of pasta you’d like for whatever type of sauce you’d like. This should just give a few basic ideas if you are trying to figure out what sauce to match with what pasta and why.
Conclusion
I really wanted to wrap this up today but again this post has become way bigger than I had intended. So next week we will cover things made with ground beef like meatloaf, burgers, and chilli and that will be the end of it. After that, there will be one more post in this basic cooking course series to kind of wrap the whole thing up. See you next week and please remember to share this with anyone who you think would enjoy it.
0 Comments