
As adult humans, there are certain things that we need to be able to do to take care of ourselves. We need to know how to do laundry. We need to know how to pay bills. And, we need to know how to cook a few basic meals. Because this isn’t a laundry or bill paying blog, we aren’t going to talk about either of those. Today, we are going to look at a few meals that everyone should know how to make.
None of the meals or recipes that I am going to share with you today are overly complex, this is a basic cooking course after all. But of course that doesn’t mean they aren’t delicious.
Enough chit chat, let’s get to it. This is…
BASIC THINGS EVERYONE SHOULD BE ABLE TO COOK
Starches –
Before we get too far into this I wanted to just touch on rice and potatoes first. A key component to a balanaced meal is having some kind of carb be it bread, rice, pasta, or potatoes. We are going to talk about pasta a little later on so let’s take a look at potatoes and then rice.
Potatoes
Mashed Potatoes
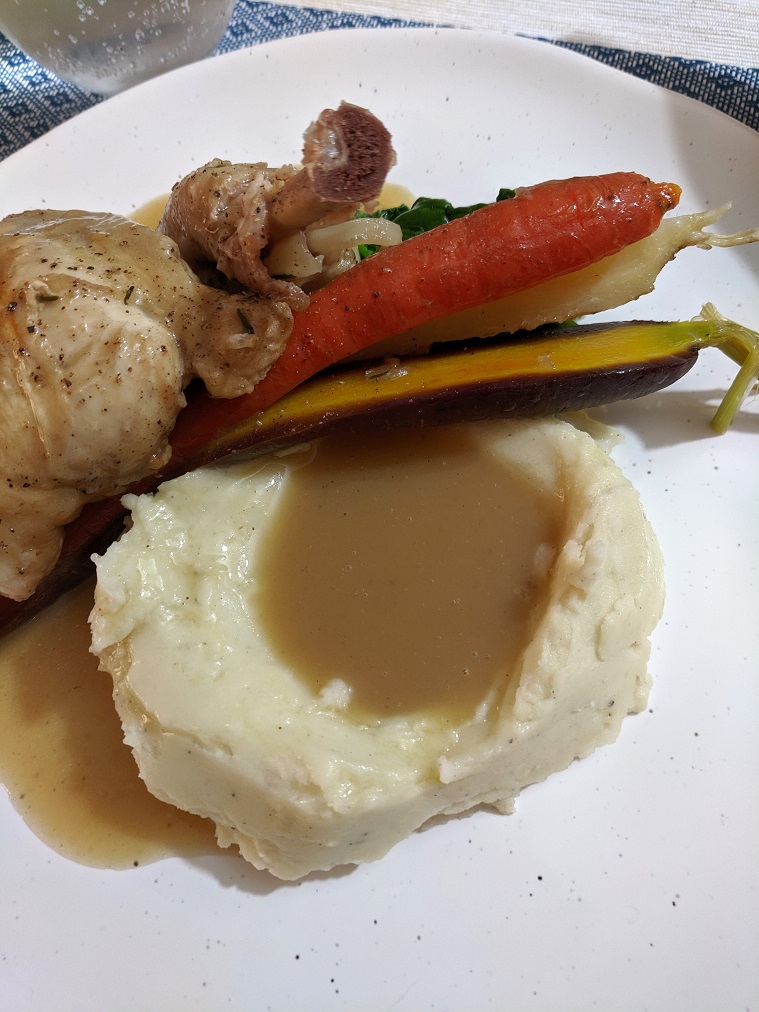
When done well there are very few things in the world better than good mashed potatoes. By good, I mean smooth, creamy, buttery, and well seasoned. Potatoes like that can be the star of any plate no matter what the main attraction is supposed to be. But how do we make potatoes like that? What’s the secret? Obviously, I’m going to tell you.
The right potato for the job
Believe it or not, there are right and wrong potatoes to use for mashed potatoes. For my money, I prefer a russet or white potato for mashed potatoes. I’ll get into the reasons for this in a second. Before I do though, I want to say that Yukon gold potatoes and a few other waxy varieties can and do make delicious mashed potatoes. Especially since these varieties of potato tend to have a superior flavour. However, it is a more difficult process and requires a little more finesse. This is due to the fact that when these types of potatoes are cooked they tend to get gummy. This is especially true when they start to lose their heat. Because of this, they have to be processed very quickly after cooking. They usually also require a higher portion of cream and butter to get the desired consistency. I save these for special occasions.
Russets
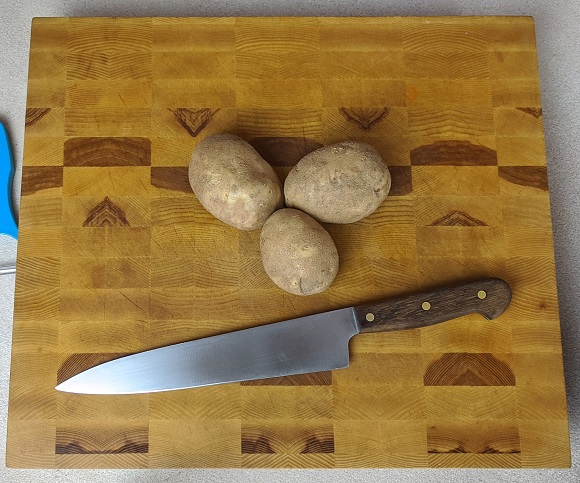
To me, there are many benefits to using a russet potato to make mashed potatoes. First and foremost, their size is convenient. Russet Potatoes are a fairly large variety which makes them easy to hold while peeling, and you get more potato per potato. They are also cheap and readily available.
The russet potato is dry and mealy. This means it doesn’t generally hold a lot of water and it mashes very easily. However, like most potatoes, if over boiled russets can absorb and hold large amounts of water that will make mashed potatoes watery.
When cooking russet potatoes for mashed potatoes, peel and dice them into evenly sized cubes. Rinse the potatoes under cold water until the water runs clear. This will wash off excess starch. Next, put the potatoes in a pot of cold water. Add enough salt to make the water taste like the ocean. I suggest about 1 big teaspoon per litre of water. Bring the potatoes to a boil and cook only until the potatoes are tender, then drain.
Let them dry
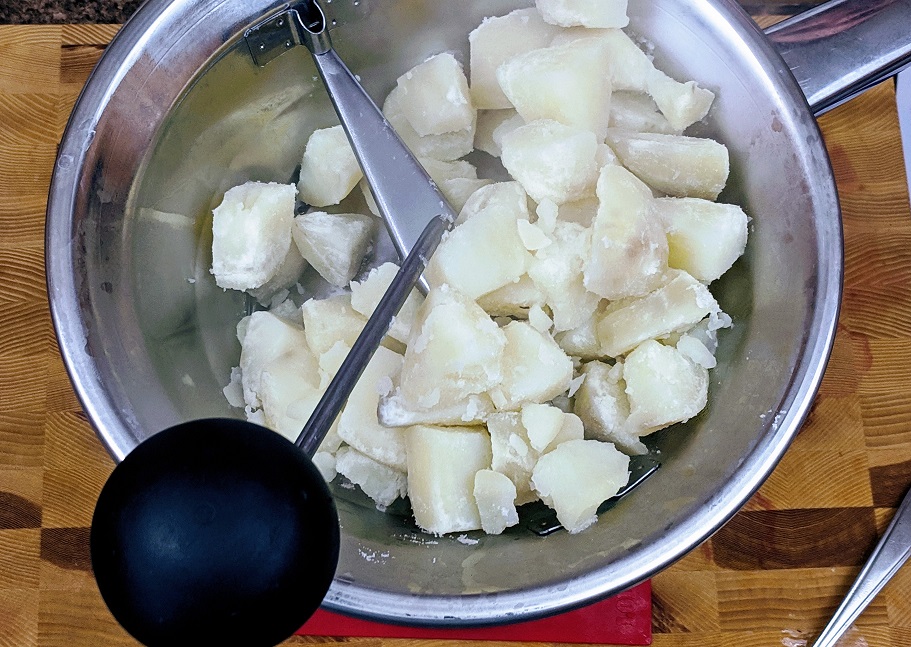
One of the most keys to really great mashed potatoes is to make sure the potatoes are dry before mashing them. This is done in two main ways. First of all, as I already mentioned, don’t overcook the potatoes. There really isn’t any coming back from this. The potatoes will become waterlogged and then there really isn’t much you can do about it.
The second way, or rather the second step to drying the potatoes is to let them steam dry in the colander. After the potatoes are cooked, drain them as you would in a colander. Then, just leave them alone for about five minutes. You will see all this steam coming up from the potatoes and you may think that this means you are losing heat, but really that steam means that moisture is evaporating from the potatoes and drying the out. You will even notice a colour change. The potatoes will go from a mild yellow colour to dry white colour. That’s what you want.
Cream and Butter
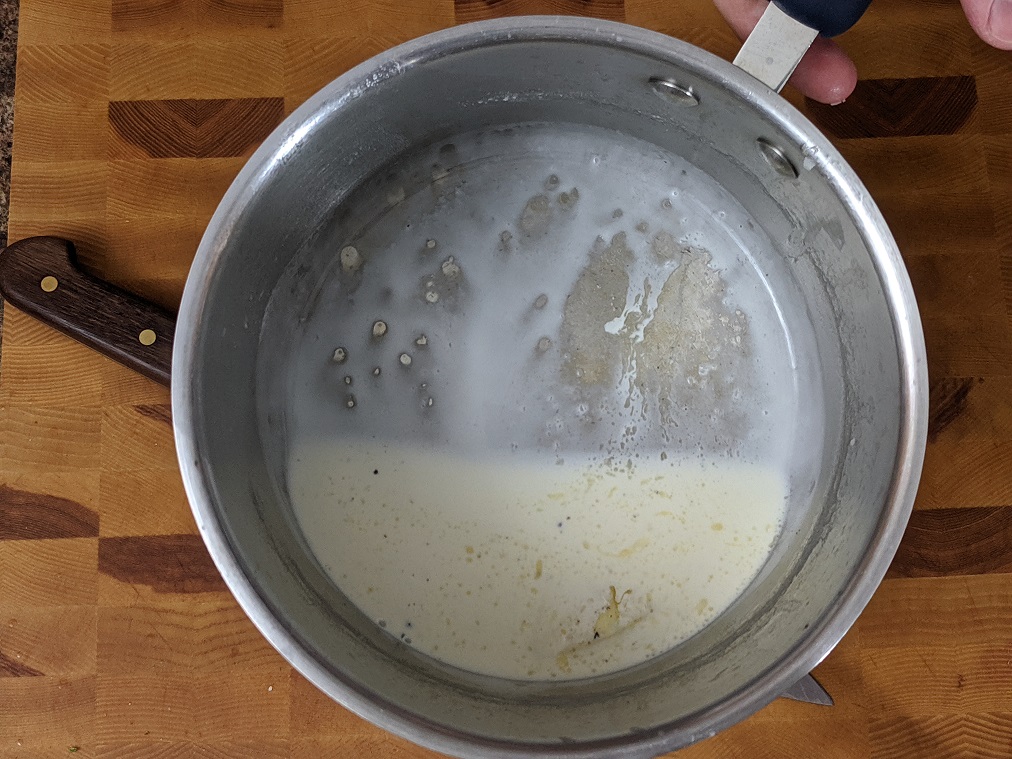
While the potatoes are steam drying in the colander take the opportunity to heat up the cream and butter. I say cream, but you can use milk if you prefer. However, the cream will provide a richer flavour and a better texture to the potatoes. Heating up the dairy before adding it to the potatoes will help keep the potatoes hot. Cold mashed potatoes aren’t nearly as good as hot ones.
Since the potatoes are in the colander, you can use the pot the potatoes were cooked in to heat up the cream and butter.
How much cream and butter should you use? For four to five russet I use between 1/4 -1/2 cup of cream and 2 tbsp of butter.
Seasoning
Potatoes on their own are pretty bland, they need salt and pepper. Add a little seasoning to the cream and butter then add more to taste once the potatoes are mixed in.
How much salt and pepper should you use? For four to five russets I generally use about 1 – 1 1/2 tsp of Kosher Salt and about 1/4 – 1/2 tsp of pepper. Really though, it comes down to taste. Add a little, taste and add more as needed.
MASHER V. MIXER V. FOOD MILL
There are three main tools that people use to mash potatoes. They are a regular old potato masher, a mixer like a kitchen-aid, or a food mill. I’m much more partial to the food mill than the other two options.
I prefer using a food mill to make mashed potatoes because it yields the smoothest potatoes you will ever have. Using a hand masher it is next to impossible to get all the lumps out of the potatoes. As for a mixer, I find I rarely get all the lumps out and there is the risk of over-mixing the potatoes. This can cause the potatoes to get gummy and pasty.
So, the potatoes have been cooked and drained. The cream and butter have been heated, and seasoning has been added. Set the food mill over the pot and mill the potatoes right in. Then mix to combine the potatoes with the cream and butter. What you have will be absolutely delicious, smooth, buttery, creamy potatoes.
Smashed Potatoes
What are smashed potatoes?
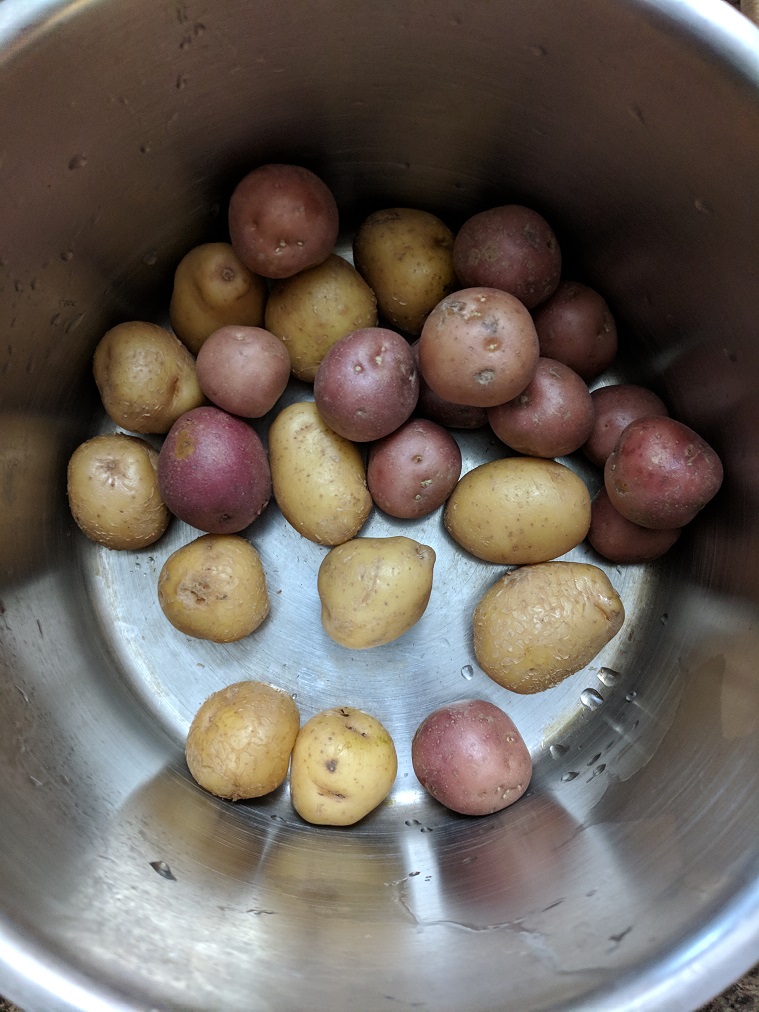
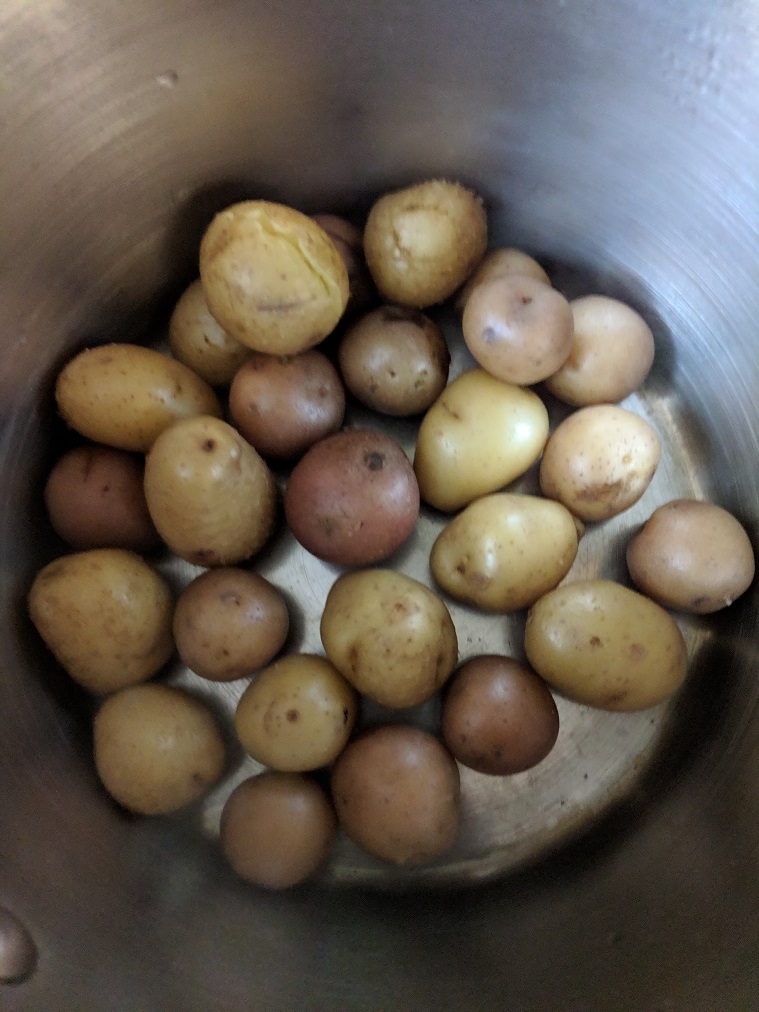
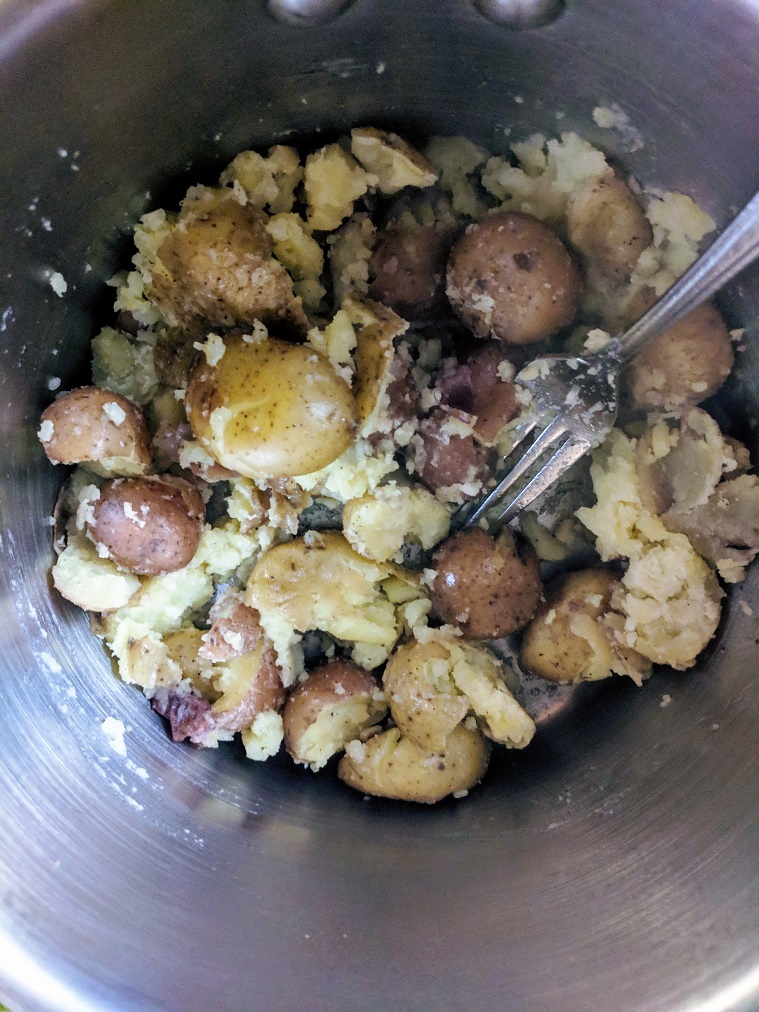
Smashed potatoes are potatoes, usually small ones, that have been boiled until tender and then smashed with the back of a spoon or a masher. They are different from mashed potatoes in two main ways; the skin is left on them, and they are chunkier. The goal isn’t to have one smooth consistent texture.
This style of potato can be made in a variety of ways and there are actually two on this list. This first one is made by mixing buttermilk, butter, and salt and pepper into the smashed potatoes. Imagine that you are using the same proportions you would for regular mashed.
The buttermilk will give the potatoes a really nice fresh flavour. That flavour combined with the texture makes these potatoes a really unique potato dish and one that is terrific for summer.
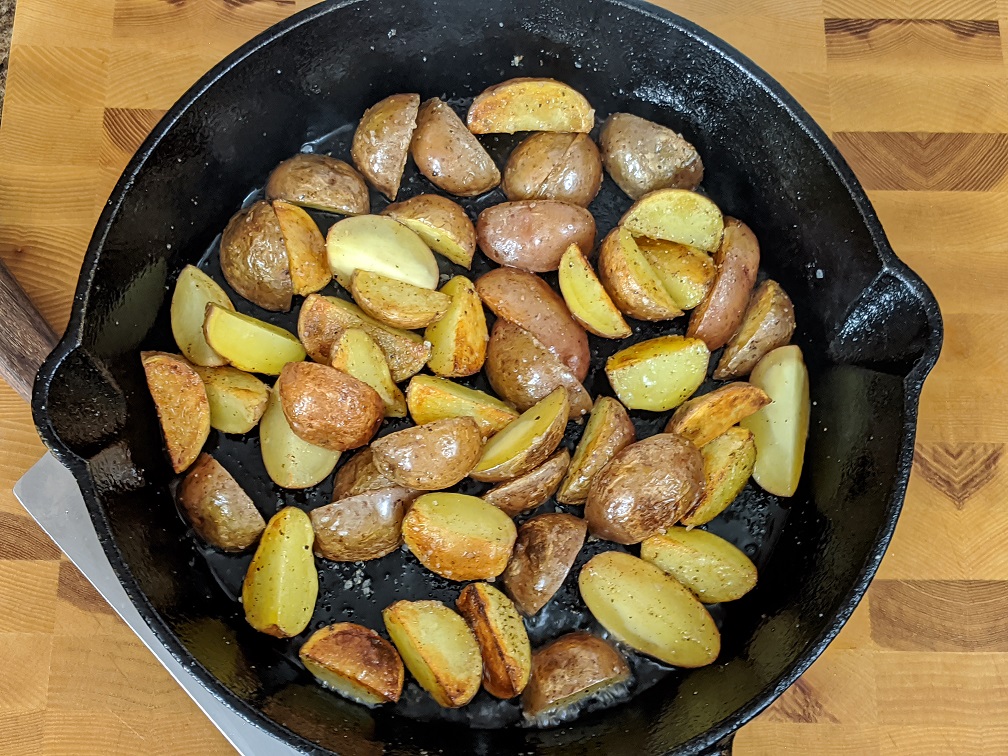
Lemon Roasted Potatoes
Potatoes tossed with lemon, olive oil, thyme, garlic, smoked paprika, salt, and pepper then roasted until crispy. Damn!
Just about any kind of potato can be used to make this dish. I like to use either russet or Yukon gold potatoes but, anything will work.
The first step is to combine the just form 1 lemon, 2-3 tbsp olive oil, 3-4 sprigs of thyme, 2 cloves of crushed garlic, 1 tsp smoked paprika, a big pinch of both salt and pepper. Mix this all up and give it a taste. Take some potatoes, cut them into wedges and toss with the lemon, olive oil mixture and spread onto a parchment-lined sheet pan. Bake in a 375°F oven for 35-40 minutes or until the potatoes are cooked through and crispy. They will have to be flipped at least once about halfway through cooking.
These potatoes go great with just about anything.
Rice
I can’t count the number of times people have told me about all the problems they have cooking rice. It’s too wet. They burnt it. The rice is crunchy. Listen, I know to some people this may seem crazy (myself included) but the struggle is real for these people. And so today I thought I would take the opportunity to talk in-depth about cooking rice and how to get it perfect every time.
The right rice for the job
There are over 40,000 varieties of cultivated rice out there so choosing the right one for your needs can be difficult. Really though, there are only 3-4 varieties you need to think about in everyday cooking. They are basmati rice, brown rice (usually whole grain basmati), sticky rice such as sushi rice, jasmine rice, and arborio or carnaroli rice which are both used to make risotto.
Though both basmati and jasmine make good all purposes rice, I prefer basmati as it is generally a bit cheaper, more readily available and I find cooks a bit better. If I am making sushi, fried rice, or other foods from Japan, China, Korea, Thailand, or Vietnam I typically use sticky rice. This will often be labelled as sushi rice. If I am making risotto it is either arborio (which I find easier to find) or carnaroli which I prefer of the two. Brown rice I use if I feel I need a bit of a healthy boost but this is rare for me though it is great in burrito bowls and the like.
Typically, I will have at least 2-3 of the above varieties of rice on hand at any given time. Notice how I didn’t list minute rice in there. To be blunt, I think minute rice is garbage. All of the flavour has been taken away in the name of convenience. White rice takes usually around 17-25 minutes to make from start to finish. While it’s cooking the rest of dinner can be prepared. I honestly see no reason for minute rice.
Rinsing
It is generally suggested that you rinse rice until the water runs clear for two main reasons. First of all to remove any dirt or grime. Second of all to rinse away any excess starch. It is usually a good idea to rinse rice however if you do, it is very important that you drain off as much water as possible. Any excess water left from rinsing may lead to the rice being soggy or mushy when cooked.
If you feel as though you are not getting enough water out of your rice cut back the amount of water you are adding when cooking by a tablespoon or two. This should compensate for the over-saturation.
Follow the instructions
This may seem way too obvious but follow the cooking instructions on the package the rice came in. Different brands of rice, even if it is the same type of rice, may suggest different ratios of liquid to rice, and different cooking times. That is why it is always important to read the instructions.
I should point out that sometimes these instructions are just wrong. Sometimes you follow them perfectly and the rice just doesn’t turn out. So, follow the instructions the first time you make the rice. If it turns out, great! If it doesn’t, adjust.
Things to look out for
If the rice is very wet and mushy, cut back on the amount of water you added to the rice. If the rice is very wet but hard, cook the rice for longer. On occasion the rice may be hard and very dry, in this case, you need to increase the amount of liquid you added to the rice.
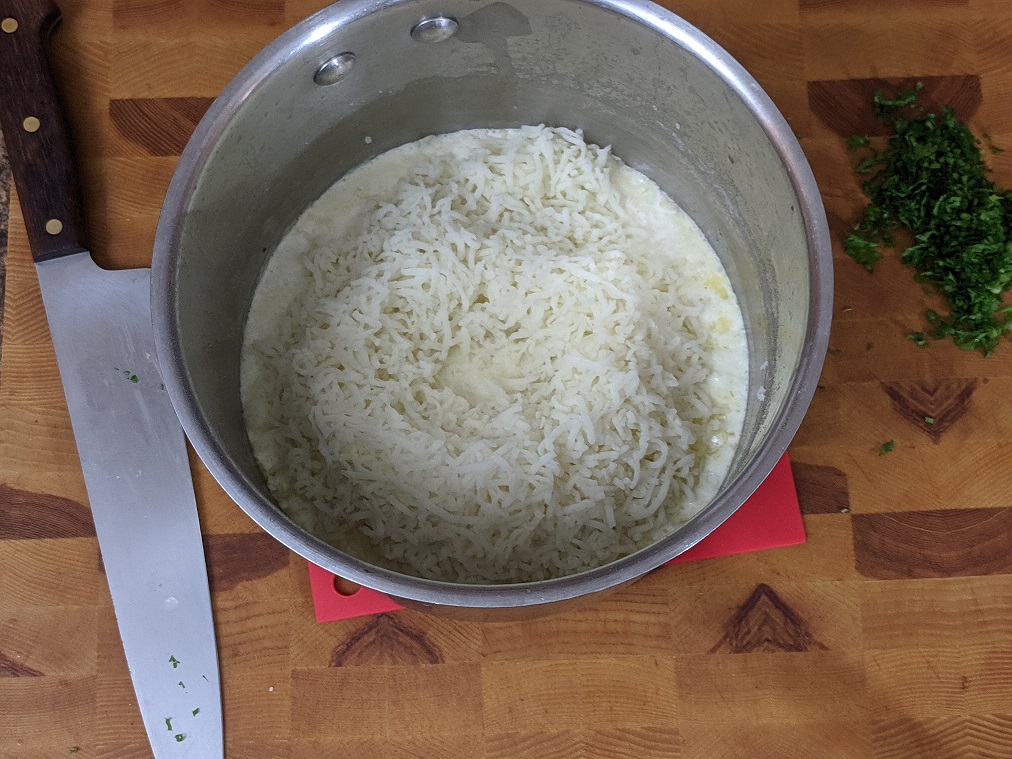
Generally, for rice, the cooking process is as follows. Combine the liquid, rice, salt, and a little fat in a pot. Bring it to a boil on high heat. Once it starts to boil turn the heat down to low, cover the pot and simmer. Once the allotted time has passed remove the pot from the heat and leave it alone, without lifting the lid for about half the amount of time as the initial cooking time. So, if you cook the rice with the lid on for 17 minutes, let it sit for at least 8 or 9 minutes. Then, fluff with a fork and serve.
Cooking time vary depending on the type of rice and how it is processed so make sure to read the instructions on the package.

Roasted Chicken
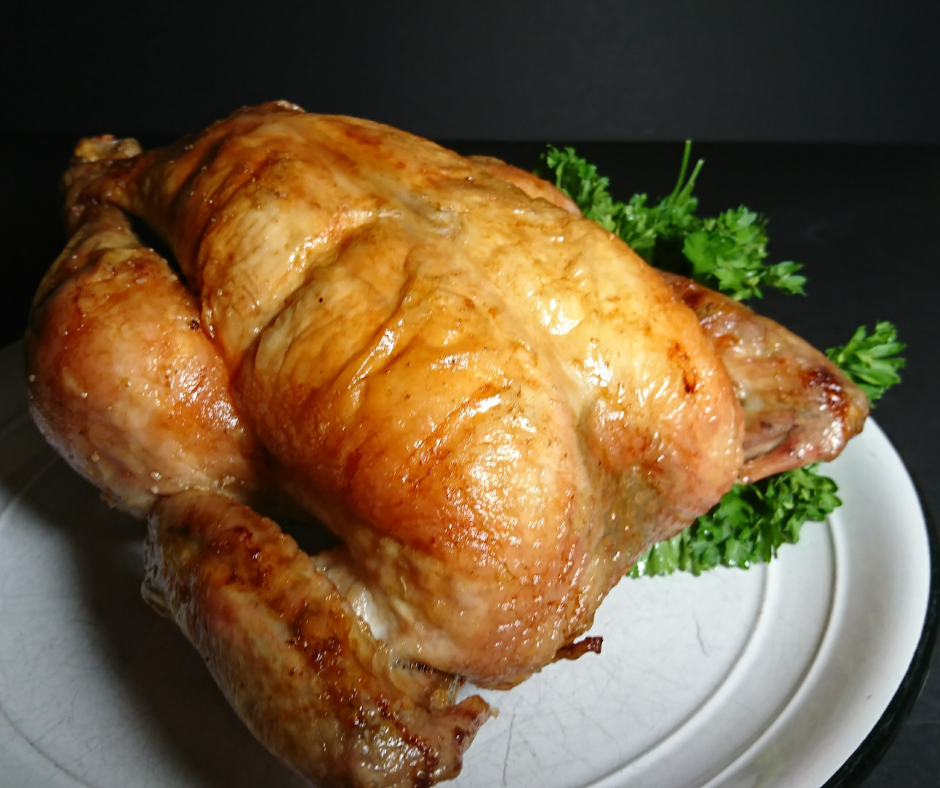
A well-cooked roast chicken is one of the rare pleasures in life. Crispy, buttery, golden skin, with tender, flavourful meat hidden below the surface. What could be better than that? But roasting a chicken isn’t something that people are just able to do. Its simplicity is extremely complex and takes practice and time to learn.
In some ways it feels like roasting a chicken is a dying skill. Most of us are much more likely to pick up a rotisserie chicken from the grocery store than to roast one ourselves. Of course, and I’m sure it goes without saying, there is no comparison when it comes to taste and quality. A home roasted chicken is a hundred times better. But, it does take time and effort to prepare.
The key to a good roast chicken is getting all of the skin nice and crispy without overcooking the rest of the bird. There are a few simple things that you can do to make this process easier.
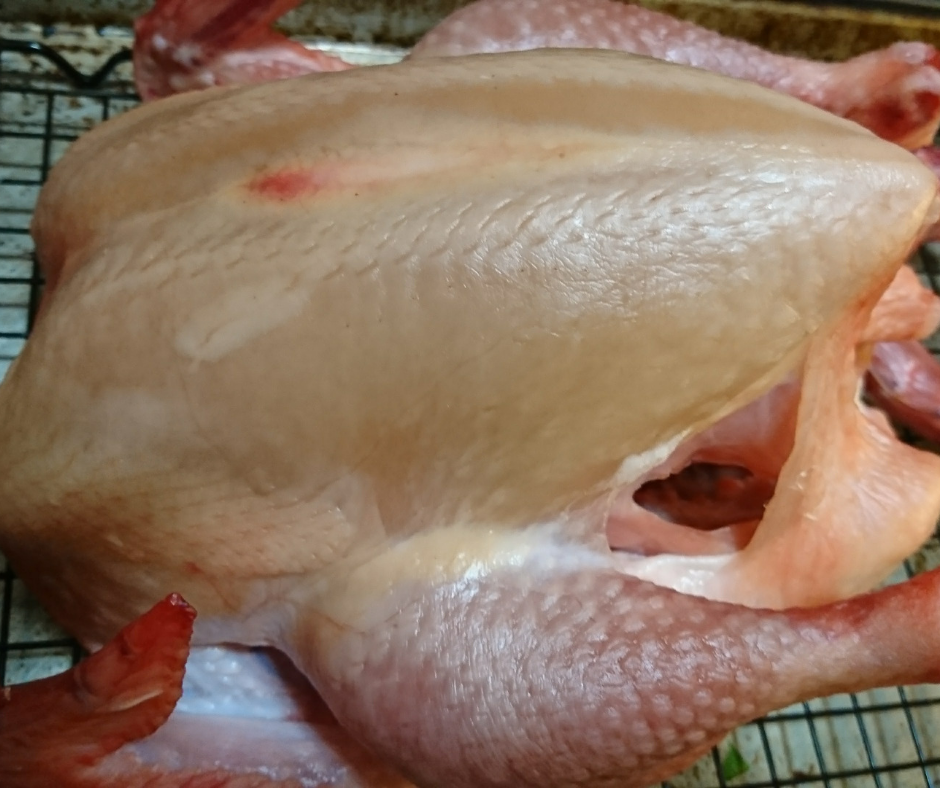
Dry the skin
Removing moisture from the skin of the chicken is the single most important step in getting really crispy and brown. This doesn’t just count for chicken. If you want a really nice sear on a pork chop or steak, make sure the surface is dry first. This can be done in one of two ways.
Dry the skin with a paper towel. This is not my personal favourite as I find it doesn’t do a fantastic job. However, in a pinch, if you are pressed for time, this is the go-to technique. Get a few paper towels and dry the chicken inside and out. It’s pretty straight forward.
The reason you want to dry the chicken inside is that any extra moisture inside the chicken will add moisture to the oven which will prevent the skin from crisping. The goal is to remove as much moisture from the surface of the chicken as possible.
Or, you can air-dry the chicken. Air-drying the chicken is exactly what it sounds like. This is letting the chicken dry naturally over a period of time. To do this, the chicken is placed on a rack, set over a pan or baking sheet and placed in the fridge for a day or two uncovered. I know that this seems foreign to a lot of people, putting a chicken in the fridge uncovered, but it works and it is the technique.
The reason you want the chicken on a rack is because liquid will pool at the point of contact if it is sitting on a flat surface. This will lead to their being one big wet spot on the chicken that won’t brown and it looks pretty gross. The pan under the rack is there to collect any drippings.
Leaving the chicken uncovered, as I said may seem like a really weird and uncomfortable thing to do but it is what allows the skin to dry. If the chicken is wrapped, moisture will get trapped and the skin will stay damp. This process usually takes about two days and you may have to flip the chicken after the first day. It’s done when the skin is dry and tightly clinging to the meat.
Be aware that leaving raw chicken uncovered in the fridge is perfectly safe as long as other foods aren’t coming into contact with it and it isn’t dripping on foods. Again, keep the chicken on a rack with a pan under it to prevent juices from running on to other foods. Also, keep the chicken on the bottom rack of your fridge and make sure other food items are stored well away from it.
Cooking the chicken
Now that the skin of the chicken is dry, it is almost ready to cook. There are only two things that need to be done first. The first step is to grease up the bird. I generally use a good quality olive oil for this or, clarified butter. I find regular butter has too much water in it which causes the skin to soften. So, rub the whole chicken inside and out with olive oil. The only thing left to do is to season the chicken very well, inside and out with salt. That’s it.
Once the chicken is oiled and seasoned, put it in a roasting pan with a rack and fire it into an oven heated to 400°F.
Now comes the fun part. The best way to ensure that the chicken gets evenly crispy on all sides is to rotate it every 20 minutes or so. Start with the chicken breast up. After the first 20 minutes rotate it onto its left side. Then after another 20 minutes rotate it to breasts down, and so on. Continue doing this until the chicken is cooked through. And yes, it is worth the effort.
How long the chicken takes to cook depends on the size of the chicken and the quality of your oven. Generally, 15-20 minutes per pound is suggested. The only way to know for sure if the chicken is done is with a thermometer stuck into the deepest part of the thigh. The temperature should be 168°F – 170°F.
Basting/Resting
If you notice that there are some spots of the chicken that just aren’t crisping up you may want to baste or brush those spots with a little more oil. You shouldn’t need to worry about basting the whole chicken.
With the chicken cooked through and the skin nice and crispy all that is left is to let the chicken rest. In a lot of ways, this is the hardest part. The chicken will look so good, like a cartoon roast chicken form bugs bunny or the Simpsons, but leave it alone! Don’t touch the chicken for at least 10 minutes. 15-20 is better.
Let the chicken rest, uncovered on the rack it was cooked on. This will allow the juices to redistribute throughout the bird keeping it juicy and moist. Resting will also give air time to circulate around the skin causing it to crisp up even more.
While the chicken is resting you can make gravy or sides.
Pork Chops
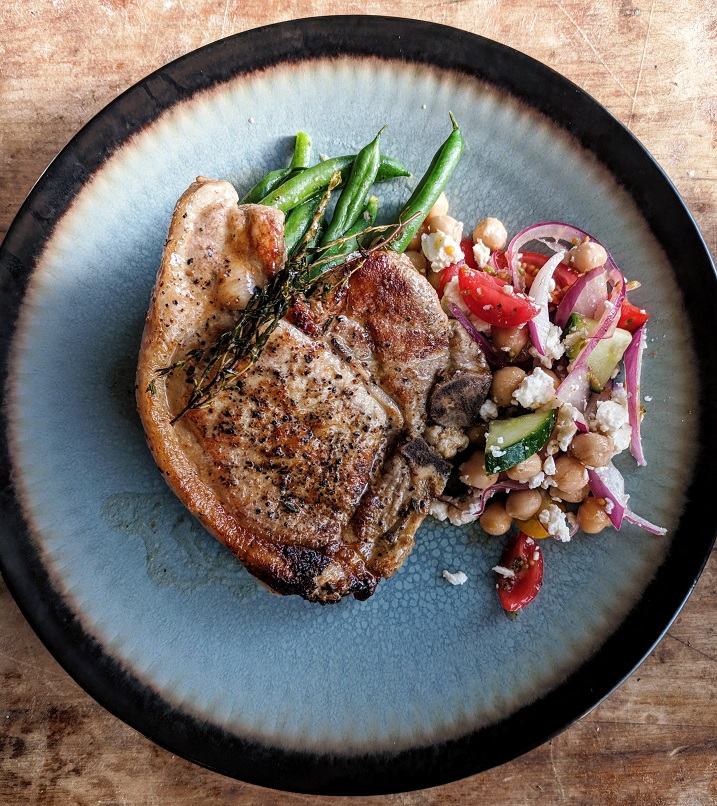
If you don’t love pork chops you have probably never had them cooked to perfection… Or you just don’t eat pork which is completely possible but not at all what we are talking about today.
Let’s assume for argument’s sake that you don’t like pork chops because whenever you eat them, they’re overcooked and dry. This is a very common problem, especially with the thin grocery store pork chops that we’re all used to.
So, what can be done? How can we prevent pork chops from becoming dry pieces of particle board that absorb all the moisture out of our mouths? How can we add flavour before we even cook them? How can we make something that seems so mundane, the star of any meal?
Part of the problem with pork chops is the part of the pig that they come from. It is a very lean part of the animal. The less fat, the less flavour and the more likely to dry out while cooking. There is one bonus, however, because these muscles don’t get a tonne of work compared to leg muscles, they are very tender.
The fear of pork
The big fear that people have with pork is that if they undercook it they will get trichinosis. With modern farming and butchering techniques, this isn’t actually much of a worry. There has only been one case of trichinosis in Canada since 1980. This happened in 2013 and it was from a homegrown hog, not a commercially produced one.
Having said that, I’m not suggesting that you start eating rare pork. What I am saying is that pork doesn’t have to be overcooked. It just has to be cooked to a final temperature of 165°F or 74°c. By final, I mean the temperature that it comes to after resting. So, cooking a pork chop to 160°f and letting it rest will bring it up the other 5° without overcooking it.
As a bit of a side note, you are much more likely to get trichinosis from undercooked game meat like venison then you are from pork. The most common occurrences in Canada come from bear and walrus meat.
A bone to pick
Another problem with pork chops is that they are often sold with either a rib bone or a piece of the spine attached. I prefer bone-in pork chops but, the meat nearest the bone takes longer to cook than the rest of the chop. So, by the time that meat is cooked, the rest is over cooked. This is a problem. Especially, when people are afraid of under cooked pork.
There are some ways to cook the pork chop completely through, including around the bone, and keep the meat tender. But these processes can be complicated like confit or require special equipment like a sous vide cooker.
So, what we have to think about is either eating the pork with the meat around the bone a little underdone. Or, finding a way to keep the meat tender while still cooking it through around the bone.
Brine and Marinate
Brines
The difference between a marinade and a brine can be kind of hard to pinpoint. The key is that they serve different purposes. We will get into that in a second but I think an easy way to think of it is that a brine is salty, a marinade is acidic.
A brine is a solution of water and salt. Usually, sugar and other flavourings are added as well. I actually talked about this a bit and gave a recipe in this post when I was talking about ribs. The traditional purpose of a brine was to preserve meat over a long period of time. We don’t often use a brine for this anymore because we have fridges and freezers.
Today, there are two main reasons to use a brine. The first is to impart flavour through herbs and aromatics. The second purpose is two-fold: Brining has a tenderizing effect because the salt breaks down certain muscle filaments. The salt also causes the proteins to absorb and hold more moisture. What that means is that brining pork chops makes them more flavourful, more tender, and juicier. Brined pork chops are more forgiving than un-brined ones. They can stand to be a little overcooked and still be juicy and tender. This means that the meat around the bone can be cooked without sacrificing the rest of the chop.
Because marinades are by their nature acidic they break down muscle fibers making meat more tender. The problem with marinades is that they are slow to penetrate the meat. This can cause an overly acidic exterior with an untouched interior.
Due to the nature of marinades they are generally suggested for smaller pieces of meat or even meat cut into thin strips.
Marinades can absolutely be used for pork chops. There is no question about it. For my money a brine is much more forgiving and the better option.
Marinades
Because marinades are by their nature acidic they break down muscle fibres making meat more tender. The problem with marinades is that they are slow to penetrate the meat. This can cause an overly acidic exterior with an untouched interior.
Due to the nature of marinades, they have generally suggested for smaller pieces of meat or even meat cut into thin strips. Marinades can absolutely be used for pork chops. There is no question about it. For my money a brine is much more forgiving and the better option.
Cooking Pork Chops
When cooking pork chops (BBQ excluded) I prefer a two stage cooking process. All that means is that I start them in a pan and finish them in the oven or in liquid like a sauce.
Starting them in a pan or skillet allows me to brown the surface of the pork chops. This adds depth to the flavour of the pork. This also cuts down on my cooking time.
Imagine I have two identical pork chops. I put one directly in the oven. The other, I sear on all sides in a pan and then put it in the oven. Which one will cook quicker?
The seared one will cook quicker, even when taking the time to sear into account. The seared pork chop still takes less time to cook compared to the one that went directly in the oven.
DIRECT HEAT VS. INDIRECT HEAT
The reasoning behind this little experiment is pretty straight forward. Cooking in pan on a burner is a direct heat transfer cooking method. Meaning, the heat is coming from the element which is in contact with the metal pan which is in contact with the pork chop. This contact allows for a fairly smooth and consistant transfer of heat from the burner, through the pan, to the pork chop.
An oven is an indirect heat source. The heat coming off of the elements have to travel through the air present in the oven. Air is a terrible conductor of heat. By the time the heat reaches the pork chop it has lost a lot of it’s energy and heating ability.
SO THEN, WHY NOT COOK THE PORK CHOP FULLY IN THE PAN?
Although direct heat is an efficient way to transfer heat energy, it isn’t great at evenly distributing that heat throughout the item being cooked. So, you can cook a pork chop completely in a pan. It is however, fairly difficult to get a nice even cook on the chop.
The other problem with completely cooking in a pan is heat management.
Imagine I have a pork chop that is 1 inch thick that I’m cooking in a pan. There is going to be a very large temperature variance from the part of the pork chop that is in contact with the pan, and the part that is contact with the air. Every time I flip the pork chop there is going to be this heating and cooling cycle.
An oven, though not really efficient, holds a fairly stable temperature. This means that there will be less of a temperature variance from the top to the bottom of the pork chop. This makes for a more even cook. This is why I prefer a two stage cooking process for pork chops.

PUT A LID ON IT
There is the option to put a lid on your pan and create a little oven inside. This still raises the issue of the direct vs. indirect heat transfer. The only real way to avoid this is liquid. If I were to add some wine, stock, cream of mushroom soup (as we are all probably familiar with) or sauce to the pan this could balance out the heat. There is a danger in using liquid in this way.
If you are using liquid to finish your pork chop it is important that you don’t boil the meat. Boiling will toughen the pork chop and quickly over cook it.
Ideally, when finishing your pork chop with a liquid this would be the process you would follow:
- Sear the pork chops on all sides.
- Remove them from the pan.
- Drain off any excess fat.
- Add your liquid.
- Bring it to a boil.
- Reduce the heat to low and add the pork chops back in.
- Put a lid on the pot and simmer for five to ten minutes.
This liquid process has the added benefit of a more even distribution of heat. This will cook the meat closest to the bone along with everything else.
GRILLING
Grilling is an entirely different ball game. And one that I unfortunately don’t really have time to get into today. In the spring I will do a whole grilling post to answer any questions that you may have.
SAUCING
There is one more benefit of the two stage cooking method. I can develop that nice sear on the surface, and then add sauce to the pork chops when they go in the oven.
The sauce doesn’t have to be BBQ sauce. It could be some white wine, stock, brandy and cream, any number of things. This allows me to develop that deeper flavour that a sear provides while still enjoying my favourite sauce.
Steak
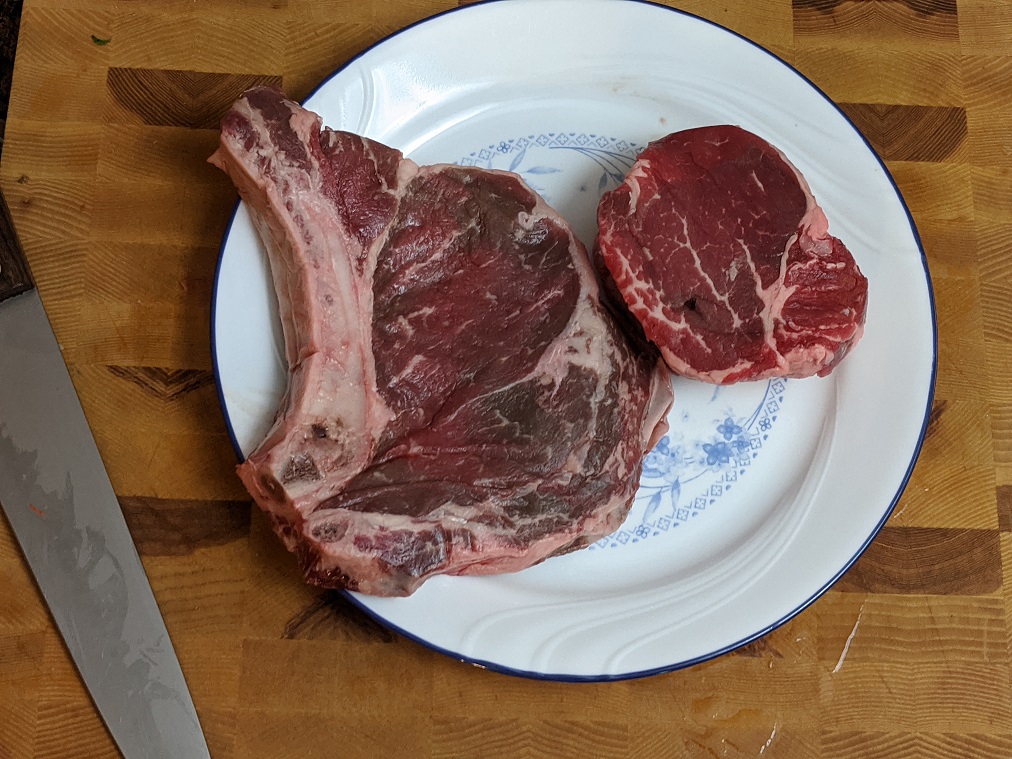
What’s better than a perfectly cooked steak? Whether it’s a rib-eye, tenderloin, t-bone, strip loin, or sirloin there is simply nothing better. I know that there are people out there, meat-eaters, that doesn’t really like steak. Often the reason they give is that they don’t like it when blood comes out of the steak on to their plate and stains their potatoes. They find steak tough. Or they don’t like the flavour. Today, I’m going to show you that all of these issues that many people have with steak are easily fixed by choosing the right steak and with proper cooking techniques.
If I had to choose a favourite cut of steak it would unquestionably be rib eye. Why? Well, because I love the fat content of a rib eye. I find the meat is tender and flavourful. It just suits me. But what about you? Do you have a favourite cut of steak? Do you know the difference between steak cuts?
CHOOSING THE RIGHT STEAK FOR YOU
Imagine that in your whole life you have never had a steak before. You walk into the butcher shop, you see all the options, all the potential. How do you know what to choose? How do you know what steak is going to be right for you? Now, even if you have been eating steak your whole life there is a really good chance that you eat what you’re familiar with and what you grew up with.
If you grew up in the sixties and seventies, or if you were an adult in that period there is a really good chance that you think that a t-bone steak is the pinnacle of flavour and decadence. If you grew up in the eighties you may think porterhouse is everything. In the nineties, it was all tenderloin and strip loin. Now, it’s strip loin and ribeye. Times change. Tastes change. However, there is a steak for every taste and time.
Choosing the right steak for you takes some thought. You have to know what you like and what you don’t like. If you don’t know that, you need to experiment with a bunch of different steaks to find out and what a fun experiment it will be.
When I choose a steak I am looking for fat content, tenderness, and flavour. That is why I prefer a rib-eye steak to other cuts. The rib eye is the fattiest cut, and because of that, I find it has the most flavour. Because I love rib eyes doesn’t necessarily mean that you will. To find out what might be right for you, let’s take a look at each of the five most common cuts of steak individually.
RIB EYE
The rib eye is cut from the rib section of the cow. It is a lightly used muscle which is why it is so tender. It is also the most marbled of all the steaks which give it a high-fat content, and more flavour than other steaks. If you like fatty, juicy, flavourful meat then the rib eye is right for you. If you prefer something a bit leaner you are looking in the wrong place. These are best cooked medium-rare to medium.
NEW YORK STRIP LOIN
The Strip Loin is the most common steak for people who don’t really know much about steak. It isn’t a particularly flavorful or tender cut of meat. The strip loin is cut from the short loin of the cow which sits right behind the rib section nearer the back end. In comparison to the ribeye, it has little marbling or fat content. It does have a layer of gristle and fat on the top of the steak which may or may not be cut off prior to cooking.
SIRLOIN STEAK
The sirloin is essentially the same thing as the strip loin. The only difference is that it comes from a little further back on the cow. A sirloin is part of the t-bone steak. Depending on where you are in the world sirloin may just refer to strip loin or strip loin may refer to sirloin. There really isn’t much difference.
TENDERLOIN
As you can probably guess from its name, the tenderloin is very tender. It is the most tender of all the steaks but it has next to no fat content and personally I find it has very little flavour. In other parts of the world, the tenderloin is called filet, fillet, or eye filet. The tenderloin is a part of the cow that never really does much work, hence why it is so tender. It is a great steak for those that don’t really like to chew. A good tenderloin should basically melt in your mouth.
Tenderloin would never be my first choice for a steak as it is typically one of the most expensive cuts and again I don’t find it that flavourful. Having said that, if it’s put in front of me I will happily eat it, or any steak really.
T-BONE STEAK
T-bone steak is one of those cuts that have a reputation as being the gold standard of steak. As the name suggests it has “t” shaped bone. This bone separates two cuts of meat which make up the t-bone steak. Those cuts are tenderloin and sirloin or strip loin. A tenderloin and a sirloin do not cook in the same amount of time. And so you may order a t-bone and get half of it perfectly cooked but the other half is going to either be over or undercooked.
In theory a t-bone steak is a great idea. You kind of get the best of both worlds. However, in practice it never really works out. If you’re wondering a porterhouse is a t-bone that is cut from further back on the cow. It has a greater portion of tenderloin where the t-bone has more strip loin or sirloin.
CONCLUSION
If you are just dipping your toe into the wonderful world of steak I suggest starting with a strip loin. It has a decent flavour and is fairly tender and isn’t very expensive. If you like really tender things with not a tonne of flavour and you have money to burn then the tenderloin is for you.
If you have been eating strip loins and tenderloins your whole life but have always shied away from the rib eye it might be time you try it. And if you are the type of person who likes to live on the edge, and doesn’t mind a little extra fat because you know it means a lot of extra flavours, then a rib eye is right for you.
COOKING STEAKS AT HOME
It is all well and good to know what type of steak you want but if you have no idea how to cook it once you get it home what’s the point? There are three main ways that people can cook steak at home. All three techniques can yield a delicious steak if you know what you’re doing. So, let’s take a look.
BARBECUE
Probably the cooking method that most people jump to first when talking about steak is the barbecue. There is a good reason for this. Steaks cooked over an open flame can be amazing as long as the person cooking knows what they are doing. There are a lot of “Grill Kings” out there who burn the outside of their steaks to a crisp and leave the inside raw or way overcooked.
The secret to really good barbecued steak is simple; heat management.
Often times people will crank the barbecue and try to cook a steak over that high heat. This can work if your careful and your paying attention. However, there is a big risk of burning the steak and ruining dinner. For thinner cuts of meat that cook quickly, this isn’t much of a concern and really you want that high heat for those.
For anything thicker than your little finger you want a more moderate, consistent heat. This will give you a uniform temperature throughout the steak without burning the crap out the outside of the steak.
For really large cuts you may want to start them on very high heat to get a really nice sear on the outside and then turn the heat way down close the lid and finish cooking them that way.
BROILER
The broiler in most people’s ovens is rarely used. Some people don’t know how to use it. But, if done right it you can cook the best home cooked steaks you’ve ever had.
The broil setting on your oven turns the top oven element on high. This creates a very high direct heat. This works very well for cooking smaller cuts of meat or for searing the outside of bigger cuts at the beginning or at the end of cooking. The downside to using the broiler is that it is going to heat your house up and the fat splattering from the steak is going to make a mess in your oven. It is totally worth it though. This method can cook steak very quickly and so it is important to keep an eye on the steak the whole time it’s cooking.
STOVE TOP
For my money, there is really only one way to cook a steak on the stovetop and that is in a cast-iron pan. You have to get the pan very hot before you put the steak in. I don’t usually even add oil to the pan as enough fat comes out of the steak. This method is great for cuts of any size but bigger cuts may need to be finished in the oven.
The big upside to cooking steak in a cast iron pan is that you get a beautiful even sear. You also have more control over the cook because you are hands-on the steak the whole time, and you can baste it with butter and herbs. This is my preferred method of cooking steak at home. The downside to this technique is that if you don’t have a good hood vent your house is going to be filled with smoke. Also, your stovetop is going to be covered in grease spatter.
CONCLUSION
No matter how you are cooking your steak or what cut of steak you are cooking there are a few tips that you should know that will give you the best steak possible.
DRYING
First of all, when you get home with your steak, unwrap it and put it in your fridge overnight ideally on a rack so both sides of the steak can breathe. This will dry the surface of the steak allowing you to get the best sear you can and concentrating the flavour of the meat itself.
WARMING
Before you cook your steak let it come to room temperature. That’s right, let the steak sit out on your counter for thirty to sixty minutes prior to cooking it. It takes less energy to heat something that is room temperature than it does to heat something that is fridge temperature. This will allow for a more even and quicker cook. As your steak will be cooking in less time, it will have less residual heat and will have less carryover.
Carry over cooking is when the residual heat in an item continues to cook it once it has been removed from the heat source. The greater the mass of an item and the longer it has been cooking the greater the amount of residual heat and thus more carry overcooking.
RESTING
After the steak is cooked it is very important to let it rest. The reason why involves that residual heat we were just talking about.
When you take a steak off of a heat source it takes time for that heat to dissipate. As that heat is dissipating the molecules within the steak start slowing down. As the molecules within the steak slow down and cool the fat and muscle proteins that have been liquefied by the heat starts to cool and solidify. This allows for an even distribution of fat and moisture throughout the steak.
If you were to cut into a steak as soon as it comes off the heat all of these juices would come pouring out. The rarer the steak the more bloody those juices will be. If you take that same steak, no matter how rare, and let it rest for five to ten minutes depending on its size, those juices will remain in the steak when it’s cut. As I’m sure you can imagine, a steak can’t be juicy if all of its juice is on the plate. Resting allows for a juicy tender steak.
SEASONING STEAK
Steak isn’t cheap, and can actually be very expensive depending on what you are buying. Because it is so expensive I stay from overpowering sauces and flavourings. I actually want to taste the steak.
When it comes to seasoning a steak I keep it pretty simple. I generally stick to salt and pepper occasionally adding garlic and onion powder and maybe old bay seasoning. That’s about as far as I go. If I am roasting a larger steak or a whole strip loin, prime rib, or tenderloin I may do a garlic and herb rub. The thing is all these flavours compliment the flavour of the steak rather than overpowering it.
I also may baste my steak with butter, garlic and herbs while it’s cooking. Again, this compliments the flavour of the steak. Basting gets the flavour into all the nooks and crannies of the steak making it even more delicious.
When it comes to sauces I keep it pretty simple. Flavoured butter is always a great option. You just mix herbs and flavourings into butter, put it on the steak and let it melt. Delicious! I also like chimichurri which is an herb sauce from South America that works incredibly well with steak. I am also partial to pan sauces, demi-glace, and horseradish.
I always avoid barbecue sauces and things like HP Sauce on steaks. I find these completely cover up the flavour of the steak making it a waste. If someone is serving me a steak with an overpowering sauce my first assumption is that they are serving me a low-quality steak. The sauce is there to cover up the low quality. Always be wary of strong sauces.
When it comes to steak, simple is always best. Pay the money for a good steak and you won’t need any sauce at all.
TEMPERATURE
One final thing we haven’t touched on yet is temperature. How do you like your steak cooked? Well, it depends on the steak. I find that with a rib-eye medium is perfect. Anything less and the fat doesn’t really get a chance to cook properly. When it comes to strip loins rare to medium-rare is preferable. And for tenderloin medium rare is the perfect temperature.
On tv and in restaurants you will see chefs and cooks checking the doneness of steaks simply by touching them. We can do this because of practice. When you cook a thousand steaks you get a pretty good idea of how they feel and how they act. You can tell the difference between when a strip loin is medium and when a tenderloin is medium. They feel very different. And so I recommend using a thermometer rather than guessing at the temperature.
For rare steaks, the temperature is 130°. Medium rare is 135°F-140°F. Medium is 140°-150°. Medium well is 150°-160°. And well done is 160°-170°.
Conclusion
This post has become much bigger than I had initially intended it to be, so I am going to break it into two parts. Next week we will look at cooking fish, pasta, things with ground beef and more.
Thanks for reading!!
0 Comments
Trackbacks/Pingbacks