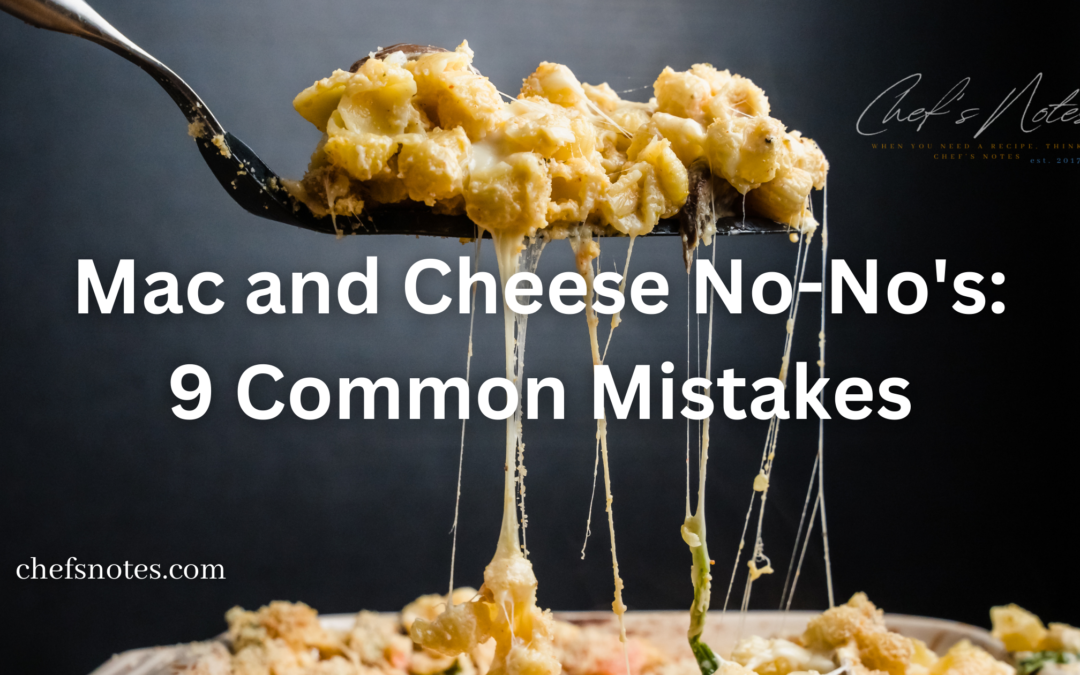
Looking for the perfect Mac and Cheese recipe? Avoid these 9 common mistakes to make sure your dish is a hit at your next potluck. From overcooking the pasta to using the wrong type of cheese, these mistakes can ruin your Mac and Cheese and leave it inedible. Don’t be the one to bring the bad Mac and Cheese to the party. Follow these tips to ensure your dish is a delicious success.
Mistake #1 Not Using a Roux
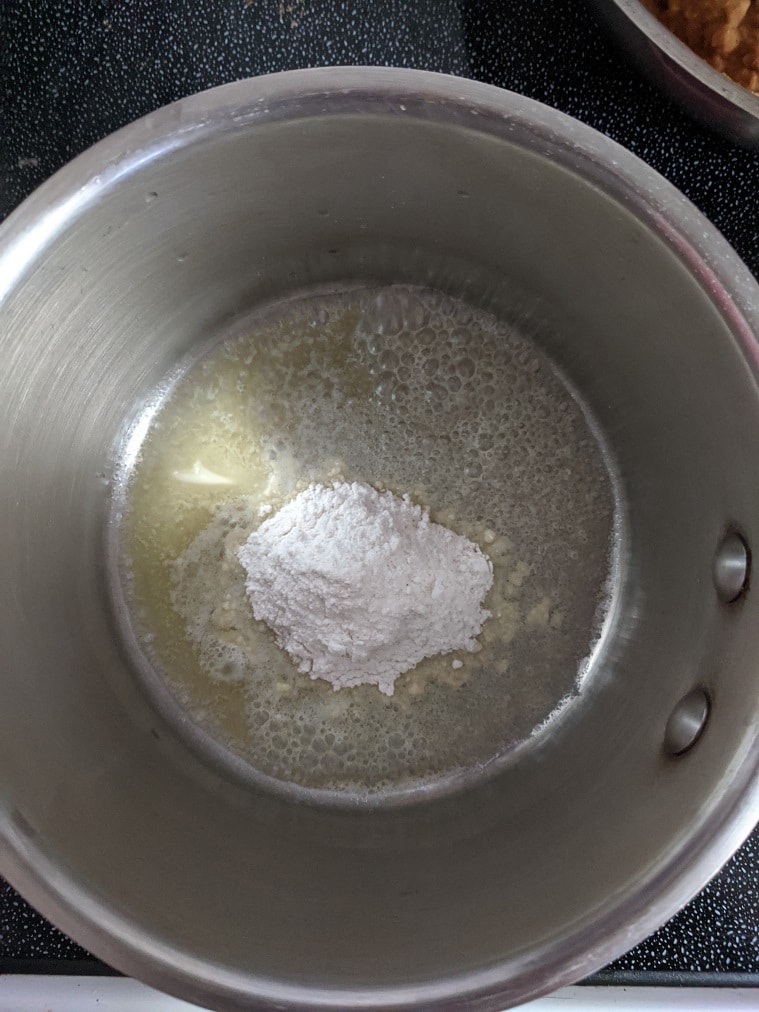
Roux is a crucial component in many classic dishes, including the beloved Mac and Cheese. It’s a simple mixture of equal parts flour and butter that’s cooked together and used to thicken sauces and gravies. Without a roux, your cheese sauce can turn out unstable and may even curdle during cooking.
To make a roux, start by melting butter in a pot. Once melted, whisk in an equal amount of flour and continue cooking and whisking for 4-5 minutes. You can then use the hot roux to thicken cold milk, or whisk cold milk into the hot roux. By using a roux, you’ll create a stable base for your cheese sauce that will result in a creamy and delicious Mac and Cheese.
Mistake #2 Wrong Milk For The Job
When making Mac and Cheese, it’s important to choose the right type of milk. While it may be tempting to use lower-fat milk to save on calories, it’s important to use at least whole milk (3.25% Milk Fat) to ensure the best texture and stability. The higher fat content helps to prevent the Mac and Cheese from becoming greasy or separating during cooking. If you only have 2% milk on hand, consider adding a bit of whipping cream to it in a ratio of 1:3 (1 part whipping cream to 3 parts milk) to increase the fat content. Trust me, your Mac and Cheese will thank you!
Mistake #3 Undercooking Bechamel
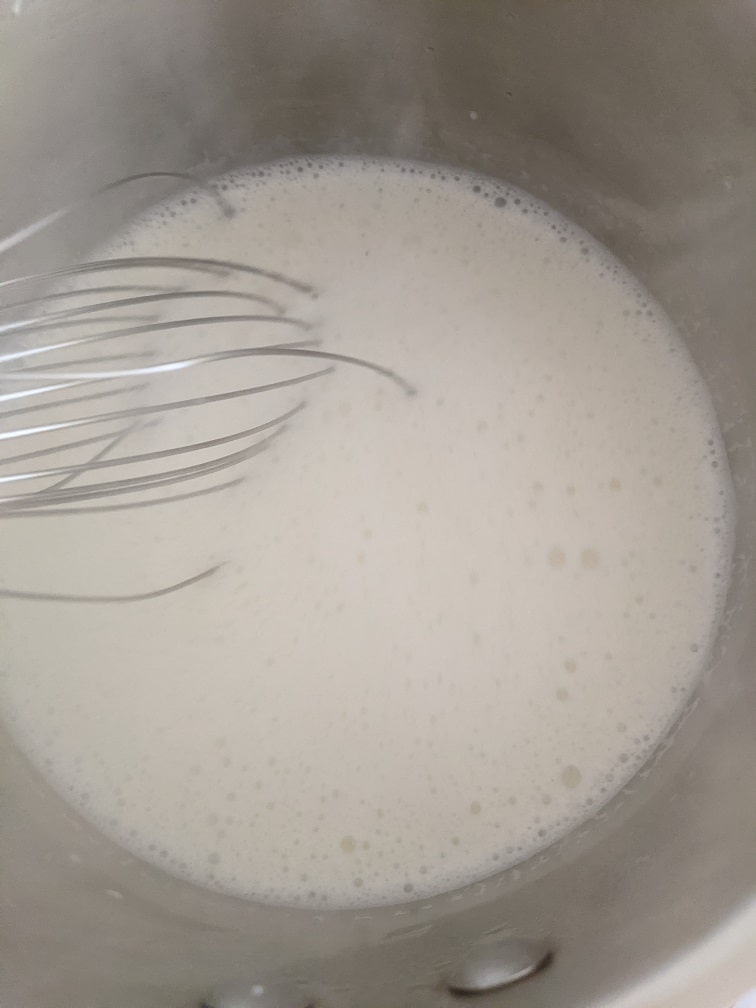
If you want to make the perfect Mac and Cheese, it’s important to pay attention to the details, including the Bechamel sauce. Bechamel is made by thickening milk with a roux, a mixture of flour and butter that’s cooked together to various degrees to achieve different flavours and colours. The roux is an essential component of the Bechamel, as it helps to thicken the sauce and give it structure. However, if the roux is not cooked long enough, it can impart a raw, floury taste to the Bechamel. This can ruin the texture and flavour of your Mac and Cheese, leaving you with a dish that’s grainy and unpalatable.
To avoid this common mistake and ensure a smooth and creamy Bechamel sauce for your Mac and Cheese, it’s important to simmer the sauce while gently whisking it for at least 10 minutes before adding in the cheese. This will help to cook out any raw flour flavour and give you a sauce that’s perfect for your Mac and Cheese. Don’t skimp on the cooking time – a little extra effort will pay off in a delicious and satisfying dish that’s sure to be a hit with your friends and family. So next time you’re making Mac and Cheese, be sure to give the Bechamel the time it deserves. Trust us. Your taste buds will thank you!
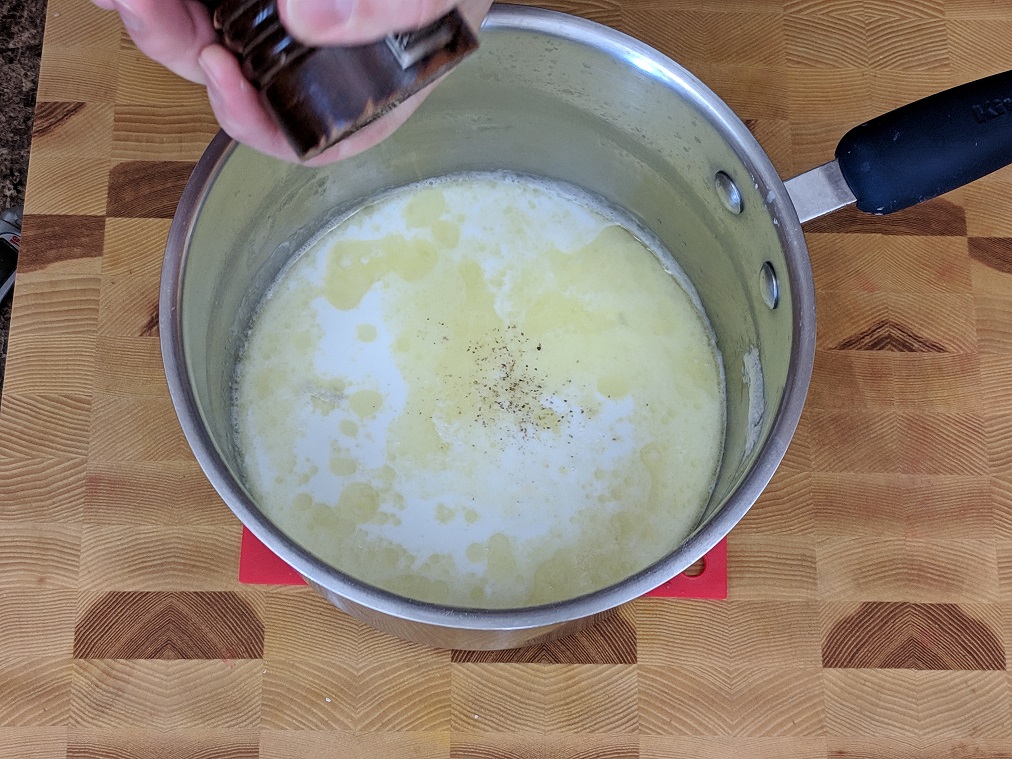
Flavour is key when it comes to making delicious Mac and Cheese, and the Bechamel sauce is no exception. While a basic Bechamel made of butter, flour, and milk provides the base for the Mac and Cheese sauce, it’s important to add in some extra flavourings to make it truly stand out. Some options to consider include nutmeg, cayenne, salt, pepper, onion powder, and garlic powder. These ingredients can help to enhance the taste of the Bechamel and add depth and complexity to the overall cheese sauce. A few drops of lemon juice can also help to brighten the flavour and add some balance.
When adding these flavourings to your Bechamel, it’s best to do so after the roux has been cooked and the milk has been added. This will give the flavours time to infuse into the sauce and develop fully. Be sure to add in enough flavourings to make your Bechamel shine in your Mac and Cheese, but be careful not to overdo it – a little goes a long way when it comes to seasoning. With the right balance of flavours, your Bechamel sauce will take your Mac and Cheese to the next level.
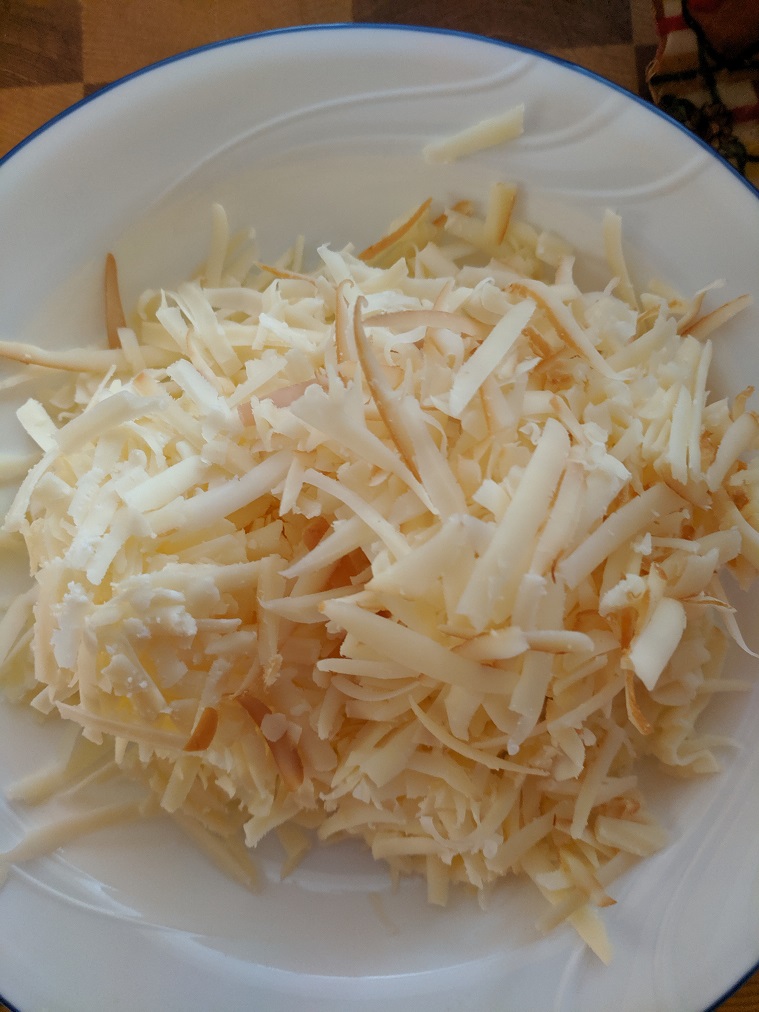
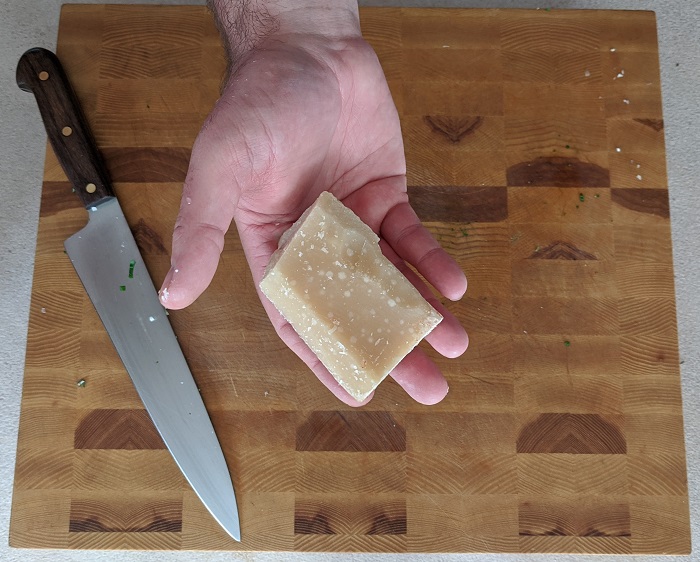
Mistake #5 Making Poor Cheese Choices
When it comes to making the perfect Mac and Cheese, the cheese you choose can make all the difference. To add depth and complexity to the flavour, it’s best to use a minimum of three different types of cheese. Aged cheddar is a great choice for flavour and colour, and adding in a little turmeric or paprika can help to enhance the colour if you’re using white cheddar. Swiss or Monterey Jack cheese can also add texture and flavour to the dish. For an extra layer of flavour, consider using an aged cheese like parmesan or asiago or a bold blue cheese like cambozola or gorgonzola. A smoked cheddar is another excellent option that can add depth and character to the dish.
However, it’s important to avoid using cheeses that won’t contribute to the desired flavour and texture. Processed cheese like American cheese or Velveeta may melt easily, but they don’t have much flavour and can result in a bland, uninspiring dish. Similarly, soft and crumbly cheeses like feta or goat cheese may not melt well and can lead to a grainy or uneven texture. To get the best results, stick with cheese varieties that are known for their melting abilities and bold flavours. Experiment with different combinations to find the perfect blend for your tastes.
Mistake #6. Adding The Cheese Too Quickly
When it comes to adding cheese to your Bechamel sauce for Mac and Cheese, timing is everything. If you add the cheese too quickly, it can cause the sauce to split or become unstable during cooking. To avoid this, it’s important to take a few extra steps to ensure that the cheese is fully incorporated into the sauce.
First, be sure to grate any firm or hard cheese before adding it to the sauce. This will make it easier to incorporate and prevent the sauce from becoming clumpy or grainy. Then, add the grated cheddar to the Bechamel a little bit at a time, whisking it in until it’s fully incorporated. Repeat this process with the Swiss cheese, and finish with the parmesan or blue cheese.
This process will help to emulsify the oils in the cheese into the sauce, which can prevent oil separation during cooking and give you a smooth and creamy Mac and Cheese. By following these steps, you can ensure that your cheese is perfectly integrated into the Bechamel, resulting in a delicious and satisfying dish.
Mistake #7 Cold Pasta
When making Mac and Cheese, it’s important to pay attention to the temperature of the pasta and cheese sauce to ensure that the finished dish is creamy and flavorful. Here are a few tips to keep in mind:
Avoid adding cold pasta to a hot cheese sauce, as this can cause the sauce to solidify and the emulsion of the cheese to weaken. Instead, make sure to keep the pasta hot while preparing the cheese sauce and add it to the sauce while it’s still warm.
To achieve perfectly cooked pasta in your Mac and Cheese, slightly undercook the pasta before adding it to the cheese sauce. This will help to prevent the pasta from becoming overcooked and mushy when the dish is finished baking. Just be sure to test the pasta for doneness before adding it to the sauce, as it should still have a slight bite to it.
To keep the pasta hot, you can try placing it in a large bowl and covering it with a clean dish towel or foil. Alternatively, you can heat the pasta briefly in the microwave or on the stove before adding it to the cheese sauce.
By following these simple tips, you can help to ensure that the cheese sauce stays smooth and creamy and that the pasta is perfectly cooked in your Mac and Cheese. The result will be a delicious and satisfying dish that’s sure to be a hit with your friends and family.
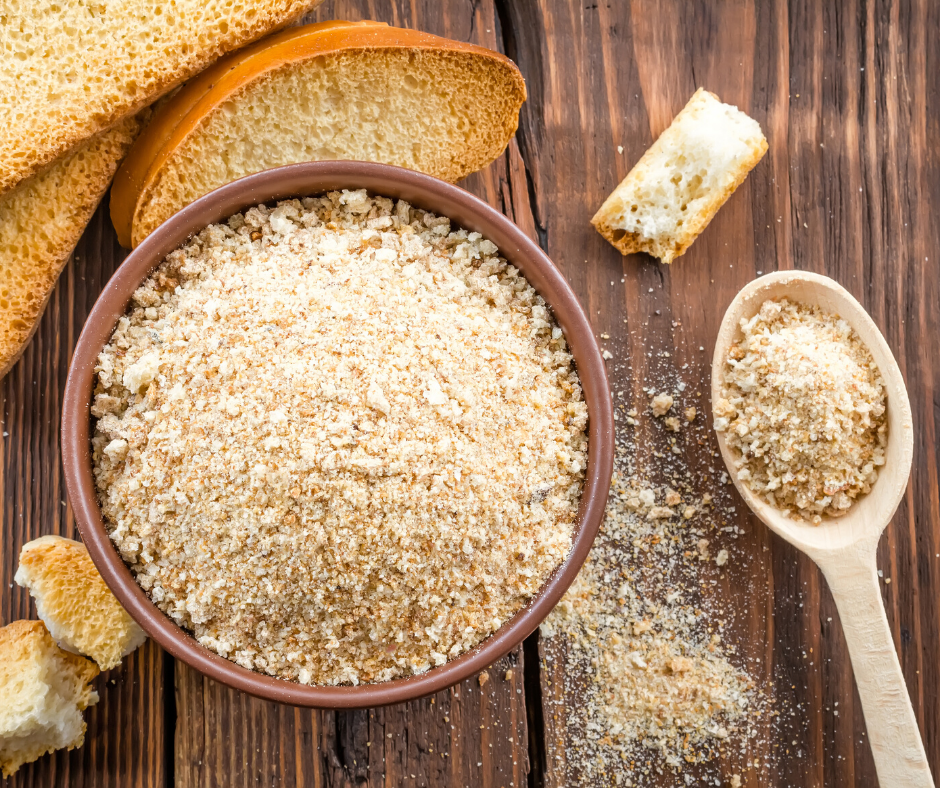
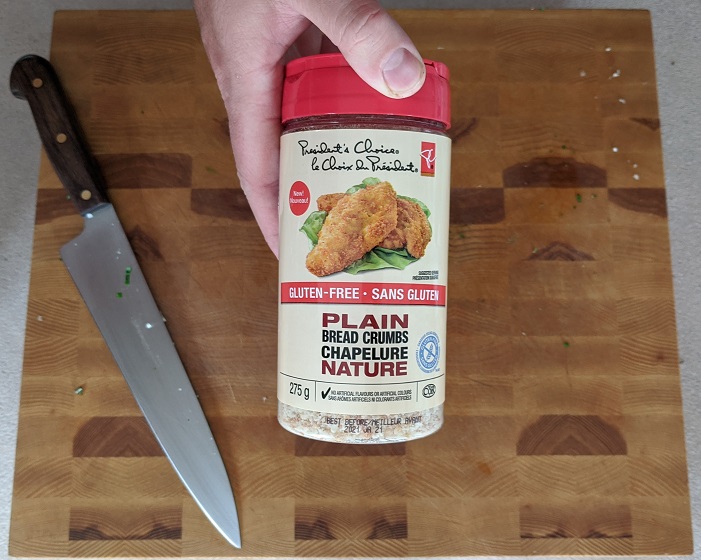
Mistake 8 Plain Bread Crumbs
The breadcrumb topping on Mac and Cheese serves two main purposes: to add a crunchy texture and to help the dish brown in the oven. However, it’s important to remember that the topping should also be flavorful in order to enhance the overall taste of the dish.
One way to add flavour to the breadcrumb topping is to mix it with grated parmesan and cheddar cheese. This will give the topping a savoury and slightly sharp flavour that complements the creamy cheese sauce. You can also add in other seasonings like onion powder, garlic powder, salt, pepper, and fresh parsley to give the topping an extra boost of flavour.
It’s also a good idea to taste the breadcrumb mixture before adding it to the top of the Mac and Cheese to ensure it has enough flavour. If it tastes bland, add a little more of the cheese or other seasonings until you get the desired taste. Remember, the breadcrumb topping may seem like a small detail, but it can make a big difference in the final flavour and texture of your Mac and Cheese. Don’t skip this step – a little effort in seasoning the topping can go a long way in creating a delicious and satisfying dish.
Mistake #9 Over Baking/Temperature Too High
When making Mac and Cheese, it’s important to pay attention to the cooking time and temperature to ensure that the dish is creamy, flavorful, and not overcooked. If you’re using the broiler to set the sauce and brown the top of the Mac and Cheese, it’s essential to make sure that the sauce and pasta are already hot before placing the dish under the broiler. This will help to ensure that the dish is heated through and the breadcrumb topping browns evenly.
If you’re heating up a batch of Mac and Cheese that was made ahead of time or is cold from the fridge, it’s best to bake it in the oven at a lower temperature for a longer period of time. This will help to gently heat the dish without drying it out or causing the cheese sauce to separate. A good starting point is to bake the Mac and Cheese at 350°F for 20-30 minutes or until the sauce is hot and bubbly and the breadcrumb topping is nicely browned. If the top of the dish isn’t browned to your liking, you can finish it off under the broiler for a few minutes. Just be sure to keep a close eye on the dish while it’s under the broiler to prevent burning.
By following these simple tips, you can help to ensure that your Mac and Cheese is cooked to perfection and enjoy a delicious and satisfying meal.
Conclusion
In conclusion, making the perfect Mac and Cheese involves paying attention to a few key details. From choosing the right kind of milk and cheese to cooking the Bechamel sauce and pasta to the right consistency, to seasoning the breadcrumb topping and avoiding overcooking, there are many ways to take your Mac and Cheese from mediocre to amazing.
By following the tips and tricks outlined in this post, you’ll be well on your way to creating a Mac and Cheese that will be the talk of the town. Don’t be afraid to get creative and add your own personal touches to the dish – after all, that’s what makes cooking so much fun!
And as a bonus tip, consider mixing in some extra gooey cheese like Swiss or gorgonzola into the Mac and Cheese before adding the breadcrumb topping. This will give the dish that delicious, stringy cheese look that we all know and love from TV Mac and Cheese.
Thanks for reading, and don’t forget to share this post with your friends on social media or via email. And if you enjoyed it, be sure to subscribe to the blog to stay up-to-date on all our latest posts and recipes. Happy cooking!
Have you ever dreamed of becoming a pasta salad master? Yeah, me either, but after having made all 5 of the pasta salads featured in this post yesterday, I’d say that I’ve come pretty close to that master title. So, why did I make 5 Pasta Salads in one day? Am I sick? Do I have a screw loose? Possibly, but more importantly, I am so excited to share these with you that I didn’t want to wait another second. So, I wrote the recipes and tested them all yesterday, and I am glad that I did because I think that you are going to love these.
Each one of these 5 Pasta Salad recipes has loads of flavour, and you can make them in around 20 minutes. I highly recommend that you try all of these and pick which ones are your favourites then add them to the regular rotation of dishes that you cook. Just don’t make them all at once like I did because it’s a lot of pasta salad. Each one of these recipes makes about 4 cups. If you’re keeping track, that means that I made about 20 cups of pasta salad in one day. Also, I used gluten-free pasta to make all of these which kind of limits the shapes of pasta that I can use. So, if you are using regular pasta, feel free to mix up the shapes a bit.
Alright, let’s get to it, here are my…
Greek Pasta Salad
The first pasta salad that we are going to look at today is a Greek Style. I took my best Greek Salad Recipe, threw out the lettuce, and added some pasta. It sounds easy because it was. It was also delicious. This pasta salad is best left to marinate in the fridge for about an hour before eating. This marinating time allows the pasta to absorb the flavour from the vegetables and dressing. If you like Greek Salad, you are going to love this version.
Making the dressing
To make the dressing for the Greek Pasta Salad, start with some Red Wine Vinegar then add a bit of prepared mustard, oregano, garlic, lemon juice, and honey. See the recipe below for the measurements. Once those first ingredients are in the bowl, whisk them together and then whisk in some olive oil. Taste the dressing, season it with salt and pepper to your liking and its done.
Making The Greek Pasta Salad
To the Greek dressing, add a 1/2 cup each of green bell pepper, red onion, pitted olives, and feta cheese along with 1 cup of cucumber. Next, cut 12 cherry tomatoes in half and add those to the other ingredients along with 8-10 fresh chopped mint leaves. The final step is to add in 2 cups of cooked pasta (I used gluten-free penne, but you don’t have to) and gently stir until everything is mixed. Put the salad in the fridge for an hour or two and enjoy!
Greek Pasta Salad
Take everything you love about Greek Salad, take out the lettuce and add in some pasta. You can't go wrong with this delicious Greek Pasta Salad
Keyword: Best Pasta Salad, Greek Pasta Salad, Greek salad, summer cooking, Summer food
Servings: 4cups
Author: Chef Ben Kelly
Ingredients
2cupsCooked Penne Pasta
1cupDiced Green Pepper
1/2cupDiced Red Onion
1cupDiced Cucumber
1/2 cupCrumbled Feta Cheese
1/2 cup Sliced and Pitted Olives
8-10Mint Leaves, Chopped
12Cherry Tomatoes, cut in half
Dressing
2tbspRed Wine Vinegar
2tbspOlive Oil
2-3tspLemon Juice
1tspPrepared Mustard
1tbspDried Oregano
2 tspChopped Garlic
1tspHoney
Instructions
In a medium mixing bowl combine all of the dressing ingredients then whisk to combine them. Season the dressing with salt and pepper to suit your taste.
Add the salad ingredients into the bowl with the dressing and toss or gently stir to combine.
Cover the salad and put it in the fridge to marinate for at least one hour before serving.
Caprese Salad is an Italian dish made of seasoned tomatoes, fresh mozzarella, olive oil, balsamic vinegar, and fresh basil. If you’ve never had a Caprese salad, I can’t suggest enough that you do. It is one of the most straightforward and most delightful salads you will ever taste. With a sweeping stroke of genius, I added pasta to it. Okay, it’s not that big a deal, and I am probably not this person to do this, but that doesn’t take away from how delicious it is.
Making the dressing
To start the salad, we first have to make a simple dressing of equal parts of olive oil and balsamic vinegar. To the oil and vinegar, add a clove of thinly sliced garlic and let it sit for about 5 minutes. This time will allow the garlic flavour to mellow out a bit and dissipate into the oil.
Making Caprese Pasta Salad
To the olive oil and balsamic vinegar, add a bunch of halved cherry tomatoes, some prepared pesto, a container of bocconcini, salt, pepper, sugar, and finally some pasta. As with the Greek Pasta Salad, this is best left in the fridge for an hour before serving.
Caprese Pasta Salad
Tomatoes, Basil, Pasta and Fresh Mozzarella, Combined and then Dressed with Olive Oil and a Little Balsamic Vinegar. Is this your new favourite pasta salad? Possibly.
Nicoise salad is a French Salad from the city of Nice. How could it not be good? Most chefs generally regard it as the best salad ever put to the plate and for a good reason. Although this pasta salad version would be considered blasphemy by some, it is regarded as delicious by most. Let’s take a look at how to make it while ignoring the naysayers.
Making the dressing
To make the Nicoise dressing start with a bit of red wine vinegar, then add grainy mustard, honey, garlic, parsley, lemon juice, salt and pepper. Mix all of those ingredients and then whisk in some olive oil. Taste the sauce and adjust the seasoning with salt and pepper as needed.
Making Nicoise Pasta Salad
Once the dressing is ready, add in 1 can of drained tuna, some olives, blanched green beans, tomatoes, and some cooked pasta. Mix the salad and garnish with a couple of hardboiled eggs. If you are unfamiliar with this salad, it may seem odd at first sight, but of the 5 pasta salad, this is hands down my favourite. Do not skip this salad; you don’t know what you’ll be missing if you do.
Nicoise Pasta Salad
Nicoise salad is often considered by Chefs to be one of the best salads ever created. Now, you can have it in pasta salad form.
My favourite sandwich of all time to eat is the clubhouse. (It also happens to by my least favourite sandwich to make in a restaurant.) I don’t know why I love it so much, but I always have. When I was thinking about this post, this was the first salad that came to mind. It was a no brainer that a clubhouse sandwich would make a fantastic pasta salad. I decided to go with an avocado sriracha mayo to make it a little creamy and a little spicy, and I’m glad I did because I found that that combination made the salad. Okay, let’s take a look at how to make it.
Making the dressing
To make the clubhouse pasta salad dressing, mash an avocado and combine it with mayo, lime juice, salt and pepper, sugar, and sriracha. Taste the dressing and adjust with salt, pepper, and lime juice to suit your taste.
Making Creamy Avocado Club Pasta Salad
To the avocado mayo add some diced cooked chicken, crispy bacon, and cherry tomatoes along with the pasta. Mix the salad, plate it, and garnish it with aged cheddar cheese and parsley. I’ve to tell you, this is something truly special.
Creamy Avocado Club Pasta Salad
You love a good clubhouse sandwich, now you'll love it as a pasta salad. No need to worry about stabbing yourself in the face with those frilly toothpicks just to get the flavours you love.
This final pasta salad is my version of the classic pasta salad I ate at every post luck growing up. What is special about this pasta salad is that it makes a great base to build your own recipes upon. You can easily switch the dressing or add some other ingredients and you have a compleltety new salad to call your own.
Making the dressing
For my version of this classic pasta salad, I start with an all-purpose dressing (it works for coleslaw and potato salad too) made of mayo, mustard, white vinegar, salt, pepper, and sugar. You can add herbs like parsley or dill to this as well, but I decided to keep it simple.
Makin Classic Pasta Salad
Into the dressing goes carrot, celery, and red onion along with the pasta. That’s it, that is the whole salad. The only thing left to do is to let the salad sit in the fridge for two hours before serving then enjoy it!
Classic Pasta Salad
This classic Creamy Pasta Salad is a classic for a reason.
Keyword: Best Pasta Salad, Classic Cooking, Classic Creamy Pasta Salad, Pasta Salad, summer cooking, Summer food
Servings: 4cups
Author: Chef Ben Kelly
Ingredients
2cupsCooked Macaroni Pasta
1/2cupVery thinly sliced Carrot
1/2cupThinly sliced celery
1/2cupThinly Sliced Red Onion
Dressing
1/4cupMayo+ 2 tbsp if you would like it more creamy
1tbpsWhite Vinegar
1/2tspSugar
1tspPrepared Mustard
Salt and Pepper To taste
Instructions
Mix all of the dressing ingredients together in a medium mixing bowl.
Add the remaining ingredients and toss or gently stir to combine.
Cover the salad and let sit in the fridge for at least 1 hour before serving.
Notes
If you would like the dressing a little more creamy you can add an additional 2 tbsp of mayo. Also, dill and or parsley would make a nice addition to this salad.
I hope that you take these recipes and put them to work for you, that’s what I made them for. I want you to cook them, eat them, serve it to the people that you care about, and enjoy them. But, I also hope that you see how you can create your own pasta salads with just a little creativity and effort.
Have a great week, everyone! Thank you for reading! Remember to subscribe to the blog, so you never miss a post again and share this post because that will help the blog grow and continue creating content like this. If you like this post you may also like 5 Small Changes That Will Have A Major Impact On Your Cooking.
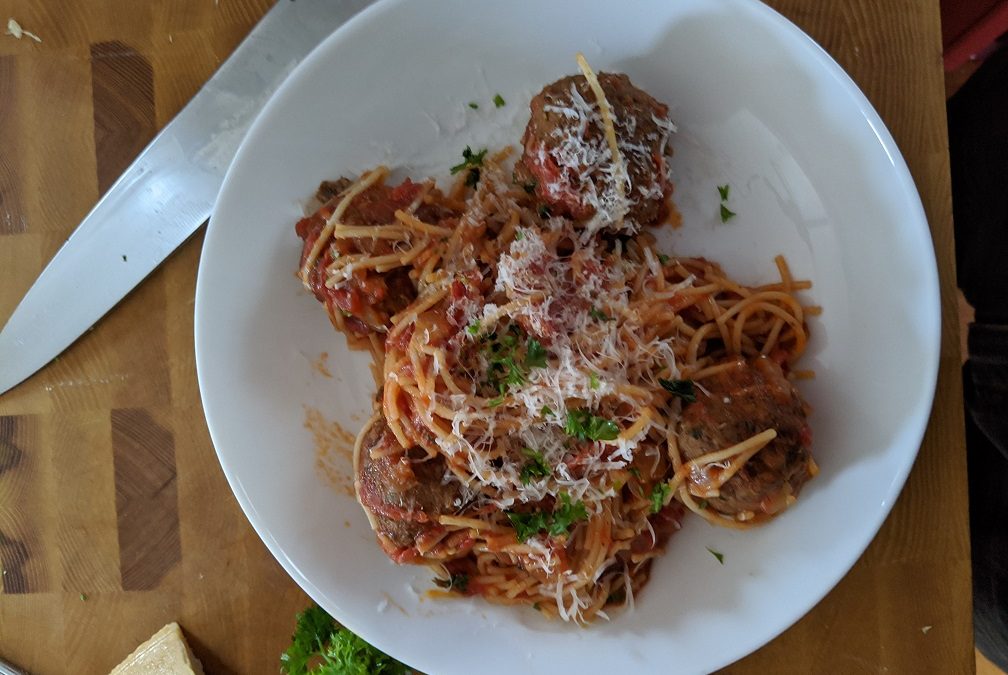
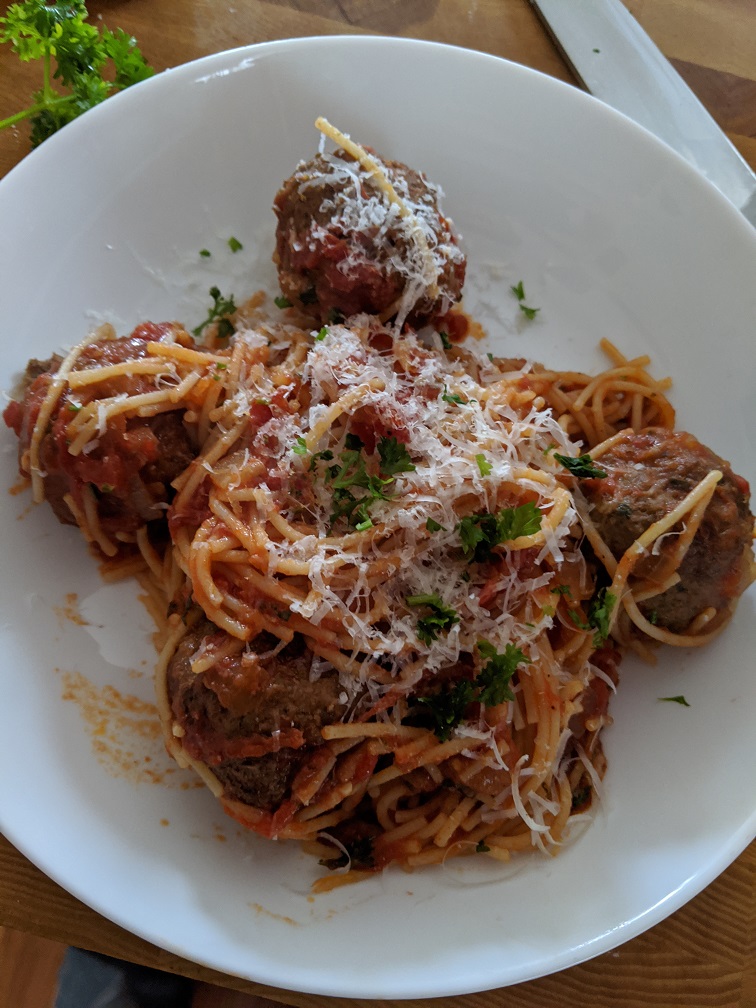
Spaghetti and Meatballs is the most Italian food (other than pizza) that most of us can think of. Strangely enough, most Italians would never combine the two. If they do, the two items would be served separately rather than as one dish. However, in North America Spaghetti and Meatballs is a classic. It also happens to be one of my wife’s all-time favourite dishes, so we had it last night for her Mother’s Day dinner. Today, I’m going to show you exactly how I made it.
This…
How To Make Spaghetti and Meatballs Like a Pro
The Sauce
It should go without saying that you are never going to make a great bowl of Spaghetti and Meatballs without first making a great sauce. What is really important to note here is that great does not mean complicated and it absolutely does not mean a lot of ingredients. Case in point, the sauce we are going to look at today has only eight ingredients. That’s all. Let’s take a look at it.
Making the Sauce
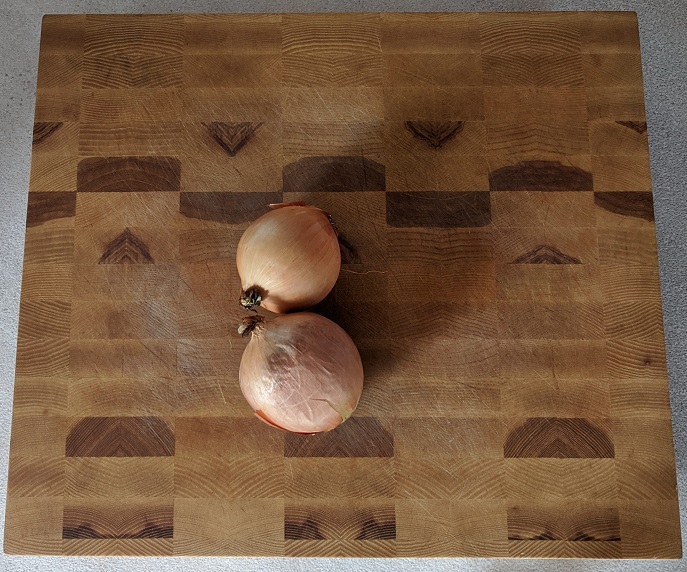
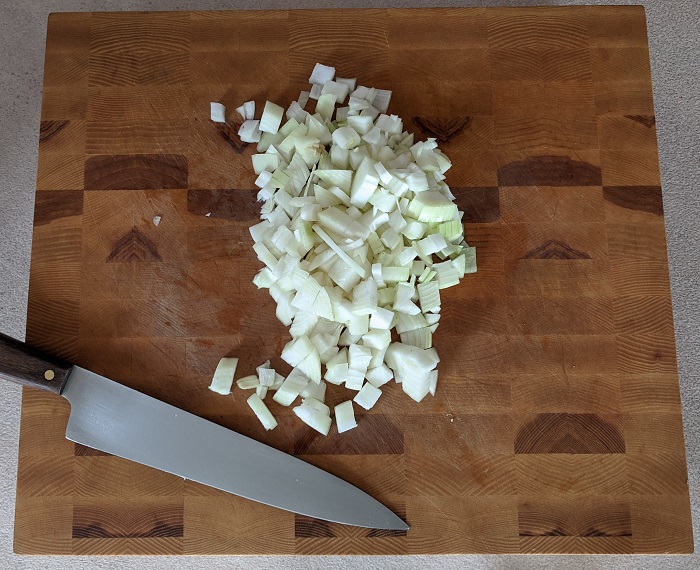
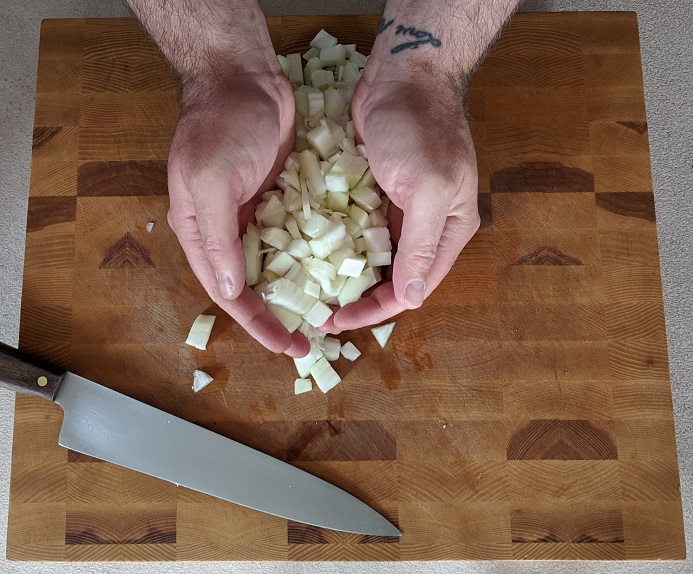
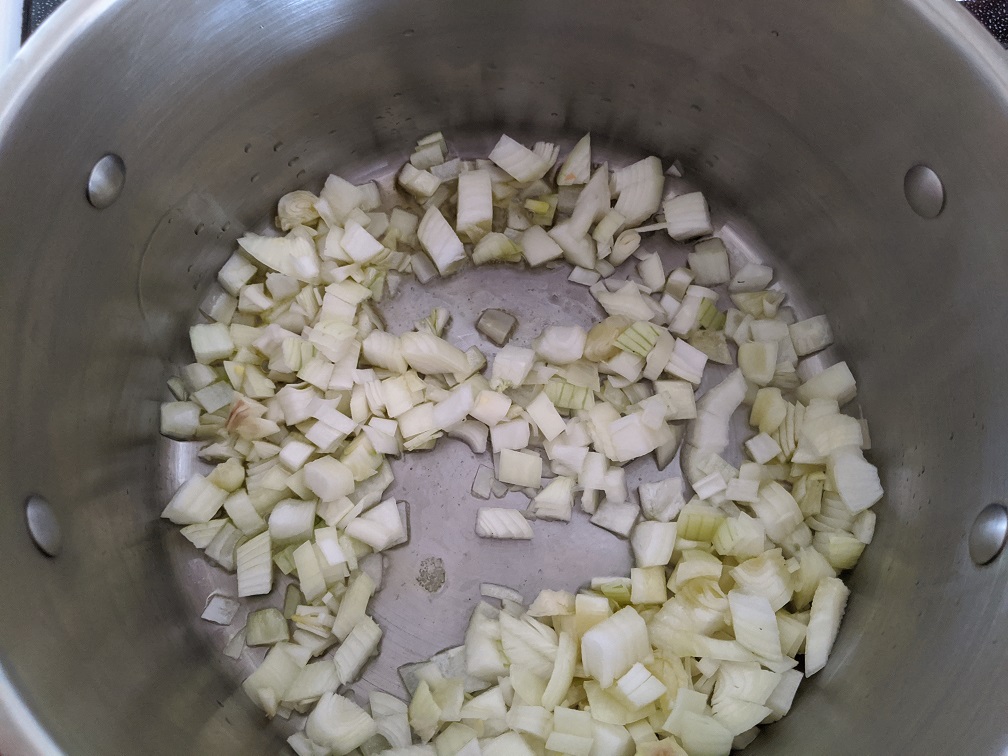
To start the sauce I first diced 2 medium onions which came out to be about 1 cup. While I was dicing the onion I heated a large pot over medium-high heat and added in about 3 tbsp of olive oil. I added the onions into the pot and cooked them for about 10-15 minutes or until they started to caramelize. It is important to stir the onions every few minutes so they don’t burn.
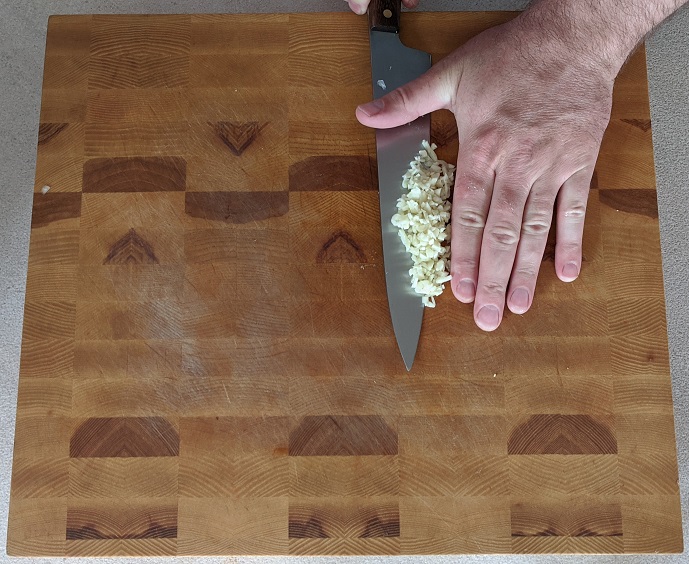
While the onions were cooking I used the time to prep my other ingredients. First, I chopped up 3 cloves of garlic which was about 2 tbsp in total. Once the onions were caramelized I added the garlic in and cooked it for about 2 minutes.
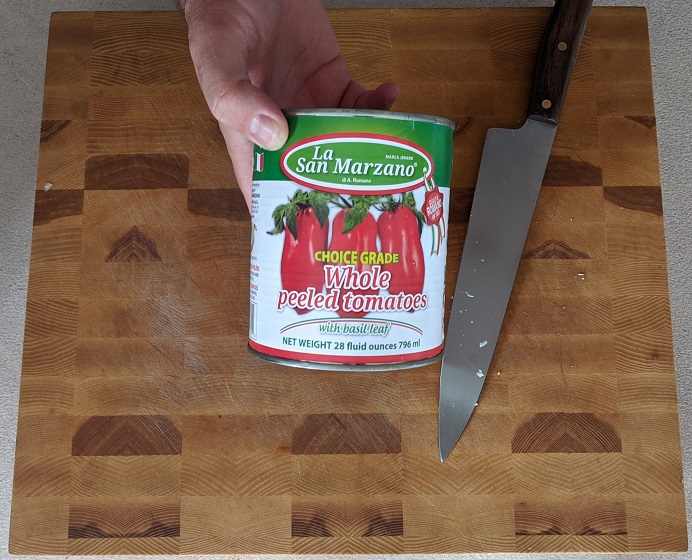
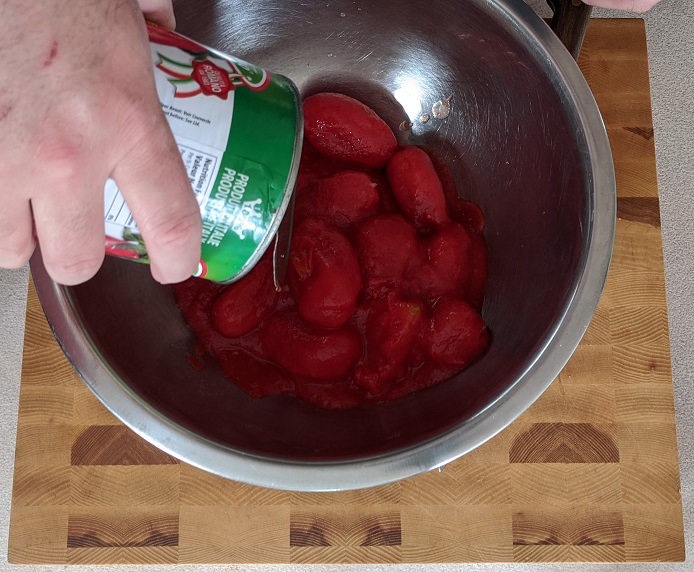
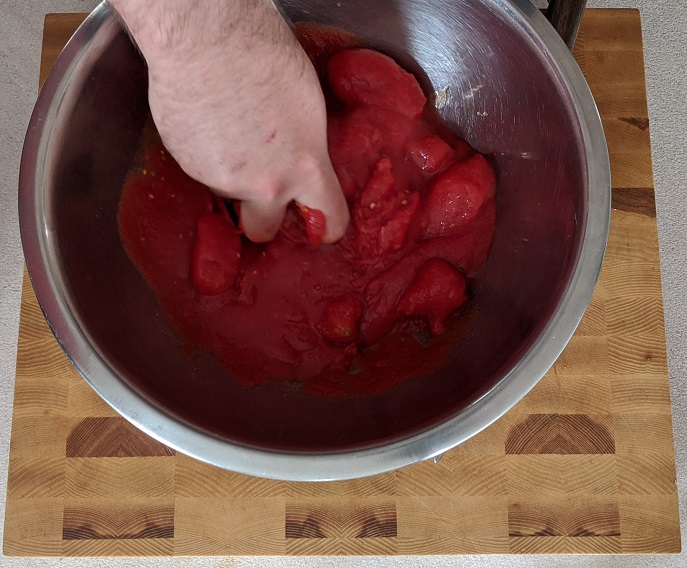
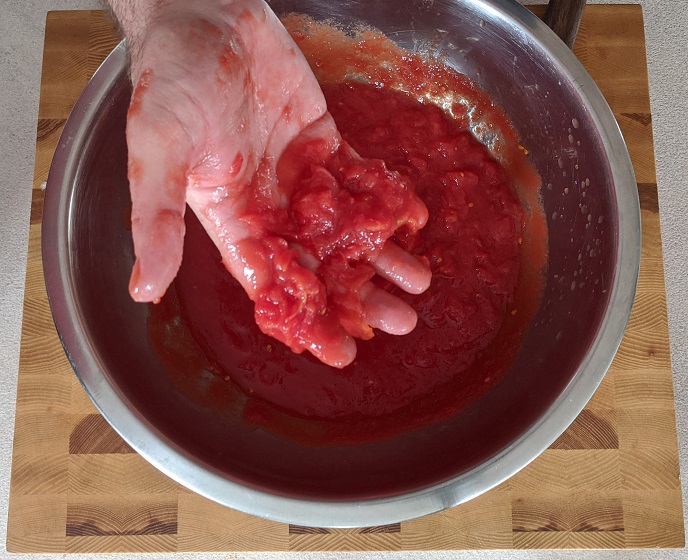
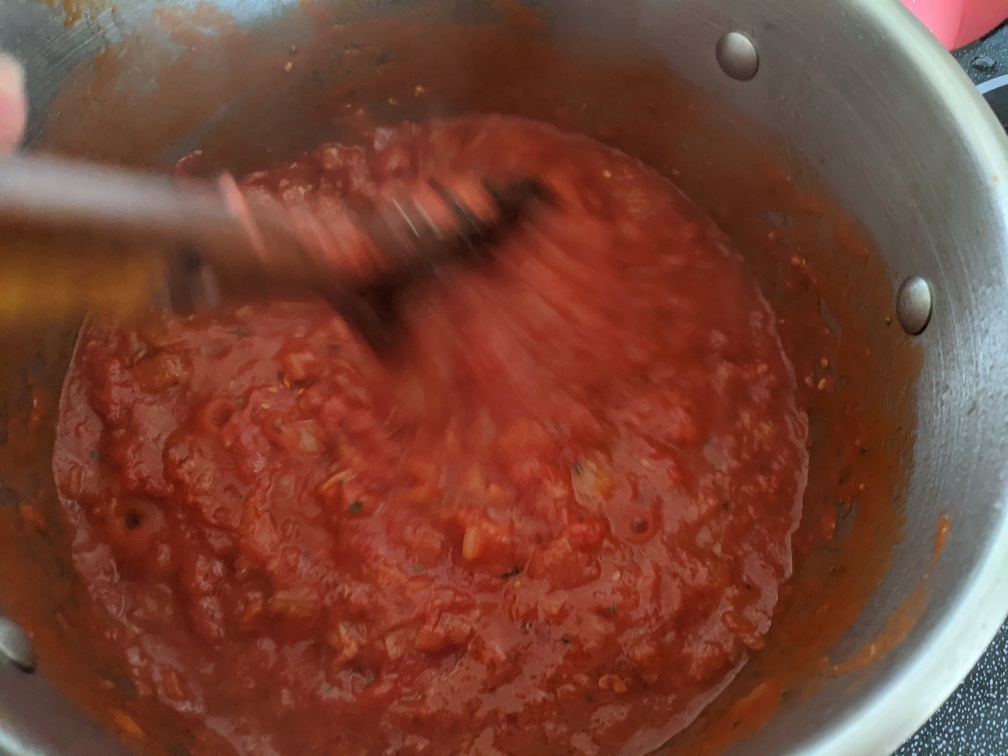
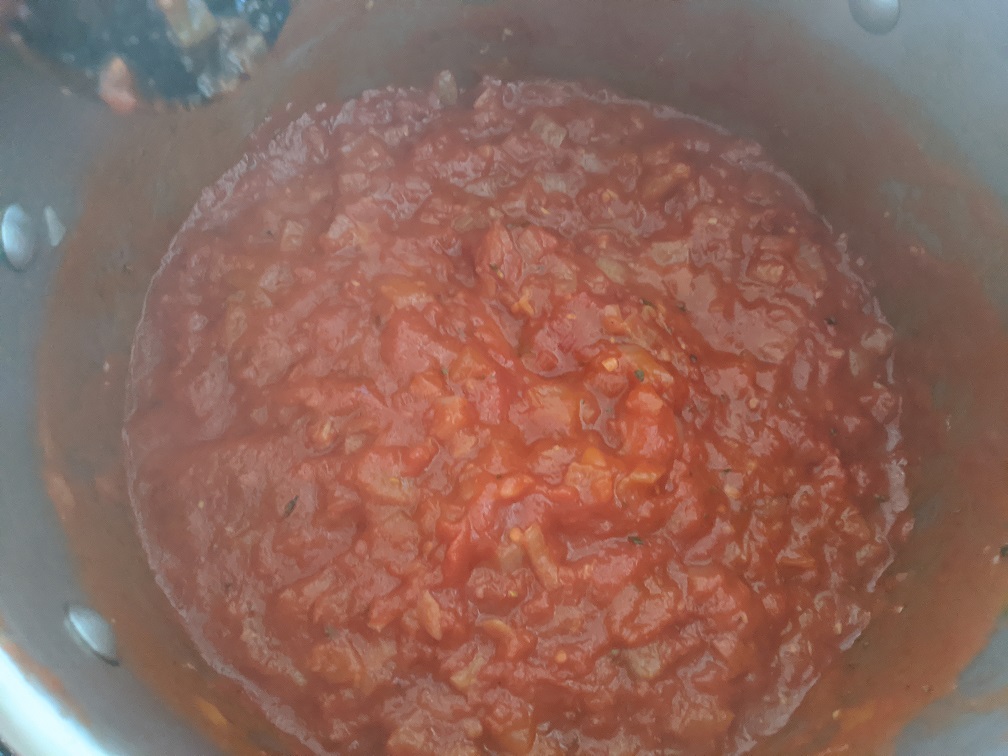
While the garlic cooked with the onions I opened a can of whole Italian tomatoes, poured them into the bowl, then crushed them with my hands. You can use a hand blender if you’d prefer, I just like to get my hands dirty. Then, I dumped the tomatoes into the garlic and onions. Depending on how much liquid there is in your tomatoes you may need to add a bit of water to the sauce.
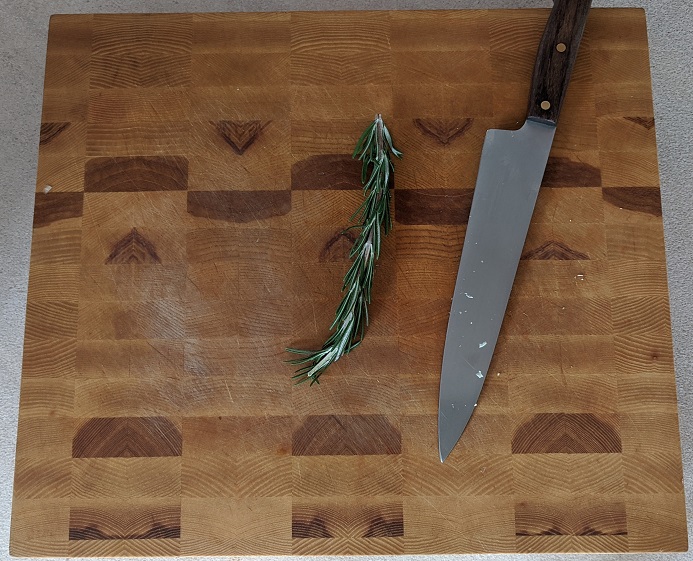
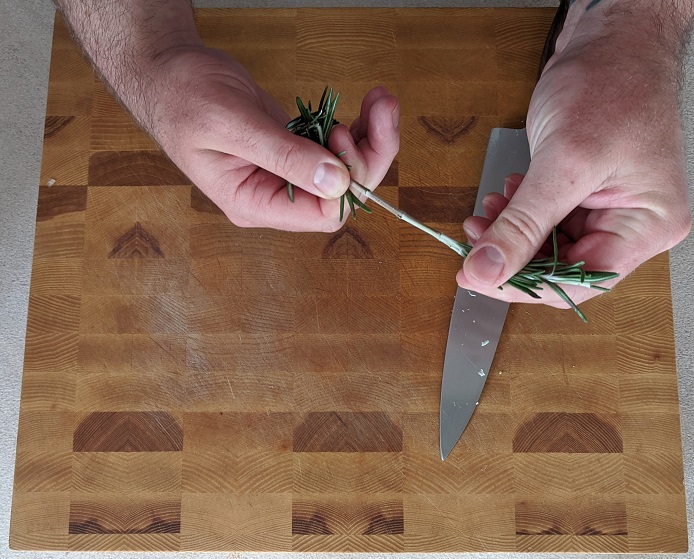
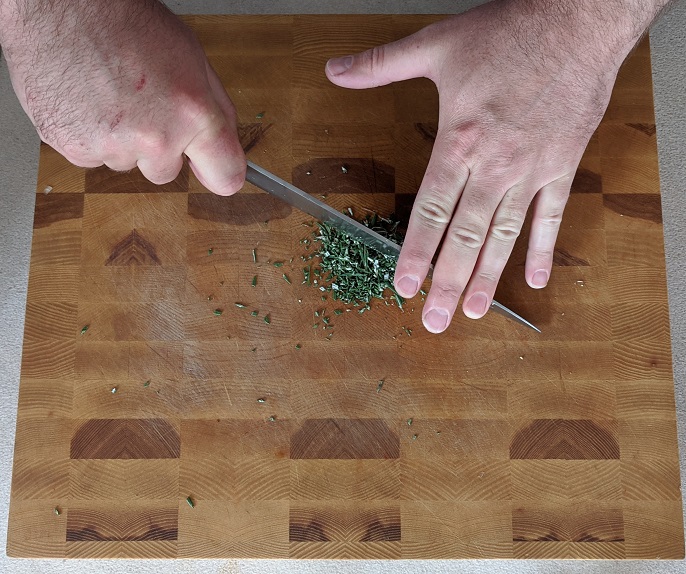
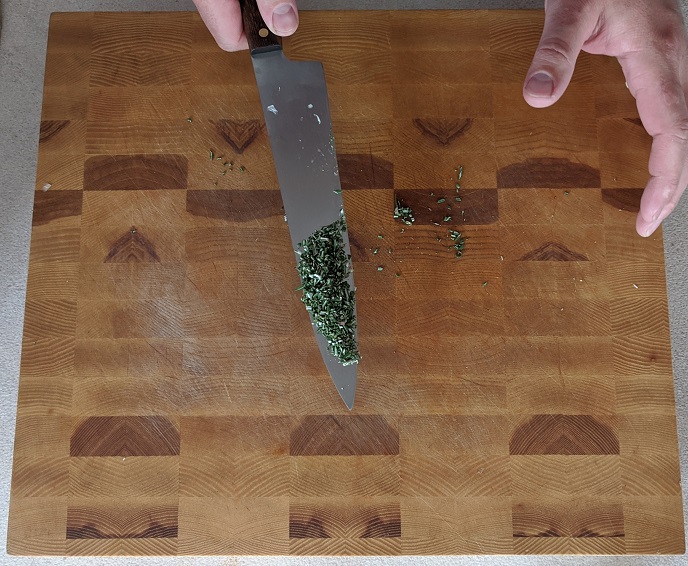
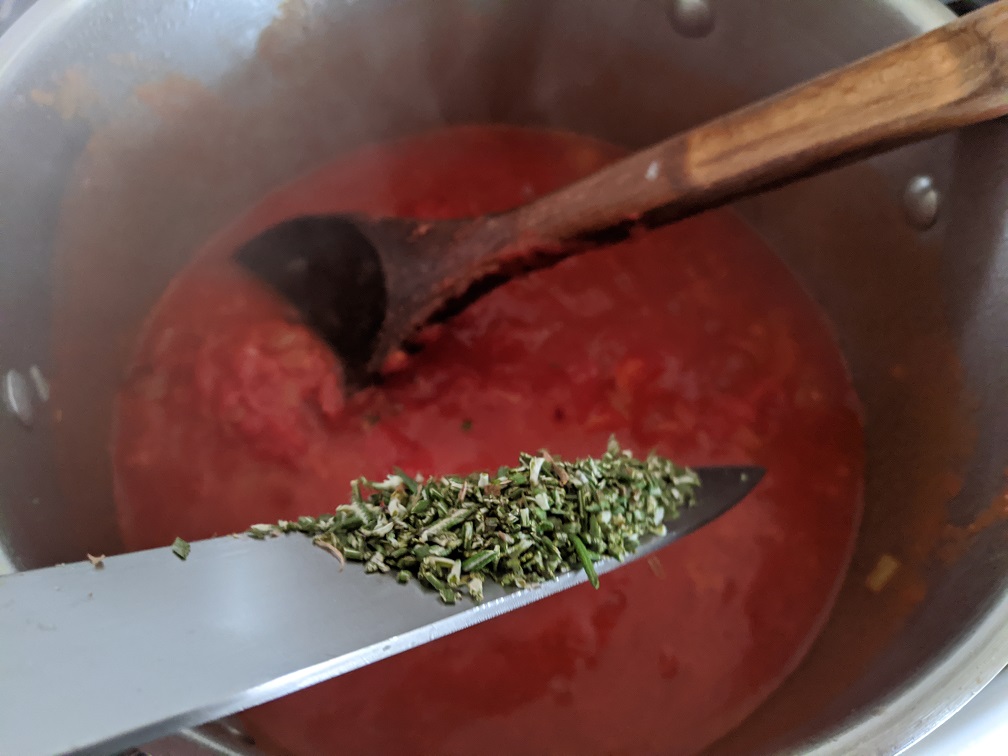
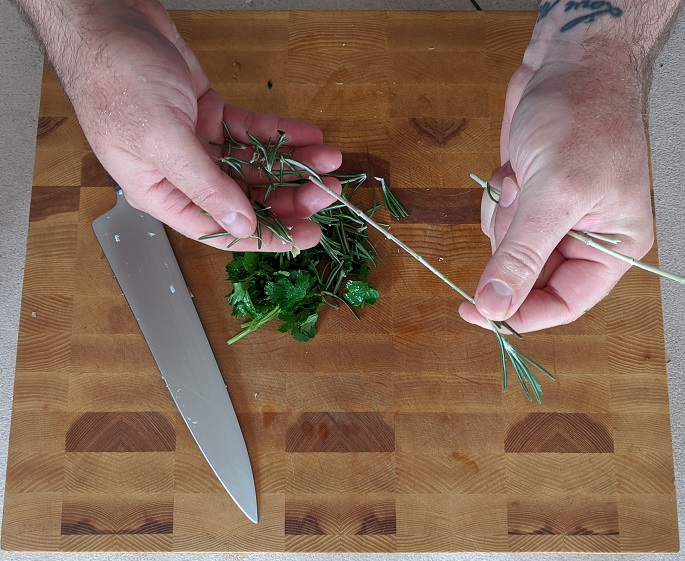
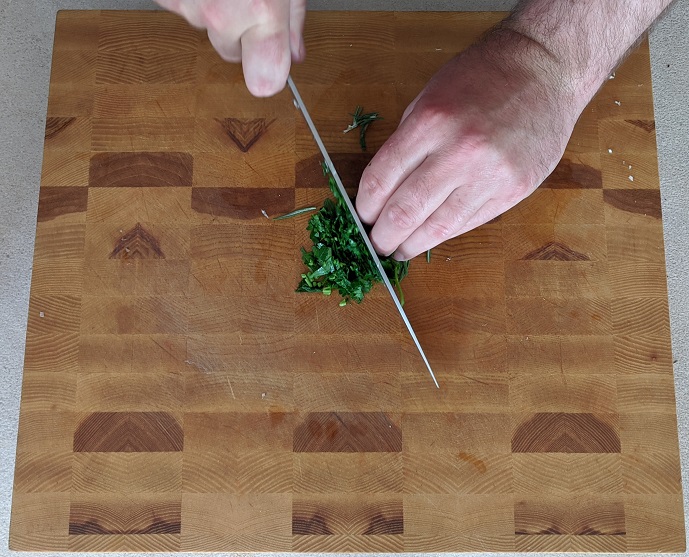
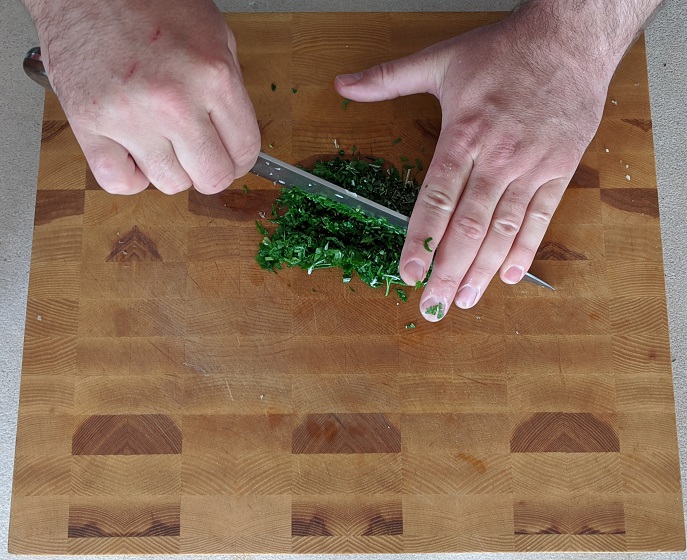
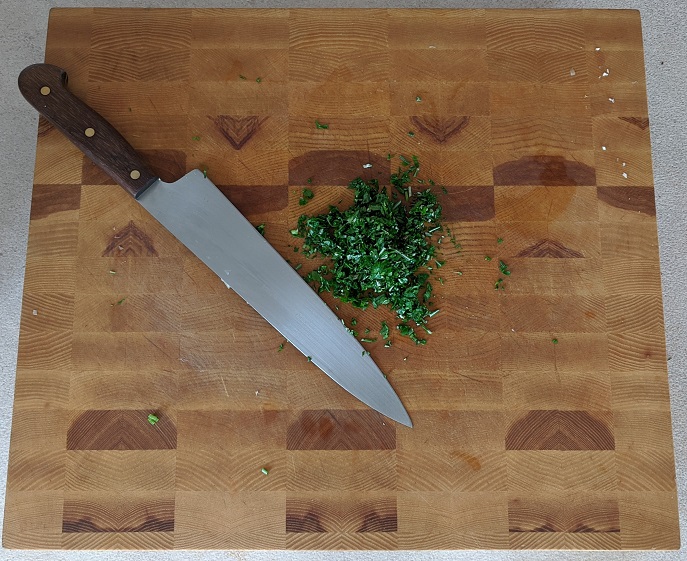
For the last few steps of the sauce, I chopped up about 1-2 tbsp of rosemary and added it to the pot. Finally, I seasoned the sauce to taste with salt, pepper, and sugar then let it simmer for 20 minutes and set it aside until I was ready to use it.
Basic Tomato Sauce
This is a really great all-purpose tomato sauce. Here I use it with Spaghetti and Meatballs, but it works just as well on a meatball or sausage and pepper sandwich, chicken parmesan or just about anything you can imagine.
1 796 mlCan Of Whole Italian Tomatoesdumped into a bowl and hand crushed
1cupDiced Onion
2tbspMinced Garlic
1-2tbspFresh Chopped Rosemaryor basil
3tbspOlive Oil
Salt, Pepper, and Sugar to taste
Instructions
Heat a large pot over medium heat then add in the olive oil and onions.
Cook the onions for 10-15 minutes or until they are lightly caramelized then add in the garlic and cook for 2 more minutes.
Add in the tomatoes, and a 1/4 to 1/2 cup of water if needed then add in the rosemary and seasoning.
Bring the pot to a boil, turn the heat down to low and simmer for 20 minutes. Taste and adjust the seasoning with salt, pepper, and sugar as needed. Remove from the heat and set aside until ready to use.
With the sauce out of the way, let’s now take a look at the meatballs.
First of all, I should say that for a very, very long time I hated meatballs. (I feel like this is becoming a theme on the blog). I found them to be dry, chewy and tasteless, it didn’t matter who made them, I hated them. Then, I started working at an Italian restaurant and discovered how good a meatball could actually be. A good meatball is tender, juicy and full of flavour. Easy to say, but how do you accomplish it?
The meat
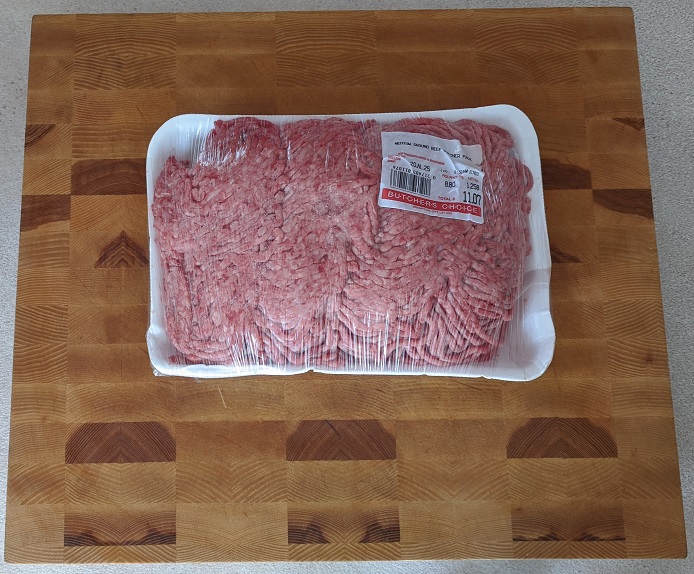
The first step to making a delicious meatball is using the right meat. There has to be fat in the meat, meaning you should not use lean ground beef to make a meatball. This lack of fat will lead to all the common issues people encounter when making meatballs like dryness and chewiness. Having said that, I also wouldn’t suggest using full-fat ground beef. I generally suggest a nice medium ground. Not only does it have more flavour than lean ground beef, but it is also considerably cheaper. If you want to really step up your game substitute a quarter of the ground beef for ground pork. I didn’t do that in this recipe but it does make a really great meatball.
The flavourings
The next step to making a great meatball are the flavourings. I find that meatballs are like burgers. People add way too many ingredients and the flavour becomes jumbled. Like with most things I cook, I prefer a more minimalist approach. I also much prefer fresh herbs to dried herbs if you have them.
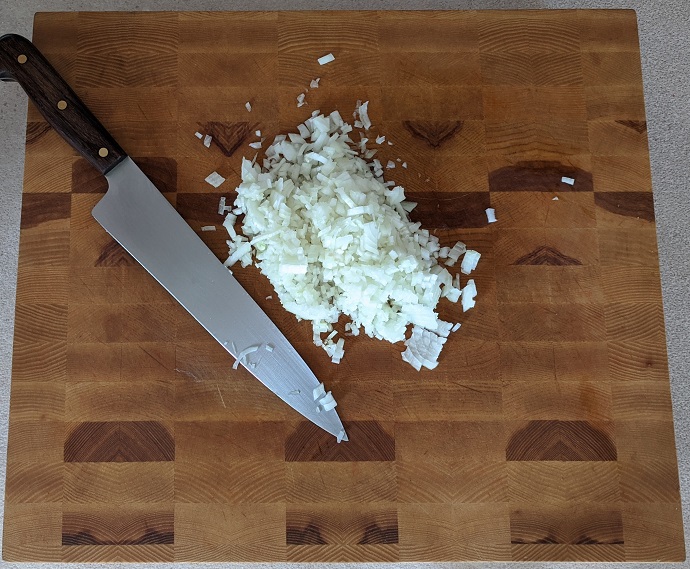
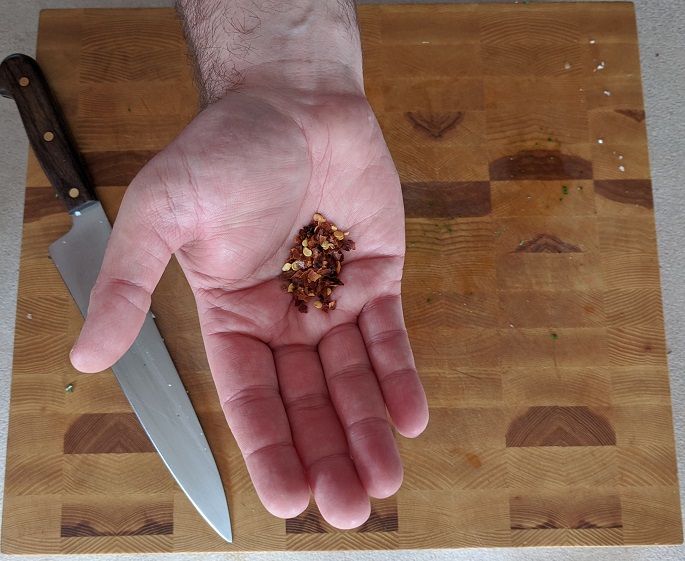
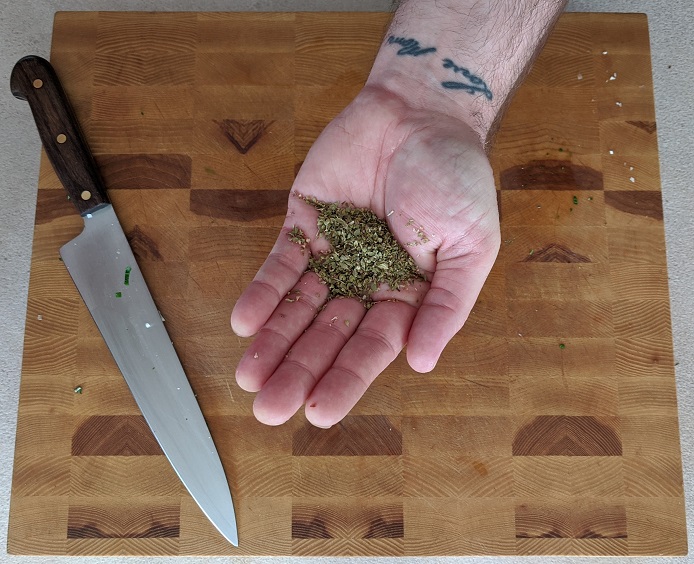
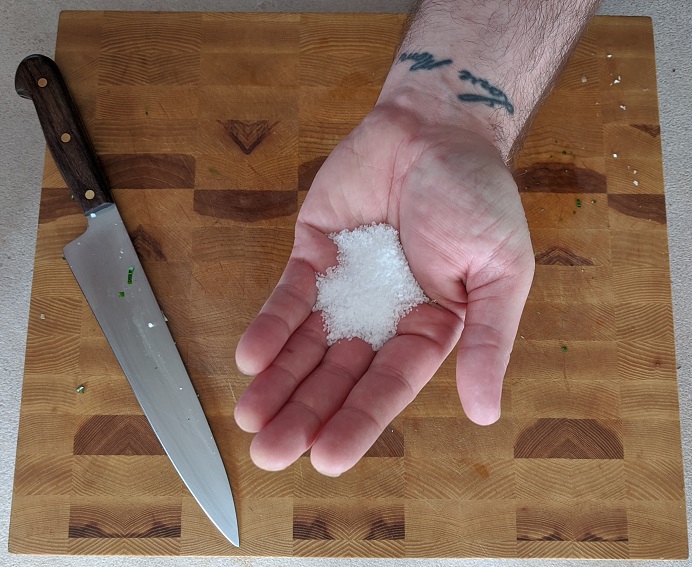
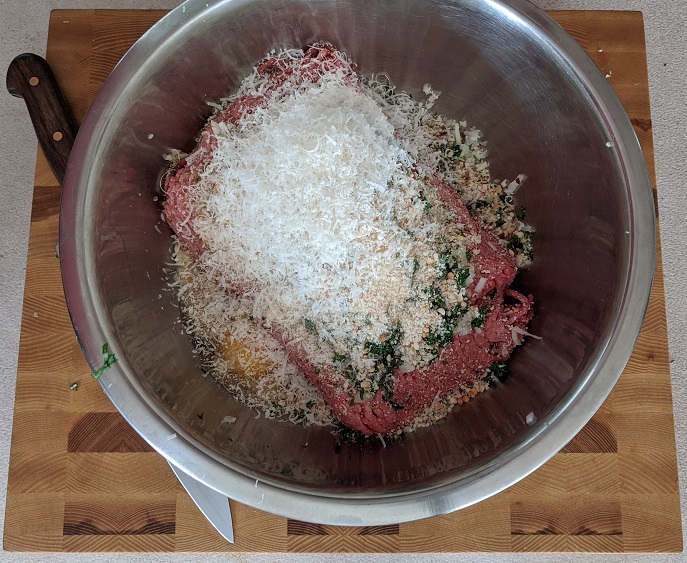
For these meatballs I used about 1 cup of very finely minced onion, about 2 tbsp of minced garlic, 1 tbsp each chopped parsley, rosemary and dried oregano (the one exception to the fresh herb comment), 1/2 tsp crushed red pepper flakes, and 1/2 cup fresh grated parmesan. Of course, I also added salt and pepper which was about 1 1/2 tsp kosher salt (less if you are using table salt) and about 1/2 – 3/4 tsp fresh cracked black pepper.
The binders
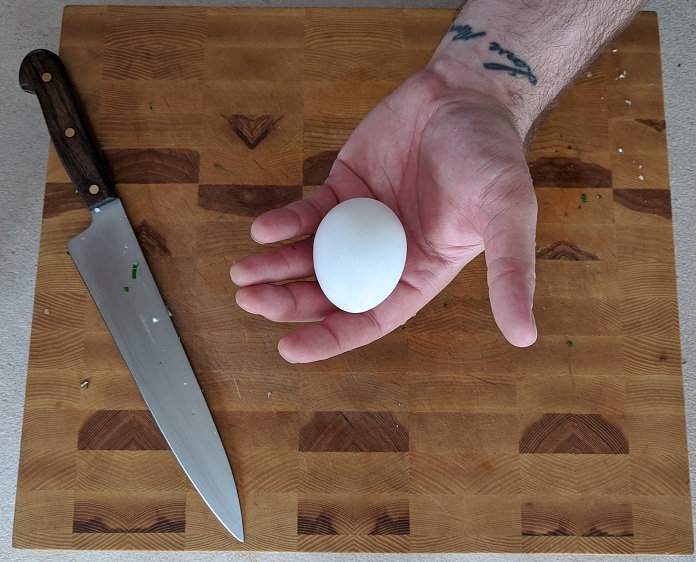
The last things to add to the meatball mix are binders. For this, I used about 1/2 – 3-/4 of a cup of bread crumbs (gluten-free of course) and 1 lg egg. That’s it.
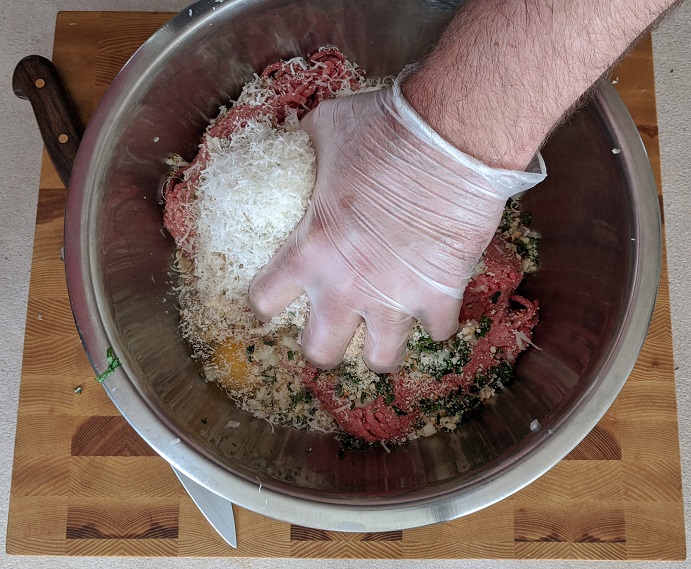
Now that all the ingredients for the meatballs were in the bowl and ready to go it was time to mix. For this, I used my two favourite tools in the kitchen, my hands. I mixed not only until the ingredients were fully incorporated but until the meat got a little tacky. This has a specific culinary name that you really don’t need to know. All you do need to know is that by mixing the meat until it is tacky, you are creating a mix that is going to give you smooth tender meatballs. This took 4-5 minutes.
Forming/Cooking the Meatballs
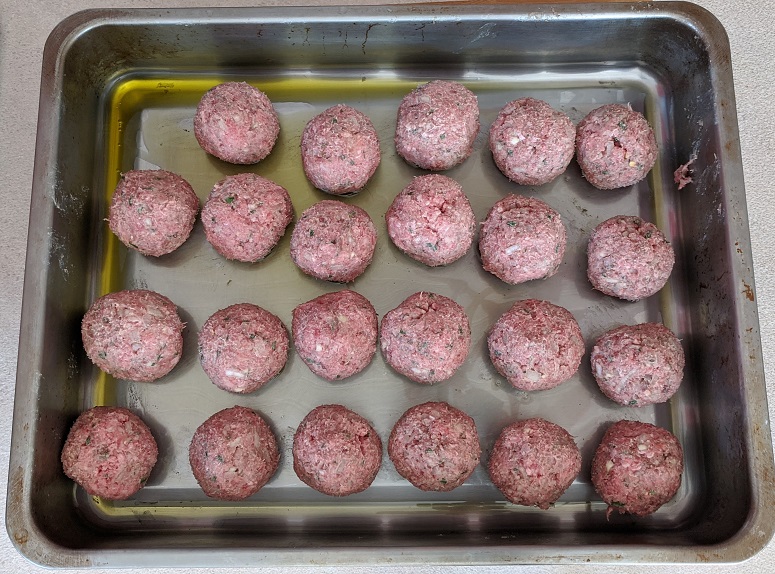
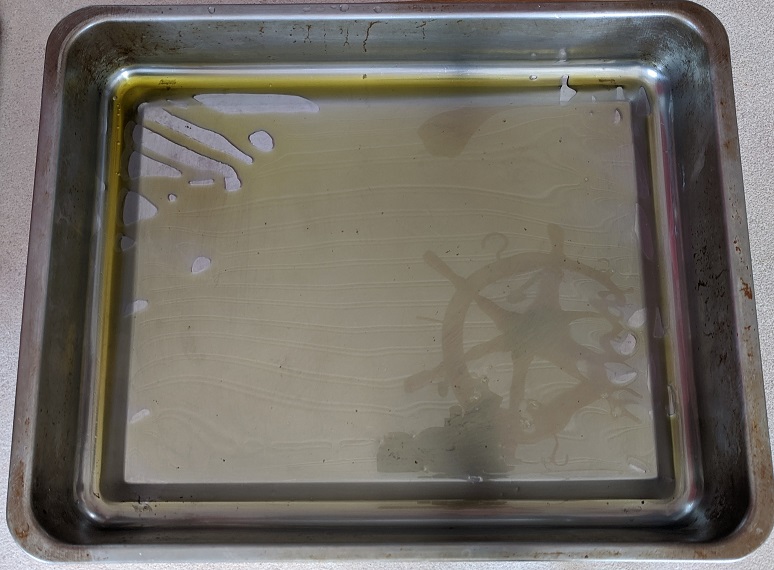
With the meat all mixed I poured about 1/4 cup of olive oil into a roasting pan and preheated my oven to 400°f, then I started making the meatballs.
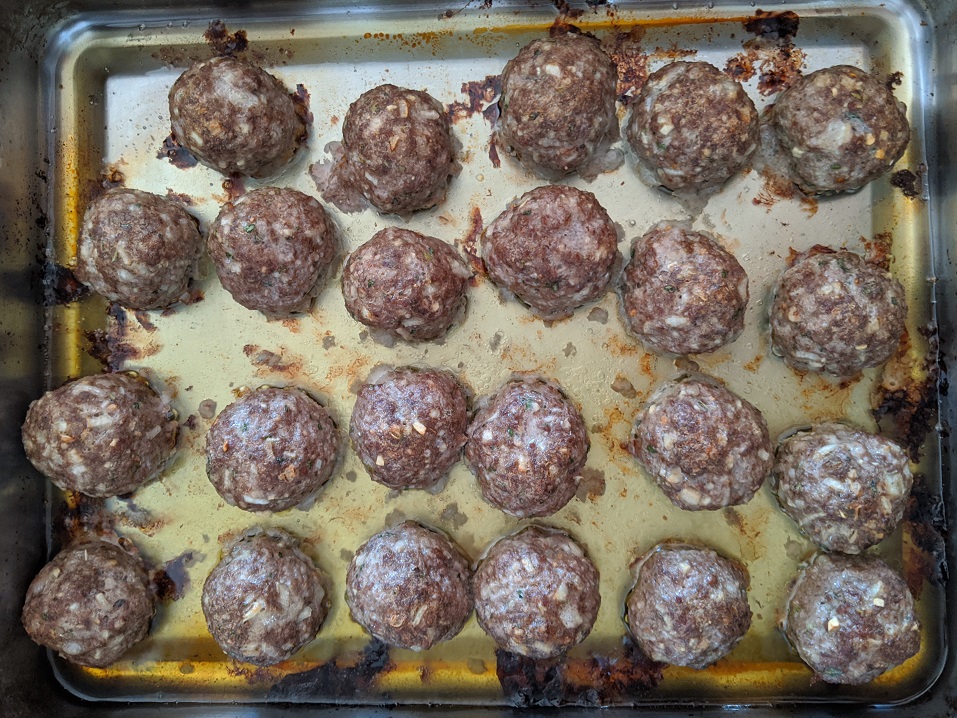
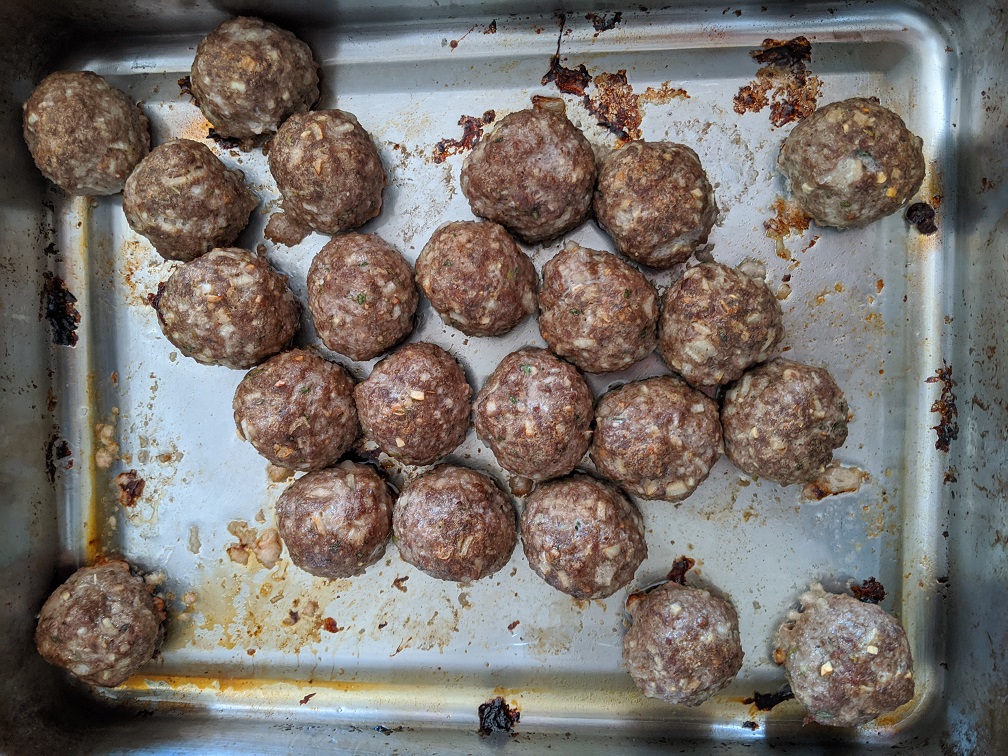
The size that you chose to make your meatballs really comes down to personal preference. I like kind of medium size while some people like really big ones and some people prefer very small ones. Make them however you’d like, just make them all the same size. Once all of the balls have been formed and placed in the roasting pan, put the whole thing in the heated oven for about 35 minutes or until they are nice and brown. You can flip them halfway through cooking if you’d like.
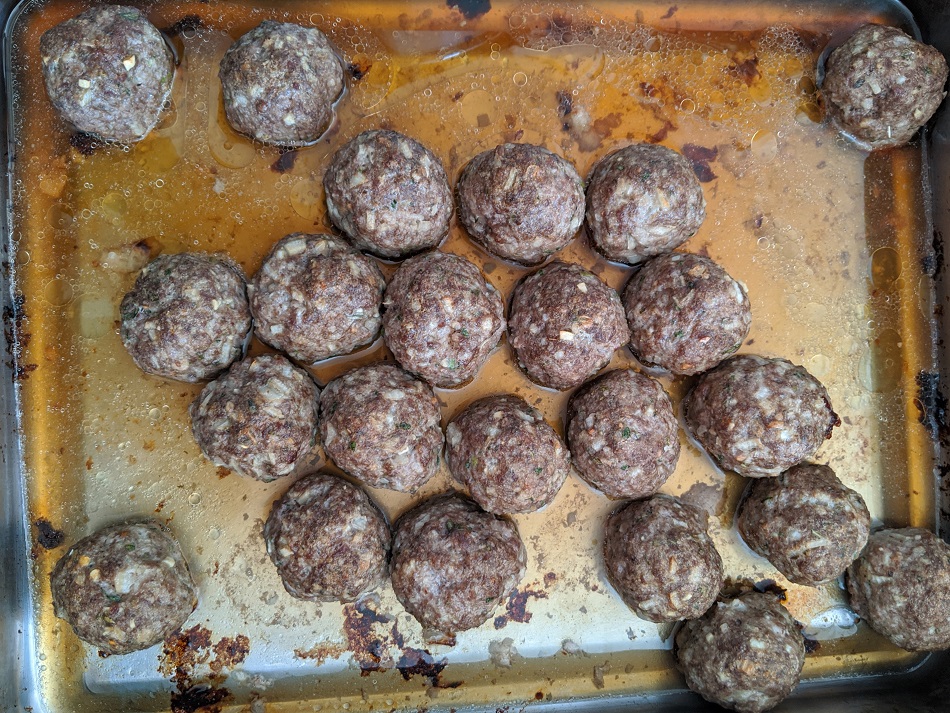
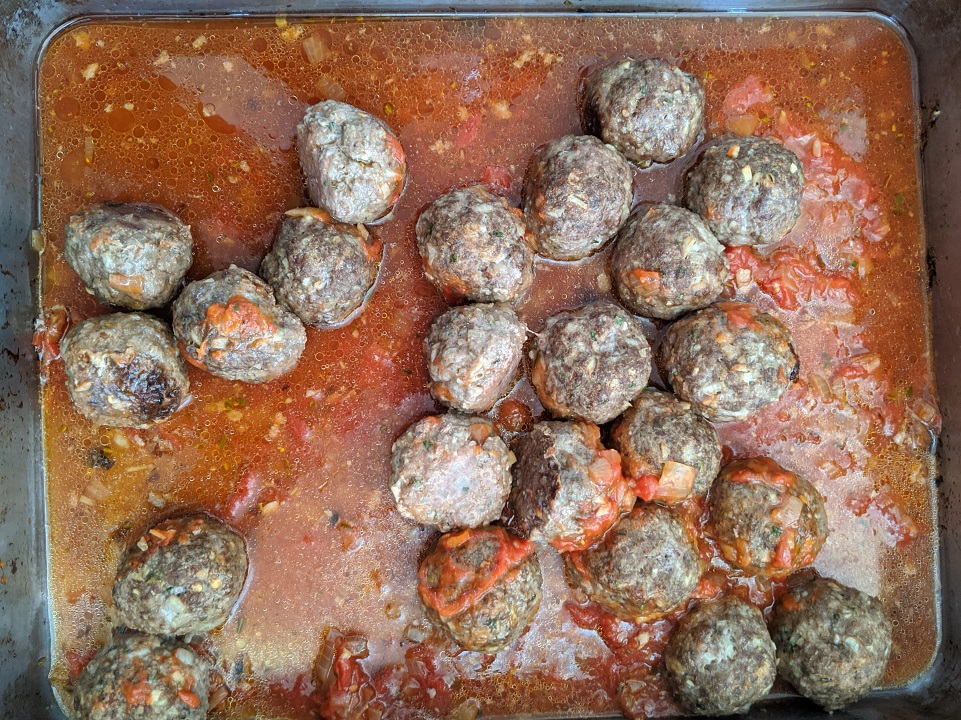
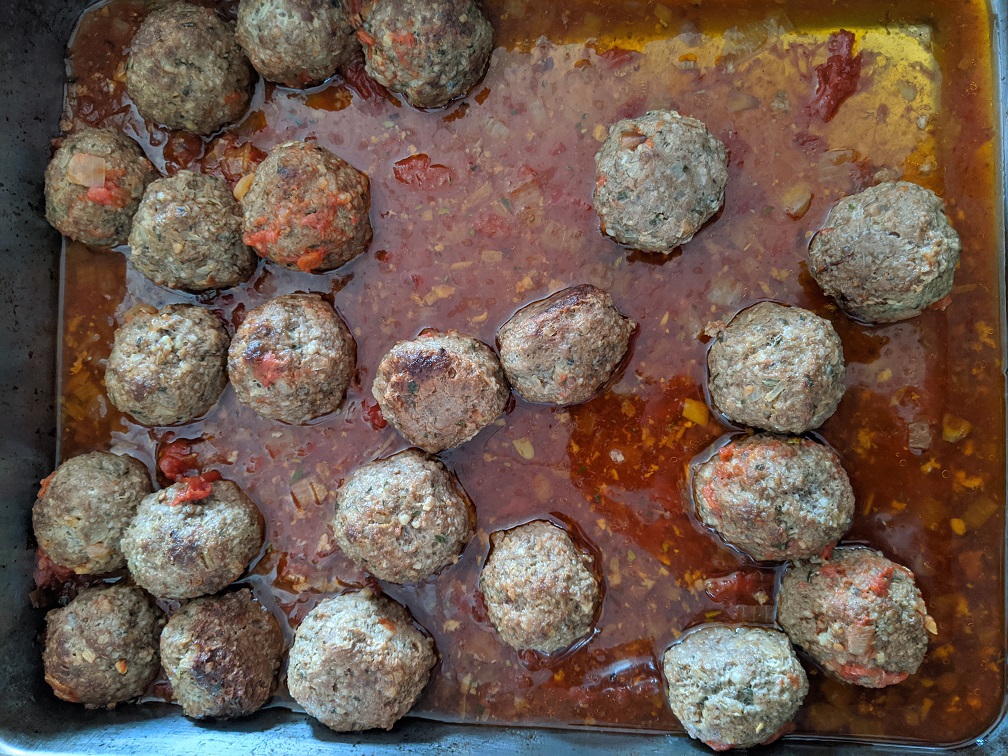
After that initial cook, I removed the meatballs from the oven and drained off as much of the fat as I could from the roasting pan. Next, I added about 2 cups of beef stock (you could also use red wine) to the roasting pan along with about 1/3 of the tomato sauce. I tossed the meatballs around to coat them, turned the oven temperature down to 325°f, covered the roasting pan with foil and put it back in the oven for another 35 minutes. After the 35 minutes, I removed the foil cover from the meatballs and put them back in for another 20 minutes.
Finishing the dish
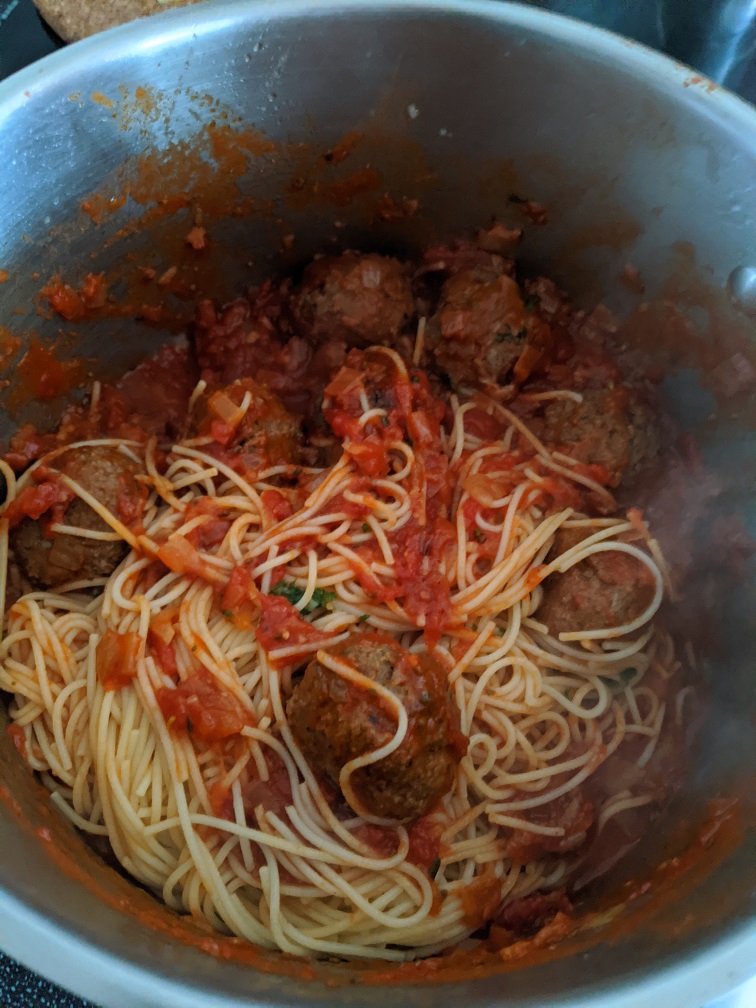
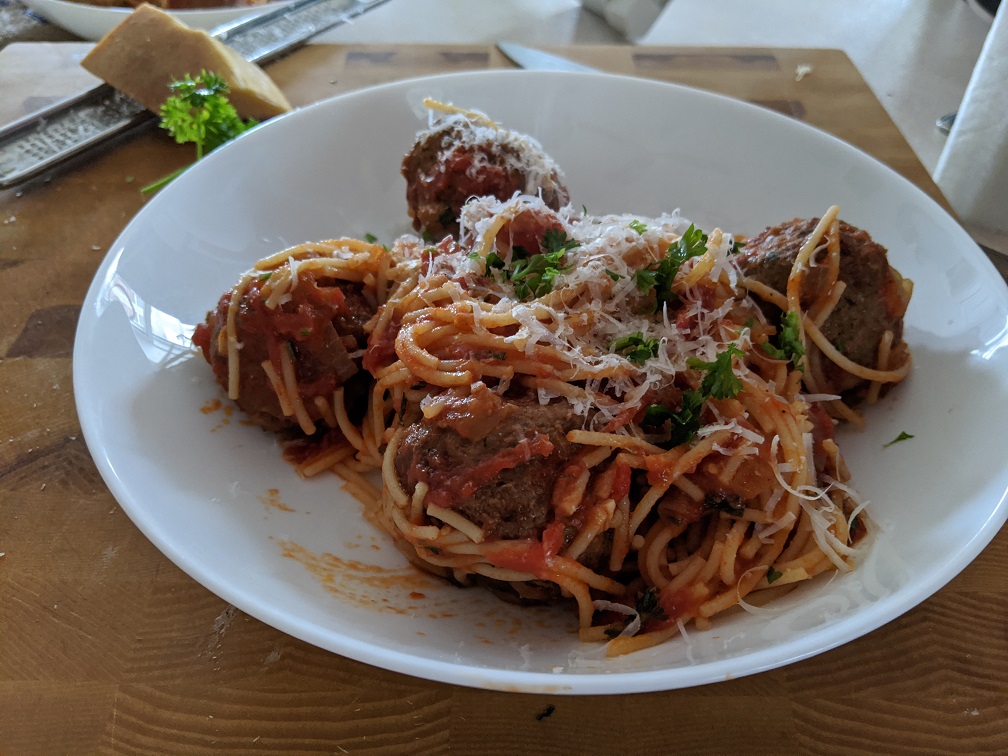
While the meatballs were finishing in the oven I brought a large pot of water to a boil and cooked my pasta. I also heated the remained of my sauce back up. Once the meat balls were finished, I added 8 of them (4 each for my wife and me) to the hot sauce, add in the pasta and tossed. At this point, I also add in about 2 tbsp of garlic butter. This may seem odd, but it adds so much flavour it is incredible. This is optional however I highly recommend it. Also, finishing tomato sauces with a bit of butter (plain or garlic) is always the way to go. Try it for yourself. I then plated the Spaghetti and Meatballs and finished it with freshly grated parmesan, fresh chopped parsley, and a bit of fresh cracked pepper.
Keyword: Chicken Pasta, Meatballs, Spaghetti and Meatballs
Servings: 23meatballs
Ingredients
1.2 kgMedium Ground Beef
1cupMinced Onion
2tbspMinced Garlic
1tbspChopped Parsley
1tbspChopped Rosemary
1tbspDried Oregano
1/2tspCrushed Red Pepper Flakes
1/2cupFreshly Grated Parmesan
1 1/2tspKosher Salt1 tsp if using table salt
3/4 tspBlack Pepper
3/4cupBread CrumbsGluten-Free
1lgEgg
1/3batchBasic Tomato Sauce
2cupBeef Stock
1/4cupOlive Oil
Instructions
Combine all the ingredients except the olive oil, tomato sauce and beef stock in a large bowl and mix until the meat is tacky, about 5 minutes.
Add the olive oil to a roasting pan.
Form the meat into 23-24 even size balls and place in the oiled roasting pan.
Bake the meatballs in a 400°f oven uncovered for 35 minutes flipping them halfway through.
Remove the meatballs from the oven and drain off all the excess fat.
Add the beef stock and tomato sauce to the roasting pan, cover with foil and bake in a 325°f oven for 35-45 minutes. Remove the foil and bake for another 10-20 minutes.
Toss the meatballs with tomato sauce and pasta and serve.
I highly recommend that you try this meatball recipe. I’m willing to be that it will be one of the best meatballs that you’ve ever had. If you do try them I’d love to hear about it. Also, if you have a meatball secret that I havn’t mentioned I would love to hear that too.
Thank you as always for reading and remember to subscribe to the blog so you never miss a post. And…if you really liked this post please remember to share it! Have a great Monday everyone, talk to you soon.
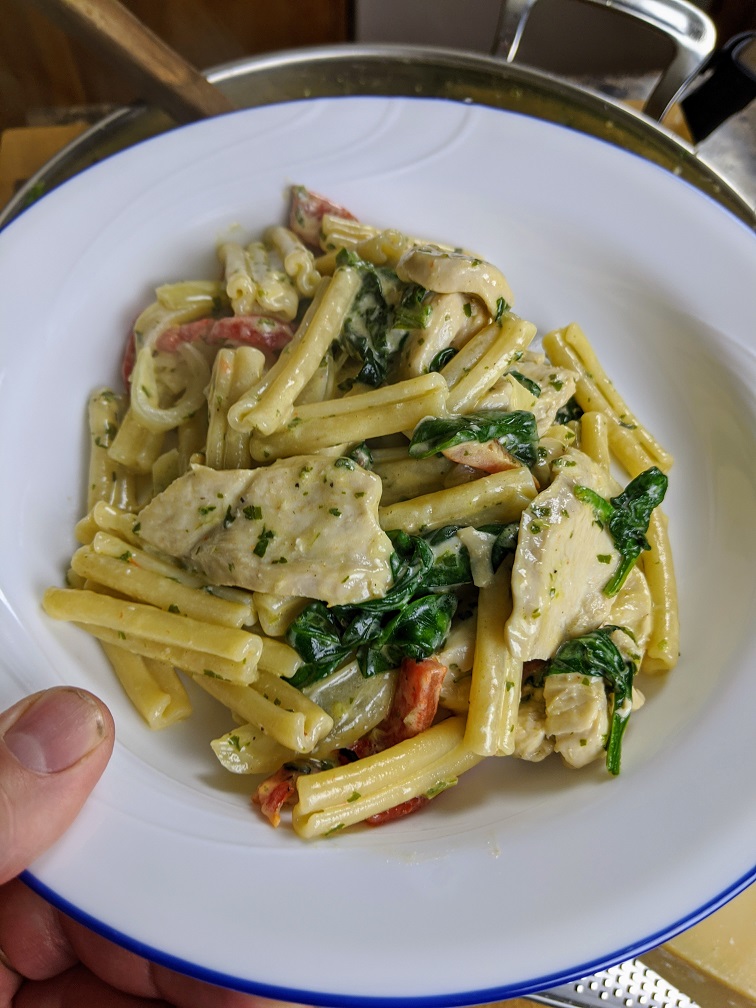
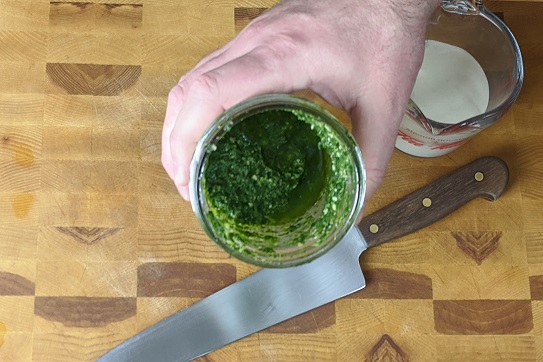
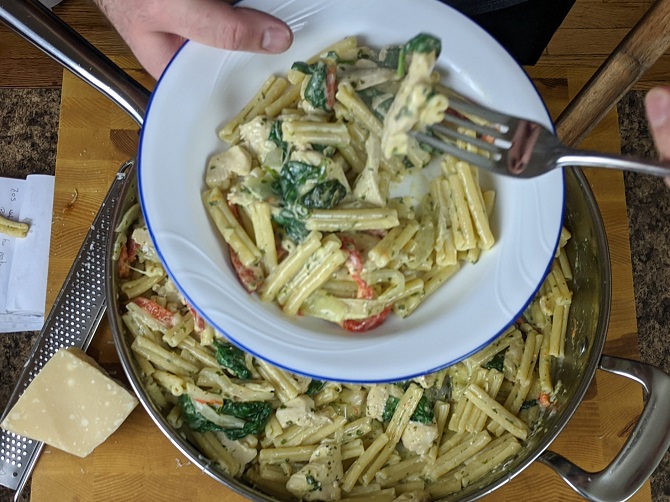
Hello and happy Monday, everyone! Today, we are going to kick the week off right with a quick recipe for Creamy Chicken Pesto Pasta. It’s so fast to make you can do it from start to finish in under 30 minutes. Oh, and it is delicious!
Some of you may remember that way back in March of last year; we did a 30 Minutes or Less Chicken Pesto. Though similar to what we are doing today, there are some apparent differences between the two. The Chicken pesto from last year was pretty much just chicken, cherry tomatoes, pesto, and pasta. Today our pasta has chicken, roasted red pepper, spinach, pesto, and cream. So again, it is similar but different. One other significant difference between the two posts is that in the one from last year, we made the pesto, this time we are using premade, though I did make it. You can make it or use store-bought stuff if that’s what you prefer.
Okay, let’s take a look at how to make…
Creamy Chicken Pesto Pasta in 30 Minutes or Less
7:05 pm – Getting Started
It was 7:05 pm when I started cooking last night. The first step was to get the pot on for the pasta. I filled a medium-sized pot with hot water, added some salt, and put it in the stove on high.
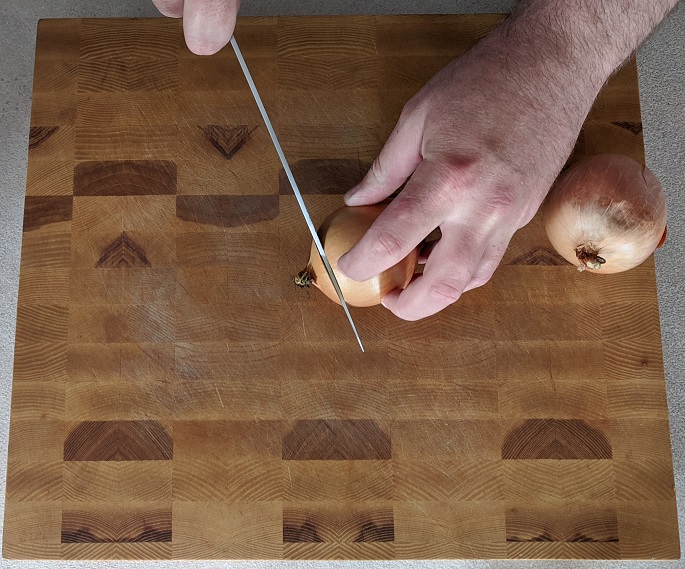
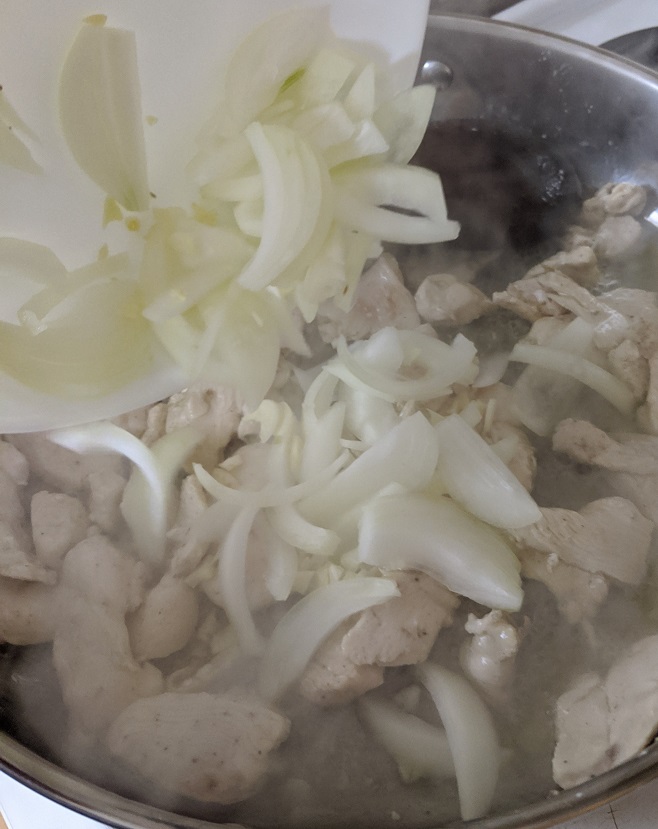
Once the pot was on the stove, I got to work on an onion and some garlic. The onion I used was pretty small, so if all you have are large onions, only use half. For whatever reason, I cut the onion as though I was going to dice it. At the last minute, I changed my mind and decided I want to slice it, so I went back after it was peeled and cut the root off. With the root cut off the onion, I proceeded to slice it. I also peeled and sliced one relatively large clove of garlic. Once the onion and garlic had been sliced, I put them on a plate and set them aside.
7:08 pm – Chicken
Once I was done with the onion and garlic, it was chicken time. But, before I got my hands all covered in chicken, I put a large, heavy-bottomed skillet on medium heat on the stove.
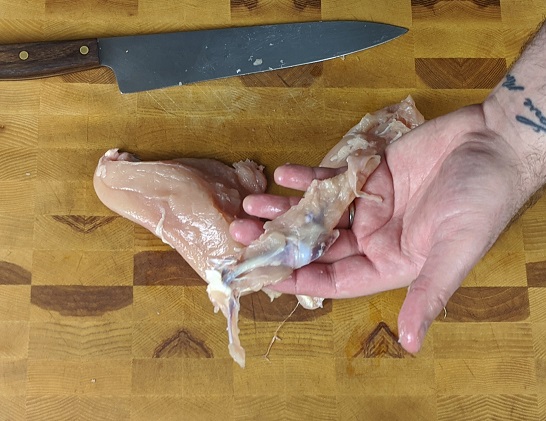
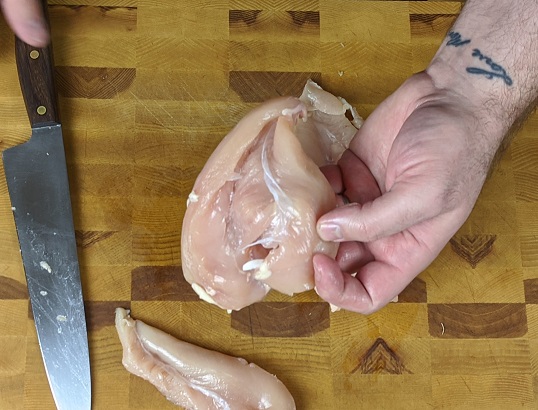
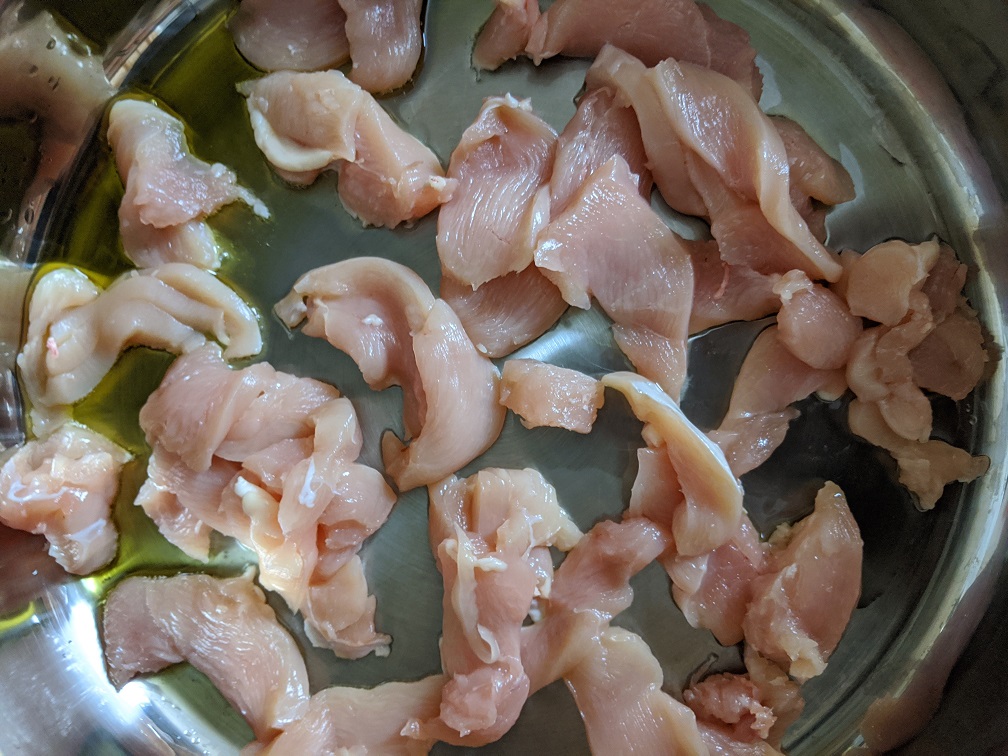
The chicken I bought was a chicken breast that still had a bit of the rib and wing bone attached. I bought this because it was cheaper than boneless chicken breast. I should also say I’m not generally a fan of chicken breast. However, on the rare occasion that I do buy it, I usually get it bone-in and skin-on. It is way cheaper and with a little practice takes next to no time to clean.
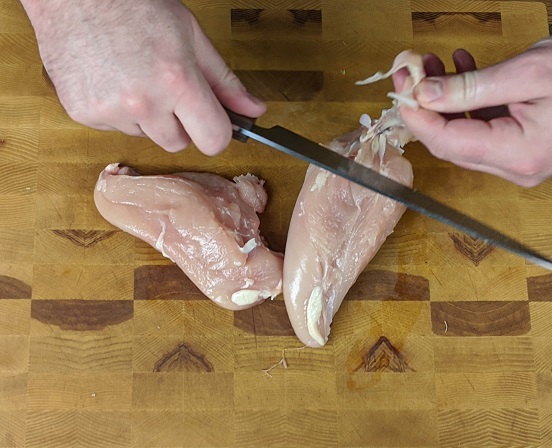
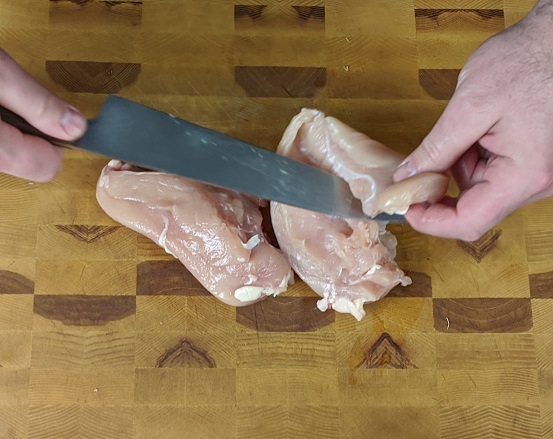
To clean the chicken, I found the bone and followed it with my knife to cut it away. I then took the tenders off the breast. The tender is the little flap of meat on the underside of the breast. If you’ve ever bought breaded chicken tenders, this is what they are made of. With the tender removed, I sliced the breast and tender into 1/2 cm pieces.
7:12 pm – Cooking the chicken
Now, that the chicken was all sliced, I added 1-2 tbsp of olive oil into my pre-heated pan along with the chicken. When I added the chicken in, I spread it out in a single layer to speed up the cooking process. I also turned the heat up a little on my pan as it wasn’t quite hot enough. You may not need to do this. The issue was that my pan is very thick and just wasn’t getting hot enough.
While the chicken was cooking I took a few minutes and thoroughly cleaned my knife, cutting board, and work area.
7:15 Cooking the pasta
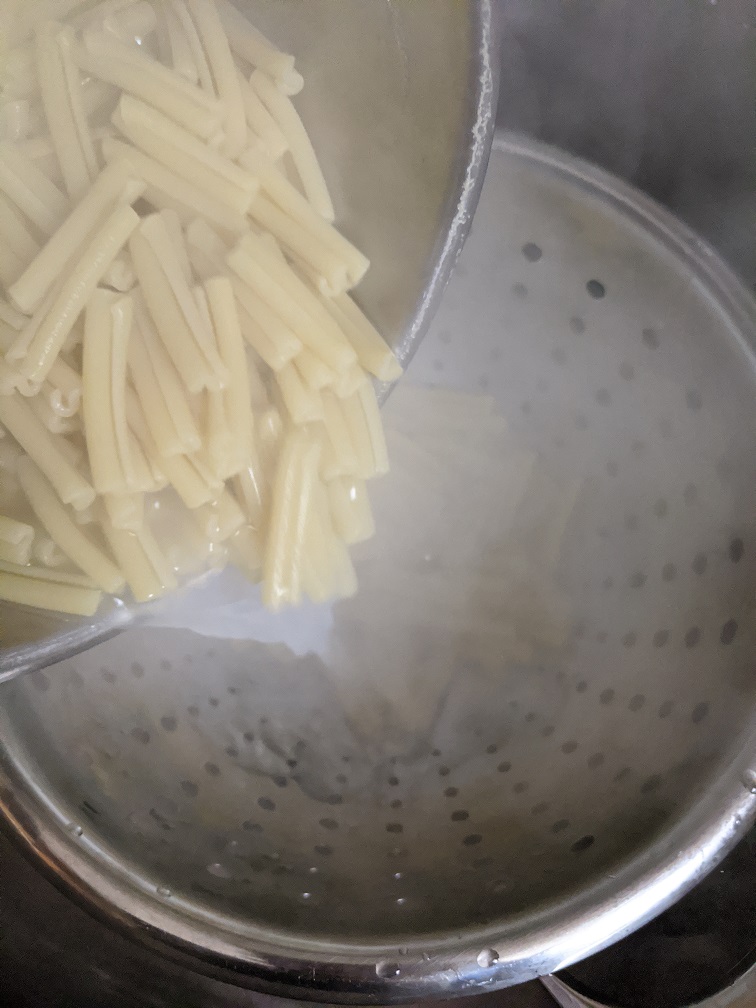
Around 7:15 pm the water for my pasta was boiling, and my chicken was cooking. The pasta I used takes about 12 minutes to cook. I knew that if I started cooking it at this point it would line up pretty perfectly with when the sauce would be done. How did I know that? The chicken was almost cooked through and I knew that sauce wasn’t going to take that long. Also, even if the timing didn’t line up perfectly, there was only going to be a few minutes difference and I could compensate for that. So, I dropped the pasta in the water.
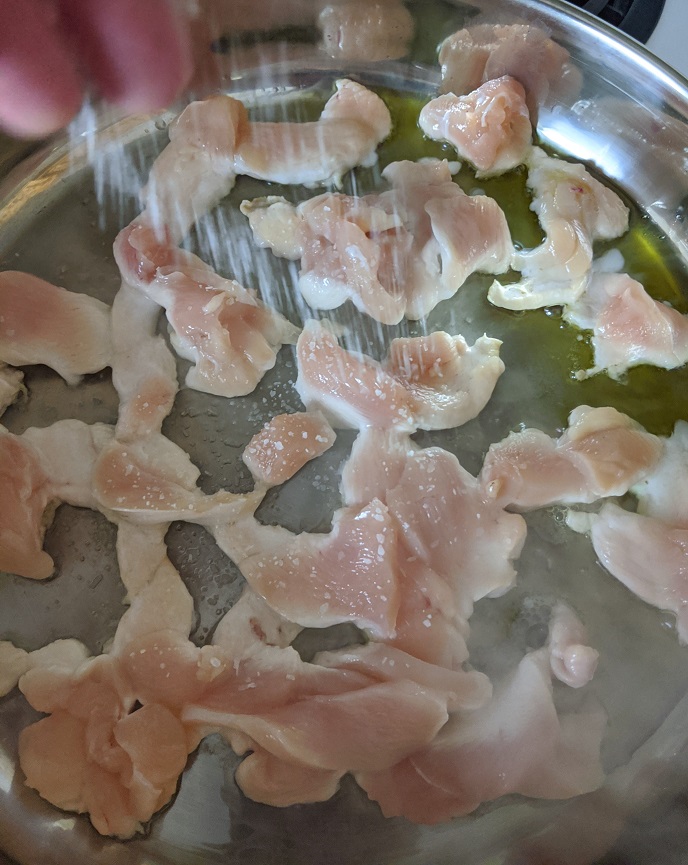
I also took this opportunity to season the chicken generously with salt and pepper then I flipped the chicken and finished cooking it through.
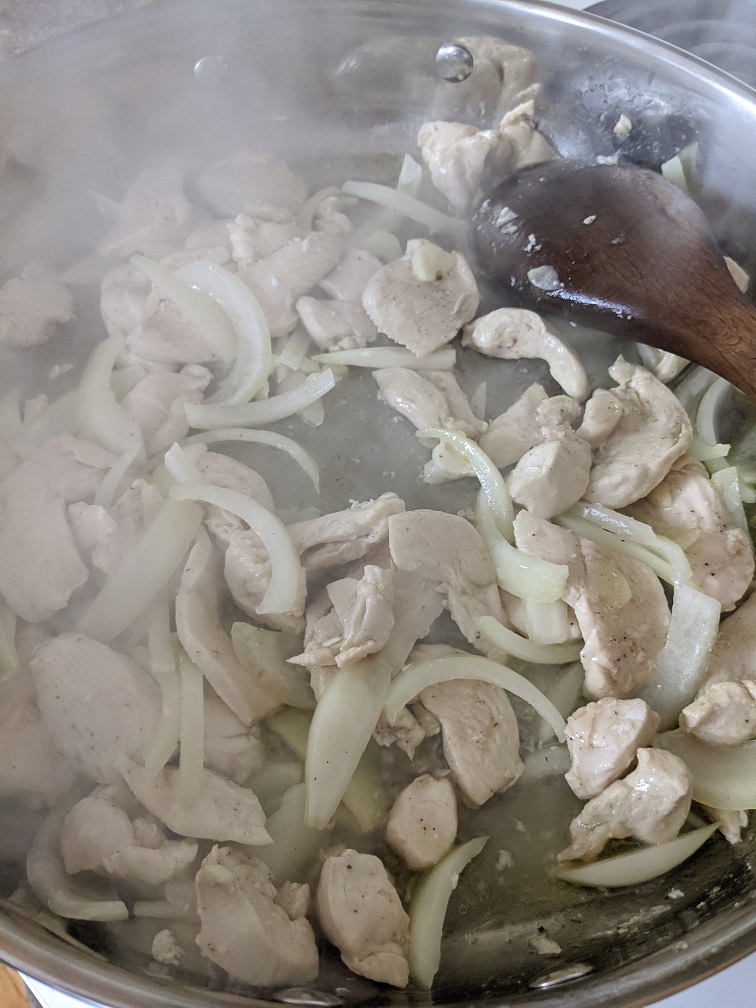
7:20 pm – Onions and Garlic In
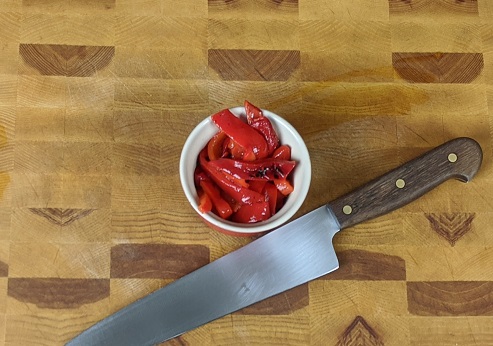
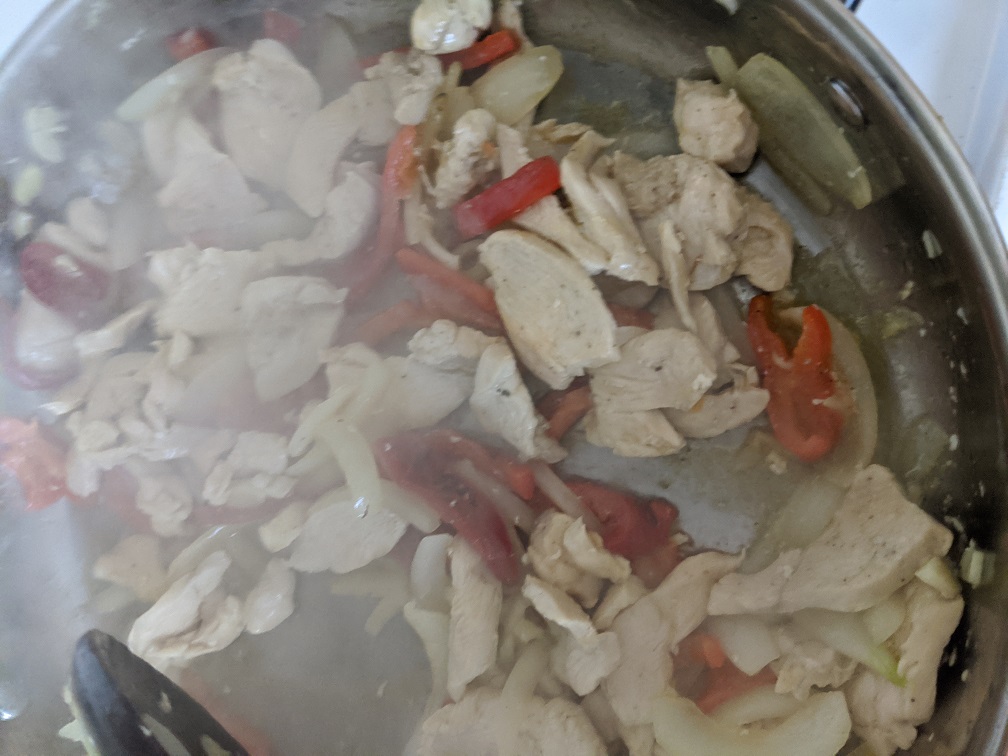
At 7:20 I add the onion and garlic into the pan along with the chicken. I cooked, stirring for about 2 minutes before adding in the roasted red peppers.
The roasted red peppers I used were jarred. They came pre-roasted and sliced into thin strips. You can obviously roast your own peppers. However, I happened to have this on hand and wanted to use them up. They’re actually pretty good out of the jar so if you want to save some time I suggest going this route. I used about 1/2 a cup of peppers in total.
7:24 pm – Sauce It
At 7:24 pm I added in about 1/4 cup of pesto. Again, this was pesto that I had made a few days ago and had in the fridge. You can make it from scratch (link at the top of the post) or you can buy it. I prefer to make it because it tastes better and has no preservatives and stabilizers. But, if you want to save some time you can go that route. Once I added in the pesto I let it cook for about a minute before adding in the cream.
At first, I added in a 1/2 cup of heavy cream, but I ended up having to add in a bit more to loosen the sauce. In total, I used about 3/4 of a cup. If you don’t want to use the cream I suggest making a bechamel by cooking roux into milk to thicken it. You don’t want to add straight milk or anything less than heavy cream (whipping) because it will curdle when it hits the heat.
7:26 pm – Spinach
After adding the cream, which came to a boil very quickly I tasted the sauce and added a bit more salt and pepper as was needed. Then I added in 2 big handfuls of baby spinach and stirred until it was softened into the sauce.
7:28 pm – Drain Pasta
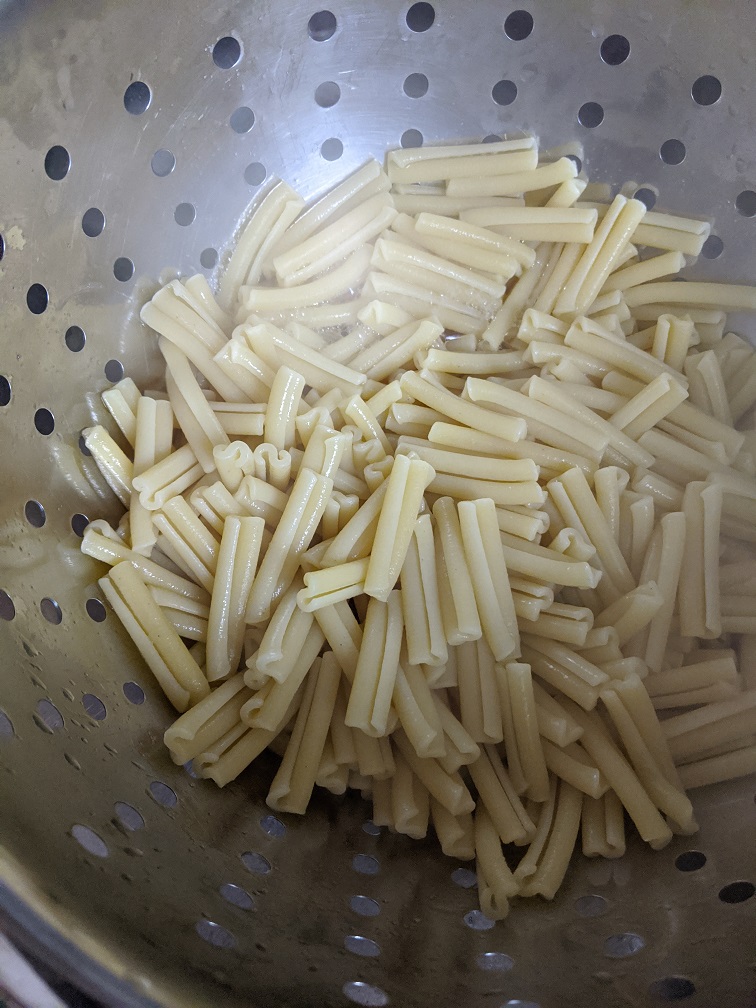
At 7:28 pm my pasta was done. I drained it and added it to my sauce.
7:29 pm – Turn off heat and finish
I grated about 1/4 cup of parmesan into the pasta, stirred everything together and served.
Conclusion
This is not a diet pasta recipe by any means but it also isn’t nearly as heavy as you may think it is. Recipes like this will often suggest multiple additions of cream, each one being reduced before the next is added. This makes the pasta very heavy. You don’t get that with this. Also, the roasted red pepper and spinach along with the pesto give this pasta an incredible flavour. I highly recommend you give this a shot. If you do, I’d love to hear what you think.
Thank you, everyone, and have a great Monday. And remember to tune into Dinner with Ben tonight at 6 pm Atlantic time on my Facebook page.
Creamy Chicken Pesto Pasta
What more is there to say? It's creamy, it's chicken, and it's pesto. Delicious!
Thank you for reading the post. If you liked it, remember to share it on Facebook, Pinterest, or Twitter by clicking the icon to the left of the right of the page. Did you know that Chefsnotes.com has almost 400 posts just like this one? Imagine all the great tips, tricks, and recipes you’ve missed. Don’t miss any more! Subscribe to Chef’s Notes by putting your email address in the subscription box at the top right of the sidebar. You will be notified of every new post. And if you would like to know more about me, click the link below to read my story.
When I was around 12 my mom had a friend who had children that closely matched the age of my sisters and me. She lived right by our school. Occasionally, when mom had to go into town we would go to this friend’s house for dinner. It was one of these days when I first experienced tuna casserole.
My mom’s friend’s version of tuna casserole, as I now know, was pretty classic. It was tuna, pasta, and vegetables in a cream of mushroom sauce, covered with crushed potato chips and baked. My mom was a great cook but for whatever reason had never made anything like the tuna casserole I had that day. It made such an impression on me that I remember it more vividly than almost anything else from that period of my life. Interestingly enough, to this day that is the only tuna casserole I’ve ever had.
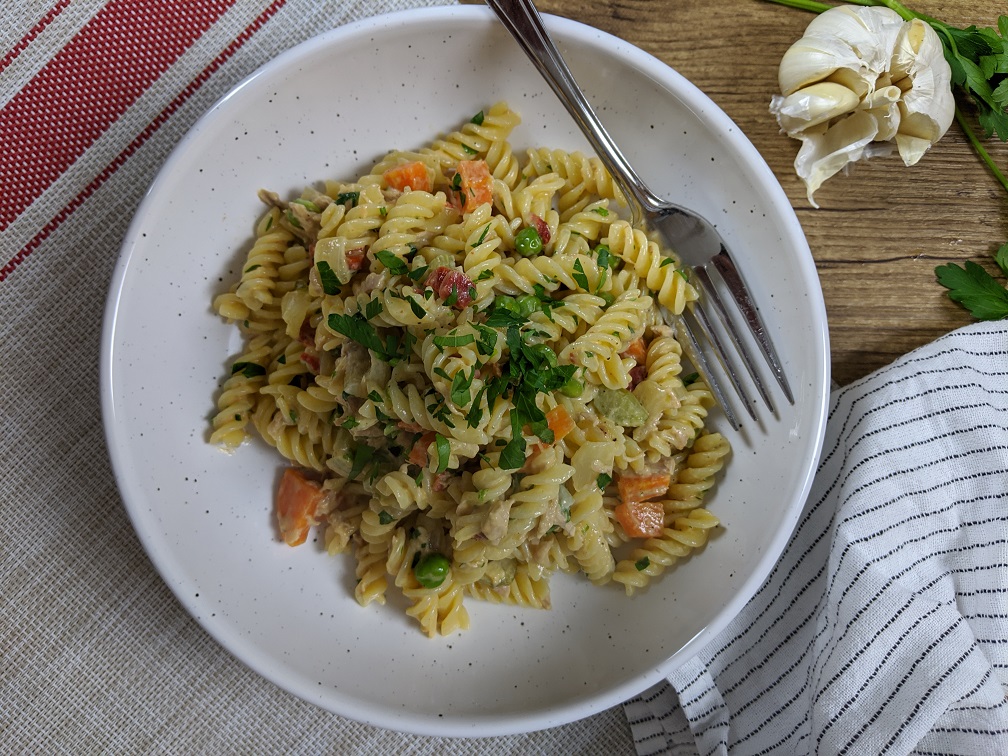
It was that tuna casserole I had in mind while I was creating this creamy tuna pasta recipe. Essentially, I wanted to make an updated version of that tuna casserole I ate well over 20 years ago. Gone are the crushed potato chips, cream of mushroom soup and long baking time. Now, we can all have that flavour and experience in under 30 minutes. Let’s take a look at how to me my…
Creamy Tuna Pasta In 30 Minutes or Less
12:45 – Getting Started
I made this creamy tuna pasta for a late lunch and started cooking at 12:45. The first thing I did was get a big pot of salted water on the stove for the pasta. Next, I put a frying pan on the stove over medium heat for the sauce. With that, it was time to get down to the real work.
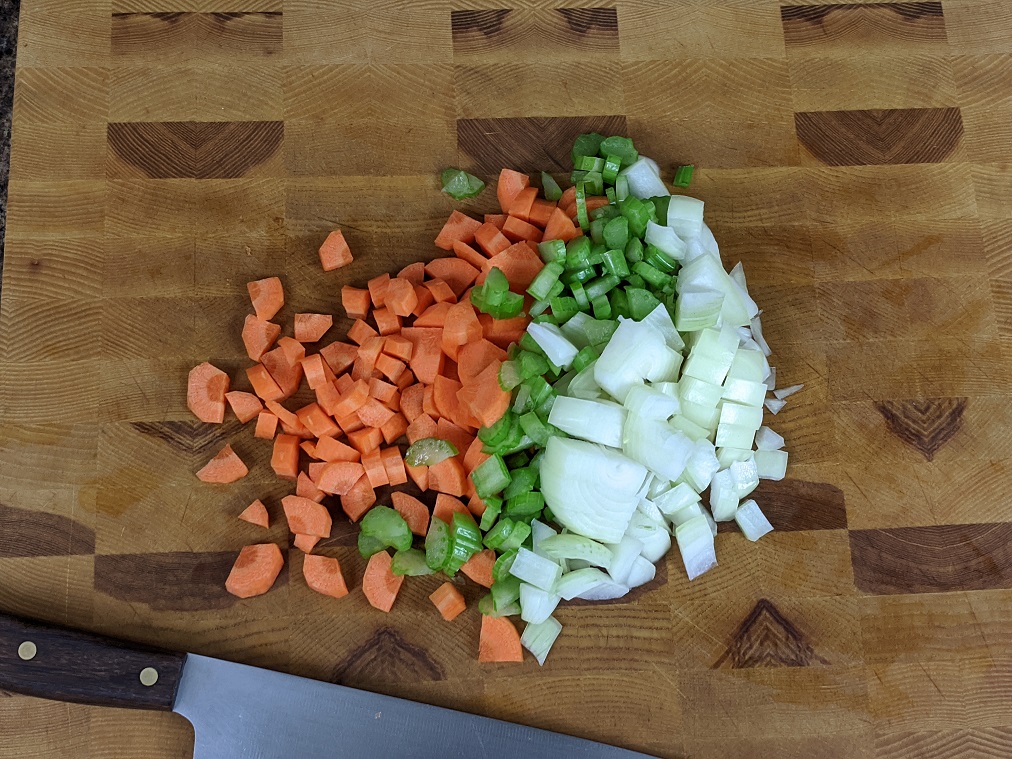
For the sauce I started with a base of carrot, onion, and celery, I peeled and diced 1 onion and 1 carrot, then sliced 1 celery stalk.
12:49 pm – Start cooking
By the time I was done cutting my vegetables my pan was nice and hot. I added in 1 tbsp each butter and olive oil. I used butter for the flavour and the olive oil to help prevent the butter from burning. Once the butter melted I added in the vegetables.
12:50 pm – Garlic
While the vegetables were cooking I peeled and sliced 2 cloves of garlic. I also diced about a 1/2 cup of roasted red pepper. I added roasted red pepper because I just happened to have it in my fridge. You don’t have to add this but I did find it added a nice sweet tone to the overall flavour.
I gave the carrot, onion, and celery a stir then added in the roasted red pepper and garlic.
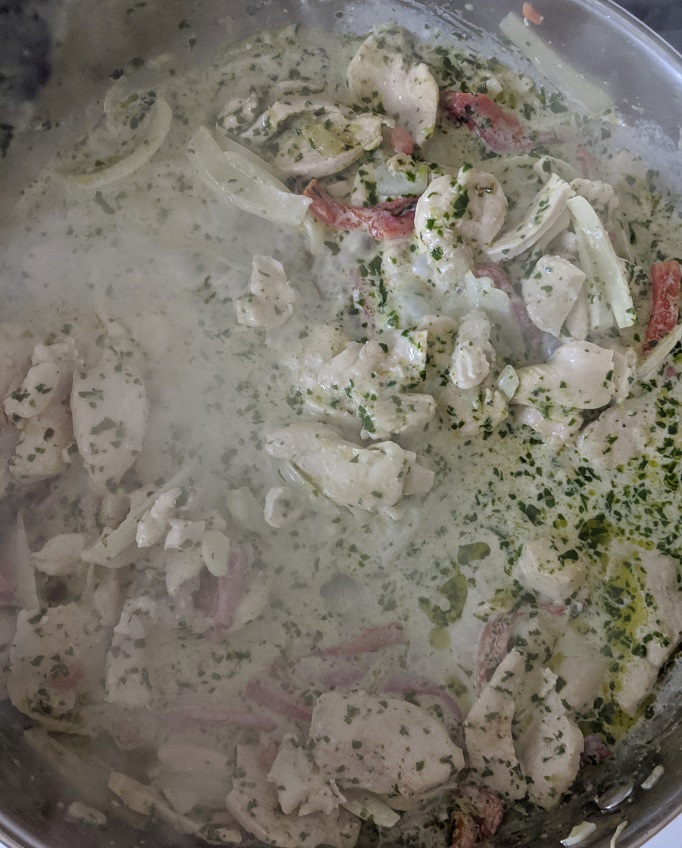
12:54 pm – Tuna
While the garlic and peppers were cooking I opened up my can of tuna. I drained the liquid right into the frying pan. This added a really nice subtle tuna flavour to the pasta that you won’t get from the tuna itself. The pan was hot enough that the juice evaporated very quickly.
12:55 pm – Cream
After the tuna juice mostly evaporated I added in 1 cup of whipping cream and a 1/2 cup of frozen peas. I’ve said it before and I’ll say it again. Don’t skimp out on the cream here. If you use blend cream, coffee cream, half and half, or milk, it will curdle and it will be gross. If, for some reason you want a lighter version of this, take the time and make a bechamel. Otherwise enjoy the rich delicious flavour of full fat, 35% whipping cream.
Once the cream and peas go into the pan bring it to a boil then reduce the heat to low and simmer.
12:57 pm – Pasta in
Around this point, my pasta water was boiling and yours should be too. Add the pasta in and cook it according to the package instructions. While the pasta is cooking chop about a 1/2 cup of parsley.
1:05 pm – Drain Pasta
Once the pasta is cooked drain it as you normally would. While it is draining, add the tuna into the sauce and stir to break it up.
1:06 pm – Finish the creamy tuna pasta
Add the pasta into the sauce along with the parsley. Toss or stir the pasta to coat it with the sauce. Taste and adjust the seasoning with salt and pepper. Serve by itself or with a green salad.
Conclusion
The first bit of this pasta took me back to that dinner at my mom’s friend’s house all those years ago. I hope that you have a similar experience with it.
If you aren’t a big fan of tuna you could add canned or fresh salmon, chicken or ham instead. No matter what, it will be delicious. But don’t take my word for it. Try it for yourself.
Thank you as always for reading and stay tuned for Wednesday when I am launching my free 10-week basic cooking course “Kitchen Clueless to food independent” and remember to subscribe to the blog so you never miss a post.
Creamy Tuna Pasta
A new take on the old school Tuna Casserole. A quick meal your family will love.
Good morning world! After just over two weeks of radio silence, I am back and ready to roll. For those of you that don’t know, my wife and I just had a baby and so I took a bit of time off to adjust to that massive life change. For me, everything is different, but for you, things should mostly be the same. Some of my posts may appear a little later in the day than they normally would, and down the road, things may become a little more oriented to feeding a young family, but other than that it is business as usual. Speaking of business, as usual, let’s get to it.
As I am just kind of easing back into work I thought it would be good to start with a fairly simple dish for 30 minutes or less. Don’t let the long name confuse you. This is a simple dish that anyone can make and pretty much everyone will enjoy. Let’s take a look.
This is…
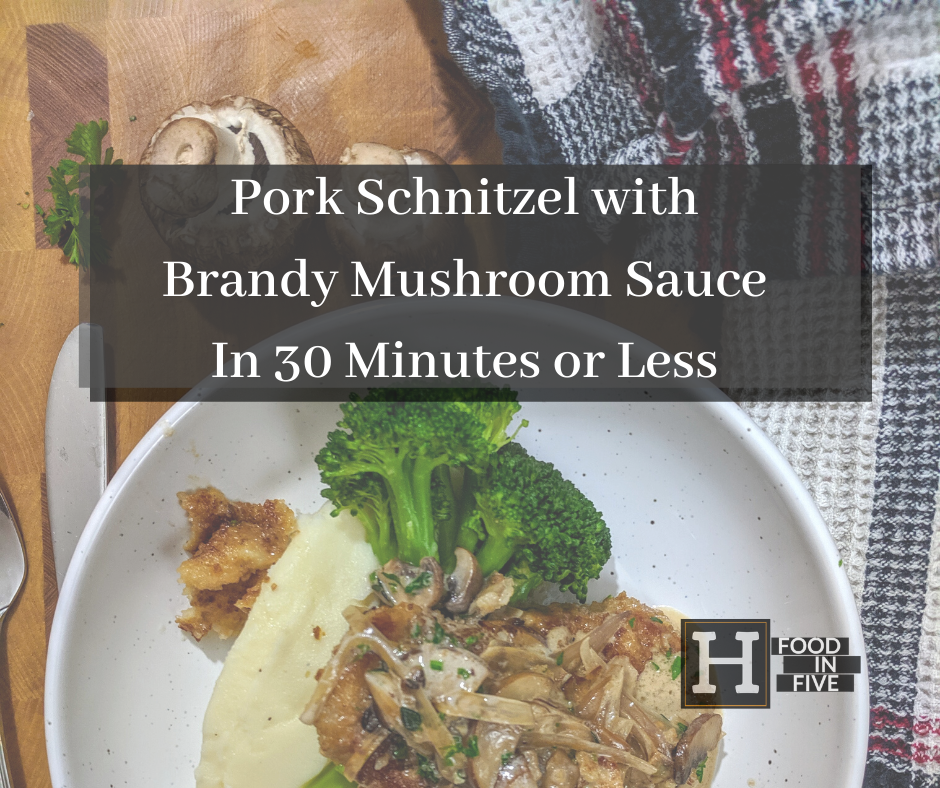
Pork Schnitzel with Brandy Mushroom Sauce In 30 Minutes or Less
6:20 pm – Potatoes
It was 6:20 pm when I started cooking last night and the first thing I had to get going on was the potatoes. I took 4 small-ish russet potatoes, peeled them, diced them, rinsed them in cold water until the water ran clear, then covered them with hot salted water and cooked them on high until they were tender. With the potatoes on the stove which took about 4 minutes in total, it was time to focus on my sauce ingredients.
6:24 pm – Sauce Prep
The sauce for this dish is what is known as a pan sauce. All that means is that the sauce is made in the same pan as the main protein, usually incorporating drippings from the protein. We aren’t going to really have any drippings, but we are going to use one pan to cook the schnitzel and the sauce.
The first thing I did was peel and thinly slice one shallot. If you don’t have shallots, half a small onion would work. Next up, I removed and discarded the stems from four cremini (brown) mushrooms, and thinly sliced them. The last thing I sliced was 2 cloves of garlic. To the sauce ingredients, I added 2 sprigs of thyme.
6:28 pm – Broccoli
I set the sauce ingredients aside, which took about 4 minutes to prep, then I got to work on some broccoli. I really like long spears of broccoli and I find cutting broccoli this way leads to the less wasted stem. To do this cut off the bottom third or half of the broccoli stem. I cut the bottom half off because my pot wasn’t big enough to hold longer stems. Then cut the broccoli into 6 pieces lengthwise.
After the broccoli was cut I put it in a pot with just about 1 inch of water. The goal here is to steam the broccoli rather than boiling it. I set the pot aside until I was ready to cook it.
6:29 pm – Breading Pork Schnitzel
Finally, it was schnitzel time! To make the schnitzel I used what is known as the standard breading procedure. You start with flour (I used potato flour because it’s what I had on hand), then a beaten egg, then bread crumbs. The idea is that the flour sticks to the meat (or vegetables), the egg sticks to the flour, and the bread crumbs stick to the egg.
Really, all I did here was beat 1 egg, and season the potato flour with salt and pepper. I used “fast fry” pork loin chops so I wouldn’t have to pound them out with a meat mallet. I dipped them in the flour, then the egg, then the bread crumbs and set them aside.
6:35 pm – Cooking Pork
As I was finishing breading the pork I turned my pan on to medium-high heat. Once the pan was hot I add in 1 tbsp of butter, then the pork. I cooked the pork for 2-3 minutes per side then removed it from the pan. I wiped the pan out with a paper towel and put it back on the heat.
I also turned the broccoli on high at this point.
While the pork was cooking, I chopped up about 2 tbsp of parsley and set it aside.
6:41 pm – Sauce
At this point the broccoli had started boiling. I turned the heat off and left the lid on the pot.
I added 1 tsp of olive oil into the pan I cooked the pork in along with the mushrooms, shallots, garlic, and thyme.
While the sauce vegetables were cooking I drained my potatoes, heated up 1 tbsp of butter, 2 tbsp of cream, and mashed the potatoes into it. I put a lid on the potato pot and set it aside until I was ready to eat.
I cooked the mushrooms and onions for about 4 minutes then added in 2 tbsp brandy. This got cooked for 1 minute then in went the beef stock and a pinch of salt and pepper. I added the pork back into the pan and cooked it for 1 minute per side before adding in a 1/4 cup of cream. I cooked the sauce for 1-2 more minutes, seasoned with salt and pepper, added in the parsley and served.
To plate the food I started with mashed potatoes, then the broccoli upon which I placed a pork chop and some of the sauce. Such a delicious meal!
Conclusion
This really is a great meal that you can make any day of the week. Also, that breaded pork is fantastic for pork parmesan, pork burgers, and lots of other things.
Cover the potatoes with hot salted water and put on high.
Cook the potatoes until tender, drain, warm 1 tbsp of butter with 1/4 cup cream then mash the potatoes and mix with the hot cream and butter.
While the potatoes are cooking slice the broccoli into spears.
Add 1 cup of water to the pot with the broccoli, bring to a boil and cook for 3 minutes with a lid on the pot.
Remove the broccoli from the heat and let sit with the lid on the pot.
While the broccoli and the potatoes are cooking season the flour with salt and pepper then dip the pork in the flour, egg then bread crumbs. Heat a frying pan over medium-high heat with 1 tbsp butter.
Cook the pork chops for 2-3 minutes per side.
Remove the pork from the pan, wipe out the paper towel, and in 1-2 tbsp of olive oil along with the mushrooms, shallots, thyme, and garlic. Cook for 4 minutes.
Add in the brandy and cook for 1 minute before adding in the beef stock and the pork,
Cook for 1-2 minutes per side then add in the cream, salt and pepper, and parsley.
Happy Monday everybody! Being that it is Monday, we all know that means it is 30 Minutes or Less Day. The day when I show you how to make a meal from start to finish in under 30 minutes. Today, will not disappoint. We are making 3 Cheese, Ham & Broccoli Penne and oh is it delicious! Now, don’t confuse this with the Chicken and Ham Penne we did a few months back. Though these dishes seem very similar, they are very different in flavour.
With that, let’s get cooking. This is…
3 Cheese Ham & Broccoli Penne – 30 Minutes Or Less
2:50 pm – Getting Started
I actually made this fairly early yesterday afternoon. It was a busy day, I had a lot going on, and I need to get dinner done fast. That always seems to be the way.
I started cooking at 2:50 pm and the first step was to turn the oven on to 425°F. Then I filled a medium pot with hot salted water and put it on high.
2:51 pm – Ham & Onions
With the oven and the pasta water heating up I moved on to prepping my ingredients. The first of the two ingredients I prepared were onions and ham. I diced 1 medium to large onion and about 1 cup of ham.
Once these were done, I set them aside and turned a medium-sized frying pan on to medium heat. I let the pan sit for a few minutes to heat up while I moved on to my next ingredient.
2:55 pm – Broccoli
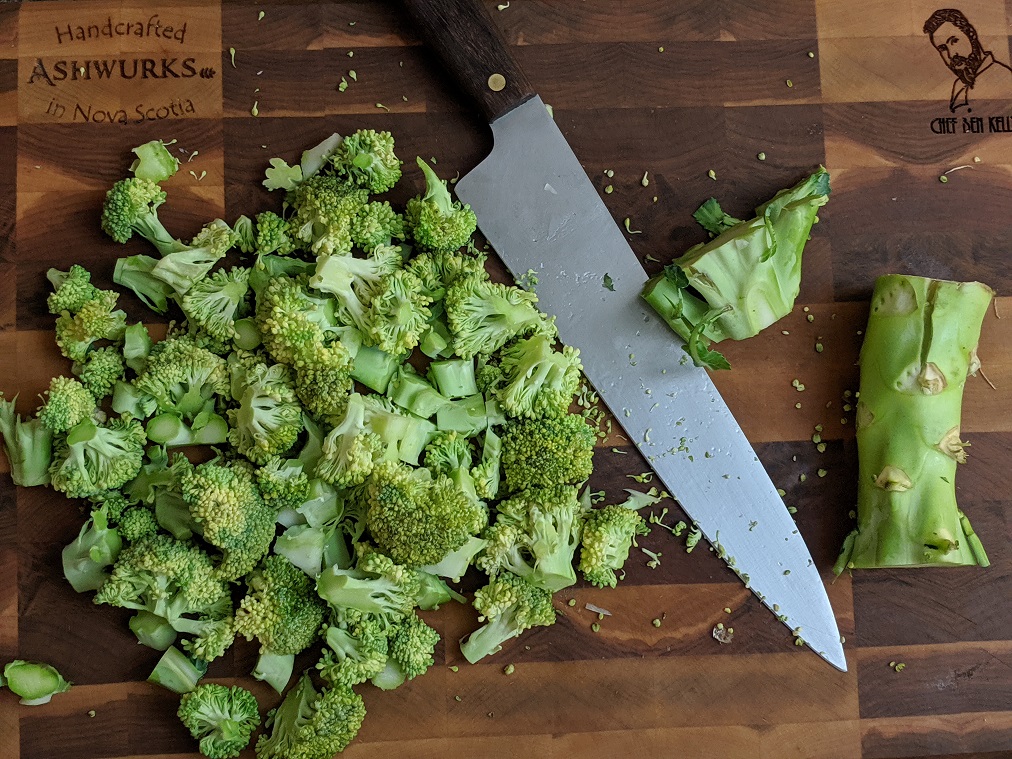
At 2:55 pm I started cutting up a head of broccoli. First, I cut the stem off, then started cutting the florets into small pieces. When cutting up broccoli, or cauliflower, cut from the bottom up. Cut through the small stems, not through the florets. Cutting through the florets will just make a big mess.
Once all the florets were separated I cut the bottom inch off the broccoli stem, peeled away the outer bark, then diced the tender inner stem. I used the inner stem in the pasta, but it is also really great for broccoli soup, stir-fries, and salads.
2:58 pm – Get Cooking
It took me about 3 minutes to cut my broccoli up and this was the perfect amount of time to heat up the pan. So, I added about 1 tsp of olive oil to the pan along with the ham and onion. You may take a little longer to cut the broccoli. If that is the case, just add the ham and onion to the pan while you are still cutting.
2:59 pm – Garlic
With the ham and onion cooking away and the broccoli set aside it was time to cut some garlic. I used 3 cloves, though 2 of them were fairly small, so 2 medium to large garlic cloves would be fine.
I cut the ends off of the garlic, gently crushed them with the flat edge of my knife, removed the peel, and thinly sliced them.
3:01 pm – Ham, Broccoli, Pasta
At this point, the pasta water had started to boil. I poured the box of penne into the water and stirred it for a minute or so to make sure it didn’t all stick together.
After putting the pasta in the pot I added the broccoli and garlic into the pan with the ham and onion. I waited to do this until the onions started to soften.
3:02 pm – Cheese
The vegetables and ham were cooking away, the pasta was boiling, and that meant it was time to cut the cheese. (7 years old me laughs out loud)
I grated a 1/2 cup each of parmesan and Jarlsberg Cheddar Cheese. Jarlsberg Cheddar is a Norweigan Cheese with a similar flavour to Swiss Cheese. If you can’t find it, you can substitute it with Swiss, Emmenthal or aged or smoked cheddar.
3:05 pm – Thyme
With the cheese grated and set aside, and the vegetables mostly cooked, I added 1 big sprig of thyme into the pan. I tossed this around for 1 minute. This was just enough time to heat the thyme sprig and for it to become aromatic. That just means I could smell it.
3:06 pm – Cream
After the thyme had heated enough to start flavouring the sauce (about 1 minute after adding it into the pan) I add in 1 cup of whipping cream. Don’t skimp here. Use whipping cream. Any other dairy will split because of the lower fat content. Also, this dish already has about 1 cup of cheese in it, and we are going to be adding more. Low fat, went out the window a while ago. Just embrace it, you will be happy you did.
3:07 pm – Cheese
Once I added the cream into the pan, it was time to drain the pasta. I drained it, then put it in a large mixing bowl. When that was done I added the cheese to the sauce and cooked it just long enough to melt the cheese.
3:10 pm – Sauce, meet pasta.
When all the cheese was melted and mixed into the cream I added it to the pasta and seasoned well with salt and pepper. I mixed this altogether.
3:11 pm – Casserole
I poured the pasta and sauce into a casserole dish and covered it with about 1/2 a cup of grated mozzarella cheese.
3:12 pm – Into the oven
Finally, I put the pasta in the oven for 5-10 minutes. I actually did 7 minutes in the oven. All I really wanted was to melt the cheese on top. With that, dinner was ready.
3:19 pm – Done Like Dinner
With one minute to spare, the pasta was plated and ready to serve.
Conclusion
It seems like there really isn’t too much to this dish and that’s because there isn’t. It is a few ingredients, tossed with pasta, cheese, and cream. That’s it. What’s more than that, everyone is going to love it.
I suggest serving this with a salad to add some greens and a few more vegetables into the meal. It can be thrown together while the pasta is in the oven.
And that just about does it. Thank you as always for reading and remember to subscribe so you never miss a post and also share this with anyone who you think would like it. Have a great Monday everyone.
3 Cheese Ham and Broccoli Penne
A quick and delicious weeknight meal. 27 minutes from start to finish.
Hello everybody! I have been off for the last week which was very nice, but I have to say that it is good to be back. And what a doozy to come back on! Chicken and ham penne, what’s not to love?
This recipe came together in about 20 minutes from start to finish and will satisfy any appetite. The portion I made was enough for two people, but the recipe can easily be doubled or tripled with little additional time. This would be very good with a side salad, though I just ate it as it is.
Okay, let’s cut the preamble, and get to the point. This is how to make…
Chicken and Ham Penne in 30 Minutes or Less
8:05 pm – pots on pots
I started this bad boy at 8:05 which I know is pretty late but don’t judge. Step one is to get the pot on for the pasta. I filled a medium pot with hot water, which I added salt to and put it on the stove on high.
With the pasta water on I also put the frying pan on the stove on medium-high heat. That way, by the time I cut the chicken, the pan would be hot and ready with no time wasted. That brings me to step two…
8:07 pm – Chicken
I used one chicken breast which along with the ham is more than enough for two people, cost-effective too. I thinly sliced it. That’s it.
With the chicken breast sliced and the frying pan hot, I added 1 tbsp of canola, along with the chicken and got down to business.
My pan looks a little beat up because of a dinner I did over the weekend. I scrub and I scrub and it just won’t come off. I’ll have to get some steelwool to make it shine.
8:08 pm – Cleaning the board
As you probably noticed I cut raw chicken on my cutting board. So, before I went any further I took a minute or two to wash my board and my knife.
Keep it clean people!
8:10 pm – Going ham
With my knife and board once again clean and ready to use it was time to get down with the slice and dice. First up, the ham. I had a nice little piece of ham, about 2 inches squared. I diced it into small evenly sized pieces then set it aside.
With the ham diced and out of the way, it was onion time. This recipe doesn’t need much onion and I already had a quarter of an onion cut in the fridge so that was what I used. Waste not want not. I diced it up.
By the time the ham and onion were diced, the chicken was browned. That meant I could add the newly diced ham and onion into the pan.
I should also say that I as intermittently stirring and flipping the chicken while I was doing my dicing.
8:12 – Garlic
Chicken, ham, and onion in the pan. It’s time to get down with some garlic. Two cloves to be exact. I cut the root end off the cloves, gave them a little crush, removed the peel and thinly sliced them. That’s it.
At this point the pasta water was boiling so, I added the penne into the pot and gave it a stir (I’m using gluten-free penne).
I added the garlic into the pan and cooked it for a minute. Then I added in the wine and cooked it until about half of it had evaporated.
8:18 pm – Peas
Between cutting the garlic, adding the pasta to the water, adding the garlic to the sauce, cooking it for a minute, deglazing with the white wine, and then cooking it down about six minutes had gone by in total. It was no 8:18 and time to add the peas in. I used a handful of frozen peas.
With the peas in the pan, I started picking some thyme. The trick here is to grab the sprig right at the top with one hand and run the fingers of your other hand straight down the stem. This should strip the leaves off fairly easily. Then just give it a quick chop.
8:20 – Cream
The peas had cooked a little bit which meant it was time to add a bit of cream and some salt and pepper. I cooked the cream down for about 2 minutes, add the thyme and then removed the pan from the heat.
8:22 pm – Pasta
At 8:22 I drained the pasta and added it into the sauce which I then tossed together. I finished the dish with some freshly grated parmesan cheese. I tasted it, adjusted the seasoning with salt and pepper, and just like that, dinner was done.
Conclusion
This is a really delicious and quick pasta and just about everyone will love. Once you plate it add a bit more parm and a bit more pepper and enjoy.
Linguine and Clams is such a classic pasta. Featured in more movies than I can count, it is almost the quintessential Italian-American pasta dish. There is for good reason for this; it’s absolutely delicious!
I’ve been craving Linguine and Clams for a while now and thought it would make a great dish for 30 minutes or less. In fact, it took me only about 20 minutes to put this all together from start to finish. I served the pasta with a light salad of mixed greens drizzled with olive oil, white wine vinegar, and a little salt and pepper.
I used canned clams for this for two simple reasons. The first being that whole clams need to be soaked for at least a few hours, then cleaned prior to using. That can’t be done in under 30 minutes. The second reason is because I actually prefer canned clams in this. The juice from the clams makes a delicious sauce and the clams are tender and flavour without being sandy.
Okay, enough chit chat, let’s get to it. This is
Linguine and Clams in 30 Minutes or Less
12:20 – Getting Started
I actually made this for lunch, but it works just as well for dinner.
To start I filled a large pot with hot salted water, put it on the stove on high, and put a lid on it. Covered pots boil about 30% quicker than pots that aren’t covered.
12:21 – Garlic
With the pot on and starting to heat up, I got down to business prepping my ingredients. The first was a few cloves of garlic.
I cut the ends off the garlic, crushed them a little, pulled the peel off and then thinly sliced it. I set it aside.
12:23 – Onion
With the garlic done and out of the way I went about slicing an onion. First I cut the top and bottom off, then I cut the onion in half down through the middle. I set aside half the onion for another time and removed the peel from the half I kept. With the onion peeled all that was left was to slice it.
I always suggest slicing onions with the grain as opposed to across them. They cook better and less onion juice ends up spraying into the air. So, you cry less.
12:25 – Parsley
The last bit of chopping I had to do was the parsley. I took about 1/4 cup of curly parsley that had already been washed and chopped it up until it was fairly fine.
The trick for chopping parsley is to bunch it up into a tight ball and slice it as thin as you can. Then go over one or two more times with your knife.
12:26 pm – Clams
At this point I was pretty much just waiting for the pasta water to boil so I opened up my clams and set them aside. I left the lid slightly attached because I wanted to be able to easily strain the liquid from the clams. This liquid will go into our sauce, but if the clams get added at the same time they will become rubbery, which is not what we want.
12:30 pm – Boiling
Okay, so I had to wait another 4 minutes for the pasta water to boil. Once it did start boiling, I turned the pan on for the sauce to medium then added the linguine to the water.
12:31 pm – Sauce
I let the pan heat up for about a minute then added in olive oil and butter. Once the butter melted the onions went in.
12:33 pm – Garlic
I cooked the onions for about two minutes then added the garlic. I cooked this for another two minutes then added in the white wine and reduced it until it was almost completely evaporated, then I added some pepper and the juice from the clams. I turned the heat up and cooked this for 3 or 4 minutes.
12:37 pm – Pasta
At 12:37 I drained the pasta and then added the remaining ingredients into the sauce. That was the clams, parsley, a bit of butter, a bit of salt and the drained pasta.
The extra bit of butter at the end helps to thicken and enrich the sauce. Don’t leave it out. It’s really important.
12:39 pm – Finished
At 12:39 I plated the pasta, put some washed mixed greens in a bowl and drizzled them with a bit of olive oil, white wine vinegar, and salt and pepper. Just like that dinner was done!
Conclusion
I don’t think I can say enough how much I love this pasta. It is light, quick and super delicious. I strongly advise you to give this a shot. It’s worth it.
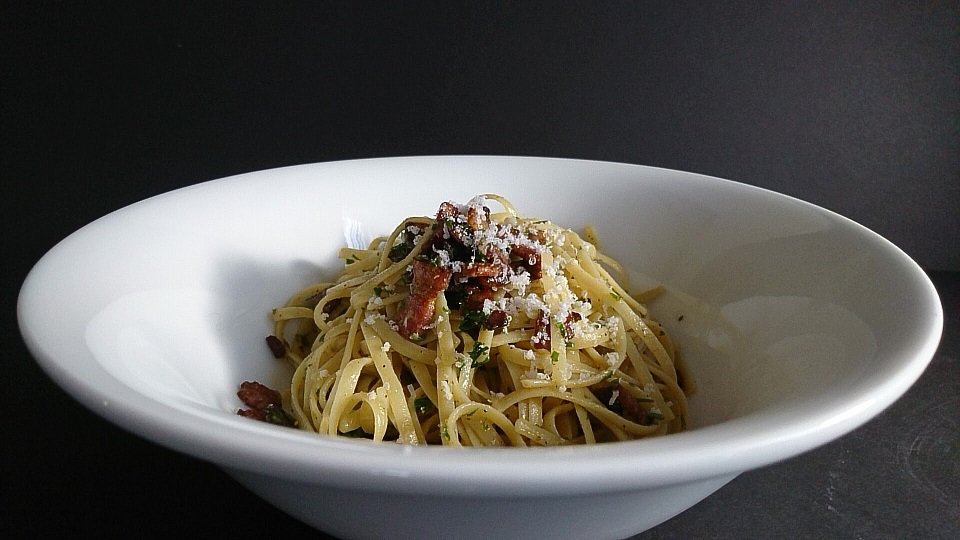
Pasta Carbonara sometimes gets a bad rap. Often in restaurants what is sold as carbonara is actually nothing like the real thing. It is all too common to see a big bowl of pasta tossed in a heavy cream sauce with a bit of bacon and maybe some peas and have it labeled as pasta carbonara. I’m here to tell you that that ain’t it. Today, we are going to talk about the real thing.
Prepare to have your mind blown because this is…
Everything I Know About Pasta Carbonara
What is pasta carbonara?
Pasta carbonara is a simple pasta dish originating in Rome. A true carbonara should have five, maybe six ingredients maximum. One of those being pasta. It absolutely does not contain cream of any kind.
If carbonara doesn’t have cream in it, what makes the sauce so creamy?
Great question!
The creaminess of the sauce comes from the combination of two ingredients; egg and cheese.
How to make carbonara
I’ve been trying to kind of beat around the bush here and build up suspense but it’s almost impossible to talk about carbonara without completely giving up what it is. So, let’s cut preamble and get to it.
Carbonara consists of guanciale(we’ll get to that in a second), pasta, parmesan or pecorino cheese, eggs, and pepper. Sometimes parsley will be added. That’s it.
What is guanciale?
Guanciale (guan-chal-a) is cured and dried pig cheek or jowl. It is very similar in taste and texture to good bacon with the exception that there is no smoky flavour. If you can’t find or don’t want to use guanciale, pancetta, or bacon can be used as a substitute.
What type of pasta should you use?
The pasta used for carbonara is most commonly spaghetti or a slightly thinner spaghettini.
How is it made?
Okay, here comes the fun part!
When I say that carbonara is a simple pasta dish, I really mean that. In fact, most classic Italian pasta dishes only contain a handful of ingredients and take a few minutes to make. They are often light as opposed to their North American counterparts.
To make carbonara get a pot of water boiling for the pasta. Dice up the guanciale or bacon into pieces (about 1/2 a cup total) about the size of the fingernail or your little finger. Put the bacon in a pan with a teaspoon or two of olive oil and turn on to medium-low heat. Cook the bacon until it has crisped up a little.
While the bacon is cooking put a handful of dried spaghetti in the pot of boiling water, you want enough pasta for two people.
Now, in a mixing bowl combine two eggs, plus one extra yolk along with half a cup of grated parmesan cheese. It is really important to use real parmesan for this, not the pre-grated stuff out of the bottle. Mix the cheese and egg yolks really well and season with fresh cracked pepper.
Keep the bacon in the hot pan but drain off half of the oil. Add the cooked pasta to the bacon pan and toss to mix and coat the pasta with the remaining oil. Add the hot pasta and bacon mixture to the egg and cheese mixture and stir with tongs.
If you’ve been paying attention you will realize that the eggs aren’t cooked. Good eye! But, that’s not really true. The heat from the bacon and the pasta, as long as your timing is right, will be enough to cook the egg and melt the cheese. This will make the sauce and give the pasta that creamy consistency.
Serve the pasta garnished with a little more grated cheese and maybe a touch of parsley.
That’s it. That is how you make a true pasta carbonara.
Conclusion
The simplicity of carbonara is part of its magic. This dish can be made in as long as it takes to boil some pasta and cook some bacon and with ingredients you probably already have.
It is fantastic for a quick dinner, along with a salad. Or, for a light lunch. And, that’s actually something to think about as well, this dish, pasta carbonara is not heavy. It is actually very light. You don’t feel gross after eating it, unlike the version that is made of pure cream.
If you’ve never had anything like this before I beg you to try it. Because once you see how amazing this is, you may start to understand the real reason why pasta is so popular in Italy. It isn’t because it’s heavy, or because it has twenty ingredients. Pasta is popular in Italy because it is a terrific vessel for almost anything, no matter how simple it may seem.
Thanks for reading everyone and remember to subscribe so you never miss a post.
Just as a quick note, Monday is Canada day and I will be taking the day off. This means that there will not be a 30 minutes or less post this week. I will be back in full force the week after. Enjoy your long weekend!
We use cookies on our website to give you the most relevant experience by remembering your preferences and repeat visits. By clicking “Accept”, you consent to the use of ALL the cookies.
This website uses cookies to improve your experience while you navigate through the website. Out of these, the cookies that are categorized as necessary are stored on your browser as they are essential for the working of basic functionalities of the website. We also use third-party cookies that help us analyze and understand how you use this website. These cookies will be stored in your browser only with your consent. You also have the option to opt-out of these cookies. But opting out of some of these cookies may affect your browsing experience.
Necessary cookies are absolutely essential for the website to function properly. This category only includes cookies that ensures basic functionalities and security features of the website. These cookies do not store any personal information.
Any cookies that may not be particularly necessary for the website to function and is used specifically to collect user personal data via analytics, ads, other embedded contents are termed as non-necessary cookies. It is mandatory to procure user consent prior to running these cookies on your website.