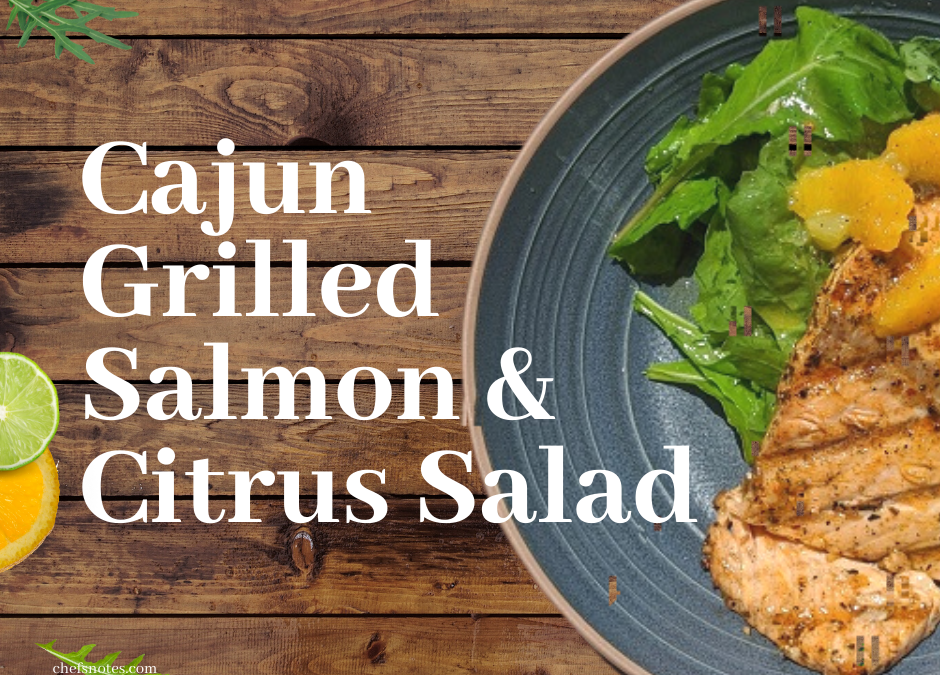
There is a magical exchange of flavour as a fresh Salmon fillet gets gently kissed by the flames of the grill. Combine that magic with the delicious sorcery that is Cajun Seasoning, and you know it’s only going to get even better. Today, we are going to look at how to make Delicious Cajun Grilled Salmon. In case that isn’t enough, we are also going to make a citrus and arugula salad to act as the base for the Salmon creating a healthy lunch or light dinner option. Let’s get to it.
Cajun Seasoning
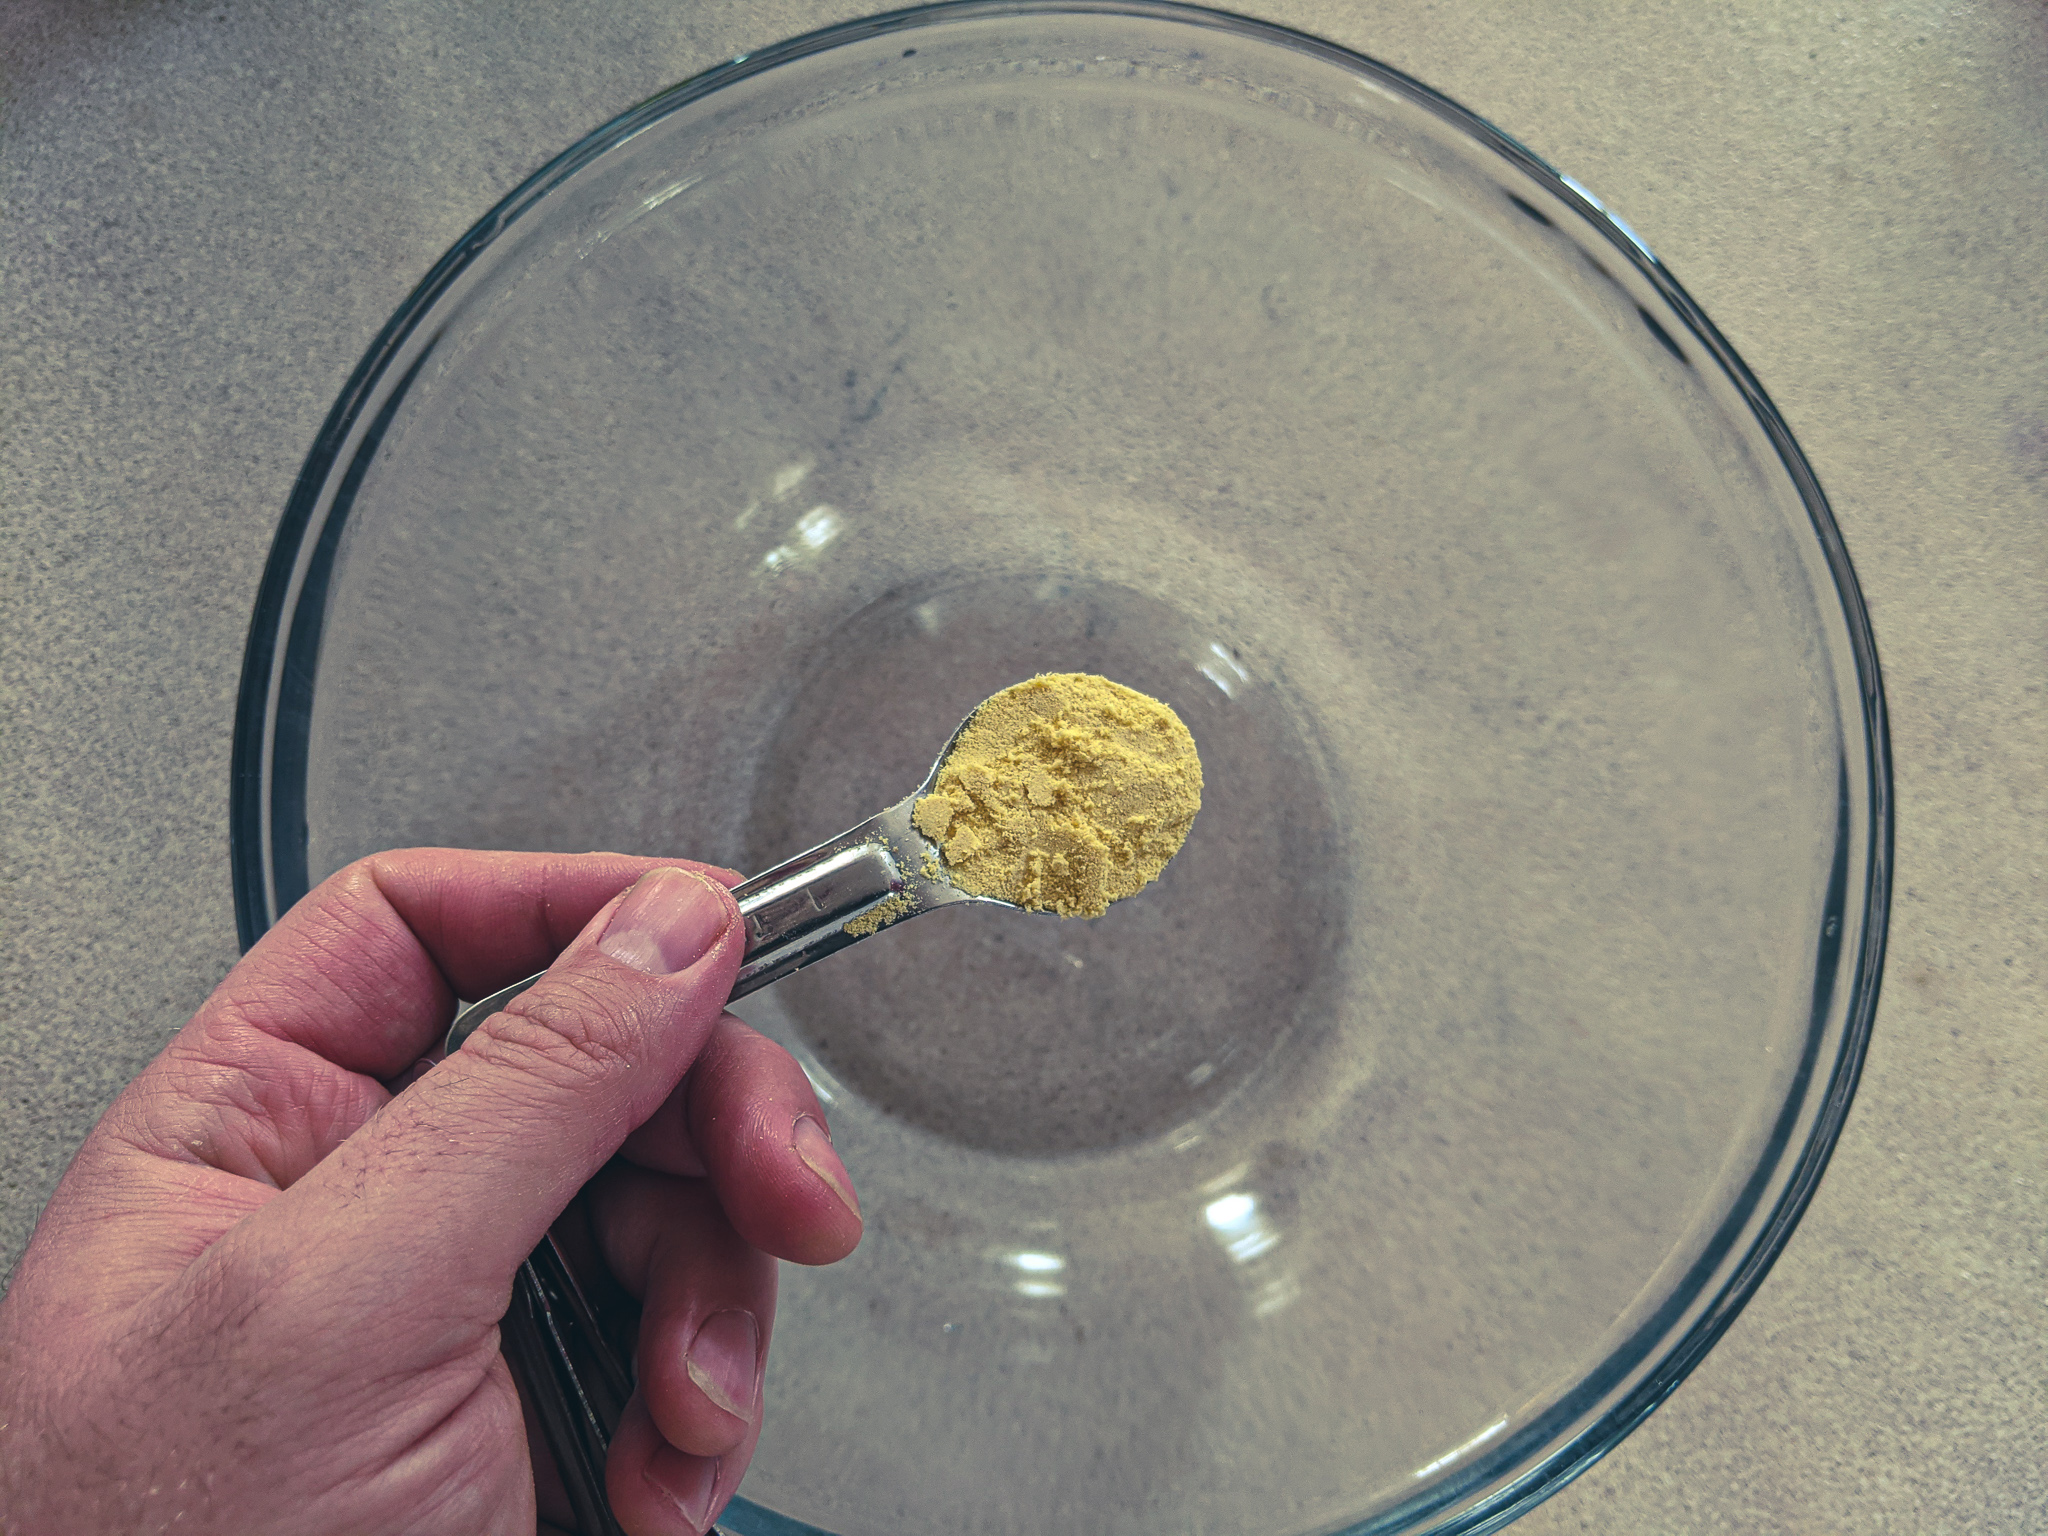
If you search “Cajun Seasoning Recipe” into Google, you will get somewhere around 10 million results. So, if you want to make your own Cajun Seasoning, there are more than enough options out there. Usually, I would opt to make my own. However, I bought this bottle of Club House Cajun Seasoning for my niece a few months ago when she was house-sitting for us. Instead, then let it sit in the cupboard and go to waste, I figured I should use it up.
To make the rub for the salmon, I combined 1 tbsp of the Cajun Seasoning with 2 tbsp of olive oil and mixed it up. I rolled two salmon fillets in the mixture, wrapped the whole thing in plastic wrap and put it in the fridge for two hours to marinate.
Grilling The Salmon
After the salmon had been marinating for about one hour and forty-five minutes, turn on your grill to medium-high heat to preheat it. Bring the temperature up to 400°F and let it heat until the salmon is ready to grill. The goal of this heating is to get the temperature of the grill grates to 400°f. This heat is integral in making sure that the salmon doesn’t stick, or at least sticks less. Once the grill is hot and has had time to heat (about 10 minutes), the salmon can go on.
Put the salmon on the grill “presentation side” down. The presentation side of the salmon is the better-looking side, usually the side that didn’t have (or doesn’t have) skin on it. Cook the salmon, without touching it, lid down, for 5 minutes. Using tongs and a spatula, carefully flip the salmon and cook it for another 5-6 minutes. The cooking time will depend on how thick your salmon is, and how well done you like it to be. I prefer my salmon to be a little undercooked, but cook yours as you see fit. Once the salmon is cooked, remove it from the grill and serve it with the salad.
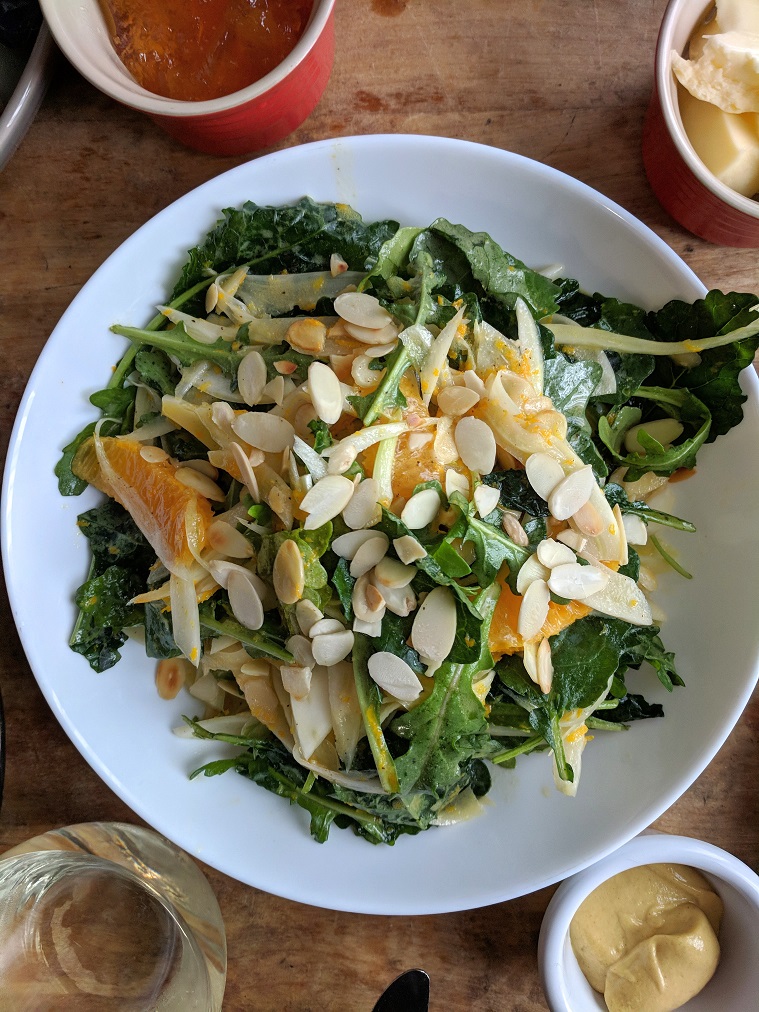
Citrus Salad
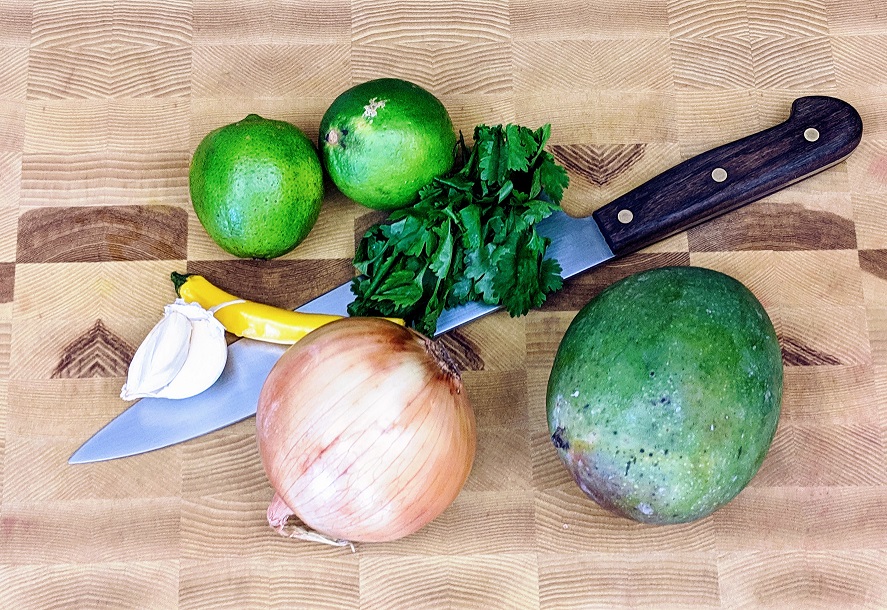
The base for the salmon is a basic citrus salad that contains only a handful of ingredients. However, there is one part of making this that can be a bit tricky. The key to this salad is the segments of orange and lime. To create these citrus segments, use a sharp knife to cut them free from the fibrous part of the orange. Let’s take a look at how to do this.
How to segment an orange.
If you look at the second picture in the gallery below, you will see an orange with the top cut off. All those white lines, the ones that make it easy to pull an orange apart, those are what divide the orange into segments. For this salad, you want only the orange segment and not the white lines. Now, look at the third picture in the gallery. In the third picture, you can see that I am using my knife to cut inside those white lines on both sides of the orange segment. Cut as close to those lines as possible so that the segments release from the orange. Put those segments into a bowl, and squeeze whatever is left of the orange to get any remaining juice out.
This segmenting process may seem like a pain, and in some ways, it is, but it has two primary purposes. The first is that the segments are more enjoyable to eat without that fibrous membrane. The second purpose is that doing this allows you to have orange segments and fresh orange juice while only using one orange.
How to peel an orange using a knife.
Peel the orange, using a knife and cut as close to the orange flesh as possible. Make sure that the pith (the bitter white partof the orange) is removed while avoiding cutting into the orange as much as possible. I find the easiest way to do this is to cut the top and bottom off of the orange, place it on your cutting board, then use a sharp knife to cut the skin away. As you cut the skin away, it is crucial to curve your blade around the shape of the orange; this will cut down on waste.
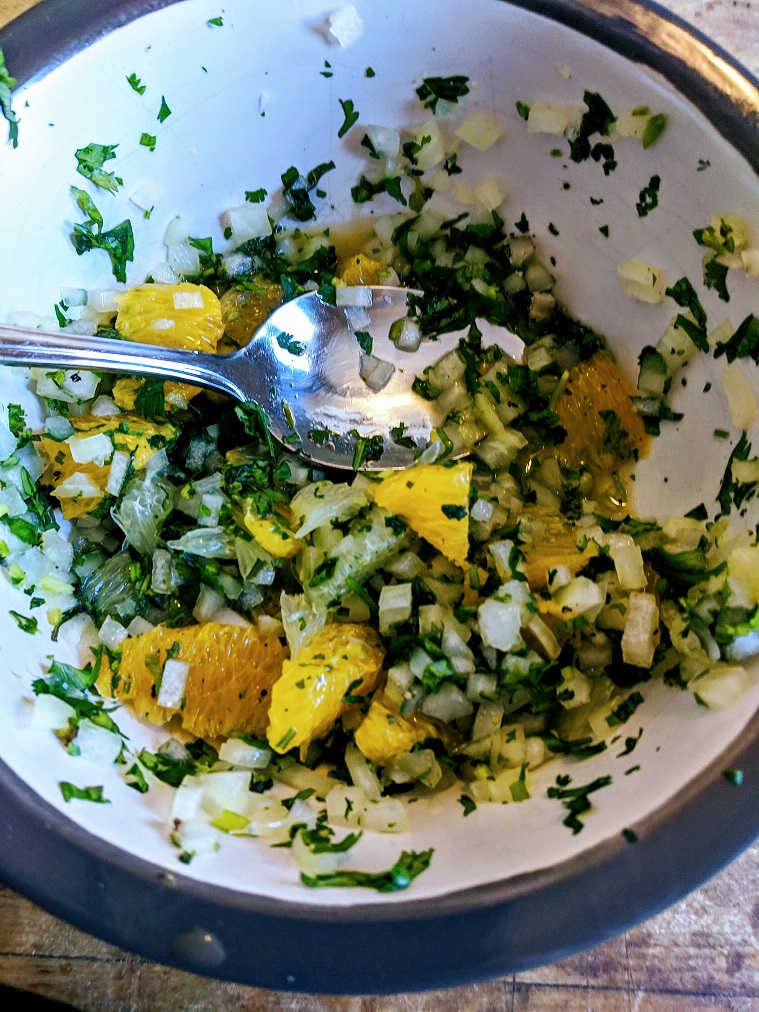
Making the Citrus Salad.
Once the orange is segmented, zest the lime into the bowl, then segment that as well. Add in 1 tsp each of mustard and honey, along with a pinch of salt and pepper. Gently whisk the contents of the bowl, trying not to break the citrus segments apart as much as possible. Now, slowly whisk 1/4 cup of olive oil into the dressing, then add in the arugula, toss, and serve.
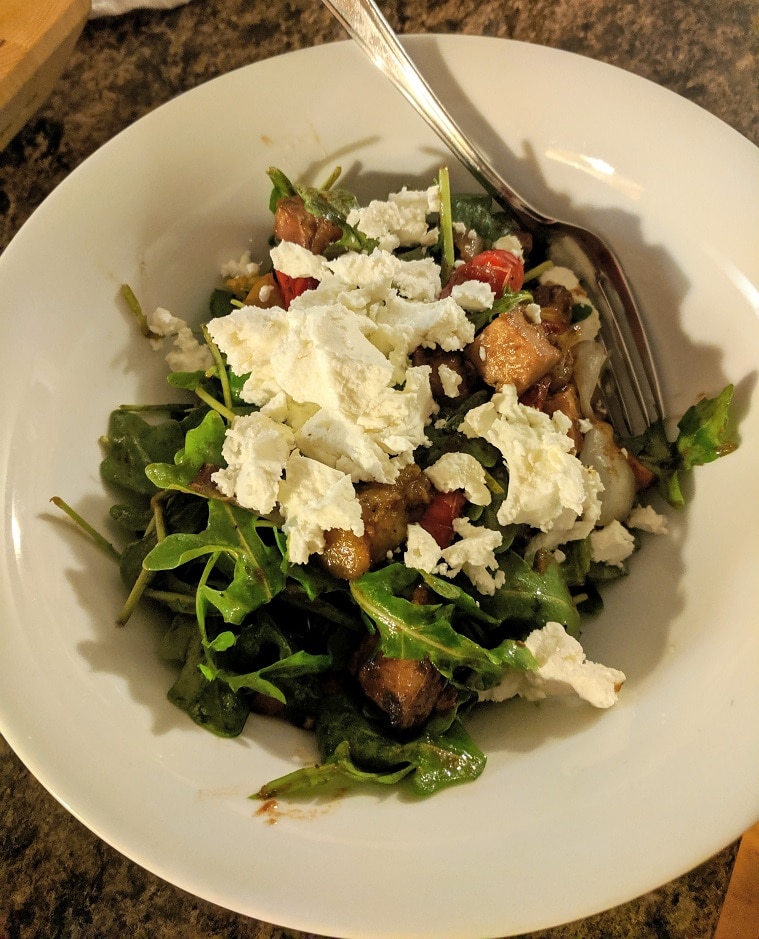
Putting it all together
The final step is to combine the salmon and the salad. Put the dressed arugula in a bowl and top with the salmon. Spoon some of the dressing and a few of the citrus segments over the salmon, and enjoy.
Cajun Grilled Salmon and Citrus Salad
Cajun Grilled Salmon, On Top Of Arugula With Citrus Vinaigrette.
Keyword: Barbecue, Best Pasta Salad, Citrus, Salmon, Summer Barbecue, Summer food
Servings: 2Servings
Author: Chef Ben Kelly
Ingredients
Cajun Salmon
2filletsSalmon
2tbspOlive Oil
1tbspCajun Seasoning
Citrus Salad
1lgOrange, Cut into Segments
1Lime, Zested and Cut into Segments
1tspHoney
1tspMustard
4cupsArugula
1/4cupOlive Oil
Salt and Pepper to taste
Instructions
Salmon
Combine the olive oil and Cajun seasoning in a medium bowl.
Roll the salmon in the Cajun Seasoning Mixture to coat it. Cover the bowl with plastic wrap and put it in the fridge to marinate for 2 hours.
Preheat your grill to 400°f for about 15 minutes.
Depending on how thick your salmon is, cook it 3-6 minutes per side over medium heat with the lid down.
Once the salmon has reached your desired level of doneness remove it from the grill and place it on the salad.
Citrus and Arugula Salad
Peel a large orange and using a small sharp knife cut between the membrane of each segment so that each segment comes away freely leaving the fibrous membrane behind. Once all of the orange segments have been cut free, squeeze the juice out of the remaining bit of orange into a bowl with the segments.
Using a microplane, grate the zest of the lime into the bowl with the orange. Once zested, peel the lime and segment it as you did with the orange, then squeeze any juice out of the bit that is left behind.
To the bowl with the orange and lime segments and juice add the honey, and mustard then gently whisk to combine.
Slowly whisk in the olive oil, then season to taste with salt and pepper.
Toss the arugula with the dressing divide it among two bowls and top with the Cajun Grilled Salmon. Finish the salad by spooning the citrus segments and dressing over the salmon.
The most difficult part of this salad is segmenting the citrus, and once you get the hang of that, you can do it in a minute or two. I promise, it is worth the effort. If you are looking for something light, with lots of fresh flavour, this Cajun Grilled Salmon Citrus Salad, is exaclty what you’ve been looking for.
Thank you for reading! If you enjoyed this post share it on Facebook or Pinterest because that will help me continue to grow. If you did enjoy this post you may also like my 5 Best Pasta Salad Recipes. Subscribe to Chefsnotes.com at the top right of this page to get Chef’s Notes in your inbox.
Have you ever dreamed of becoming a pasta salad master? Yeah, me either, but after having made all 5 of the pasta salads featured in this post yesterday, I’d say that I’ve come pretty close to that master title. So, why did I make 5 Pasta Salads in one day? Am I sick? Do I have a screw loose? Possibly, but more importantly, I am so excited to share these with you that I didn’t want to wait another second. So, I wrote the recipes and tested them all yesterday, and I am glad that I did because I think that you are going to love these.
Each one of these 5 Pasta Salad recipes has loads of flavour, and you can make them in around 20 minutes. I highly recommend that you try all of these and pick which ones are your favourites then add them to the regular rotation of dishes that you cook. Just don’t make them all at once like I did because it’s a lot of pasta salad. Each one of these recipes makes about 4 cups. If you’re keeping track, that means that I made about 20 cups of pasta salad in one day. Also, I used gluten-free pasta to make all of these which kind of limits the shapes of pasta that I can use. So, if you are using regular pasta, feel free to mix up the shapes a bit.
Alright, let’s get to it, here are my…
Greek Pasta Salad
The first pasta salad that we are going to look at today is a Greek Style. I took my best Greek Salad Recipe, threw out the lettuce, and added some pasta. It sounds easy because it was. It was also delicious. This pasta salad is best left to marinate in the fridge for about an hour before eating. This marinating time allows the pasta to absorb the flavour from the vegetables and dressing. If you like Greek Salad, you are going to love this version.
Making the dressing
To make the dressing for the Greek Pasta Salad, start with some Red Wine Vinegar then add a bit of prepared mustard, oregano, garlic, lemon juice, and honey. See the recipe below for the measurements. Once those first ingredients are in the bowl, whisk them together and then whisk in some olive oil. Taste the dressing, season it with salt and pepper to your liking and its done.
Making The Greek Pasta Salad
To the Greek dressing, add a 1/2 cup each of green bell pepper, red onion, pitted olives, and feta cheese along with 1 cup of cucumber. Next, cut 12 cherry tomatoes in half and add those to the other ingredients along with 8-10 fresh chopped mint leaves. The final step is to add in 2 cups of cooked pasta (I used gluten-free penne, but you don’t have to) and gently stir until everything is mixed. Put the salad in the fridge for an hour or two and enjoy!
Greek Pasta Salad
Take everything you love about Greek Salad, take out the lettuce and add in some pasta. You can't go wrong with this delicious Greek Pasta Salad
Keyword: Best Pasta Salad, Greek Pasta Salad, Greek salad, summer cooking, Summer food
Servings: 4cups
Author: Chef Ben Kelly
Ingredients
2cupsCooked Penne Pasta
1cupDiced Green Pepper
1/2cupDiced Red Onion
1cupDiced Cucumber
1/2 cupCrumbled Feta Cheese
1/2 cup Sliced and Pitted Olives
8-10Mint Leaves, Chopped
12Cherry Tomatoes, cut in half
Dressing
2tbspRed Wine Vinegar
2tbspOlive Oil
2-3tspLemon Juice
1tspPrepared Mustard
1tbspDried Oregano
2 tspChopped Garlic
1tspHoney
Instructions
In a medium mixing bowl combine all of the dressing ingredients then whisk to combine them. Season the dressing with salt and pepper to suit your taste.
Add the salad ingredients into the bowl with the dressing and toss or gently stir to combine.
Cover the salad and put it in the fridge to marinate for at least one hour before serving.
Caprese Salad is an Italian dish made of seasoned tomatoes, fresh mozzarella, olive oil, balsamic vinegar, and fresh basil. If you’ve never had a Caprese salad, I can’t suggest enough that you do. It is one of the most straightforward and most delightful salads you will ever taste. With a sweeping stroke of genius, I added pasta to it. Okay, it’s not that big a deal, and I am probably not this person to do this, but that doesn’t take away from how delicious it is.
Making the dressing
To start the salad, we first have to make a simple dressing of equal parts of olive oil and balsamic vinegar. To the oil and vinegar, add a clove of thinly sliced garlic and let it sit for about 5 minutes. This time will allow the garlic flavour to mellow out a bit and dissipate into the oil.
Making Caprese Pasta Salad
To the olive oil and balsamic vinegar, add a bunch of halved cherry tomatoes, some prepared pesto, a container of bocconcini, salt, pepper, sugar, and finally some pasta. As with the Greek Pasta Salad, this is best left in the fridge for an hour before serving.
Caprese Pasta Salad
Tomatoes, Basil, Pasta and Fresh Mozzarella, Combined and then Dressed with Olive Oil and a Little Balsamic Vinegar. Is this your new favourite pasta salad? Possibly.
Nicoise salad is a French Salad from the city of Nice. How could it not be good? Most chefs generally regard it as the best salad ever put to the plate and for a good reason. Although this pasta salad version would be considered blasphemy by some, it is regarded as delicious by most. Let’s take a look at how to make it while ignoring the naysayers.
Making the dressing
To make the Nicoise dressing start with a bit of red wine vinegar, then add grainy mustard, honey, garlic, parsley, lemon juice, salt and pepper. Mix all of those ingredients and then whisk in some olive oil. Taste the sauce and adjust the seasoning with salt and pepper as needed.
Making Nicoise Pasta Salad
Once the dressing is ready, add in 1 can of drained tuna, some olives, blanched green beans, tomatoes, and some cooked pasta. Mix the salad and garnish with a couple of hardboiled eggs. If you are unfamiliar with this salad, it may seem odd at first sight, but of the 5 pasta salad, this is hands down my favourite. Do not skip this salad; you don’t know what you’ll be missing if you do.
Nicoise Pasta Salad
Nicoise salad is often considered by Chefs to be one of the best salads ever created. Now, you can have it in pasta salad form.
My favourite sandwich of all time to eat is the clubhouse. (It also happens to by my least favourite sandwich to make in a restaurant.) I don’t know why I love it so much, but I always have. When I was thinking about this post, this was the first salad that came to mind. It was a no brainer that a clubhouse sandwich would make a fantastic pasta salad. I decided to go with an avocado sriracha mayo to make it a little creamy and a little spicy, and I’m glad I did because I found that that combination made the salad. Okay, let’s take a look at how to make it.
Making the dressing
To make the clubhouse pasta salad dressing, mash an avocado and combine it with mayo, lime juice, salt and pepper, sugar, and sriracha. Taste the dressing and adjust with salt, pepper, and lime juice to suit your taste.
Making Creamy Avocado Club Pasta Salad
To the avocado mayo add some diced cooked chicken, crispy bacon, and cherry tomatoes along with the pasta. Mix the salad, plate it, and garnish it with aged cheddar cheese and parsley. I’ve to tell you, this is something truly special.
Creamy Avocado Club Pasta Salad
You love a good clubhouse sandwich, now you'll love it as a pasta salad. No need to worry about stabbing yourself in the face with those frilly toothpicks just to get the flavours you love.
This final pasta salad is my version of the classic pasta salad I ate at every post luck growing up. What is special about this pasta salad is that it makes a great base to build your own recipes upon. You can easily switch the dressing or add some other ingredients and you have a compleltety new salad to call your own.
Making the dressing
For my version of this classic pasta salad, I start with an all-purpose dressing (it works for coleslaw and potato salad too) made of mayo, mustard, white vinegar, salt, pepper, and sugar. You can add herbs like parsley or dill to this as well, but I decided to keep it simple.
Makin Classic Pasta Salad
Into the dressing goes carrot, celery, and red onion along with the pasta. That’s it, that is the whole salad. The only thing left to do is to let the salad sit in the fridge for two hours before serving then enjoy it!
Classic Pasta Salad
This classic Creamy Pasta Salad is a classic for a reason.
Keyword: Best Pasta Salad, Classic Cooking, Classic Creamy Pasta Salad, Pasta Salad, summer cooking, Summer food
Servings: 4cups
Author: Chef Ben Kelly
Ingredients
2cupsCooked Macaroni Pasta
1/2cupVery thinly sliced Carrot
1/2cupThinly sliced celery
1/2cupThinly Sliced Red Onion
Dressing
1/4cupMayo+ 2 tbsp if you would like it more creamy
1tbpsWhite Vinegar
1/2tspSugar
1tspPrepared Mustard
Salt and Pepper To taste
Instructions
Mix all of the dressing ingredients together in a medium mixing bowl.
Add the remaining ingredients and toss or gently stir to combine.
Cover the salad and let sit in the fridge for at least 1 hour before serving.
Notes
If you would like the dressing a little more creamy you can add an additional 2 tbsp of mayo. Also, dill and or parsley would make a nice addition to this salad.
I hope that you take these recipes and put them to work for you, that’s what I made them for. I want you to cook them, eat them, serve it to the people that you care about, and enjoy them. But, I also hope that you see how you can create your own pasta salads with just a little creativity and effort.
Have a great week, everyone! Thank you for reading! Remember to subscribe to the blog, so you never miss a post again and share this post because that will help the blog grow and continue creating content like this. If you like this post you may also like 5 Small Changes That Will Have A Major Impact On Your Cooking.
On Friday I did a post about how to make Delicious and Tender Ribs. As part of that meal, I made a really delicious Creamy Avocado and Corn Salad. I had originally planned on including that recipe in rib post, but the post was becoming a little too long so I decided to make it a separate post. Based on the number of requests I have gotten for the salad recipe, I think I made the right choice.
Years ago I went over to my sister’s house for dinner. I made tacos and she made a really delicious salad with cherry tomatoes, avocado, and poblano peppers. It was this salad that I had in mind when I created the Creamy Avocado and Corn Salad for today’s post. The salad we are going to look at today is a lot different than the salad my sister made for me all those years ago, but it has the same feel as a light and summery salad. Let’s take a look.
This is how to make…
Creamy Avocado and Corn Salad
Getting Started
The only part of this salad that needs to be cooked is the corn. So, to start I boiled 1 cup of corn niblets until they were tender. Once cooked, I drained the corn and rinsed it with cold water. With that, I was ready to get going on the rest of my salad.
Before we get going I want to talk for a second about the avocado in the recipe. It is really important that the avocado be very ripe. It should be just on the brink of being overripe. That softness is what gives the salad it’s creaminess. If you can only find hard avocados cover them with flour and let them sit for a day or two. There is an enzyme in the flour that will speed up the ripening process. If you can’t wait a day or two you can use a 1/2 cup of prepared Guacamole in place of the avocado.
Okay, let’s get to it.
Putting the salad together
To start the salad I cut 9 grape tomatoes into quarters and diced a half green pepper. Along with these ingredients, I added the cooked corn, 1 green onion that was thinly sliced, and the avocado as the base of the salad. The fresh vegetables give the salad a terrific texture and fresh flavour, while the avocado adds that creaminess once the salad is mixed up.
Flavouring the salad
The dressing for the salad is made right in the bowl with all the other ingredients and provides a wallop of fresh summery flavour. To start the dressing I added in 1 tbsp each chopped parsley and cilantro. Along with the herbs, I added red pepper flakes, coriander, lime juice and zest, honey, red wine vinegar, olive oil, and salt and pepper. You can find the quantities in the recipe below.
Finishing the salad
Once all the ingredients were in the bowl, I mixed the salad very well, seasoned with salt and pepper, tasted and adjusted as needed. Mixing the salad mashed the avocado and made the dressing very creamy. With the salad all mixed up and ready to go, I covered it with plastic wrap and put it in the fridge for an hour. This resting period is very important in order to maximize the flavour of the salad. Letting the salad hang out in the fridge allows the spices time to open up, and for the other flavours to blend and mature. To better understand this change take note of how the salad tastes before and after it is put in the fridge.
Creamy Avocado and Corn Salad
The perfect side dish for your next potluck, cook out, or barbecue.
I am very confident that this salad is going to quickly find its way into your regular summer rotation. It is creamy and crunchy. It’s got loads of flavour, and it comes together very quickly with basic ingredients. A definite must-try.
If you would like to change the salad a little it would be great with the addtion of cooked black beans, fresh jalapeno, and/or some red bell pepper. What other ingredients do you think would make a good addition to this salad?
Thank you for reading and remember to subscribe to the blog so you never miss a post again. And, if you enjoyed this post please remember to share it! Have a great Monday everyone.
Hello everyone! First of all, this blog post is a day late. I’m still in the process of moving (actually finished yesterday), and I got stuck at my old apartment with no internet. Usually, I would just go to a cafe or something, but obviously, that is out of the question right now. Anyway, I’m sorry for the delay.
Today, as we progress through my free basic cooking course, “Kitchen Clueless,” we will be learning about understanding salads. What does that mean? Well, we will take a look at different kinds of salads, dressings, and everything in between.
The salad comes in many different forms and flavours. It actually sometimes seems as though the term salad is so broad that it could mean just about anything. Really, it can. But to keep this simple, we are going to narrow this down a bit. We are going to separate this into two main categories, green salads and everything else. The meaning of green salad should be pretty obvious. It refers to any salad with a base of leafy greens such as lettuce or spinach. Everything else is…well, it’s everything else that we call a salad.
We’ve all eaten green salads. Everything from spinach salad to Caesar salad to tossed salad falls in this category. Although those salads may make up some of the most common leafy green-based salads, they are by no means the only ones. There is a seemingly unlimited combination of greens and ingredients that can be used to create delicious green salads.
Leafy greens make up the base of our salads. As the base, they provide a lot of flavour and texture. So, the type of green we choose for our salads is actually pretty important. It sets the tone of the salad as a whole.
With so many options out there for leafy greens, it can be hard to decide which one is best for the salad we want to make. If we make the wrong choice, we could end up overpowering the other ingredients. There is also the possibility that we choose too soft greens to pair with our garnish or dressing. This can result in soggy greens.
Let’s look at some common greens and the types of dressings and garnish we can pair with them.
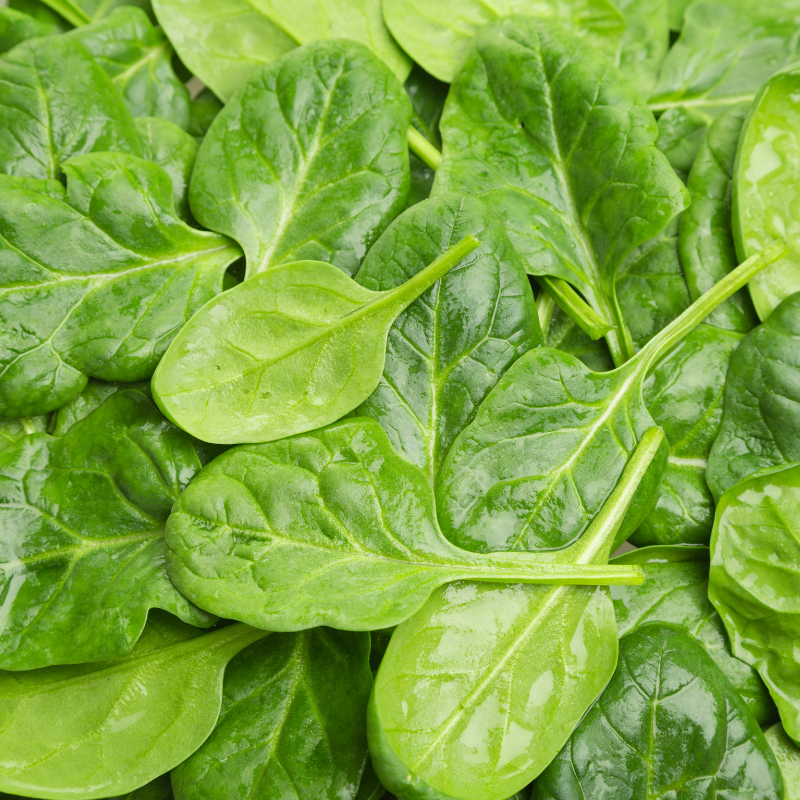
Baby Spinach
Baby spinach is a hearty green with a fairly mild flavour. This green can hold up to just about anything. It may even be served with a warm vinaigrette and garnish though this is more of an autumn-style salad.
Baby spinach does really well when balanced with sweet and salty. Sweet ingredients like fresh or dried fruit and berries, or even candied nuts work very well. Also, sweeter vinaigrettes like maple, honey Dijon, and balsamic all work very well.
Bacon is always a great choice to bring that salty element to a spinach salad. It could also come from salted nuts or slightly salty cheese like parmesan. Speaking of cheese, goat cheese and spinach are always good friends.
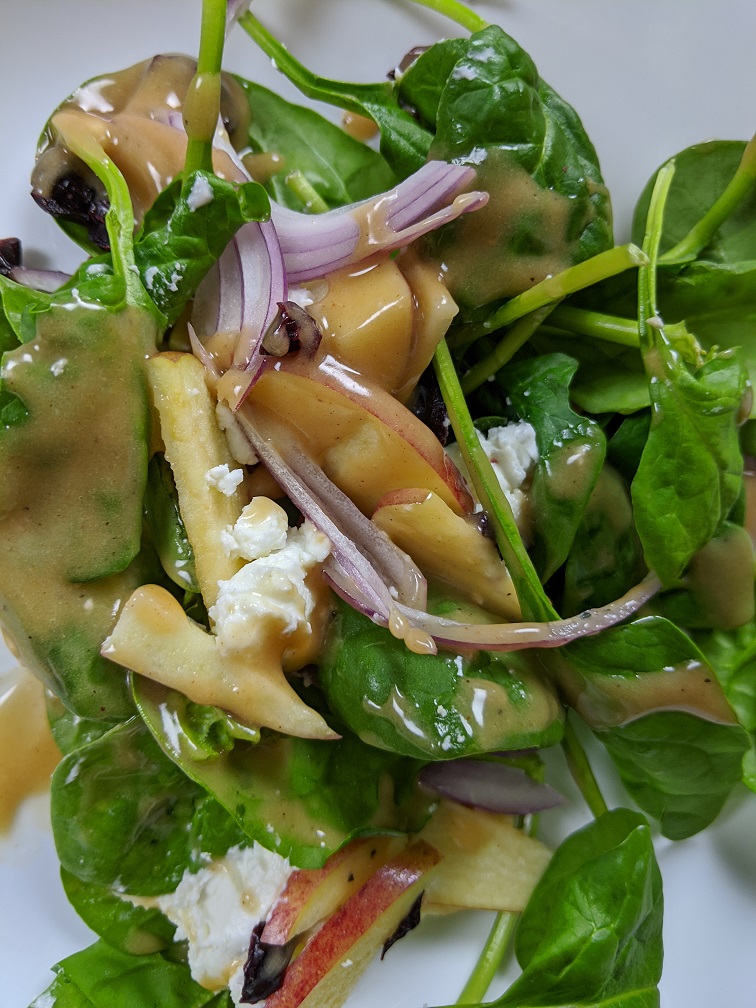
An example of a classic spinach salad would have spinach, red onion, bacon, egg, and poppy seed dressing. Simple, classic, and delicious. The picture below has red onion, goat cheese, apple, dried cranberry, and a maple vinaigrette.
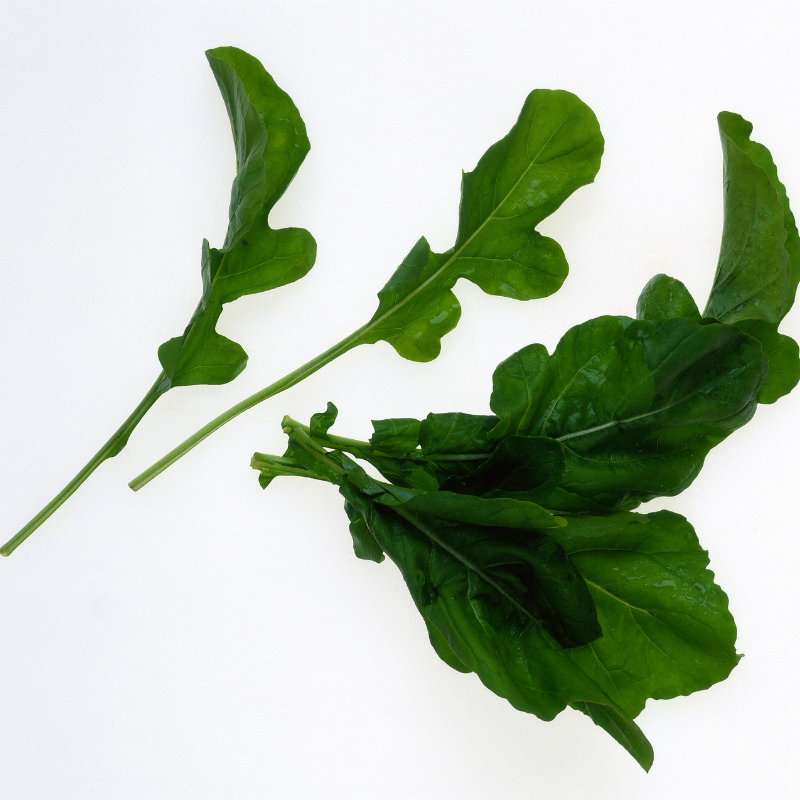
Arugula
Arugula, also known as rocket, is a hearty green with a complex peppery, nutty, spicy flavour. Like spinach, arugula can hold up to just about anything. It is commonly served as part of a mixture of greens though it is delicious on its own.
Typically, salads made from arugula are very simple. This simplicity is due to the complexity of flavour coming from the arugula itself. There is no need to add a bunch of extra stuff. Having said that, an acidic vinaigrette balances that complexity very well.
Generally, I serve arugula with a simple lemon vinaigrette. To this, I add some segmented oranges, a little shaved parmesan or Asiago, and some toasted almonds. Anything along those lines will work well.
Mesclun
Mesclun is really just a mixture of tender baby greens. These greens are typically a little more fragile than arugula or spinach, and they have a more mild flavour. They do add a lot of colour to any salad.
The great thing about this mixture is it generally tastes great on its own with a light vinaigrette. It doesn’t really need much else. Of course, it can be used to make a salad, but it is important to be light-handed with the garnish and dressing as the greens will literally and figuratively collapse under the weight of many ingredients. A few thinly sliced or shaved fresh vegetables and a light dressing is all you need. This makes a really great garnish salad.
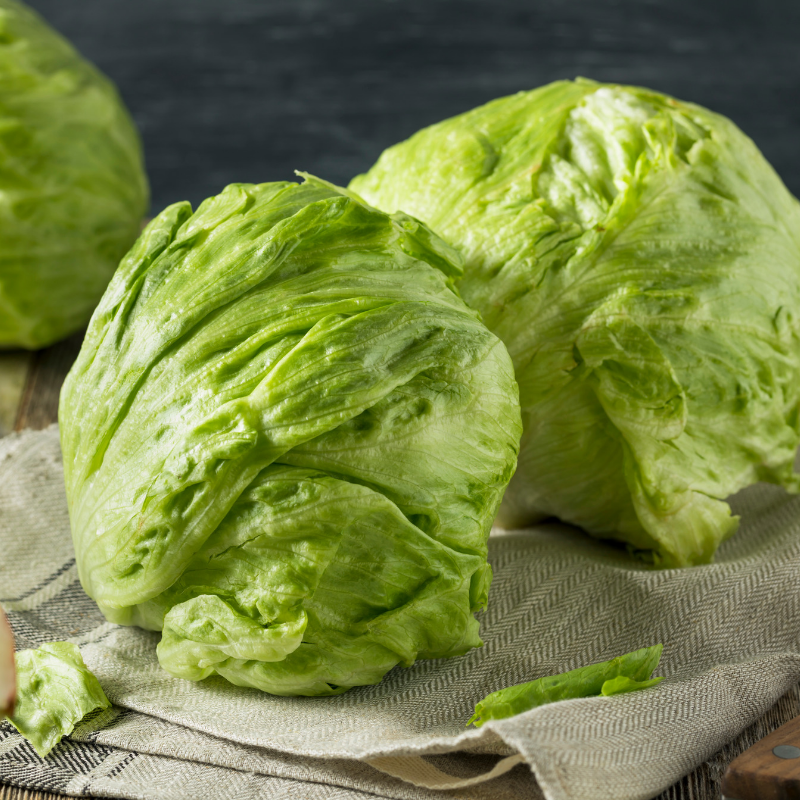
Iceberg Lettuce
Iceberg lettuce is fantastic for tossed salads. It holds up well against lots of vegetables and thick, rich dressings. Iceberg has a very mild, neutral flavour and a pleasant crisp texture that is unique and amazing.
I always think of pairing iceberg lettuce with whatever vegetables are freshest and lots of them in terms of garnish. For the dressing, generally something creamy like ranch or french. We want a dressing that will coat the lettuce and vegetables and provide a lot of flavours.
Iceberg lettuce often gets a bad rap, but I think it is kind of the rock star of the salad world for my money. To put things into perspective, mesclun would be like an excellent classical musician. Arugula would be a jazz drummer, and spinach would be a folk singer.
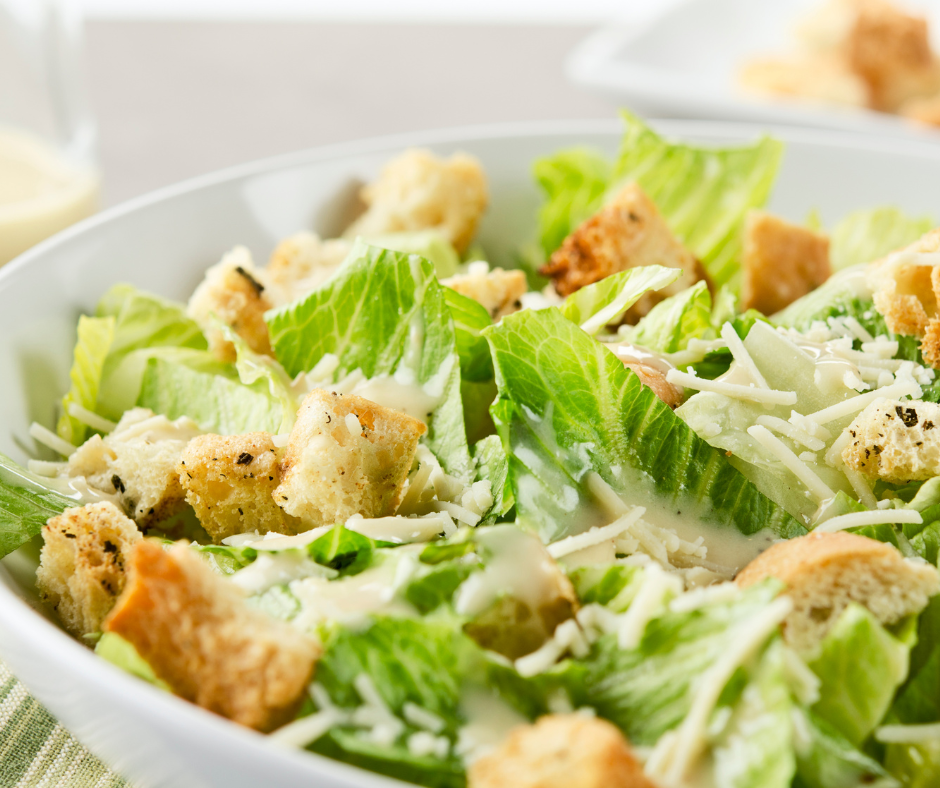
Romaine Lettuce
Romaine lettuce is most commonly associated with Caesar salad. This is obviously a widespread use for this lettuce, but it is not the only one. In North America, you will commonly see Romaine in Greek Salads, and it is regularly used in Middle Eastern cuisines. Romaine is surprisingly hearty lettuce and can even be cooked if desired.
Although I am a fan of Caesar salad and Greek Salad, I prefer to use romaine lettuce in bowls like a burrito bowl, shawarma bowl, or something like that. The reason is that romaine holds up well to heat. So, if I add the romaine to the bowl with hot rice, beans, chicken, some salsa, and cheese, I know that the lettuce will hold up. Really, romaine to me is just great, versatile lettuce.
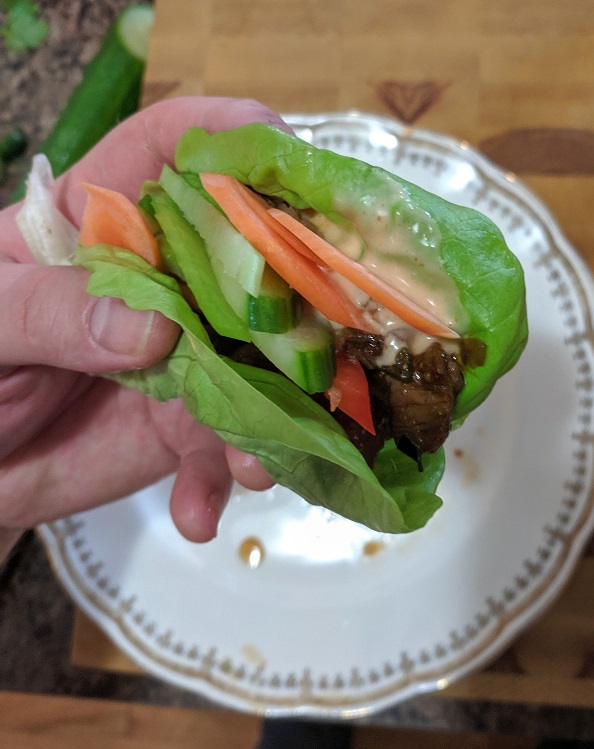
Bibb Lettuce
Bibb Lettuce, also known as Boston Bibb, or Butter Lettuce, has a sweet, silky flavour and a very tender texture. Generally, when used to make a salad, bibb lettuce is served whole or half, drizzled with dressing and sprinkled with garnish.
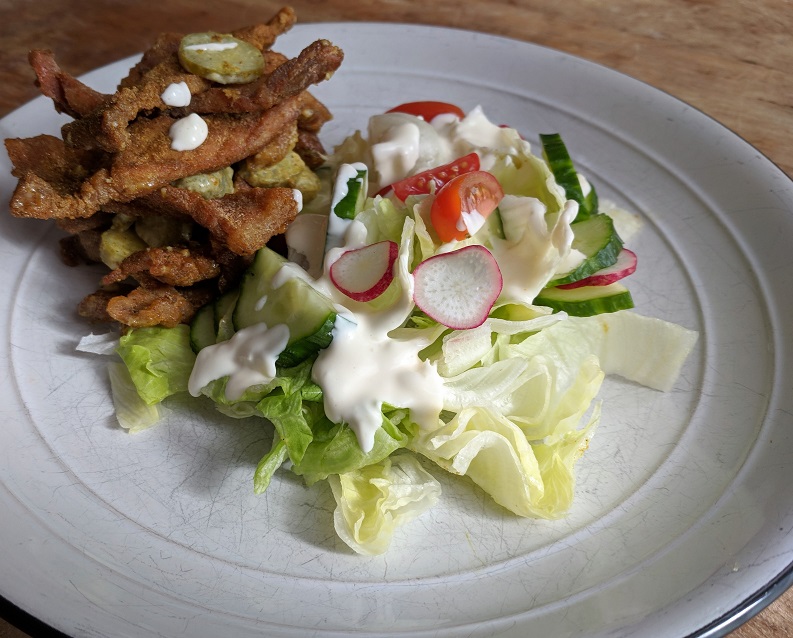
I actually prefer to use Bibb Lettuce for salad wraps like the one below. I see them more like a soft, green taco shell than for salad, though they do work for salad as well.
I could spend all day just talking about different greens and lettuces, but we need to move on. I think that this should give you a few good ideas and a decent starting place. I think really the key is to try different greens and experiment a little. You never know what you might fall in love with. Now, let’s take a look at some common dressings.
Salad Dressing
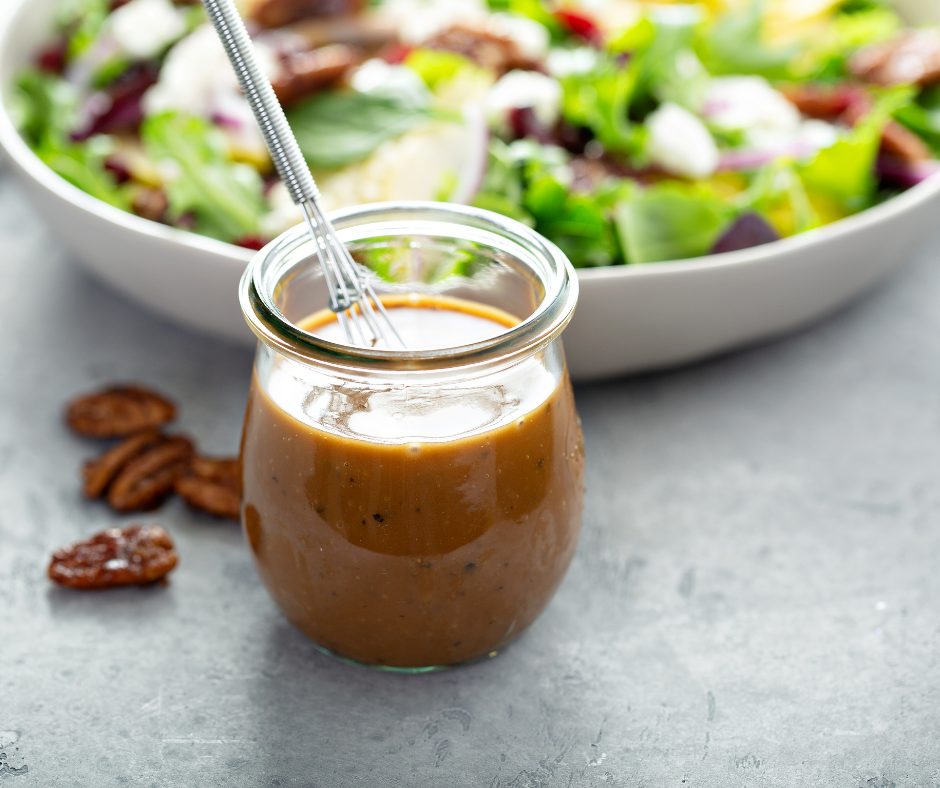
A good salad dressing should coat your salad but not make it soggy or heavy. The dressing should be vibrant and complement your salad, yet not overpower it. Choosing the right dressing for your salad is just as important as all the other ingredients. You need to find a balance of flavour. The best way to balance the flavour of a salad is to make your own dressing. It is easy, quick, cheap, and delicious. I would venture to guess that you already have all the ingredients you need to make a great salad dressing on hand. You don’t need to buy expensive ingredients. Just use what you have.
There are two main types of salad dressings. The first type is a vinaigrette which is based on vinegar and oil. The second type is egg and oil-based like Caesar Salad dressing. The two types of dressings have a lot in common. For starters, they are both emulsification of oil and another liquid. Secondly, they are both made in almost the same way. Finally, the principles behind both types of dressings are the same. There is one main difference between the two types of dressings. An egg-based dressing is permanent emulsification. A vinaigrette dressing is temporary emulsification. This means that unless you use commercial binders as they do in store-bought dressings, your vinaigrette will eventually separate. This is fine. When it does separate, and you want to use it, just give it a big shake, and it will come back together.
What is emulsification? Emulsification is a mixture of two or more liquids that usually don’t mix, such as oil and water. Emulsification is facilitated through the use of stabilizers. In the case of an egg-based dressing, the stabilizer or binder is actually the egg itself. More specifically, it is a phospholipid in egg yolks called lecithin, which acts as a binder. In a vinaigrette, ground mustard seeds or garlic can do the same thing as the egg yolk in an egg-based dressing.
As I said, the process for both types of dressing is pretty much the same. You start with your base. If you are making an egg-based dressing, this would be your eggs. You would begin with your vinegar and a stabilizer such as ground mustard or garlic for a vinaigrette. You add your oil be it olive oil, nut oil, or a neutrally flavoured oil such as canola. The key here is that you add it slowly. If you add your oil too quickly, you will over saturate your binder, and your emulsification will break. After all your oil has been absorbed, you add the rest of your ingredients, such as flavourings and seasonings. Alternatively, you can add your flavourings before your oil, but I find it better to do it after.
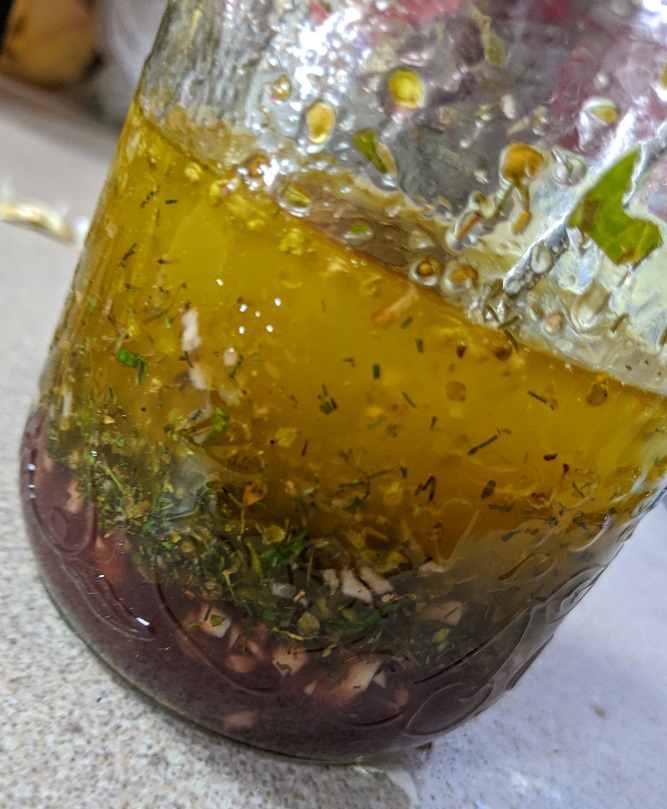
Vinaigrette –
When making a vinaigrette, you have a lot of options of how to flavour it. This flavouring begins with the first few ingredients. You can use different flavoured oils such as garlic oil which is a byproduct of roasting garlic. You can use nut oils or literally any other oil you choose. The same goes for vinegar. Don’t limit yourself to just white vinegar. You can use sherry vinegar, blueberry vinegar, balsamic, cider, white wine vinegar, red wine vinegar. All of these will drastically change the flavour of the vinaigrette. If you are going to use flavoured oils and vinegar, just think about how that flavour will affect the rest of your salad and the rest of the ingredients in your vinaigrette.
I have included a few recipes below for different Vinaigrettes to give you an idea of the possibilities. Once you get the hang of this and the basic understanding, you will be making your own vinaigrette recipes in no time. An important thing to note about Vinaigrettes is the ratio of vinegar to oil. This pretty much stays consistent across the board so remember this. Use 1/4 vinegar to 3/4 oil so, if you want 1 cup of salad dressing. Use 1/4 cup vinegar and 3/4 cup of oil. Stick with that ratio, add whatever else in that you want, and you will be golden.
Basic Vinaigrette
This basic recipe can be used to make thousands of kinds of salad dressings. Change the vinegar and add different ingredients like herbs and garlic to make whatever vinaigrette you would like.
This basic recipe can be used to make thousands of kinds of salad dressings. Change the vinegar and add different ingredients like herbs and garlic to make whatever vinaigrette you would like.
This basic recipe can be used to make thousands of kinds of salad dressings. Change the vinegar and add different ingredients like herbs and garlic to make whatever vinaigrette you would like.
This basic recipe can be used to make thousands of kinds of salad dressings. Change the vinegar and add different ingredients like herbs and garlic to make whatever vinaigrette you would like.
Egg-based dressings are made the same way as basic vinaigrettes. The difference is that an egg is used rather than mustard as the binder. As with a vinaigrette, egg-based dressings benefit from the use of flavoured oils and vinegar. Again, it just comes down to what other ingredients are present in your dressing and your salad.
There is some concern with egg-based vinaigrettes because the egg is used raw. The health department suggests that you pasteurize your eggs first, but no one does this. I think that there is enough acid coming from the vinegar that there isn’t too much worry. Having said that, if you would prefer not to use a raw egg to make a dressing, you can use it instead. If you use mayonnaise as the base, you may have to thin it out with a little more vinegar and then just whisk your flavourings into it. Easy enough.
Some people will use the whole egg for egg-based dressings, and some will just use the yolk. I prefer to use just the yolk. If you are not going to use the egg white, don’t waste it. It can be frozen in a small container and thawed when you want to make a meringue or something like that. Using just the yolk will give me a thicker, creamier dressing than when using the whole egg. You can try both ways and see which one you prefer. The process is the same either way.
One egg yolk can emulsify about one cup of oil. Now, to be fair, egg yolk can emulsify more oil than that, but I find that one cup is kind of the optimal amount. Anything after one cup, and you are risking the structure of your emulsification.
Other than flavoured oils and vinegar, there are lots of things you can add to your dressing to flavour it. Really, just about anything you want. This is where you can get creative. Honestly, add anything you want, from pieces of apple to anchovy, to caramelized onions, to bacon. It really is up to you.
Basic Egg Based Dressing Recipe
A simple and delicious egg-based salad dressing recipe.
While whisking slowly begin to add the oil, just a few drops at a time to begin with.
Once these initial few drops have been absorbed by the egg yolk you can begin to add the oil in a slow steady stream whisking constantly.
If you notice that some of the oil is not being absorbed stop pouring the oil and mix the mixture until the oil is absorbed then being to add the oil again.
Once all the oil has been added and absorbed add the rest of your ingredients and mix them into the dressing.
Add whatever flavourings you would like. Transfer the dressing to a container, cover, and place in the fridge for twenty minutes to allow the dressing to absorb all the flavours.
I said that there were two main types of salad dressing. This is true, but it isn’t the whole truth. Although the two I’ve already mentioned are the two main ones, there is a third. The third type of salad dressing is diary-based. Dairy-based dressings are generally made from fermented or cultured dairy such as yogurt, sour cream, or buttermilk. The dairy-based dressing that really stands out is Ranch. There are some others, but they are generally one-offs rather than really common.
When using yogurt or sour cream, it really just comes down to thin it out with liquid, adding more acid to it and then flavouring it. Buttermilk is usually used with other bases to add a tart creamy flavour.
As we saw a little bit when talking about greens, a salad garnish can be just about anything. Fresh vegetables, fresh or dried fruit and berries, cold sliced meats, cooked or smoked seafood, cheese, nuts or seeds. However, just about anything can be a salad garnish that doesn’t mean that everything should be all the time. What I mean by that is when it comes to garnishing a salad, generally less is more.
As far as I know, there aren’t really any hard and fast rules for when what, and how much of something should be added to a salad. Just use your better judgment. If something seems really out of place, probably avoid it. The only other thing I would say about garnish is to make sure that the ingredients you are using are the best quality they can be. There is no hiding mushy tomatoes or sour grapes.
Other Salads
Salad; “a cold dish of various mixtures of raw or cooked vegetables, usually seasoned with oil, vinegar, or other dressing and sometimes accompanied by meat, fish, or other ingredients.”
The Oxford Dictionary
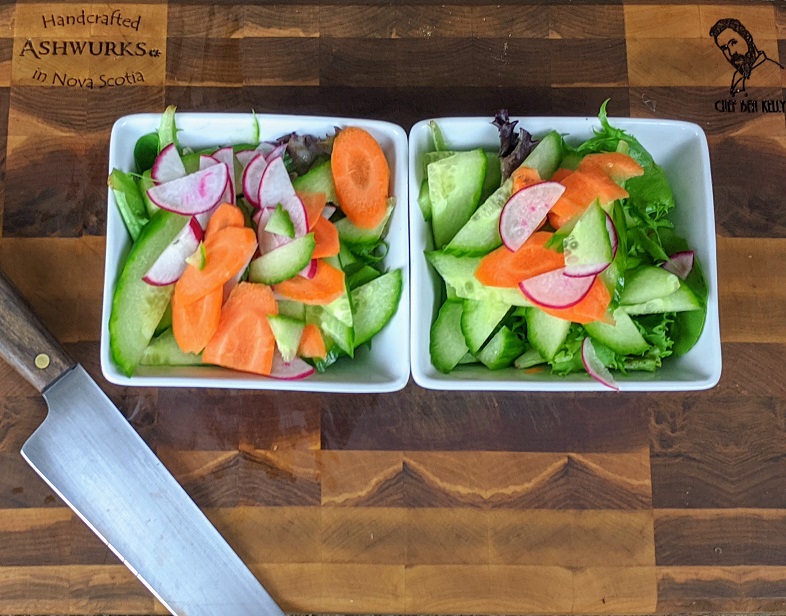
When we think about types of salad that don’t include lettuce, the main one that probably comes to mind, or at least that comes to my mind, is potato salad. Of course, that isn’t the only one. The picture above is for a chickpea greek salad, the recipe for which I will share in a moment. When it comes to makings salads without greens, there really aren’t any rules at all. As the definition above says, a salad can be just about anything. However, I would actually argue that this definition is too narrow. Salads don’t have to be cold. A roasted vegetable salad tossed with arugula can be both hot or cold. Potato salad can be served hot in the French style or cold in the North American style. The point is that anything you want to make into a salad, you can.
All the same, principles apply for these types of salads as they do for green salads. Don’t overpower your main ingredient with dressing or garnish. Don’t make a soggy salad. You can even use all of the same dressings. There isn’t too much else that I can say about the differences and similarities between these types of salads, so let’s actually just look at two specific examples: potatoe Salad and Chickpea Greek Salad.
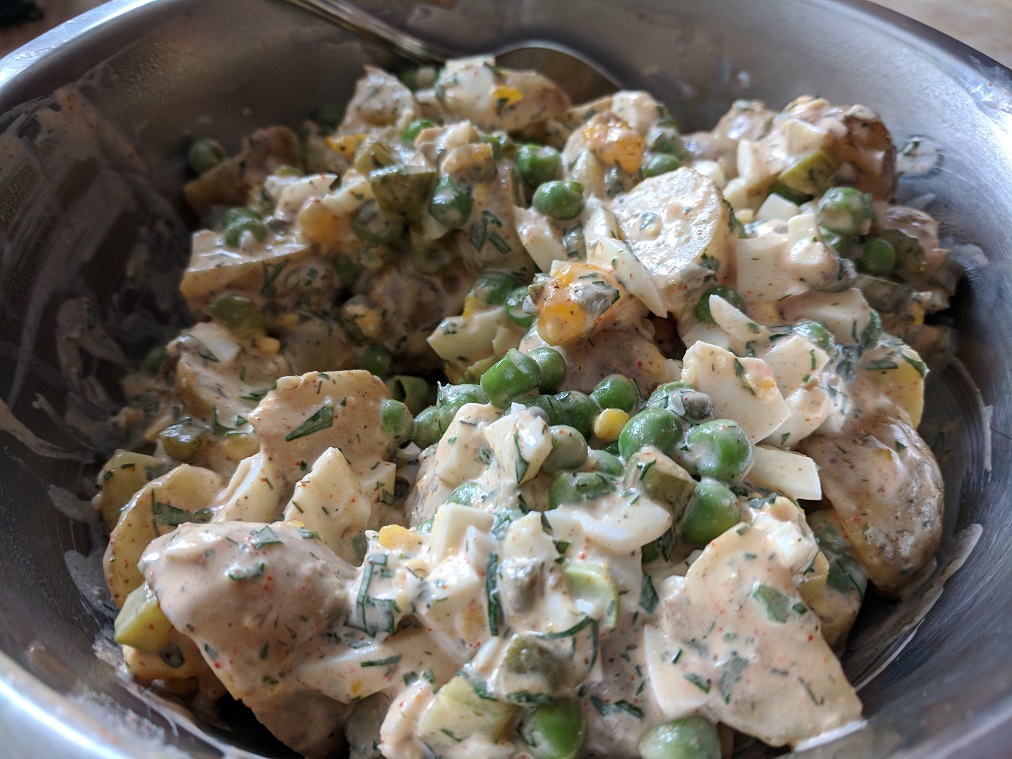
Potato Salad
Potato salad is one of those ubiquitous barbecue and potluck sides that everyone makes. And somehow, everyone thinks they make the best version of it. But if we’re honest, a lot of versions of potato salad are completely terrible. All too often, it just tastes like mayonnaise with a bit of raw onion and potato mixed in. Not very appetizing. But, what makes a good potato salad and what makes a bad one? Let’s take a look.
The do’s and don’ts of potato salad
When making potato salad, there are a handful of things that people often get wrong and also a handful of things that people often get right. The first and most important part of thinking about when making a potato salad is, of course, the potato.
All too often, people will use a variety of potatoes that is watery or mealy. These tend to become waterlogged if overcooked. They also fall apart easily, leaving you with a bowl of mashed potato salad which sounds pretty gross. Generally, a waxy variety of potatoes is best for potato salad. Potatoes like Yukon gold, fingerlings, new potatoes or red bliss are all examples of this. All of these hold their shape well when cooked. This gives texture and body to potato salad.
It is always best to cook the potatoes a day ahead of time and cool them in the fridge. This allows the starches time to set and the potatoes to cool. Plus, it is just less work on the day, and that’s always a good thing.
We’ve talked about potatoes, but what else should go in our potato salad? What about other ingredients?
Other potato salad ingredients
Other common potato salad ingredients include eggs, peas, onion, herbs and bacon. Let’s take a look at each and see what our options are and whether we should use them or not.
In all honesty, whether you put eggs in your potato salad or not comes down to taste rather than right or wrong. I think yes, but that’s because I really like eggs. I find that they add a nice textural change to the potato salad—also, the yolk, even when hard-boiled, can help thicken the sauce. If you are going to use eggs in your potato salad, cook them a day ahead to allow them to cool fully.
I also like to add onions to my potato salad. If you generally add chopped white or red onion to your potato salad, that’s fine. But, maybe mix it up once in a while. Chopped green onion or chives make a great addition to any potato salad. Their flavour is more mellow than white or red onion, and so they have less of a tendency to overpower the other ingredients in the salad. If you choose to add red or white onion to your potato salad, dice them as fine as you can. This will lower their impact and make for a more pleasant eating experience.
Adding fresh herbs to your potato salad is an easy and delicious way to elevate it a little bit. A little parsley, dill, and even tarragon and mint can go a long way. This simple act of adding a few chopped fresh herbs will have such a massive impact on the overall flavour of the salad. I’m serious. You won’t believe the difference a few herbs can make.
Should you put bacon in a potato salad? It depends. I am absolutely not opposed to putting bacon in potato salad as long as it is done for the right reasons. Are you putting bacon in the salad because it adds a smoky, salty element that the salad is missing? Does it add a little crunch that would add to the textural experience? Does it add to the nuance of the potato salad? Or, are you adding bacon to the salad because it’s bacon and bacon is supposed to make everything better?
Over the past decade or so, there has been a trend to add bacon to everything. You’ve heard that bacon makes everything better. Wrong! Don’t get me wrong, and I love bacon. What I don’t love is adding unnecessary ingredients to dishes just for the sake of adding them. Also, adding bacon to a mediocre potato salad does not make it better. It just makes it a mediocre potato salad with bacon in it. Use bacon when it adds to the potato salad, not just because it’s bacon.
I really like adding peas to potato salad. This is in part because my mother always did and partially because I love peas. Should they be in every potato salad? No! I usually only use them when I am recreating my mother’s potato salad or making a version with mint and/or dill in it. Peas go really well with both of these flavours.
I do find that peas add a nice fresh sweetness to the salad. It is just essential that if you are going to use peas, not overcook them. When done right, they add vibrant green colour with a fresh sweet flavour that pops in your mouth. When done wrong, they add a greyish green colour and bland flavour along with a mushy texture. Like bacon, add peas only when it makes sense, not just because they are peas.
The sauce
If the potatoes are the most important part of a potato salad, the sauce comes in at a very close second. There are many variations on potato salad dressing. Mine changes, as I’m sure yours does, based on the other ingredients present in the salad. But mostly, I use a mayonnaise base. Sometimes vinegar or mustard is the base as well, but most often, it is mayo.
I will often take, let’s say, 1/2 a cup of mayonnaise and add 1 tbsp of mustard. This could be regular yellow mustard, Dijon, or grainy mustard. I add 1-2 tbsp of vinegar. This could be red or white wine vinegar, white distilled vinegar, sherry vinegar, or even cider vinegar. I add 1-2 tsp of sugar or honey. I also add a few chopped gherkins or dill pickles which adds a nice crunch and flavour. I finish it with a little paprika, either smoked or sweet. I taste and adjust the seasoning as needed with salt and pepper and add it to the salad.
Making potato salad
I’m not going to give you an actual recipe for this because you don’t need one. But here is a rough idea, Boil about 1 lb of waxy potatoes. Let cool. Dice the potatoes and combine with a couple of boiled eggs, chopped green onions, 1-2 tsp chopped fresh dill, 1-2 tsp chopped fresh parsley, 1-2 chopped gherkins. Add in some just boiled and cooled peas, along with the dressing I described above. Done and done.
Finally, here is the recipe for the Chickpea Greek Salad in the picture above. You can read the full post by clicking this link.
Mediterranean chickpea salad
A quick, delicious and healthy salad that works just as well as a side dish as it does a lunch.
Salads are a great way to add greens and fresh fruit, and vegetables to your diet. They can be as simple or complex as you want. You can use homemade or store-bought dressing, and you can dress it up however you want. Experiment, play around and have fun. To me, that is what salads are all about.
I hope you’ve enjoyed this part of my free basic cooking course. You can find last week’s lesson all about soup right here. Next Wednesday we will be looking at some basic meals that everyone should know how to make. Stay tuned, and thanks for reading!
A note for regular blog readers
Regular readers of the blog will notice that this post is late by one day and two hours. I apologize for the delay, and I hope you understand. Also, as this is a long Easter weekend, I have decided to take a few days off to spend time with my wife and son and get our lives organized after our move. That means there will be no post tomorrow (Friday) or Monday, but I will be back on Wednesday. There will still be Dinner with Ben on my Facebook page at 6 pm Monday, so tune in for that.
Other than all that, I hope that you have a great Easter Weekend and stay safe. Oh, and if you have any food-related questions this weekend, please feel free to contact me. I’m always happy to help.
…One more thing… if you are wondering how Easter will work this year with all the social distancing measures and everything, check out the segment I did on CTV this week here.
Summer is built for salads and what is a salad without a delicious salad dressing? Well, it’s just a bowl of lettuce and some vegetables I suppose.
Salad dressings are cheap and easy to buy. There’s a whole aisle of them at the grocery store. But they are even cheaper to make at home. What you’ll notice is that store-bought dressings will have things like xanthan gum, potassium sorbate, and calcium disodium EDTA.
In all honesty, as far as we know these additives are completely harmless. However, given the choice between food with a bunch of preservatives in it, and food with none, I pick none every day of the week.
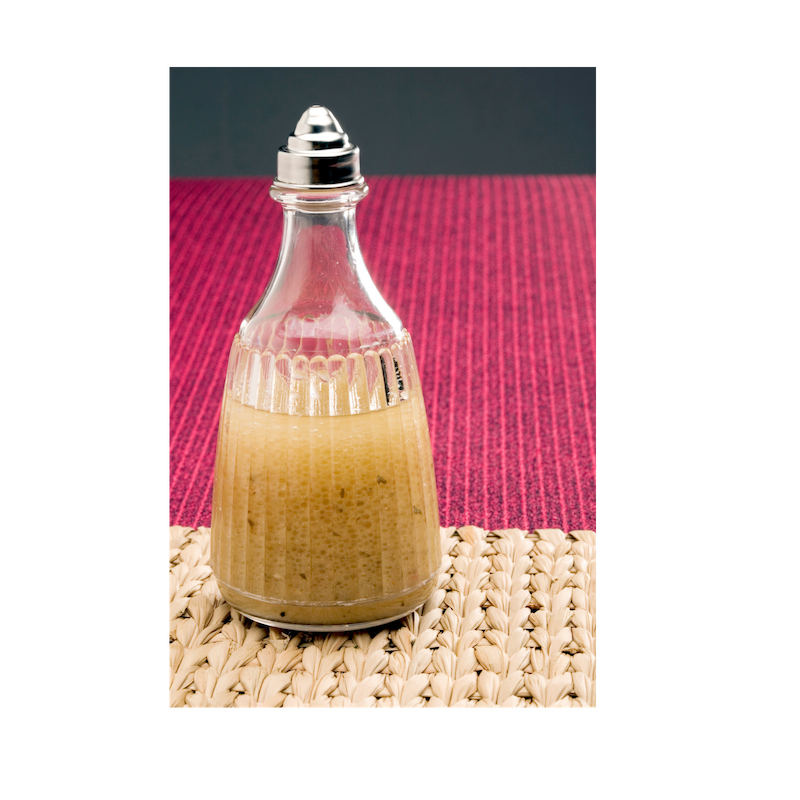
Basic Salad Dressing
Making your own salad dressing can be as simple as mixing a bit of oil and vinegar together. It doesn’t have to be complicated. Even the more complicated sounding dressings are only complicated in theory. For example, when you think about creating an unnatural bond between oil and vinegar molecules by using a binder and mechanical agitation, it can boggle the mind. Especially when you get down to how this emulsion of two incompatible molecules is so tenuous that it could easily break if even slightly overpowered.
All that really means is that oil and vinegar is slowly whisked together with a little bit of mustard or egg yolk to hold the bond together. That’s it.
Basic process
The basic process for making a vinaigrette goes like this.
Combine vinegar with binder and flavourings.
Slowly whisk a few drops of oil into the vinegar mixture.
Slowly whisk a few more drops of oil into the vinegar mixture.
In a slow steady stream whisk the remaining oil into the vinegar mixture.
Season the vinaigrette with salt and pepper and serve.
That’s it.
Common Mistakes
The biggest mistake I see and hear about is that people combine all of the oil and vinegar all at once and then try to whisk it together. This will not hold a bond. It may come together briefly, especially if you are using a blender. But, if you build your vinaigrette slowly and properly it will hold together for much, much longer.
When I saw the vinaigrette will break or separate all I mean is that the oil will float to the top and the vinegar will sink to the bottom creating to very distinct layers. A well-made vinaigrette will have no clear difference between the oil and vinegar because they are literally joined as one at the molecular level.
Ratios
The ratio of vinegar to oil in a vinaigrette is really important. If too much oil is added, the bond will be over powered and will break. It not enough oil is added the vinaigrette won’t be viscous enough and won’t coat your salad.
Generally, a ratio of one part vinegar to three parts oil is suggested. However, a ratio of one part vinegar to four parts oil is also possible. Though it may seem counterintuitive, the more oil that is added to the vinaigrette the thicker it will be. So, if you want a really thick vinaigrette use four parts oil to one part vinegar. For a more fluid consistency use three parts oil to one part vinegar.
1/4 cup Vinegar
3/4 cup Oil
Yield = 1 cup of standard vinaigrette
2 tbsp Vinegar
3/4 cup + 2 tbsp Oil
Yield + 1 cup of thick vinaigrette
Basic Vinaigrette
This basic recipe can be used to make thousands of kinds of salad dressings. Change the vinegar and add different ingredients like herbs and garlic to make whatever vinaigrette you would like.
This post is about salad dressing not just vinaigrette but I’ve mostly just been talking about vinaigrette. The reason for this is that the process for making a vinaigrette is the same for making an egg-based dressing or mayonnaise. The only difference is that the mustard is replaced with egg yolk.
The recipe above could easily be used to make Caesar dressing for example if the mustard is replaced with one egg yolk (the mustard can be used along with the egg yolk as well). Additionally, two cloves of garlic, a few anchovies or Worcestershire sauce, lemon juice, and parmesan cheese would be added. But the basic recipe is identical.
Changing the recipe
That basic recipe can be used to make hundreds if not thousands of salad dressings that are all built on the same process but flavoured differently. Don’t believe me?
Maple Balsamic Vinaigrette
This basic recipe can be used to make thousands of kinds of salad dressings. Change the vinegar and add different ingredients like herbs and garlic to make whatever vinaigrette you would like.
This basic recipe can be used to make thousands of kinds of salad dressings. Change the vinegar and add different ingredients like herbs and garlic to make whatever vinaigrette you would like.
This basic recipe can be used to make thousands of kinds of salad dressings. Change the vinegar and add different ingredients like herbs and garlic to make whatever vinaigrette you would like.
This basic recipe can be used to make thousands of kinds of salad dressings. Change the vinegar and add different ingredients like herbs and garlic to make whatever vinaigrette you would like.
Hopefully, now you are starting to notice that even though all of those recipes will taste very different, they are all pretty much the same. It’s just knowing that basic formula and then adding and changing things to make it something different.
There is no end to the changes you can make and the different dressings you can create. Master this basic salad dressing and then the world is your oyster.
I’d love to hear about the salad dressings you come up with. Leave it in the comments or hit me up on social media.
Last night I made one of my wife’s go-to meals; Chicken and Quinoa Greek Salad. This is something that she will often make at the beginning of the week and then use it as lunch for three or four days. When using it for lunches it is best to either leave the dressing off until you are ready to eat it, or leave the lettuce out until you are ready to eat it. Either way, it will still be delicious.
At first glance, this may not seem like a very substantial meal, but I could barley finish the bowl that I had. The chicken and the quinoa make this salad really filling.
One other great thing about this salad is considering how many meals you can get out of it, it is pretty inexpensive. The total cost for all the ingredients was around $30. But, I still had loads of tomatoes, mini cucumbers, feta, lettuce, and yogurt left to use in other things. Also, this salad will stretch four people at least two days possibly longer. So really, that’s a minimum of eight meals for $30 or, $3.75 a meal. That’s pretty good.
All right, enough chit chat. This is how to make…
Chicken and Quinoa Greek Salad in 30 Minutes or Less
6:36 – Quinoa
I meant to start cooking at 6:35 but there were technical issues that set me back slightly. So, I started at 6:36.
The first thing I did was get the quinoa on. I measured 1 cup of quinoa and 2 cups of water into a medium-sized pot and put it on the stove on high.
I brought the quinoa to a boil, put the lid on, reduced the heat to low, and let it simmer for 15 minutes. Then I took it off the heat and let it sit for 5 minutes before fluffing it. Of course, while the quinoa was cooking I was busy doing other things.
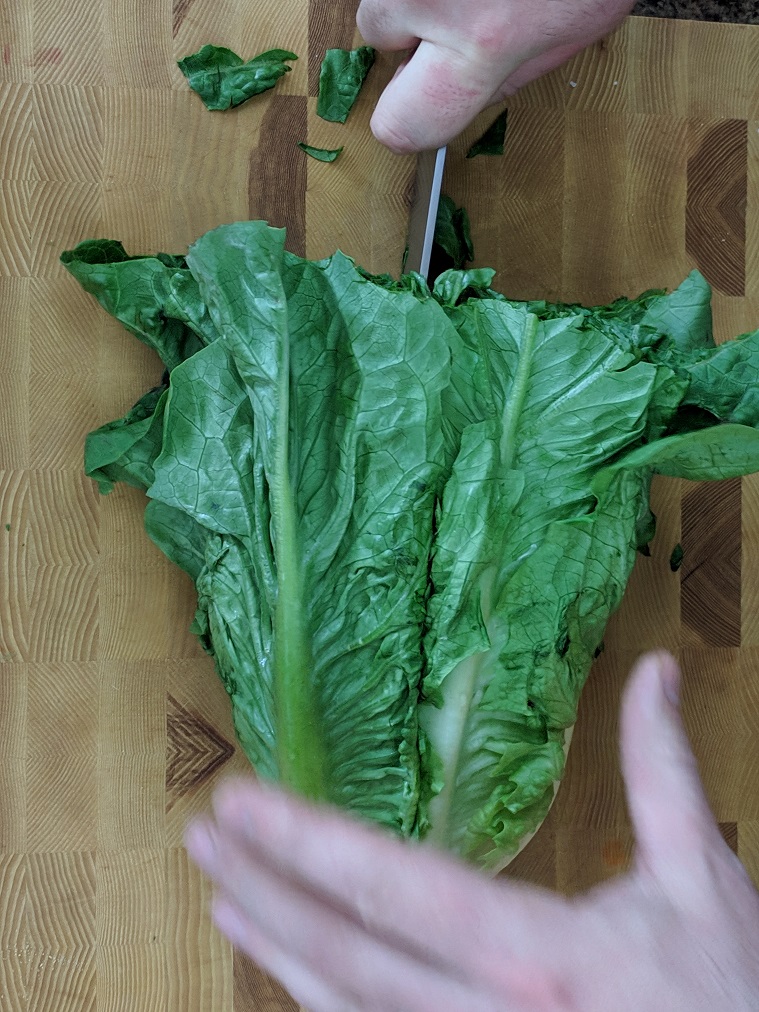
6:37 – Cut and wash the lettuce
After I got the quinoa on I cut and wash the lettuce. Pretty straight forward. If you want a more detailed description of how to properly cut the lettuce check out last weeks 30 minutes or less here.
6:39 – Chicken
With the lettuce cut and set aside and the quinoa simmering away I got to work on the chicken. I first put a large cast-ironskillet on the stove over medium heat. Then, I cut the two chicken breasts in half horizontally. I laid the breasts on my cutting board, drizzled them with Picholine Olive oil, dried oregano, and salt and pepper. I rubbed the seasoning into the breasts and then placed them in the hot cast-iron skillet. I didn’t need to add any oil to the skillet because of the oil I had rubbed into the chicken breasts.
6:48 – Flipping the chicken
Full disclosure I messed up a bit here. It took me a good three or four minutes of rummaging through my spice cupboard to find the oregano and my pepper. So, this took a little longer than they should have. However, I did still finish within 30 minutes. But, this should not take you 10 minutes.
The chicken was in the pan for about 4 minutes before I flipped it. Then I put a lid on the pan and cooked it until it was done flipping it once or twice more.
I also washed the chicken off my knife and cutting board before jumping into cutting the vegetables.
6:49 – Cut Veg
I occasionally do some contract work with Super Store which is a grocery store chain here. Mostly I do cooking classes but I also sometimes do culinary demos and sampling. Yesterday I was doing sampling of mini cucumbers and feta. Standing there all day handing out samples of these things gave me a really bad craving which is what led to this dinner. That is why I am using baby cucumbers. Feel free to use regular ones.
At 6:49 I got down to business cutting up all the vegetables. I started by dicing the mini cucumbers. Then I quartered some grape and cherry tomatoes. Finally, I sliced up a green pepper and a quarter of a large red onion. I put all of the vegetables in a bowl.
6:54 – Greek Dressing
Cutting the vegetables took about 5 minutes with stopping to take the pictures. If it takes you a bit longer it isn’t the end of the world. Remember that I blew a bunch of time looking for spices.
I made the dressing right in the bowl with the vegetables. I could give you some fancy made-up reason as to why I did this but I honestly don’t know why I did. I was watching my self do it and thought “Um, why am I doing this.” I didn’t have an answer and I had already gone too far. You can make the dressing in the bowl with the vegetables as I did or, you can make the dressing like a normal person in a separate bowl.
Either way, the ingredients in the dressing were 1/4 cup Picholine Olive Oil, 1 tbsp oregano, 1 tbsp red wine vinegar, the juice of 1 lemon, 2 cloves of minced garlic, 1/4 cup pulled curly parsley, 1 tsp dried dill, salt, and pepper.
I mixed up all the dressing ingredients tasted it and adjusted it as needed. At this point the quinoa was done and had rested and the chicken was done.
I added about half the quinoa into the salad saving the rest for another use. I also added about 1/4 cup crumbled feta and mixed everything together. This cooled the quinoa down a bit which meant it was time to mix in the lettuce.
This all took about 6 minutes.
7:00 –
All that was left was to plate the salad.
I put the quinoa Greek Salad mixture into a bowl, sliced one of the half chicken breasts and put that over the salad. I finished it with a little more feta and a little yogurt. Done and done and well within the 30 minute mark.
Conclusion –
This salad is seriously delicious and seriously filling. You could serve this with some warm naan bread or pita which would make it even more filling. This is a nice dish for hot weather as the only two things that need to cook is cooked on the stovetop. This way your house doesn’t get too hot.
I highly suggest that you try this salad. I’m pretty confident that you will love it and it may get you thinking about ways that you can bulk salads up a little more to turn them into meals rather than side dishes.
As always thanks for reading the blog and remember to subscribe so you never miss a post. Also, if you have any salad tips that you would like to share, post them in the comments section below.
Chicken Quinoa Greek Salad
A delicious and filling salad. The perfect meal for a hot summer day.
1/2cup Good Quality Olive Oilhalf for dressing half for the chicken
2 tbspDried oreganohalf for dressing half for the chicken
1tbspRed Wine vinegar
2clovesMinced Garlic
1lemonJuiced
1/4cupChopped Parsley
1tspDried Dill
Salt & Pepper
2tbspPlain Greek Yogurt
Instructions
Quinoa
Combine the quinoa with two cups of water and a pinch of salt in a medium pot and bring to a boil over high heat.
Once the pot begins to boil, cover it with a tight fitting lid and reduce the heat to low.
Let the quinoa simmer for 15 minutes.
Remove from the heat and let rest, covered for an additional 5 minutes.
Fluff with a fork and serve.
Chicken
Cut the two chicken breasts in half horizontally.
Lay flat on the cutting board and drizzle with olive oil, salt, pepper, and dried oregano on both sides.
Heat a large skillet on medium heat.
Sear the chicken on one side. Flip the chicken and cover. Reduce the heat slightly and cooked covered, flipping once or twice until the chicken is cooked through.
Let the chicken rest, then slice and serve.
Salad
Cut, wash, and spin dry the lettuce.
Combine all the vegetables in a large mixing bowl, except the lettuce.
Add the olive oil, red wine vinegar, lemon juice, oregano, dill, garlic, parsley, and salt and pepper into the bowl. Taste and adjust seasoning as needed.
Mix the warm quinoa into the vegetables along with 1/4 cup of crumbled feta cheese. Mix well.
Add the lettuce and mix.
Serve the salad in a large bowl, top with sliced chicken, the remaining feta, and a spoon full of yogurt.
Salad comes in many different forms and flavours. It actually sometimes seems as though the term salad is so broad that it could mean just about anything. To keep things simple today we are going to focus specifically on green or garden salads. We will leave all the other types for another time.
The salads that we are going to focus on today have a base of leafy greens. They are served cold or at room temperature. They have a dressing, and garnish ingredients like fruit, vegetables, seeds or nuts.
Why are we talking about these salads today? Well, because we are deep into spring with summer fast approaching. The first wave of fresh seasonal vegetables are just starting to hit the stores and markets. Essentially, it is salad season.
Really though, do we need an excuse to talk about salads? They are a delicious addition to any meal, or a great light meal on their own. With that let’s look at…
Everything I Know About Salad
Salad Greens
Leafy greens make up the base of our salads. As the base they provide a lot of the flavour and texture. So, the type of green we choose for our salads is actually pretty important. It sets the tone of the salad as a whole.
With so many options out there for leafy greens it can be hard to decided which one is best for the salad we want to make. If we make the wrong choice we could end up over powering the other ingredients. We could end up with soggy greens.
A salad can be made mainly in two different ways. We can start with the greens and build the salad from there. Or, we can start with the garnish and match the greens to it. Either way we can make a delicious salad, it just takes some thought.
Let’s take a look at some common greens and the types of dressings and garnish we can pair with them.
Baby Spinach
Baby spinach is a hearty green with a fairly mild flavour. This green can hold up to just about anything. It may even be served with a warm vinaigrette and garnish though this is more of an autumn style salad.
Baby spinach does really well when balanced with sweet and salty. Sweet ingredients like fresh or dried fruit and berries, or even candied nuts work very well. Also sweeter vinaigrettes like maple, honey Dijon, and balsamic all work as well.
Bacon is always a great choice to bring that salty element to a spinach salad. It could also come from salted nuts or slightly salty cheese like parmesan. Speaking of cheese, goat cheese and spinach are always a good friend.
Arugula
Arugula,
also known as rocket is a hearty green with a complex peppery, spicy flavour. Like spinach, arugula can hold up to just about anything. It is commonly served as part of a mixture of greens though it is delicious on its own.
Typically, salads made from arugula are very simple. This simplicity is due to the complexity of flavour coming from the arugula itself. There is no need to add a bunch of extra stuff. Having said that, an acidic vinaigrette balances that complexity very well.
Generally, I serve arugula with a simple lemon vinaigrette. To this I add some segmented oranges, a little shaved parmesan or Asiago, and some toasted almonds. Anything along those lines will work well.
Mesclun
Mesclun
is really just a mixture of tender baby greens. These greens are typically a little more fragile than arugula or spinach and they have a more mild flavour. They do add a lot of colour to any salad.
The great thing about this mixture is it generally tastes great on its own with a light vinaigrette. It doesn’t really need much else. Of course, it can be used to make a salad but it is important to be light handed with the garnish and dressing as the greens will literally and figuratively collapse under the weight of a lot of ingredients. A few thinly sliced or shaved fresh vegetables and a light dressing is all you need.
Iceberg lettuce
Iceberg lettuce
is fantastic for tossed salads. It holds up well against lots of vegetables and a thick rich dressing. Iceberg has a very mild, neutral flavour and a pleasant crisp texture that is so unique and amazing.
In terms of garnish I always think of pairing iceberg lettuce with whatever vegetables are freshest and lots of them. For dressing, generally something creamy like ranch or french. We want a dressing that is going to coat the lettuce and vegetables and provide a lot of flavour.
Iceberg lettuce often gets a bad rap, but for my money I think it is kind of the rock star of the salad world. To put things into perspective mesclun would be like a really good classical musician. Arugula would be a jazz drummer, and spinach would a folk singer.
I could spend all day just talking about different kinds of greens and lettuces but we need to move on. I think that this should give you a few good ideas and a decent starting place. I think really the key is to try different greens and experiment a little. You never know what you might fall in love with.
Salad Garnish
As we saw a little bit when talking about greens, a salad garnish can be just about anything. Fresh vegetables, fresh or dried fruit and berries, cold sliced meats, cooked or smoked seafood, cheese, nuts or seeds.
Although just about anything can be a salad garnish that doesn’t mean that everything should be all the time. What I mean by that is when it comes to garnishing a salad, generally less is more.
As far as I know there aren’t really any hard and fast rules for when, what, and how much of something should be added to a salad. I would say just use your better judgment. If something seems really out of place, probably avoid it.
The only other thing I would say about garnish is just make sure that the ingredients you are using are the best quality they can be. There is no hiding mushy tomatoes, or sour grapes.
Salad Dressing
There are three main types of salad dressings. Basic vinaigrettes, think Italian or Greek Dressing. Egg or mayonnaise based vinaigrette like Caesar dressing. And creamy, dairy based dressing like ranch. All three of these dressings have their purpose and applications. Let’s take a look at each individually.
Basic Vinaigrettes –
At its most basic form a vinaigrette is just oil and vinegar. Typically, other ingredients are included to add flavour, and to bind the oil and vinegar together.
Most often homemade vinaigrettes are held together by mustard either prepared or in powered form. There is a whole scientific process behind this that I don’t really have time to get into. What I will say is that mustard and egg yolk both hava a group of proteins known as lecithin that act to hold together the oil and vinegar molecules. So, in a basic vinaigrette the mustard holds it together. In an egg based vinaigrette the egg holds it together.
Basic vinaigrettes often have some kind of sweetener in them as well. This could be the vinegar in the case of balsamic or a raspberry vinegar. These both have a bit of sweetness already. More often a little honey, or maple syrup may be added.
For more information on this check out this post I did this time last year about how to make a kick-ass salad.
Egg Based Vinaigrette –
Egg based vinaigrettes are made in exactly the same way as basic vinaigrettes, the difference being egg is used rather than mustard as the binder. In egg based vinaigrettes are thicker and creamier than basic vinaigrettes.
There is some concern with egg based vinaigrettes because the egg is used raw. The health department suggest that you pasteurize your eggs first, but no one does this. I think that there is enough acid coming from the vinegar that there isn’t too much of a worry. Having said that, I cannot suggest that you use raw egg to make a dressing. Instead, I suggest using mayonnaise as the base as it really is pretty mush the same thing you were going to make anyway.
If you are going to use mayonnaise as the base you may have to thin it out with a little more vinegar and then just whisk your flavourings into it. Easy enough.
Dairy Based Dressings –
Dairy based dressings are generally made from some kind of fermented or cultured dairy such as yogurt, sour cream, or buttermilk.
When using yogurt or sour cream it really just comes down to thinning it out with liquid, adding more acid to it and then flavouring it. Buttermilk is usually used with other bases to add a tart creamy flavour.
Conclusion
Salads are a great way to add greens and fresh fruit and vegetables to your diet. They can be as simple or complex as you want. You can use homemade or store bought dressing (I suggest homemade but that’s just me). And you can dress it up however you want. Experiment, play around and have fun. To me, that is what salads are all about.
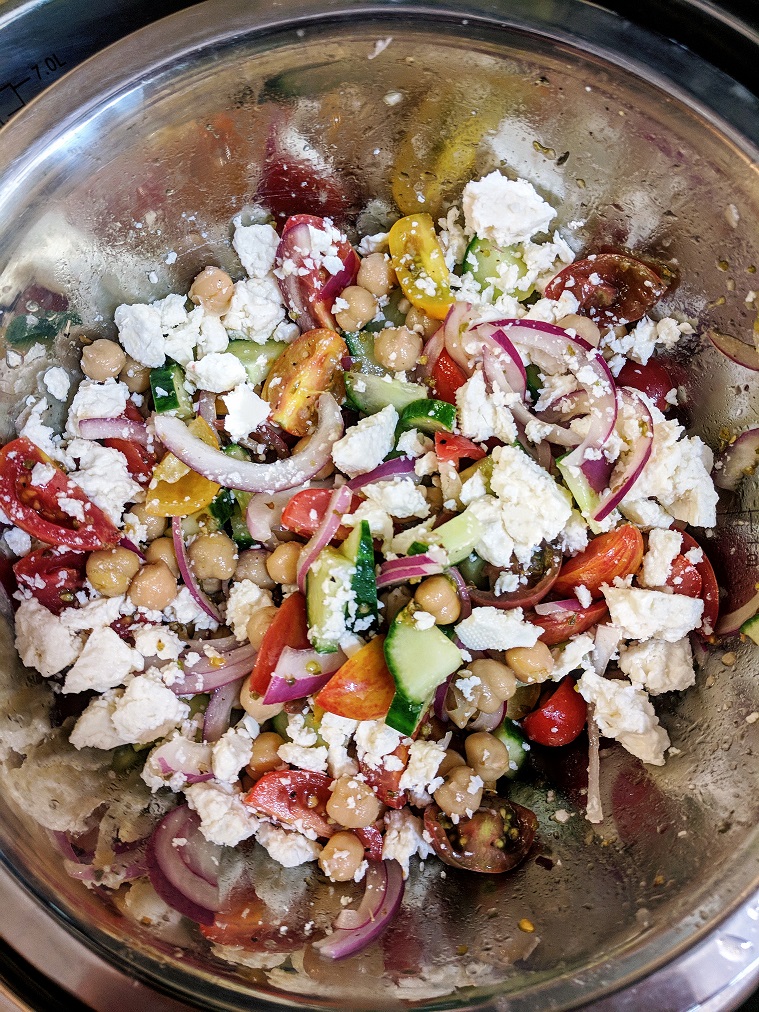
We’ve all heard about the Mediterranean diet. It is almost mythical. For whatever reason the people who grew up eating this way live longer and healthier than almost anyone else. Now, because I like all of you so much, and I want all of us to be around for a very long time, I thought I would share my recipe for Mediterranean Chickpea Salad.
Let’s take a look…
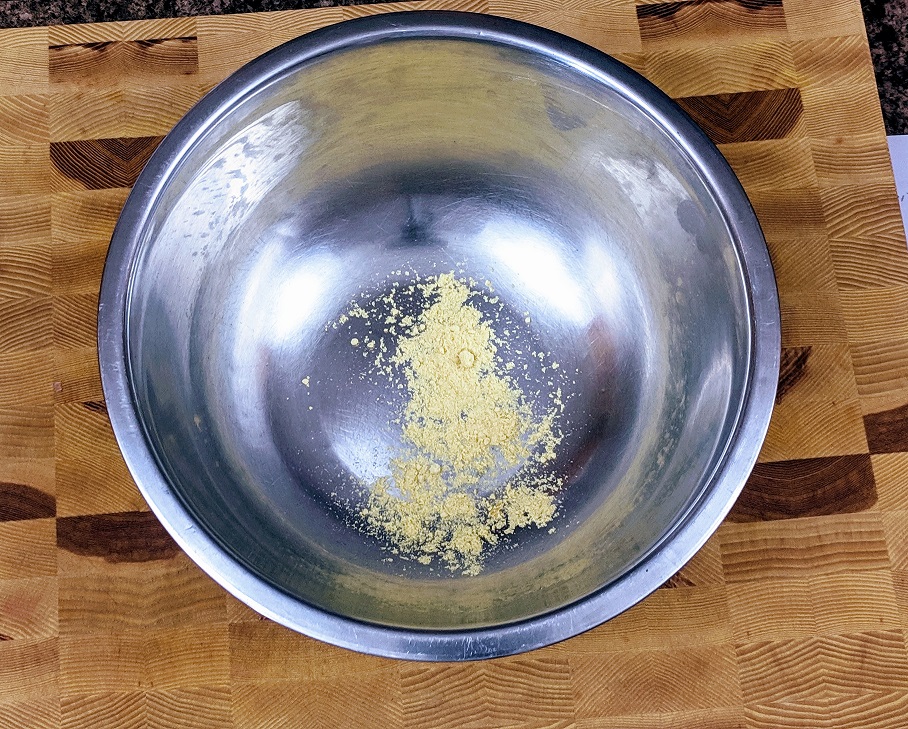
Chickpeas
At the core of this salad sits chickpeas. A nutrient and protein dense legume that has been being cultivated for over 7500 years. Depending on where you are in the world you may know chickpeas as garbanzo beans or in their semi-liquid state, hummus.
The chickpeas provide this Mediterranean Salad with a big punch of protein and dietary fiber so what’s not to love?
Chickpeas come in two main states; dry, or canned. Dry chickpeas have to be soaked, preferably overnight and then boiled and cooled. Canned chickpeas just need to be opened, drained and rinsed. If you are the type of person who plans out your meals and knows a few days in advanced what you will be eating I would go with dried chickpeas. For everyone else I suggest canned ones.
Mediterranean Vegetables
Mediterranean Vegetables are those vegetables you would commonly find in Mediterranean food. Vegetables like cucumber, tomato, red onion, bell peppers, olives, zucchini, egg plant, etc.
For my version of this Mediterranean Chickpea Salad I lean more towards Greek influence than anything else. So, in my salad I use tomatoes, red onion, cucumber and olives. Having said that, there are very few limits to the what vegetables you could add to this.
It’s also important to note that I went for a very fresh version of this salad using all raw vegetables. However, roasted or grilled bell peppers, onion, zucchini, egg plant, etc. would be very good in this salad as well. This would be terrific during BBQ season.
Additional Ingredients
Mediterranean Herbs
In addition to the vegetables in this salad there are also some fresh herbs and Feta Cheese. Let’s talk about the herbs first.
In North America we tend to think of mint as a sweet herb. An herb that would be served with a dessert as a garnish, or in tea. In the Mediterranean it is very often used in savoury dishes to great effect. Adding a small handful of chopped mint to this Mediterranean Chickpea Salad adds that little pop of flavour that no one was expecting but that everyone will love.
Another herb that goes very well with this salad, and pairs surprisingly well with mint is dill. A few sprigs of fresh dill add a really nice flavour. This can all be complimented with a little thyme, rosemary or oregano.
Feta Cheese
If you don’t know what Feta Cheese is you are missing out. Feta is a Greek Cheese generally made of sheep’s milk, goat’s milk, or a combination of the two. It is slightly salty with a grainy crumbly texture and it is absolutely delightful. In all honesty if you don’t know what it is or haven’t tried it, I really suggest you do. Here is a link to the Feta Wikipedia write up if you would like some more information.
The purpose of the feta in this salad is to add that little bit of saltiness as well as that creamy, cheesy texture. Seriously though, if you have the option to add cheese why wouldn’t you? And why not make it feta?
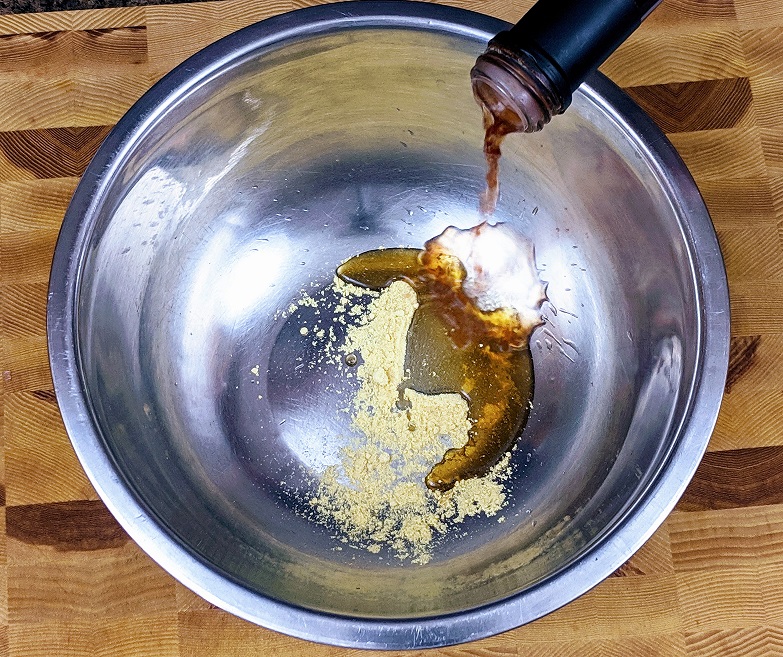
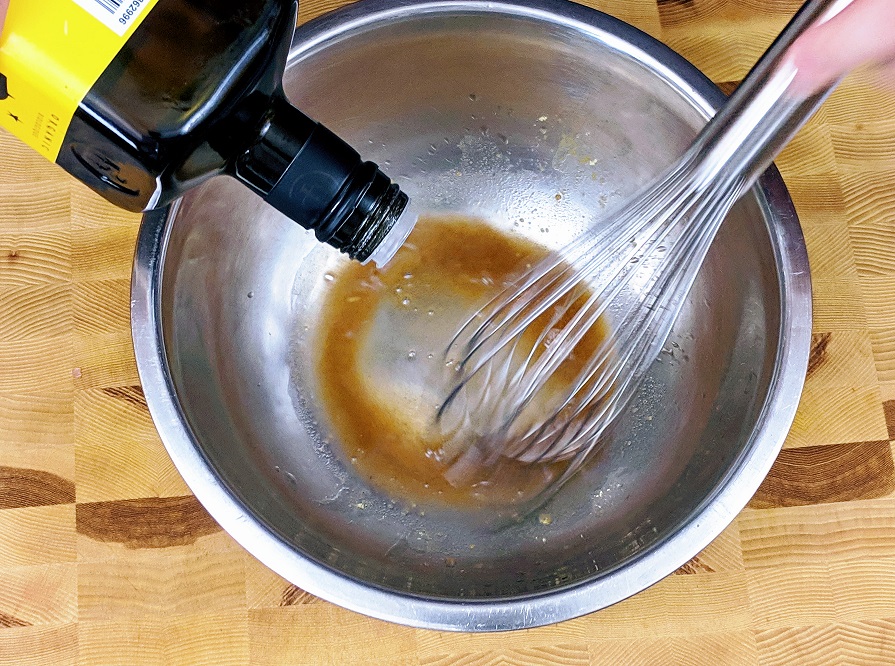
Salad Dressing
The dressing for this salad is pretty straight forward. Red wine vinegar, dried oregano, a touch of honey, a bit of garlic, salt and pepper, and olive oil. It’s the kind of dressing that can be thrown together in seconds but packs in a lot of flavour. Lemon can be added as can fresh herbs to add to the flavour.
Conclusion
This Mediterranean chickpea salad tastes great and is pretty great for you. It can be served as a side dish, eaten with chunks of roasted chicken or fish, or even just on it’s own for lunch. In theory it will even last up to four days in the fridge, but it will be gone long before then.
If you are looking for a side dish to jazz up your mid week meal, or something quick you can put together for lunch, this is the salad for you.
Thanks for reading and remember to join the mailing list so you never miss a post. See you soon!
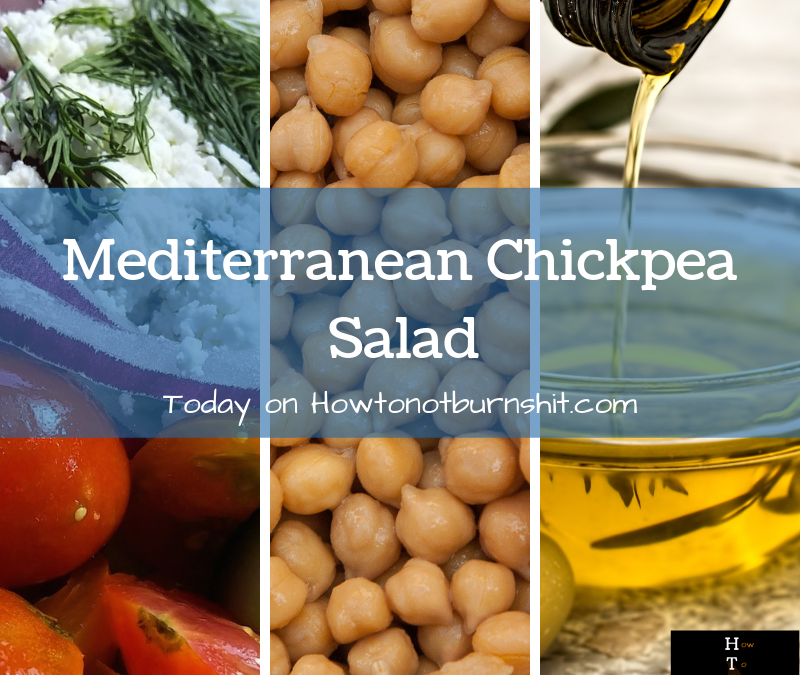
Mediterranean chickpea salad
A quick, delicious and healthy salad that works just as well as a side dish as it does a lunch.
Defining what exactly a salsa is can seem complicated. I don’t know, it might actually be complicated. This complication, if any comes from the fact that it seems like almost anything can be a salsa.
Growing up, salsa was pretty much one thing. An acidic tomato based sauce, with onion, and spice that we dipped tortilla chips in. Now, salsa is made of almost anything. But the truth is that it always kind of was. Salsa, just means sauce.
For a more in depth description check out what Wikipedia has to say on the matter.
For our purposes we are going to consider salas a chunky (not puréed) sauce with three main elements. There will be some type of fruit, from tomato to mango. There will be acid like citrus or vinegar. And there will be some type of spice.
Today, we are going to look at the composition of a salsa. I am going to give you a few specific recipes, but ideally by the end of this post you won’t need them. The goal here is for you to finish this post confident that you can walk into your kitchen and make a salsa out of just about anything. To do that I’m going to tell you…
Everything I Know About Salsa
To Cook or Not To Cook?
There are two main types of salsa, cooked and not cooked. The difference is pretty obvious.
Cooked Salsa
If you are unsure of how to tell the difference between a cooked and uncooked salsa just open a jar of salsa and look inside. Every jar of salsa you have ever had from Pace to Neil Brothers, to Old El Paso, to the stuff you bought at the local farmers market, has been cooked.
Cooked salsa has a much different flavour, texture and appearance than uncooked salsa. Cooking takes away the sharpness of flavour. You loose the bite of the onion, and the pop of flavour from the tomato and herbs.
There are a few benefits to cooked salsa over uncooked ones. The obvious benefit is that you can can them. Even without canning they tend to last much longer than their fresh cousins. The real benefit comes from the flavour.
Cooking does take away sharpness and brightness but it also helps develop depth, richness, and character. Cooked salsa tends to have a fuller flavour than fresh ones. That’s really the big difference.
Fresh Salsa
If I’m making tacos, nine times out of ten I’m going to be making a fresh salsa to go along with them. In fact, at home I rarely make cooked salsa at all. There are a few reasons for this.
Fresh salsa is really quick to put together. In a few minutes of chopping and mixing I have a delicious fresh salsa to compliment whatever taco I’ve made. And not just tacos. Burritos or burrito bowls, grain bowls, even just nachos, or any number of other things.
Fresh Salsa has a fresh flavour. Obvious, I know. This is the thing that I love most about fresh salsa, that big hit of freshness. It doesn’t mater what type of Mexican influenced food you are having, a fresh salsa can really compliment it.
Okay, we’ve talked about Cooked Salsa vs. Fresh Salsa. Now let’s take a look at the building blocks of a salsa cooked or not.
Like I said in the intro to this post, salsa has three main components; Fruit or the main ingredient, Acid, and Spice. Let’s take a look at these three items individually. Actually, before we do that, let’s take a look at the supporting ingredients.
Supporting Ingredients
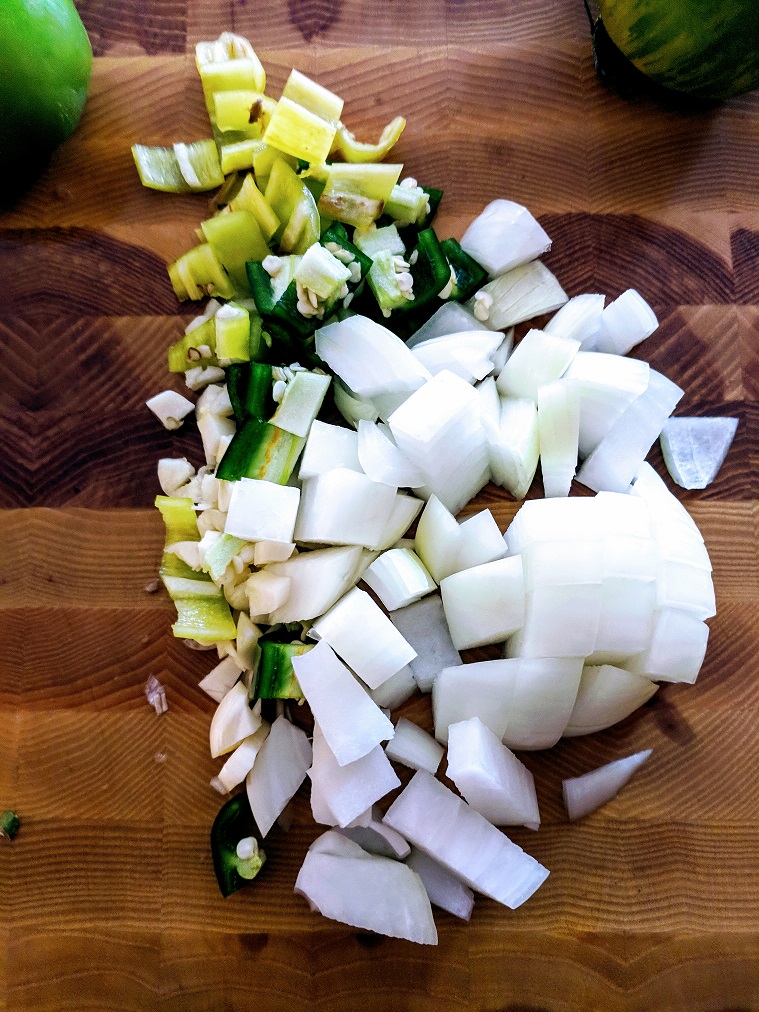
Generally, other than the alternating ingredients like the fruit, acid, and spice, salsas are pretty much all the same, cooked or not. They almost always have onion, and cilantro. Garlic is often added. Sometimes parsley, oregano, or ground cumin may be included as well.
It is not uncommon to add tertiary ingredients like black beans, or bell peppers as well. We aren’t really going to get into that today though.
If you start with a base of just chopped onion and cilantro you can’t really go wrong. Just add some chopped fruit, a bit of acid, and a touch of spice and you’re all set.
Fruit
I know a lot of people don’t consider tomato a fruit, but it is. I think it’s fair to say that most people would consider tomato the most common salsa base, and it likely is. However, one of the beautiful things about salsa is it’s versatility. It doesn’t have to made of or even contain tomatoes.
Using the starting point of finely chopped onion and cilantro I have made salsa from pineapple, mango, peaches, individual citrus fruits or a mixture of a few different ones, apple, pear, cranberry, even melon, and of course tomato. The key is just to chop everything up nice and fine.
Acid
Just like tomato is the most typical fruit to be used to make a salsa, lime juice is the most typical acid. Why? Because it commonly grows in Mexico and South America where salsa comes from. It has that quintessential salsa flavour. Having said that, it isn’t the only acid available.
Any kind of citrus juice can do the job as can any kind of vinegar. Really it just comes down to pairing the acid to the main ingredient in the salsa and the main item the salsa is being paired with. When in doubt, just use lime juice.
The acid has two main purposes. The first of which is flavour. The acid not only adds it’s own element to the overall flavour of the salsa, it also makes all of the other flavours pop. Meaning, it creates more vibrance.
The second purpose of the acid is to break down the main ingredient and draw liquid out to create a kind of sauce for the sauce (salsa).
There is a third purpose specific to canning salsa. The acid lowers the ph level making salsa safe to can. You only have to worry about this if you are sealing the salsa in jars.
Spice
A salsa without a bit of spice or heat is no salsa at all. It doesn’t have to burn your face off, but that element is important. This is especially true when using a sweet fruit as the base. The heat has a balancing effect.
The type of chili you use will determine how hot the salsa will be. The chili also adds it’s own unique flavour to the salsa. Jalapeno is always a good bet. For a more mild flavour remove the seeds and white ribs from the jalapeno and only chop up the actual pepper part.
You can use any other type of chili you can imagine. Habanero, serrano, or poblanos (which aren’t too spicy) are also commonly used in salsas.
Choosing the right salsa
The things that we put salsa on are generally either fairly neutral in flavour or very strong in flavour. This means that we are either looking to impart flavour or compliment.
Imparting Flavour
If we are trying to impart flavour, we want a very strongly flavoured salsa with a lot of depth. This is where cooked salsa comes in very handy. Having said that, a bold fresh salsa can do this job just as well.
Use a strong main ingredient in your salsa like cooked tomato or pineapple. Compliment that with some strong background flavours like cumin and extra cilantro. Even add a bit of extra heat or use strongly flavoured chili like chipotle.
Complimenting Flavour
If you have a dish that on it’s own has is very flavourful, a strong salsa can muddy the flavours and distract from them. For this purpose you want to back off on the punch from the salsa. Use more mild ingredients like mango, or fresh tomato. Use very little cumin if any. A milder chili like polano or jalapeno is probably better suited to this job.
When I’m thinking about the type of salsa I’m going to make it always starts with the dish it’s going to be served with. I always try to think of it as an additional ingredient to the overall composition rather than it’s own thing. What I mean is that I use the salsa to fill in the gaps in flavour of the final dish.
So, if I slow roast some pork to make tacos and I’ve made a rub with four different types of chili and pork is really spicy, I don’t need or want to add a lot of heat to the salsa. Instead, I want something that is going to balance, or even cut through that heat. What does that? Sweet and acid. So, in this case make a salsa that is more sweet and acidic than it is spicy. The reveres is true as well.
If I make a dish that completely lacks spice. I make a spicy salsa.
The salsa, fills in the gaps and smooths out the final dish.
Conclusion
Salsa can be a really terrific condiment. Honestly, if done well it can make the whole dish. As we’ve seen it can be used in a variety of ways and made from a variety of ingredients. It not only goes well on tacos, but a nice grilled peach or mango salsa makes a great addition to a summer pork chop or haddock fillet too.
The key to making salsa is to not over complicate it. It shouldn’t have more than five or six ingredients. Start with a good base, and taste continuously as you make it and you can’t go wrong.
There are a bunch of different salsa recipes published throughout my Facebook and Instagram pages and if you ask me I will be happy to hunt them down and share them with you. But it’s my hope that you can now confidently make a basic salsa without a recipe. If would like to check some out bon appétit has a great list salsas here.
A note on cilantro
I know that some people reading this are thinking “Oh, cilantro! Gross!” But here’s the thing, you are really missing out.
For a very long time I hated cilantro. It always tasted like soap to me. Slowly, I started eating it and over time that soap taste went away and I absolutely fell in love it. Now, I use more cilantro at home than any other herb.
If you hate cilantro, do yourself a favour and try it. Not once or twice, but over the course of a few months try it multiple times. Start with small amounts and once that’s tolerable add more.
If you put in this effort you will find something that you have been missing forever.
The same is true for spice. Start small and work your way up. There is nothing like the euphoric feeling you get from eating something really spicy. It’s incredible. And nothing compliments spice, like cilantro.
Warmer weather is finally here, and with it comes fresh greens and vegetables. Because of this, it’s the most salad-full time of the year! Salads are a great way to load up on vitamins and nutrients, and they are delicious. It is easy, however, to get stuck in a repeating salad cycle. No one wants to eat the same salad over and over, night after night. So, what are some things that we all can do to jazz up our salads?
First of all, what is a salad? Most people think of salads like lettuce, with vegetables and dressing. Yes, this is one type of salad, but really, it’s not the only kind. A salad is a combination of fresh ingredients with a sauce. Bare that in mind when your thinking about what kind of salad to have with your next meal. Maybe, with the help of the tips below, you will come up with something cool.
Homemade Salad Dressings
First of all, make your own salad dressing. It is not complicated at all. And really, there only two base recipes you need to learn to make any dressing you want. One is vinaigrette, and the other is egg-based like mayonnaise.
Vinaigrette
To make a kick-ass vinaigrette, use a ratio of 4-1 oil to vinegar. Start with 1/4 cup white wine vinegar, mix in 1 tbsp dijon mustard and 1 tbsp honey. Season that with salt and pepper. Combine 1/2 cup of olive oil with 1/2 cup vegetable oil and slowly, while constantly whisking, incorporate the oil into the vinegar and honey mixture. You need to take your time and make sure the first addition of oil is fully incorporated before adding any more.
The above recipe is a basic vinaigrette. To it, you can add fresh herbs, berries, different kinds of vinegar, different sweeteners, and a multitude of other ingredients. For example, if you add a bit of lemon juice, a chopped clove of garlic, some parsley, basil and oregano, and a pinch of dried chillies you have Italian dressing. Use red wine vinegar instead of the white wine, a higher portion of olive oil and add a bit of garlic, lemon, oregano, olive, and feta, you have Greek Dressing. Sub the honey for maple and double the portion plus add a bit more mustard and you Maple Dijon. Get the idea?
Egg-based salad dressing
Egg-based dressings are made almost exactly the same way as a vinaigrette. The only difference is that in a vinaigrette, the mustard is acting as the binder between the oil and vinegar. Whereas in an egg-based dressing, the egg yolk is that binder. So to make an egg-based dressing start with the same base as the vinaigrette, 1/4 cup white wine vinegar, 1 tbsp honey, but one egg yolk instead of the mustard. Now make the dressing the same way.
To the make egg-based dressings, you can add garlic, lemon juice, Worcestershire sauce, anchovy, a bit of dijon mustard, parmesan, and black pepper, and you have Caesar dressing. To the basic recipe, you could also add a bit of chopped onion, garlic, dry mustard powder, chives, parsley, dill, black pepper, lemon, and a bit of buttermilk and you have ranch dressing. See how easy that was?
Now that we have the dressings down what else can we do to up our salad game?
Greens
Use different greens. We often get stuck in the trap of only ever using romaine lettuce, iceberg lettuce, or spinach to make salads. Luckily there are loads more greens out there that make salads look and taste a thousand times better. Greens like bib lettuce, also known as butter lettuce or Boston Bib, is fantastic with a bit of homemade ranch, some bacon bits and a touch of cheese. Those colourful mixed greens you always walk by are excellent when dressed with a light vinaigrette or as the base of a more substantial salad.
There are also greens like arugula with its nutty, peppery flavour. Endive, radicchio, kale, and about a million other types that all make great salads.
Who said a salad needs lettuce anyway? Ditch the lettuce altogether. A salad of shaved fennel, oranges, sunflower seeds, fresh herbs, and a light vinaigrette is perfect for a summer lunch or dinner. Shaved asparagus with dried cranberries and slivered almonds served with an egg-based dressing makes a great side salad as well.
The point is, spring and summer are the best times of year to explore what can be made with a few fresh ingredients. Adding ingredients like fresh or dried fruit, seeds or nuts, even cooked grains like barley or quinoa, really make a salad more than just a salad. Start with a homemade dressing and the best ingredients you can, and you can’t go wrong. Enjoy!
Thank you for reading the post. If you liked it, remember to share it on Facebook, Pinterest, or Twitter by clicking the icon to the left of the right of the page. Did you know that Chefsnotes.com has almost 400 posts just like this one? Imagine all the great tips, tricks, and recipes you’ve missed. Don’t miss any more! Subscribe to Chef’s Notes by putting your email address in the subscription box at the top right of the sidebar. You will be notified of every new post. And if you would like to know more about me, click the link below to read my story.
We use cookies on our website to give you the most relevant experience by remembering your preferences and repeat visits. By clicking “Accept”, you consent to the use of ALL the cookies.
This website uses cookies to improve your experience while you navigate through the website. Out of these, the cookies that are categorized as necessary are stored on your browser as they are essential for the working of basic functionalities of the website. We also use third-party cookies that help us analyze and understand how you use this website. These cookies will be stored in your browser only with your consent. You also have the option to opt-out of these cookies. But opting out of some of these cookies may affect your browsing experience.
Necessary cookies are absolutely essential for the website to function properly. This category only includes cookies that ensures basic functionalities and security features of the website. These cookies do not store any personal information.
Any cookies that may not be particularly necessary for the website to function and is used specifically to collect user personal data via analytics, ads, other embedded contents are termed as non-necessary cookies. It is mandatory to procure user consent prior to running these cookies on your website.