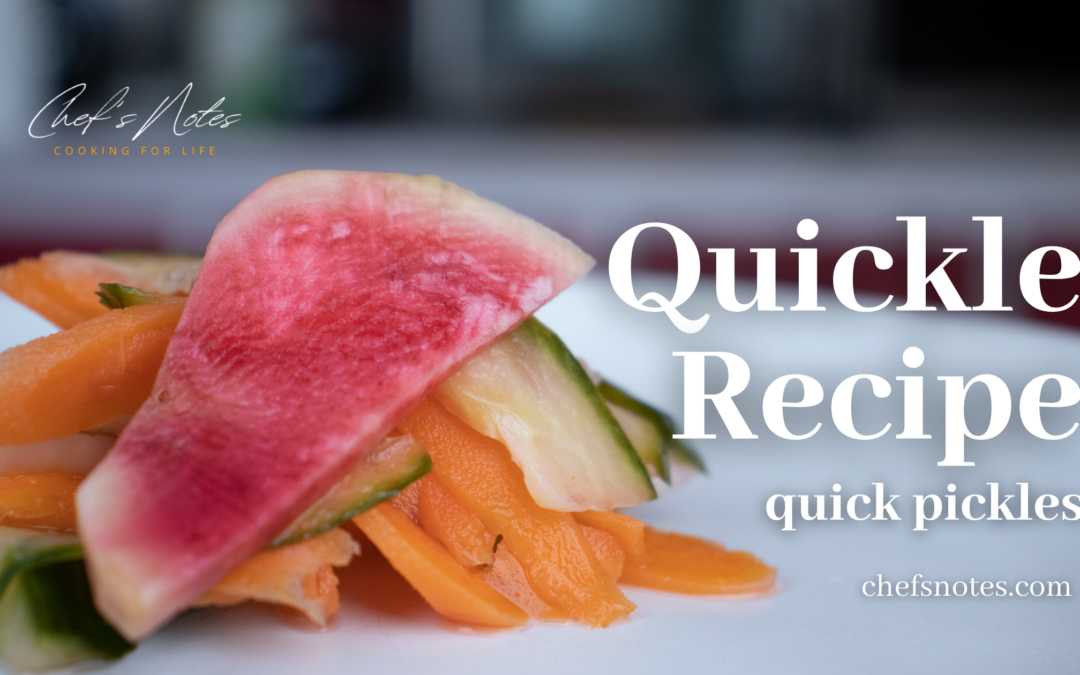
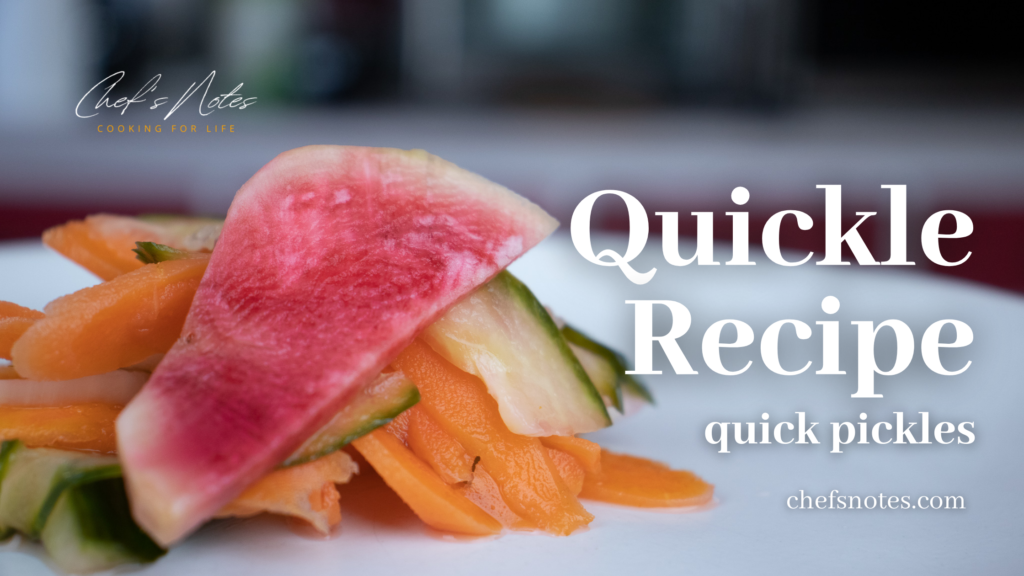
Quickles or quick pickles are exactly what they sound like. Pickles that are quickly made. While traditional pickles take weeks to properly pickle, quickles are made in less than an hour. You can flavour quickles with pickling spices, dill, garlic, mustard, or whatever else you’d like, just like regular pickles. Quickles are great on sandwiches, burgers, pulled pork, fried chicken, Bahn mi, or as a side with ham or charcuterie. In this post, I’ll share my Quickle recipe and discuss the main differences between regular pickles and quickles. You can find the recipe directly below but keep reading for more details.
Quickle Brine
Pickle Brine vs. Quickle Brine
Typical pickle brine is a solution of about 5 to 7% salt and anywhere from 1:1 to 1.5:1 vinegar to water. Quickles, on the other hand, typically have a higher salt and vinegar content. A quickle brine is an 8 to 10% salt solution with a 1.5:1 to 2:1 vinegar content. This higher salt and vinegar content in quickles is because the vegetables have less time to reach an equilibrium with the solution. Essentially, they need to absorb as much flavour as possible in as little time as possible.
What Types of Vinegar Can You Use?
You can make quickles with any vinegar you’d like. I prefer either cider vinegar or white wine vinegar, but red wine, rice, or balsamic vinegar will work. However, if using balsamic vinegar, remove the sugar from the recipe because the vinegar is already sweet.
What Salt Should You Use?
To make Quickles or any pickle, you want to use pickling salt or kosher salt. Both of these can be found at any grocery store. Do not use table salt because it has iodine in it, which will give the Quickles a harsh flavour.
How Long Will Quickles Last?
In a sealed container, quickles should last about two to four weeks in the fridge. If they start to smell off, or if mould forms on the surface, discard them. Ideally, you shouldn’t make more quickles than you will use in a week or so.
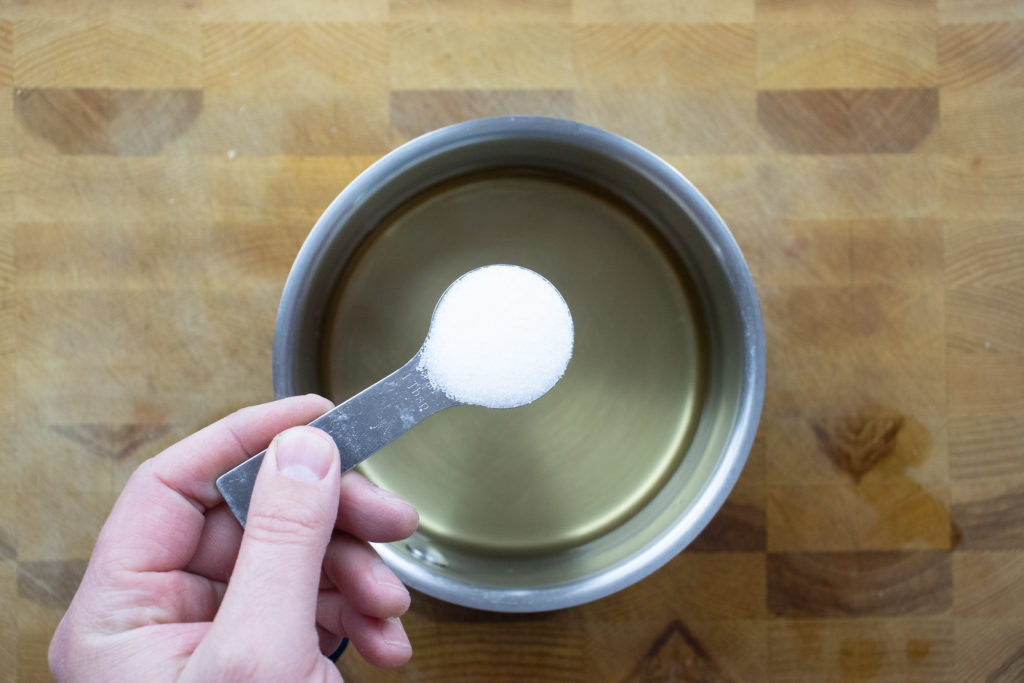
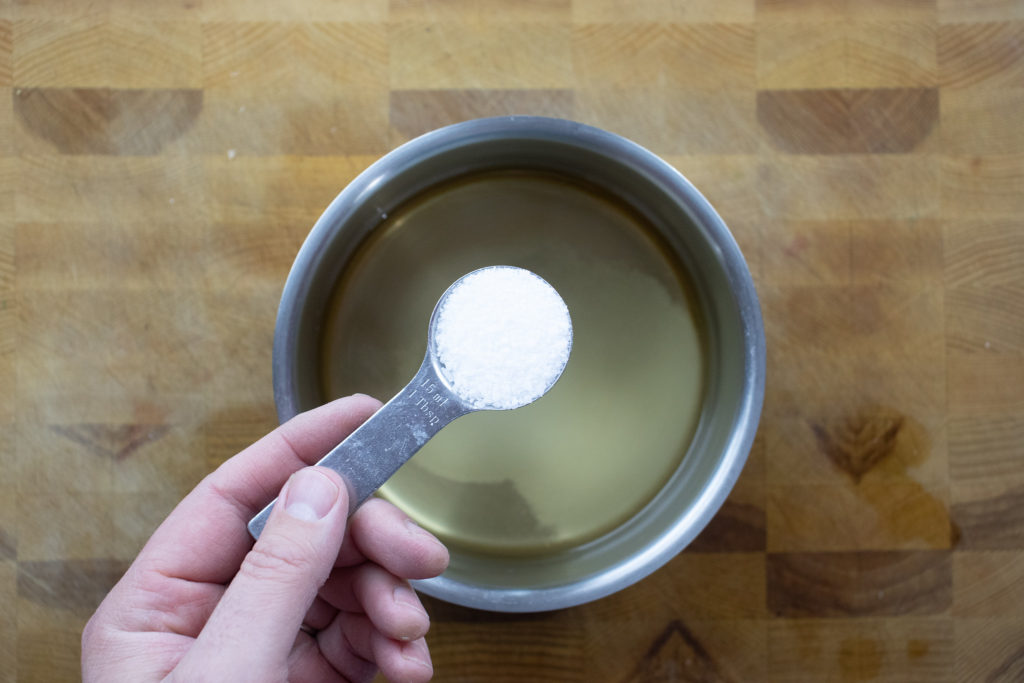
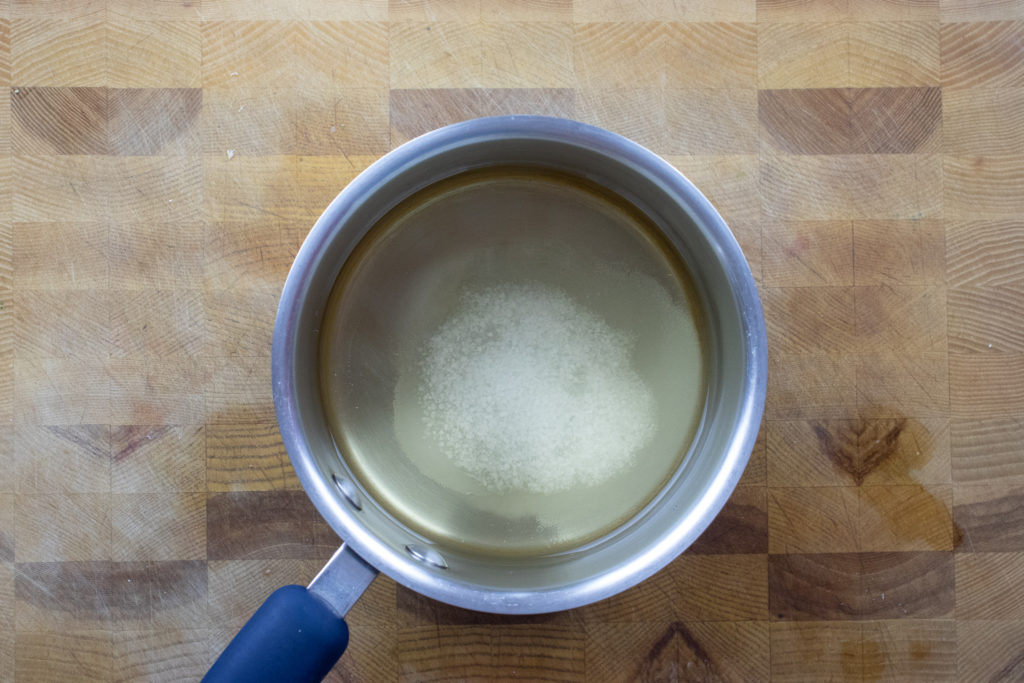
Making The Quickle Brine
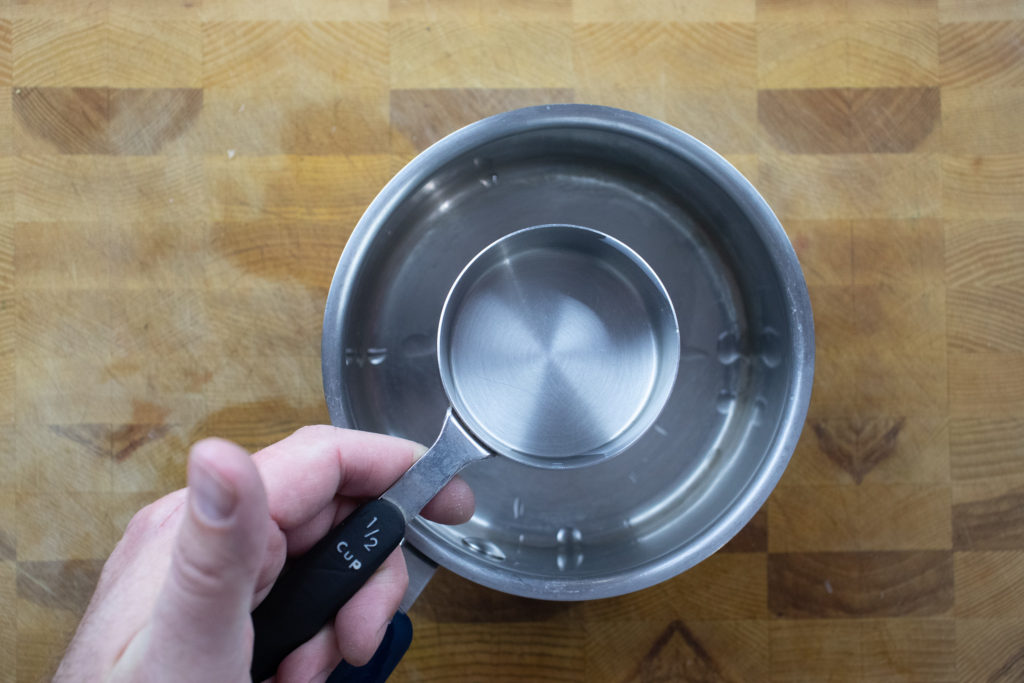
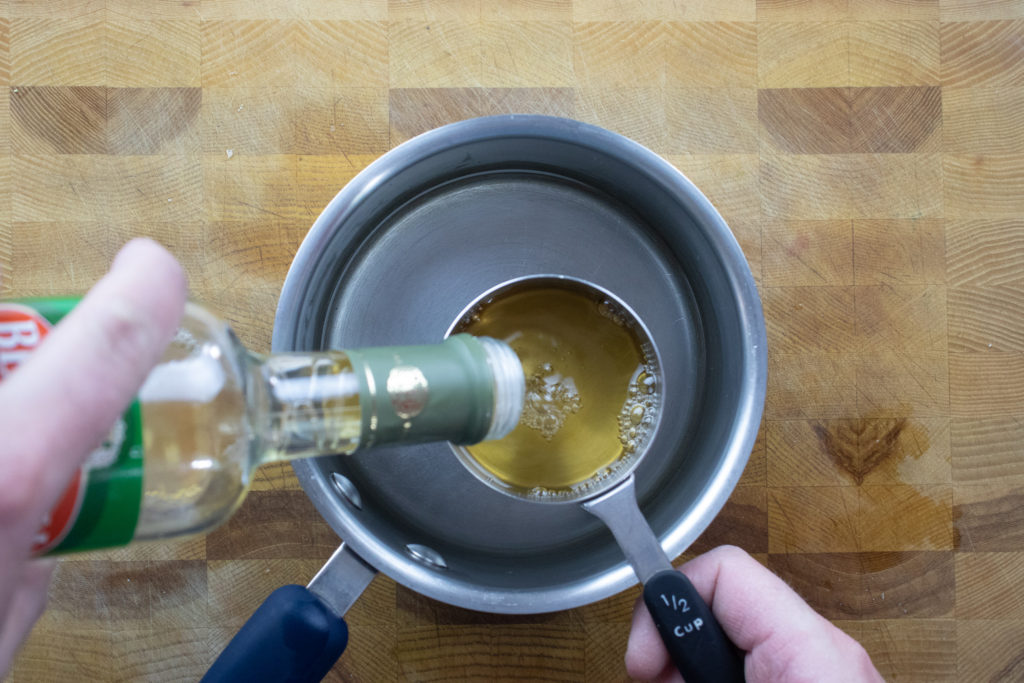
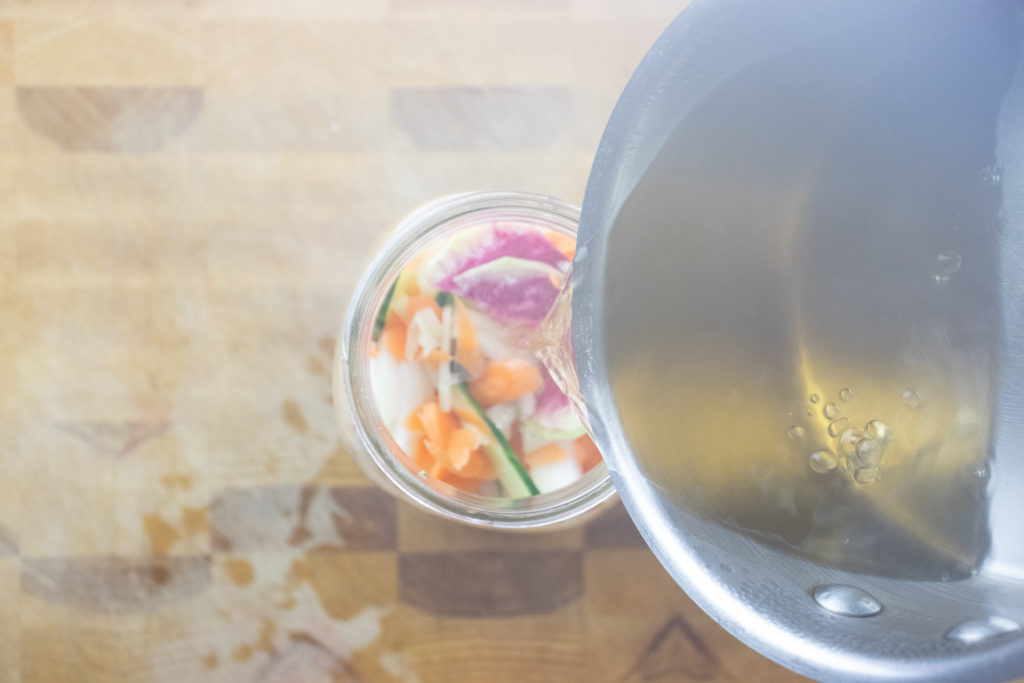
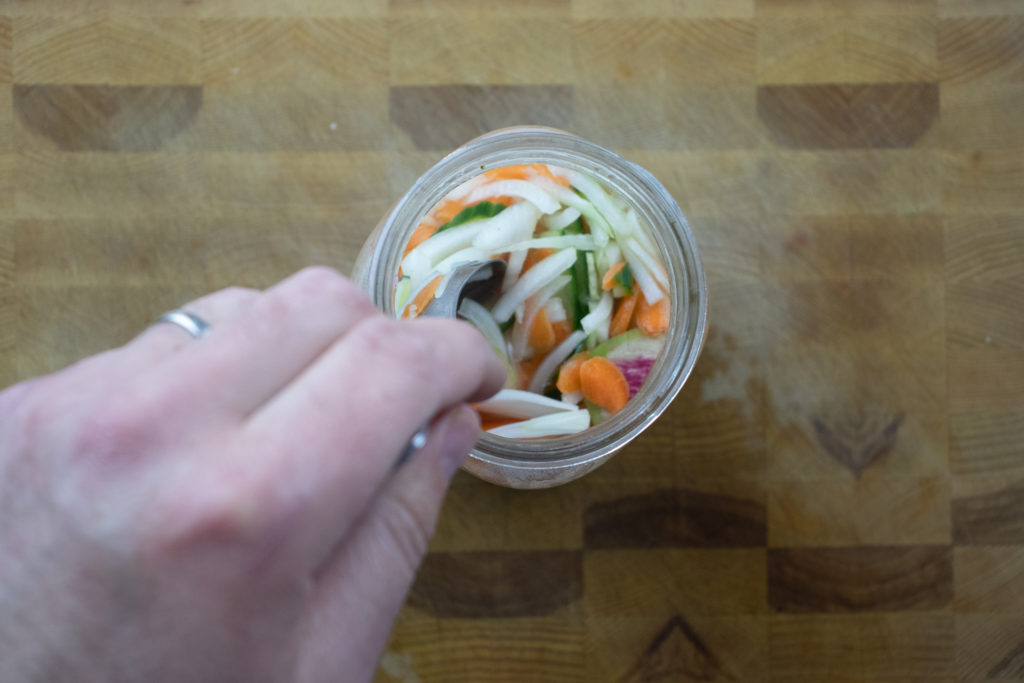
To make the Quickle brine get a medium pot and add the vinegar, water, salt, and sugar. Bring the brine to a boil over high heat, stirring to ensure the salt and sugar dissolve. Once the brine comes to a boil, pour it over your vegetables. For crunchy Quickles, cool the brine in the fridge before adding the vegetables. The trade-off for this method is that the vegetables will have a less briny flavour.
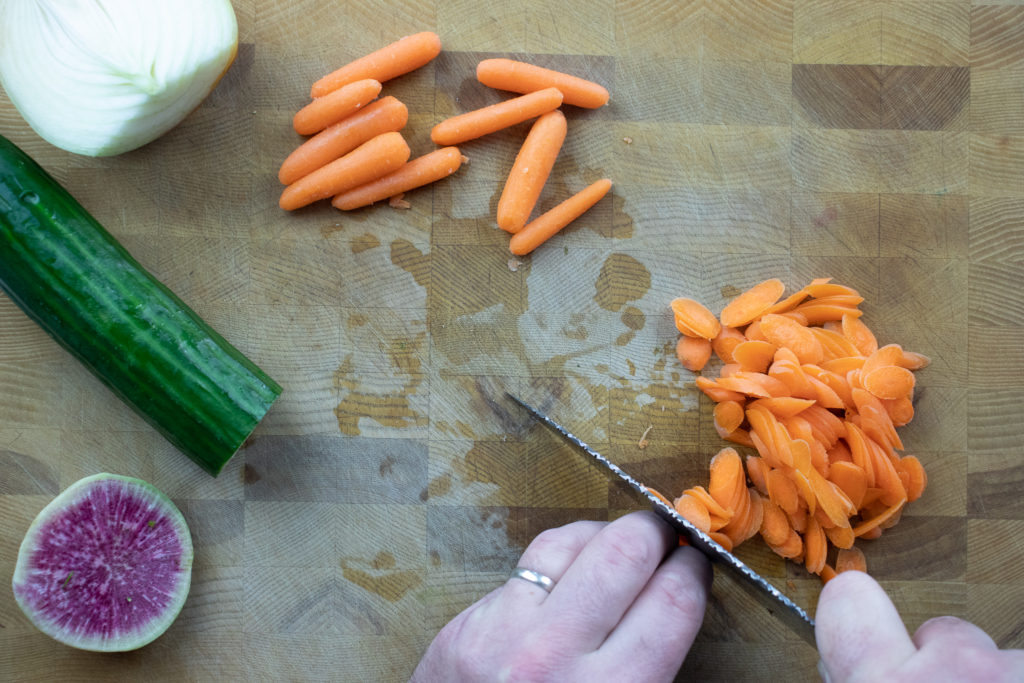
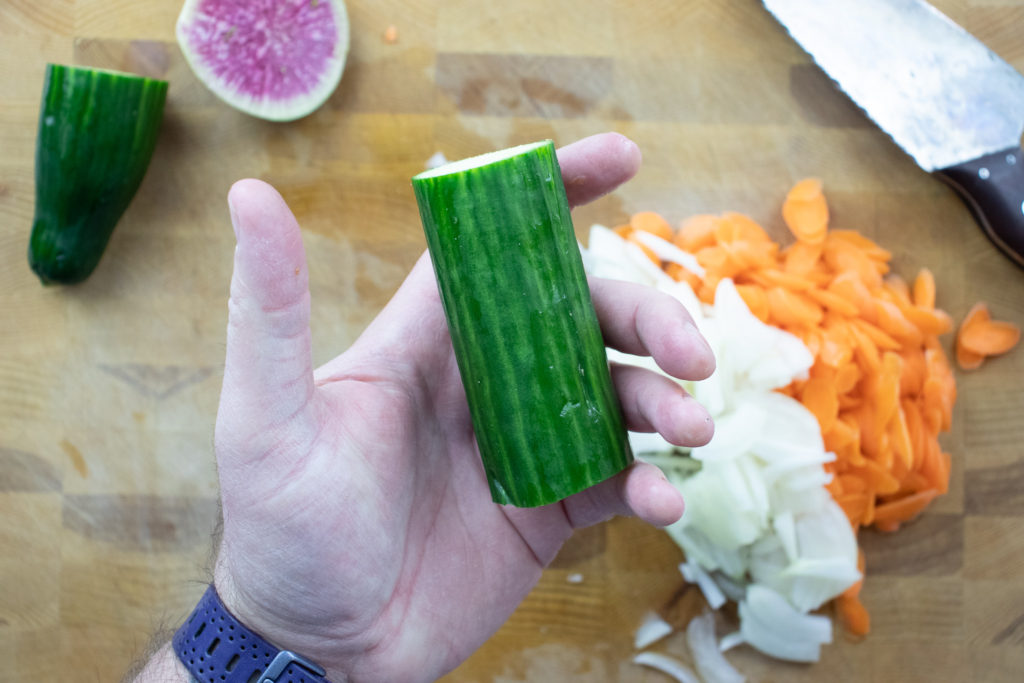
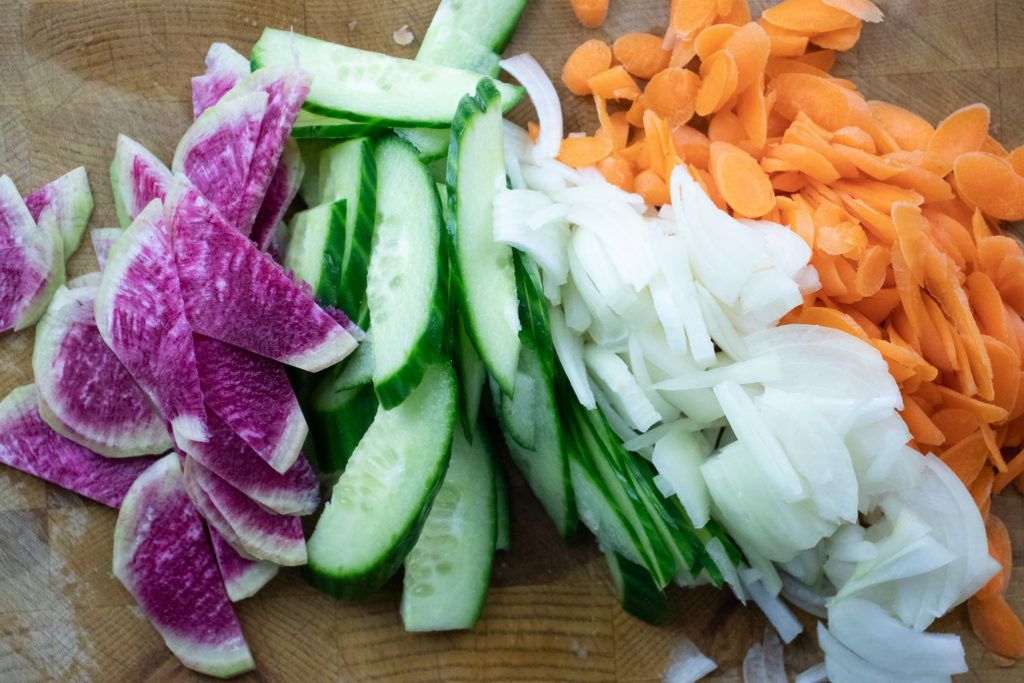
Prepping Quickle Vegetables
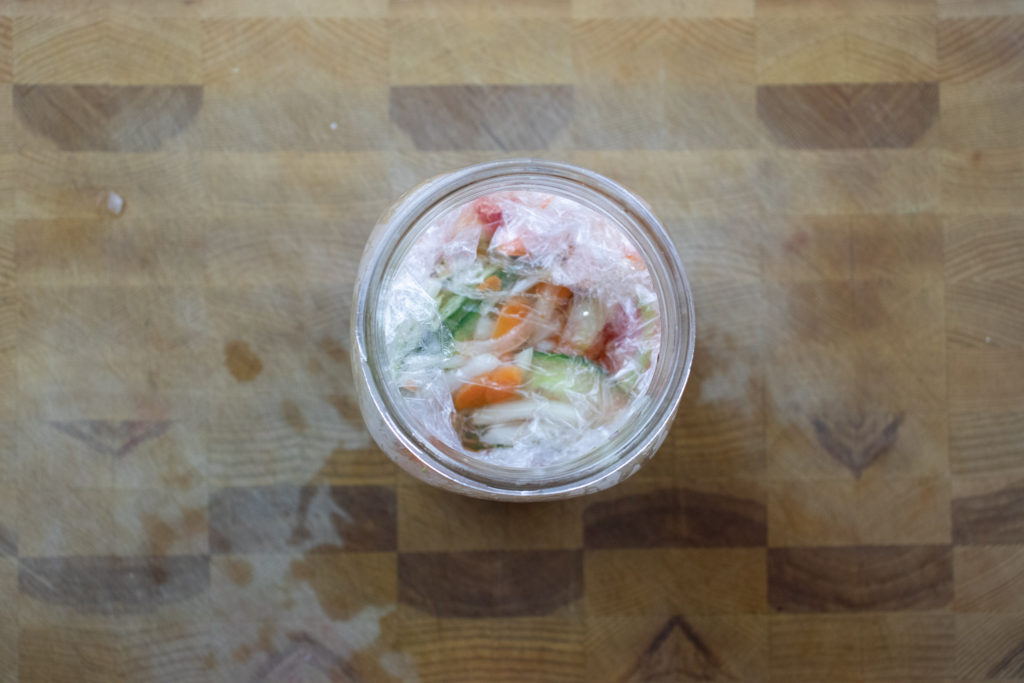
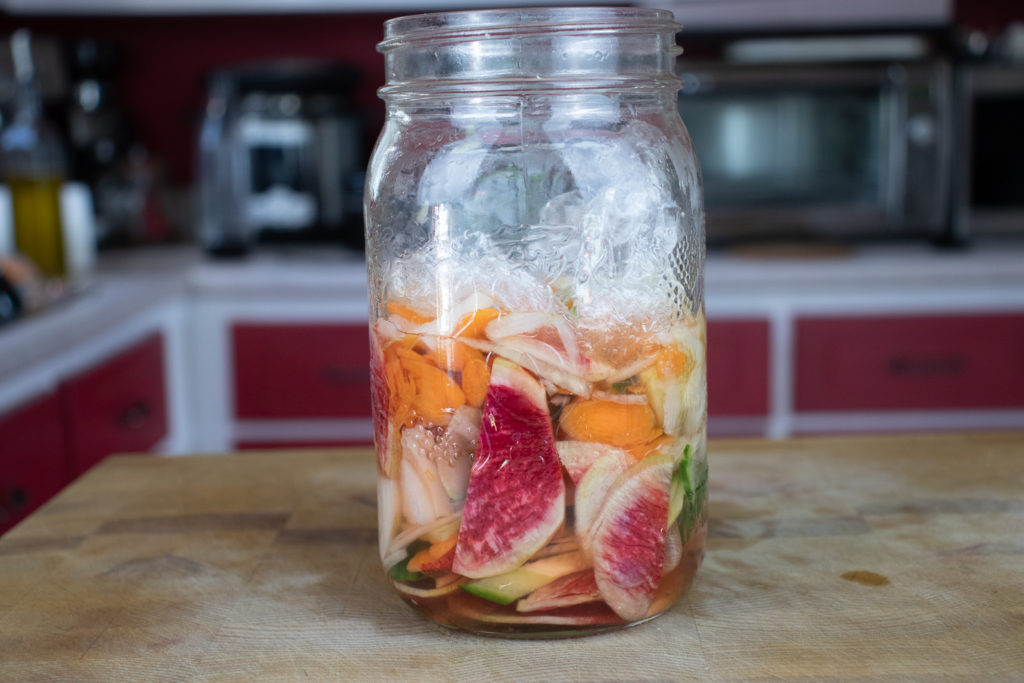
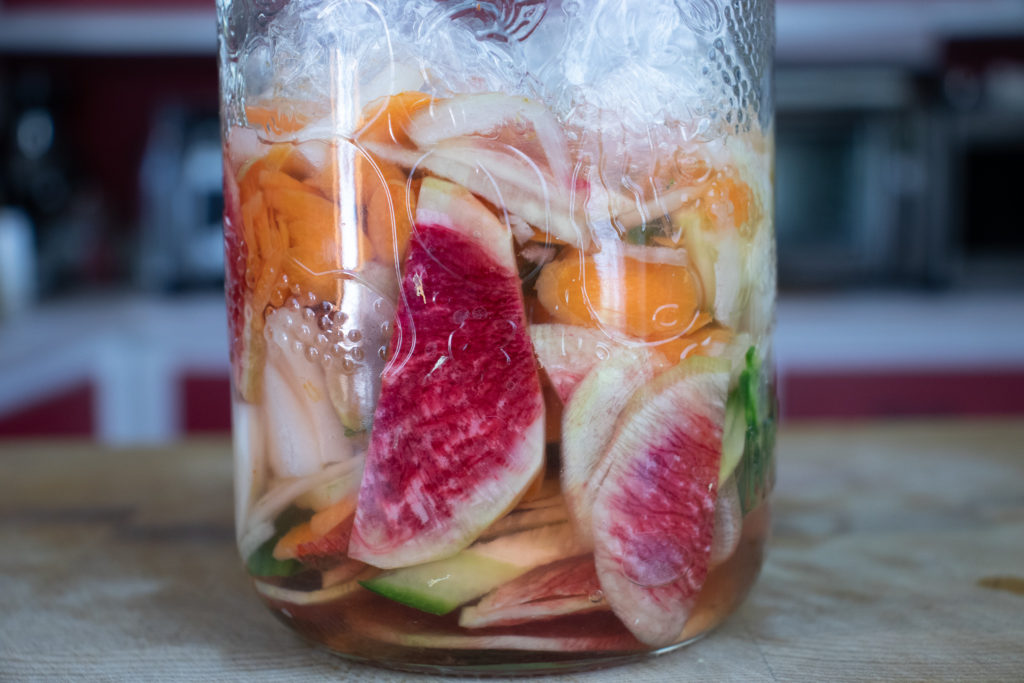
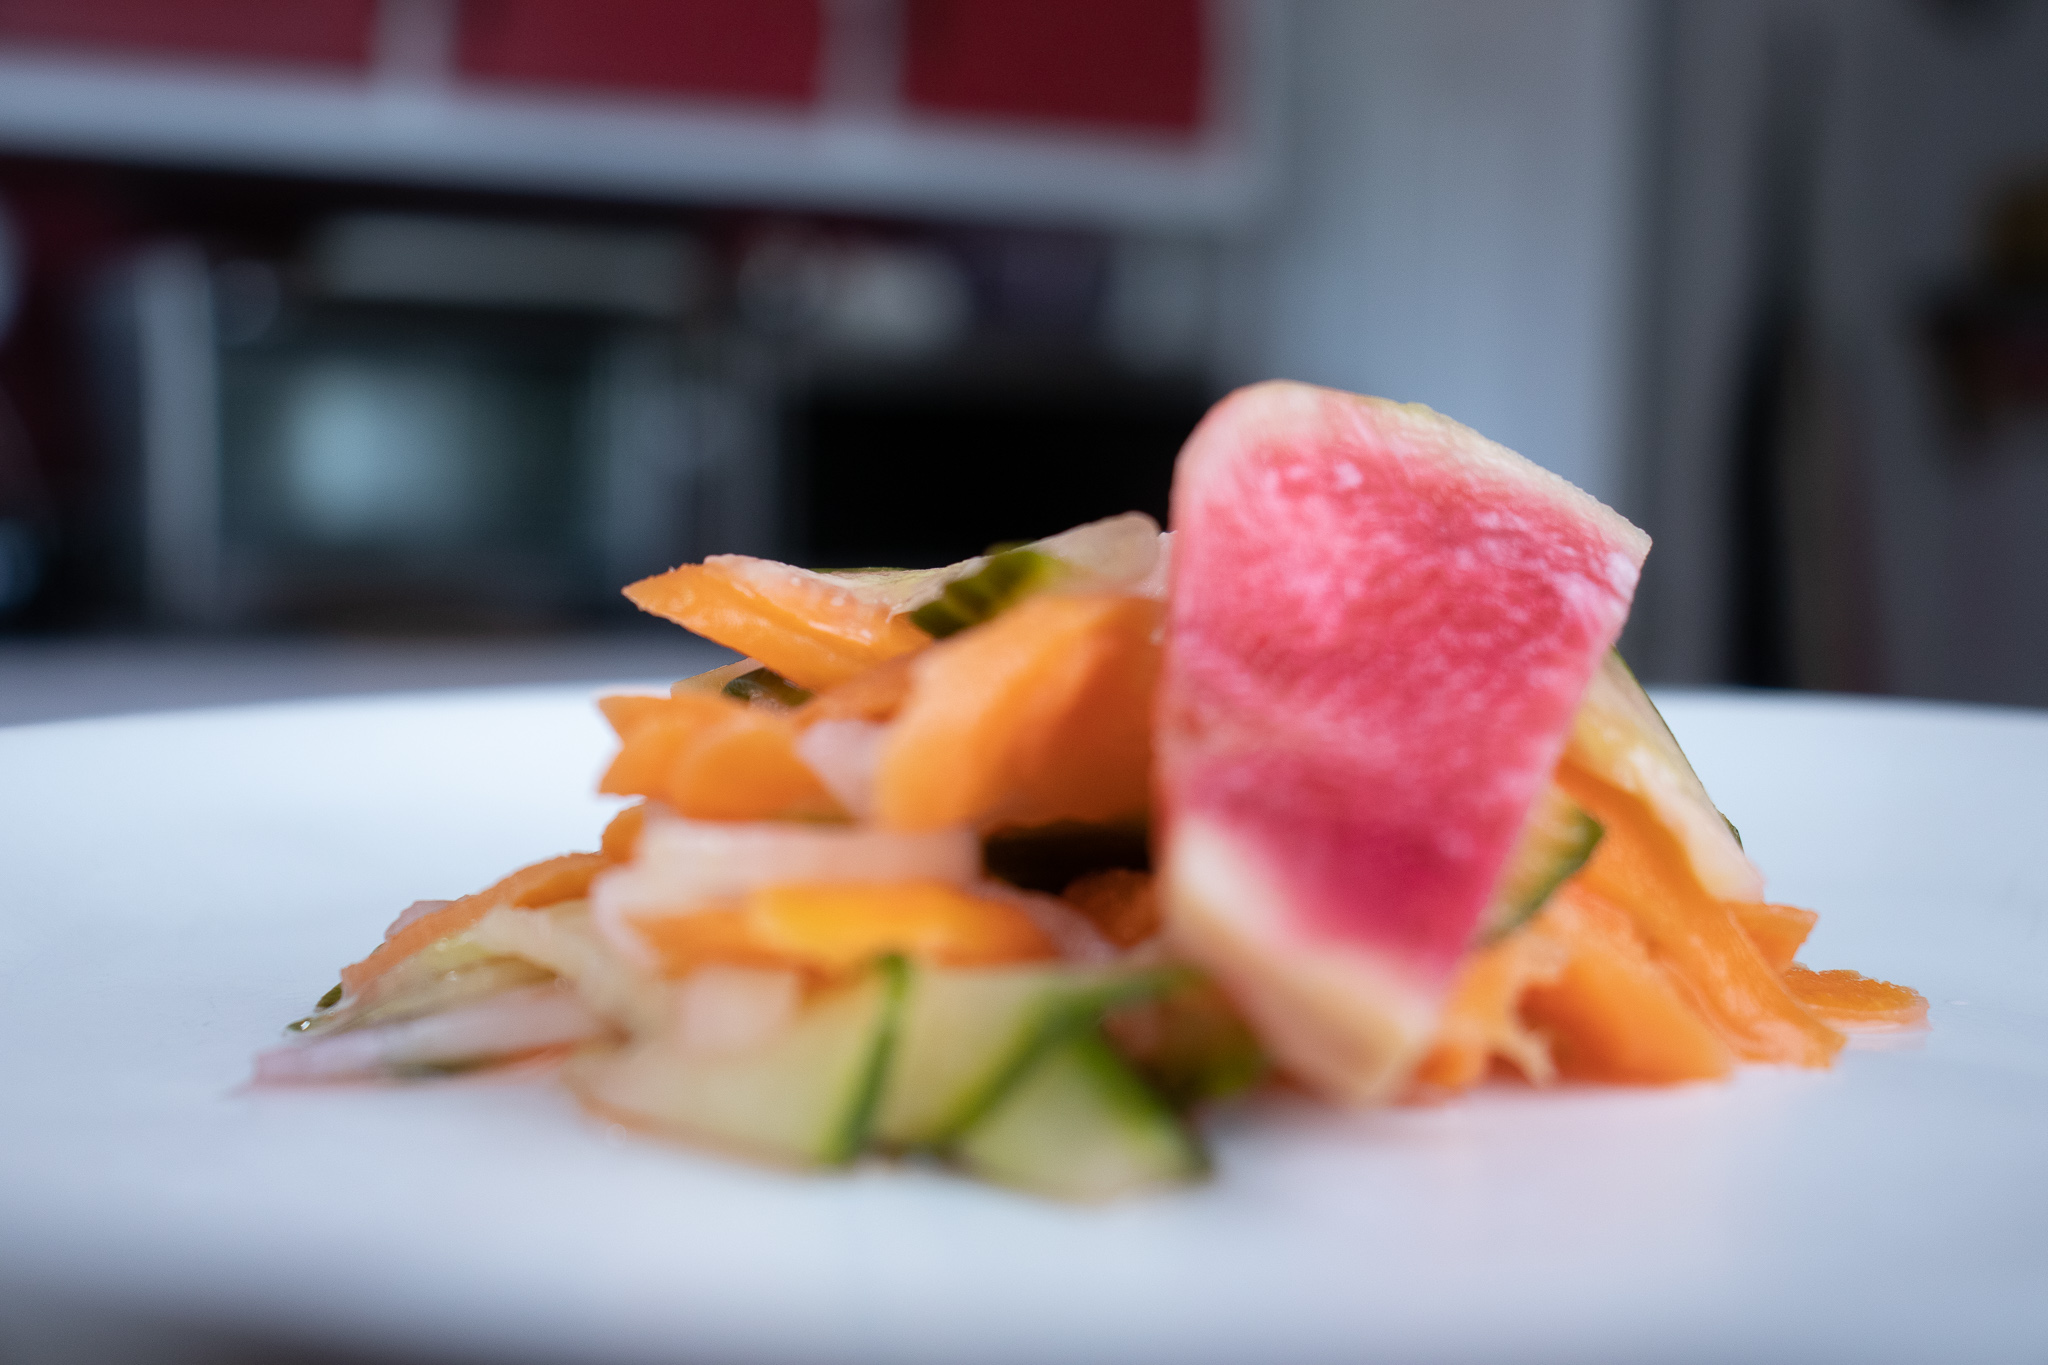
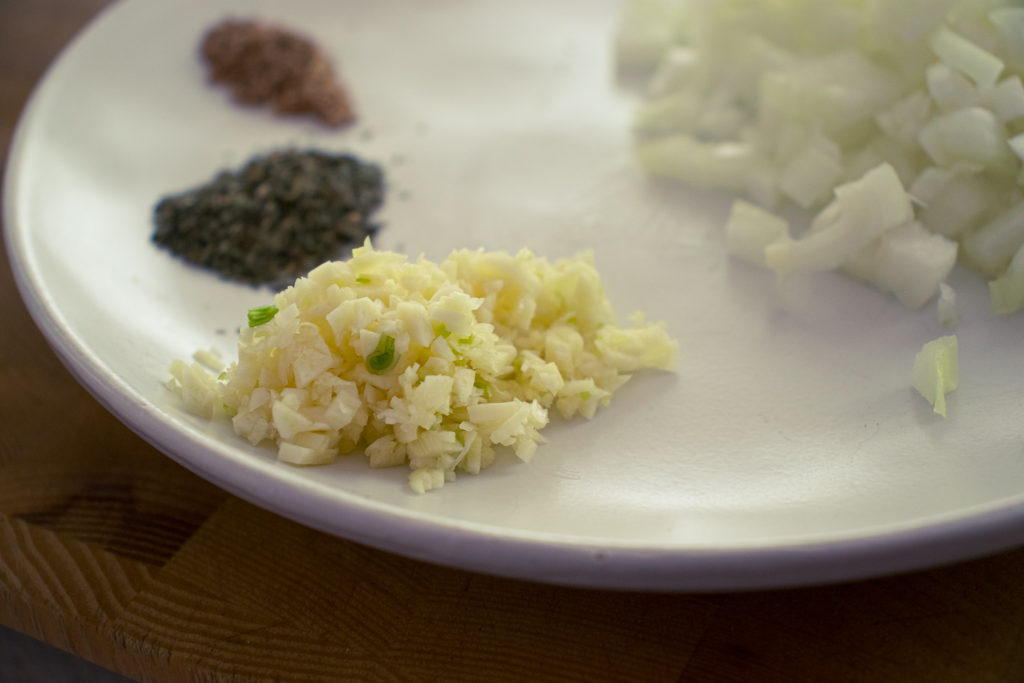
Vegetables for Quickles should be cut thin. Otherwise, they won’t absorb any flavour. 2 to 3 mm is the perfect range. If you add hot brine to the vegetables, you can cut them a bit thicker. The vegetables I used were cucumber, carrot, onion, and watermelon radish. Other vegetables you can use include cauliflower, daikon, asparagus, green beans, beets, etc. Essentially, if you can make regular pickles out of it, you can use it to make quick pickles So, slice the vegetables and put them in a clean jar or container. When making Quickles, you don’t have to worry about sterilizing the container as you would for regular pickles because the risk of contamination is low to non-existant.
Finishing The Quickles
To finish the Quickles, pour the hot or cold brine over the vegetables, cover them, and cool them to room temperature. If the brine is cold, cover the Quickles and put them in the fridge for at least an hour before use. For the hot brine method, the quickles are ready to use once the brine cools to room temperature. After they’re cool, store the quick pickles in the fridge.
The Wrap Up
I love these quick pickles for many reasons, but mainly because of how versatile they are and how quick they are to make. If I want to make a Banh Mi Sandwich, I can make a fresh batch of Quickles and have them ready in less than an hour. You can’t beat that. I suggest that you experiment with this recipe and make it your own. The world is your oyster when it comes to making Quickles.
Thank you so much for coming to my blog and reading this post. I hope you’ve enjoyed it and that you’ve taken something useful from it. This blog aims to share the knowledge and skills that I’ve learned over my 20-plus year cooking career to help make cooking more enjoyable and more accessible for those who don’t find it easy and enjoyable. If you’d like to be a part of that mission, there are a few ways that you can help. The easiest way to help is to share this post on Facebook or Pinterest or even just leave a comment below and give the recipe a good rating. If you’d like to help financially, join my Patreon by clicking here. Patrons get access to exclusive content, including live streams, monthly cooking videos and more. And, if you want to always know what’s going on with Chef’s Notes, you can subscribe to my monthly newsletter below, so you never miss a post. You get all the behind-the-scenes information and lots more.
Quickles (Quick Pickles)
Quickles or Quick Pickles are exactly what they sound like; Pickles that don't take long to make. These pickles have carrot, onion, radish, and cucumber but you can use any firm vegetable you'd like.
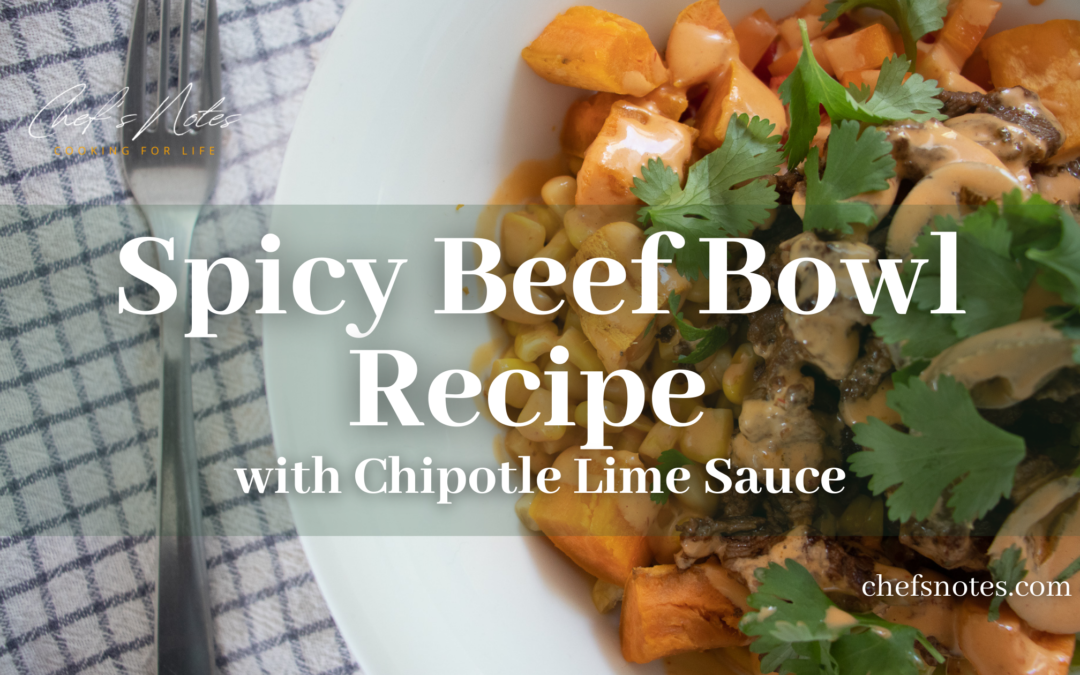
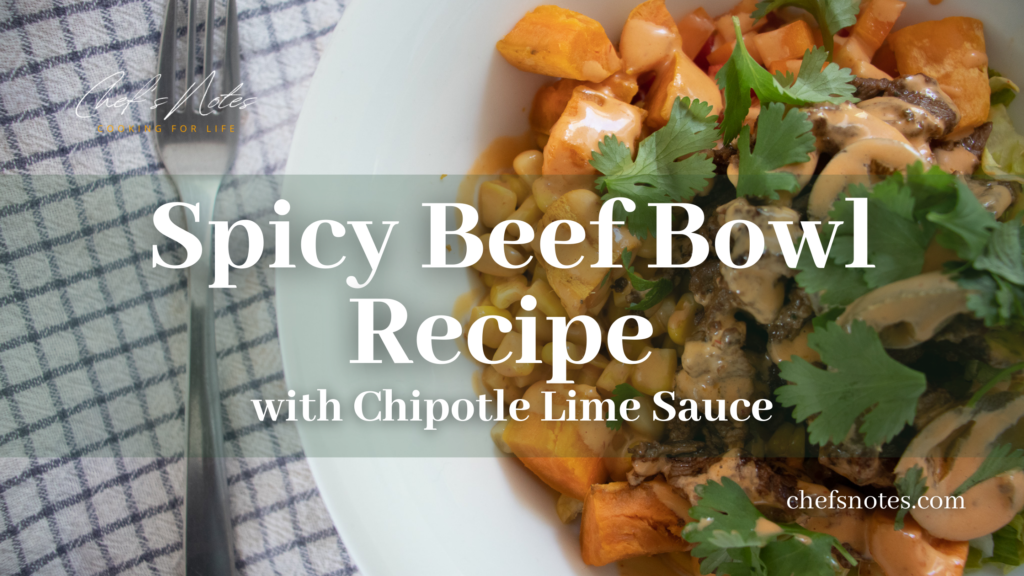
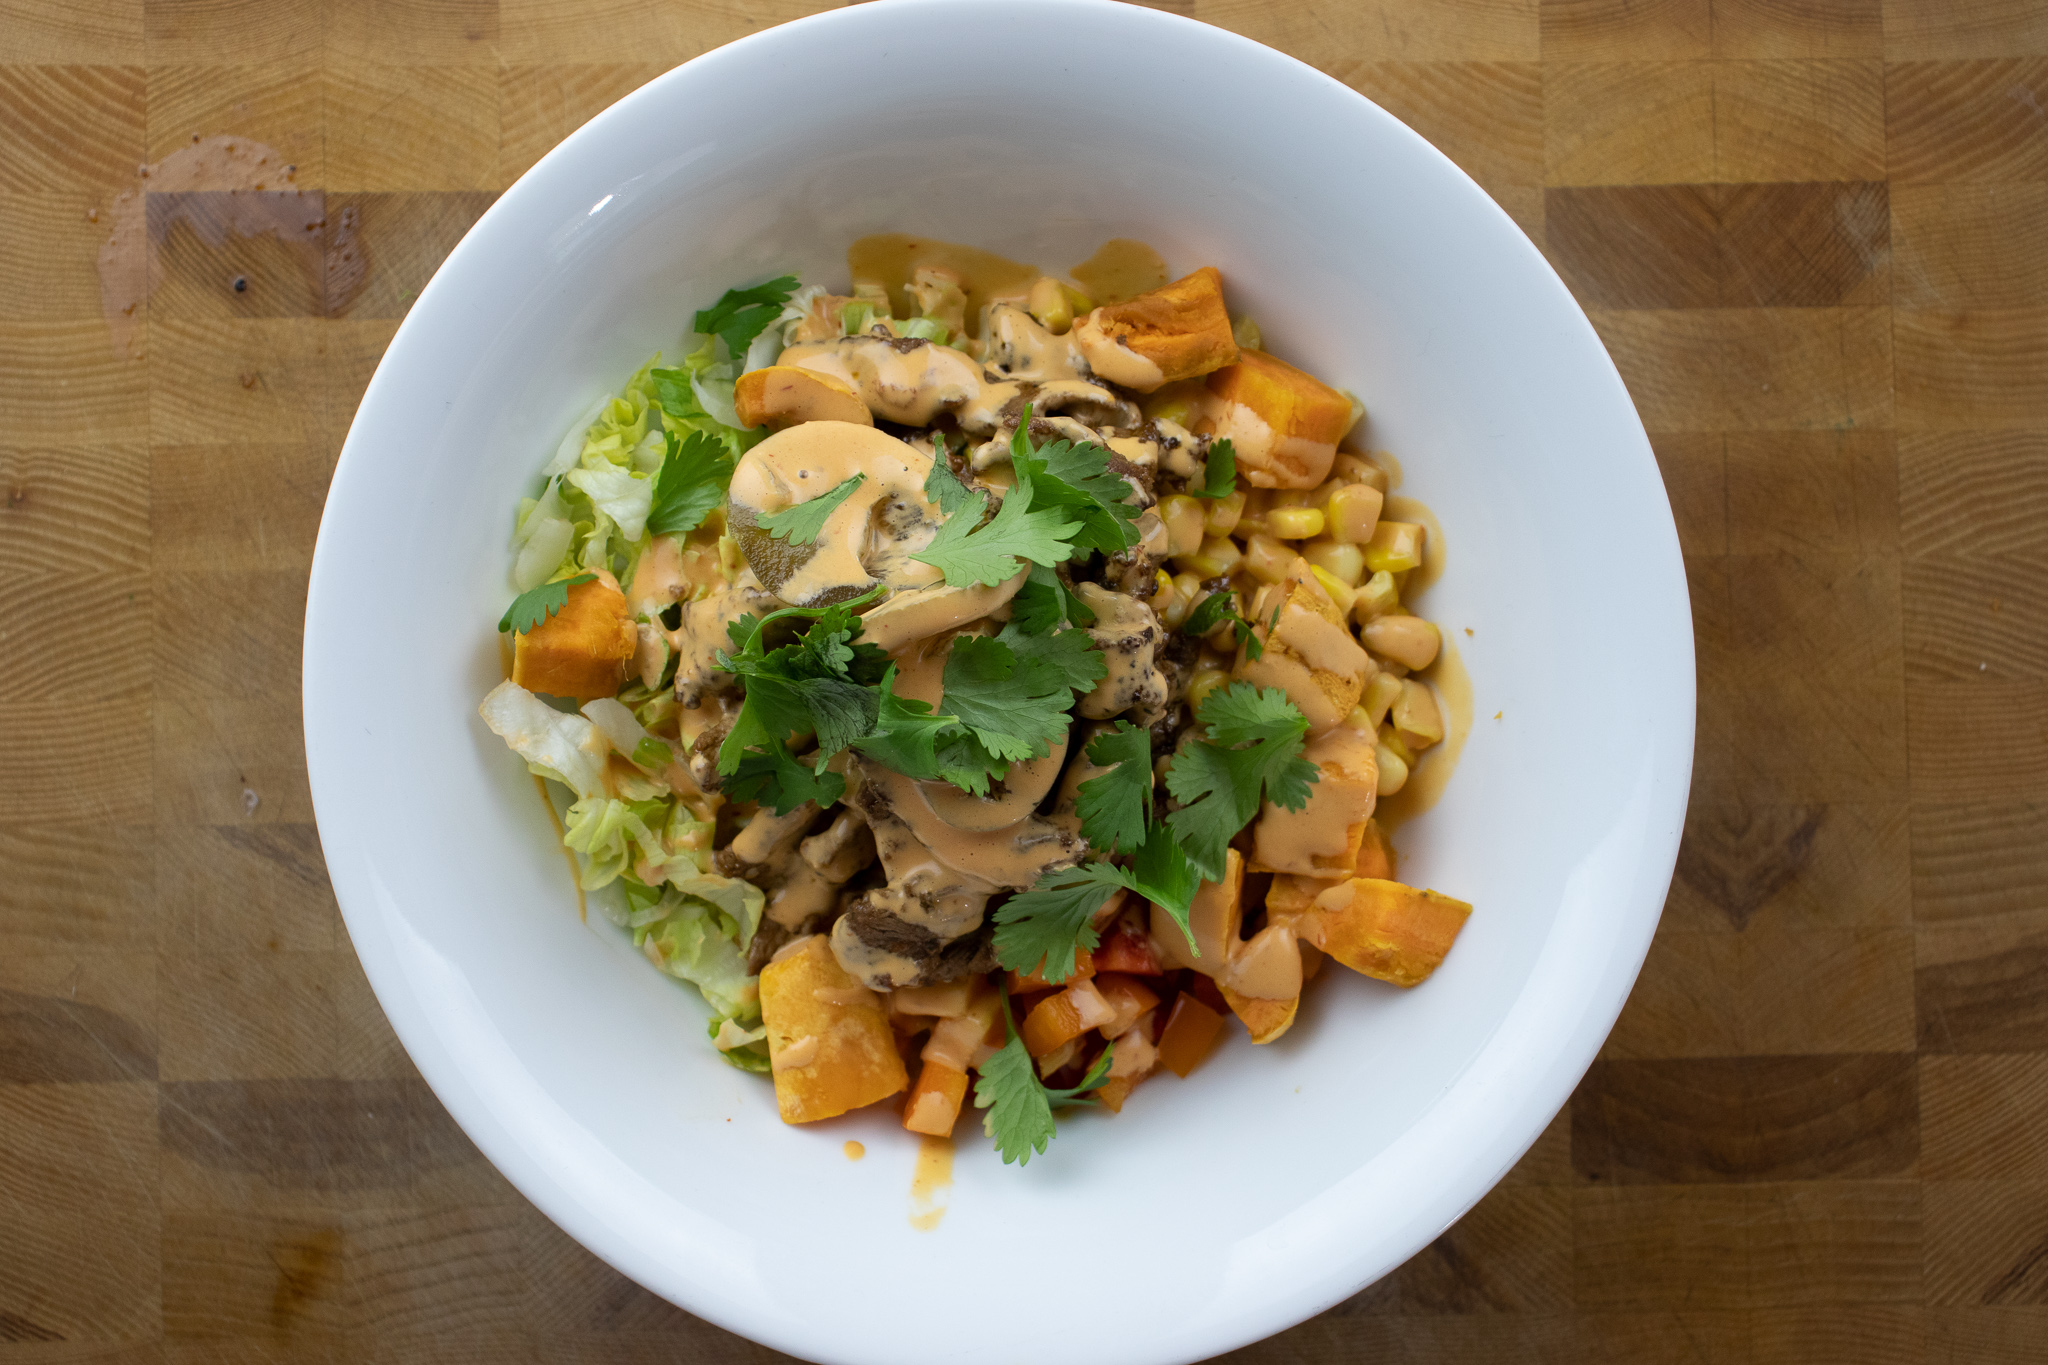
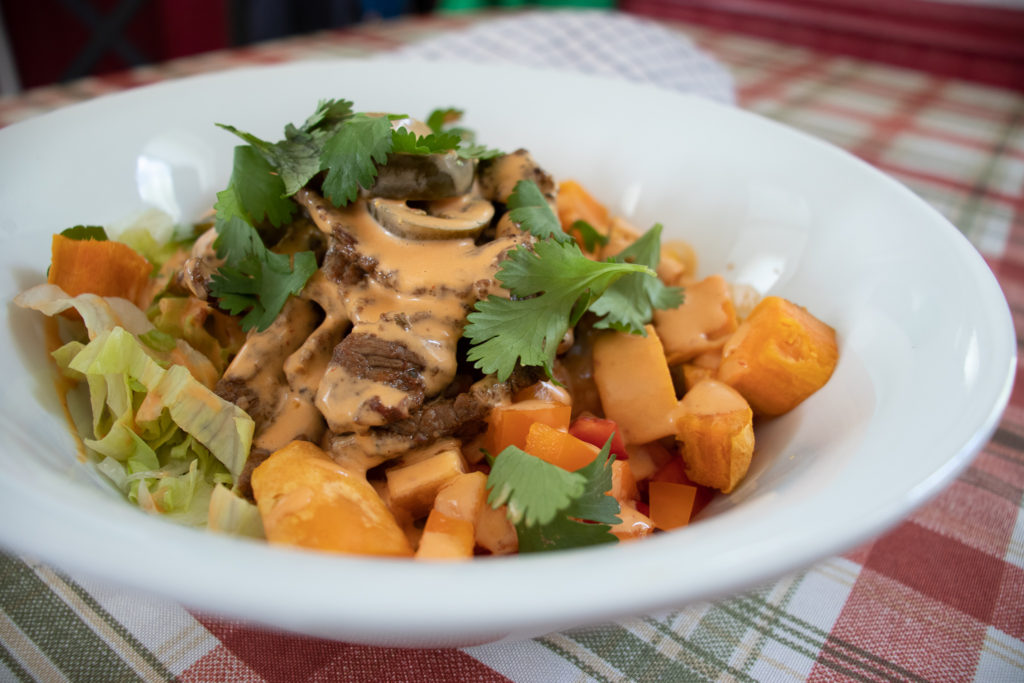
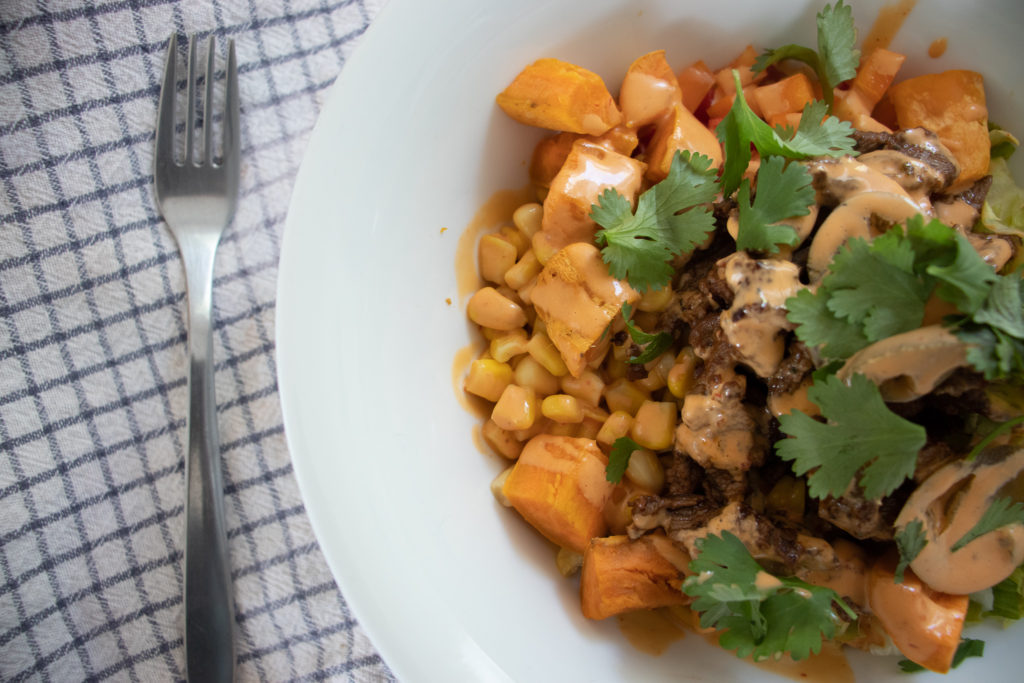
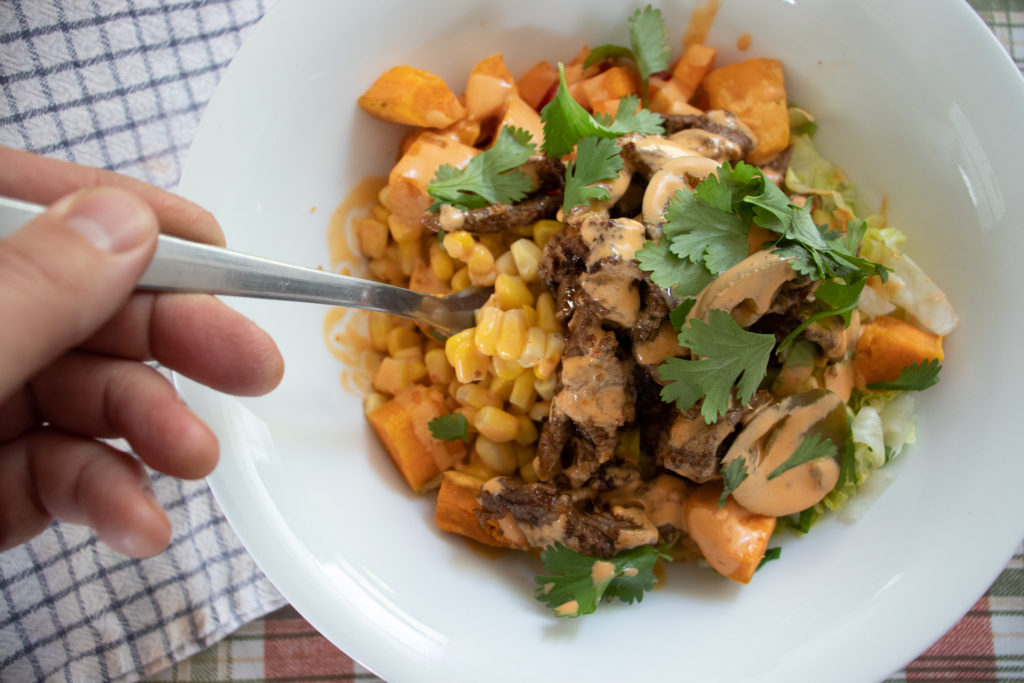
Looking for a spicy, flavour-packed bowl recipe? Look no further! Our spicy beef bowl recipe with tangy chipotle lime sauce will become your new favourite. It’s loaded with marinated beef, lots of veggies, and a little bit of rice for a crave-worthy meal perfect for sharing. Don’t want to use beef? No problem – this recipe is versatile enough to work with your preferred protein. Keep reading for all the delicious details, and get ready to cook up a storm!
Spicy Beef Bowl: What’s Inside?
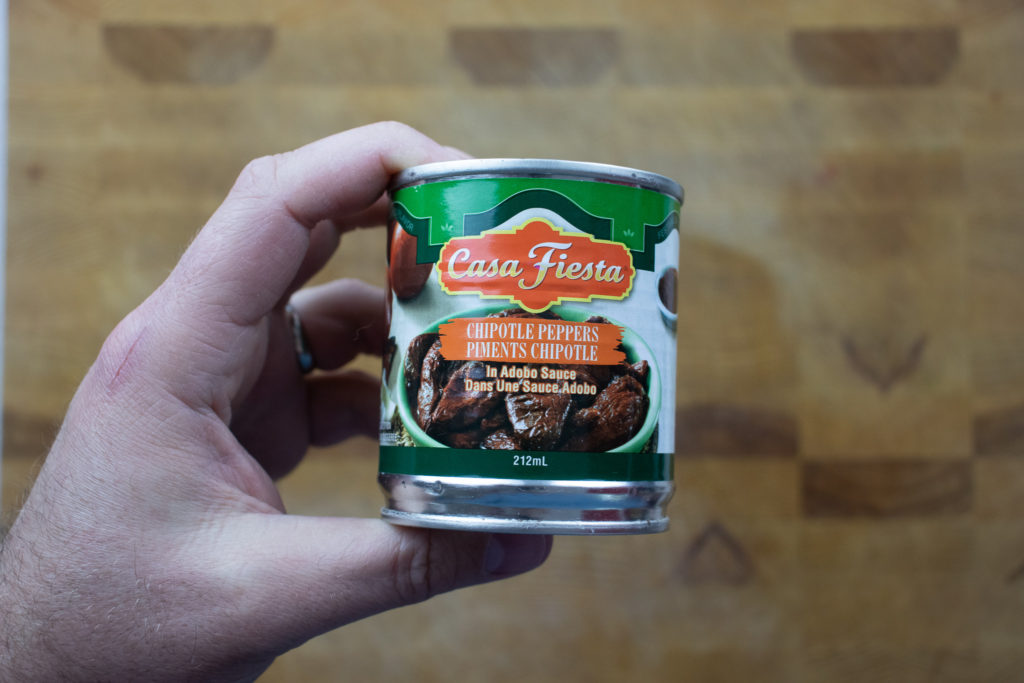
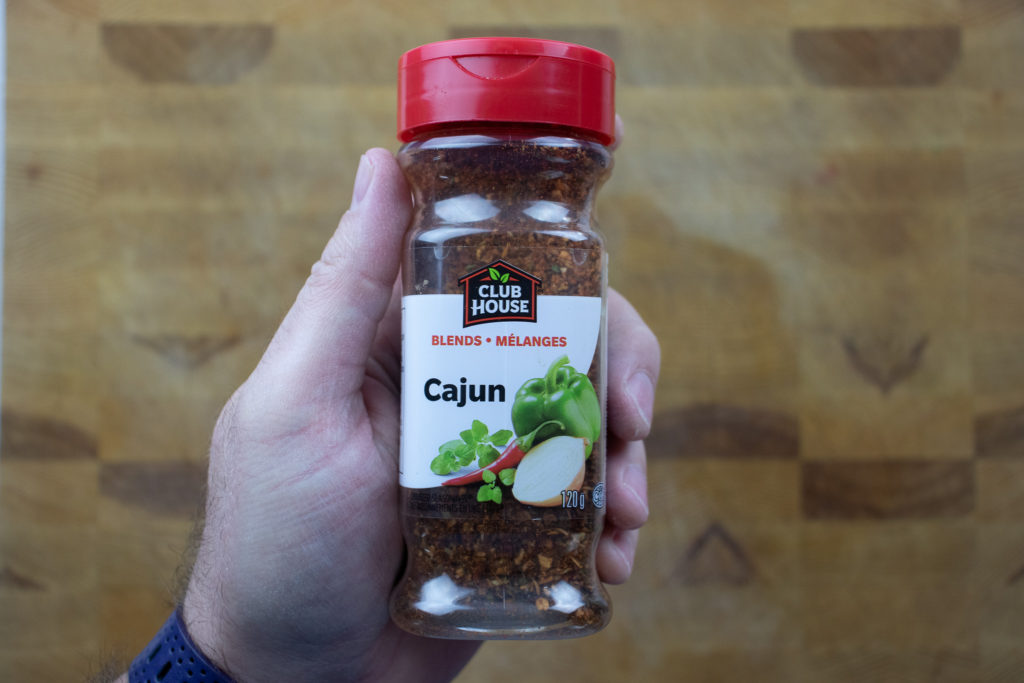
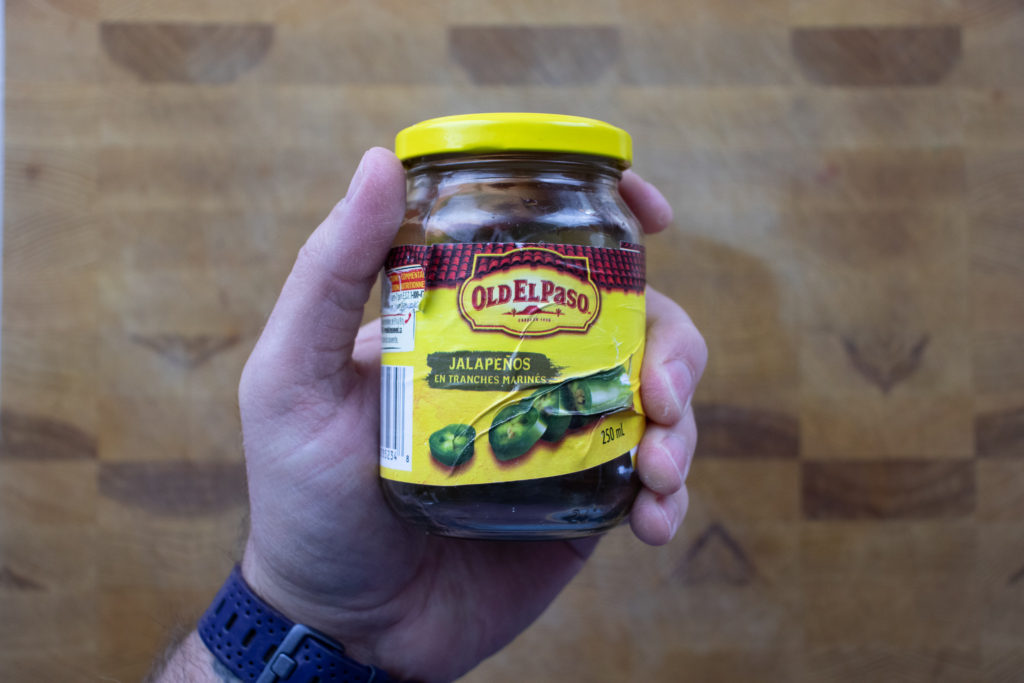
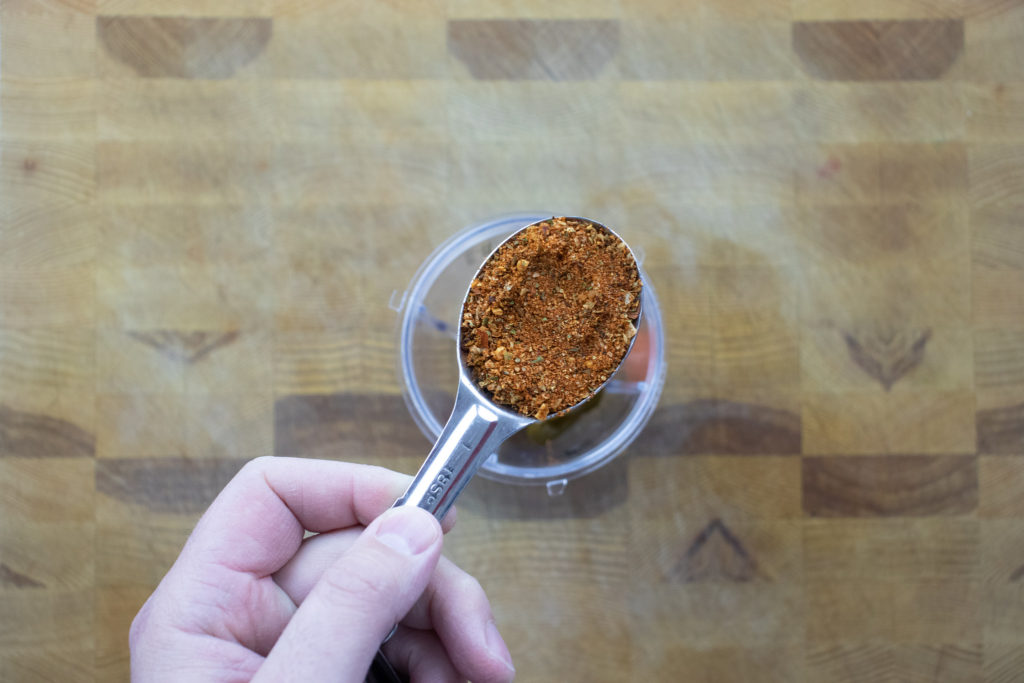
This spicy bowl recipe is loaded with bold, flavourful ingredients that are sure to satisfy your cravings. I’ve included chipotles in adobo, cajun seasoning, and pickled jalapenos in the marinade for the beef and the chipotle lime sauce. These spicy ingredients add a ton of flavour to the dish. If you’re looking for an extra kick, add half a habanero pepper to the marinade and sauce. From the marinated beef to the standalone jalapenos, every ingredient in this bowl is carefully chosen to deliver maximum flavour and spice. Keep reading to learn more about this recipe and how to make it at home.
Marinating The Beef
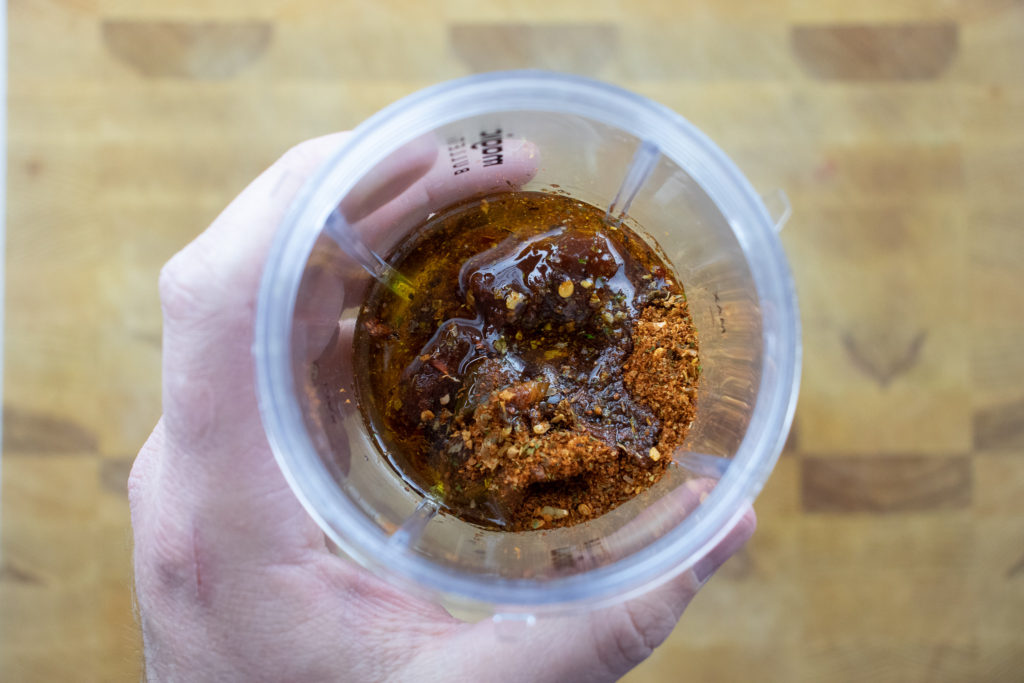
Making the spicy beef marinade
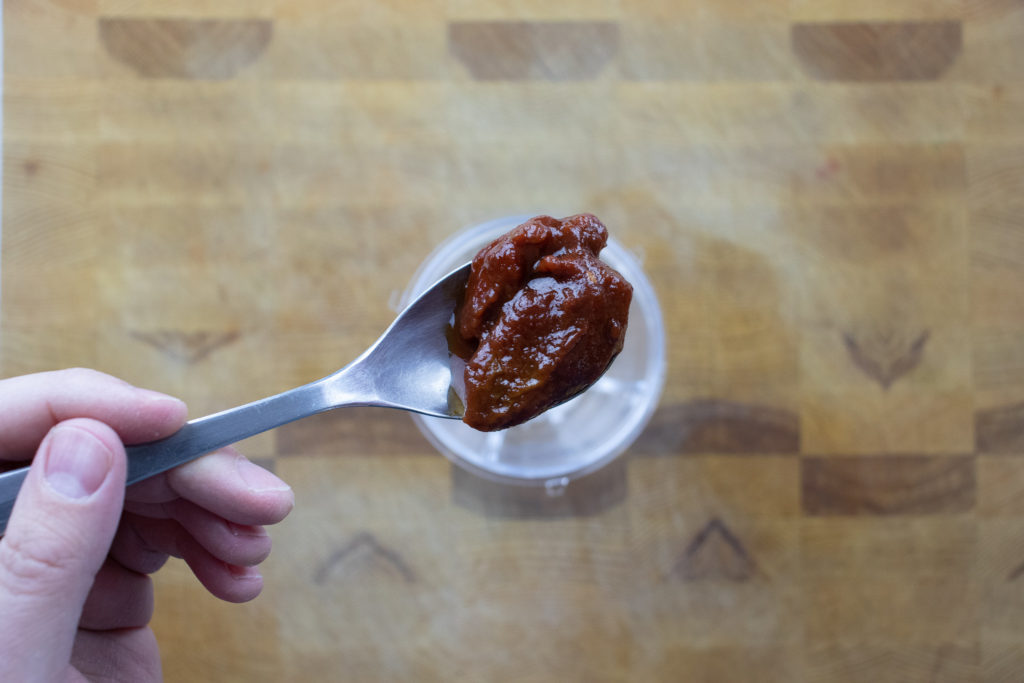
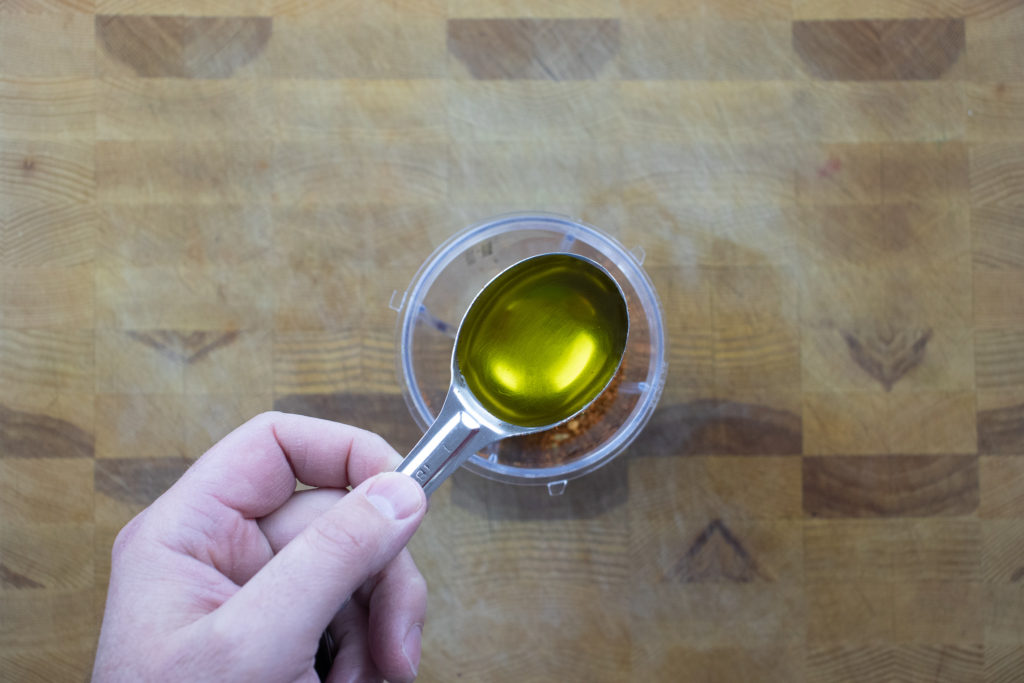
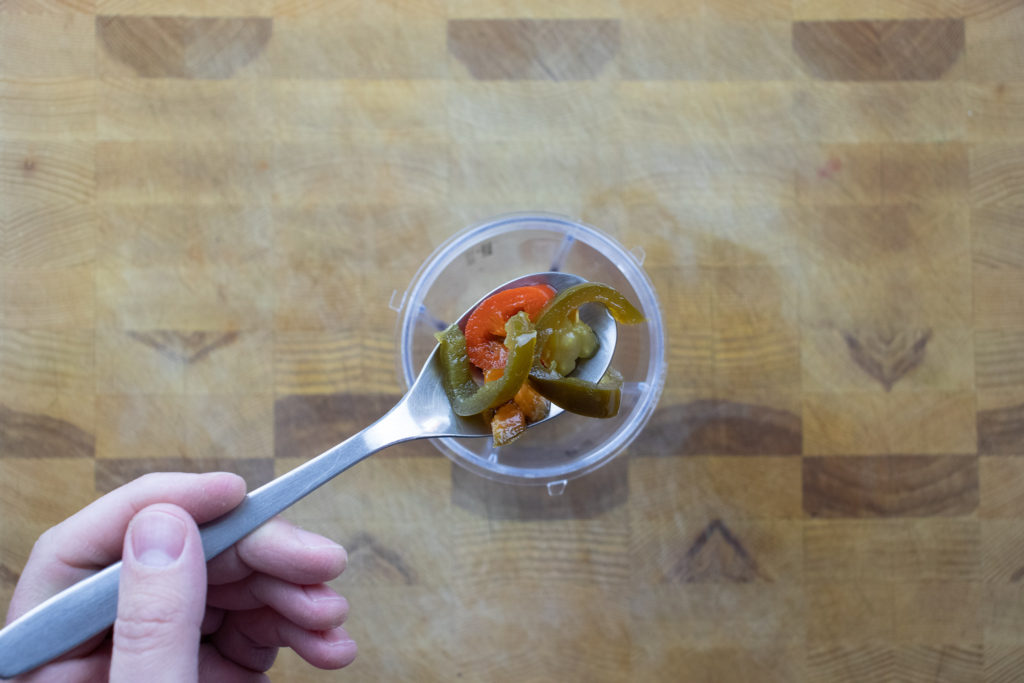
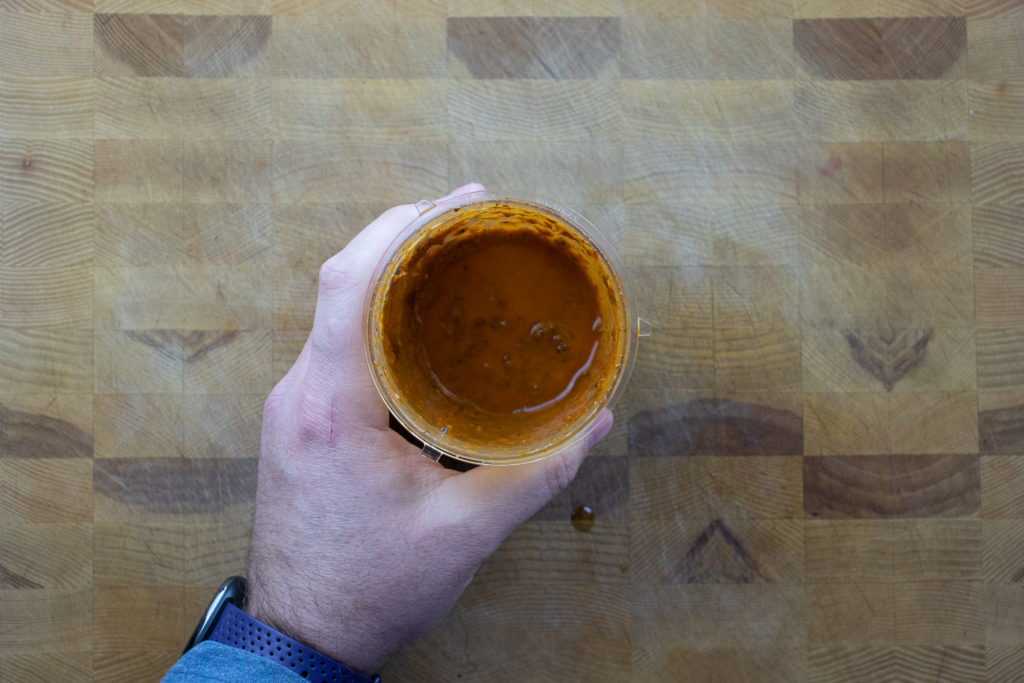
This spicy beef marinade is packed with bold, flavourful ingredients to boost your meat’s taste. One of the key players in this marinade is chipotles in adobo sauce – have you heard of it? It’s a Mexican condiment made from smoked and dried jalapeno peppers that have been rehydrated and canned in a sauce made of tomato, vinegar, and spices. In addition to the chipotles, you’ll also need cajun seasoning, pickled jalapenos, olive oil, and salt. Just toss all these ingredients into a blender or food processor and blend until smooth. If you don’t have either of these appliances, it’s no problem – finely chop the chipotles and jalapenos by hand and mix them with the other ingredients. This marinade works well with various proteins, including beef, chicken, pork, salmon, or tofu. Use your favourite, or mix it up and try something new! Keep reading to learn more about using this marinade in the spicy beef bowl recipe.
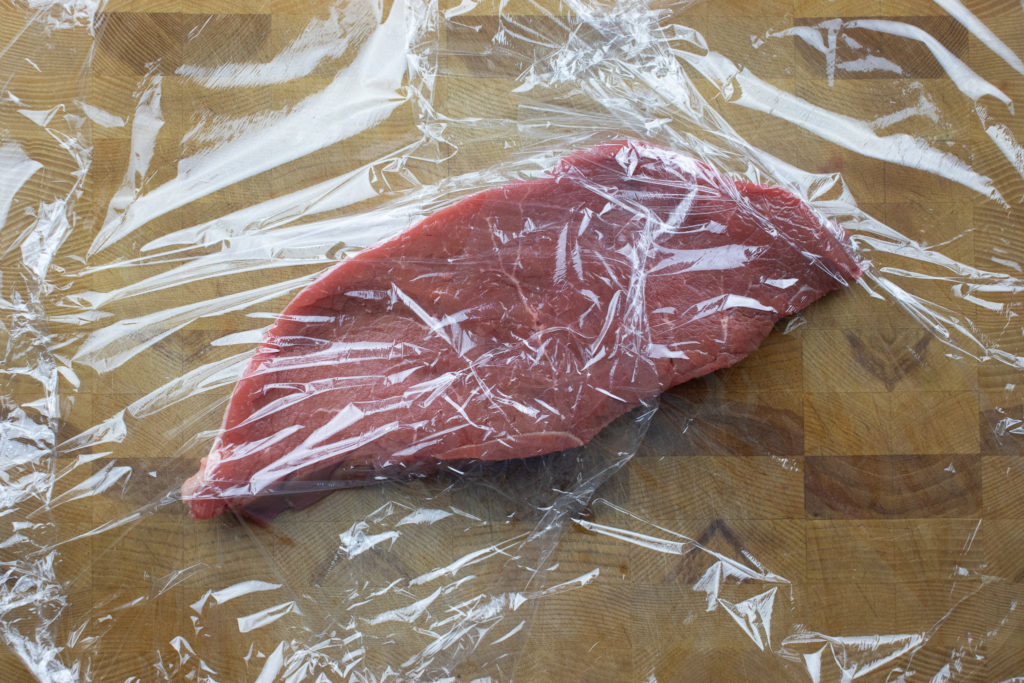
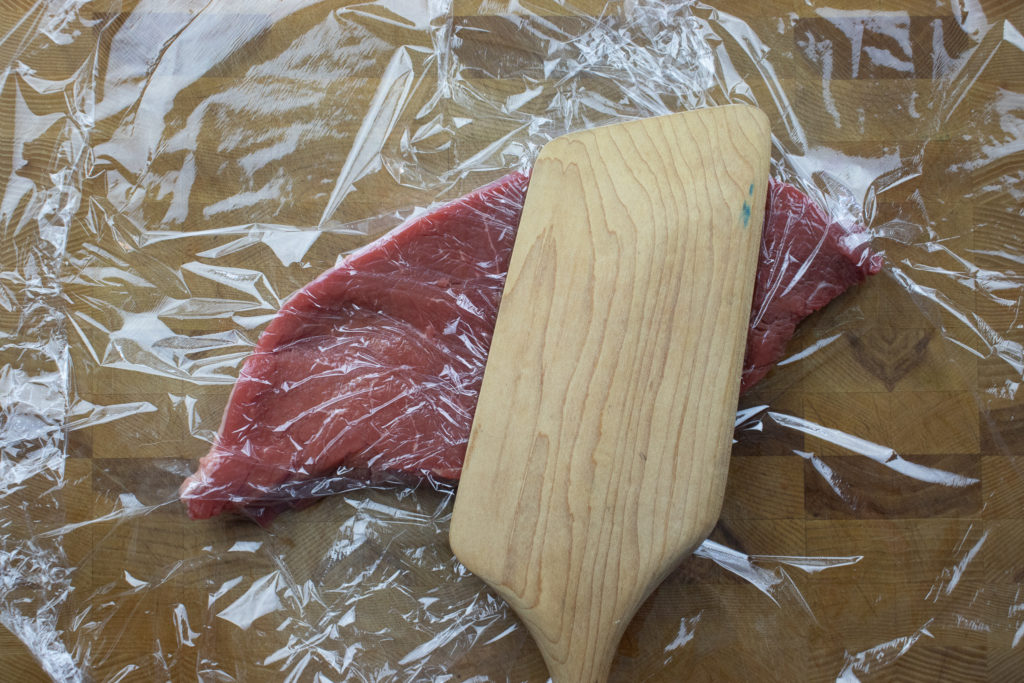
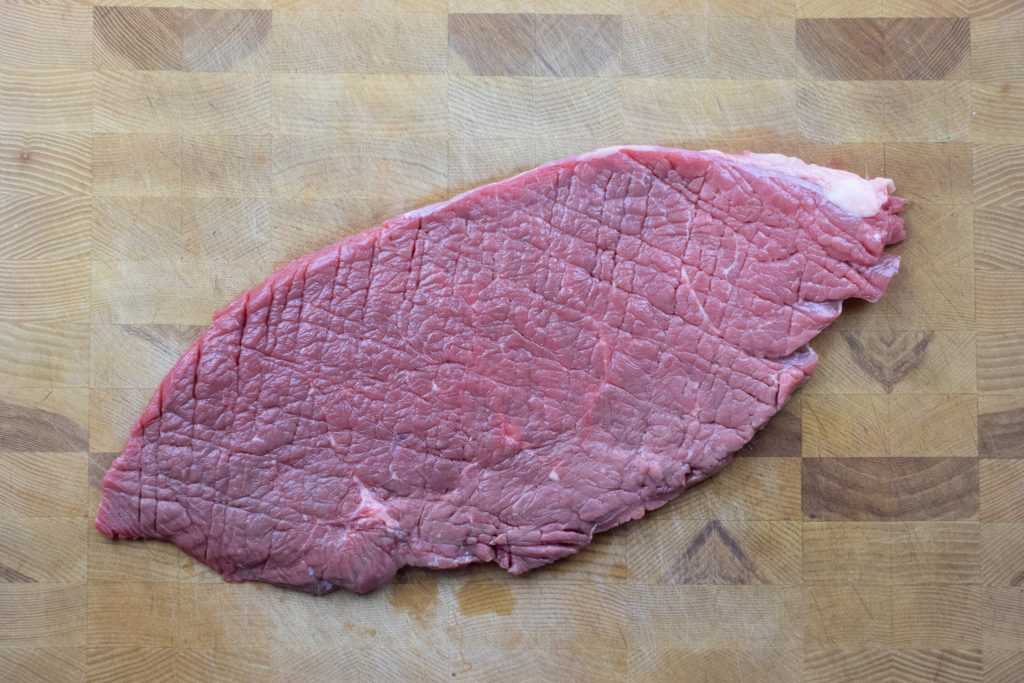
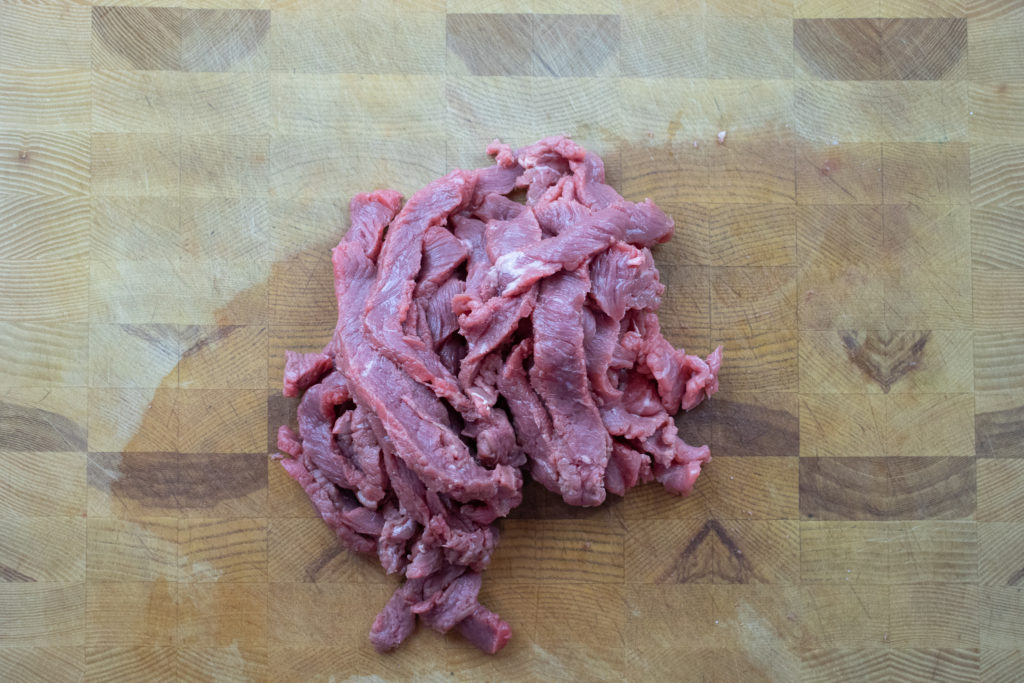
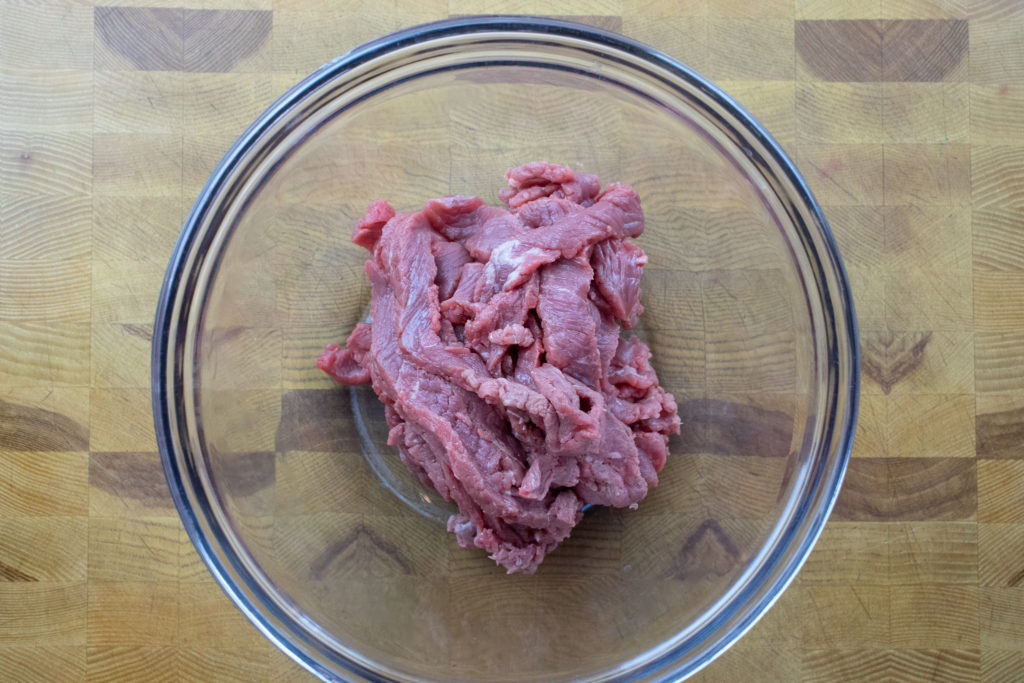
Preparing the beef
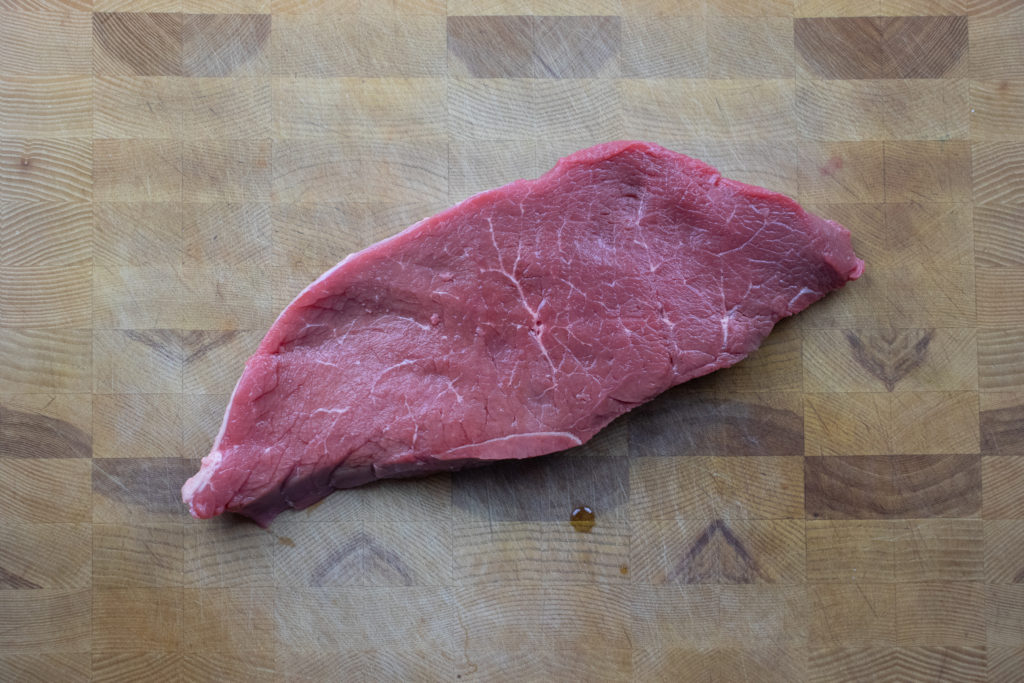
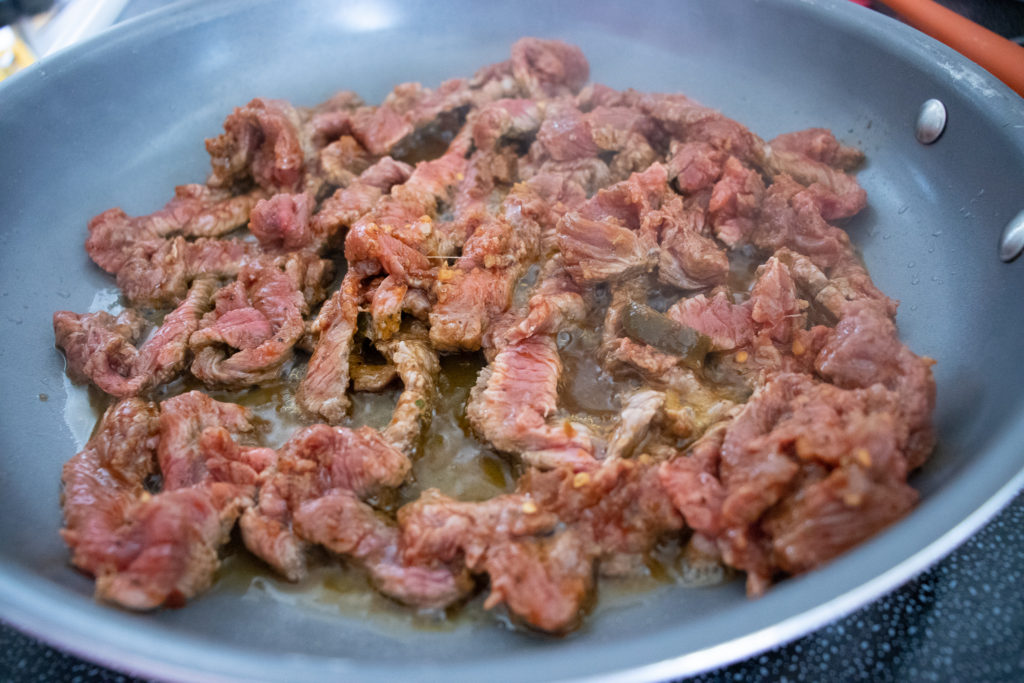
For this spicy beef bowl recipe, I recommend top sirloin, but sirloin tip, inside round, or top round would also work well. Sirloin is a lean cut of meat that comes from between the loin and the round or rump of the cow. It is often used for grilling but can be tough if not prepared correctly. To make it more tender, it is best to pound the meat thinly and then slice it across the grain into thin strips. This helps shorten the muscle fibres and makes the meat more enjoyable and easier to eat.
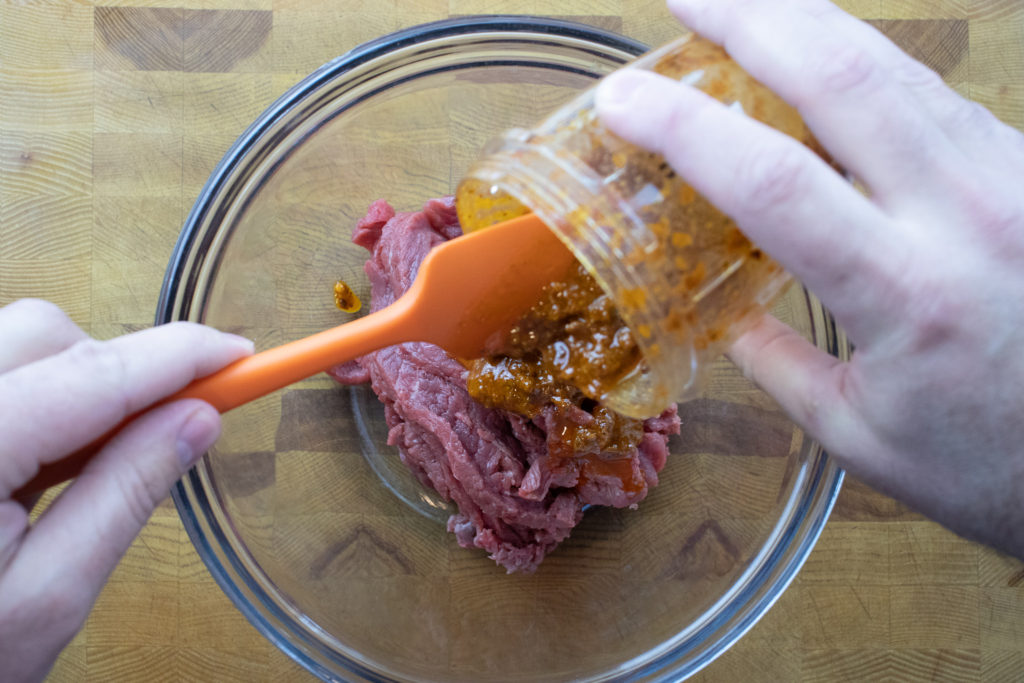
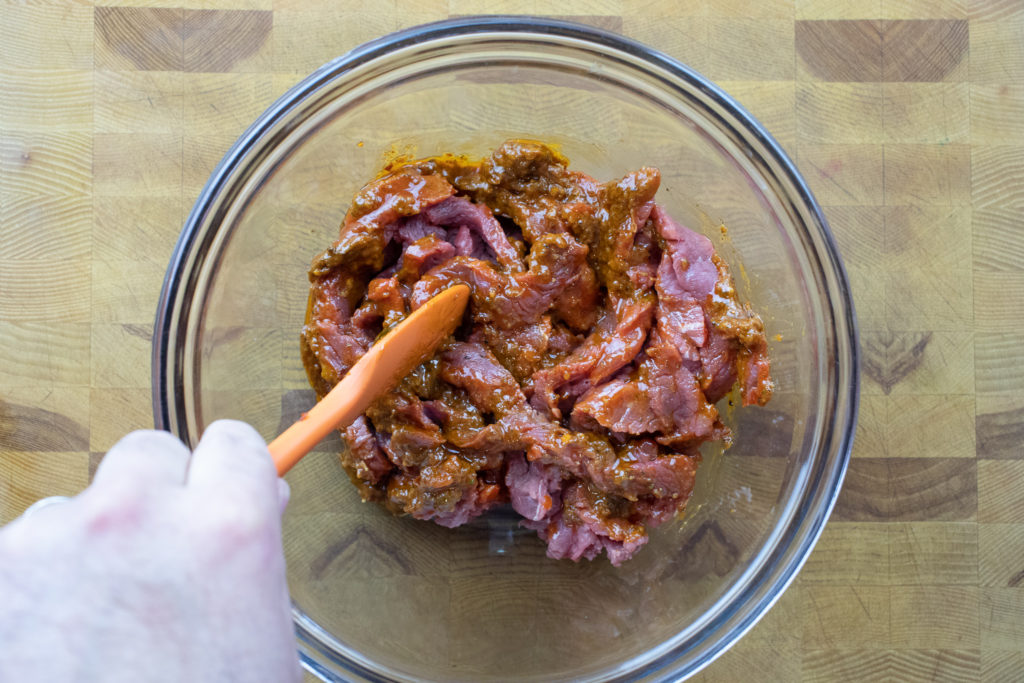
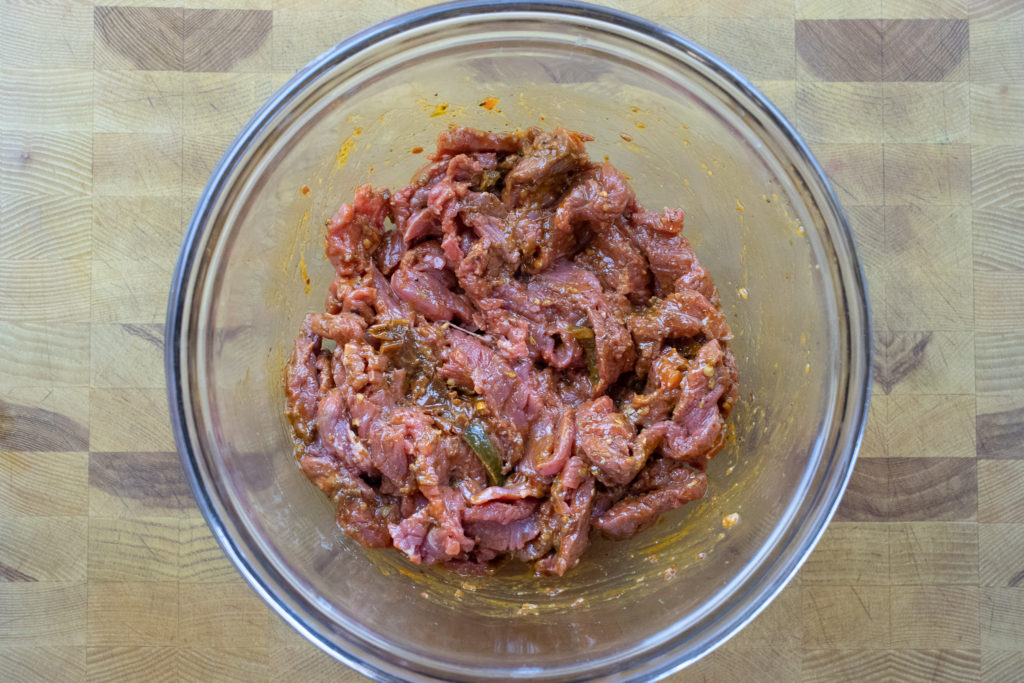
Marinating the spicy beef
Put the sliced top sirloin in a medium mixing bowl or zip-lock bag. Add the marinade to the beef and mix well to ensure all the beef is coated. Cover the beef and put it in the refrigerator for a minimum of two hours and a maximum of twenty-four hours. Any less than two hours and the meat isn’t going to pick up much of the marinade’s flavour. Any longer than a day, the meat will start to cure, making it tough.
Tangy Chipotle Lime Dressing
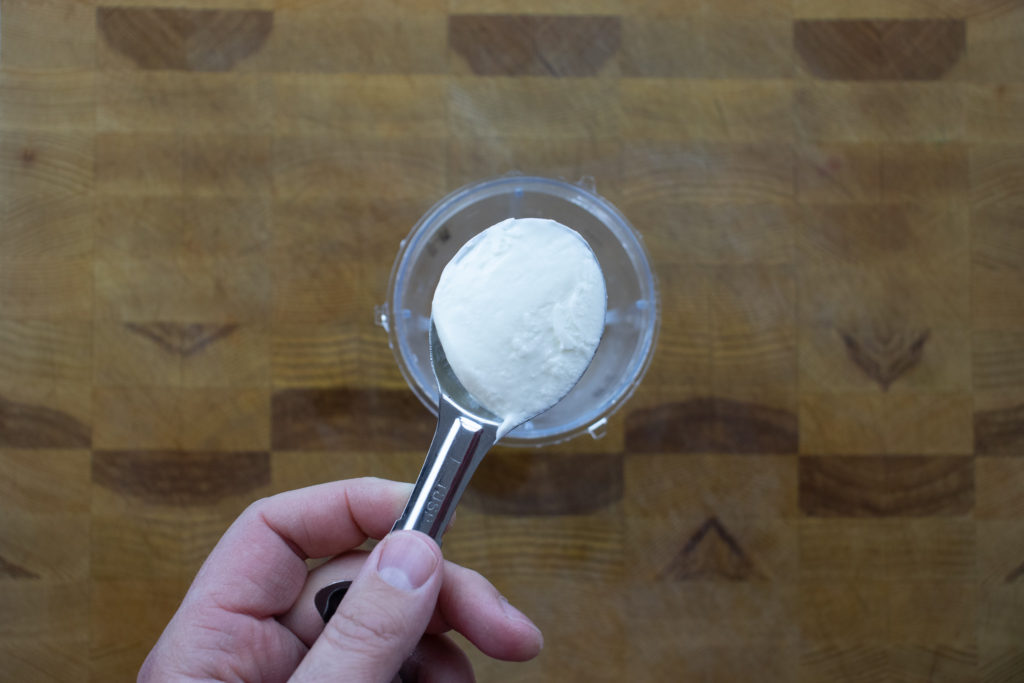
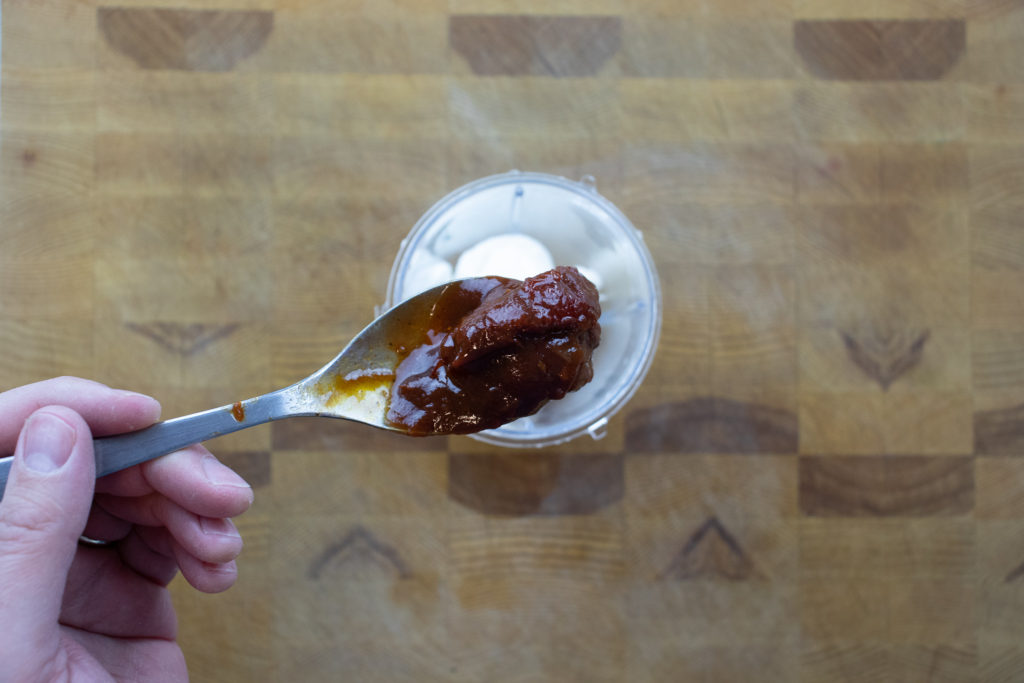
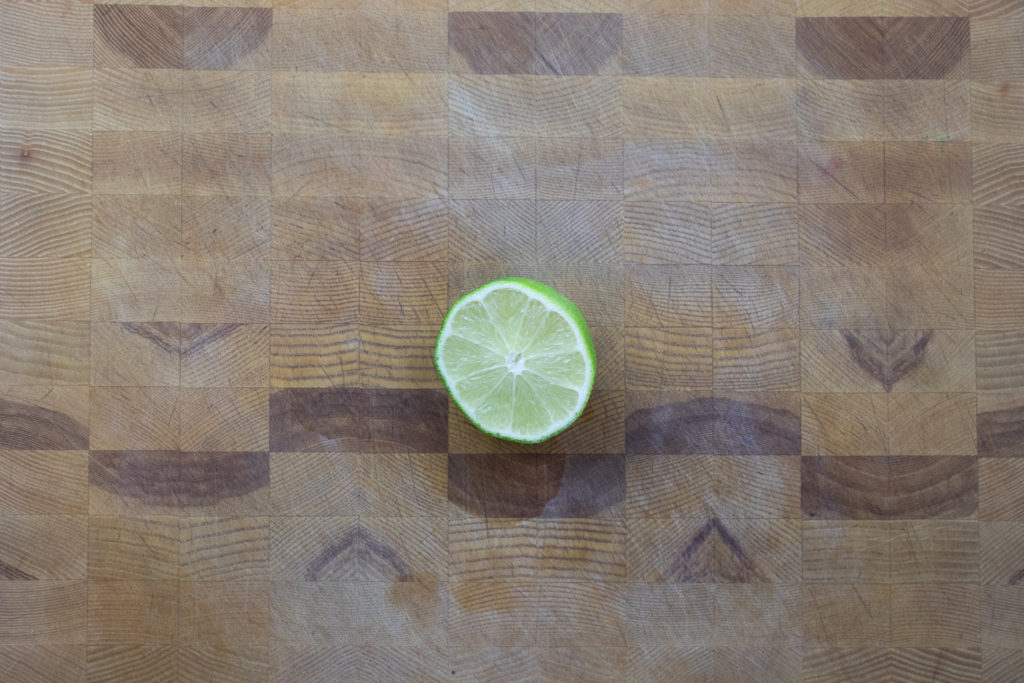
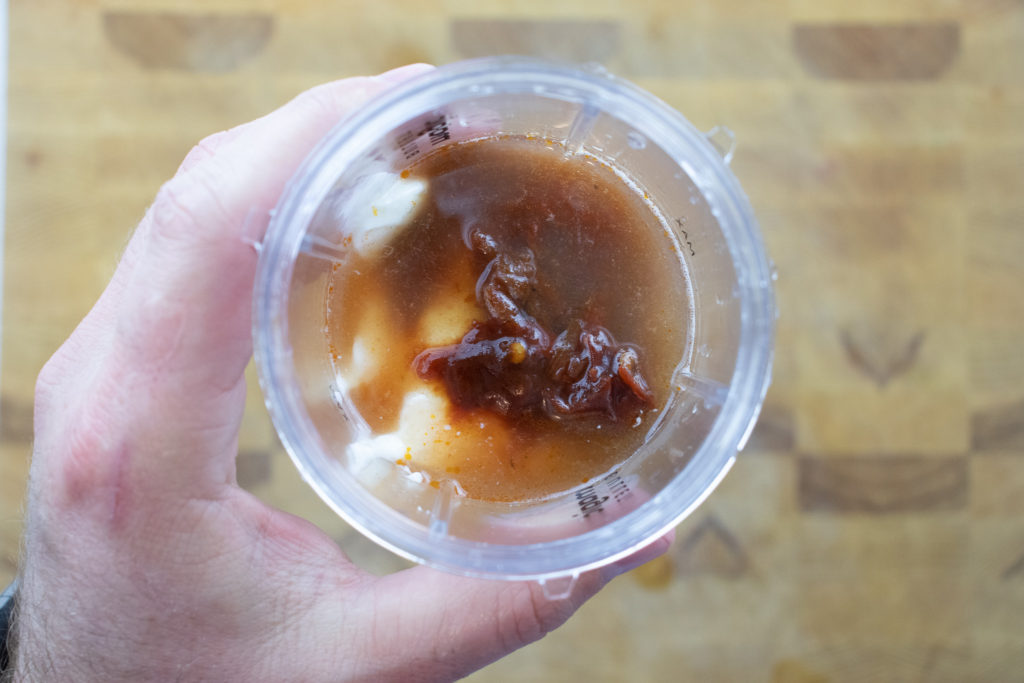
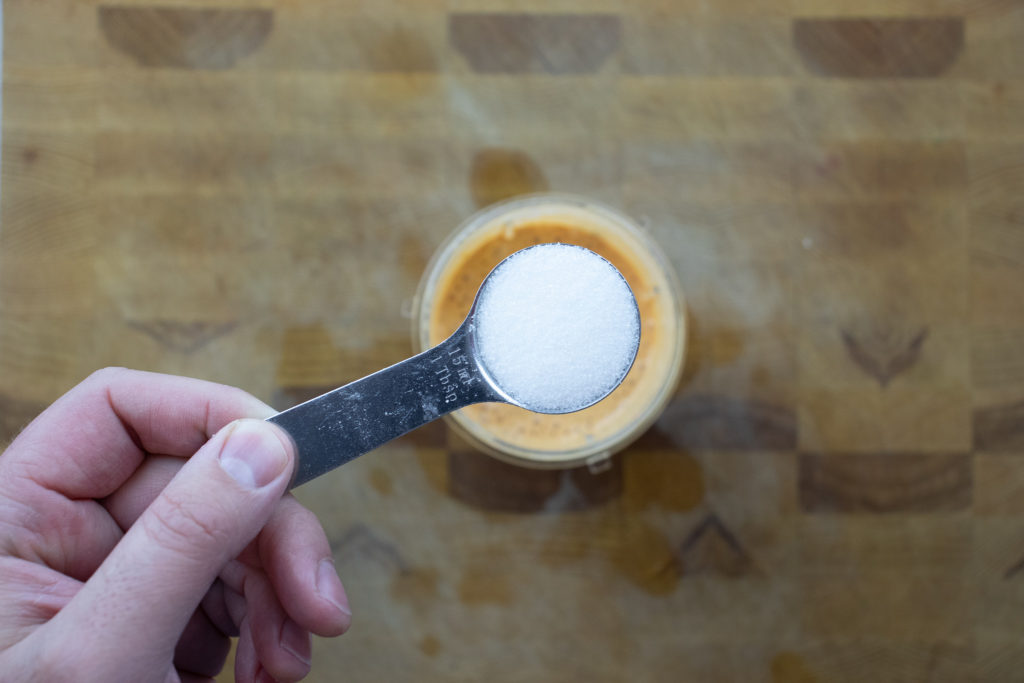
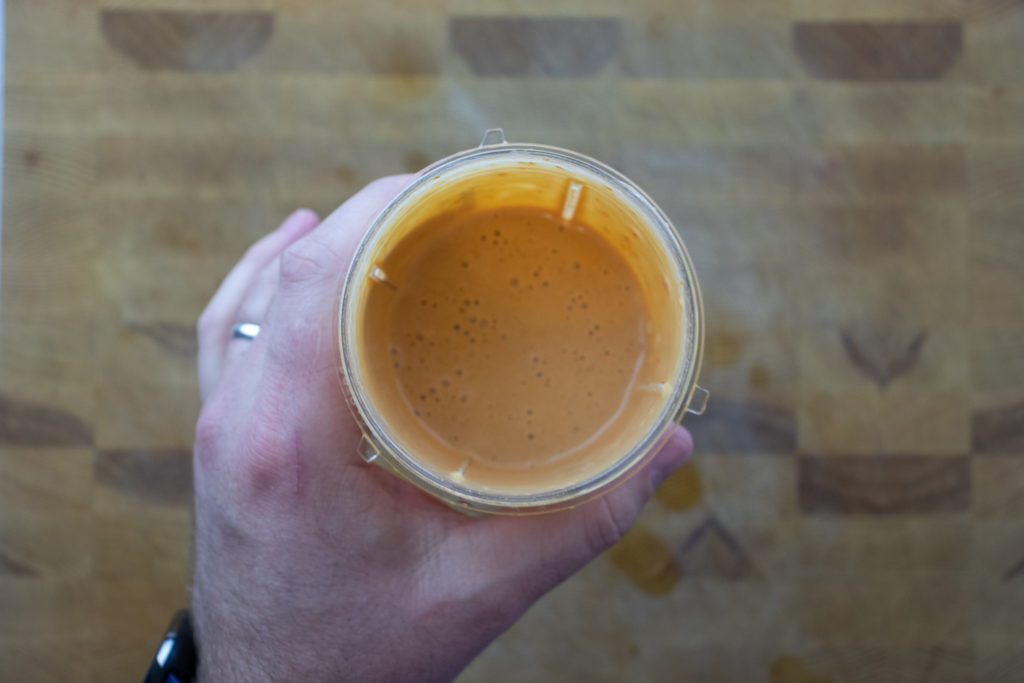
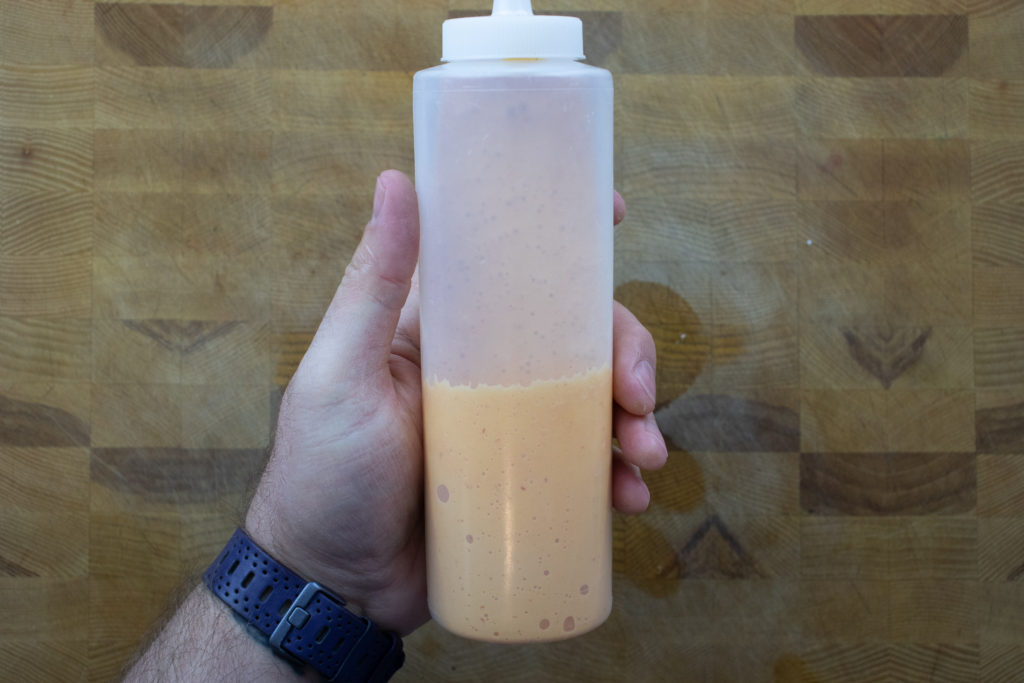
While the beef is sitting in the marinade, take a minute to make the dressing. The chipotle lime dressing combines Greek yogurt or sour cream, mayonnaise, lime juice, chipotle in adobo, sugar, and salt. Put all the ingredients in a small blender and blitz until smooth. Again, if you don’t have a blender or food processor, you can chop the chipotles as fine as possible by hand and mix them with the other ingredients.
What to do with leftover chipotles?
If you find that you have leftover chipotles in adobo sauce, don’t worry – there are plenty of ways to put them to good use! One option is to chop or purée the remaining chipotles and freeze them in an ice cube tray. This way, you can easily pop out a few cubes as needed the next time you want to add a spicy kick to a recipe. Another option is to mix the leftover chipotles with mayonnaise or sour cream to create a spicy condiment for sandwiches or burgers. You can add them to scrambled eggs or omelets for a spicy breakfast or use them to marinate chicken, pork, or tofu before grilling or roasting. Finally, you can mix the leftover chipotles with melted butter or oil to create a spicy drizzle for roasted vegetables or seafood. These are just a few ideas, but the possibilities are endless with a bit of creativity and some leftover chipotles in adobo sauce! You could also try these delicious Chipotle Lime Turkey Tacos.
Cooking The Spicy Beef
Before you start cooking the spicy beef, you should get your ingredients prepped and ready to go. This includes cooking the rice and sweet potato (or using leftovers from the night before), defrosting frozen corn or opening a can of corn niblets, and of course, making the Tangy Chipotle Lime Sauce.
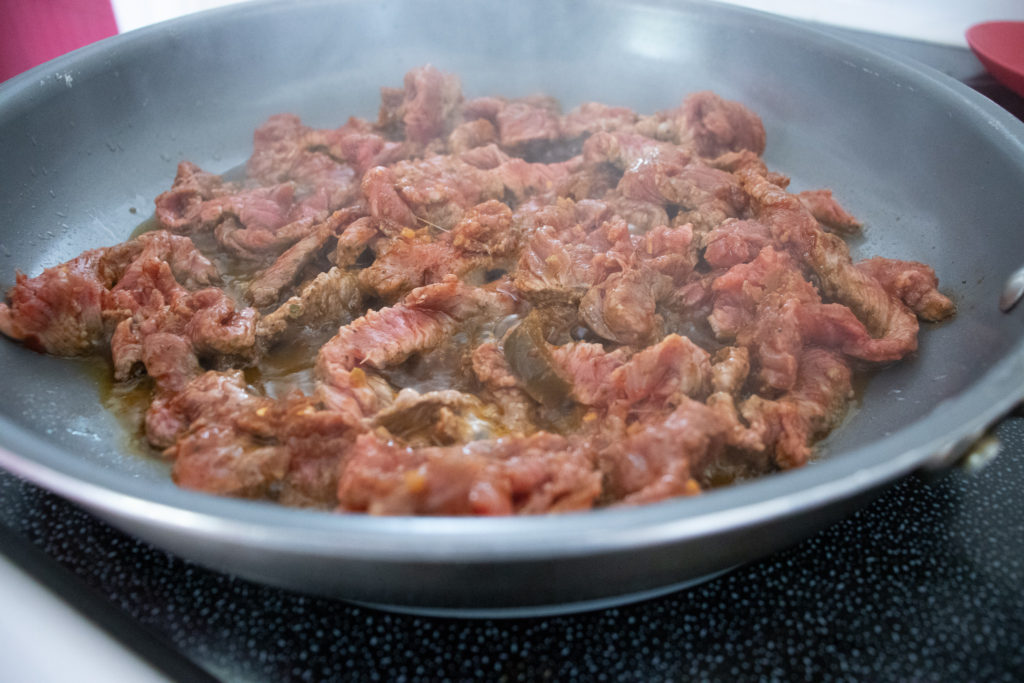
Once everything is ready, it’s time to cook the beef. You have a few options here – you can skewer the beef and cook it on the grill for a delicious, smoky flavour, or cook it in a pan on the stove. If you opt for the latter, heat a large, non-stick skillet over medium-high heat and add a teaspoon or two of cooking oil. Cook the beef in two batches, wiping the pan out between each and making sure it heats back up before adding the second batch. Once the beef goes in the pan, let it sit for a minute or two, flip it, and cook for another minute. You don’t want to overcook the beef, so aim for a medium-rare to medium doneness. Once the beef is cooked, remove it from the pan and set it aside while you cook the second batch.
With everything prepped and the spicy beef cooked to perfection, it’s time to assemble your spicy bowl and dig in! Enjoy!
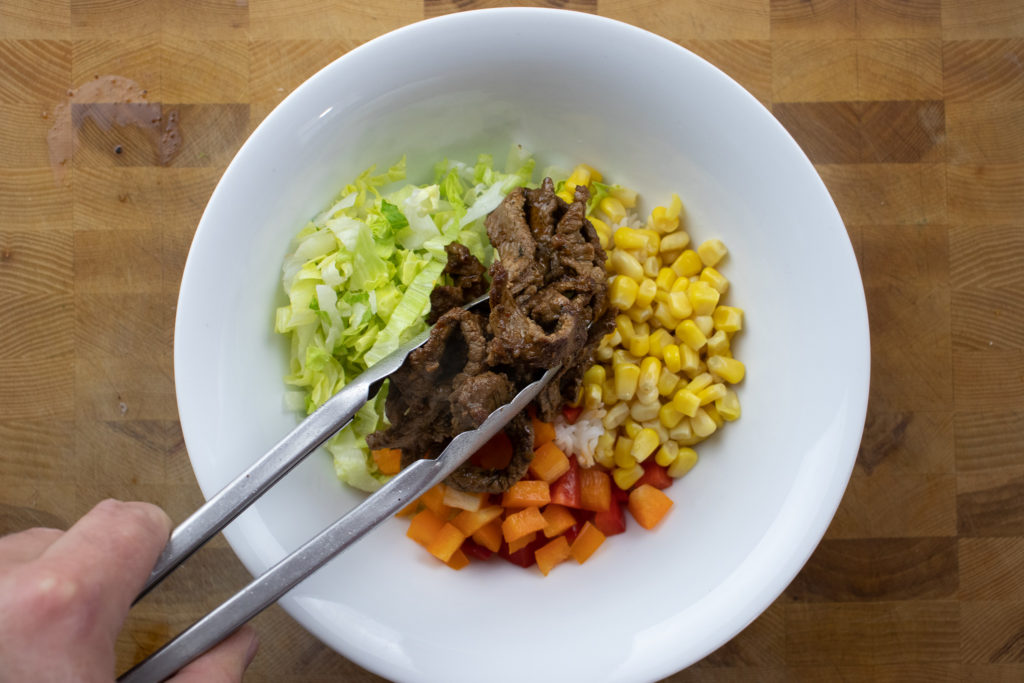
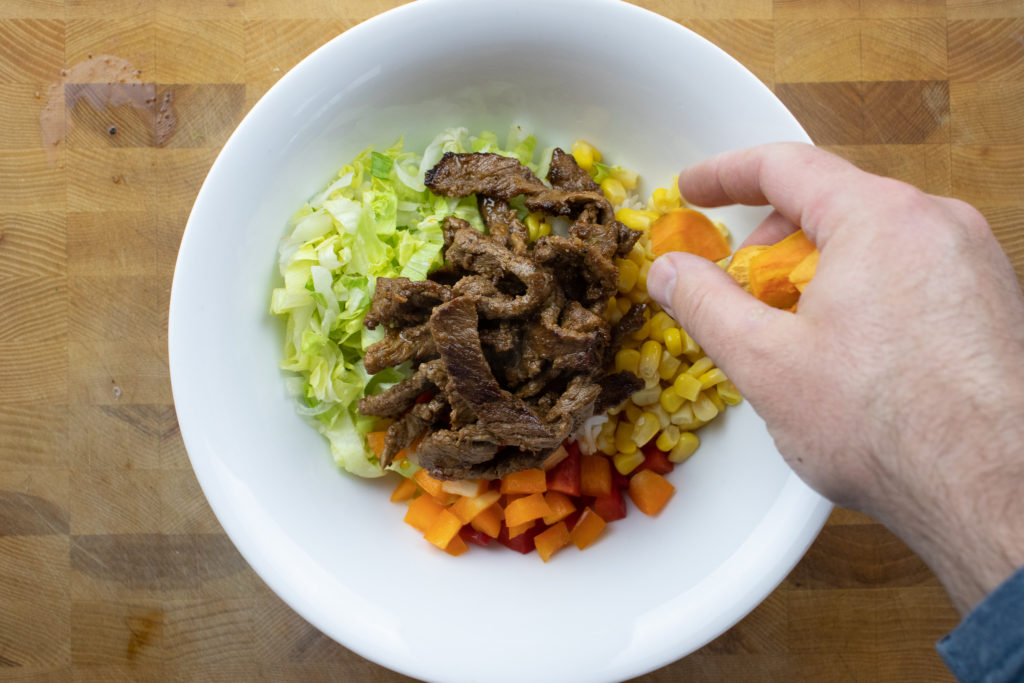
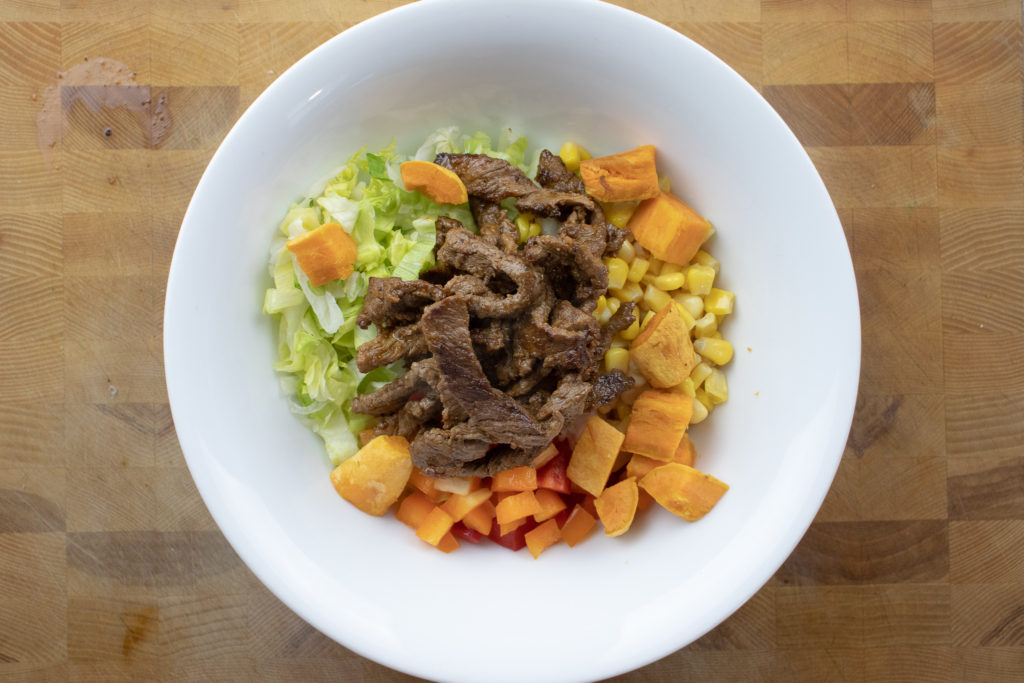
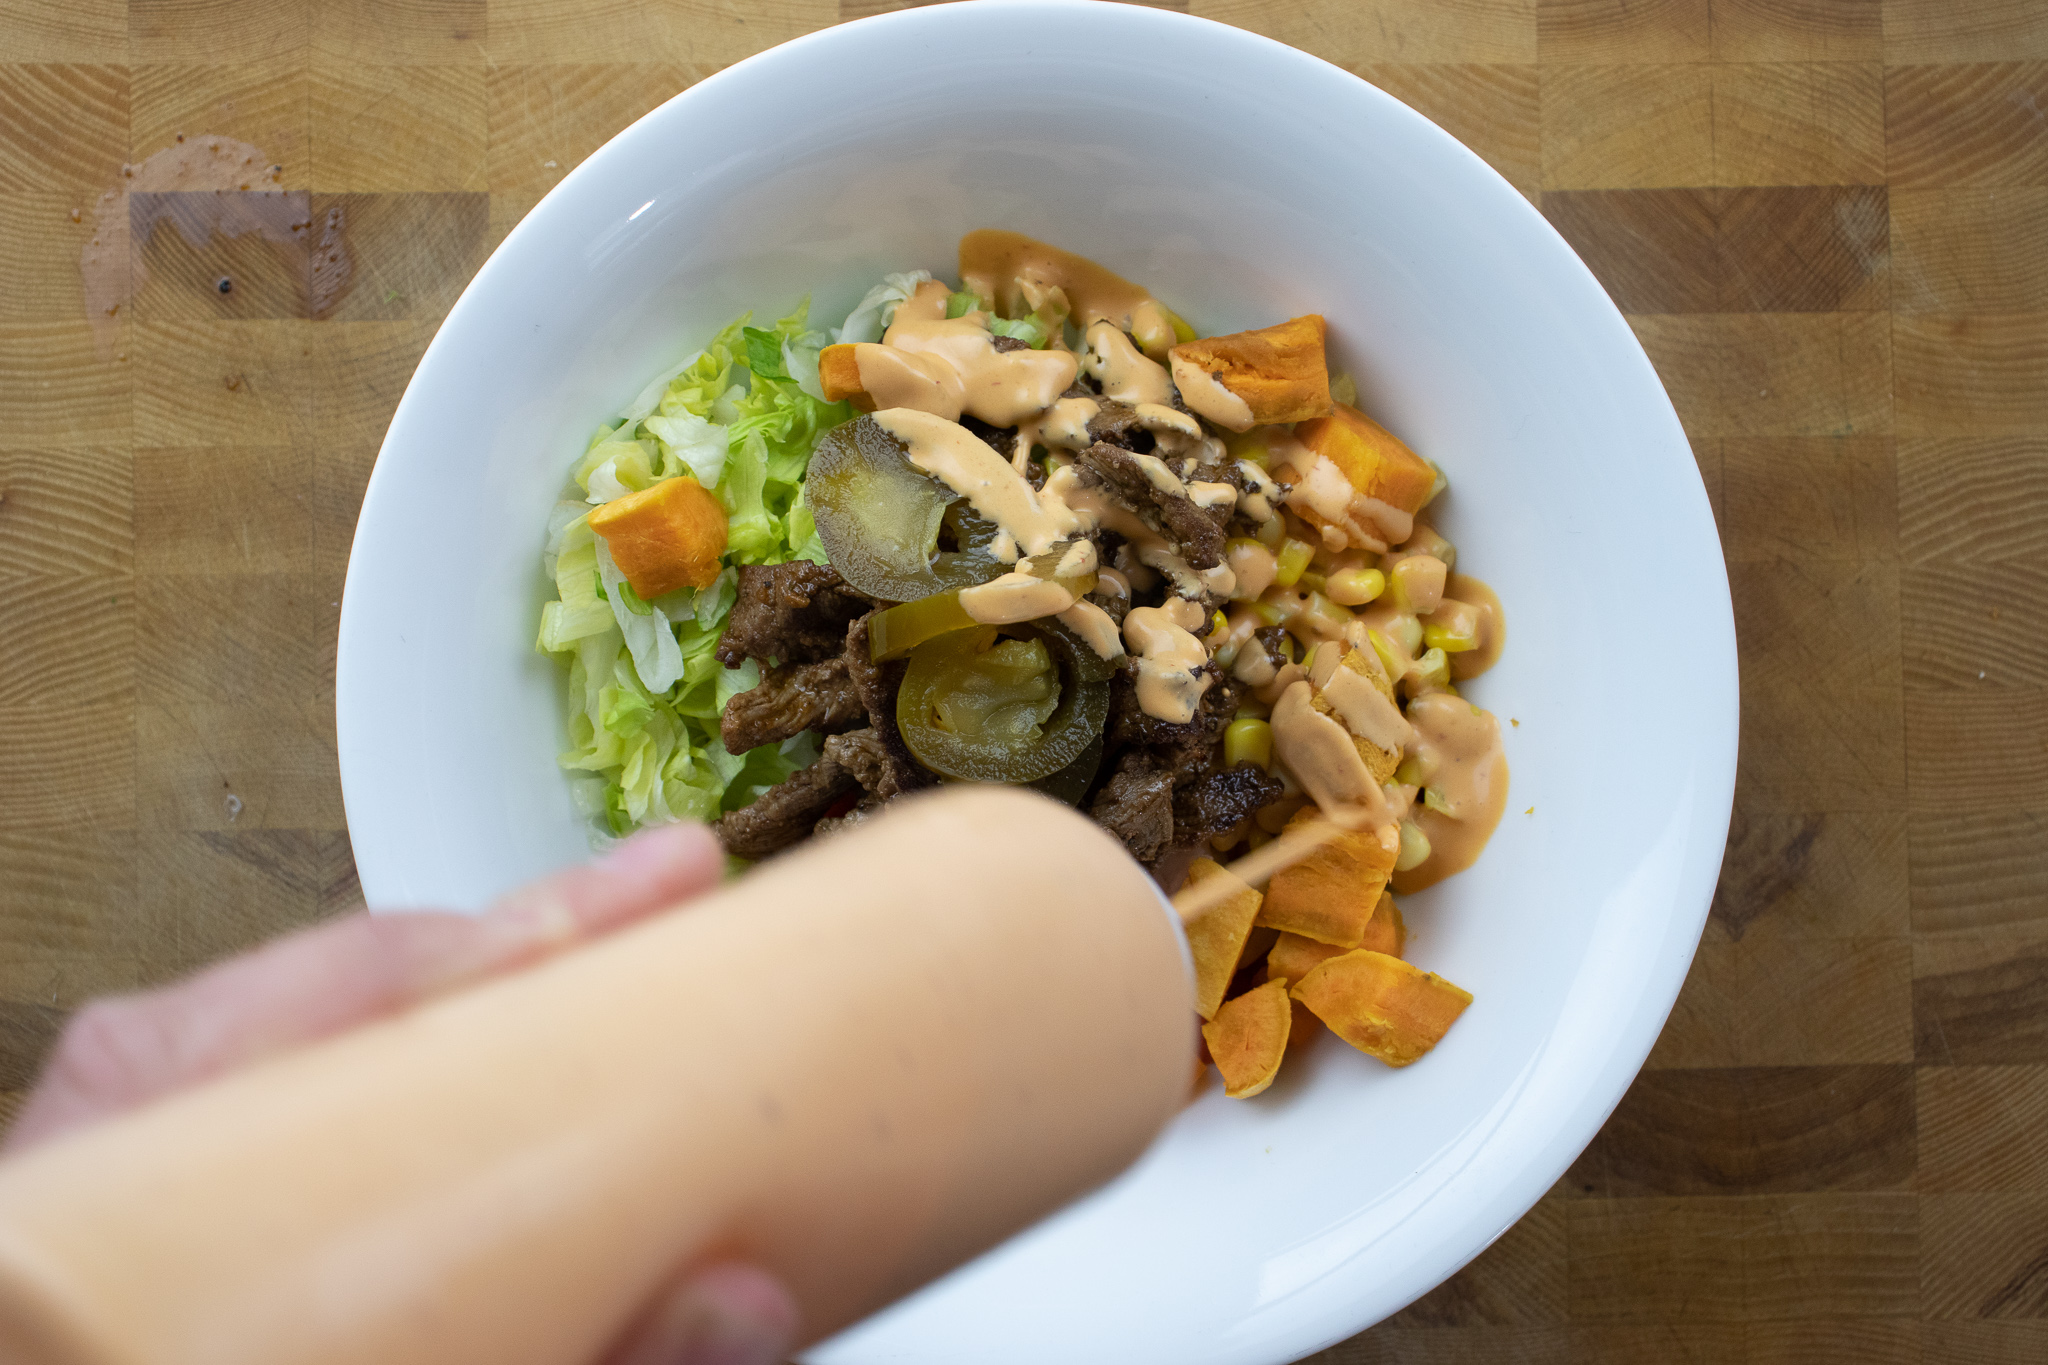
Assembling The Spicy Beef Bowl
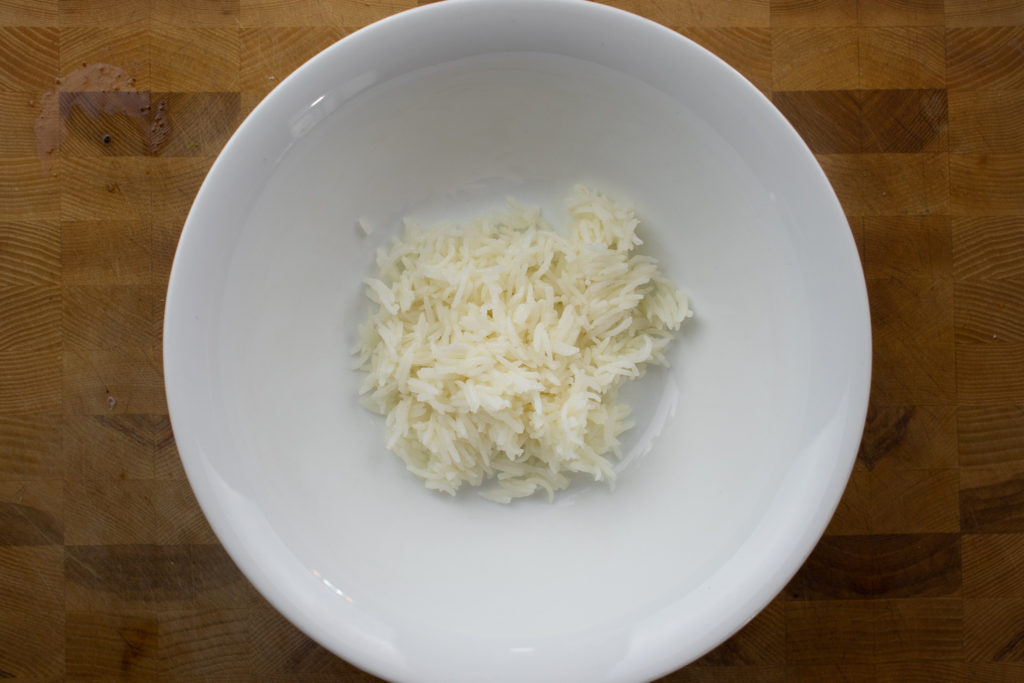
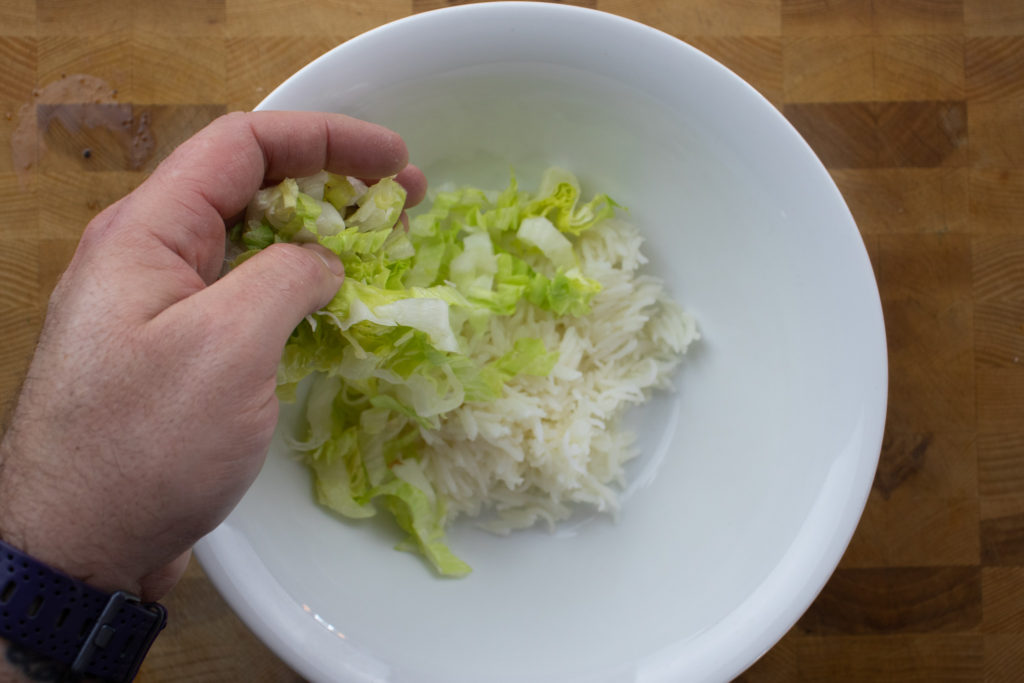
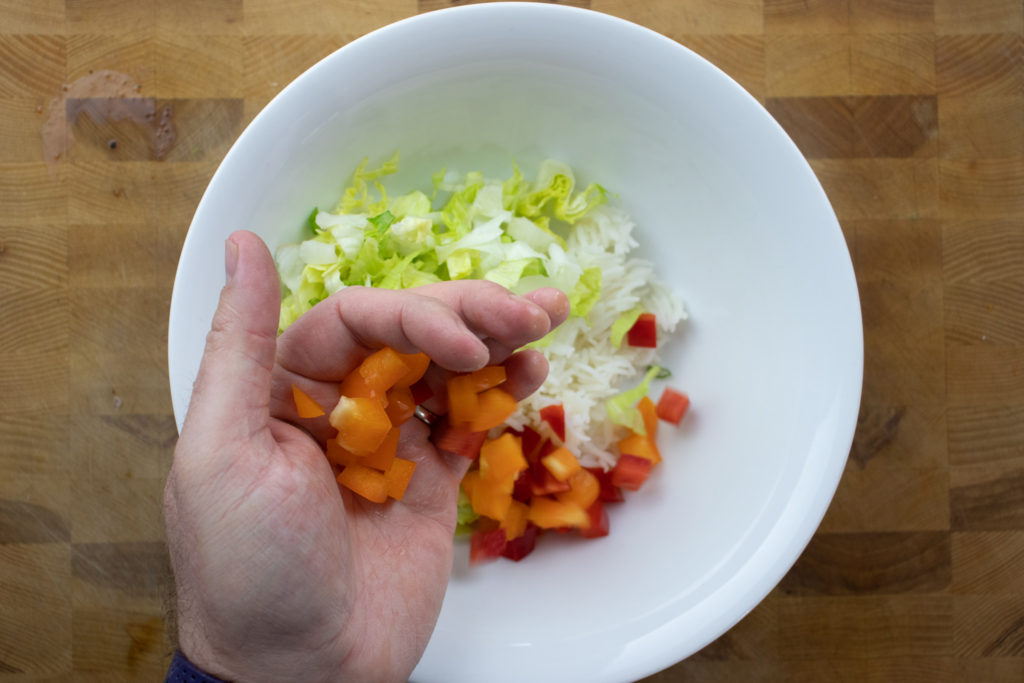
Assembling your spicy beef bowl is easy and fun! Start by adding half a cup of cooked rice to the bottom of two bowls. You can use any kind of rice you like – white, brown, jasmine, basmati. The list goes on. Next, top the rice with shredded lettuce, diced bell peppers, corn, spicy beef you cooked earlier, sweet potato, pickled jalapeno, and Tangy Chipotle Lime Sauce. You can add as much or as little of each ingredient as you like, depending on your personal preferences. Finally, top the spicy bowl with thinly sliced green onions and a sprinkle of cilantro for a fresh, aromatic finish.
With everything assembled and ready to go, it’s time to dig in and enjoy your delicious spicy bowl! You can eat it as is, or add your favourite hot sauce or salsa to give it an extra spicy kick. Whatever you choose, I hope you enjoy your spicy bowl as much as I do!
Wrap Up
Whether you’re looking for a hearty lunch or a light dinner, this spicy beef bowl recipe is sure to satisfy you. One of the great things about it is that it’s highly customizable – you can try it with different proteins like pork, chicken, salmon, or tofu, or add in other ingredients like black beans, red onion, or cheese. The chipotle lime sauce is also excellent on sandwiches, especially with grilled chicken, or even on these Fish Tacos With Mango Salsa. The point is, the components of this spicy bowl recipe are versatile, so you don’t have to worry about the leftovers going to waste.
Thank you for coming to my blog and reading this post. I appreciate your support and I hope you continue to enjoy my content. Until next time!
Spicy Beef Bowl
Spicy marinated beef, rice, and vegetables with chipotle lime sauce make this spicy beef bowl one to remember.
Put the olive oil, chipotle, jalapeno, and cajun seasoning in a blender and blitz.
Thinly slice the beef and combine it with the marinade. Cover it and put it in the fridge for 1 to 2 hour.
Heat a large skillet over medium-high heat. Add the cooking oil and the beef. Brown on both sides then remove the meat from the pan and set it aside.
Spicy Chipotle Sauce
Combine all the sauce ingredients in a blender and blitz until smooth or, mince chop the chipotles and mix with the yogurt, mayonnaise, sugar, and lime juice.
Taste the sauce, and season with salt to taste.
Use the sauce right away or cover and store in the fridge for up to four days.
Spicy Bowl
Divide the rice among two bowls.
Add the lettuce, corn, bell peppers, green onion, jalapeno, and beef in the bowl. Top the bowl with the sauce, and cilantro then serve.
Notes
Substitute the beef with chicken, pork, or tofu and keep the recipe as is.
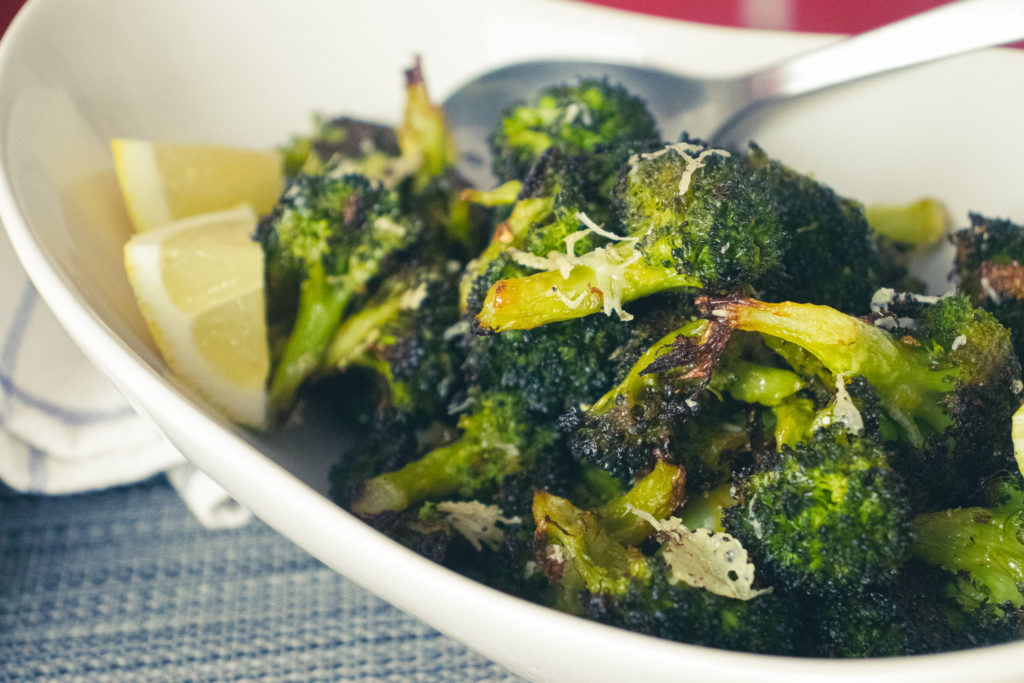
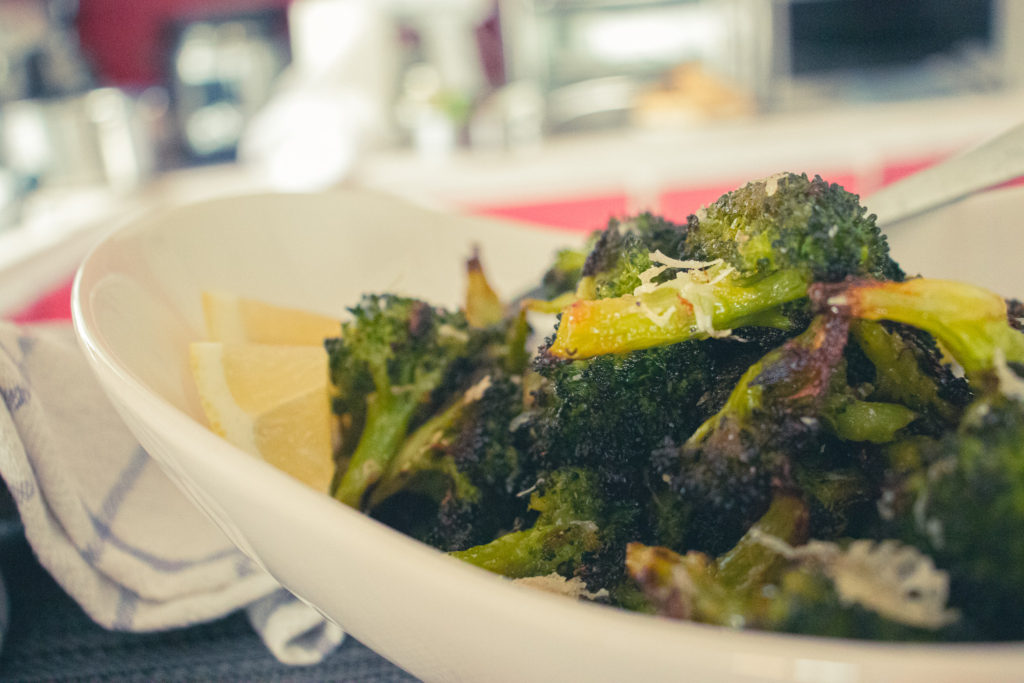
Could roasted lemon parmesan broccoli be the best broccoli side dish there is? It is very possible. And I’m willing to say yes. The texture and flavour of roasted broccoli are something enjoyable and unexpected. Some friends and family members may turn up their noses when you say you’re having broccoli with dinner. But, when you serve them this, they will change their tune. If they don’t, you can always get new friends and family. Alright, let’s get cooking!
How To Make Roasted Lemon Parmesan Broccoli
Usually, at this point in the post, I would list all the ingredients in the recipe but do I really need to? I mean, it’s all kind of there in the name. The only additional ingredients are olive oil, crushed red pepper flakes and salt. So, that’s it. Now, the first step to making this dish is optional. You don’t have to do it. It will just speed up the roasting time. The benefit of not doing it is that the finished broccoli will be crisper. So, do you want a quicker cooking time or more crispy broccoli? That is a decision you’ll have to make for yourself. And this first step I’m talking about is, of course, blanching.
How to cut broccoli
First things first, you need to cut the broccoli into florets. Cut the bottom inch or two off the stem and discard it. You don’t need it. Now, cut the broccoli from the bottom up. Cut the stem, not through the florets. This will keep most of the broccoli intact and will make less of a mess than if you cut it from the top down. In total, you want between four and five cups of broccoli.
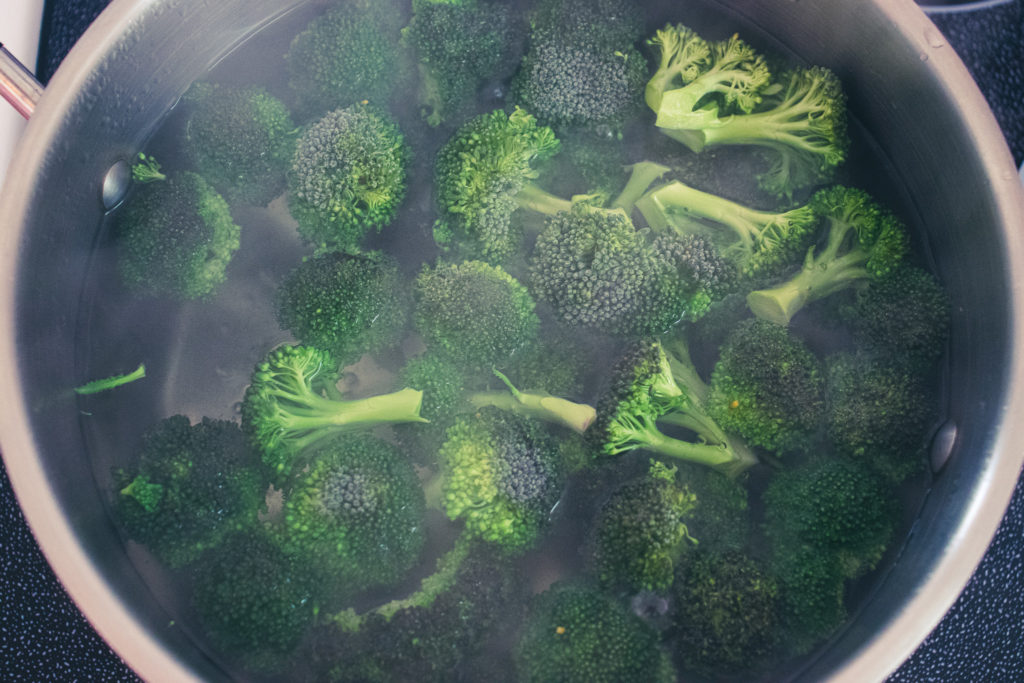
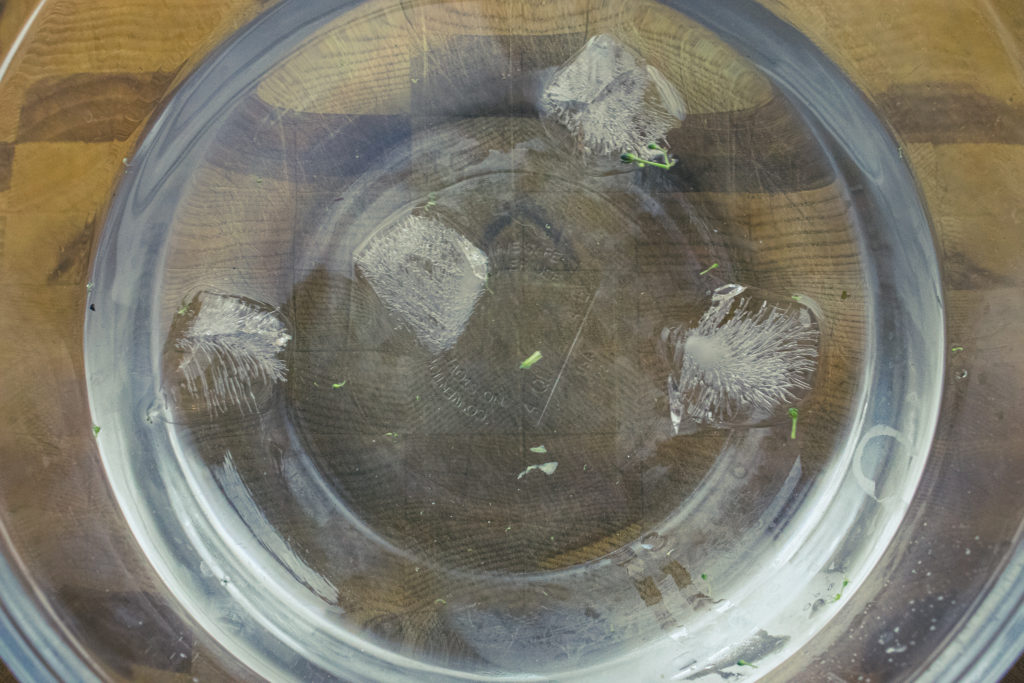
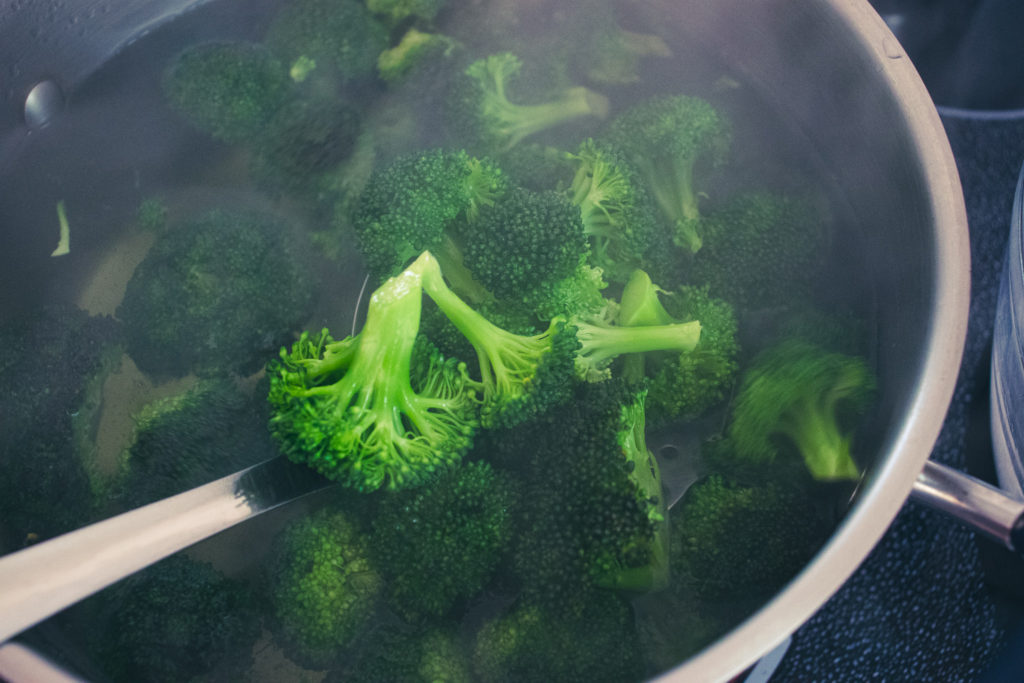
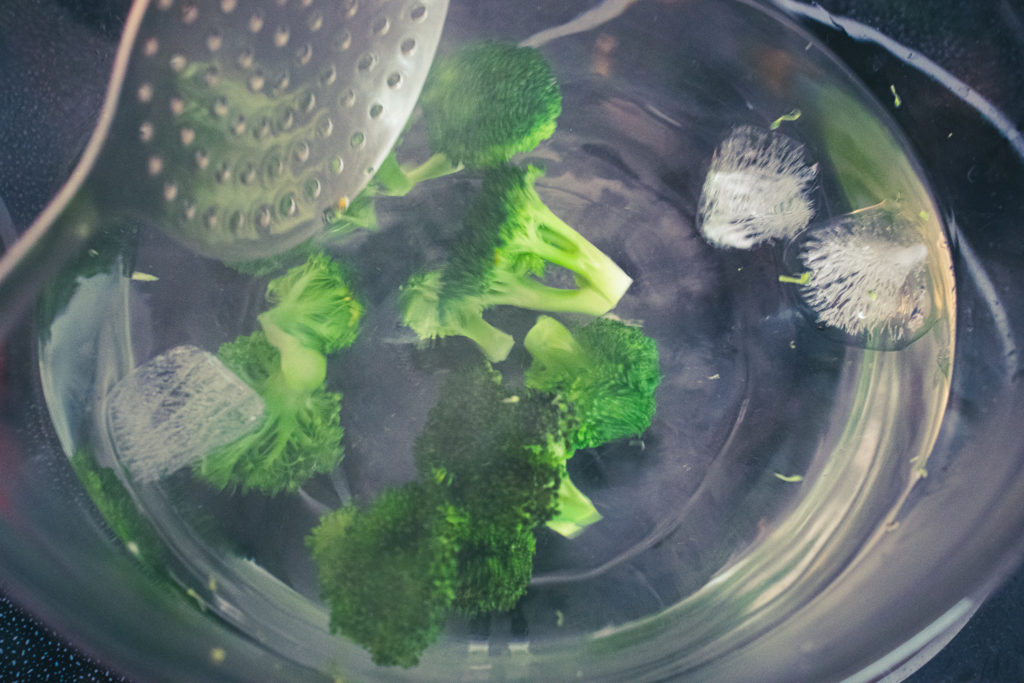
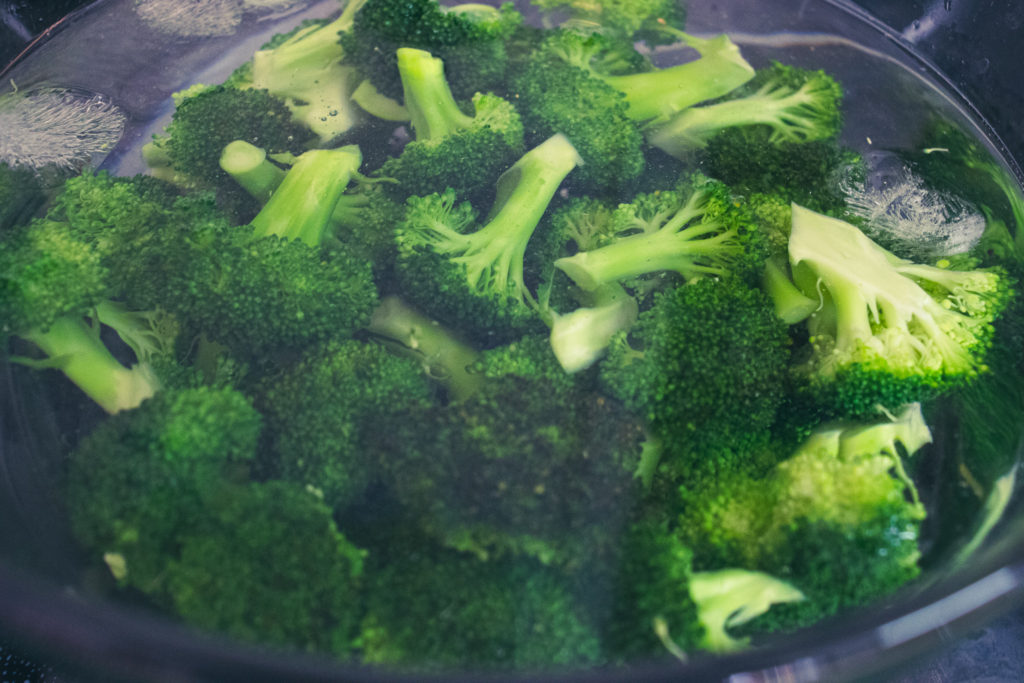
How to blanch broccoli
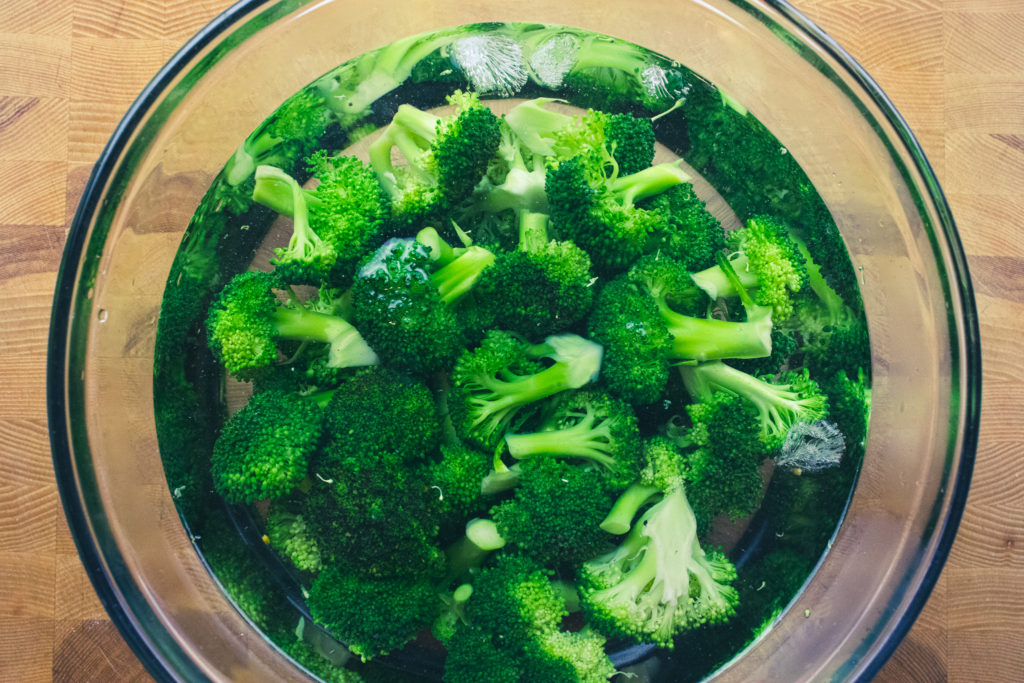
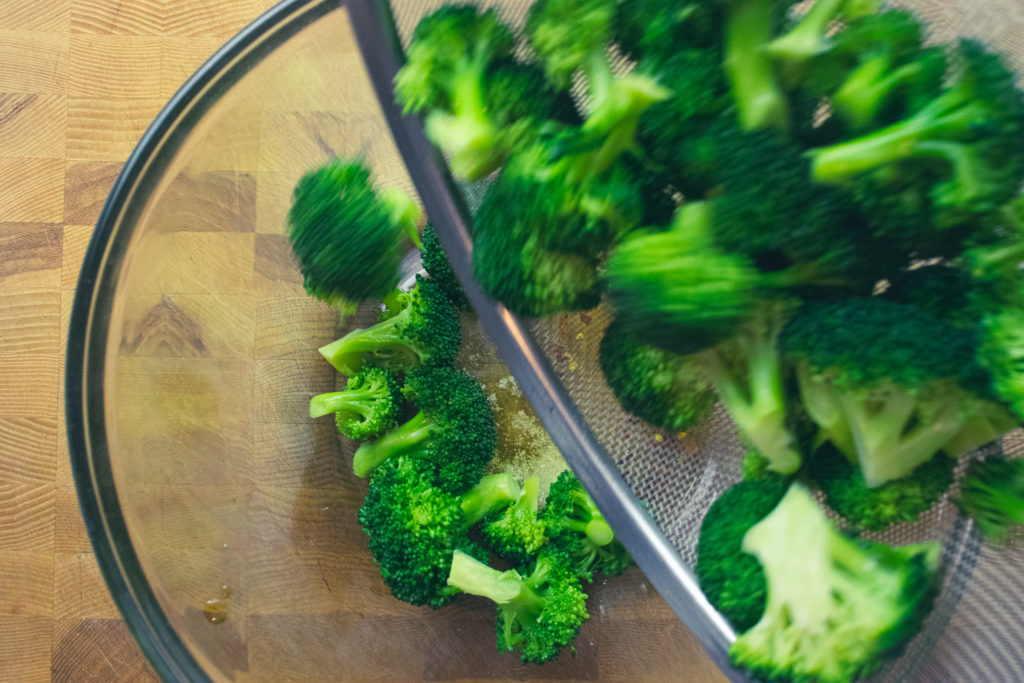
Before you start cutting the broccoli, fill a large pot with water. Add a teaspoon of salt and bring it to a boil on high heat. Also, get a medium or large mixing bowl, and add some ice and water to it. Put the cut broccoli in the boiling water for one minute. Drain the broccoli and immediately add it to the ice water. Gently stir the broccoli until it has completely cooled. Next, drain the broccoli again. This time, drain as much water off of it as possible. Then pat it dry with a clean kitchen towel or a paper towel. The more dry the broccoli, the more roasted it will be. Blanching has the added effect of helping to keep the broccoli bright green rather than turning brown in the oven.
Seasoning the broccoli
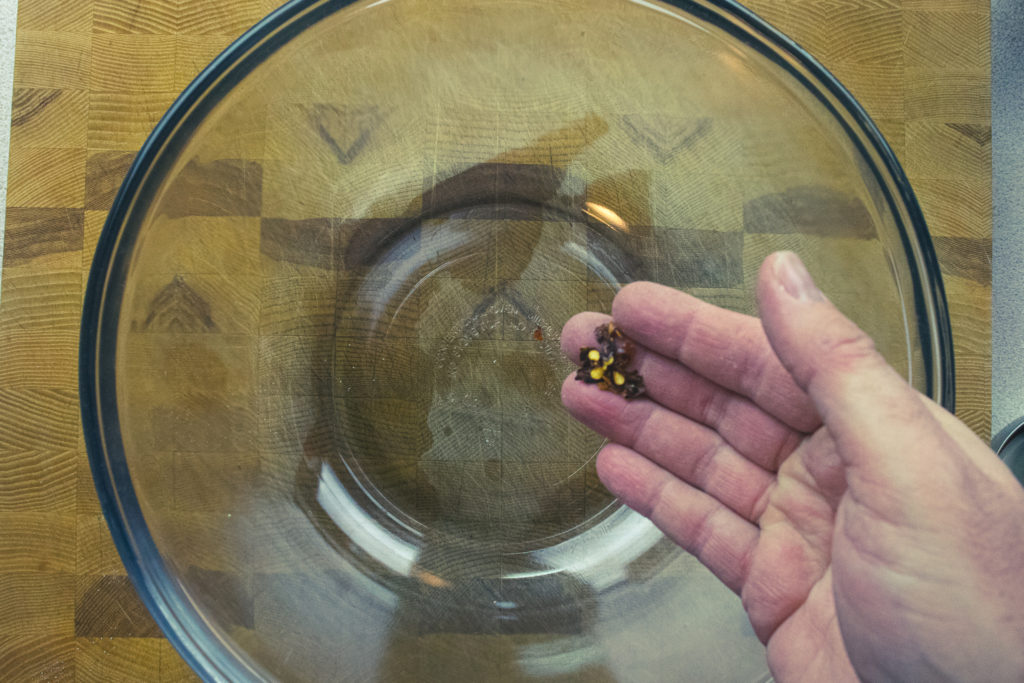
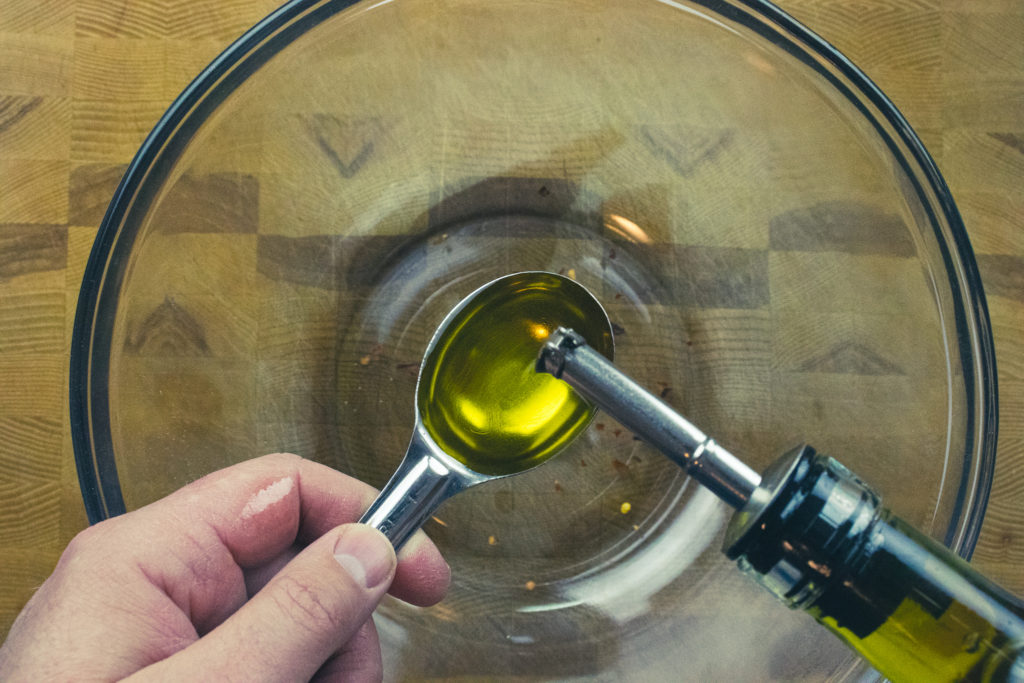
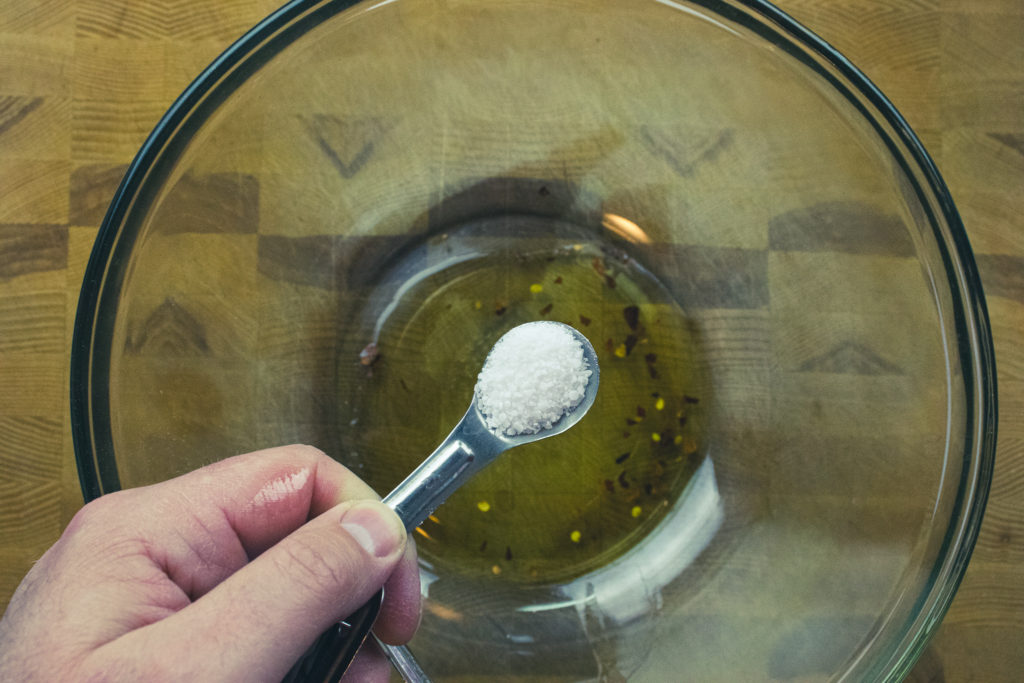
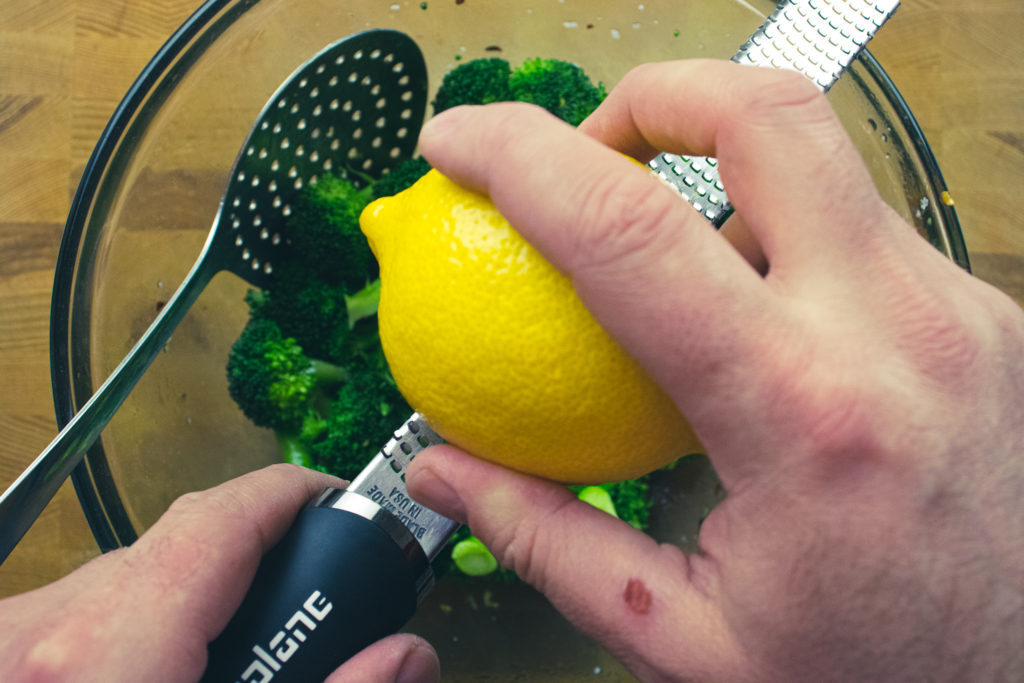
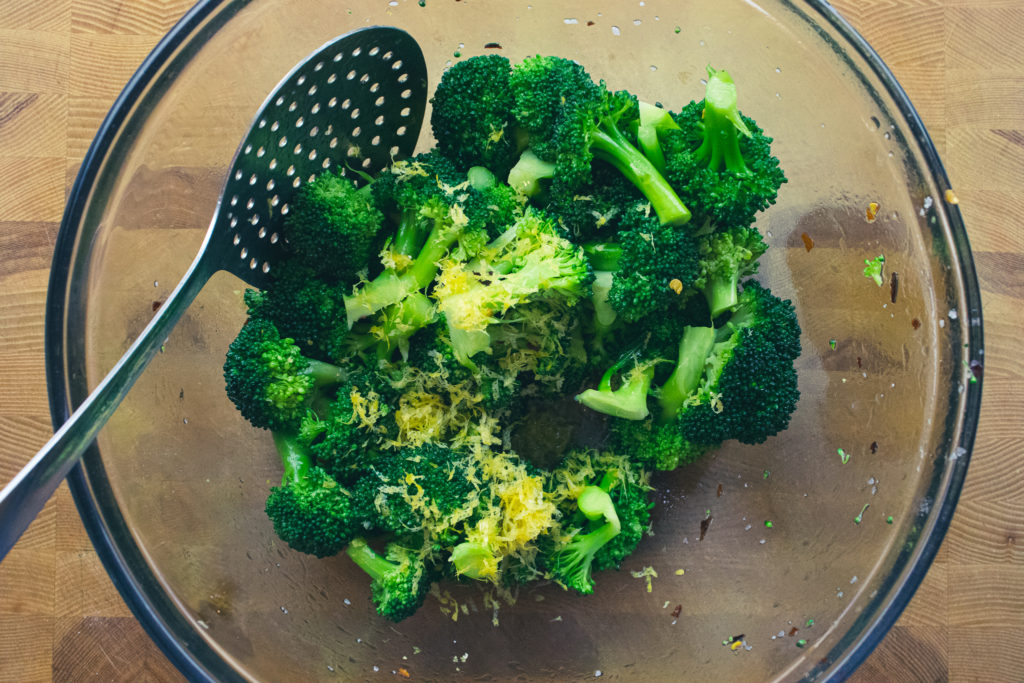
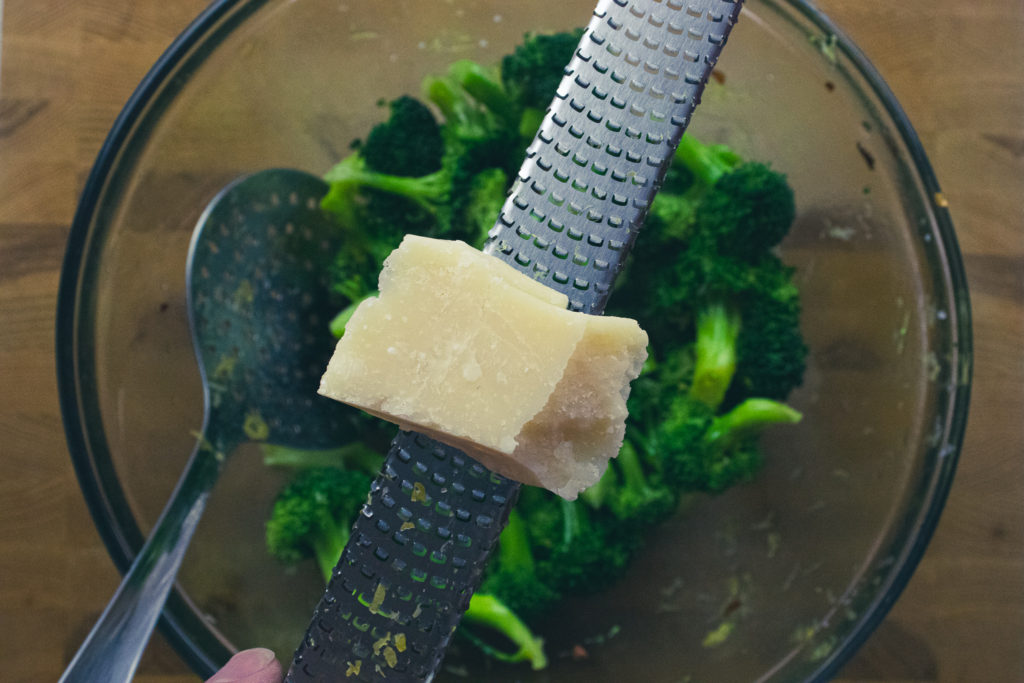
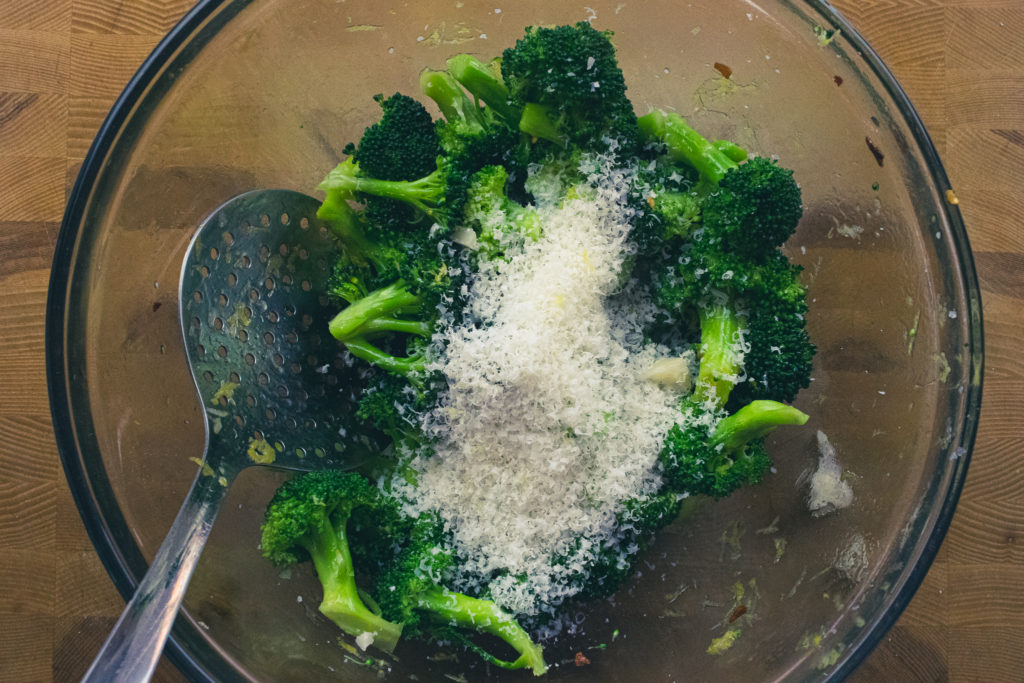
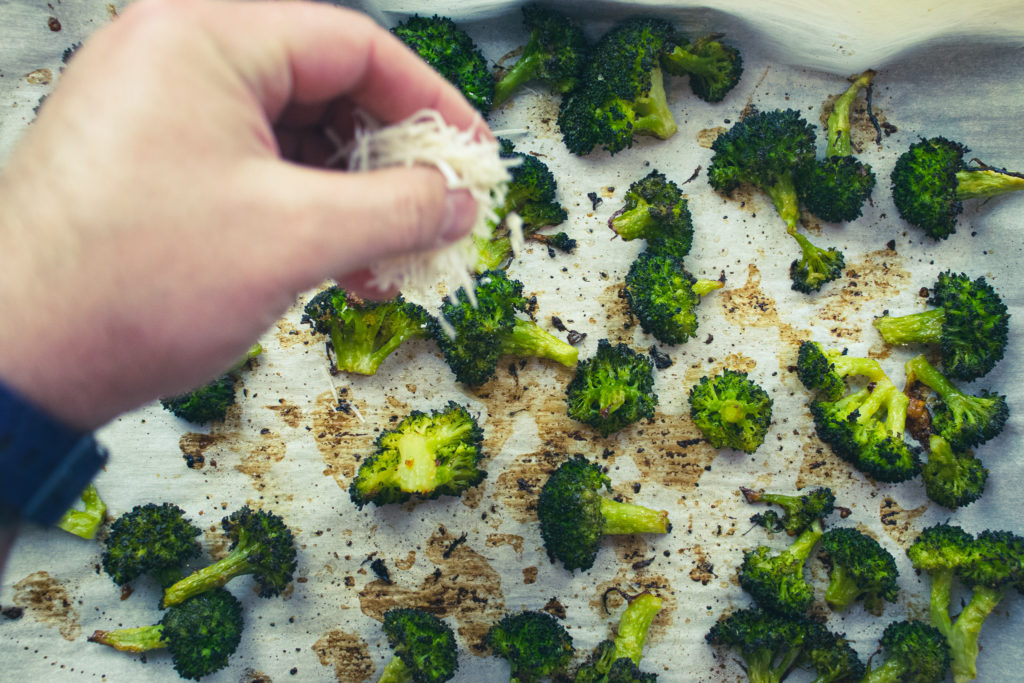
The broccoli is cut, blanched, and dried. Now it’s time to season and roast it. To make the seasoning grab another mixing bowl and put in it the crushed red pepper flakes, olive oil, and salt. Put the broccoli in the bowl and stir to coat it. Next, zest the lemon into the bowl and grate the parmesan in as well. Mix the broccoli really well. Rather than doing this the way that I did, which was kind of dumb, you can zest the lemon and grate the parmesan into the oil, mix it up, then toss in the broccoli. I’m not sure why I did it the way I did. Also, if you choose not to blanch the broccoli, don’t add the parmesan until the broccoli is almost cooked, or it will burn.
How to roast broccoli
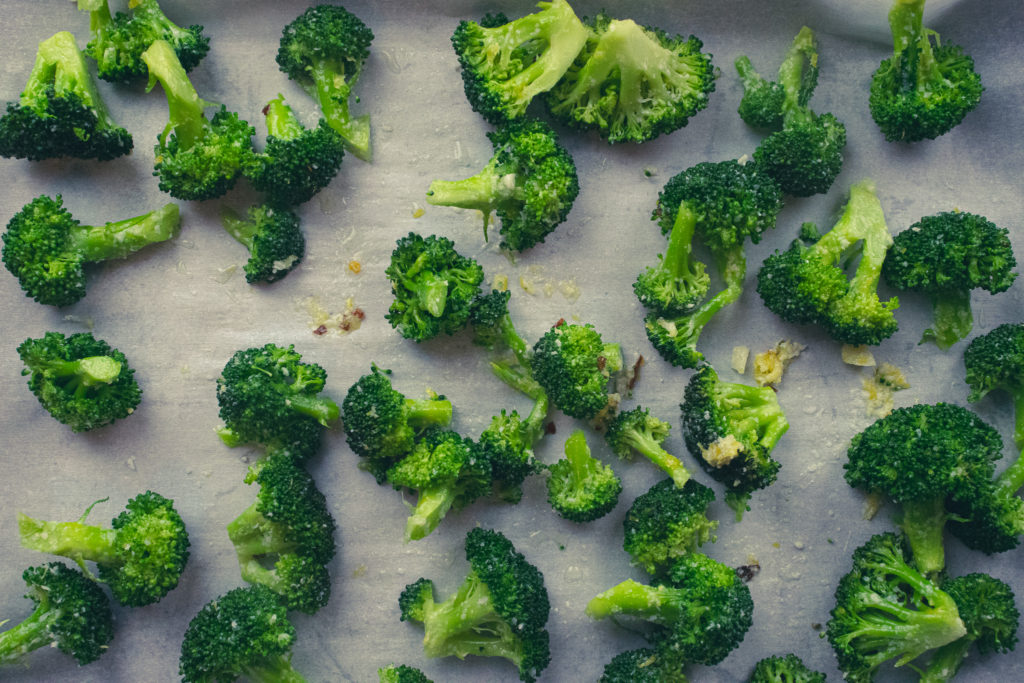
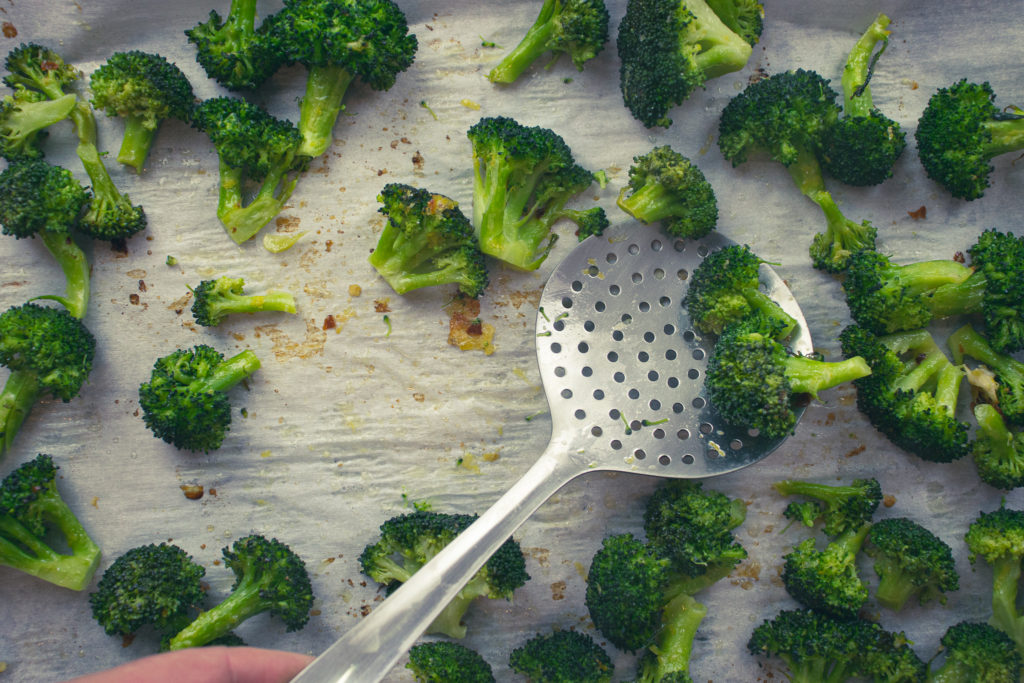
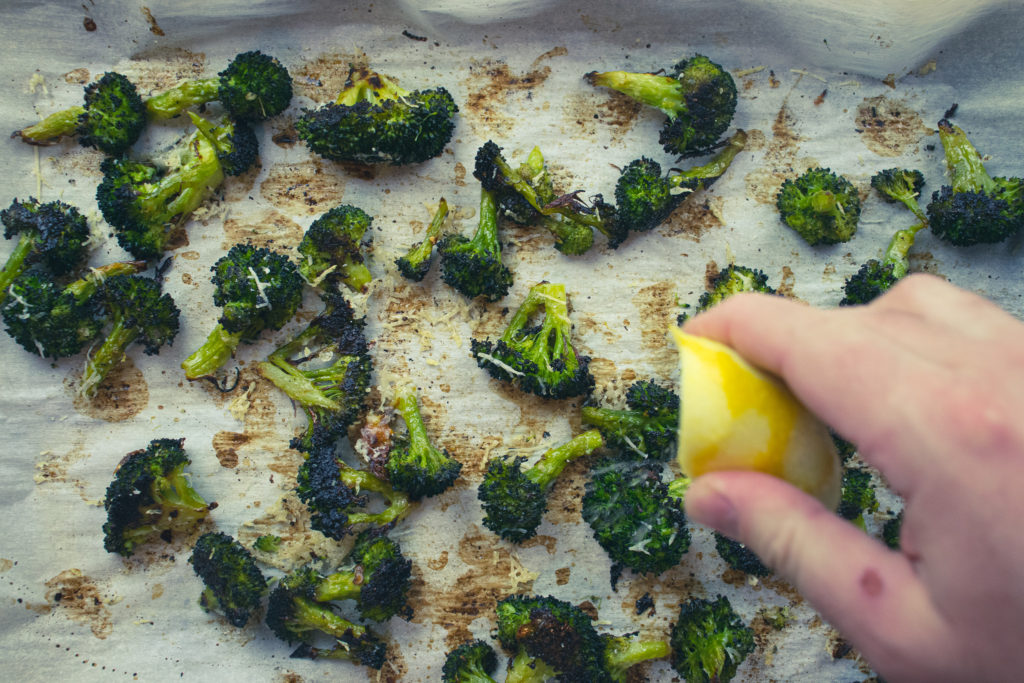
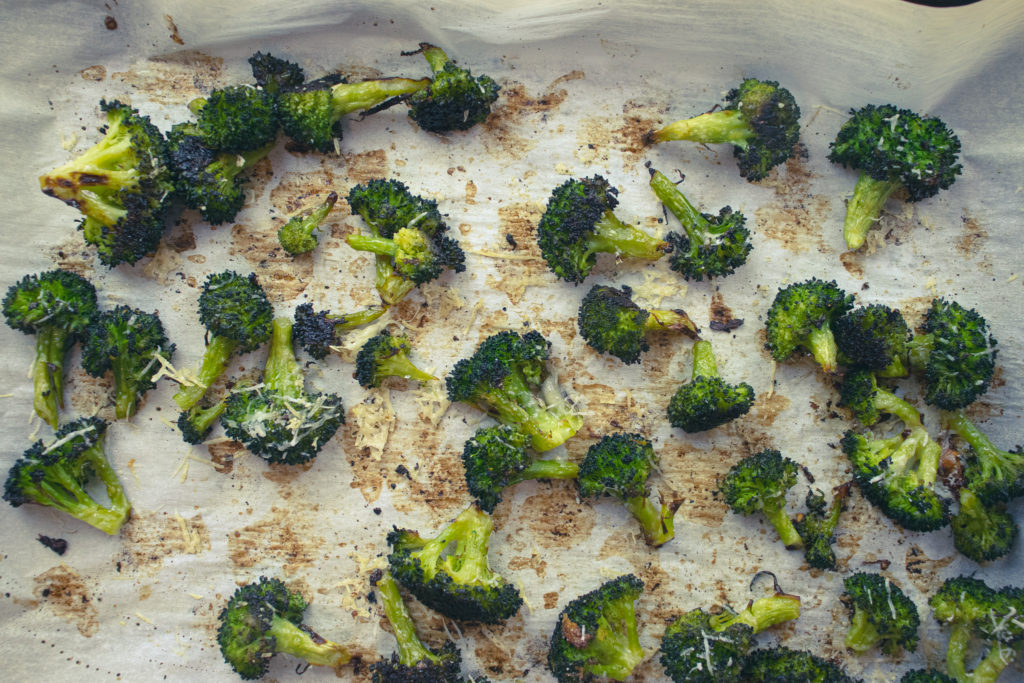
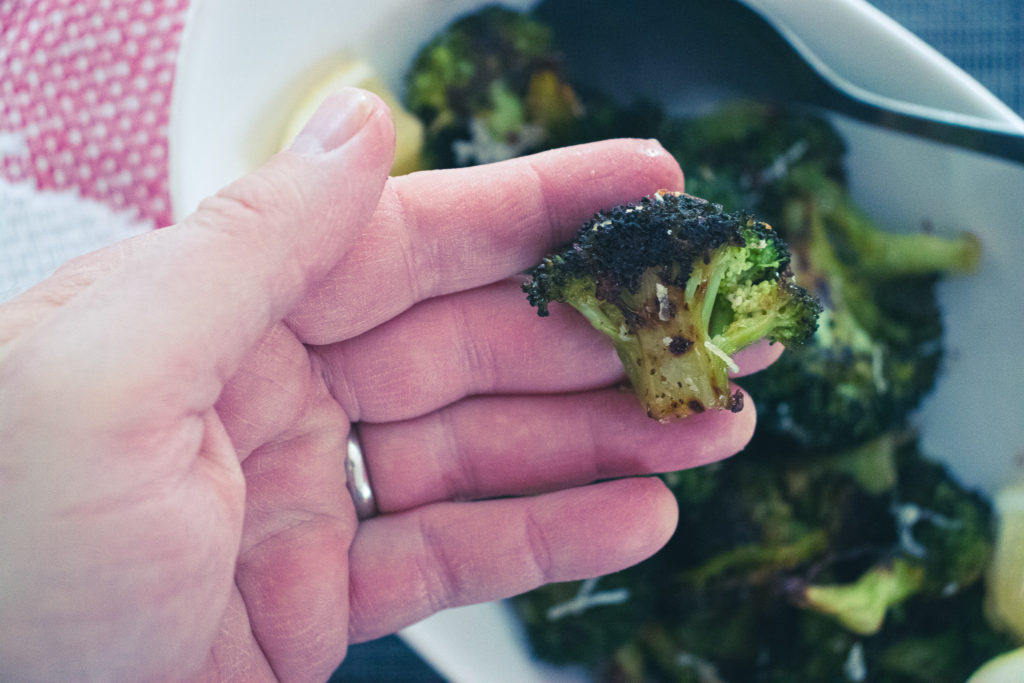
Preheat your oven to 400°f. Line a baking sheet with parchment paper and spread the seasoned broccoli out onto the sheet pan in a single layer. Put the broccoli in the oven on the middle rack for 15 minutes. Then, take the broccoli out of the oven, flip the pieces, and put it back in the oven for another 12 to 15 minutes or until the broccoli is golden brown. If you didn’t blanch the broccoli, roast it for 22 minutes, flip and roast it for another 18 to 22 minutes, adding the parmesan 10 minutes after flipping it. When the broccoli comes out of the oven, finish it with a little more parmesan cheese and a squeeze of fresh lemon juice. Then, you can eat it as is for a snack, serve it as a side dish, or put it in a salad.
Wrap Up
It is no secret that I love roasted vegetables, but roasted broccoli has to be one of my absolute favourites. It always reminds me of my first job working in a Chinese Restaurant. Not because that restaurant served roasted broccoli, but because when broccoli was stir-fried in those super hot commercial woks, it took on that same roasted flavour. If you’ve never had roasted broccoli, you are missing something special from your life. You don’t even need to add the lemon and parmesan to enjoy it. It will be delicious no matter what.
Thank you so much for coming to my blog and reading this post. I hope you’ve enjoyed it and that you’ve taken something useful from it. This blog aims to share the knowledge and skills that I’ve learned over my 20-plus year cooking career to help make cooking more enjoyable and more accessible for those who don’t find it easy and enjoyable. If you’d like to be a part of that mission, there are a few ways that you can help. The easiest way to help is to share this post on Facebook or Pinterest or even just leave a comment below and give the recipe a good rating. If you’d like to help financially, join my Patreon by clicking here. Patrons get access to exclusive content, including live streams, monthly cooking videos and more. And, if you want to always know what’s going on with Chef’s Notes, you can subscribe to my monthly newsletter below, so you never miss a post. You get all the behind-the-scenes information and lots more.
Roasted Lemon and Parmesan Broccoli
Roasted Lemon and Parmesan Broccoli makes a delicious snack or side dish for any meal. Roasted broccoli takes on a different flavour and texture than steamed broccoli that will surprise and delight your family and friends.
Keyword: broccoli, parmesan, Roasted Vegetables, Side Dish
Servings: 4servings
Author: Chef Ben Kelly
Equipment
2 mixing bowls
1 cutting board
Measuring Spoons
1 Large Pot
1 Colander
1 sheet pan
parchment paper
1 clean kitchen towel
1 spoon
1 spatula
Ingredients
4 – 5 cupsbroccoli florets
2tbspolive oil
1pinchcrushed red pepper flakes
1 1/2tspsalt split
1/4cupgrated parmesan split
1tbsplemon zest
1/2lemon, juiced
Instructions
Heat your oven to 400°f.
Cut the stem off the broccoli and discard. Next, cut the broccoli into florets.
Fill a large pot with water and 1 tsp of salt. Bring to a boil. Fill one medium mixing bowl with ice water.
Put the broccoli florets in the boiling water for 1 minute, then drain and put in the ice water. Stir until cooled. Drain well and pat dry with a clean kitchen towel.
In another mixing bowl, combine the olive oil, 1/2 tsp of salt, crushed red pepper flakes, lemon zest, and 2 tbsp of parmesan cheese. Mix. Add the broccoli and stir to coat.
Line a sheet pan with parchment paper and spread the broccoli out onto it in a single layer. Put the broccoli in the oven on the middle rack and roast for 15 minutes.
Remove the pan from the oven, flip the broccoli pieces, and roast for an additional 12 to 15 minutes or until the broccoli is golden brown. Then, remove the broccoli from the oven.
While still hot, season the broccoli with lemon juice and the remaining 2 tbsp of parmesan. Serve.
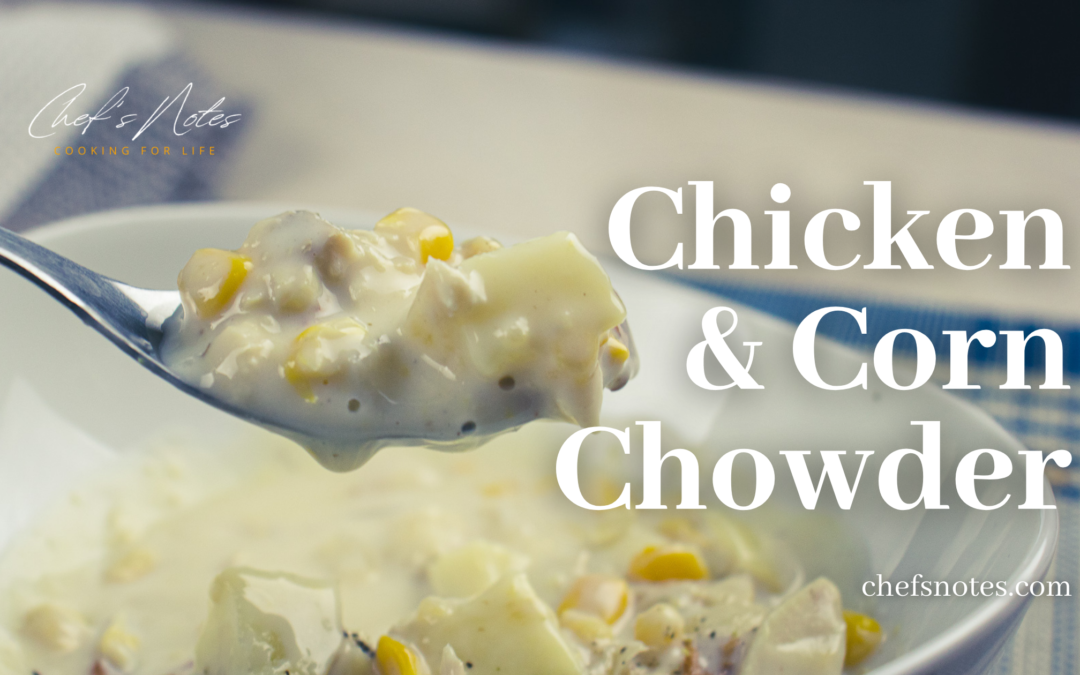
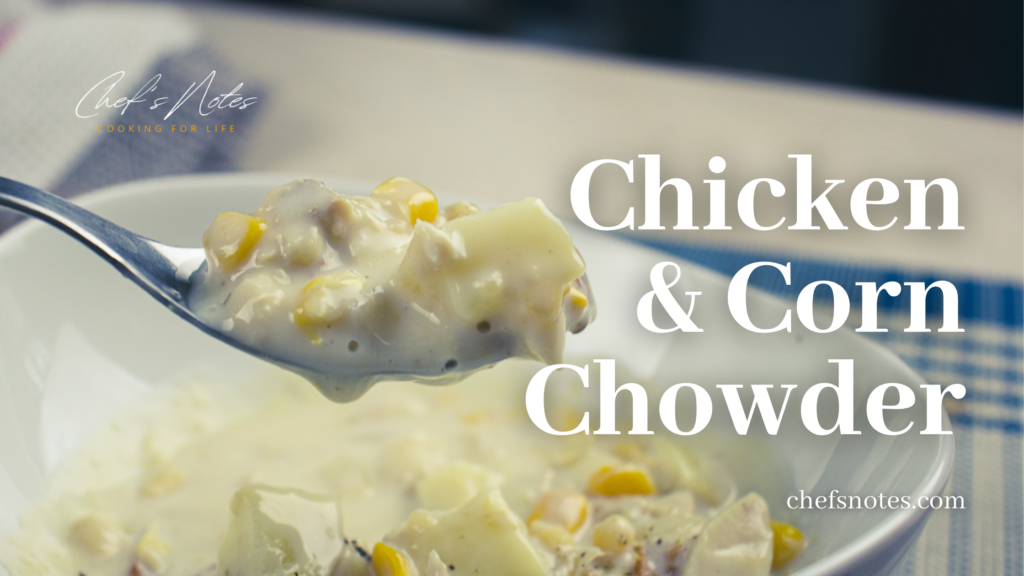
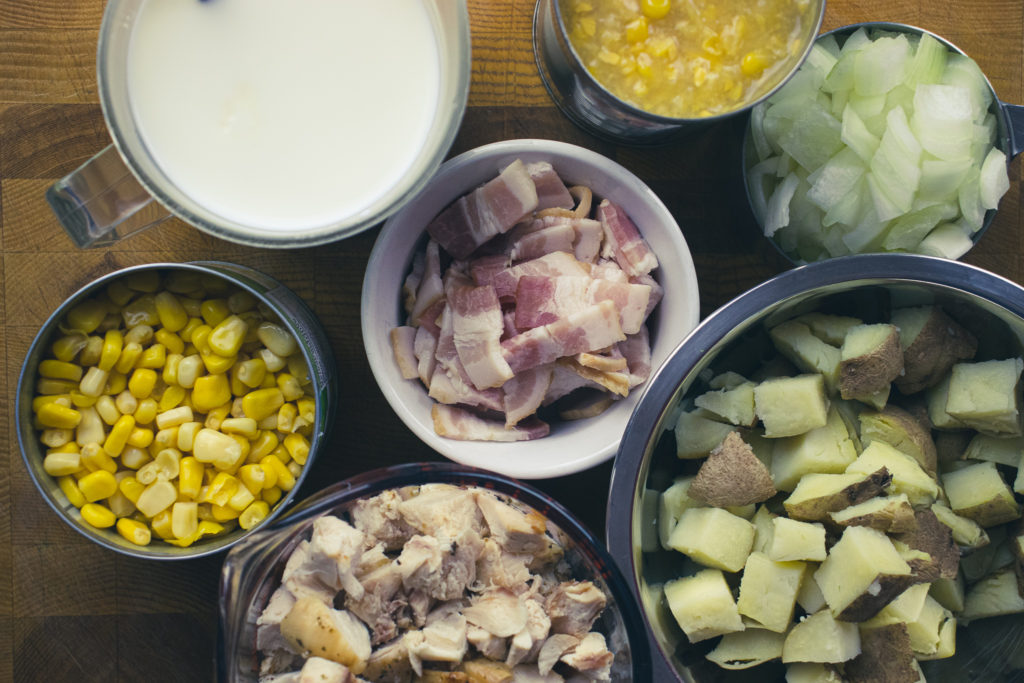
There is no single dish that means more to me than corn chowder. It is the first thing I learned to cook and was taught by my mom. It always has and will always have a special place in my heart. This Chicken and Corn Chowder is a little different from my mom’s. She never put the chicken in it, but it still has that same feeling as my mom’s recipe. When I eat it, I’m still reminded of my mom and of her teaching me to cook. She taught me that one of the secrets to good corn chowder is using leftover baked potatoes. I’ve taken that a step further and used leftover roasted chicken, making this dish comforting, delicious, and frugal. I hope you enjoy the recipe and the chowder. Let’s get to it.
Chicken and Corn Chowder Ingredients
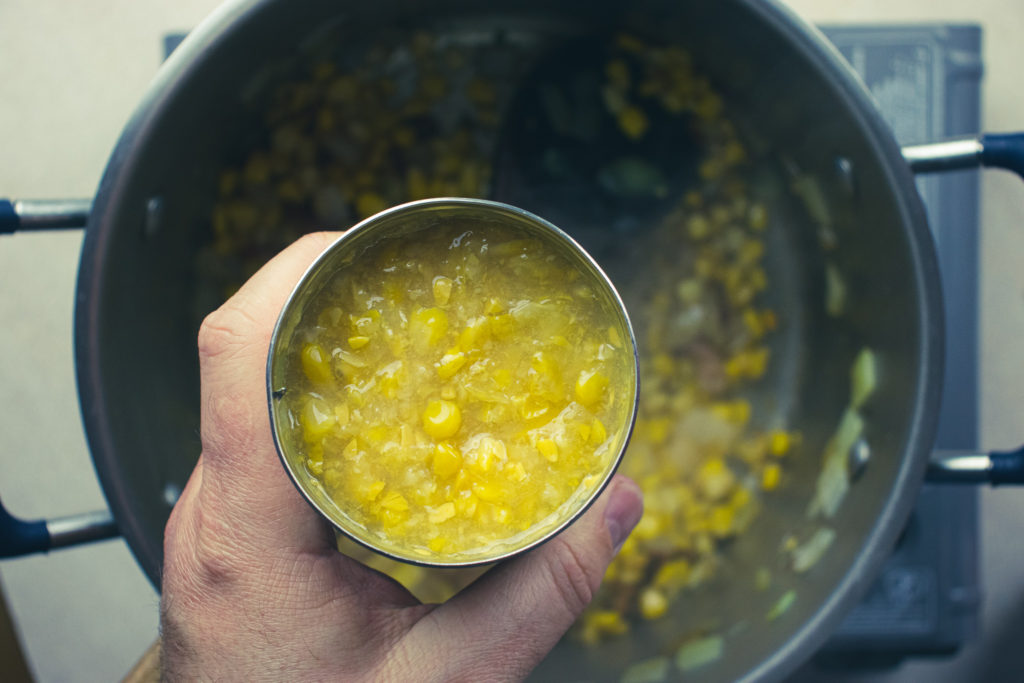
As I said in the introduction to this post, Chicken and Corn Chowder is a fantastic way to use up leftover roast chicken and baked potatoes. That’s exactly what I’ve done with this recipe. The first two ingredients are leftover chicken and baked potatoes. Of course, you can cook the chicken and potatoes fresh if you’d like. The other ingredients are creamed corn, corn niblets, onion, bacon, milk, cornstarch, salt, pepper, and a little sugar.
I used to work at a restaurant where we served corn chowder. Their recipe, which made four litres (a gallon) of chowder, had an entire kilogram (2.2 lbs) of sugar in it. It was way too sweet. I didn’t like it all, but lots of people loved it. So, if you want to add a little more sugar than I did, you can. I’ll leave that up to you. But I don’t recommend adding as much as that restaurant did.
How To Make Chicken and Corn Chowder
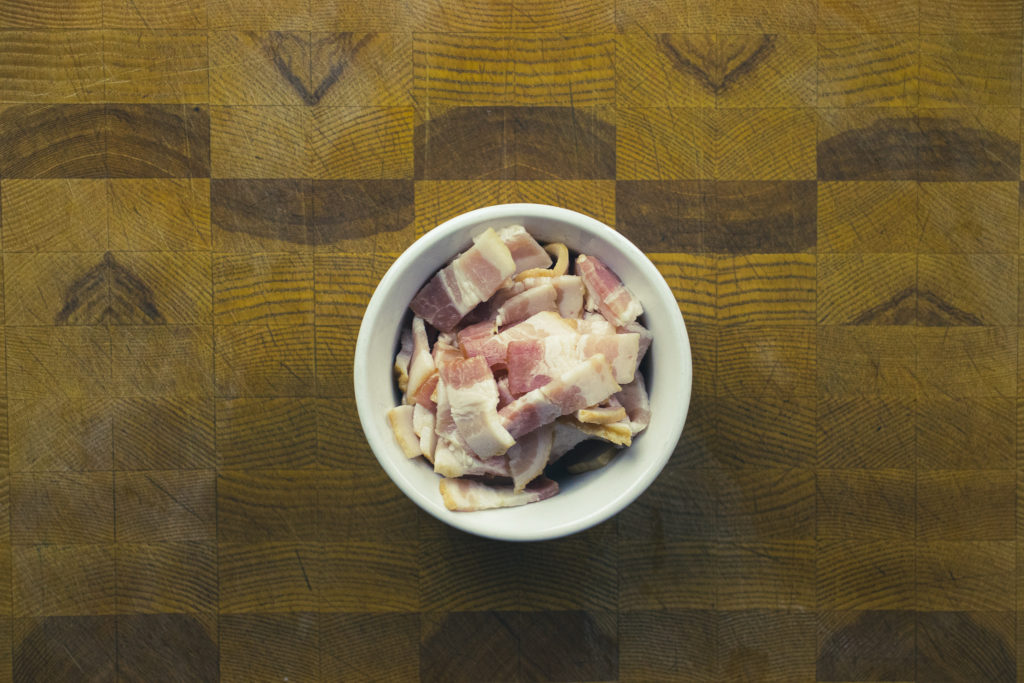
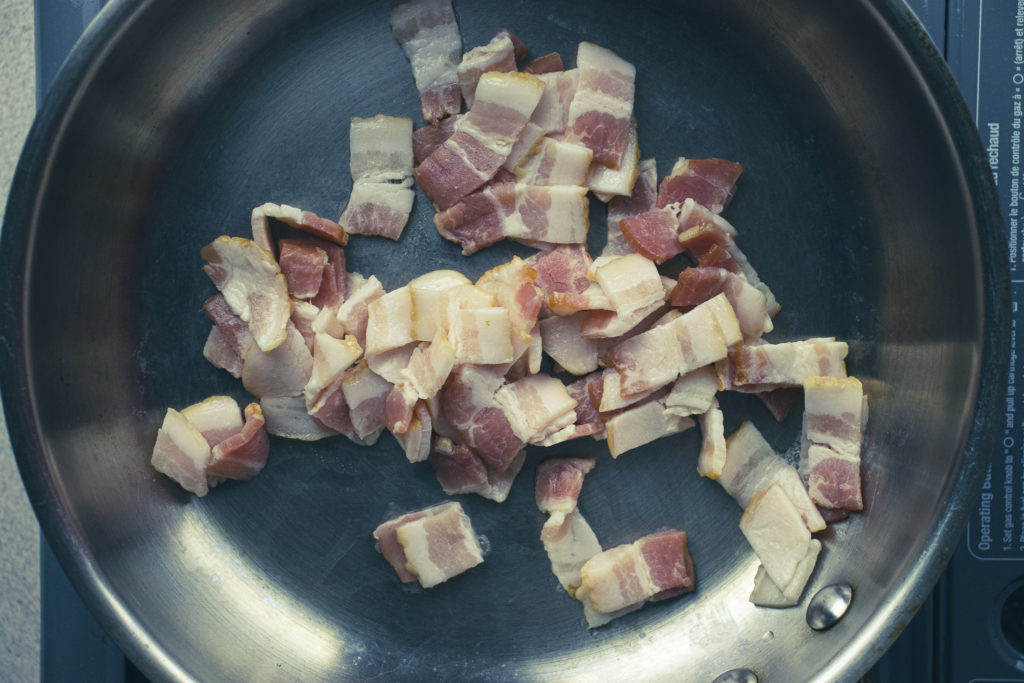
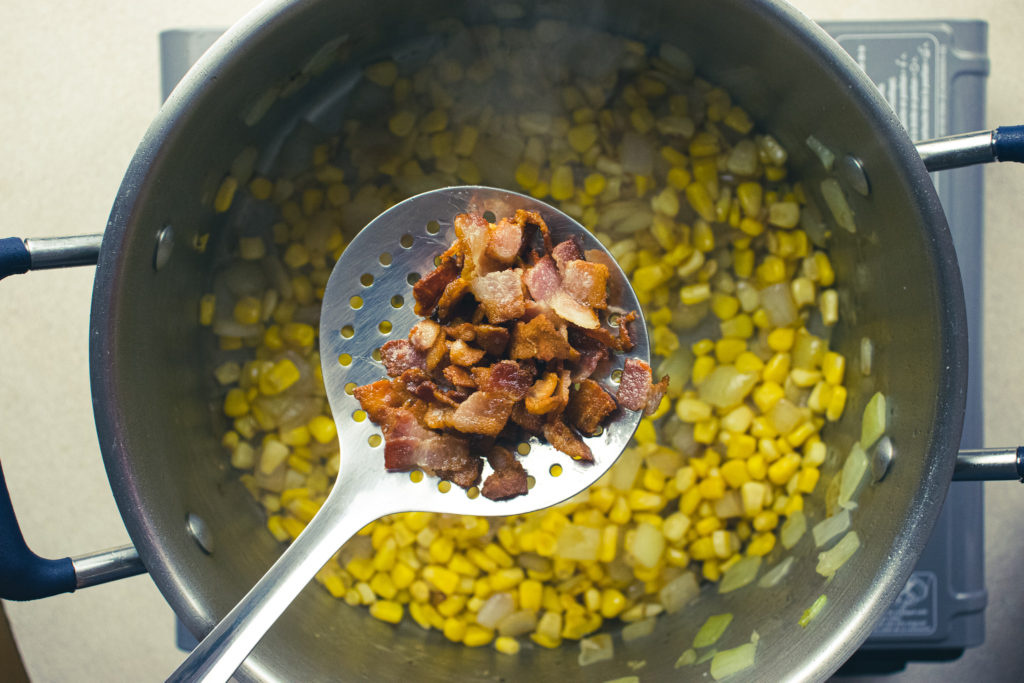
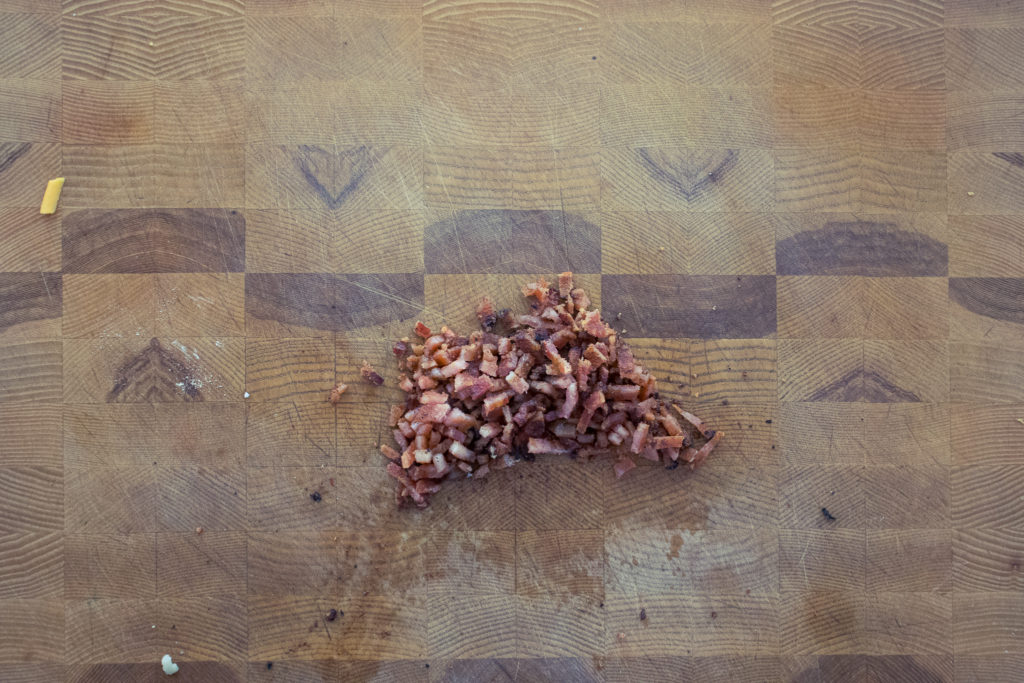
Bacon
If you have leftover cooked bacon, you can use that, but I cooked my bacon fresh. I like really crispy bacon in my chowder, so I made what’s called lardons. That’s a French term for really crispy pieces of bacon. To make the bacon super crispy, put it in a pan, put the pan on medium heat and let it cook. The fat will render out of the bacon, and it will get crispy in about 10 minutes. Once the bacon is cooked, drain the fat off and set it aside until you’re ready to add it to the chowder. Alternatively, you can microwave the bacon for a few minutes.
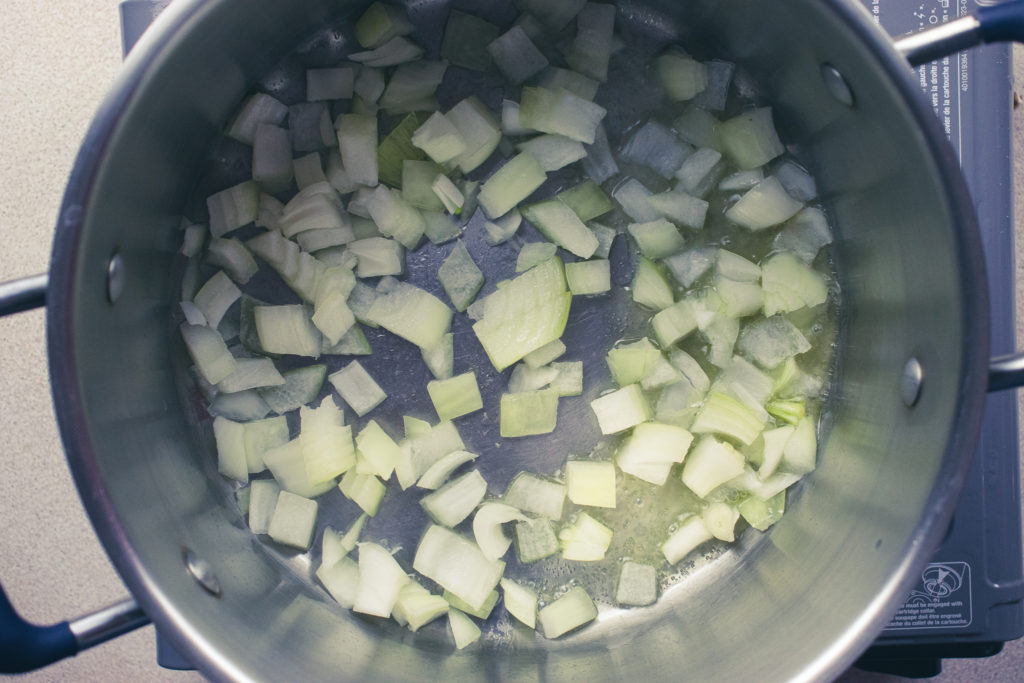
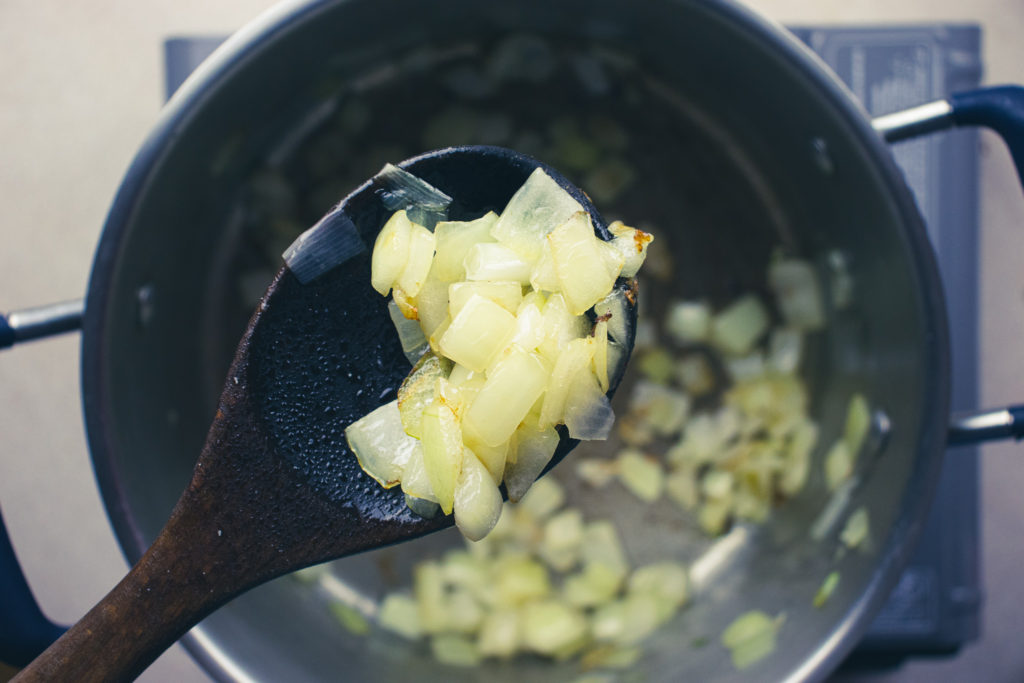
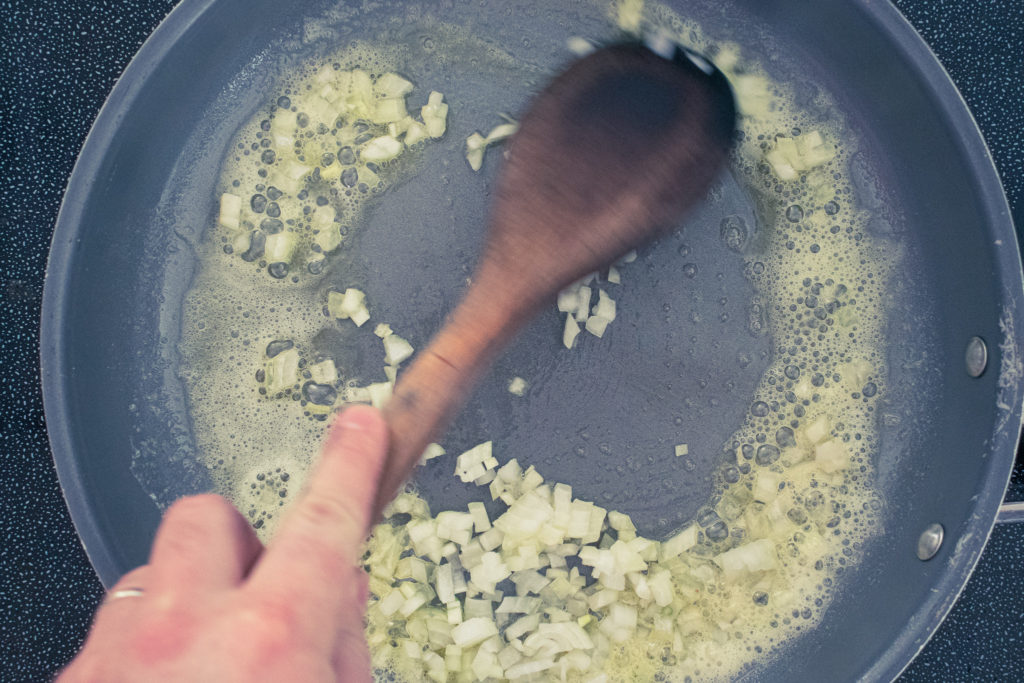
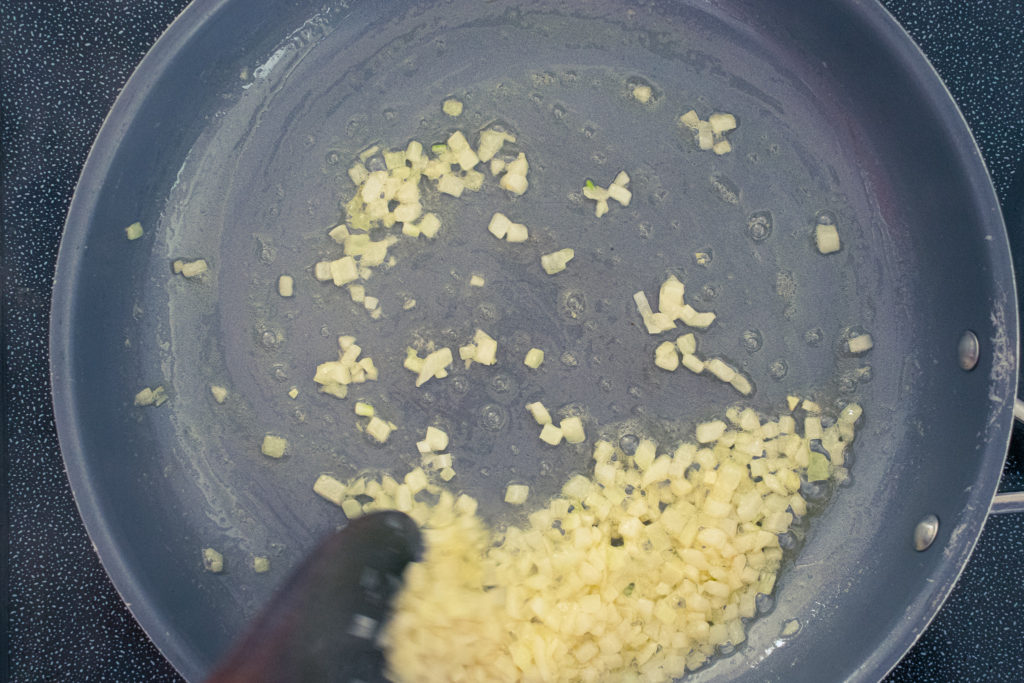
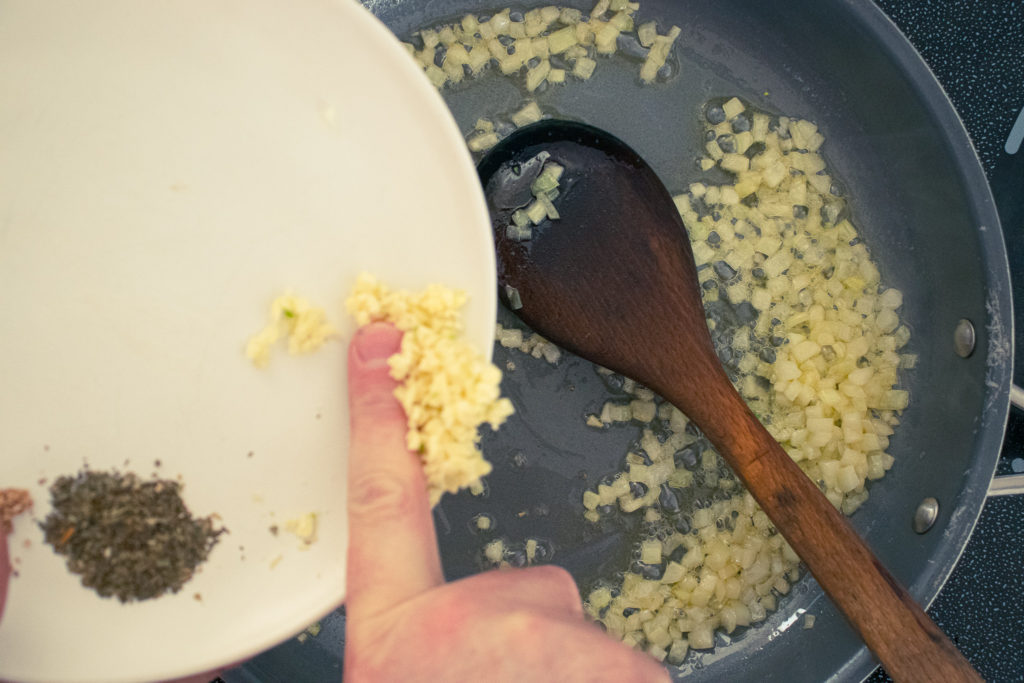
Sauté The Onion
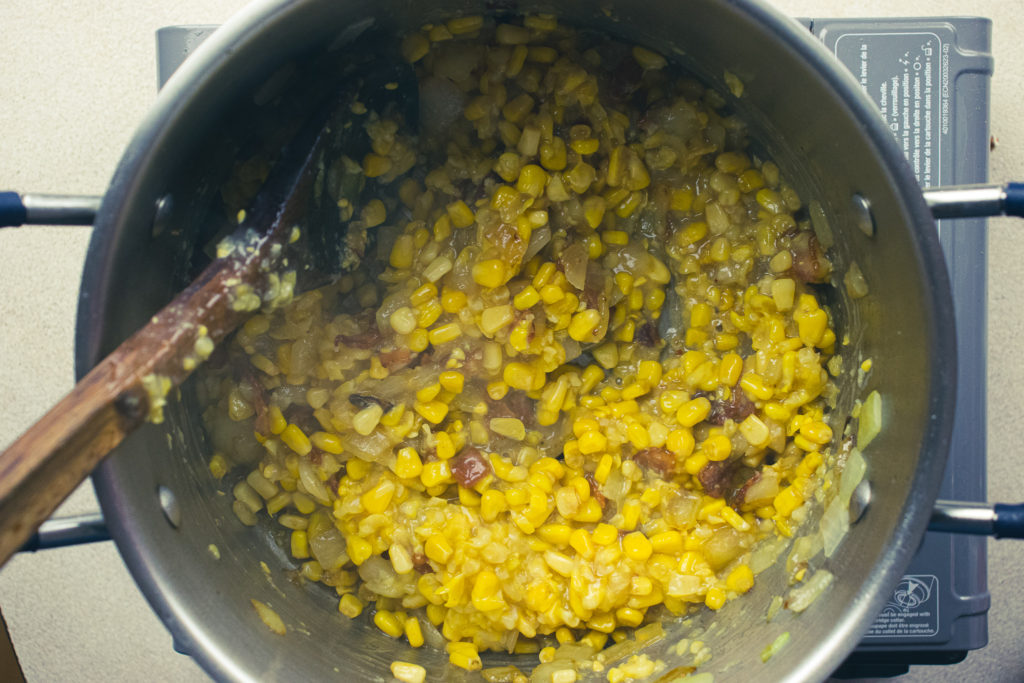
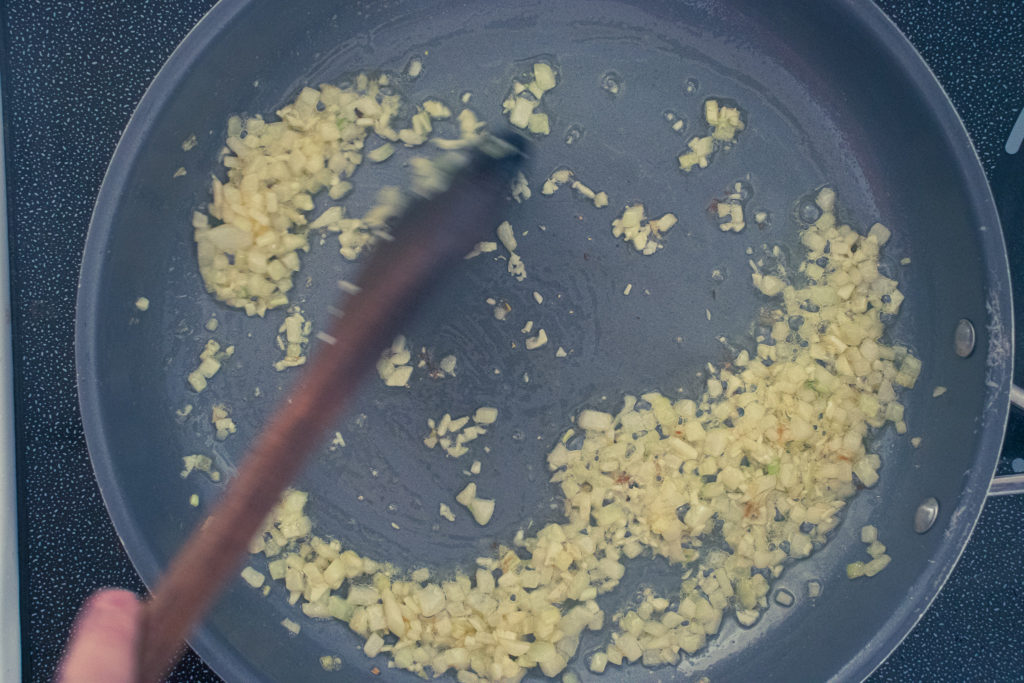
The chowder starts with a base of sautéed onion. Heat a large pot over medium heat and add a bit of cooking oil. Add the onions and a pinch of salt. The salt will help break down the onions a little and speed up the cooking process. Cook the onions for 5 to 7 minutes or until they are soft, translucent, and a little brown around the edges. Cooking the onions until they start to brown makes them a little sweet, lessening the need for sugar.
Next Step
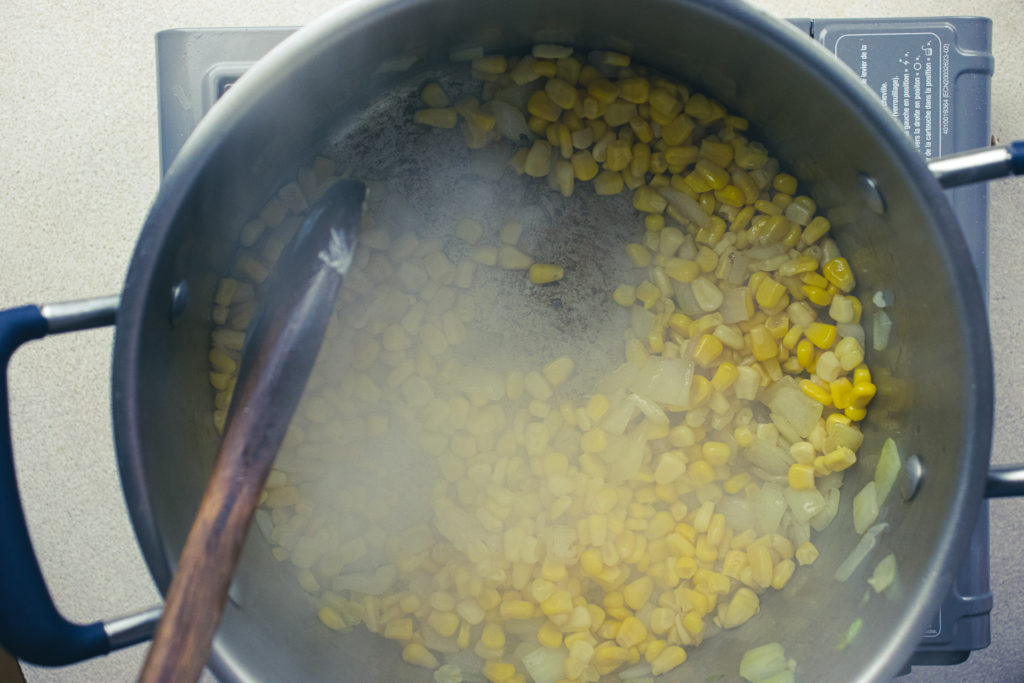
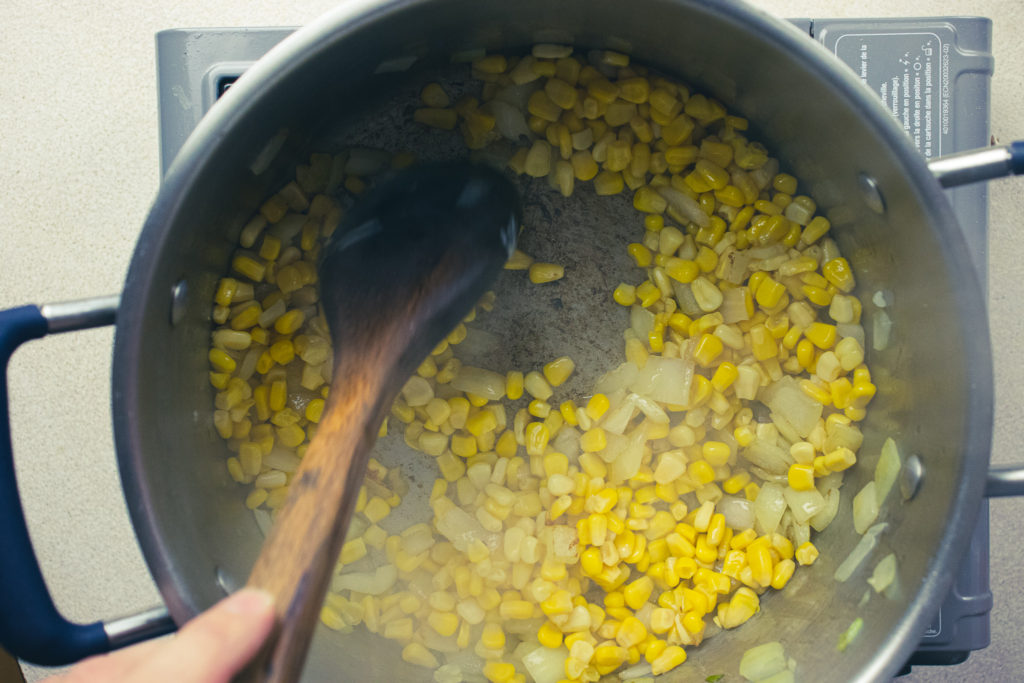
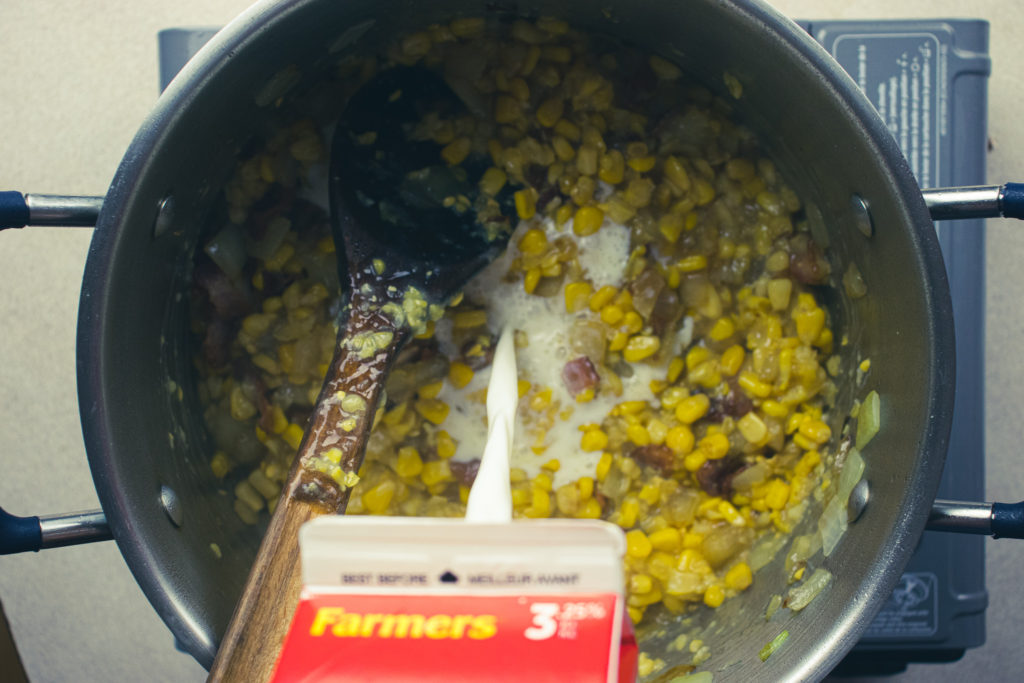
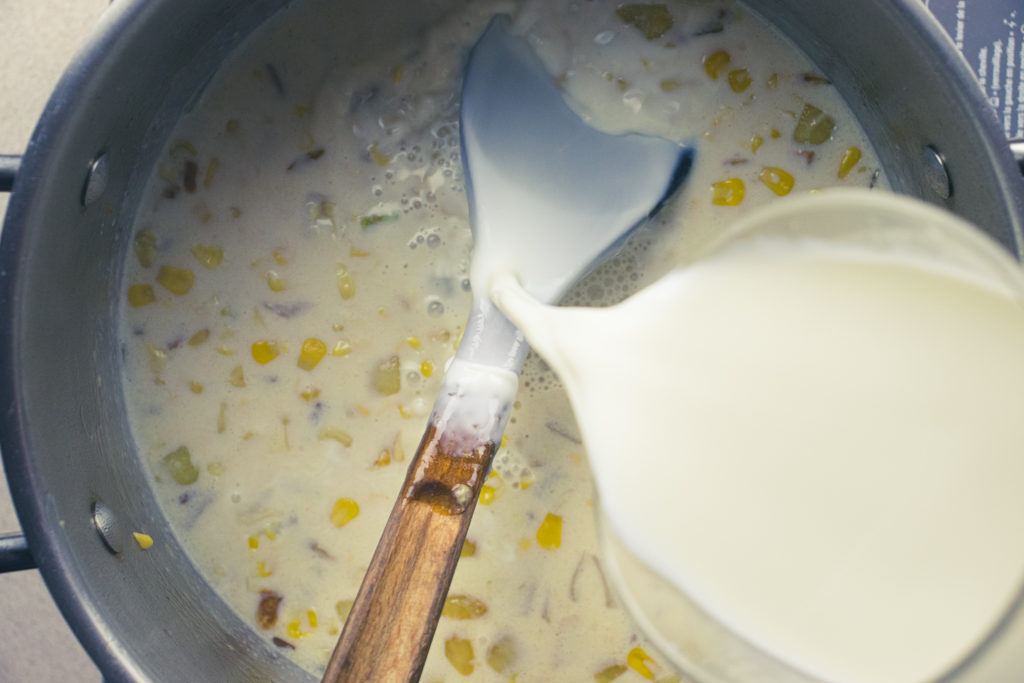
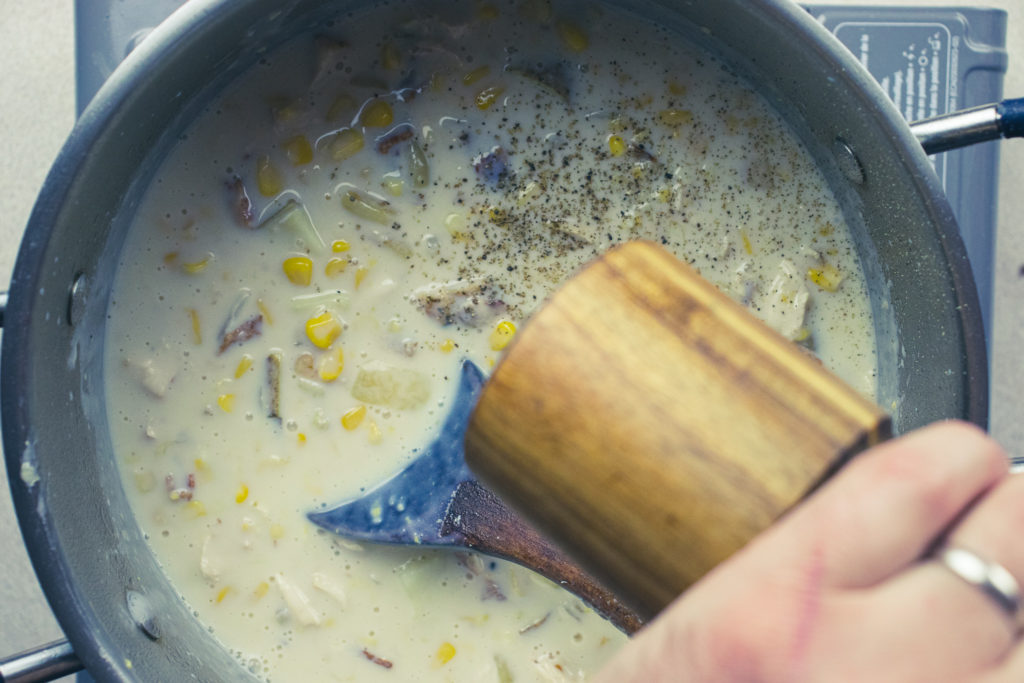
After the onions are cooked, add the corn niblets to the pot and cook for about two minutes. If the corn gets a bit of colour on it, all the better. Next up, add the bacon, creamed corn, and 4 of the 5 cups of milk. Stir the pot, making sure to scrape the bottom to lift off any bits of food that have stuck. Heat the chowder until the milk is hot and starts to steam. Heating the milk should take between 5 and 10 minutes, depending on your stove.
Thickening
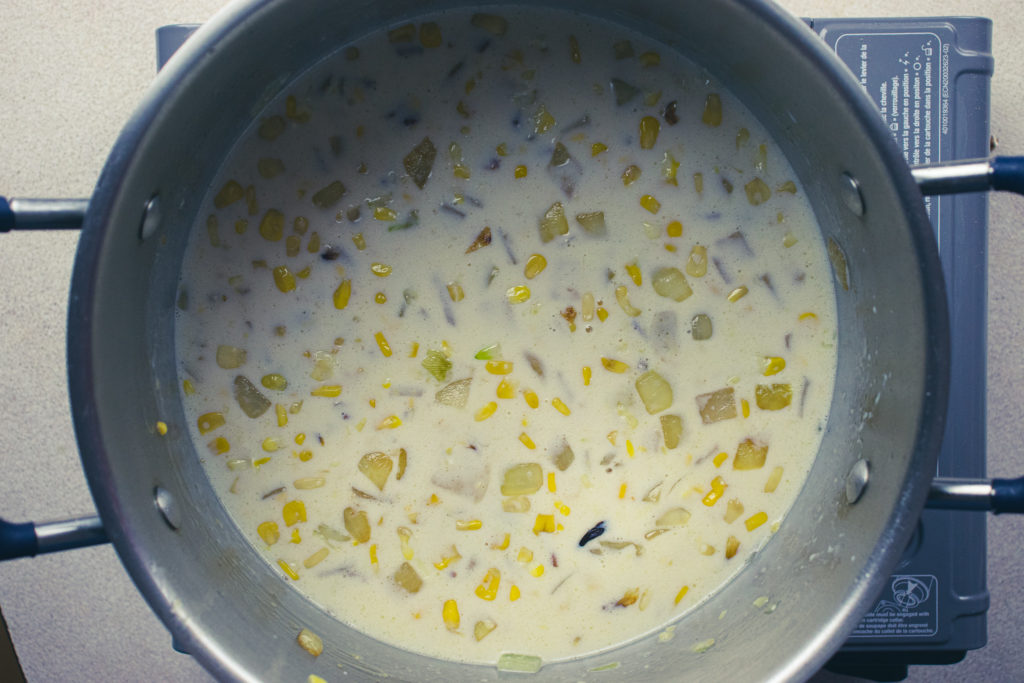
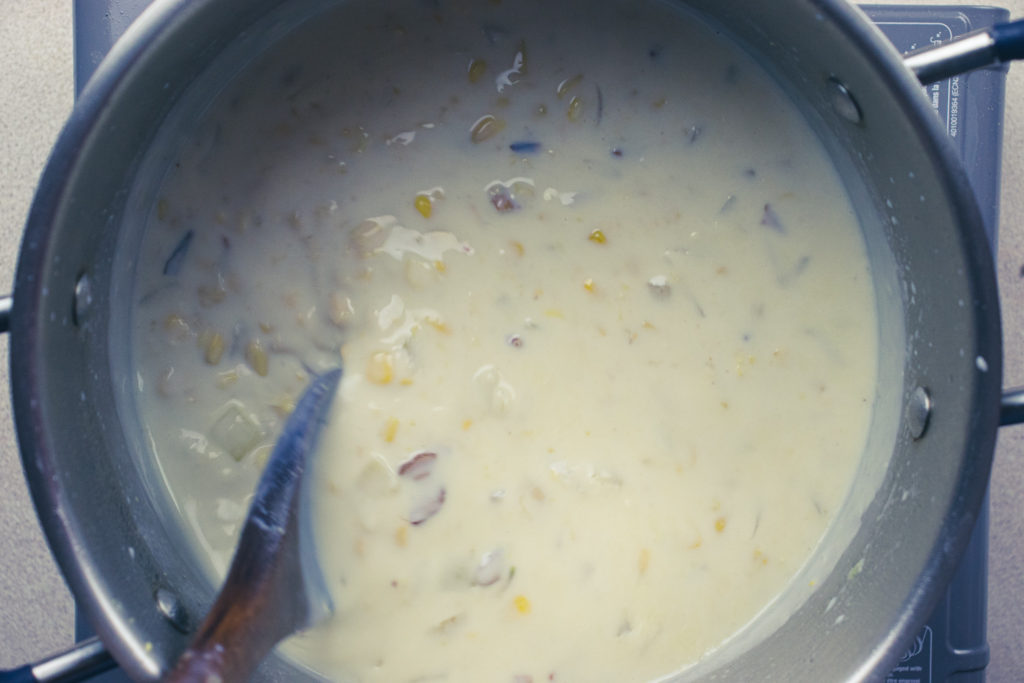
While the chowder is heating, take the remaining 1 cup of milk and mix it very well with the cornstarch. Pour that mixture into the chowder and stir until it thickens. About 5 minutes. Make sure to stir the milk and cornstarch mixture immediately before adding it to the chowder to ensure that it is thoroughly mixed.
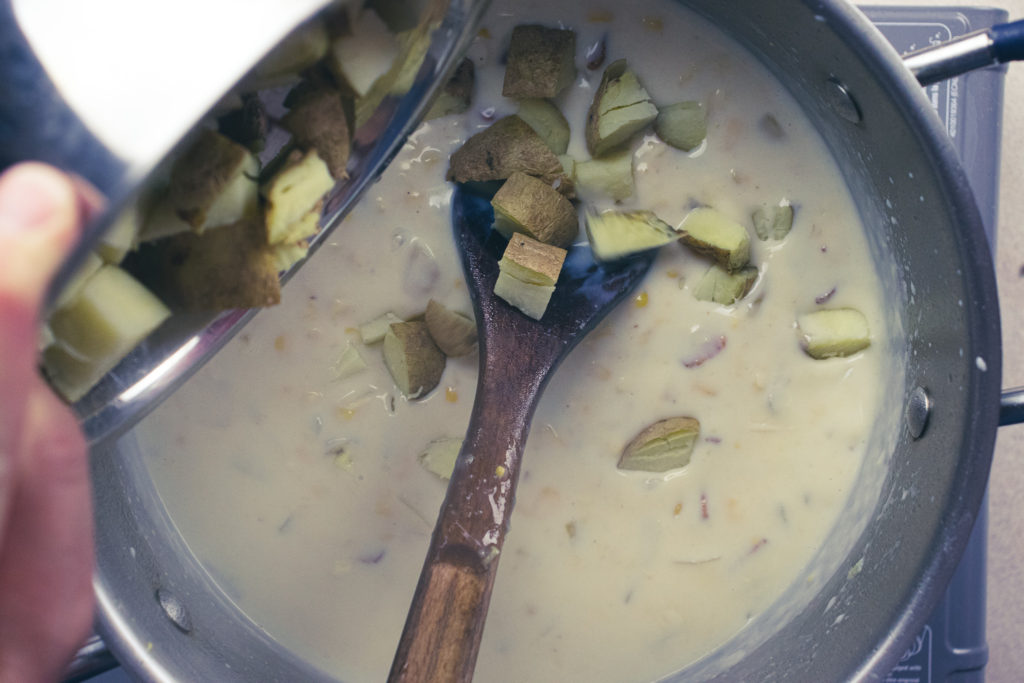
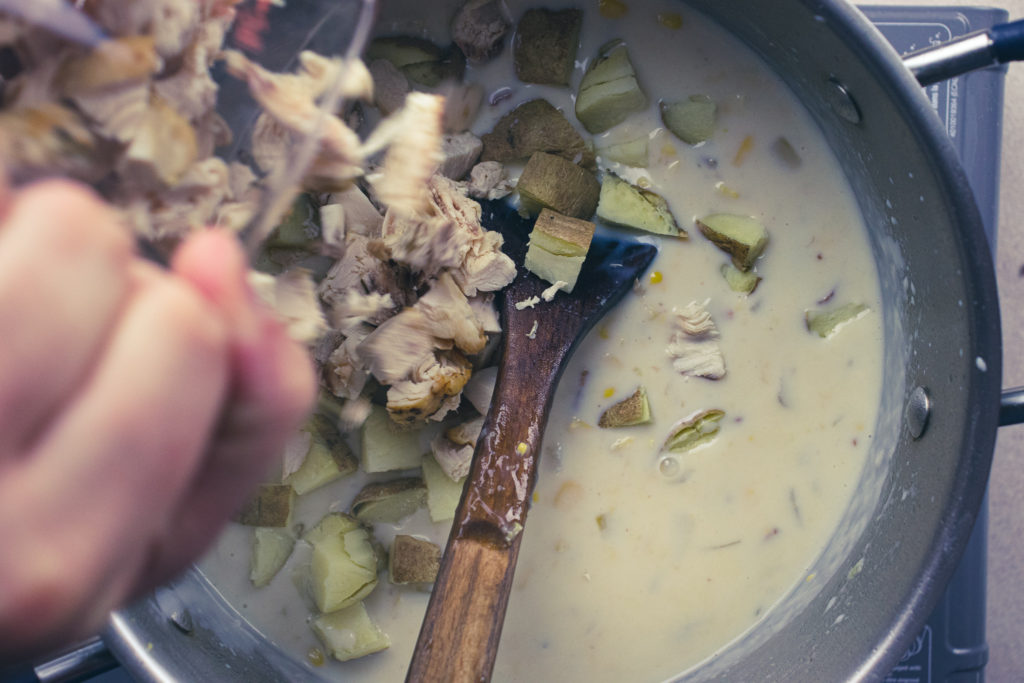
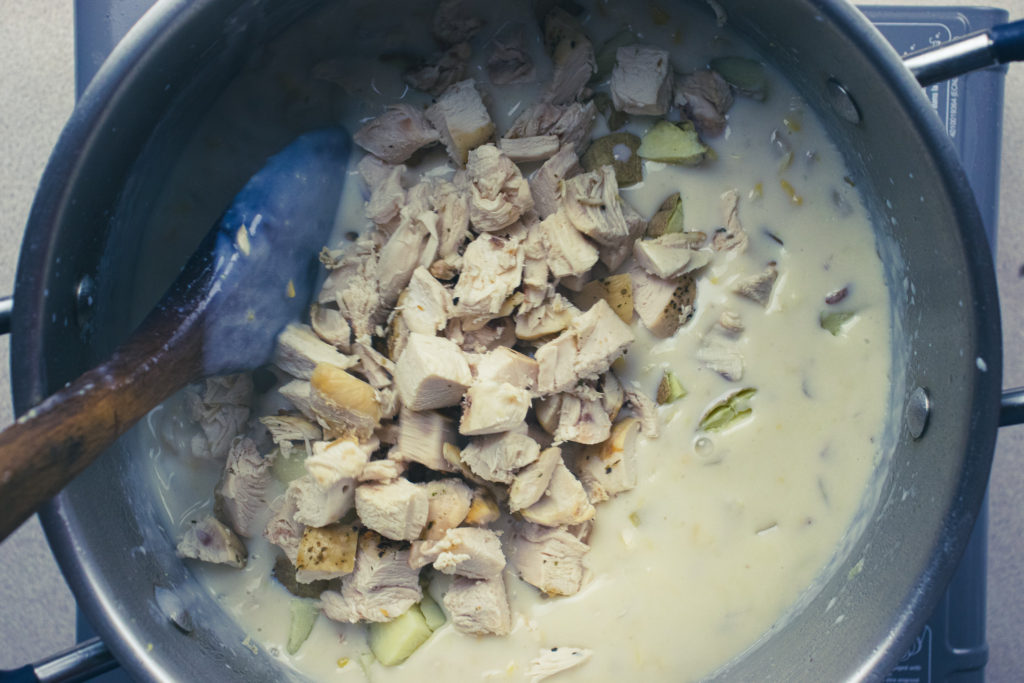
Chicken and Potatoes
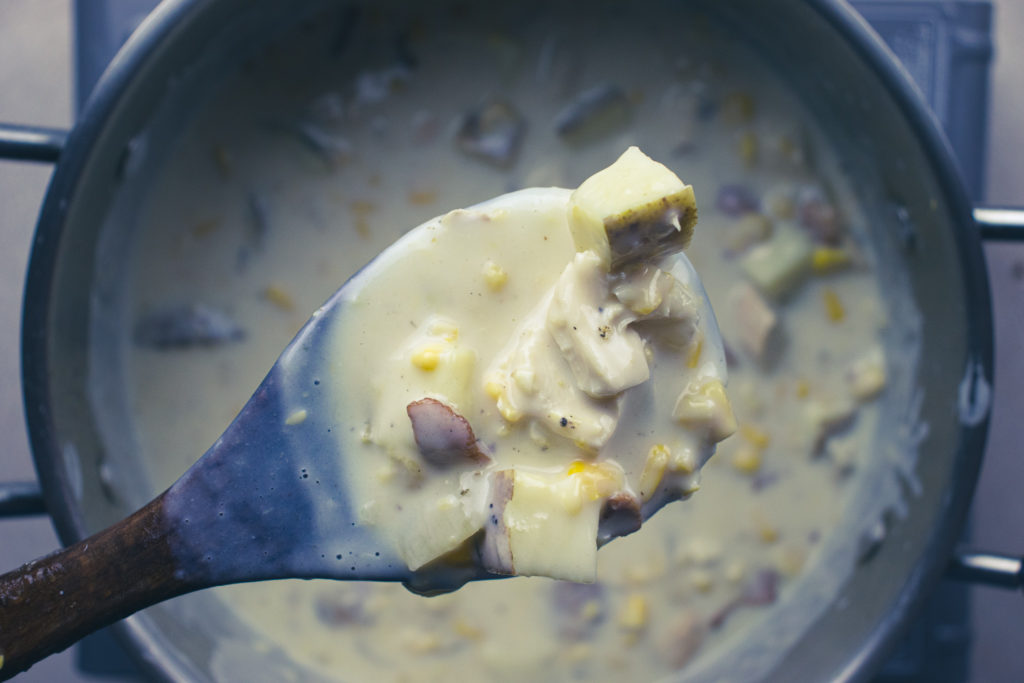
Once the chowder’s thick and chowder-like, add potatoes, chicken, salt, pepper, and sugar. Simmer for about five minutes or until the potatoes and chicken are heated. Taste and adjust seasoning as needed with salt and pepper, then serve.
The Wrap-Up
I can’t tell you how happy I was doing this post. Specifically, when I was done cooking and got to eat the chowder. It doesn’t matter what kind of mood I’m in or what’s going on in my life. A big bowl of corn chowder, chicken or otherwise, will always put a smile on my face. Hopefully, it puts a smile on your face too. Enjoy!
That does it for today. Thanks for reading. I hope you’ve enjoyed the post. Remember to share this on Facebook or Pinterest and leave a comment below. I love to hear from you. Finally, remember to sign up for my mailing list so you don’t miss out on exclusive recipes and cooking tips. Members of the mailing list also get a sneak peek at all the upcoming posts. Sign up below. Have a great day! I’ll see you back here next Thursday.
Chicken and Corn Chowder
Chicken and Corn Chowder is a hearty and frugal meal using leftover chicken and baked potatoes. It is creamy and delicious. Great for any meal.
Put the bacon in a medium skillet and put it on medium heat. Cook, stirring every few minutes, until the bacon is crisp, about 8 to 10 minutes. Remove the bacon from the pan and drain it on a paper towel. Set aside.
Heat a large pot over medium heat. Add the cooking oil, onion, and a pinch of salt. Cook the onion for 4 to 5 minutes or until the onions soften, turn translucent, and start to brown around the edges.
Add the corn niblets to the pot and cook, stirring for 2 minutes. Add the creamed corn, crisp bacon, and 4 cups of milk. Stir to loosen any bits of food from the bottom of the pot. Cook until the milk starts to steam.
In a small bowl or measuring cup, combine 1 cup of cold milk with the cornstarch. Mix well, then pour into the steaming milk. Cook, stirring, until the chowder thickens, about 5 to 10 minutes.
Add the chicken, potato, salt, pepper, and sugar. Simmer for 5 minutes, gently stirring now and again. Taste the chowder, adjust the seasoning as needed with salt and pepper, then serve.
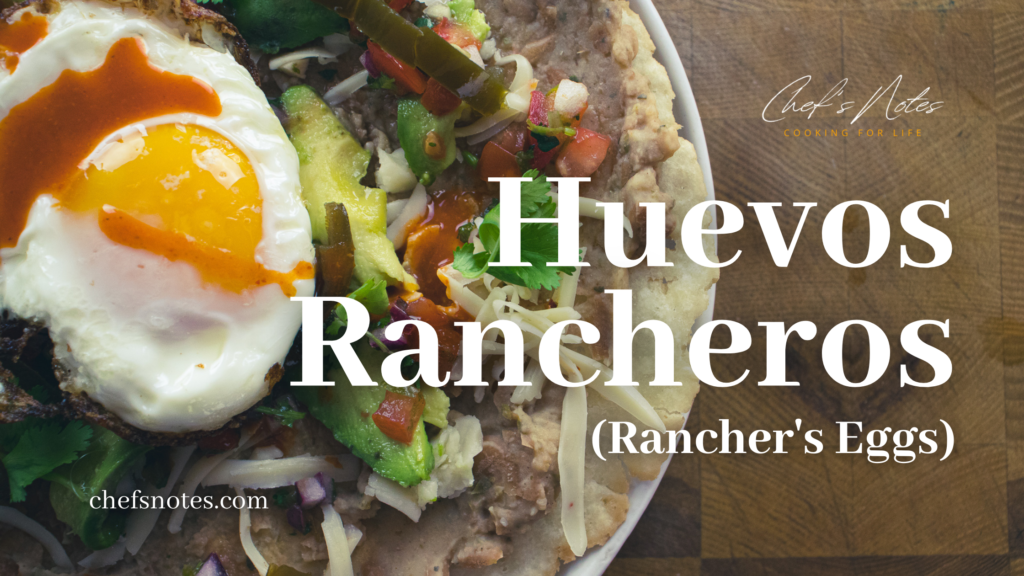
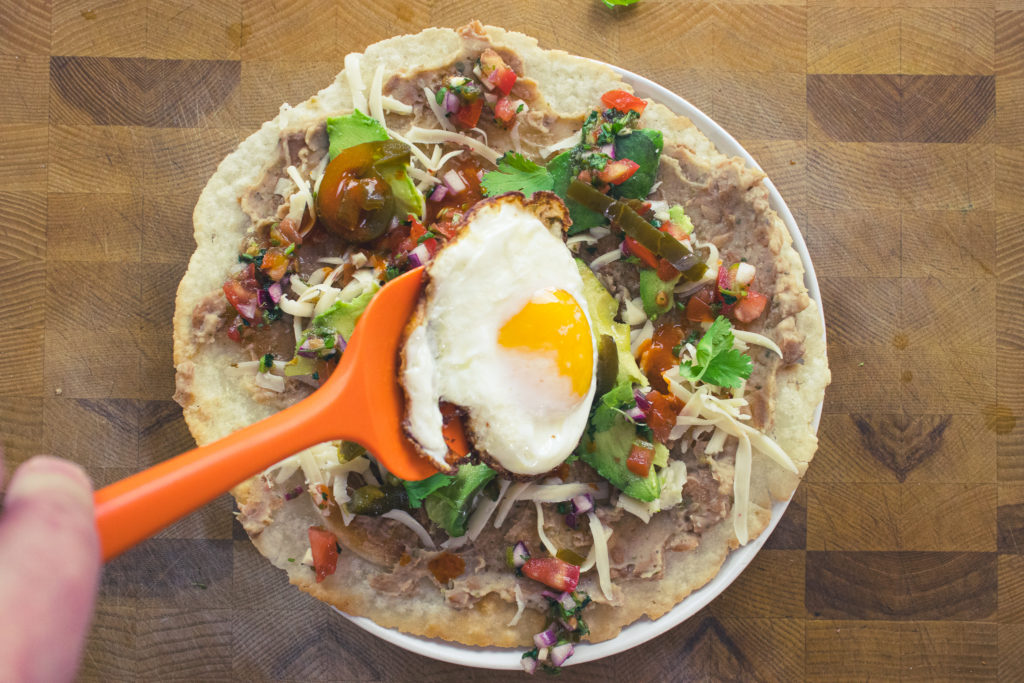
Huevos Rancheros. What is that? Huevos is Spanish for eggs, and Rancheros is Spanish for Ranchers or farmers. So, Huevos Rancheros is Ranchers or Farmers eggs. Essentially, it’s the Mexican version of a full English Breakfast but with a lot more flavour and without making you feel like you just ate a brick. For those who read the blog every week, you’ll know that the last two posts have been building to something. This is what the Pico de Gallo and Refried beans posts have been leading to and what a treasure we have come across. This is a 100% must-make dish. So, what are you waiting for? Let’s get cooking!
Huevos Rancheros Ingredients
The ingredients for my Huevos Rancheros are a tortilla (10 to 12 inches). I used the PC Gluten-Free White Tortillas. You will also need refried beans, Pico de Gallo, pepper jack cheese, pickled jalapeno rings, hot sauce such as Cholula, a few cilantro leaves, avocado, and an egg. This is the kind of dish you can make with almost anything. You may substitute the refried beans for mashed sweet potato or switch the Pico de Gallo for a store-bought salsa. You can add sour cream or plain yogurt if you’d like as well. The sky is the limit. The key ingredients are a tortilla, and an egg served open-faced. You can find my refried bean recipe here and my Pico de Gallorecipe here.
Frying The Tortilla
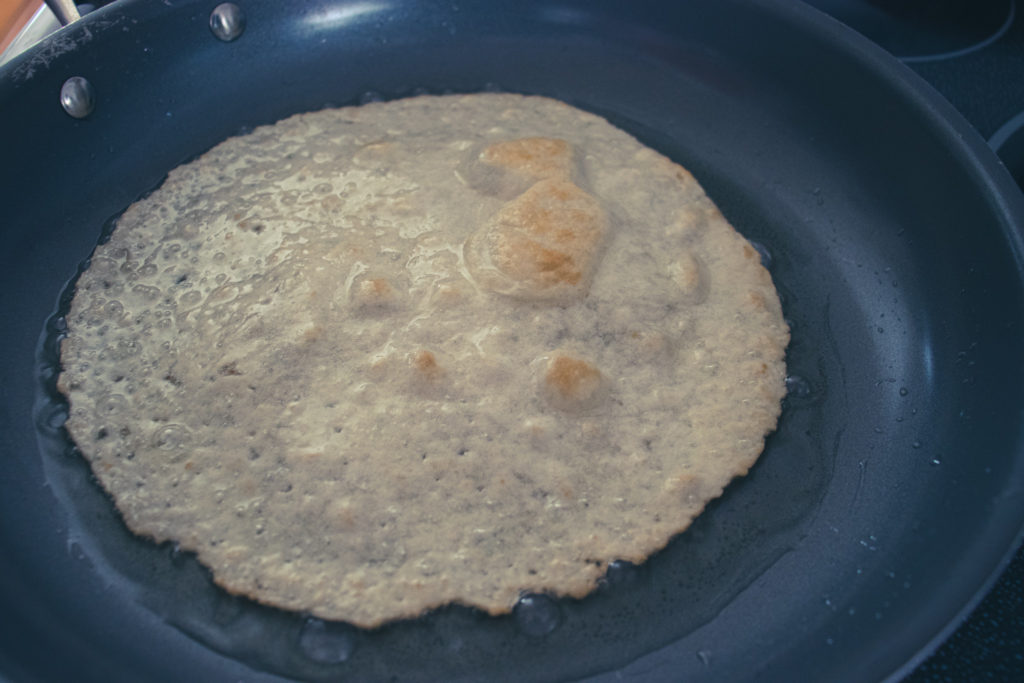
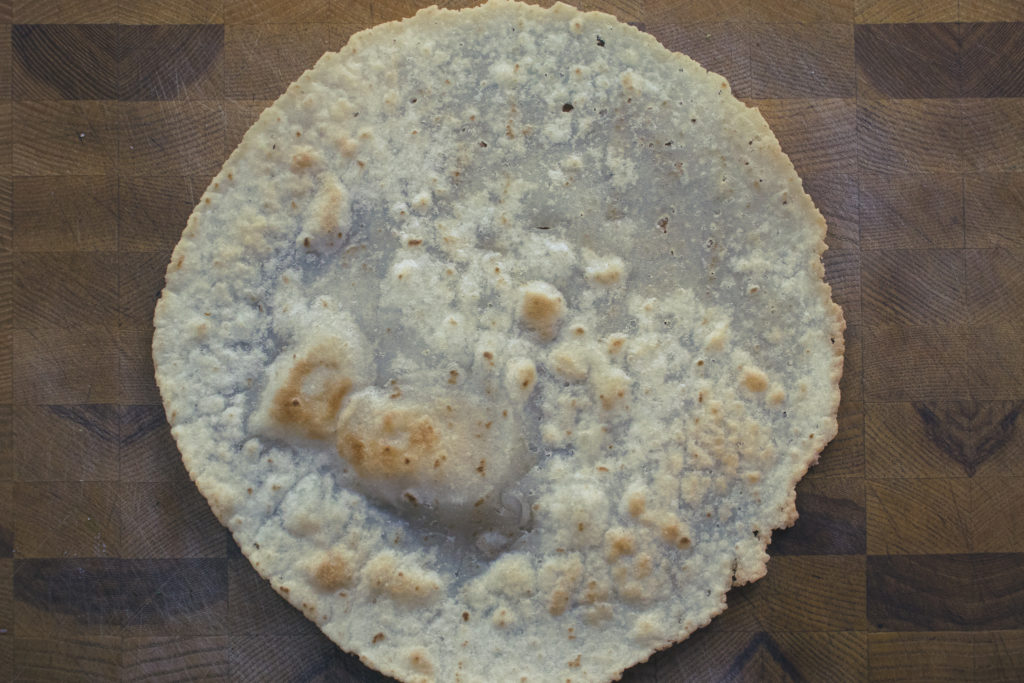
The first step to making Huevos Rancheros is to fry the tortilla. Alternatively, you can bake or grill the tortilla. The point is that you want it to be a bit crispy. Get a skillet large enough to fit your tortilla. Heat it on medium-high. Add in 1 tbsp of cooking oil. Fry the tortilla for 45 to 60 seconds per side or until crisp. Remove the fried tortilla from the pan and set it aside.
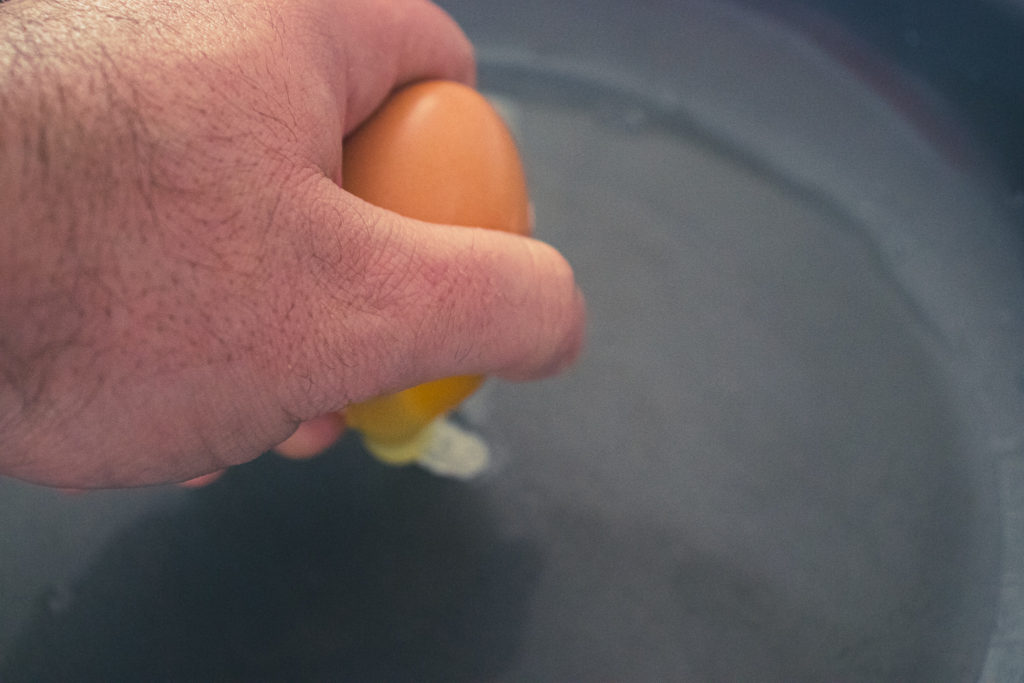
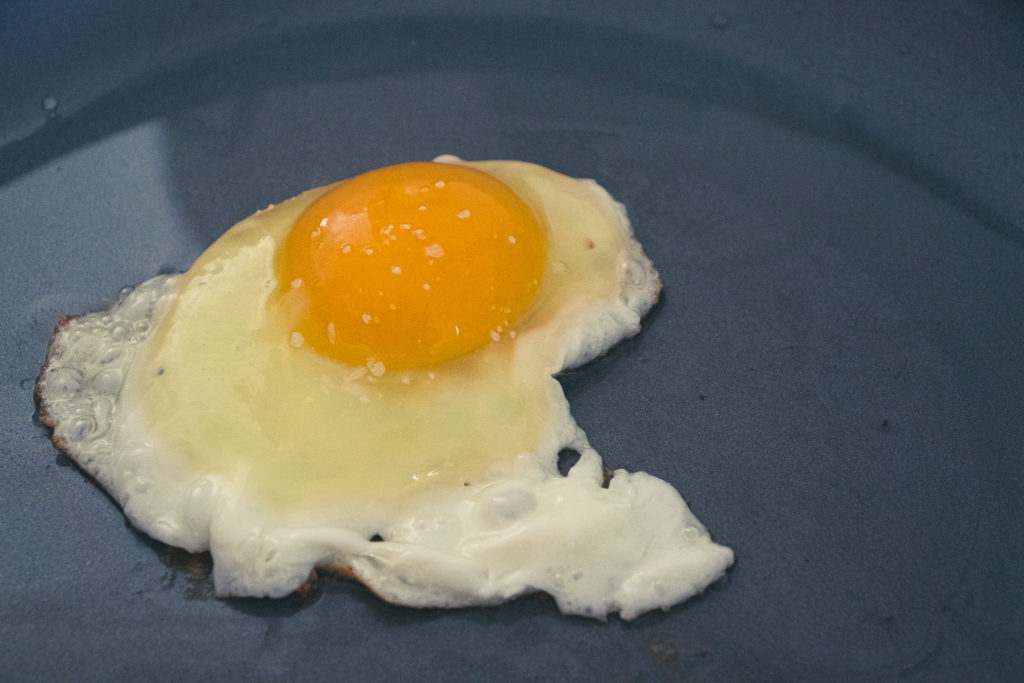
How To Cook A Sunny Side Up Egg
While your skillet is still hot, add another tablespoon of cooking oil, and crack an egg into the pan. Spoon the hot oil over the white of the egg to cook it. Season the egg with a bit of salt. Once the whites are set, remove the egg from the pan and set it aside while you dress the tortilla.
Assembling The Huevos Rancheros
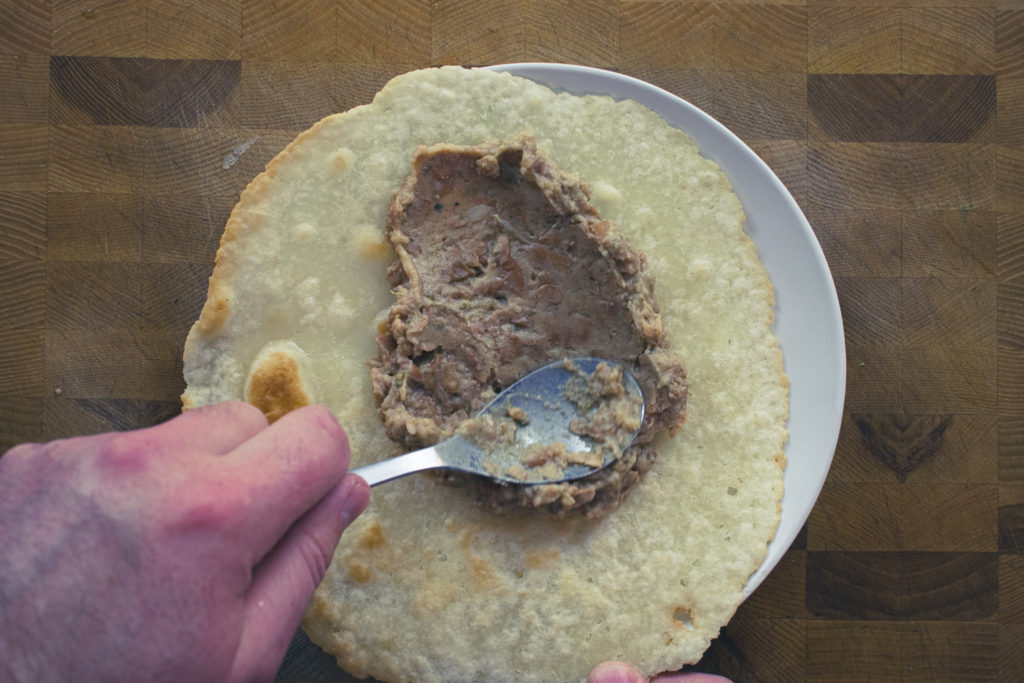
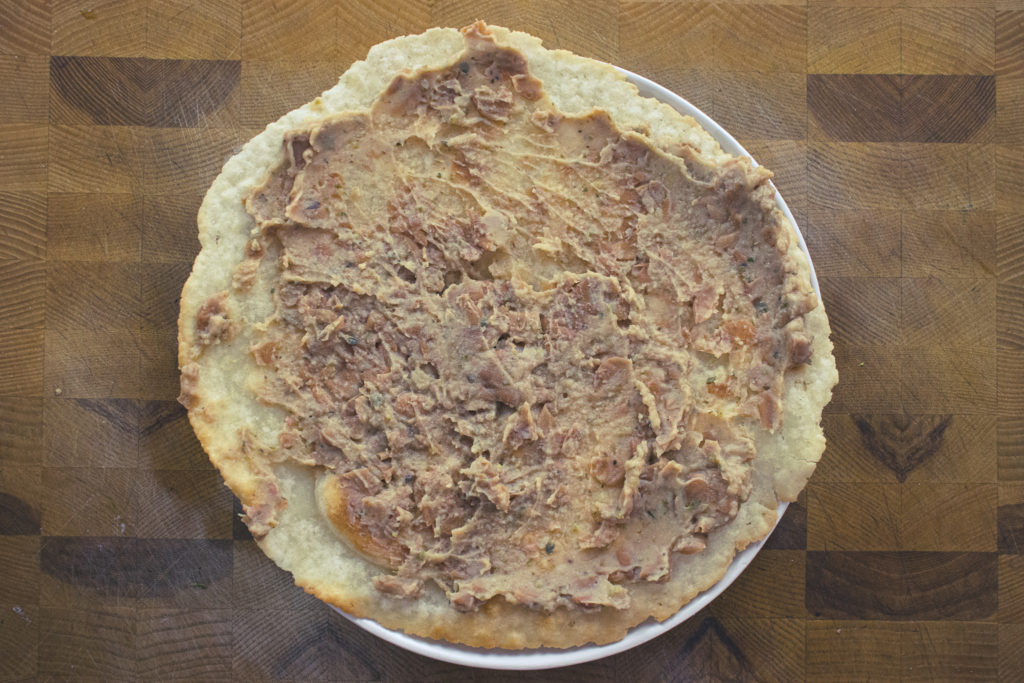
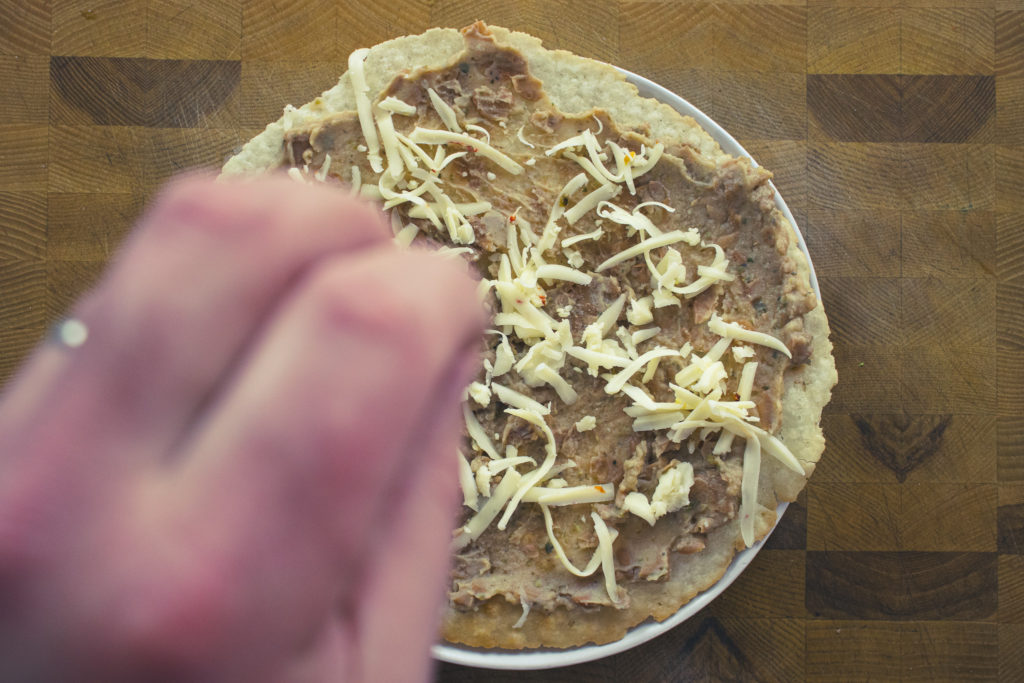
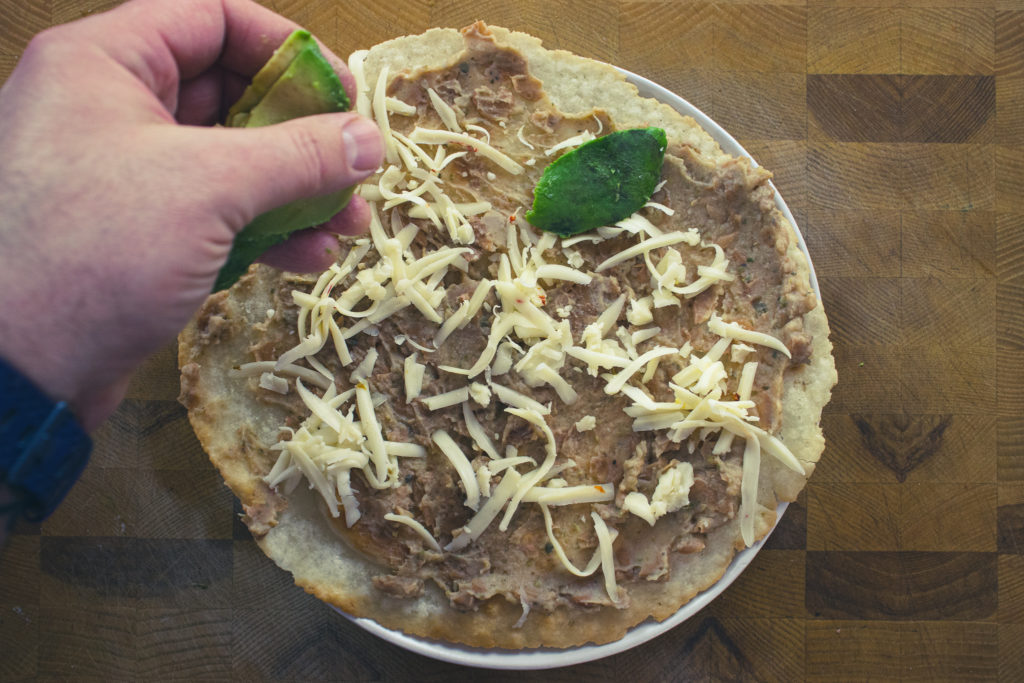
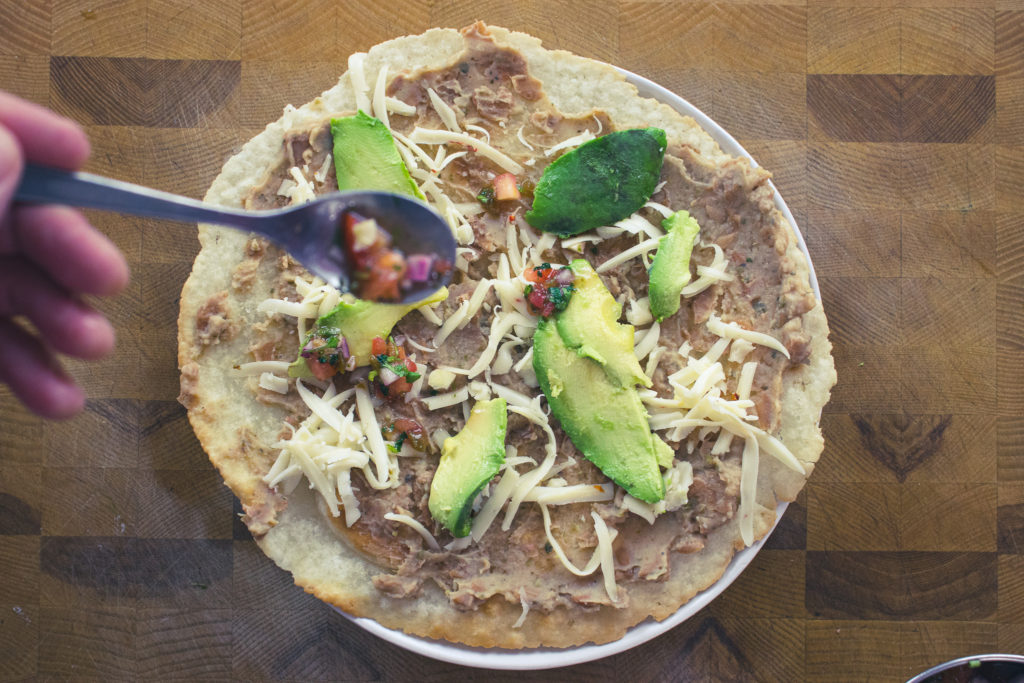
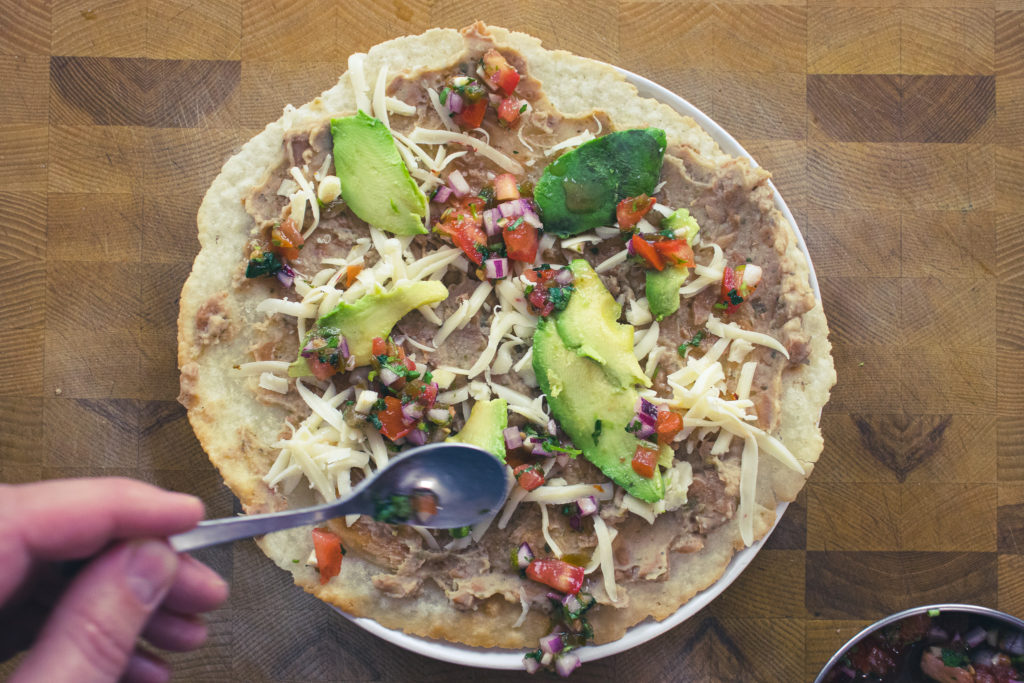
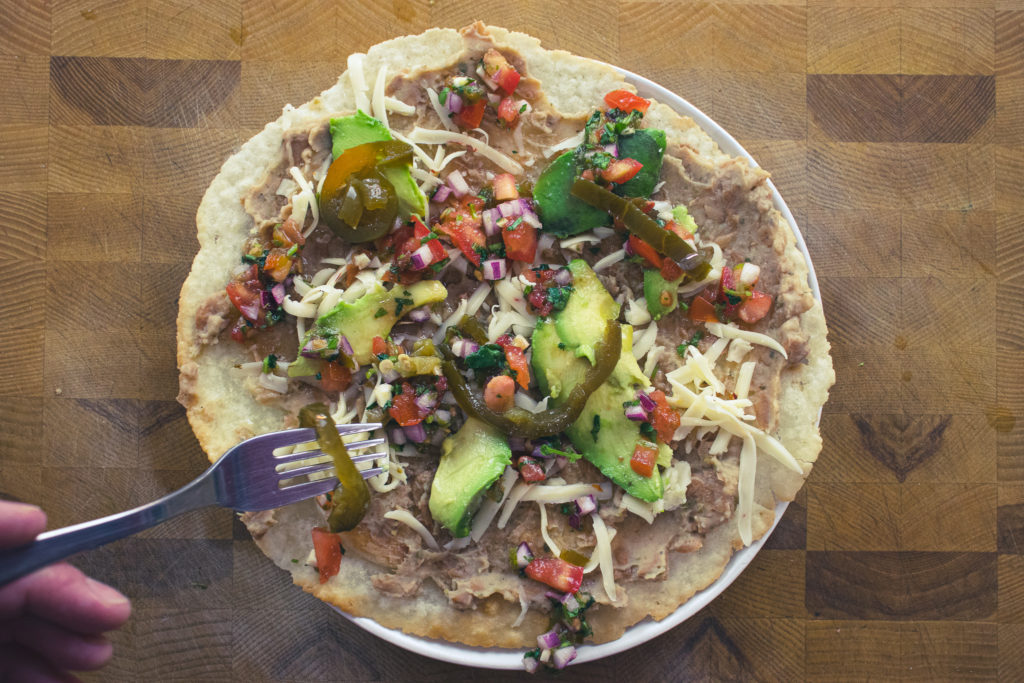
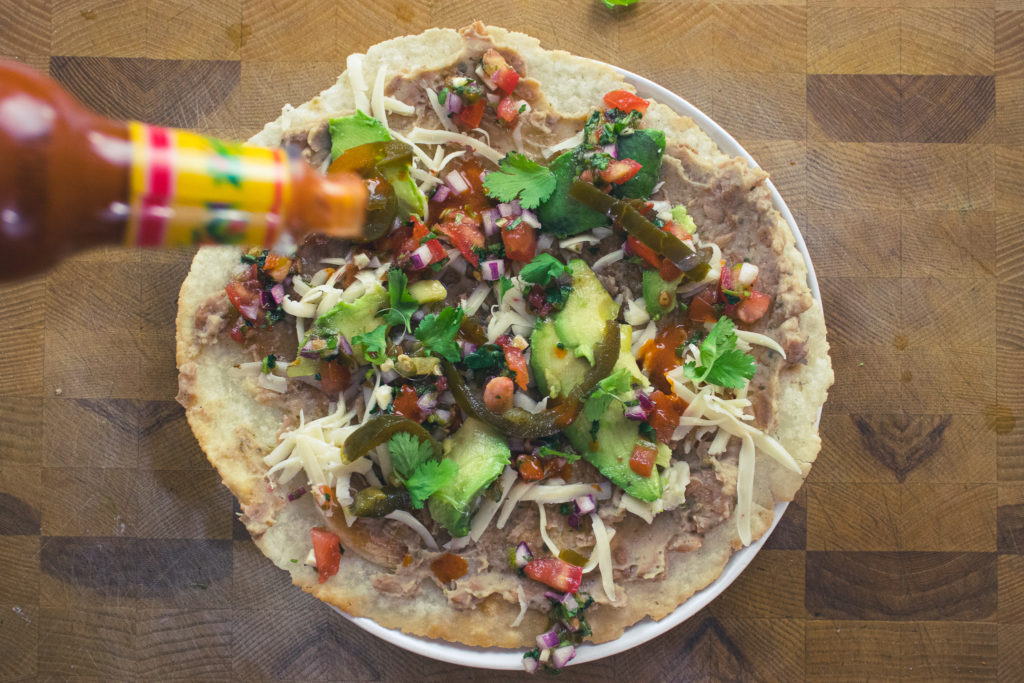
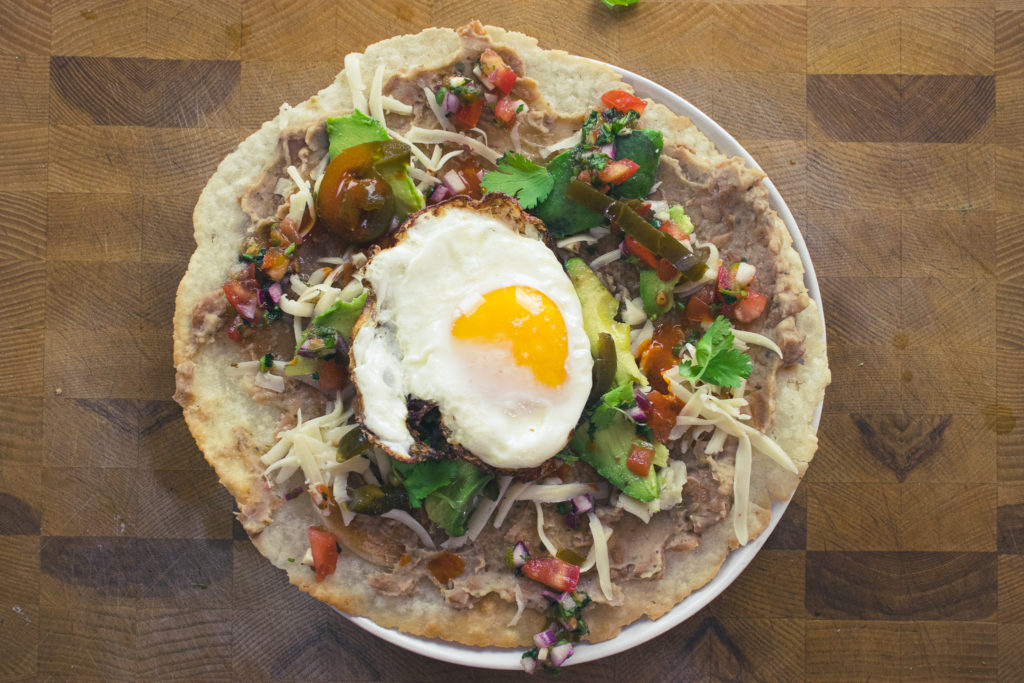
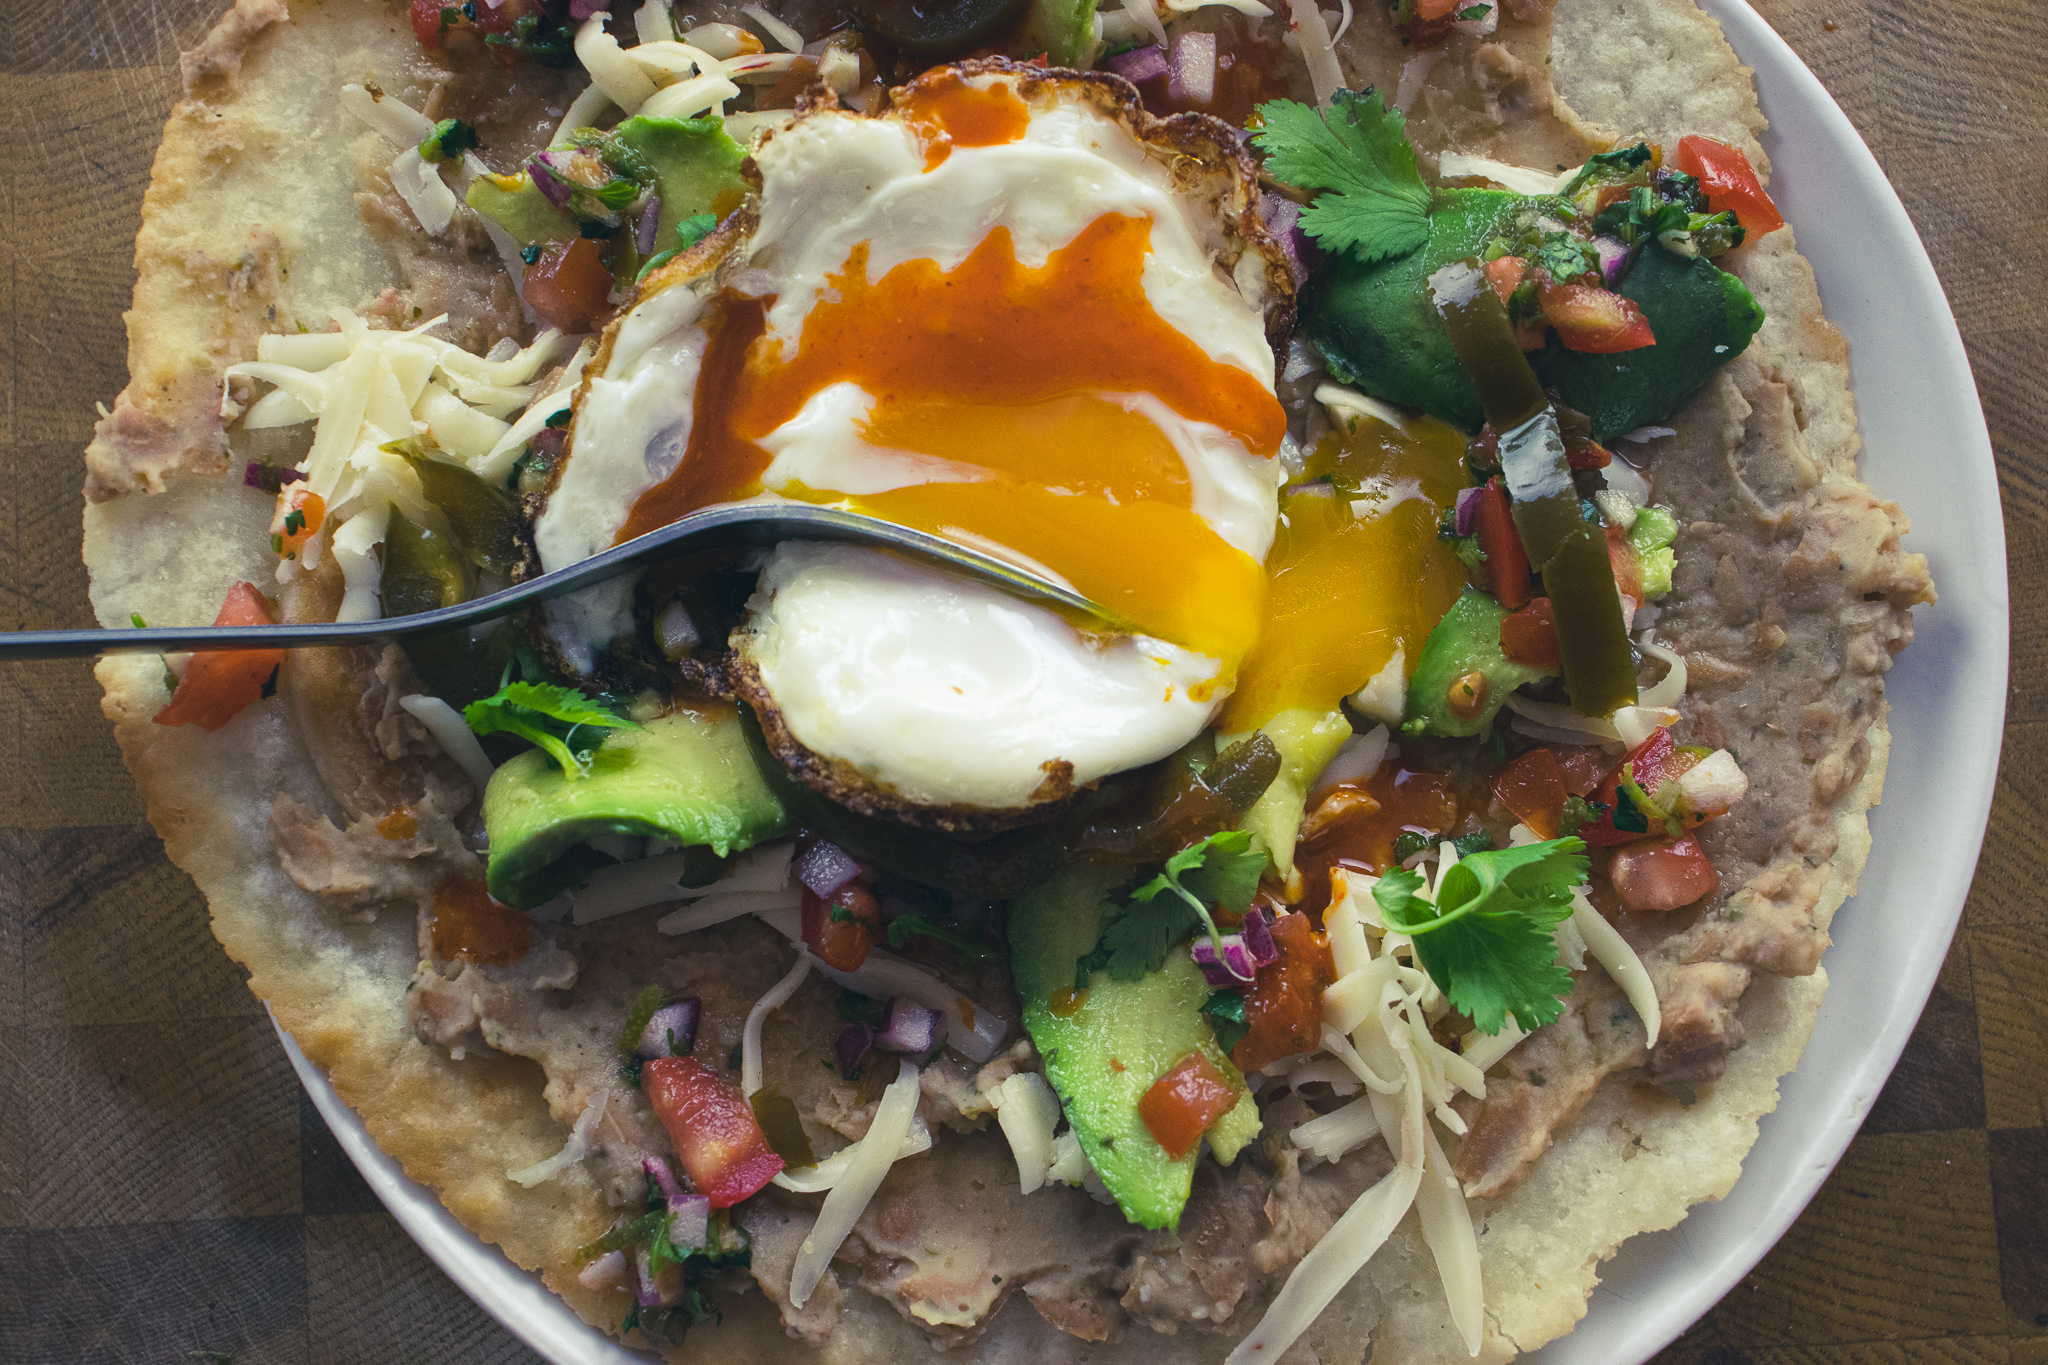
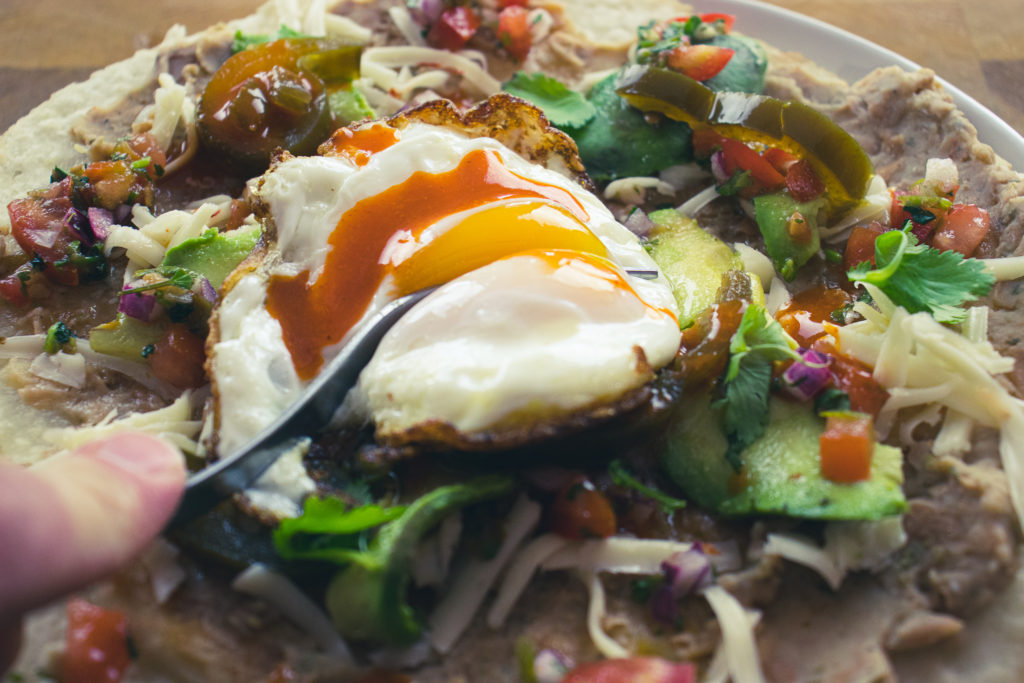
To assemble the Huevos Rancheros, first heat your refried beans. You can do this in a pot with a few tablespoons of water or in the microwave for a minute or two. Next, spread the warm beans on the tortilla. Top the beans with grated pepper jack cheese. Spread the sliced avocado on the cheese, then top that with the Pico de Gallo. Next, add the jalapeno rings, cilantro, and hot sauce. Finish the huevos rancheros with the sunny-side-up egg. Drizzle a little extra hot sauce on the egg to make it pretty for the pictures, and enjoy!
The Wrap Up
This is one of the best breakfast foods I’ve ever had. It makes you feel like you’re ready to take on the day, but you don’t feel heavy and weighed down. The flavours are vibrant and exciting, especially first thing in the morning. If there is a better way to start your day, I haven’t found it. I hope you’ve enjoyed this post, but more so, I hope you make this and try it for yourself. You’ll be so happy that you did. The only thing you’ll regret is that you didn’t make two.
That does it for today. Thanks for reading. I hope you’ve enjoyed the post. Remember to share this on Facebook or Pinterest and leave a comment below. I love to hear from you. Finally, remember to sign up for my mailing list, so you don’t miss out on exclusive recipes and cooking tips. Members of the mailing list also get a sneak peek at all the upcoming posts. Sign up below. Have a great day! I’ll see you back here next Thursday.
Huevos Rancheros
Huevos Rancheros is a hearty Mexican farmer's breakfast. It's meant to power you throughout the day and wow does it taste good. It's also got everything your body needs including protein, fats, calcium, and more. This is the kind of dish that makes you wonder why you haven't been eating this for breakfast your whole life.
1/4avocado, peeled, pit removed, and thinly sliced
10cilantro leaves
5pickled jalapeno rings
1tsphot sauceoptional
1/4lime, juiced
1egg
Instructions
Pick a skillet that is big enough to fit the tortilla. Heat the skillet over medium-high heat. Add 1 tbsp of cooking oil to the hot pan then put in the tortilla. Fry the tortilla for 45 to 60 seconds per side or until crisp. Remove the tortilla from the pan and set it on a plate or cutting board.
Once the tortilla is out of the pan, add the second amount of oil to it and crack the egg into it. Spoon the hot oil over the egg to cook the whites. Once the whites have set remove the egg from the pan and set it aside for a minute while you dress the tortilla.
Warm the refried beans in a small pot with a little water or in the microwave. Spread the beans onto the tortilla.
Top the beans with cheese, avocado, pico de gallo, jalapeno, cilantro, and hot sauce. Finish the huevos rancheros with the sunny-side-up egg and serve.
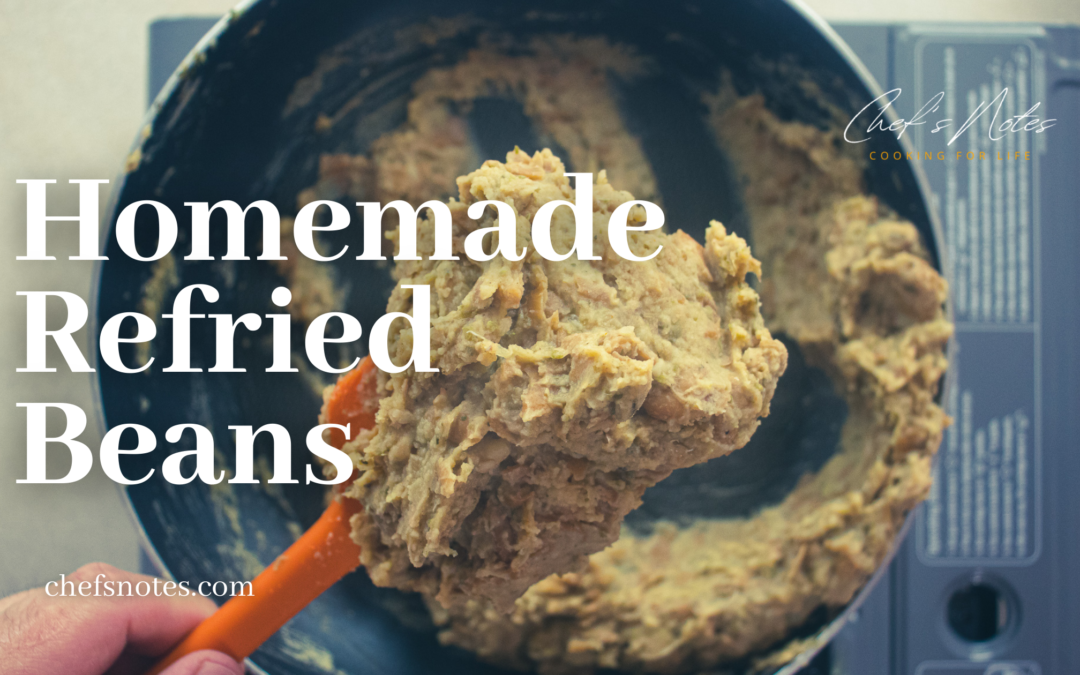
Refried Beans. The name alone can evoke feelings of gastrointestinal issues in people who’ve only ever had them in a fast-food place or from a can. However, homemade refried beans make a healthy side dish, taco topping, or chip dip. They are flavourful and chocked full of protein, iron, calcium and fibre. What’s not to love about them? So, please set aside your misconceptions and join me to learn how to make a simple dish that you’ll come back to time and time again. Let’s get to it!
What Are Refried Beans?
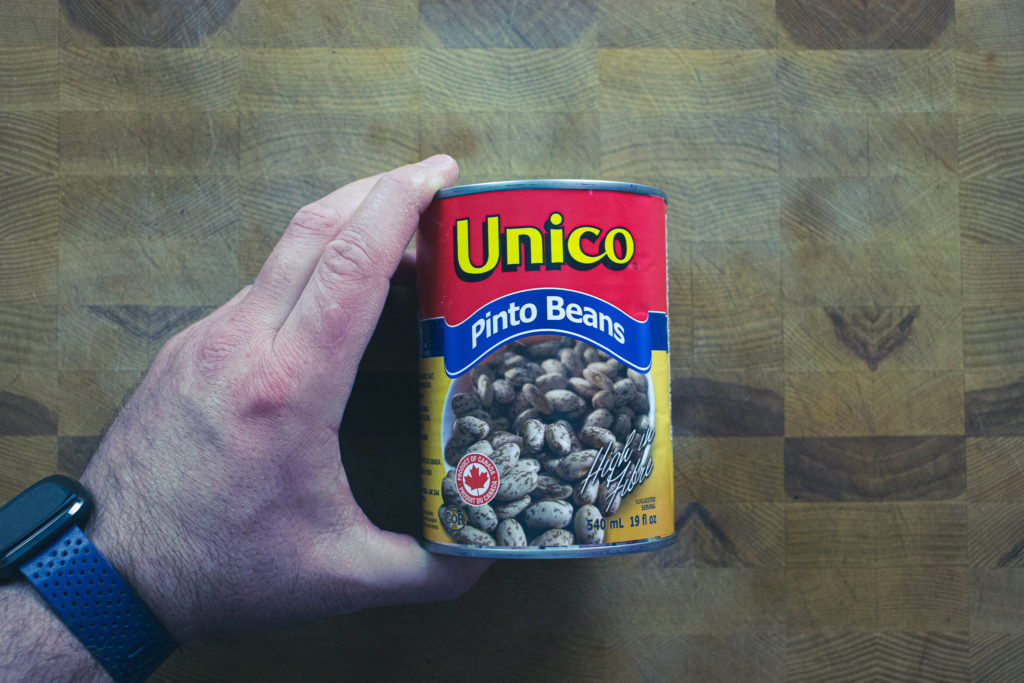
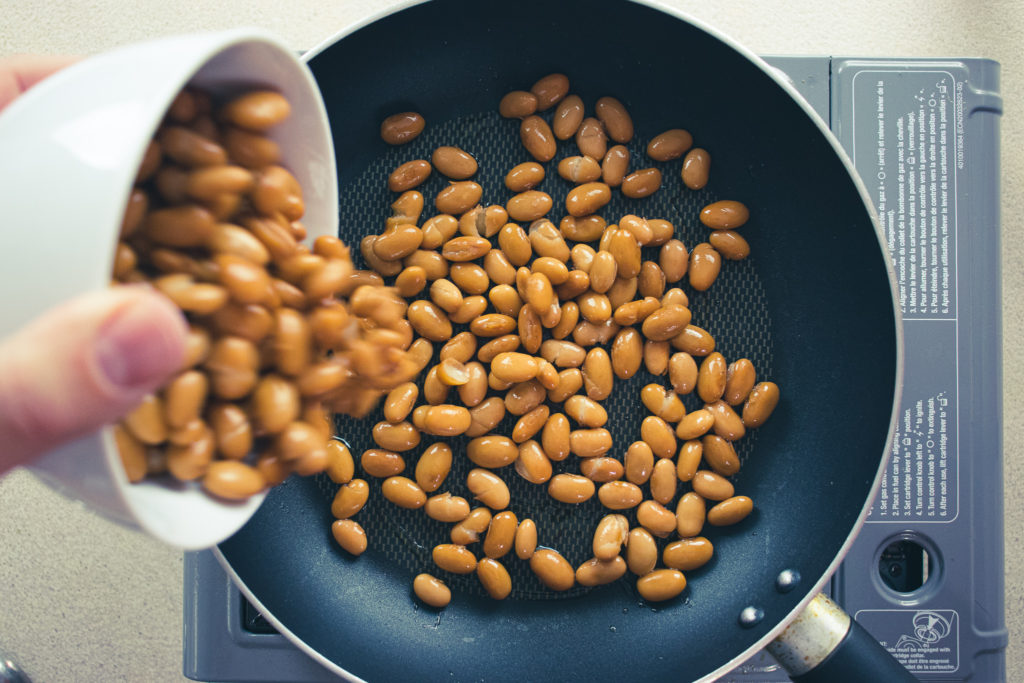
The traditional way to make refried beans is to soak and boil dried beans. Then, mash the beans, and fry them with spices. However, the term refried is kind of misleading because the beans are not fried twice. From what I can tell, refried is just the best way to translate the Spanish word “refritos” into English. If you’d like to read more about refried beans, have a look at this Wikipedia article. My version of refried beans uses canned beans, so the soaking and cooking is already done. And I cut down on preparation time by mashing the beans while frying them.
Refried Bean Ingredients
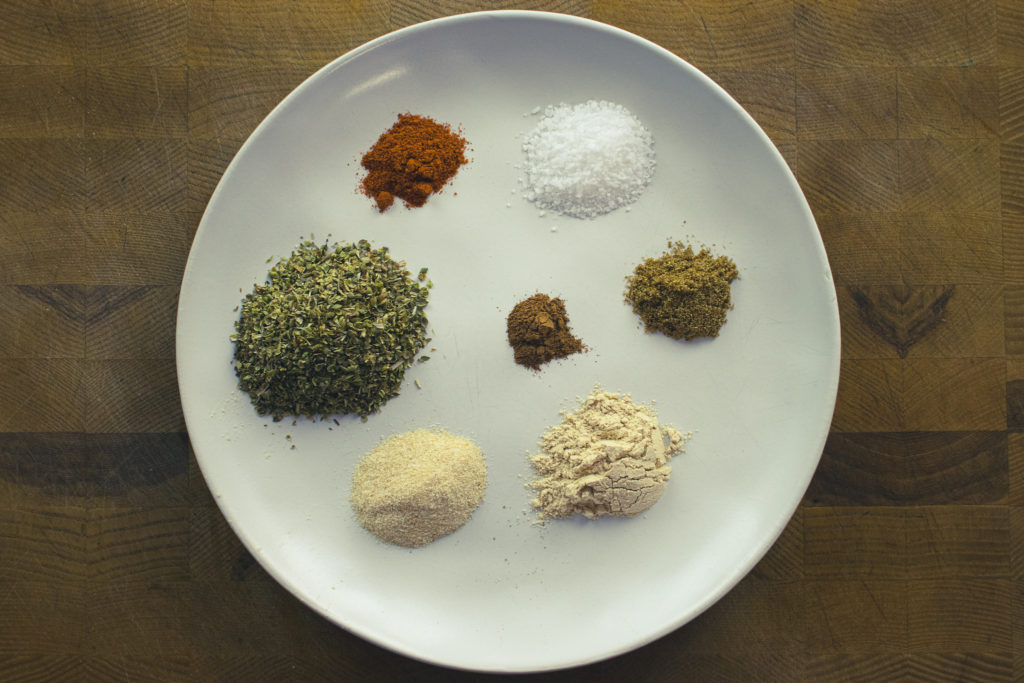
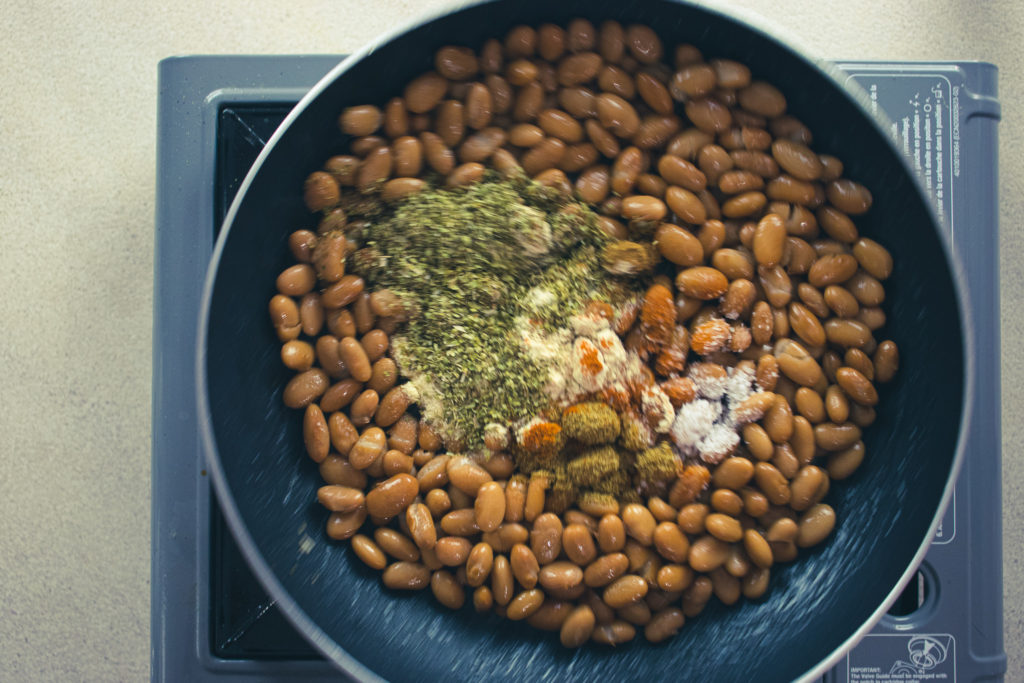
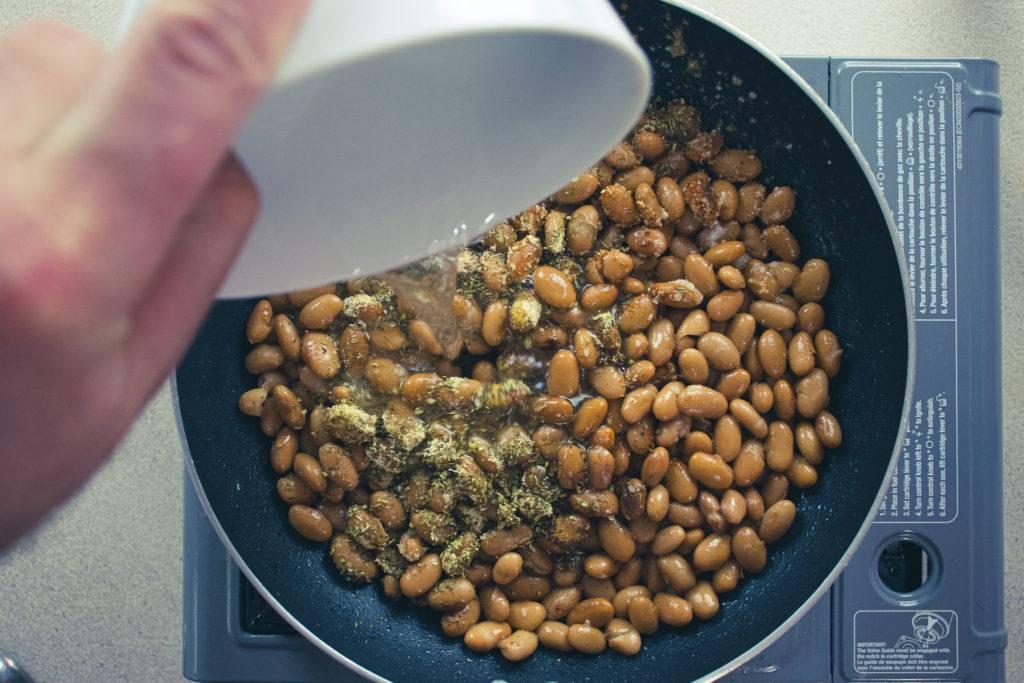
The ingredients for this refried bean recipe are oregano, garlic powder, onion powder, cumin, cinnamon, cayenne, smoked paprika, salt, pinto beans, water and lime. You can substitute the smoked paprika for sweet paprika. You can also use two tablespoons of Mexican Chile powder instead of all the other spices if you’d like. Finally, you can use other beans such as black beans or even kidney beans in place of the pinto beans.
How To Make Refried Beans
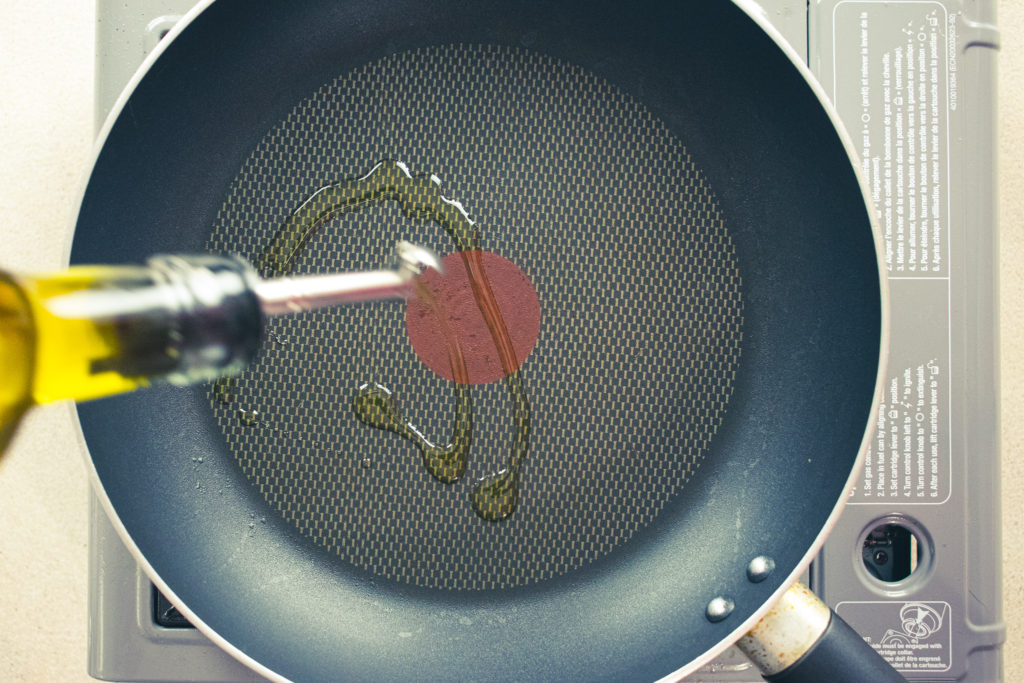
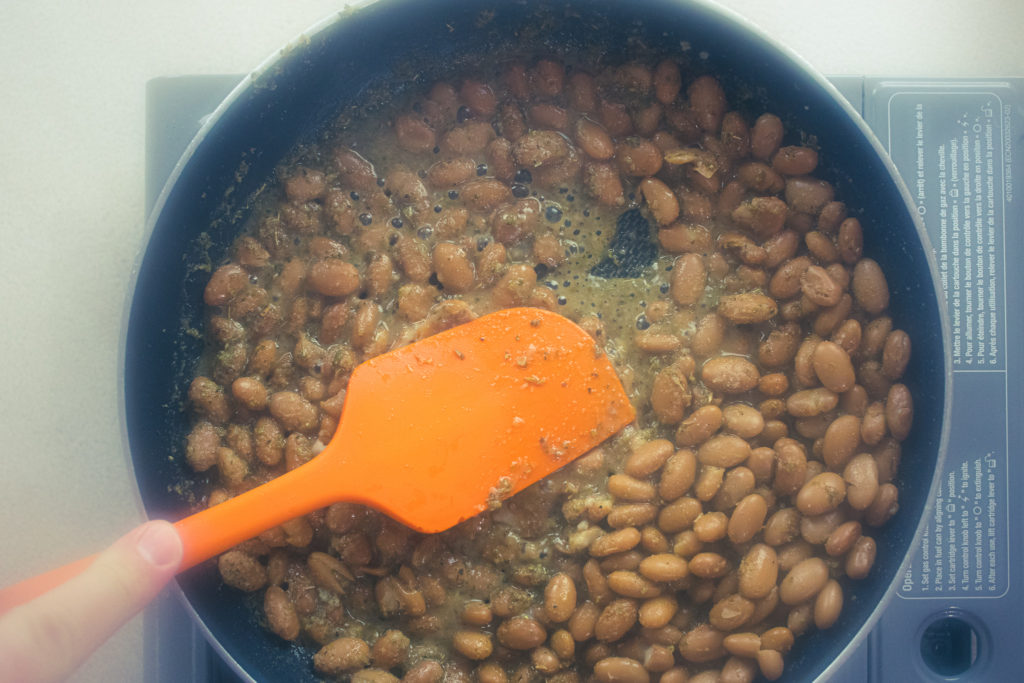
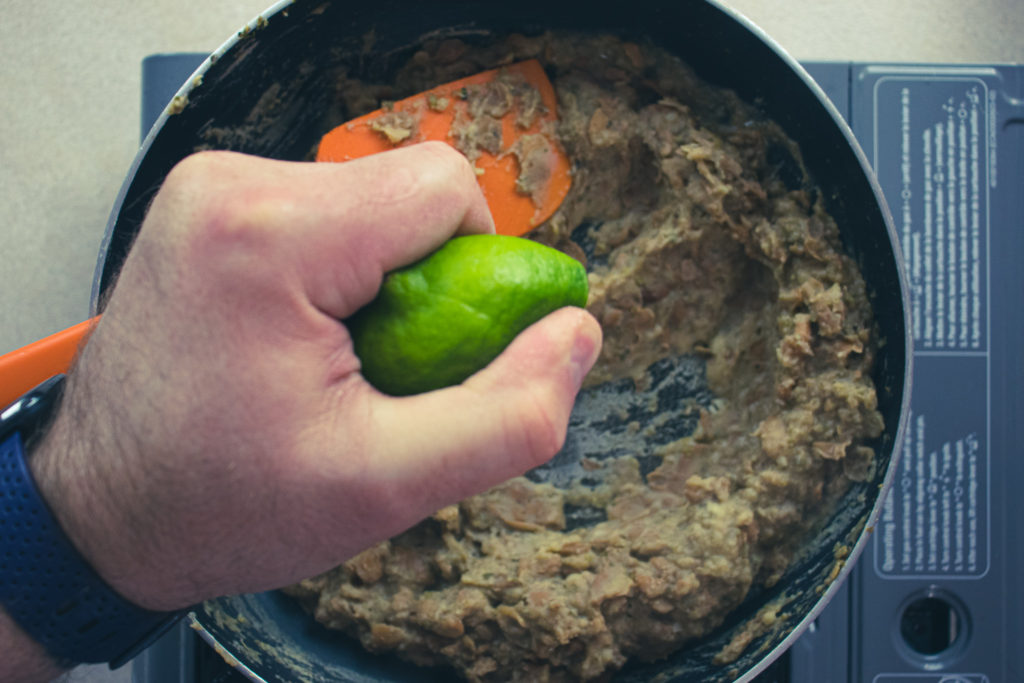
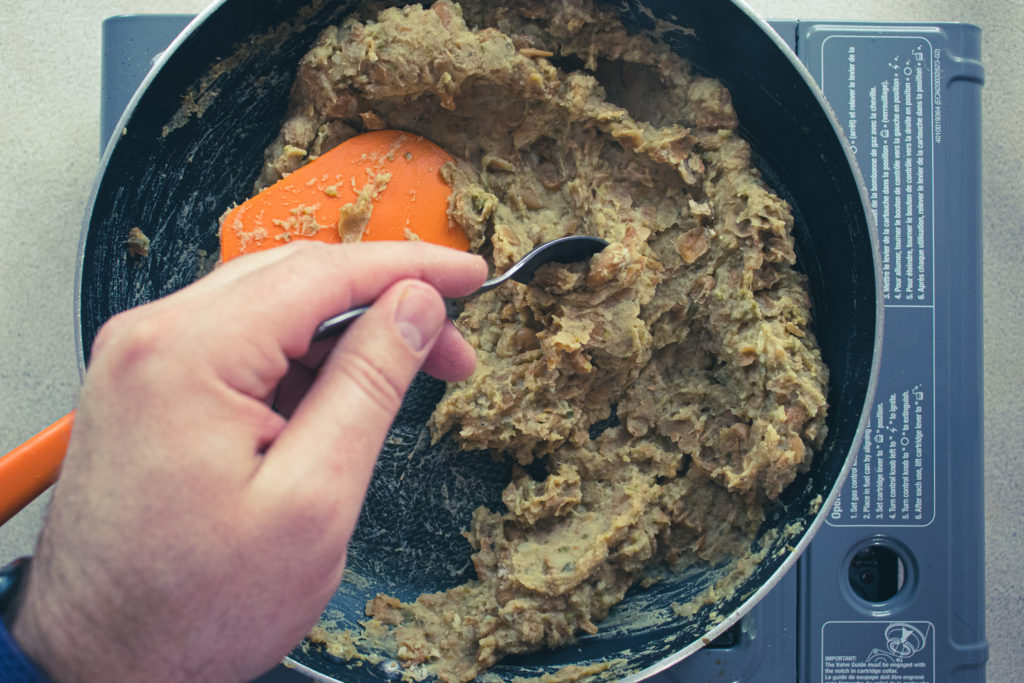
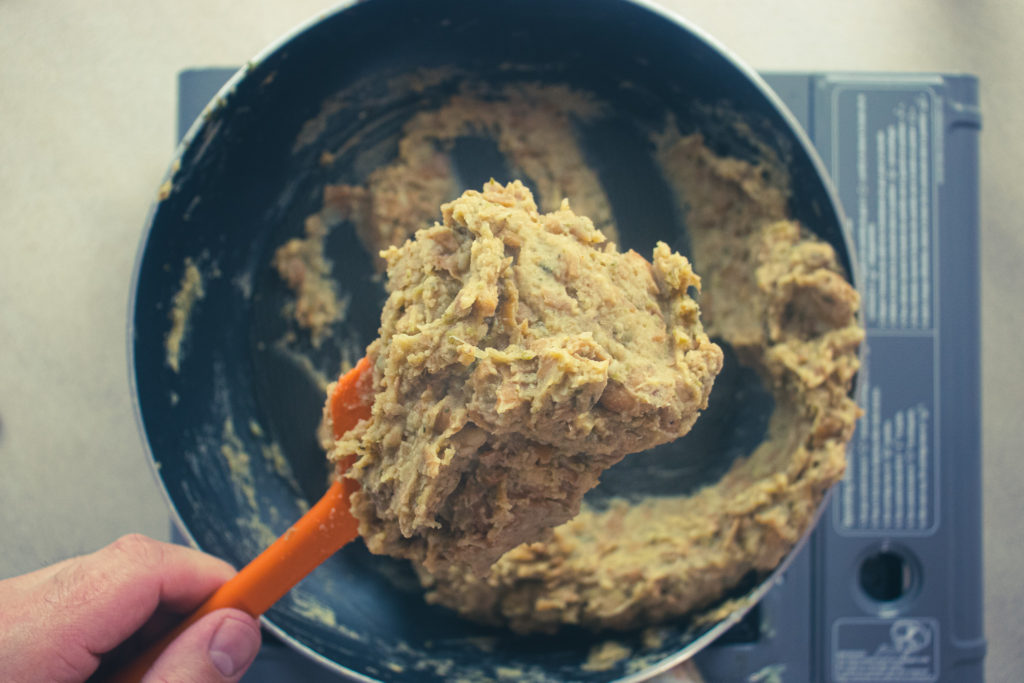
First, drain and rinse the beans. Next, heat a medium skillet over medium-high heat and add a few teaspoons of olive oil. Add the beans and fry for about two minutes. Add in the spices and fry for another minute before adding the water. Bring the pan to a boil, turn the heat down to medium-low and simmer for ten minutes. Keep an eye on the pan, as you will likely need to add a little more water as they cook. Finally, mash the beans, then season them to taste with lime juice and salt.
How To Use Refried Beans
These beans make a fantastic dip for tortilla chips. They also make an excellent topping for tacos or burritos. You can even make a delicious quesadilla with refried beans and cheese. Essentially, if a tortilla is involved, refried beans can play apart.
The Wrap-Up
You can find canned refried beans in most grocery stores, but they are much better when you make them yourself. As you can see from the recipe above, they don’t take long to make. Once the beans are completed, you can store them covered in the fridge for four days. I’ve never tried, but I’m sure you could freeze them. If you liked this post, check out last week’s post about homemade Pico de Gallo.
That does it for today. Thanks for reading. I hope you’ve enjoyed the post. Remember to share this on Facebook or Pinterest and leave a comment below. I love to hear from you. Finally, remember to sign up for my mailing list so you don’t miss out on exclusive recipes and cooking tips. Members of the mailing list also get a sneak peek at all the upcoming posts. Sign up below. Have a great day! I’ll see you back here next Thursday.
Refried Beans
Refried beans make a great dip for tortilla chips or the perfect topping for a taco or burrito.
Put the eggs in a pot of water. Bring the water up to 140°f and let the eggs sit at that temperature for 3 to 4 minutes. Do not let the water go above 142°f or the whites will start to set. After 3 to 4 minutes, drain the water out of the pot and run the eggs under cold water for 2 minutes. The eggs are now safe to use without cooking them.
Separate the whites and yolks of the eggs being careful not to get any yolk in the whites. Put the whites in the bowl of a mixture and add a pinch of salt. Beat the eggs on medium-low speed with the whisk attachment until the whites start to foam. Add 1/4 cup of sugar, 1 tbsp at a time then turn the speed up to high and beat the eggs to stiff peaks. Transfer the whites to a separate bowl.
Add the yolks and another 1/4 cup of sugar to the mixer bowl. There is no need to clean it after beating the whites. Beat the yolks until they are pale yellow and the sugar is fully mixed in. Add 1 tsp of vanilla and 1 tbsp of brandy. Mixing should take 4 to 5 minutes.
Mix the mascarpone into the yolk mixture then fold in the egg whites 1/3 at a time.
In a medium bowl combine the coffee, 2 tbsp of sugar, and 2 tbsp of brandy.
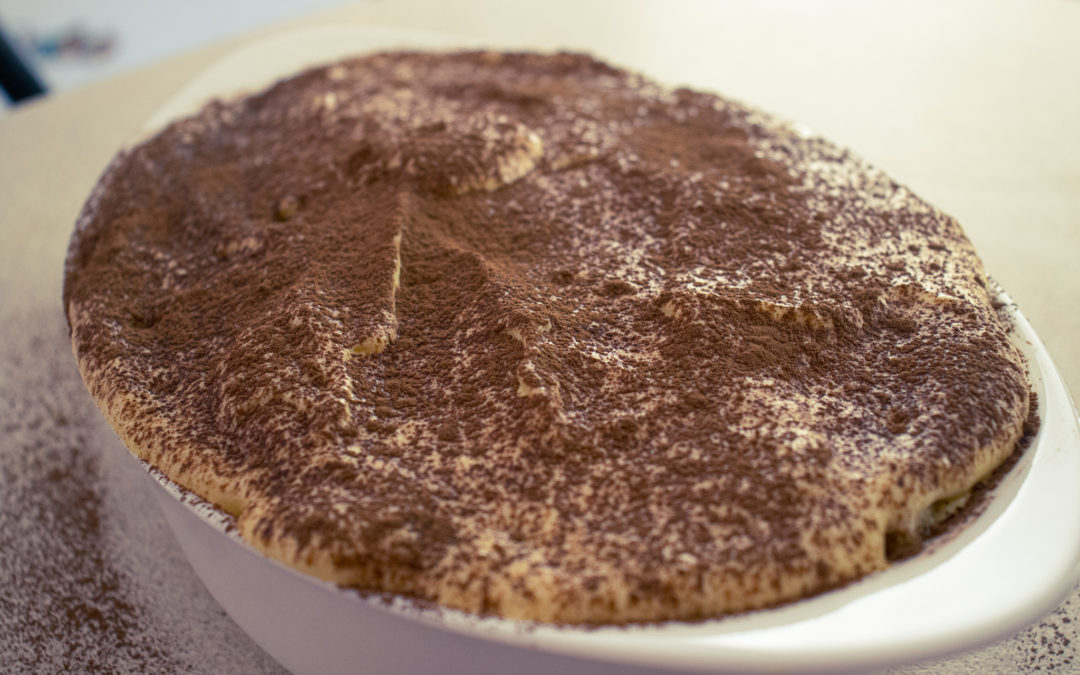
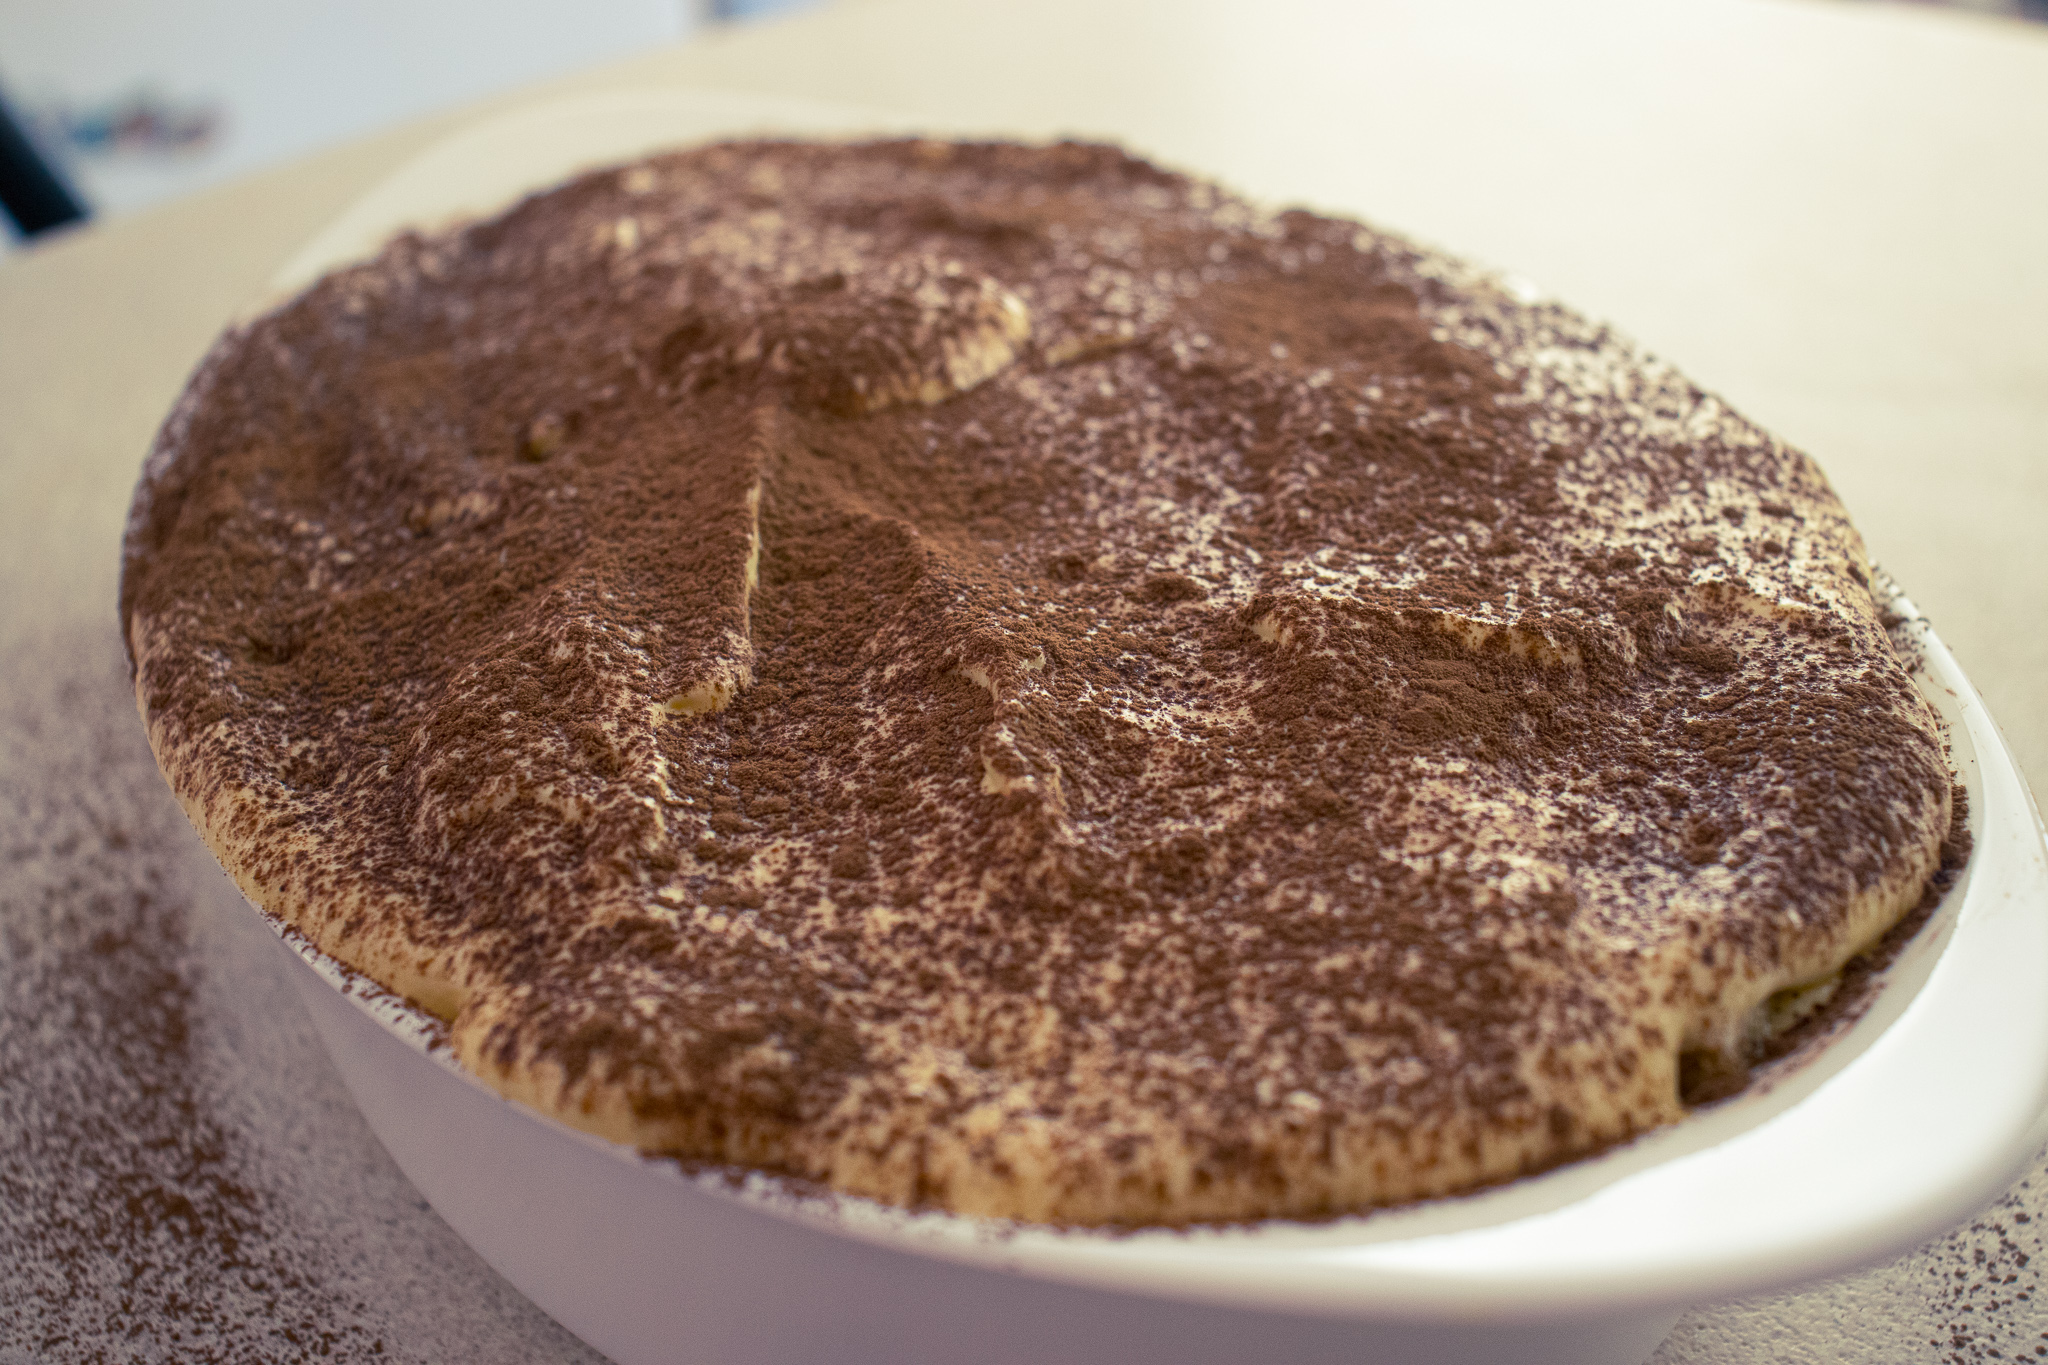
Get a 9X9 casserole dish and spread a thin layer of mousse in the bottom of the dish.
Dip the ladyfingers in the coffee mixture and place, sugar-side down in the dish. Cover the whole bottom of the dish with ladyfingers then top with mousse. Repeat this process until the dish is full. Finish with a layer of mousse and sprinkle with cocoa.
Put the tiramisu in the fridge and let it rest for two hours before serving.
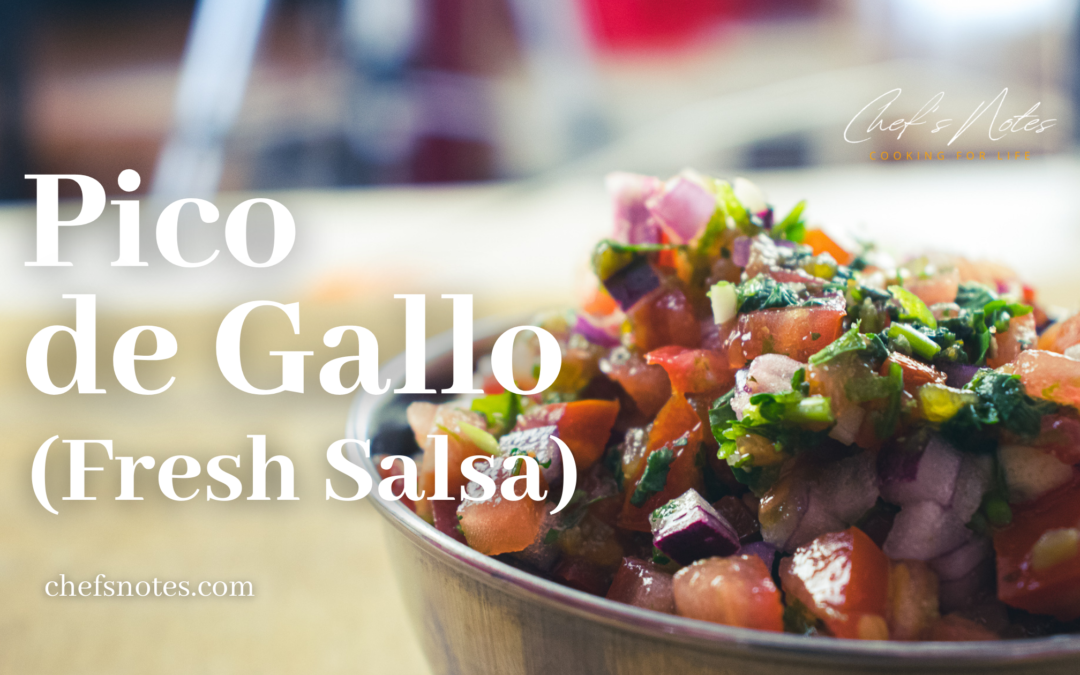
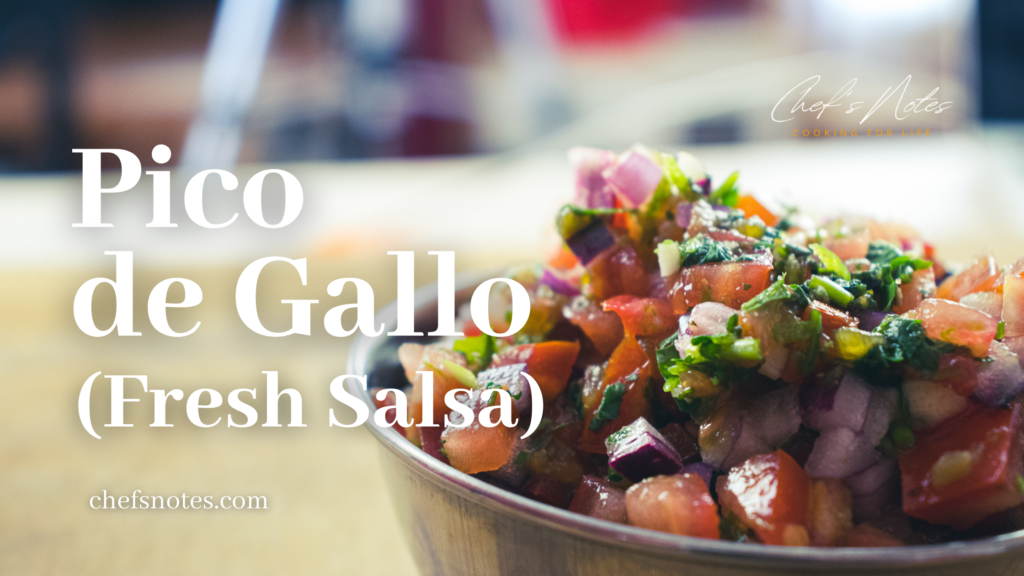
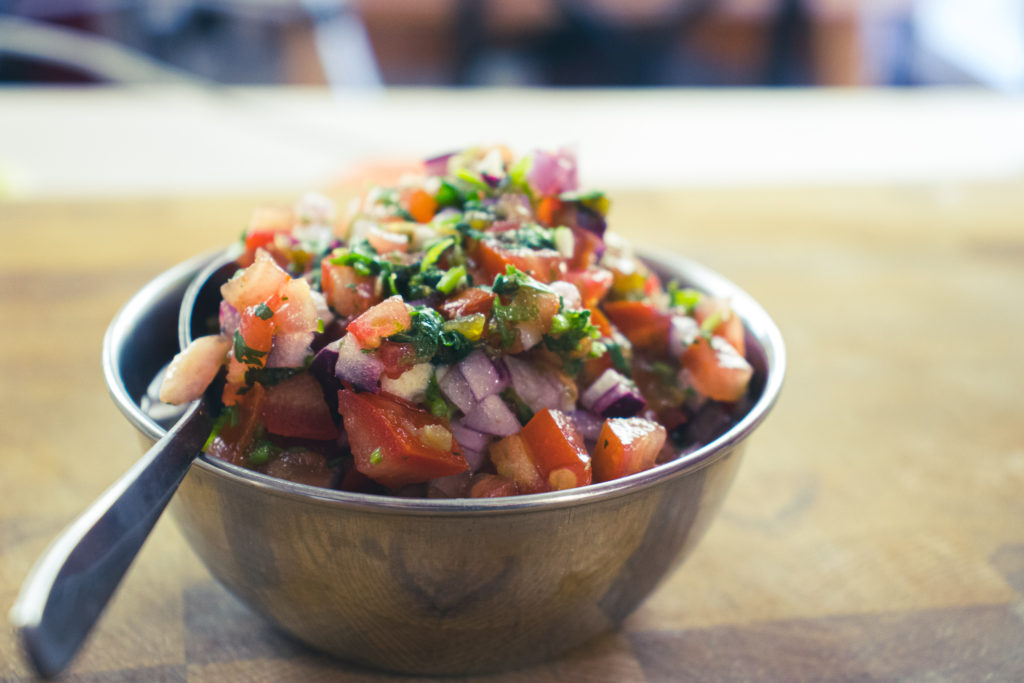
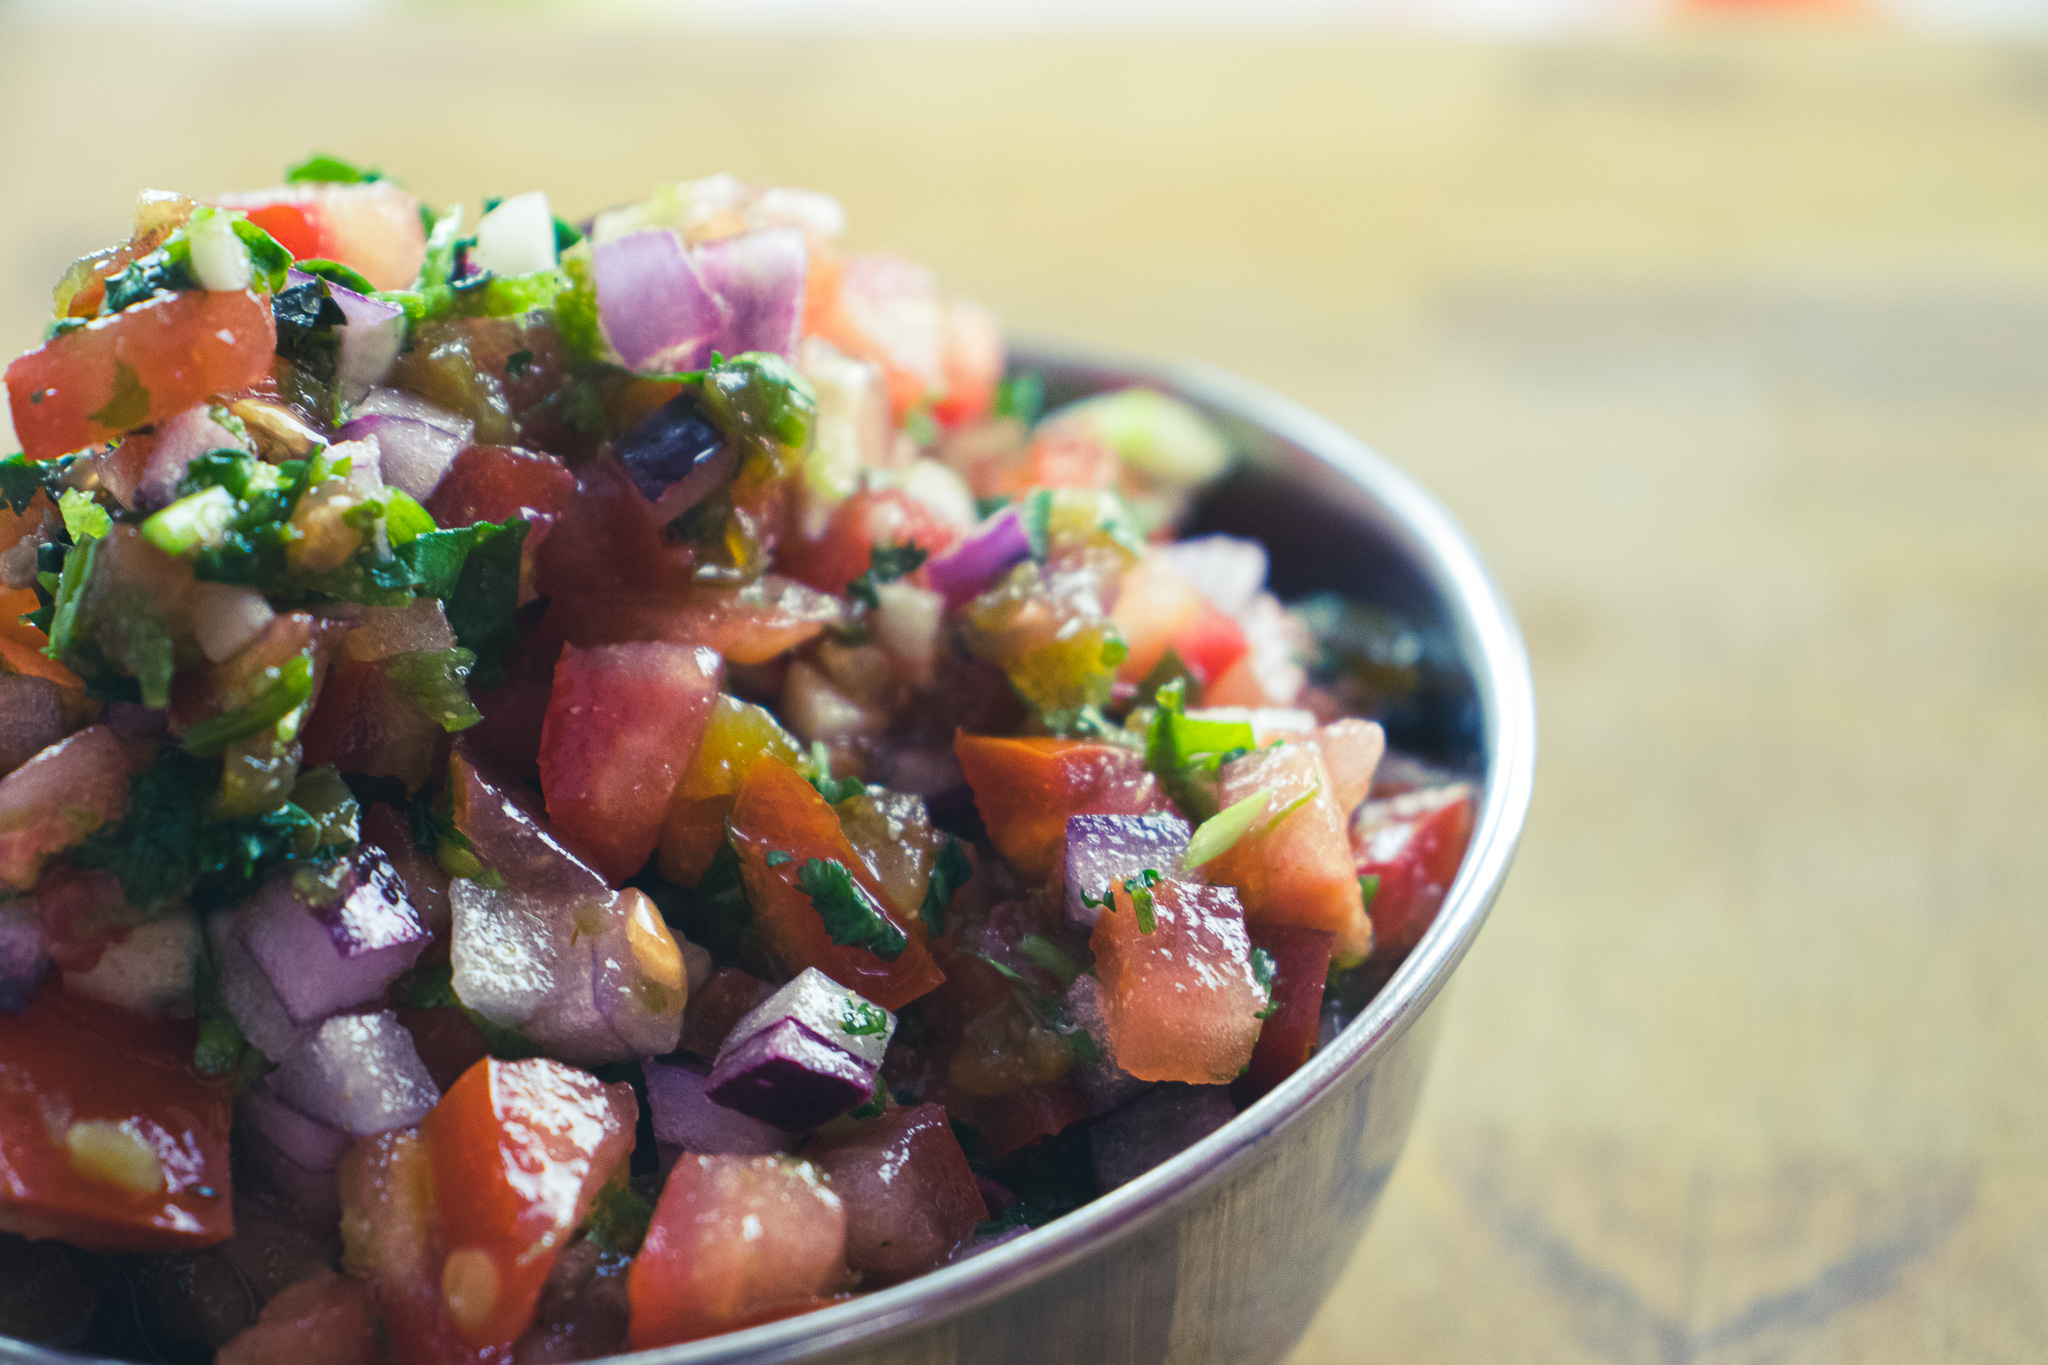
Pico de gallo, you’ve heard the name, you’ve seen it around, you might have even eaten it. But, do you know what it is? How to make it? In today’s post, you’ll learn everything you ever wanted to know about this delicious Mexican dish, including how to make it and what to do it. So, without further ado, gather some friends because pico de gallo is meant for sharing. Now, let’s get cooking. You can find the recipe directly below, but keep reading for more information.
What’s the difference between Pico de Gallo and Salsa?
There are many different kinds of salsa. Salsa means sauce. Think about how many different kinds of sauce there are in French cooking. There are hundreds, if not thousands. Mexican cuisine is the same. They have countless versions of salsa. Some are like the thick, cooked version you buy in the jar at the grocery store. There are salsas that are liquids or very liquidy. Then, there are salsas like pico de gallo that are uncooked. Essentially, pico de gallo is composed of the same ingredients as a grocery store salsa, but it’s not cooked. Everything is fresh. This gives pico de gallo more of a bite and fresh summery flavour. Some people consider pico more of a finely chopped salad or side dish than a salsa, but I disagree. And honestly, how you think of it doesn’t really matter. It tastes just as delicious either way.
Traditional pico de gallo is typically onion, cilantro, tomatoes, peppers, and lime. Today’s version is not far off the traditional recipe, but with the addition of a little garlic and some spices. Check out this link to learn more about pico de gallo.
How To Make Pico de Gallo
Ingredients
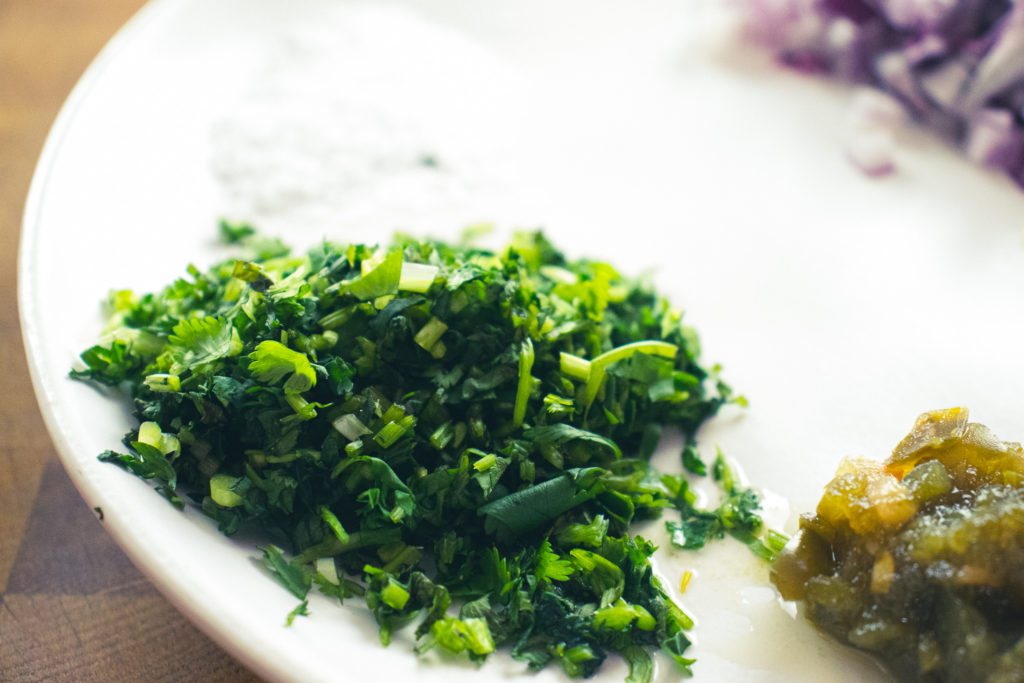
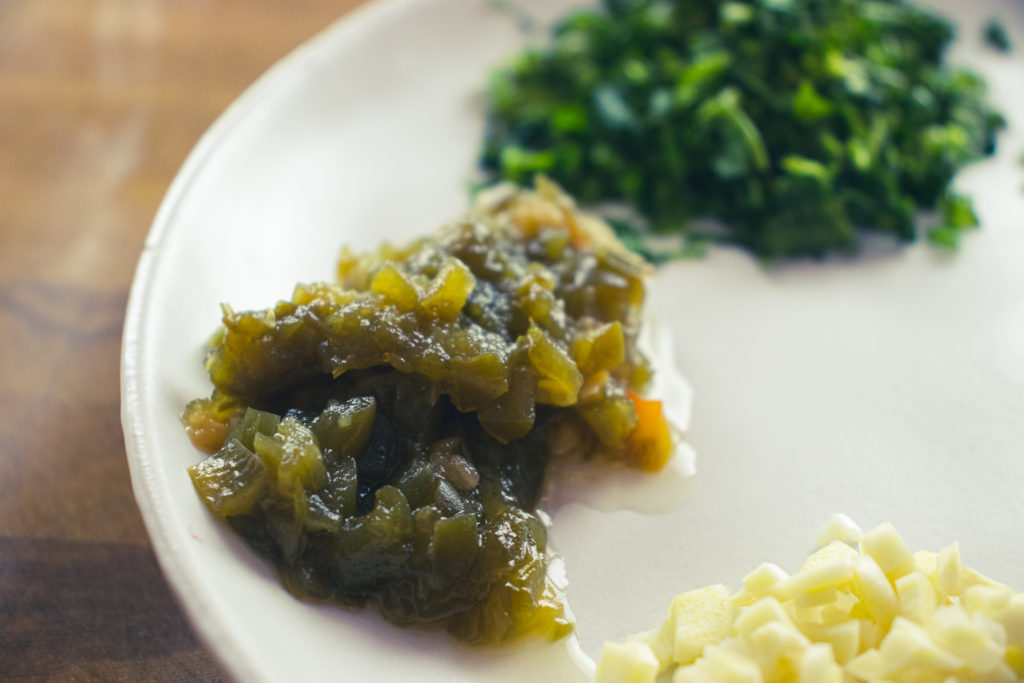
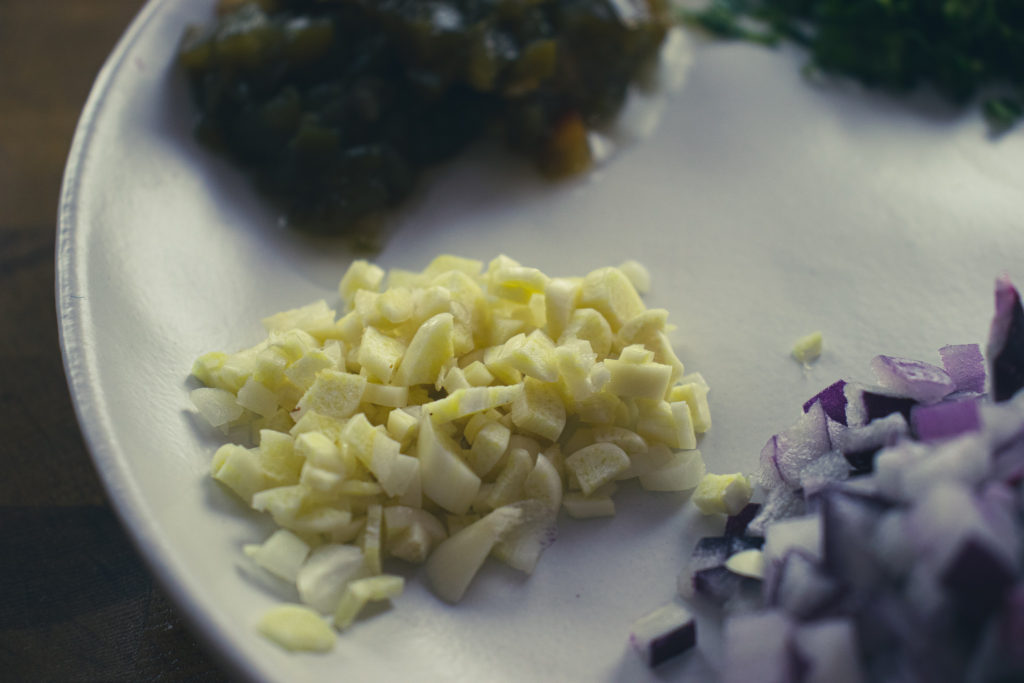
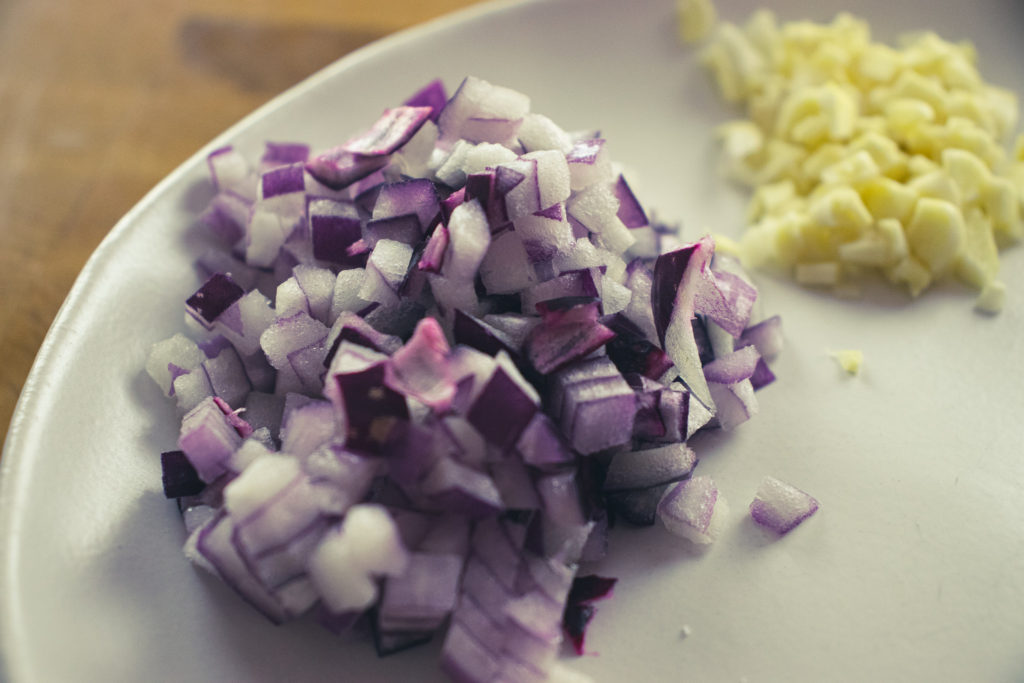
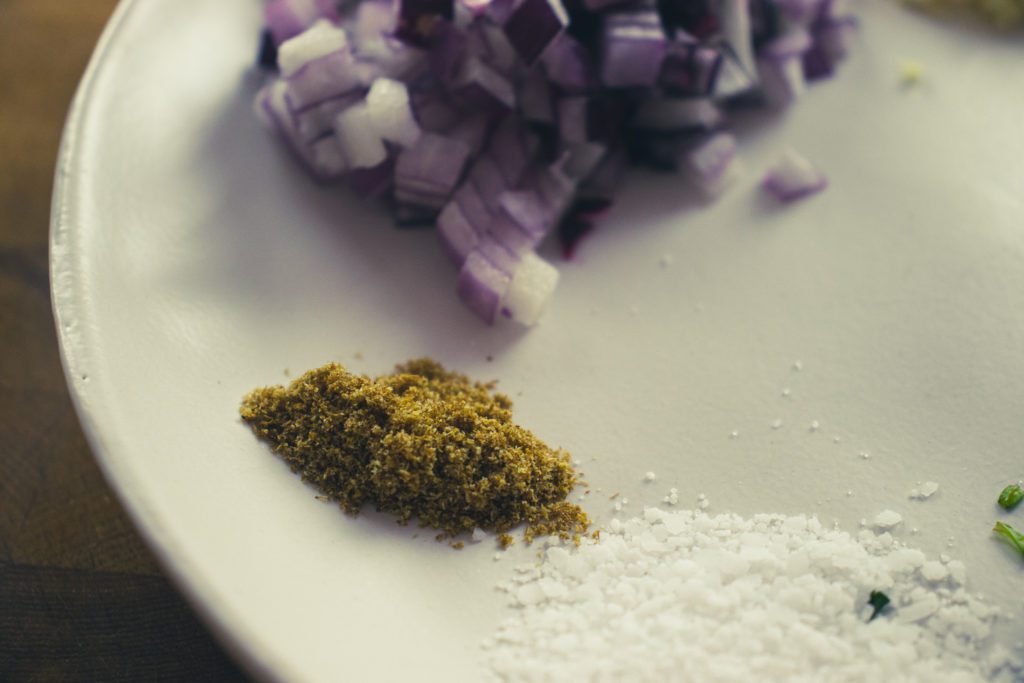
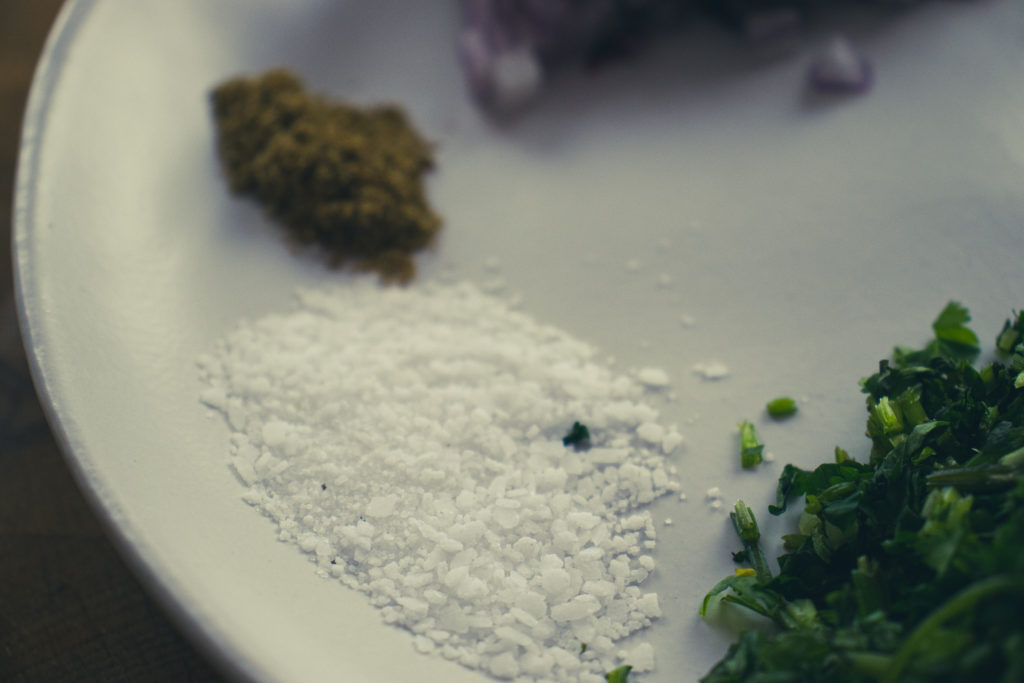
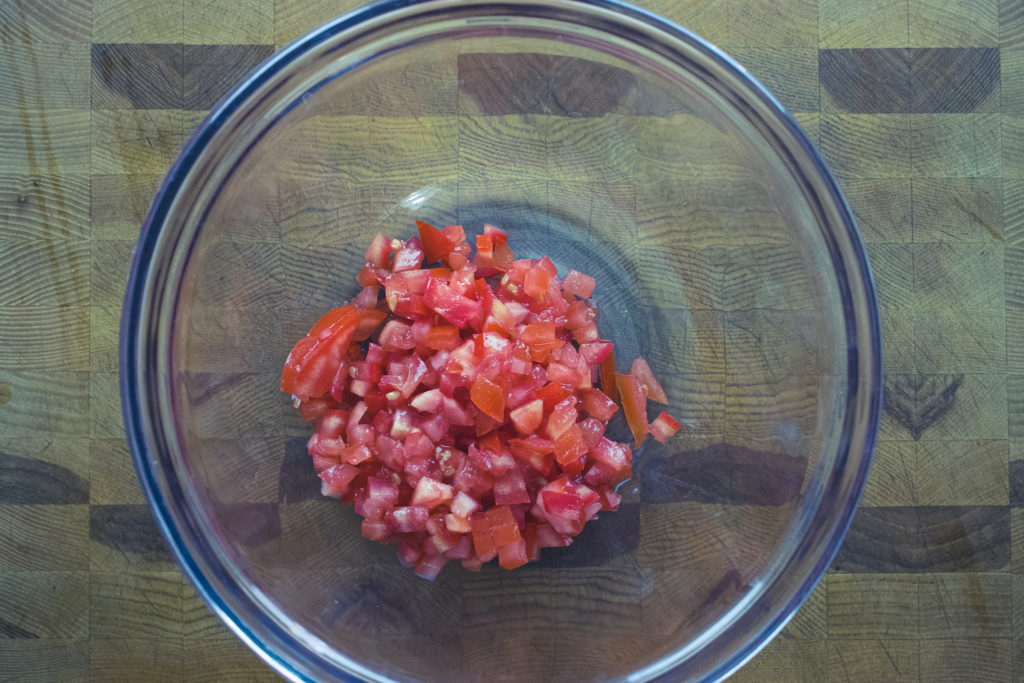
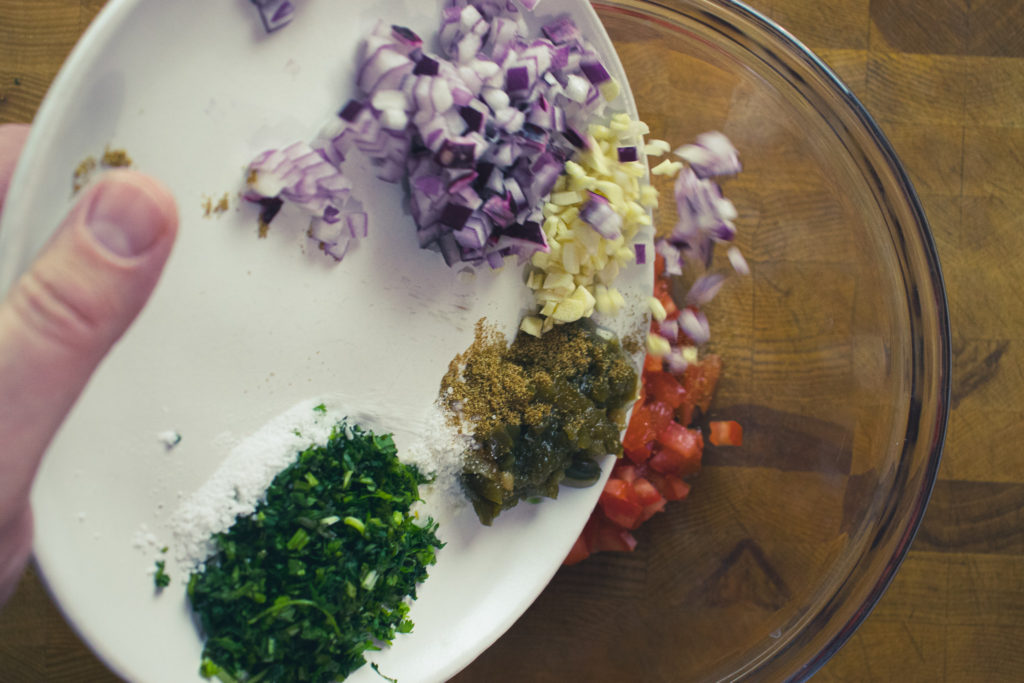
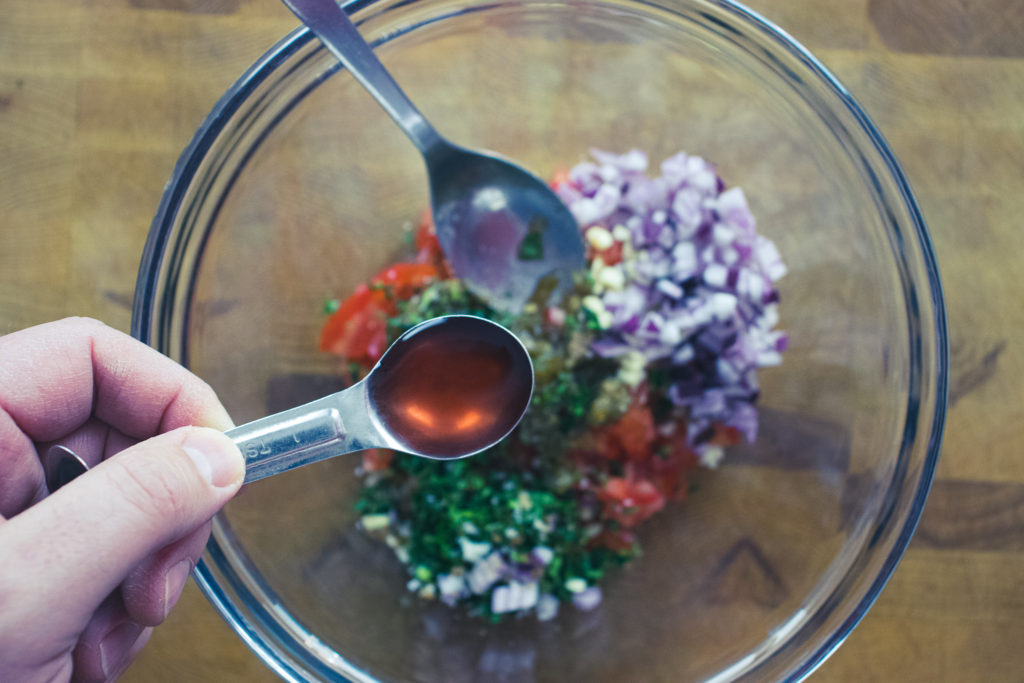
The ingredients for this recipe are tomatoes, cilantro, pickled jalapeno, garlic, red onion, cumin, salt, red wine vinegar, lime juice and zest. All of the ingredients are hand-cut, very small. I used pickled jalapenos because I had them on hand, and while adding a little heat, they help balance the acidity of the finished salsa. Of course, you can leave out the cumin if you’d like, but I find that it adds a nice flavour.
Making Pico de Gallo
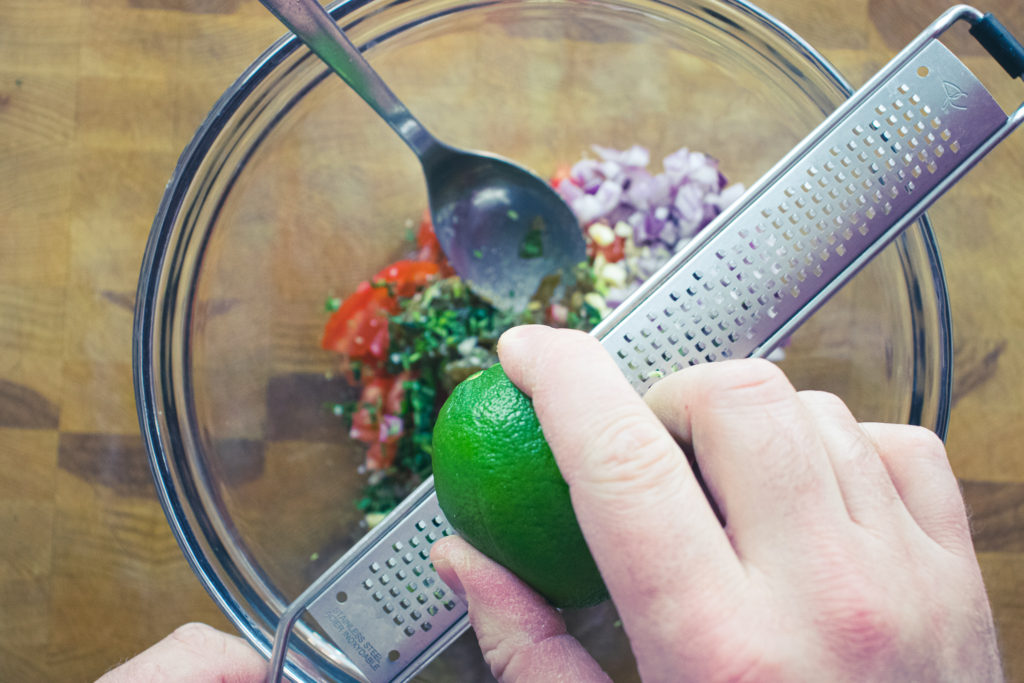
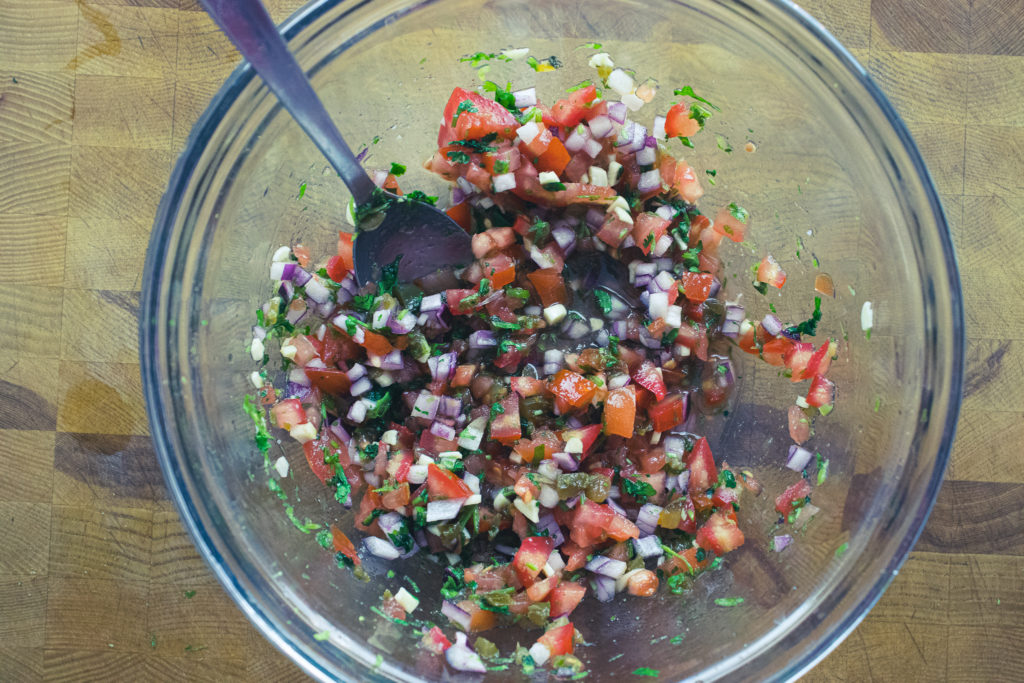
There really isn’t too much to say about making pico de gallo. I already mentioned cutting everything very small by hand. It’s essential that you don’t just throw everything into a blender or food processor. Pico de gallo should have texture. You should be able to see the different ingredients. Put all the ingredients in a medium mixing bowl, and mix well. When zesting the lime, make sure you only get the green part in the bowl and zest the lime directly over the bowl keeping the flavour from the essential oils in the food rather than on a cutting board. You can use the pico de gallo immediately after making it, but covering it and putting it in the fridge for an hour helps the flavour develop.
Uses
What do you do with it once you’ve made pico de gallo? You can throw it on a taco, dip chips in it, and put it on a piece of grilled fish. Or, put it in a burrito. Think of it not just as a dish on its own but as an additional ingredient. Over the years, I’ve made a bunch of different salsas on this site and if you like this recipe, you may also like my pineapple pico do gallo and my mango pico de gallo. If you want to learn more about salsa in general, check out this post I did about Everything I Know About Salsa.
The Wrap-Up
If you’ve never had a fresh salsa like pico de gallo, you’ve got to try it at least once. It’s an entirely different beast from the grocery store variety. But, even if you make it just to dip chips in, you’ll be happy you gave it a chance. Next week’s post will be similar to this in a way. I don’t want to give away too much just yet. But, this post and next week’s post are building to something that I’m very excited to share with you, so stay tuned cause you’re not going to want to miss it.
That does it for today. Thanks for reading. I hope you’ve enjoyed the post. Remember to share this on Facebook or Pinterest and leave a comment below. I love to hear from you. Finally, remember to sign up for my mailing list so you don’t miss out on exclusive recipes and cooking tips. Members of the mailing list also get a sneak peek at all the upcoming posts. Sign up below. Have a great day! I’ll see you back here next Thursday.
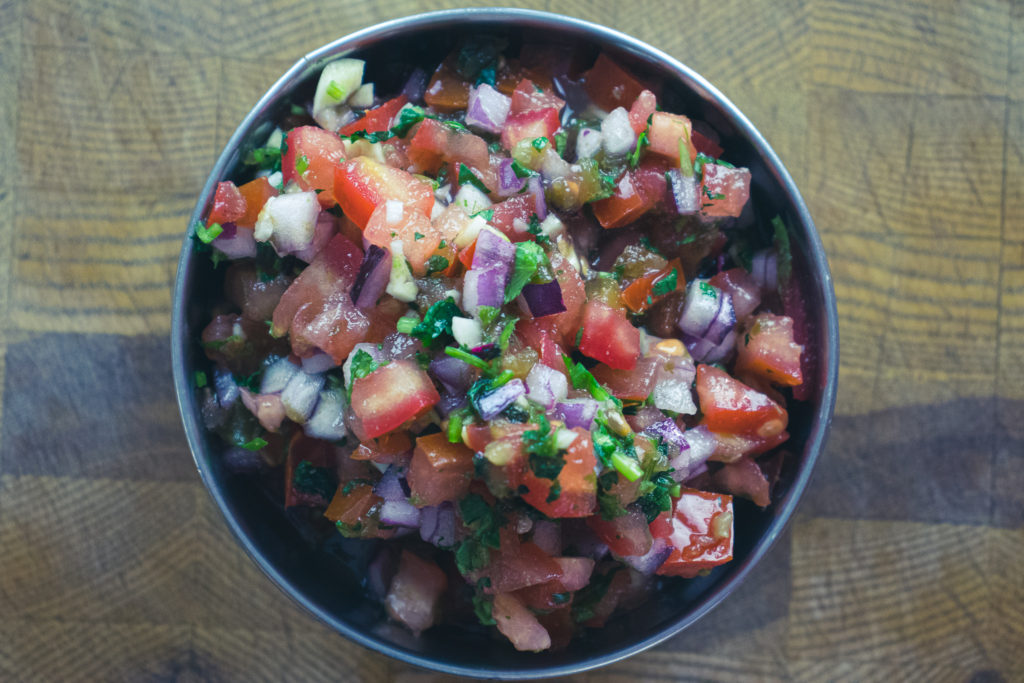
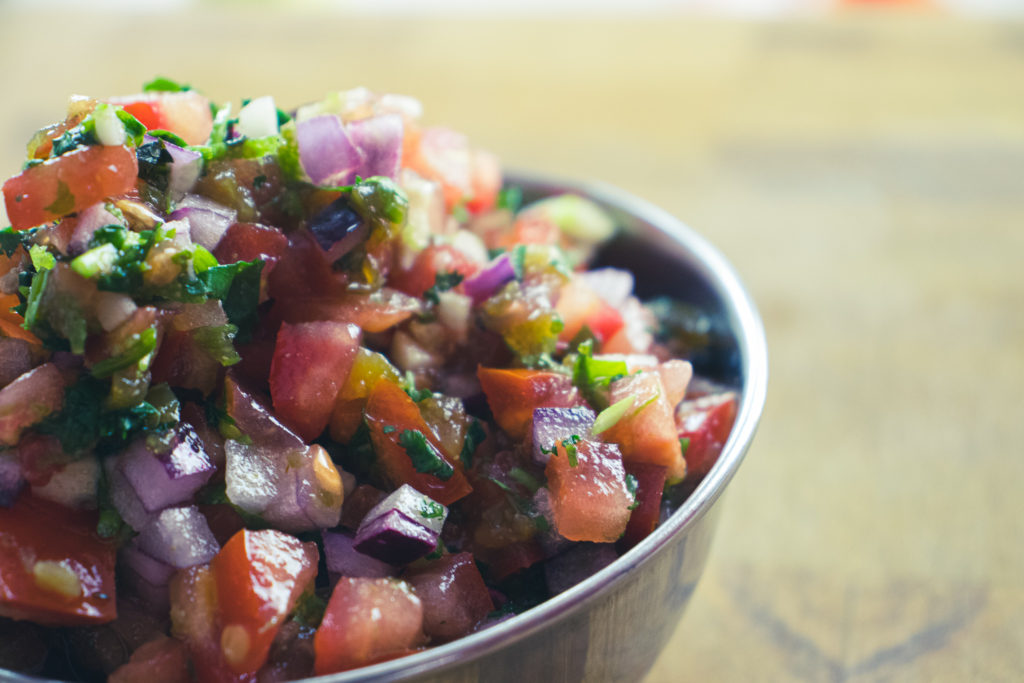
Pico de Gallo
Pico de Gallo is fresh salsa used commonly in Mexican cuisine. Use it for dipping tortilla chips, topping tacos and more.
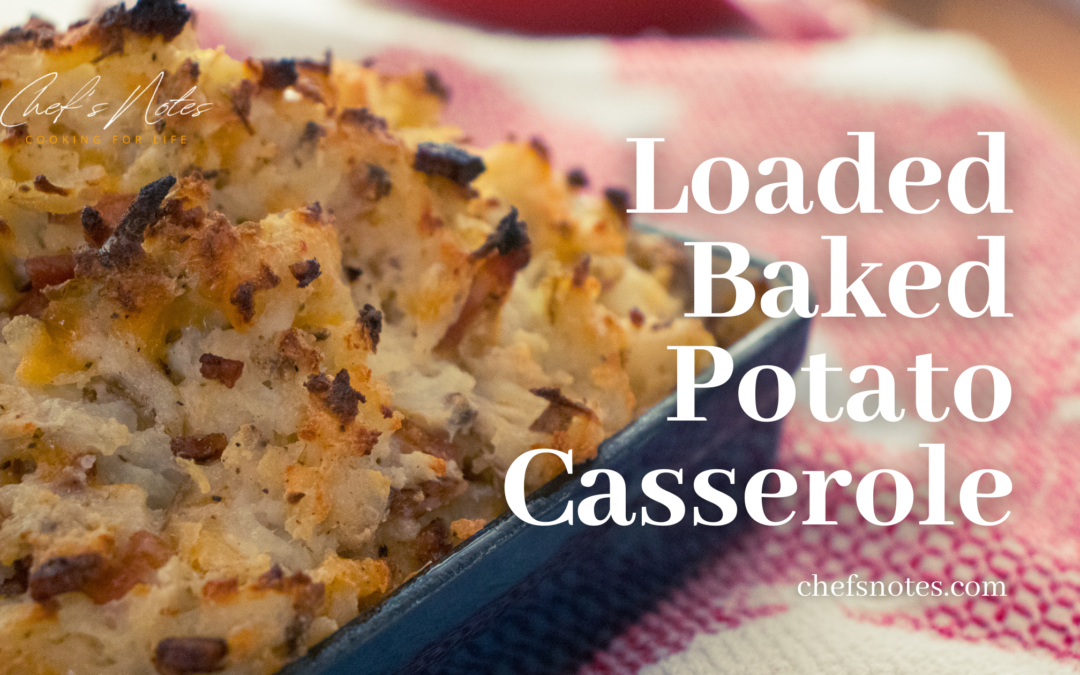
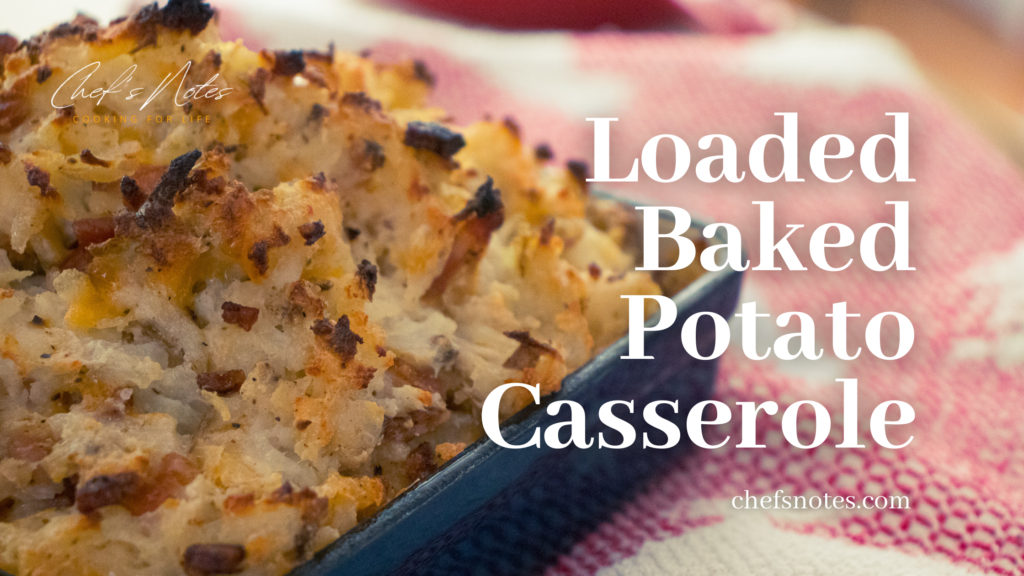
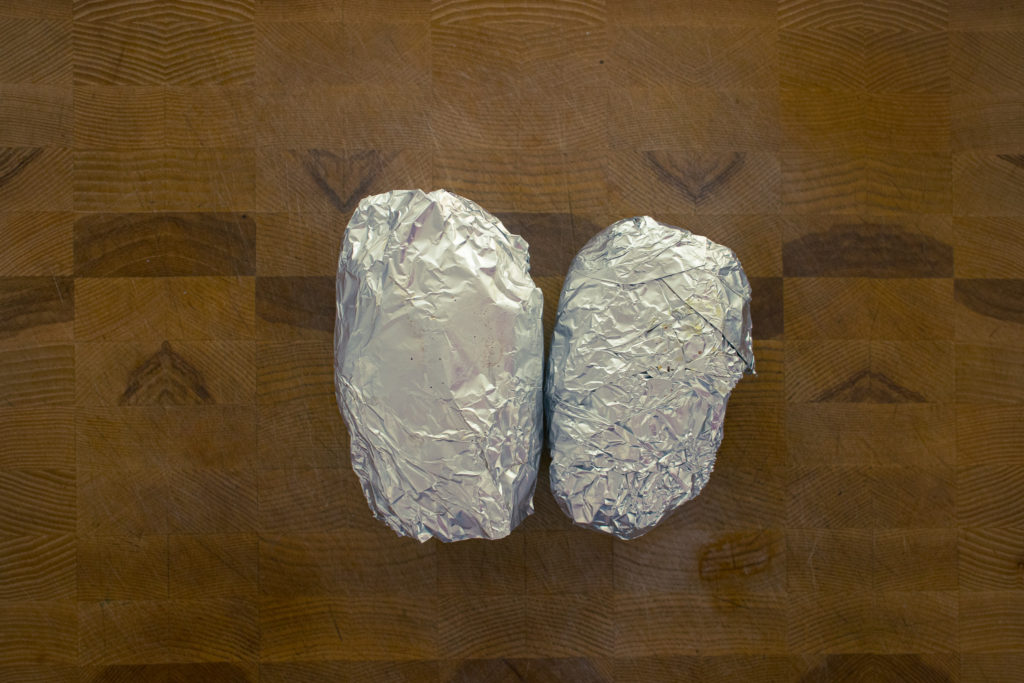
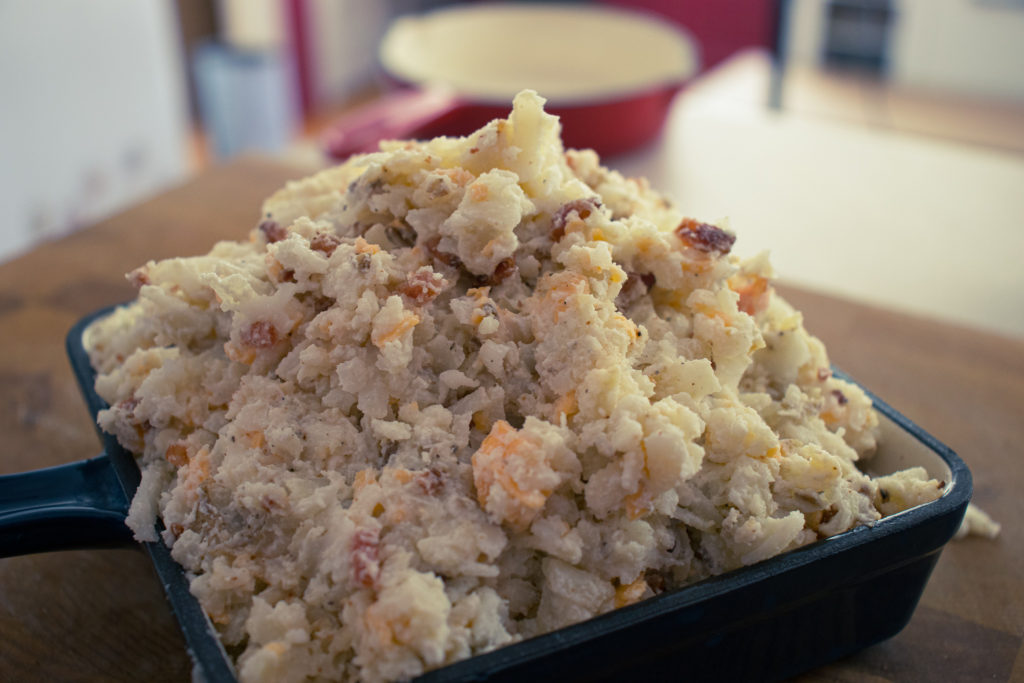
Friends, have I got a treat for you today? I present my loaded baked potato casserole. You’re going to want to share this with your friends because it is too rich for one person. Potatoes, bacon, onion, sour cream, and cheddar cheese make this one of the best side dishes you’ll ever find for your next steak dinner. Let’s get cooking!
Loaded Baked Potato Casserole Ingredients
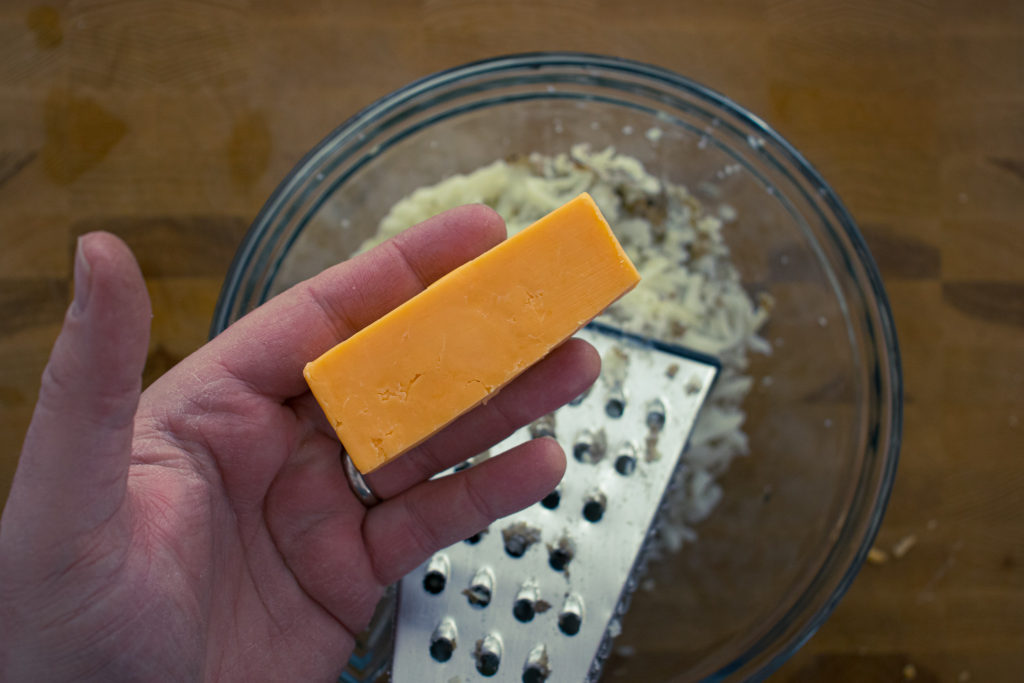
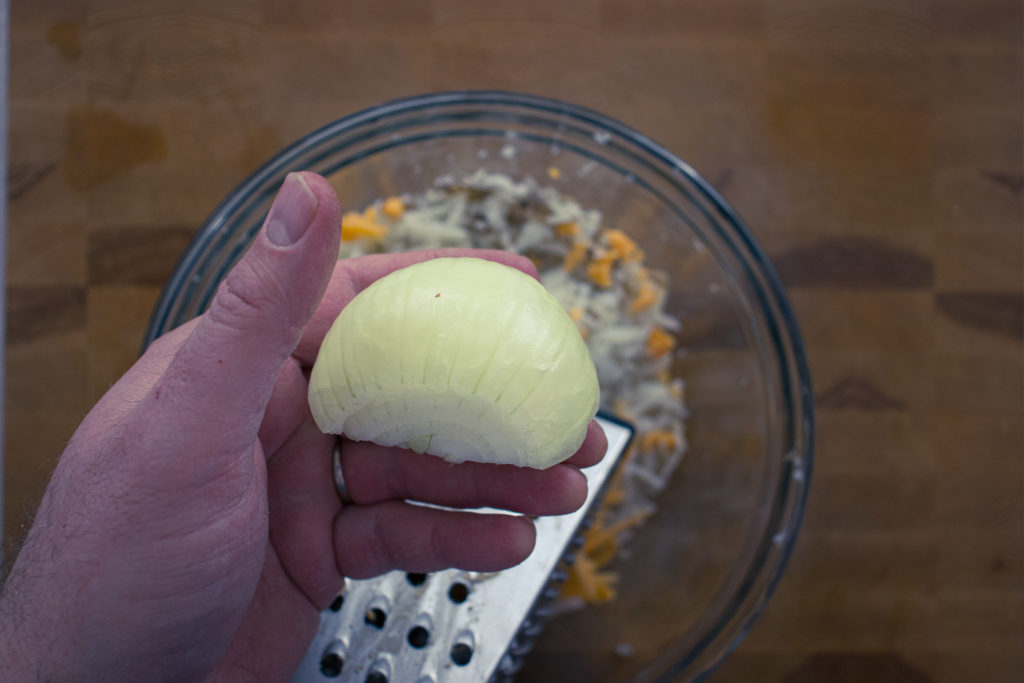
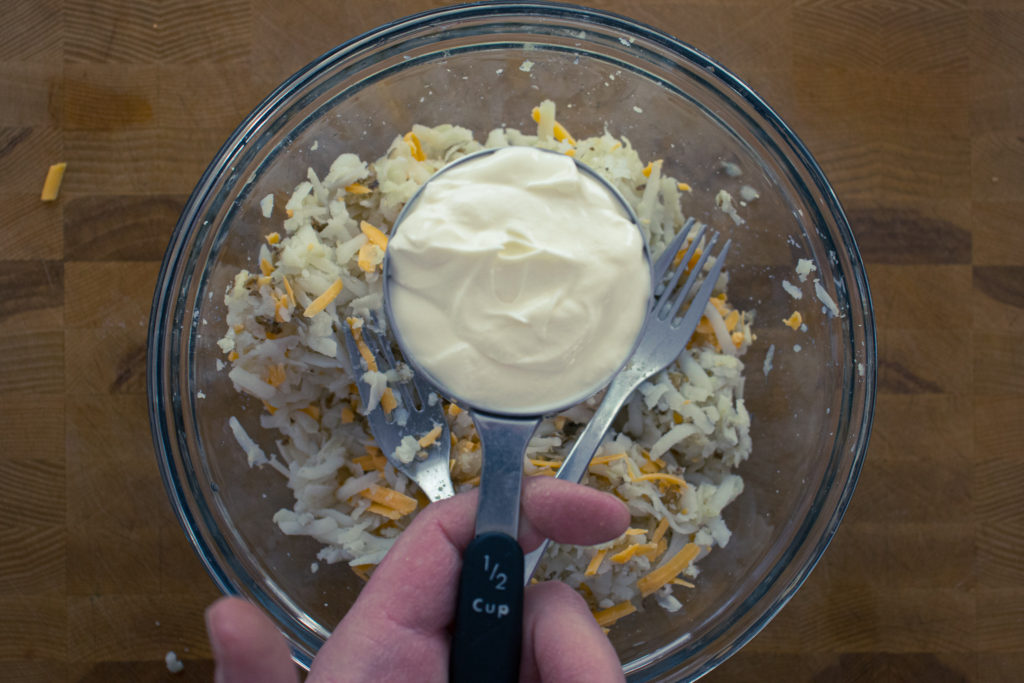
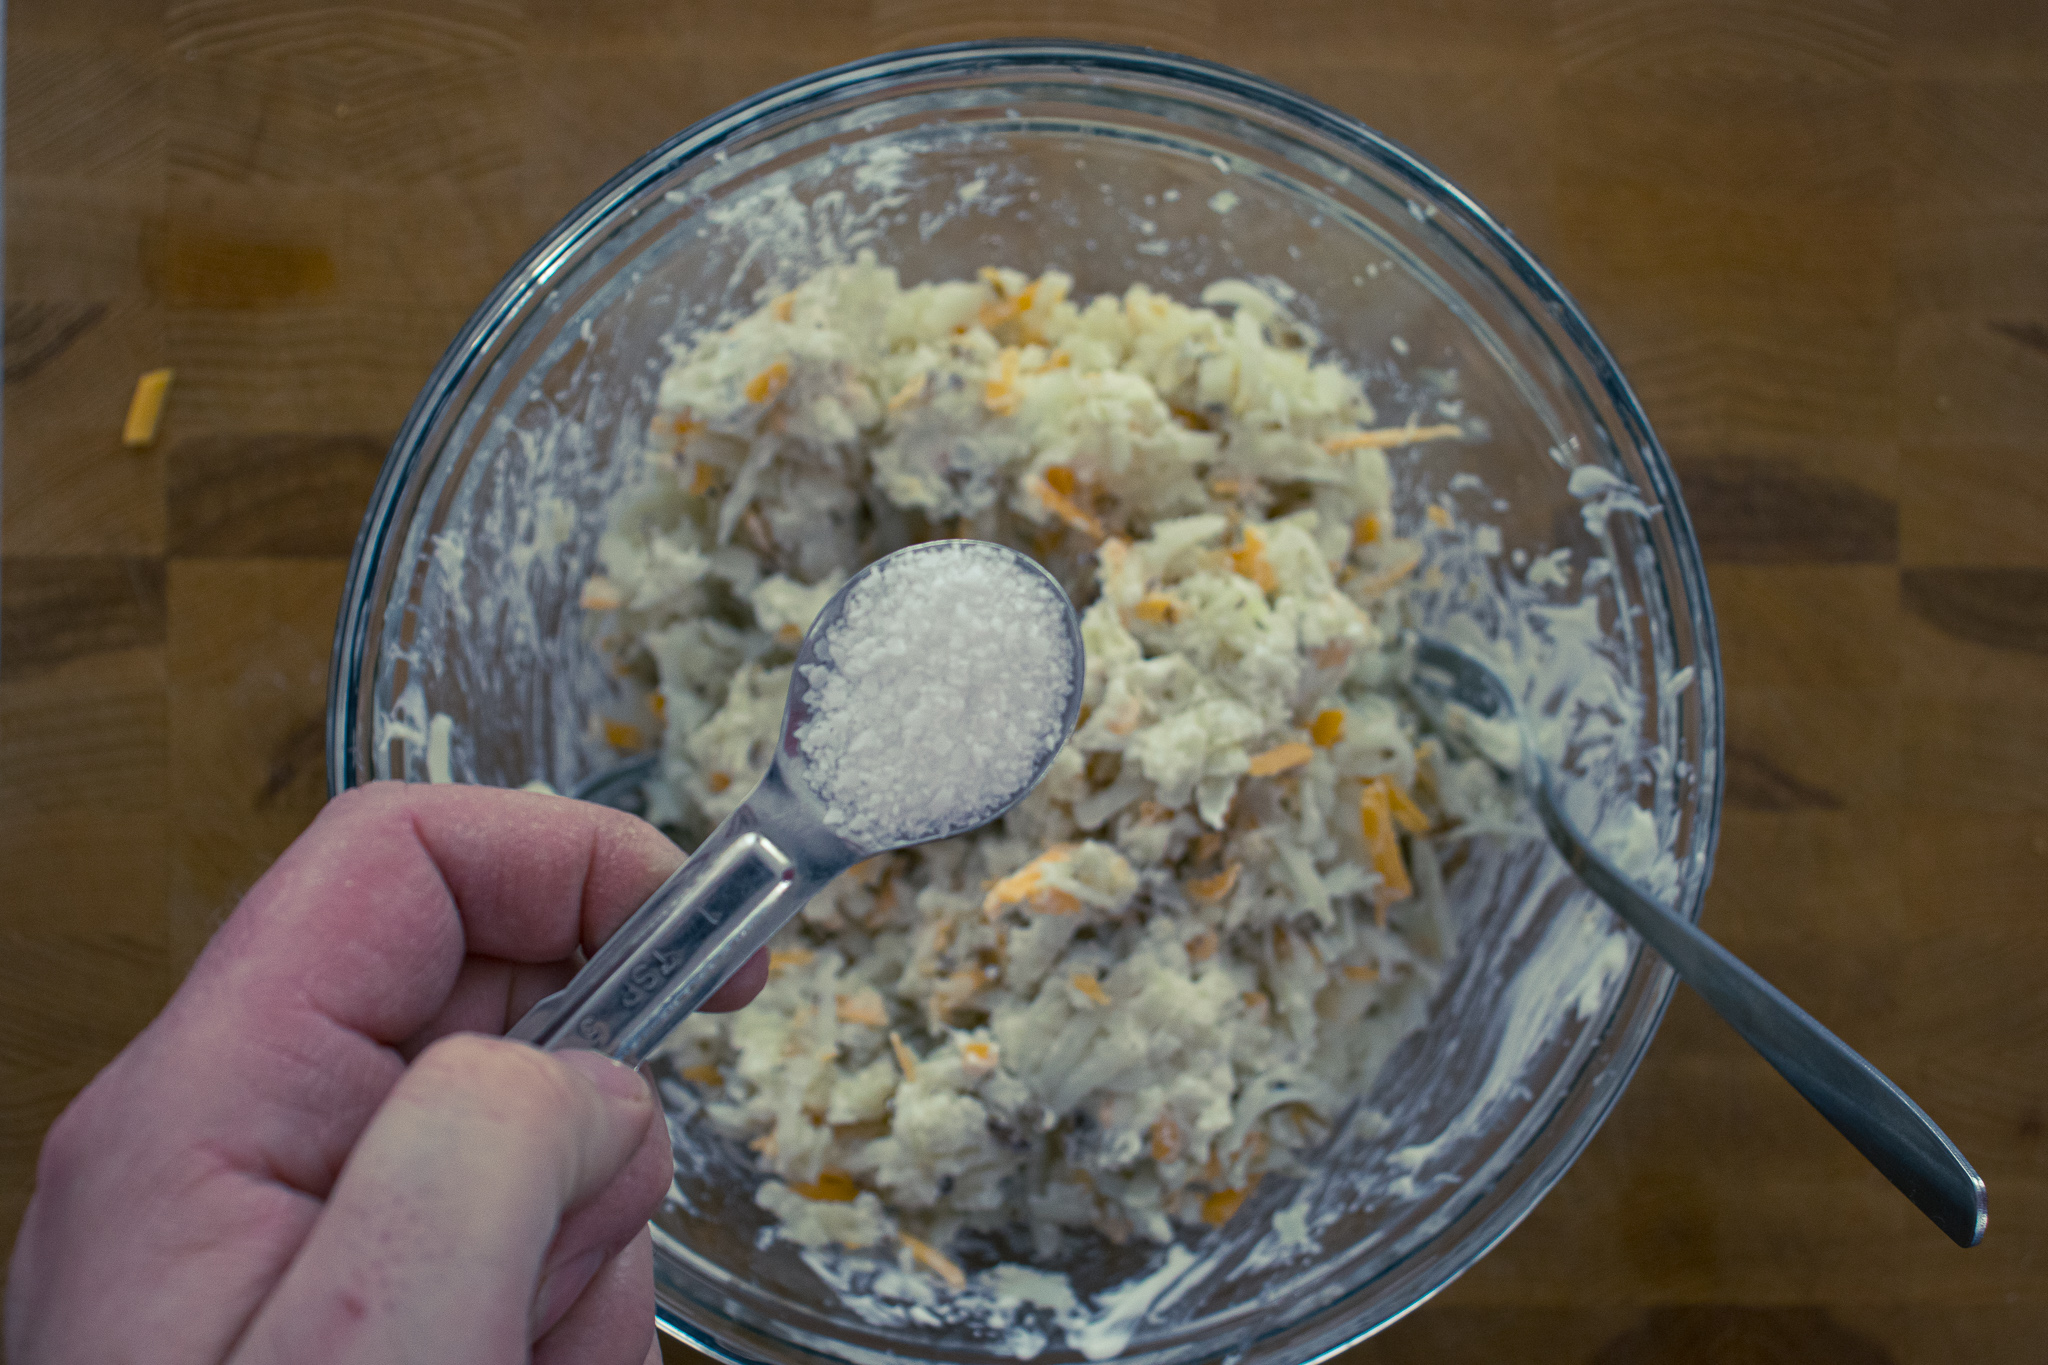
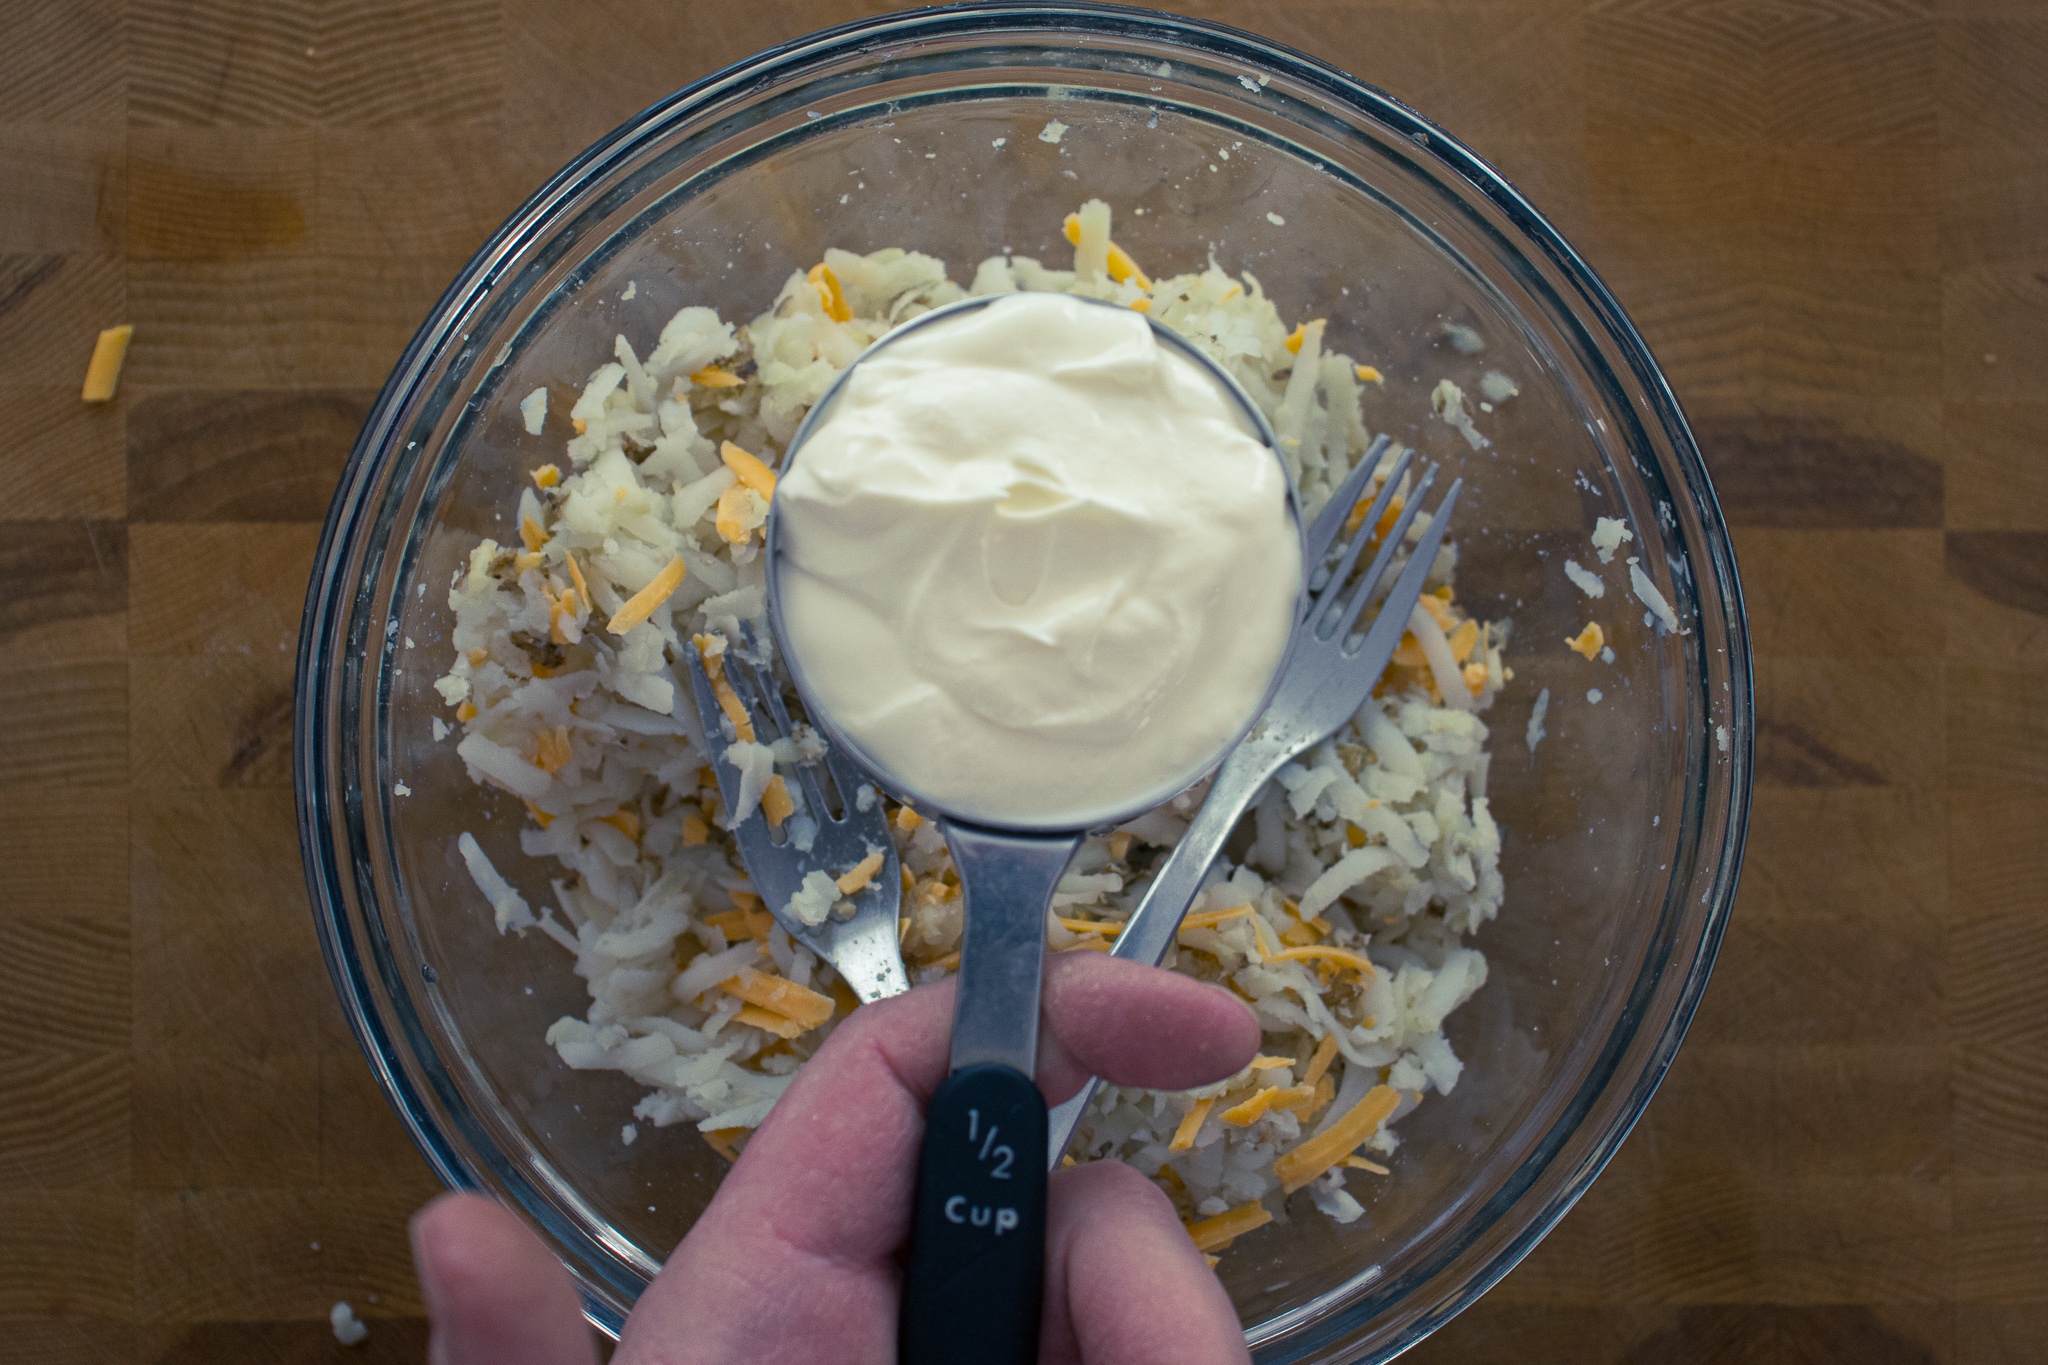
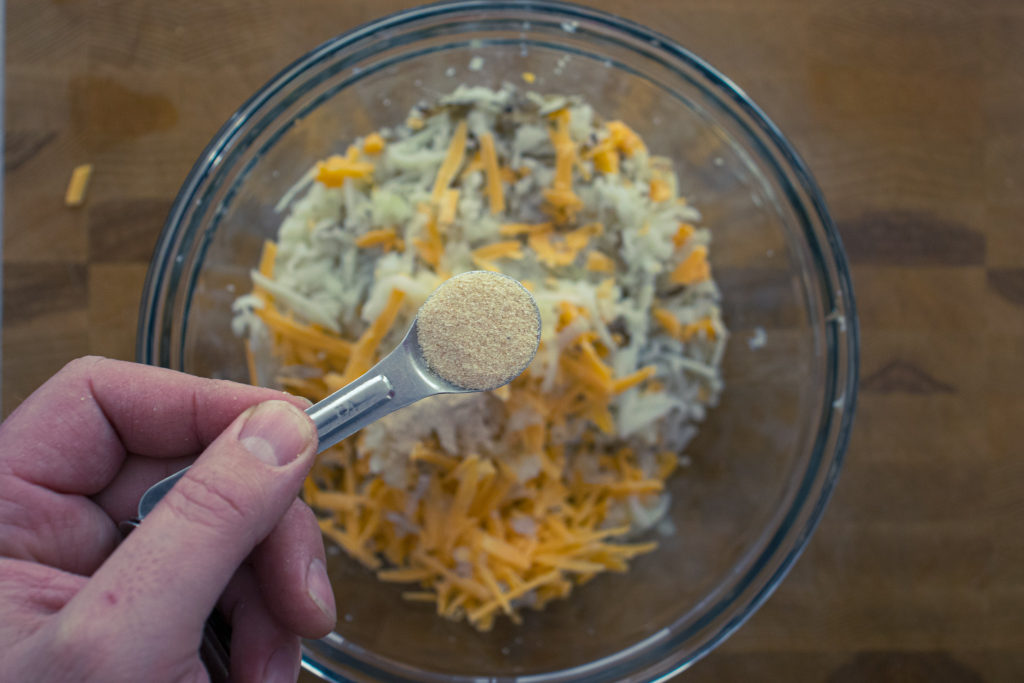
One of the great things about this loaded baked potato casserole is that you can use leftover baked potatoes and leftover crispy bacon. For this recipe, you will need two leftover and chilled baked potatoes, 1/4 cup grated cheddar cheese, half an onion (about 1/4 cup of grated onion), 1/4 cup chopped crispy bacon, 2 tbsp hot bacon grease or melted butter, 1 1/2 tsp salt, 1/4 tsp black pepper, 1/2 cup sour cream, 1/2 tsp onion powder, and 1/2 tsp garlic powder.
How To Make Loaded Baked Potato Casserole
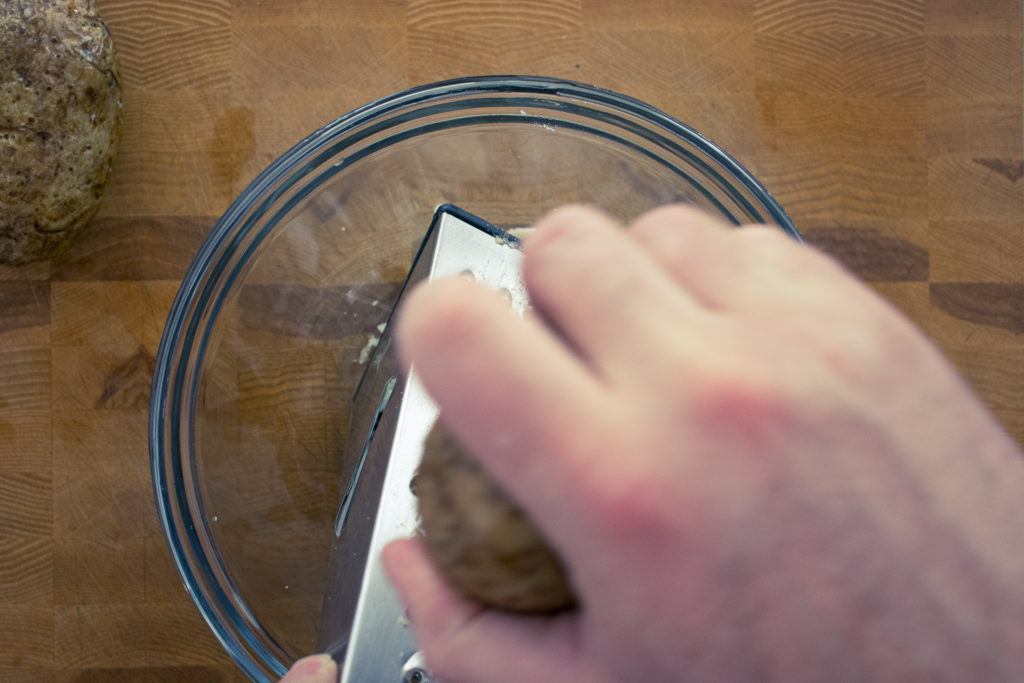
Break out the grater
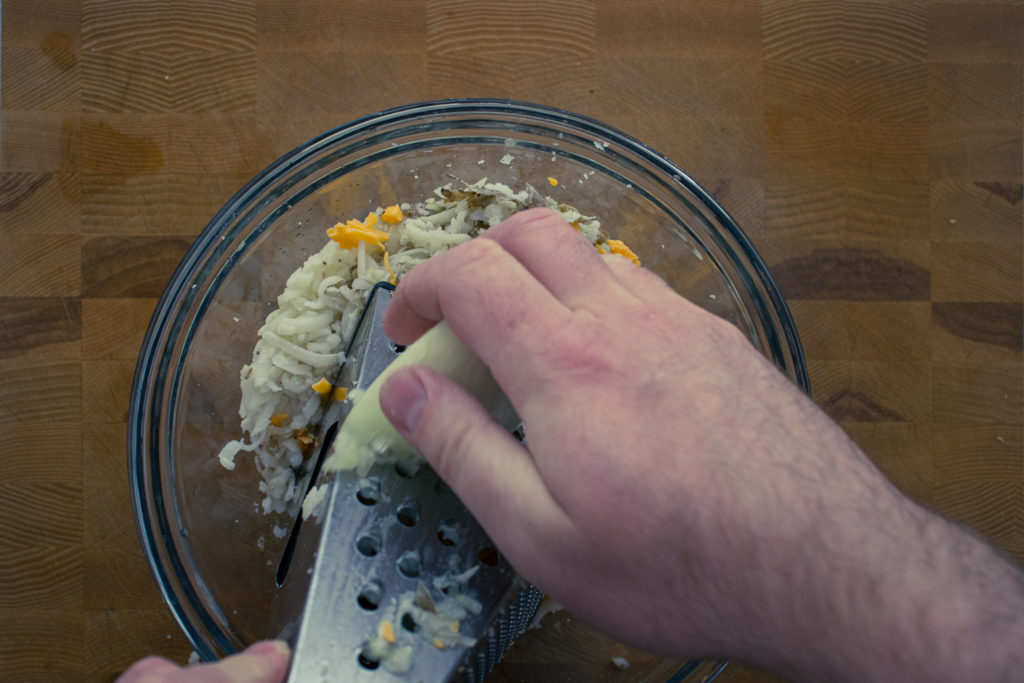
Pull the greater out of the cupboard because it will get some use today. Set the grater over a medium mixing bowl and grate the potatoes, skin and all. Next, grate the onion. Remove the skin first. Finally, grate the cheese. Now would be a good time to fire up the oven too. Turn it on to 425°f.
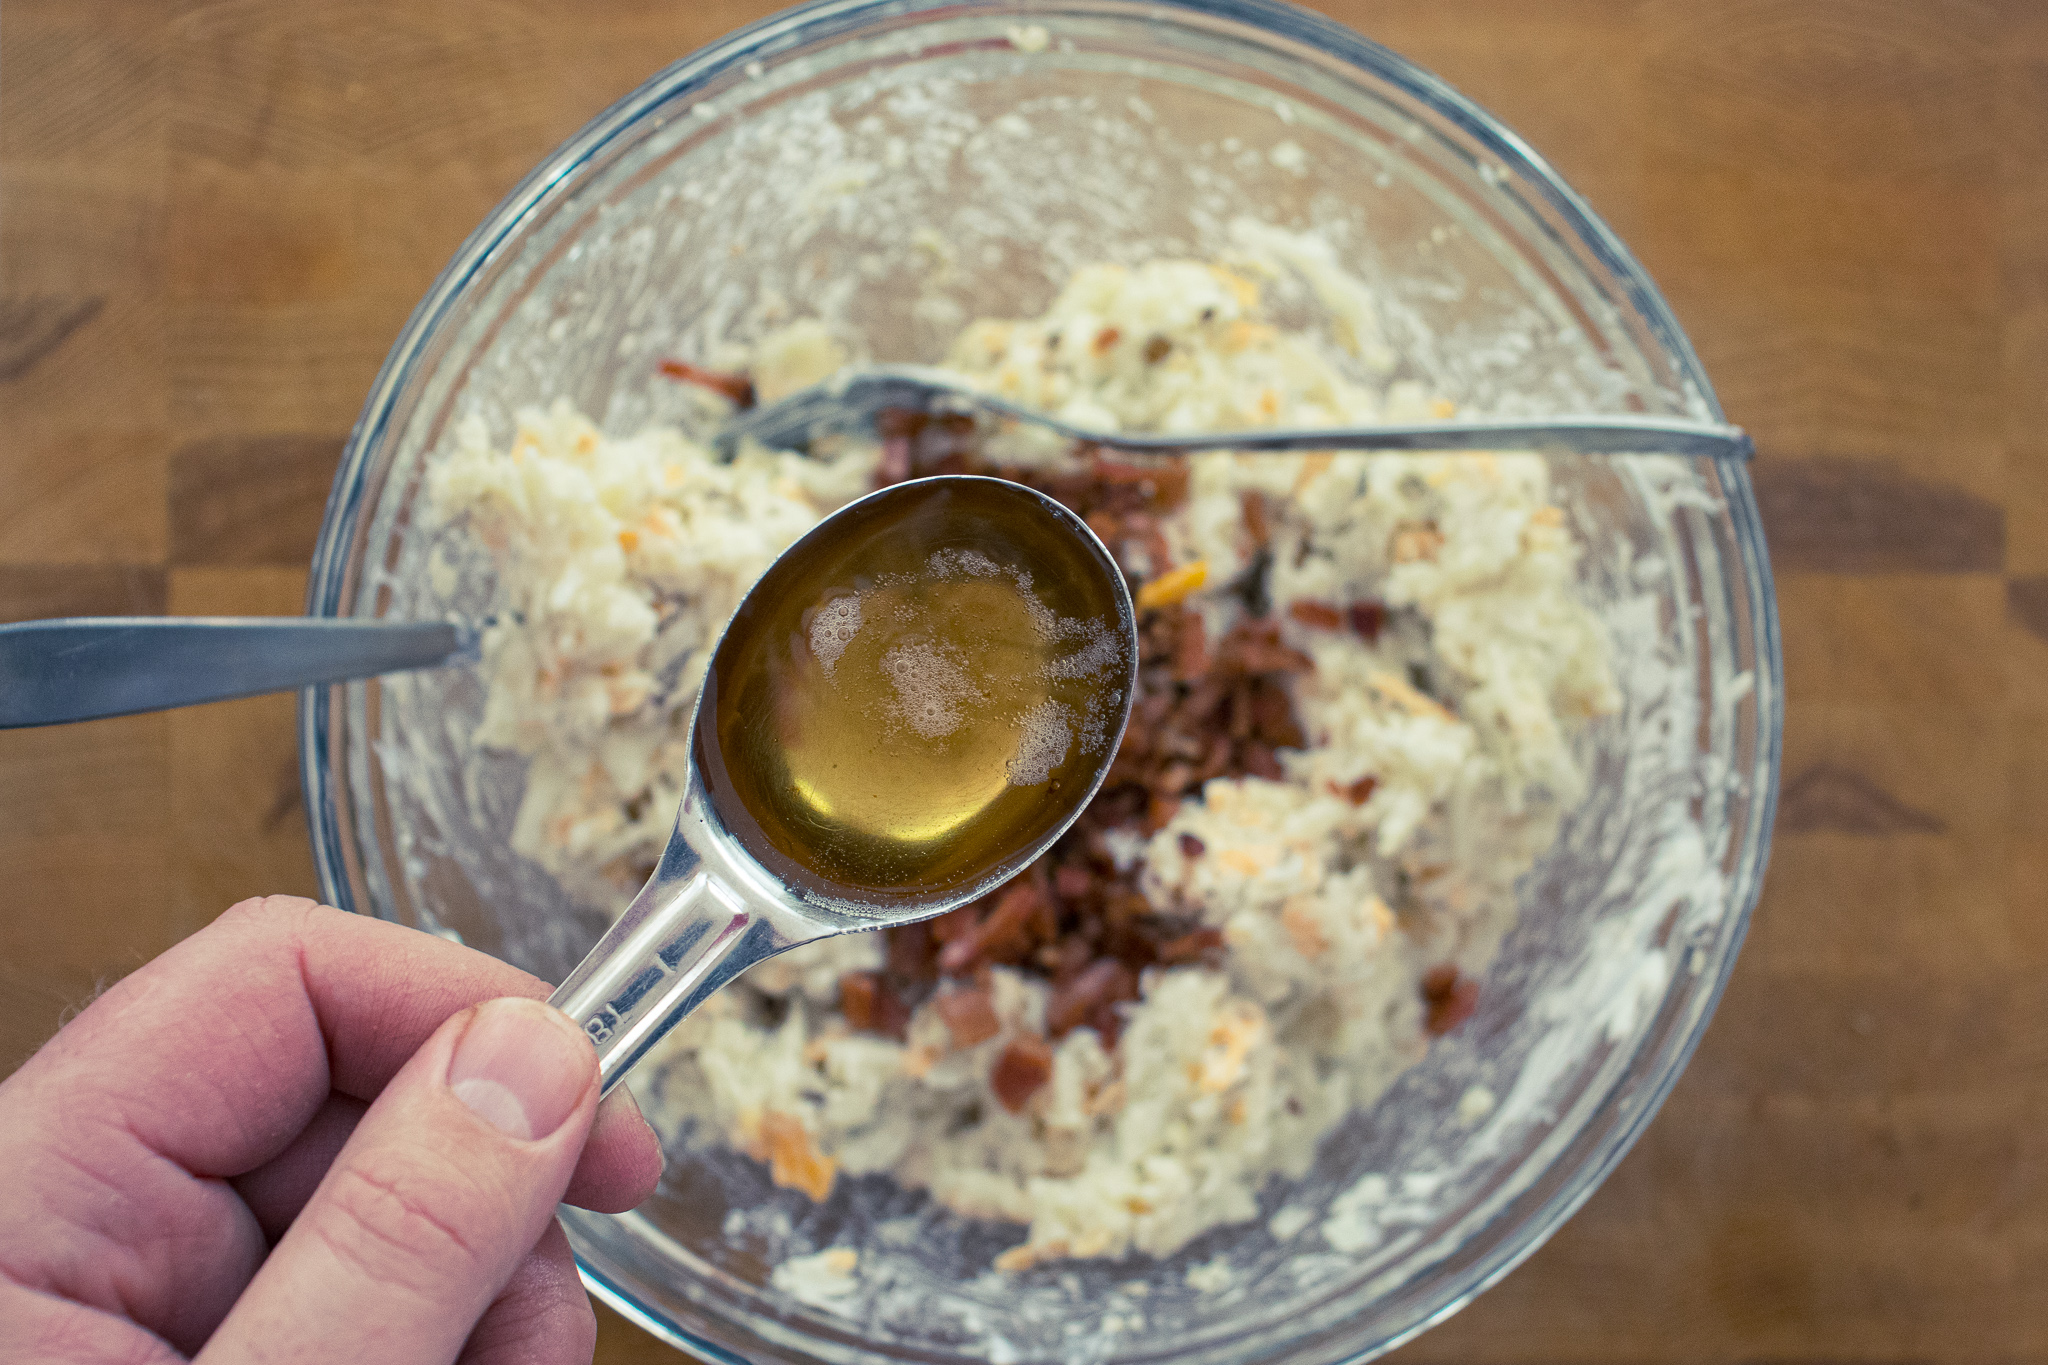
Measuring spoons
At this point, your grater probably needs some rest. Luckily, it’s time for the measuring spoons to get to work. So, set the tired old grater to the side and get those spoons a measuring. Measure out some bacon fat, salt, pepper, onion powder, and garlic powder. Now, whip out the old measuring cup and measure up some sour cream. Put all this stuff in the bowl with the potatoes.
Mix it up!
The key to this loaded baked potato casserole is the texture of the potatoes. They should not be mashed. You took all that time to grate the potatoes, don’t undo all that hard work by over mixing and mashing them. So, when mixing all the ingredients, rather than using a spoon, use two forks and gently toss the ingredients together. That will keep the texture of the potatoes and will make the casserole light and fluffy.
Bake the loaded baked potato casserole
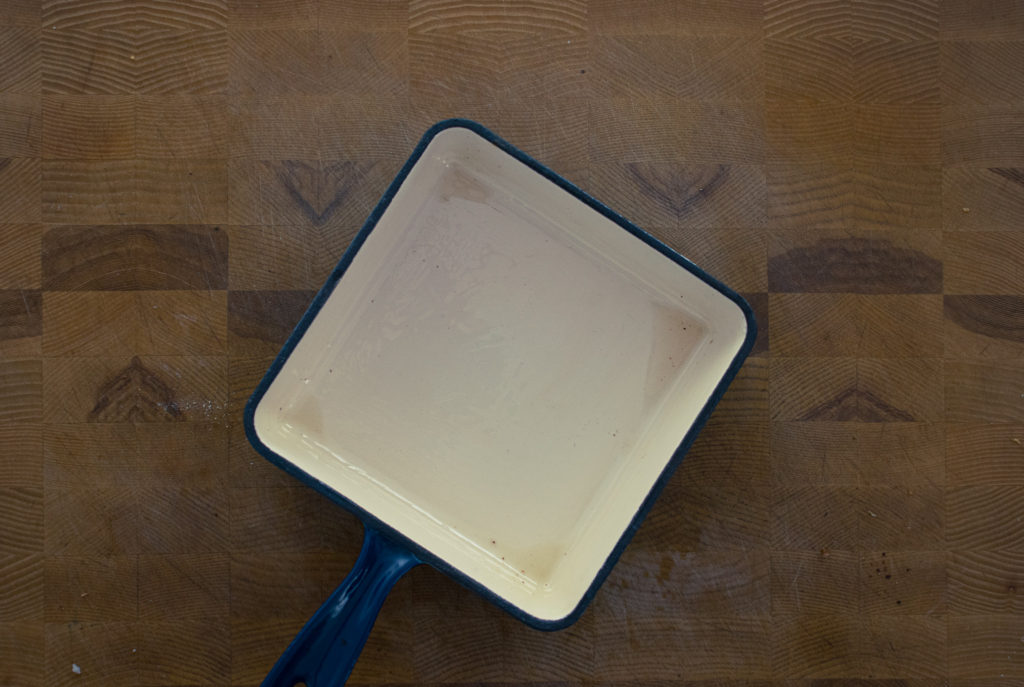
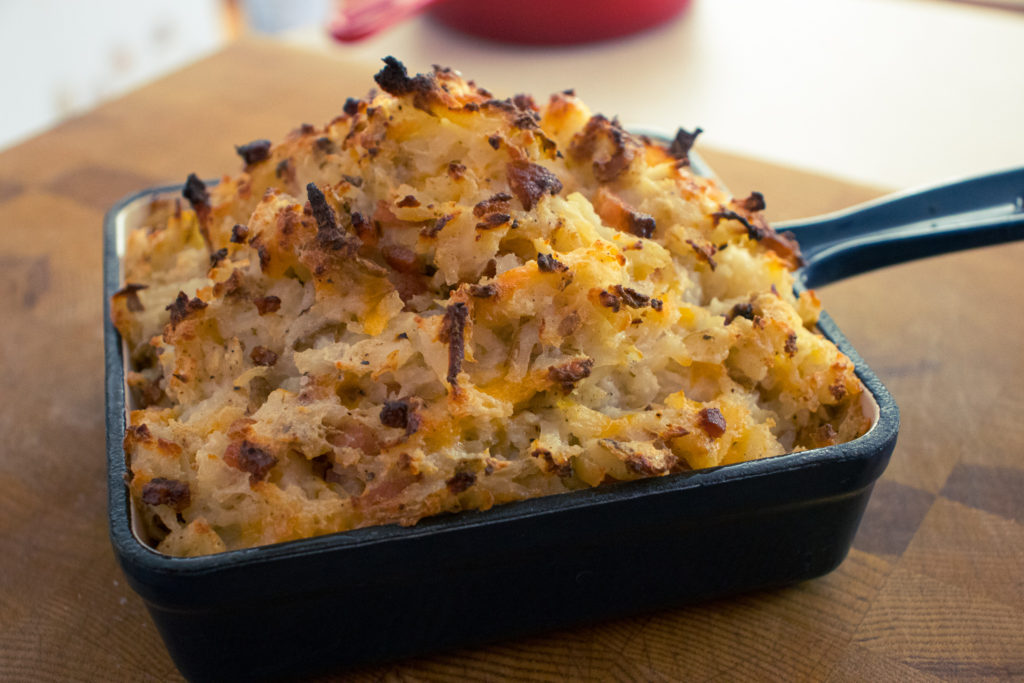
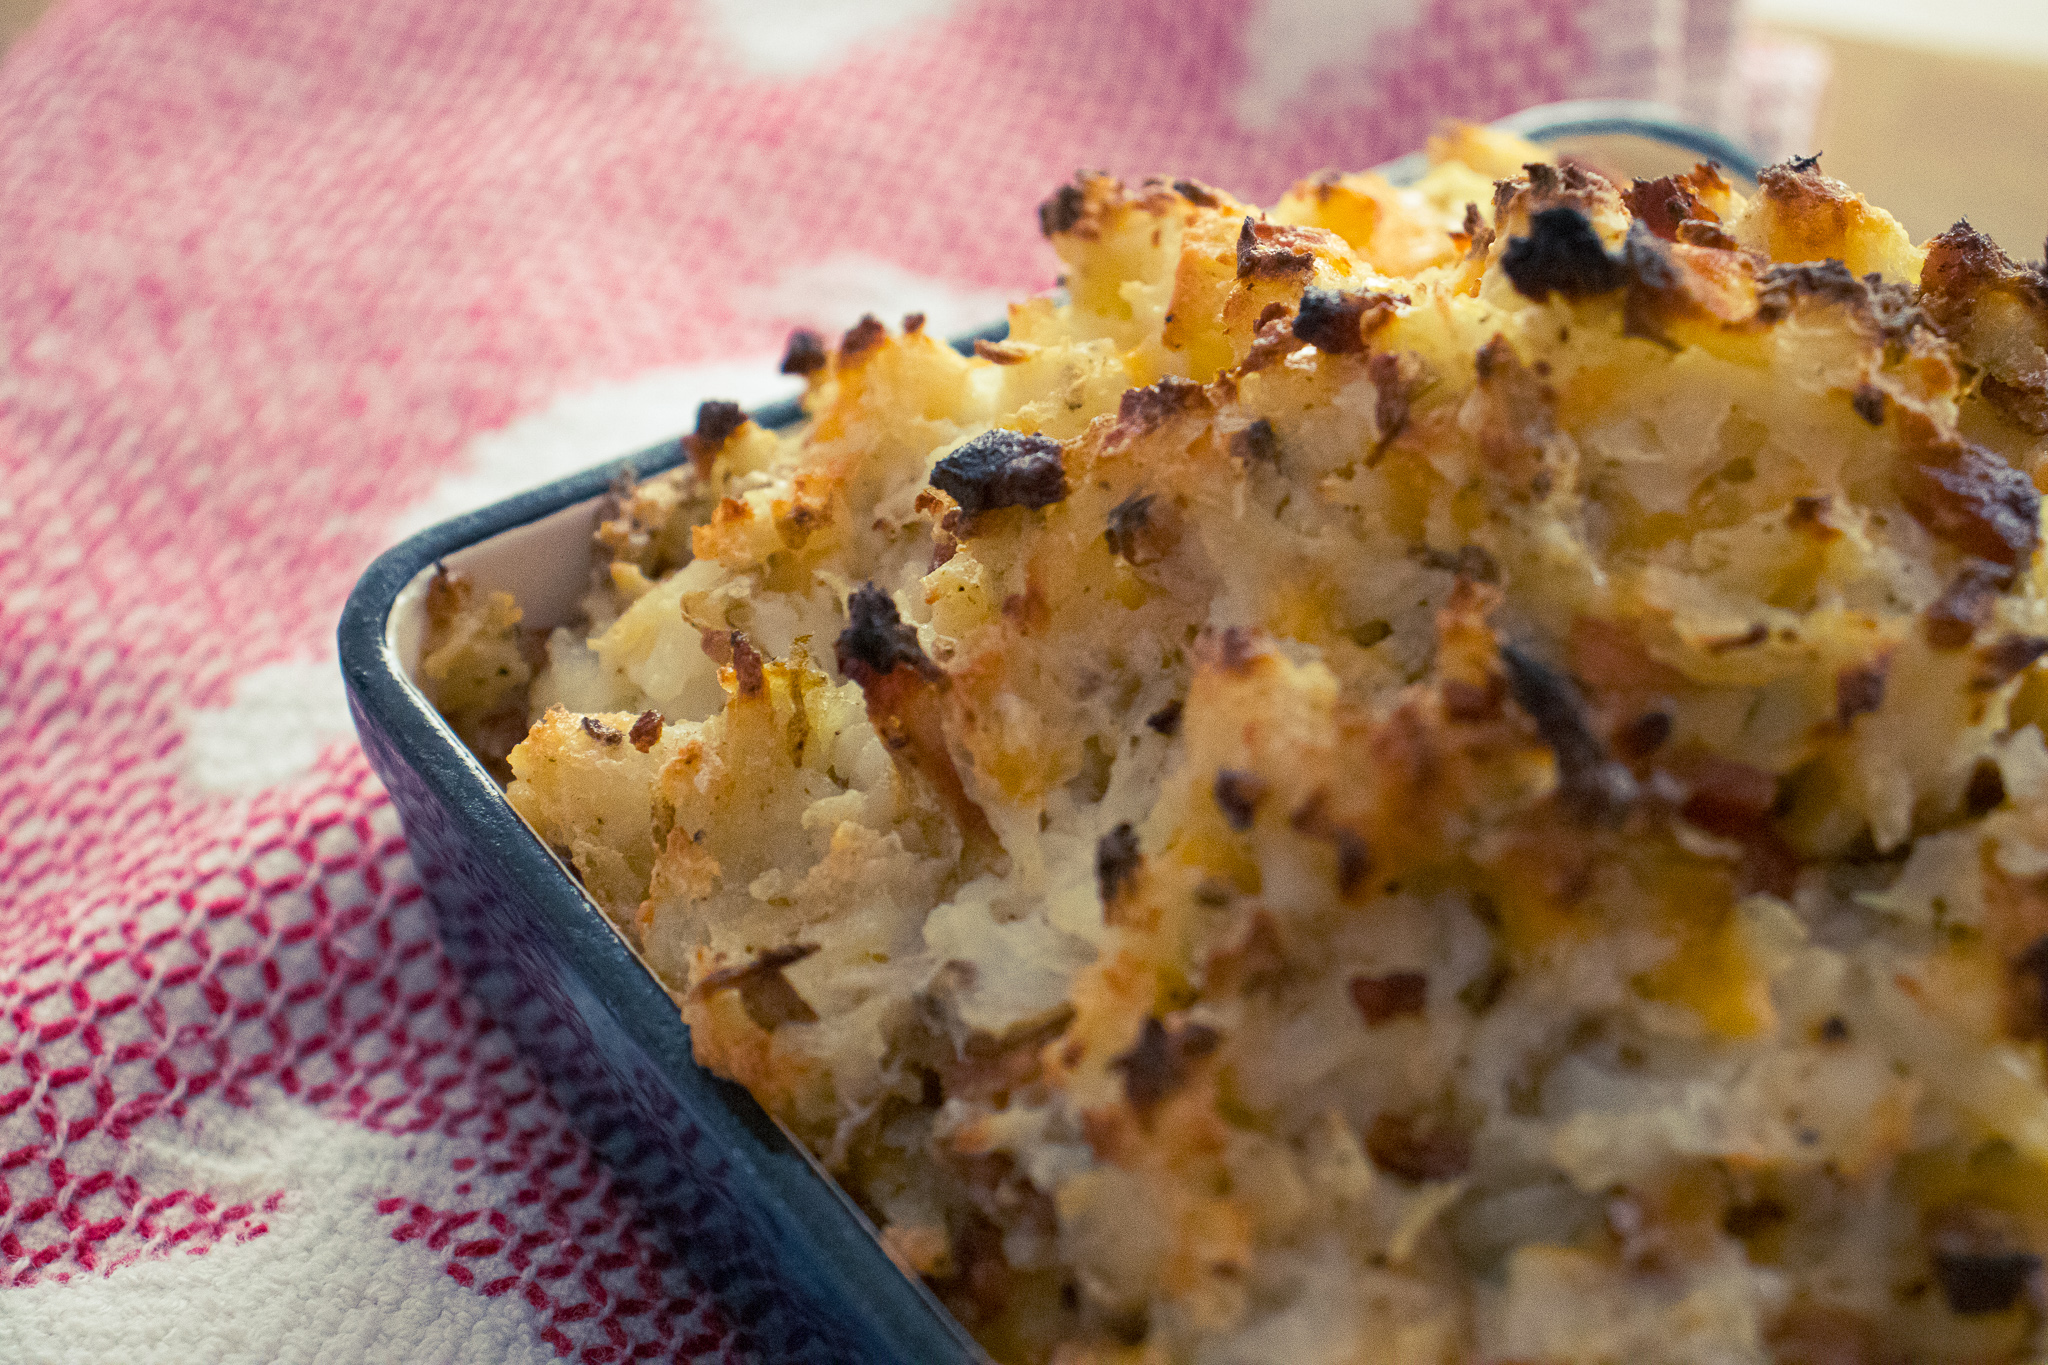
To bake the casserole, gently transfer it from the mixing bowl to a lightly greased oven-safe dish. I have these snazzy little castiron pans you can see in the picture below, but any small dish will work. You can use a loaf pan, or if you have ramekins, you can make individual portions. Just like when mixing, you don’t want to destroy the texture of the potatoes when you transfer them from the bowl to the dish. Definitely, don’t push them down into the dish. Bake, the casserole for 30 to 35 minutes or until the top, is golden brown and the peeks are browned. If you make individual portions, bake them for 20 to 25 minutes. Take the casserole out of the oven and enjoy!
The Wrap-Up
The top of this loaded baked potato casserole gets nice and crispy while the middle stays soft and tender. This is a great side dish for a steak dinner, roast beef, or even a lobster dinner. But be aware, it is very rich, and you won’t be able to stop eating it.
That does it for today. Thanks for reading. I hope you’ve enjoyed the post. Remember to share this on Facebook or Pinterest and leave a comment below. I love to hear from you. Finally, remember to sign up for my mailing list so you don’t miss out on exclusive recipes and cooking tips. Members of the mailing list also get a sneak peek at all the upcoming posts. Sign up below. Have a great day! I’ll see you back here next Thursday.
Are you looking for another great side dish for your steak dinner? Check out this Steakhouse Creamed Spinach Recipe. This post was inspired by Chef John’s Potatoes Romanoff. Check out his video here.
Loaded Baked Potato Casserole
This loaded baked potato casserole is the perefect way to use leftover baked potatoes, and it is one of the best side dishes you'll find for a grilled steak. It's rich, filling, and delicious.
Grate the potatoes on a cheese grater into a medium mixing bowl.
Melt the bacon fat or butter and pour it into the potatoes.
Add the cheddar cheese, onion, crispy bacon, salt, pepper, sour cream, onion powder, and garlic powder. Mix well but only enough to distribute the ingredients. You don't want to mash the potatoes. It's easiest to use two forks to mix rather than a spoon.
Spoon the potato mixture into a small oven-safe dish that has been lightly greased, such as a loaf pan. Don't smooth out the top.
Bake the loaded baked potato casserole in a 425°f oven for 30 to 35 minutes or until it is hot and the top is golden brown.
Serve the casserole as a side with a nice steak, thick-cut pork chop or ribs.
Notes
The potatoes should be leftover from the day before and chilled.Cook about 4 strips of bacon, reserve the fat and use that in the potatoes. Use 1/4 cup of sour cream for a less tart flavour.You can assemble the casserole up to one day ahead, then heat it in the oven as the recipe says.
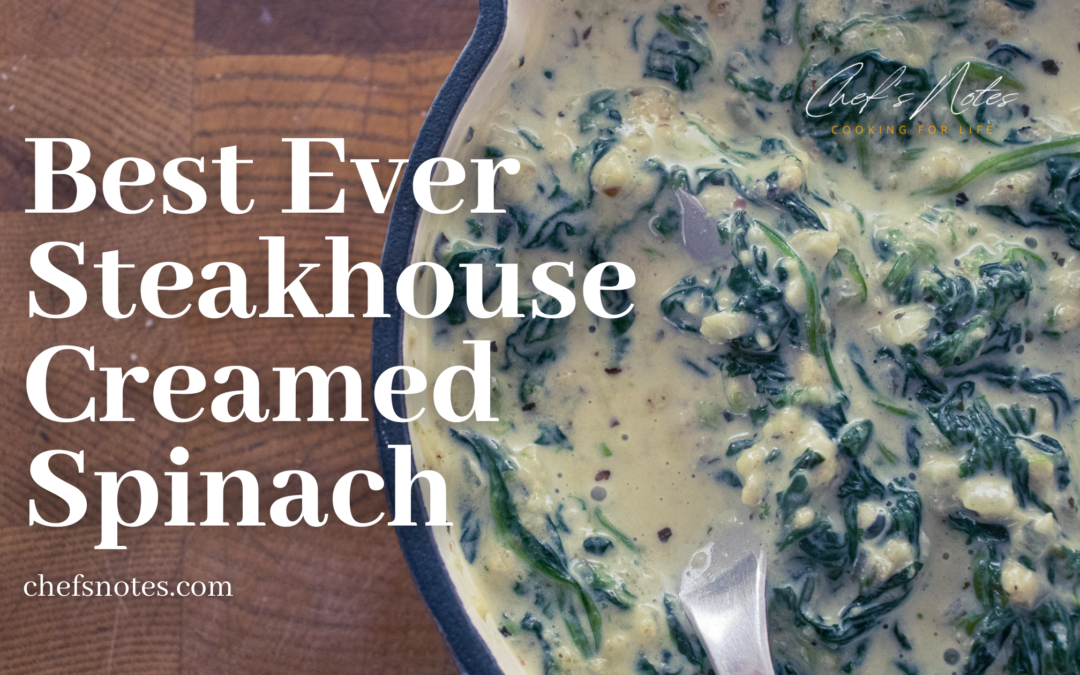
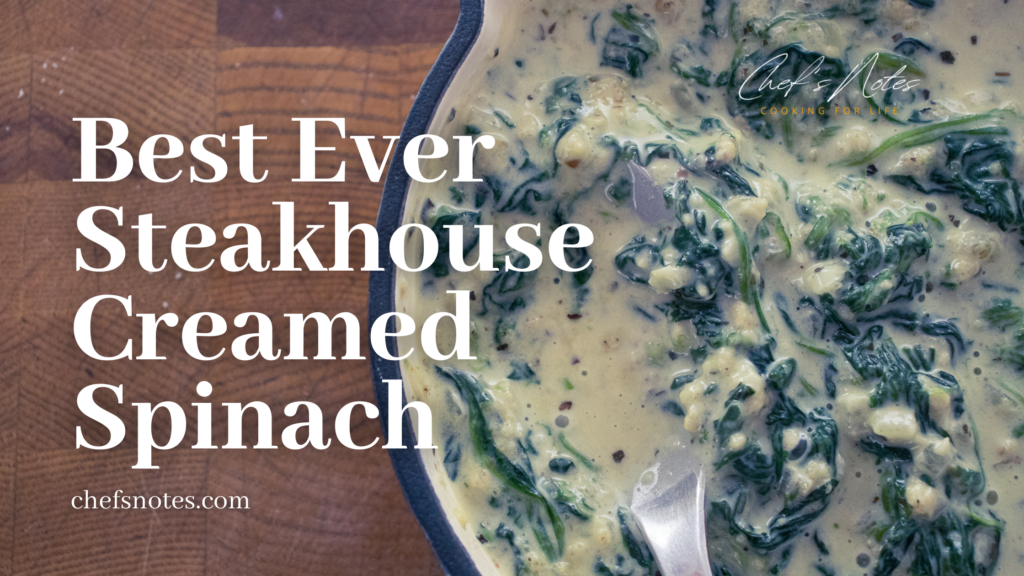
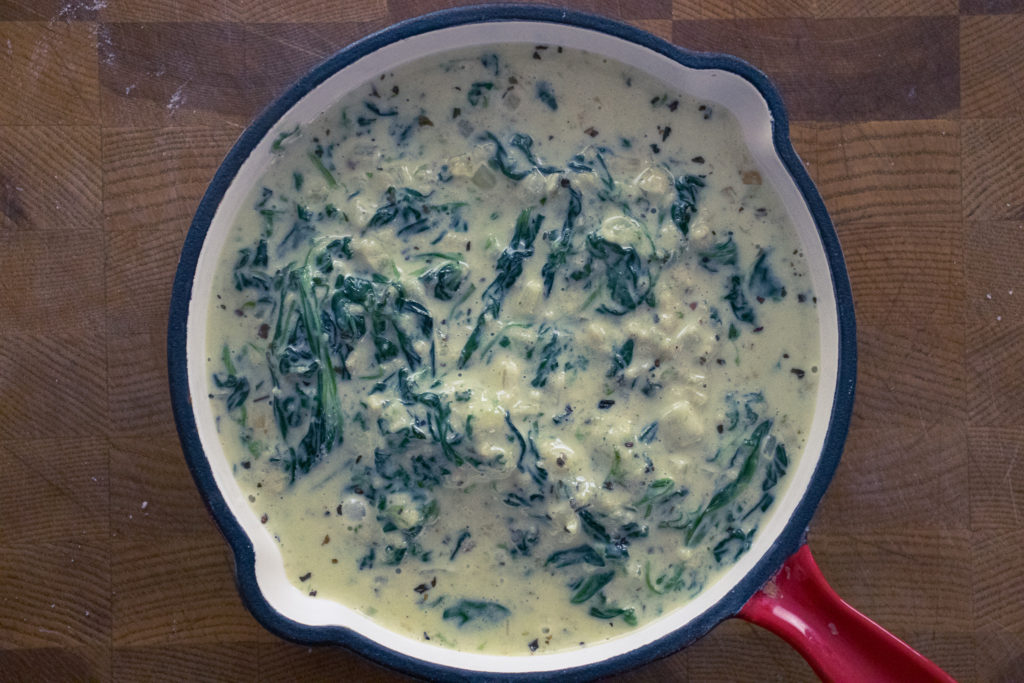
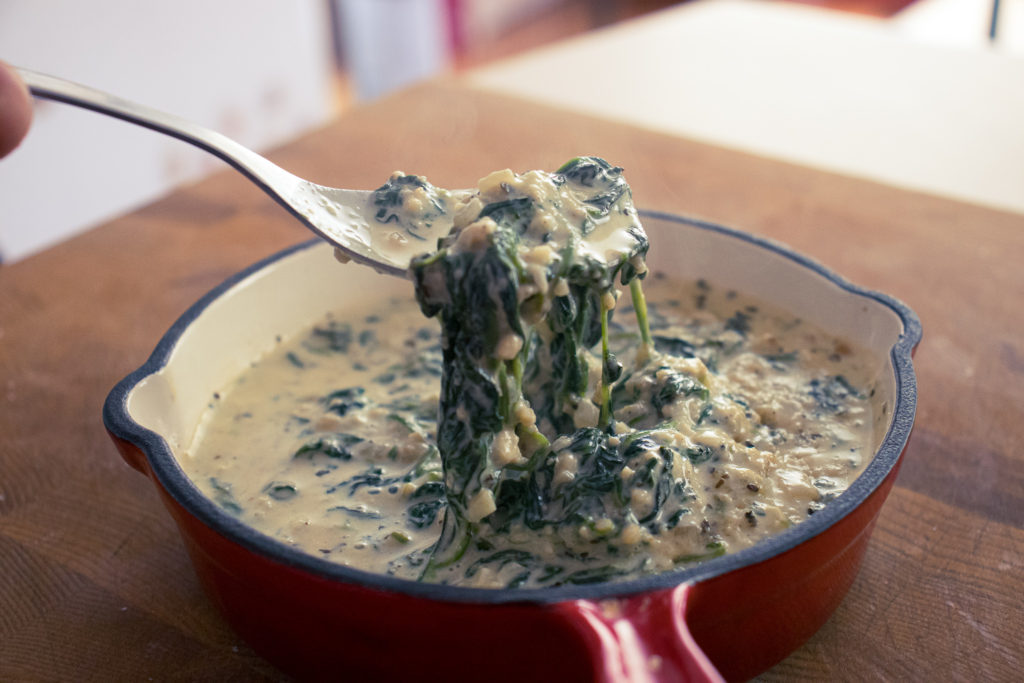
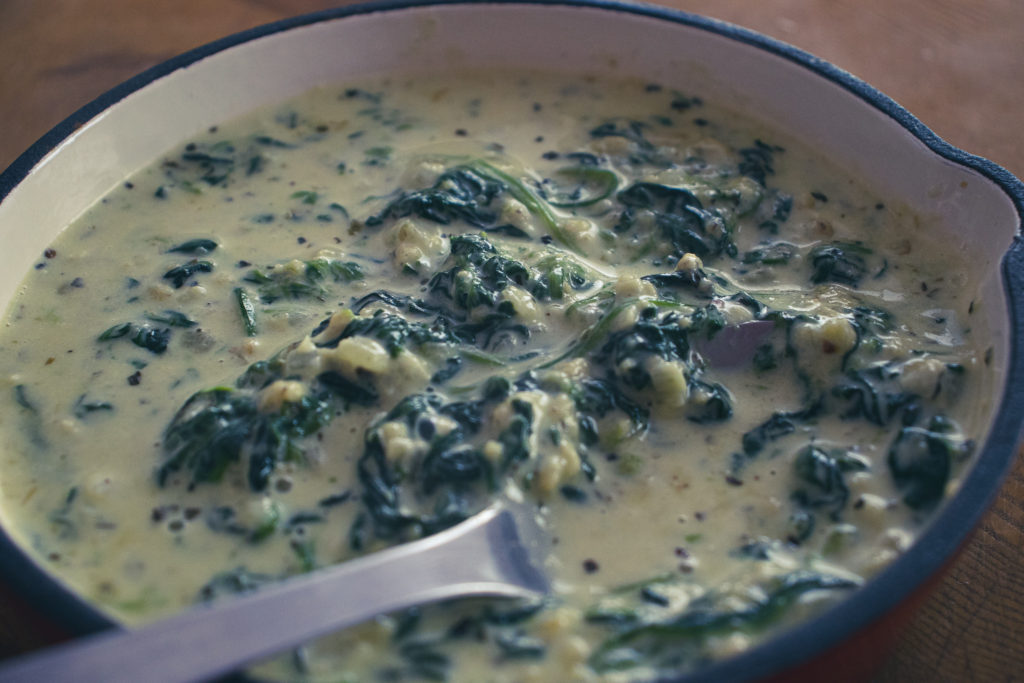
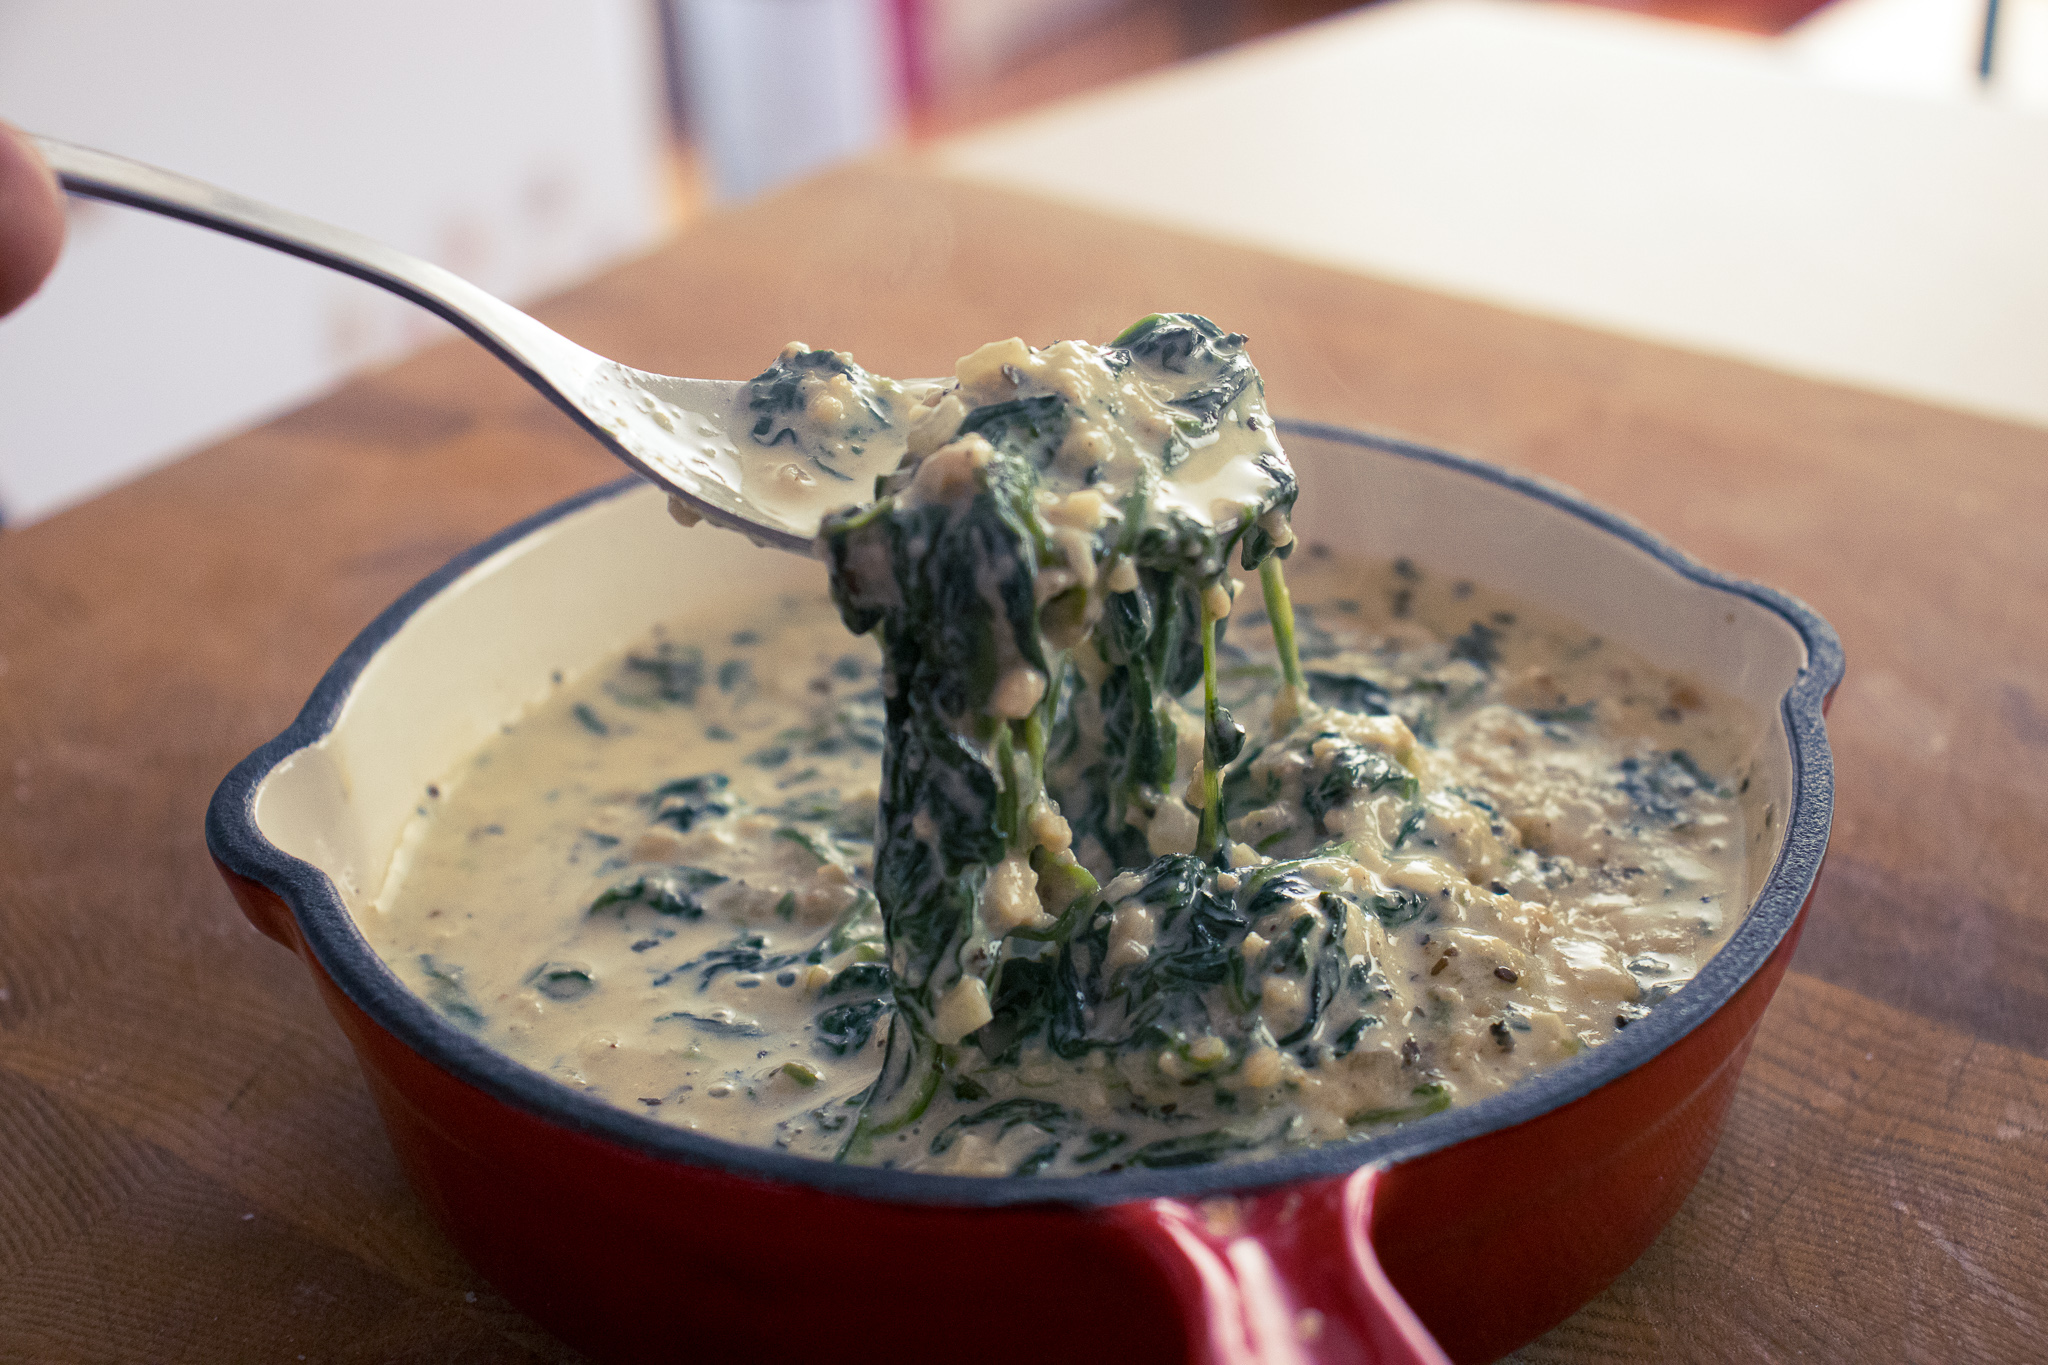
Creamed spinach has been a steakhouse classic since there have been steakhouses. The creamy, spinachy flavour pairs so perfectly with a nice steak or pork chop that they are a match made in heaven. However, just because something is a classic doesn’t mean we shouldn’t try and do better. So, this post starts with a question. Could the classic steakhouse creamed spinach be any better? I think yes. So, I’ve taken the classic steakhouse creamed spinach and married it with my favourite spinach dip recipe to create something even more special. This is my Best Ever Steakhouse Creamed Spinach recipe. Enjoy.
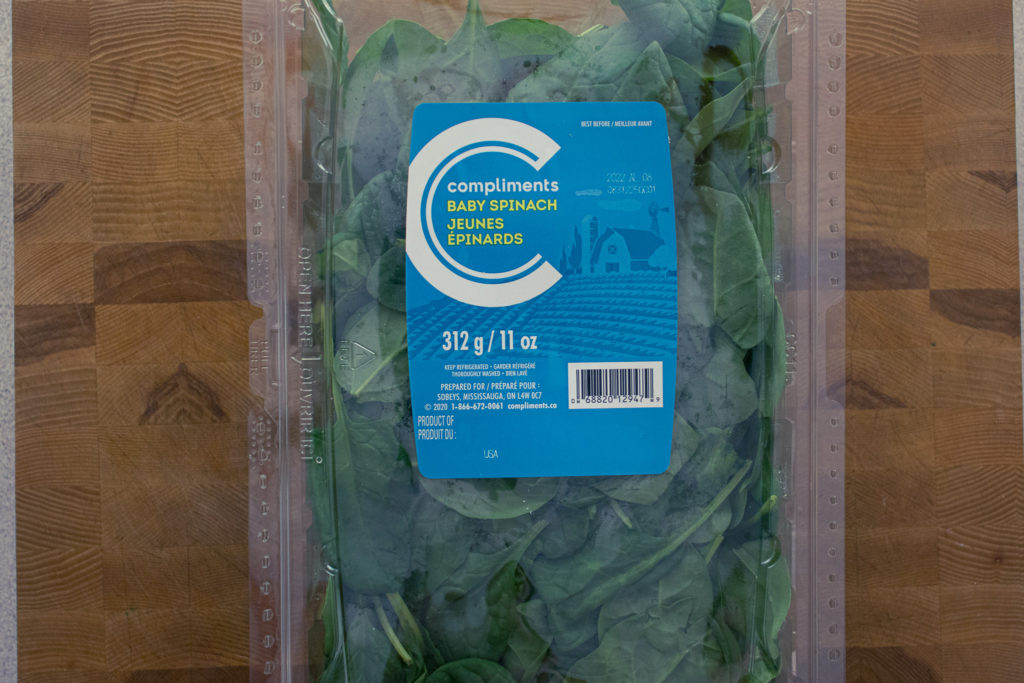
Creamed Spinach Ingredients
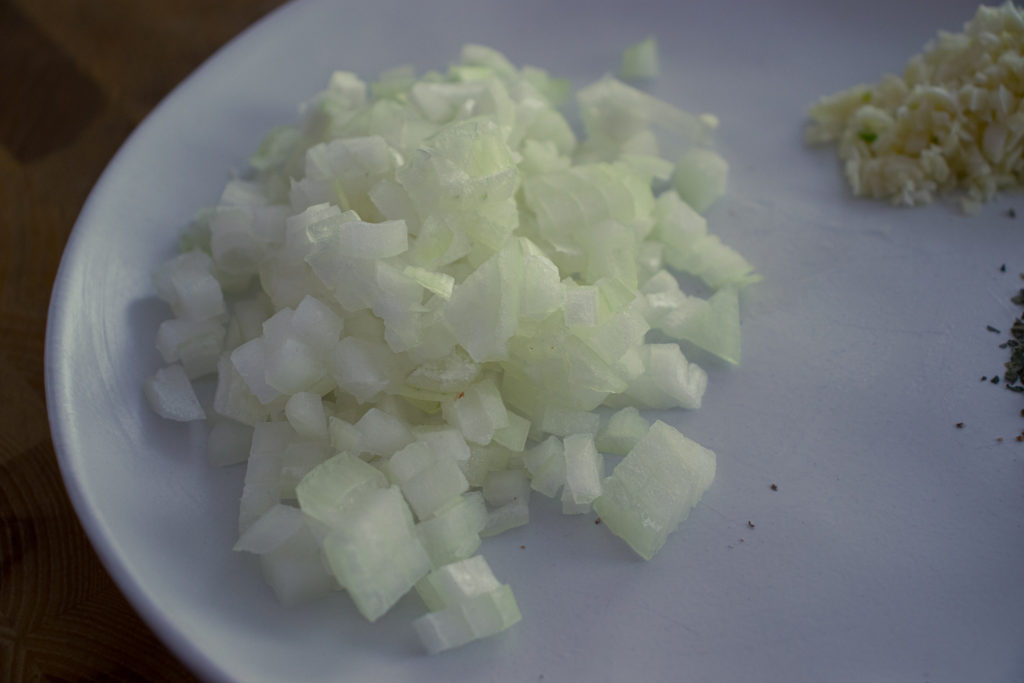
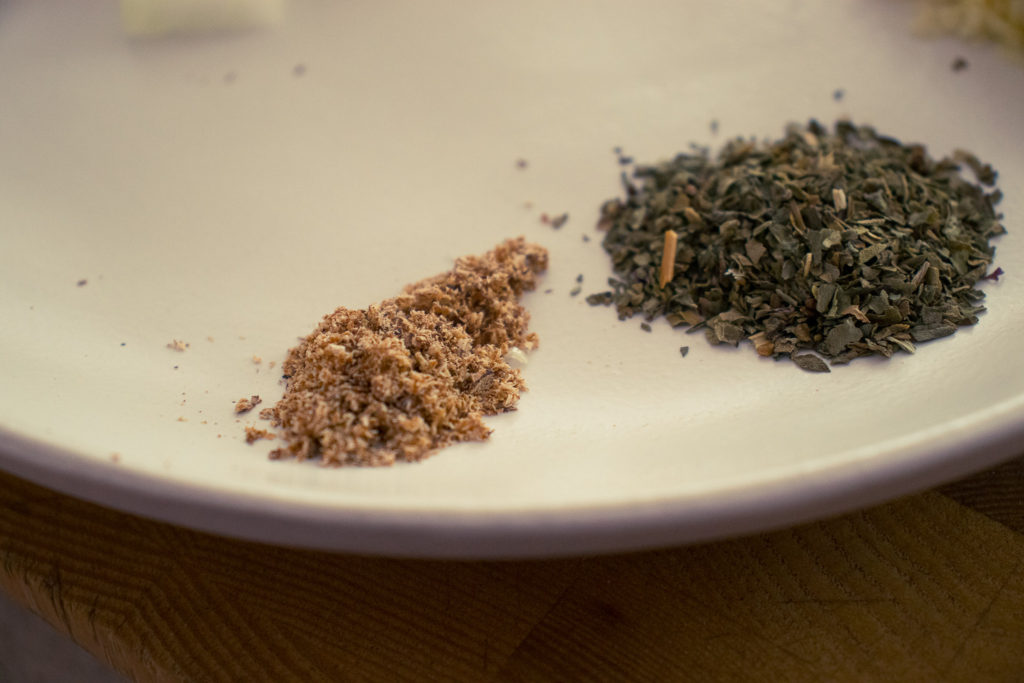
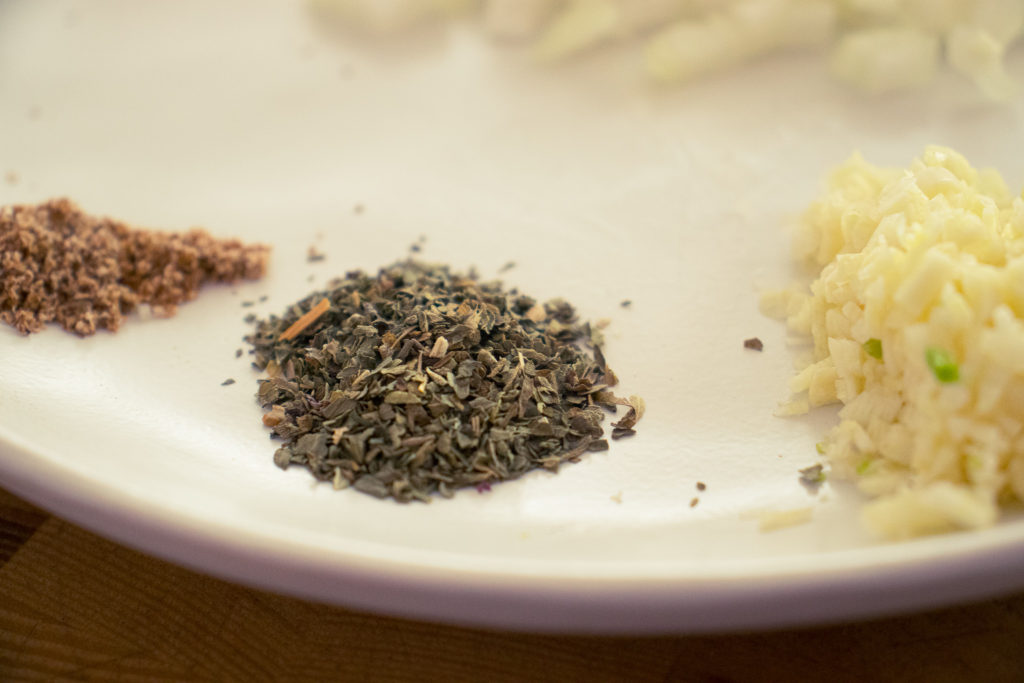
The ingredients for my Best Ever Steakhouse Creamed Spinach are baby spinach, cream, milk, onion, garlic, dried basil, grated nutmeg, salt, pepper, parmesan cheese, swiss cheese, olive oil, and butter. If you don’t want to use cream, you can make a bechamel with milk instead. In that case, double up on the milk, and after the onions and garlic are sautéd, add 2 tbsp of flour to the pan. Stir in the flour, and make sure it is well and truly mixed. Then add the spinach and follow the recipe as it is. You can also substitute the swiss cheese for a sharp cheddar if you’d like.
How To Make The Best Ever Steakhouse Creamed Spinach
Getting Started
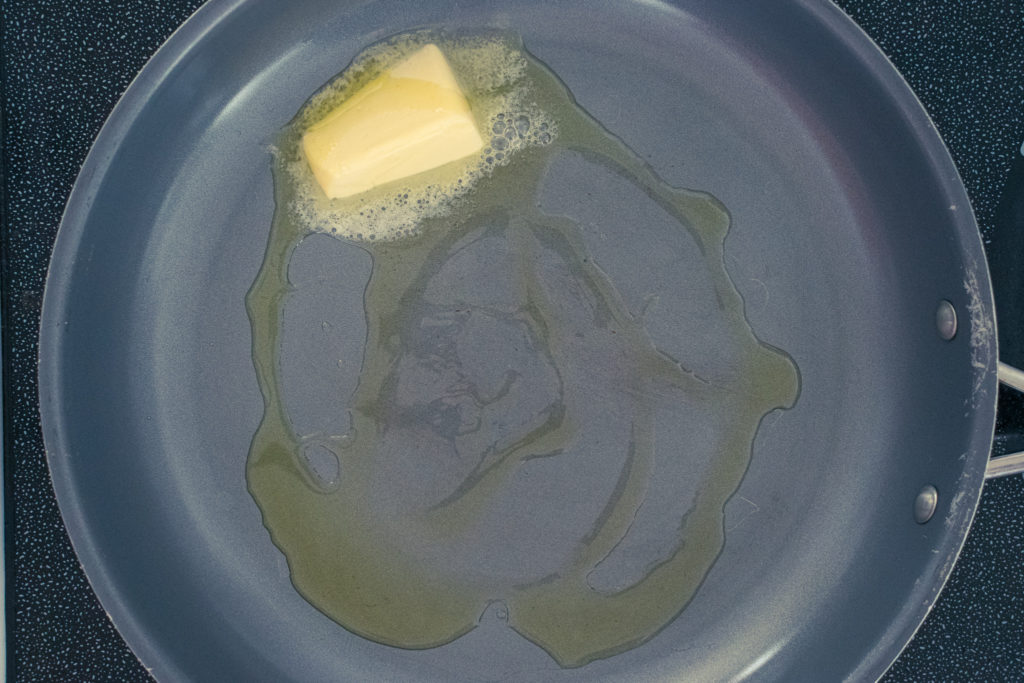
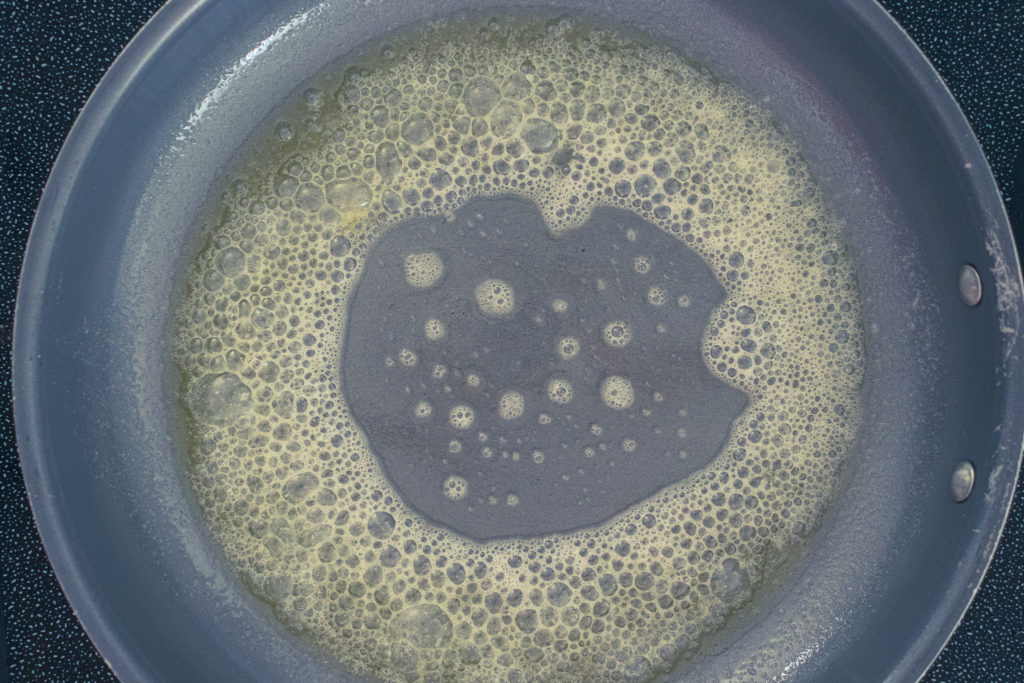
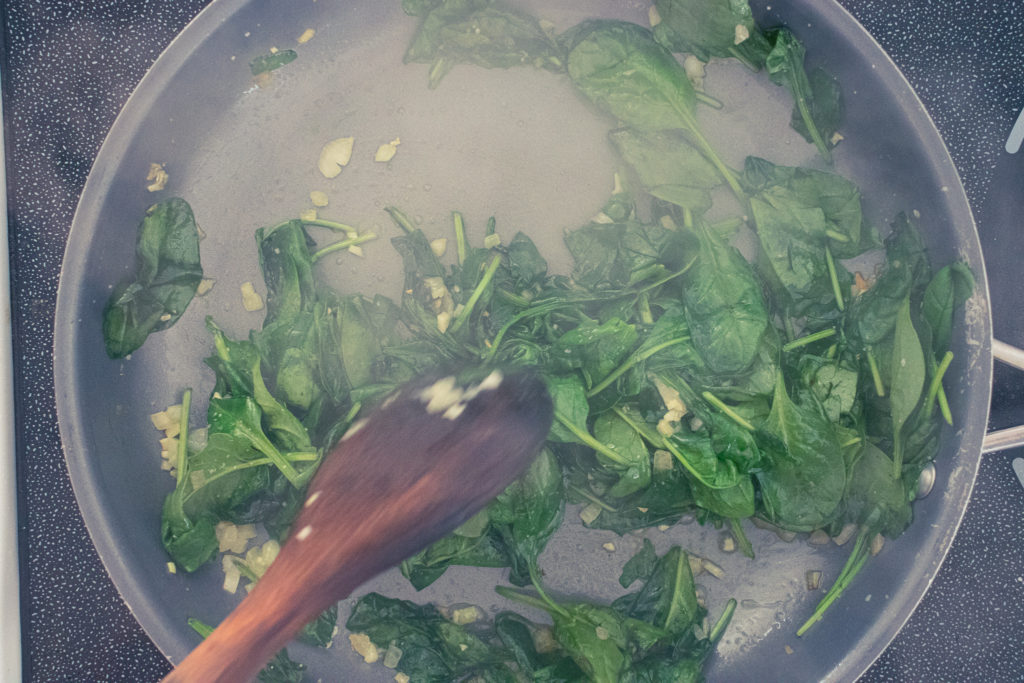
Heat a large skillet on medium-high. Add olive oil and butter to the pan. Once the butter melts and foams, add in the onions and sauté for about three minutes, or until the onions soften. Then, add the garlic and sauté for one more minute.
The Next Step
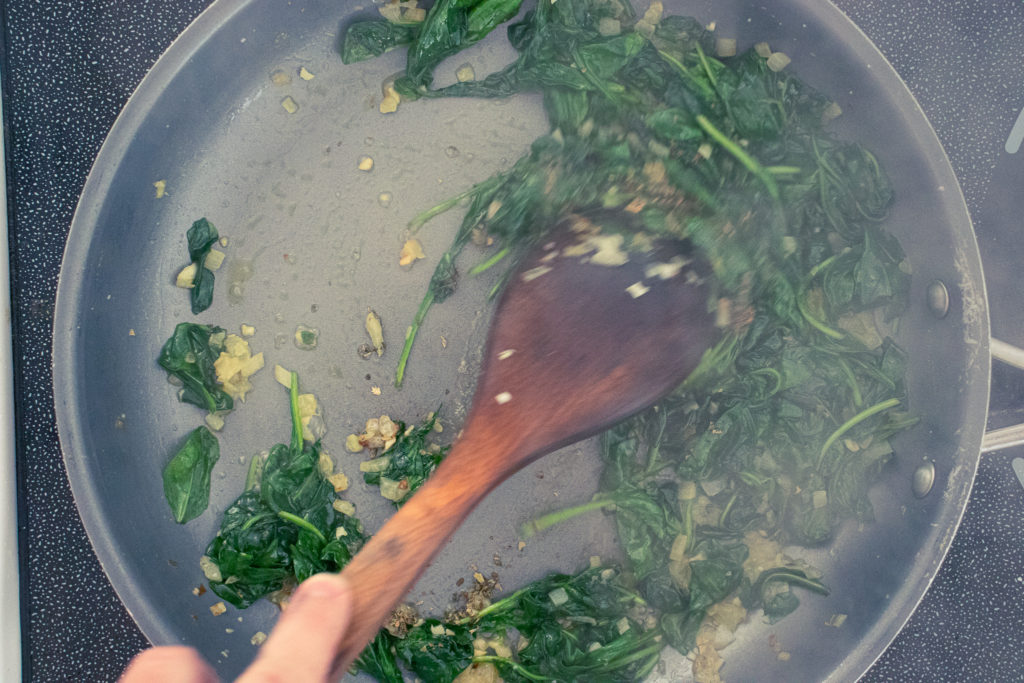
Once the garlic becomes aromatic, add the spinach and cook until it is all wilted, about three to four minutes. Seasoning the spinach with a pinch of salt will help it wilt a little faster. If there is a lot of liquid in the bottom of the pan from the spinach, keep cooking until that has mostly all evaporated.
Moving On
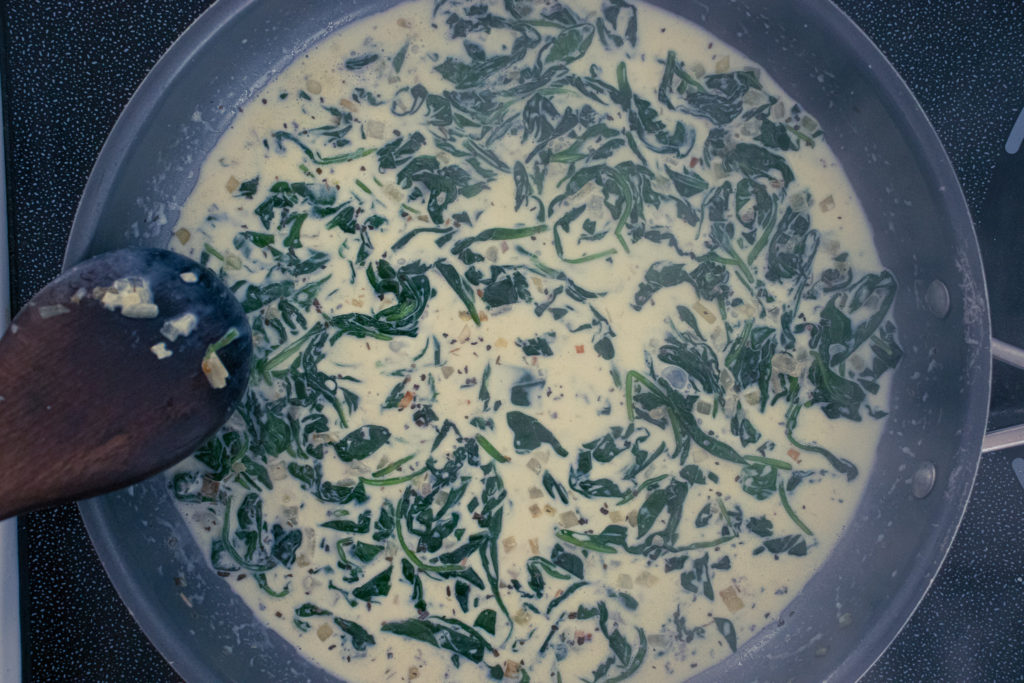
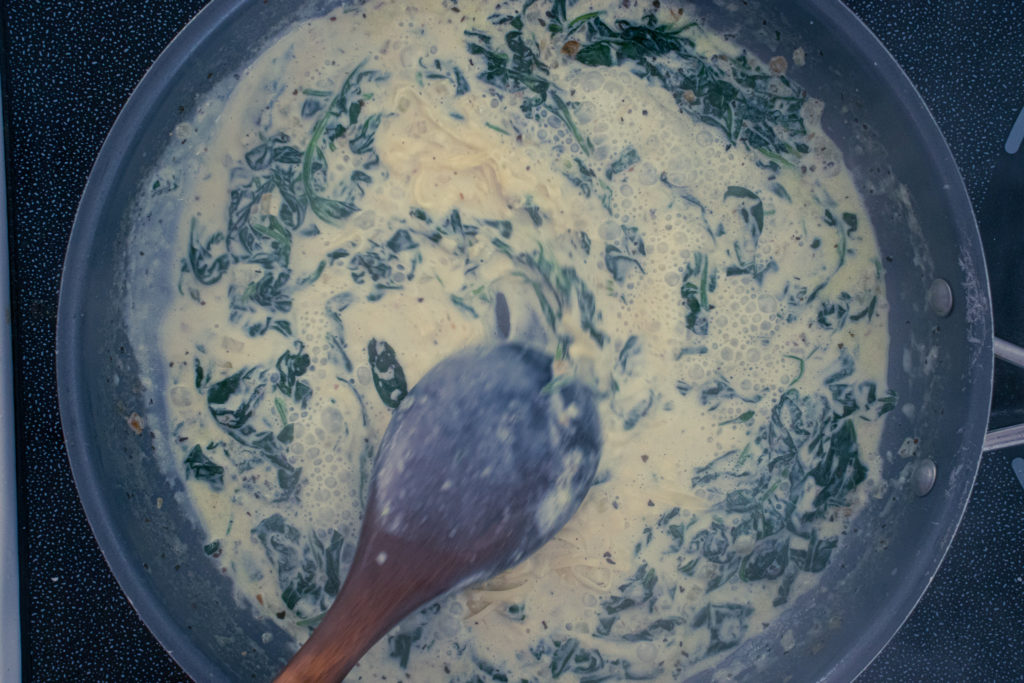
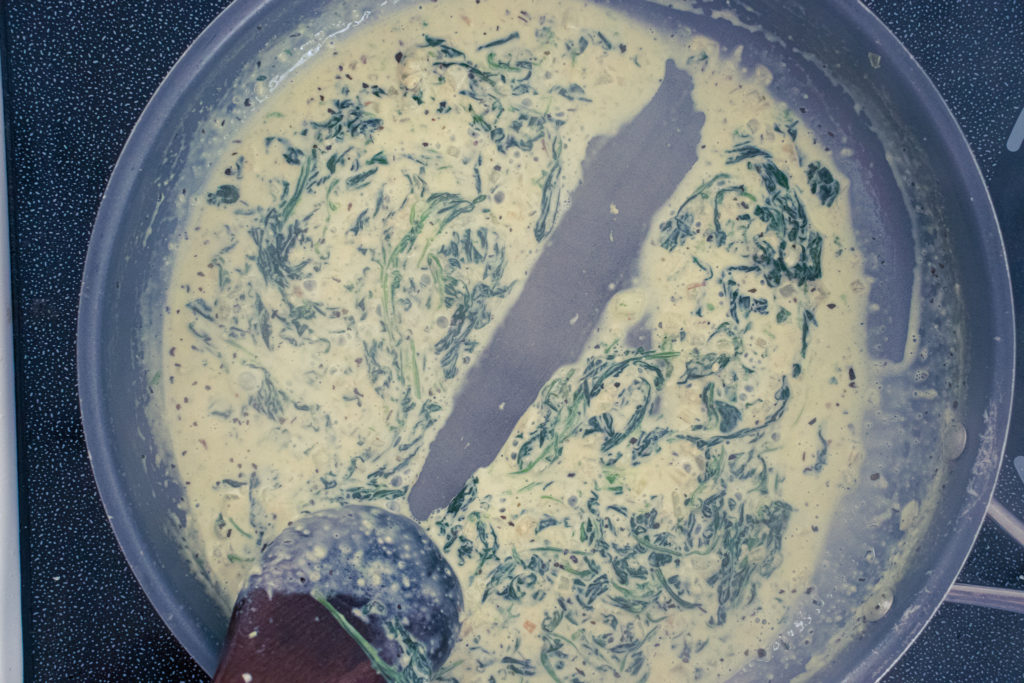
Once the spinach is wilted and most of the liquid from the spinach has evaporated, add the nutmeg, basil, milk, and cream to the pan. Bring the pan to a boil, then reduce the heat to medium-low and simmer for about eight to ten minutes, or until the dairy thickens.
Finishing The Steakhouse Creamed Spinach
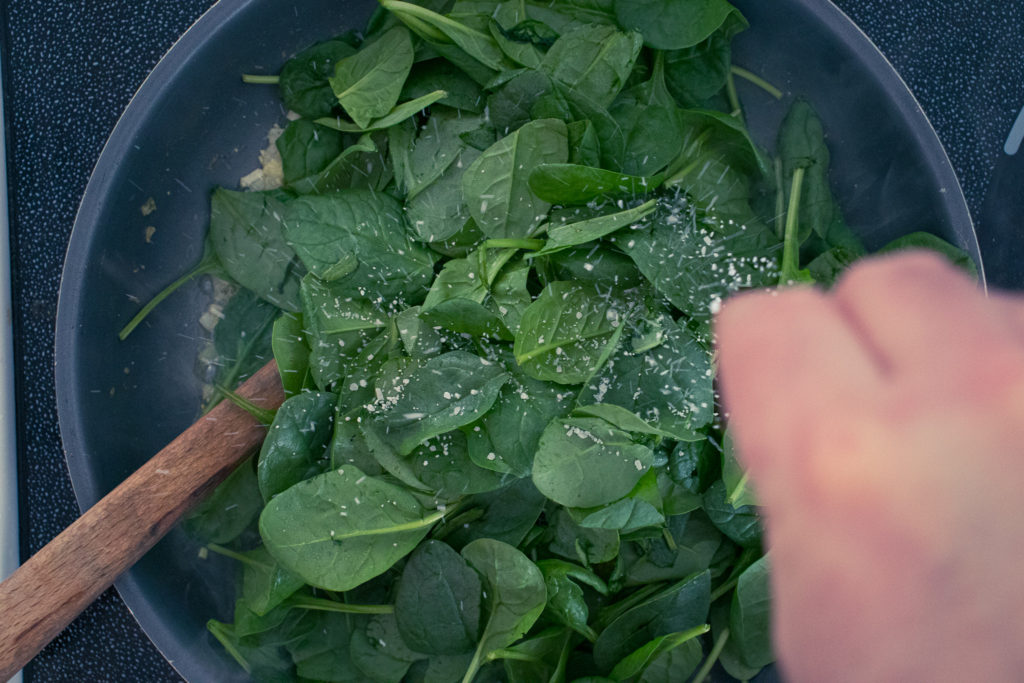
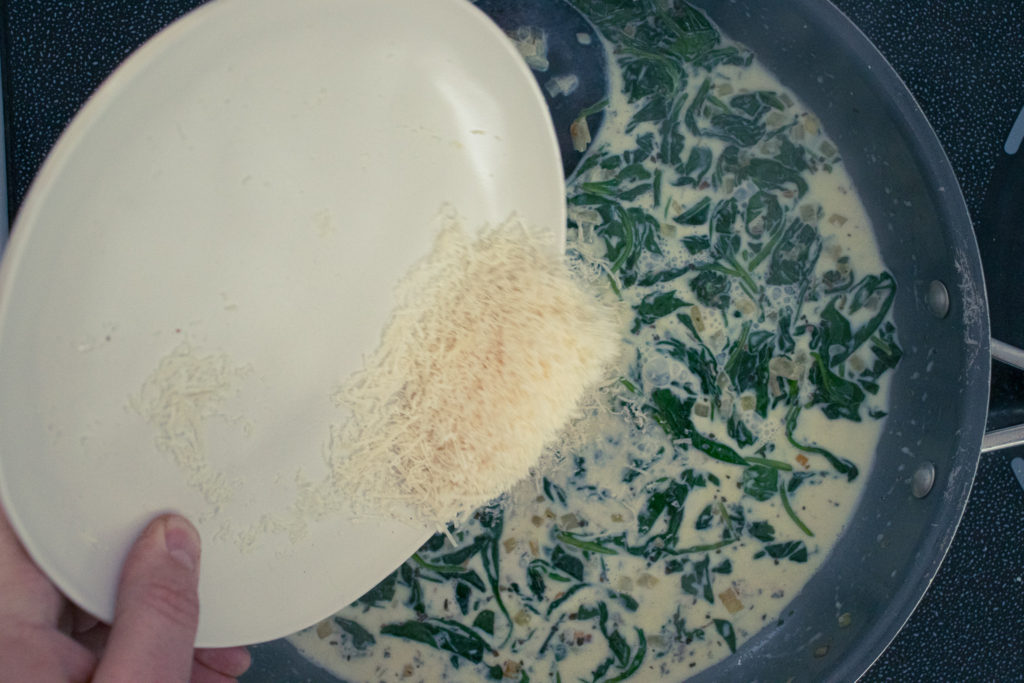
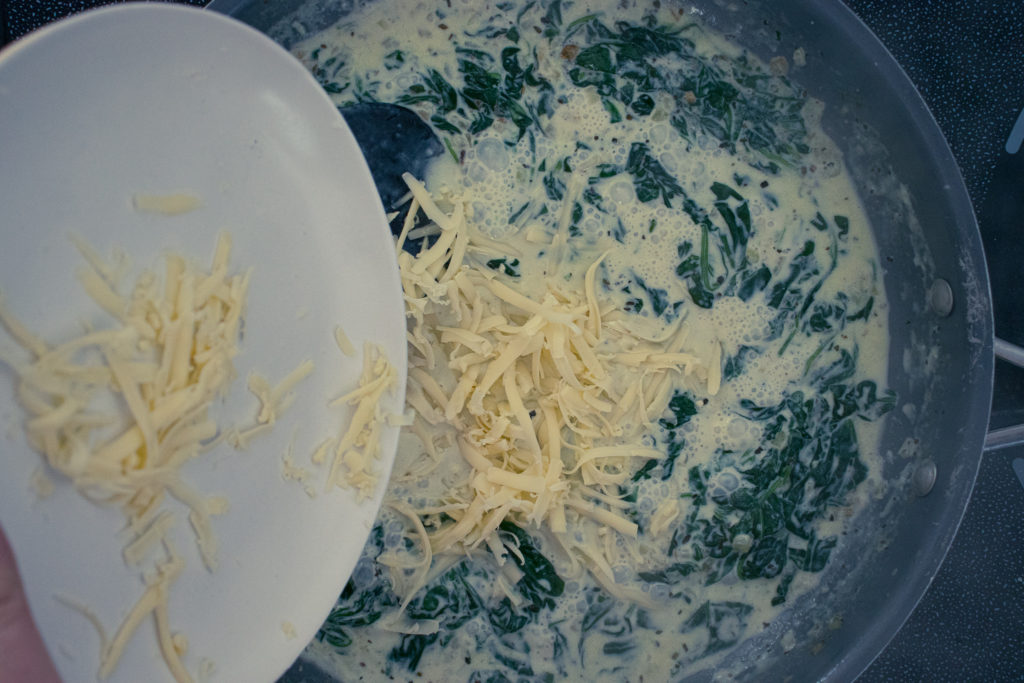
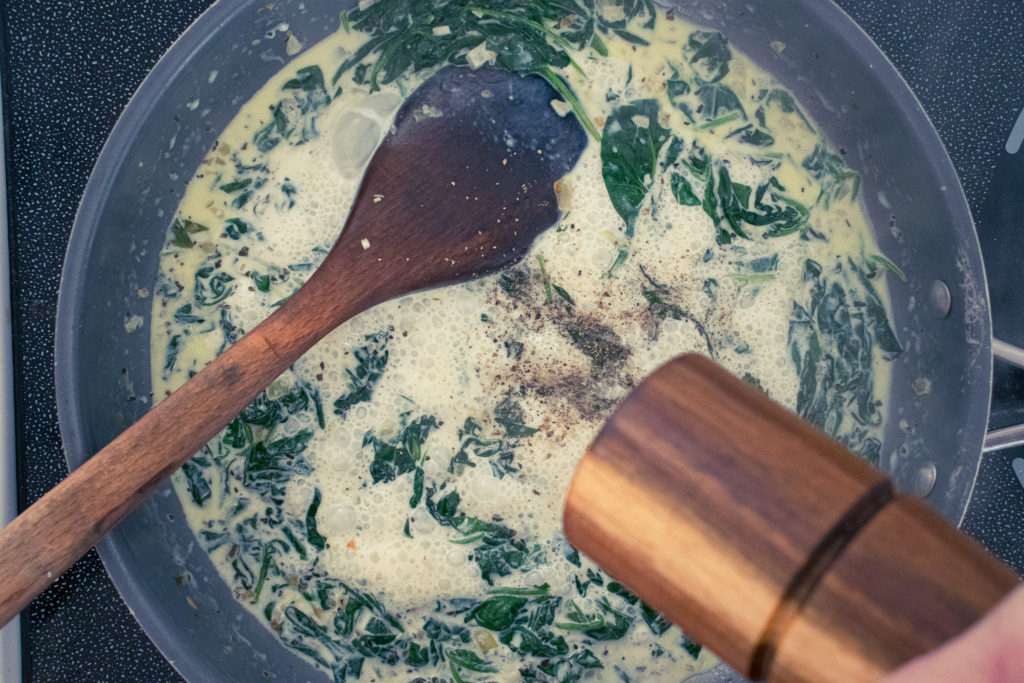
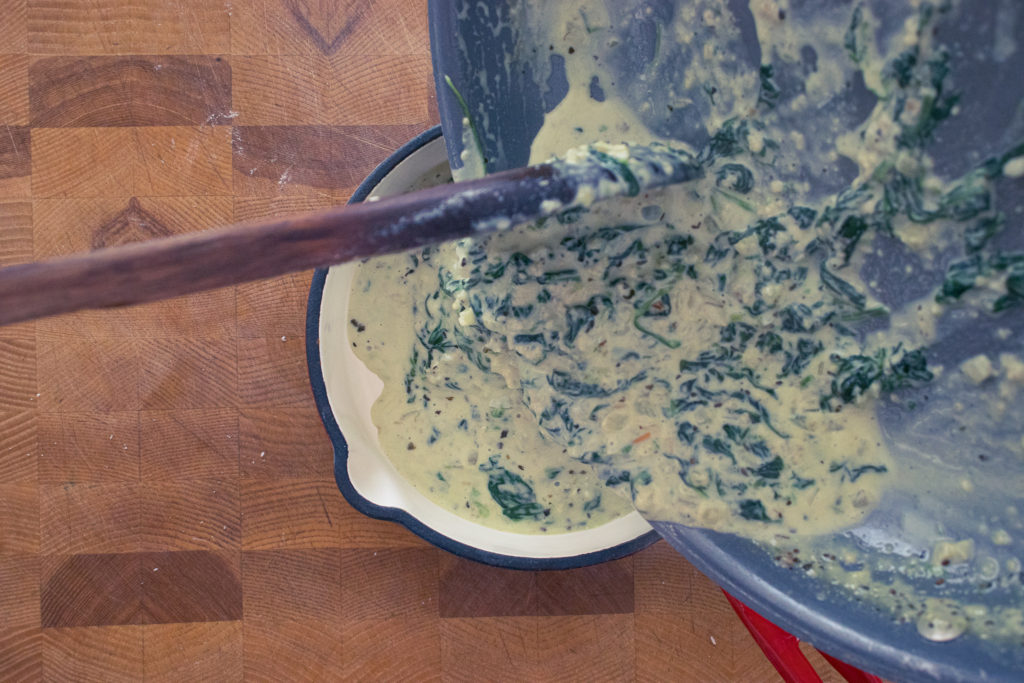
The final step is to add the parmesan and swiss cheese. Keep cooking until the cheese has melted and is mixed into the spinach. Taste the spinach and season with salt and pepper as needed. The reason we wait until now to fully season the dish is twofold. First, if we season in the beginning, that salt flavour will become stronger as the milk and cream reduce. Number two, the cheese will add a bit of saltiness to the dish, so until that’s added, we don’t know how much salt is needed. When finished, the creamed spinach should be thick enough that a line drawn down the middle of the pan with a spoon stays for at least two seconds.
The Wrap-Up
Creamed Spinach might not be a dish that you often think about, but the next time you’re having a nice steak, or a really good pork chop, it should come to your mind. It makes such a great side dish and elevates the whole meal. It is such a classic steakhouse dish for a reason. It’s really good, and it’s worth a try.
That does it for today. Thanks for reading. I hope you’ve enjoyed the post. Remember to share this on Facebook or Pinterest and leave a comment below. I love to hear from you. Finally, remember to sign up for my mailing list, so you don’t miss out on exclusive recipes and cooking tips. Members of the mailing list also get a sneak peek at all the upcoming posts. You can sign up below. Have a great day! I’ll see you back here next Thursday.
Steak House Creamed Spinach
Creamed Spinach is a classic sidedish of high-end steakhouses around the world. Now, you can enjoy it at home. This version is like a cross between a really good spinach dip, and creamed spinach. It tastes amazing but this porbably isn't something you want to eat every day.
Heat a large skillet over medium-high heat. Add the butter and olive oil. Once the butter melts and starts to foam, add the onions and sauté them for about 3 minutes or until they begin to soften.
Add the garlic to the onions and sauté for another minute.
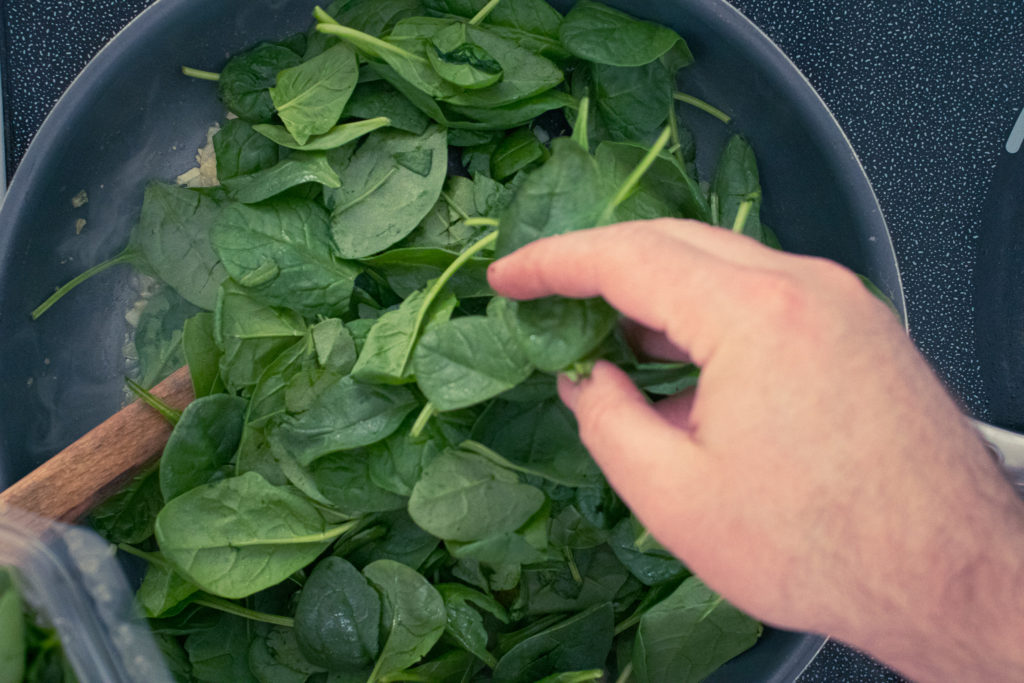
Add all of the spinach to the pan and cook until it is all wilted. This will take 2 to 3 minutes.
Pour the cream and milk into the pan, followed by the nutmeg, dried basil, and a pinch of salt and pepper. Bring to a boil, then turn the heat down to medium-low and simmer for 8 to 10 minutes or until it thickens.
Stir the parmesan and swiss cheese into the spinach until it melts and is fully incorporated. Taste the spinach and season with salt and pepper as needed.
Serve with your favourite steak or pork chop recipe.
We use cookies on our website to give you the most relevant experience by remembering your preferences and repeat visits. By clicking “Accept”, you consent to the use of ALL the cookies.
This website uses cookies to improve your experience while you navigate through the website. Out of these, the cookies that are categorized as necessary are stored on your browser as they are essential for the working of basic functionalities of the website. We also use third-party cookies that help us analyze and understand how you use this website. These cookies will be stored in your browser only with your consent. You also have the option to opt-out of these cookies. But opting out of some of these cookies may affect your browsing experience.
Necessary cookies are absolutely essential for the website to function properly. This category only includes cookies that ensures basic functionalities and security features of the website. These cookies do not store any personal information.
Any cookies that may not be particularly necessary for the website to function and is used specifically to collect user personal data via analytics, ads, other embedded contents are termed as non-necessary cookies. It is mandatory to procure user consent prior to running these cookies on your website.