
Hello everyone and welcome to week three of my Kitchen Clueless Cooking Course. Today we are going to be taking a look at basic knife skills from how to sharpen a knife, to how to hold one. We will also look at some basic cutting techniques and talk about why you should know them.
Why are knife skills important?
Knowing the basic knife skills I’m about to layout for you is very important for a lot of reasons. First and foremost it will make you quicker and more efficient in the kitchen. Secondly, it is much safer to use a knife when you know the proper techniques. And thirdly, when your cooking becomes quicker and you feel safer it becomes more fun. If you enjoy cooking more, you will want to cook more. The more you cook, the better you will get at it and the more you will enjoy it. See what I’m getting at here?
Okay, let’s get to it. This is…
Basic Knife Skills – Kitchen Clueless Cooking Course
A sharp knife is a safe knife
Knives can be scary. Believe me, I have the scars on my hands to prove it. But, every single scar on my hand got there because I was using a knife incorrectly or I using a knife that wasn’t as sharp as it should have been. The common belief is that if a knife is too sharp it will be more likely to cut you or that if you do cut yourself it will be way worse than with a dull knife. Let me put the record straight once and for all. This belief is 100% false. A dull knife is much, much more dangerous than a sharp knife.
Why is a dull knife more dangerous than a sharp knife?
In a some ways it does seem counterintuitive that a sharp knife is safer than a dull knife, that is until you really start to think about it. The real benefit of a sharp knife is that it is easily going to cut into the food. A dull knife, on the other hand, will slide around and possibly slip into your finger. A sharp knife also requires much less force than a dull knife to cut.
Example 1
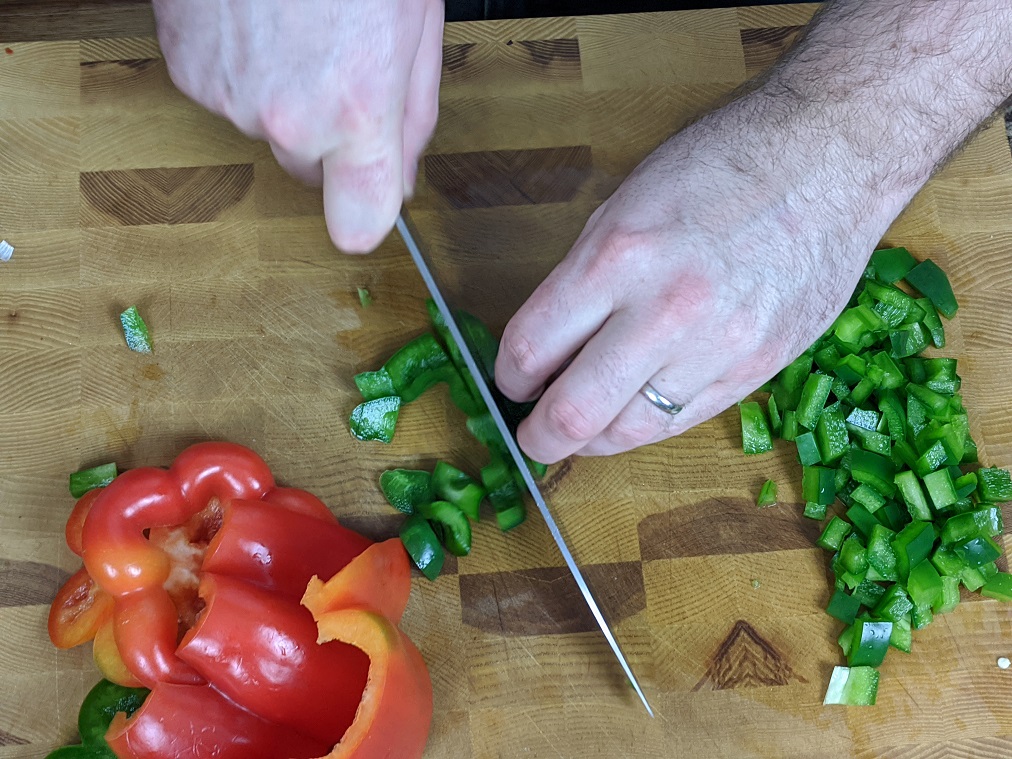
Imagine you are cutting a bell pepper. Your knife is dull. As you begin to cut the pepper you find that you need to put some real force behind the knife to get it through the pepper’s skin. As you’re coming down with all that force the knife slips because it is too dull to cut into the pepper. The knife slips right into the fingers of your other hand and you have ruined dinner and have to go to the hospital to get a few stitches.
Example 2
Now imagine that you are cutting another bell pepper. This time your knife is sharp. As you begin to cut the pepper you notice that the knife effortlessly glides through the pepper and requires next to no force. Even though the knife is sharp, and is easily cutting through the pepper, let’s imagine that it snags a pepper seed and slips. Because you aren’t putting very much force into the knife as it slips you have more than enough time to pull your hand back and save your fingers. Even though it was a close call, it could have been much worse.
Those two examples are based on real situations I’ve been in and that I’ve seen countless times. You may think that I’m exaggerating the differences between a dull knife and a sharp knife but I promise you I’m not. I can’t tell you the number of times I would have cut myself if not for that split second I had to pull my hand away all because I wasn’t putting that much force into my knife.
Experiment
To illustrate my point I’m going to give you an experiment to do. Don’t worry, you’ll still have all your fingers at the end of this. You should seriously do this. Go to any door frame in your house and stand in the middle of it with your hands flat at your sides. Put the backs of your hands against the door frame and push as hard as you can for 15-20 seconds. Step out of the door frame and watch what happens to your arms. After another 15-20 seconds step back into the door frame and gently put the back of your hands on the door frame for 15-20 seconds then step out. I’m willing to put money on the fact that the results were much more dramatic when you stepped out of the door frame the first time compared to the second time.
The point of this is simply to illustrate that when applying a great amount of force, you give up an amount of control and that force has to be released in some way. At first, it was being released into the door frame, but when the door frame was taken away it was released into the air. When you are using a dull knife and putting all that force into it and it slips, that force has to go somewhere. The knife is going to go very quickly into whatever direction it has slipped. Hopefully, that isn’t the direction your fingers are in.
How to sharpen a knife.

One common problem is that most people don’t know how to sharpen their knives. Maybe you don’t have to. Wherever you live there is probably a professional knife sharpening company. It won’t be very expensive, you’ll only need to get it done once or twice a year, and it will be worth it. Just google knife sharpening in your town.
Sharpening Tools
Another point that I want to make here is that it isn’t that difficult to sharpen a knife. You may think that you need a fancy whetstone or an electric sharpener but you don’t. I’m willing to bet you $100 that you actually have everything you need to sharpen your knives already. Don’t believe me? Do you have a coffee mug? What about a ramekin? Anything that is ceramic will at the very least have a ring on the bottom that is unglazed. This can be used to sharpen your knife. I know that sounds crazy but I have done this many, many times and it works like a dream. You can actually take a very dull knife, and work it on the ceramic for a few minutes and get it razor sharp.
The key to sharpening a knife is the angle at which the blade glides across the stone or ceramic. A good guide to getting the proper angle is a penny (if you can find one). Put the knife flush with a flat surface. The handle will need to be hanging off the table, cutting board, or whatever flat surface you are using. Now, take a penny and slide it under the top of the blade close to the handle. The angle this creates is pretty much the angle you want the knife at as it is gliding across the sharpening surface.
The second most important thing to keep in mind when sharpening a knife is consistency. The angle must remain the same at all times, and the number of strokes across the sharpening surface must be the same for both sides of the blade. If the number of strokes is different per side, this could eventually ruin your knife. Rather than going one for one on the strokes (one stroke flip the blade, one stroke, flip the blade) I prefer to go five for five or twelve for twelve. It doesn’t really matter as long as it stays even.
Sharpening Technique
When sharpening a knife you want to push the blade forwards across the stone rather than pulling it backwards. This may seem counterintuitive but it is the proper way to do it. Dragging the blade back across the sharpening surface will round off the edge of your knife making it very dull.
Homework
Before you move on to the next section I suggest doing a little homework. Go to your kitchen and grab a knife and a mug. Flip the mug over on your counter exposing the uncoated ceramic on the bottom. Use that uncoated ceramic to sharpen your knife as I described above. You will be amazed at how well this works. Just remember to keep that angle consistent and to keep an equal number of strokes per side of the blade.
Now that your knives are nice and sharp, let’s move on to the next section.
How to hold the knife
Other than having a sharp knife nothing is more important when it comes to knife safety than the grip you have on your knife. The wrong grip can leave you with little to no control. It can also lead to hand cramps and fatigue. The proper grip, on the other hand, will give you maximum control over the knife while being relaxed enough to keep your hand from camping or getting fatigued.
I have seen people hold knives in a variety of ways. Some are okay, and some are terrible. But of all of the holds I have seen, there are two that stand out as the most common. Let’s take a look.
The wrong knife holds
The way back grip
First of all, we have what I call the way back grip. The knife is held very far back on the handle. This grip makes it look like the person holding the knife is trying to run away from the blade. The main problem with this grip is that the knife holder has no control over the knife. The knife will be very wobbly in the hand because this is not where the handle is designed to be held. It doesn’t fit in the hand properly. As I’m sure you may have guessed, a wobbly knife is an unsafe knife. Now only that, but there is no way to get consistency with your cuts when your knife is wobbling around like crazy.
This way back grip also completely changes the center of gravity for the knife which can lead to a lot of problems when cutting.
The pointing finger grip
The pointer finger grip is a little better than the way back grip, but not by much. This grip is where the knife holder places the index finger on top of the knife blade. This also reduces the knife holder’s control over the knife. Besides the increased potential for cramping, this technique turns the knife into a blunt object removing its innate agility.
There are three main ways to use a knife. Rock it back and forth. Push and pull it. Or, chop it straight up and down. The pointing finger grip locks the knife in the hand in such a way that it prevents the freedom of motion required to properly and efficiently use those three main techniques. In essence, it slows you down, makes you less precise, and makes the knife more dangerous by giving you less control.
There is also a weird thing that I have seen happen time and time again with this grip. For whatever reason when holding the knife in the pointer finger grip the knife holders hand has a tendency to migrate up the blade. Sometimes this becomes so extreme that they are no longer in contact with the handle at all holding only the blade. I know that sounds ridiculous but I have seen it happen time and time again.
Perfect Illustration
Just to illustrate my point I went to a stock image site and typed in slicing. The image below is what came up. Everything is wrong with this. If you look at the hand holding the knife it is in the pointer position so high up on the blade that one of the middle finger is pretty much under the blade. Come back to this image after you read the next few sections and see what else you can pick out as wrong about it.

The proper way to hold a knife
I want to make something very clear here, there is no one right way to hold a knife but there are two that are best. Which one you use is determined by the size of your knife in relation to your hand, and comfort. Let’s take a look.
When I was a little boy I played little league. Almost every time a player was at bat the coach would yell at them to choke up on the bat. What he meant was to hold the bat higher up on the handle, changing both the pivot point and the center of gravity of the bat. This allowed our tiny hands more control over the bat. Using a knife is very similar. The more you choke up on the handle (the closer to the blade of the knife you position your hand), the more control you will have over the knife.
I always suggest to people that they hold the knife as high on the handle as if comfortable for their hands. Again, this is really going to depend on the size of the handle in relation to your hand. The knife that I use most often has a fairly thin handle. Because of this, it is most comfortable for me to pinch the blade between my thumb and index finger just before it meets the handle. My other three fingers then wrap around the bottom of the handle in a relaxed but firm grip. This is the grip I most prefer and the one I recommend most.
The second best grip is really just a nice firm but relaxed grip high up on the handle as close to the blade as possible.


Your other hand
Let’s just clarify one thing right off the bat. Flat fingers create a big target for an out of control knife. Holding your hand flat against a piece of food while cutting is a really good way to cut yourself very badly.
The middle finger first position
A common cooking conundrum is how to hold the fingers on your other hand. I call what I am about to describe to you the middle finger first position. The best way I can figure to describe this is to stand your hand straight up on a cutting board. The fingertip of your middle finger should be the only part of your hand touching the board. Now, bend your middle finger only so much so that the tips of your index and ring fingers are now touching the board in line with your middle finger.
As scary as this will be to most of you, that first knuckle of your middle finger, the one that is slightly ahead of the ring and index fingers, should always be in contact with the side of your knife. It acts as a guide and stabilizer for your knife. As you cut, the side of the knife should always be being gently pushed into your middle finger. It is this finger that moves backwards and guides the knife. So, it is the hand that is holding the food that controls the width of the cut, not the knife-hand.
Benefits
The middle finger first position also gives an additional point of contact with the knife (the first knuckle of your middle finger). This acts as a stabilizing force on the knife. There should ideally be two to three points of contact on the knife at all times. The knife in the hand. The knuckle against the side of the blade, and the tip of the knife on the cutting board. We will get more into that last one when we look more in-depth at proper cutting techniques.
Holding your fingers in the middle finger first position will seem awkward in the beginning. The more you do it, the more natural it will become. As we’ve seen there are multiple benefits to this finger position. First of all, it creates a much smaller target than the flat finger position. It puts your fingers in a position that makes it very quick and easy to pull away should the knife slip. It helps to stabilize your knife. And, it allows you to cut more accurately and with greater speed.


Proper Cutting Technique
We touched on proper cutting techniques a little bit earlier in this post. Now, we are going to get a bit in-depth with it.
In movies and on tv shows when an actor playing a chef or cook cuts something it pretty much always happens in the same way. They essentially just smash their knife through the food and on to the cutting board over and over. This may look kind of cool but it is stupid for so many reasons.
Knives are not hammers
Knives are not hammers so they shouldn’t be used like one. Unless you are incredibly proficient with a knife there is no possible way to get any uniformity in your cuts when cutting in this tv style. Because of the diminished control and precision that comes with using a knife in this way the risk of injury is increased dramatically. It will also dull your knife, damage your cutting board, and bruise your food which can cause some foods to turn bitter.
Rather than using brute force to smash through foods, knives should be thought of as gliders.
Knives are gliders
Imagine a standard kitchen knife. Now, imagine that the blade of the knife is cut into even thirds. For most things, the back third of the blade is what should be cutting through the food. The side of the middle third of the blade should always be in contact with the first knuckle of your middle finger. And, some portion of the front third of the blade should always be in contact with the cutting board.
When cutting, rather than using an up and down motion (chop) the knife should be pushed forward and down so that it glides through the food. Then it should be pulled up and back to reset the position. You can think of it kind of like a sewing machine or like the piece of metal that connects the two wheels on one side of a locomotive. It is very important that some portion of the front third of the blade always be in contact with the cutting board when using this technique.
This technique is used for slicing small to medium-sized foods and it has a lot of advantages. First of all, it is much easier on the wrist, arm and hand than most other techniques. It is very safe because the knife always has three points of contact (knife hand, guide hand, cutting board). There is little to no force required due to the gliding and slicing motion. It is very accurate. And, it does not bruise the food being cut.
Homework
Go to your kitchen and get a cucumber or a carrot. Cut it into three-inch chunks then cut those in half lengthwise. Take one of those pieces of cucumber or carrot and place it so the flat, lengthwise cut surface is flat on the cutting board. Now, just like we talked about, stand your hand straight up on the carrot or cucumber so that only the tip of your middle finger is touching it. Bend your middle finger only enough so that the tip of each finger on either side of it comes into contact with the carrot. The three fingers should be in line with the first knuckle of the middle finger slightly ahead. Take your thumb and little finger and grip the carrot behind your front three fingers to stabilize it. Now, carefully using the glider technique cut the carrot using your middle finger on your guide hand to control the width of the cut.
Take your time with this. There is no need to rush. Speed will come with practice.


Basic Cuts
Now that we are all on the same page with how to use a knife properly, let’s take a look at some basic cuts that will come in handy throughout this course, and in your everyday life.
How to Julienne
Julienne is a type of cut where the food item is cut into matchstick. The size of the matchstick can vary from 3×3 mm to 1 x 1 cm. Julienne bigger than 1 x 1 cm and the julienne is known as a baton or batonnet. A similar style of cut used for soft herbs is known as a chiffonade. For a chiffonade, the herbs are rolled or stacked and cut into long thin strips.
To cut food julienne the food item is first cut into equal-sized pieces which are then sliced into planks the desired thickness of the final julienne. Those planks are then cut lengthwise a width equal to their thickness.


How to Dice
Dice means small cubes. To dice a food item, other than round foods, that item is first cut into either julienne or baton depending on the desired size of the final dice. The julienne or baton is then cut across to create evenly sized cubes. The bigger the julienne, the bigger the dice.


How to Slice and Dice an Onion
Onions and other round foods like tomatoes come with there own unique challenges and techniques to meet those challenges. Let’s take a look at how to slice and dice an onion.
Sliced Onion
When slicing an onion first cut off the top and bottom, then slice it in half down through the middle top to bottom. A lot of people peel onions whole but this is a pain. Instead, cut the onion in half, then peel it. It is much easier. Once the peel is removed place the two halves of the onion flat on the cutting board. You will notice lines running the length of the onion from top to bottom. You want to cut with these lines, not against them. Cutting against the line will lead to more onion juice flying in the air and you crying more. The onions also cook better when they are sliced this way rather than across the lines.


Diced Onion
To dice an onion first start by cutting only the top off. Then cut straight down through the root cutting the onion in half. It is very important that you leave the root attached. Peel the onion. Lay the onion flat and make two to six (depending on the desired size of the final dice) evenly spaced horizontal cuts in the onion again keeping the root intact. As you make the horizontal cuts keep your hand placed firmly on top of the onion with your fingers up. You want to make sure that your fingers are clear in case the knife slips.
Once you have completed your horizontal cuts, turn the onion so that the root is pointed away from you and make multiple verticle slices down through the onion. Once again, do not cut through the root. After you make your verticle slices you should be able to pick the onion up by the root and have it mostly hold together.
No, turn the onion once more so that the root is facing away from your knife. Slice straight down through the onion across the verticle slices. What you should have is evenly diced onions.


Conclusion
Following the basic knife skills I’ve laid out in this post will help you become a better cook. You will become faster, which will lead to you enjoying it more than you do right now. The big secret here though is that you have to consistently use these techniques if you want them to work for you. Reading this isn’t enough, you have to do the work. Practice, practice, practice.
If you haven’t checked out the first three posts in this series you can find them here, here and here.
If you can think of any basic knife skills tips or information that I missed please share it in the comments or on social media. And remember to subscribe to the blog up at the top right of this post so you don’t miss a thing.
0 Comments
Trackbacks/Pingbacks